

24 easy and affordable DIY Christmas ornaments that can be used together on a tree
I love decorating for Christmas, but usually don’t have the money to buy all the ornaments I want. Let’s face it, even at discount stores, filling your tree with ornaments can cost you an arm and a leg. So over the years, I’ve made dozens of easy DIY Christmas ornaments to fill my trees, and they didn’t cost much at all. I thought it was about time I shared all my DIY Christmas ornaments in one complete roundup. And to be honest, this post blew my mind because I never really noticed how many ornaments I made over the years!
Most of these affordable ornament projects can be completed in under an hour, and many are kid-friendly. That makes them perfect for a family craft night or a cozy solo project. For some of them, you don’t even need to buy supplies, and it doesn’t get better than that.
Here’s a quick example: Last year, I saw a set of six elegant, thin, velvet ribbon bows for sale for $25! What? That’s just ridiculous! I wrote a tutorial about how to make a bow with thin ribbon and ended up with 18 bow ornaments to cover my small tree for just under $10. They look almost identical to my inspiration.
Ready to craft your own affordable holiday magic? Let’s dive into my favorite DIY Christmas tree ornaments that you can make for just a few dollars. When you look at all of them in one post like this, you’ll hopefully notice how they all work together to create a beautiful, cohesive look. I’ve used them in different variations over the years, and they make me happy. Bottom line: it’s not a hodge-podge of an ornament roundup because they can all work together beautifully on the same tree.

DIY paper and cardboard Christmas ornaments (simple, affordable, and recycled)
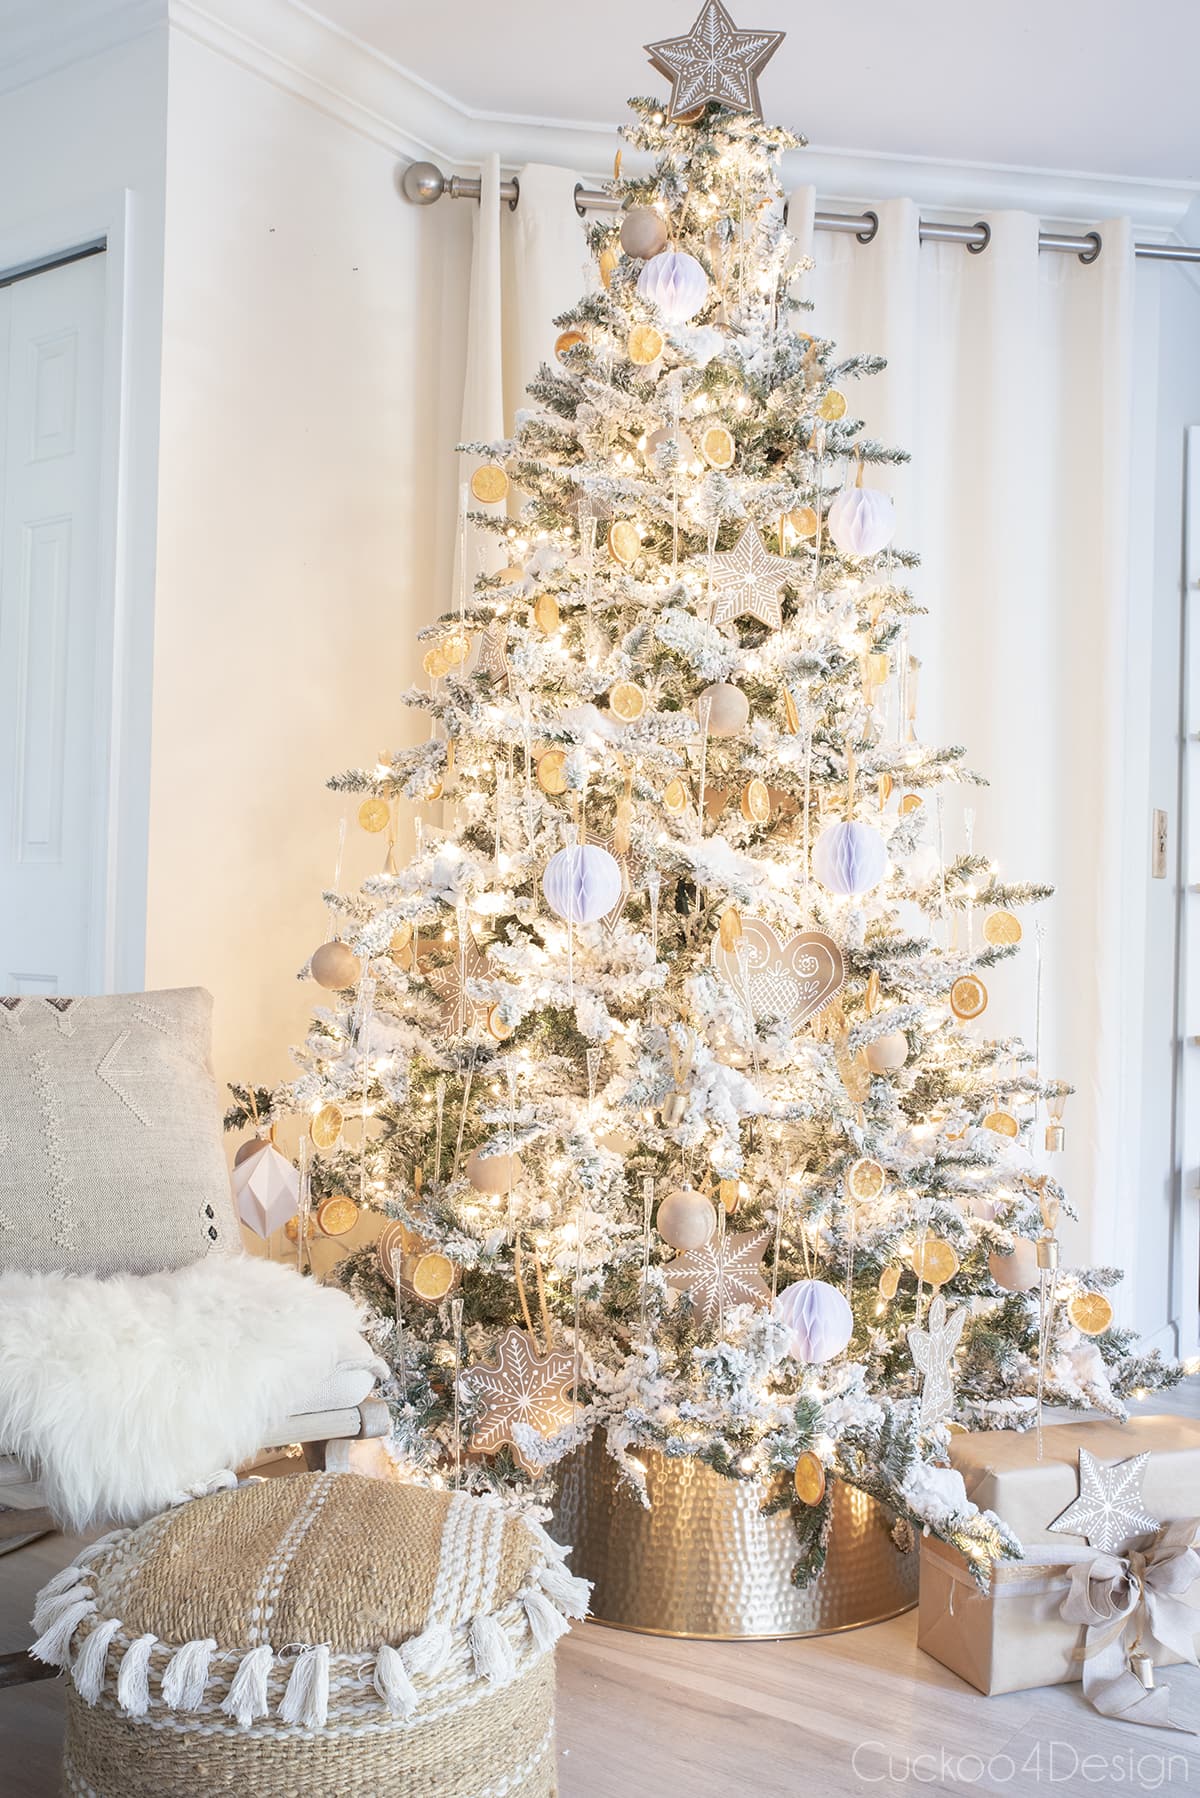
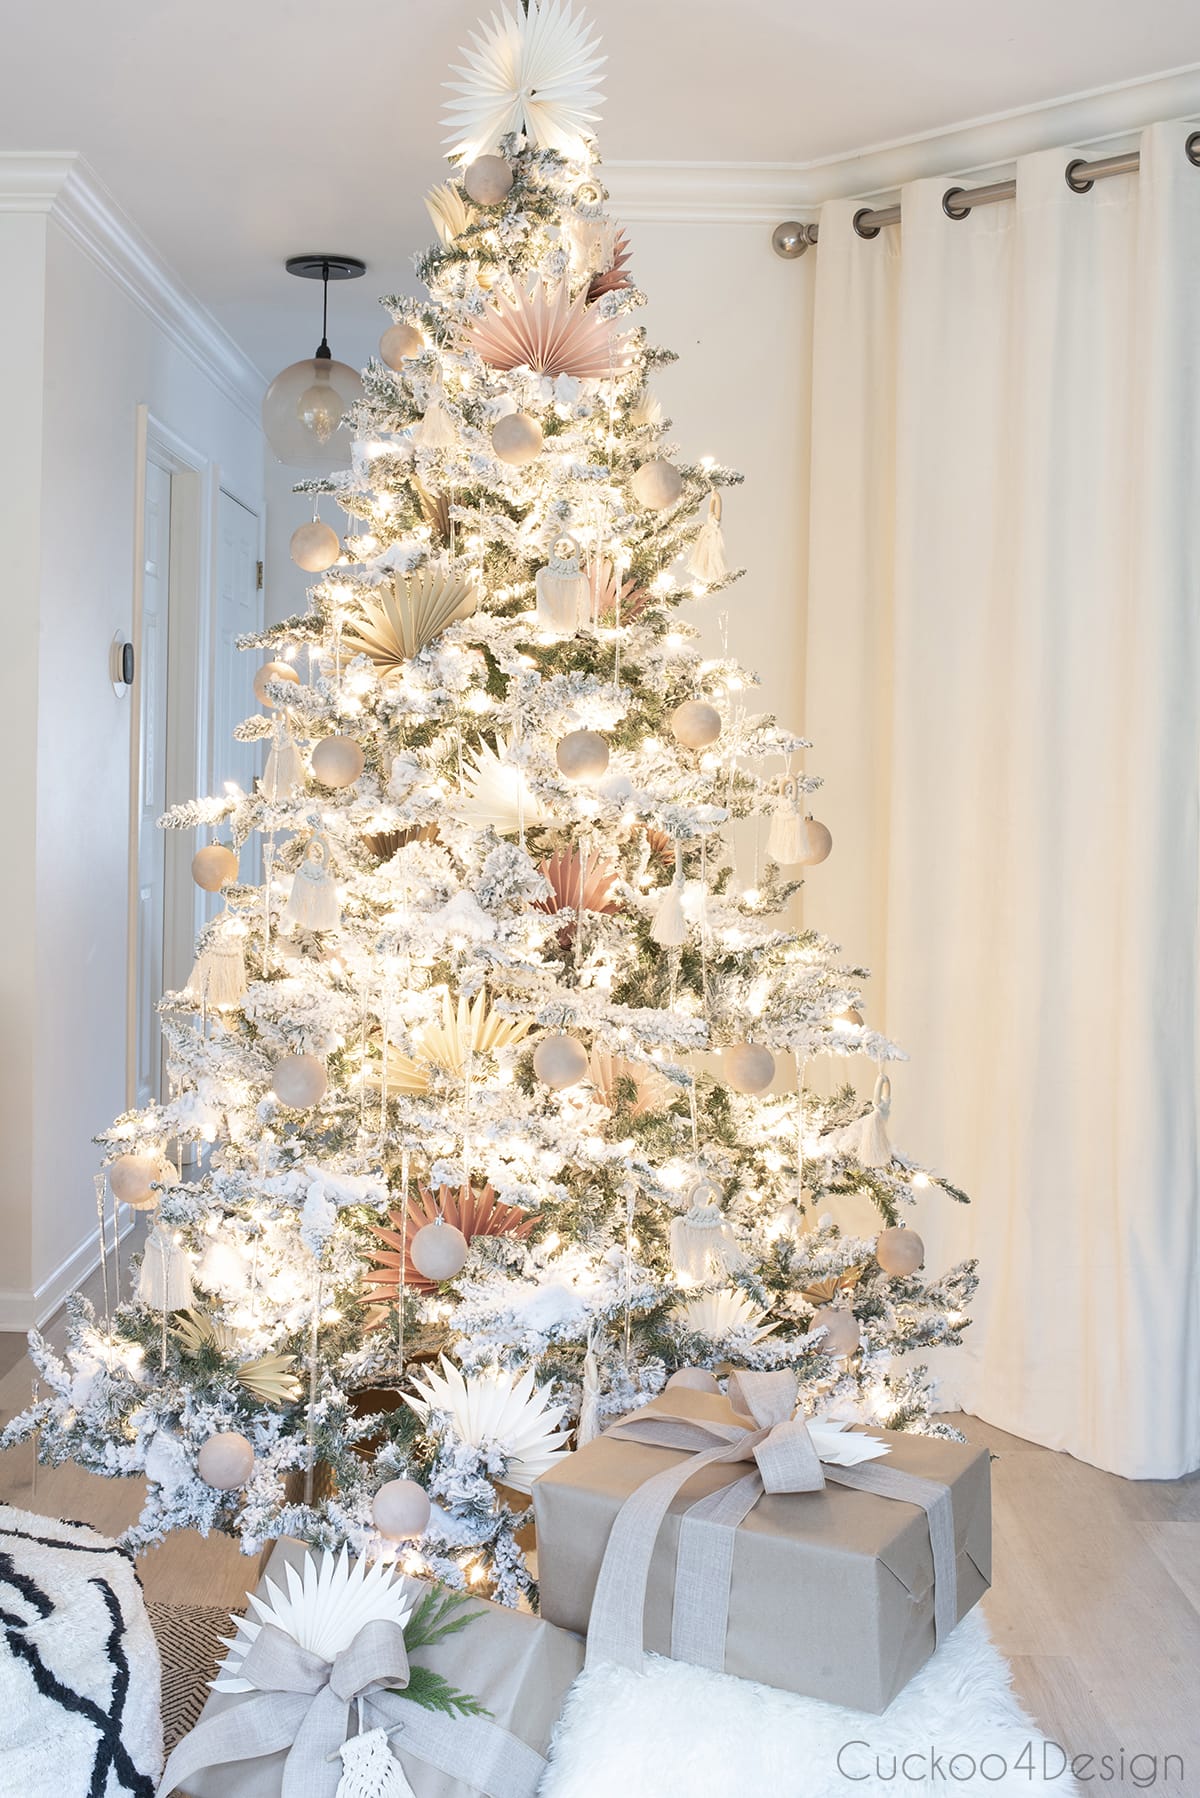
Paper, cardstock, poster board, and cardboard make surprisingly stunning Christmas ornaments. And they won’t break the bank! These easy DIY Christmas ornaments are lightweight, endlessly customizable, and perfect for anyone who wants a more eco-friendly approach to decorating. You can even raid your recycling bin for materials!
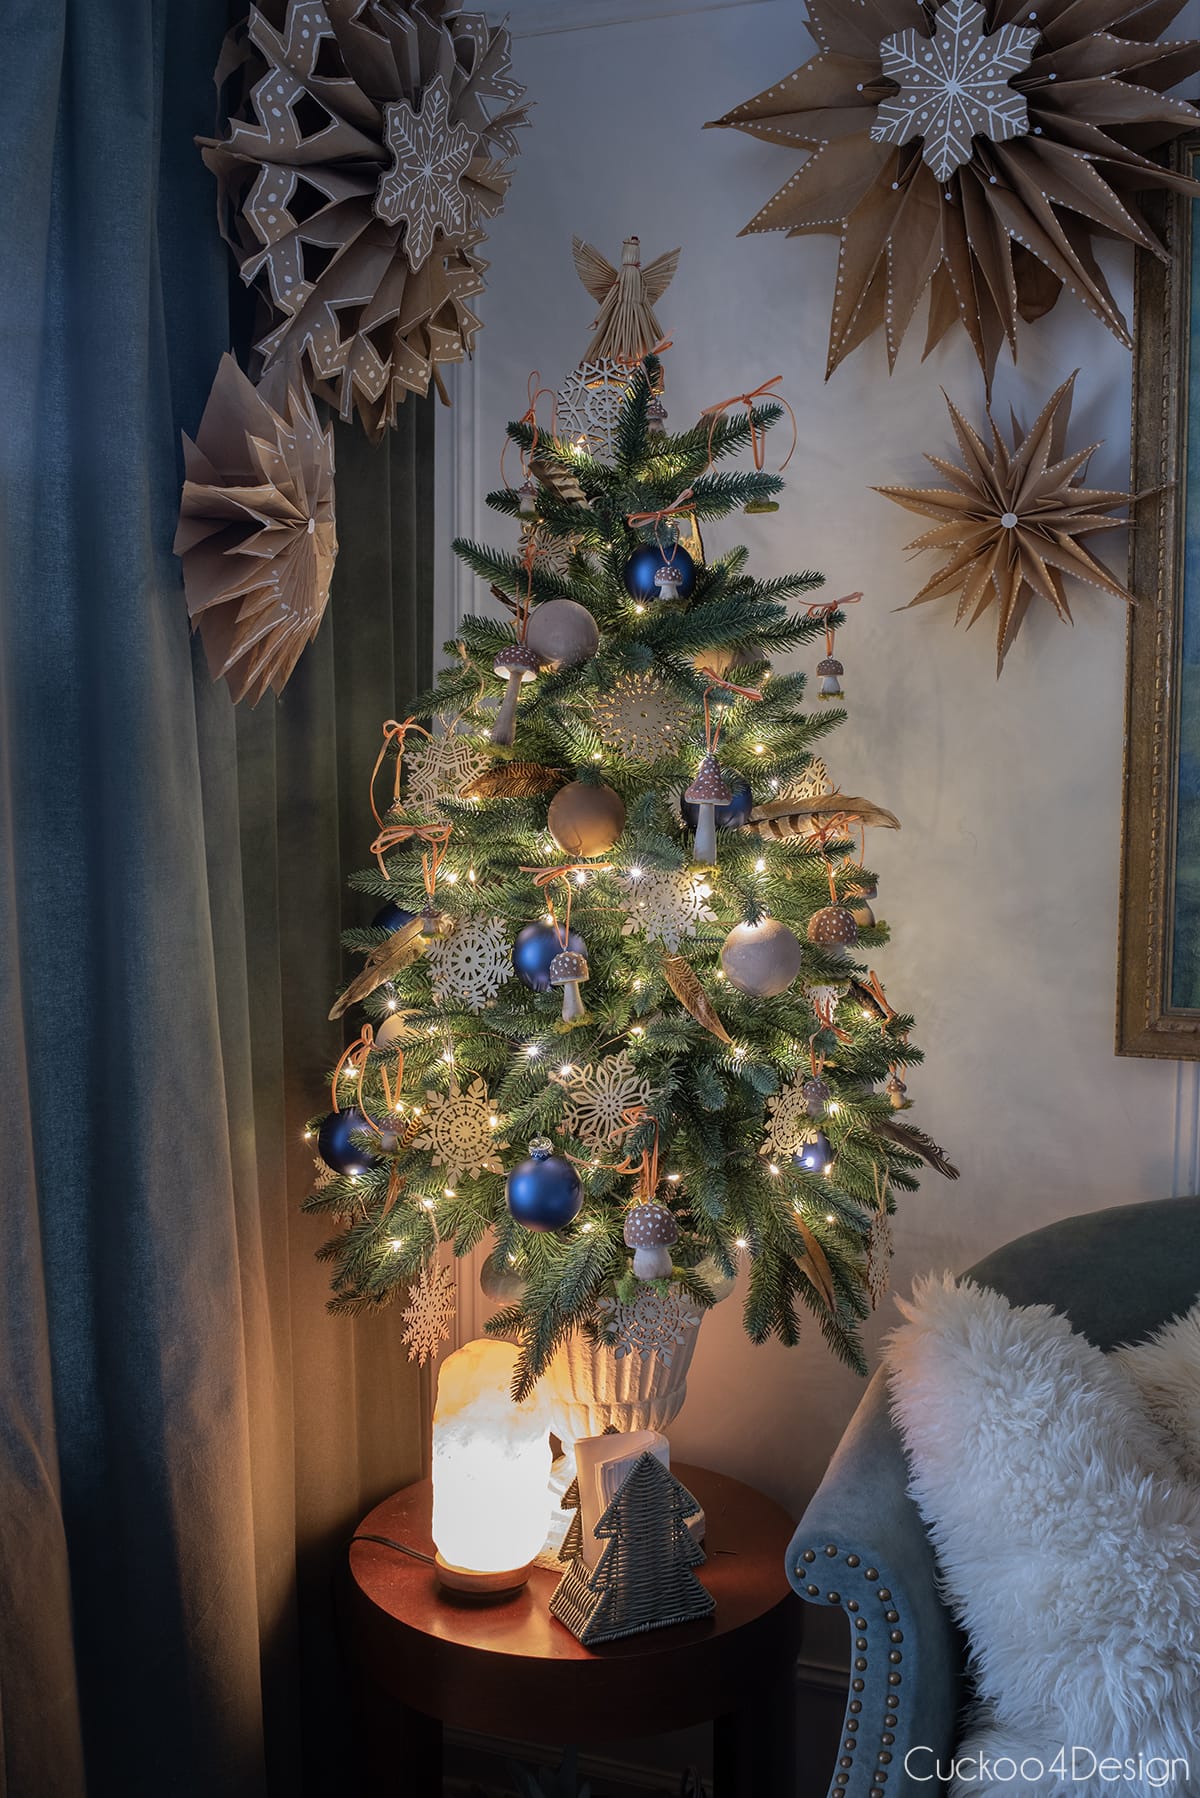
My tree, pictured below, showcases just how cohesive paper and cardboard ornaments can look when styled together. Some of these tutorials include free templates (including SVG files for Cricut and Silhouette users).
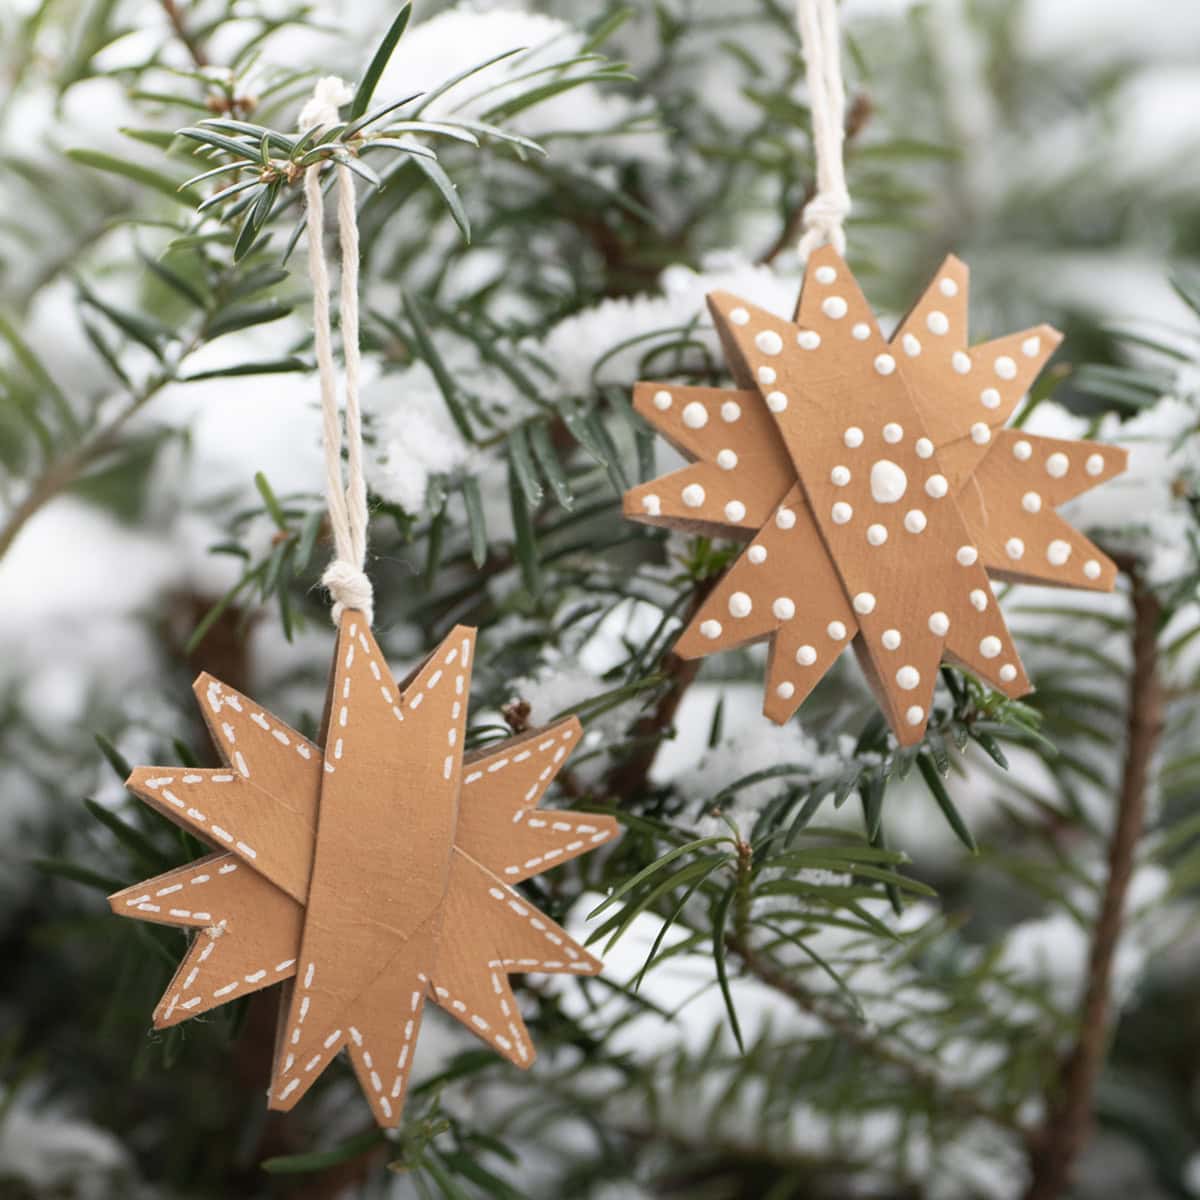
Faux DIY gingerbread ornaments (easy cardboard ornaments craft)
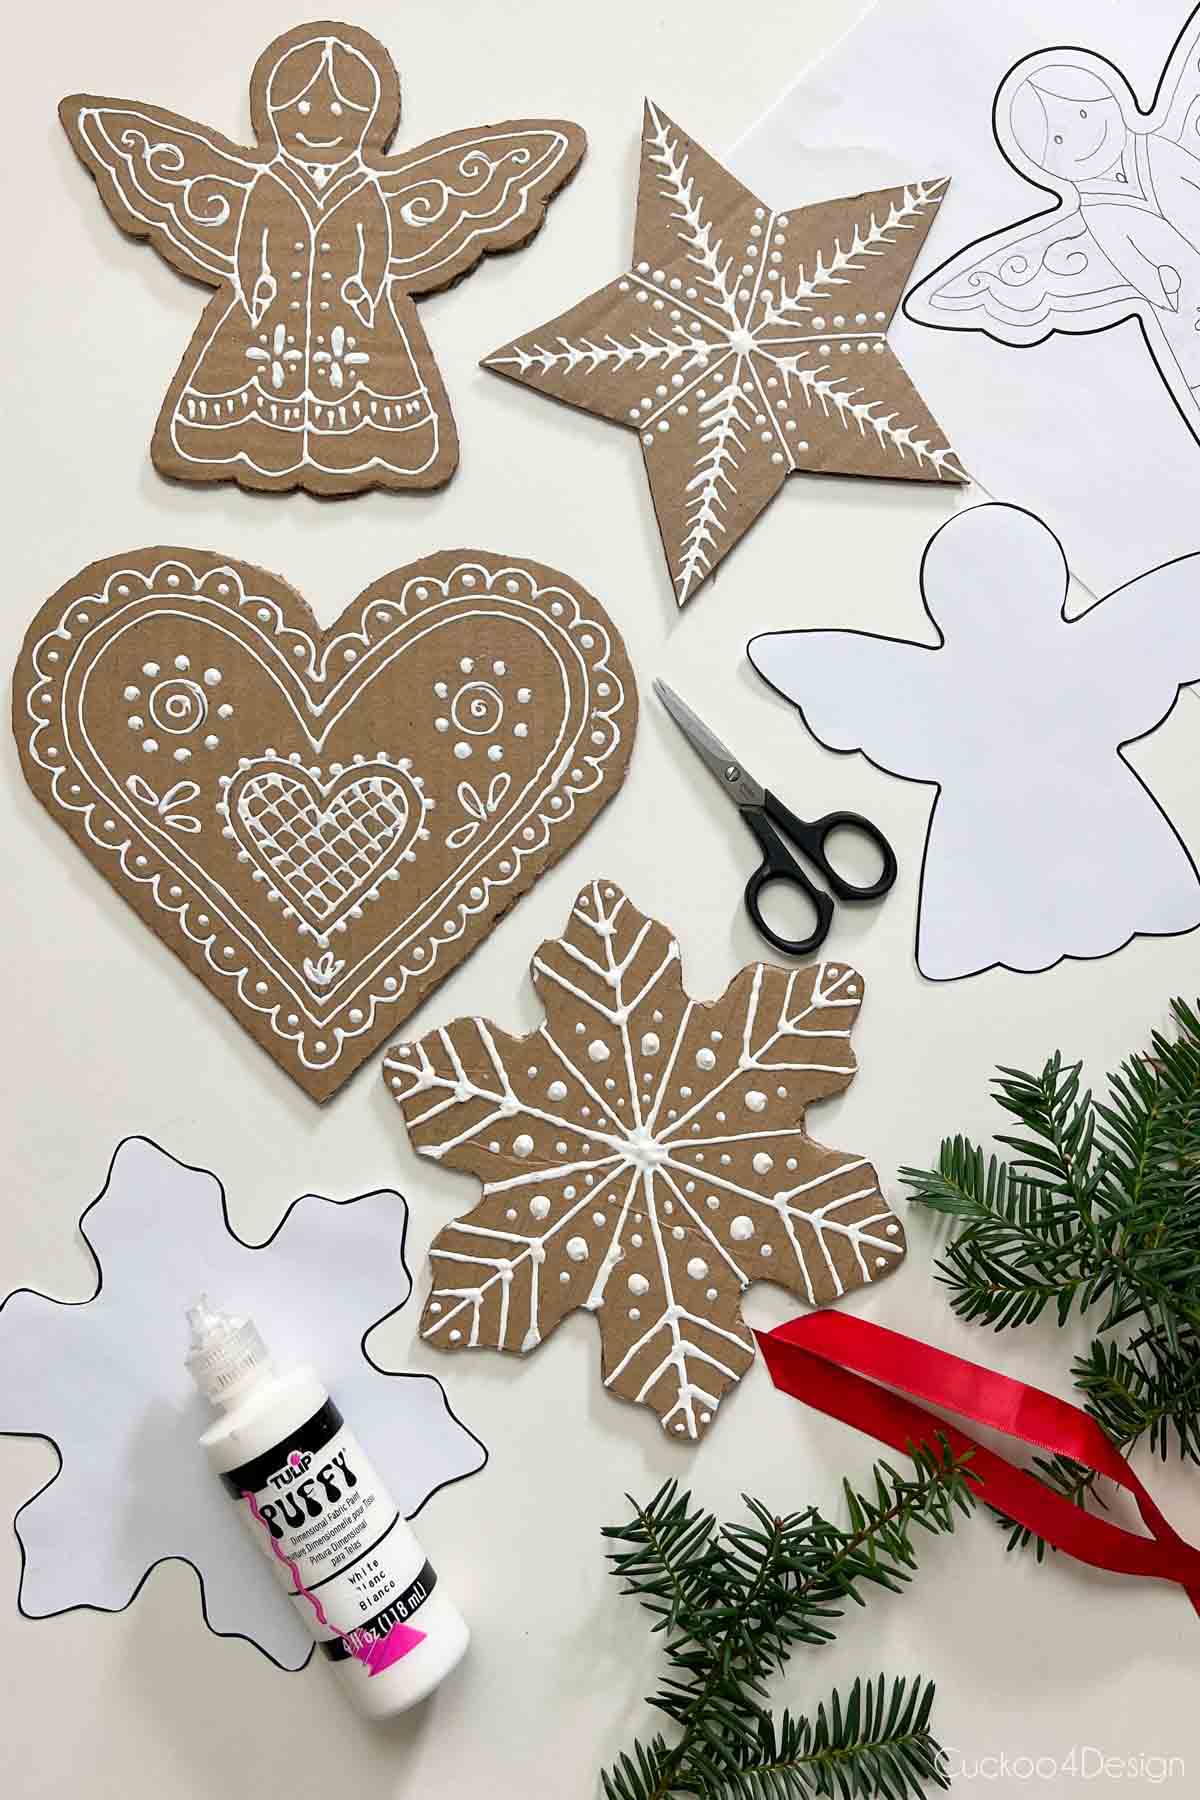
These faux gingerbread ornaments are made from recycled cardboard and painted with puffy paint to look like real gingerbread cookies. No baking required! They’re perfect for almost any style Christmas tree and pair beautifully with natural elements. Another plus is that they won’t go stale and can be reused year after year. No oven needed, just paint and creativity!
Learn how to make these no-bake cardboard Christmas ornaments that look just like gingerbread cookies, using free templates and simple craft supplies. (I included printable templates for an angel, star, heart, and snowflake in my tutorial)
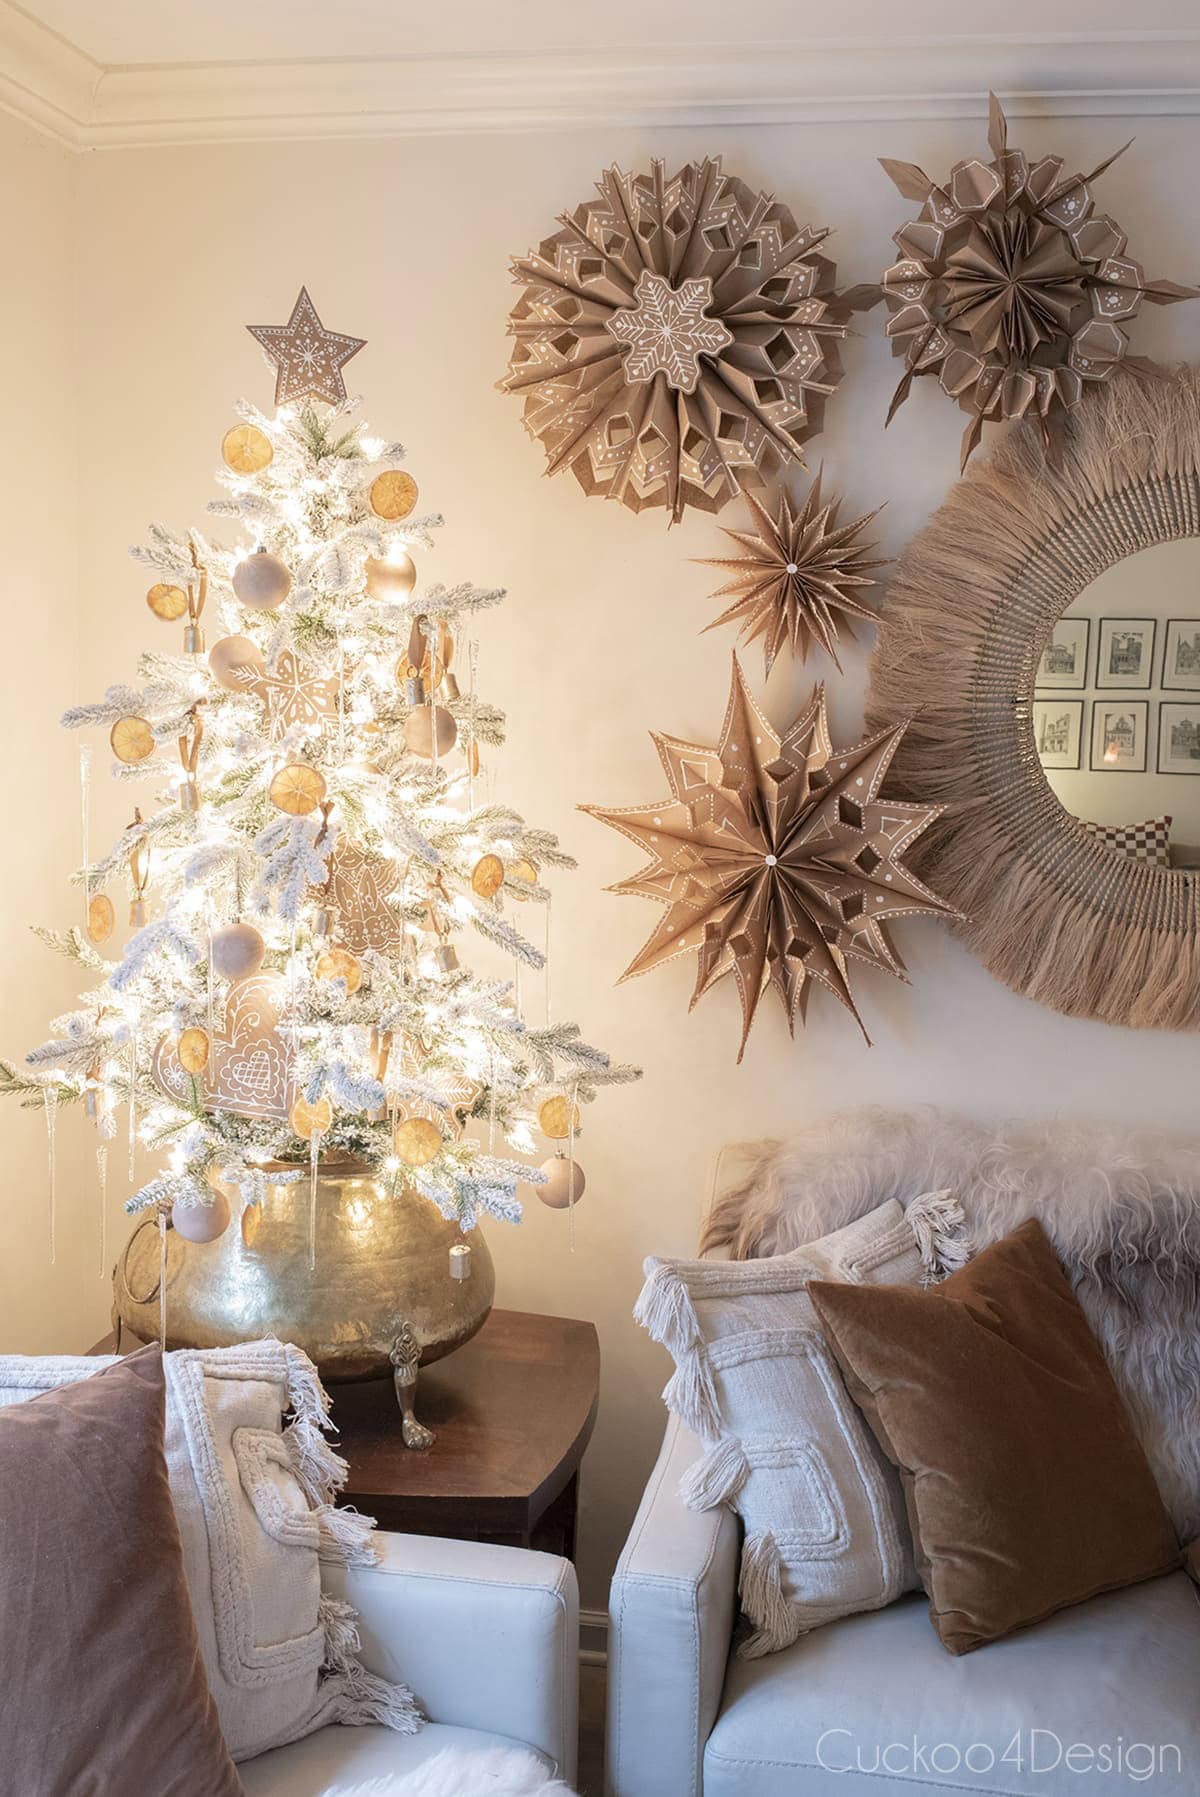
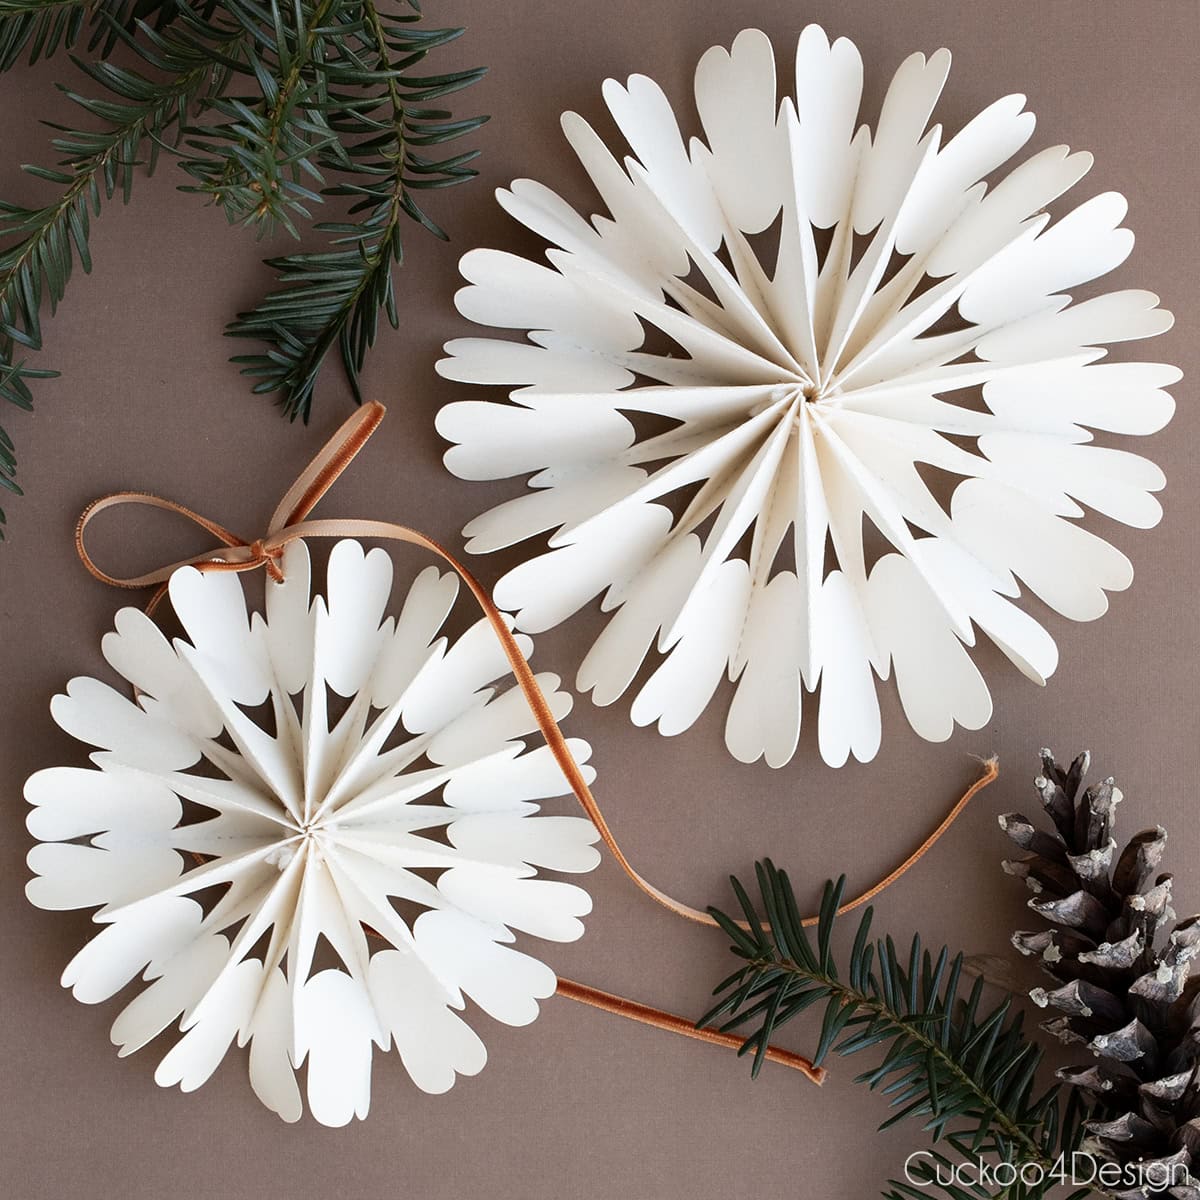
I also added gingerbread detail to the dimensional paper bag snowflakes (pictured above), which are one of my all-time favorites! They’re incredibly easy to make, require just basic supplies, and create stunning, unique snowflakes that look store-bought. I’ve been making them for years, and they never fail to impress guests.
Check out my complete tutorial for paper bag snowflakes with step-by-step photos and a video walkthrough.
How to make an origami diamond ornament
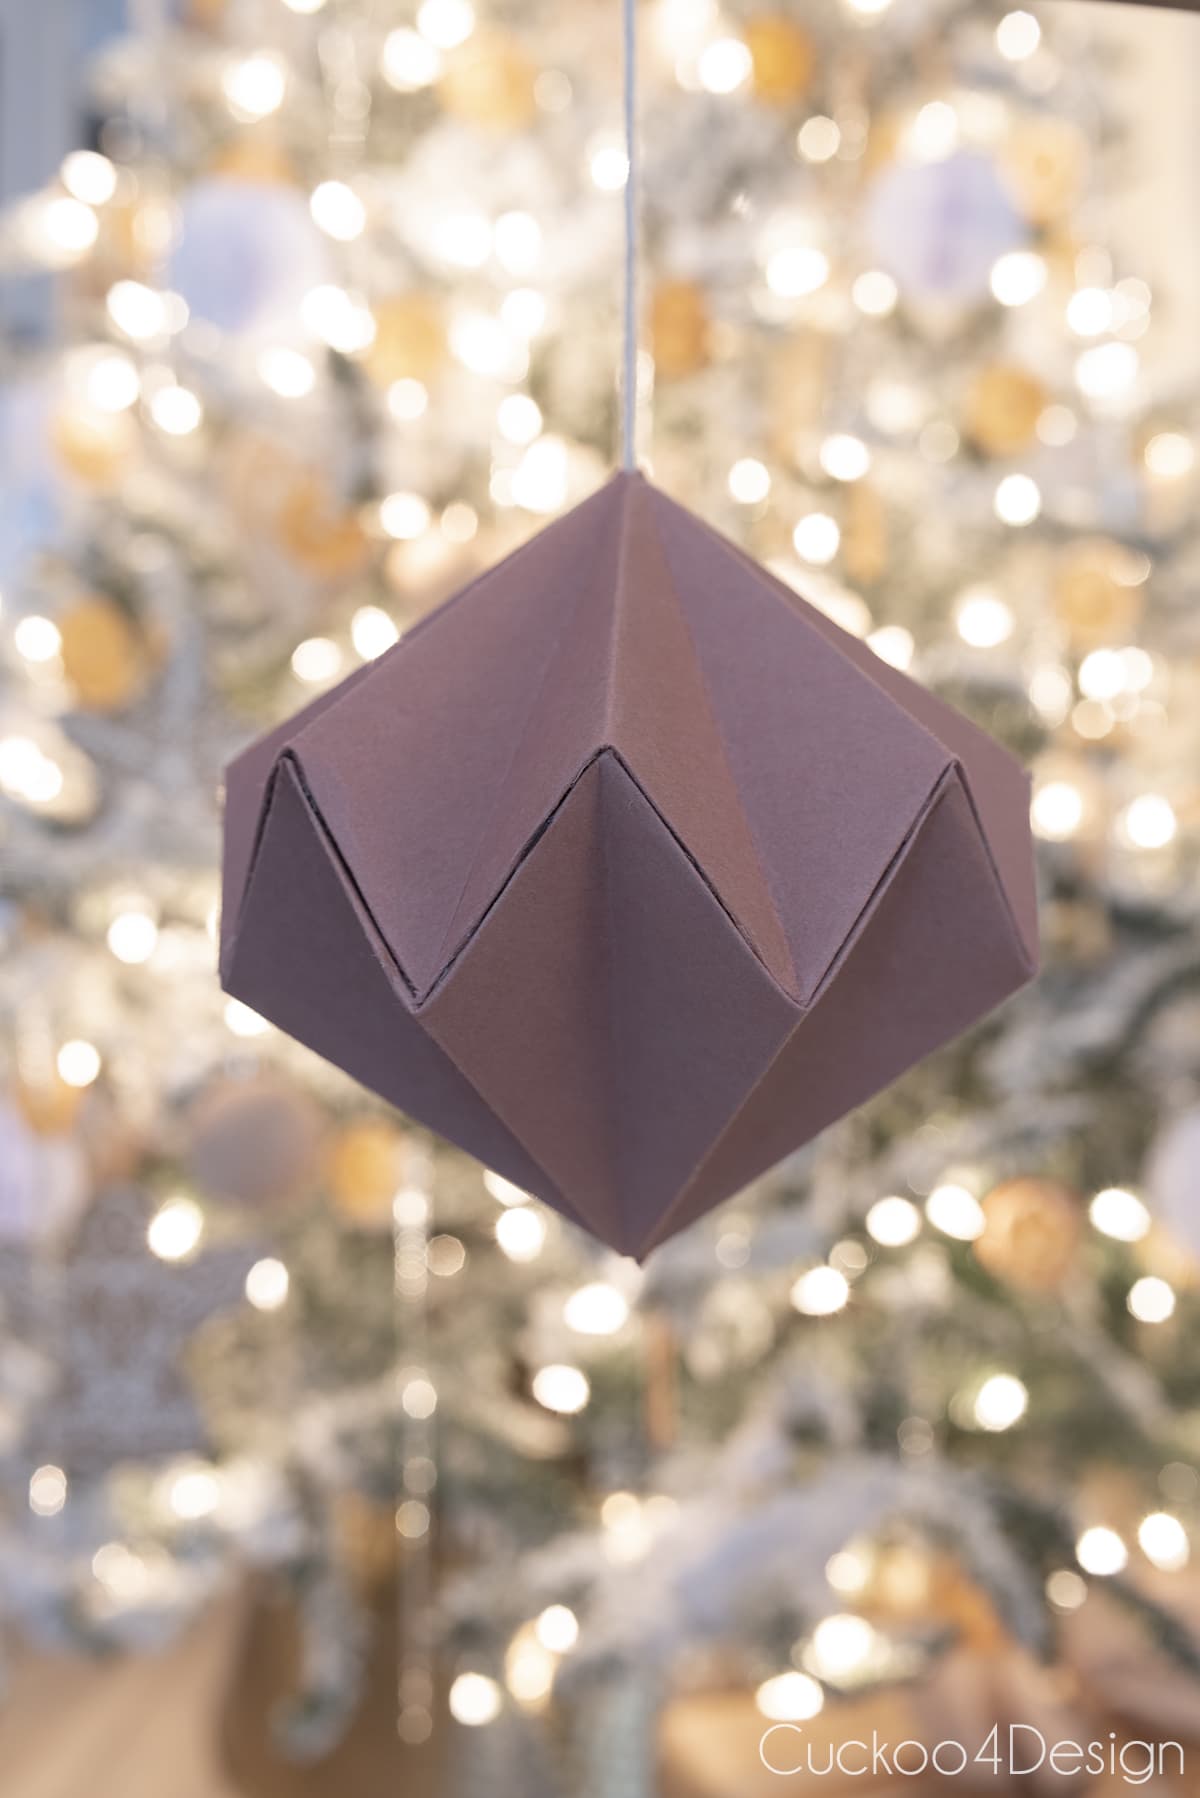
This origami diamond ornament has clean, geometric lines that add a modern, elegant touch to your tree. The best part? It’s surprisingly beginner-friendly! You can make them two-toned by using different colored paper for the top and bottom pieces, or keep them simple in solid colors. They also look stunning in patterned or metallic paper.
Follow my step-by-step origami diamond ornament tutorial to create these stunning geometric decorations.”
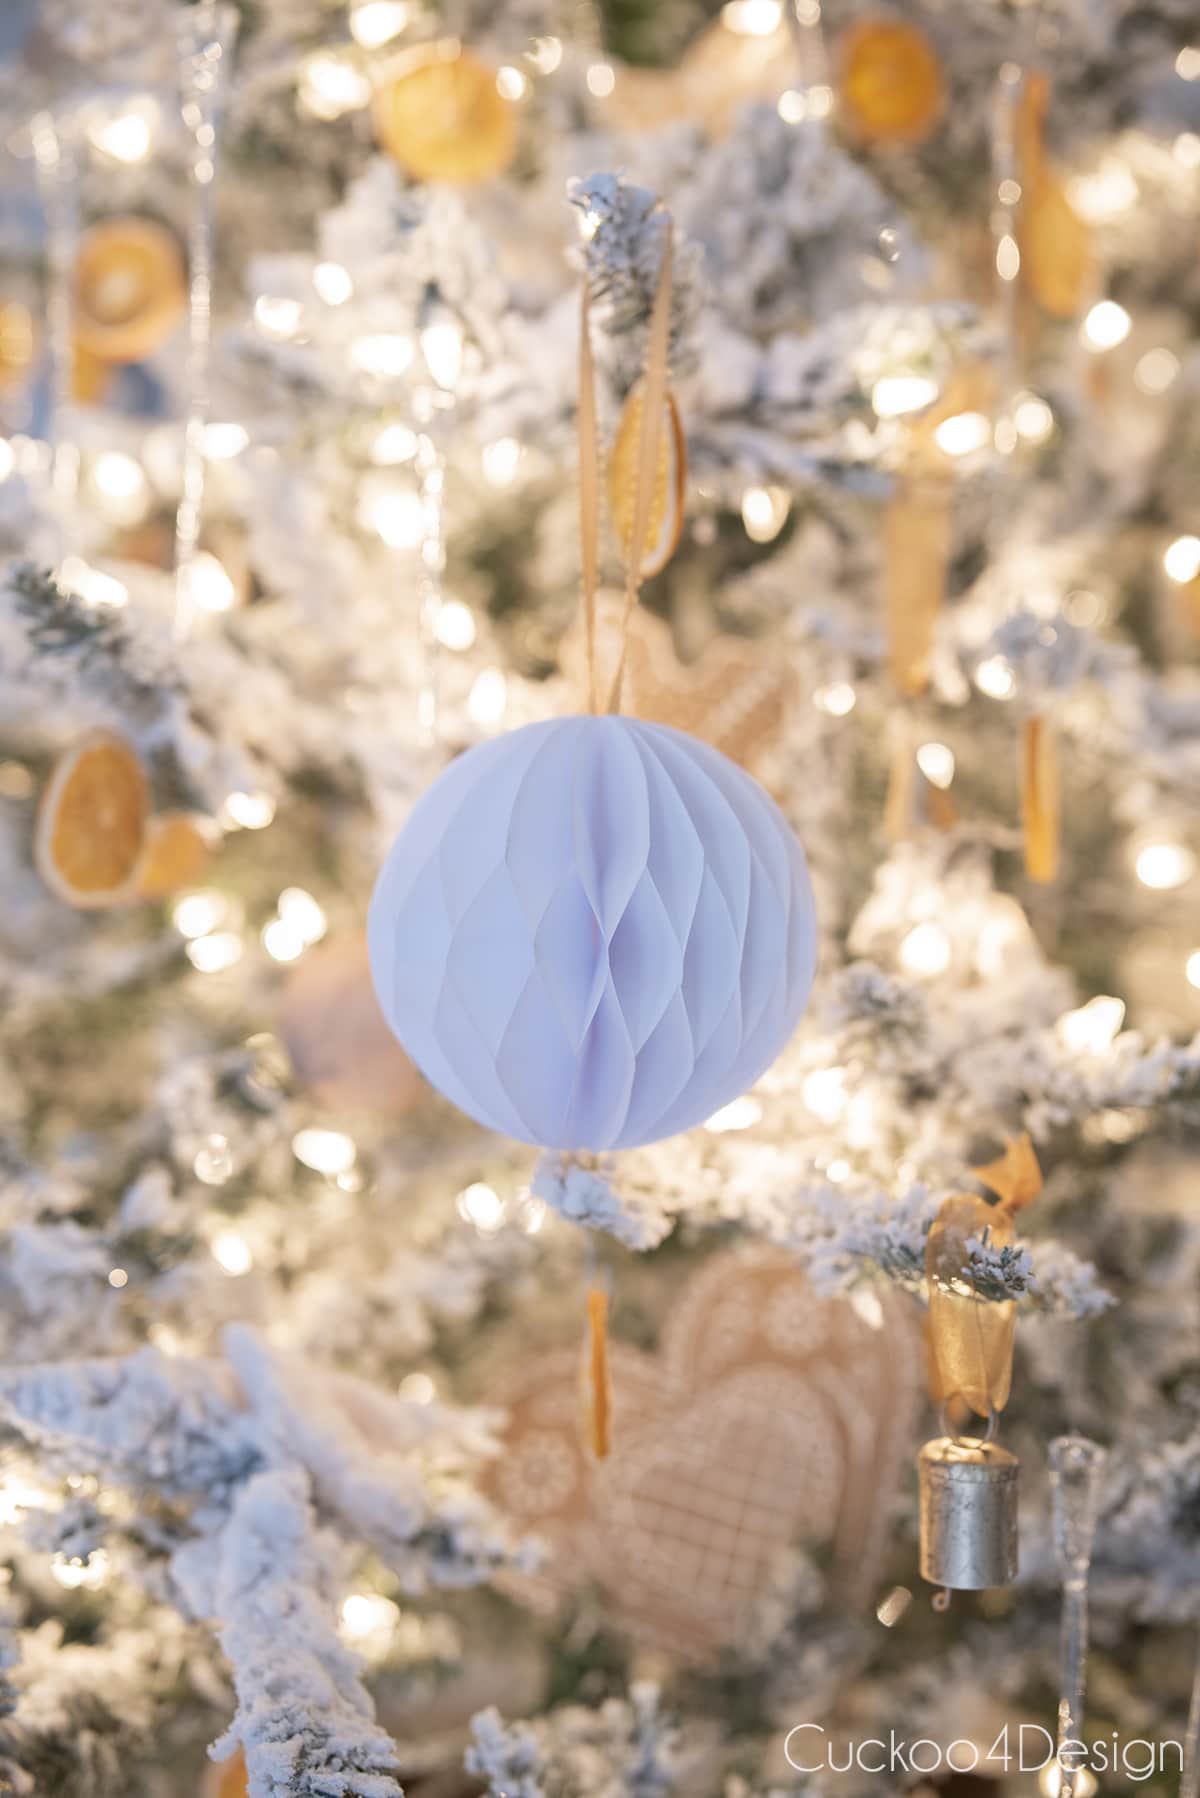
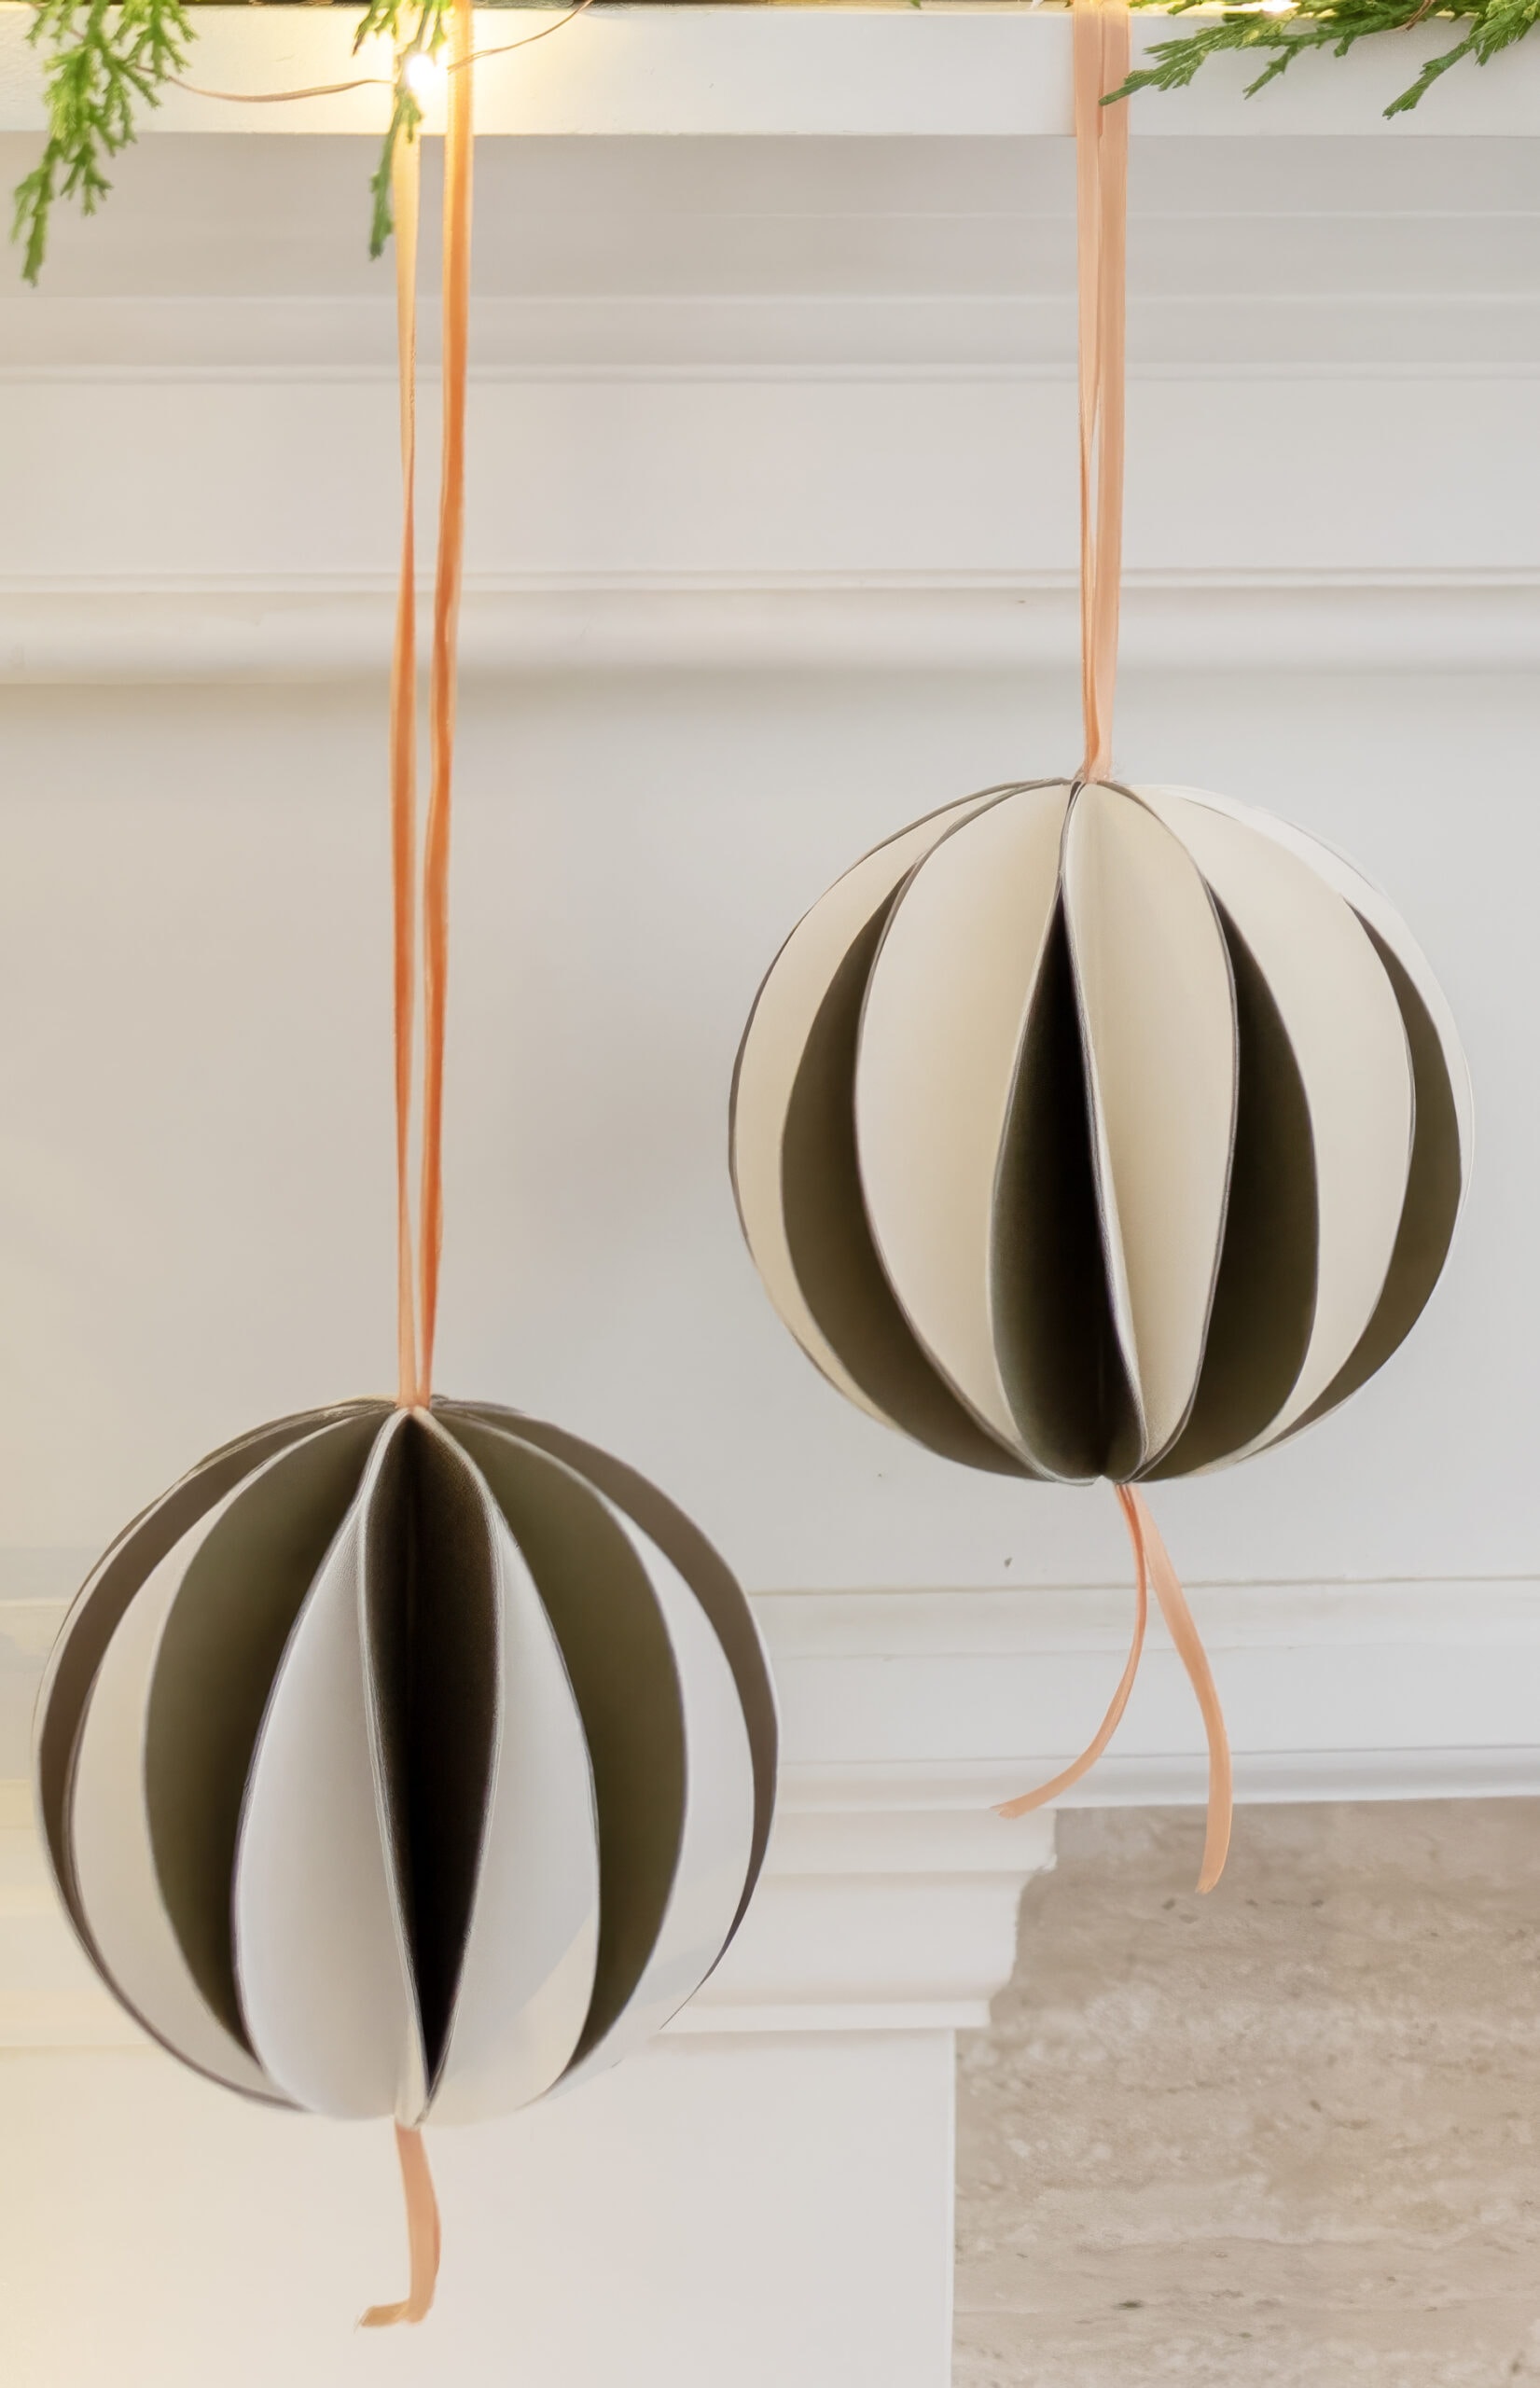
DIY honeycomb ornaments
Honeycomb ornaments add gorgeous texture and dimension to your Christmas tree without any complicated techniques. Made by stacking and gluing paper circles with alternating glue lines to create that distinctive honeycomb effect. I made mostly white honeycomb ornaments to mimic snowballs, but they also look stunning other colors or even two-toned as I’m also showing you below.
Learn how to make DIY honeycomb ornaments in any color using my simple stacking and gluing technique, which is definitely beginner-friendly.
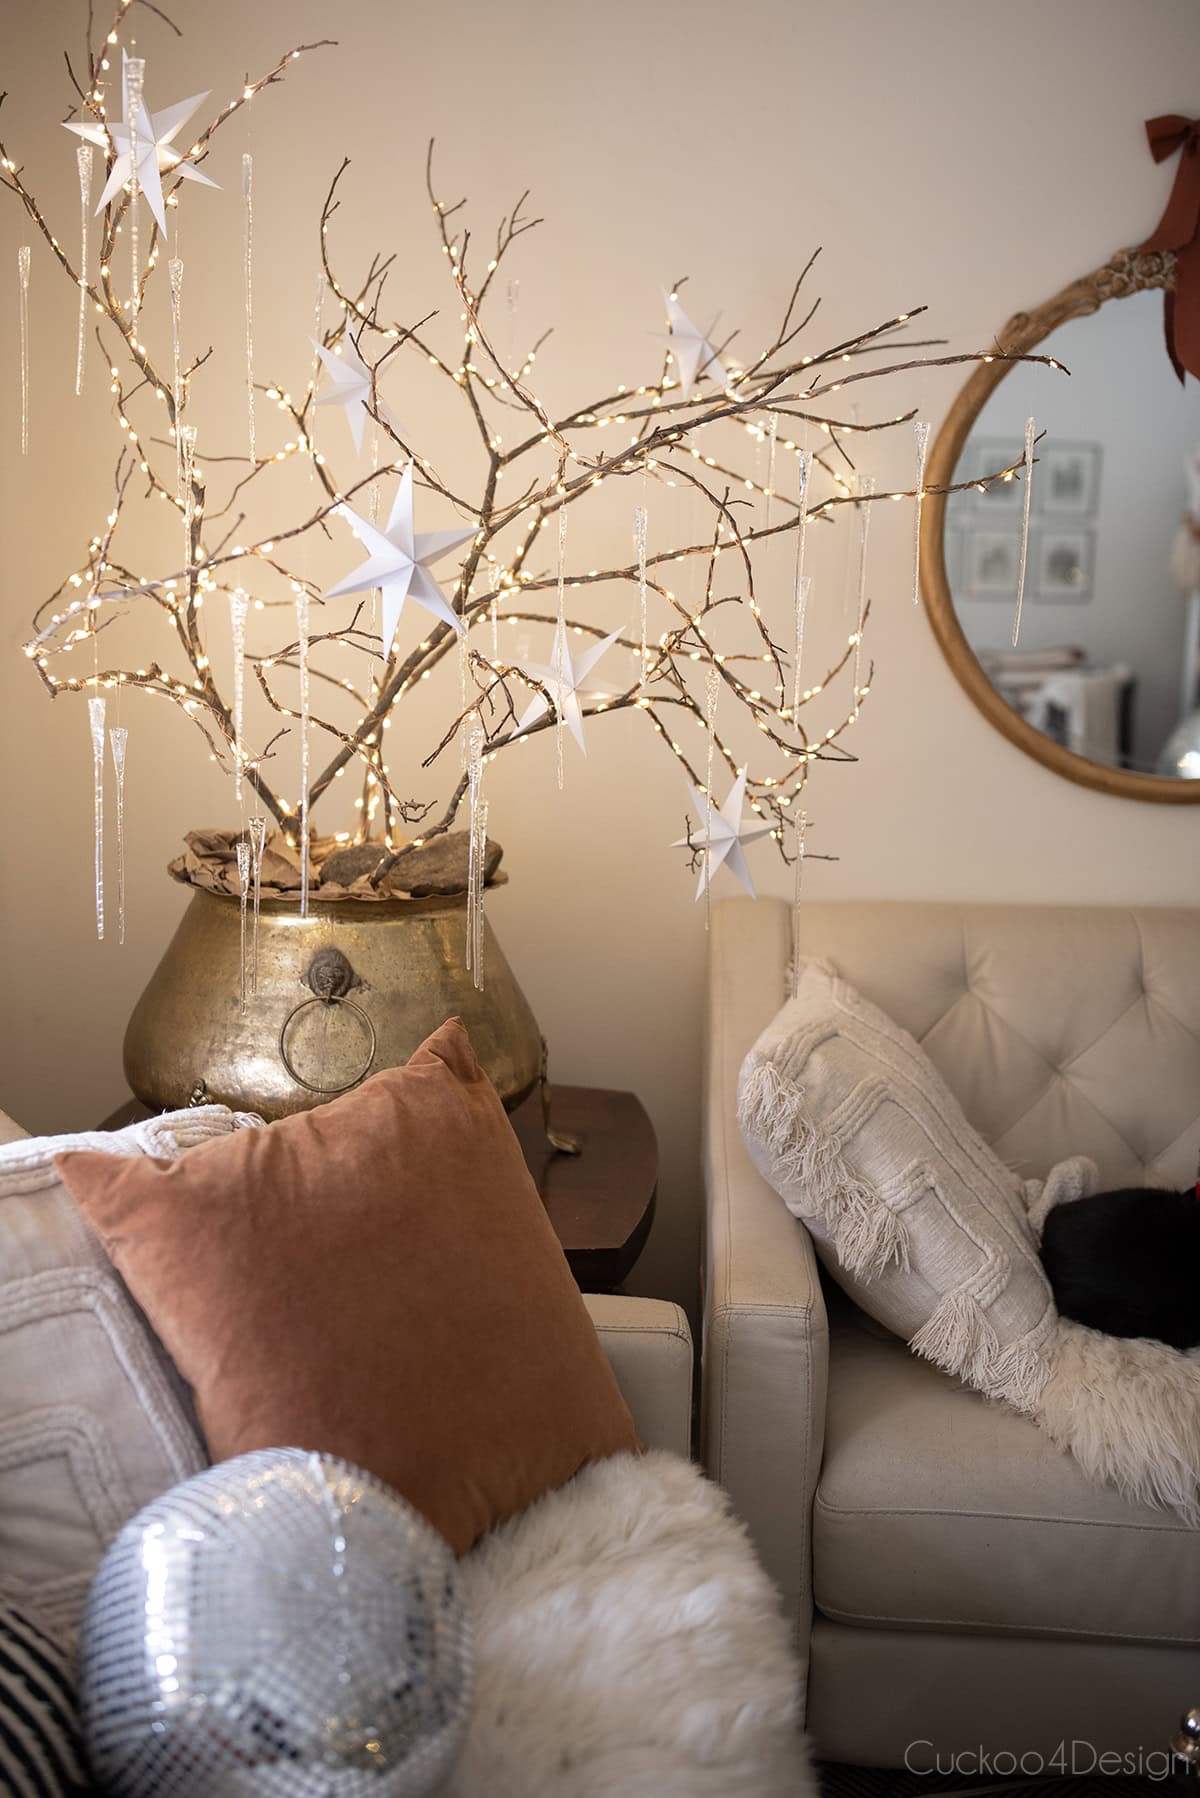
Easy DIY paper fan decorations inspired by sun palm leaves
These paper fan decorations bring a unique, bohemian vibe to your Christmas tree with simple accordion-folded paper! Inspired by dried sun palm leaves (which can be expensive to buy), these DIY versions give you the same look for pennies. They’re especially beautiful on neutral or coastal-themed trees.
Create these stunning DIY paper fan decorations using kraft paper, cardstock, or even music sheets for vintage charm.
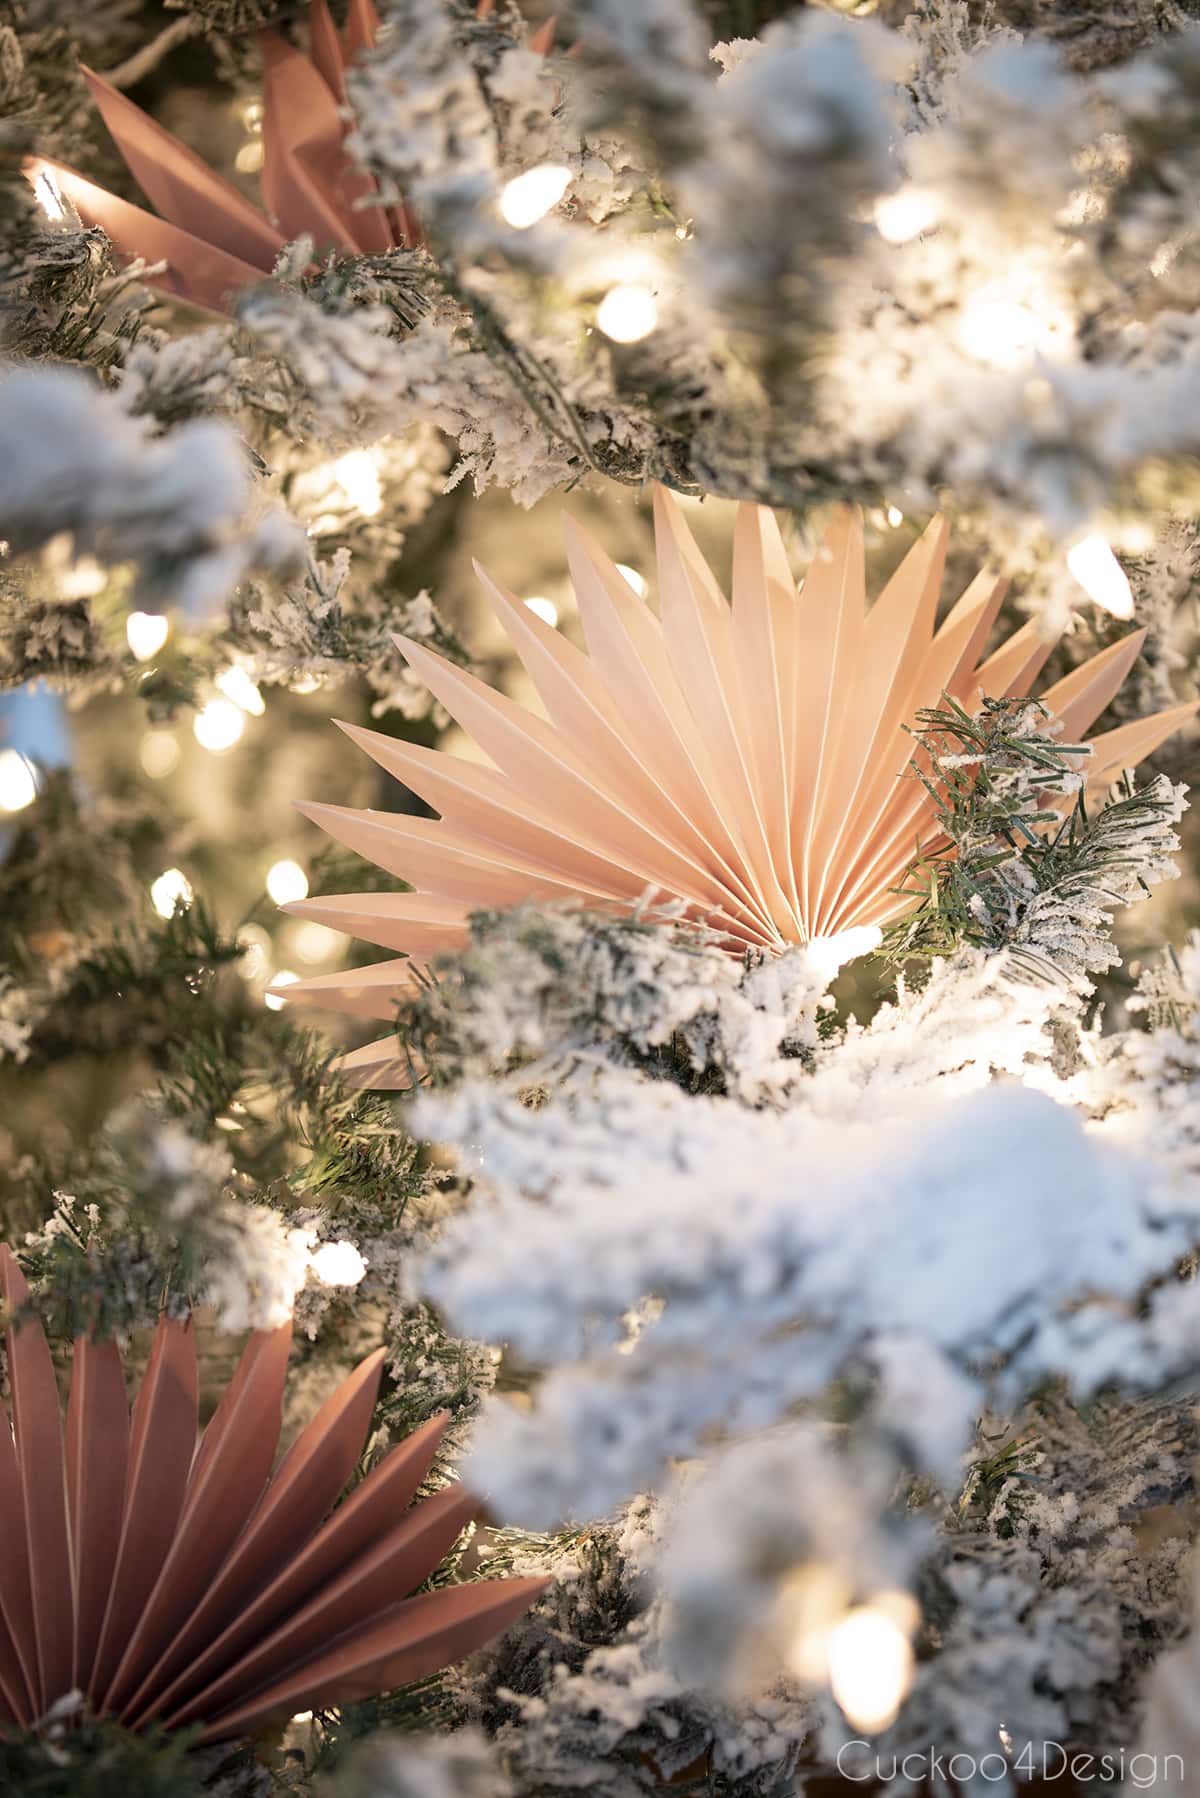
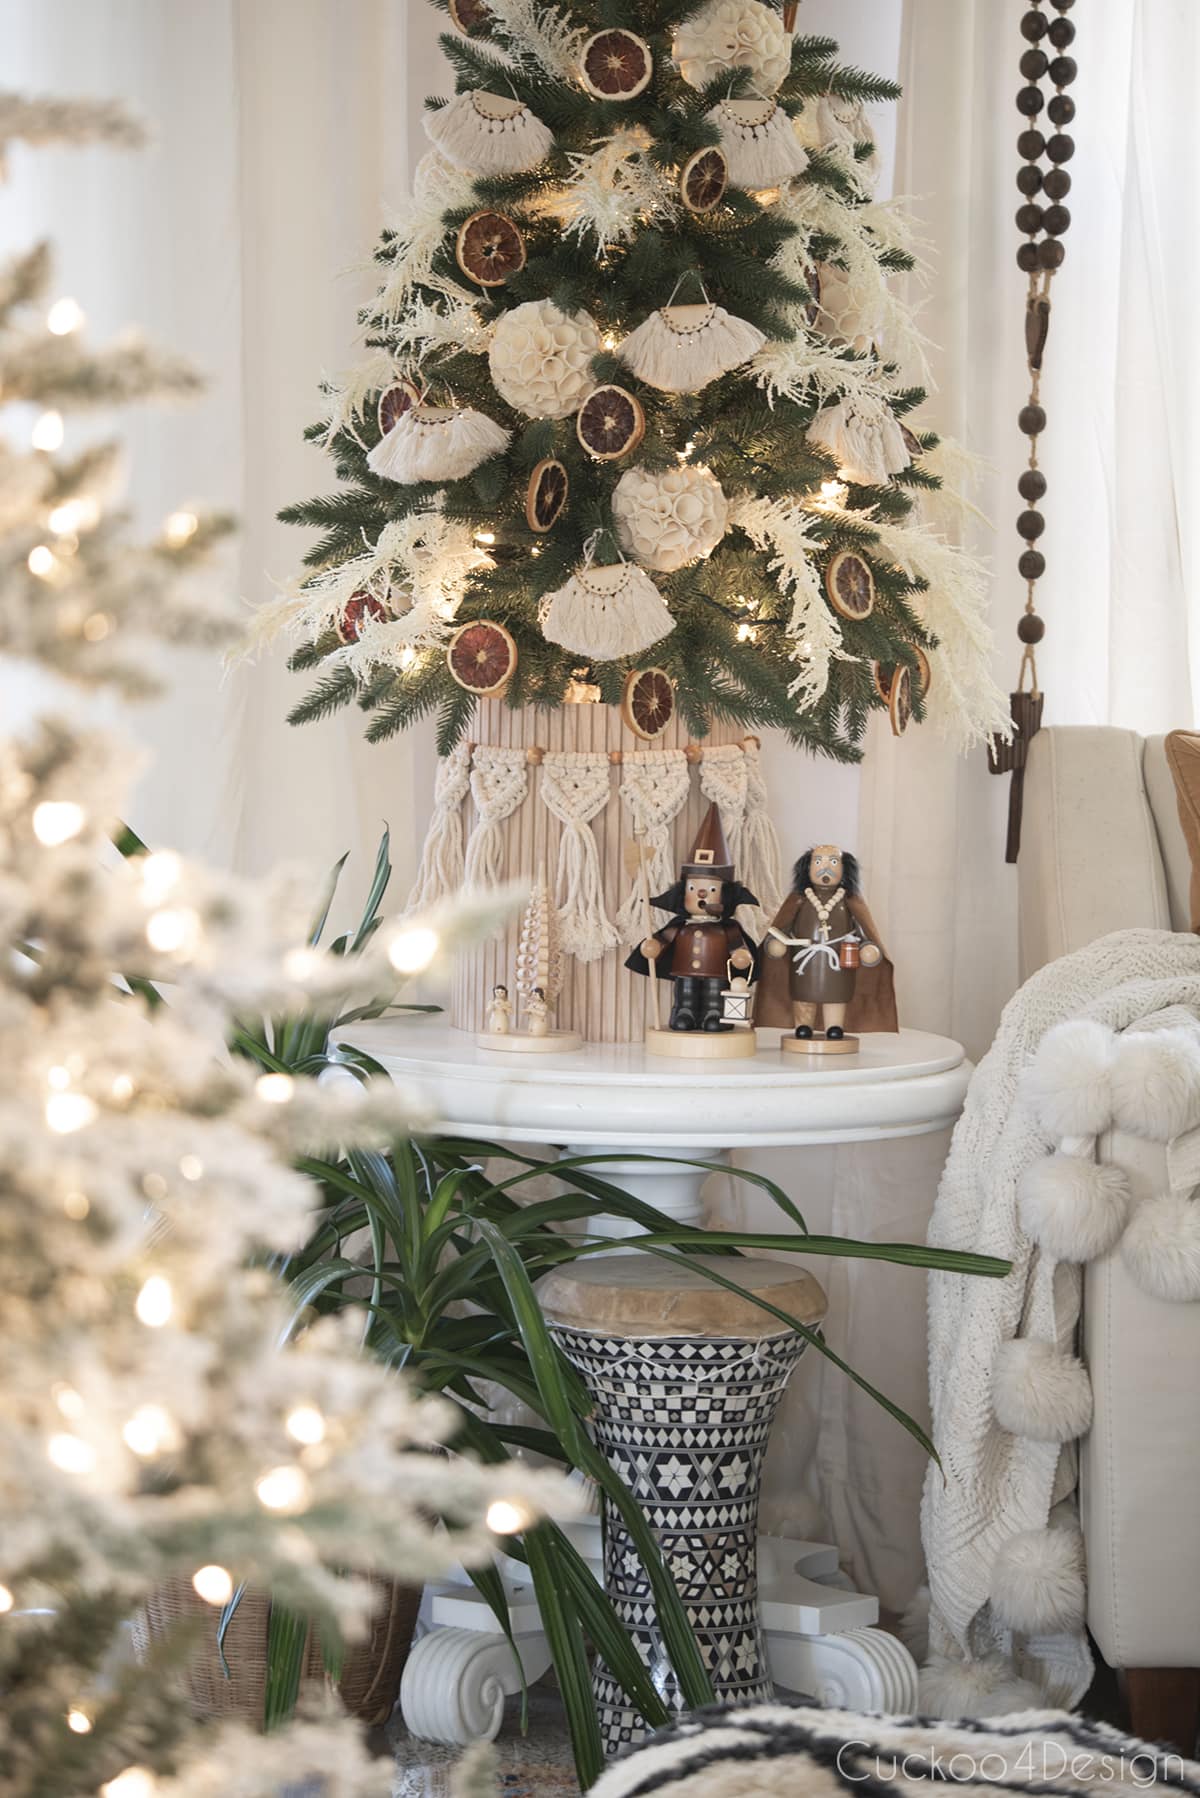
Don’t the fans look stunning on my flocked tree paired with icicles, macrame ornaments, and painted terracotta ornaments?
DIY poster board snowflakes (free snowflake SVG file included)
If you have a Cricut or Silhouette cutting machine, these poster board snowflakes are a game-changer! The free SVG file makes cutting perfect, intricate snowflakes effortless. They’re sturdy enough to last for years and look absolutely magical on any tree or as window displays.
Download the free template and learn how to make DIY poster board snowflakes using your cutting machine. Or cut them by hand if you’re patient!
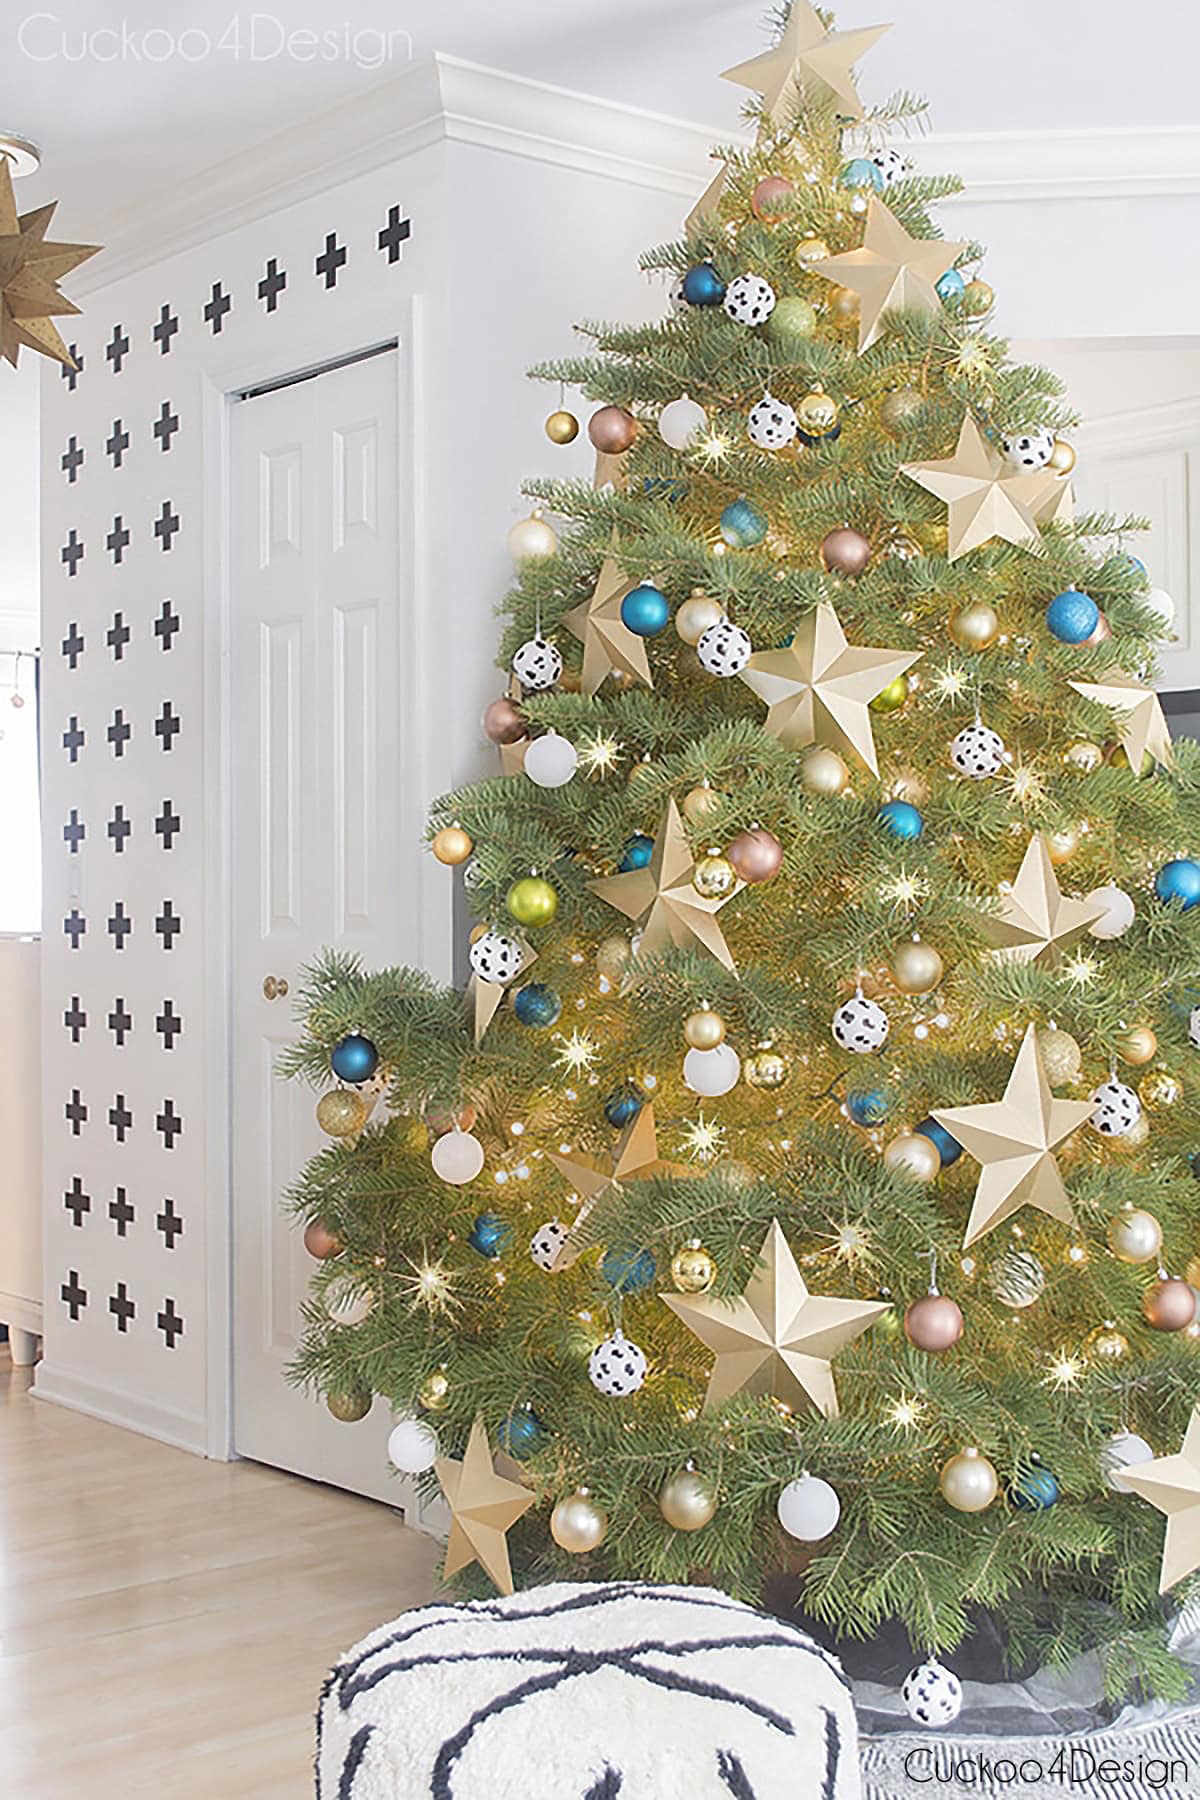
DIY 3D stars with a downloadable svg file
These dimensional stars add instant wow-factor to any Christmas tree! You can cut them by hand or use the included free SVG template if you have a cutting machine. Simply score and bend along the lines to create stunning 3D star shapes. The sturdy poster board is perfect for spray painting in metallic gold or copper for a festive look. That is something you can’t do with regular folded paper!
Learn how to make DIY 3D stars with a free SVG template included, or follow the hand-cutting instructions!

On the tree below, I paired them with my brushstroke ornaments and painted copper ornaments. But I included them in several other trees as well.
How to make folded paper stars (5, 6, or 7+ points)
This paper folding technique lets you create stars with 5, 6, 7, or even more points. You can use standard printer paper, wrapping paper, scrapbook paper, or even old book pages for a vintage look. Once you learn the folding method, you can make dozens in an evening that won’t cost you a lot.
Learn how to make folded paper stars in any size and point configuration with my detailed photo tutorial.

How to make toilet paper roll stars
Turn trash into treasure with these toilet paper roll stars! This is one of my favorite zero-waste ornament projects because it uses materials you’d normally recycle. The stars look rustic and charming, especially when painted in neutral colors.
Let me show you how to cut and assemble toilet paper roll stars using simple supplies you already have at home.

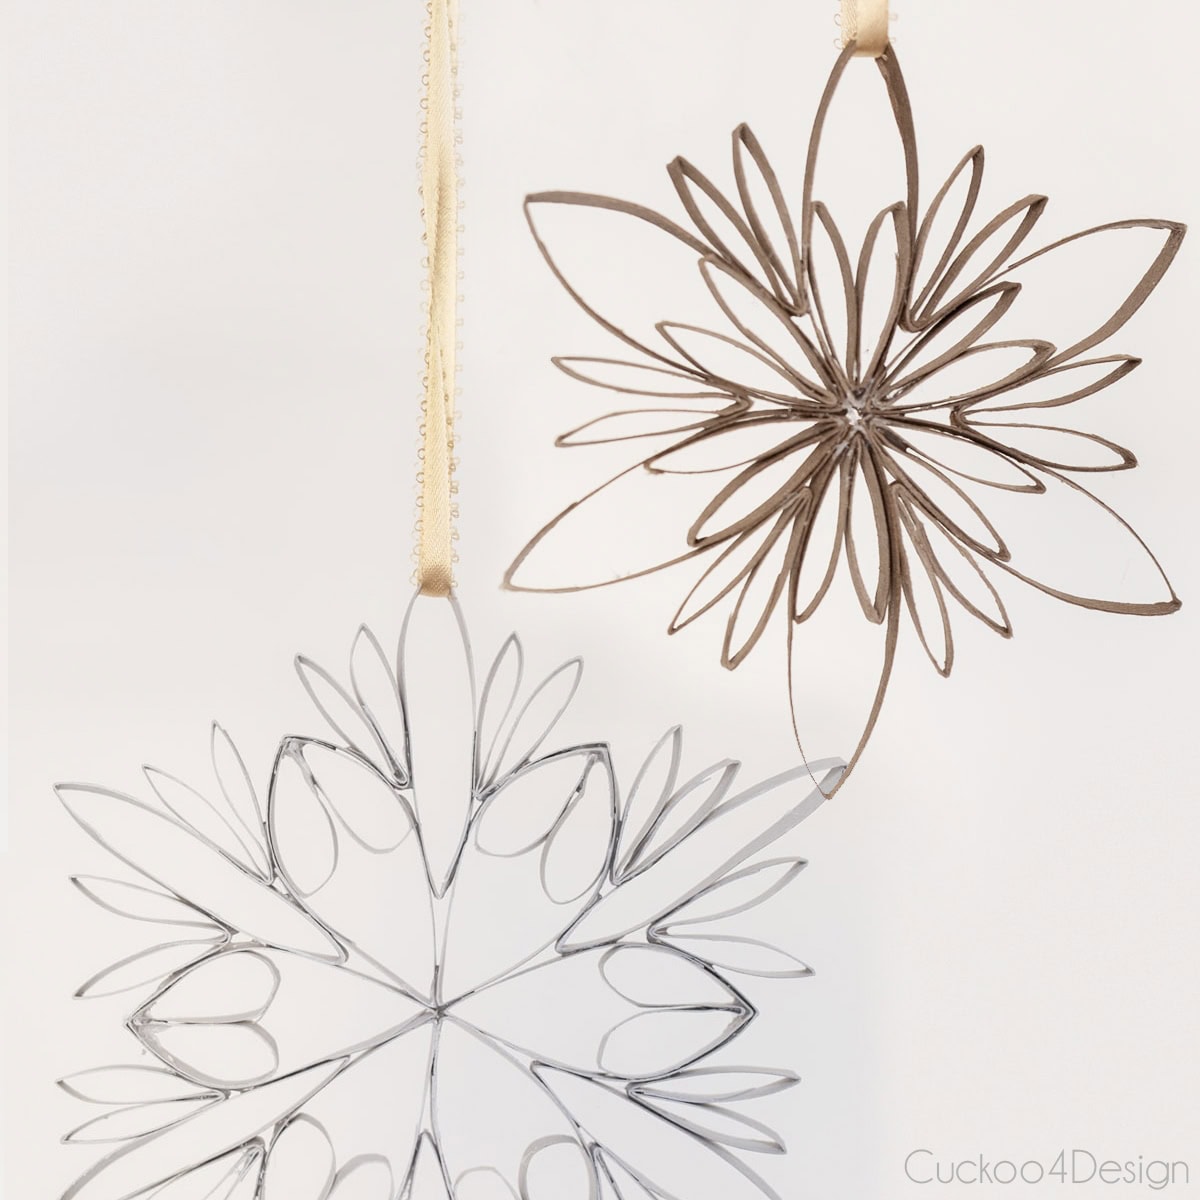
DIY toilet paper roll snowflakes
Another similar upcycled ornament craft are my toilet paper roll snowflakes. They look delicate and intricate but are surprisingly sturdy. I love that you can customize the design by arranging the cardboard pieces in different patterns. No two snowflakes need to look the same!
Try this eco-friendly approach to ornament-making with my toilet paper roll snowflakes tutorial.
Ways to paint and personalize Christmas ornaments
If you love color and personalization, painted ornaments are where the magic happens! From rustic wooden hearts to whimsical mushrooms, these DIY painted Christmas ornaments let you customize every detail to match your style. The best part? Most of these projects use inexpensive materials like plain plastic ball ornaments or wooden shapes, which you can transform with just a bit of paint and creativity.
Paint is also the easiest way to tie different ornament styles together. Just repeat your chosen colors across multiple projects, and suddenly everything looks intentionally coordinated!
DIY heart ornaments for Christmas (easy painted wooden hearts)
These hand-painted wooden heart ornaments add a sweet, folk-art touch to your tree! I painted mine with simple patterns inspired by European folk art, but you can customize them with any design.
Get the full tutorial for these DIY heart ornaments for Christmas, including painting tips and design inspiration.

Below you can see that they’re especially charming when clustered together on a small tabletop tree with my bow ornaments that I mentioned at the beginning of this roundup. Perfect match and look, right?

The easiest DIY mushroom Christmas ornaments (can be used as ornaments in a tree)
These whimsical mushroom ornaments have become wildly popular in recent years, and for good reason, because they’re adorable! Made from wooden craft pieces, they bring a cottagecore and a woodland vibe to your Christmas tree. I used colors that coordinated with the rest of my decor and used dotting tools for the caps.
Create your own woodland magic with my DIY mushroom Christmas ornaments tutorial. They are a lot easier to paint than you think!

And again, my paper bag snowflakes, the baking soda paint ornaments, and my DIY mushroom ornaments.
faux DIY Mexican Christmas ornaments with folk art design
Inspired by traditional Mexican Christmas decorations, these hand-painted ornaments feature vibrant colors and beautiful folk art patterns. Once again, I used cheap plastic ball ornaments and transformed them to look like authentic burnished pottery ornaments. Perfect for adding a global, eclectic touch to your tree.
Bring vibrant folk art to your tree with my faux DIY Mexican Christmas ornaments tutorial.

And here they are hanging on a tree with my baking soda ornaments, beeswax ornaments, and my faux gingerbread ornaments for a completely different look.

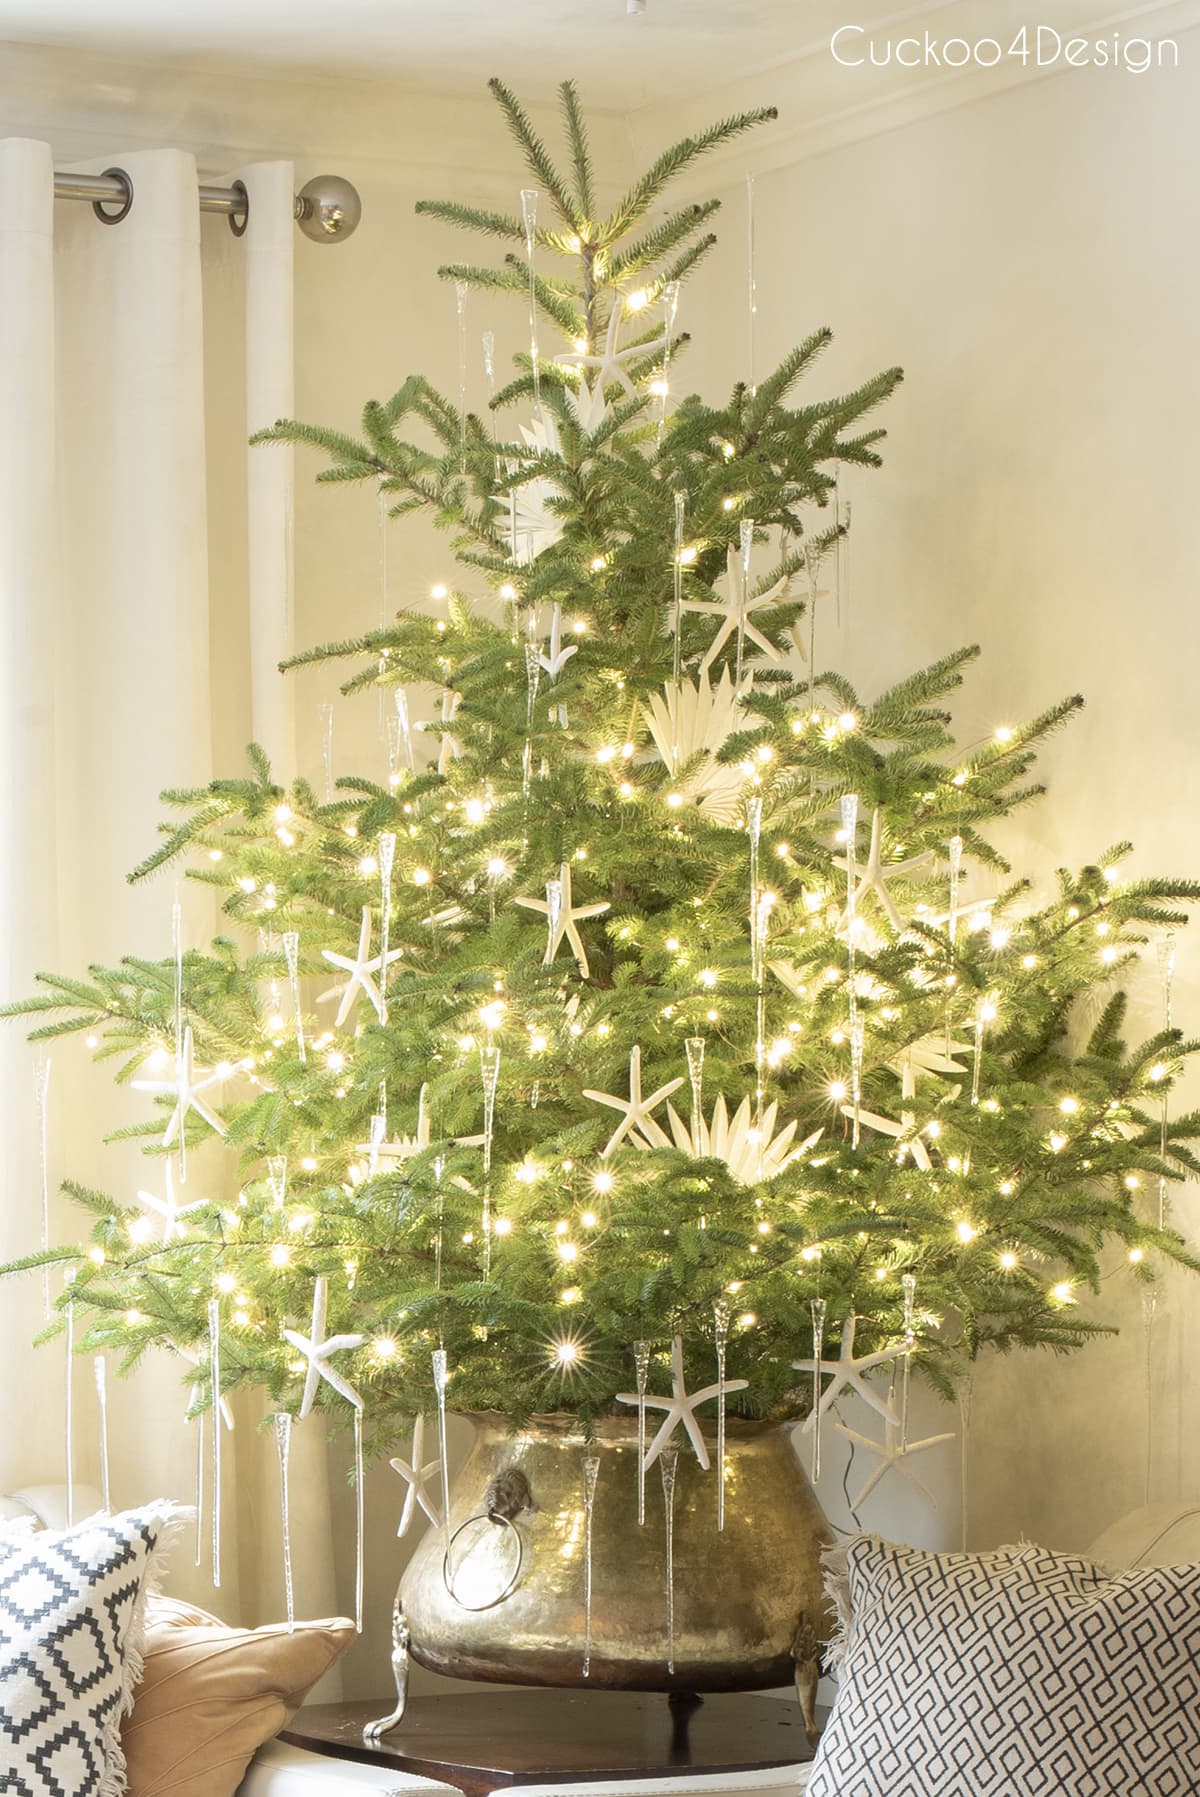
And yes, I’m guilty of splurging on ornaments here and there if you’ve noticed. There aren’t many, though, but the ones I splurged on also keep coming back yearly. So it’s a mix between high and low. The glass icicles and clip-on candle lights are my favorite.
A fun way to repurpose cheap Christmas ornaments with baking soda paint
This is hands-down my most versatile ornament technique! The baking soda paint creates a gorgeous matte, chalky texture that looks expensive. I use these ornaments on almost every tree I decorate because they work with any color scheme and add beautiful texture. You can even paint old and discolored glitter ornaments this way since their texture is perfect for this paint job.
Transform plastic thrifted or dollar store ornaments into high-end decorations using my baking soda paint ornaments technique.

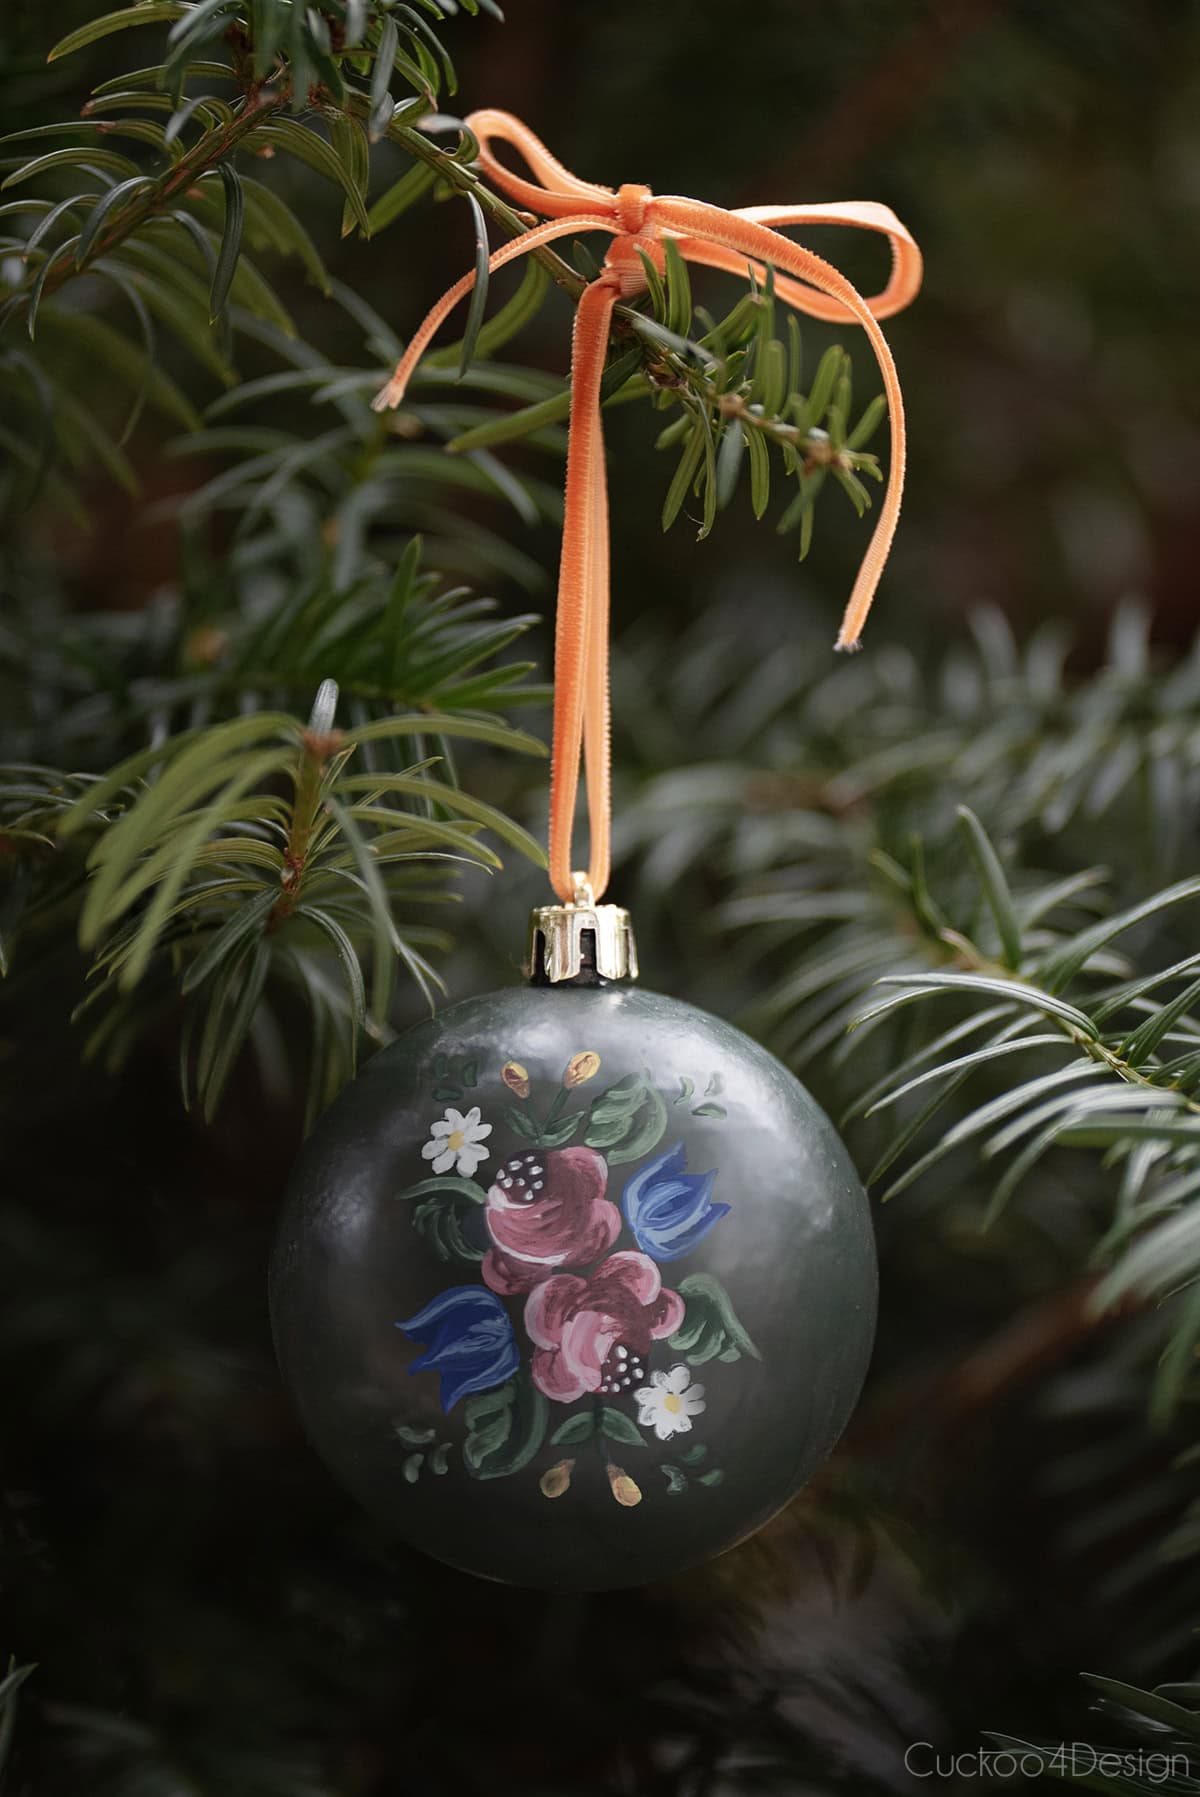
German folk art “Bauernmalerei” ornament
Bauernmalerei is a traditional German painting style featuring delicate florals and folk motifs. These ornaments take a bit more time and patience than my other projects, but the result is absolutely stunning and true heirloom-quality decorations. I still have some of my moms projects that she painted this way when I was growing up. If you love detailed painting, you’ll adore this technique.
Learn traditional German folk painting with my German folk art Bauernmalerei ornament tutorial, complete with painting patterns.
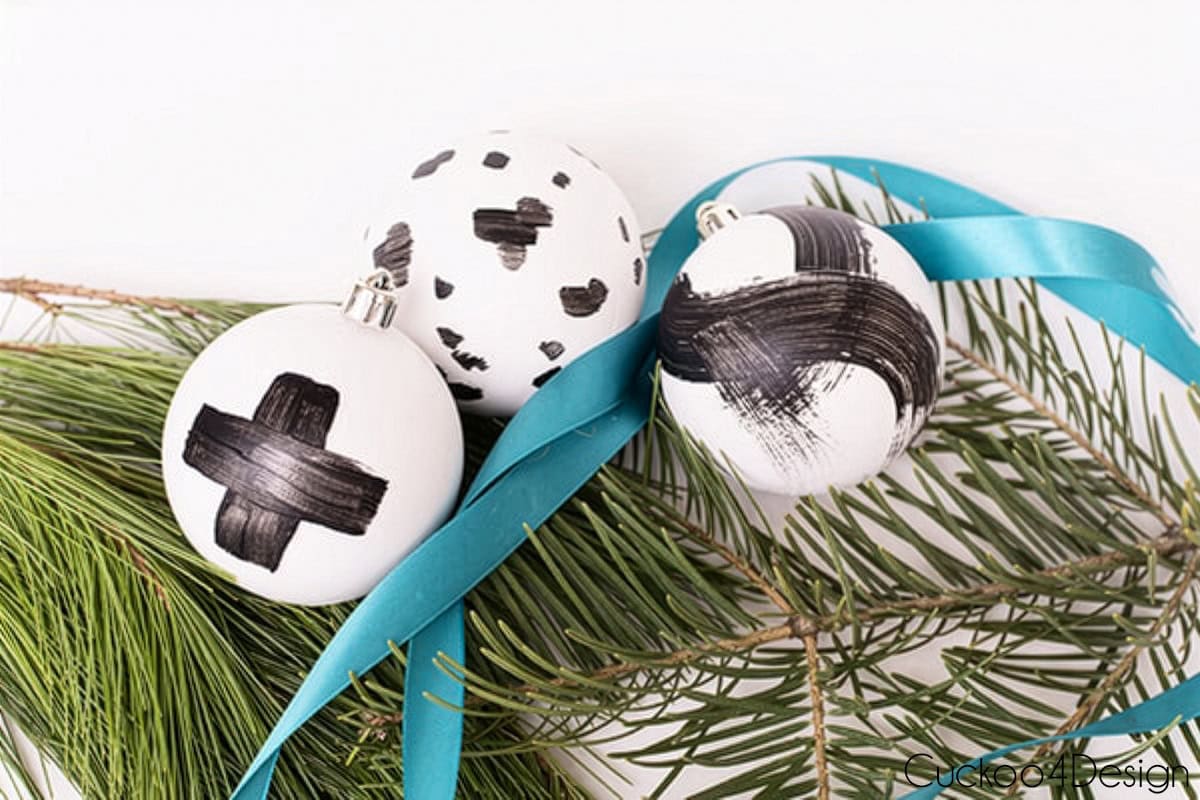
DIY brushstroke painted plastic Christmas balls
For a modern, abstract look, these brushstroke-painted ornaments are perfect! This is also my comprehensive guide to painting plastic Christmas ornaments, covering everything from solid color techniques to loose, artistic brushstrokes. The contemporary painting style makes them feel designer-worthy, and the best part? There’s no right or wrong way because every stroke adds character. Whether you want clean, minimalist, solid colors or bold abstract designs, this tutorial has you covered. This is also perfect for kids!
Check out my complete guide on how to paint plastic ornaments, including solid color and abstract techniques.
Cozy knotted Christmas ornaments (macramé designs & patterns)
There’s something incredibly therapeutic about knotting macramé ornaments on a cozy winter evening! These handmade knotted ornaments create beautiful texture on your tree and work perfectly with the boho aesthetic I love. Whether you’re making delicate angels, gnomes, or simple knotted designs, macrame ornaments add that special handcrafted touch that makes your tree feel personal and unique.
All my macrame tutorials include free patterns and use basic knots. They’re the perfect project for a relaxing craft night with cookies (or wine), holiday music, and a Hallmark movie.
How to make a macrame angel (3 easy different free patterns)
These delicate macrame angels are some of my most beloved ornaments! I’ve included three different pattern variations so you can choose your favorite style (below you can see my favorite). They work beautifully as tree ornaments, gift tags, baby showers, or even as standalone decorations hung in windows.
Get all three free patterns and learn how to make a macrame angel using basic macrame knots. Definitely perefct for beginners!

The easiest macrame ornament DIY
This super-easy macrame ornament tutorial includes a collection of different macrame ornament designs, all using variations of basic knots. Once you master the fundamental techniques of this easy knotted ornament, you can mix and match the different ornaments and patterns. All patterns are completely free and include step-by-step photos!
Check out my free DIY macrame ornaments patterns. I’m sure you’ll find something you love.


The ultimate guide to making easy macrame gnomes (free pattern)
Macrame gnomes have taken the crafting world by storm! These bearded little fellows are adorable as ornaments (or gifts). The pattern includes variations for different beard styles, noses, and hat shapes.
Create your own cute macrame gnomes using my ultimate guide with free patterns and video tutorial.

Nature-inspired ornaments
Bring a little of the outdoors inside with these nature-inspired DIY ornaments. I’ve made everything from embossed tin stars to dried-flower glass ornaments and even real starfish ornaments.
They’re simple, elegant, and give your tree a bit of that organic charm that never goes out of style.
Speaking of using natural elements, check out my dried floral Christmas tree that I made entirely out of foraged items I found on my long walks. From different grasses, to feathers, and dried florals such as thistles. It was worth all the work because collecting things on my walks is my favorite thing to do.
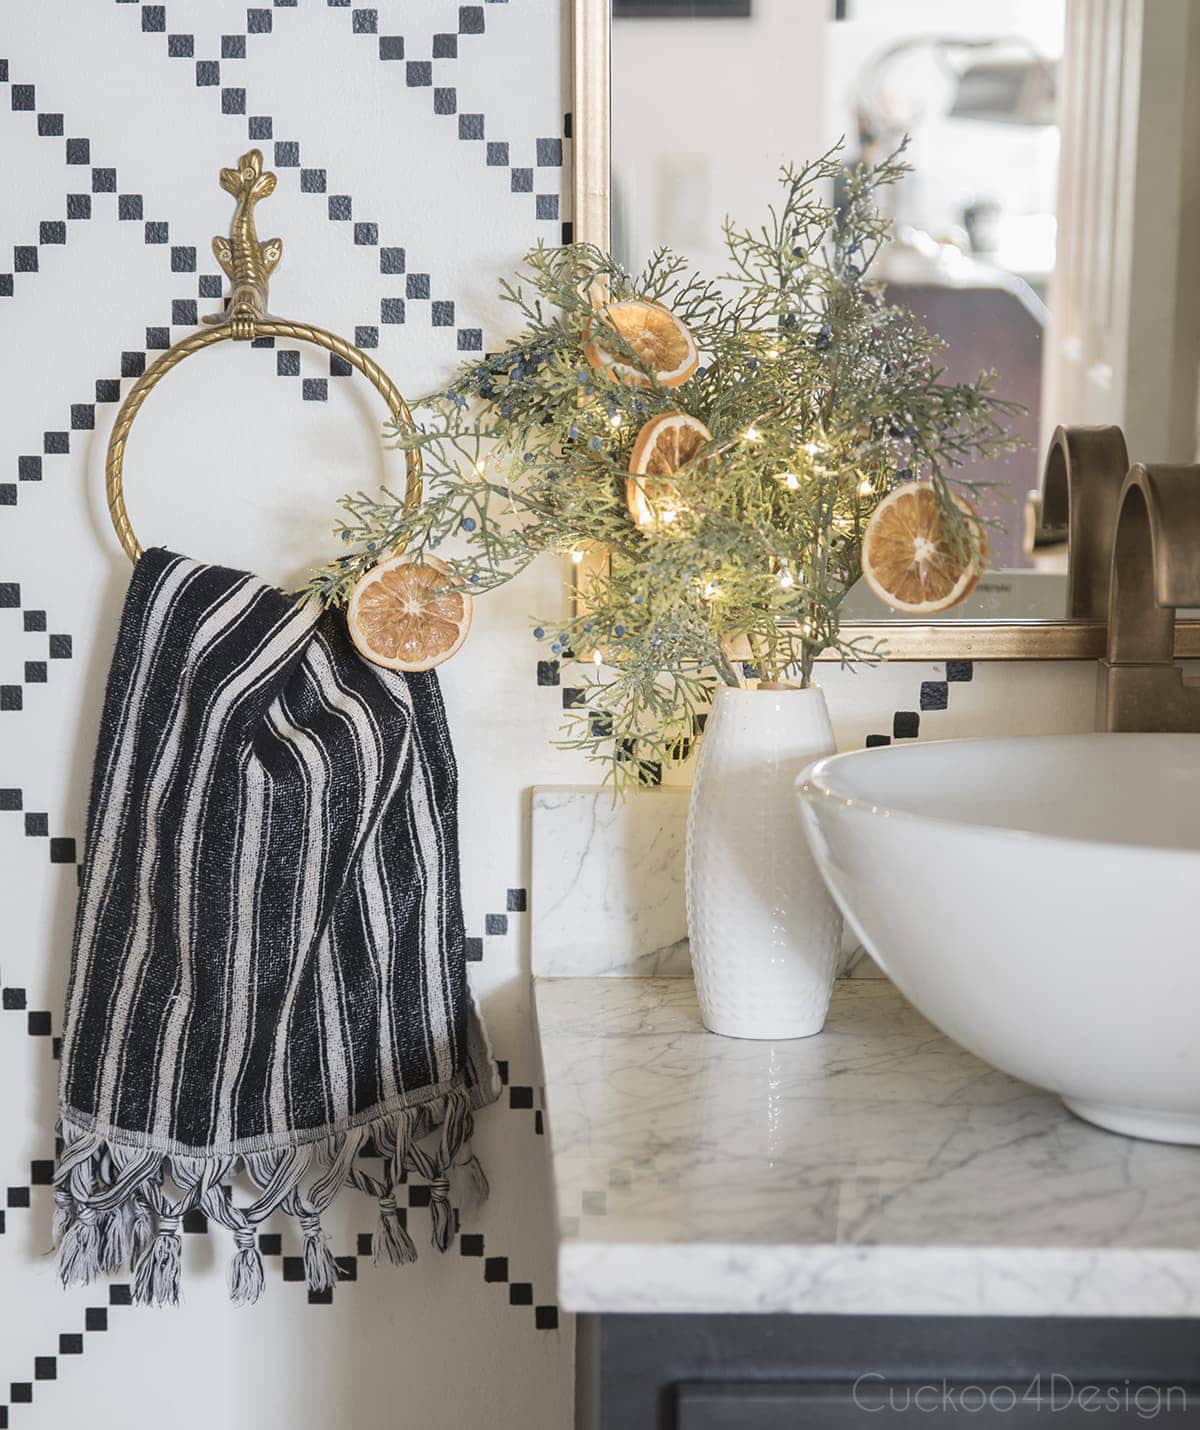
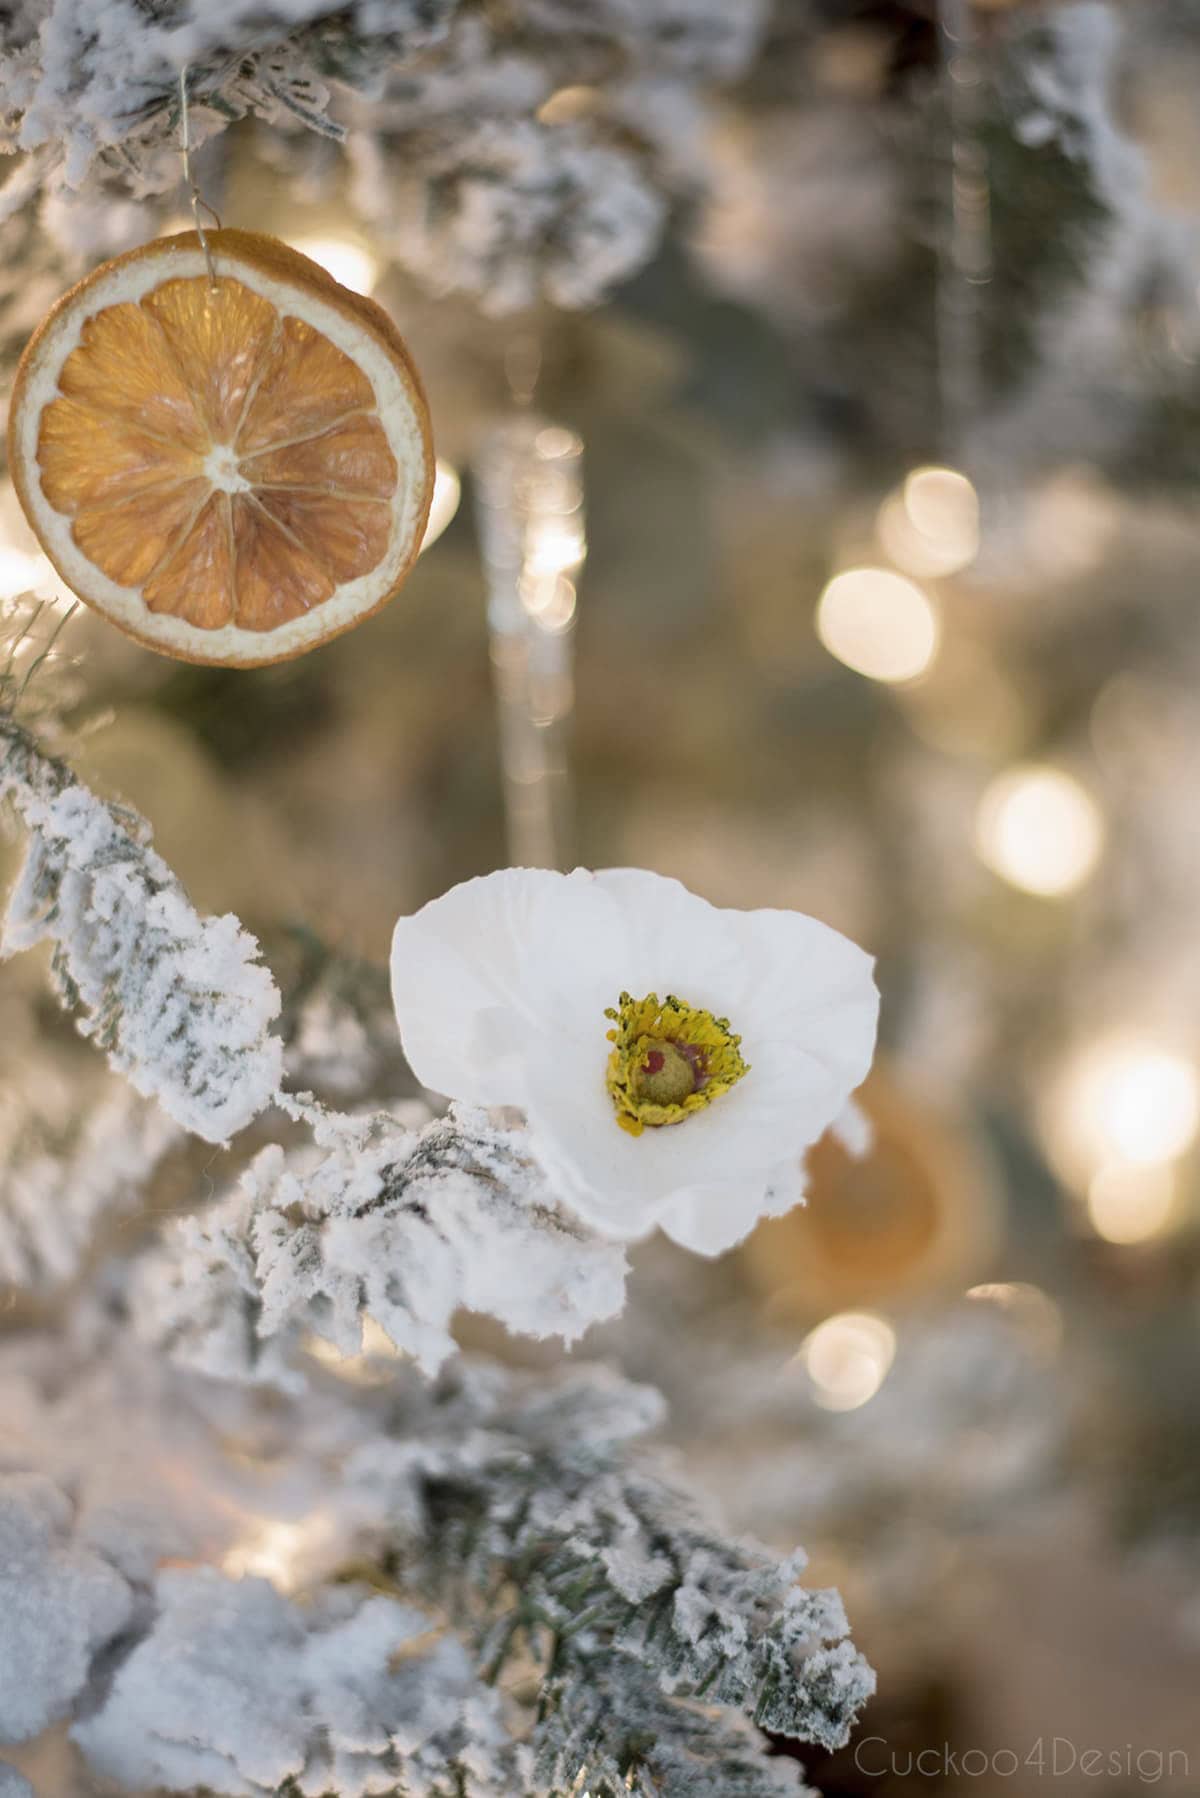
Dried orange slice ornaments
Another natural favorite that doesn’t need a tutorial is dried orange slice ornaments. I’ve used them for years, and they add the most beautiful, glowing warmth to a Christmas tree, especially when the Christmas lights shine through them.
I know it might feel a bit strange to hang something edible when grocery prices are high, but you can easily use oranges that are a bit past their prime. To make them, slice your oranges thinly and either use a food dehydrator or dry them in the oven at 200°F for two to three hours, flipping occasionally. The goal is to dry them, not cook them.
A food dehydrator makes it even simpler to make dried orange slice ornaments because you just add the orange slices and let the dehydrator do the work.
Once they’re ready, just attach simple ornament hooks or twine, hang them up, and let your Christmas lights do the rest. They’ll create that soft, magical orange glow that makes the whole room feel cozy and nostalgic.
The easiest DIY starfish ornaments for your Christmas tree
These cute DIY starfish ornaments are so easy to make. Check out my tutorial because all you need is a seashell drill and hooks.
I also have a macrame starfish tutorial, which can be used as an ornament too, for those of you that are vegan. Of course, it takes a bit longer to make but all you need to hang it from a tree is a ribbon or a hook, and they’d have the same visual impact.
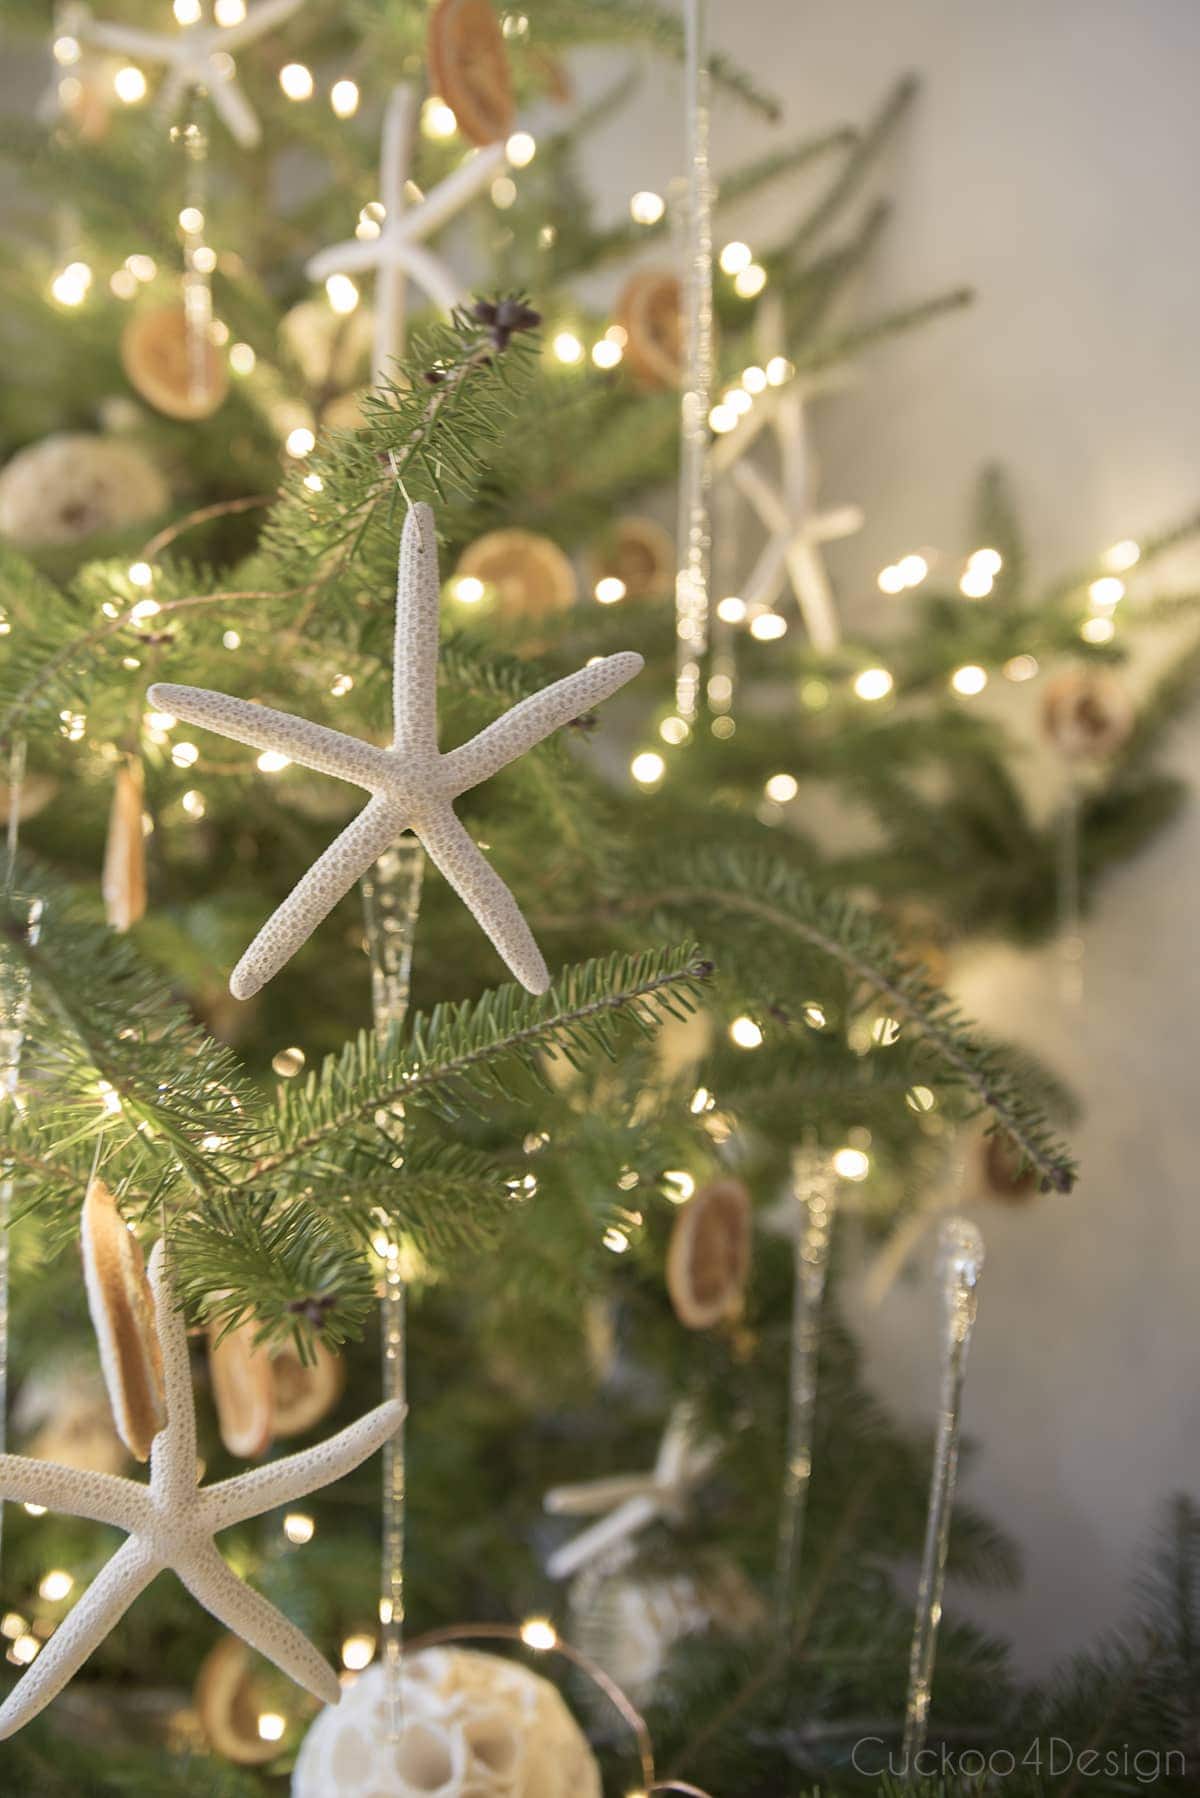
And then a tree without the orange slices but still the star fish!
DIY Christmas flower ornament (easy Christmas Rose hack)
This clever hack transforms inexpensive fake flowers into elegant ornaments in just minutes! Christmas roses (hellebores, which I grow in my garden too) are traditional holiday flowers in Germany, and these faux versions look surprisingly realistic on the tree.
Try this genius DIY Christmas flower ornament hack using faux flowers from the craft store.
DIY dried flower Christmas ornaments (simple, boho elegance)
These dried flower ornaments encased in clear glass globes are another way of using foraged flowers and grasses that I find on my walks! They have a romantic, vintage feel and showcase dried flowers beautifully. Perfect for a cottagecore or boho-chic Christmas aesthetic.
Create heirloom-quality DIY dried flower Christmas ornaments with this super simple tutorial.

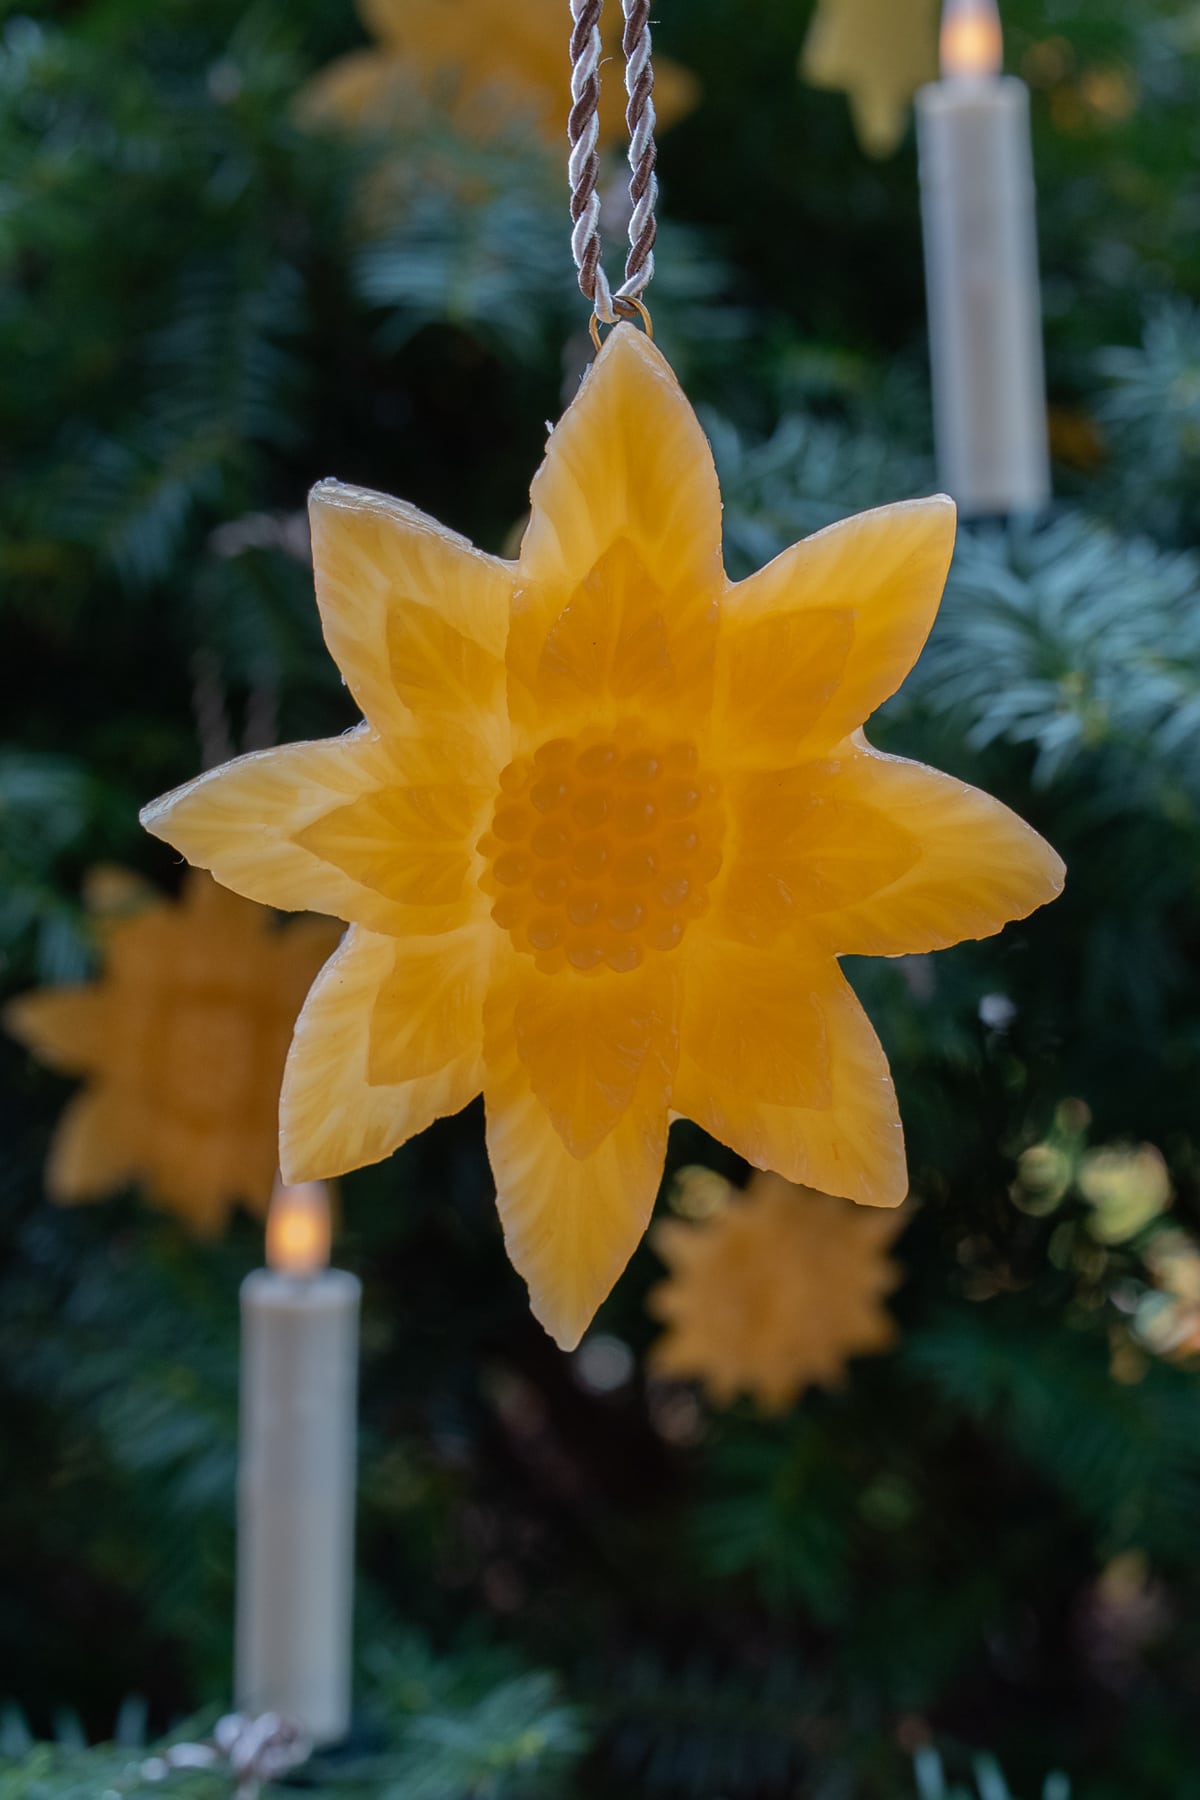
How to make beeswax ornaments (3 different ways to make them)
These beeswax ornaments are dear to my heart because they remind me of my childhood (I explain why in my tutorial). They also have a warm, natural glow and subtle honey scent that makes them extra special. This tutorial shows three different techniques so you can choose your preferred method.
Discover how to make beeswax ornaments three different ways.
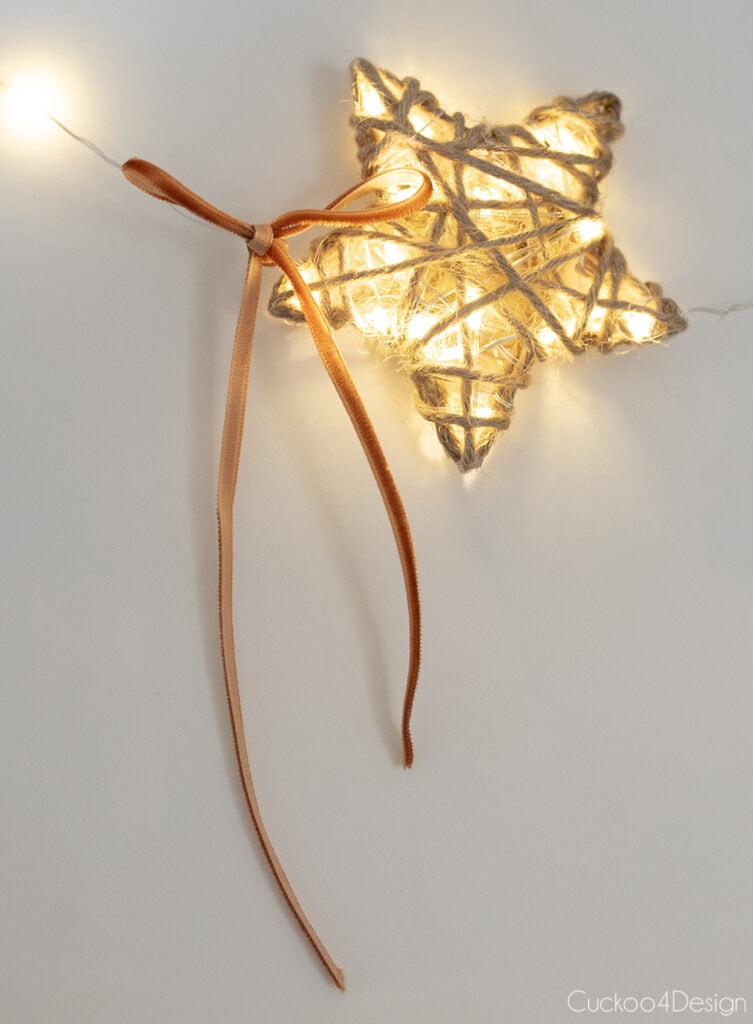
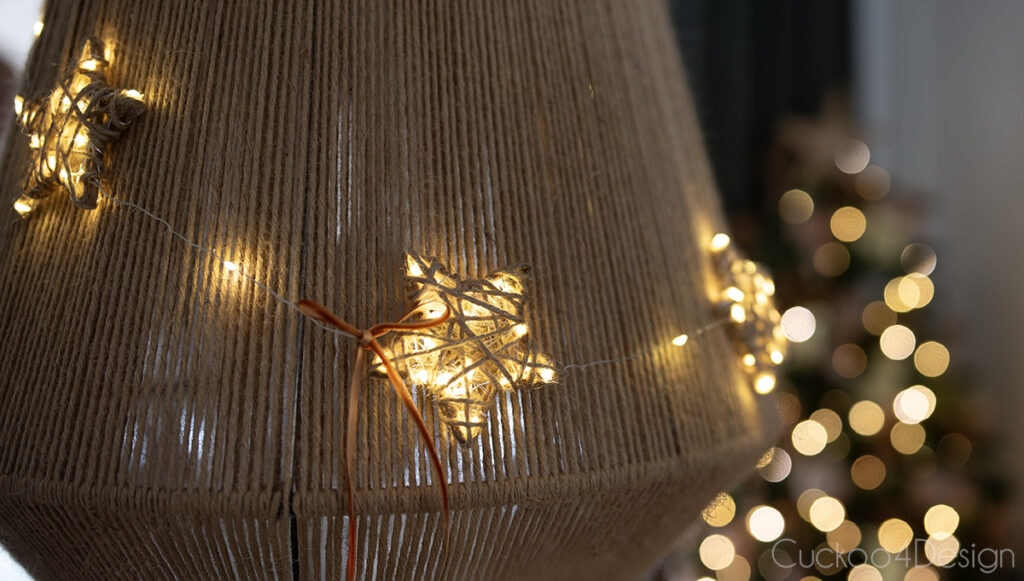
DIY light-up jute yarn star ornaments using fairy lights
I used some leftover natural jute yarn to make yarn star ornaments that light up with fairy lights. They add such texture and warmth to my Christmas decor!
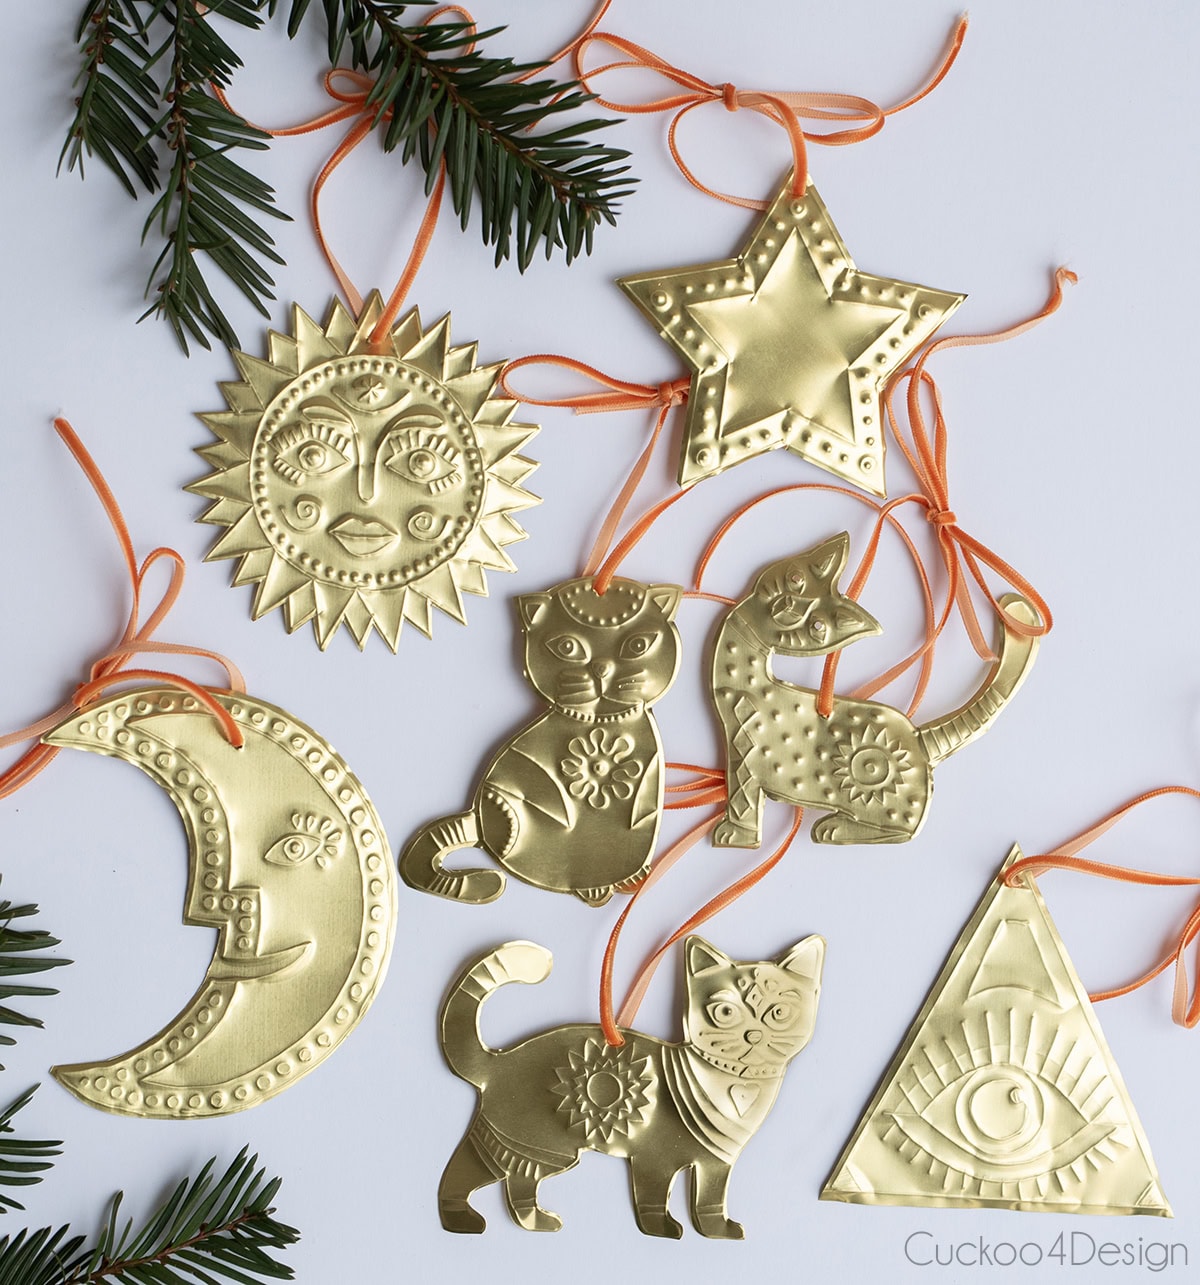
DIY embossed tin ornaments (free templates)
These embossed tin ornaments look so expensive, but really aren’t because you can even use disposable baking pans and trays! The embossing technique creates beautiful texture and vintage charm. I’ve included free templates so you can recreate traditional designs or create your own.
Channel old-world craftsmanship with my DIY embossed tin ornaments tutorial and several different free embossing templates (including cats, let me know if you want dogs too).
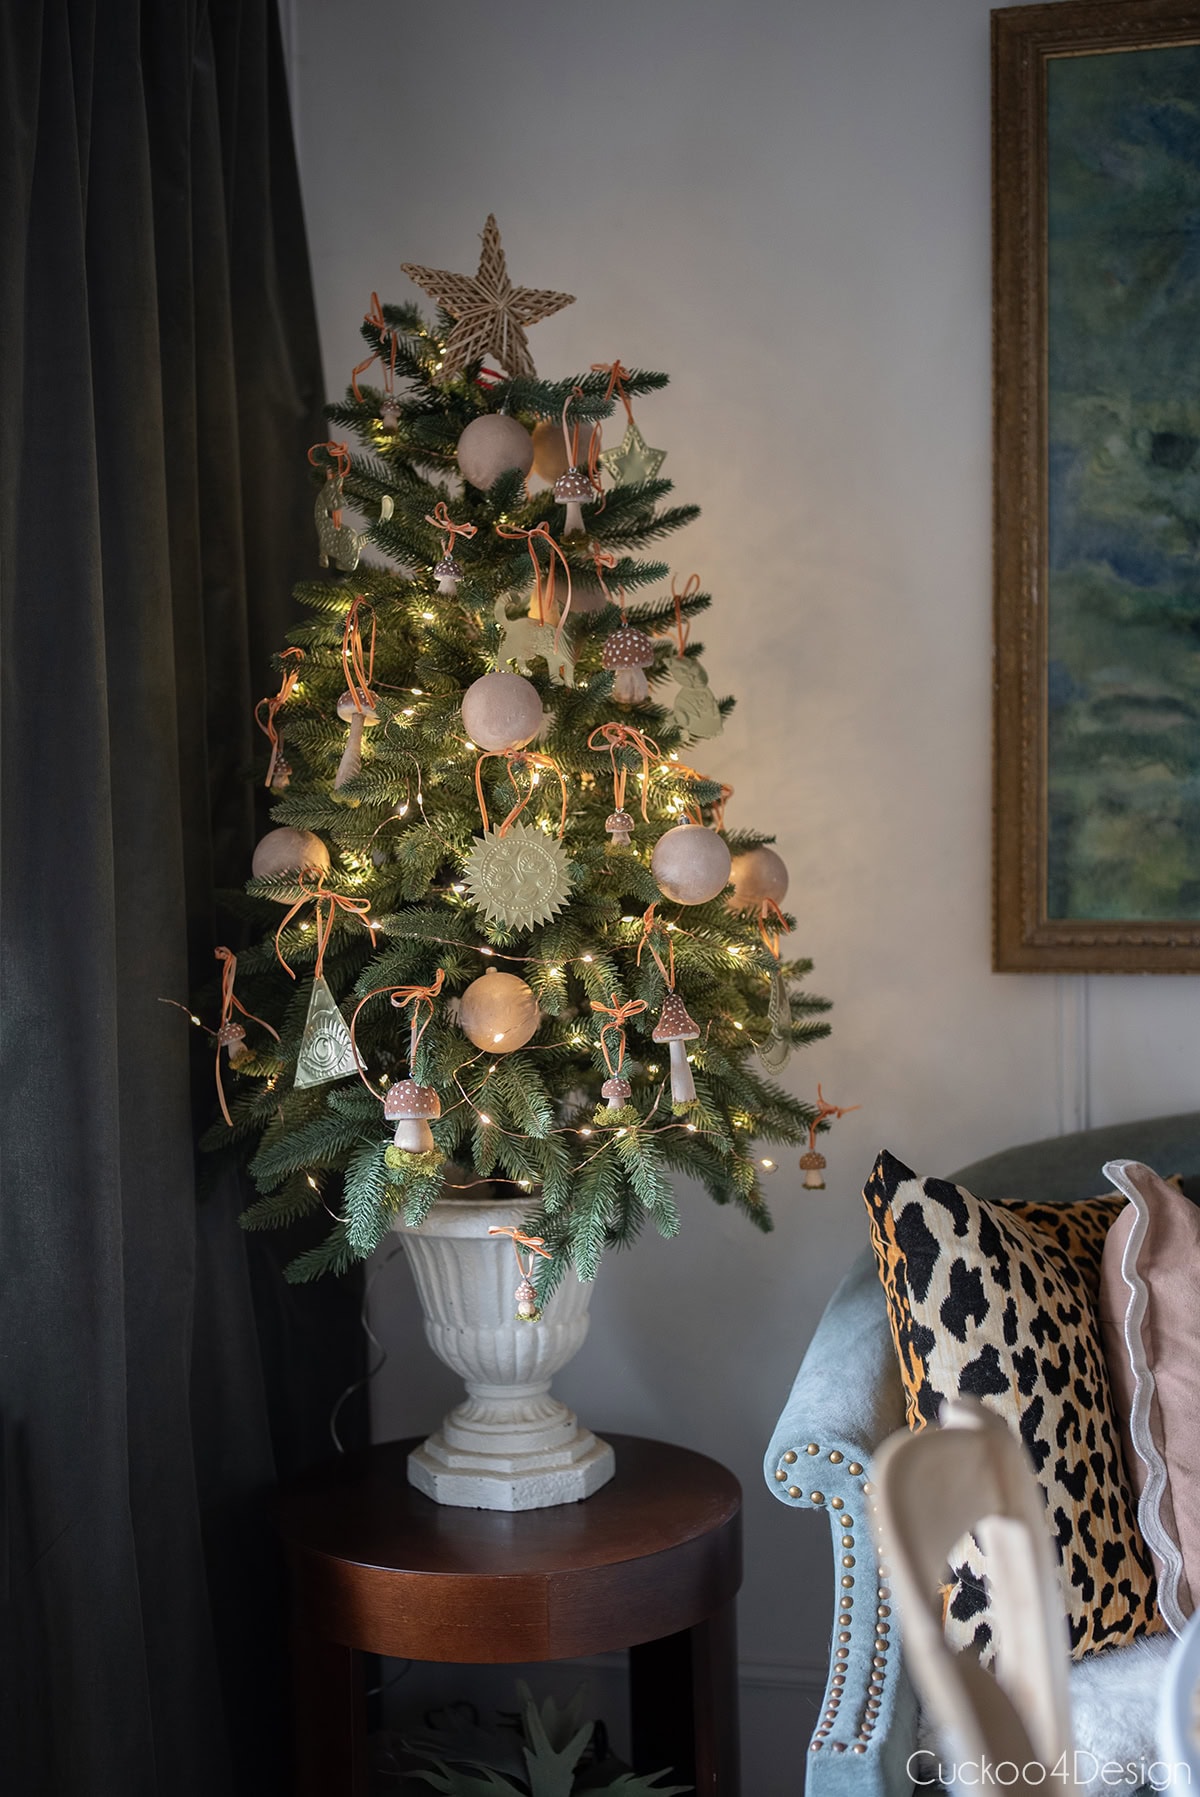
Here is the same small tree again but this time I paired the mushroom ornaments and baking-soda paint ornaments with tin ornaments.
Tips for creating a cohesive look with DIY ornaments
One of the biggest challenges with DIY Christmas ornaments is making sure they all work together instead of looking like a chaotic mix. Over the years, I’ve learned a few tricks for creating a cohesive tree that looks intentionally designed and not randomly crafted. Here’s how I make all these different ornament styles work beautifully together.
And yes, I’ve mixed my kids’ ornaments in here, too. If you don’t want to do that, give them a separate tree where they can do whatever they want. I’ve done that already, too, and they loved it.
Stick to a color palette (but keep it flexible)
The secret to a cohesive look isn’t making everything match perfectly. I really don’t like if everything matches perfectly. It’s choosing 2-3 main colors and sticking with them across different ornament types, and don’t be afraid to throw in the unexpected, too (like my disco balls or icicles, which I think are a neutral and literally go with everything and will be on all of my trees from now on)
Neutral & natural palette
- Tan/beige baking soda paint ornaments
- Natural dried orange slices
- White poster board snowflakes
- Cream macrame ornaments
- Raw wood mushroom ornaments
This combination creates a warm, organic look that feels pulled together even though the ornaments use completely different techniques.
Bold & colorful palette
- Mexican folk art ornaments, Bauernmalerei ornaments, or painted heart ornaments (just pick one)
- Colorful paper fan decorations
- Matching thin ribbon bows
The key is repeating your chosen colors across multiple ornament types. If you use teal on your painted hearts, echo it in your paper ornaments or ribbon choices.
Mix Textures
A cohesive tree doesn’t mean everything needs to be the same material. In fact, mixing textures makes your tree more interesting! What matters is that they complement each other.
Texture Combinations That Work
- Soft + Hard: Macrame ornaments paired with any of my wooden ornaments or painted ball ornaments
- Smooth + Rough: shiny tin ornaments with rustic mushroom ornaments
- Delicate + Substantial: Thin toilet paper roll snowflakes alongside chunky beeswax ornaments
- Natural + Crafted: Real starfish mixed with fan ornaments
I’ve found that having 3-4 different textures on one tree creates visual interest without looking busy. And every tree can use ball ornaments of some sort too!
Use Consistent Hanging Materials
This is such a simple trick but makes a HUGE difference! Instead of using whatever string or ribbon you have on hand, pick one type of hanging material and use it throughout:
Options that work well
- Natural jute twine (gives everything a rustic, farmhouse vibe)
- Thin velvet ribbon in one color (elegant)
- Simple white or cream baker’s twine (clean and simple)
- Metallic gold or silver thread (adds subtle shine)
- Clear thread (almost invisible)
- Metal ornament hooks (most affordable)
My favorite ornament hanging trick
With that said, I usually prefer metal ornament hooks for most of my ornaments. They might not look as pretty as the other hanging options, but they’re incredibly affordable and solve a problem that aggravates me: spinning ornaments.
Have you ever noticed that when you hang an ornament with a string or ribbon, it always ends up rotating and facing the wrong direction? You carefully position it to show the best side, and five minutes later, it’s spun around, showing the back or hanging sideways. Metal hooks prevent that spinning, giving you complete control over exactly how each ornament faces. This is especially important for ornaments with a distinct front and back, like my painted hearts or folk art designs.
That said, I do use decorative hanging materials for certain ornaments where the 360-degree view doesn’t matter. For example, round ornaments that look the same from every angle, like my honeycomb ornaments or even the mushroom ornaments.
Star ornaments only look good with a frontal view. It’s all about choosing the right hanging method for each ornament style.
The “Squint Test”
This post may contain affiliate links from which I will earn a commission at no extra cost to you. View my full disclosure policy.
Here’s my favorite way to check if everything works together: Stand back from your tree and squint. When things blur together, you should see:
- Balanced color distribution (no one area is shockingly different)
- Even visual weight (not all heavy ornaments in one spot)
- A cohesive “vibe” or mood
If something jumps out as obviously wrong when you squint, that’s your cue to adjust!
Don’t Overthink It!
But after all…The beauty of DIY ornaments is their handmade charm. They don’t need to be perfect, and honestly, a few “wild card” ornaments that break the rules can add character. I always include a couple of sentimental ornaments that don’t quite fit my theme, and that’s okay!
The goal is “cohesive,” not “matching.” As long as there’s some common thread. Whether it’s color, texture, style, or hanging material, your tree will look intentionally designed, not accidentally thrown together.
I really hope this round-up of everything I made inspired you to make your own and not just buy ornaments at the store. You’ll be so glad you did not just because it’s good for your wallet.
Tschüß,
