

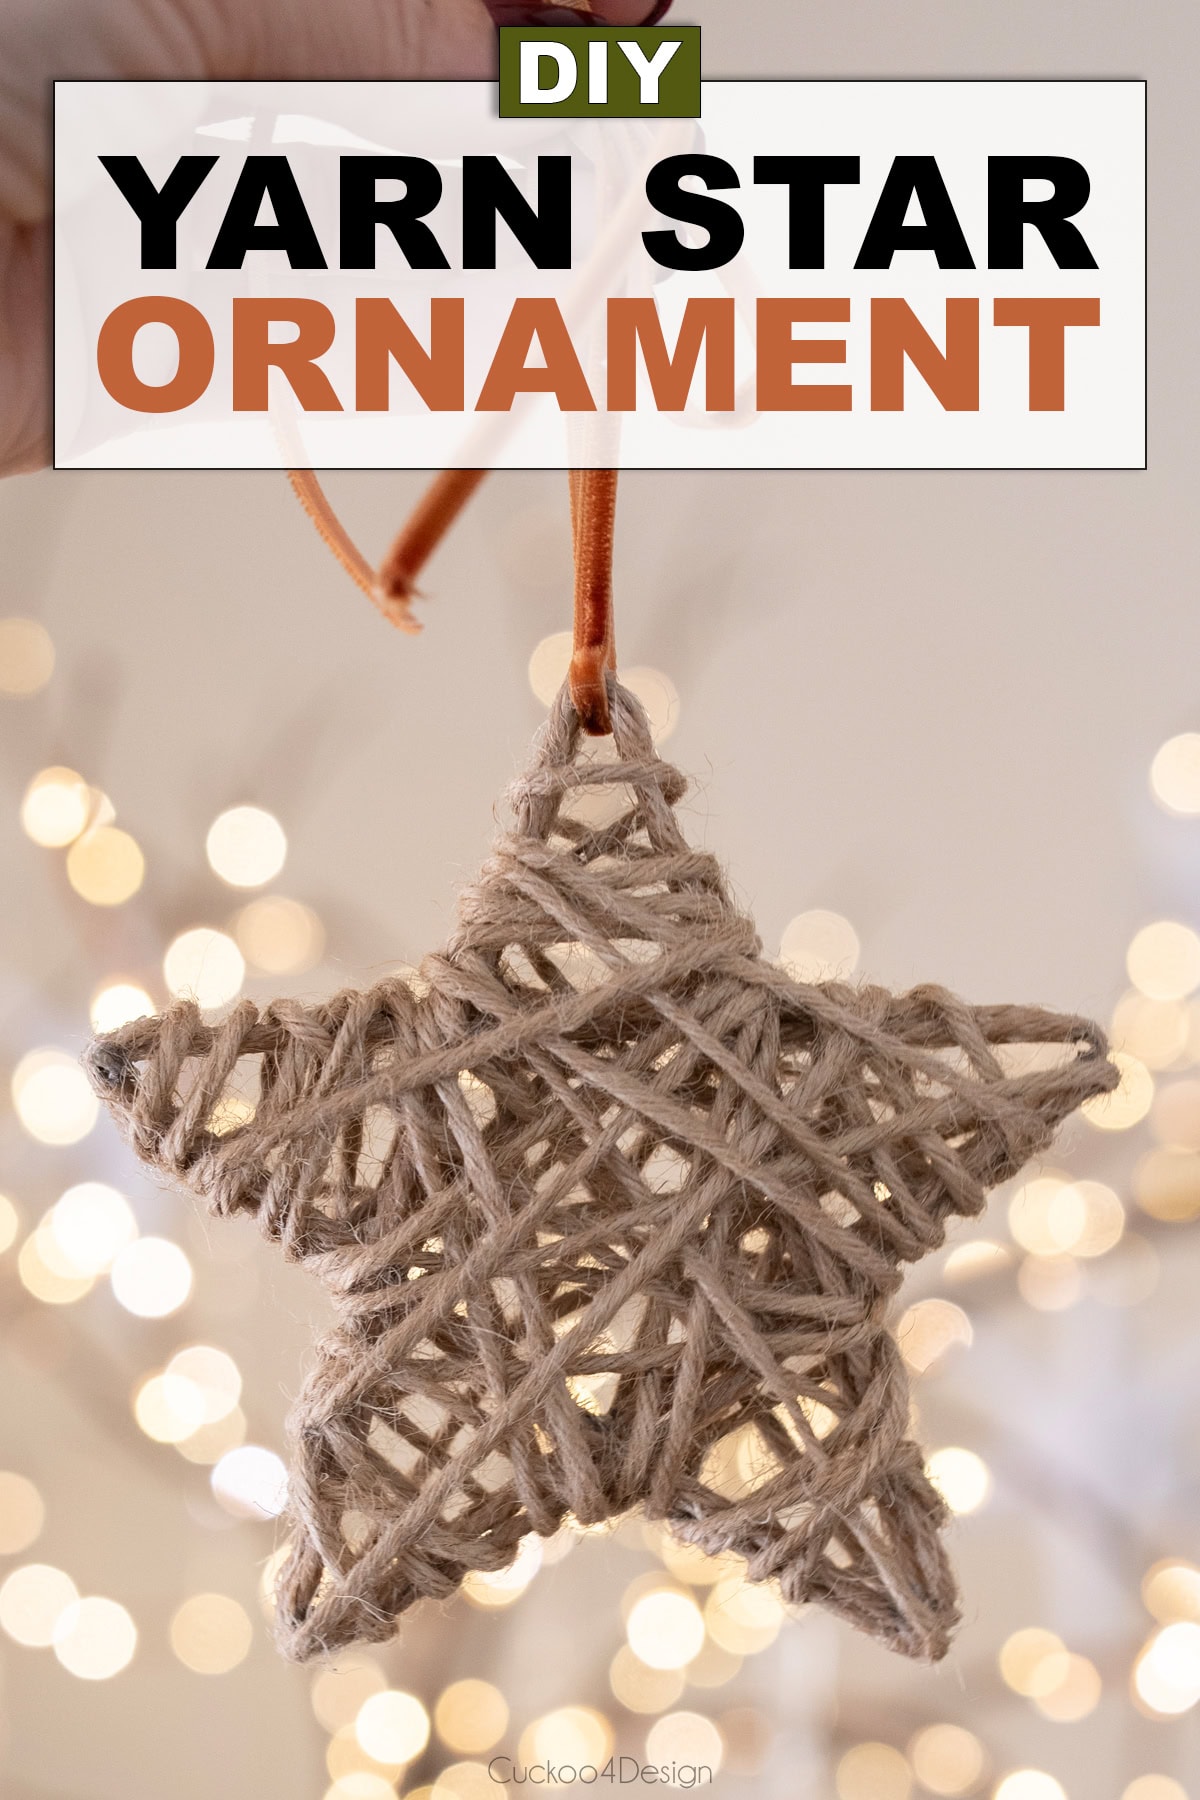
DIY light-up yarn star ornaments using fairy lights
I’m always looking for creative ways to use leftover supplies from past projects, and I still had plenty of jute yarn left from my DIY pendant light and seashell tassels tutorials. So I decided to make these light-up yarn star ornaments. While wrapped yarn star ornaments are nothing new, I put my own spin on them by adding in fairy lights to the wrapping process. That detail transforms them into something magical that fits perfectly with my eclectic Christmas decorations.

Materials for DIY yarn stars
This post may contain affiliate links from which I will earn a commission at no extra cost to you. View my full disclosure policy.
You only need a few simple and affordable supplies to make these DIY natural Christmas ornaments.
- jute yarn (or other yarn, natural twine, or wool)
- corkboard, wooden board
- finishing nails
- star template
- matte Mod Podge (or craft glue)
- bowl
- fairy lights (I used one of these 33-foot 100 LED light strands)
- scissors
- plastic wrap or a clear sheet protector for easy removal
- hot glue gun and glue
I used battery-operated fairy lights with a remote control, but usually I prefer using plug-in fairy lights, which you could use as well.
Video tutorial
It really helps to watch the video. If it doesn’t load for you here on my blog, then you can also watch it on my YouTube Channel instead.
Classical Christmas Favorites39 by Smith Productions & Kevin MacLeod is licensed under a Creative Commons Attribution 4.0 license. https://creativecommons.org/licenses/by/4.0/
How to make yarn stars with fairy lights
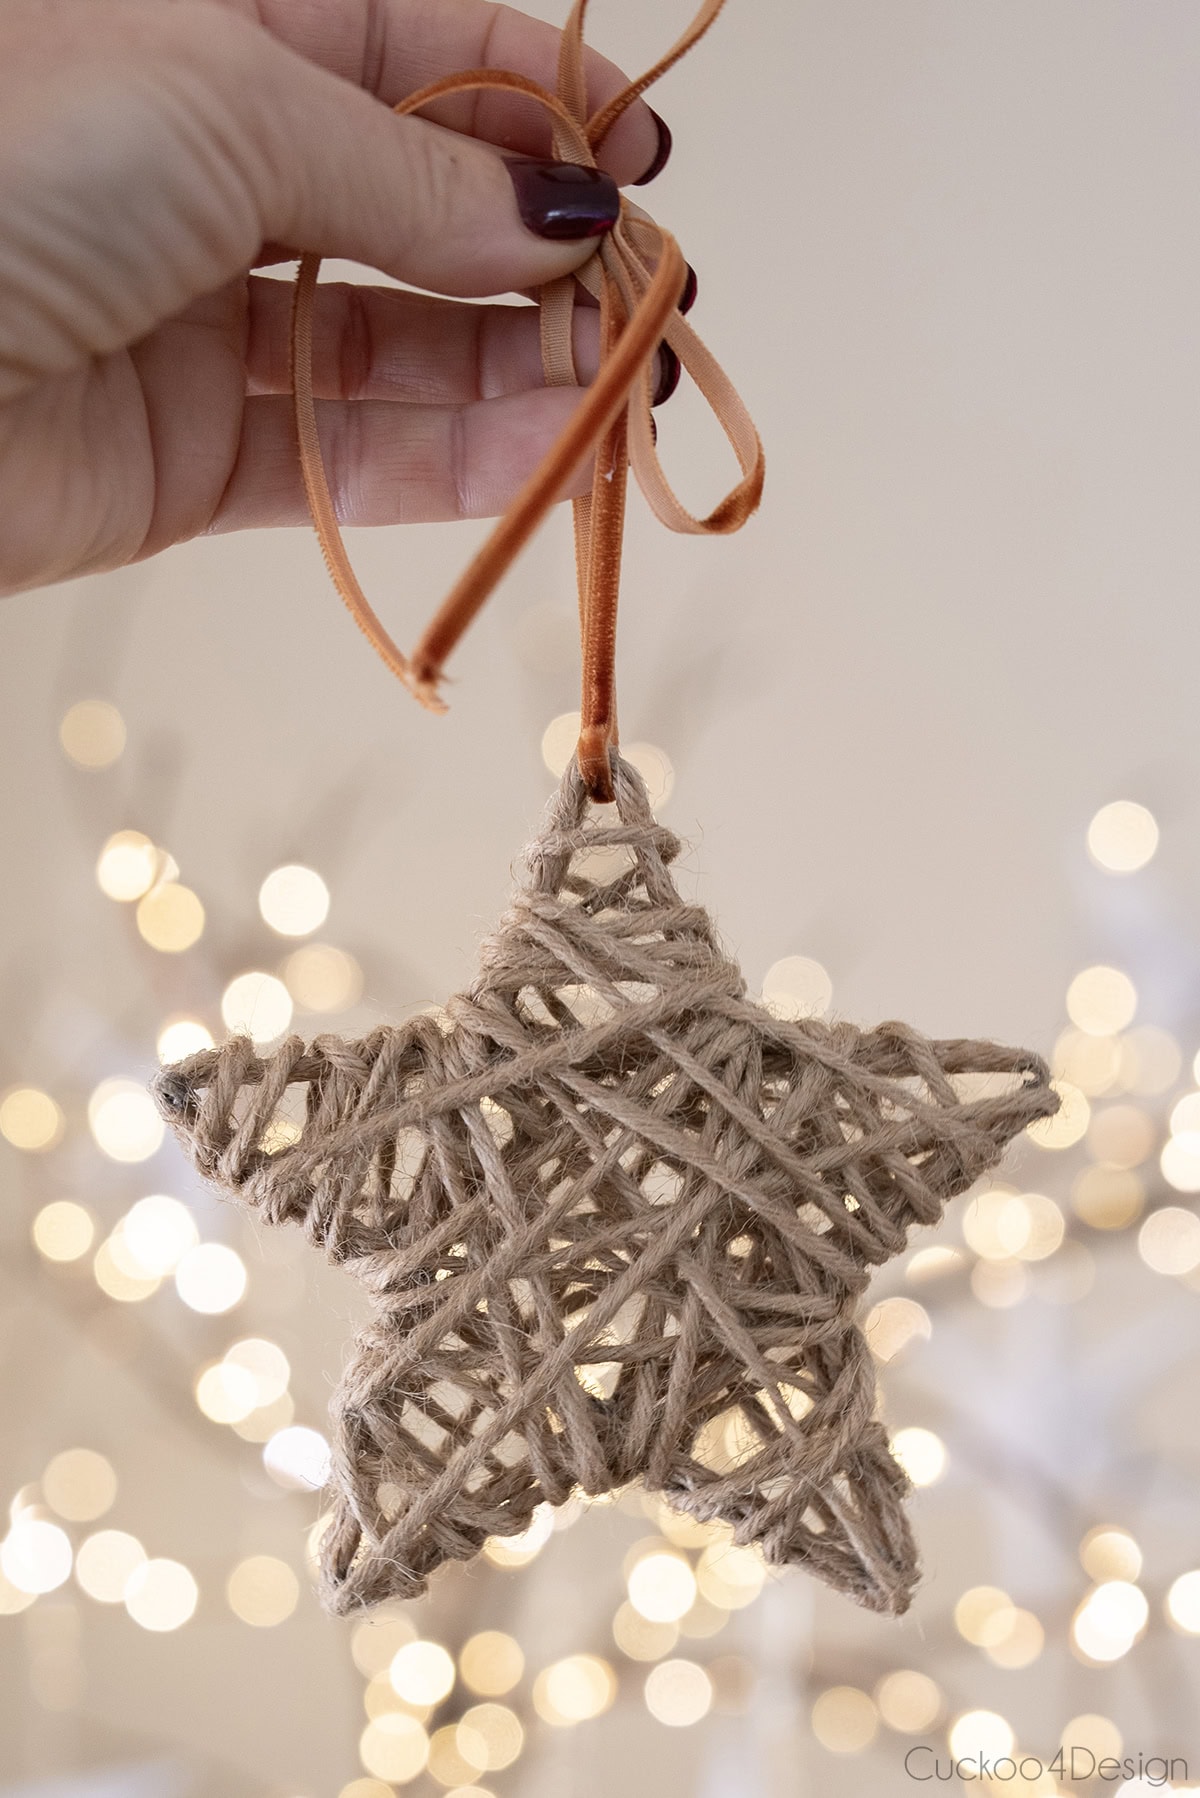
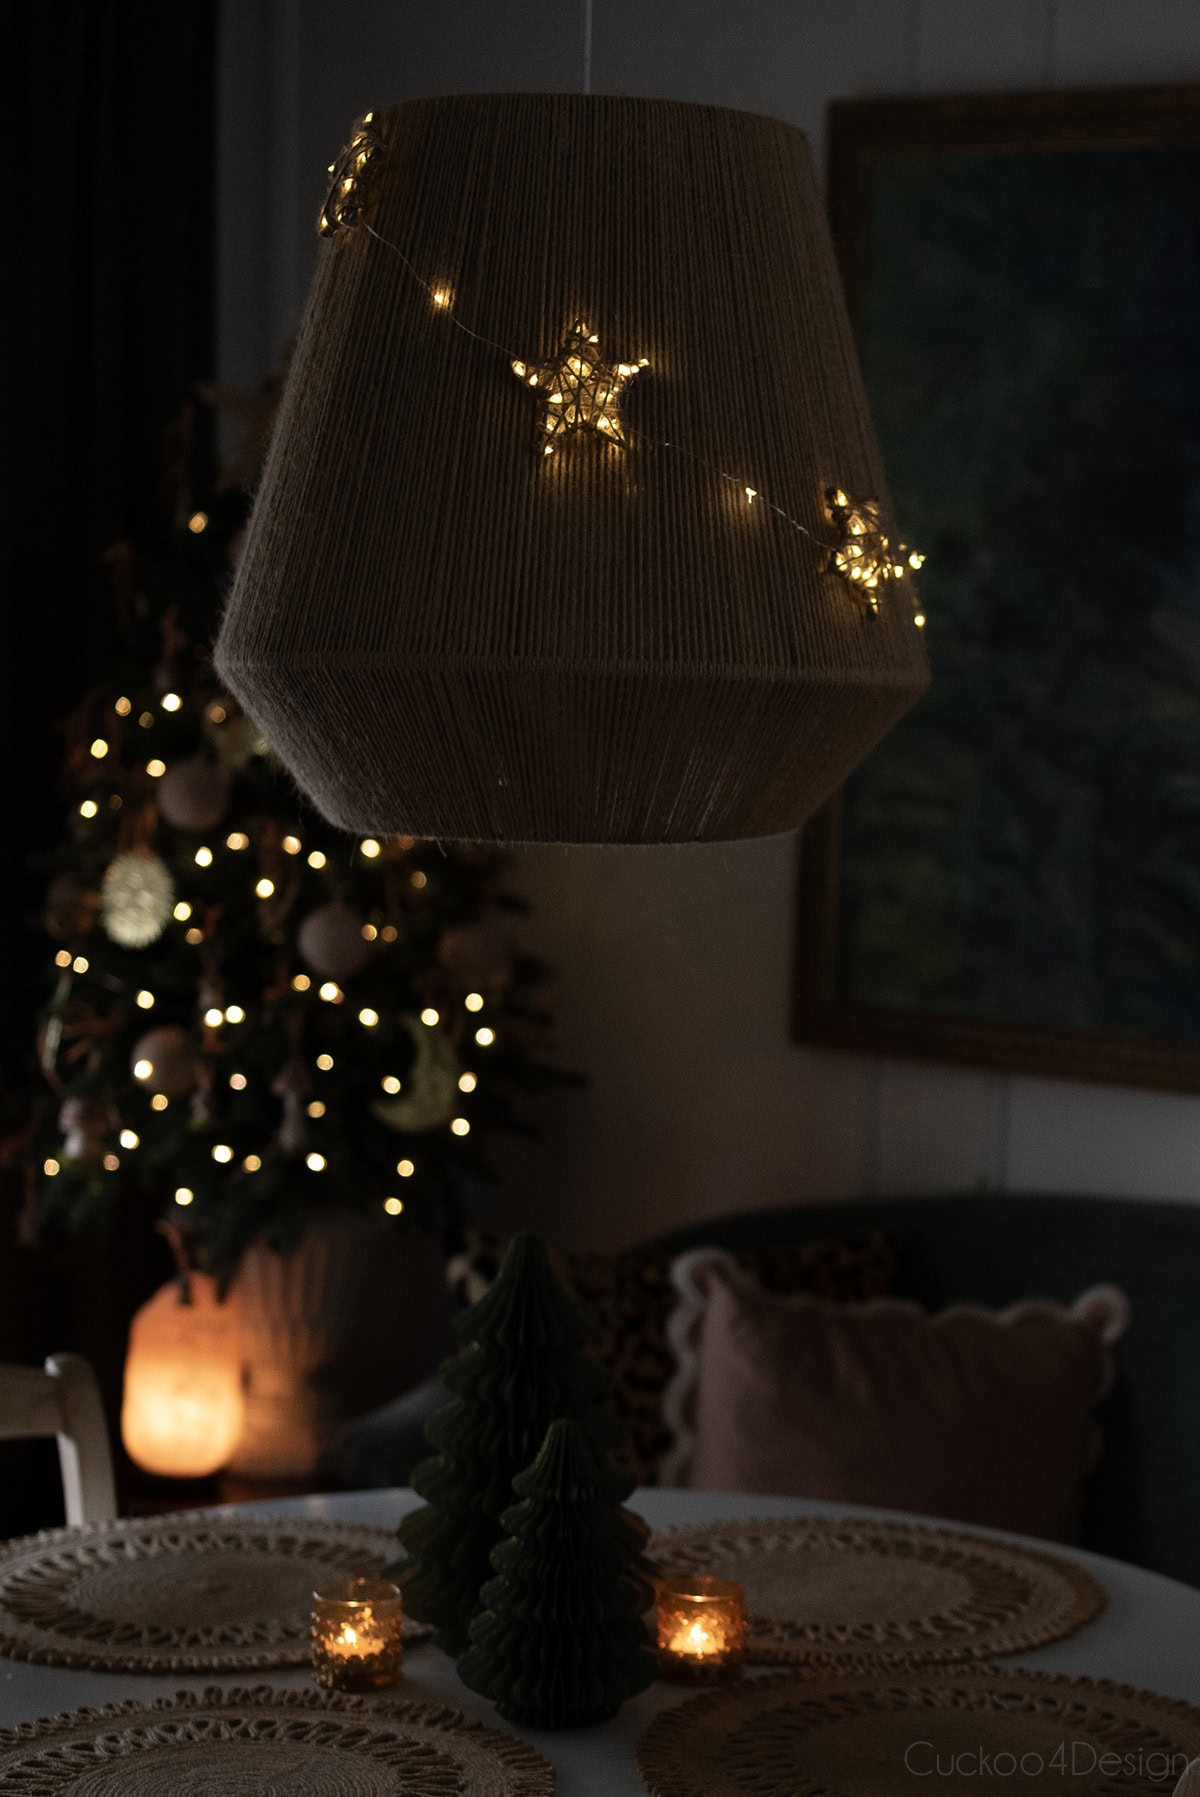
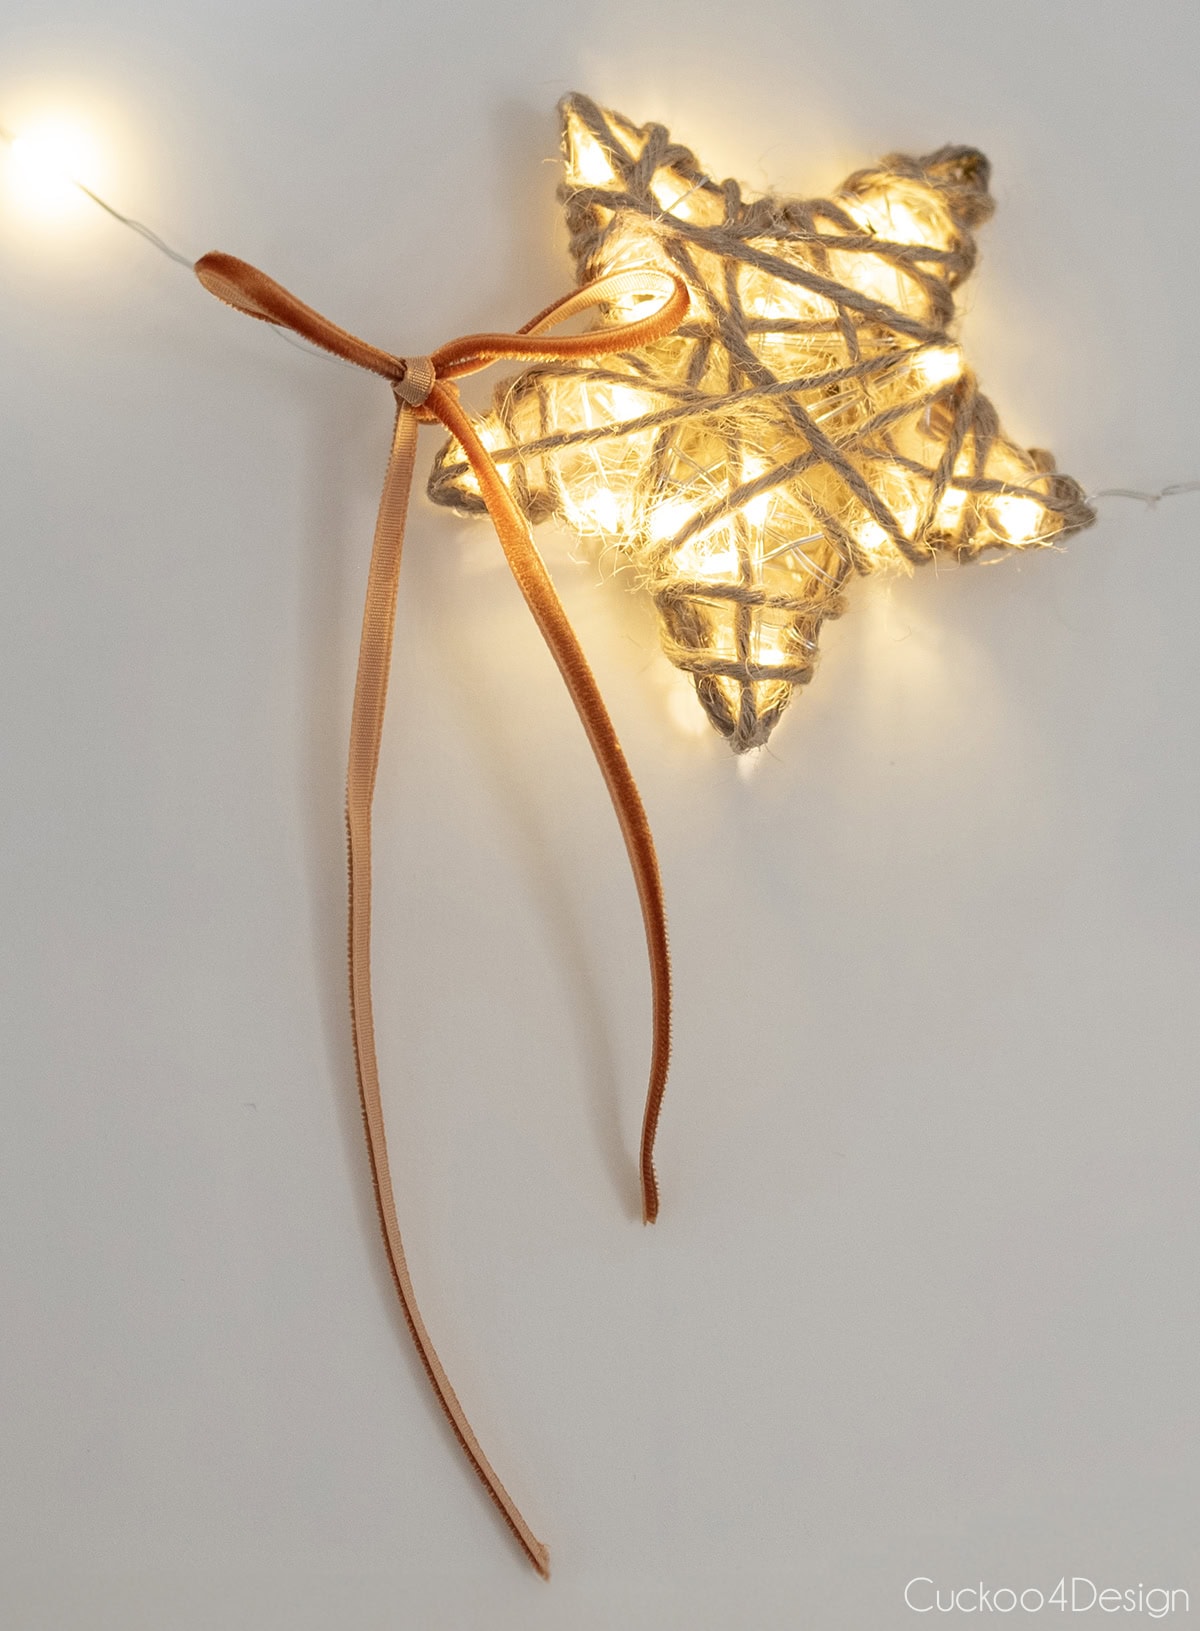
These light-up yarn star ornaments combine the cozy texture of wrapped jute yarn with the magical glow of fairy lights. The drying time of the glue-soaked yarn makes this project a bit longer, but that doesn’t influence the fact that they are pretty easy to make. The result is a rustic, textured ornament with a warm glow that looks beautiful both day and night.
This is also a perfect project for using up any leftover yarn that you might have from other projects. I could even use leftover macrame yarn from all my tutorials. But I had plenty of jute yarn remaining from my DIY pendant light and seashell tassels, so this was the ideal way to put it to good use. (I actually got the idea for this tutorial when I looked at my jute pendant light during dinner one day)
Once you get the hang of the wrapping technique, these go together quickly! Let’s get started.
Step 1: Print and roughly cut out star templates
Below you can find my star templates. You can scale them in your printer window and print them to whatever size you want. It’s ok if they are blurry because you only roughly need the corners and points. My smaller stars are about 3.25 inches tall, and these are what I ended up using for the lit yarn stars.
Roughly cut around the shape but not along the star outline.

Step 2: Prepare your yarn star template
Place the roughly cut-out star shapes on a wooden board (or corkboard, but then you need needles and not nails). Then place a clear sheet or Saran Wrap on top of the paper templates. I used a clear, old sheet protector.
Hammer the finishing nails into the corners and points of the stars as pictured below. If you are using a corkboard, then use sewing pins instead of nails. I had that board left from another project, and found that the wood and nails work best.

I filled the entire board with these templates so I could get lots of stars done at once.
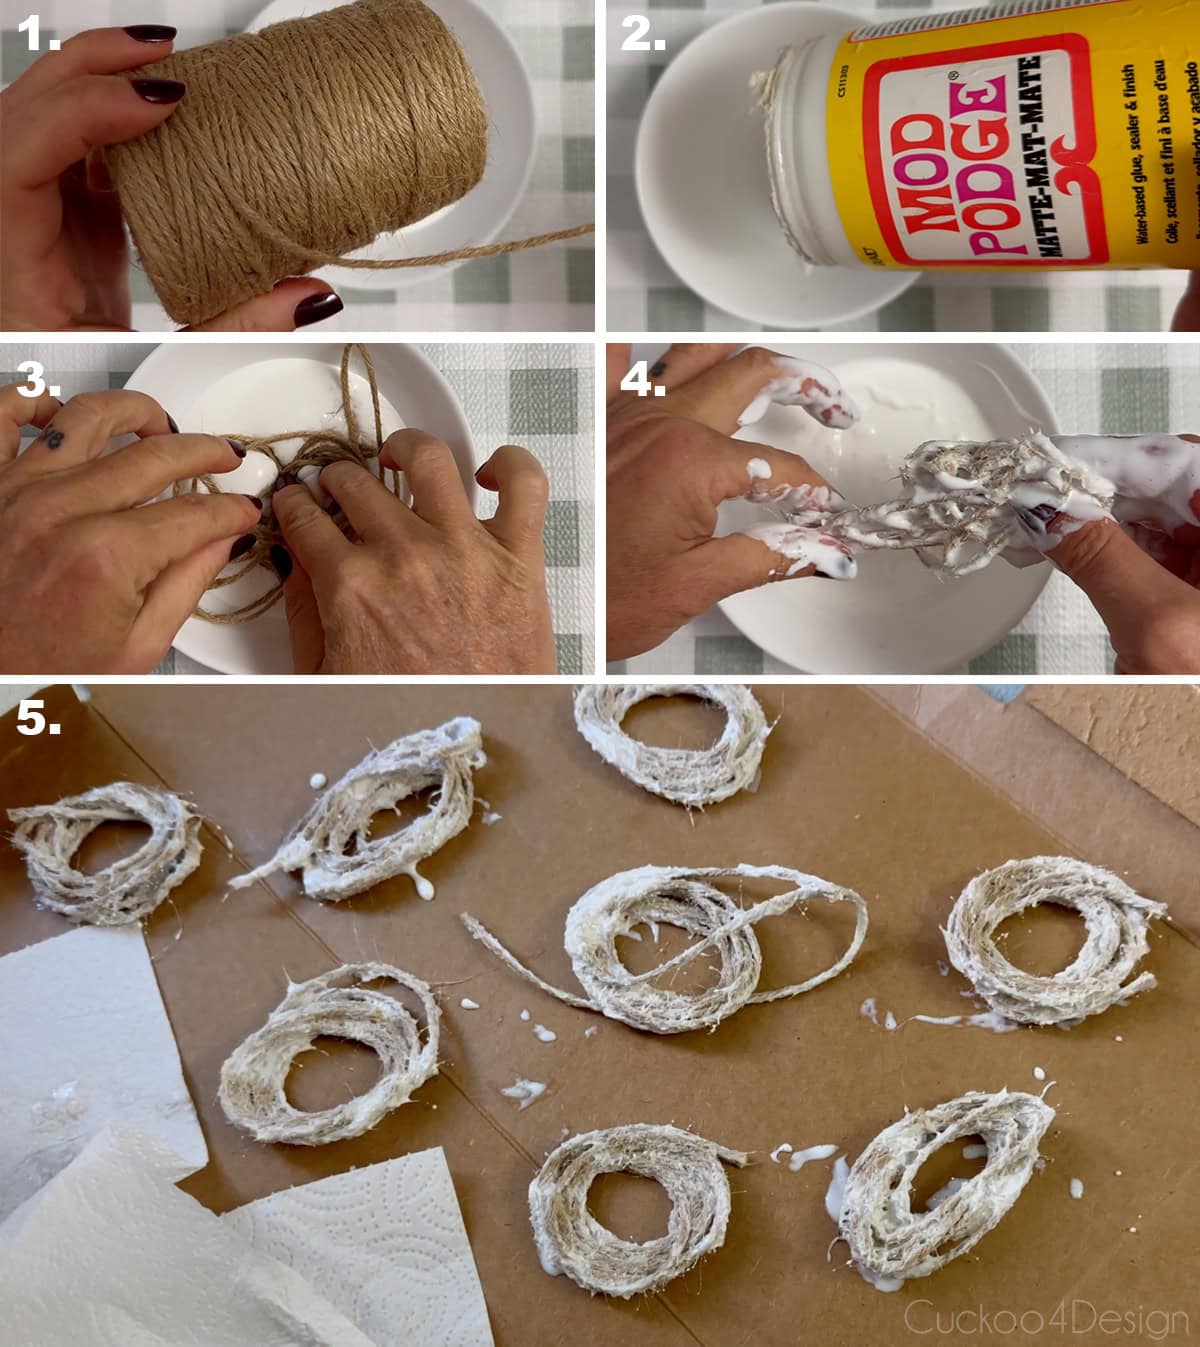
Step 3: Cut the yarn pieces and soak them in Mod Podge
I roughly wrapped the yarn around my shape three times to determine how much yarn I would need for one shape. I cut my yarn pieces at about 62 inches long.
Dump some Mod Podge into a bowl. Then take the cut yarn and soak/coat it with Mod Podge. I found it easiest to make little piles for each piece of yarn and lay them on a piece of cardboard. This part is messy.
Step 4: Wrap the star shape with the glue-soaked yarn
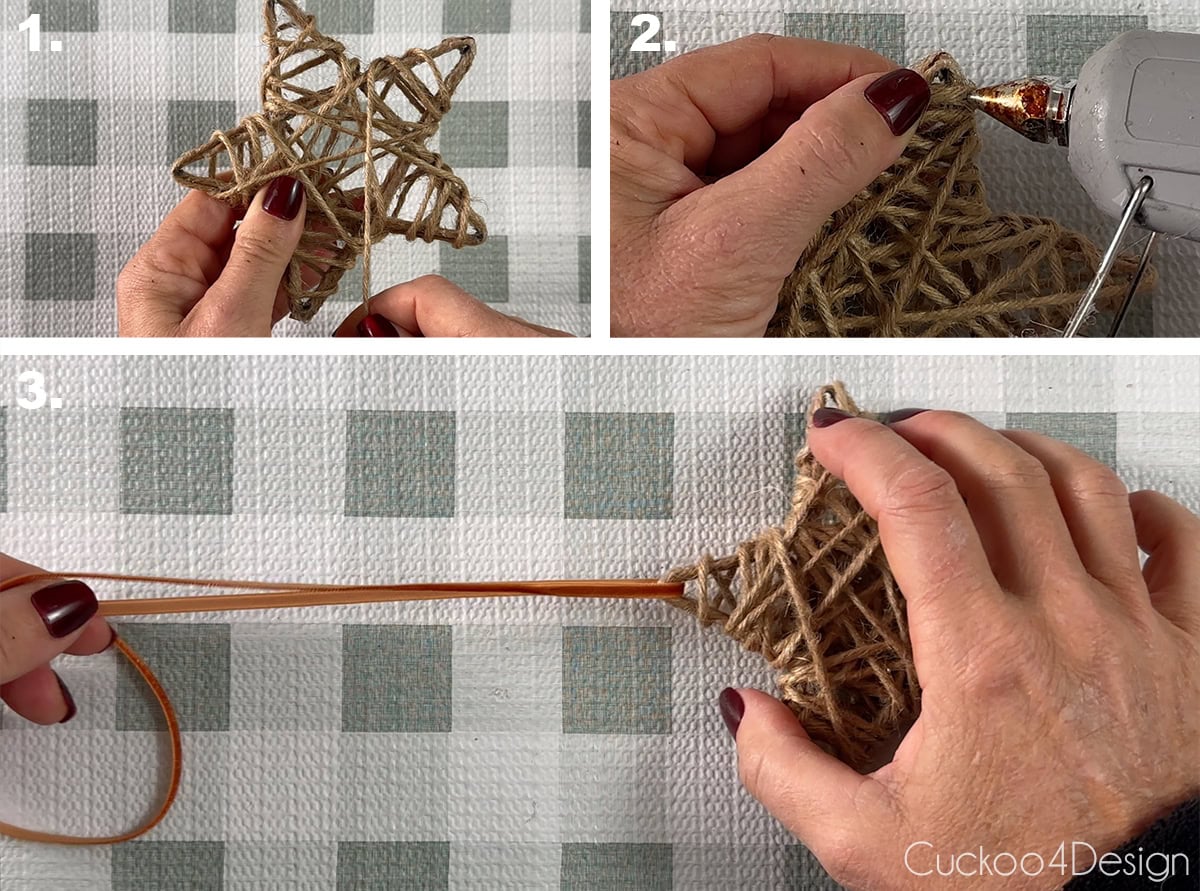
Now wrap all the star shapes three times (as pictured below) using each little soaked yarn pile. I simply tied (not knotted) the ends.
I was able to fill the entire board with star shapes.
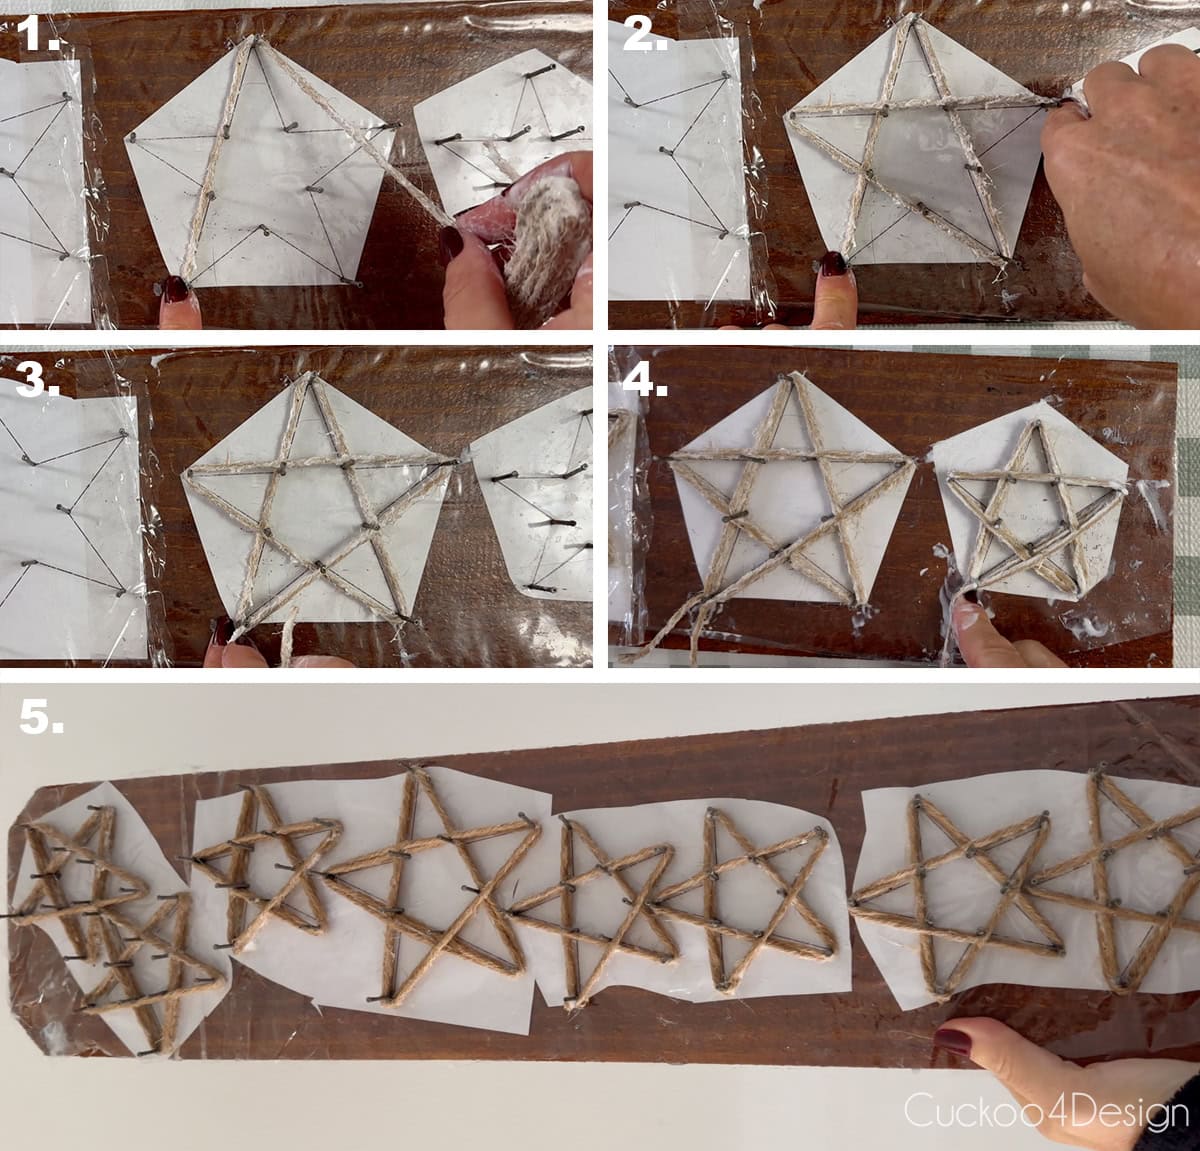
Step 5: Remove the star shape from the template
I waited until the glue was almost dry (but not completely dry) to remove the star shapes from the board. You can either slide them off the nails or remove the nails. Since I didn’t want to make more stars, I found it easiest to just remove the nails.

Step 6: Clean up any glue on the backside of the yarn star
Since the glue wasn’t completely dry, I was able to remove excess glue chunks on the back of the star and make them look nice and clean.
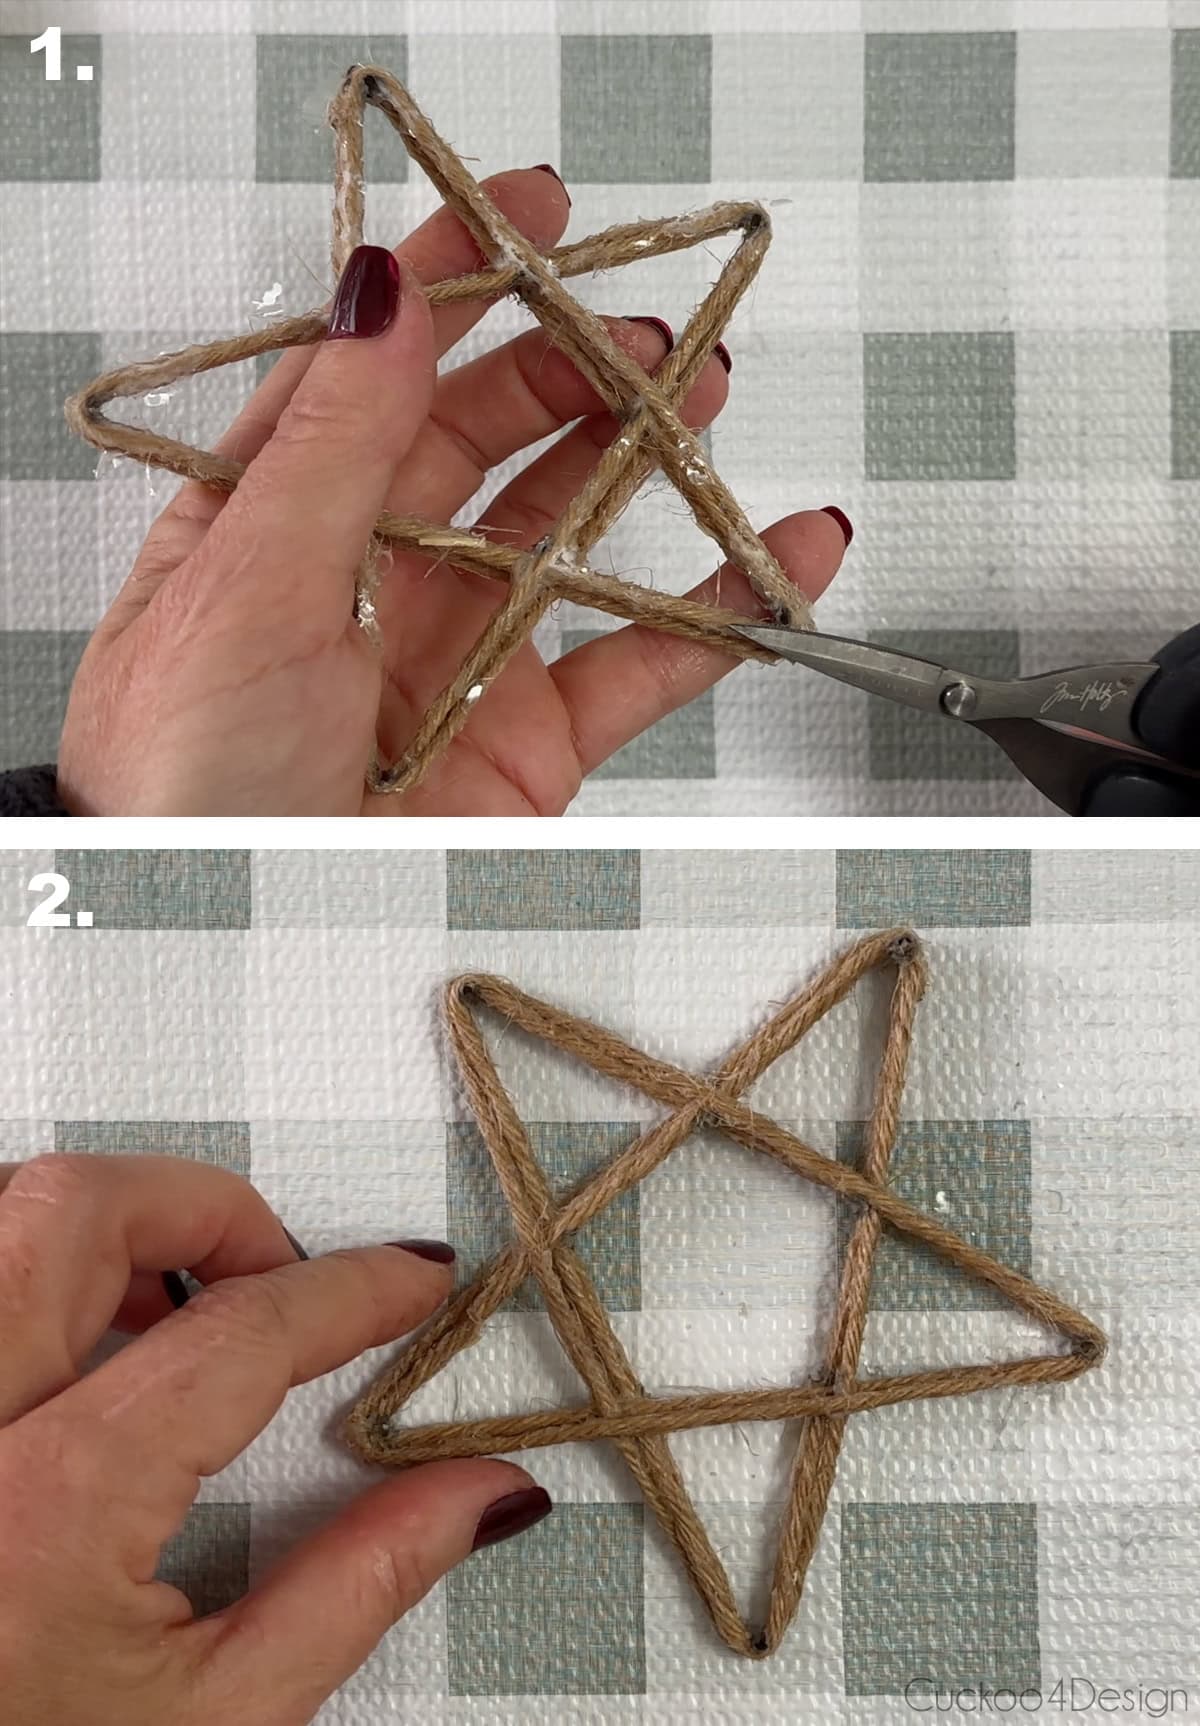
Once they are completely dry, they are surprisingly solid and hard! Perfect structure for a star frame and shape.
My nails left some dark spots in the corners, which didn’t matter in the end since it is hidden by more yarn in the end.
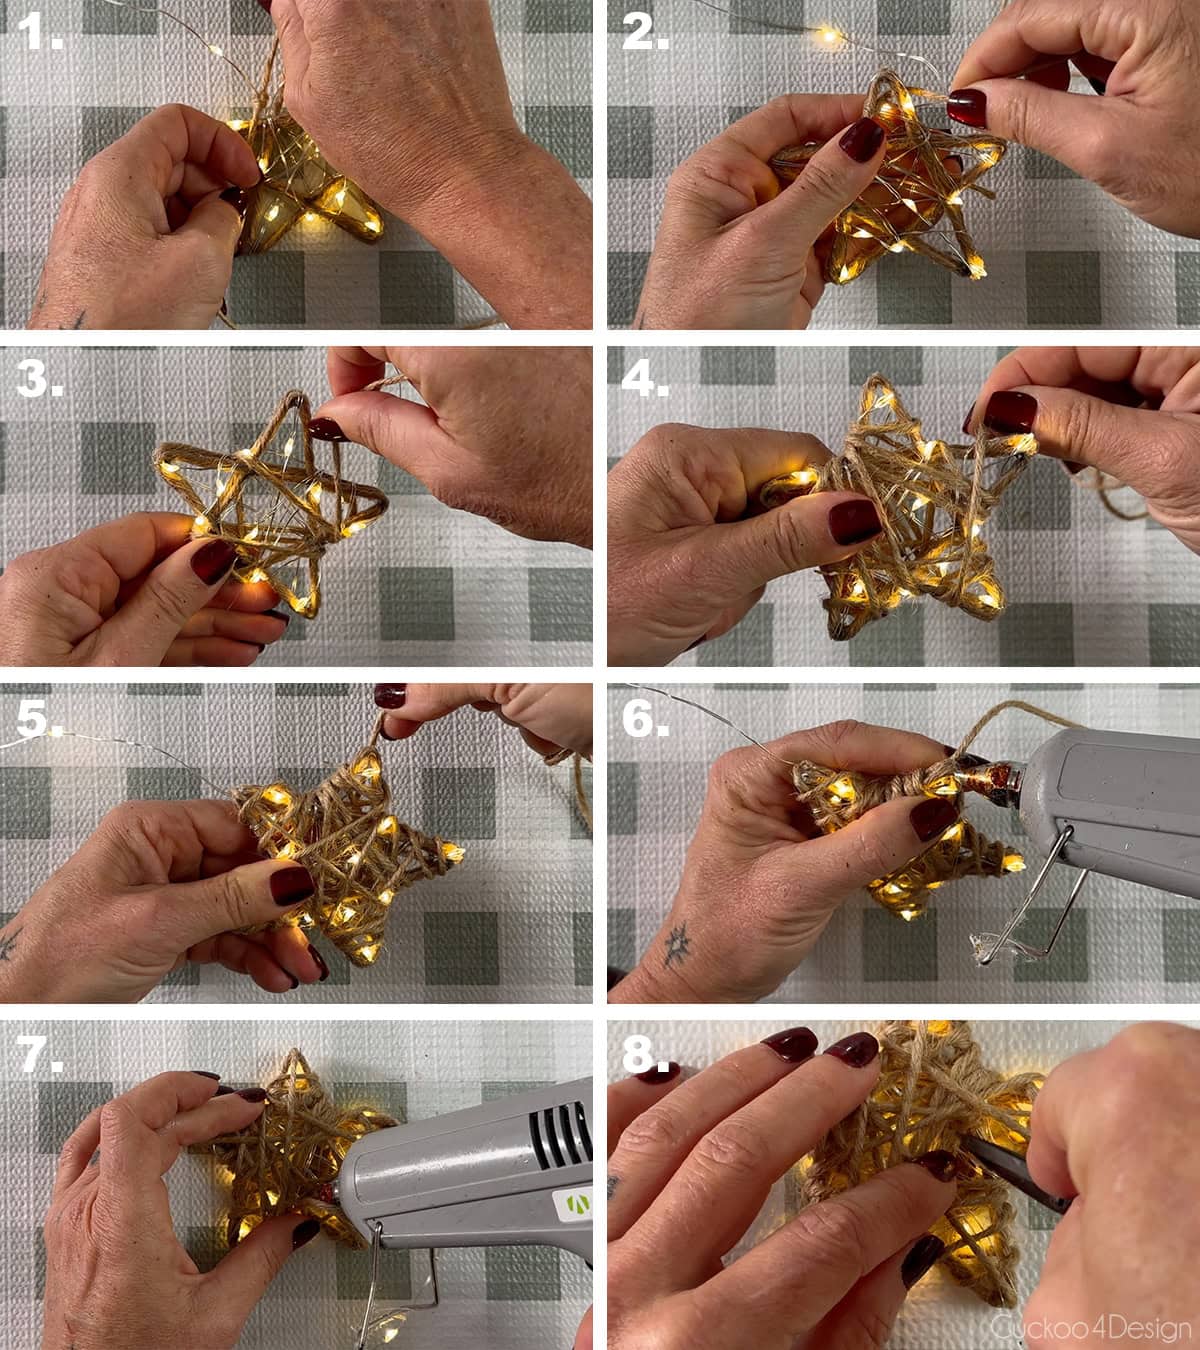
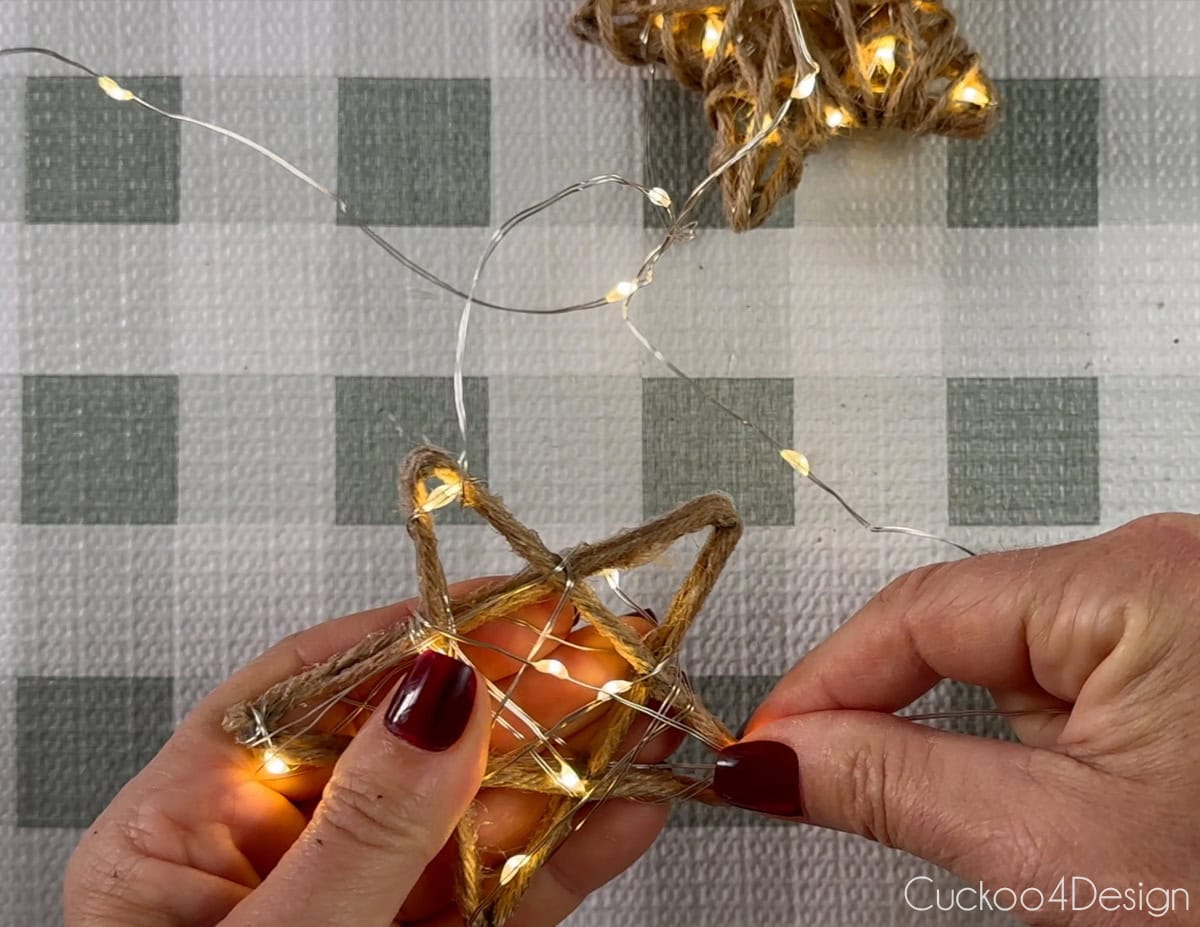
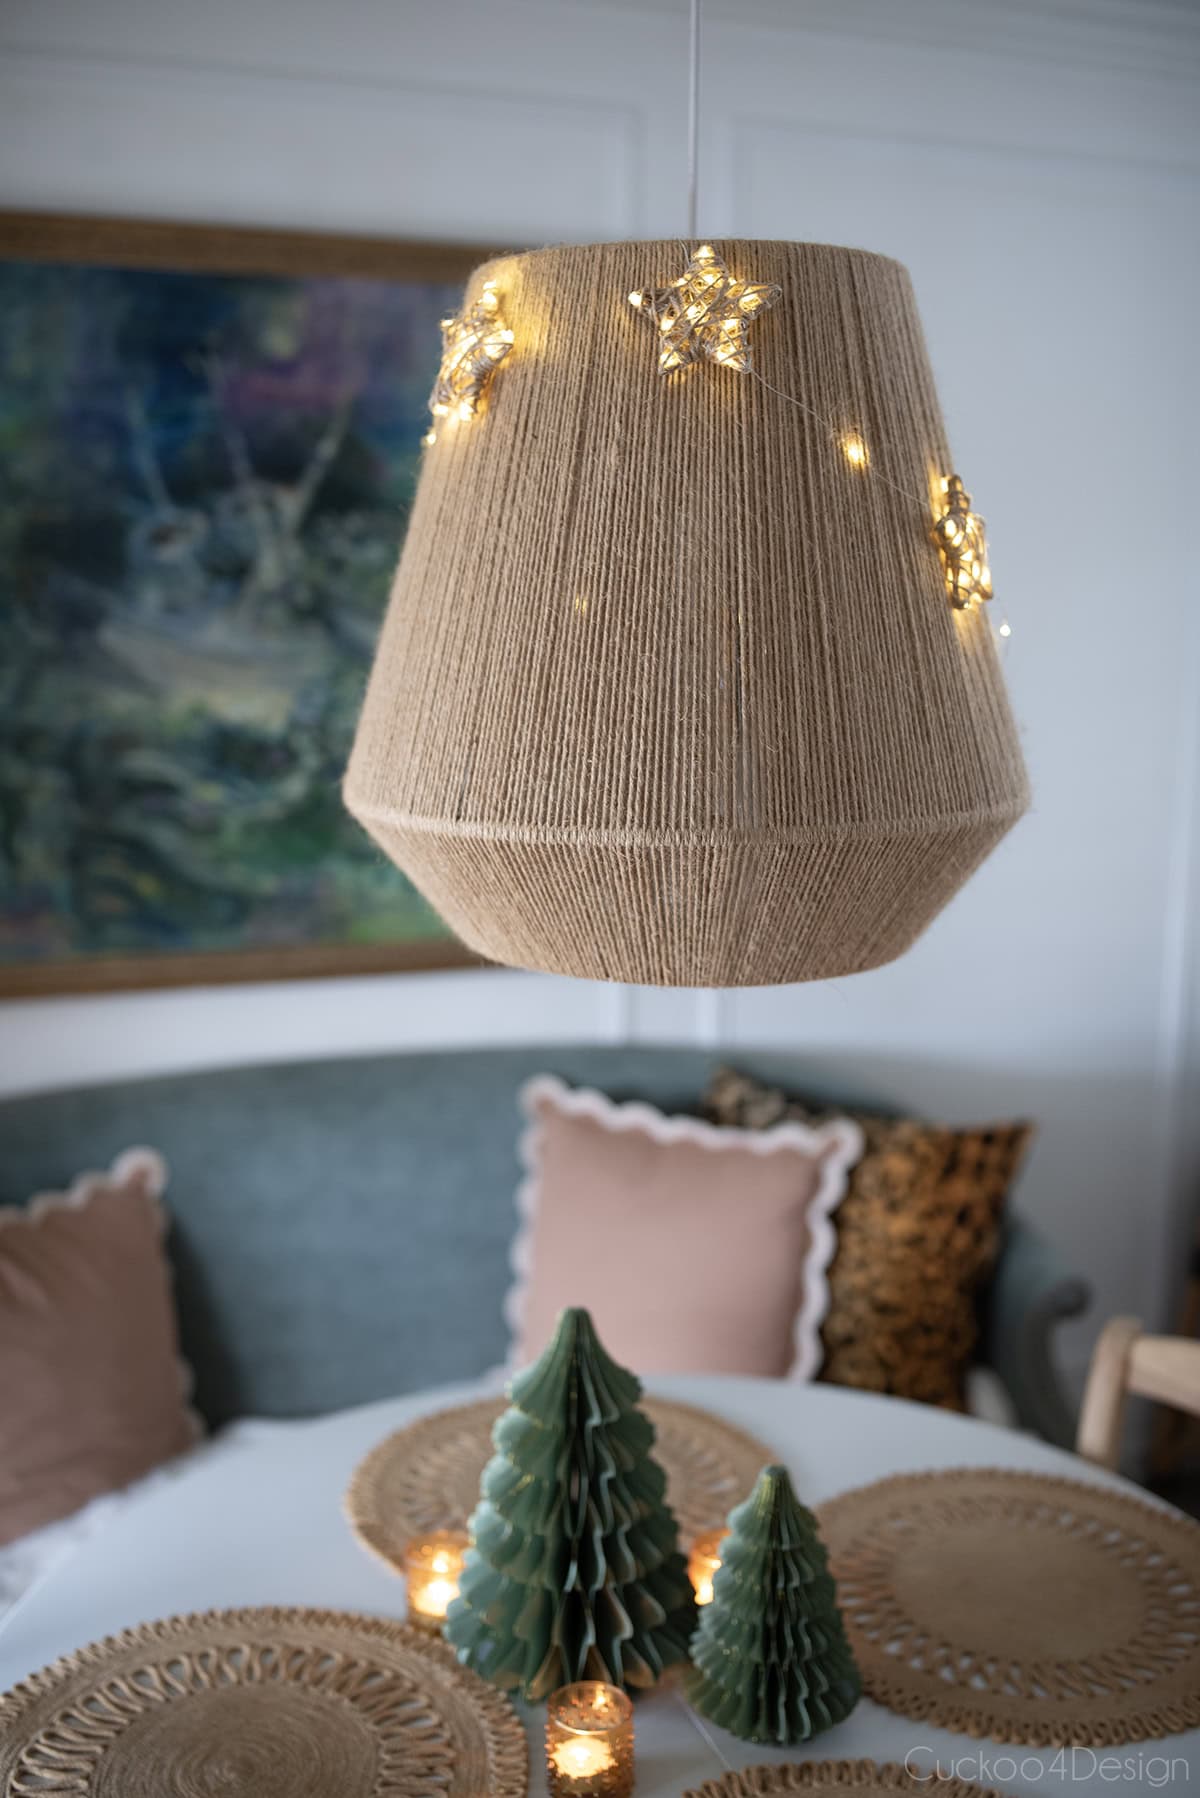
Step 7: Wrap fairy lights around the dried, stiff star
I started with the first LED light from the fairy lights strand on a star point. Then, I randomly wrapped the fairy light wire around the star shape. It helps to have the lights on to see the glow and how the star looks. You can see this really well in my video tutorial.
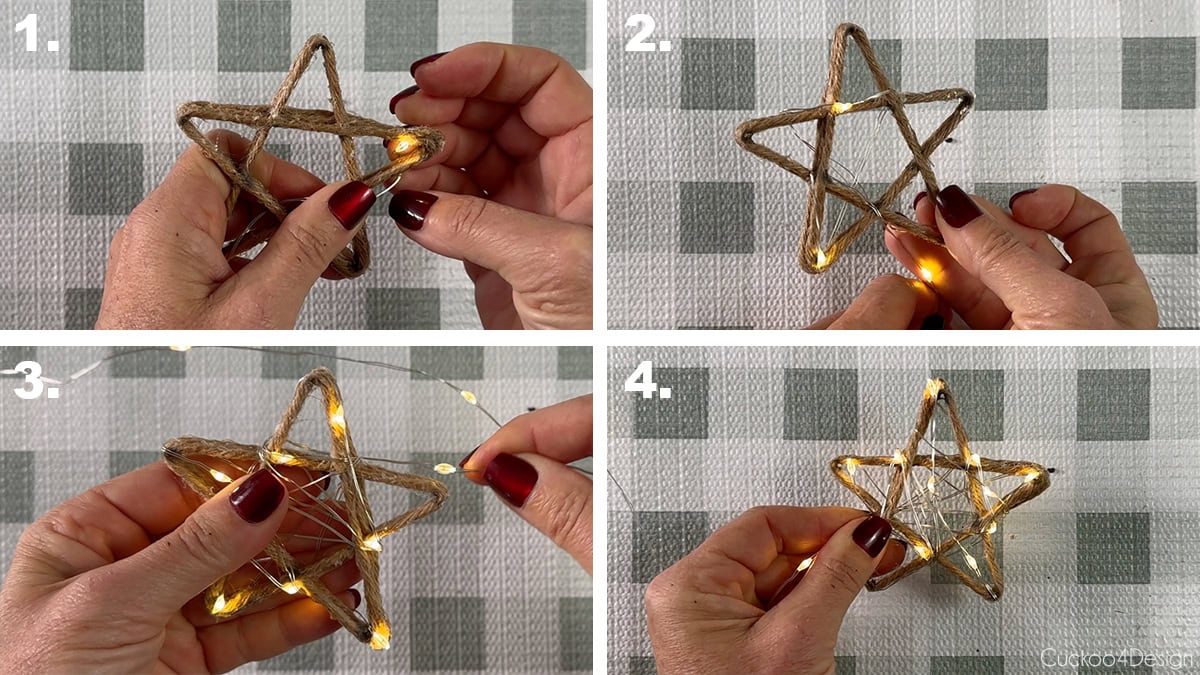
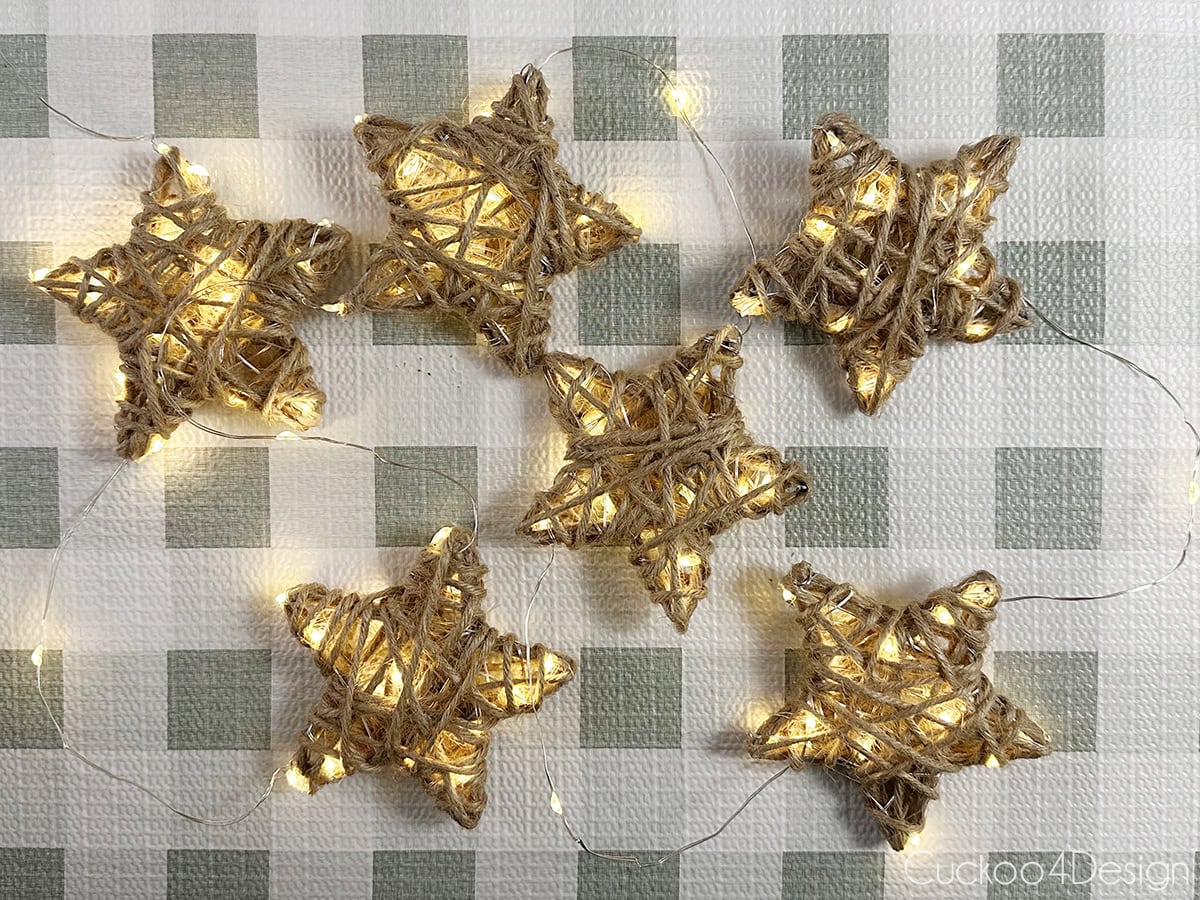
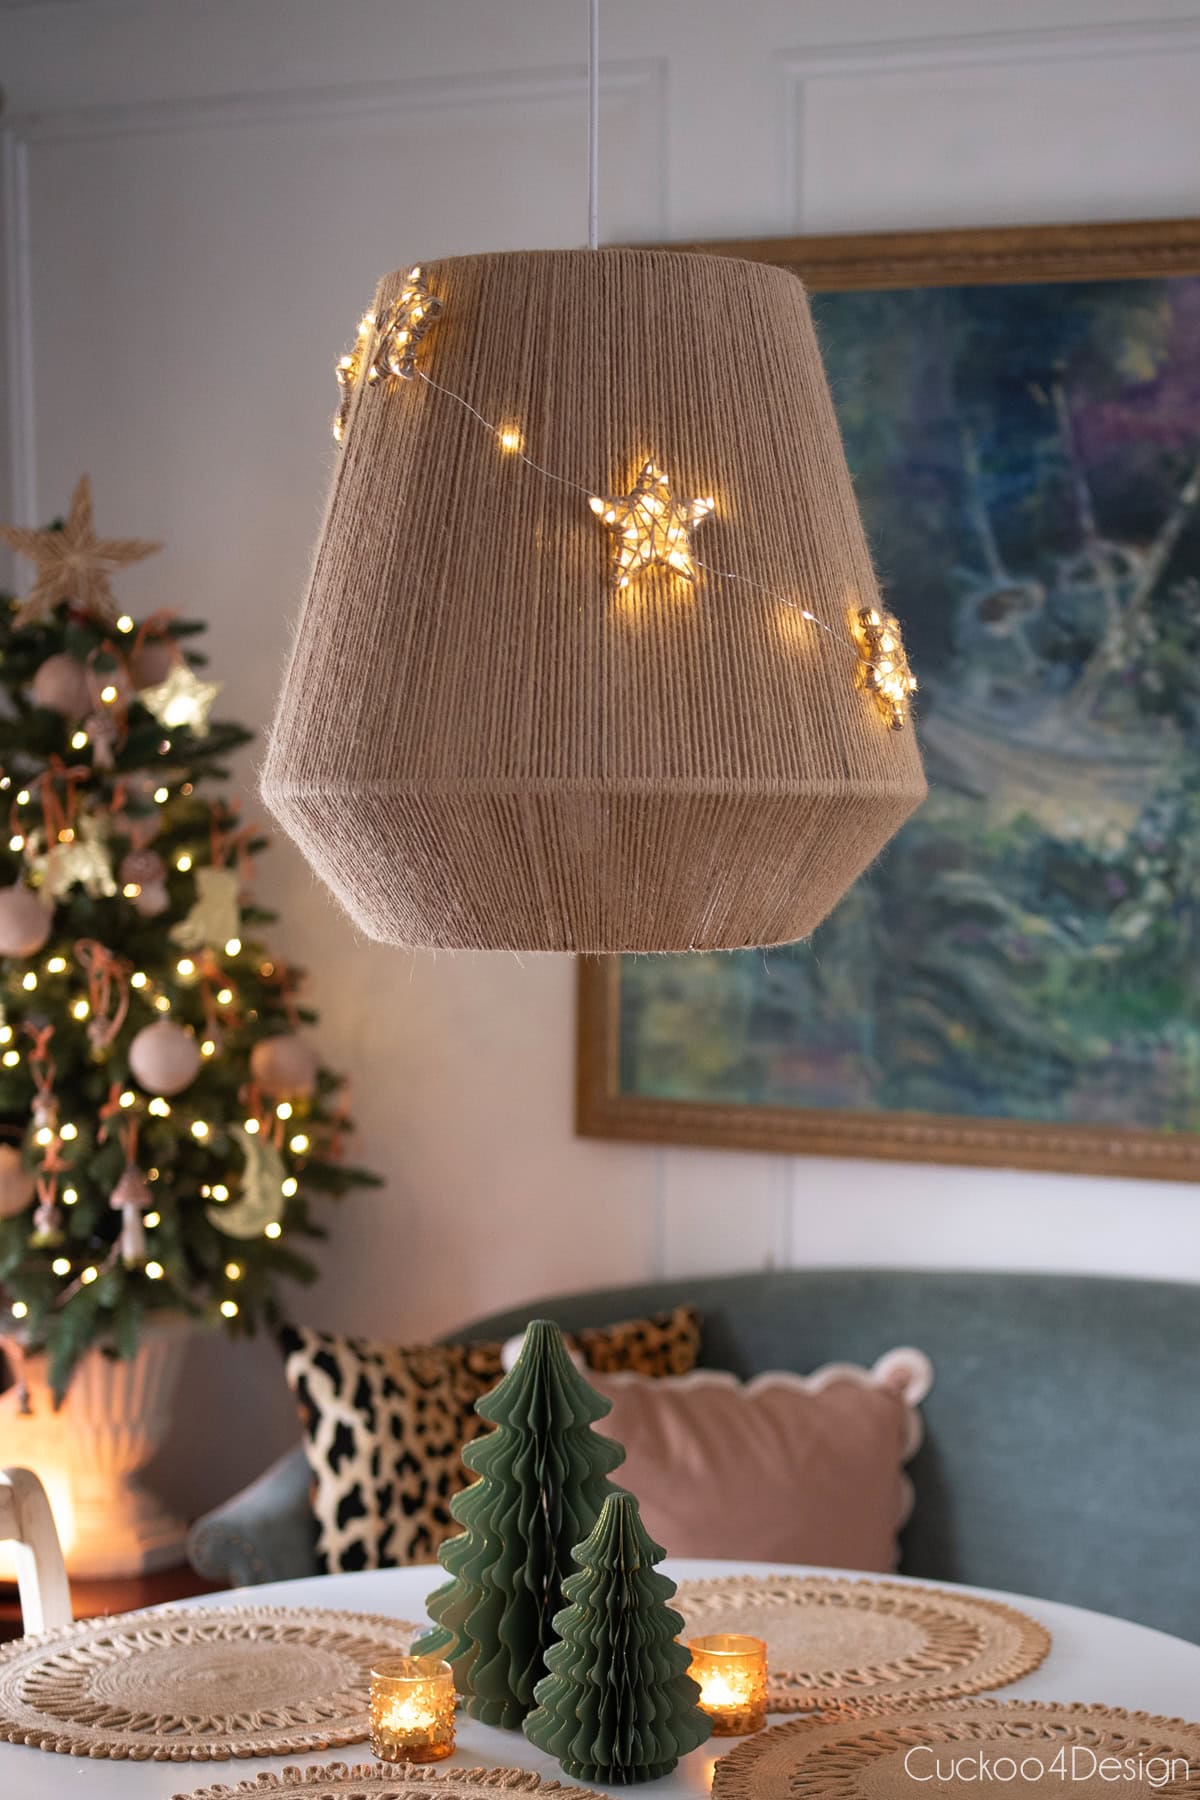
The first star had 12 fairy lights wrapped around it. The strand has 100 LED lights, and I made 6 stars with that strand of lights. I didn’t take the math and counting seriously and just wrapped unevenly. I should have put more lights on the first star.
And I left one single fairy light between stars so they wouldn’t be right on top of each other.
TIP: Here is a guideline if you want to be more exact and count the lights per star. Wrap 16 lights around 5 stars and 15 lights around 1 star, which equals 95 lights. Plus, the 5 lights left in between the stars bring it to 100 lights.
Step 8: Add a final wrapped yarn layer over the lights
Next, tie some yarn to the light strand and wrap the yarn also unevenly around the star shape. I found it very helpful to use hot glue here and there. Especially at the star points and when you are finished wrapping the star shape. You can hide the end of the yarn under some wrapped yarn.
Repeat those same steps until you used all the fairy lights from the strand.
Yarn star ornament variation ideas
There are also other ways that you could make yarn star ornaments, and I wanted to show you these options.
Leave the star shape as is
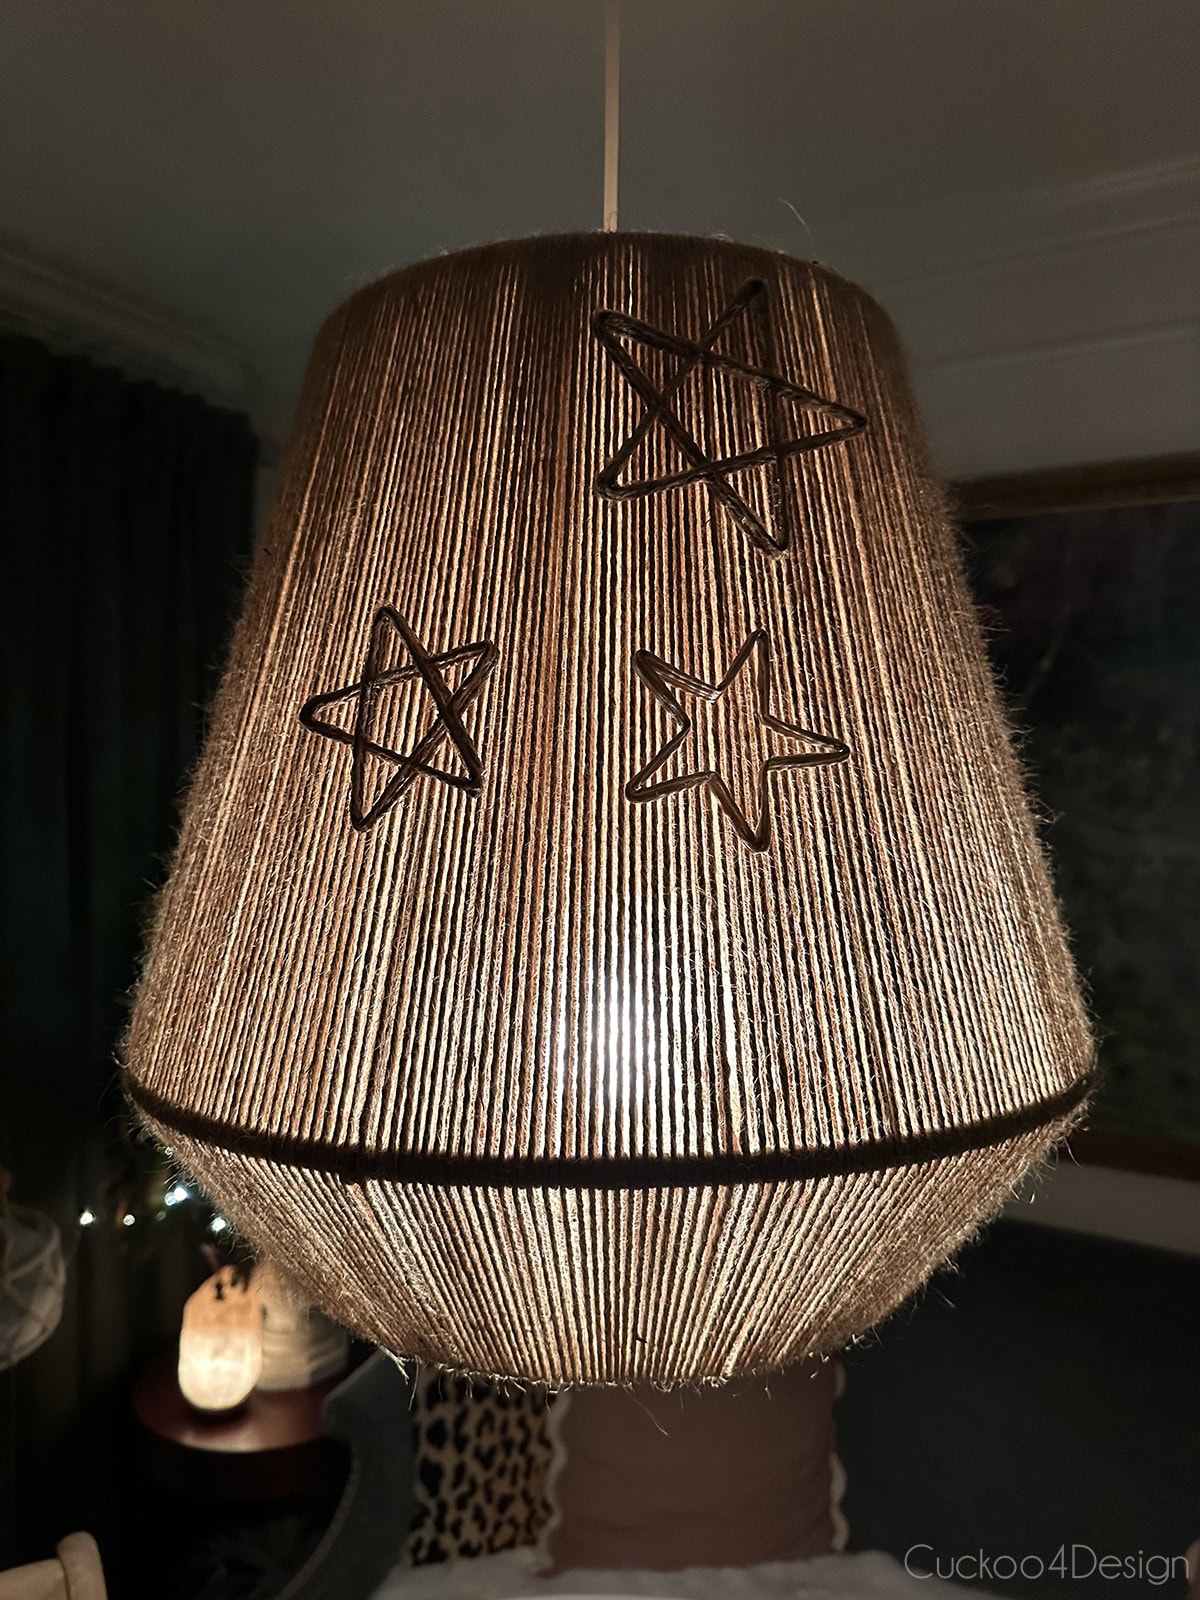
You can leave the star shapes as is and hang them, which looks pretty, too. Below you can see them on my pendant light.
The yarn star shapes just clung to the pendant on their own, like Velcro, and looked cool just as is.
Wrap the star shape with more yarn and hang it.
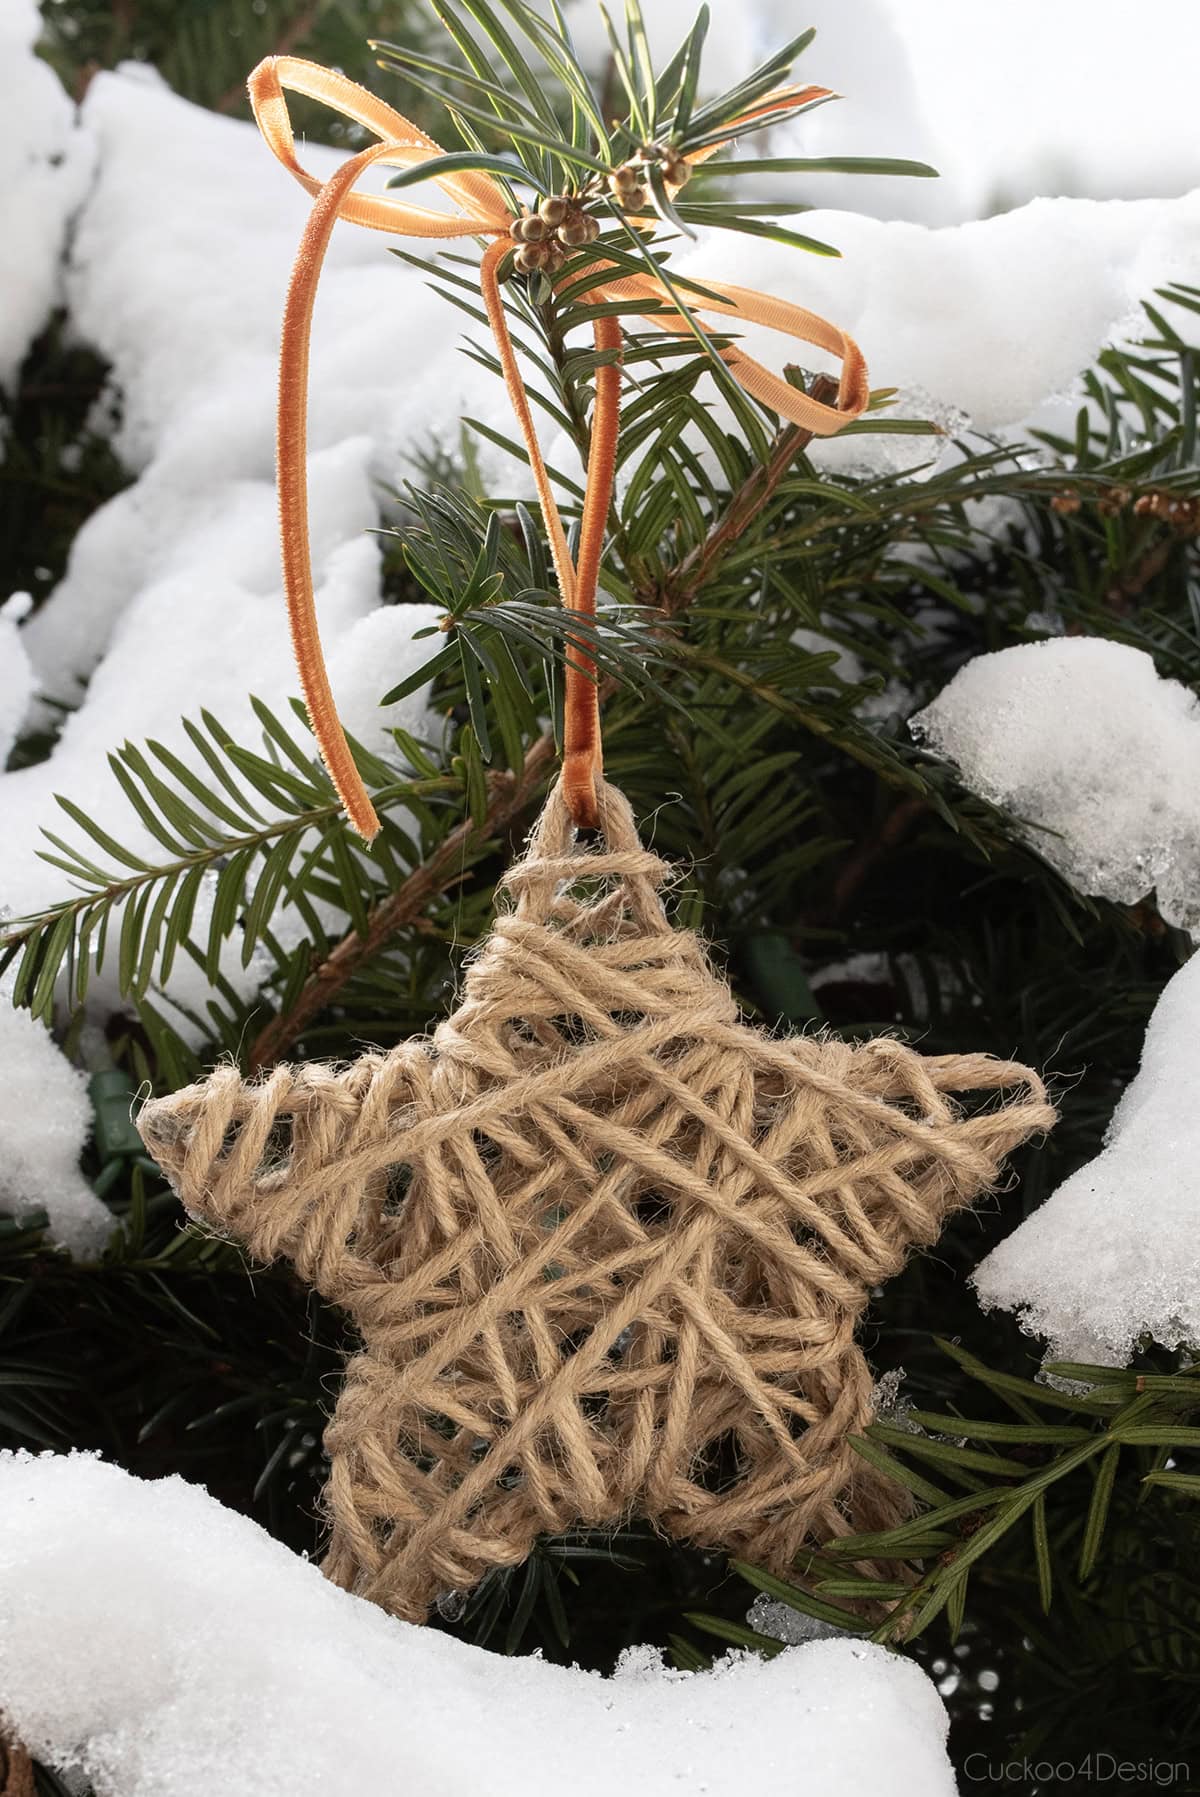
I made too many star shapes and had some left to make regular yarn star ornaments without lights as well.
Simply wrap the star shape with more yarn in an irregular pattern. Hot glue the end at a hidden spot and hang it with a ribbon. (You could also dip the yarn into more Mod Podge but I prefer not too since it is so messy)
Love the look, but short on time or not feeling crafty? Here are some similar handmade yarn star ornaments you can purchase from small businesses:

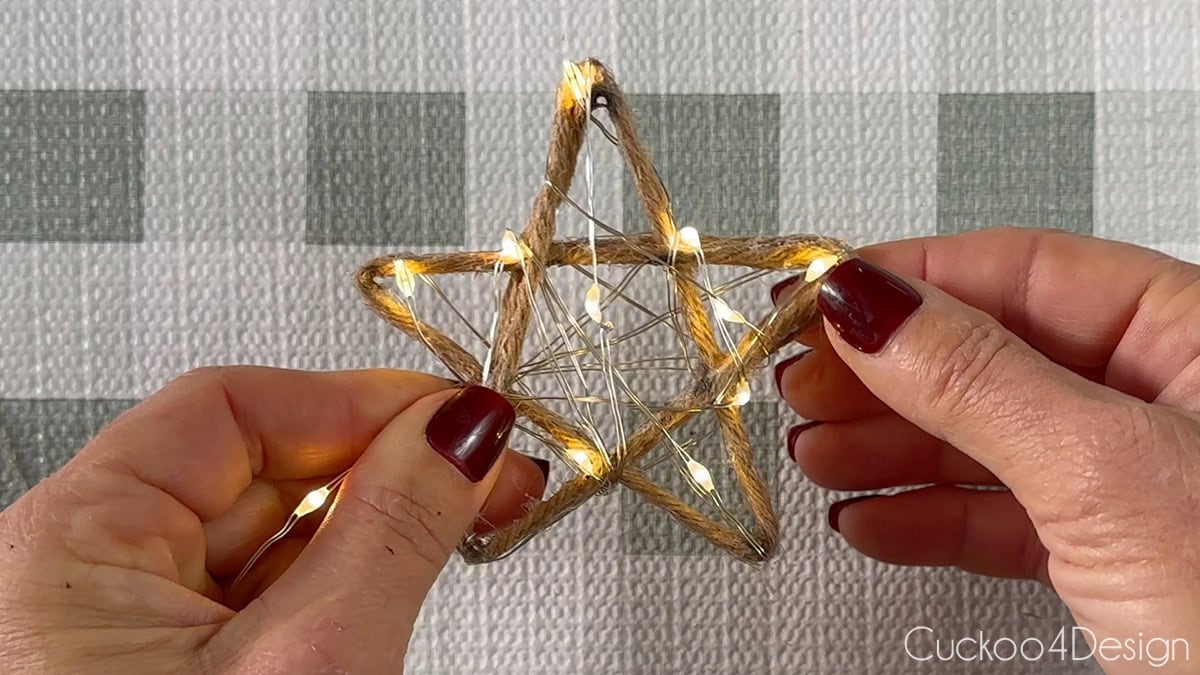
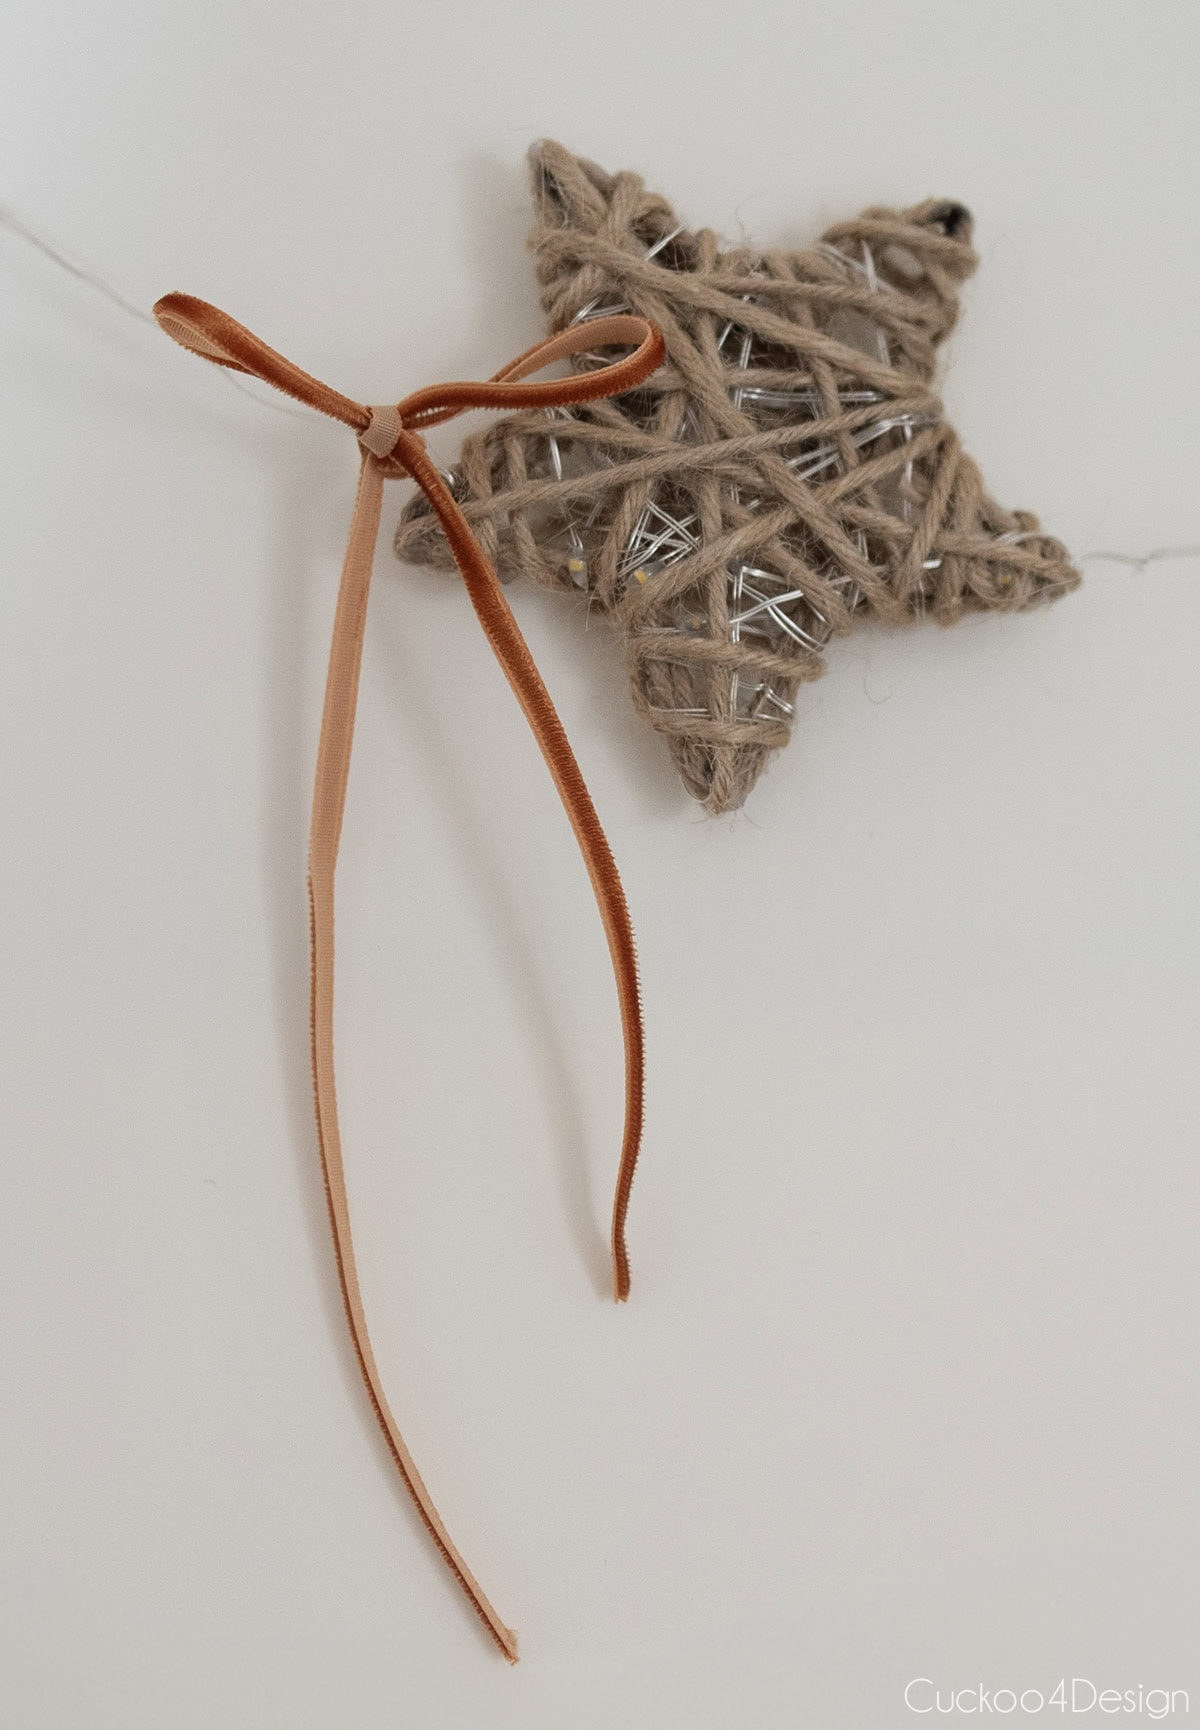
Wrap the star shape with fairy lights only
One day, I had the fairy light idea when I looked at my DIY jute pendant light. The star shapes would look pretty just wrapped in the metal wire fairy lights, but I wanted more texture.
Make a single oversized large wrapped yarn star
This is something I might still do with the rest of the yarn and the second strand of lights that I have. I can picture in my head how it would look to make one single large yarn wrapped star with one strand of lights. Stay tuned!
Decorating ideas for yarn stars
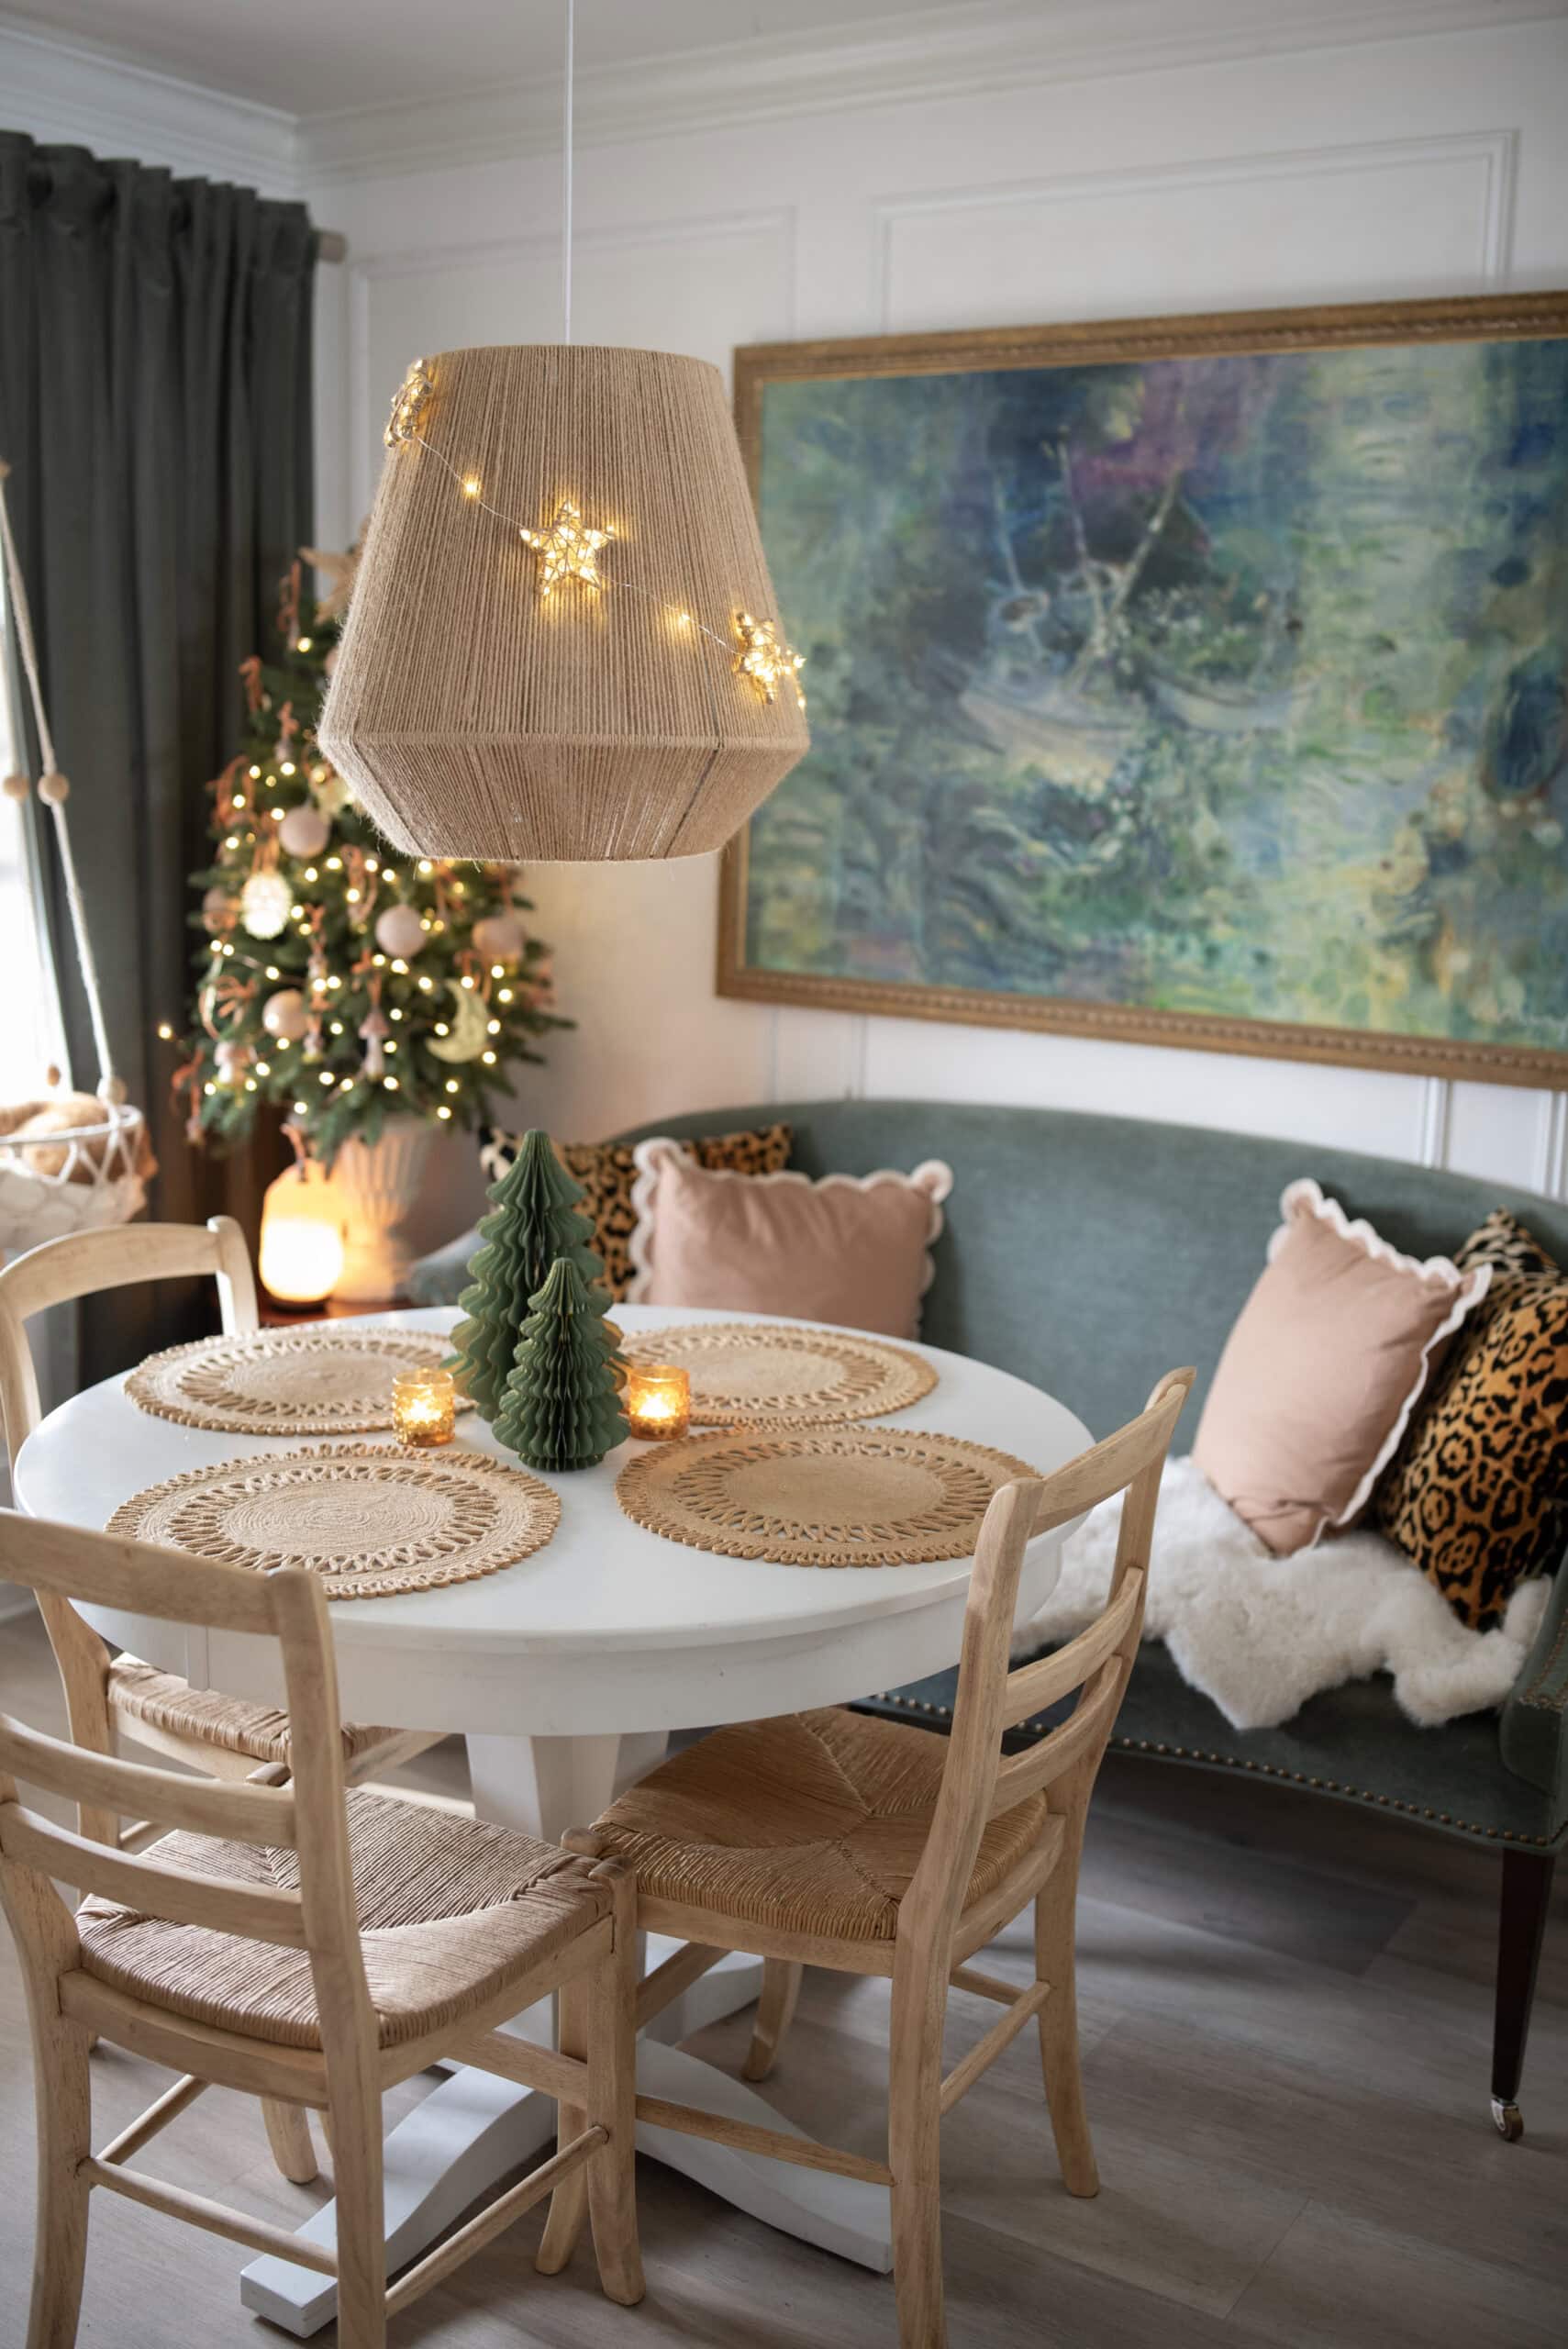
These unique yarn stars can be used in so many ways, on your tree, in a garland, or as part of your rustic or boho Christmas decor. I added mine to my jute pendant light for a cozy glow that fits the natural textures in my home. (Also, you might like my blog post about decorating with fairy lights)

Lastly, we got a fresh layer of snow, and I couldn’t resist hanging the regular yarn star in my pine tree. I love how it looks so much with all the snow. This is such a cute idea for decorating an outside tree, too.
More of my DIY star ornaments
If you love stars (I even have star tattoos) and crafting stars as much as I do, here are a few more of my DIY star ornament tutorials you might enjoy.
- A macrame star ornament – This shape is part of my macrame Christmas ornaments blog post (including several other free patterns and ideas)
- The easiest DIY starfish ornaments – A super easy coastal twist on a holiday classic.
- DIY 3D star ornaments – A cardstock craft with a dimensional look that can be spray-painted.
- DIY folded paper stars – These paper stars are customizable in size and the number of star points you want.
- DIY faux gingerbread ornaments – these DIY cardboard ornaments also have a star template and look so festive.
- DIY toilet paper roll stars – Turn household trash into upcycled and budget-friendly ornaments with my easy tutorial.
Additionally, if you want other ornament ideas besides stars, check out the full round-up of all my DIY Christmas ornaments that create a cohesive look on your tree.
Tschüß,
