

DIY 3D stars with downloadable svg file
How was your weekend today? Did you get some Christmas shopping done? I’m so behind on everything.
I thought today I’d share with you how I made all the gold 3D stars you saw throughout my Christmas tour last week. I’m sure this has been done over and over already in blogland, but I’ll write about it anyway. It’s definitely not mind-blowingly new, but they are one of my favorite accessories I added to my tour this year.
I have always liked stars, and they are perfect for Christmas.
I had a large amount of poster board stashed in the basement. You can buy several sheets at our grocery store for very cheap, and some of the stars were even made from cereal boxes I had in our recycling bin.

How to make 3D stars tutorial
This post may contain affiliate links from which I will earn a commission at no extra cost to you. View my full disclosure policy.
Now I’m lucky enough to have a Silhouette cameo ( you do not need a cutter and can use the 3D star template to cut stars by hand at home) who cuts and perforates all the lines for me, but it is totally doable without the Silhouette or Cricut, and all you need is a star shape to trace, a crafting knife, and cutting board. I tried it, and it works too. It’s just a little more time-consuming that way because you have to lightly score the areas you want to bend with the crafting knife.
Materials needed
- posterboard or thin cardboard, like cereal boxes, or even thicker scrapbooking paper
- spray paint
- cutting files and a cutting machine
- (or X-Acto knife and metal ruler, if you don’t have a cutting machine, and better than scissors)
Do you want to be able to customize your stars more? These 3D template stars are great for spray painting (the thick poster board handles paint beautifully!), but if you want the flexibility to create 5, 6, or 7+ pointed stars, check out my folded paper stars tutorial. That technique uses standard thin paper and glue instead, and you get complete control over the number of points!
Downloadable 3D stars cutting files (SVG and studio)
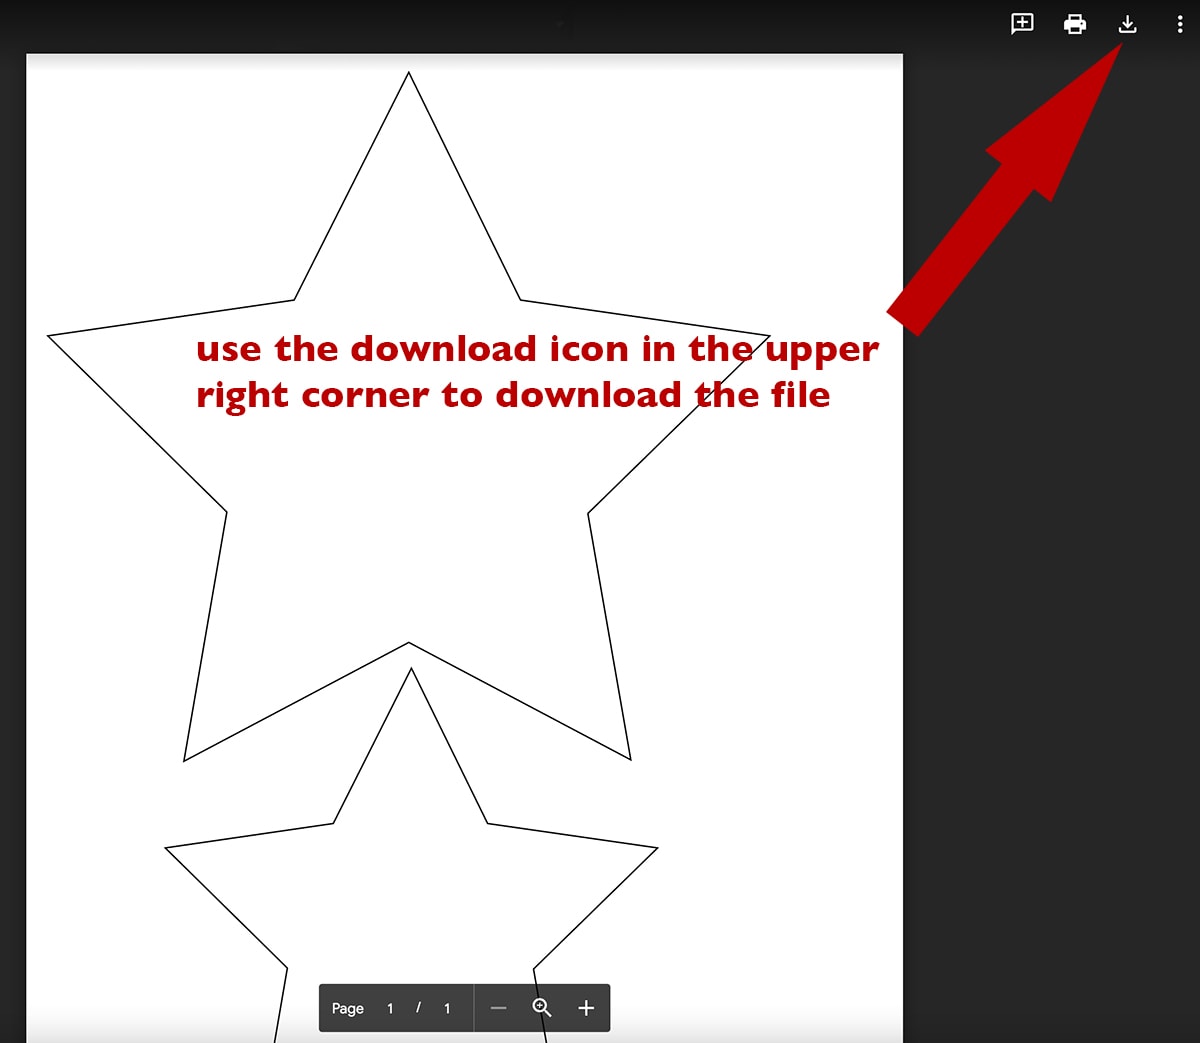
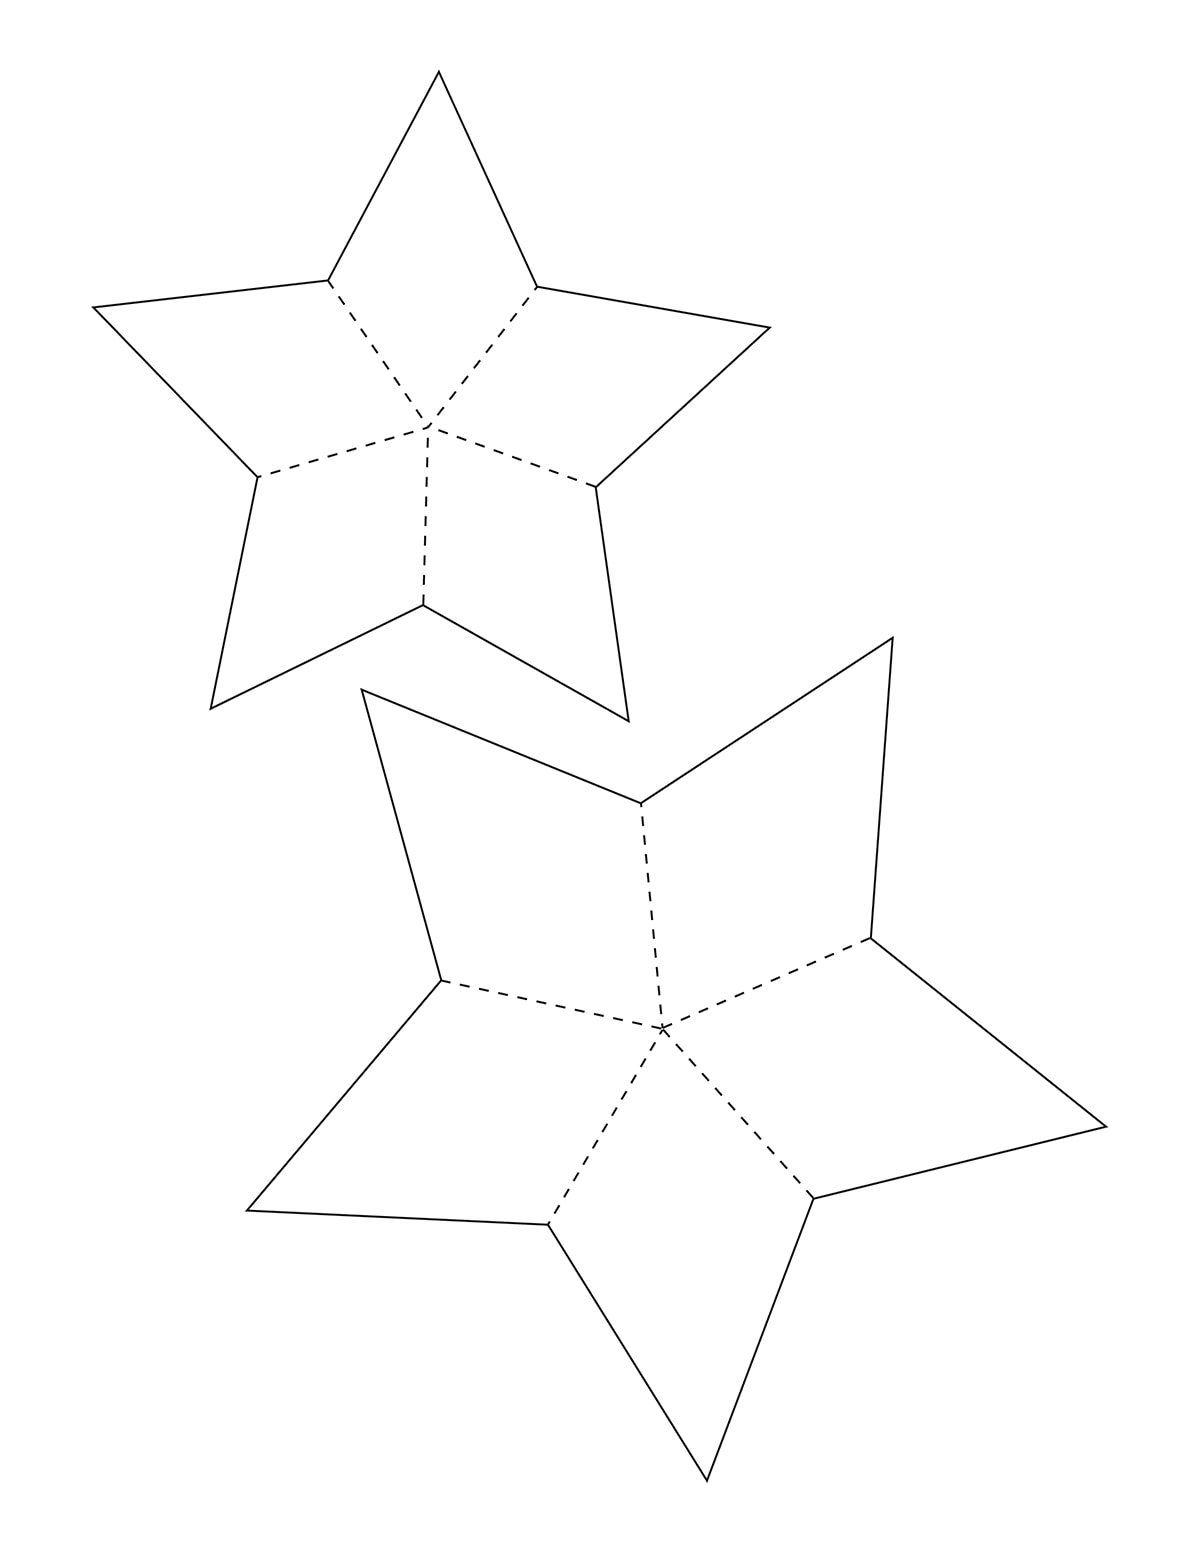
Printable 3D star shape
I added a printable 3D star shape (2 different sizes) for you in case you want to make them without a cutting machine. You can also use this printable paper star version for my gingerbread Christmas ornaments as star templates.
Step-by-step 3D star instructions
Step 1: Download the cutting file and add it to your cutter software (no cutter? No Problem!)
Start by downloading your file and uploading it to your cutter.
Make sure that you set the thickness and blade appropriate for cardstock before sending the poster board through the machine. You obviously have to cut the poster board to the size of the cutting mat before being able to feed it through the machine and peel the stars off the cutting mat.
No cutter? No Problem!
If you don’t have a cutting machine, use my printable version. Just print them on a piece of paper, cut them out, and trace the shape onto the poster board. Perforate the center score lines lightly with a craft knife by lightly running it on the edge of a ruler, but make sure not to cut the poster board all the way through.
Step 3: Slightly bend your stars
Whether you used a cutting machine or cut the stars out from my 3D star template. Simply bend the perforated lines (or slightly cut lines) to form creases and bend the stars into a 3D shape along the perforated lines.
Step 4: Paint your cut-out stars
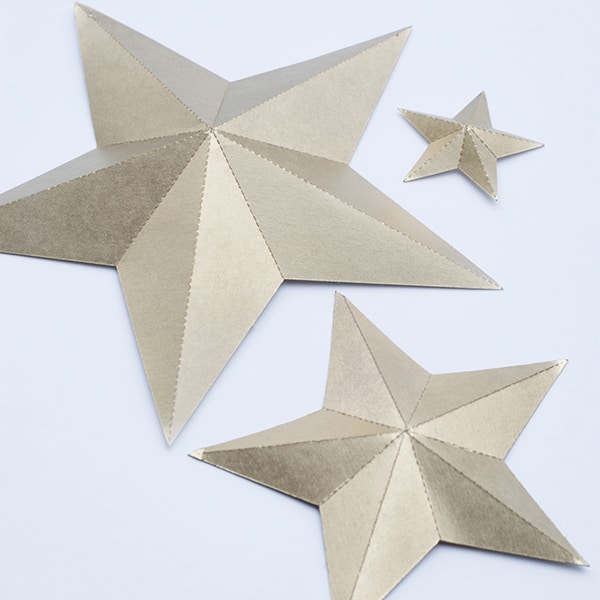
Spray paint the 3D stars with gold spray paint or whatever color you’d like. ( I used Rust-Oleum gold spray paint). I actually wanted to use copper first, but decided on gold last minute since I had already painted some Christmas balls copper. I wanted to mix more metallics.
And that’s it!
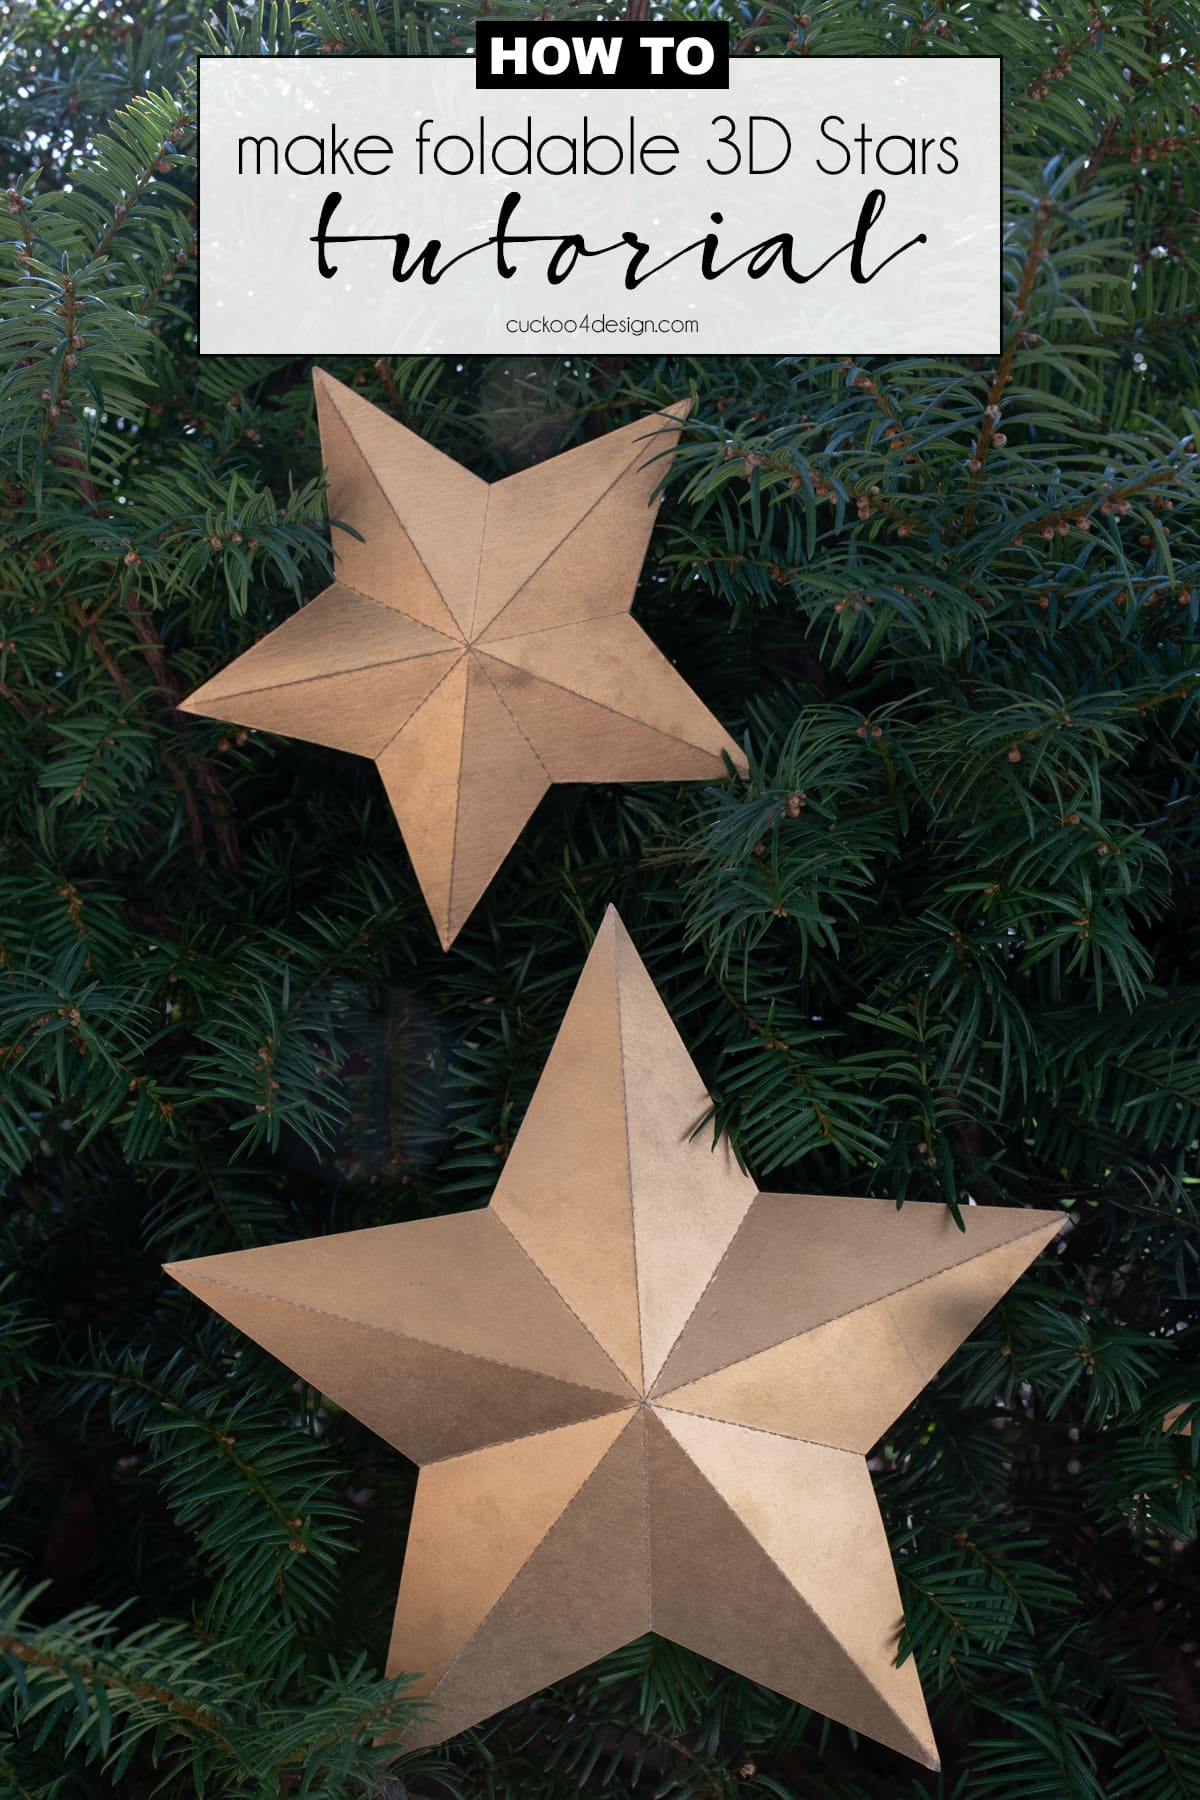
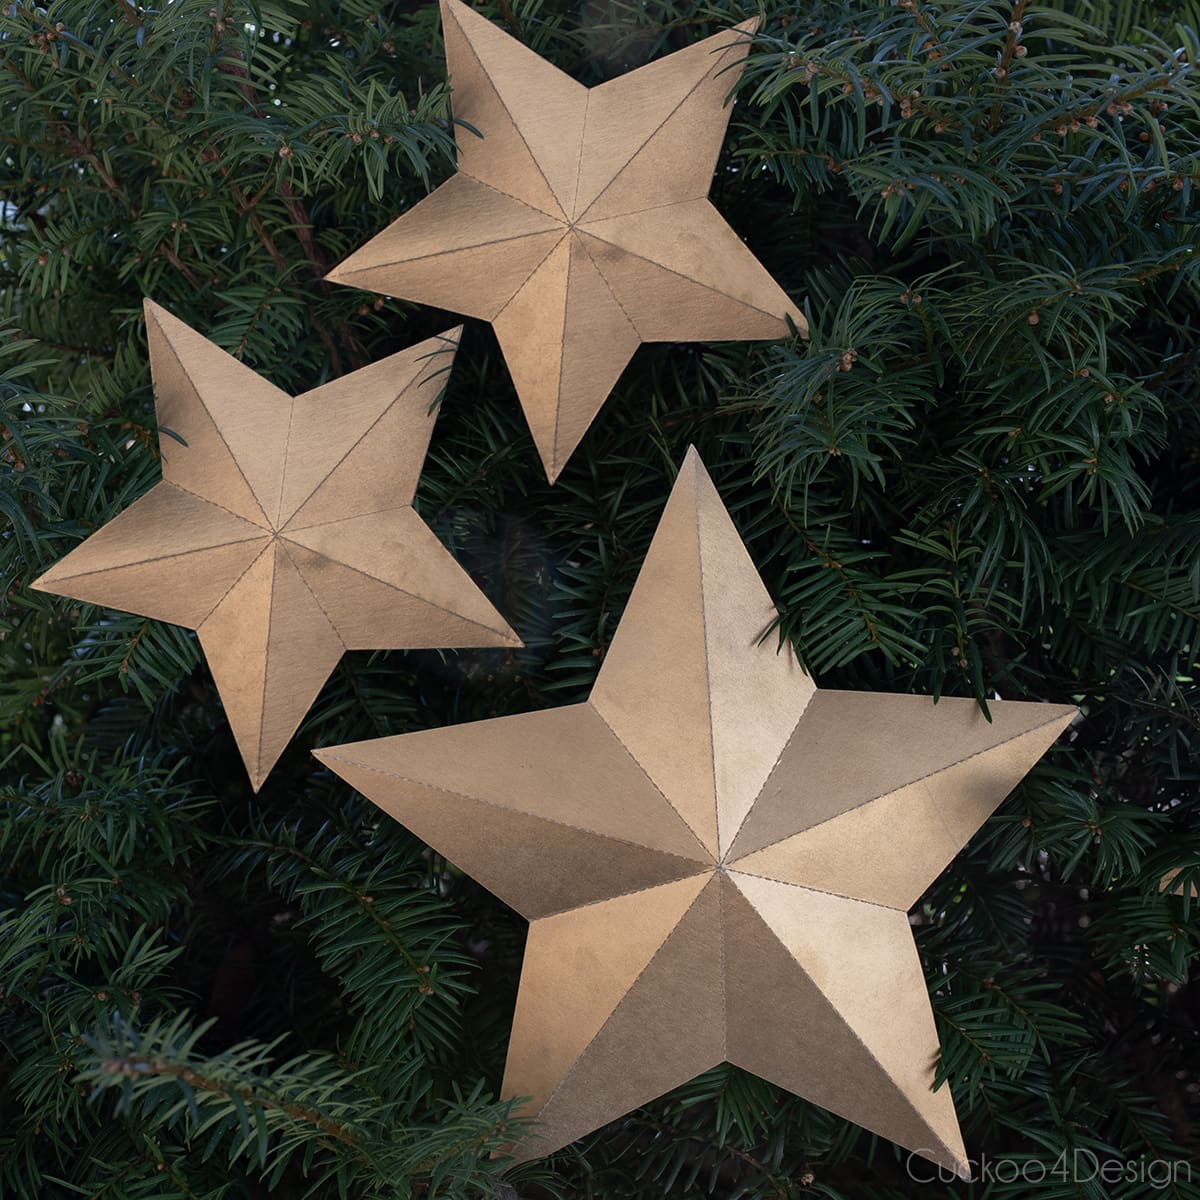
Photos of finished 3D stars
The entire star is hollow on one side, but you can see the 3D shape. The center of the star needs to be bent outward.
RELATED: Speaking of origami! I made easy origami diamond Christmas ornaments with printer paper and colored cardstock. They look very pretty and are another great affordable ornament option.


If you don’t feel like making the stars, you could also just buy papier-mache stars and spray paint them gold with the same paint I used above. These look almost identical to mine, but my version is much more affordable.
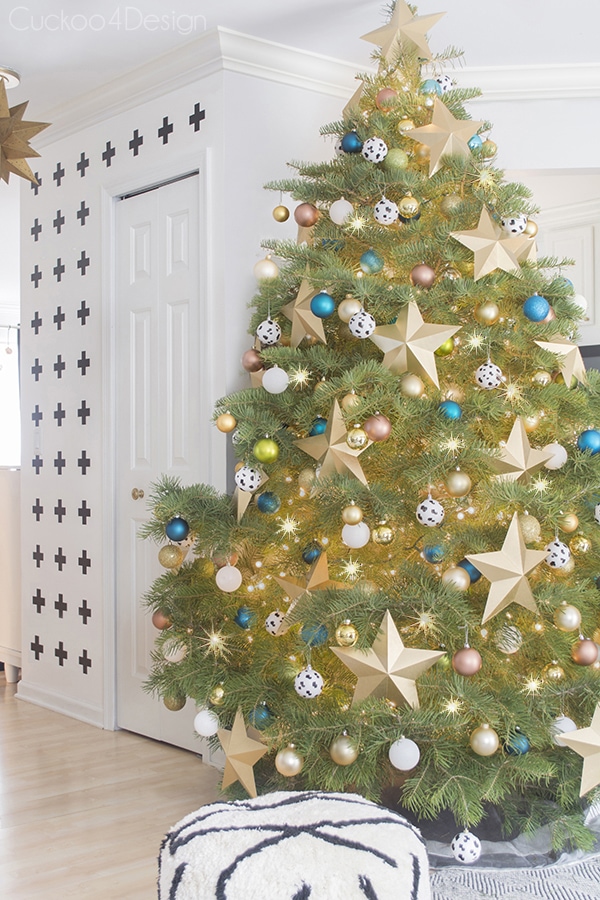
Here they are in our home. They make such a big statement for a small amount of money. I don’t like to hang them and prefer to just tuck them into the tree instead.

You might also like my tutorial about how to paint plastic ornaments. I made black and white brush stroke ornaments, which are pictured in the small tree above and the large tree below.
I even went all colorful with my Christmas decorations one year, and the stars were the perfect touch.

Other ways to use these 3D stars as decoration
- I also turned these stars into 4th of July bunting. They make the perfect 4th of July decorations.

- on a wreath
- as a garland for your mantel
- as napkin ring decor


More affordable DIY Christmas ornaments
- DIY yarn stars that light up with the help of fairy lights
- DIY poster board snowflakes with a free snowflake svg file
- DIY Macrame ornaments using scrap macrame cord
- DIY paper fan ornaments – I love how easy they are to make and are such a statement!
- Easy DIY honeycomb ornaments using standard printer paper. They kind of look like snowballs!
- Toilet paper roll snowflake ornaments, which are free and so fun to make as a craft for all ages
I feel like these stars were so easy, and they make such a big difference. I love crafts like this. None of the trees would look the same without the stars, don’t you agree?
I hope you like the stars as much as I do and have fun with your holiday decorations.
Tschüß

THESE ARE GORGEOUS!! Ahh, I love them Julia! And your tree is heart stoppingly beautiful.
Thanks so much Ursula.
I am going to try your print outs with some poster type paper that I got from a beer suitcase. I am hoping it will be easier to cut. I love stars myself. And I am hoping to make a tree tooer by roling up a poster board into a small tube. Wish me luck.
Yes I am wishing you lots of luck.
these are so beautiful and i LOVE how they look on the table setting!!!
Thank you Cassie
Oh my goodness all your trees are beautiful! I totally agree, the stars look awesome!
Thanks Emma
Super cute and such a fun project. I need to get one of the cameos I’ve heard great things!
Yes, you do. They are addicting and in the end save a lot of money too 😉
Julia! Those are incredibly beautiful!
Thank you Amy
So pretty! I was hoping you wouldn’t need a Silhouette to make these though haha Maybe Santa will drop one off at my house this year 😉
Well you can make them without too but it just takes longer 😉
Very cool! The perforated lines are probably the best part of it all. That little machine can do anything!
Haha, yes it can. The perforated lines make it so so easy.
These are STUNNING! I’ll be sharing this on my FB page.
Oh thank you so much Amy.
LOVE the stars, but I couldn’t get the link to work. Would you kindly email the download to me?
Thank you!
Hmmm, I wonder why and I sure will. Thanks for letting me know.
Wow, the power of paper! They look great and so elegant.
Thanks Jennifer. Paper and spray paint I kinda love that combo
love these so much! I don’t think I’d be able to put them away after Christmas 🙂
Maybe I shouldn’t put them away 😉 thanks Gretchen
Your trees look gorgeous!!! I don’t have a silhouette cameo, how can i print out the pattern for hand cutting?
Any star shape would do, maybe I should include a star printable with various sizes to my post too for people like you who don’t have a silhouette. I hope I can get to fixing that this weekend.
If you can that would be awesome! my son’s 2nd birthday is next month and i think these stars would make the perfect decor (and he loves his stars). Thanks for replying!
Ok, I will try my best to get it done over the weekend 🙂
I just updated a link in the post with a printable star shape. Maybe you can test it to see if it works. Merry Christmas
The stars are so pretty! I’m so behind on pretty much everything when it comes to Christmas, I can’t believe its literally days away!!
Oh gosh I hear ya. I’m not behind on Christmas decorating but everything else. Thanks so much!
I love these!! You’re so creative! Thank you for the file!! I need to see if I can figure out a way to use these around here!!
Thanks Amber, I hope downloading the file works for you. One reader told me it didn’t work for her.
I am so behind – your blog hasn’t been updating in my reader.
Love these stars and I’ll have to try them on the silhouette. What a fun idea. I hand folded stars a few years ago and it wasn’t nearly as simple.
Everything looks beautiful!
Thanks Kim and don’t worry, I’m behind too.
great post! i love the painted ornaments and dishtowel as well, will try this!
Thanks so much Genevieve, and good luck trying all the projects.
I already miss Christmas : (
Me too
A question because I can’t open the file – what kind is .studio? It doesn’t open on my laptop and I absolutely love these!
So sorry, I missed your comment. .studio is a file you can use with the cutter but you should be able to open it in other programs as well. I have to double check it.