

DIY folded paper stars tutorial (create 5, 6, or 7-pointed stars)
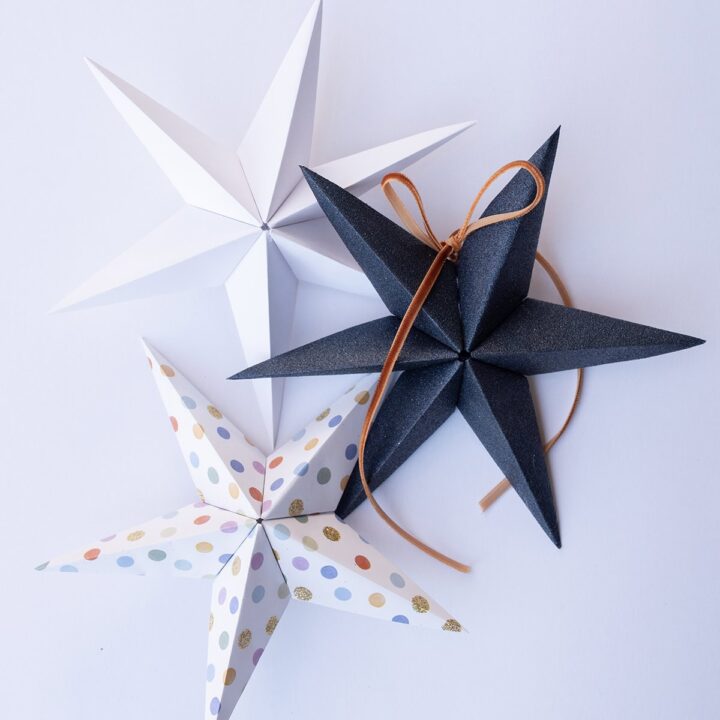
It’s no secret that I love stars; I even have star tattoos trailing up my arms. Stars have such a visual impact, which is why I wanted to make folded paper stars for this year’s Christmas decor. They’re incredibly budget-friendly and surprisingly easy to create.
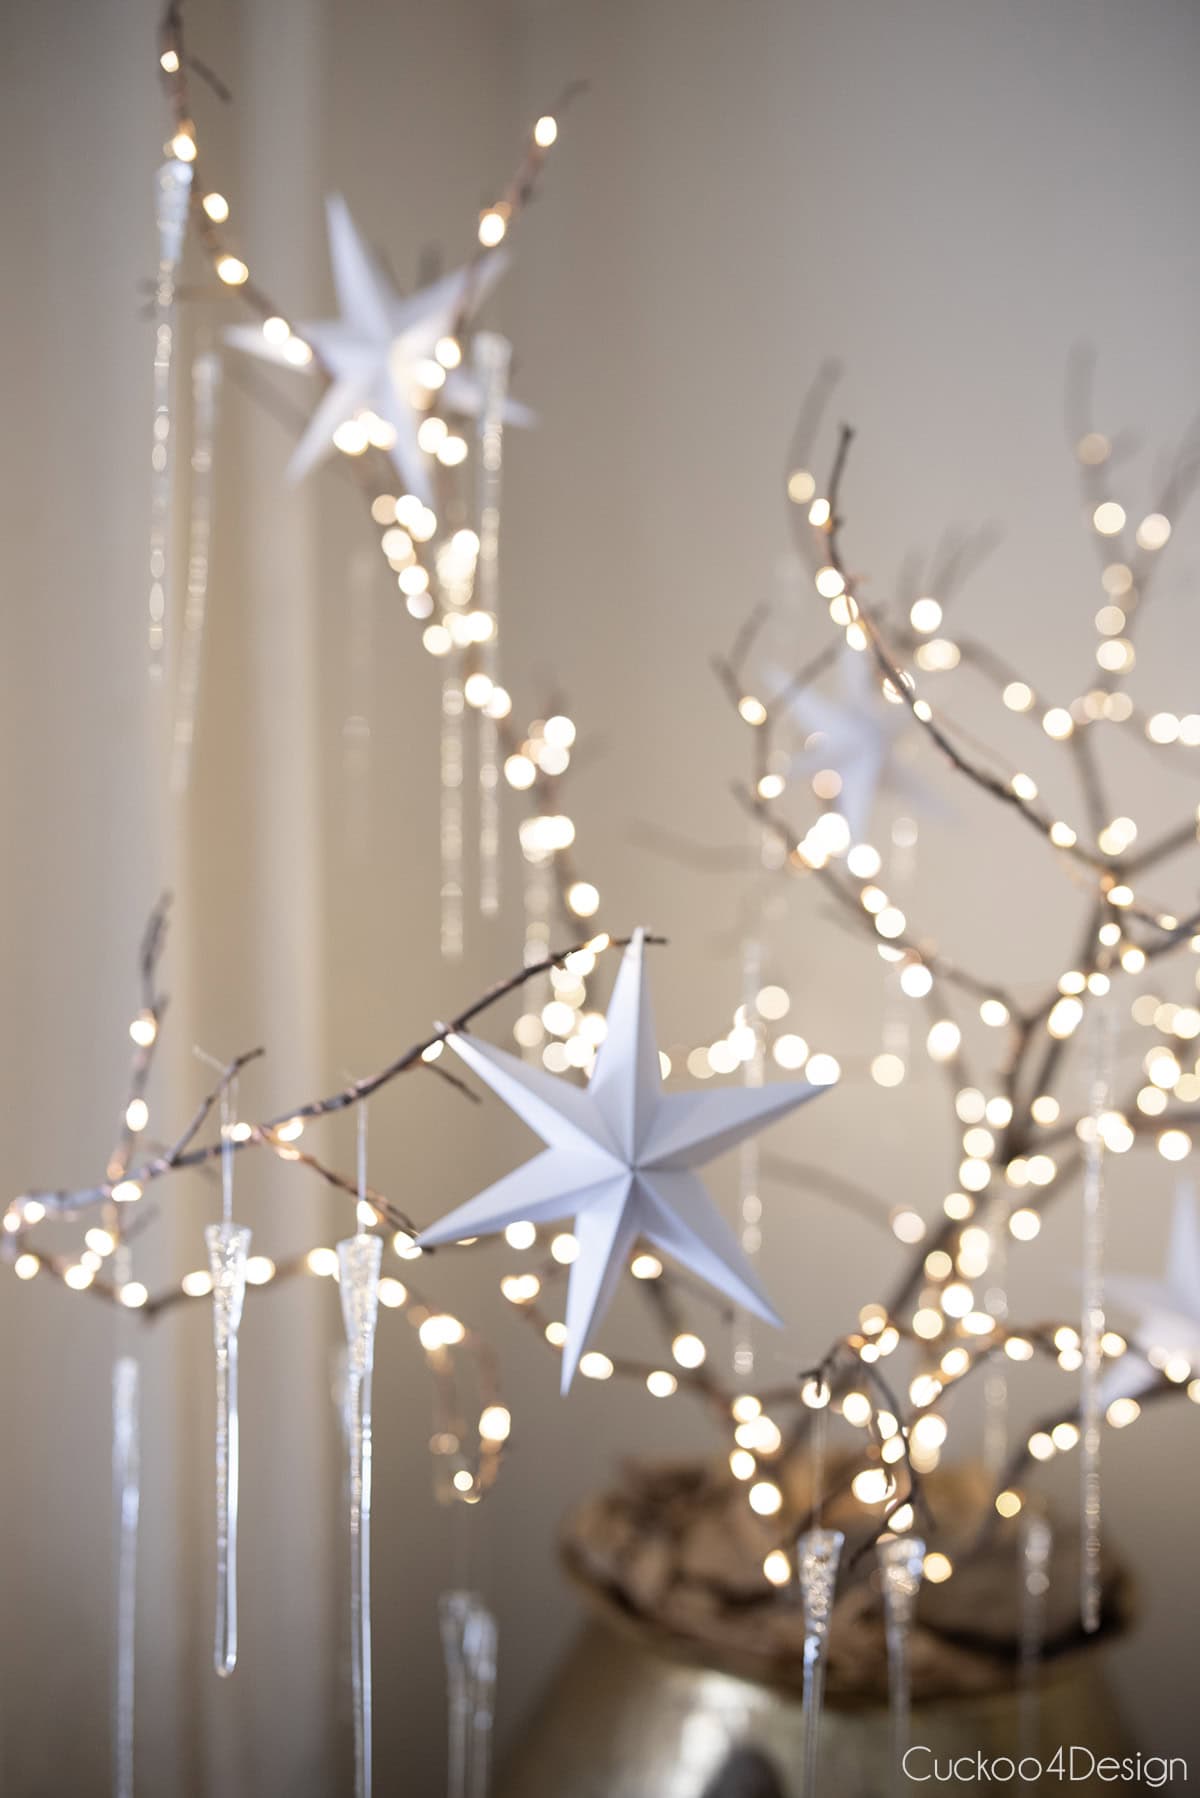
I decided to leave my fairy light-lit branches from my fall decor up this year. For fall, I add my paper leaves, and for Halloween, I add moths using my paper moth template to the branches. Adding folded paper stars gives them a completely new look for Christmas, and here’s the best part: you can customize them with 5, 6, or 7 points depending on the look you want.
Ready to learn the technique? Let’s dive into how to fold these beautiful dimensional stars without any template!

Materials needed
- paper (any paper you’d like even gift wrapping paper)
- scissors
- glue stick or hot glue
Not a fan of glue? I totally get it! My printable 3D star template creates a similar dimensional look but uses cutting and bending at perforated lines on poster board instead. No adhesive needed! Since I used poster board for those 3D stars, I was also able to spray paint them.
If you want the flexibility to make any size and customize your points, this tutorial’s folding technique is perfect for you. But the paper can’t be painted like the 3D stars because the paper will warp if it gets wet.
Video tutorial
This post may contain affiliate links from which I will earn a commission at no extra cost to you. View my full disclosure policy.
It is always helpful to watch what my hands are doing for these types of craft tutorials. If the video doesn’t load for you here on my blog, then you can also watch it on my YouTube Channel instead.
Step-by-step folded paper star tutorial
This folding technique is easier than it looks! Once you get the basic folds down, you can make a star in under 10 minutes. And you can use whatever paper you’d like and create as many star points as you like. I’ve broken it down into simple steps below, and you can follow along with the video above if you prefer to see it in action. Let’s get started!
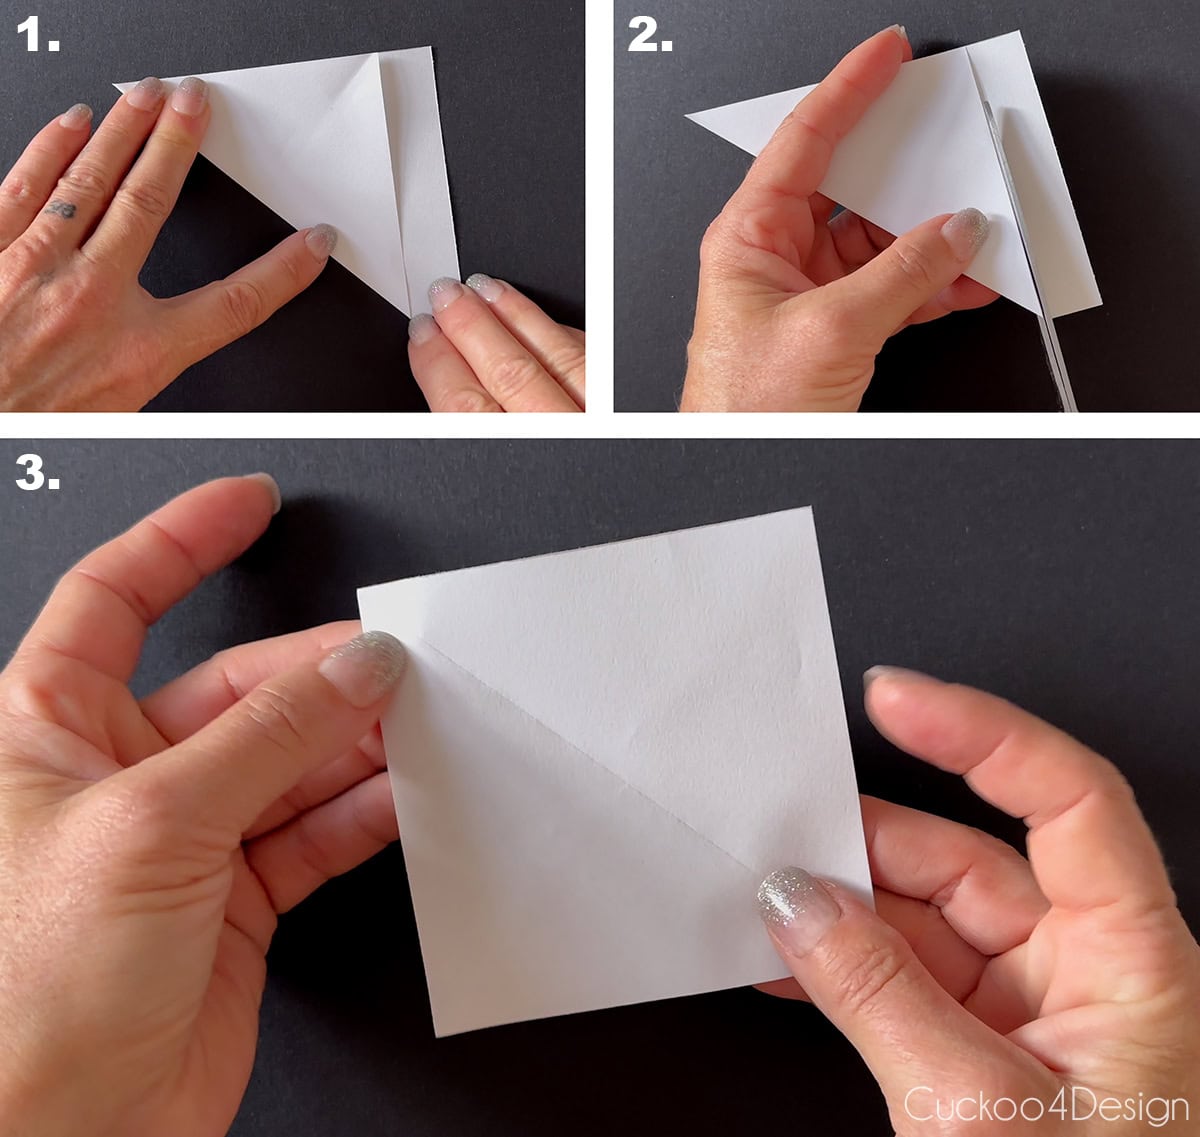
Step 1: Prepare your paper
For these folded paper stars, you need paper squares. The number of squares depends on how many points you want in your star. If you have rectangular paper like printer paper, you can fold it diagonally and then cut off the extra strip at the bottom, which results in a square piece of paper.
You need that diagonally folded center line (pictured in image 3) in the next step.
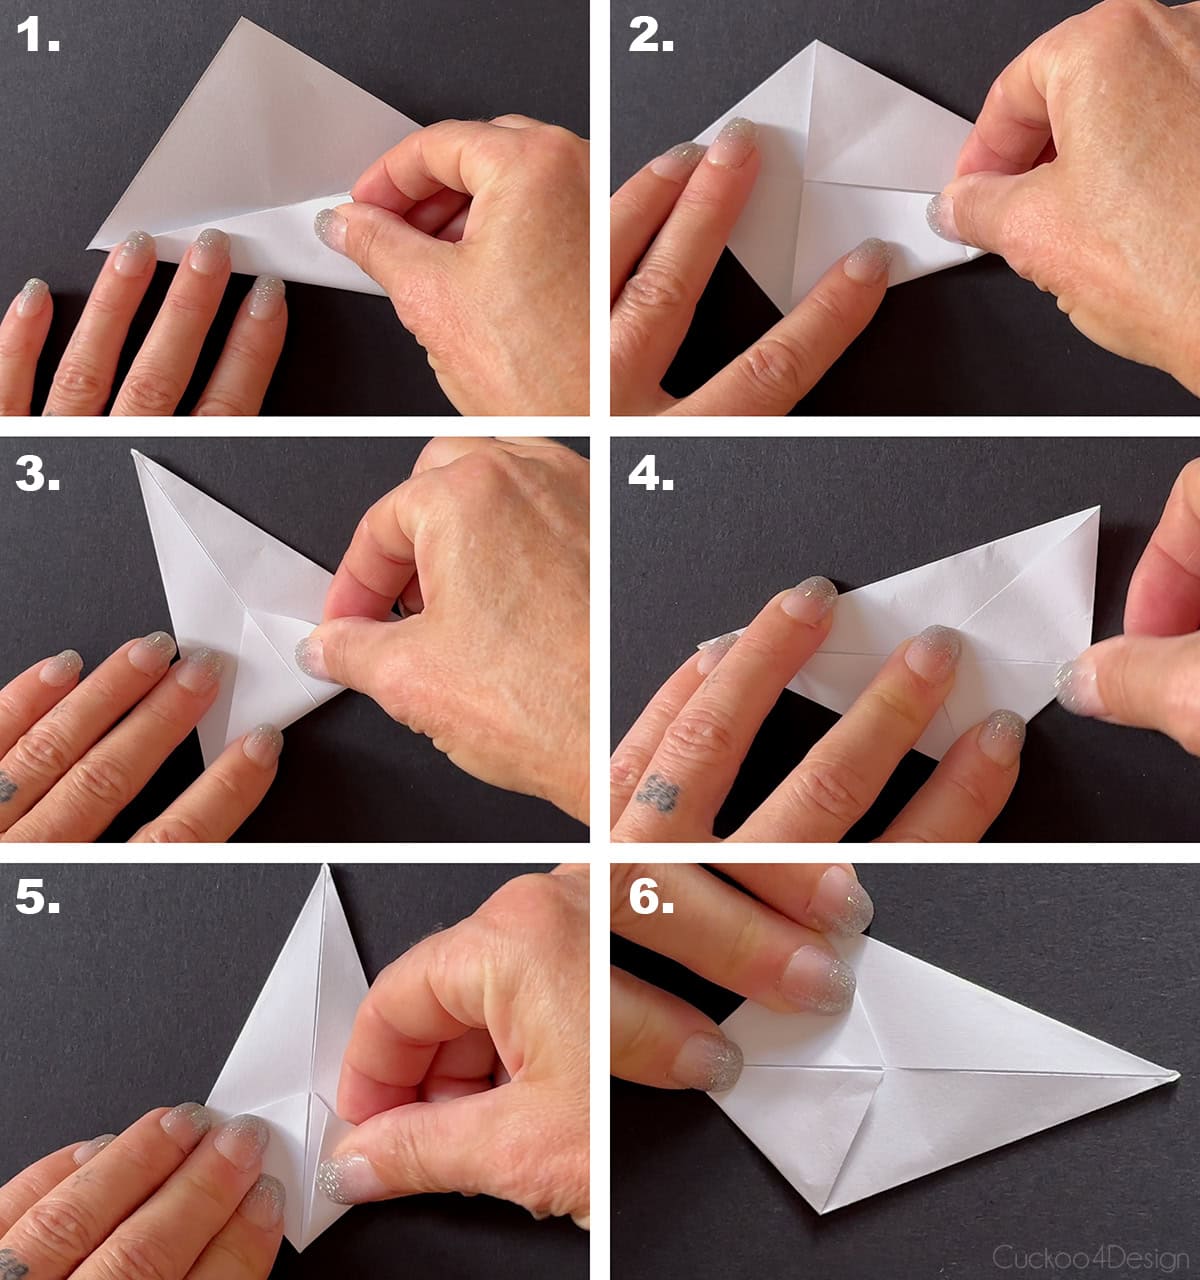
Step 2: Fold your star point
Fold your paper square inwards towards the diagonal center line on both sides, which creates a shape that looks like a kite.
Then fold the bottom up to create a triangle. (pictured in image 3) Now fold both sides of the bottom of the triangle inwards to the center line. That creates a kite shape again. (image 6)
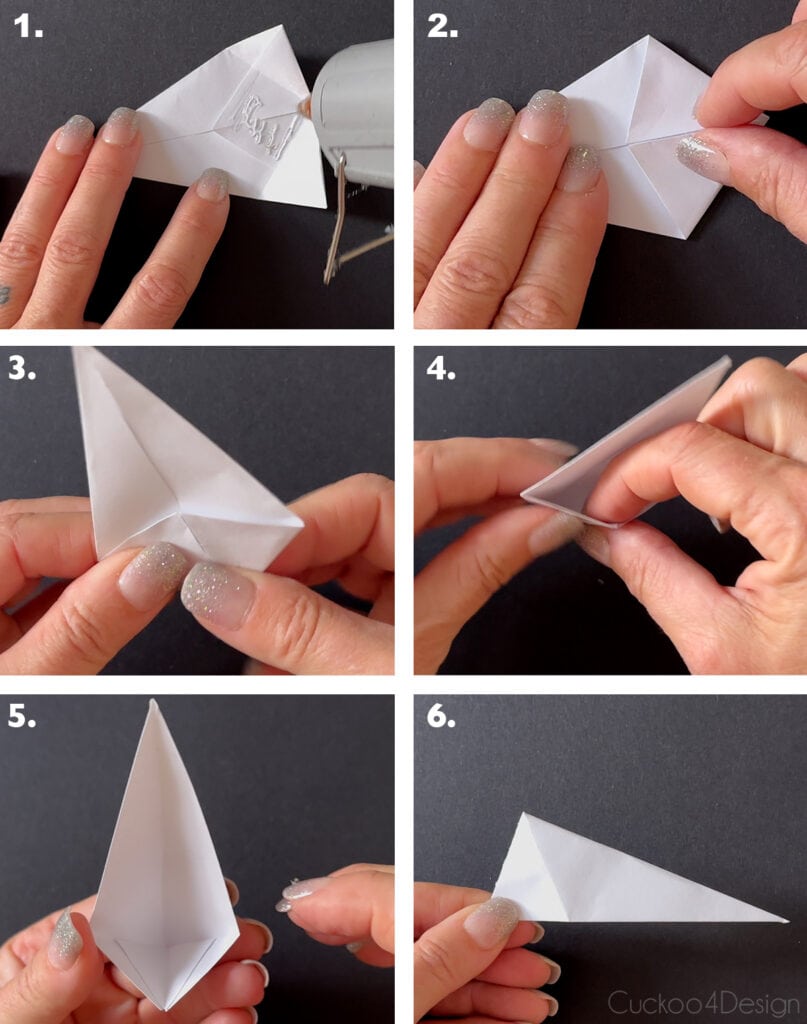
Step 3: Gluing the inside of your star point (kite shape) and shaping it
If you are doing this project with kids, use a glue stick. I prefer the hot glue because the process is much quicker.
Open the bottom folded shape. You can see a square shape created from the folded lines. That is where you add your glue. Then you fold it closed again so the folded shape can’t open again.
You should now have an oddly shaped pocket which you flatten into an uneven triangle.
Step 4: Repeat the same steps to create your desired number of star points
Now repeat steps 1 through 3 until you have the number of star points that you want to have for your folded star.
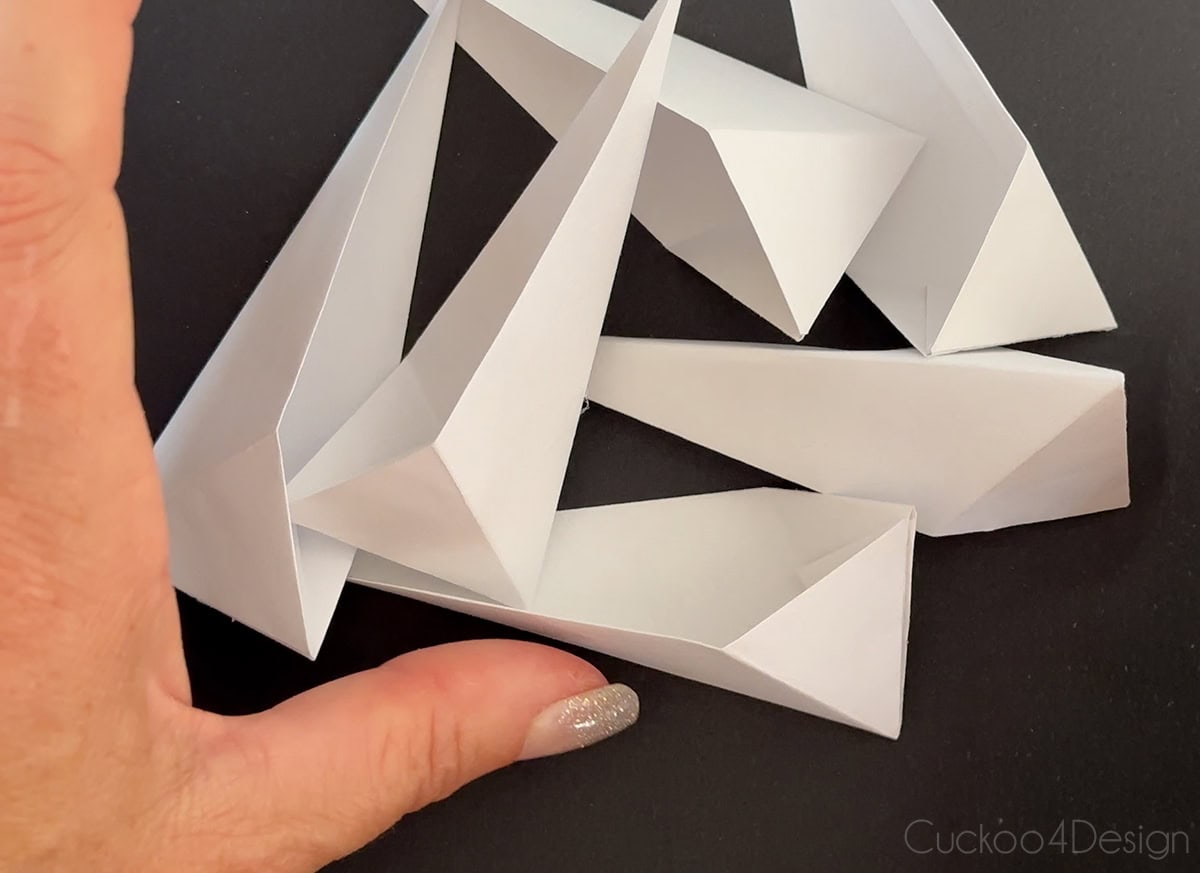
I made 5-point and 6-point folded stars. Below you can see 6 folded and glued shapes.

Step 5: Assemble your folded star with glue
Flatten your star points and apply glue to the side that has a small visible triangle shape created by the folded line. Next, lay another triangular folded shape on top to glue them together. Keep repeating that until you have a stack that is glued together.
You can open that stack like a fan. Add more glue to the last little triangle shape and close the star shape.
Tip: If you are using hot glue you only have to wait until the glue cools off to proceed to the next steps. If you are using a glue stick, you have to wait until it dries. You might need clips to hold the star shape together until it dries.

Step 6: Add string or hooks for hanging (optional)
I used silver metal hooks because they are easy to poke through the paper and also prevent the star shape from spinning on the tree.
You might also like my tutorial about how to make toilet roll stars. They are so fun and easy to make. Or my unique yarn stars using leftover jute yarn and fairy lights. It’s all about working with what you have.
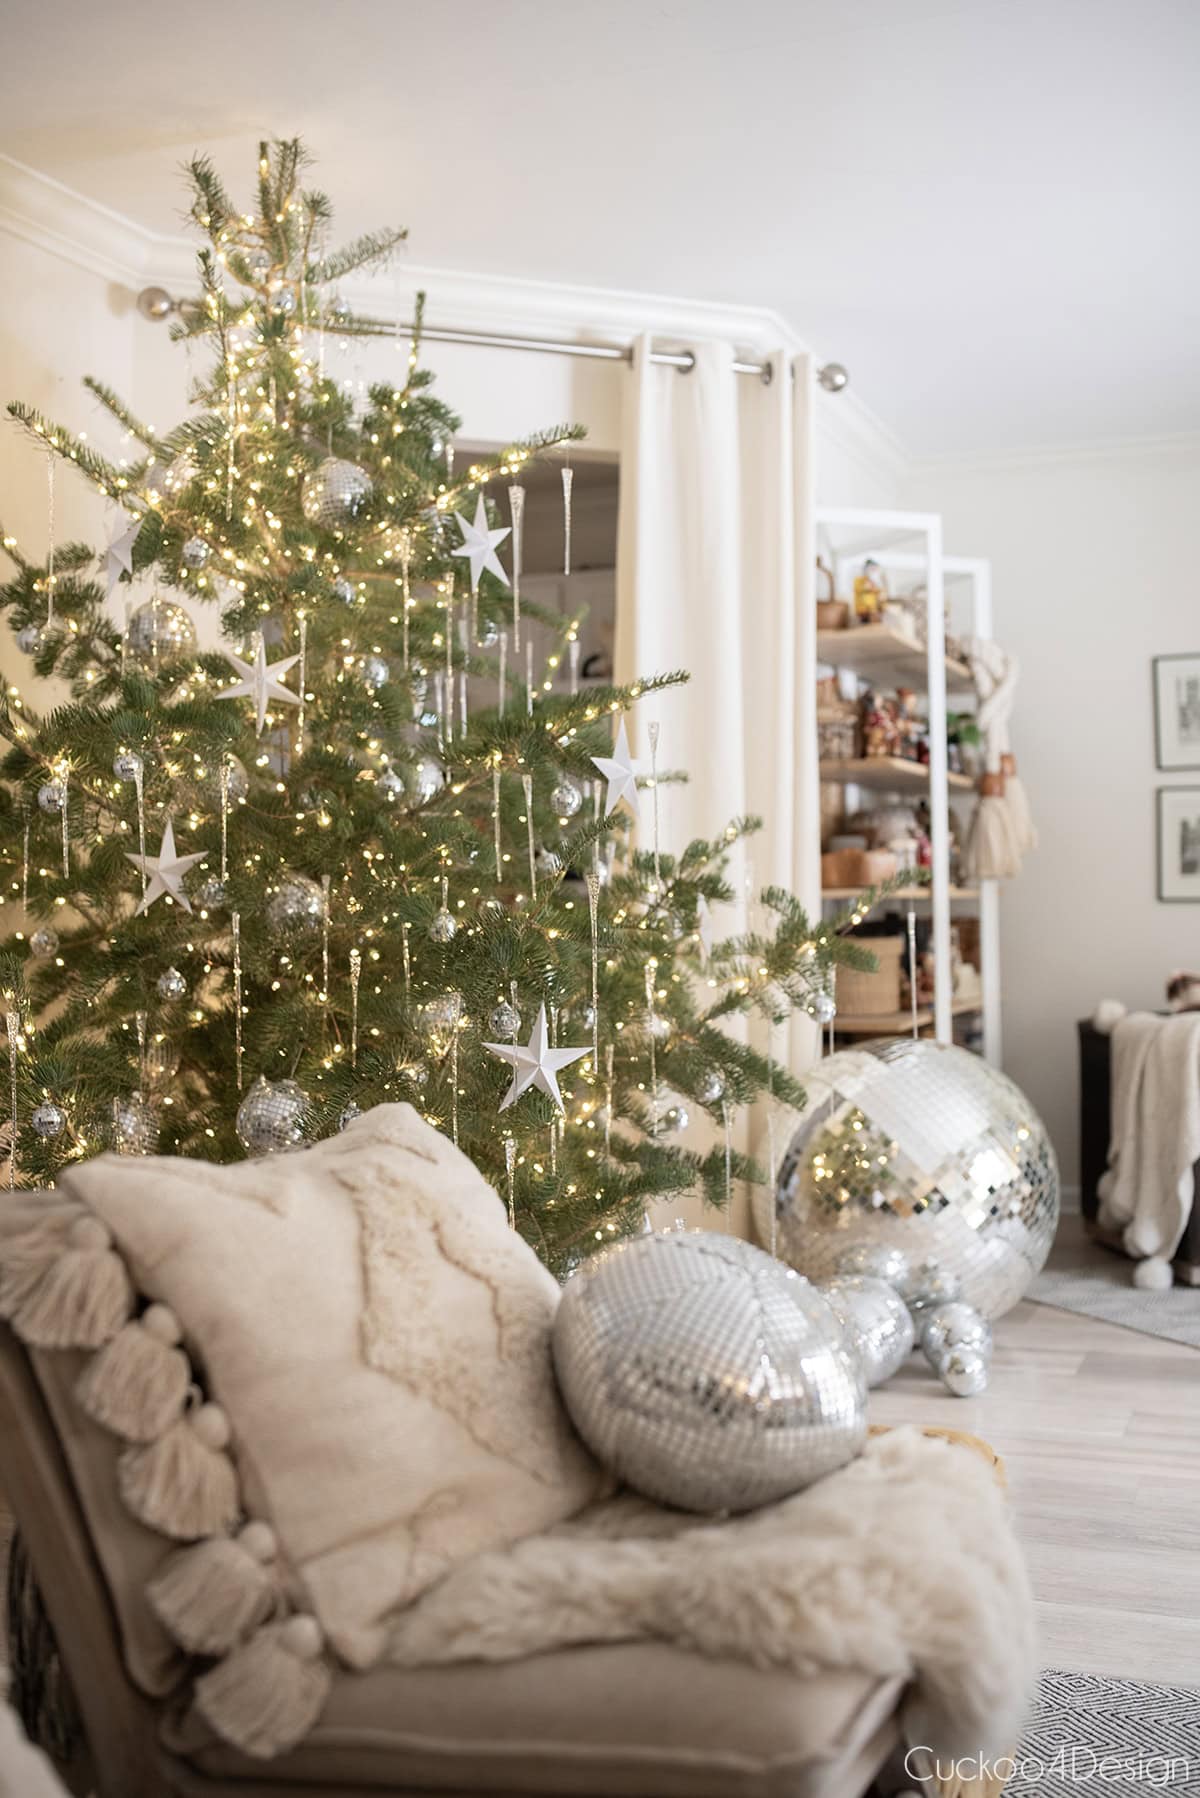
How I decorated my home with the folded paper stars

I showed them to you this week on my tree in my textured Christmas decor home tour. You might want to check out the rest of the tour if you missed it.
I made the larger star on my mantel from standard printer paper.
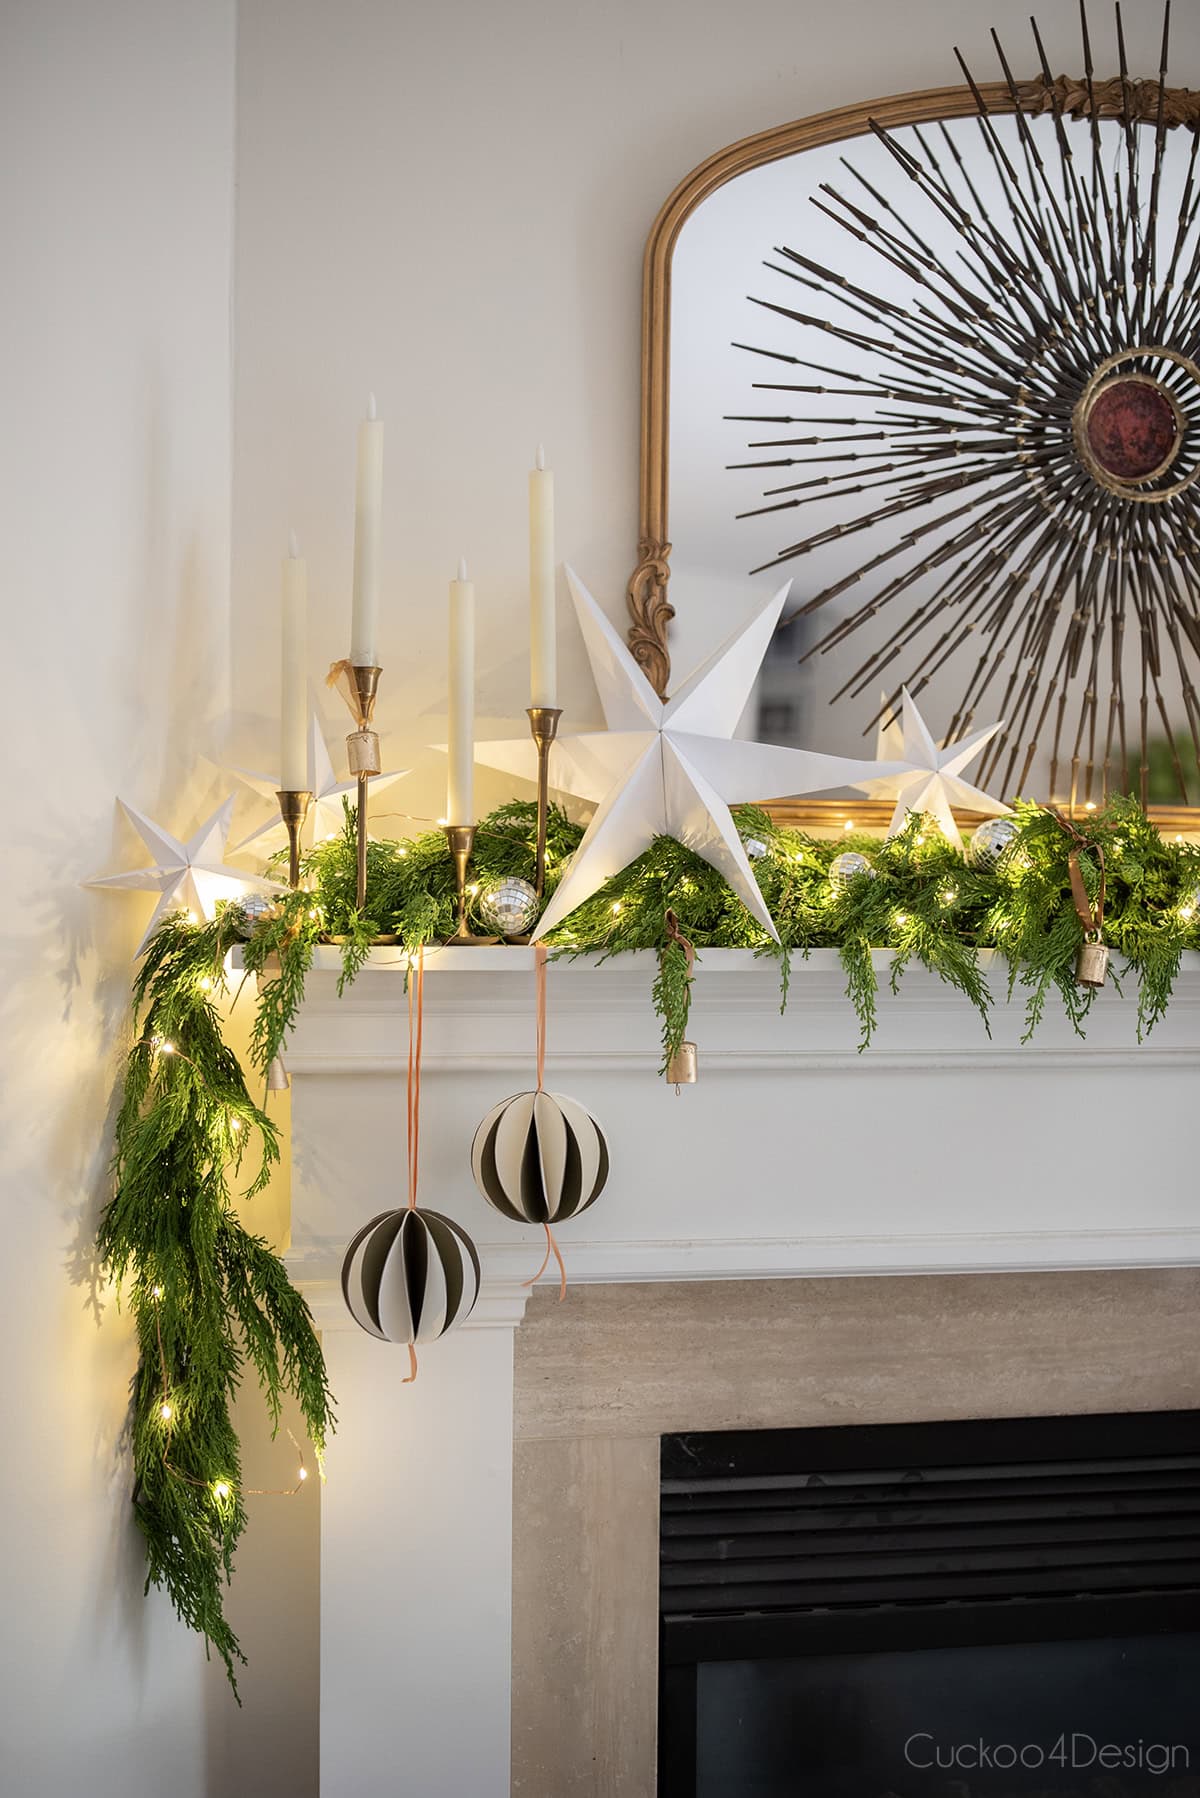
Also, check out my two-toned DIY honeycomb ornaments that are hanging from the fireplace mantel with the stars.
And here are some stars that I made with wrapping paper that I found…

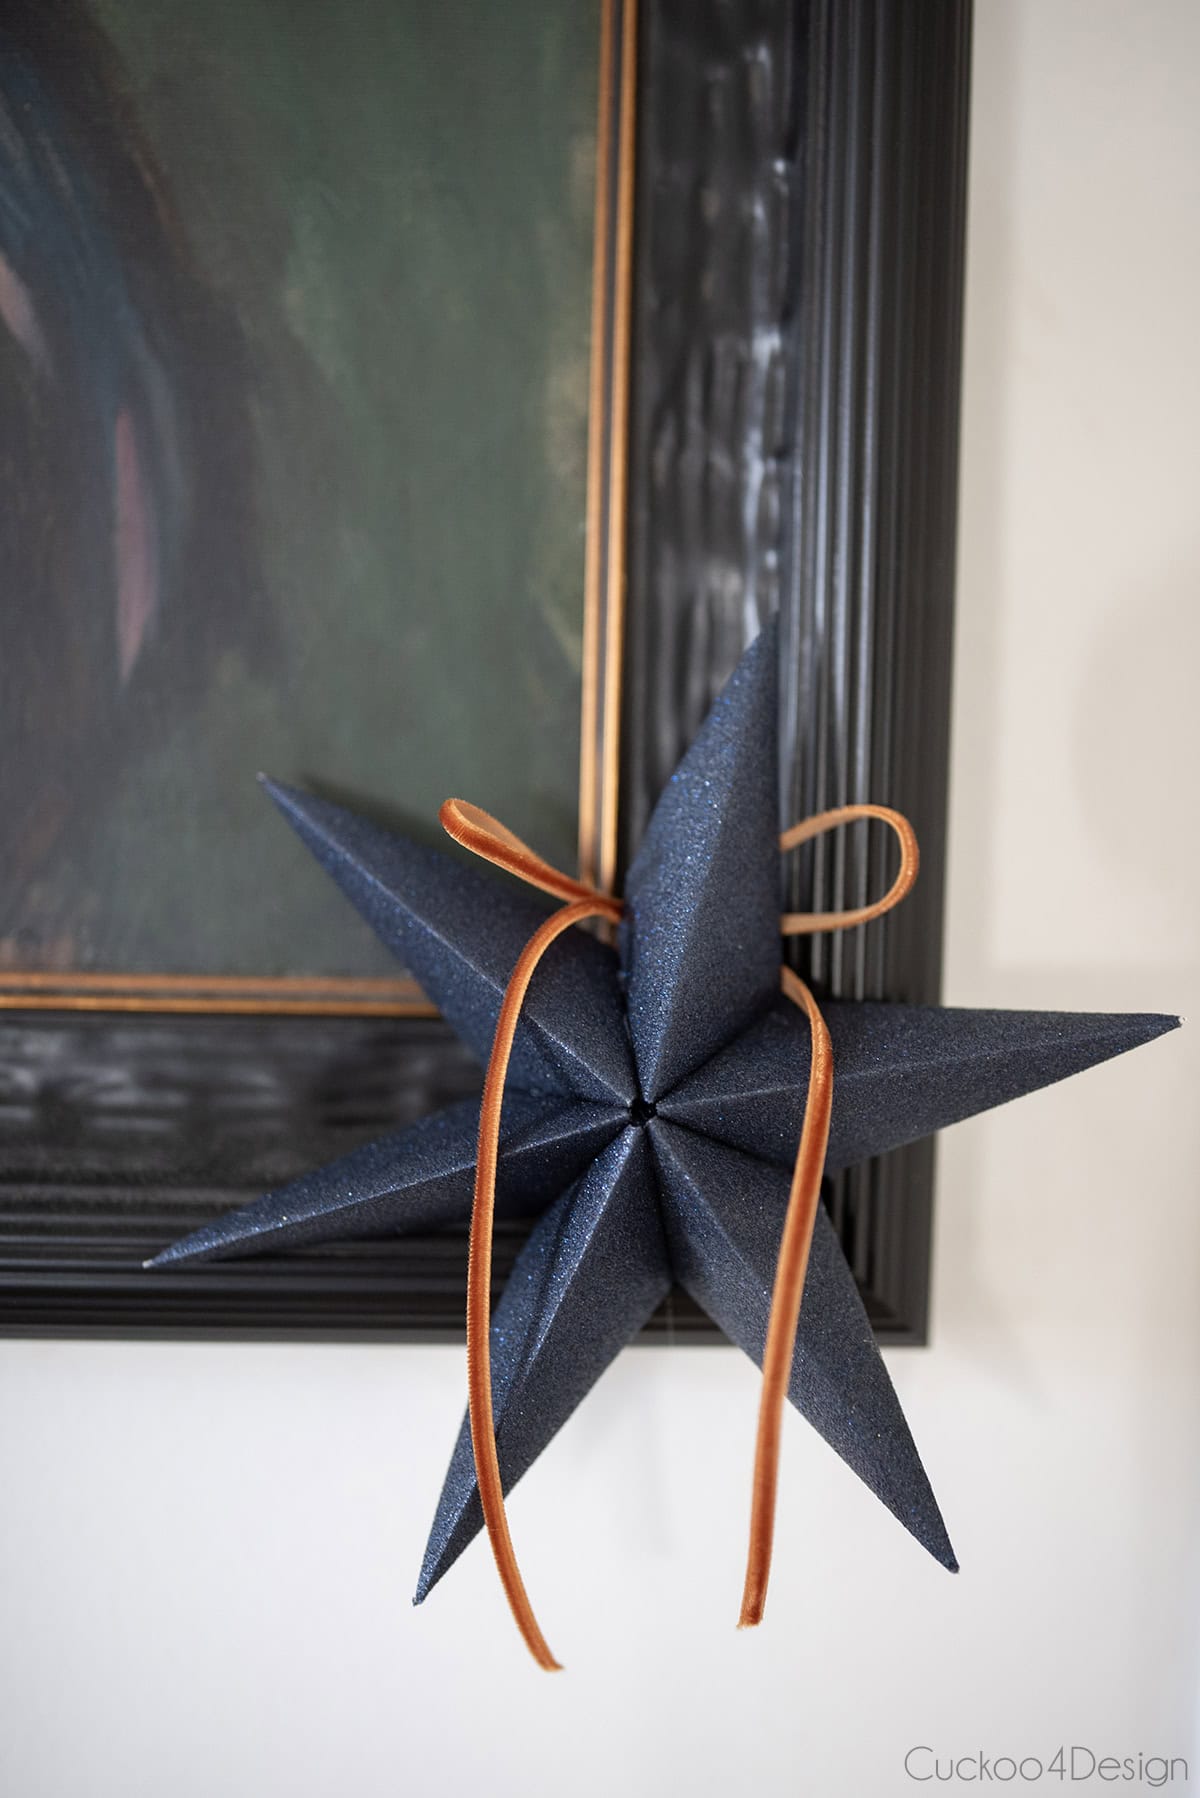
I thought it was a cute idea to decorate my great-grandmother’s portrait frame with these folded stars as well. I only got as far as making one, but I will update this post if I make more. Isn’t this a cute way to decorate artwork for the holidays?
I don’t know why, but I love decorating her portrait with different things. Remember, for Halloween, I added the macrame ghost.

I found the blue glitter gift wrap in the basement. I used it years ago when I decorated everything with jeans accessories. Yes, you heard me right! Let me give you a quick sneak peek, and you can check out the rest about how I made DIY denim ribbon that added the perfect handmade element to this blue glitter wrapping paper. I still love the look.

Here is a close-up of the same paper used for a folded paper star. I also added my favorite terracotta velvet ribbon again. And I also used that same ribbon on my DIY mushroom ornaments and my embossed tin ornaments.

One more thing, I wrote a tutorial last year about how to make a bow with thin ribbon, and that red velvet ribbon ornament looks stunning with the white stars.

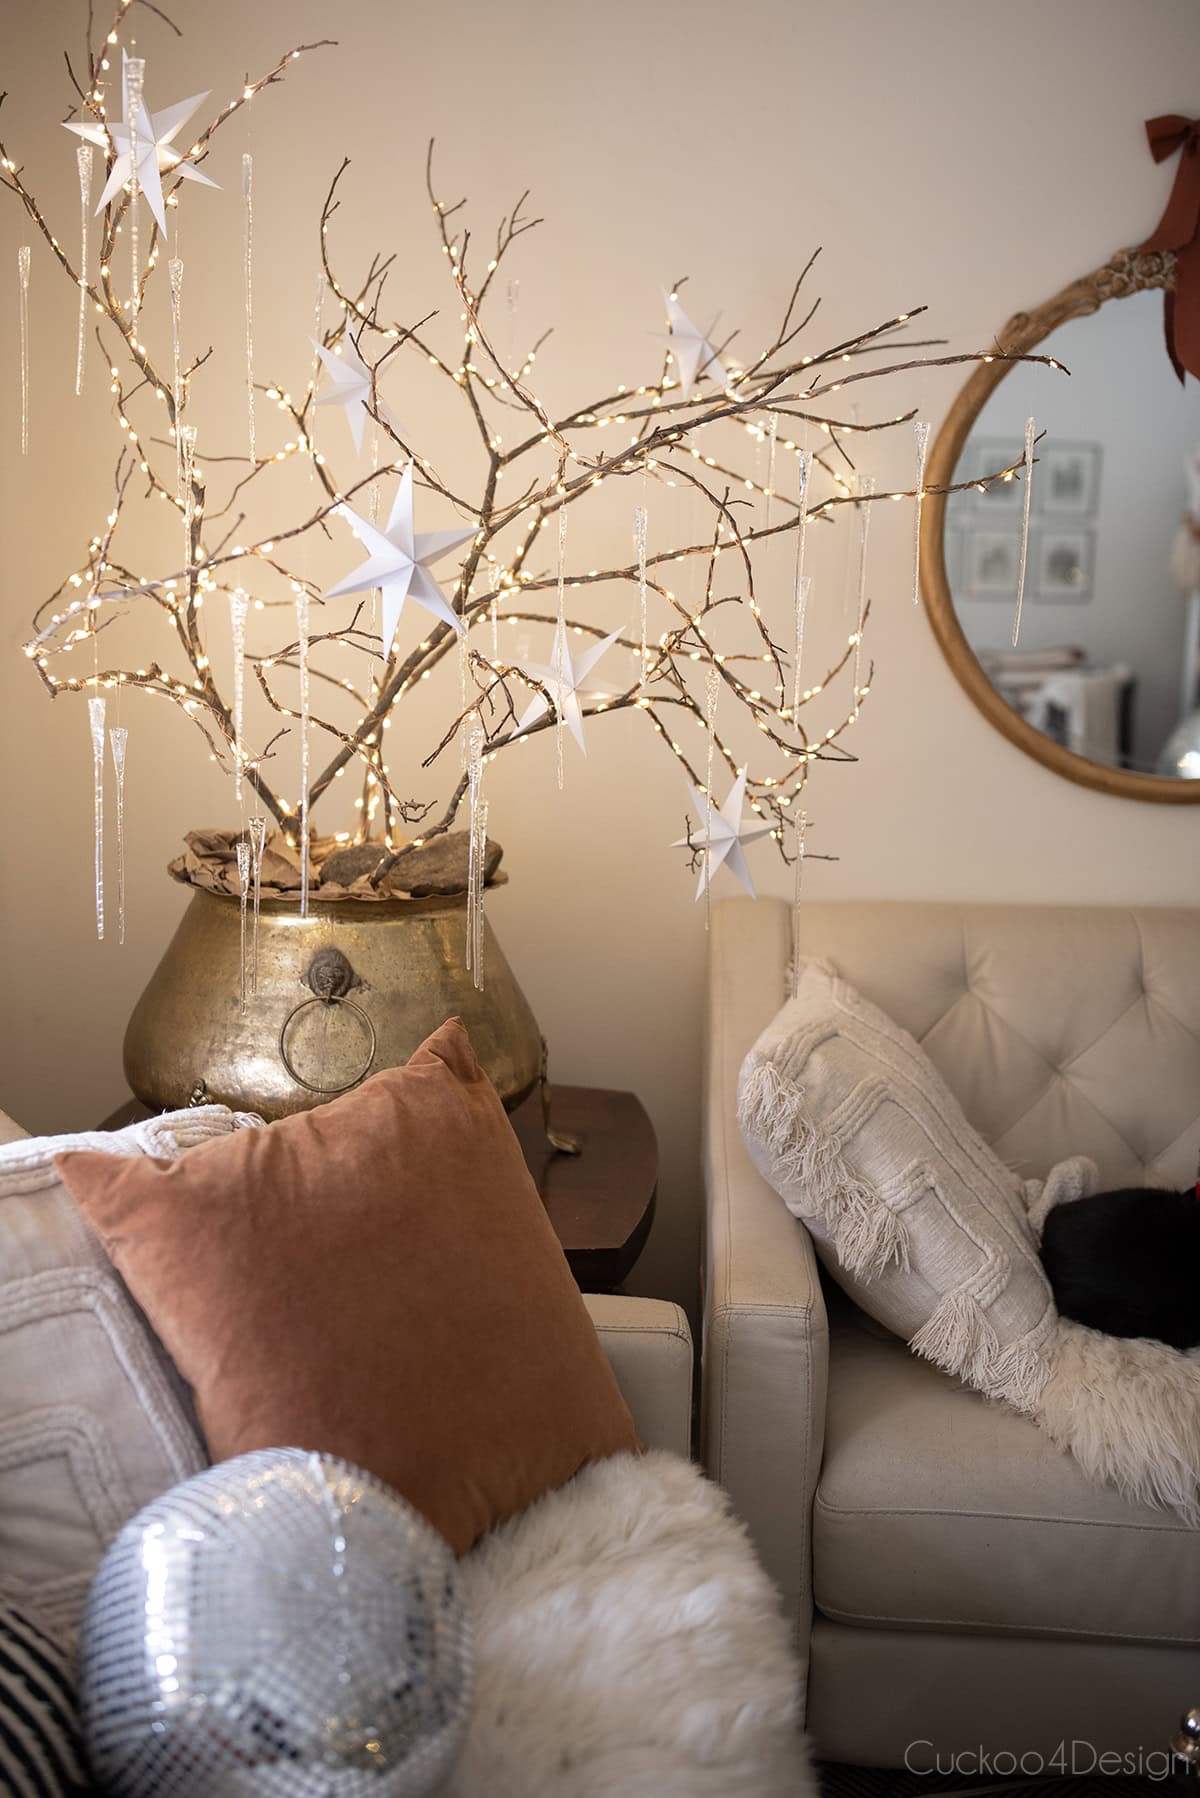
As I showed you in my last post, I kept my fairy light branches instead of adding a tree to that corner of the living room. And those branches are the main reason why I want to make today’s folded paper stars.
I know I already asked in my home tour, but… Do you get the blues after taking down all the Christmas decor after New Year’s? I definitely do, and keeping those lit branches up with the warm glow of fairy lights will help to ease the transition after. After Christmas, I plan to carry the branches into winter decor by keeping up the icicles but without the stars.

I am planning to make even more of them to add to the branches. They are the perfect crafting activity while watching a show.
FAQs
Any lightweight paper, like origami paper, printer paper, or gift wrapping paper, works best for small and regular-sized paper stars because it folds easily. Heavy paper is harder to fold.
Yes, you can make them any size, even huge folded paper stars if you use paper desk pads or large squares made from wrapping paper. When you make huge folded paper stars, it is recommended to use thicker paper or cardstock so the points hold their shape better. That is the exception when thicker paper actually works better.
You can use them for garlands, as a table centerpiece, as ornaments, gift toppers, as 4th of July decorations, or like I did to decorate a picture frame.
No, the paper can’t be painted because if it gets wet it will warp.
Tschüß,

How to Make Folded Paper Stars (5, 6, or 7+ Points)
Learn how to make folded paper stars without a template. Create 5, 6, or 7-pointed stars with this easy tutorial. Just folding and gluing!
Materials
- paper (any paper you'd like even gift wrapping paper)
- glue stick or hot glue
Tools
- scissors
Instructions
- Prepare your paper
For these folded paper stars, you need paper squares. The number of squares depends on how many points you want in your star. If you have rectangular paper like printer paper, you can fold it diagonally and then cut off the extra strip at the bottom, which results in a square piece of paper.
You need that diagonally folded center line (pictured in image 3) in the next step.
- Fold your star point
Fold your paper square inwards towards the diagonal center line on both sides, which creates a shape that looks like a kite.
Then fold the bottom up to create a triangle. (pictured in image 3) Now fold both sides of the bottom of the triangle inwards to the center line. That creates a kite shape again. (image 6)
- Gluing the inside of your star point (kite shape) and shaping it
If you are doing this project with kids, use a glue stick. I prefer the hot glue because the process is much quicker.
Open the bottom folded shape. You can see a square shape created from the folded lines. That is where you add your glue. Then you fold it closed again so the folded shape can't open again.
You should now have an oddly shaped pocket which you flatten into an uneven triangle. - Repeat the same steps to create your desired number of star points
Now repeat steps 1 through 3 until you have the number of star points that you want to have for your folded star.
I made 5-point and 6-point folded stars. Below you can see 6 folded and glued shapes.
- Assemble your folded star with glue
Flatten your star points and apply glue to the side that has a small visible triangle shape created by the folded line. Next, lay another triangular folded shape on top to glue them together. Keep repeating that until you have a stack that is glued together.
You can open that stack like a fan. Add more glue to the last little triangle shape and close the star shape.
- Add string or hooks for hanging (optional)
I used silver metal hooks because they are easy to poke through the paper and also prevent the star shape from spinning on the tree.
Notes
If you are using hot glue you only have to wait until the glue cools off to proceed to the next steps. If you are using a glue stick, you have to wait until it dries. You might need clips to hold the star shape together until it dries.
Love this – going to attempt with the four & six year old grandsons! Thanks for such a thorough tutorial, Julia?
Oh love that! Have fun!