The easiest DIY mushroom Christmas ornaments
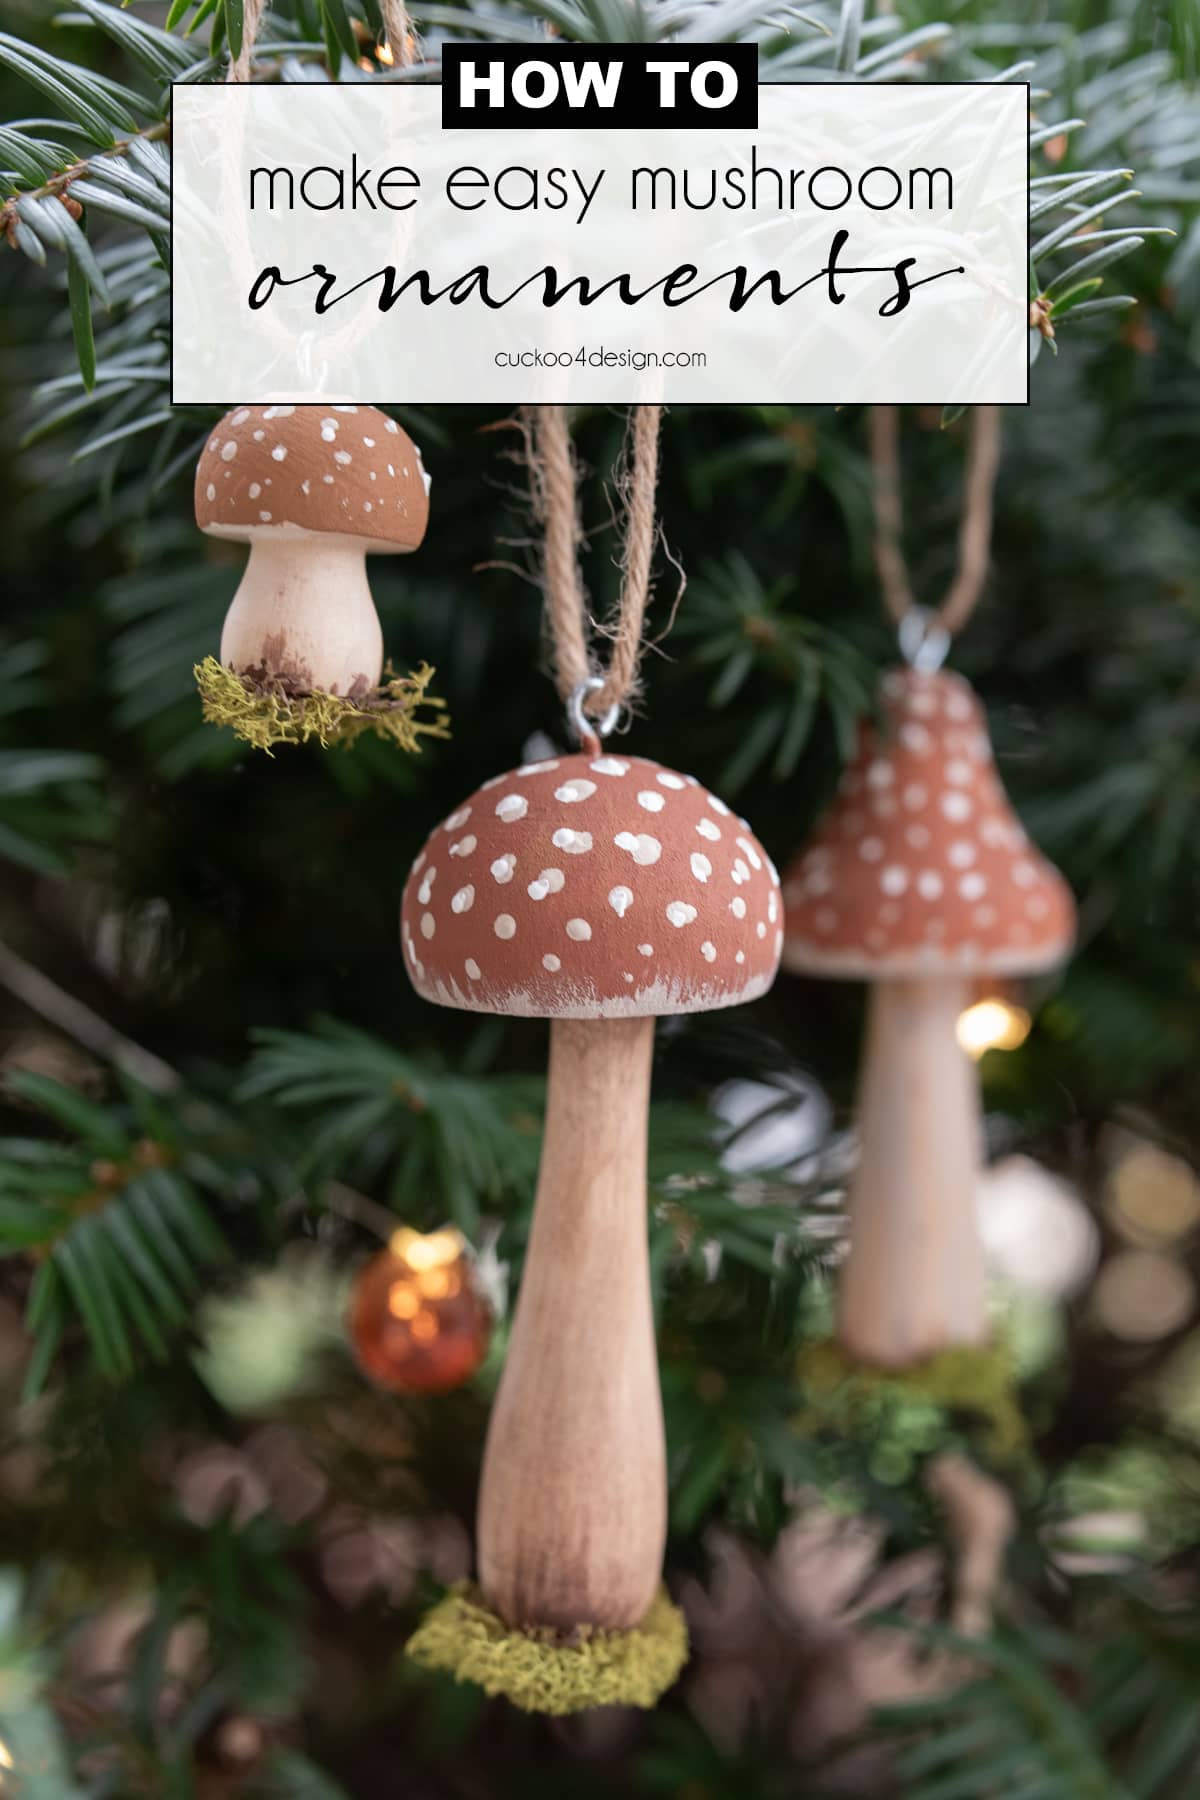
These cute DIY mushroom Christmas ornaments are easy enough even for small kids because I am using prefabricated wooden mushroom shapes and craft paint. They add a natural touch of whimsy to your Christmas tree, mantel, or even as a gift topper. I added them to several areas in my home as Christmas decor and I can’t wait to show you how to make them.
Also, did you know that mushrooms are seen as a sign of good luck and good fortune? In Germany, people keep the areas where they find their favorite mushrooms a secret because it certainly does feel like good luck when you find them. So let’s add some lucky mushrooms to our home because we all need it for the upcoming new year.

The easiest DIY mushroom Christmas ornaments
This post may contain affiliate links from which I will earn a commission at no extra cost to you. View my full disclosure policy.
I always been a big fan of mushrooms, even as a child. Not only to eat them but the way they look. When I’m home in Germany, I always have to make sure that I get to eat my favorite porcini and chanterelle dishes. Honestly, I’ve been wanting to make mushroom ornaments for a couple of years already but most tutorials require you to DIY the shape of them with paper, felt, clay, air dry clay, or other materials. Those different ways always sounded a bit more work than I wanted to put into it, plus by the time you buy all the craft supplies, they would be pretty expensive too.
So when I found these affordable prefabricated wooden shapes on Amazon, I knew I could quickly make some mushroom ornaments for an affordable price. I love how these turned out!
Plus this project reminds me of when I was little and used to paint wooden angel shapes as ornaments to hang on the tree with my mom. I still have some of them.
Supply list needed for making DIY mushroom ornaments
- wooden mushrooms
- ribbon, jute yarn, or other twine
- scissors
- preserved reindeer moss (optional)
- acrylic paint (this paint set has great colors to use for this project so you don’t need to mix the colors, only add brown to it – or simply this paint for the caps, white, ivory, and brown)
- baking soda (optional)
- craft brushes
- micro drill
- small eye hooks (I used the smallest that I could find which were #216 1/2 x 1/2 inch)
- hot glue and hot glue gun
- dotting tools (or something like toothpicks or the tip of a pen)

Video tutorial
Some of you might not want to read a long tutorial. So it’s always good to have a video tutorial. You can also watch and follow me on my YouTube Channel for more videos or in case the video doesn’t load here on my blog.
Full tutorial
Before I got started I looked at some inspiration on Pinterest. There are many great photos of mushrooms. I wanted to stay within a color range that matched my decor. A fully red cap with dots (fly agaric – Amanita muscaria) was just too much. There are some toadstools and panther cap mushrooms that have a more tan/orange-brown color with dots and that’s the direction I wanted to head in. A lot of my throw pillows have that color, especially in the dining room.
The fly agaric amanita muscaria) is called “Fliegenpilz” in German, also called a “Glückspilz” which means lucky mushroom in German.
Step 1: Paint the mushroom caps a solid color
In one bowl I mix orange, tan, white, and a bit of brown with some baking soda (optional) for some added texture to get a burnt orange color. And in another bowl, mix red, brown, orange, and light tan for a burnt red/brown color. You don’t have to do two bowls and can just pick one mixed color (or buy a premixed color of your choice).
Use a regular craft paintbrush to paint the mushroom caps with those colors. Sometimes overlapping them and always making sure it’s random strokes. Let the caps dry.

Step 2: Paint the mushroom cap edge
An angled small craft paintbrush works really well to add a feathered pattern to the bottom of the mushroom caps with ivory acrylic craft paint. You can wipe any excess paint on a paper towel if needed so it doesn’t get too thick.

Step 3: Add dots to the cap
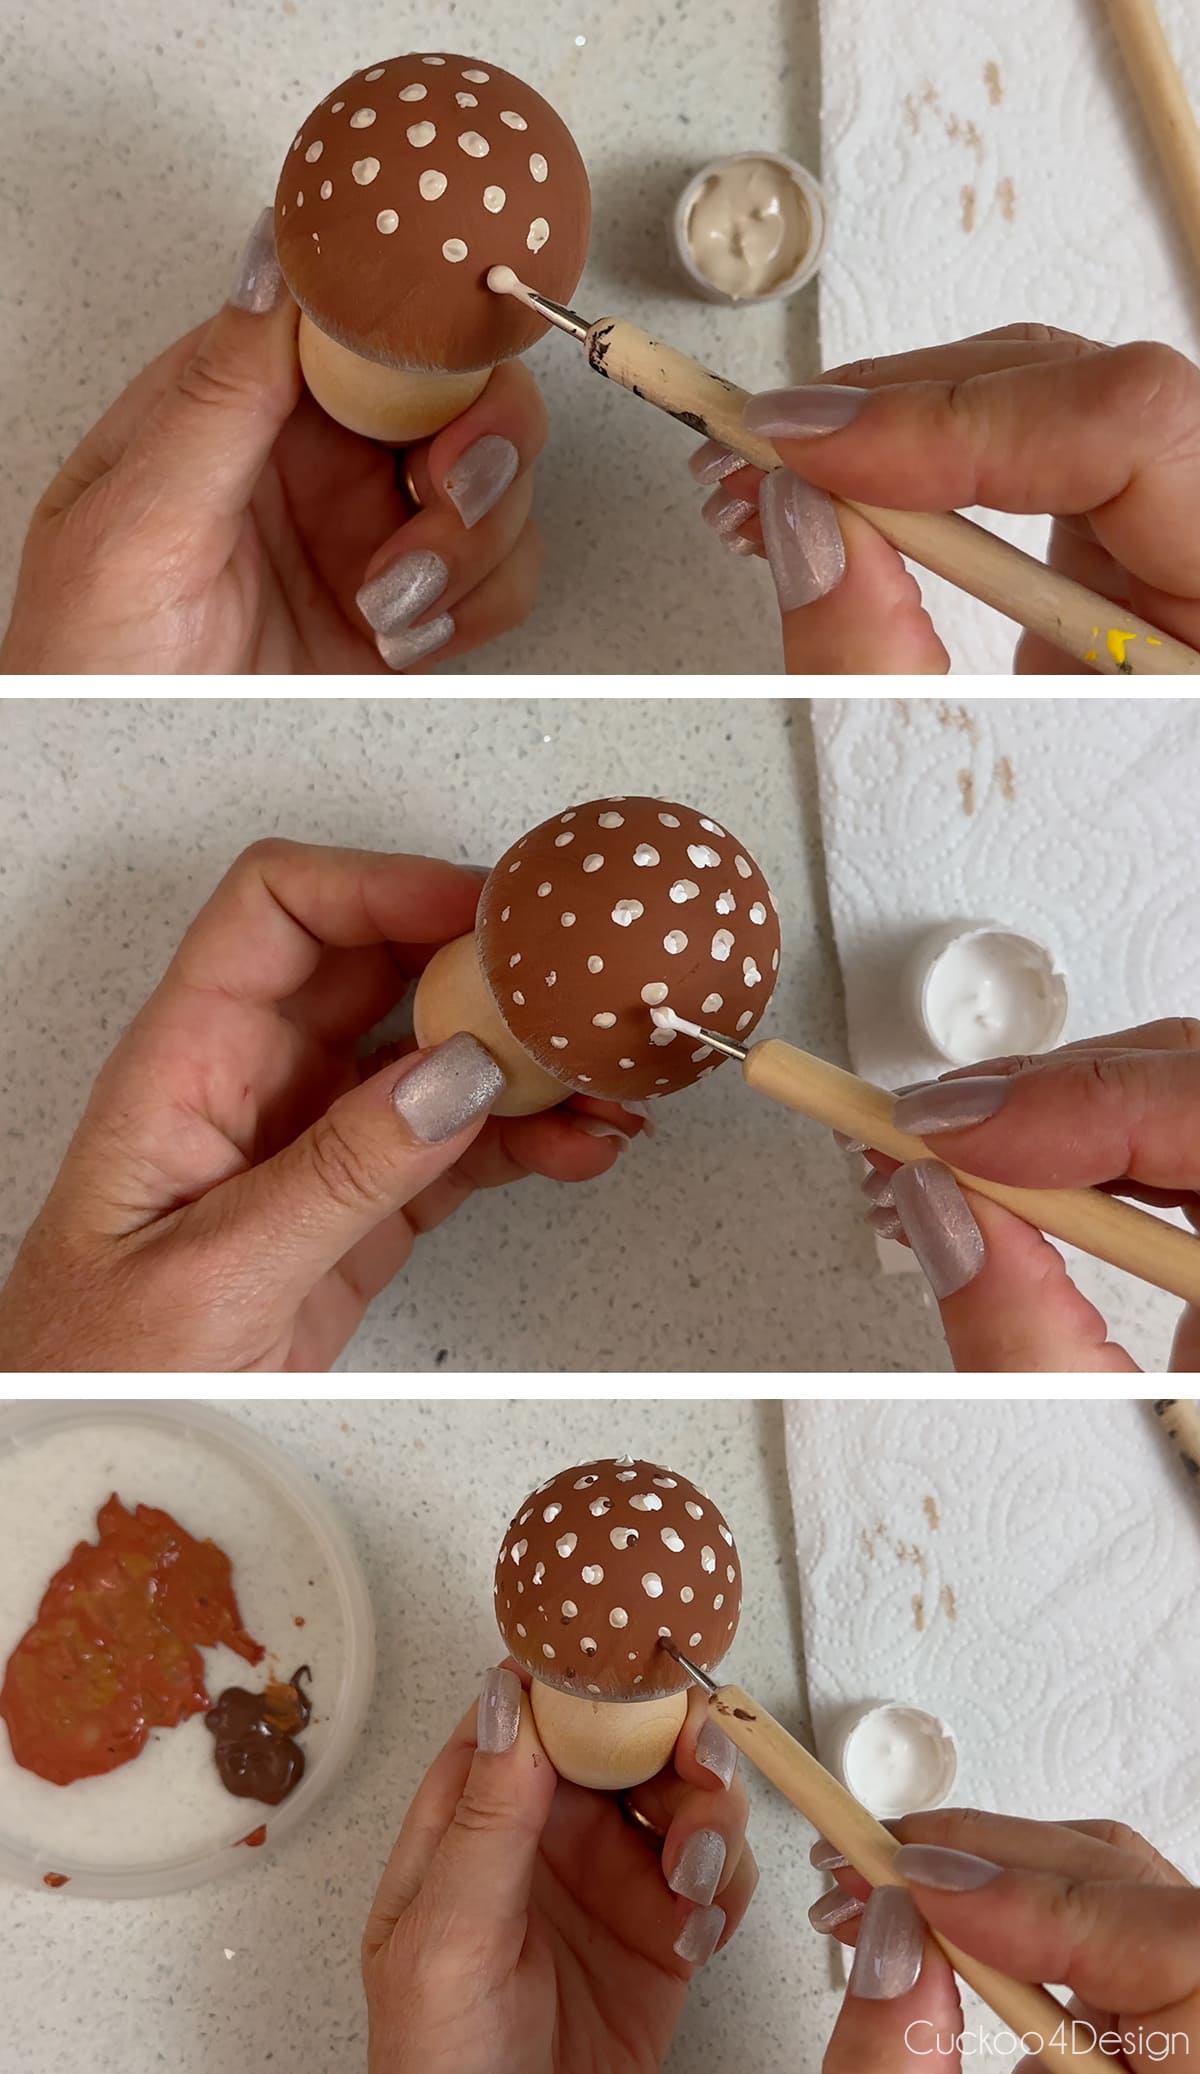
Start with the ivory acrylic craft paint (420 Linen Toile by Folk Art) to add dots to each cap of the mushroom. Simply dip a medium-sized dotting tool into the craft paint and then onto the cap. (I like having larger dots at the top of the mushroom that then get smaller towards the bottom of the cap.)
Then dip the dotting tool into white paint and add some white dots slightly off-centered to the ivory dots while overlapping. They are uneven and random polka dots.
On some of the mushrooms, you can add tiny brown dots to some of the white/ivory dots. But not to all of them.
TIP: We have the dotting tools left from my Ukrainian easter egg designs tutorial and from doing nails. If you don’t have a dotting tool, you can just use a toothpick, a small paintbrush, the other end of a paintbrush, a bobby pin tip, a paper clip tip, the tip of a pen, or anything else you could think of. Just to give you some ideas.
Step 4: Hot glue moss to the mushroom stem (optional)
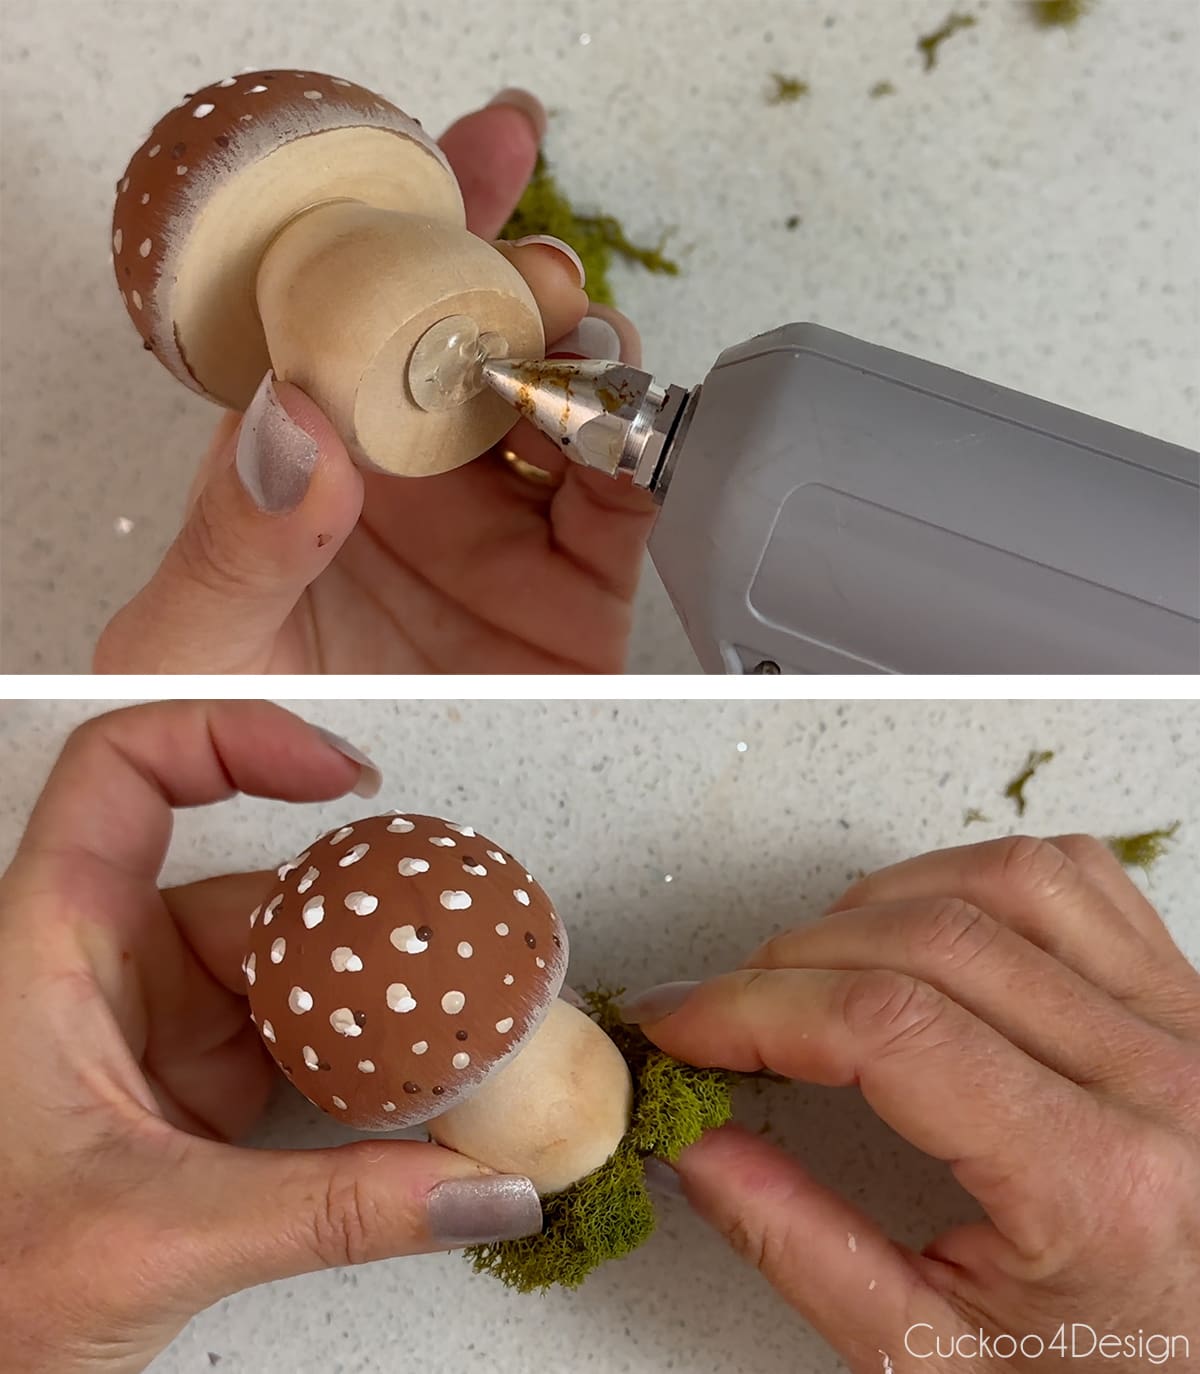
Add a generous amount of hot glue to the bottom of the mushroom stem and then firmly press the stem onto a piece of moss. My kitchen countertop was perfect for that part of the project since the hot glue doesn’t adhere to the stone. You could use a ceramic plate as well.
Step 5: Paint the stem base
Paint the bottom of the stem with dark brown paint starting right where the moss is and blend it upwards with more watered-down brown paint and a small broad craft brush. You can blend in some ivory paint too. (You can paint the mushroom stem before adding the moss, it doesn’t matter)
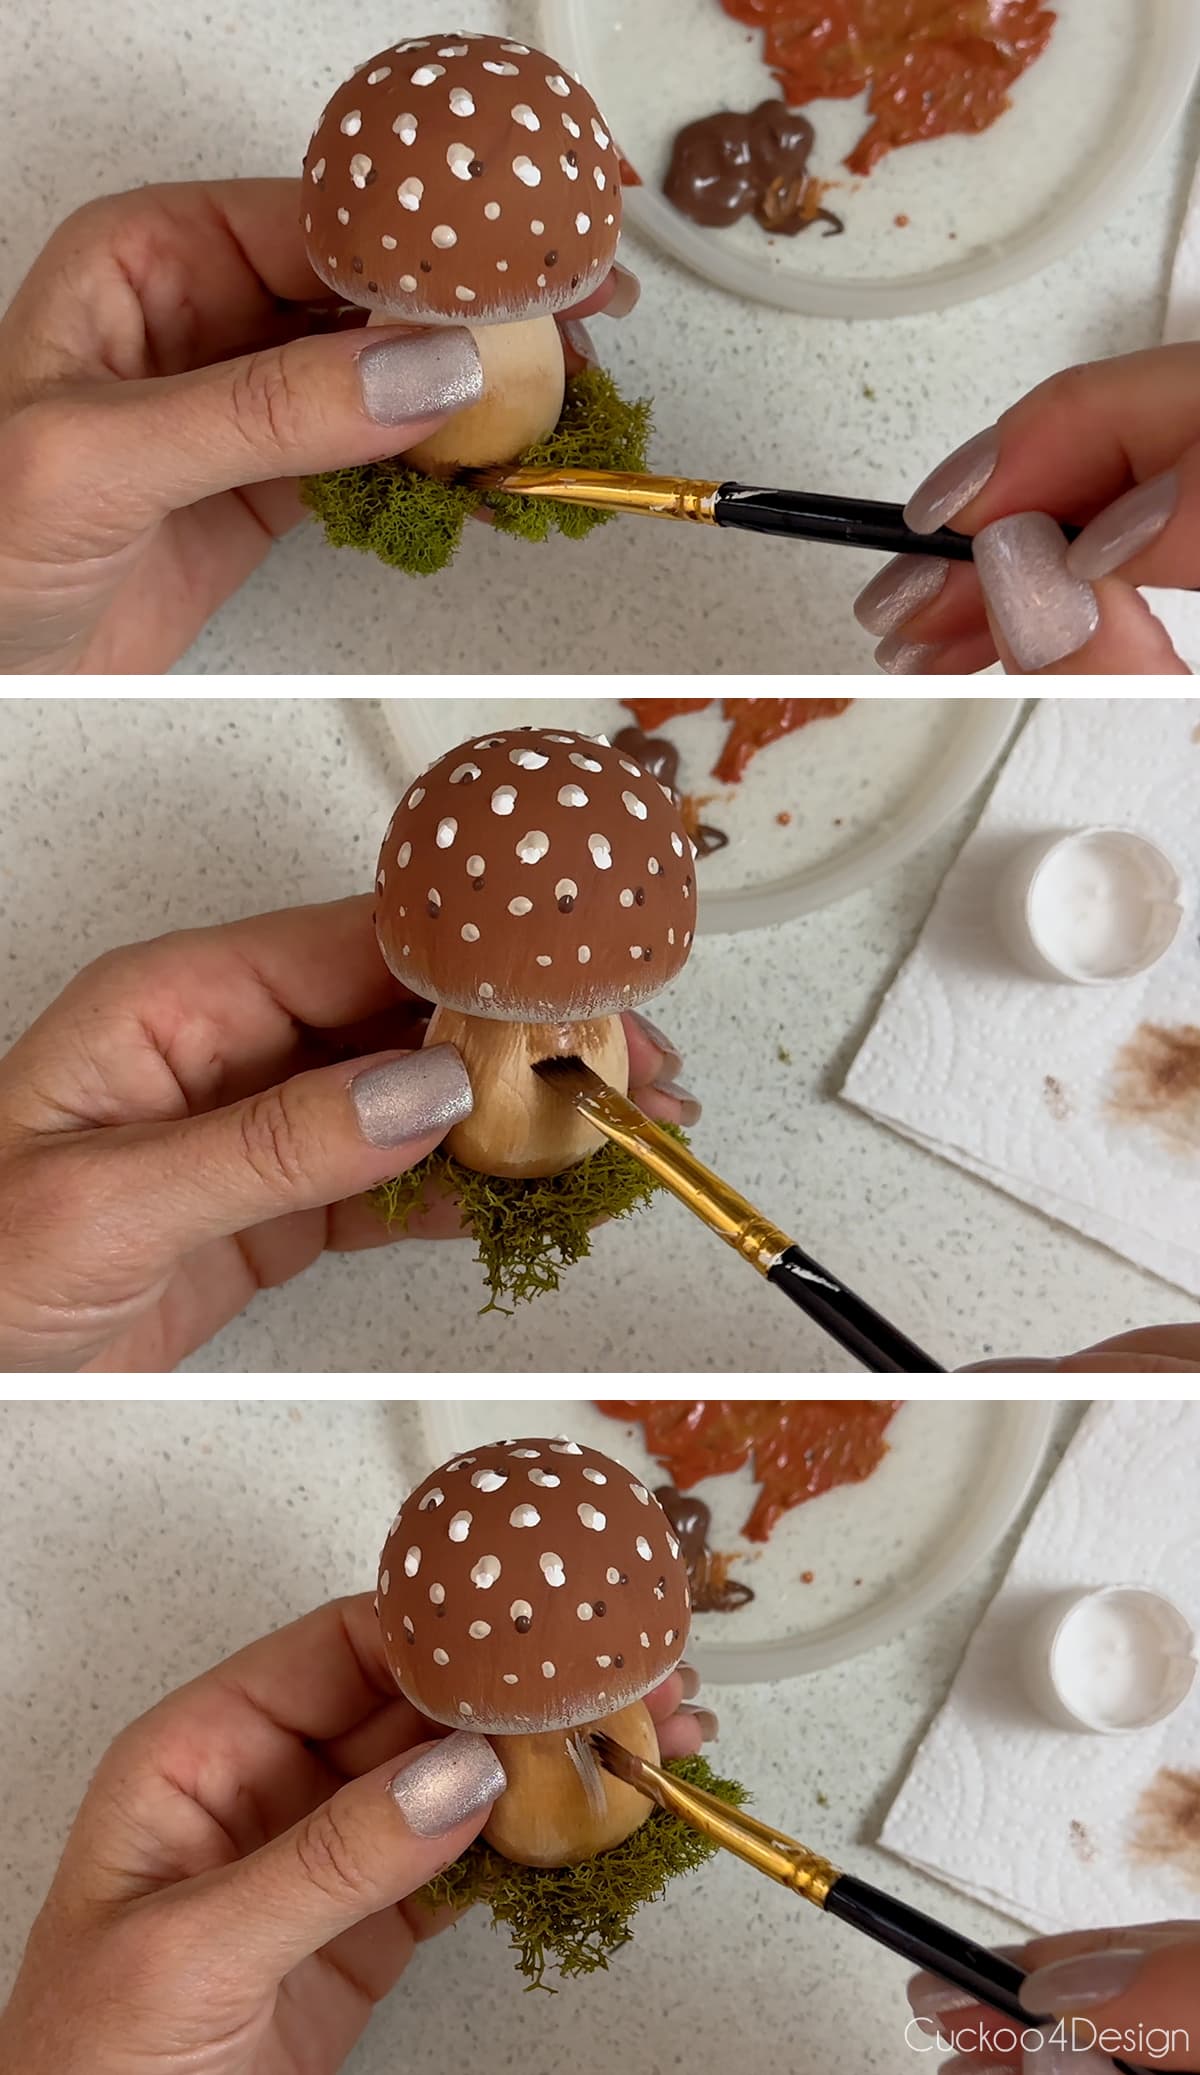
TIP: You can get very detailed with the way you paint the mushroom pattern or you can just leave it pretty simple. I think both look pretty.
Step 6: Screw hooks into the top of the mushrooms
Use the micro hand drill to start a tiny hole at the top of the mushroom cap. Then screw the eye hook all the way into the cap. If you have trouble grabbing the tiny eye hook then you can use something like the dotting tool inserted into the hook to help spin it.

Step 7: Add ribbon or twine to the hook
Cut a piece of ribbon or twine. Thread the piece through the eye hook. Loop and knot it for hanging. I like adding a bow to the top.
Or you can use the mushrooms without hook and ribbon as Christmas table decor or other holiday decor vignettes.
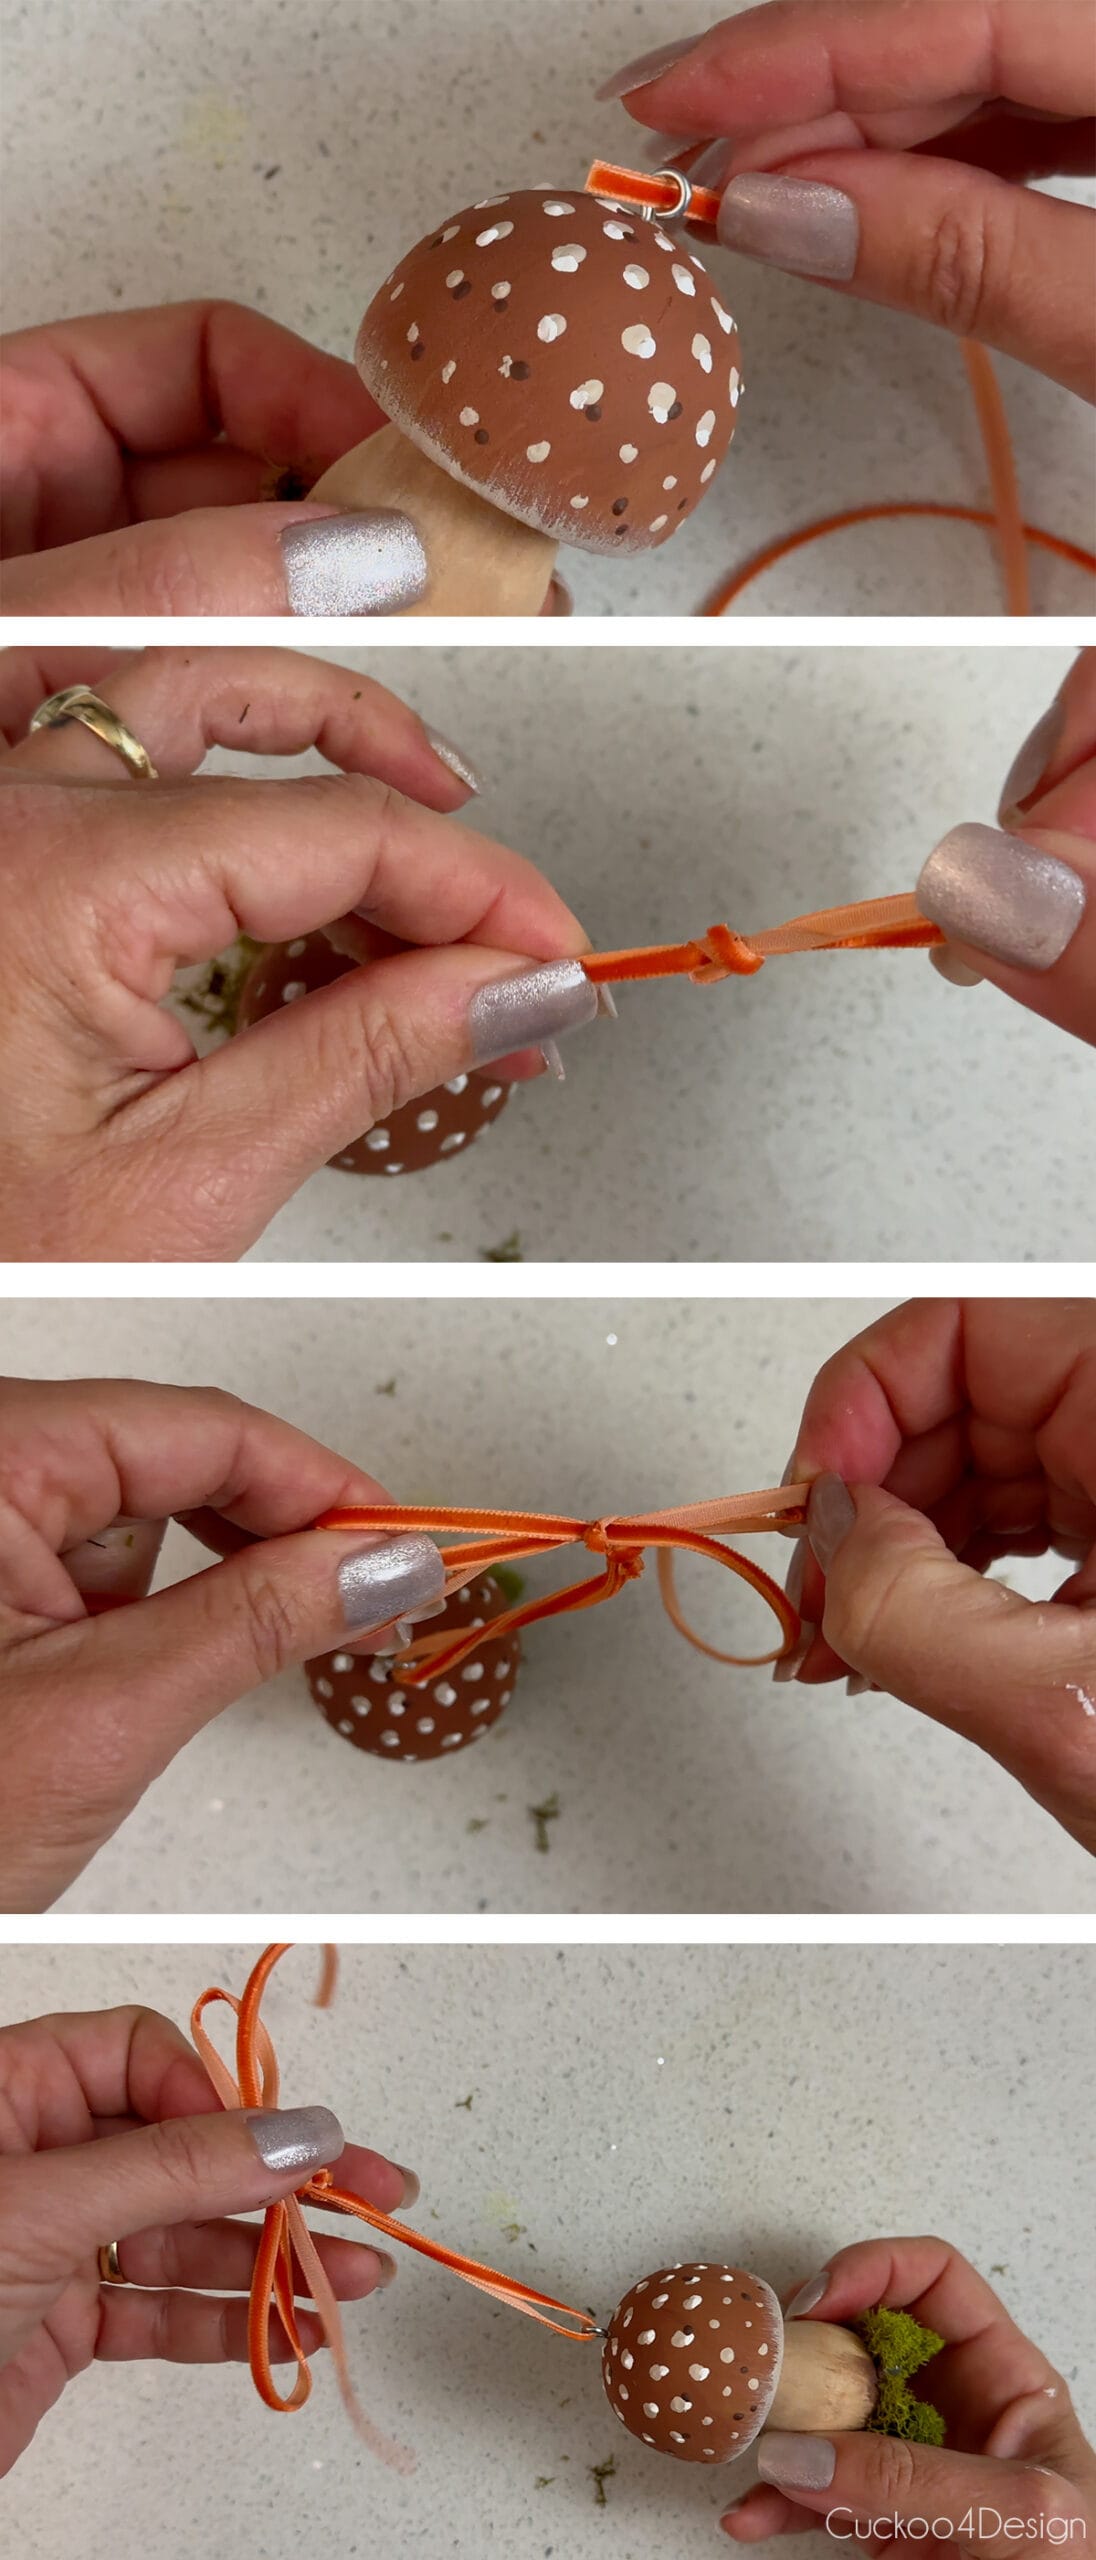
The wooden mushrooms would look great without any paint too and you could skip the painting and just add the eye hooks and ribbon.
Finished mushroom ornaments
In my recent Holiday Housewalk where I shared our new sparse artificial Christmas tree, I also showed the below view of my new antique dough bowl. I knew that bowl could use some mushrooms too.
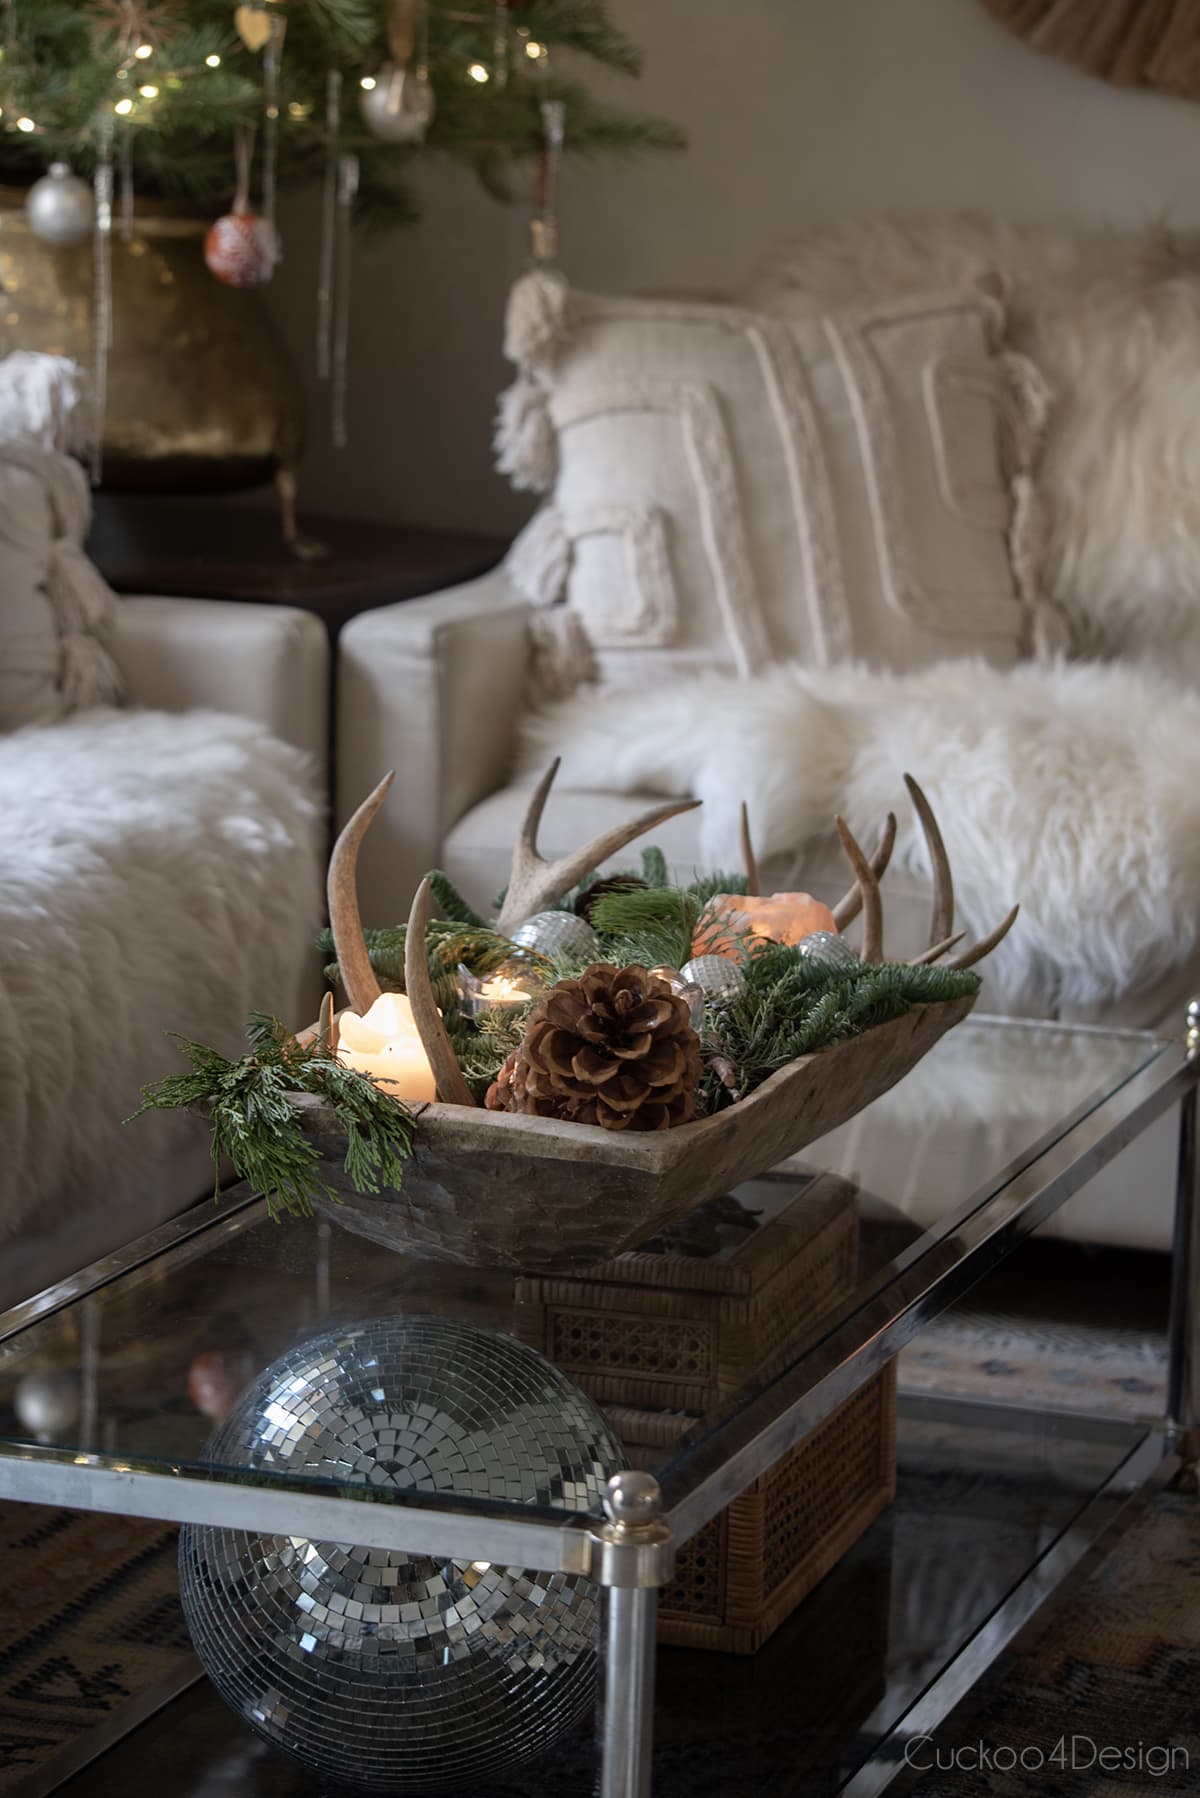
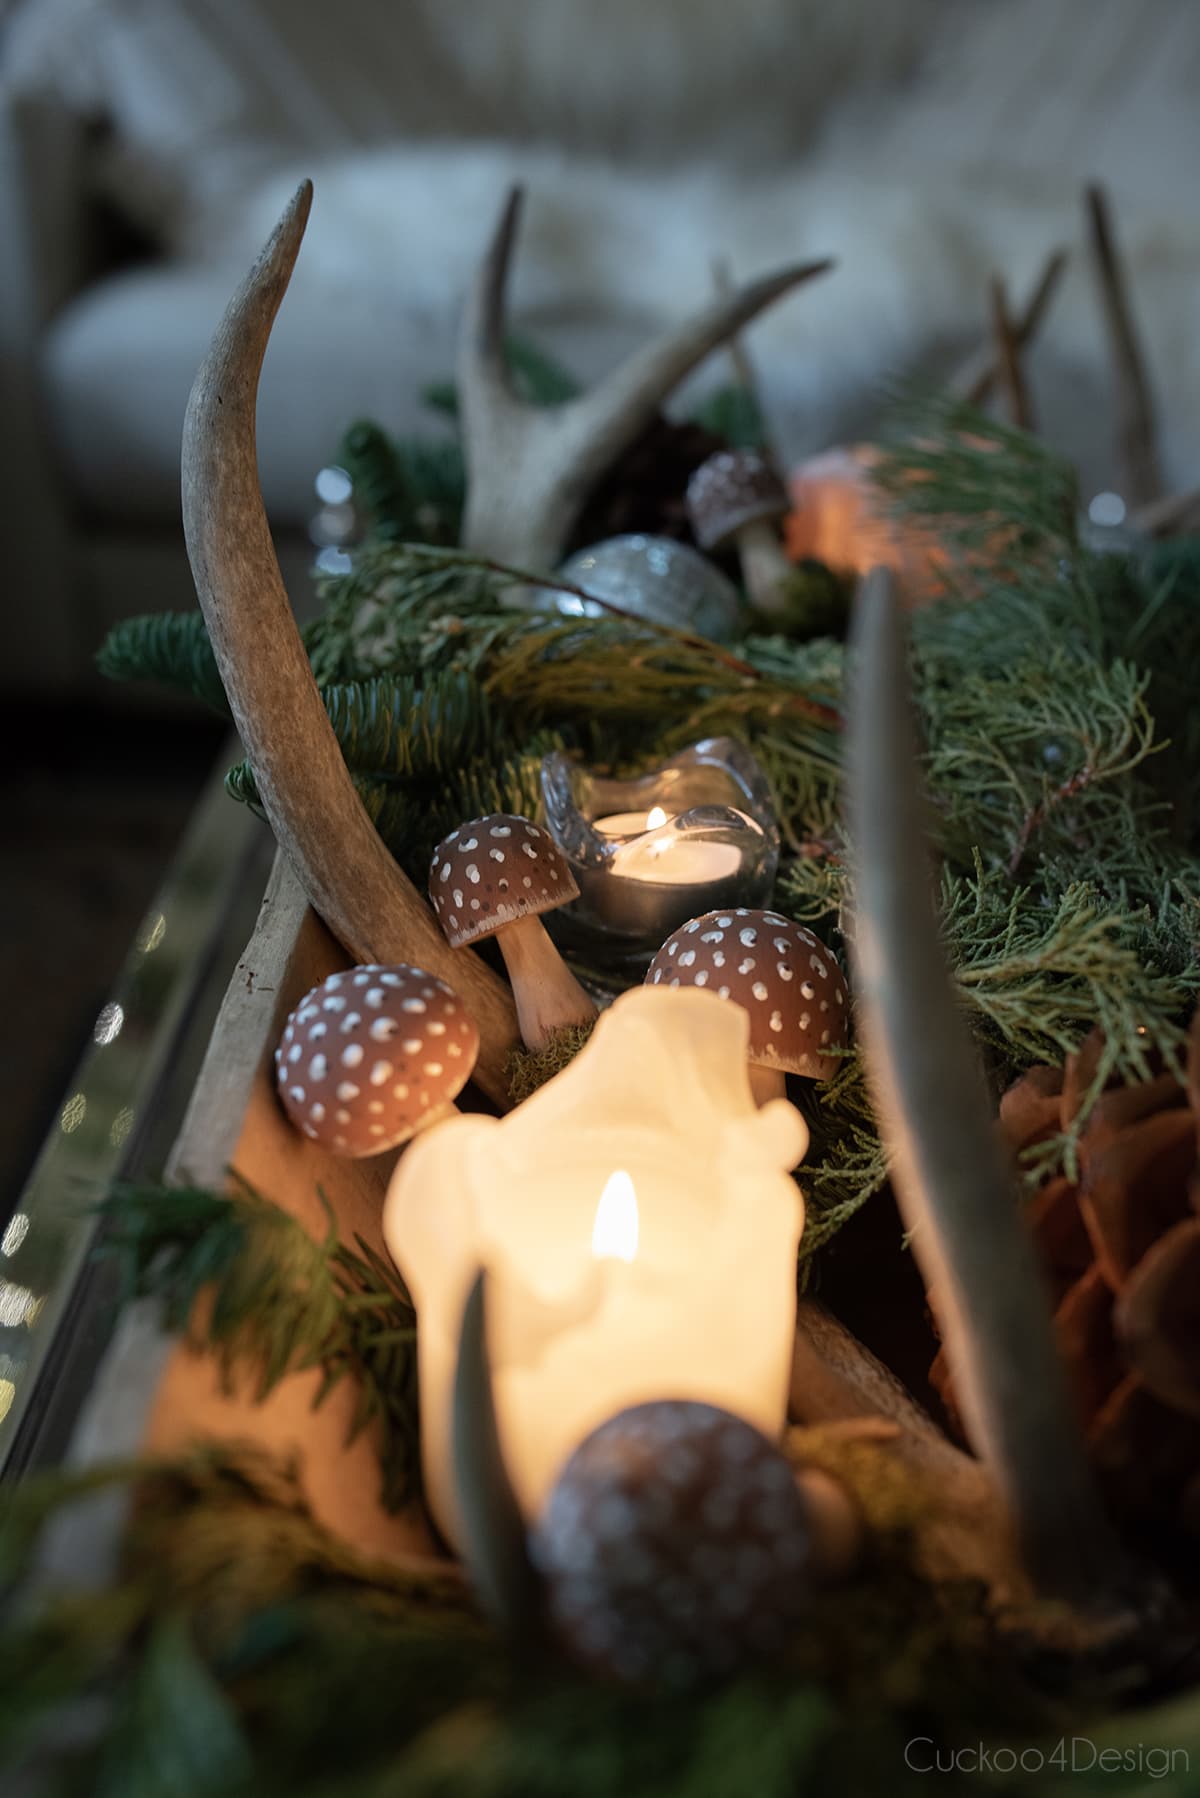
Without the eye hooks, the mushrooms are perfect for the bowl. They are the perfect touch of whimsy and it’s almost like a little fairy garden.

RELATED: You might also like more of my coffee table Christmas decor ideas and tips. Or of my decorations for the coffee table in our living room.

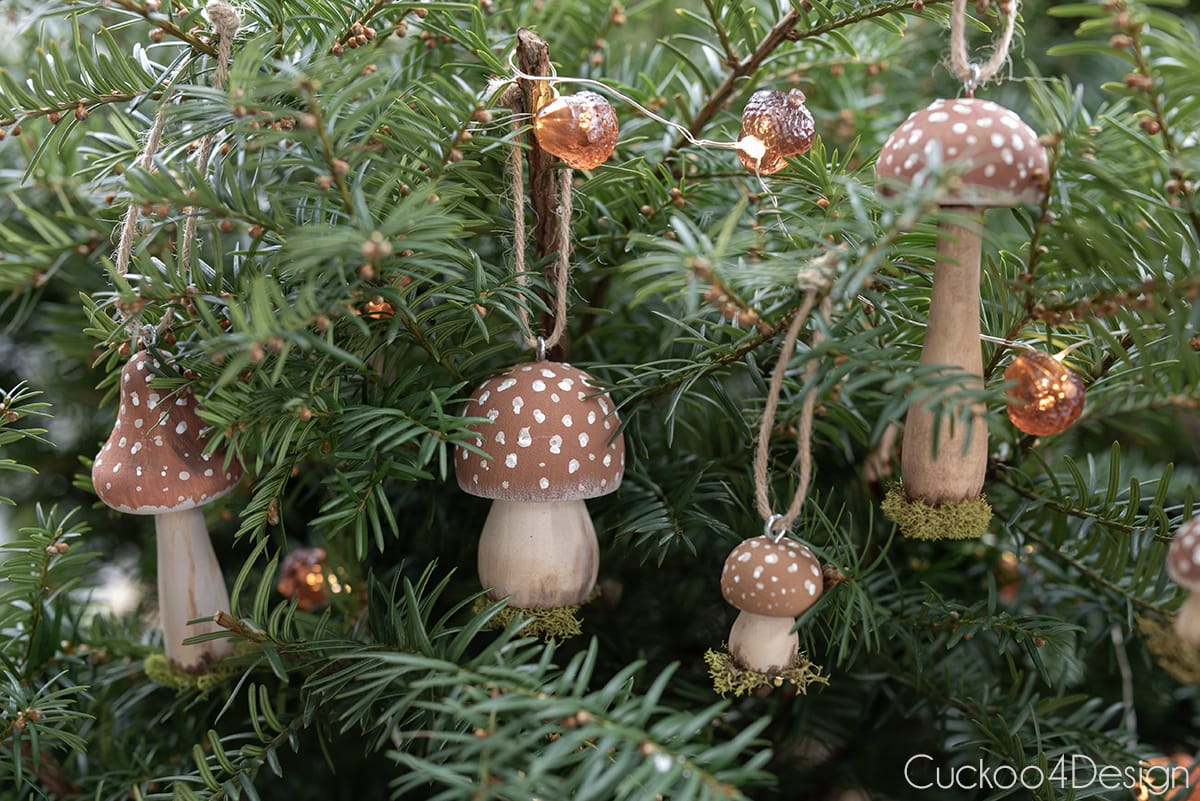
Below are the mushroom ornaments with jute yarn and acorn fairy lights. I need to take a photo of those lights in the dark.


It snowed! And I had to run outside and take a photo of them again.
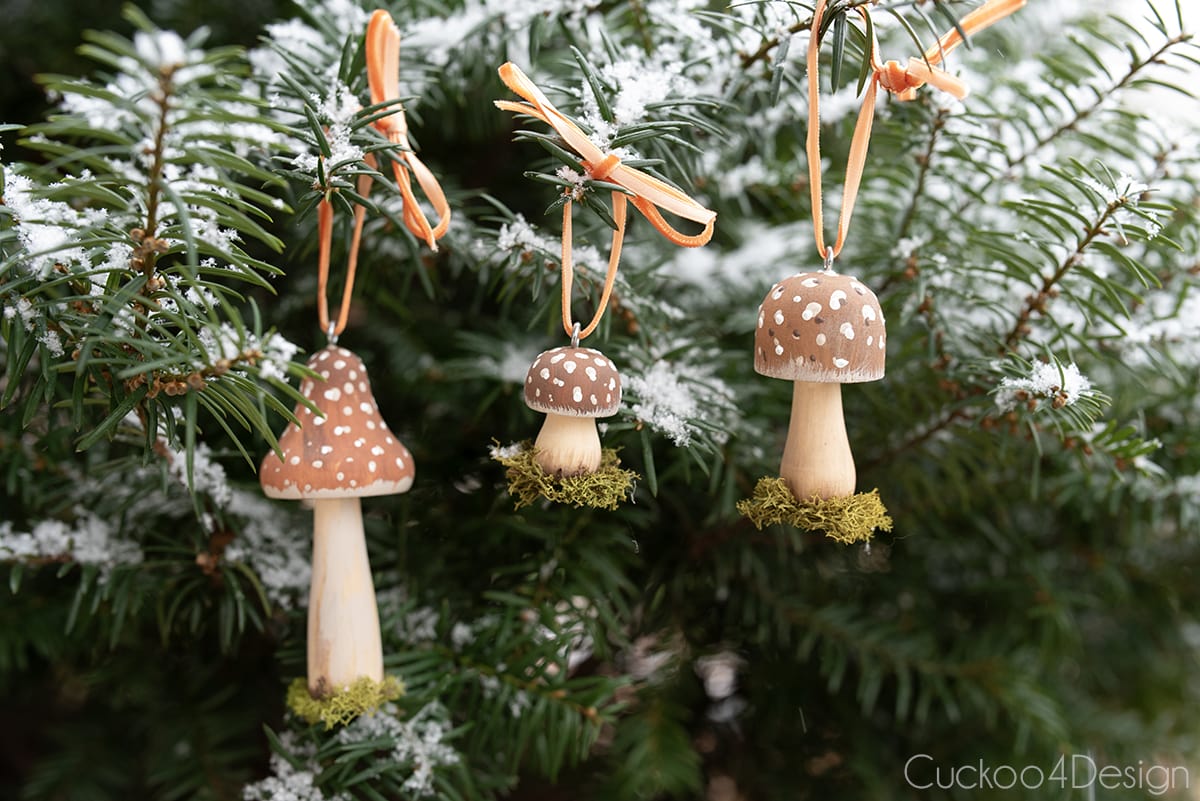

The velvet ribbon with a bow on top above pictured and below in my tree is a nice change versus the jute yarn. I had already used jute yarn for my faux burnished pottery Christmas ornaments and this is the perfect way to switch it up a bit.

RELATED: You might also like the lunch bag snowflakes with added gingerbread detail that are pictured above. Very easy to make as well.


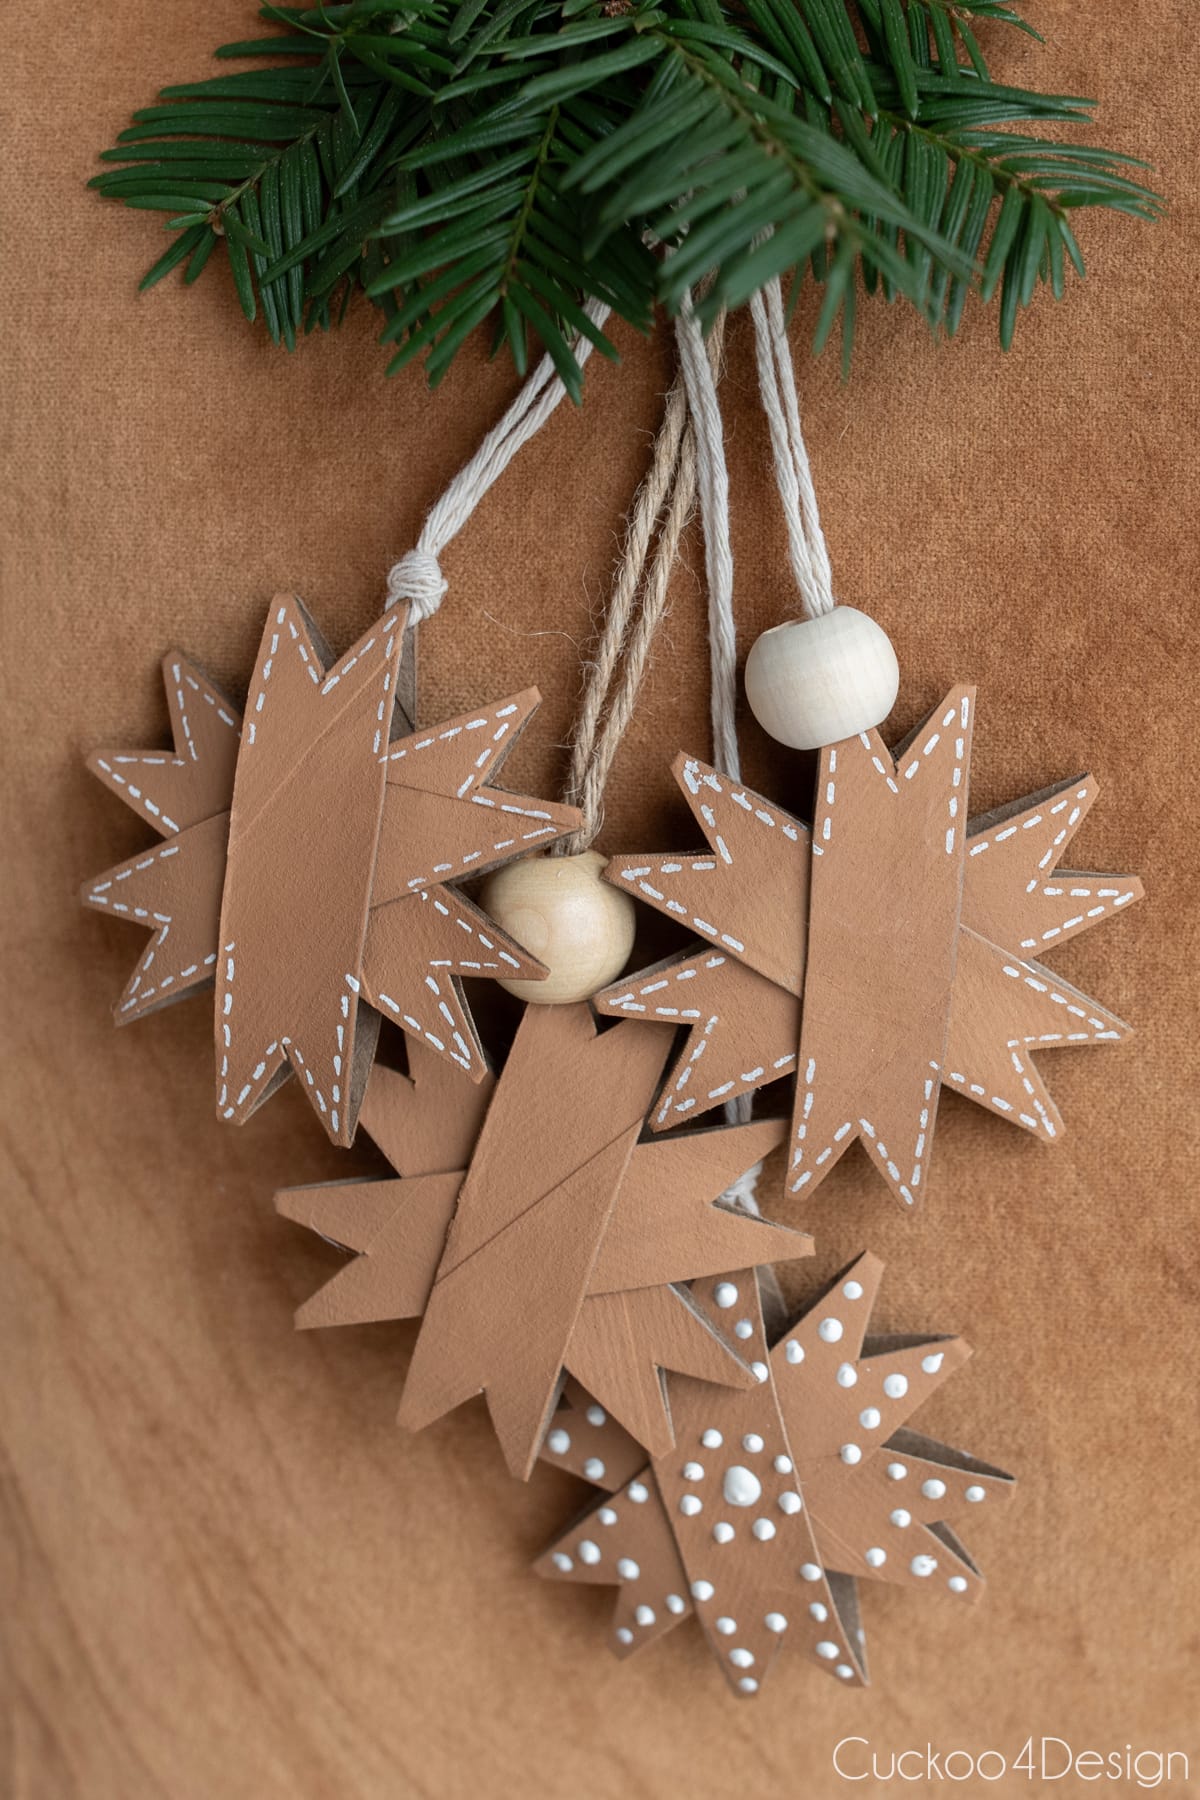
I used the same mixed paint to make toilet paper roll stars to match my favorite velvet pillows that you can see in the above photo on my dining room settee.
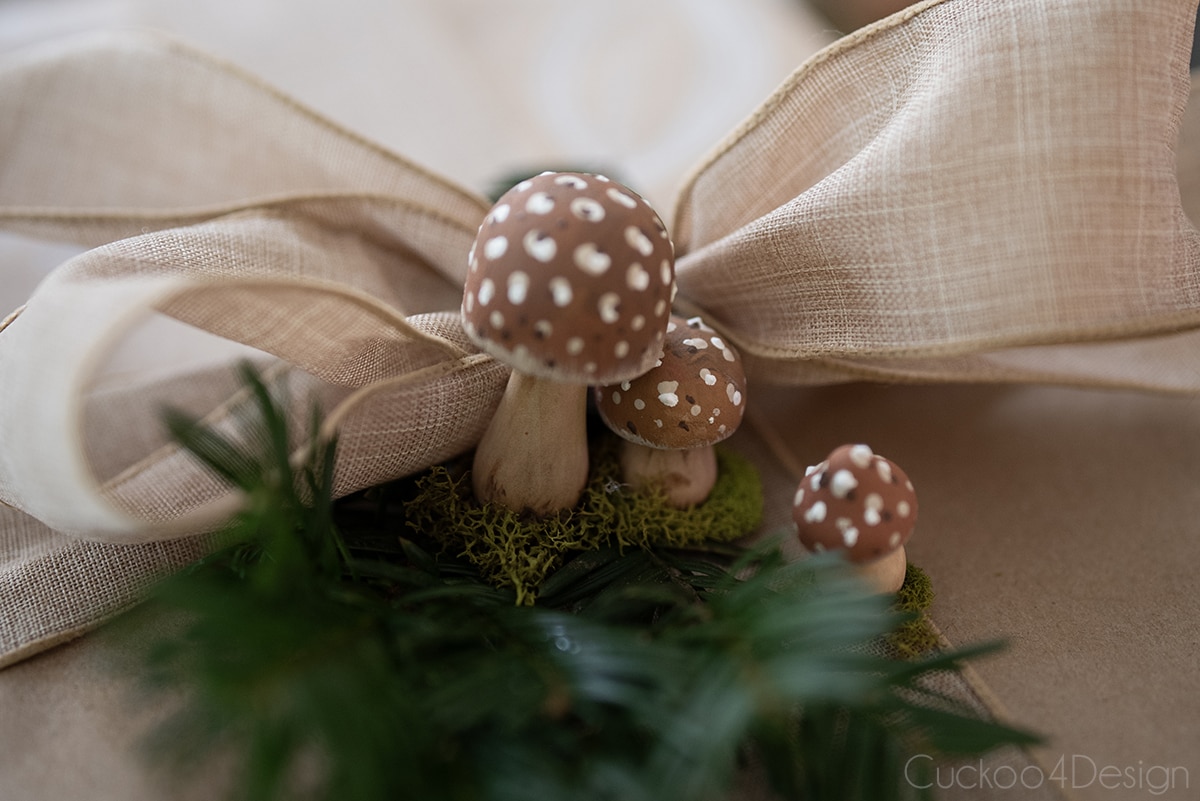
These Christmas mushrooms also make perfect gifts or you can see them below as a present topper. So cute!

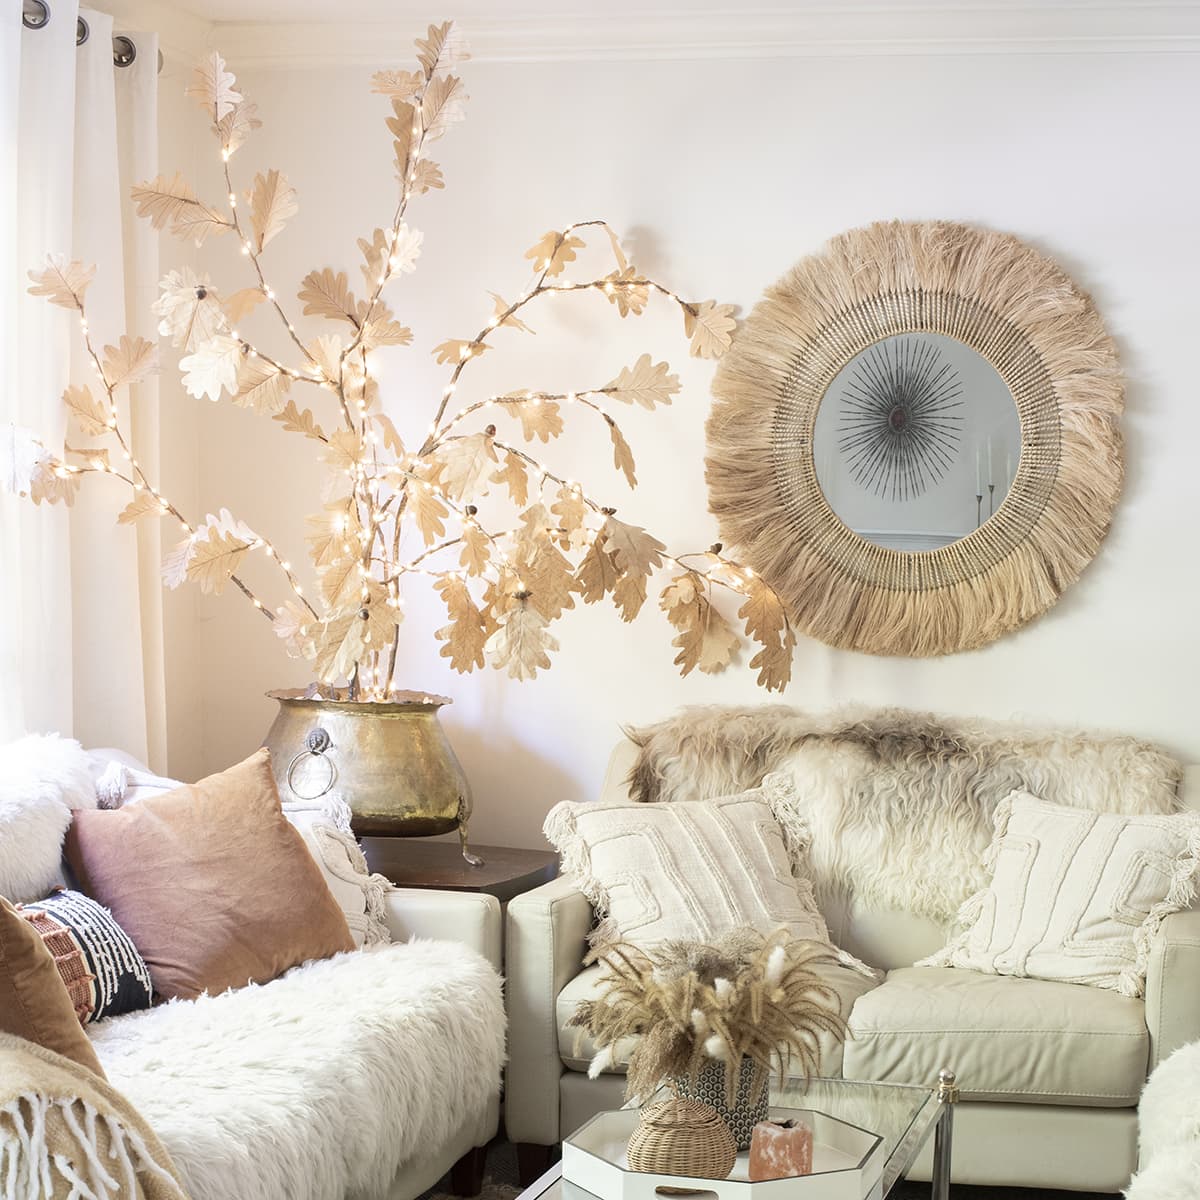
These mushroom ornaments aren’t just for Christmas. They would look cute on my paper fall leaves that I glued to branches this past fall and that’s where I will try them next fall.
Where to buy mushroom Christmas ornaments
If you don’t like to DIY then I always include options on where to find similar products. I found several mushroom Christmas ornaments that I love and would add to my Christmas home decor in a heartbeat. Aren’t these all super cute? They all use different materials from felt mushrooms to velvet mushrooms, to clay mushrooms.
More Christmas tree ornaments
I love making my own ornaments because they are so much more affordable and I like to craft. Let me show you what other tutorials I came up with in case you are interested.
- How about making crafts with toilet paper rolls or paper towel rolls? I love these cute and free toilet paper roll snowflakes that I made last year.
- Last week I made lacy doily snowflakes which can also be used as ornaments if you use smaller doilies for the project.
- For my tree this year I also made DIY mexican christmas ornaments that look like faux burnished pottery with a unique white folk art design.
- I also added traditional homemade beeswax ornaments to that same tree this year. They have such a pretty glow with the added fairy light.
- Or turn all your Amazon cardboard boxes around the holiday season into gingerbread ornaments with the help of some free templates and white puff paint.


Happy Holidays,


How to make easy mushroom Christmas ornaments
These cute DIY mushroom Christmas ornaments are easy enough even for small kids because I am only using wooden mushroom shapes and craft paint.
Instructions
- In one bowl I mix orange, tan, white, and a bit of brown with some baking soda (optional) for some added texture to get a burnt orange color. And in another bowl, mix red, brown, orange, and light tan for a burnt red/brown color. You don't have to do two bowls and can just pick one mixed color (or buy a premixed color of your choice).
Use a regular craft paintbrush to paint the mushroom caps with those colors. Sometimes overlapping them and always making sure it's random strokes. Let the caps dry. - An angled small craft paintbrush works really well to add a feathered pattern to the bottom of the mushroom caps with ivory acrylic craft paint. You can wipe any excess paint on a paper towel if needed so it doesn't get too thick.
- Start with the ivory acrylic craft paint (420 Linen Toile by Folk Art) to add dots to each cap of the mushroom. Simply dip a medium-sized dotting tool into the craft paint and then onto the cap. (I like having larger dots at the top of the mushroom that then get smaller towards the bottom of the cap.)
Then dip the dotting tool into white paint and add some white dots slightly off-centered to the ivory dots while overlapping. They are uneven and random polka dots.
On some of the mushrooms, you can add tiny brown dots to some of the white/ivory dots. But not to all of them. - Add a generous amount of hot glue to the bottom of the mushroom stem and then firmly press the stem onto a piece of moss. My kitchen countertop was perfect for that part of the project since the hot glue doesn't adhere to the stone. You could use a ceramic plate as well.
- Paint the bottom of the stem with dark brown paint starting right where the moss is and blend it upwards with more watered-down brown paint and a small broad craft brush. You can blend in some ivory paint too. (You can paint the mushroom stem before adding the moss, it doesn't matter)
- Use the micro hand drill to start a tiny hole at the top of the mushroom cap. Then screw the eye hook all the way into the cap. If you have trouble grabbing the tiny eye hook then you can use something like the dotting tool inserted into the hook to help spin it.
- Cut a piece of ribbon or twine. Thread the piece through the eye hook. Loop and knot it for hanging. I like adding a bow to the top.
Notes
- If you don't have a dotting tool, you can just use a toothpick, a small paintbrush, the other end of a paintbrush, a bobby pin tip, a paper clip tip, the tip of a pen, or anything else you could think of.
- You can use the mushrooms without hook and ribbon as Christmas table decor or other holiday decor vignettes.


