

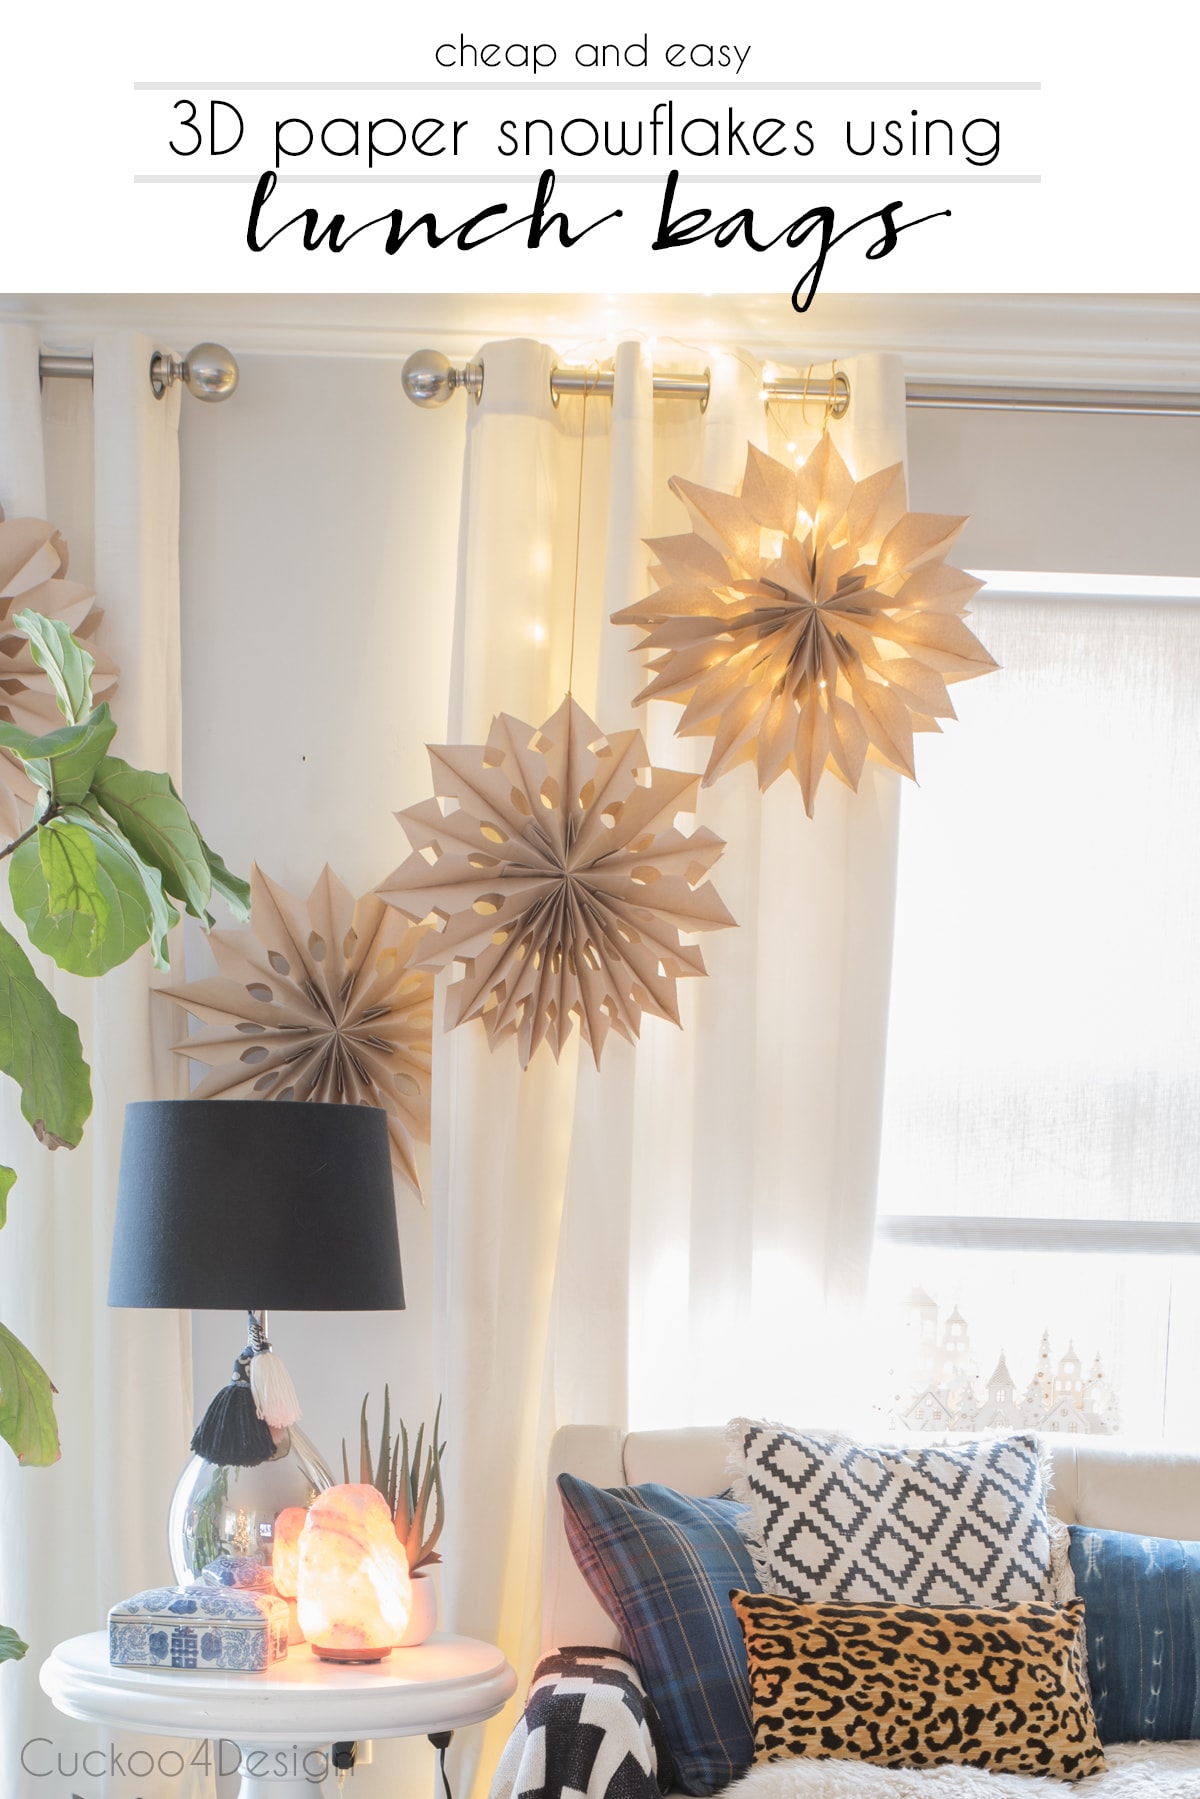
How to make 3D paper bag snowflakes using lunch bags
In this tutorial, I’m showing you how to make large, quick, easy, and affordable paper bag snowflakes using lunch bags. I’m also turning one of them into a 3D paper snowflake lantern using fairy lights.
I love how easy these large paper bag snowflakes are to make and they are the perfect last-minute decor and craft to do with your family before Christmas.

Step-by-Step Guide to 3D paper bag snowflakes
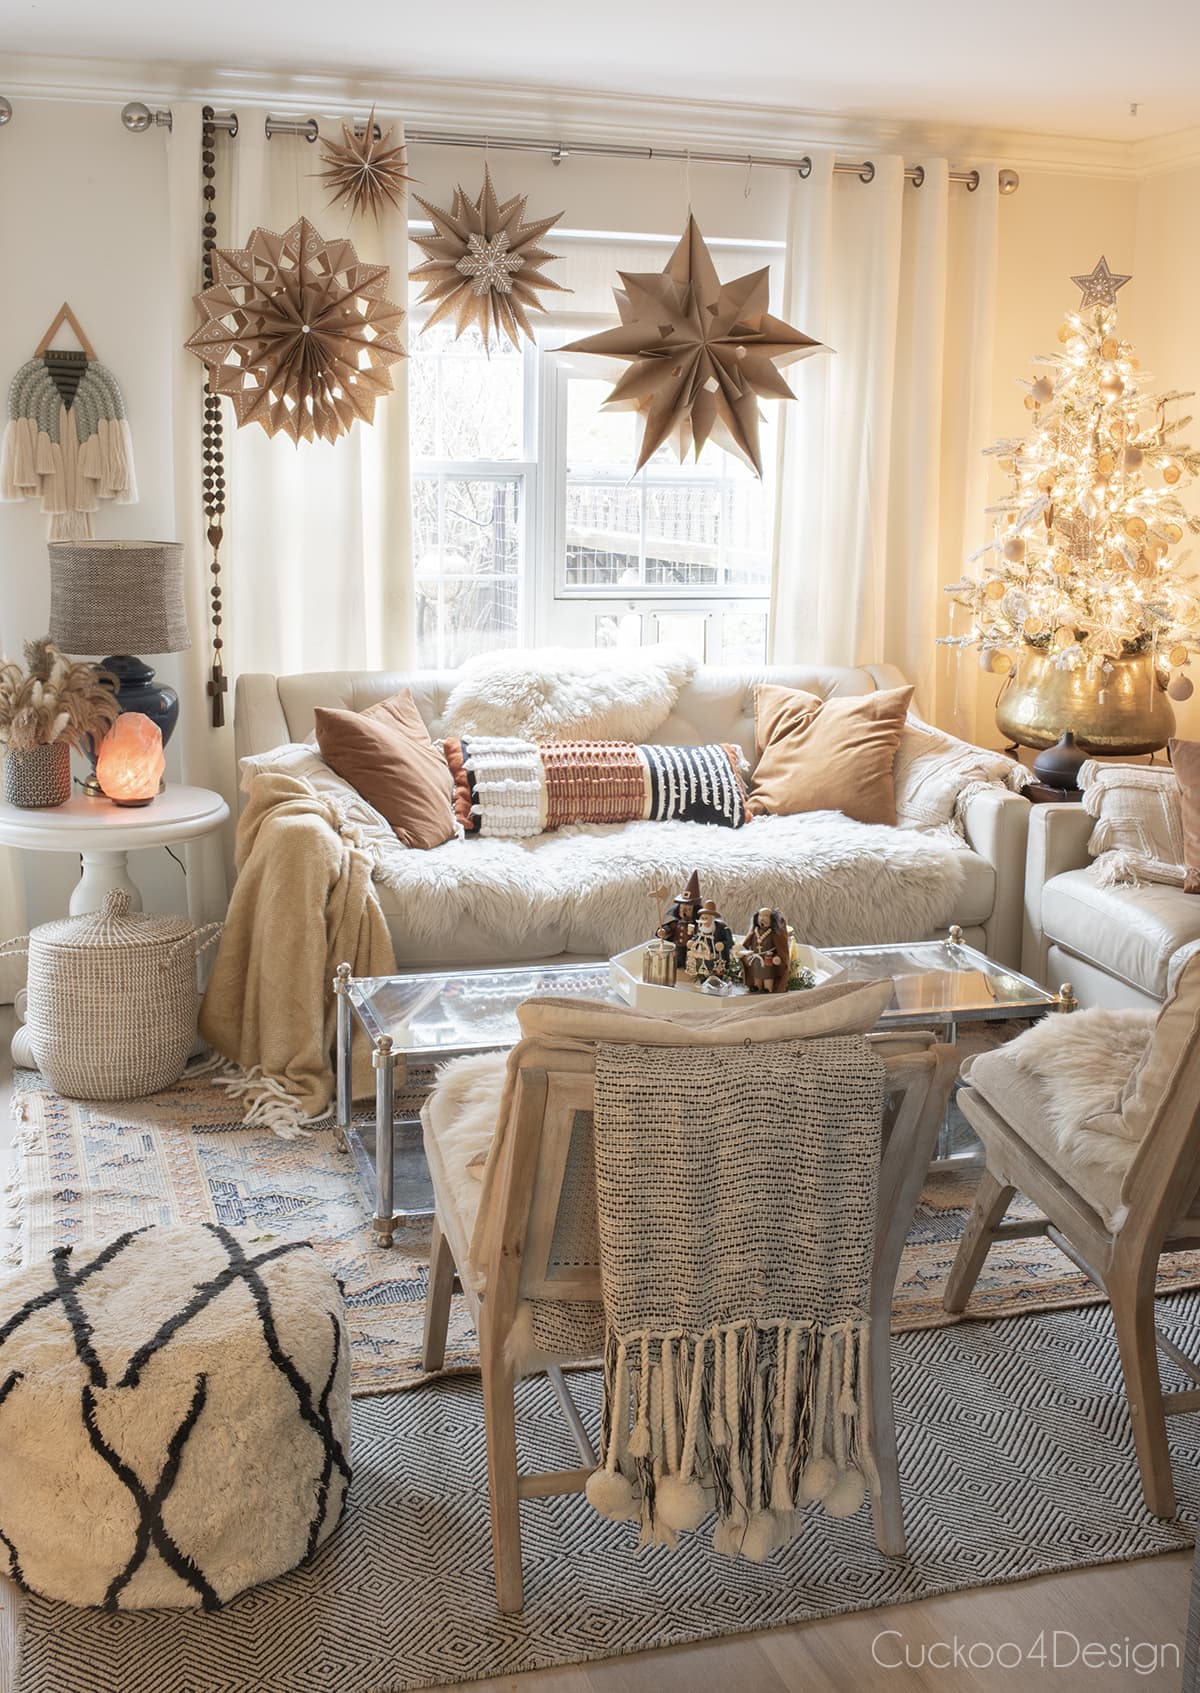
I’ve loved seeing how popular these paper bag snowflakes have become over the years. They’re still one of my favorite easy Christmas crafts. This year, I made a whole display of blue and white ones for a local 2025 ski resort winter festival, and they looked so magical grouped together. I didn’t get a photo of them hanging in the lodge, just a quick shot of them on the table while I was setting up. Whether you hang them at home or for an event, they always make any space feel festive.

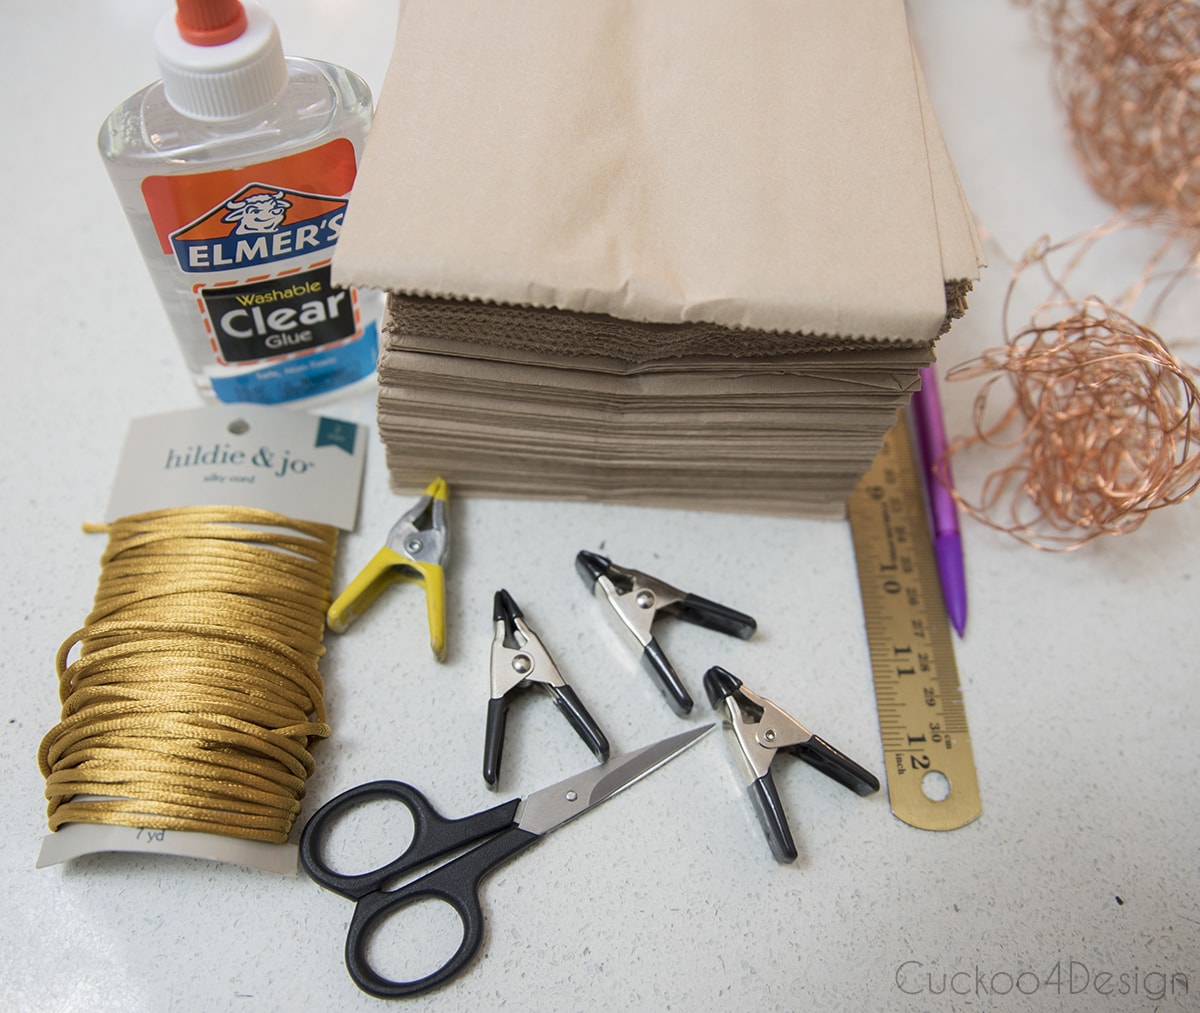
materials needed
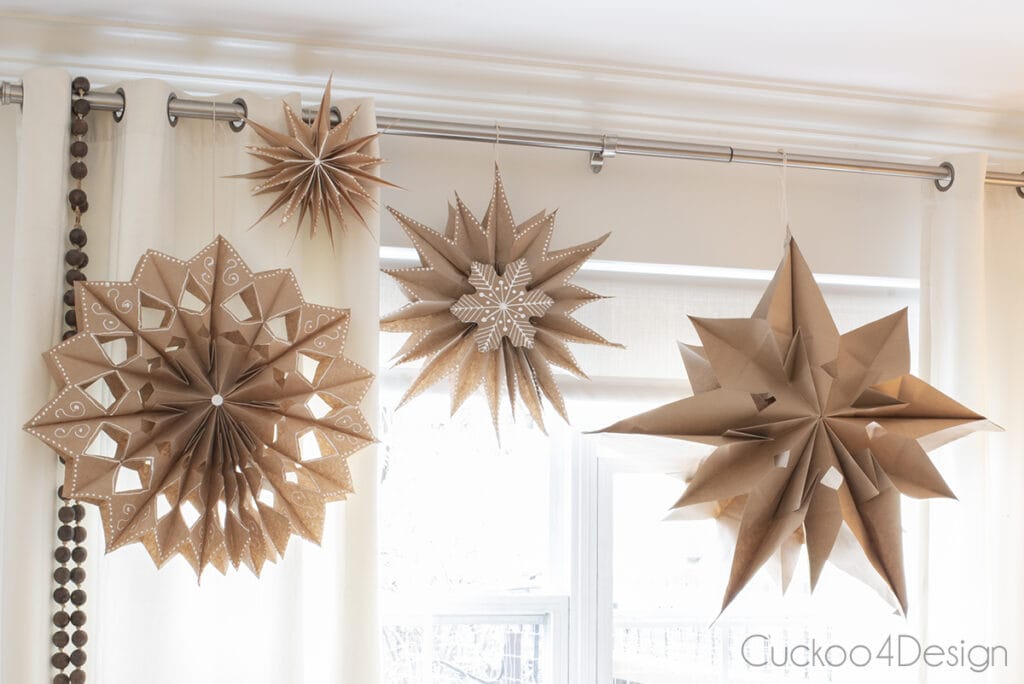
- 9 lunch bags for one paper bag snowflake (white or natural brown) – I used brown because I wanted them to be a contrast to my ivory curtains and white walls
- scissors
- craft glue
- stapler
- pencil
- ruler
- clothing pins or little clamps
- string
- fairy lights (optional) – I used fairy lights and not regular Christmas lights because I love the look and they also don’t get hot like standard strands of light bulbs. Please don’t leave the lights on unattended since they could get hot if torn at spots. And I’m not responsible for anything that might happen!!!
my tips for making DIY paper bag snowflakes
- I do not like using a hot glue gun for several reasons:
A. Kids can get burned way too easily
B. The glued center lines get way too thick and sometimes the hot glue dries too fast
C. The snowflake gets a lot heavier with hot glue than with standard craft glue
(But it works as well and if you don’t care about the above then use hot glue) - I also don’t like using glue sticks because the glue lines get too wide.
- Clear or white liquid craft glue works best.
- Make smaller snowflakes with smaller-sized snack bags for size variety.
- Try out different colored paper bags. I’ve used white paper lunch bags and black paper bags that are white on the inside.
- I like gluing the bags the night before and letting them dry overnight before cutting but that’s optional.
- Make sure you use bags without any logos or manufacturer’s prints on them. A manufacturer’s name can definitely ruin the design of the snowflakes if it peeks through the folds. However, you can find pretty Christmas designs printed on these types of brown bags and that would look very pretty.
video tutorial
Here is my video to show you the process if it doesn’t load for you then you can watch it on my YouTube channel instead.
Music credit: Oh, Little Town of Bethlehem Kevin MacLeod (incompetech.com) Licensed under Creative Commons: By Attribution 3.0 License http://creativecommons.org/licenses/by/3.0/
step-by-step instructions
This post may contain affiliate links from which I will earn a commission at no extra cost to you. View my full disclosure policy.
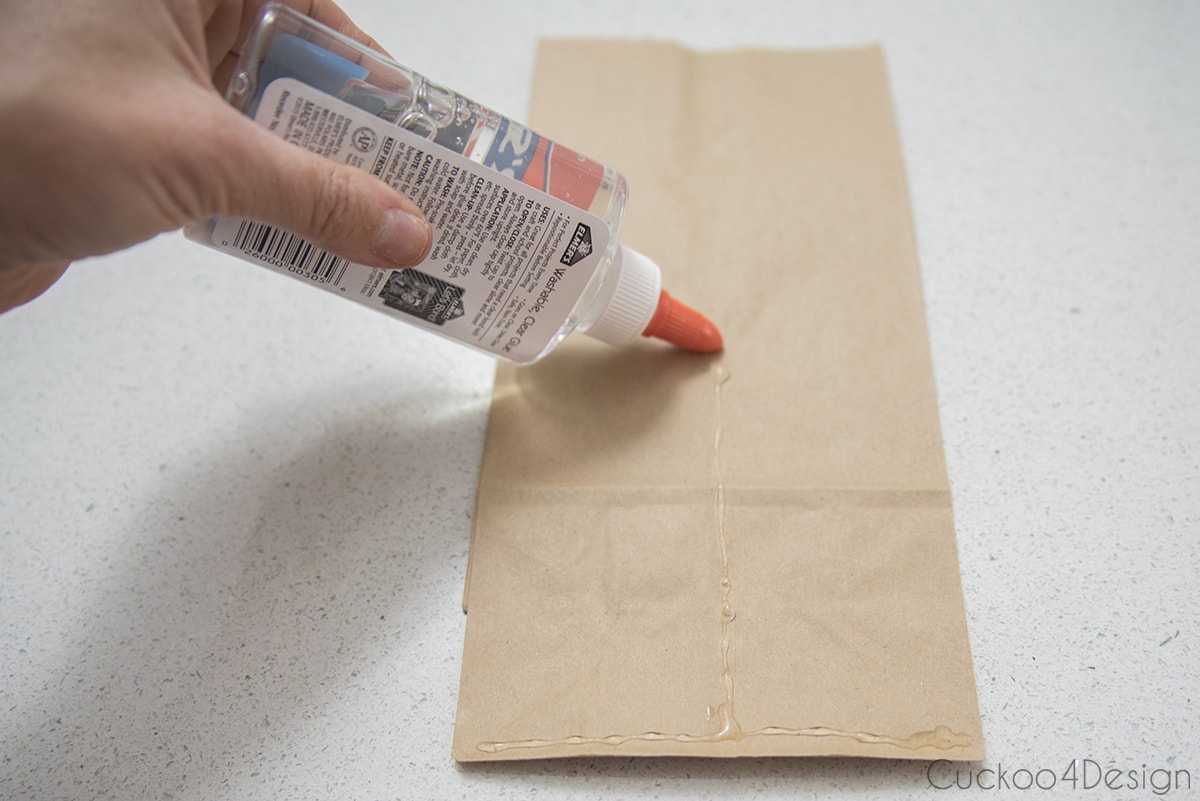
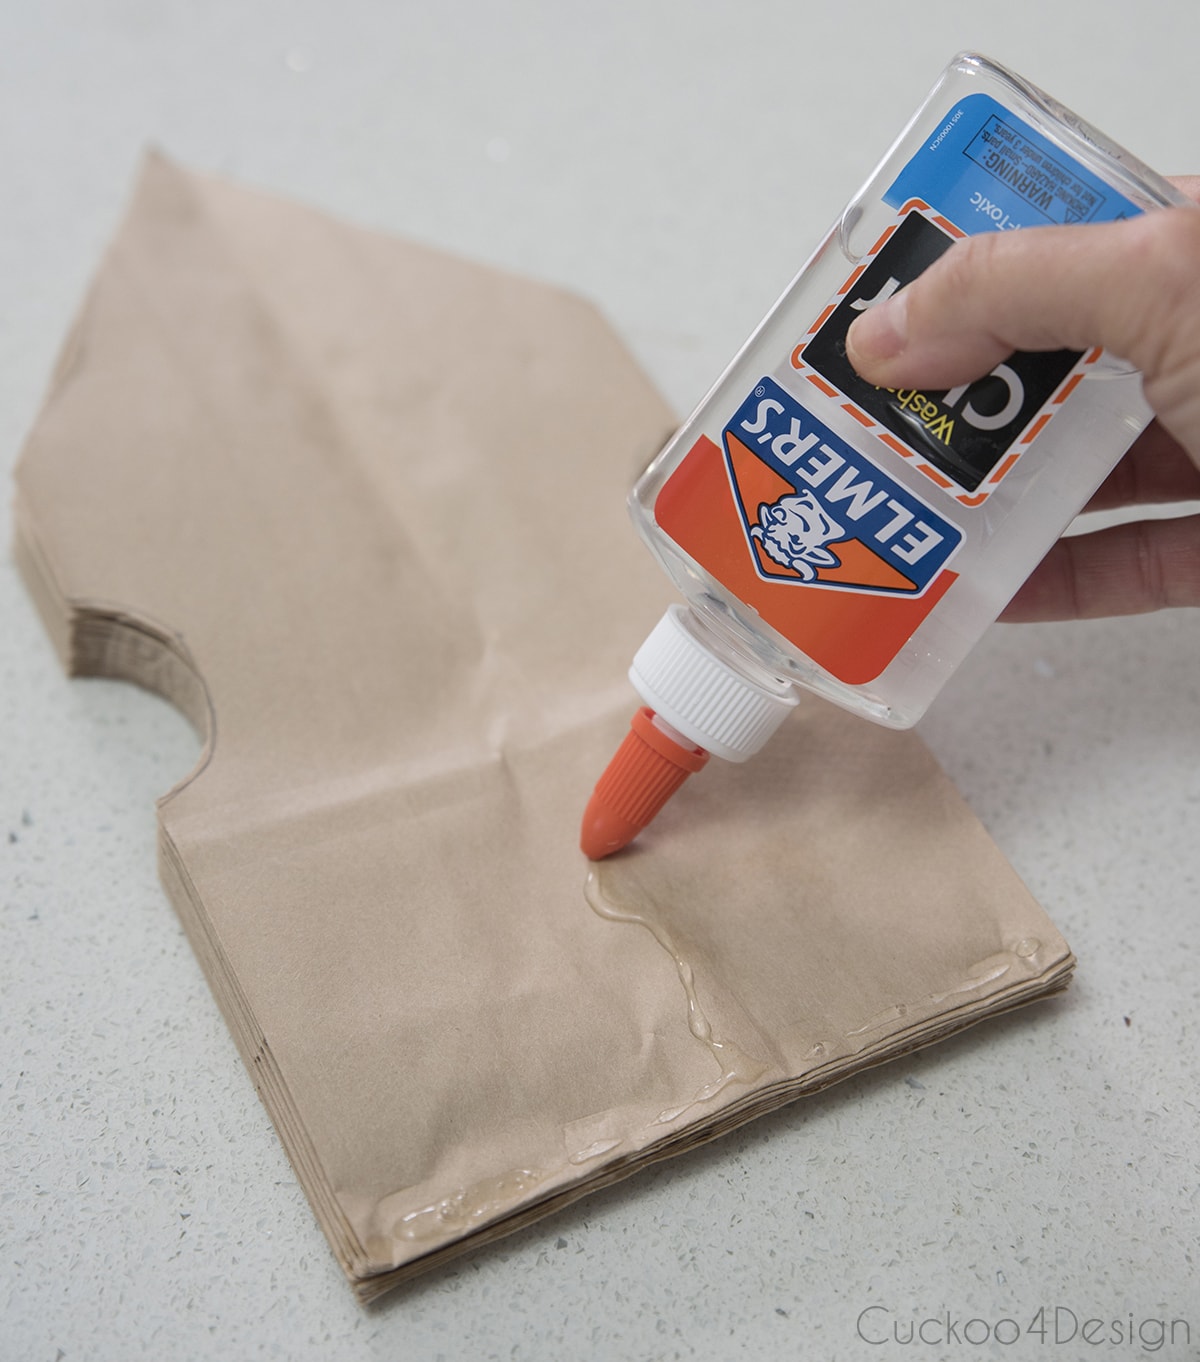
Start by gluing the 9 lunch bags together. The glue line looks like a T as shown in the below image. One thin line at the bottom of the bag and one line going up the center of the bag.
Below you can see the first bag with the clear glue drawn on in an upside-down t-shape.
Place the second bag on top of that bag of the glue line and keep repeating until all the bags are stacked and glued. It is very important to make sure that all the bags line up in the same direction, meaning all the open ends on one side and the bottom folded part on the other side facing in one direction. They are usually already lined up like that in the manufacturer’s bag.
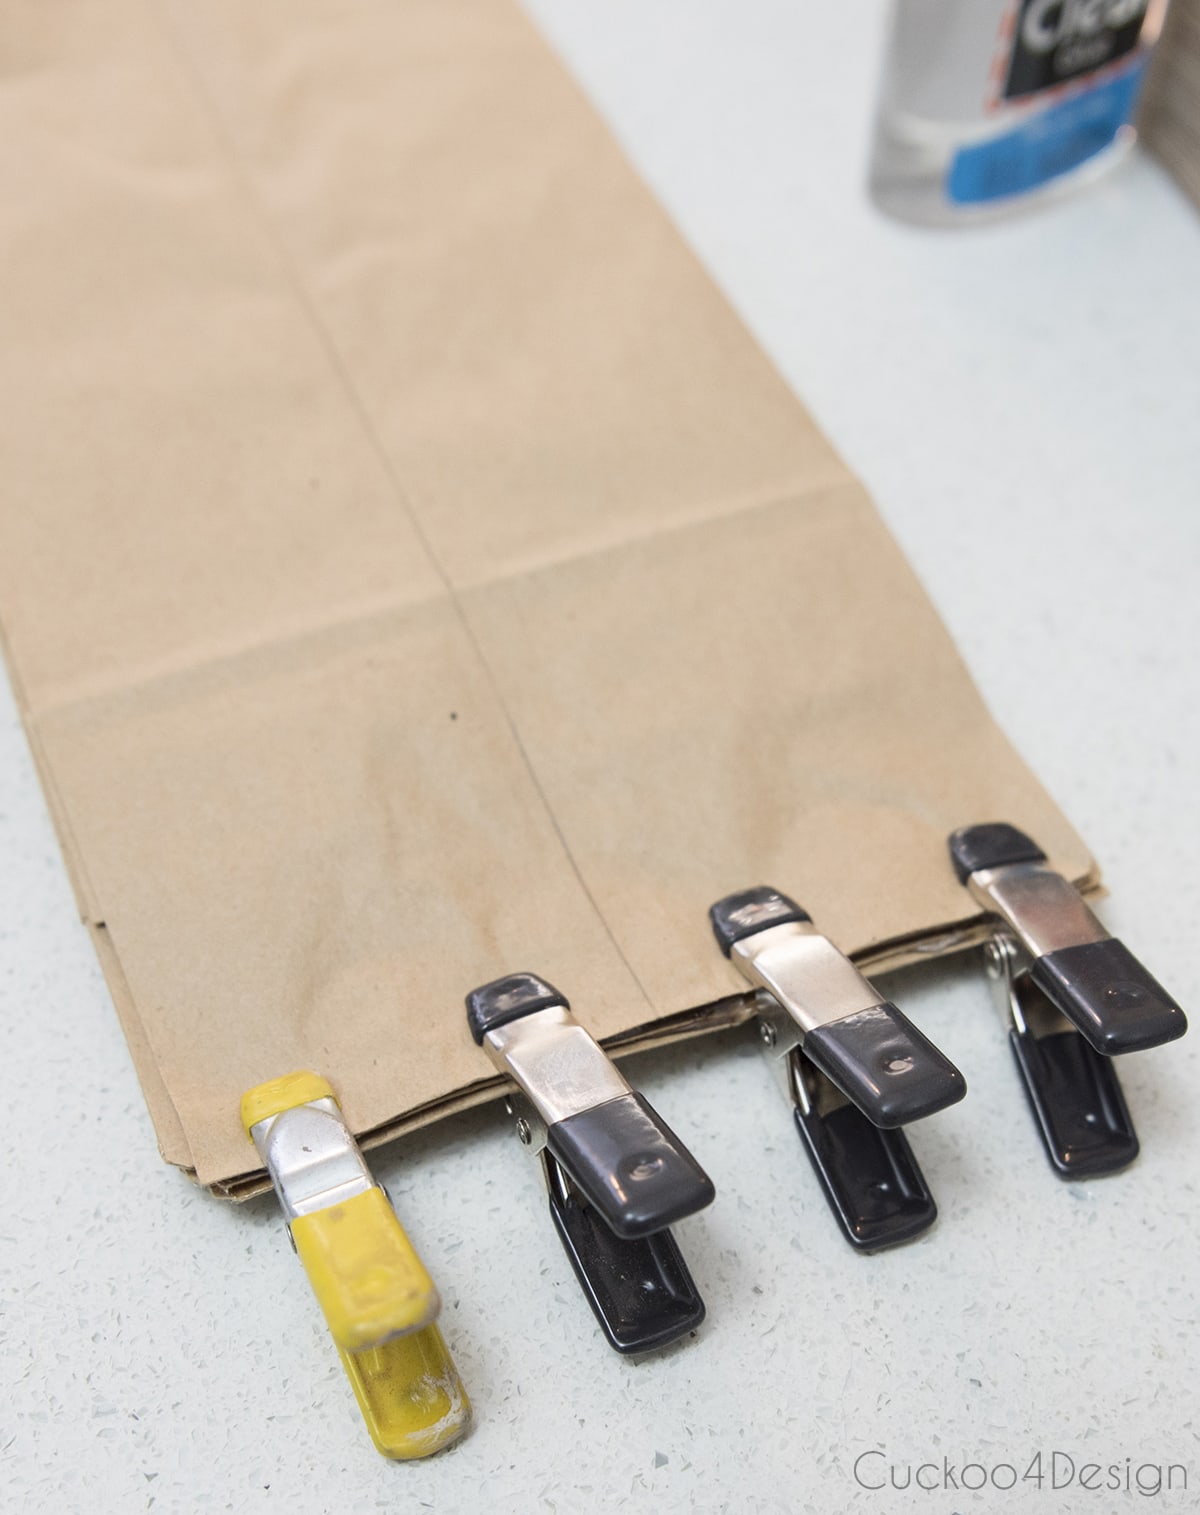
You can use clothing pins, clips, or little clamps to keep the center glue line tight on the entire stack. However, the clips are optional since I’ve also done them without and it works fine. You can also use something heavy as a weight to make sure everything glues together nicely.
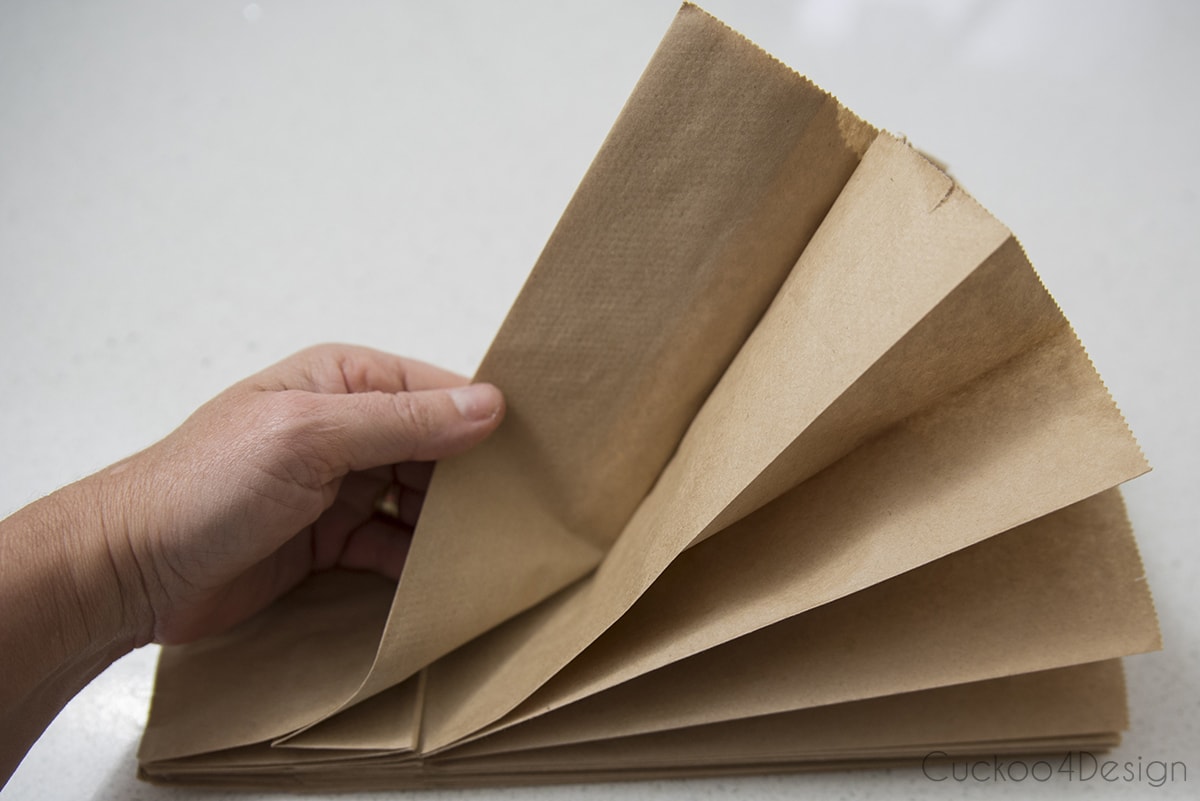
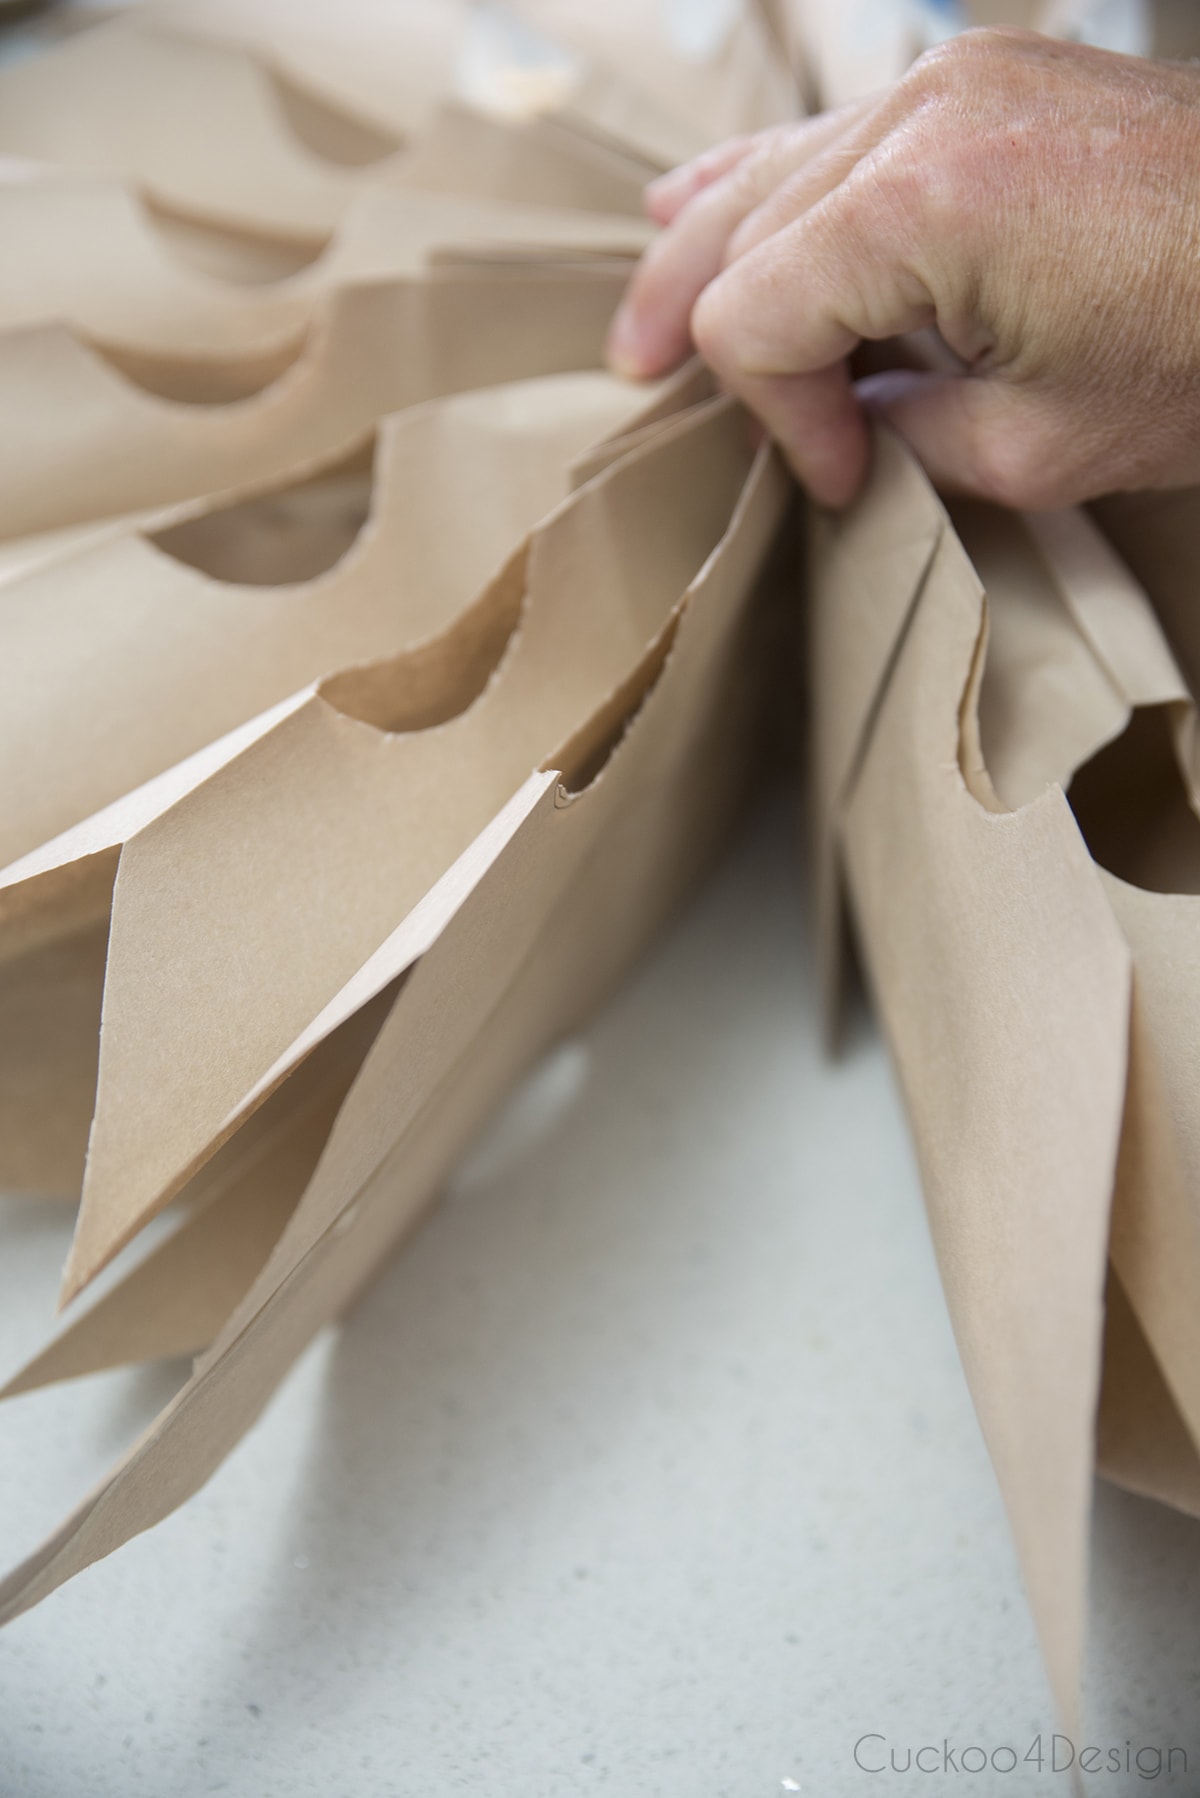
Open up the paper bag fan to make sure the bags separate and open properly before you get to the cutting part.
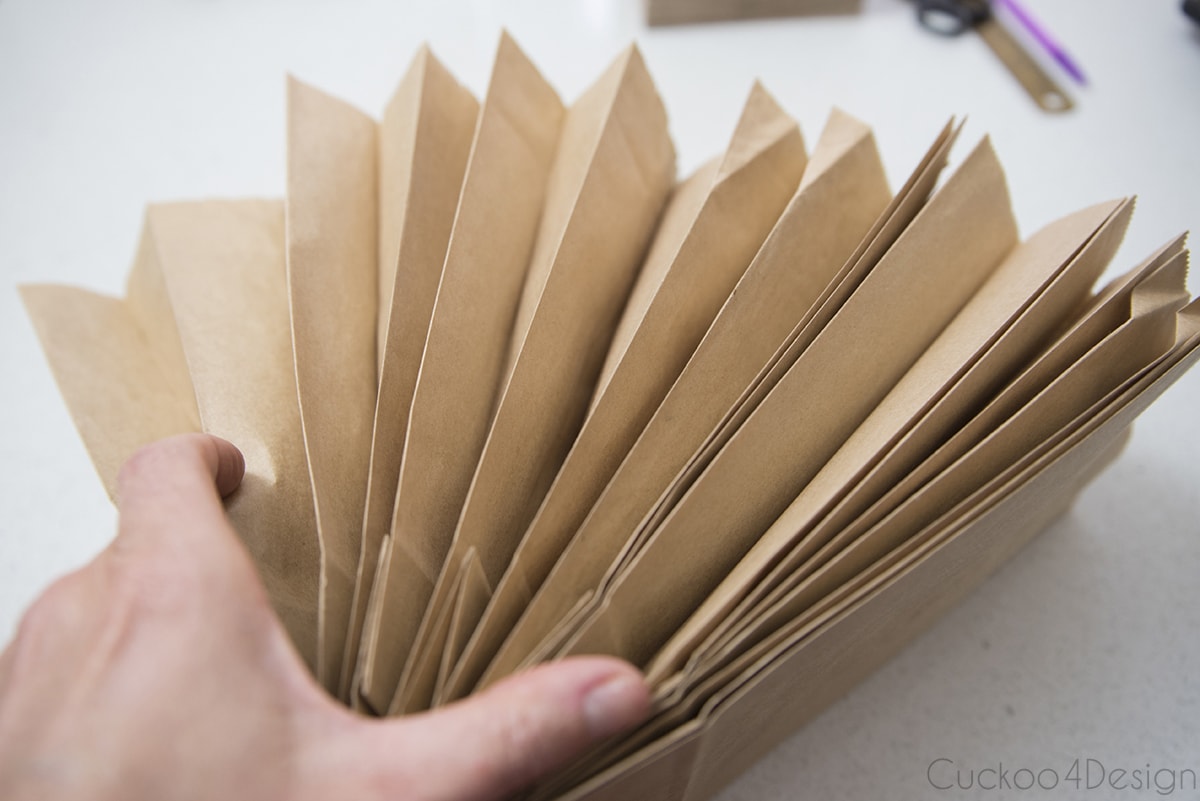
You can also use a stapler to secure some of the top edges
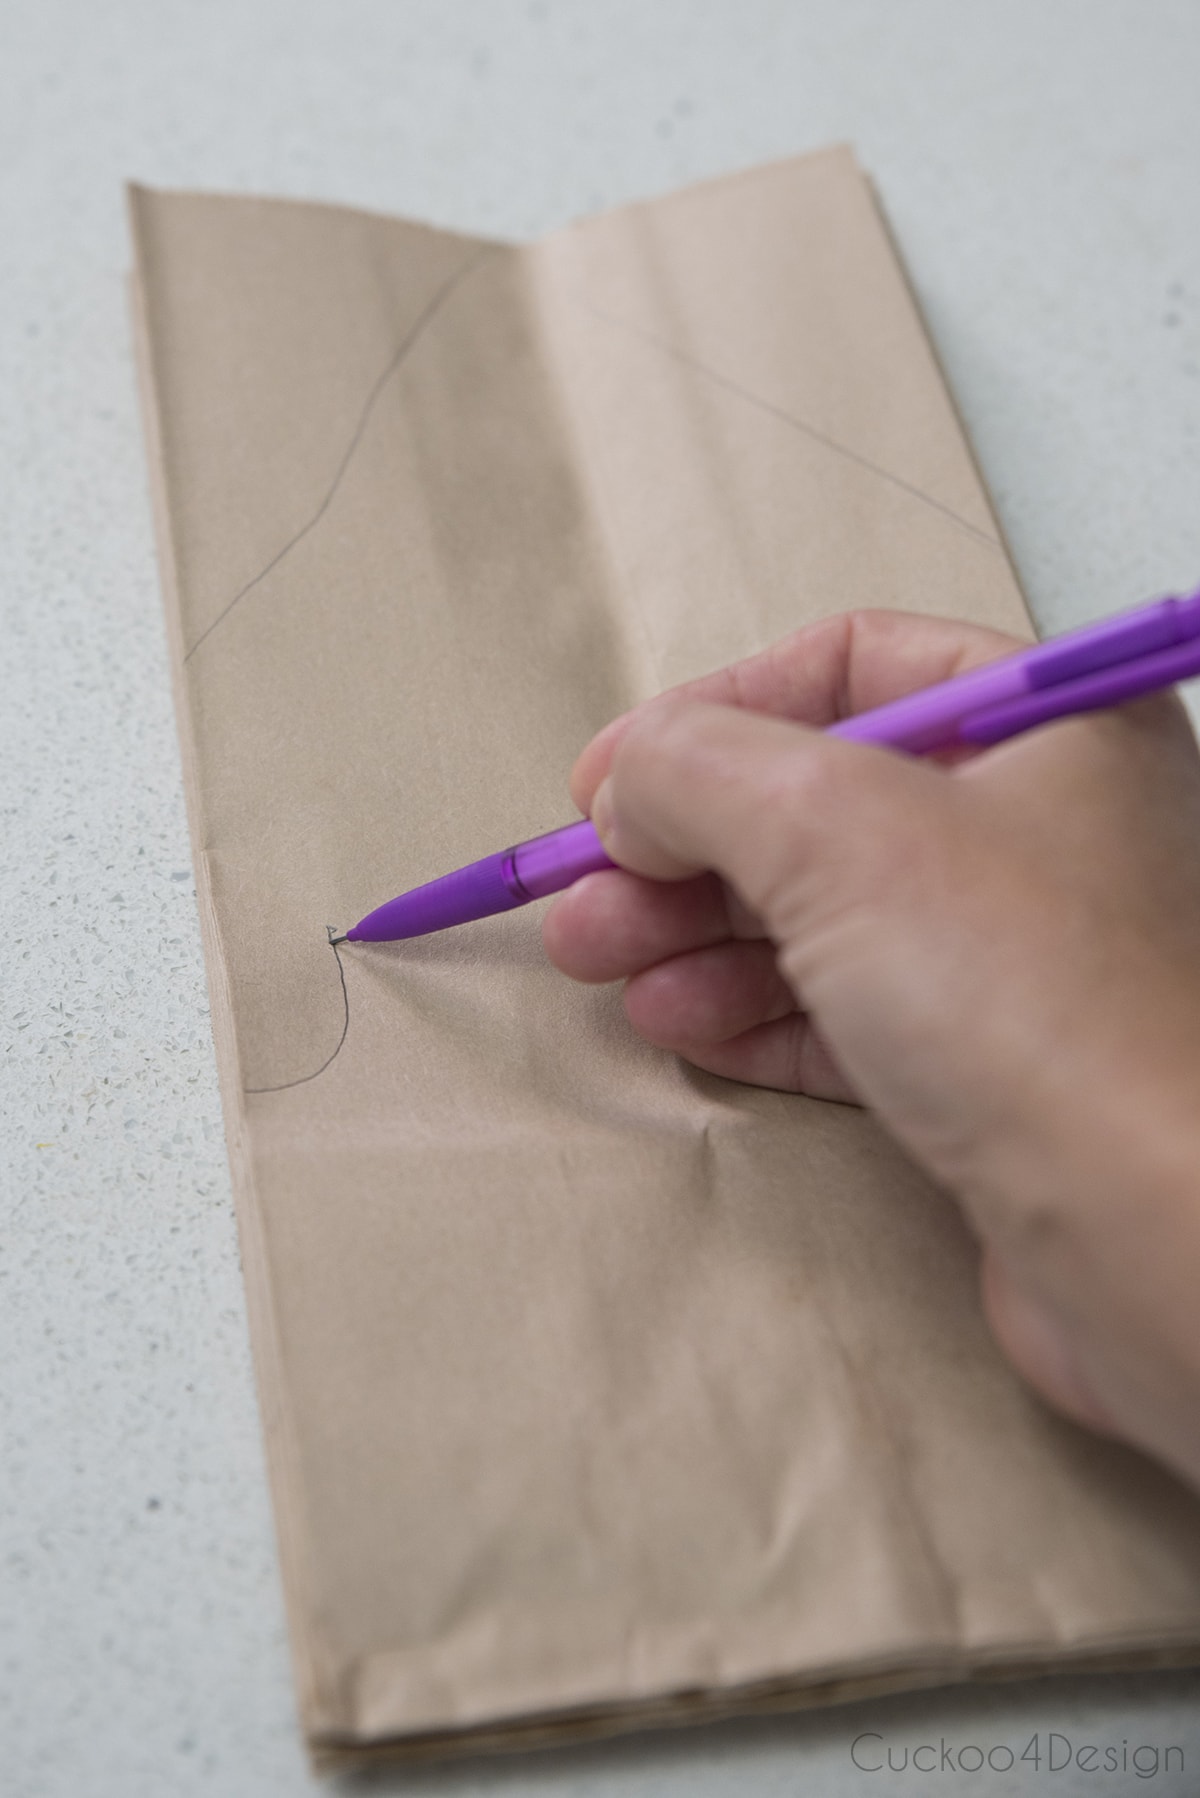
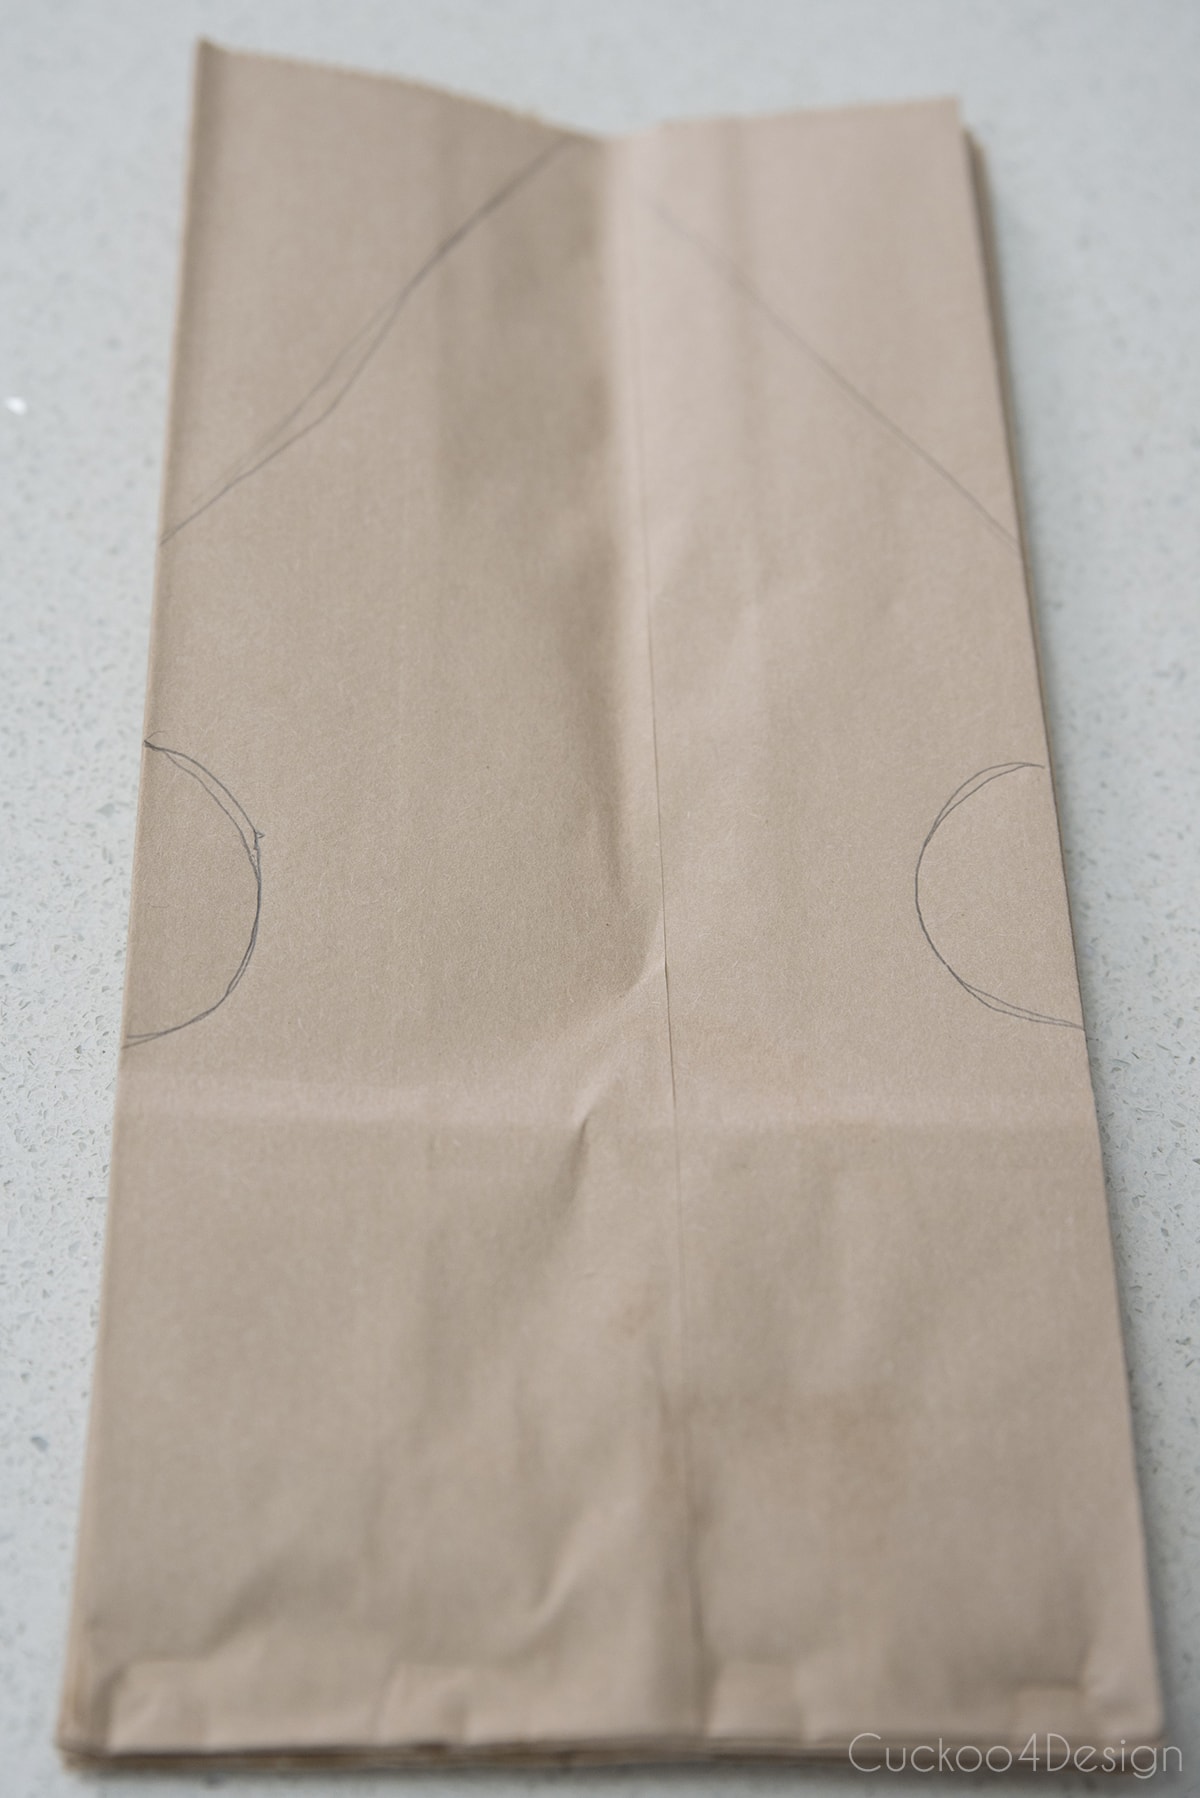
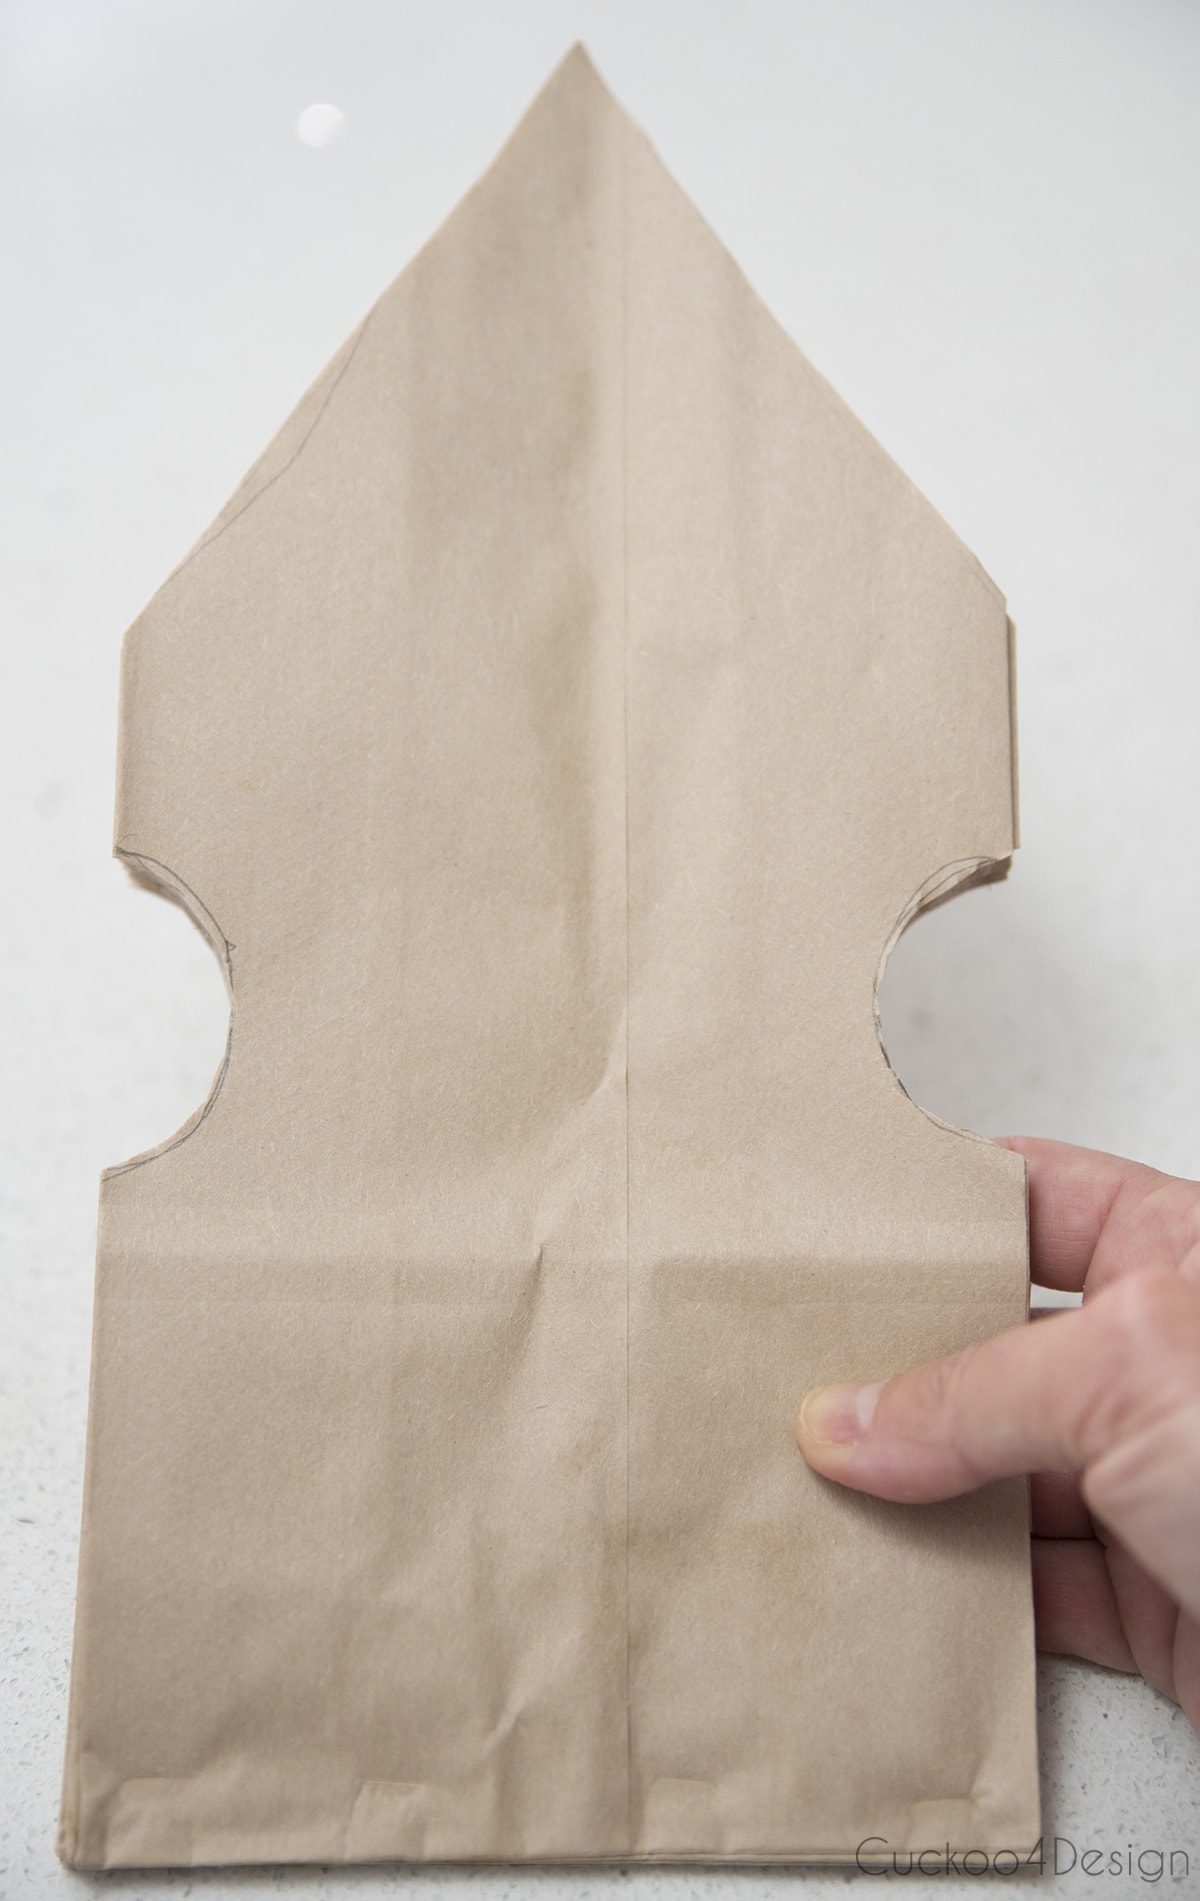
Draw on the snowflake pattern as shown on the front of the bag.
Cut the snowflake pattern with strong scissors. If you are doing this with kids then they might need help with this step.
It is ok to cut a few layers of the bags at a time if you can’t cut them all at once.
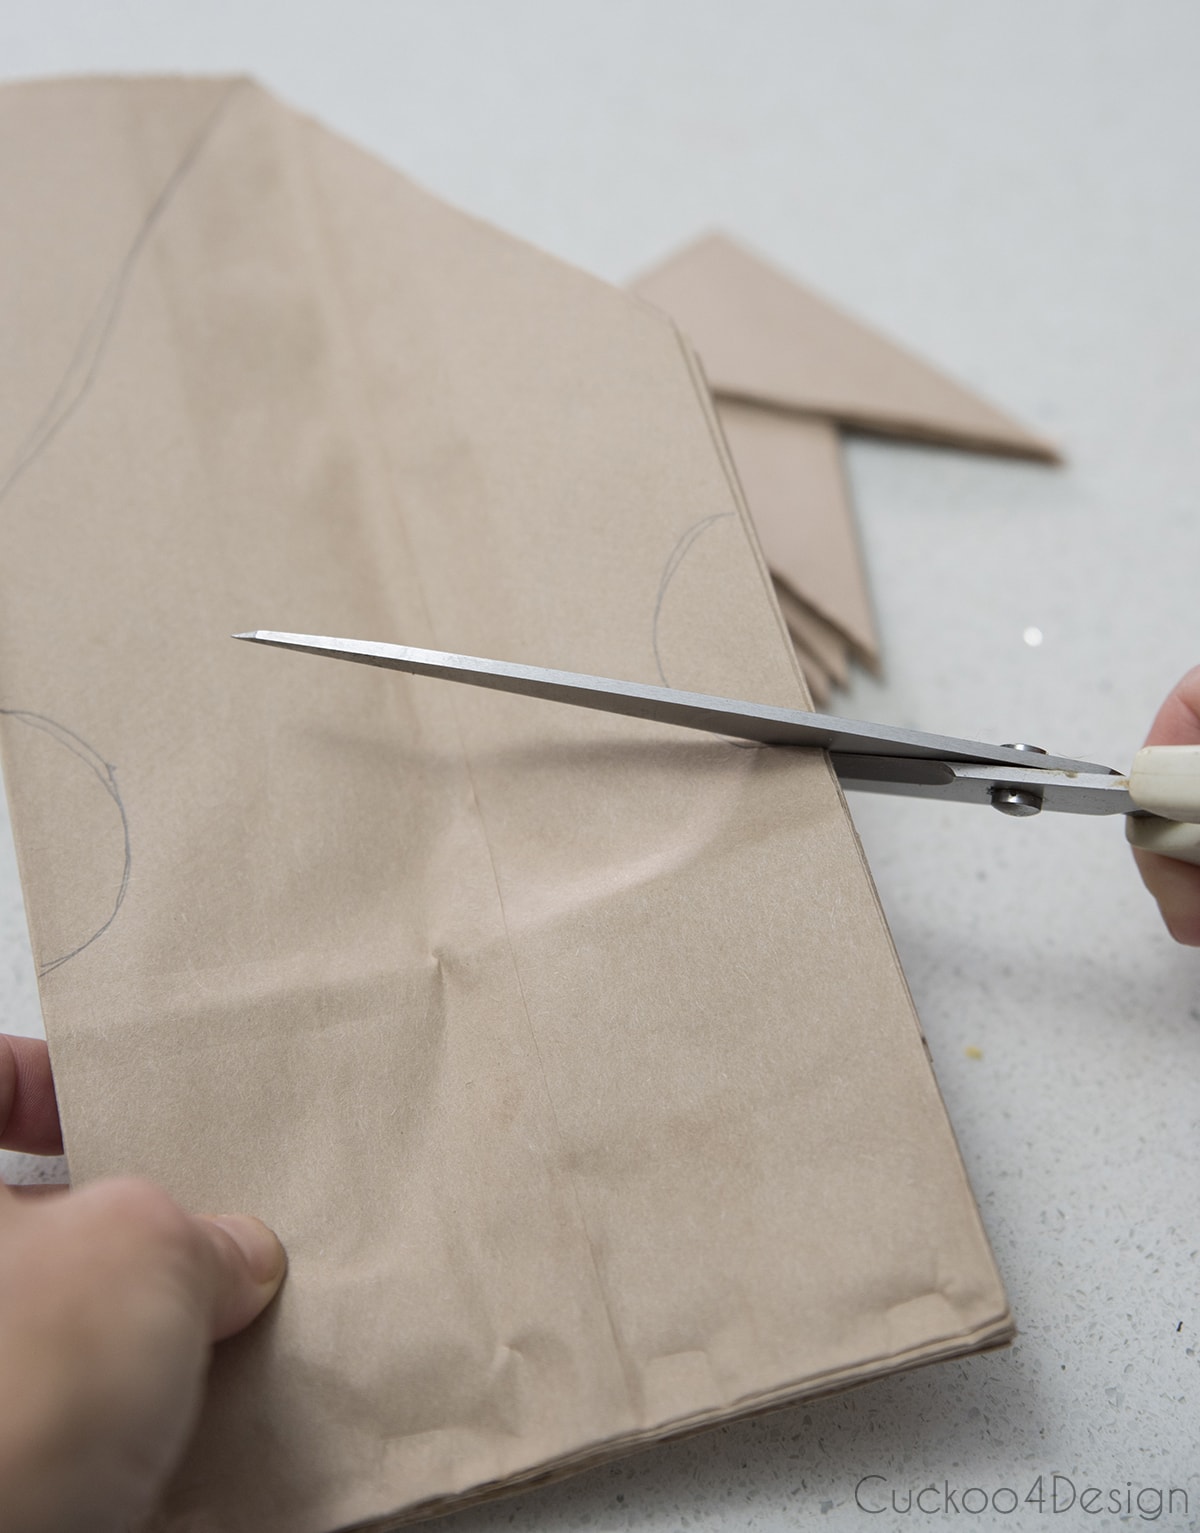
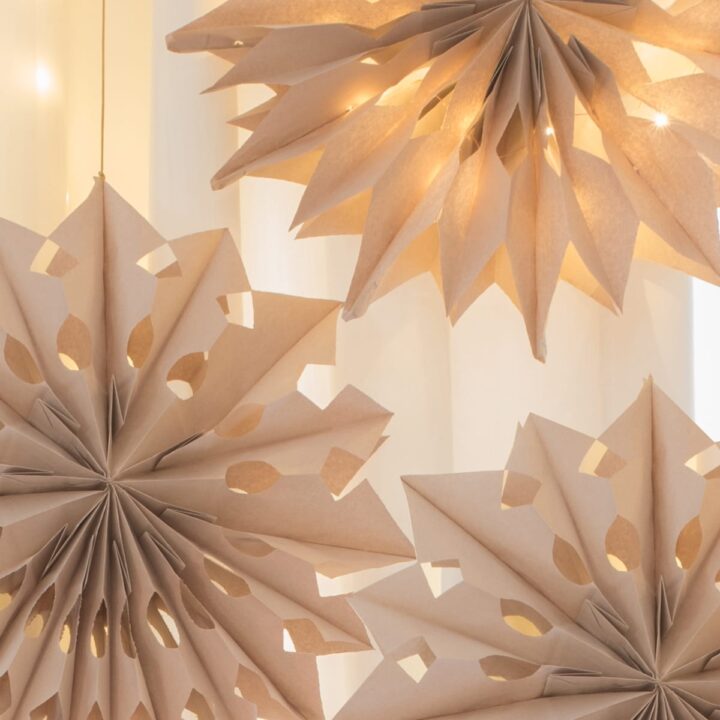
Here is one option of how you can cut the pattern. You can also round the top or add other nudges to the sides.
While I have seen others cut a design into the folded bottom area, I recommend not doing that since those tend to fall apart easier.
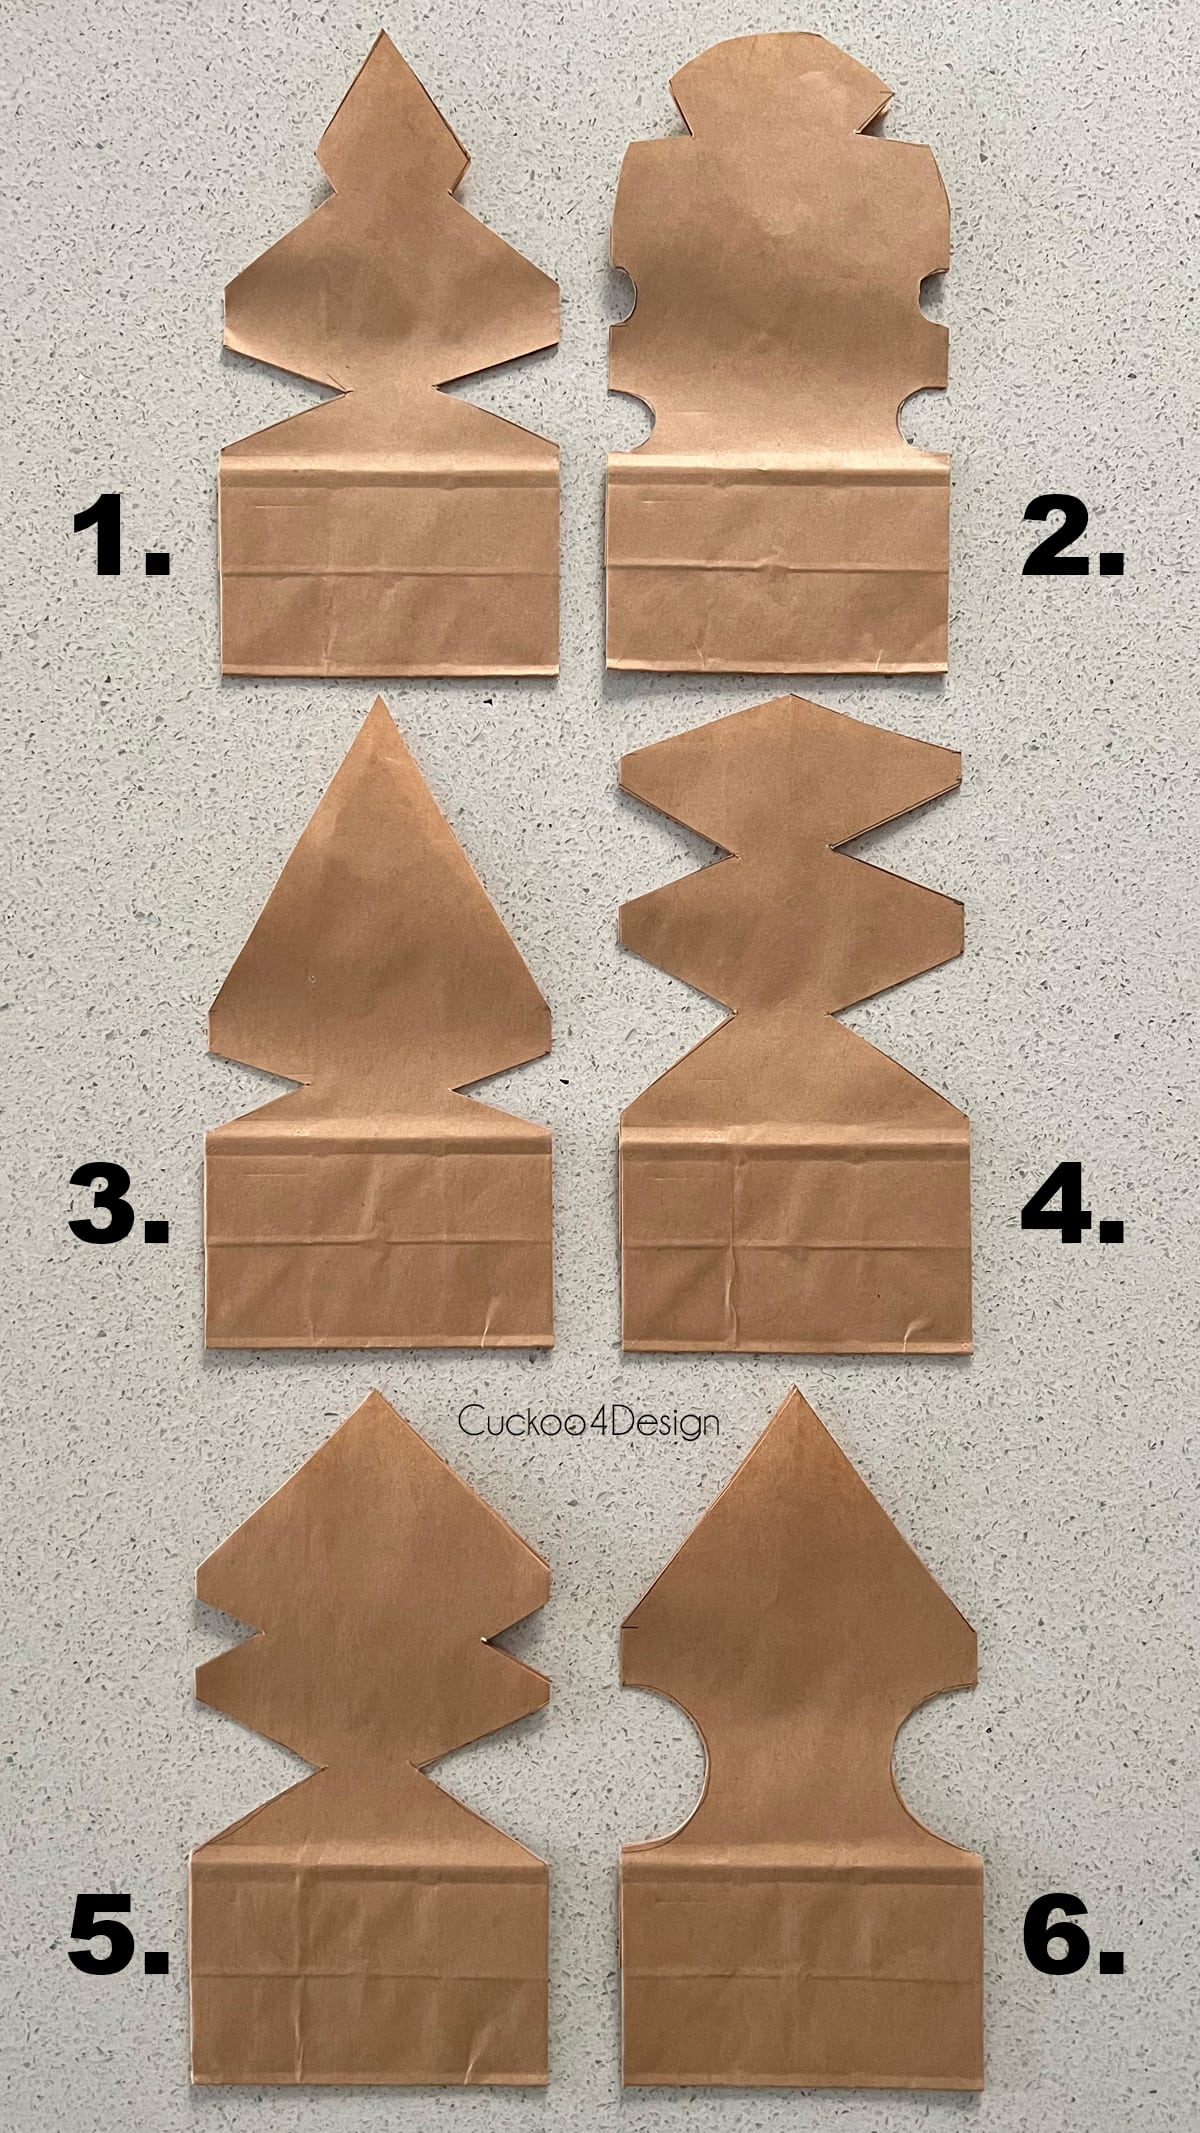
12 different paper snowflake template examples
Below are some patterns that you can use to cut the sides of the paper bags. Don’t worry about messing up your cutouts or being completely even and symmetrical. These snowflakes are super forgiving which is another reason they are such a great easy craft for kids.
Just have fun with the different patterns and different shapes!
Here are 6 simple snowflake patterns:
And here are 6 intricate snowflake patterns that you can cut:
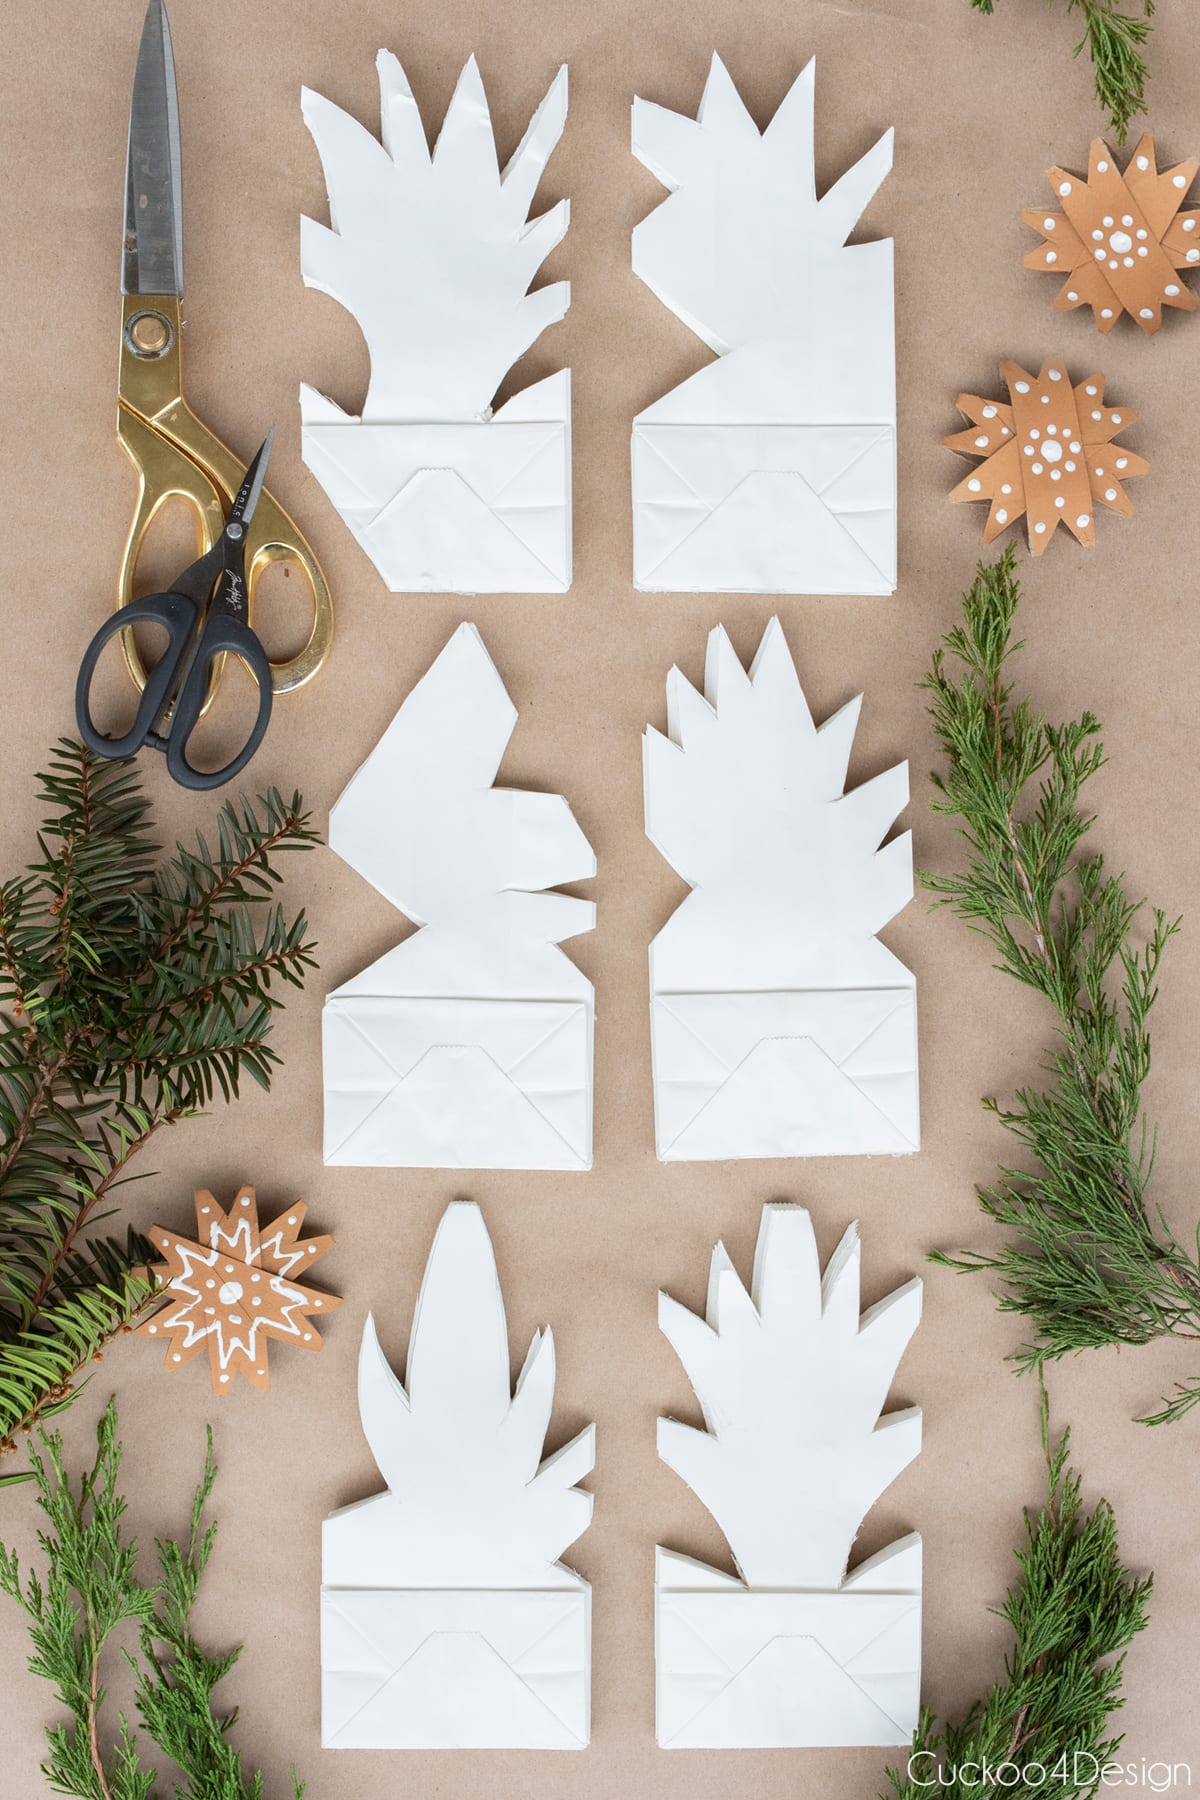
And here you can see what the snowflakes look like next to the patterns:
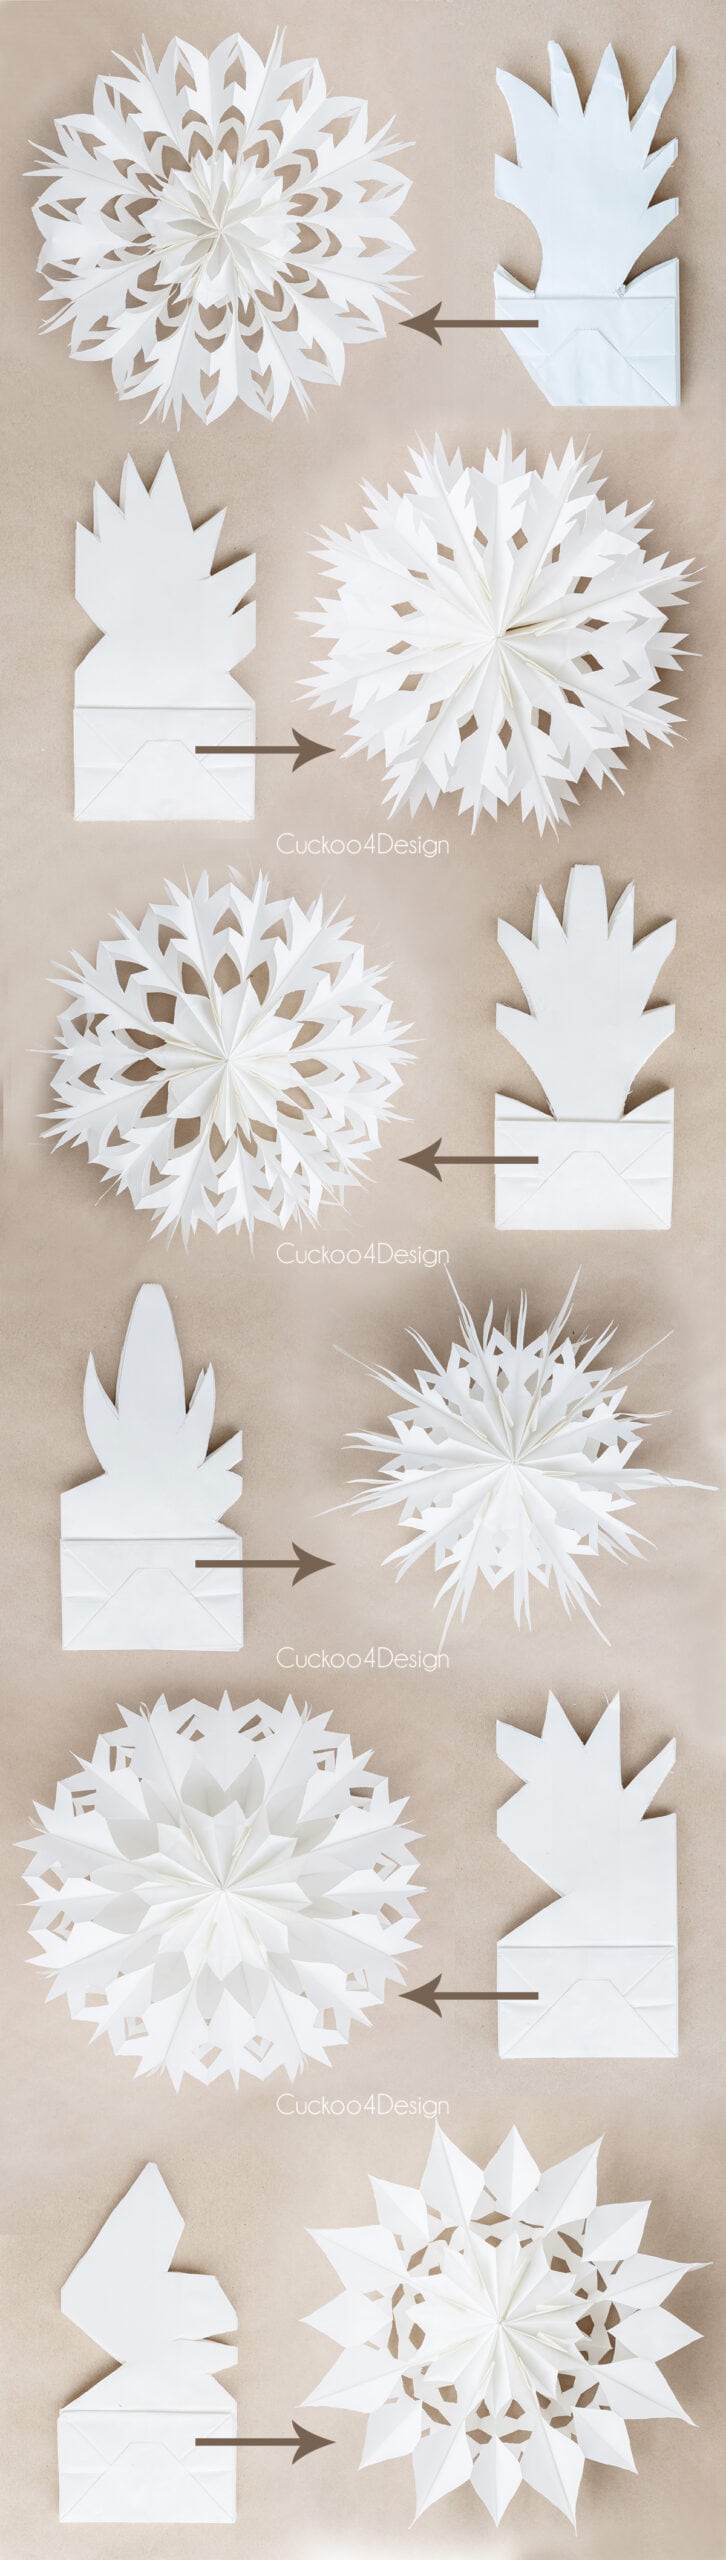
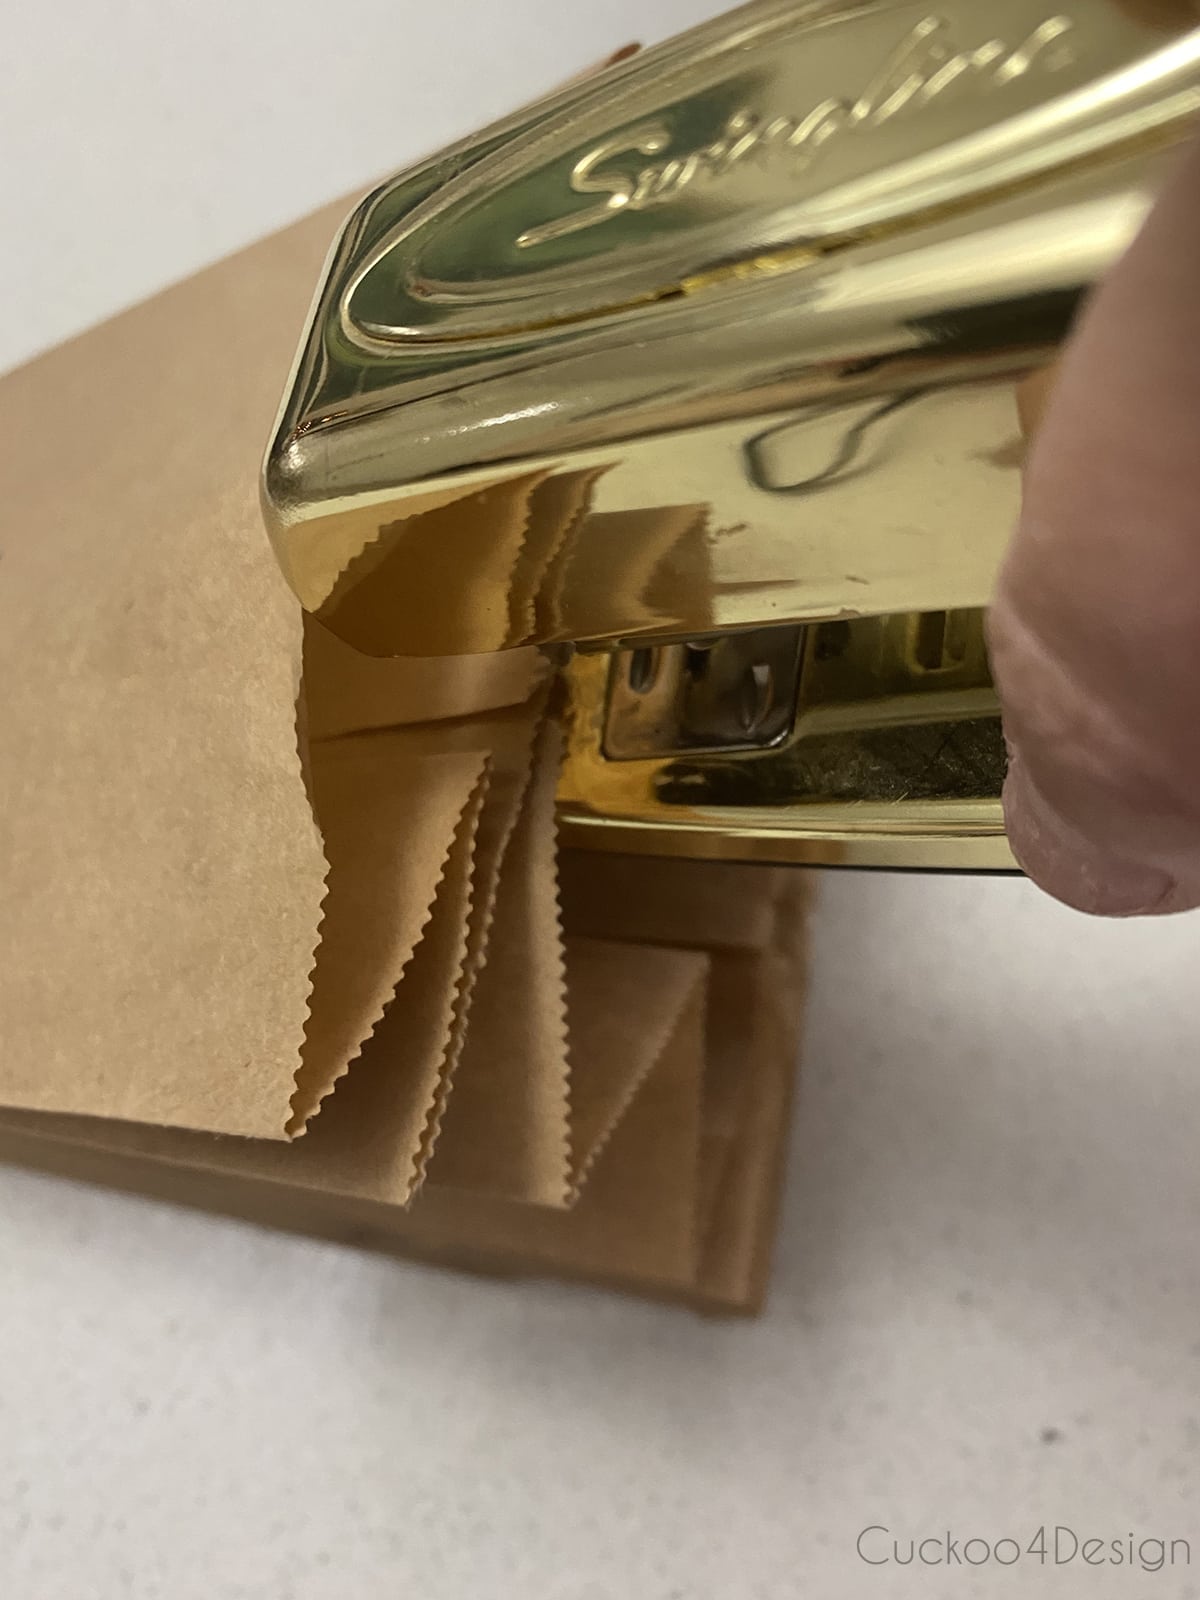
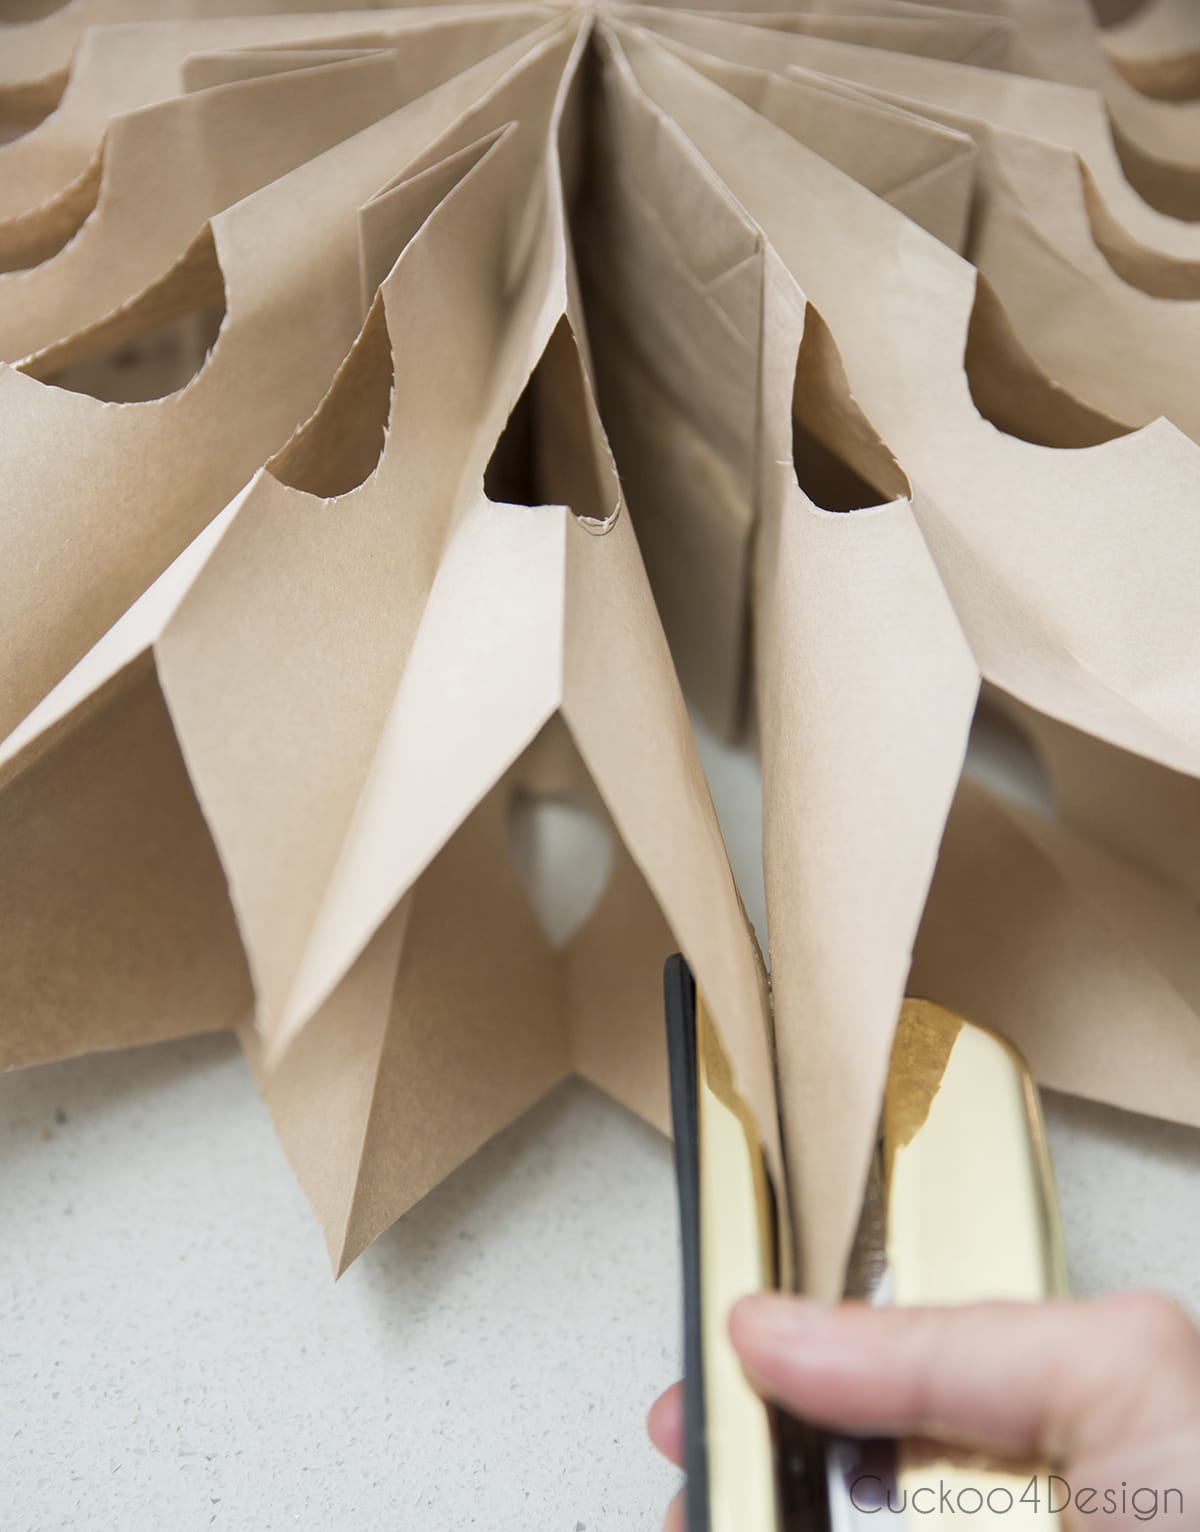
Lastly, you need to glue the final edge by applying a thin layer of glue.
Fan the snowflake out into a 3D shape and attach the edges with a stapler.
Different ways to hang your paper bag snowflakes
- Poke a hole or use a hole punch and add a string to the hole to for hanging
- You can also use yarn stapled to a point of the snowflake to hang them.
- If you want the snowflakes to look like they are floating in the windows, use a fishing line to hang them.
- If you want to hang them on the wall, use command hooks and a piece of twine.
If you want to turn the 3D paper bag snowflake into lanterns then you can watch my video to see how to do so.
RELATED: If you’ve been following me for a while then you know that I love snowflakes. I recently made snowflake canvas art, a couple of years ago I made fanned posterboard snowflakes for our tree decor with a free downloadable cutting file, and I love my easy toilet paper roll snowflakes as Christmas ornaments.
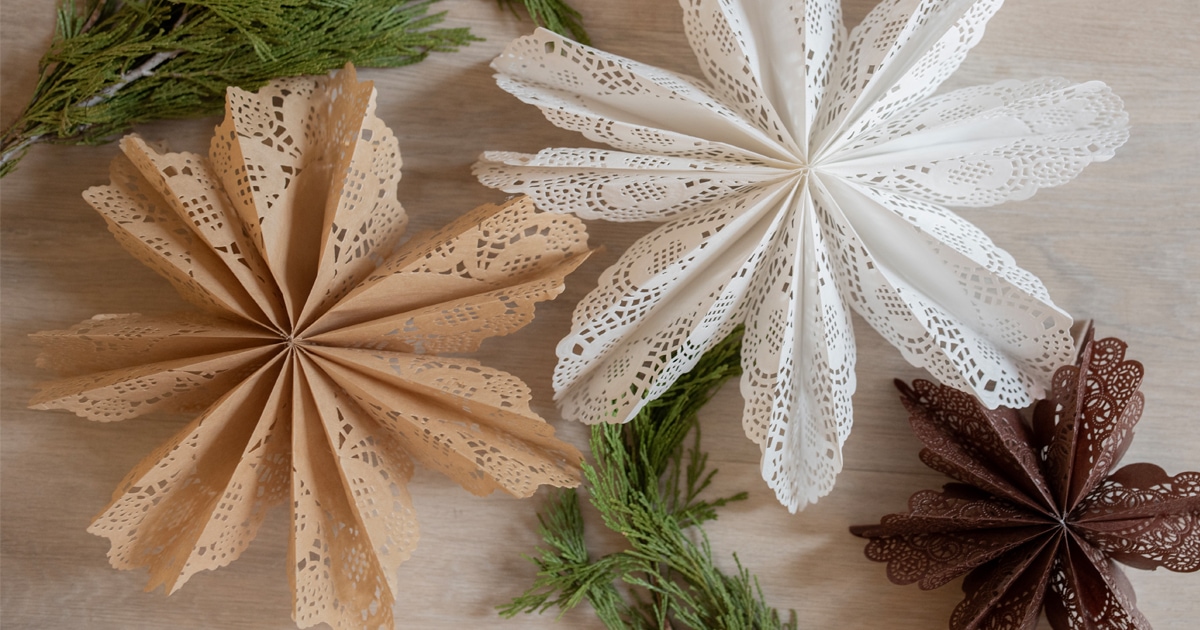
Or if you like the look of the paperbag snowflakes but would prefer not to cut out the patterns, then try my paper doily snowflakes.
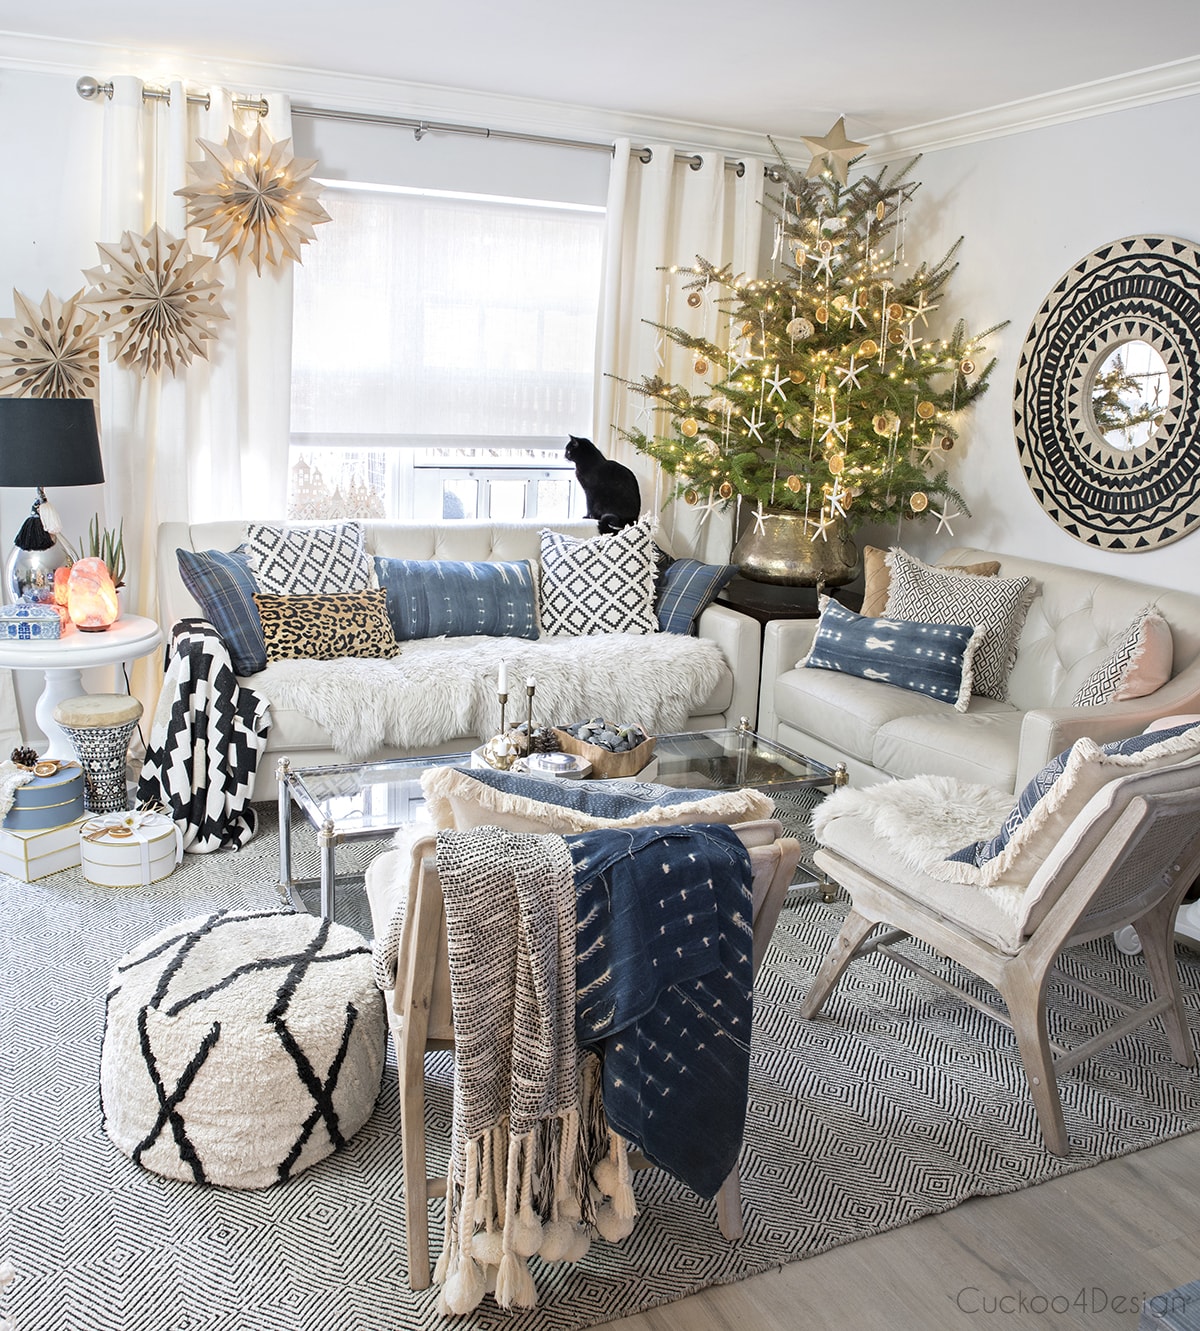
Photos of finished paper bag snowflakes
I have made them 4 years in a row and have become an expert at making them.
The fairy lights add an extra touch of sparkle.


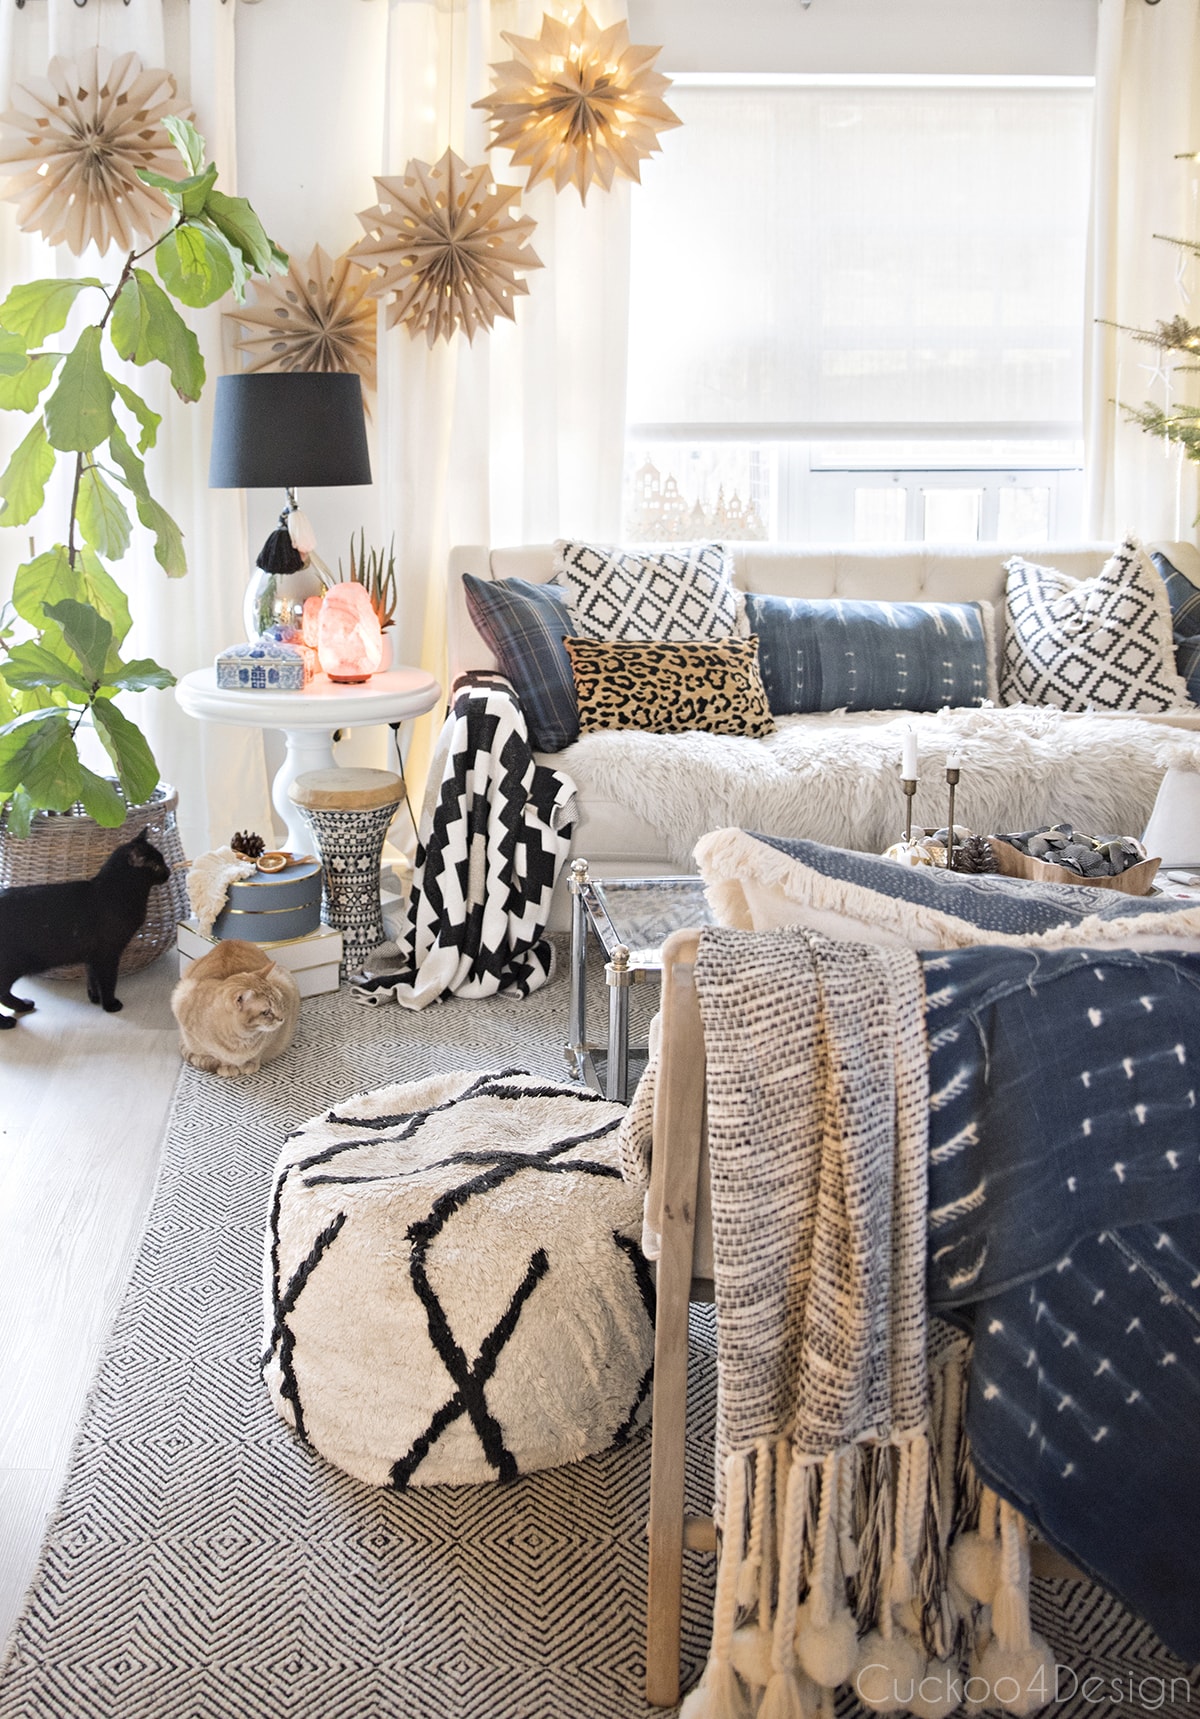

My DIY pampas grass Christmas fits right in with the color scheme.
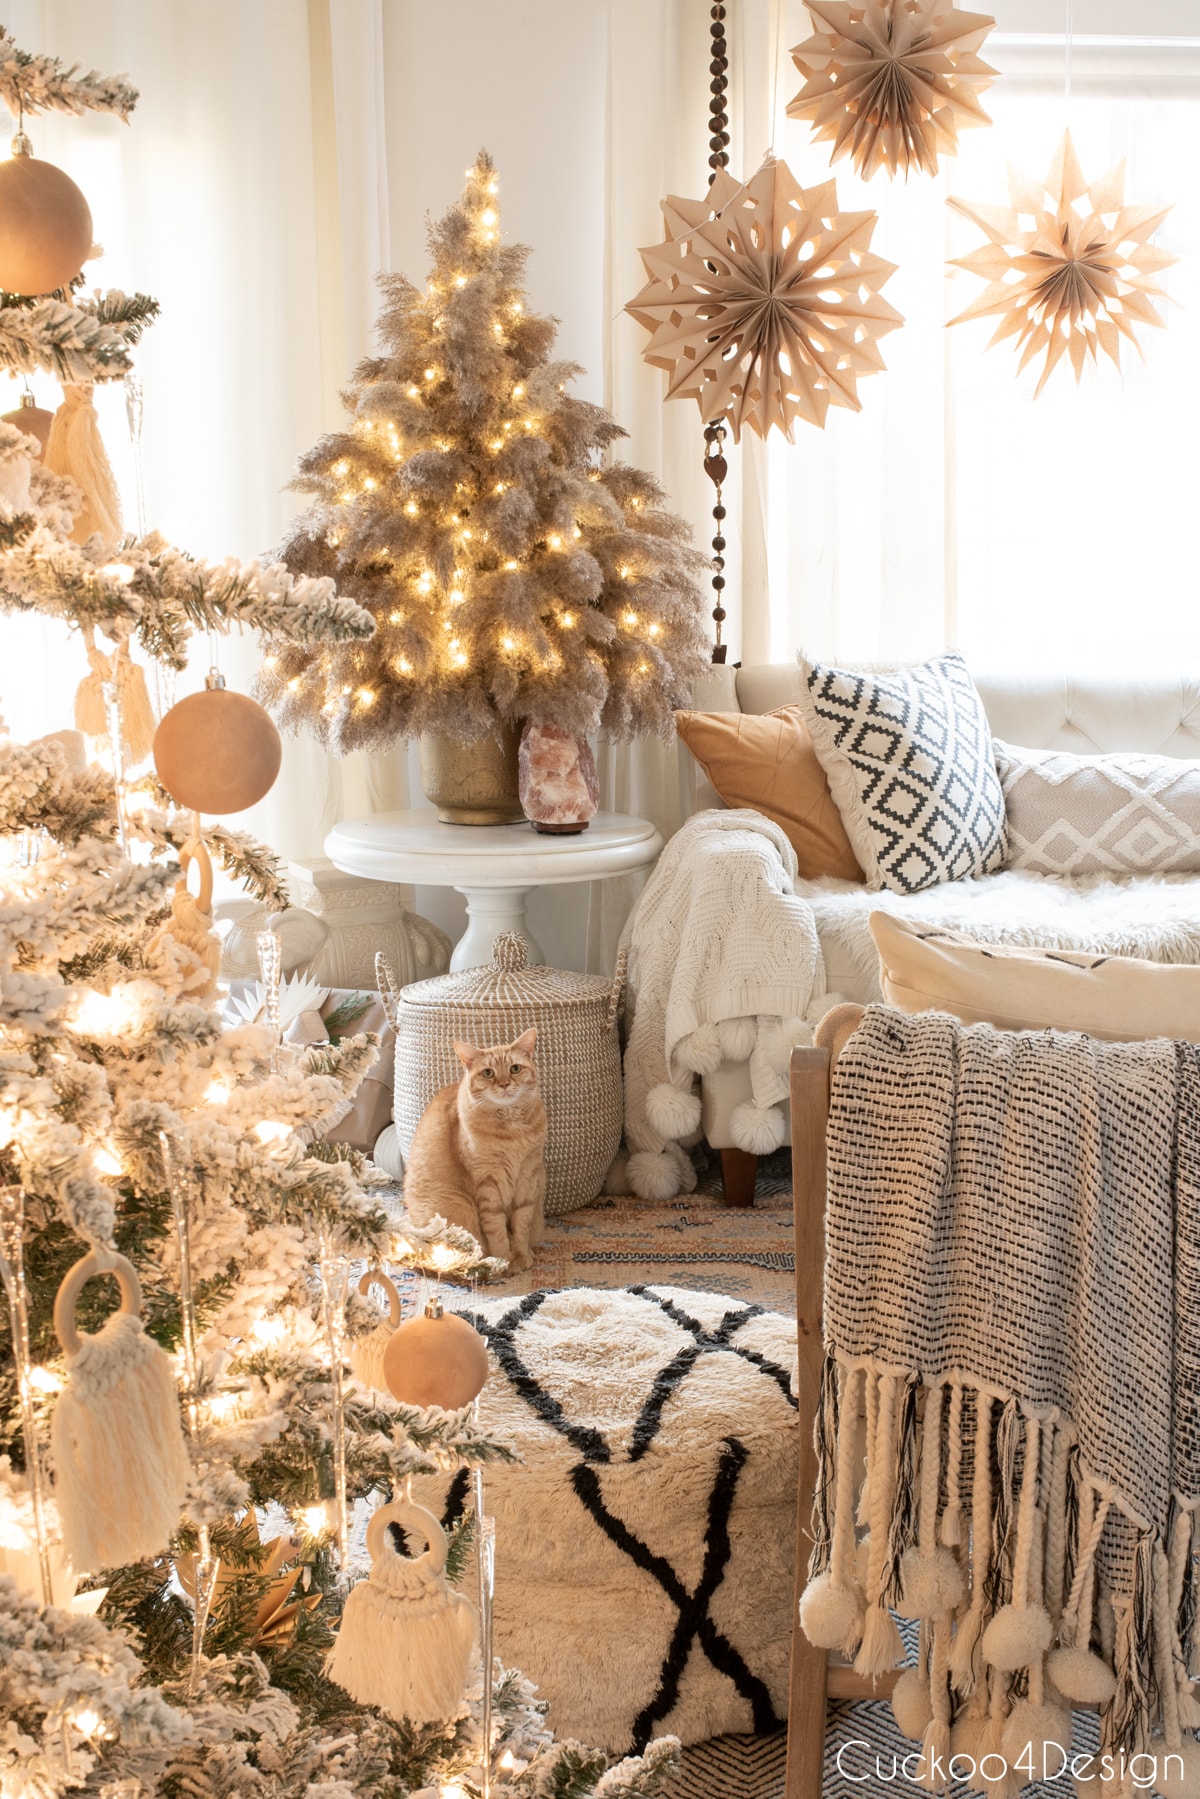
Small and large white paper bags were used in our kitchen to mix them among the brown paper bags.

Ideas to change the look of the snowflakes
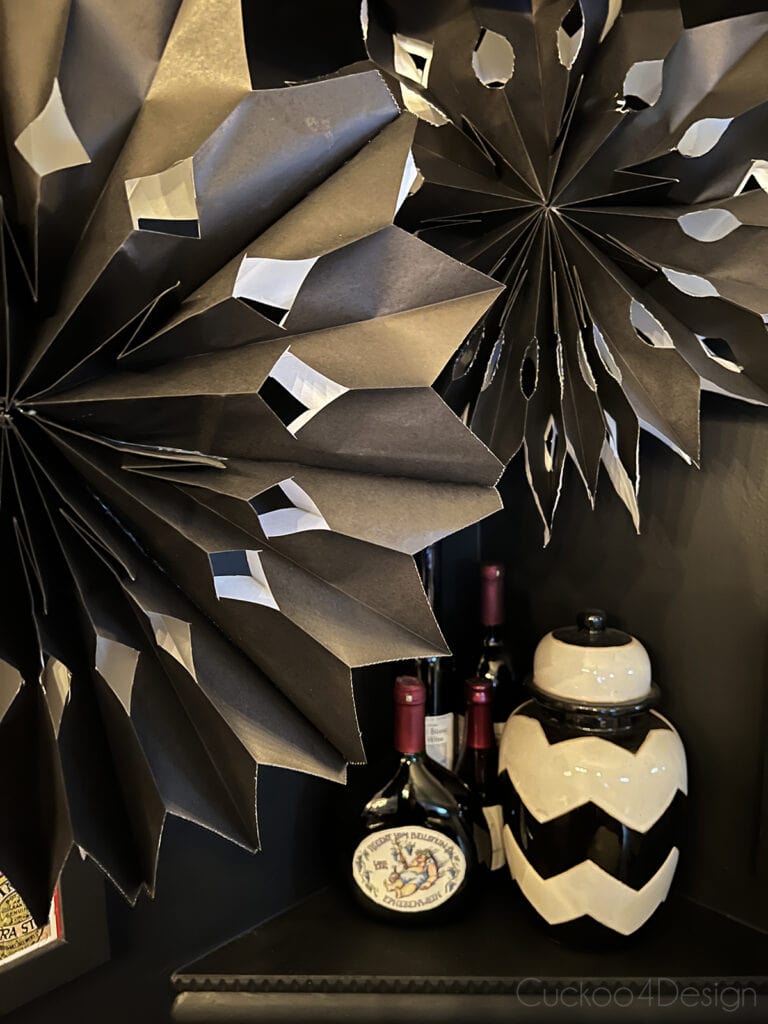
Switch it up with black and white paper bag stars as I did in our basement bar area.
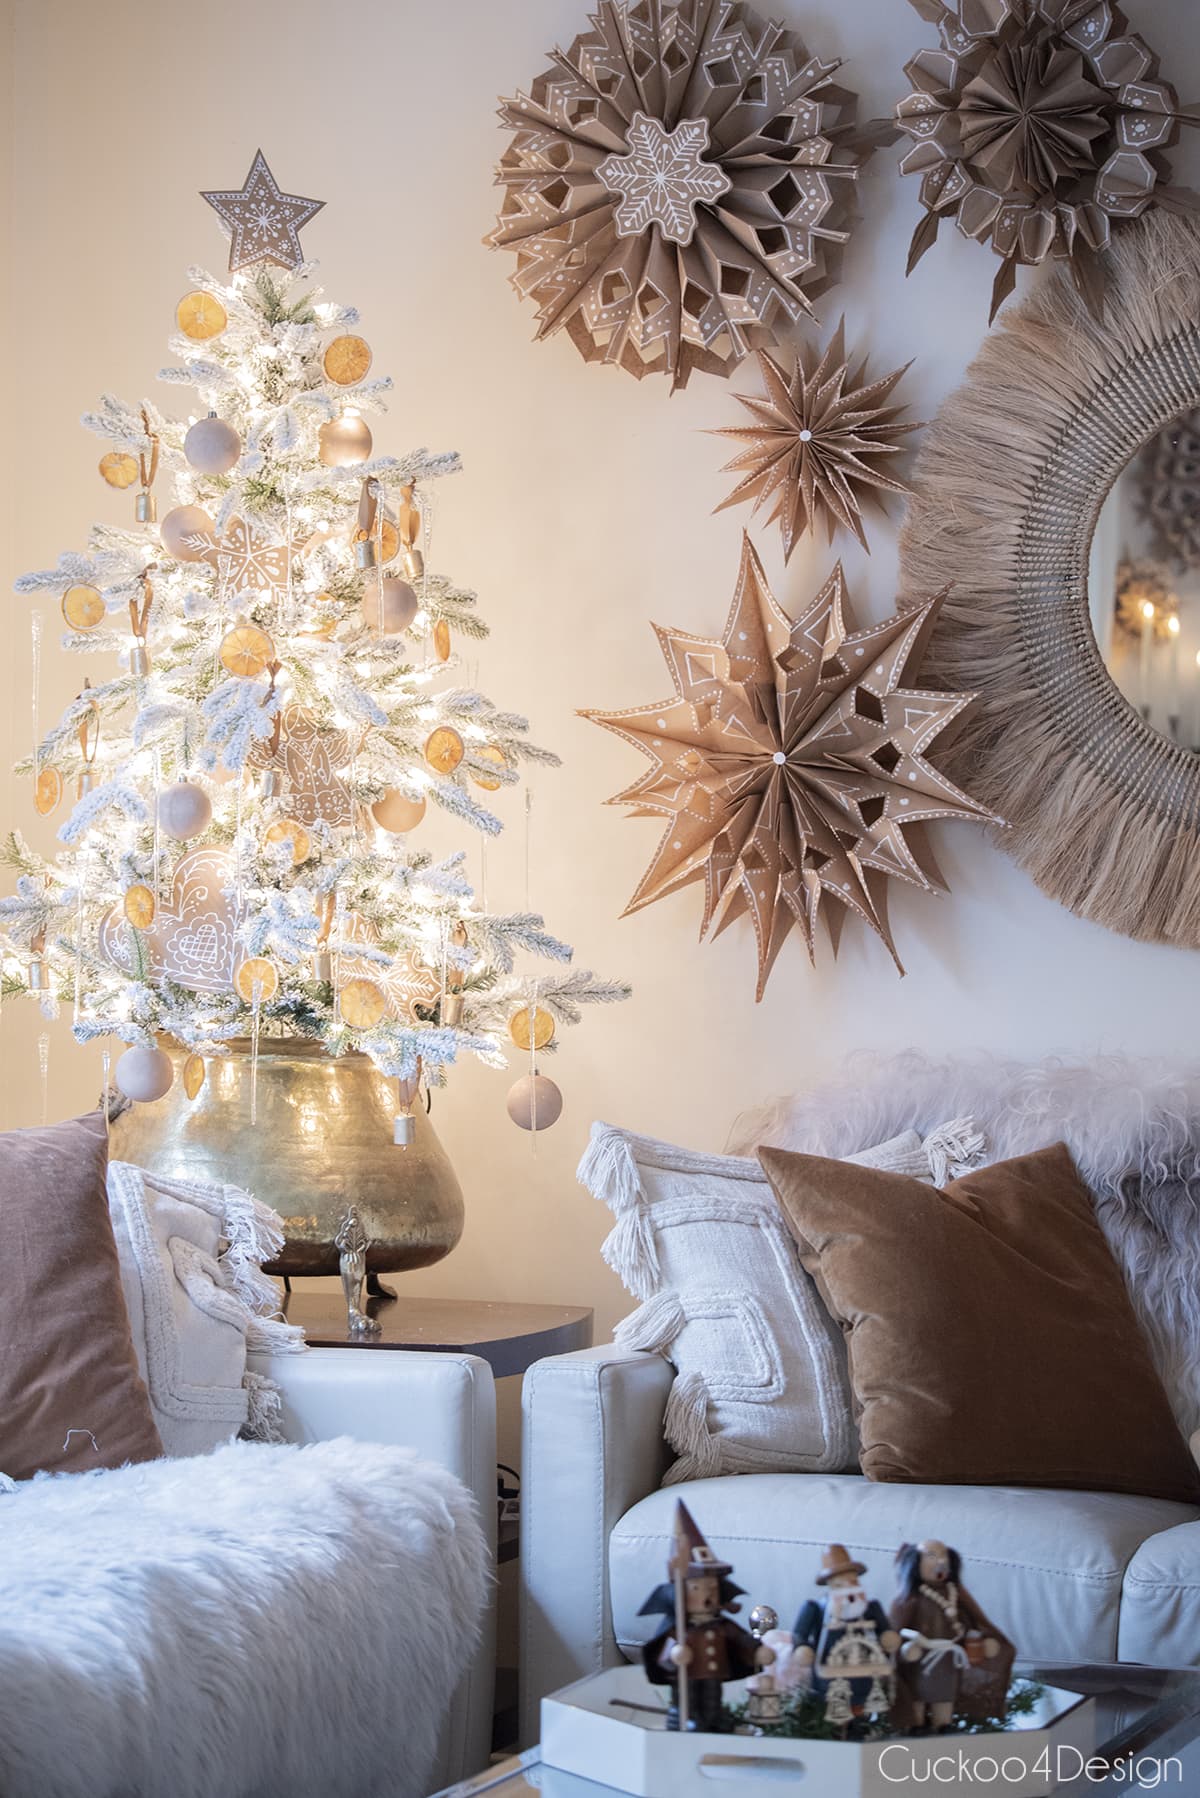
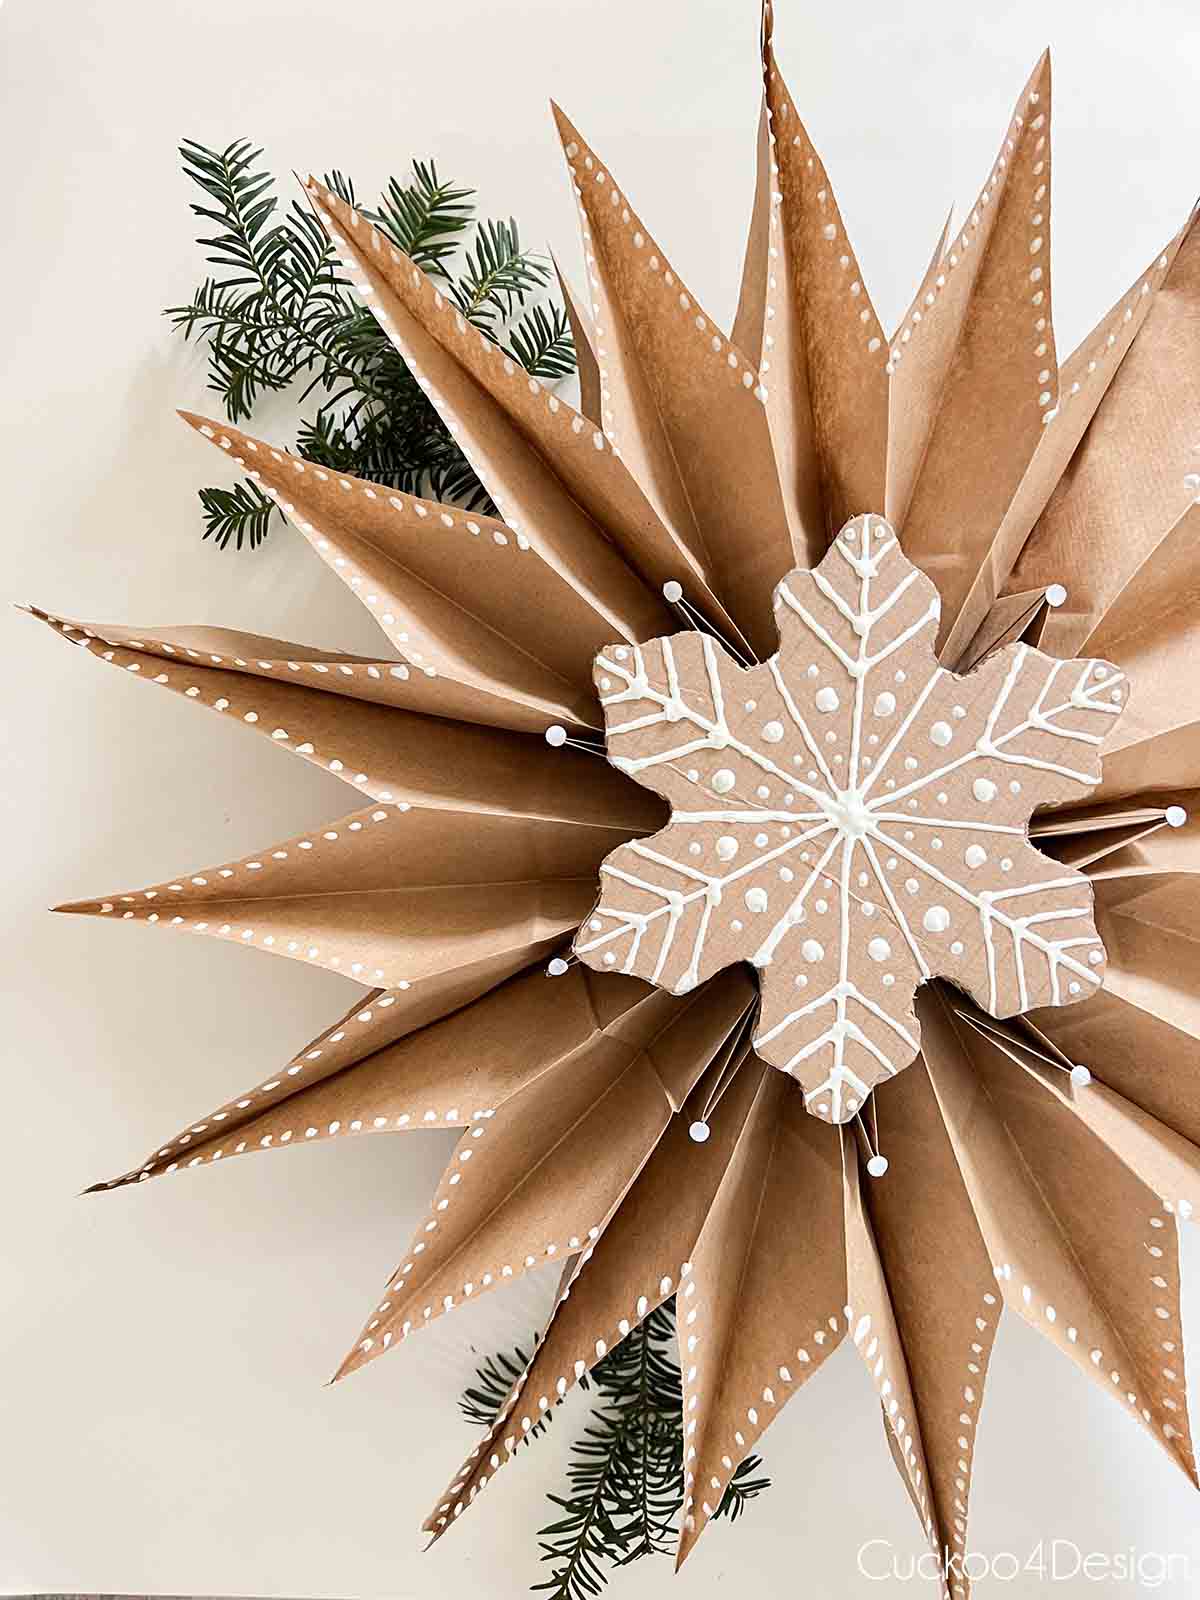
I recently added gingerbread designs to them in the same way as my faux gingerbread Christmas ornaments.
Some pattern ideas:

You can see more photos in my home tour with gingerbread decor.
You can use large brown paper shopping bags to make a giant snowflake and you only need 5 bags for that.
Now you can see why I became the paper bag snowflake expert, right?
More easy and affordable DIY Christmas decorations
- macrame Christmas tree wall hanging
- macrame Christmas ornaments (5 free patterns, including macrame snowflake)
- poster board snowflakes with free snowflake svg file
- foldable cardstock 3D star as a Christmas ornament
- plastic baking-soda paint ornaments with baking soda paint
- snowflake canvas art
I hope you enjoyed this tutorial. Happy Holidays!
Tschüß,

How to make paper bag snowflakes
In this tutorial, I'm showing you how to make large, quick, easy, and affordable paper bag snowflakes using paper lunch bags and snack bags.
Materials
- lunch bags
- craft glue
- pencil
- clothing pins or little clamps
- string
- fairy lights (optional)
Tools
- scissors
- stapler
- ruler
Instructions
- Use craft glue to glue 9 lunch bags together by drawing an upside-down t-shape on each paper bag and stacking them over one another.

- Open up the glued-together paper bag fan to make sure the bags separate and open properly. You can also use a stapler to secure some of the top edges should they come apart.
- Use a pencil to trace a snowflake shape onto the front of the glued-together paper bags. Use my free template as a guide.


- Cut the snowflake pattern with strong scissors. If you are doing this with kids then they might need help with this step. It is ok to cut a few layers of the bags at a time if you can’t cut them all at once.

- Open up the paper bag snowflake like a fan and glue the first and last bag together. The stapler is very helpful in this step while the glue is drying to ensure that the bags stay together. One or two staples should be enough.

- Staple a piece of twine, string, or cord to one tip of the snowflake to hang your pretty paper bag snowflake.
Notes
them. A manufacturer’s name can definitely ruin the design of the
snowflakes if it peeks through the folds. However, you can find pretty
Christmas designs printed on these types of brown bags would
look very pretty.
Love the hanging snowflakes! Great craft idea. Can’t wait to try it.
Thanks Ann, I had to make myself stop because I kept wanting to make more. Happy Holidays
those snowflakes look great! I might make a few for my staircase….if I can finish all the wrapping and baking!
Thank you, my husband is baking for us but I still also have to wrap gifts. I better get going tomorrow or Friday 😉 Merry Christmas!
Julia, you have the greatest MOST original ideas….love everything you do!! Have a wonderful holiday!
The snowflakes are beautiful!!!
Thank you so much Katie and Merry Christmas
Oh my word, these are amazing. What a creative and genius idea. Love the tutorial too.
these are SO beautiful! Such a great idea!
Hello Julia, thank you for this wonderful achievement. I would like to start tomorrow with the children for this Christmas that is coming.
Please, can you explain to me how to see your video tutorial ? On the link you give I see no video or download (http://creativecommons.org/licenses/by/3.0/).
Thank you very much in advance ♥
Hi Polly, that creative commons link is my Music credit that I have to give because I used the song in my video.
Please click on the triangle on the one image to watch the tutorial. I just watched and it is all working fine.
Or you can head to YouTube and watch it https://www.youtube.com/watch?v=ks1FRedU5LI
So sad these did not work out like I thought they would. I was trying to be careful as to how far I would cut into the bag but some areas cut right through. Measurements would be super helpful. I would make sure you have EXTREMELY sharp scissors. Those all metal scissors would be best
Did you add the gingerbread trim details after gluing together or before, and is it also the puffy paint like on the cardboard gingerbread? Thanks!! They are all fabulous ideas! So much to absorb! Love the terracotta pumpkins and ornaments too!
Hi Libby, yes I put painted the snowflakes after I glued them together witht he same puffy paint as the cardboard gingerbread. Thanks so much and good luck with making your own.
Hi! stumbled upon this tutorial for my daughter’s winter ONEderland party. Excited to get started! Curious, would using fewer than 9 bags still produce a larger snowflake?
Thanks for the clear guidelines!
Hi Leah! Yes, using 7 works great too. Anything less doesn’t work. Good luck!
Where does the fairy light battery pack go?
Hi Renee, mine are plug-in fairy lights not battery operated. Good luck
Julia, WOW, I just found your site on Pinterest and I’m so happy that I did. I love your snowflakes and all the wonderful design ideas you have come up with. I have subscribed to your site as I don’t want to miss anything. Thank you so very much for sharing all your ideas, without charging. It certainly means a lot to someone like me who is on a small pension. Have a great Holiday!!!!!
Thanks so much Helene for the sweet comment. That made my day! Kepp them coming. Did you see that I posted another paper snowflake tutorial today?
Hi julia, I LOVE the paper bag snowflake! However, I’m having lots of trouble fanning them out -they just don’t seem to separate and get all crinkled. Any idea what I’m doing wrong?
Hi Nancy, I”m sorry you are having issues. The only thing I can think of is that the bags glue together in the wrong spots at the top or that your bags are faulty. I’m not sure. I’ve never heard of that issue.
A paper clip or 2 will hold the fanned (first and last) bags together to hang then remove paper clips and save.
You are so right! That’s a great way to keep them for the next year. I hung mine opened from the rafters in my attic so I could bring them out again for Christmas.
Amen to all the comments! You are very talented! I just can’t seem to get it all together to make ALL the things I would like to make, and still display my nativities and such nor do I have the room. I need to cut waaaay back! But they are beautiful.
Thank you
I came for the stock tank swimming pool and stayed for the snowflakes lol
I’m brand new to your site, but I love what I’ve seen so far. I love that you include a ton of pictures. Many blogs don’t add enough pics and then there are questions as to how something is done.
Keep up the good work & thanks !
Thank you so much. I love taking photos 😉
My students loved these. I used glue dots instead of white glue and hot glue. I also used your designs to make 3d printed templates. It was easy for the students to make their sections the same. Thank you.
Oh, I’m so happy to hear that, Teresa! Happy Holidays!
This is such a creative and fun idea! I never thought of using lunch bags to make snowflakes. Can’t wait to try this out with my kids. Thanks for the detailed instructions!
I absolutely love this idea! The 3D paper bag snowflakes are such a creative way to add a festive touch to my holiday decor. Your step-by-step instructions are super clear, and I’m excited to try making them with my kids. Thanks for the inspiration!