

How to make toilet paper roll stars
Today, I want to show you how I made super easy toilet paper roll stars and how I put my own spin on them, since this is by no means a newly invented craft project. I love working with common materials that we all have in our house already and that are free. I have a huge bag full of TP rolls and love using them for different projects. This is a great eco-friendly tutorial to do with kids, just use craft glue instead of hot glue.

How to make toilet paper roll stars (simple recycled craft)
This post may contain affiliate links from which I will earn a commission at no extra cost to you. View my full disclosure policy.
Supply list
- toilet paper rolls (paper towel rolls or any other cardboard rolls work too)
- hot glue and hot glue gun (craft glue works too)
- large scissors
- small craft scissors (I just bought those and love them)
- ruler and pencil (optional)
- ribbon or twine
- wooden beads, glitter, Sharpie, and puff paint are optional for decorating

Toilet paper roll stars video tutorial
As always, I’m including a video tutorial for you, which you can also watch on my YouTube channel. A lot of times, it’s just easier to see what the hands are doing instead of reading about it.
Step-by-step instructions
I’m showing you first how to make a plain, undecorated toilet paper roll star in case you want to keep your stars plain or decorate them afterward.
Step 1: Flatten the toilet paper roll
You can use your hands, or I used the handle of my scissors to flatten the toilet paper tubes (works with paper towel rolls as well)

Step 2: Mark even sections on your rolls
You can skip this step if you are confident that you can eyeball the toilet paper roll strip cuts in the next step. I think the stars look nicer, though, if the strips are equally the same size.
I used a ruler and pencil to park 0.75-inch strips on the rolls.


Step 3: Cut the toilet paper roll strips
Use a sharp, large pair of scissors to cut even toilet roll pieces of toilet paper or paper towel rolls.

Step 4: Cut out the tips of the toilet paper roll strips
Use small, sharp craft scissors to cut small V-shapes out of the tips of the toilet paper roll strips. Make sure that you don’t go all the way to the edge of the strip on both sides, or the entire strip will fall apart.

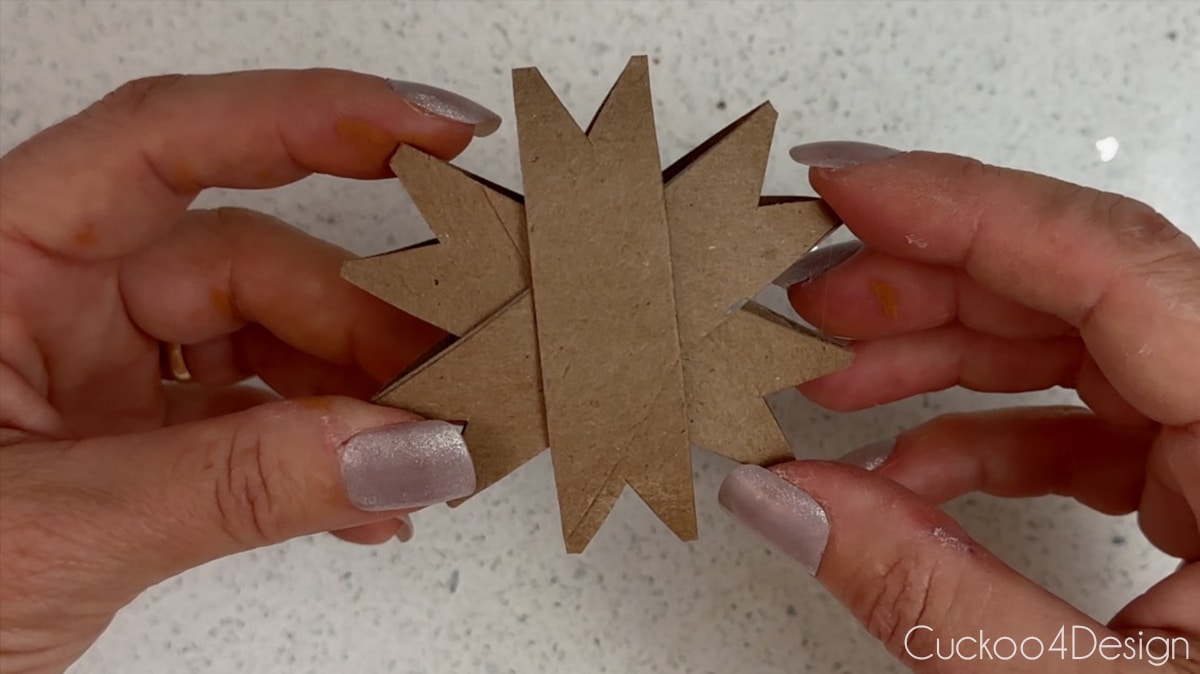
Step 5: Stack and glue the toilet paper roll strips into a star shape
You need three strips of toilet paper roll for one star. Take one of those strips and add hot glue to the outside center on both sides. (If you are doing this project with children, use craft glue instead of hot glue.)

Take that strip with the glue and insert it into the second strip of toilet paper roll so the centers meet.

When you press the two strips together (which should look like a slightly smooshed X), make sure you leave room for the third strip of toilet paper roll.

Now add a dot of glue to the center of the two glued-together strips on both sides.

And then slide them into the third strip of toilet paper roll.

If you did this all rather quickly, you should still be able to adjust the strips to get an even star shape before the hot glue cools off. (You have more time with craft glue.)

Here is the finished toilet paper roll star.
RELATED: I also made winter-themed toilet paper roll snowflakes, which are a little bit more work than today’s stars but also easy to make. But let’s focus on stars for today.
Different ways to dress up the toilet paper roll stars
Now that we’ve got the basic construction of the stars out of the way, let me show you what I did to make them match my decor, inspired by my favorite velvet pillows.
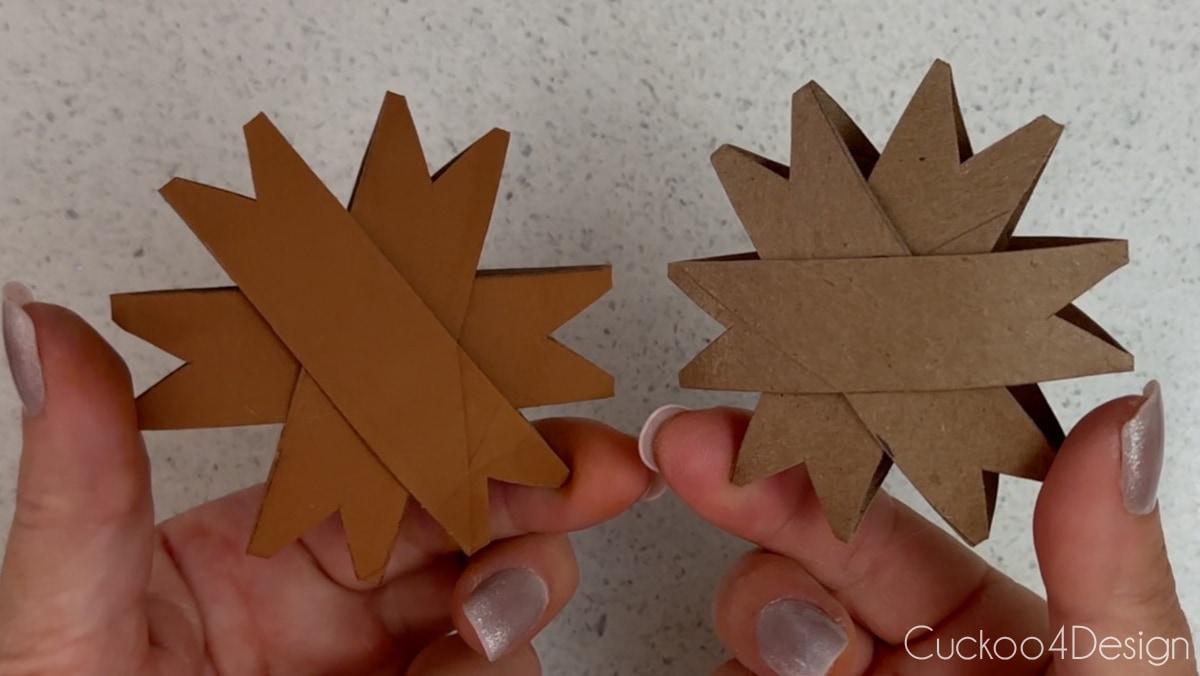
Painting the toilet paper rolls
I flattened and then painted my cardboard tubes ahead of making the stars. It is preferential, but I just like the look better and it’s easier that way too than painting every star individually. (I mixed baking soda paint the same way as I did in my DIY painted Christmas ornaments tutorial)
Let the rolls dry and then construct your star the same way as I mentioned in the above steps.

Here is a painted star versus a plain toilet paper roll star. Unfortunately, the texture isn’t all that noticeable in the photos.
Paint on faux leather stitching
You can even add faux stitching to the stars to make them look like stitched leather. I tried a white and brown Sharpie for that. Simply add small lines to the outside perimeter.

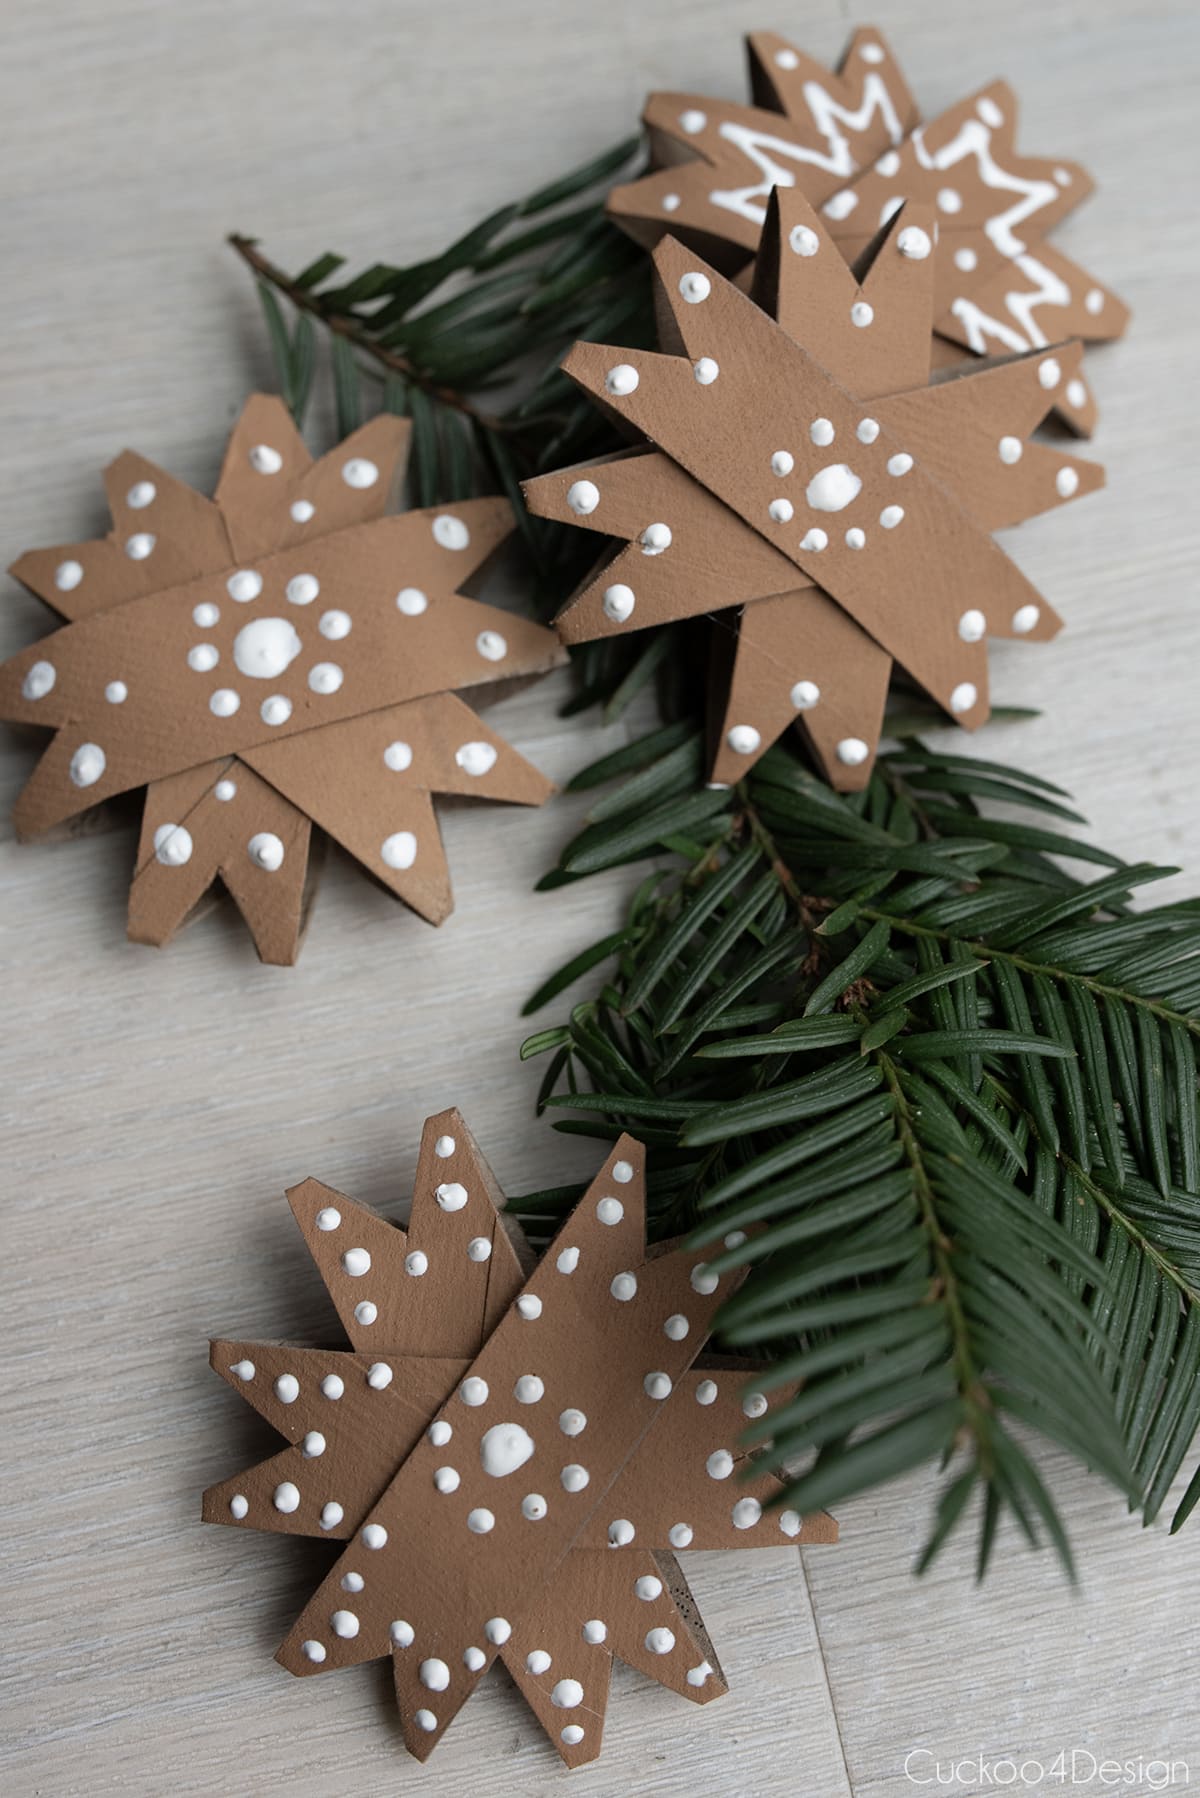
Decorating the toilet paper roll stars with puff paint
I am obsessed with puff paint and how white puff paint looks like sugar icing. You can doodle all kinds of patterns onto your stars. I kept it simple with some dotted designs, which is super easy, as you can tell in my video tutorial.

Adding wood beads to the top of the star
You can add some wooden beads to the twine or ribbon that you use for hanging.


Dip the stars in glitter
If you are a fan of glitter, you can brush the stars with craft glue and dip them in glitter to match your holiday decor.
Turn them into a gift tag
I used the same white Sharpie that I used earlier to turn them into gift tags by painting one of the strips like a banner and adding a name to the center.

Photos of finished toilet paper roll stars
I used them all over my house for my Christmas decorations and my gifts. However, the main reason that I wanted to make these super lightweight ornaments is our basement family room tree, which has family photo ornaments on it that are heavy and drag down the branches. I needed ornaments that barely weigh anything, and the toilet paper roll stars are perfect.
I never really share our basement anymore because it is so dark down there and hard to photograph. But let me show you.

We have had a Christmas family photo since the year we got married. We’ve been married for 25 years, so there are a lot of them. I usually buy the annual Pottery Barn frame ornament, but sometimes they are sold out so fast that I didn’t get one. This year is one of those years, and now I have to find one somewhere else.

Walter wanted his photo taken, too. He has fake snow on his head.

When I started to decorate for this year, I decided to repaint some of my cheap plastic ball ornaments with the baking soda paint again, as I did in my DIY painted Christmas ornaments tutorial. I mixed a paint color to match my pillows, which is a slightly darker terracotta paint color. You can see them below. I topped them with jute yarn the same way I did with my faux Mexican Christmas ornaments.
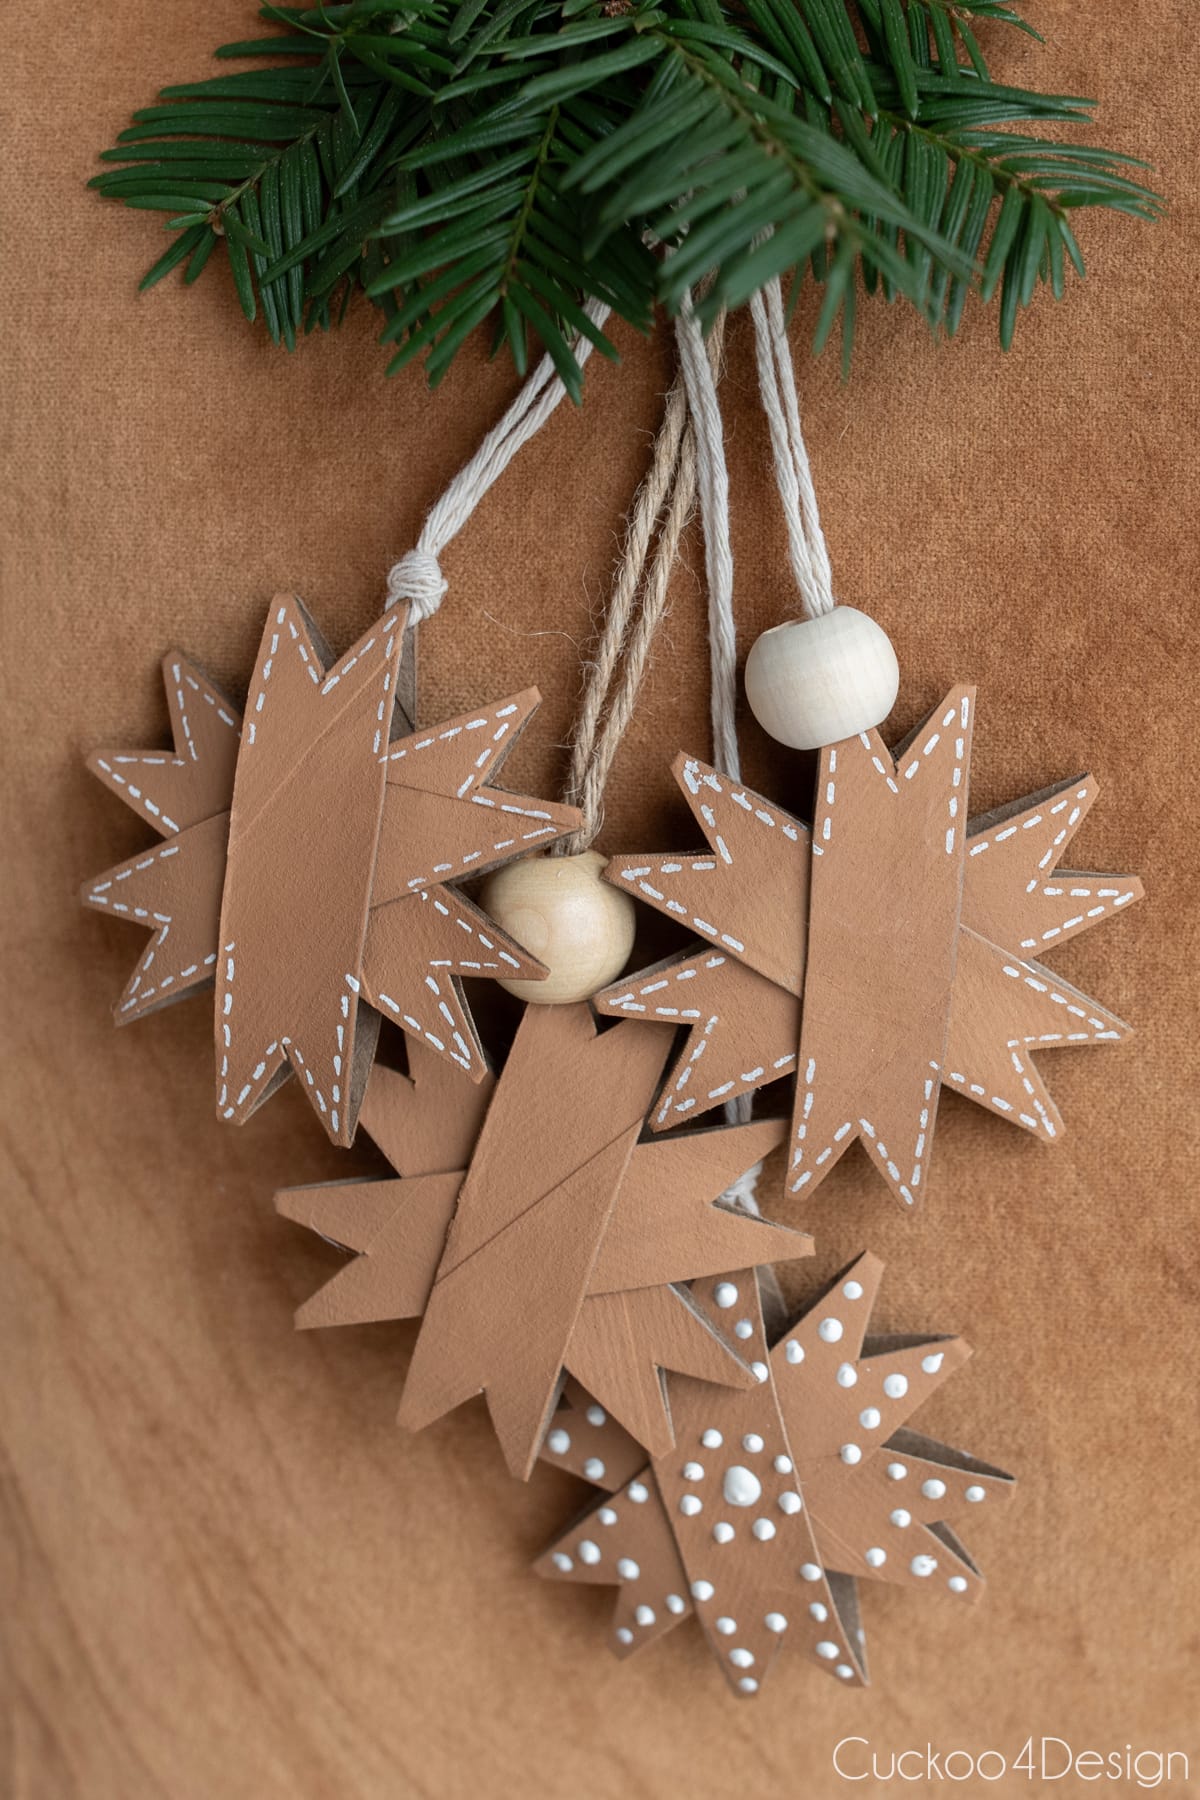
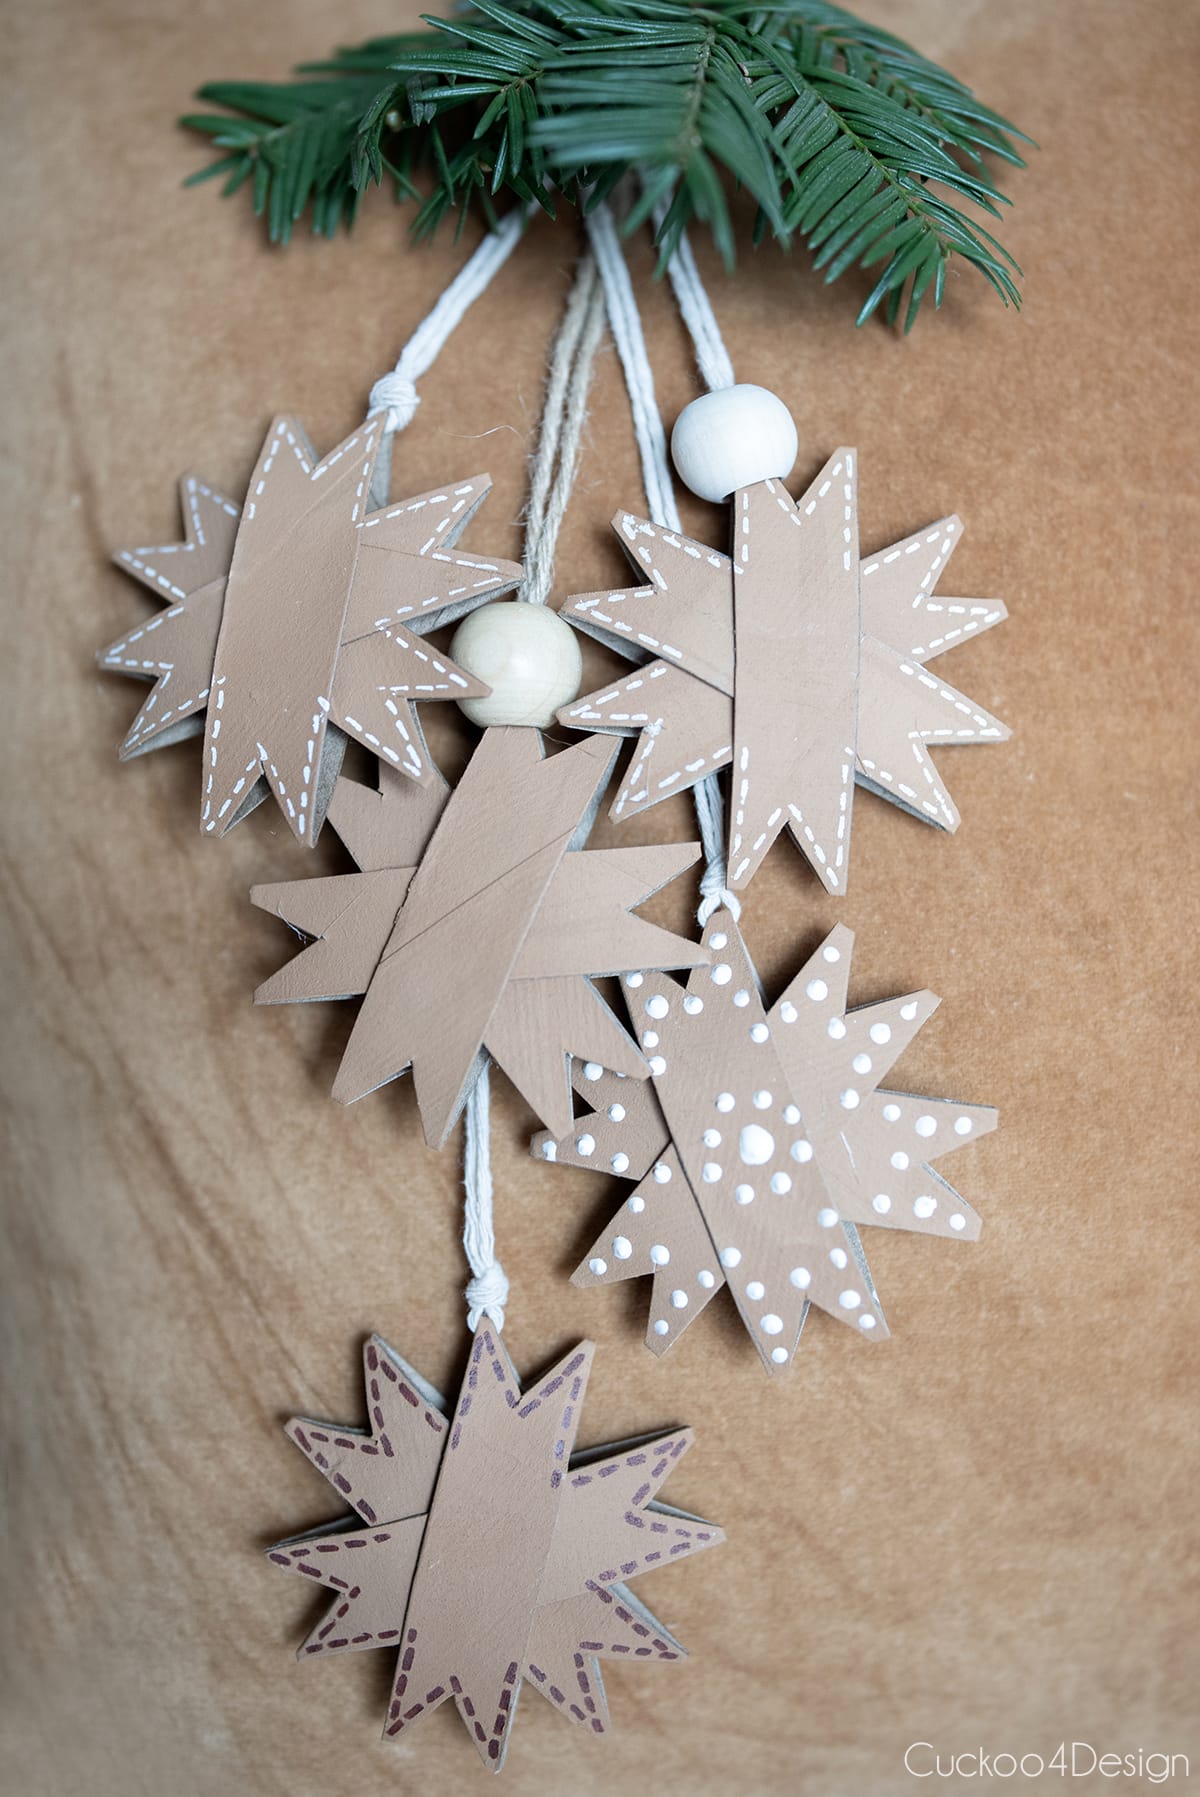
I had a lot of the mixed paint color left and used it for the caps in my mushroom Christmas ornaments tutorial. And for today’s tutorial, I used the rest of that paint. The stars look so pretty painted. My neighbor came over while I was working on them, and she asked if the stars were made from leather. I agree, in person, they look just like leather. Of course, you can keep them in plain cardboard color as well. To some of them, I added the leftover white puff paint that I used in my DIY gingerbread ornaments made from cardboard from last year.
Below, you can see a grouping of some of the mentioned DIY ornaments.

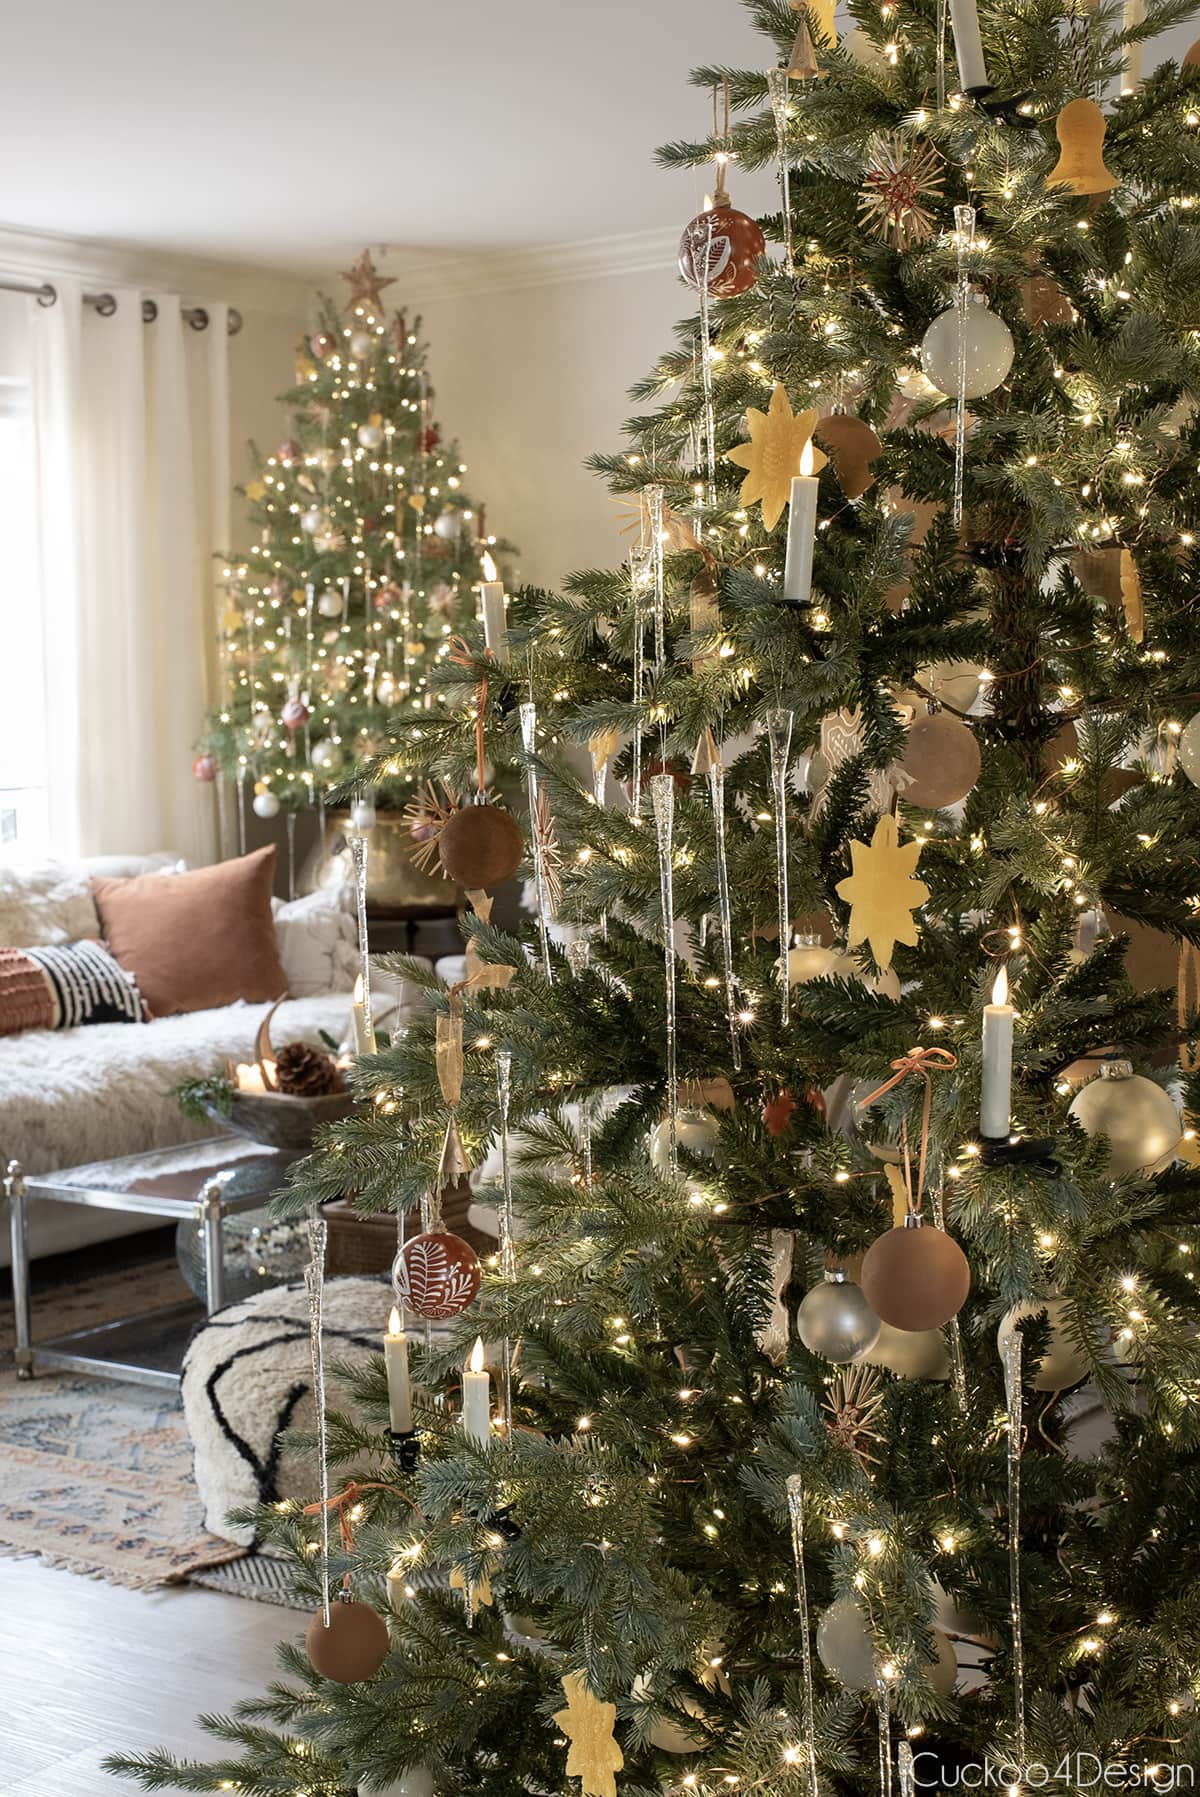
The stars don’t need a string for hanging, and I like to just stick the star ornaments on the branches. Here I have them in front of each battery-operated clip-on candle. (You can see the plastic ball ornament that I painted in the same color and texture as the orange ribbon.)
Here they are all hanging on my tree.

Do you love stars? Check out my customizable folded paper stars, where you can make 5, 6, or 7+ pointed stars. Or my DIY yarn stars that light up with fairy lights.

And here are more photos of the rest of our home decked out for Christmas this year in case you missed it. You can see that it all flows well together.
Our new live tabletop Christmas tree is decorated the same way as the other sparse artificial Christmas tree.

And across from that is our fireplace area with my new doily snowflakes.

The mushroom ornaments ended up in our dining room along with the old brown bag snowflakes that now have paper bag snowflake patterns in white puff paint as well. I love that added detail. Check out the tutorial for more info.

And here they are as different gift toppers…


I still have so many more little projects I want to share, but not enough time. Let’s see what I get done!
Happy Holidays and crafting,


How to make toilet paper roll stars
Learn how to make toilet paper roll stars. An easy, eco-friendly DIY craft perfect for Christmas, 4th of July, or everyday decor.
Materials
- toilet paper rolls (paper towel rolls or any other cardboard rolls work too)
- hot glue (craft glue works too)
- ribbon or twine
- wooden beads, glitter, Sharpie, and puff paint are optional for decorating
Tools
- hot glue gun
- large scissors
- small craft scissors
- ruler and pencil (optional)
Instructions
- You can use your hands, or I used the handle of my scissors to flatten the toilet paper tubes (works with paper towel rolls as well)

- You can skip this step if you are confident that you can eyeball the toilet paper roll strip cuts in the next step. I think the stars look nicer, though if the strips are equally the same size.
I used a ruler and pencil to park 0.75-inch strips on the rolls.
- Use a sharp, large pair of scissors to cut even toilet roll pieces of toilet paper or paper towel rolls.

- Use small sharp craft scissors to cut small V-shapes out of the tips of the toilet paper roll strips. Make sure that you don't go all the way to the edge of the strip on both sides, or the entire strip will fall apart.

- You need three strips of toilet paper roll for one star. Take one of those strips and add hot glue to the outside center on both sides. (If you are doing this project with children, use craft glue instead of hot glue.)
Take that strip with the glue and insert it into the second strip of toilet paper roll so the centers meet.
When you press the two strips together (which should look like a slightly smooshed X), make sure you leave room for the third strip of toilet paper roll.
Now add a dot of glue to the center of the two glued-together strips on both sides.
And then slide them into the third strip of toilet paper roll.
If you did this all rather quickly, you should still be able to adjust the strips to get an even star shape before the hot glue cools off. (You have more time with craft glue)


Notes
You can dress up the toilet paper roll stars by painting them, adding faux leather stitching with Sharpie, decorating them with puff paint for a gingerbread detail, adding wooden beads to the hanging twine, brushing on glue and dipping them in glitter, or turning them into gift tags and gift toppers.
You always come up with great fun ideas. Do you have a pickle ornament on your tree?
We also really enjoy our German decorative pieces such as the pyramid, the Angel and Miner, nutcrackers, smokers and various collections as well as Christmas linens.
It brings a touch of my German history to our home.
Wishing you and your family a joyous Christmas.
Hi Susan, no we actually never had a pickle ornament, not even as kids in Germany but I believe my uncle did. Love my German Christmas pieces too. And thanks so much. Merry Christmas to you and yours too.
Hello, I’ve made loads of these stars but I want to turn them into garlands instead of ornaments. Any suggestions for how to do that without all the stars sliding together?
I would tie or glue them to a ribbon individually
What is the color of the paint you used?
Hi Jody, I used a Valspar paint sample leftover called Rustic Oak 2007-7B. You can buy small samples for cheap at Lowe’s. Or you can buy terracotta colored craft paint on Amazon.