

How to make a macrame angel (3 easy different free patterns)
Learn how to make a pretty macrame angel with this simple, step-by-step tutorial that includes three different free macrame angel patterns so you can add as many details as you want to your angel.
A macrame angel isn’t just for Christmas decor. For example, they are also a perfect gift for a nursery hanging above a crib (out of reach of the child, of course), or as a gift topper.

How to make a macrame angel (3 easy, different, free patterns)
Supplies
- macrame yarn (I had several thicknesses and colors left in natural colored 2mm macrame cord, khaki 3mm macrame cord, and natural colored 4mm macrame cord)
- sharp scissors
- comb
- fabric stiffener
- wood beads (these 3/4-inch wooden beads are perfect for adding hair with macrame yarn since the holes are bigger)
- 2-inch macrame rings
- (hot glue gun if you add hair)
I used macrame yarn that I had leftover from other projects. The 3mm khaki macrame yarn that I used for the hair is leftover from my macrame necklace tutorial.
Video tutorial
As always, I made a video tutorial that shows you really well what my hands are doing during each step. It is definitely helpful. If the video doesn’t load for you, then you can also watch it on my YouTube Channel instead.
Video music credit: Midsummer Sky and Eternal Hope by Kevin MacLeod is licensed under a Creative Commons Attribution 4.0 license. https://creativecommons.org/licenses/by/4.0/
Step-by-step macrame angel tutorial
This post may contain affiliate links from which I will earn a commission at no extra cost to you. View my full disclosure policy.
This is the ultimate step-by-step guide to making macrame angels. You can customize your macrame angel according to what you like after you read this tutorial. Whether you want to add hair, different wing sizes, or different colors, it’s entirely up to you.
The easiest macrame angel
This simple macrame angel is a combo of making a tassel and a macrame feather. It doesn’t get any easier and is perfect for beginners. Of course, you can add hair to this one as well, like I’m showing you later, but I wanted to start out with the most basic way of making a macrame angel first.
Step 1: Cut your macrame pieces
- cut 2 pieces of 2mm ivory macrame yarn at 10 inches
- cut 2 pieces of 4mm natural macrame yarn at 8 inches
- cut 10 pieces of 4mm natural macrame yarn at 10 inches

Step 2: Create the angel’s body
Take the ten 9-inch pieces to create the body of the macrame angel by tying them together in the center with one of the 10-inch 2mm pieces of yarn. Then fold them in half at the center where you just tied the pieces together.
Tip: You can substitute any twine or yarn for the 2mm macrame to tie off the angel’s body since it is simply for hanging the angel and should be thinner than the 4mm macrame yarn. You can also unravel the 4mm macrame yarn to make a thinner piece of yarn.

Step 3: Add the angel head/wood bead
I like adding the wood bead/head before tying off the body shape to get a sense of proportion first. Simply insert the 2mm yarn ends through the wood bead.

Step 4: Tie off the angel dress
Now that you have an idea of proportions, you take the other 2mm piece of macrame yarn (or other thin twine) to tie off the waist of the angel dress. Trim the knot.
If you aren’t new to macrame, you can use the Gathering Knot Method but I simply just knotted the piece of yarn in the back, which is fine and makes things easier. The wings will hide this knot in the end.

Step 5: Add the basic wings
Take the two 8-inch 4mm macrame yarn pieces and fold them in half. Then, add them to the body shape with a Square Knot. This is exactly what you do repeatedly when making a macrame feather. For this macrame angel, you only do it once instead of stacking them repeatedly.
Simply place one piece folded in half behind the body of the angel. Then place the second piece folded in half in the opposite direction on top of the body.
After that thread each open end through the opposite loop and pull tight.

Step 6: Unravel, comb, and stiffen the yarn (optional)
Use a comb and your hands to unravel the dress and wings of the angel. I placed the macrame angel on a dinner plate and sprayed it with fabric stiffener. Then I combed the wet yarn back into the angel shape and let it dry overnight, but that is optional.

Step 7: Trim the yarn
Once the fabric stiffener has dried, it is easy to trim the edges of the angel dress and wings with sharp scissors.
Also, knot and trim the string for hanging the angel.

Voila, here is the simplest way of making a macrame angel without any frills and only one simple macrame knot.

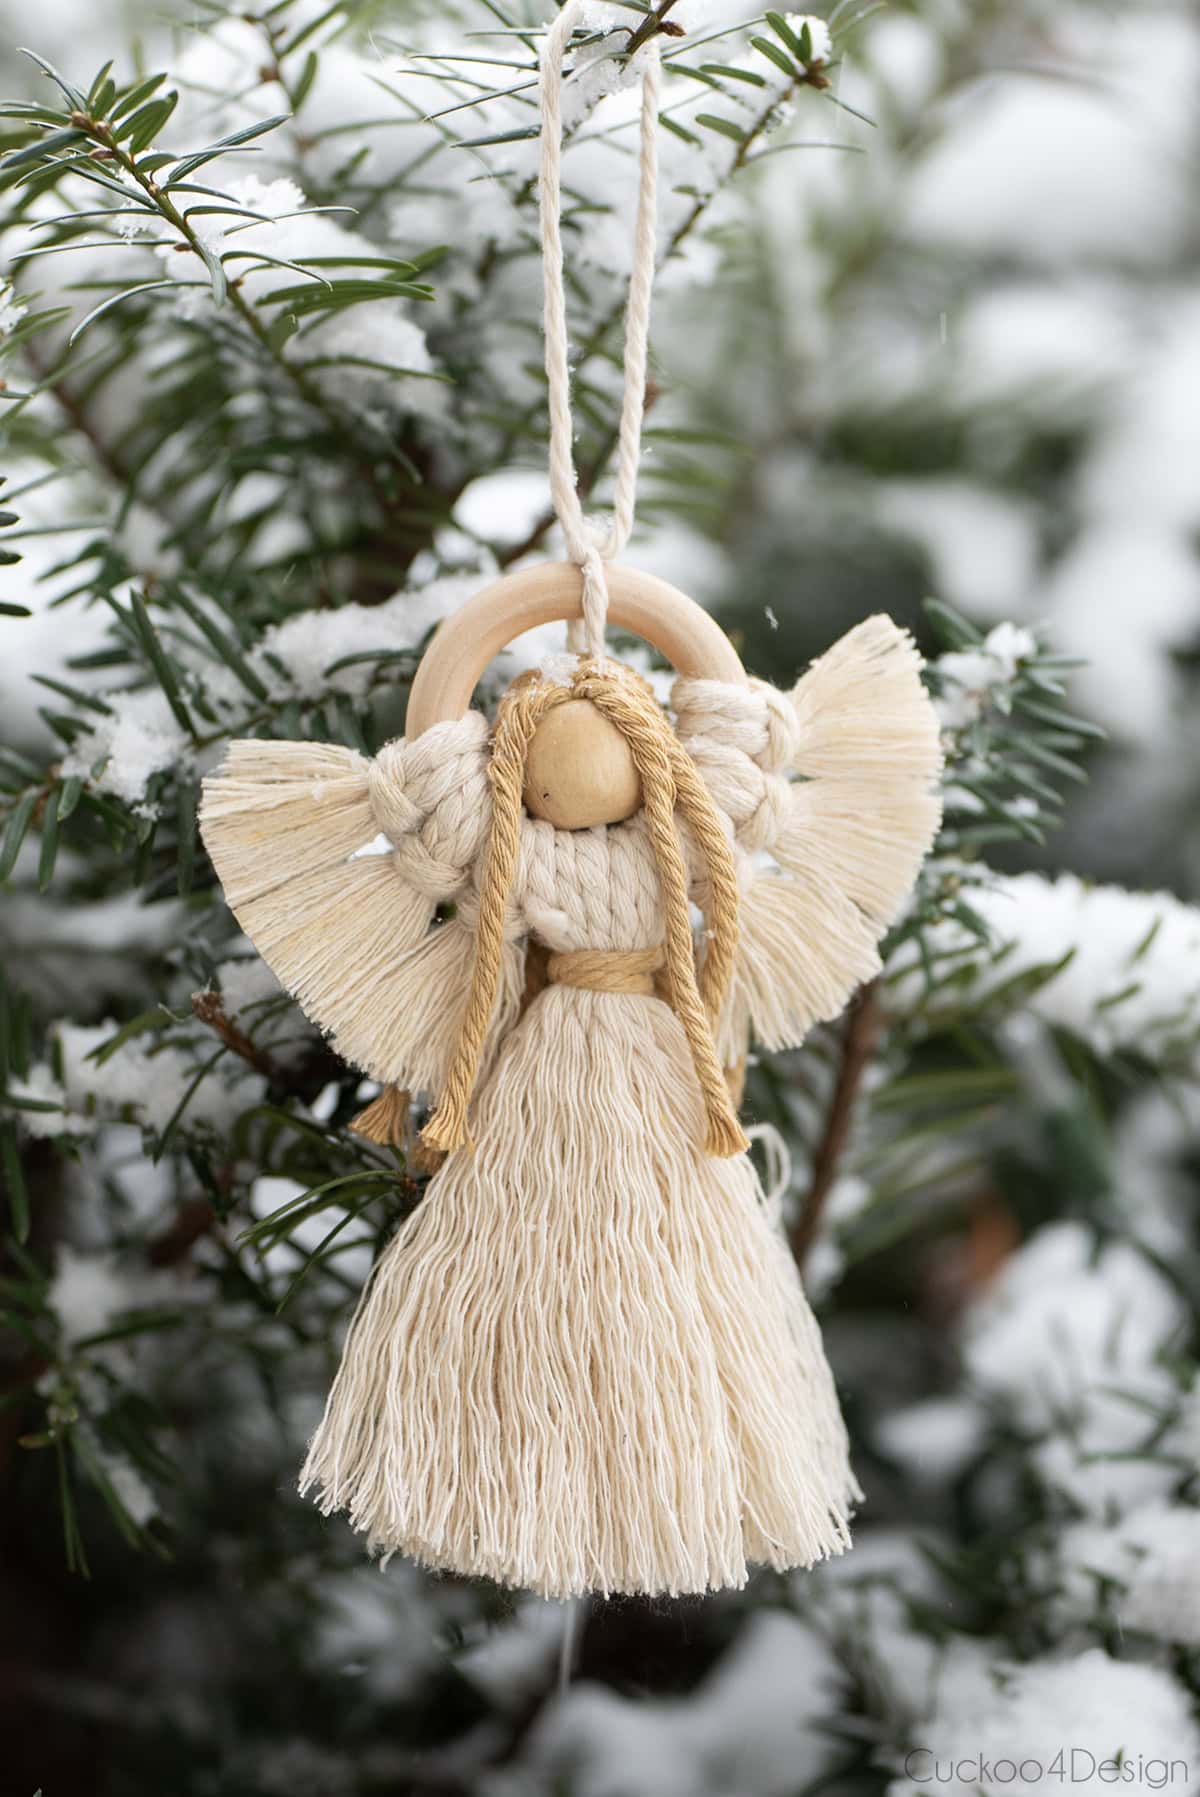
Macrame angel with hair and small wings
This second macrame angel is also very easy, although it might look a bit more complicated. Adding the hair is optional, but I love the look.
For this beautiful angel, the wood bead/head is inside the wooden ring which makes the arms look like they are above the head.
Step 1: Cut your macrame yarn pieces
- cut 2 pieces of 2mm natural yarn at 18 inches (for hanging ring and bead)
- cut 1 piece of 3mm khaki macrame yarn at 10 inches (for belt not pictured or you could use gold cord)
- cut 6 pieces of 3mm khaki macrame yarn at 10 inches (for hair)
- cut 6 pieces of 4mm natural macrame yarn at 9 inches (for body/dress)
- cut 8 pieces of 4mm natural macrame yarn at 5 inches (for wings)
Plus you need one 3/4-inch wooden bead and a 2-inch wooden ring.

Step 2: Create the macrame angel head with hair
- Tie off the six 10-inch pieces of 3mm khaki macrame yarn in the center with one piece of the 2mm neutral yarn.
- Fold the other piece of 2mm neutral macrame cord in half and thread it through the ring.
- Thread the other end through the loop of the folded piece.
- Pull on the ends of the yarn to pull it tight. This is called a Lark’s Head Knot.
- Turn the Lark’s Head Knot inward so the ends are hanging inside the ring.
- Thread the wooden bead onto the ends of the yarn that is attached to the ring so the bead is inside the ring.
- Now, take the 3mm khaki yarn and insert the ends of the yarn that you tied the 3mm yarn with into the wooden bead the opposite way to the yarn that is already inserted.
- Hold both ends of the 2mm natural yarn while pulling.
- Ensure with your one hand that the tied off khaki yarn gets inserted evenly into the wooden bead.
- Pull the khaki yarn into the wooden bead while holding it with your other hand.
- Take the two ends of the 2mm neutral yarn that are coming out of the end of the wooden bead without the bunch of 3mm khaki yarn and split it apart.
- Tie those ends tightly to the wooden ring.
- Now take the other 2 ends of 2mm neutral yarn coming out of the wooden bead with the khaki hair yarn.
- Split it apart around the ring and tie it to the opposite end of the wooden bead.
- Make sure it’s nice and tight.
- Grab the ends of that piece of yarn and knot it for hanging the angel.
- Trim the ends of the knot.
- Fix the 3mm yarn that represents the hair.
- This is what the ring, wooden bead/head, and hair should look like now.


Step 3: Add macrame cord to form the angel body
Now it’s time to create the angel dress and body shape. Take three of the 4mm 9-inch pieces, and fold them in half over the wooden ring to the one side of the wooden bead. Repeat that with the other 3 pieces on the opposite side.
Take the single 3mm khaki piece and tie off the waist of the angel. Again, you could use the Gathering Knot Method or simply knot it in the back and trim it. That is what I did since the hair will hide the knot regardless.

Step 4: Add the angel wings with Lark’s Head Knots
Now, you have a girl in a dress with her arms above her head and it’s time to give her some angel wings.
Loop 3 pieces of 4mm macrame yarn that are 5 inches long onto each side of the wooden ring next to the dress by folding the cords in half and then using a Lark’s Head Knot. This is the same way you attached the 2mm cord to the ring earlier when creating the head.

Step 5: Unravel, comb, and trim the yarn
Use a comb to unravel the macrame yarn on the dress and wings. You can stiffen the yarn again but that is optional. Trim the dress and wings with your sharp scissors.

Step 6: Trim and glue down hair (optional)
Time to fix the hair if it isn’t laying flat. You can dab small amounts of hot glue to the wooden bead and smooth the hair over the glue.
Trim the hair to your desired length.

You can open the macrame yarn for the hair as well, but I find it easier to keep it twisted. That way you can hot glue it to the wooden bead much easier.
Also, if you cut the yarn for the wings longer then you can have larger wings and cut them in a different shape as well.
And you are done with angel number two. I have to admit, this one is my favorite out of the three.

Below, it is hanging on a gift. Since this is a pink and gold gift bag, you can picture how this macrame angel would look in a nursery. You can buy a bigger wooden ring or gold metal ring and make it a bigger macrame angel wall hanging too.

Macrame angel with hair and large knotted wings
This third angel features large wings where you will need Double Half Hitch Knots, but the rest is very similar to angels one and two. Again, the hair is optional.
For this angel, the wood bead/head is outside the wooden ring, which makes the arms look like they are downward next to the body.
I also used the same colored yarn to tie off the hair, and it’s not completely inserted into the wood bead like angel number 2.
Step 1: Cut your macrame yarn pieces
- Cut 1 piece of 2mm natural yarn at 18 inches (for hanging angel)
- Cut 2 pieces of 3mm khaki macrame at 10 inches (for belt and hair)
- Cut 6 pieces of 3mm khaki macrame yarn at 10 inches (for hair)
- Cut 3 pieces of 4mm natural macrame yarn at 9 inches (for inside the body/dress)
- Cut 6 pieces of 4mm natural macrame yarn at 12 inches (for body/dress)
- Cut 8 pieces of 4mm natural macrame yarn at 24 inches (for wings)
Plus you need one 3/4-inch wood bead and a 2-inch wooden ring.
Step 2: Create the head and hair
Since this part is very similar to the second angle, I’m not going into full details. Simply loop an 18-inch piece of 2mm neutral macrame yarn that is folded in half onto the wooden ring with a Lark’s Head Knot again. Then thread on the wooden bead but keep the bead on the outside of the wooden ring.
Tie off the 6 pieces of khaki macrame yarn with a 10-inch piece of khaki 3mm yarn and insert that into the wooden bead to create the hair. Also, tie the ends securely around the wooden ring.

Step 3: Create the body/dress
Place the 4mm macrame yarn on each side of the wooden bead on the wooden ring again and tie it off at the waist with a 3mm piece of khaki macrame yarn. This time make sure that you split the dress in half over the wooden ring.

Step 4: Add the large knotted wings with Double Half Hitch Knots
Loop on four 24-inch pieces of the 4mm natural macrame yarn on each side of the body with reversed Lark’s Head Knots to create the arms that will then get knotted into wings. Again this is the same way you added the wings to the second angel, the only difference is that you don’t see the looped part because it is on the back of the angel, hence the name “reversed”.
The part of knotting the wings with Horizontal Double Half Hitch Knots is best shown in the video. Take the first cord on the left of the wing as pictured, that will be your filler cord that all the others get looped onto. Then start looping each cord onto the filler cord twice and work your way up to the wooden bead until all cords are looped on.
Now take two cords at the beginning (left side) and put them aside. Then grab the third one as your next filler cord and work your way up to the wooden bead again by looping each cord on twice.
Repeat the same thing on the other side.

Step 5: Add volume to the skirt and trim it
I wanted the dress and body of the angel to look fuller, so I looped on three more 9-inch pieces folded in half of 4mm natural macrame yarn onto the ring inside the body part.
After that, I trimmed the dress.

Step 6: Unraveling, stiffening, and trimming the wings
Now, you unravel and comb the wings the same way you did with the other angels. This is the only angel where I think stiffening the wings is a must so they keep their shape.
You can also unravel the dress, but I liked the contrast of the cords against the unraveled yarn of the wings.
After the stiffener has dried, trim the wings.
(You can also glue down the hair the way I previously did to angel two)

And you are done!

My tips for making macrame angels
- You could also use embroidery thread for the angel’s garment belt the way I used it for my combed macrame yarn wall hanging.
- I recommend thinner macrame yarn for the hair or you can unravel and comb any 4mm yarn and thicker to create the hair. But I find it easier to keep it twisted. That way you can hot glue it to the wooden bead much easier.
- Stiffening the macrame yarn after unraveling and combing it, helps the macrame angel retain its shape and helps you trim the yarn.
- You can cut different wing shapes for the angels.
- If you don’t want to add hair, then use a wooden bead with a smaller hole.
RELATED: A macrame angel ornament fits right in with my other macrame ornaments that I have made a couple years ago. I love them.


So which one of these beautiful macrame angels is your favorite?


More of my unique macrame tutorials
- How to make a macrame Christmas tree with fairy lights
- My step by step macrame heart pattern tutorial
- How to make a beautiful macrame wreath with thick wool detail
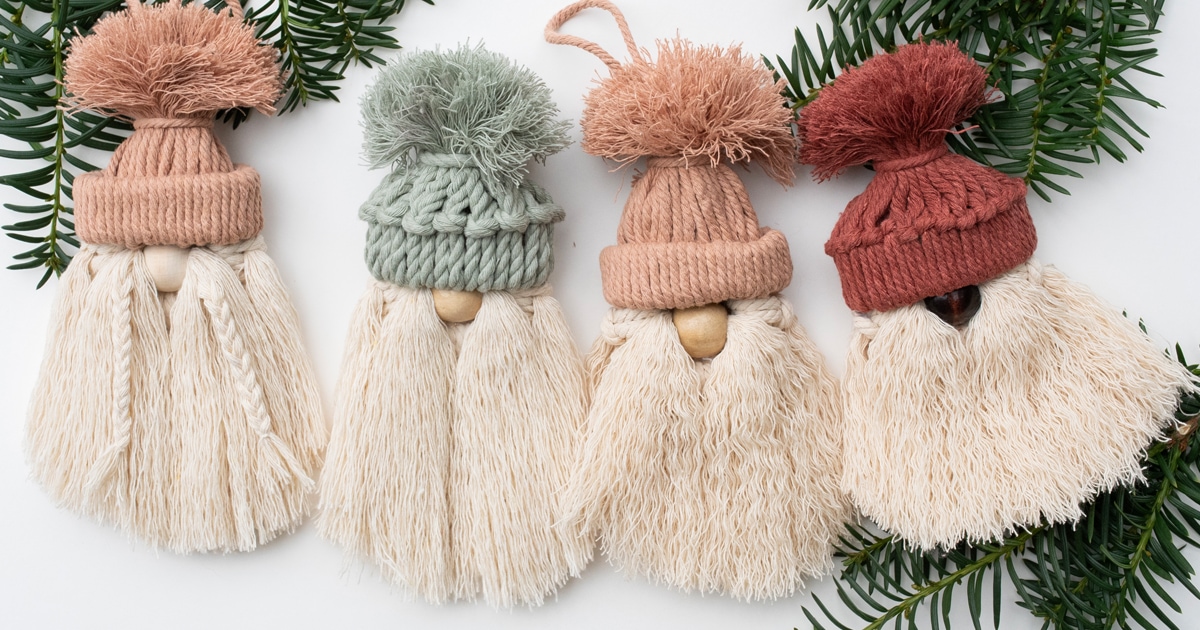
- How to make a macrame gnome (4 different ways)

Where to buy handmade macrame angels
If crafting isn’t your thing then you can find some great options already made by small shops on Etsy. There are some really pretty large macrame angel wall hangings as well. Check them out and the image will take you to the shops.

Tschüß,


How to make a macrame angel
Learn how to make a pretty macrame angel with this simple, step-by-step tutorial that includes three different free macrame angel patterns.
Materials
- macrame yarn (I had several thicknesses and colors left in natural colored 2mm macrame cord, khaki 3mm macrame cord, and natural colored 4mm macrame cord)
- fabric stiffener
- wood beads (these 3/4-inch wooden beads are perfect for adding hair with macrame yarn since the holes are bigger)
- 2-inch macrame rings
Tools
- hot glue gun (if you add hair)
- sharp scissors
- comb
Instructions
- Cut your macrame pieces
cut 2 pieces of 2mm ivory macrame yarn at 10 inches
cut 2 pieces of 4mm natural macrame yarn at 8 inches
cut 10 pieces of 4mm natural macrame yarn at 10 inches
- Create the angel body
Take the ten 9-inch pieces to create the body of the macrame angel by tying them together in the center with one of the 10-inch 2mm pieces of yarn. Then fold them in half at the center where you just tied the pieces together.
- Add the angel head/wood bead
I like adding the wood bead/head before tying off the body shape to get a sense of proportion first. Simply insert the 2mm yarn ends through the wood bead.
- Tie off the angel dress
Now that you have an idea of proportions, you take the other 2mm piece of macrame yarn (or other thin twine) to tie off the waist of the angel dress. Trim the knot.
If you aren't new to macrame, you can use the Gathering Knot Method but I simply just knotted the piece of yarn in the back, which is fine and makes things easier. The wings will hide this knot in the end. - Add the basic wings
Take the two 8-inch 4mm macrame yarn pieces and fold them in half. Then, add them to the body shape with a Square Knot. This is exactly what you do repeatedly when making a macrame feather. For this macrame angel, you only do it once instead of stacking them repeatedly.
Simply place one piece folded in half behind the body of the angel. Then place the second piece folded in half in the opposite direction on top of the body.
After that thread each open end through the opposite loop and pull tight. - Unravel, comb, and stiffen the yarn (optional)
Use a comb and your hands to unravel the dress and wings of the angel. I placed the macrame angel on a dinner plate and sprayed it with fabric stiffener. Then I combed the wet yarn back into the angel shape and let it dry overnight, but that is optional. - Trim the yarn
Once the fabric stiffener has dried, it is easy to trim the edges of the angel dress and wings with sharp scissors.Also, knot and trim the string for hanging the angel.
Voila, here is the simplest way of making a macrame angel without any frills and only one simple macrame knot.

Nice guide! Macrame can seem daunting, but your step-by-step approach makes it feel totally doable. Quick question: Is the fabric stiffener a must for keeping the angel’s shape, or can I skip it without causing any issues? Thanks for the video link, it’s great when written instructions aren’t enough. Looking forward to trying the simplest angel design first!
Hi Giselle, you can skip the stiffener if you like the look without it. It is personal preference. Happy Holidays