

DIY macrame wreath with thick wool and macrame yarn
This macrame wreath tutorial combines chunky wool and macrame yarn for a beautiful year-round wreath that works for any season, from a summer beach house to a fall mantel or Christmas door.
I have been looking for a project for about two years now where I could use the thick wool I had purchased, and that wasn’t a chunky knit blanket that you see everywhere. Pieces that incorporated macrame yarn and thick wool intrigued me. There is something special about the contrasting texture that is somewhat the same yet totally different. So a simple wool and yarn macrame wreath sounded like a good place to start.

Supplies needed for macrame wreath
This post may contain affiliate links from which I will earn a commission at no extra cost to you. View my full disclosure policy.
- 2-inch brass ring
- macrame cord (28 strings cut to 22-inch length)
- thick wool (14 cut 8-inch pieces)
- comb
- scissors
- fabric stiffener (optional)
If you can’t find thick wool like mine then you can just skip this step and add wood beads instead to the macrame v-shapes while knotting the Diagonal Clove Hitch Knots.

Macrame wreath video tutorial
Below is the video tutorial and if it doesn’t load for you then you can also watch it on my YouTube channel:
Macrame wreath instructions
Most of my macrame tutorials include simple knots like the Square Knot or Diagonal Clove Hitch Knots because they are so easy to remember. For this tutorial, you actually only need the Diagonal Clove Hitch knots, that’s it!
You can make this macrame wreath in bigger sizes as well. All you need is a larger metal ring to start with and to add yarn and wool accordingly.
Step 1: Cut yarn and attach it to the brass ring
I started out my wreath by folding the 22-inch pieces of macrame yarn in half and looping them onto the brass ring with Lark’s Head Knots as shown below and in the video.

This will form a tight circle of yarn that can be sectioned into 7 groups of 8 strings.
Step 2: Knot Diagonal Clove Hitch Knots in v-shapes around the brass ring
Take the string on the outside of one of the bunch of yarn strings and loop Diagonal Clove Hitch knots toward the center of the group.
Diagonal Clove Hitch Knots are basically loops placed onto the outer string (lead cord) on each side that then meet at the center of the group in a triangular shape.
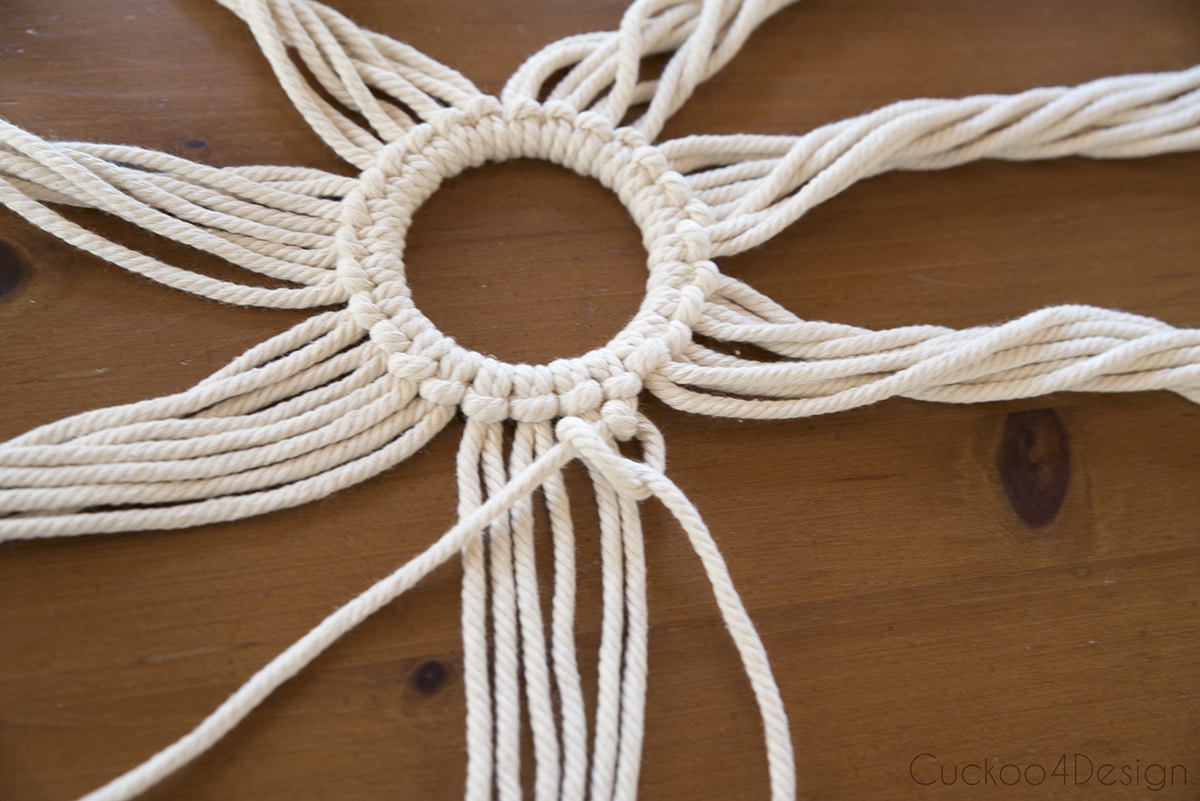

When you go all the way around you will end up with a star shape.

I used this same tutorial to make macrame Christmas ornaments in the shape of a star. This is the part of the tutorial where you’d have to stop and just open and trim the end fringe and voila you have a star-shaped ornament.
Step 3: Add another round of Diagonal Clove Hitch Knots
Add more Diagonal Clove Hitch knots around the circle over the bottom centers of the last round as shown below.

You will end up with short ends which I trimmed and then combed out the edges a little before starting to weave the thick wool yarn into the piece.
Step 4: Add short strands of thick wool to the macrame v-shapes
This step of adding the thick wool is better visible in the video because you have to use the center of the triangular shapes to loop and weave the short pieces of wool through. Similar to a Lark’s Head Knot.


Go all the way around the wreath as shown. You can trim the ends and you are DONE!

Macrame wreath making tips
- In the end, you can spray the wool with fabric stiffener to ensure that the wreath doesn’t lose shape. Do not soak the thick wool in fabric stiffener. Lay it flat while letting it dry!
- You can also customize this wreath and turn it into a spring wreath or macrame fall wreath with some fall foliage or dried flowers. Or you could add some sparkle and turn it into a macrame Christmas wreath. Super easy!
- You can make a much smaller version with small brass rings and turn it into macrame wreath ornaments similar to the ornaments I mentioned earlier.
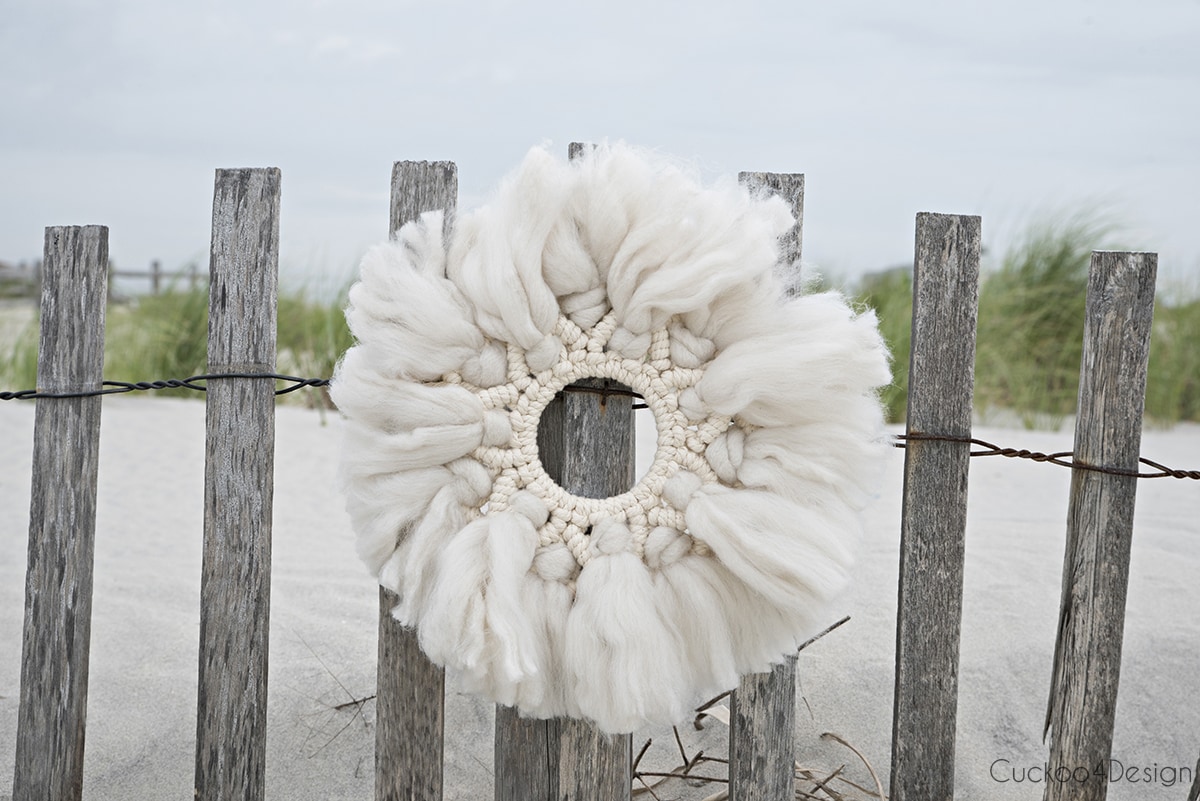
Photos of the finished macrame wreath
I loved taking photos of this beautiful macrame wreath on the beach and can’t wait to hang it somewhere at home. Hey, maybe on the front door?


RELATED: Do you love beachy vibes? You might also like my mussel shell craft, where I turned mussel shells from our dinner into beautiful flowers.

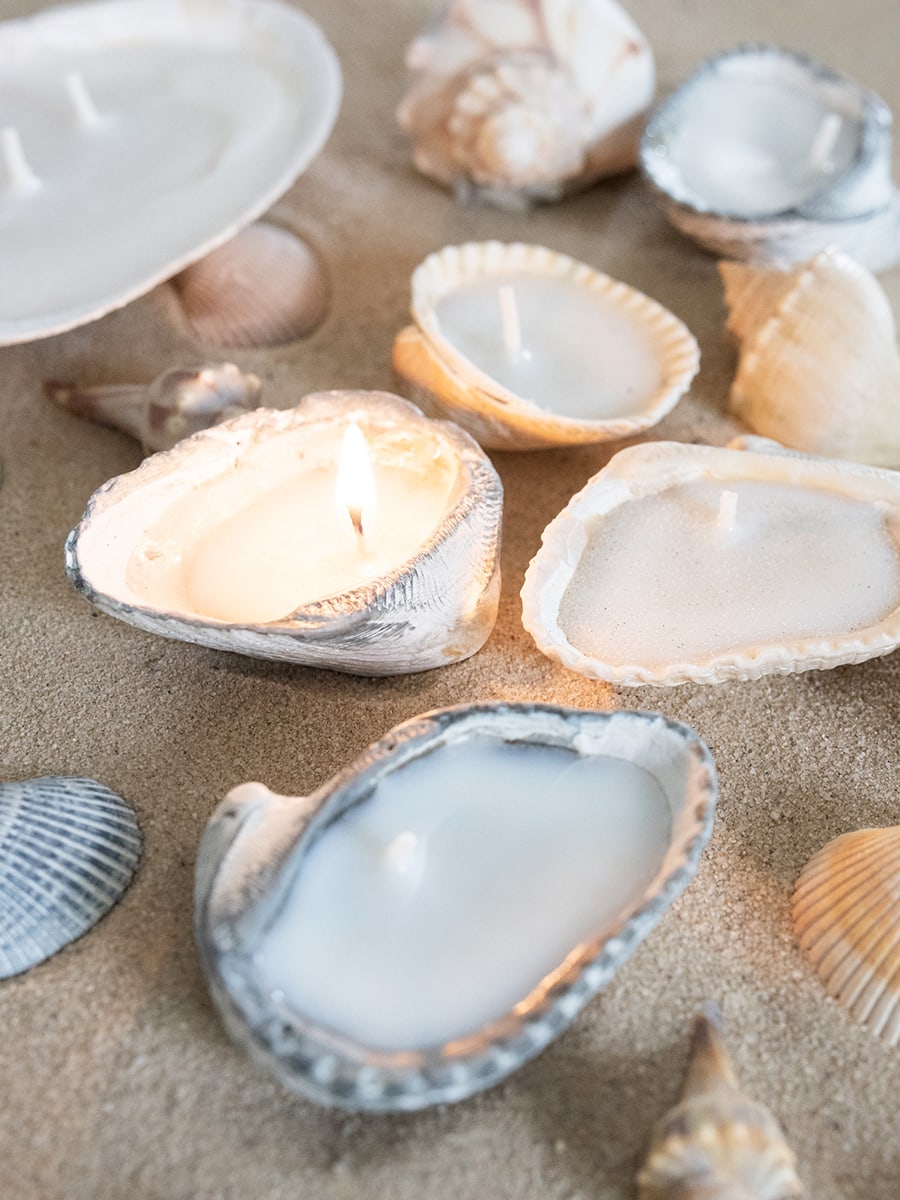
Or check out how to make DIY seashell candles.


Where to buy macrame wreaths
If making your own isn’t your thing then you can support some small businesses on Etsy and choose from beautiful macrame wreaths already made. Here are some beautiful ones I found.

More unique macrame projects and tutorials
Macramé makes such stylish home decor without spending a lot of money and it’s so much fun to make. If you have made friendship bracelets as a child then you can do these bigger knotting projects too. Trust me.
- macrame garland
- macrame earrings
- How to make a macrame necklace (3 different ways)
- macrame feather and macrame leaf tutorial
- macrame heart
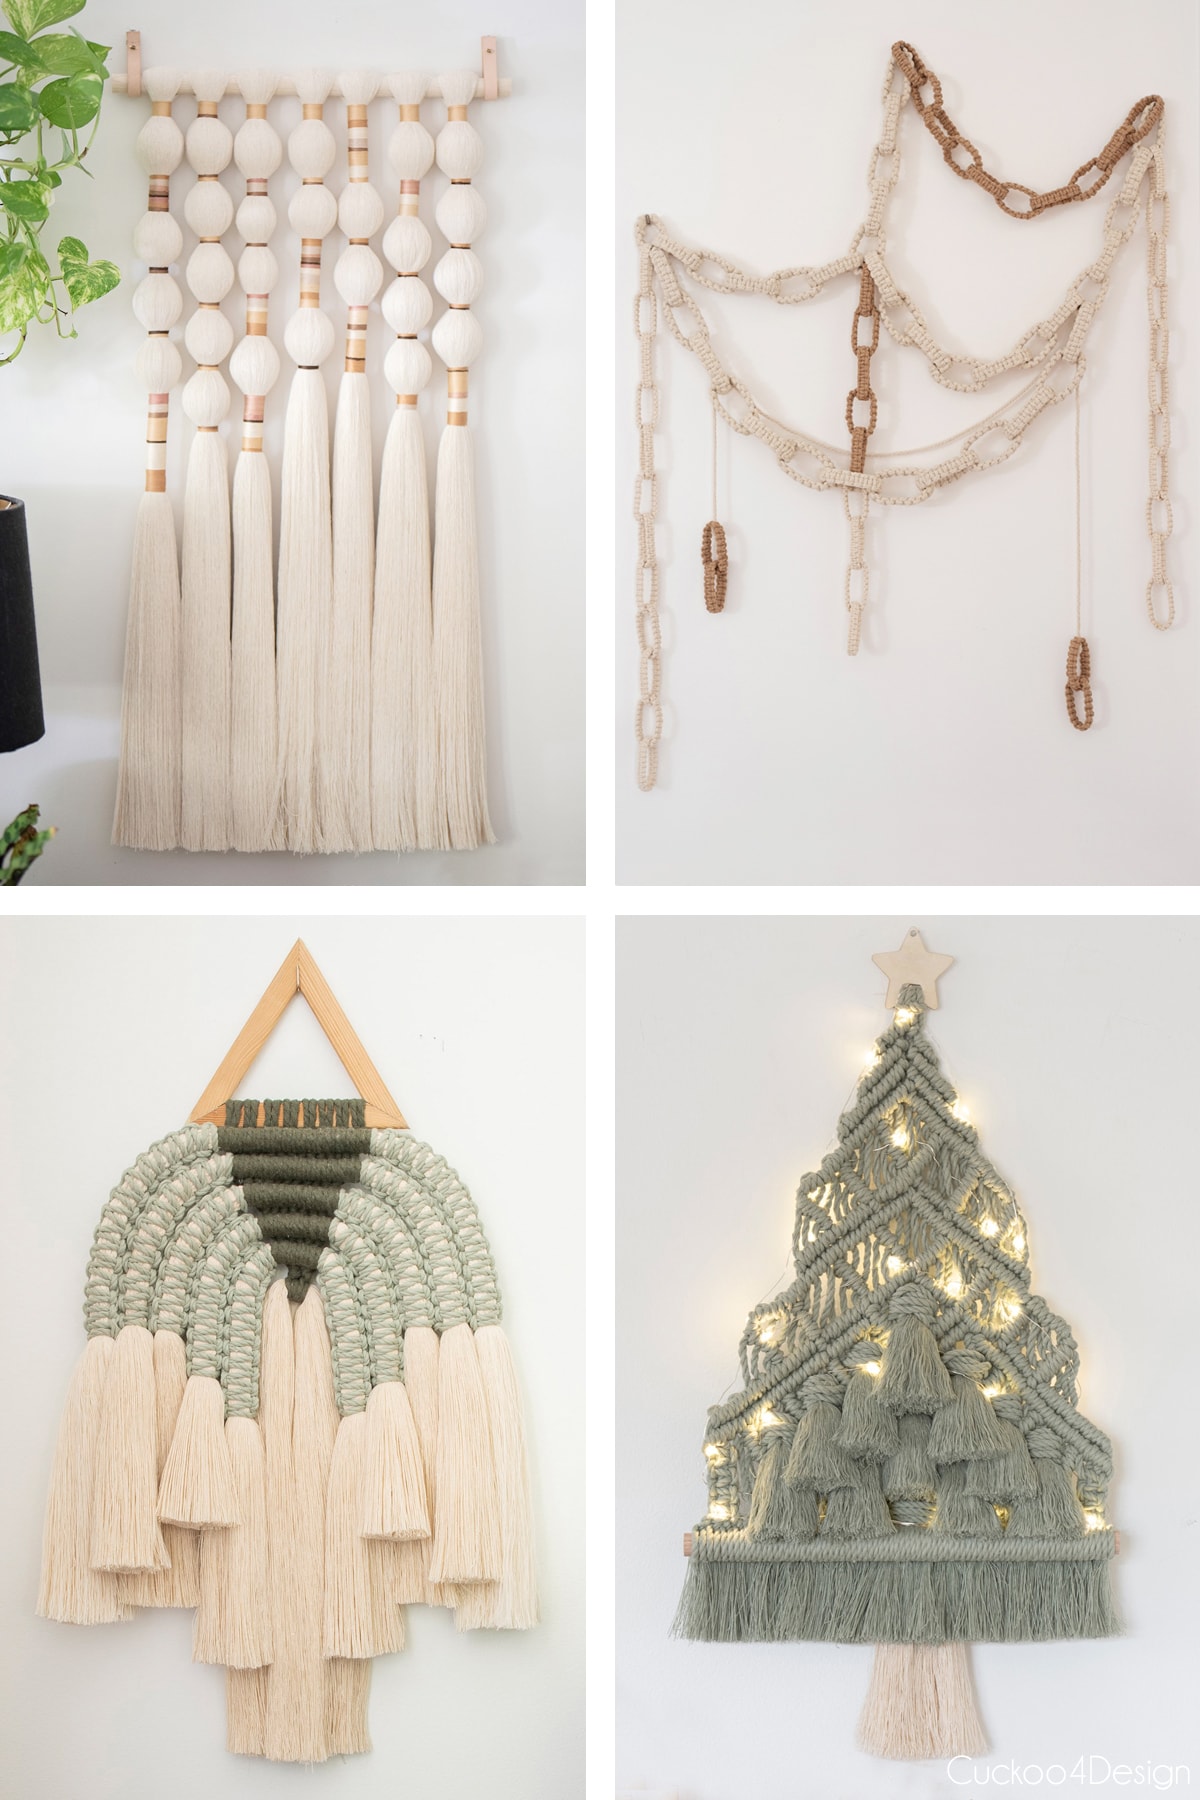
- My 4 favorite unique macrame wall hangings that I made (pictured below): macrame ball wall hanging with embroidery floss, macrame chain link garland wall hanging, modern macrame wall hanging, and my macrame Christmas tree wall hanging.
That’s it for today. I hope you enjoyed it.
Tschüß,


DIY macrame wreath with thick wool and macrame yarn
Make a beautiful macrame wreath with chunky wool using just two simple knots. Easy tutorial that works for any season and includes a video.
Materials
- 2-inch brass ring
- macrame cord (28 strings cut to 22-inch length)
- thick wool (14 cut 8-inch pieces)
- fabric stiffener spray (optional)
Tools
- comb
- scissors
Instructions
- Cut yarn and attach it to the brass ring
Cut 28 pieces of macrame cord to 22 inches long. Start out the wreath by folding the 22-inch pieces in half and looping them onto the brass ring with Lark’s Head Knots as shown in the photos and in the video. This will form a tight circle of yarn that can be sectioned into 7 groups of 8 strings.
- Knot Diagonal Clove Hitch Knots in v-shapes around the brass ring
Take the string on the outside of one of the groupings of macrame cords and loop Diagonal Clove Hitch knots toward the center of the group. Diagonal Clove Hitch Knots are basically loops placed onto the outer string (lead cord) on each side that then meet at the center of the group in a triangular shape. When you go all the way around you will end up with a star shape. - Add another round of Diagonal Clove Hitch Knots
Add more Diagonal Clove Hitch knots around the circle over the bottom centers of the last round. You will end up with short ends which you can trim and then comb out the edges a little before starting to weave the thick wool yarn into the piece. - Add short strands of thick wool to the macrame v-shapes
This step of adding the thick wool is better visible in the video because you have to use the center of the triangular shapes to loop and weave the short pieces of wool through. Similar to a Lark's Head Knot.
Go all the way around the wreath as shown in the video. You can trim the ends and you are DONE!
I love this wreath!! Could you tell me the name of that thick wool you used? Also…are there different weights of macrame cord? What size did you use? I am absolutely going to make this if I can find wool that thick. Is it chunky or bulky? What # is it? How much of each (cord and wool) did you need?
Hi Colleen, just noticed that none of the links to the materials I used were working but they are now. And like I mentioned in the post I used 28 strings cut to 22-inch length of the macrame yarn and 14 cut 8-inch pieces of the thick wool.
Thankyou…oh, I knew how long to cut the lengths of cord and yarn as per your instructions. I just wondered how many balls of each one I would require?
You should only need one ball each
Thank You so much Julia for your beautiful creations. I love all that you create
Thanks so much for the compliment Sue
Hi! I’m struggling with the half hitch knots lining up. Is there any way to get step by step pictures? Thanks.
Sorry, you are struggling. I know that pausing the video tutorial that I included on the images that you need helps a lot. Did you try that already?
Ma la ghirlanda a stella è diversa dal tutorial
I’ve been looking for a beautiful unique wreath and this is it!!
How do I adjust the string length if I start with a 4” or 6” brass wring?
TIA!
I think you just need to cut addiotional string for more star points if I’m understanding you correctly. Good luck!