

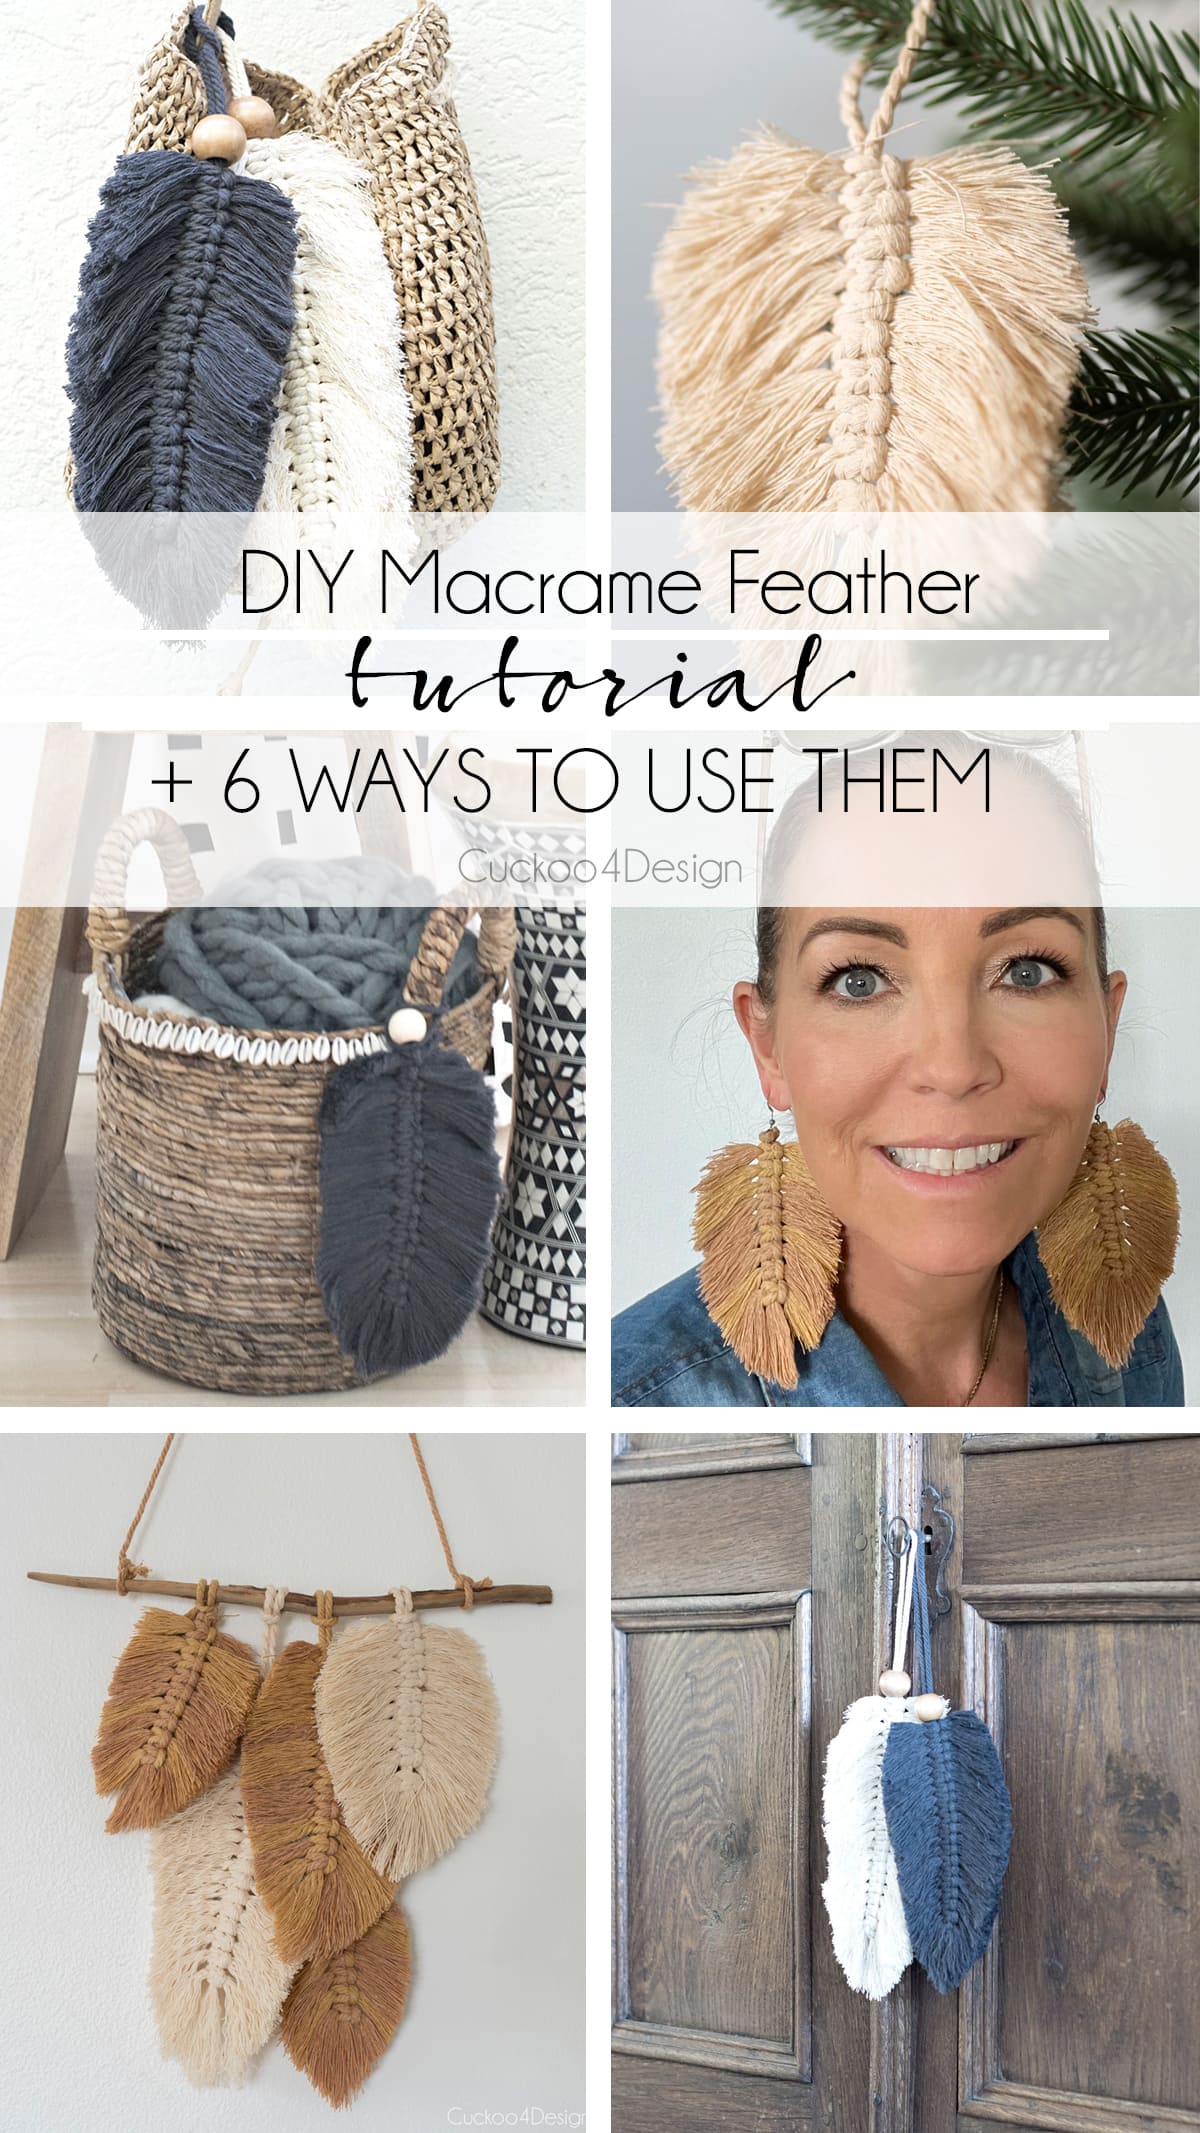
DIY Macrame Feather tutorial (6 different ways to use them)
A macrame feather is the perfect beginner project because they are so easy to make and can be used in so many different ways. In this tutorial I am showing you how to make one with a video and 6 different ways to use them as a fashion or home decor accessory.
I had the idea for these macrame feathers at home and brought the yarn and beads with me on a trip to Germany. Crafting with my sister-in-law there is one of my favorite things and packing some yarn and beads is easy to do. All the purse photos and the closet shot with the feather hanging on it were taken at my parents’ house. I just wanted something fun, pretty, and easy to make, and I left one behind as a gift for my mom when I flew home.
I had no idea it would become one of my most popular posts ever.

How to make a macrame feather
This post may contain affiliate links from which I will earn a commission at no extra cost to you. View my full disclosure policy.
Macrame feathers are also the perfect way to use leftover yarn from other projects. Some macrame projects like my modern macrame wall hanging or macrame chandelier used a lot of cotton cord and trimming at the end of the project produced a lot of odd-sized leftover pieces. Save those leftover pieces for small projects like this. I have also used leftover yarn for my macrame earrings, fringe earrings, and boho drawer pulls using macrame yarn.
Materials needed for a macrame feather
- 4mm macrame yarn for larger macrame feathers and 3mm for smaller feathers
- pair of scissors (I like using sharp scissors for hair)
- wood beads (optional, example 1 and example 2)
- hair comb or cat brush (I love using a comb in combination with a wire pet brush, sometimes called slicker brushes)
- fabric stiffening spray or starch (optional)
If you don’t have macrame yarn, you could also use wool, rope, hemp, jute, synthetic, or any other cords laying around the house. If you use a different material, you might most likely not be able to unravel and comb it like I did at the end. It would certainly give a different look.
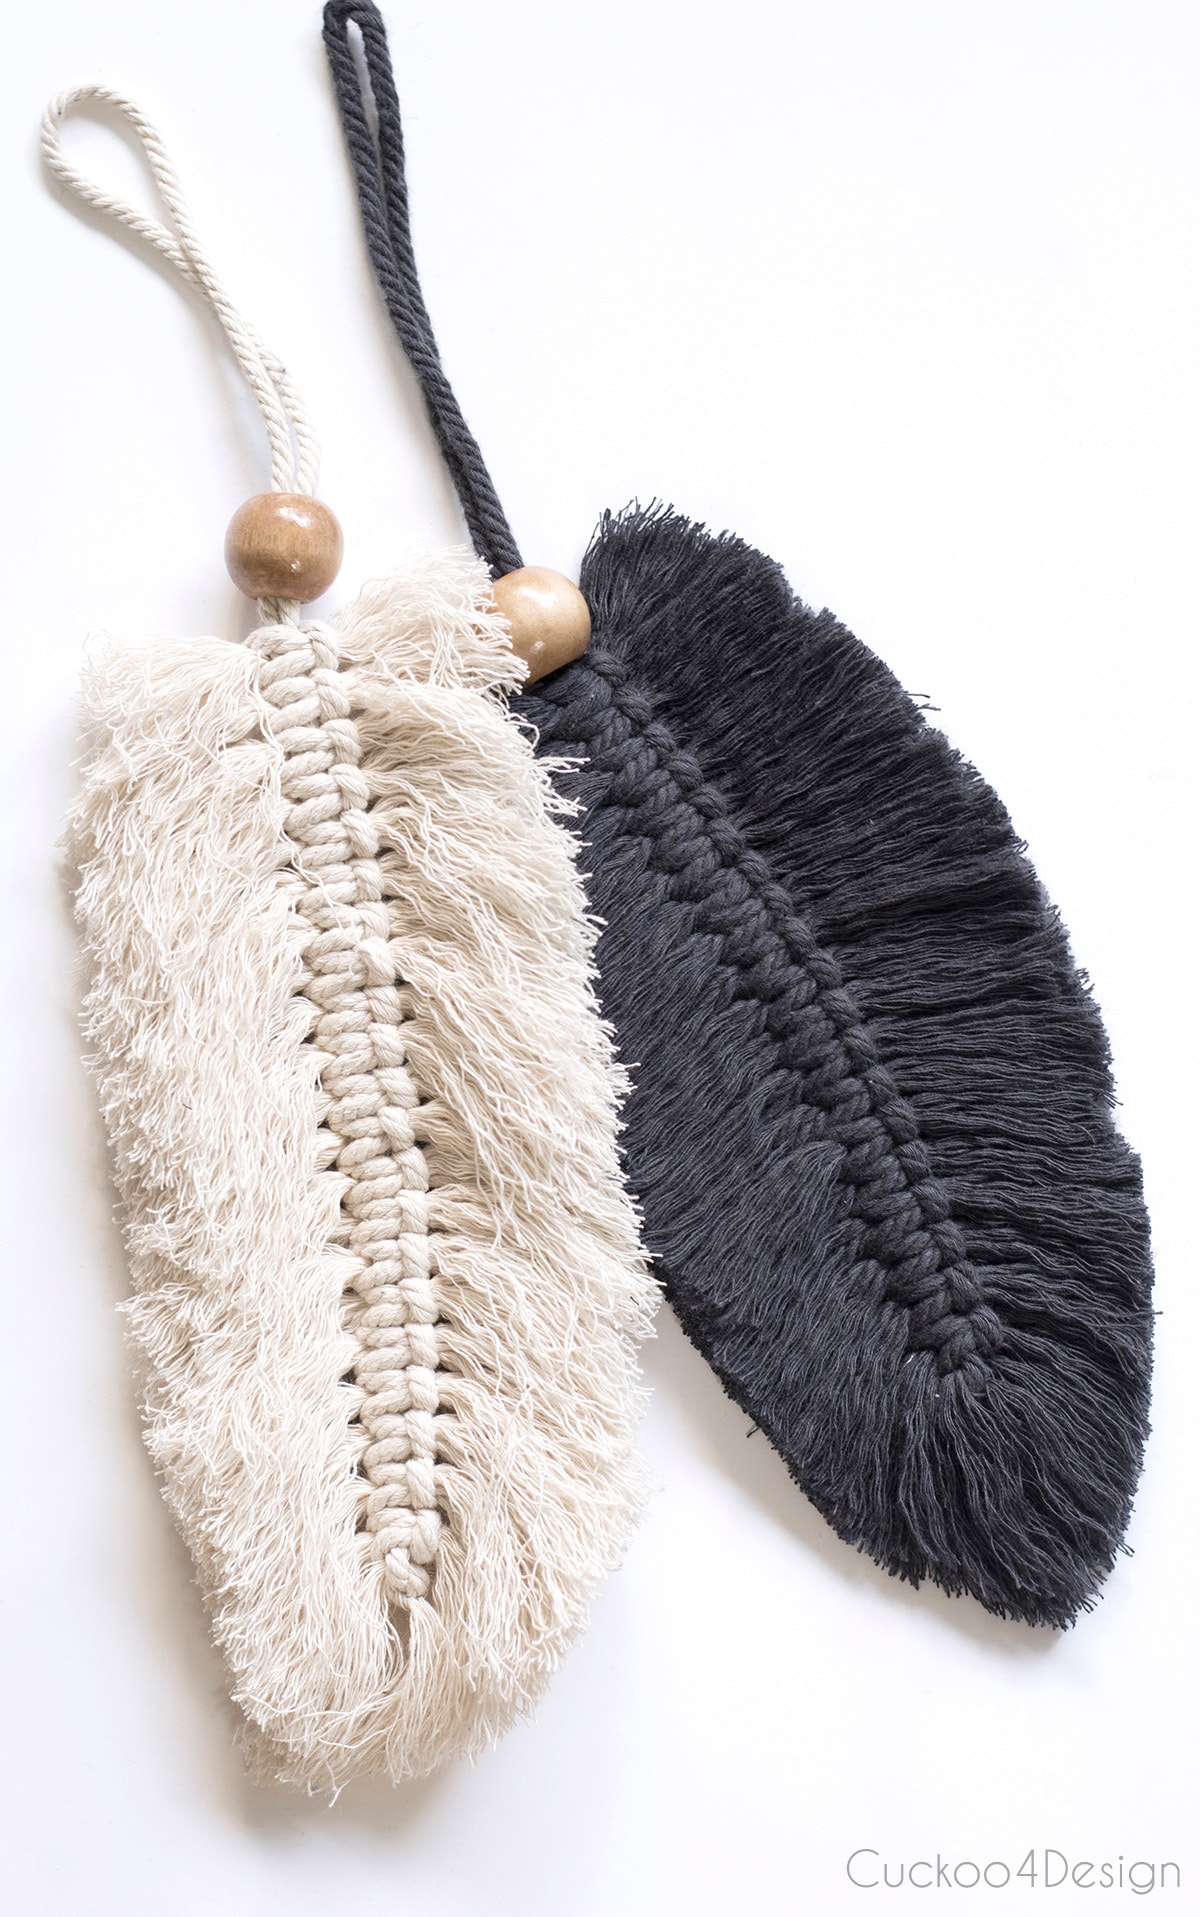
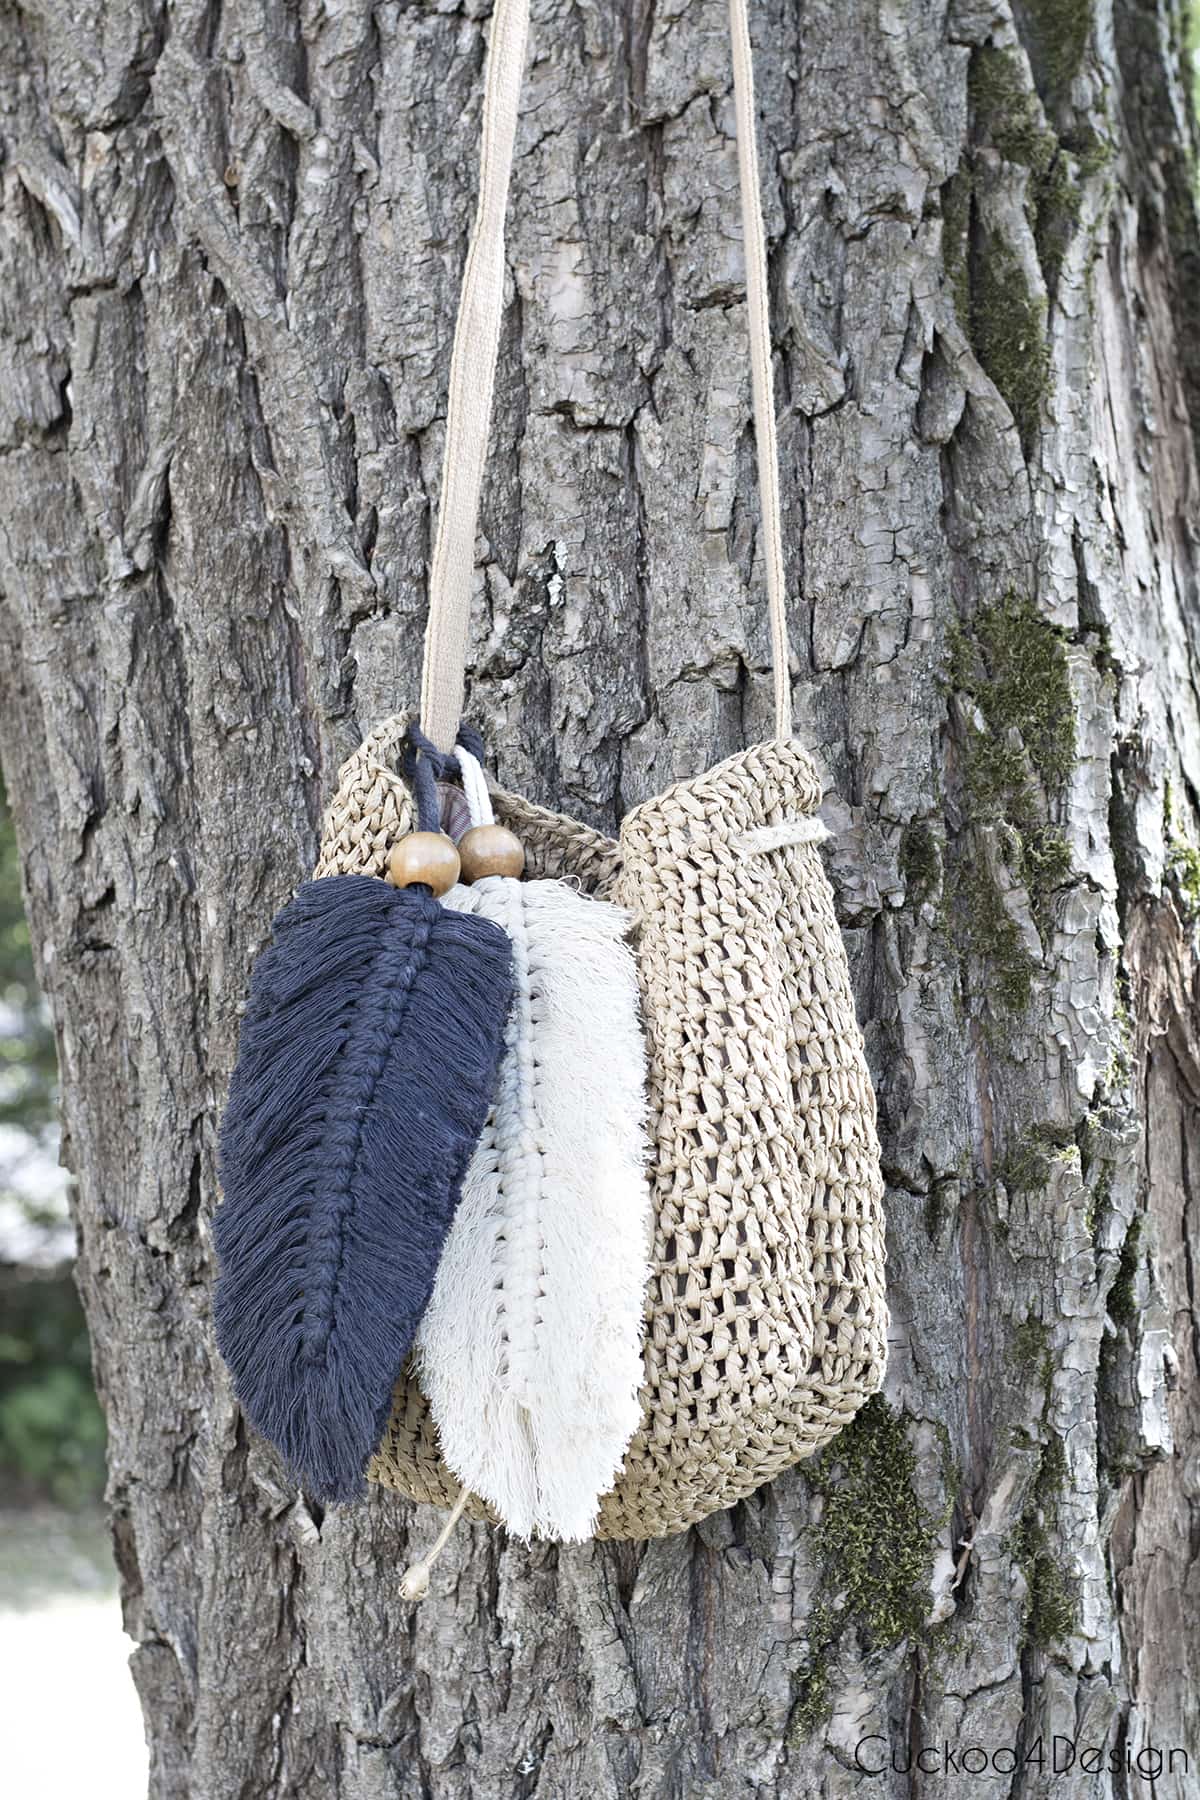
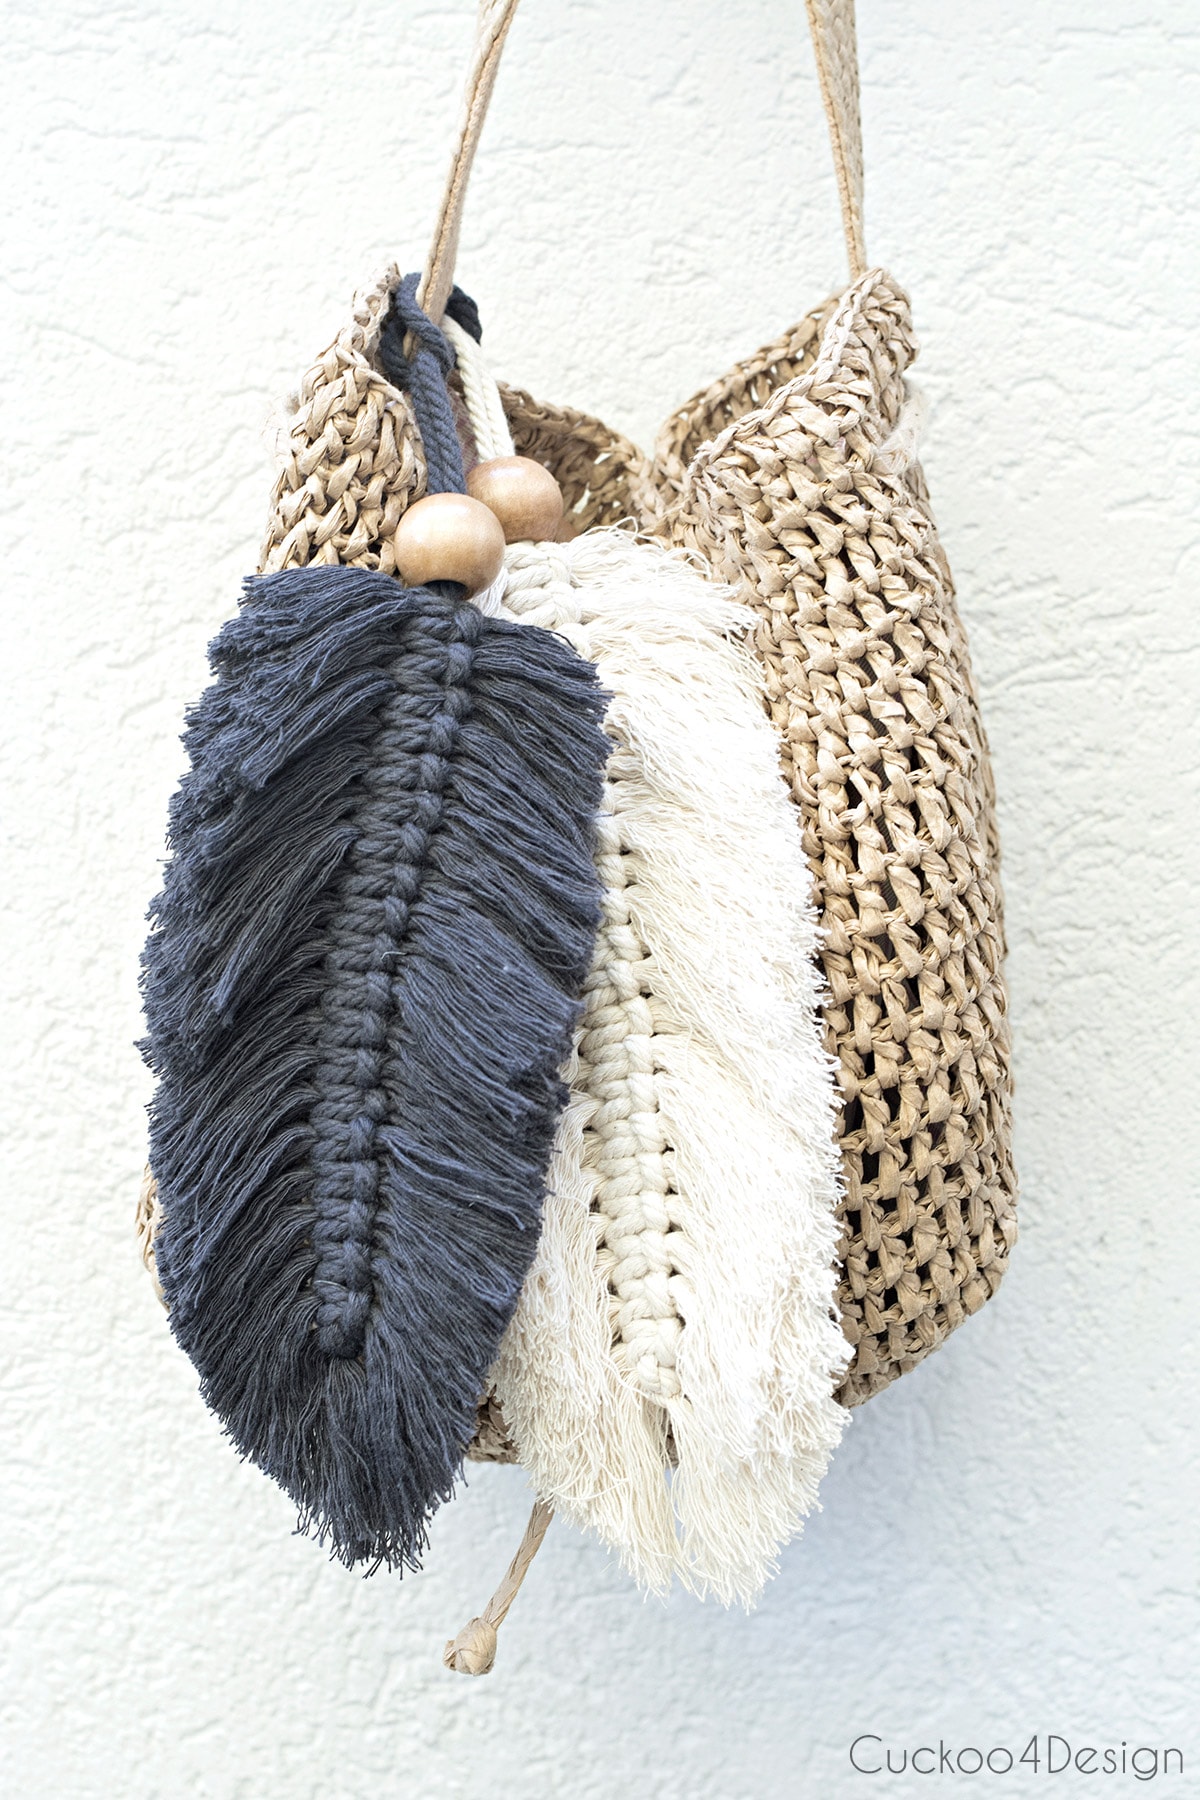
Another cute idea is to use different colors to create more texture and variations for each feather (I’m showing an example below).
Video tutorial
You can read my step-by-step instructions below or watch my short macrame feather video tutorial below. If that isn’t loading, then you can also check it out on my YouTube channel.
Step-by-step tutorial
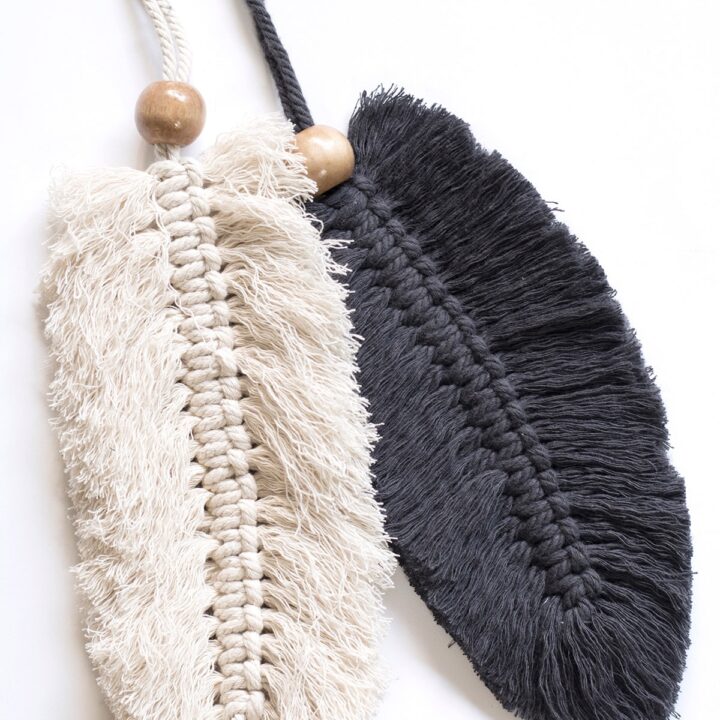
I made my first macrame feathers rather large to make a statement. If you remember, my tassels are all rather large as well. I used 4mm yarn for the large macrame feathers, and for the smaller ones, I used 3mm macrame yarn.
Step 1: Create the feather center shaft
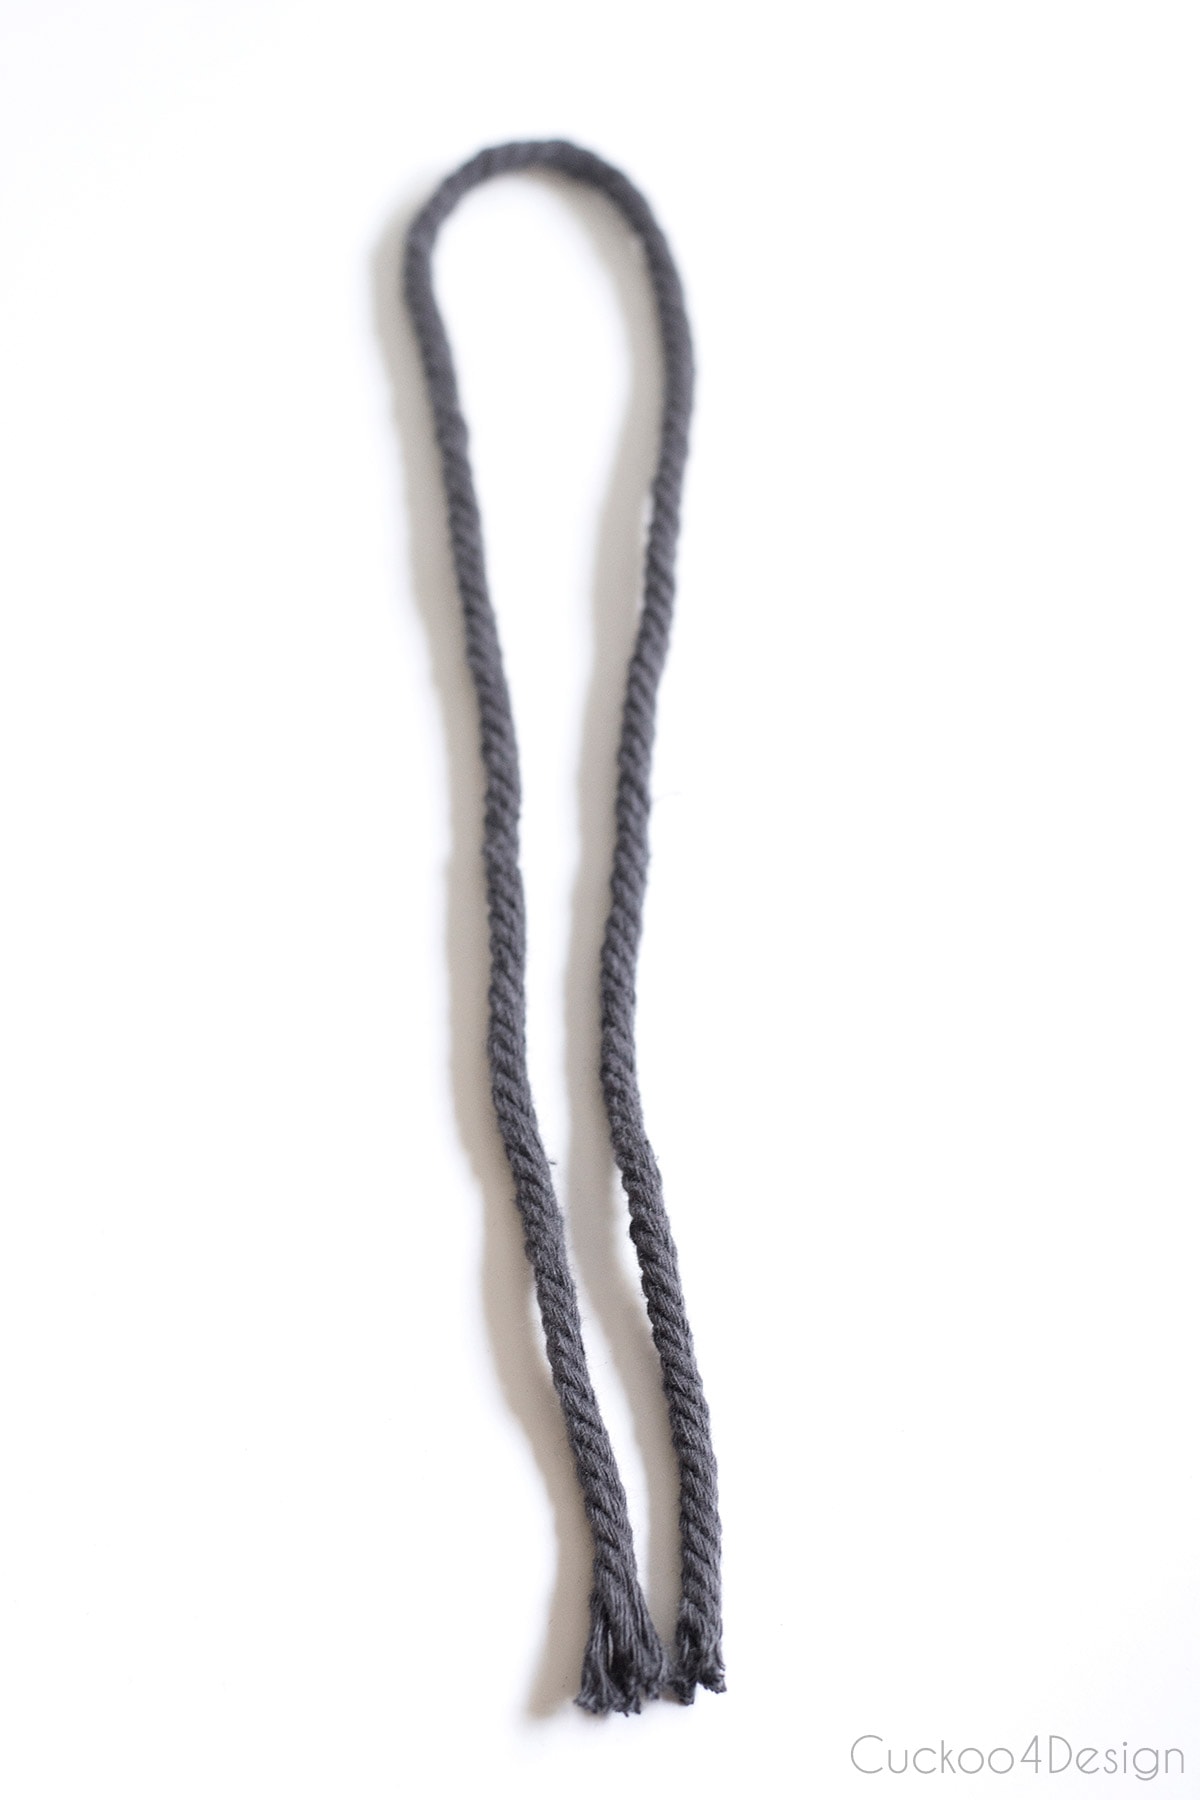
I started out by using a 20-inch piece of macrame cord. Fold that in half and lay it on a clean surface, as shown below. This will be the piece that creates the center shaft of your feather.
Step 2: Add your cords to the shaft to create the feather shape
Start out with your first two pieces of yarn that are around 8 inches long and folded in half as well. (This project is perfect for using all your leftover scraps from other macrame projects.)
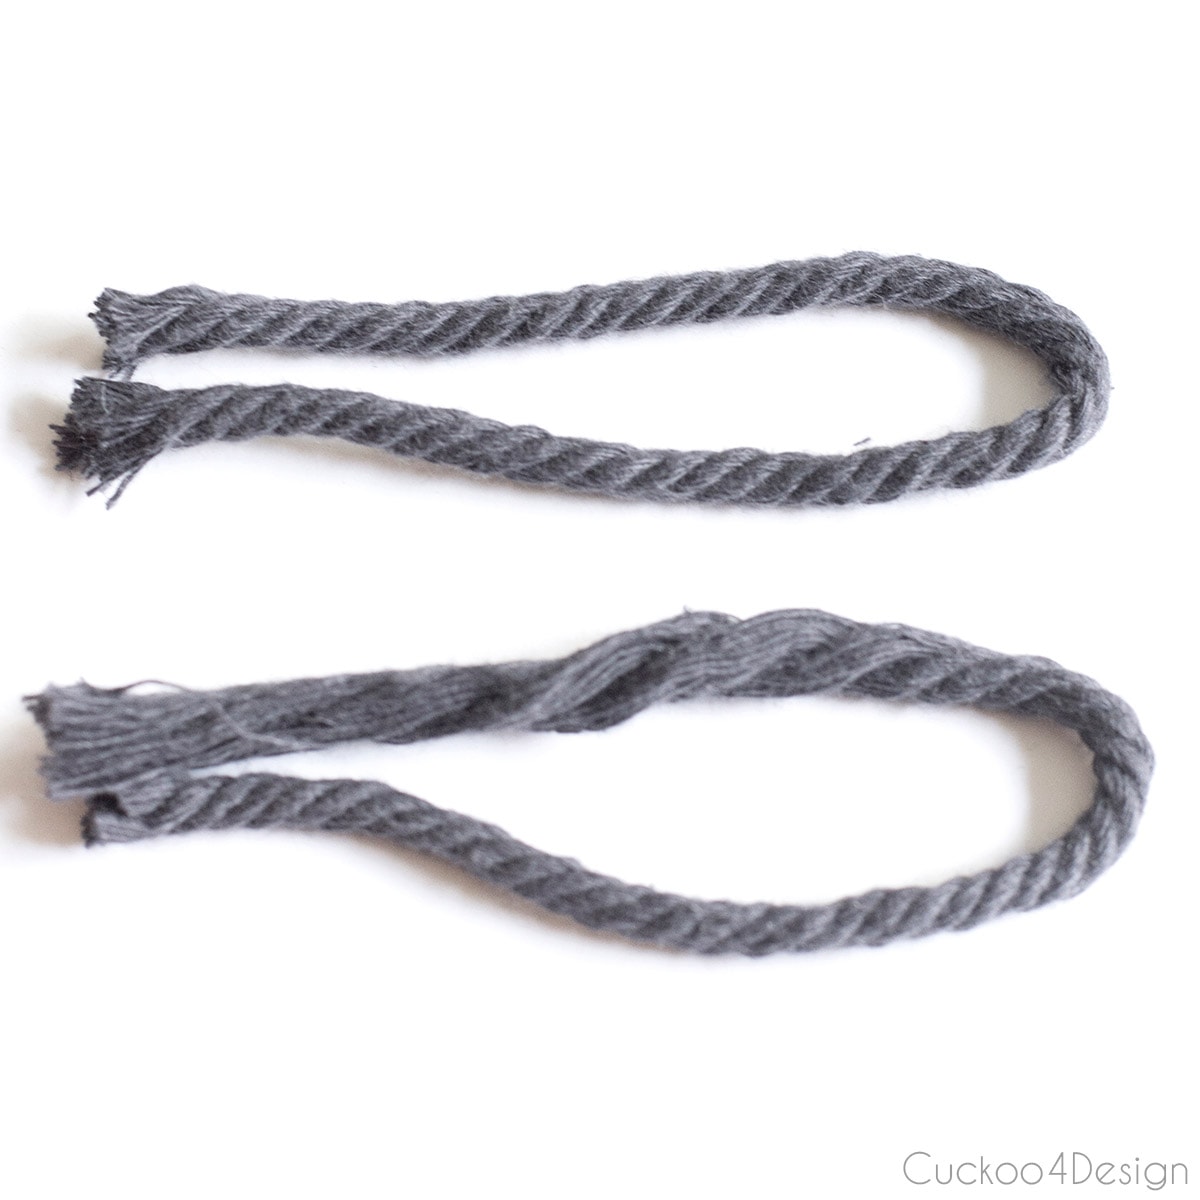
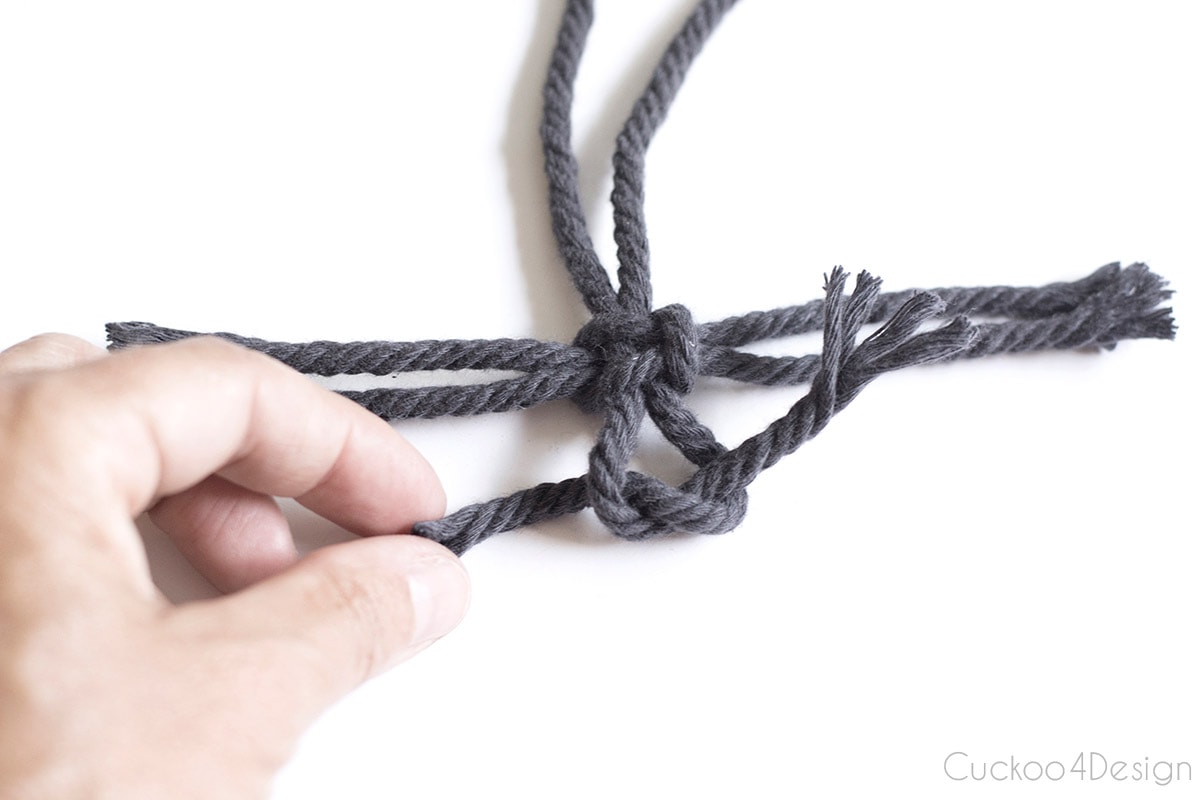
The one strand that is folded in half gets placed under the longer shaft centerpiece, the way I’m showing in the photo below. (You can see the process in my video)

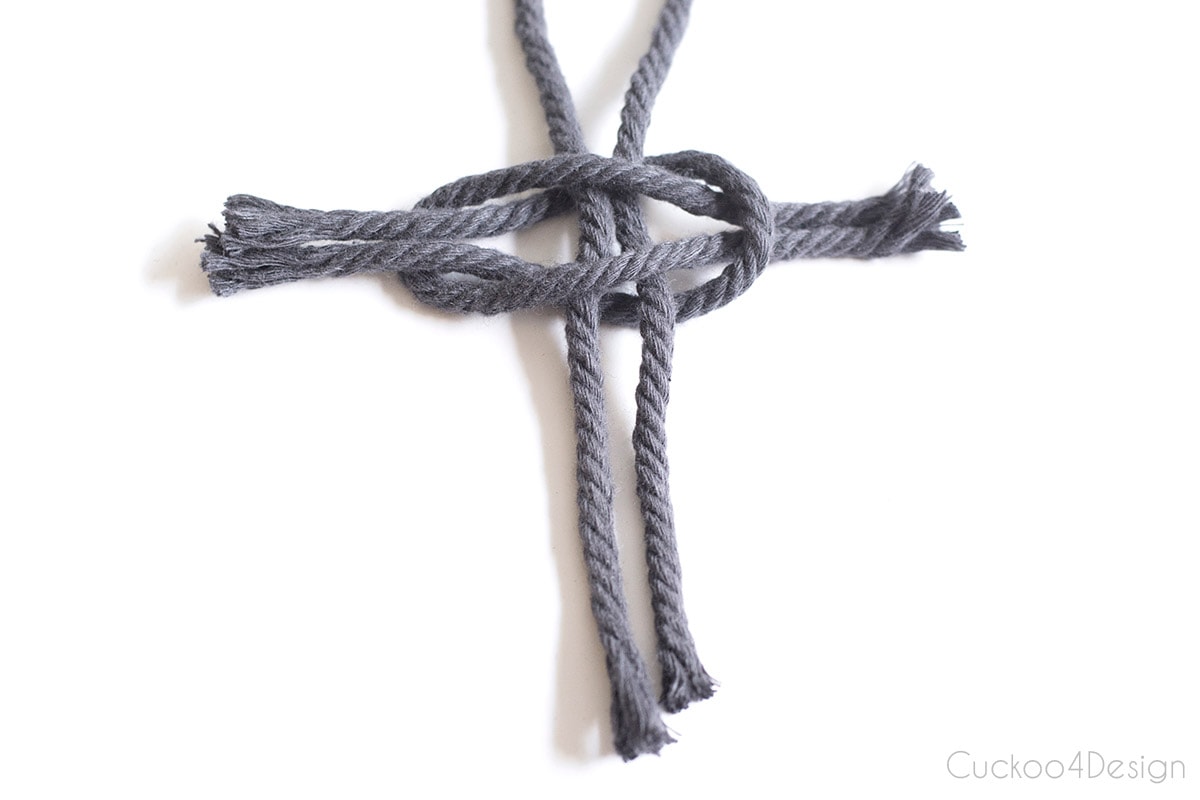
Place the other short string on top of the shaft. Then, thread the ends of each piece of macrame yarn through the loop of the opposite piece and pull the yarn ends tight with the feather’s shaft in the center. This is called a Square Knot.
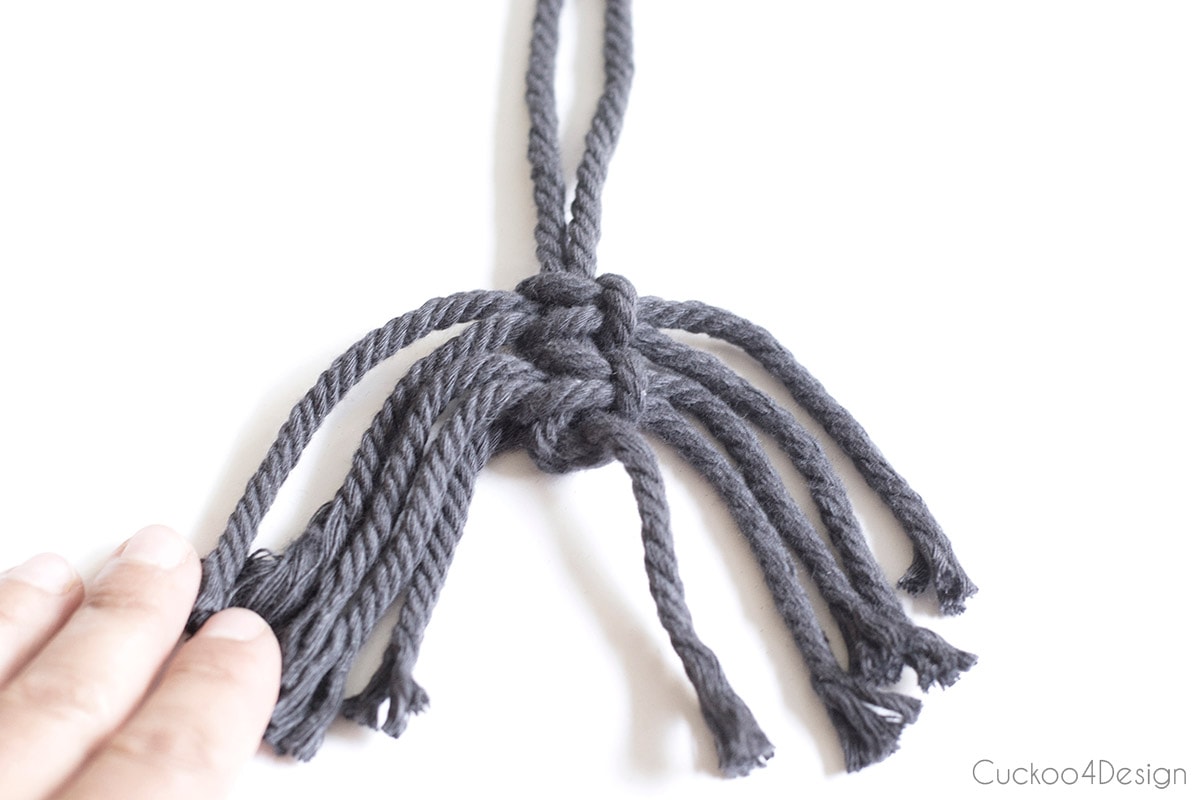
Pull it all tight. You can push these knots up to where you want them and as tightly together as you want.
RELATED: I used this simple method to attach the wings to my macrame angel.
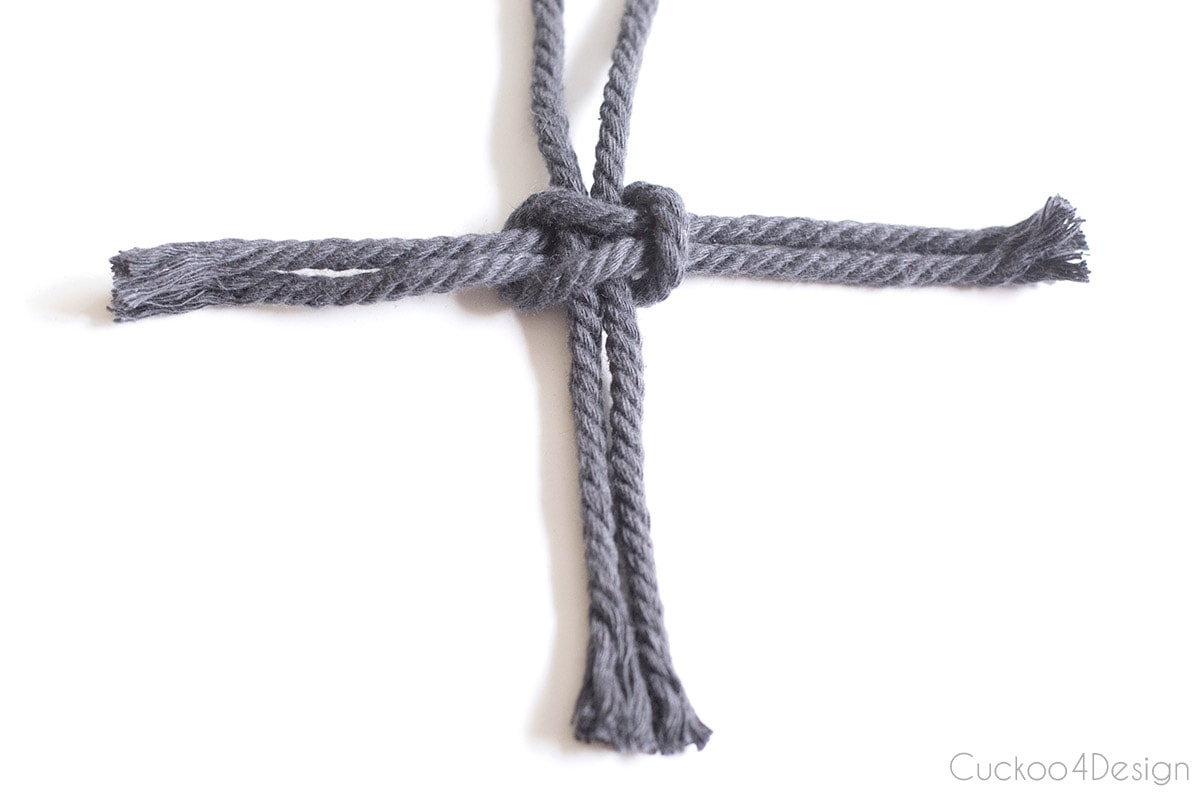
Then knot the bottom/end of the long shaft string so the square knot can’t slide out of the bottom.
After that, you must keep stacking the same Square Knots to achieve the desired length. You can stack them in the same direction as I did or in the opposite direction for a different look.
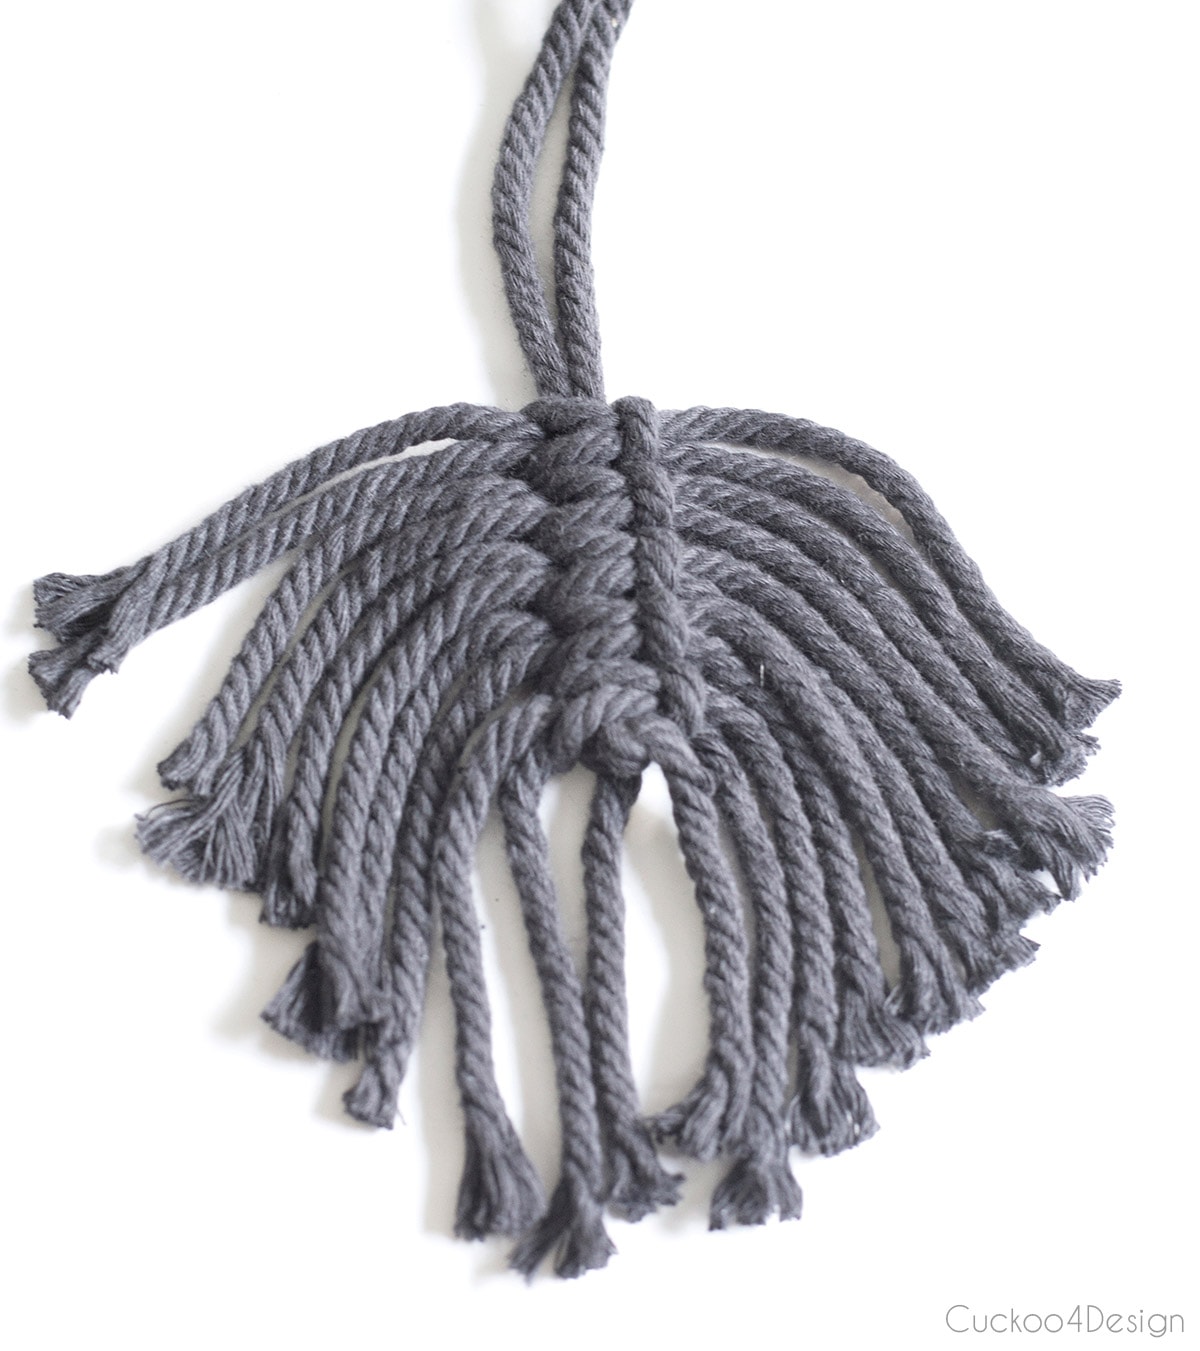
I made my feathers around 10 to 12 inches long.
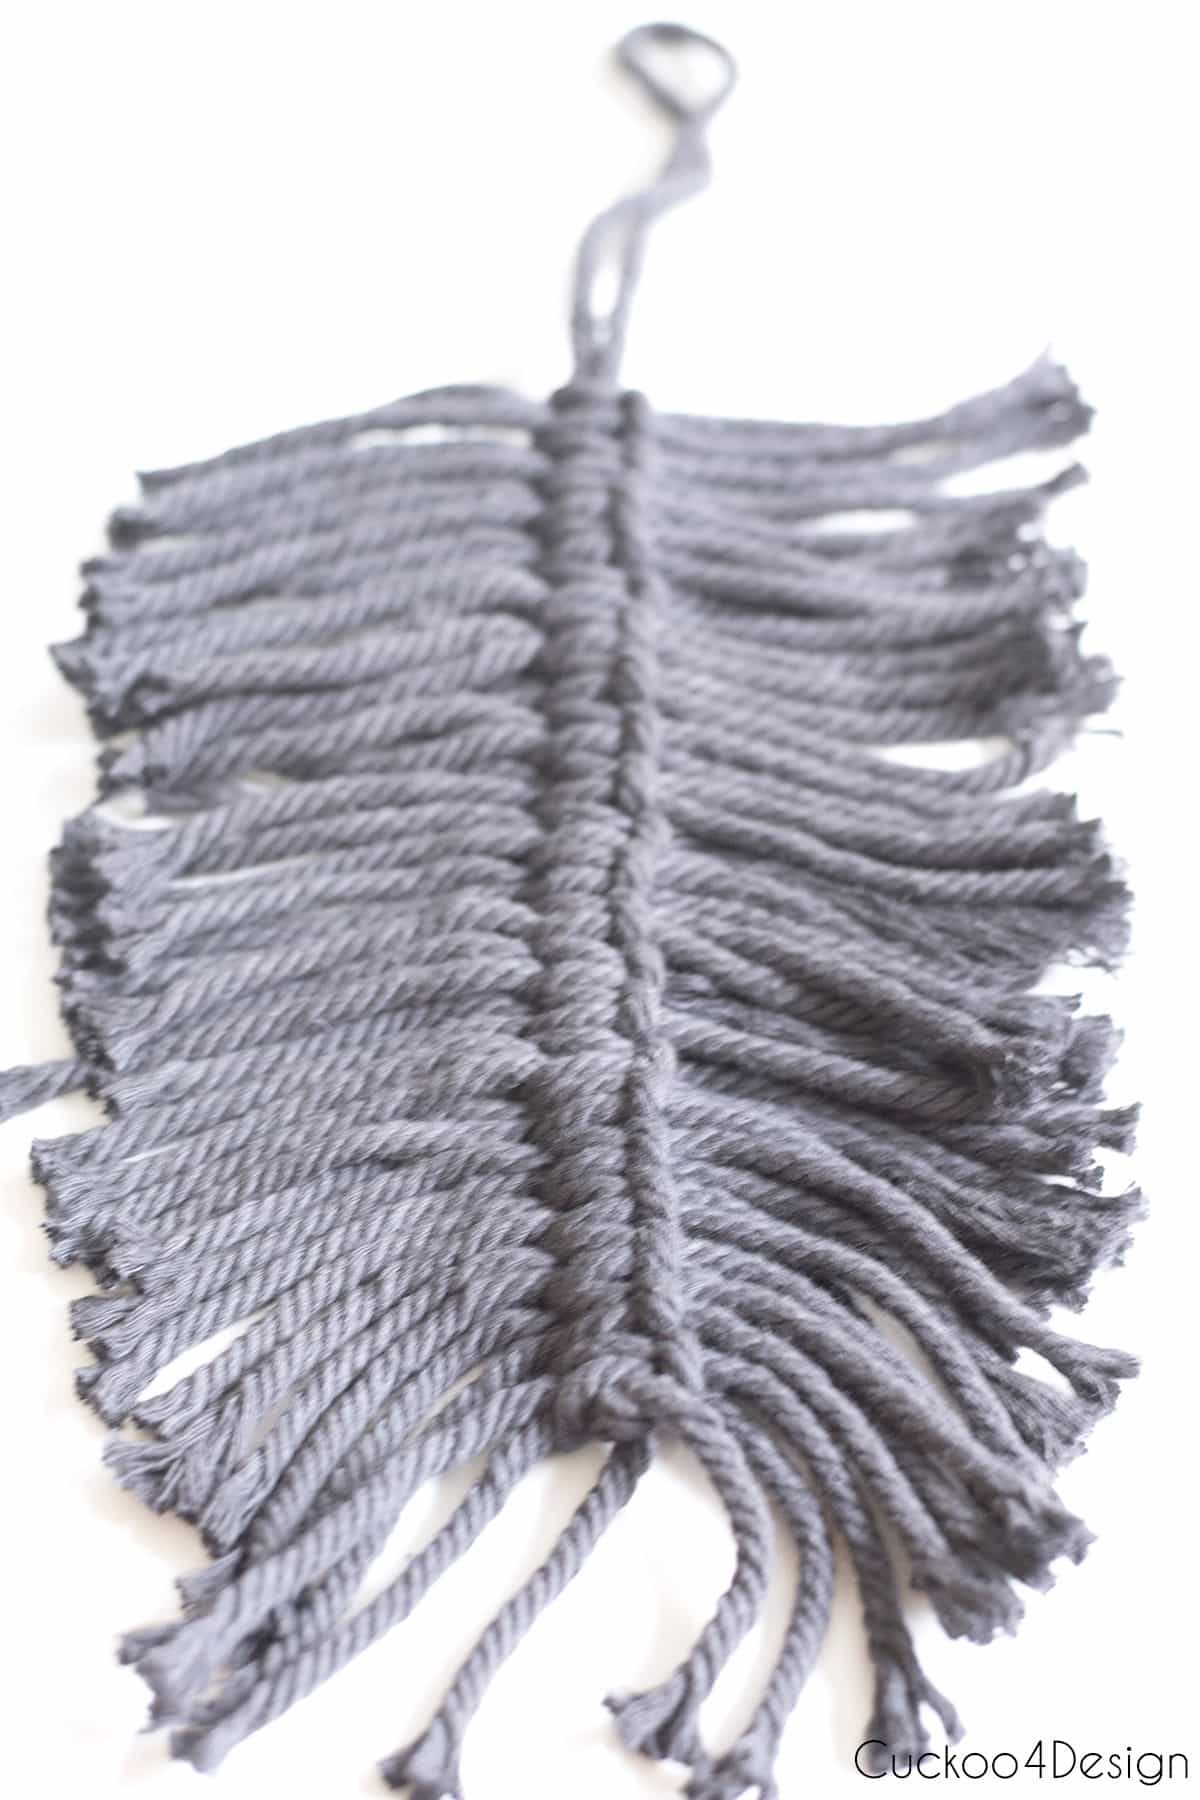
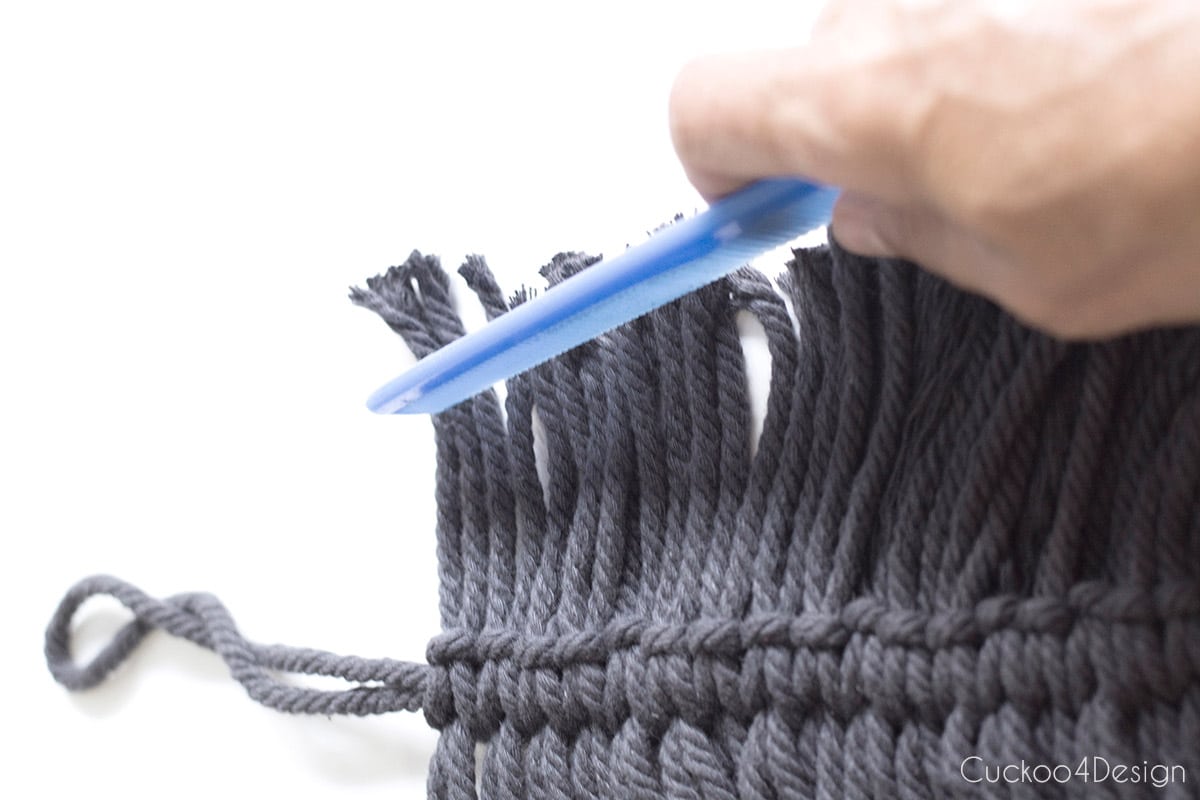
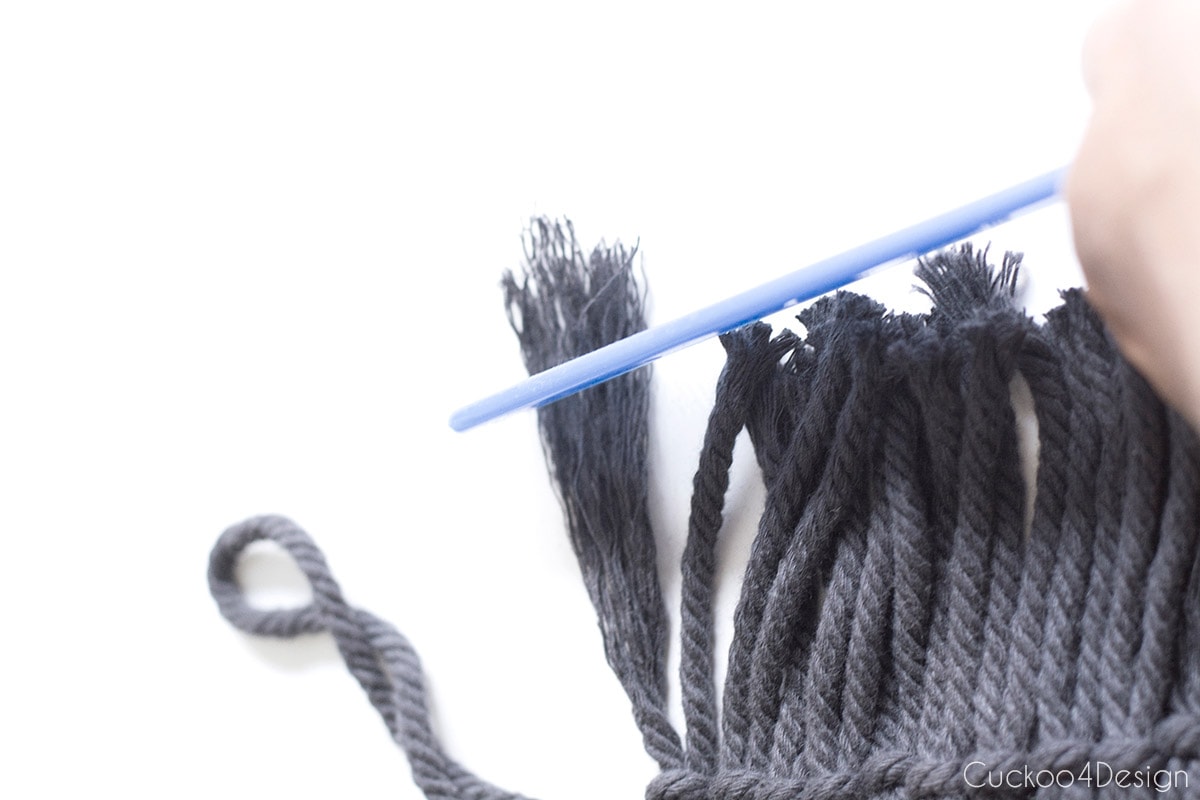
Step 3: Unravel and comb the macrame yarn
After stacking the Square Knots, unravel the macrame yarn and comb it.
I’ve become an expert in opening and combing macrame yarn. I’ve done it so many times on a large scale, especially with my macrame ball wall hanging using combed macrame yarn and embroidery floss.
I love doing this part while watching a Netflix show. It’s calming to me. I know…I’m odd 😉
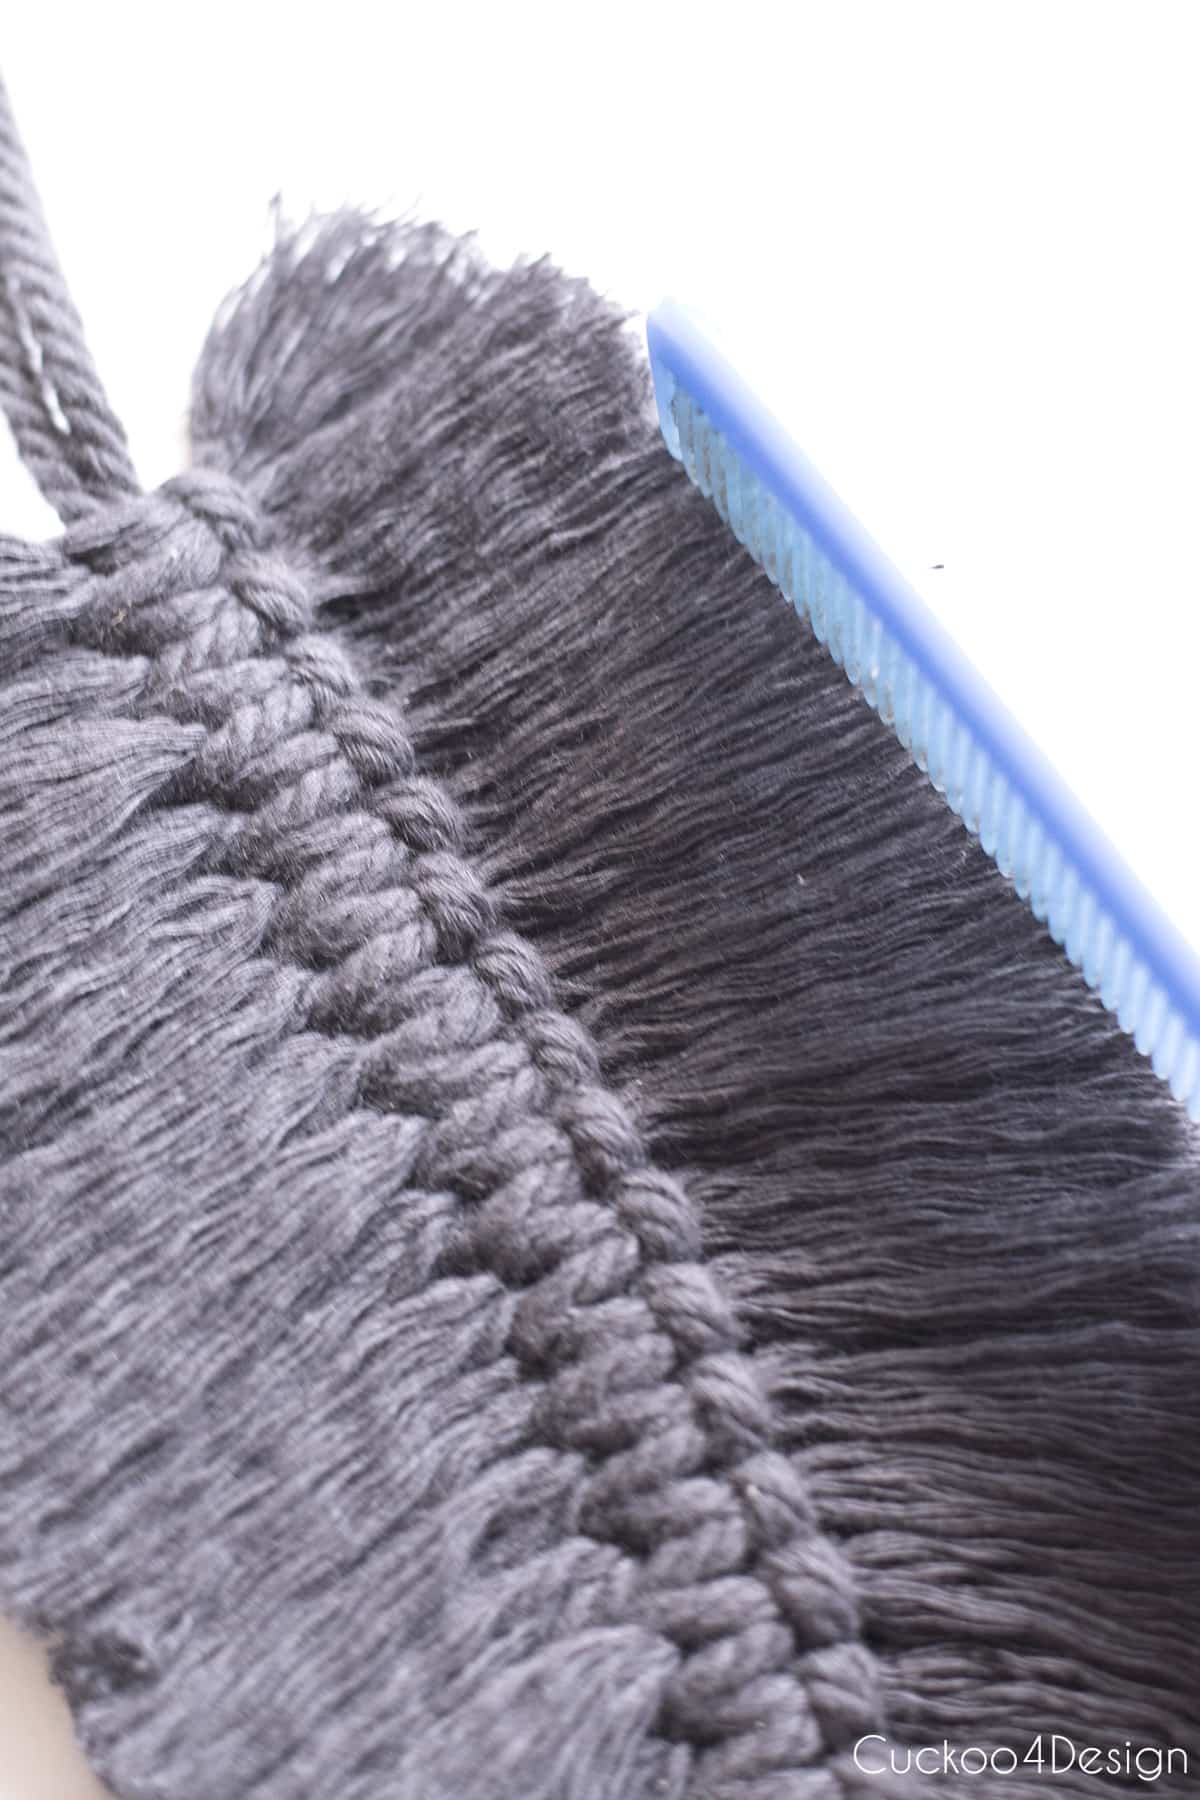
Macrame Combing Tip: On my larger scaled projects that involve combing macrame yarn, I solely use the pet hairbrush. I still like using the comb for smaller pieces like the macrame feathers, especially when you get close to the shaft, because the wire brush can tear at the center knots and make them look messy.
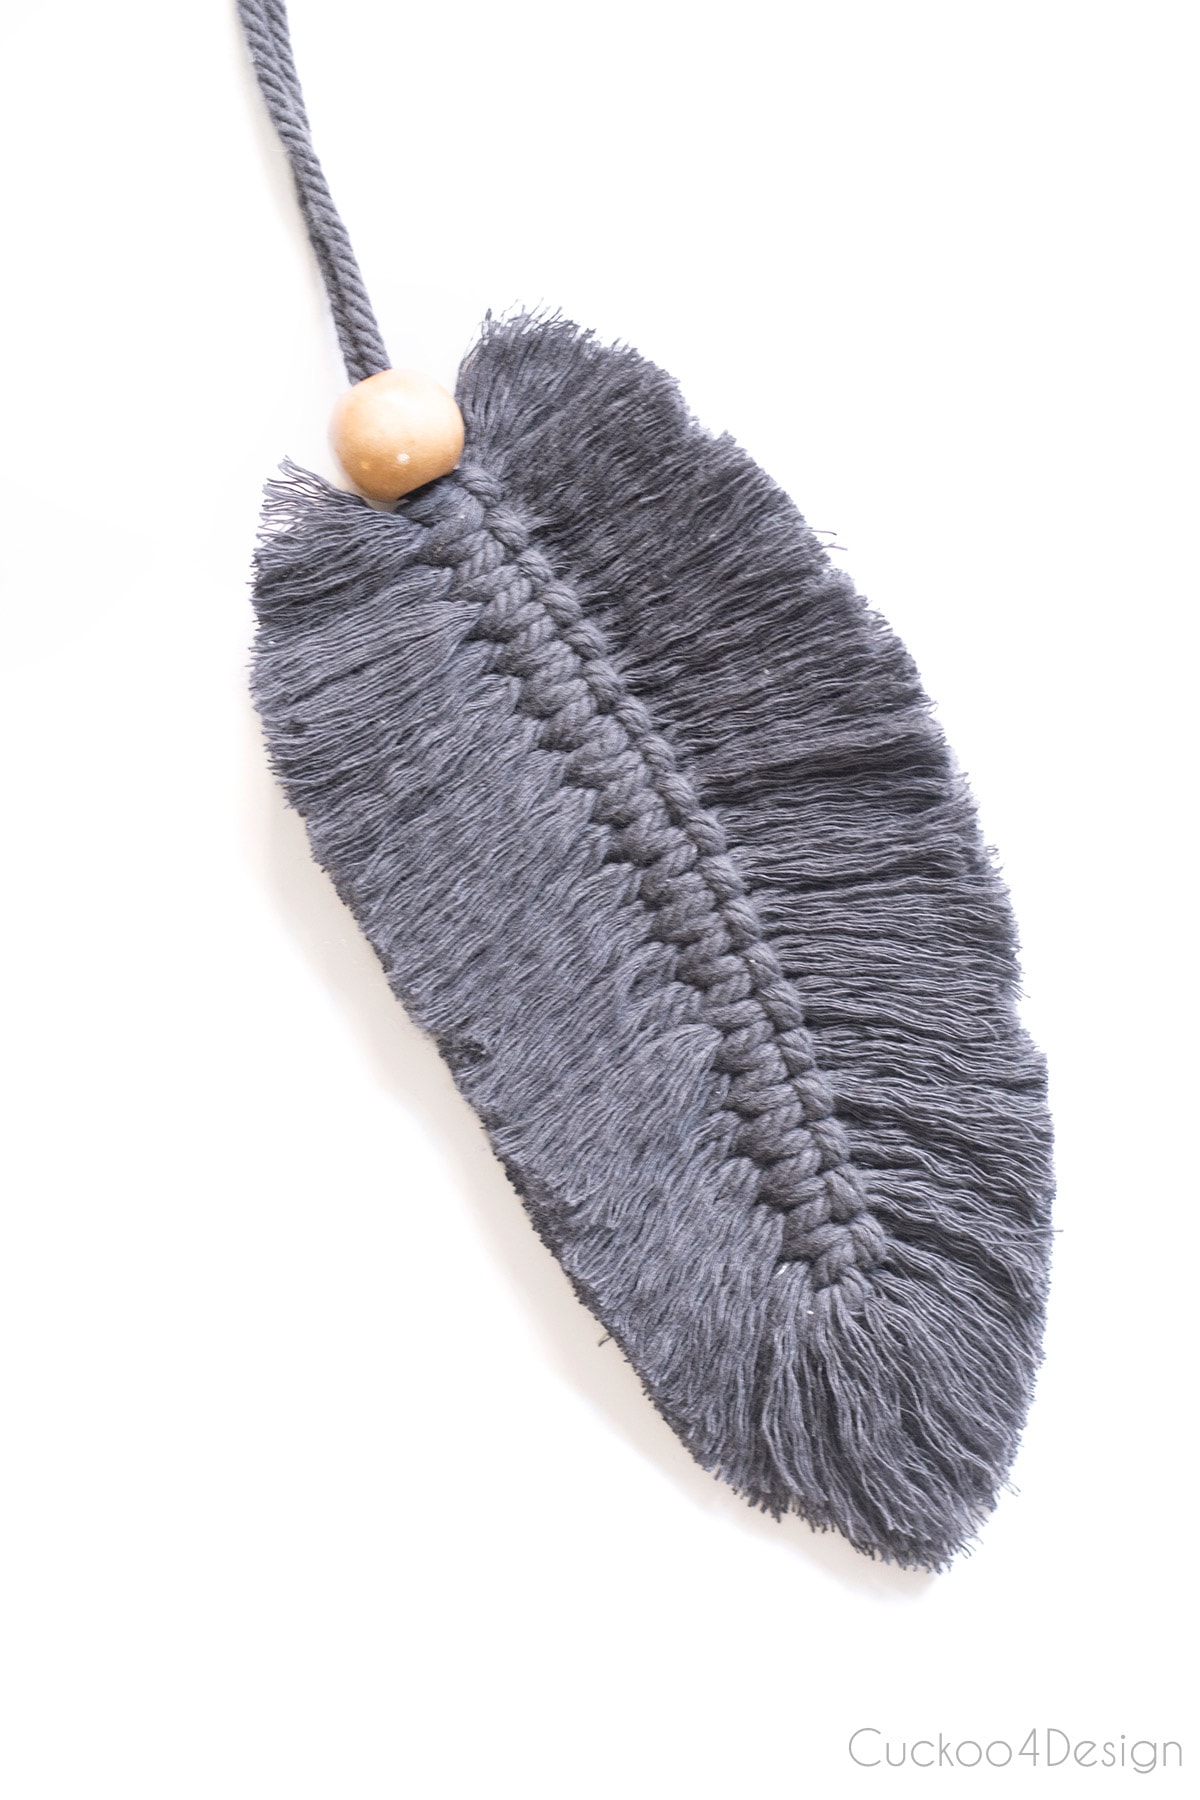
When you unraveled and combed the left side and right side of the macrame feather, then you should end up with something like you see below.
Tip: I love dipping the entire macrame feather in fabric stiffener or starch. I let it dry on a flat surface which will keep the feather stiff and helps keep its shape. (this is optional and not required to make a macrame feather)
Step 4: Trim the macrame feather edges
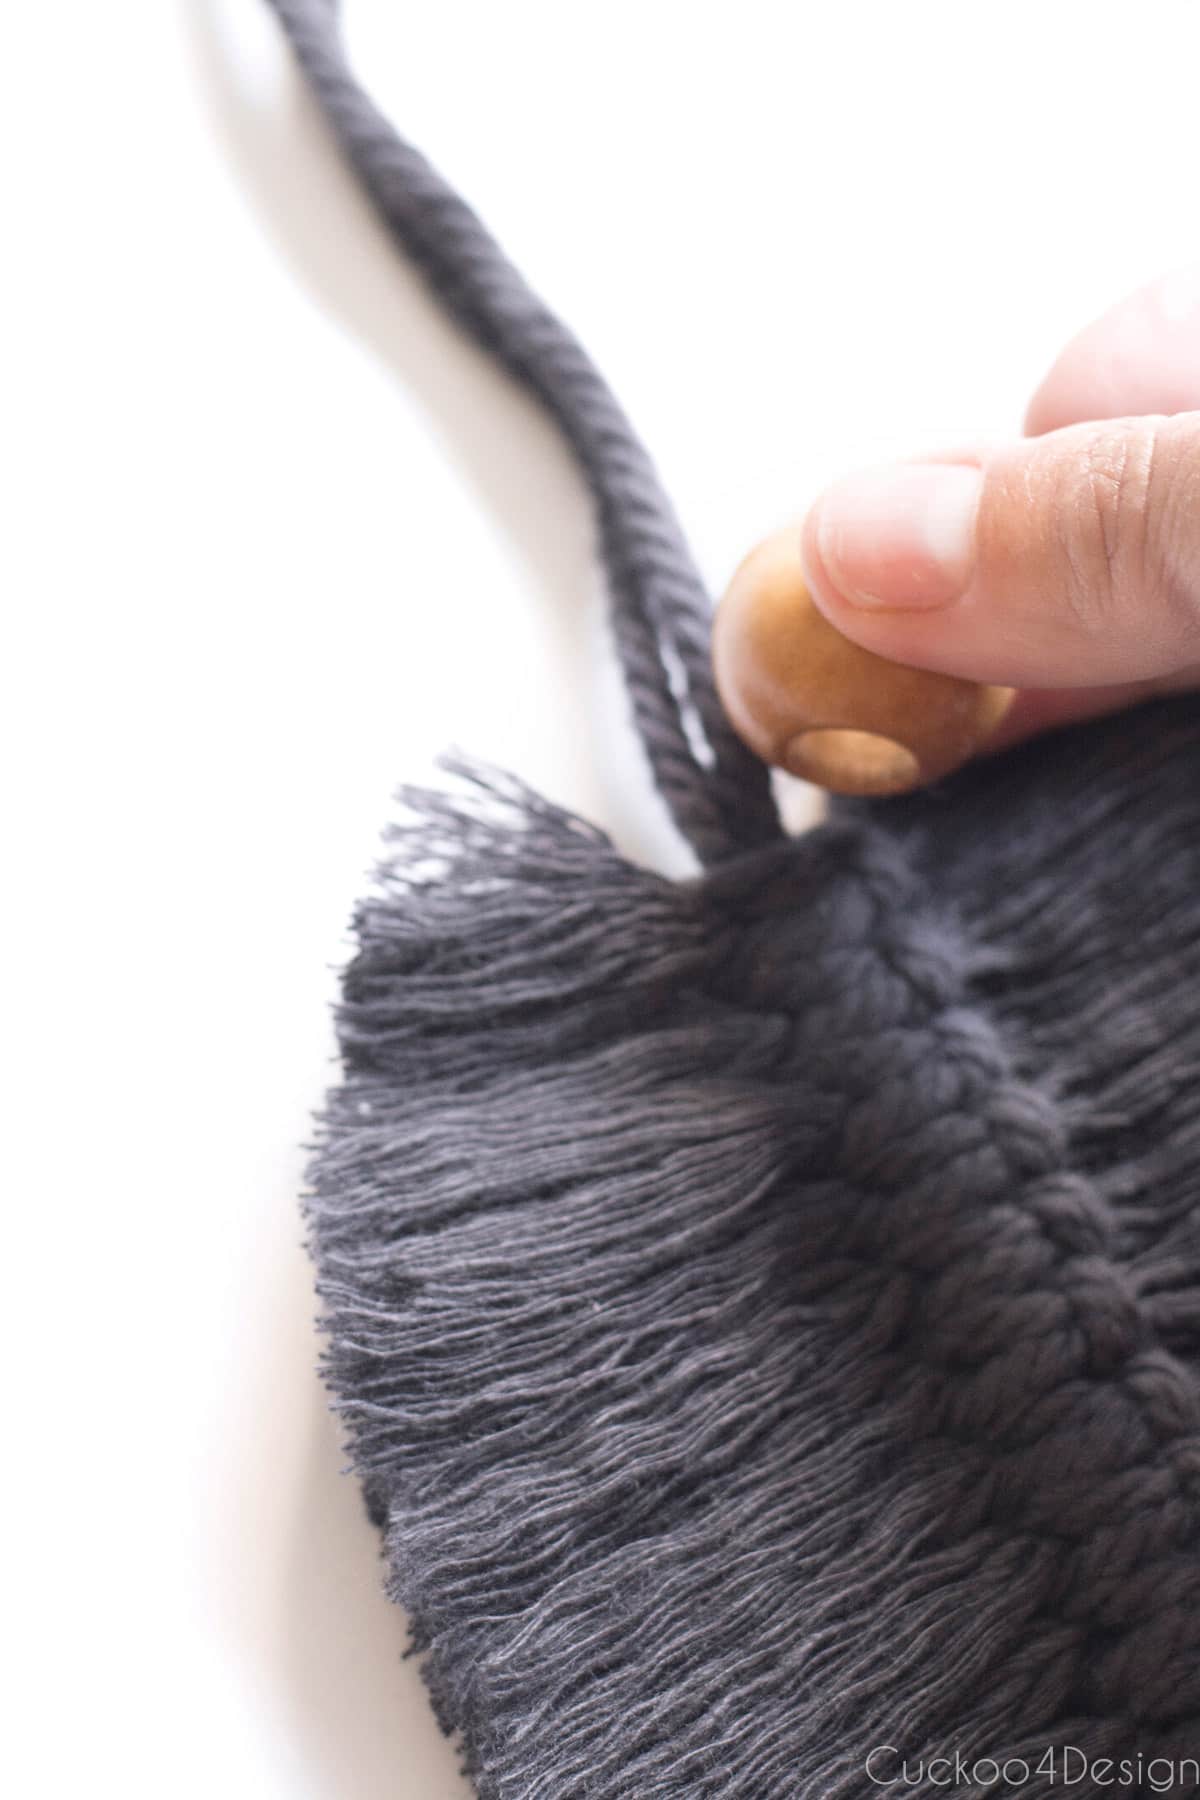
Now, it is time to trim the ends of the cording to create the shape of the feather. You don’t need a template for this. Every feather is unique in nature and should be slightly different. That’s the beauty of them.

And at the end, you can slip a wooden bead at the end of the string.
My tips for making a macrame feather
- You can spray the macrame feather with spray starch or dip it in starch to make sure it doesn’t lose its feather shape. I do not recommend using hairspray because it is way too sticky. When the fabric stiffener has dried completely, then you can brush the macrame feather again and see if you need to trim the edges again.
- Be careful when you use a brush, especially when making smaller macrame feathers, because you can hurt the shaft of the feather. The comb works better most of the time.
- I use hair-cutting scissors or very sharp small crafting scissors to cut the fringe. They work so much better than large scissors for this specific task.
- Use the right yarn for the size of the feather you are making! (See my macrame feather earrings below as a great example)
And voila, you have a pretty DIY macramé feather that you can use as an accessory.
6 ways to use DIY macrame feathers as an accessory
I love that macrame feathers are so versatile and easy to make. I’ve moved them around the house and wardrobe so many times already. Let me show you how I have used them.
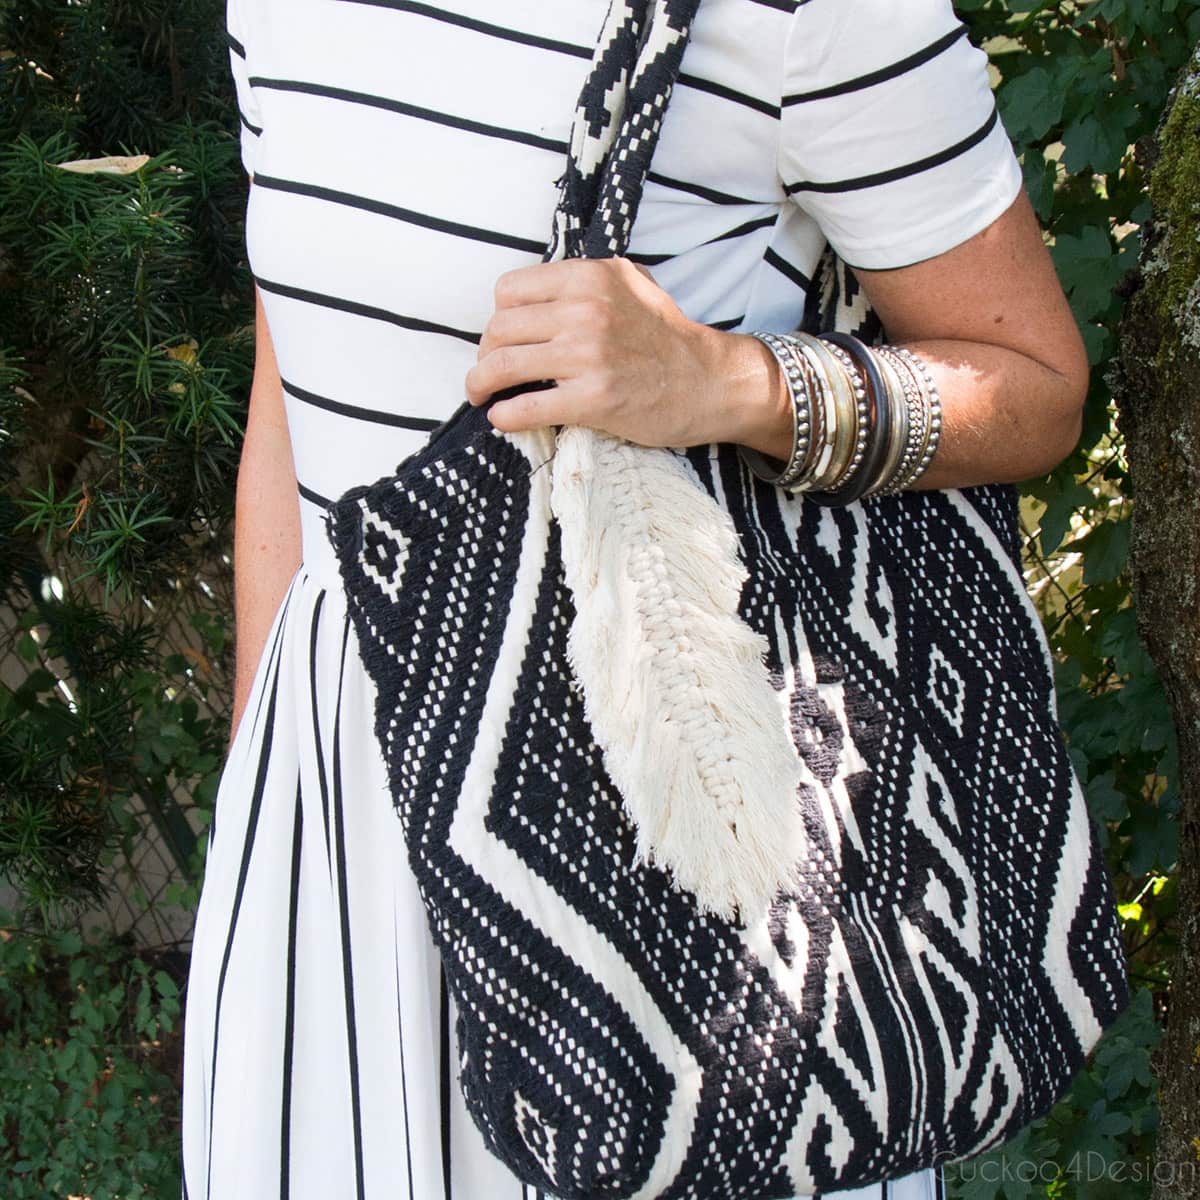
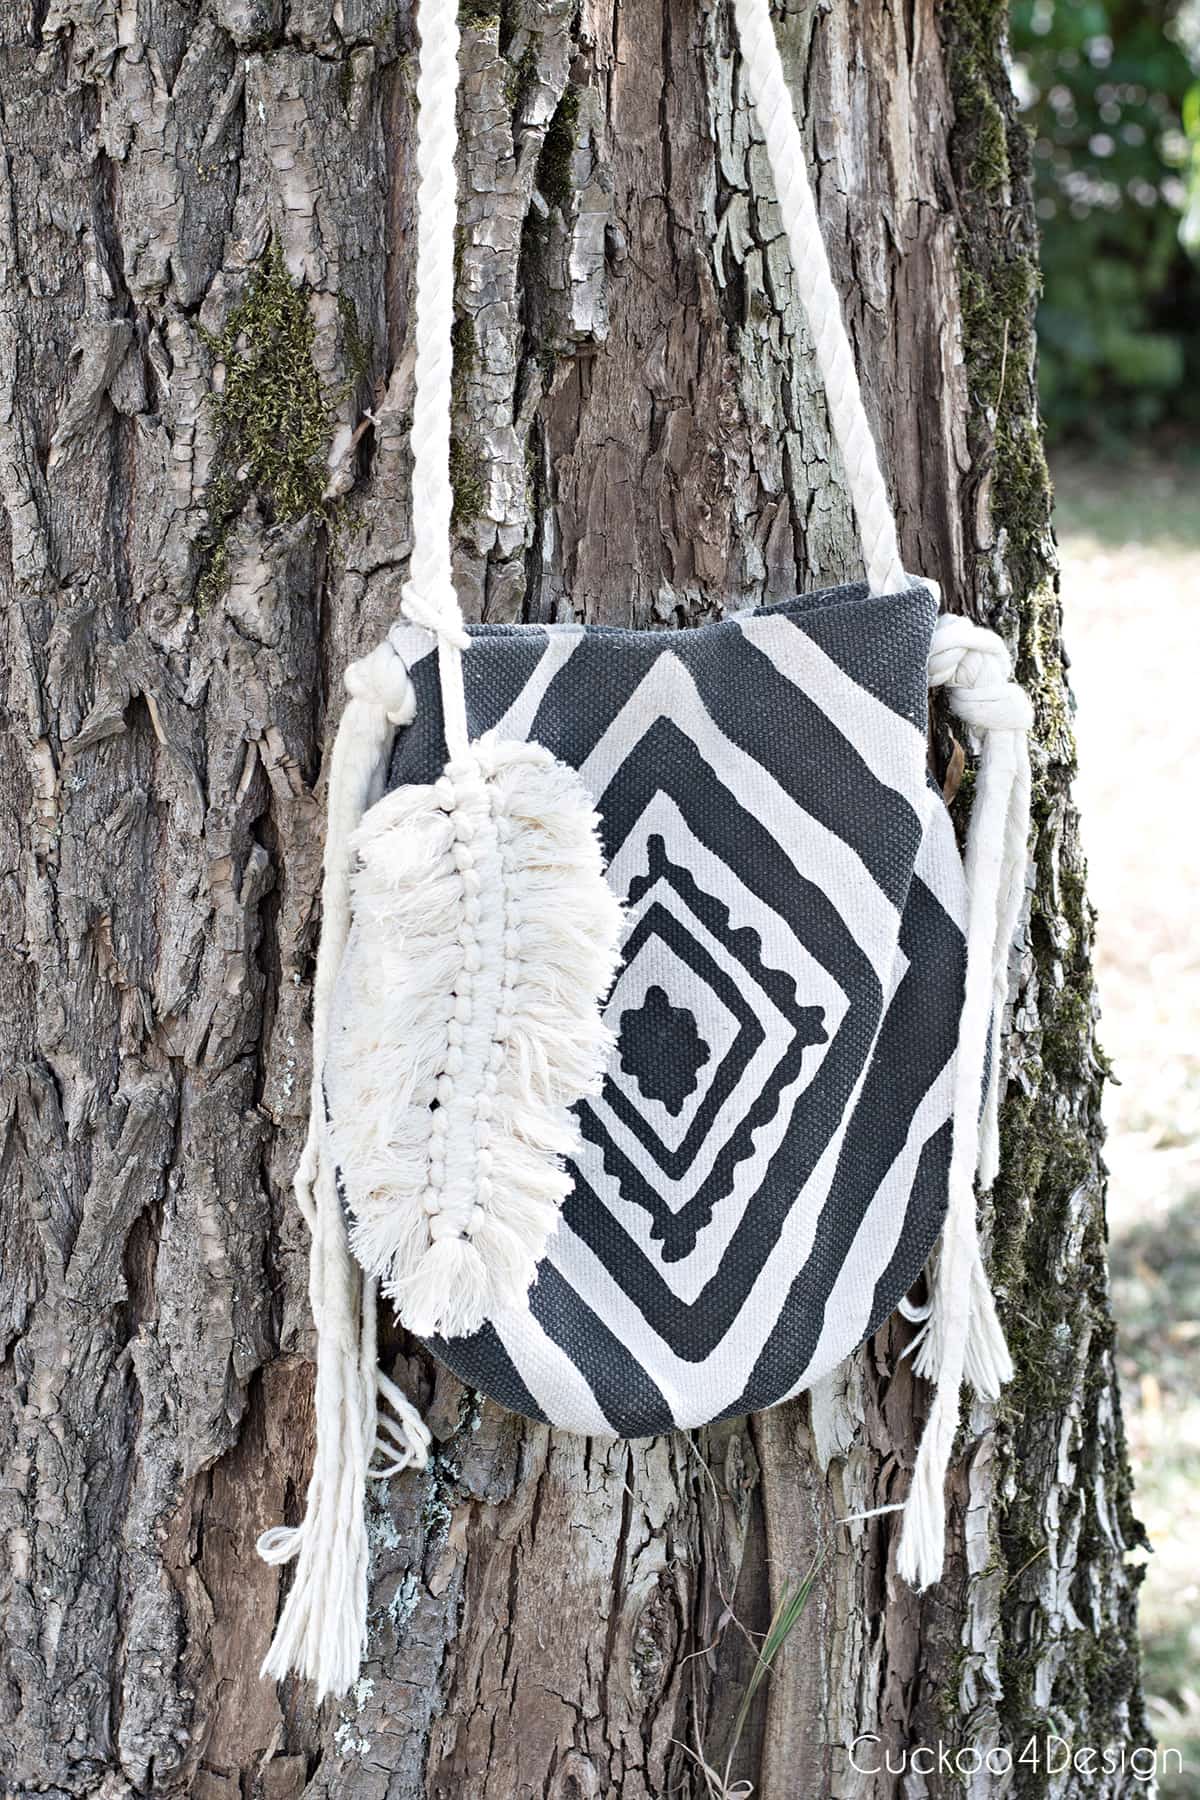
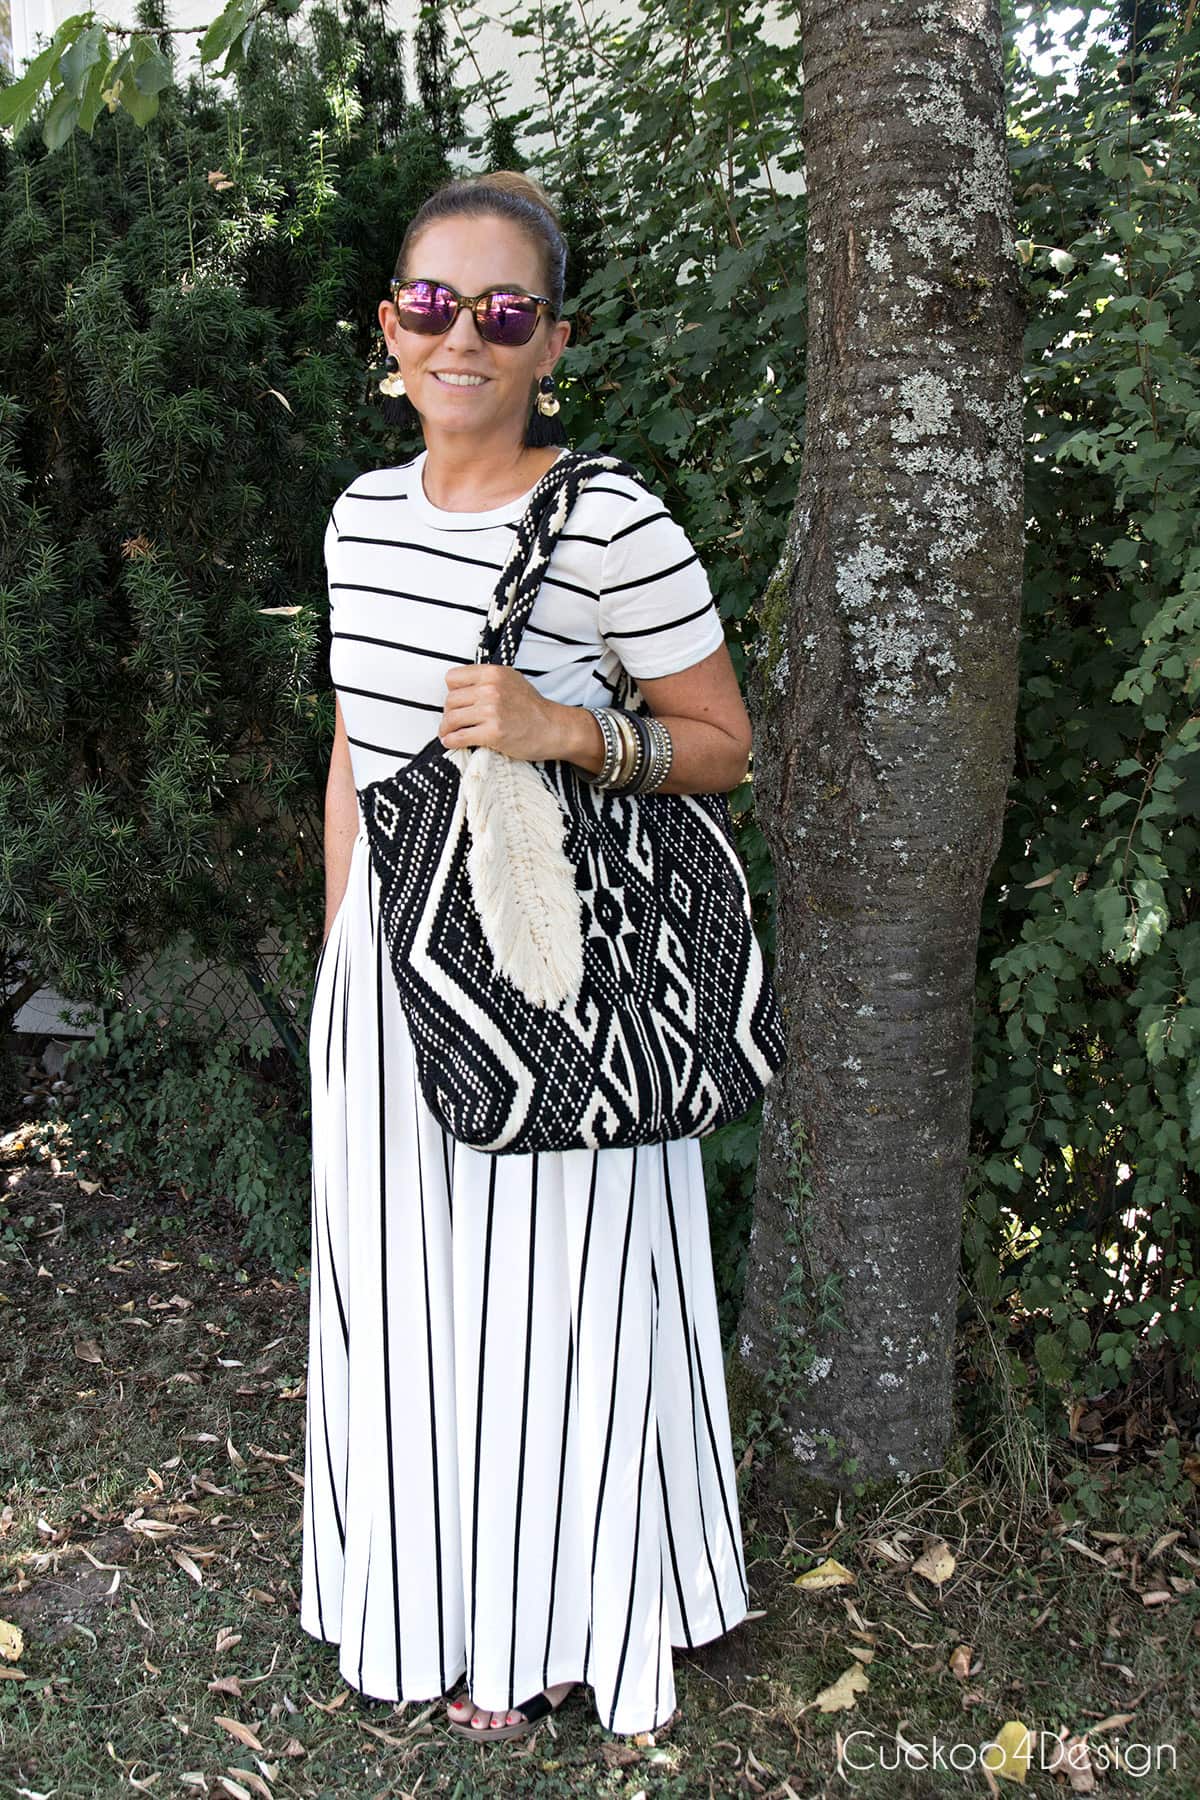
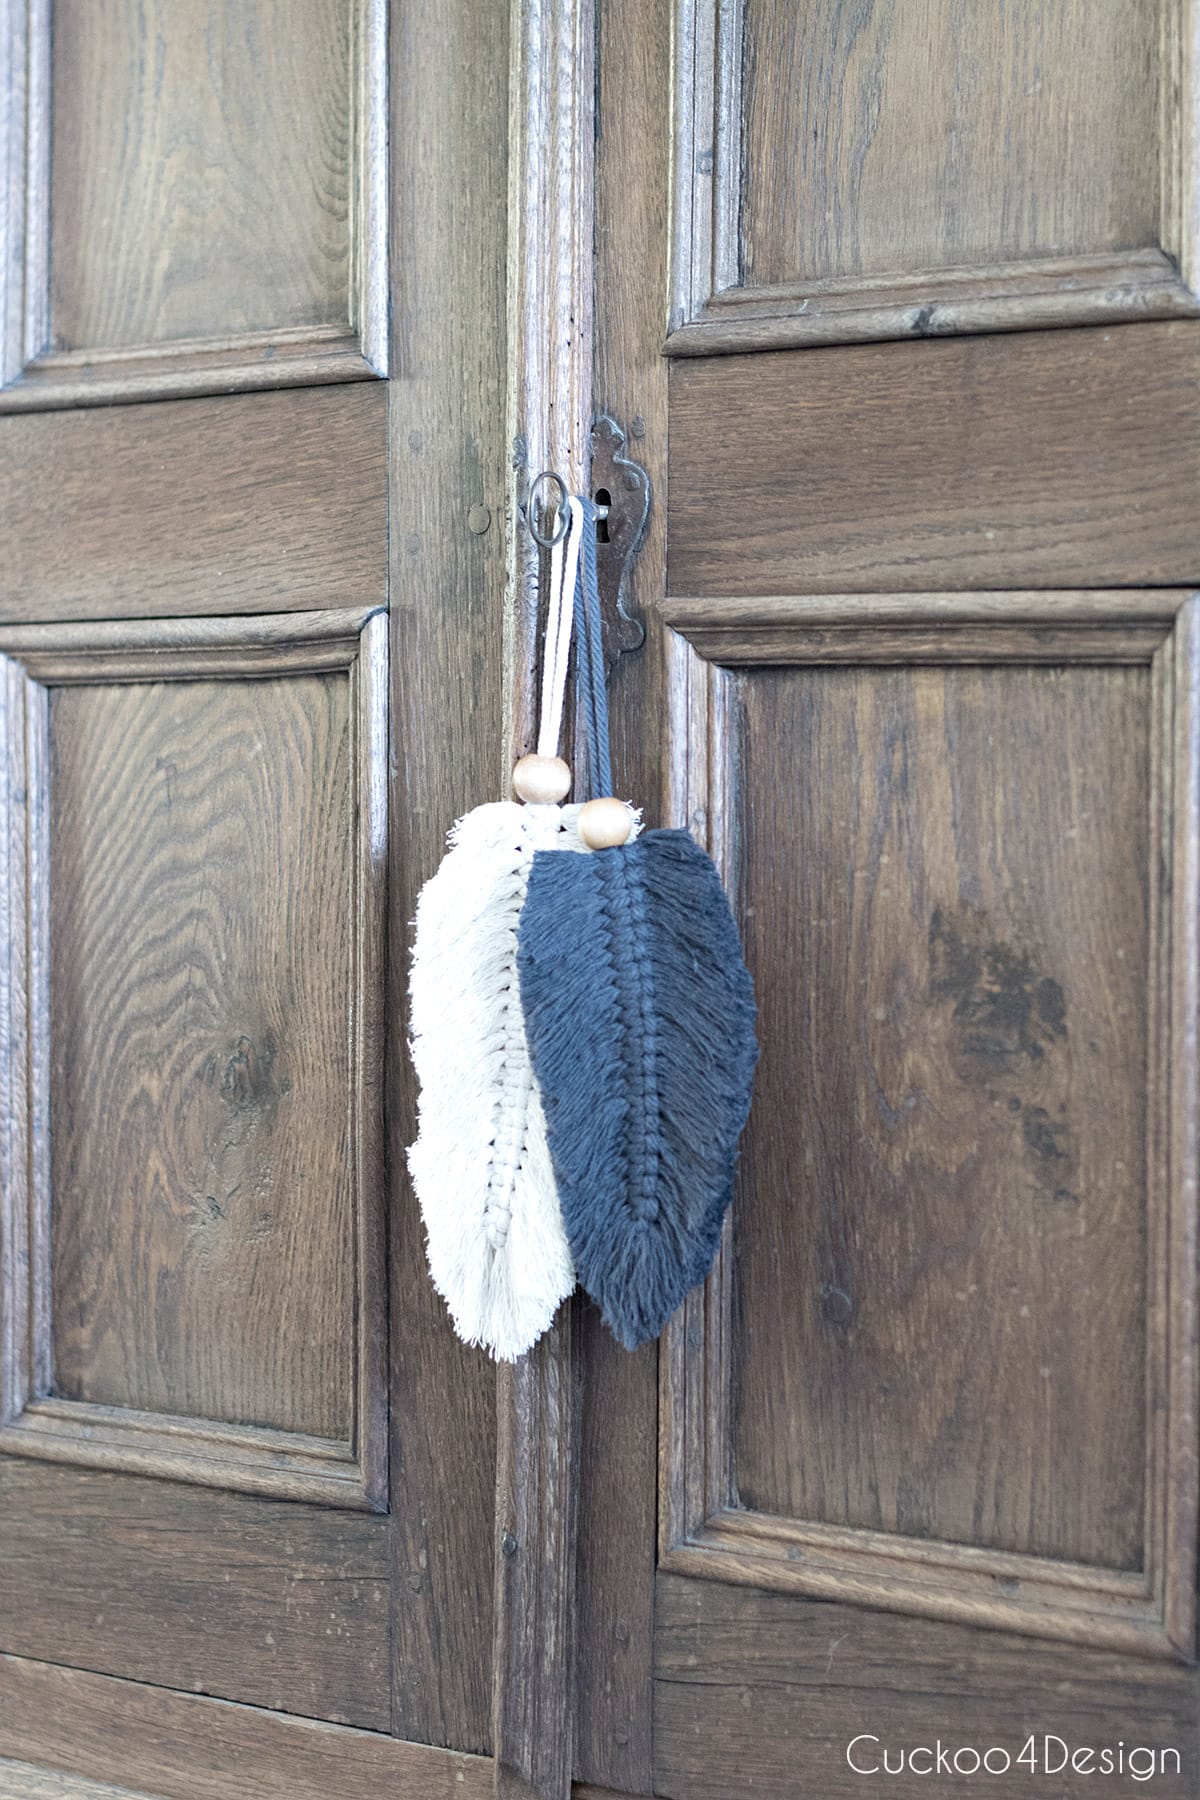
Macrame feather purse charm
You know I like adding purse charms to my bags, and the large macrame feathers are my favorite purse accessory.
Last year I made a huge blue ombre stacked tassel. This macrame feather resembles a tassel but adds more boho charm to your outfit or home decor.
Let’s not confuse the macrame feather with a macrame leaf. They are similar in shape but have some differences in added texture and knots.
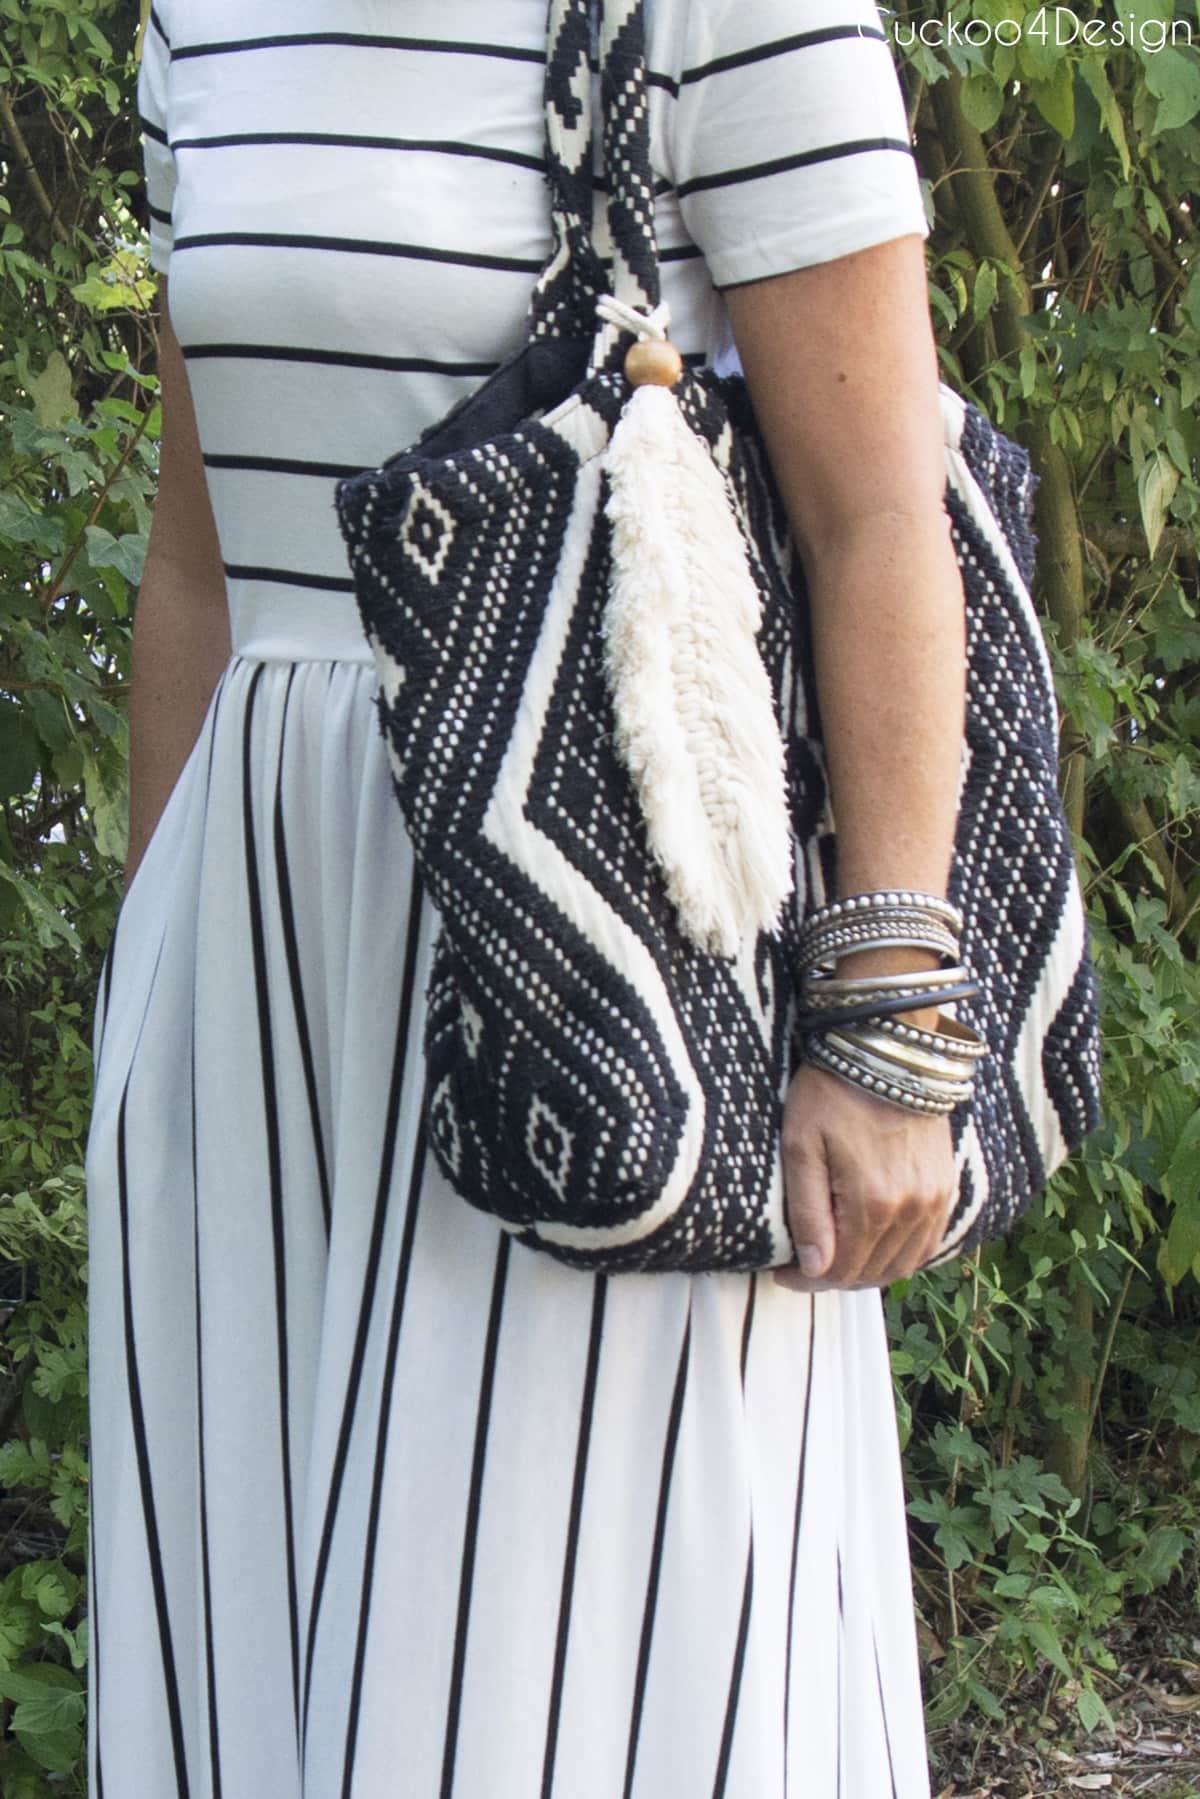
By the way, I bought the dress in two colors for under $25 and love it (white with black stripes and black with white stripes). Unfortunately, I bought the dark dress for my mom (haha), and she loves it too, so I have to give it up as intended, even though I don’t want to. The bag was from Loft a couple of years ago and, unfortunately, is not available anymore.
The raffia bag is my mom’s and is perfect for the oversized macrame feather. I made the dark one for her, and she keeps it on that bag. If you want a similar one, then you can find great options on Etsy.
RELATED: If you are new around here and like easy macrame craft projects with simple knots, then you can see my macrame garland, macrame plant hanger, macrame wreath, or macrame stone wrap tutorial on my blog as well.
Macrame feather keychain accessory
In this case, it’s an old key on a wooden cabinet, but you can use it on any keyring or even a doorknob.
I love my parents’ antique milk cabinet. It’s so pretty, and the macrame feather is a fun accessory for it.
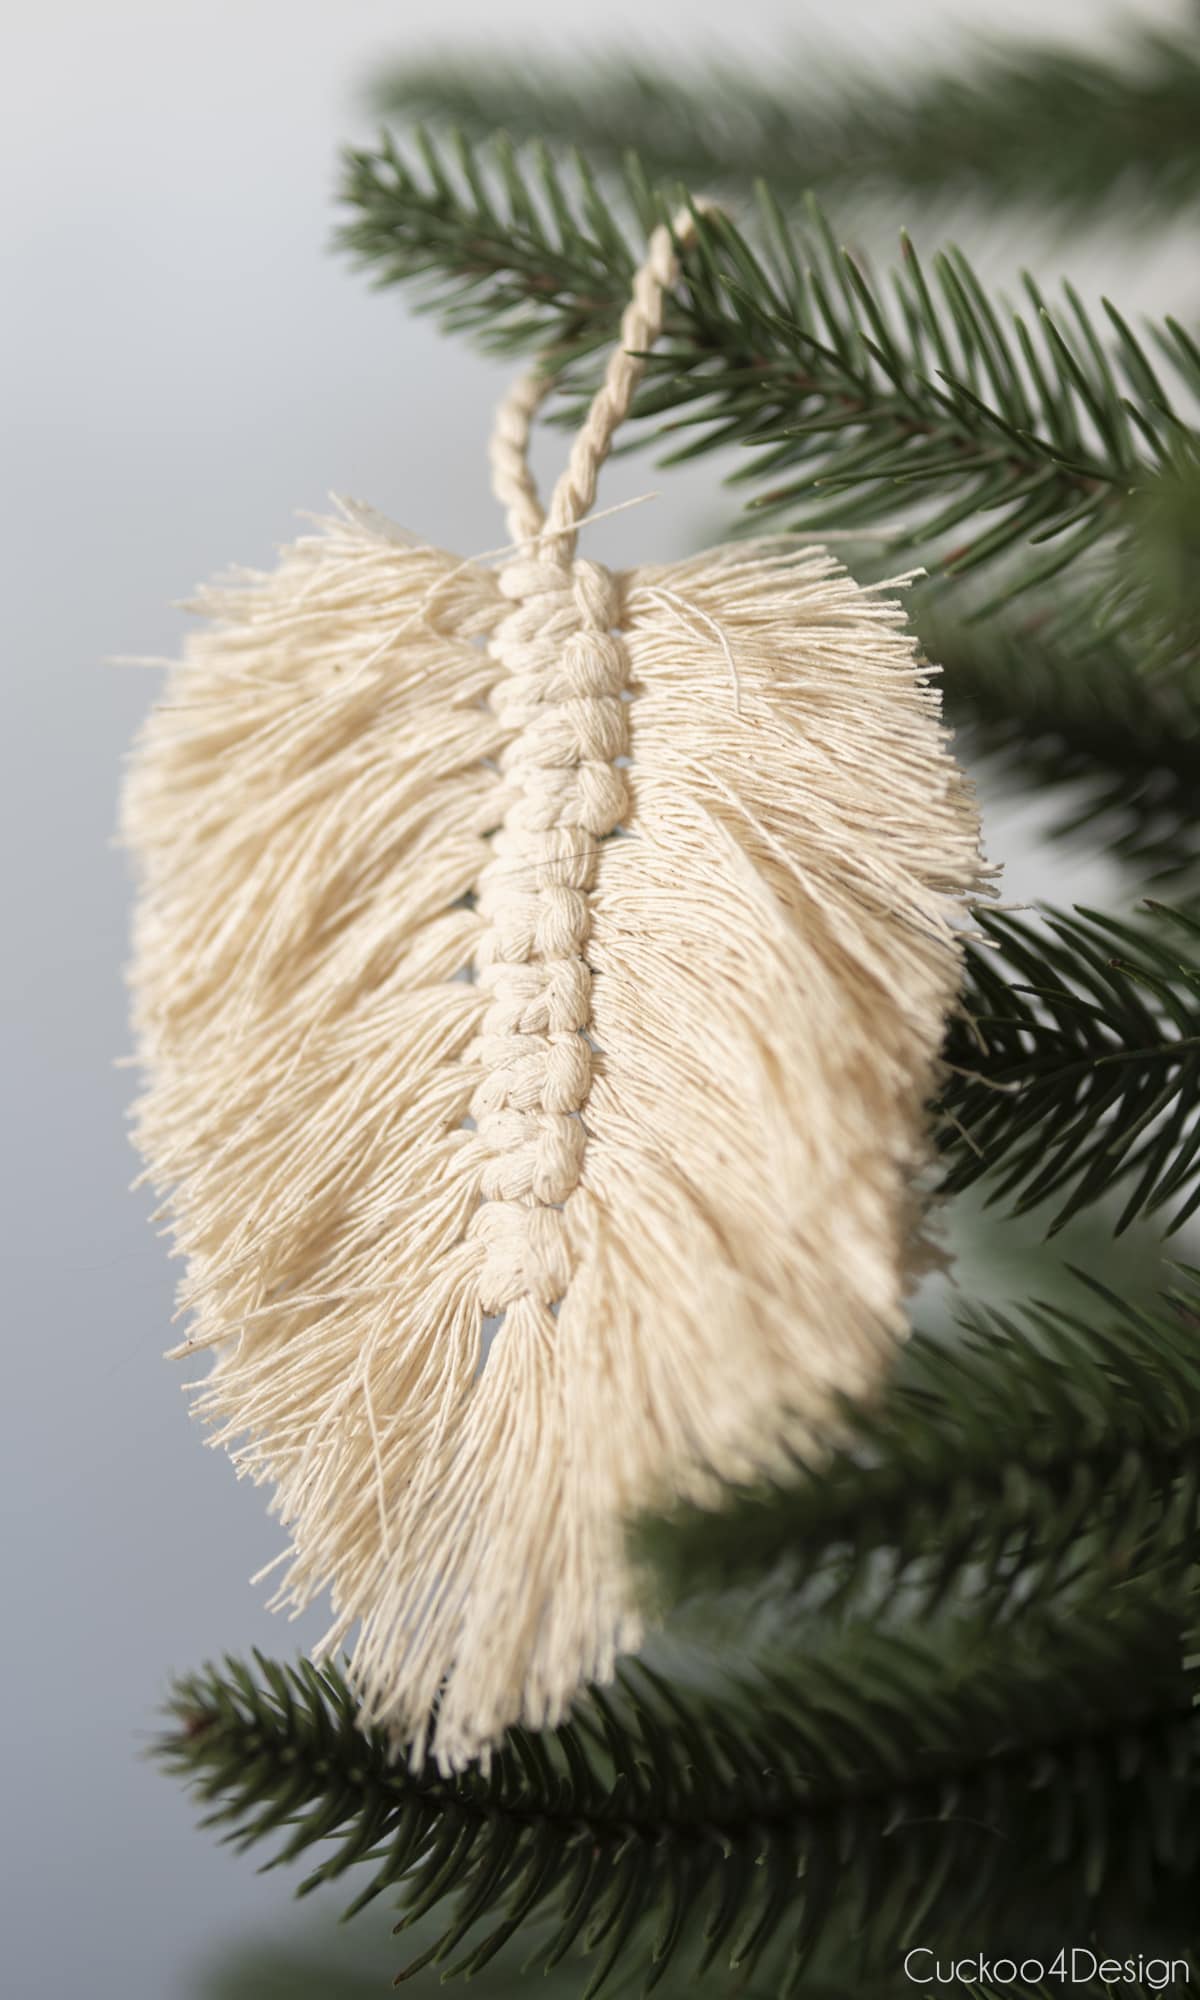
Macrame feather Christmas ornament
I’ve made several macrame Christmas ornaments that ended up on my boho Christmas tree. They are such a stylish and affordable option. Christmas decor can be so expensive but it doesn’t have to be.
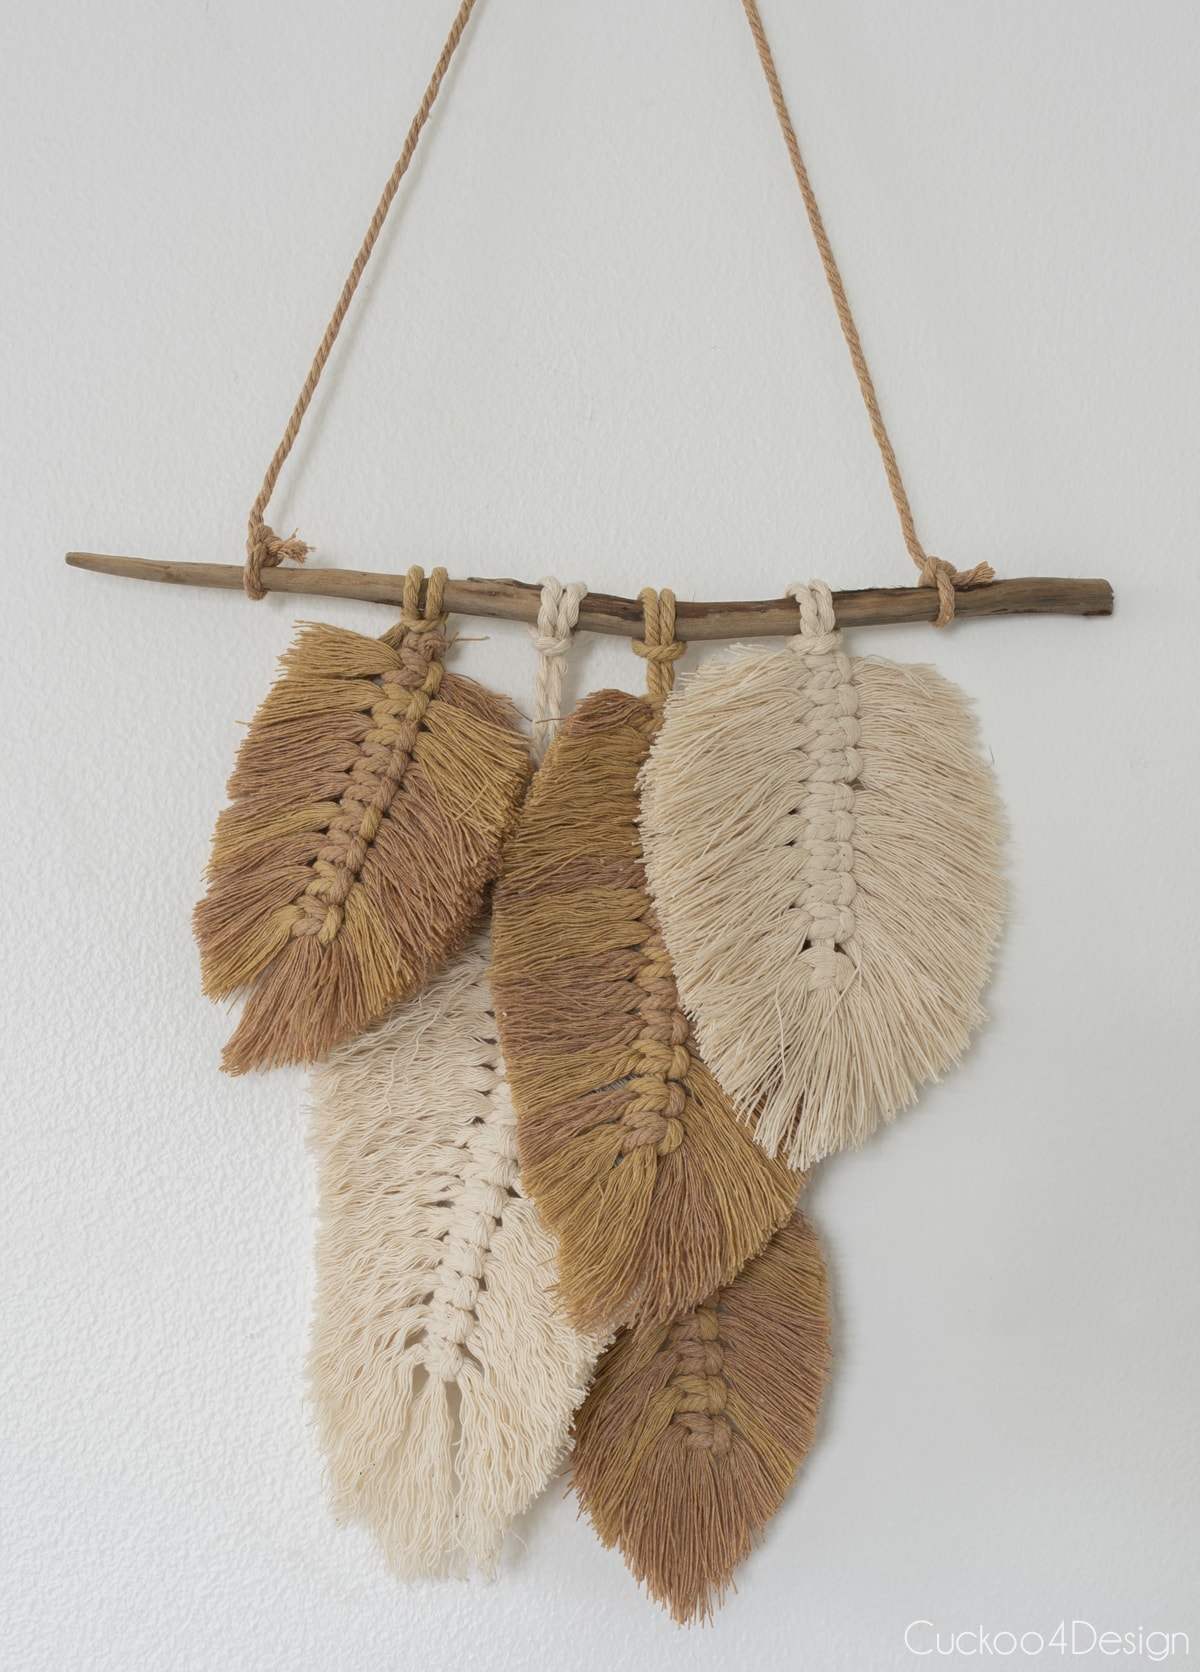
Macrame feather wall hangings
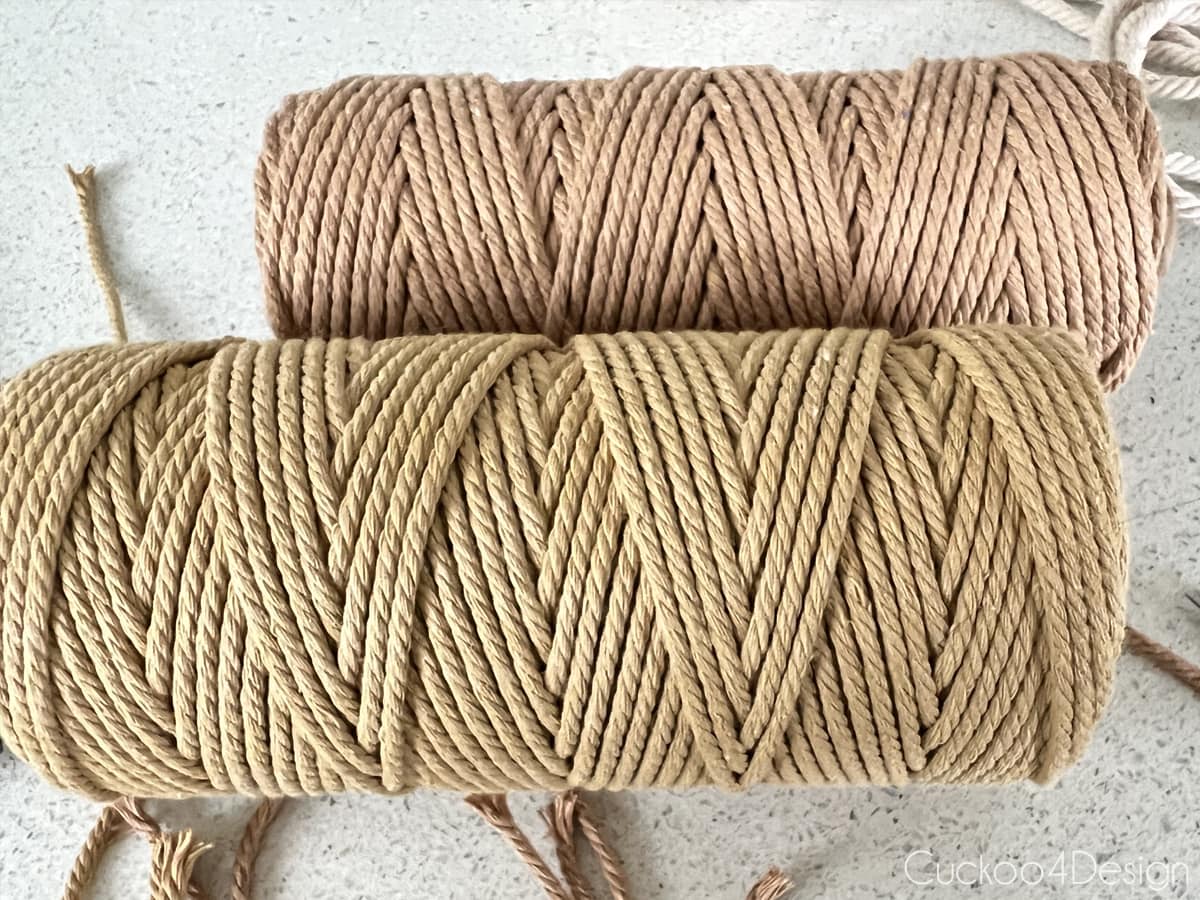
I also like using two different but similar 3mm macrame yarn colors. As you can see below, I used the colors coffee and khaki. Another one of my favorite colors that would look good combined with the others is brick red. I have used that color for my macrame tassel keychain DIY.
Loop the main piece that creates the shaft of the macrame feather onto a stick with Lark’s Head Knots. Add as many as you want to create your macrame feather wall hanging.
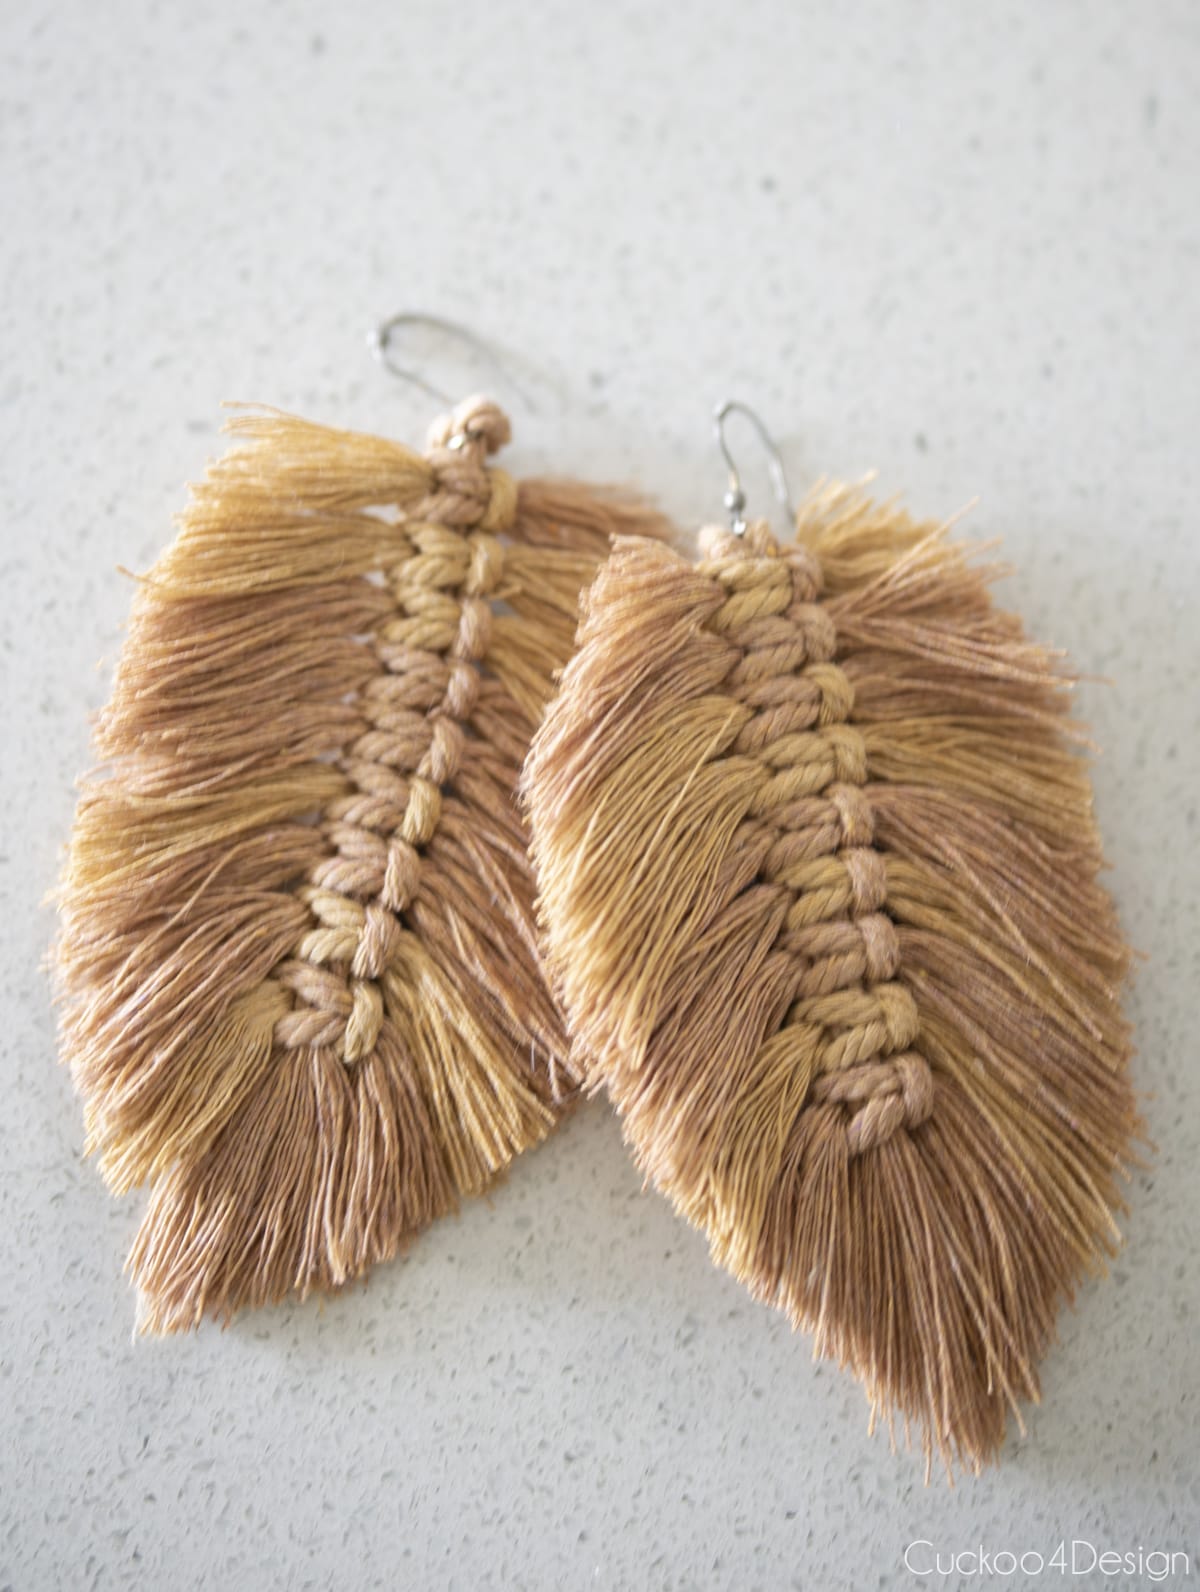
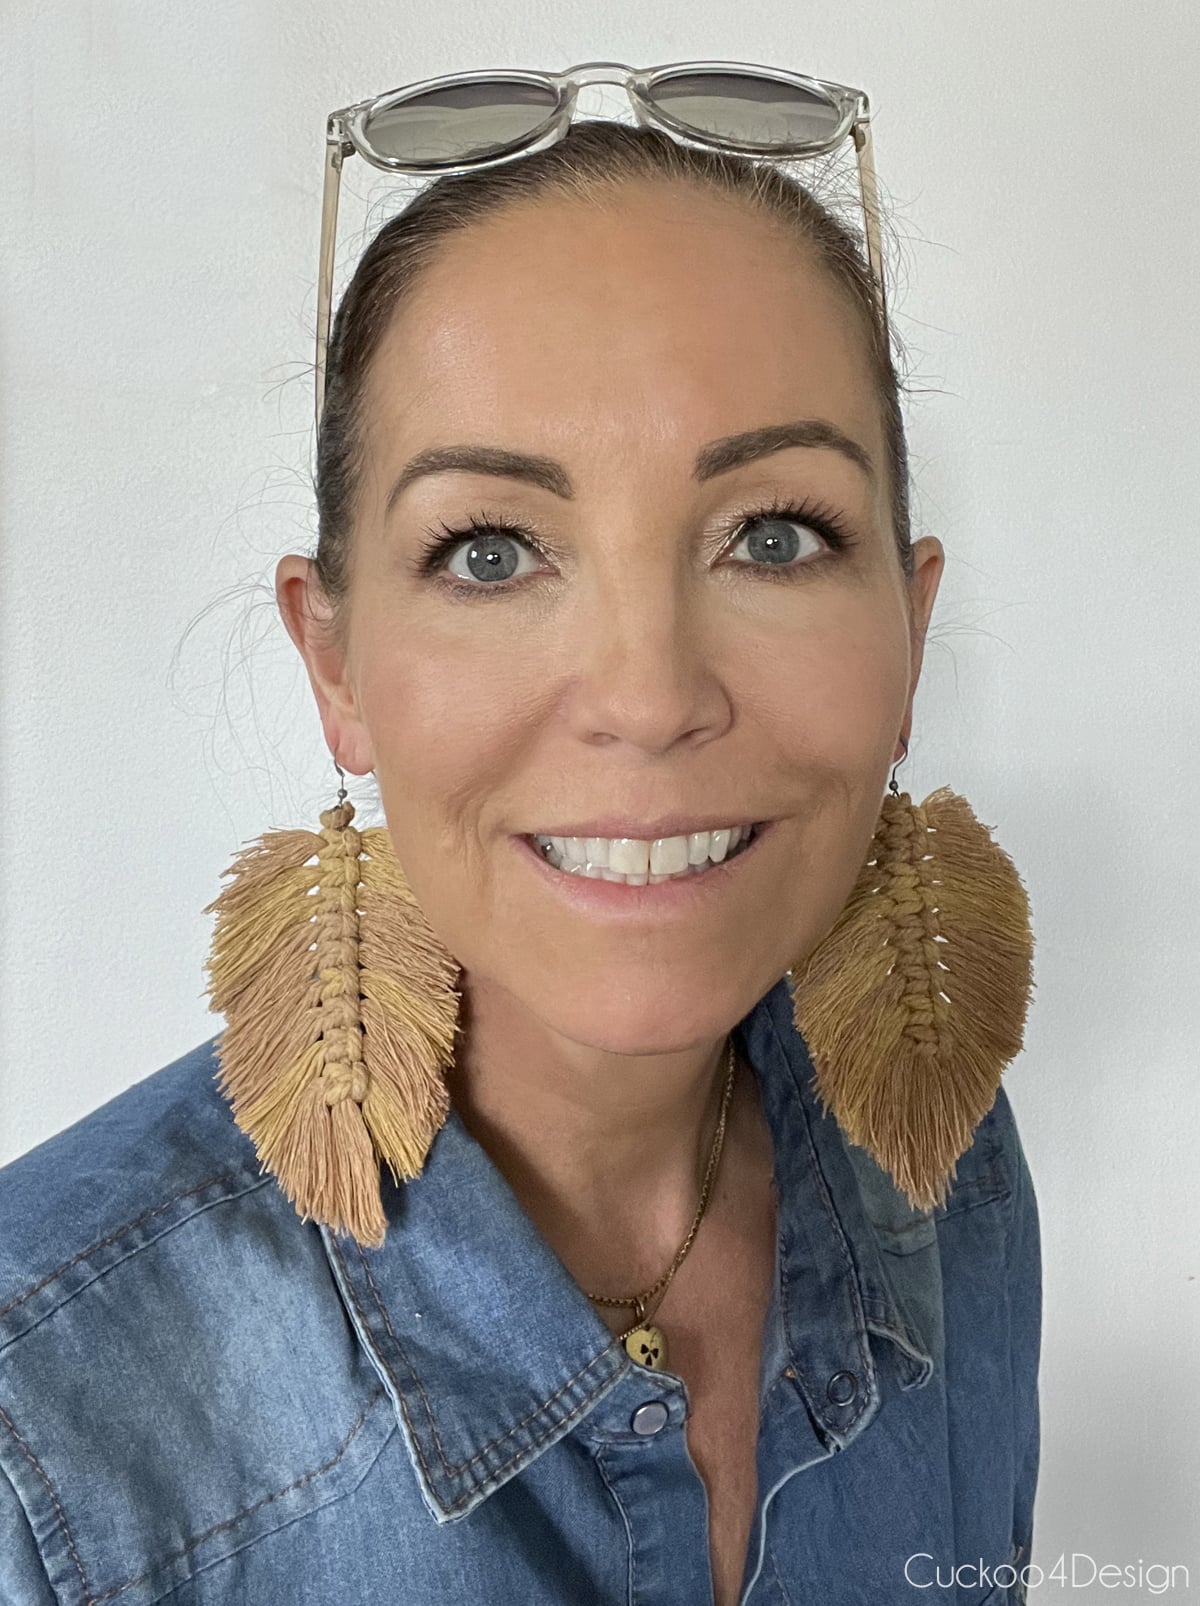
Macrame feather earrings
Macrame feather earrings are just as easy to make. Simply loop a Lark’s Head Knot onto your earring hook, as shown below. This creates the middle of the feather.
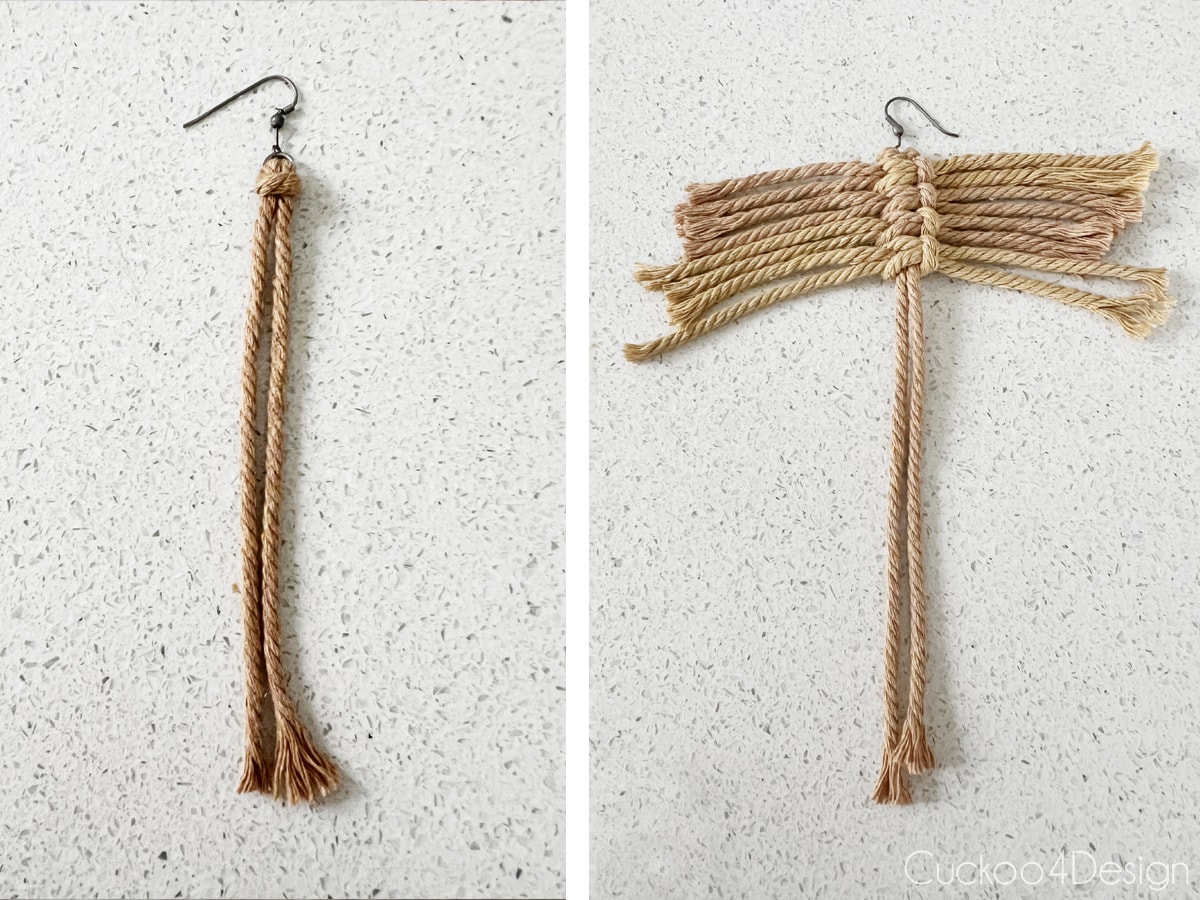
Mine are rather large macrame feather earrings, but I like big jewelry pieces. You can certainly make them a lot smaller, and if you don’t like using hooks, then you could also glue them to a studded earring like I did in my fringe earring tutorial.
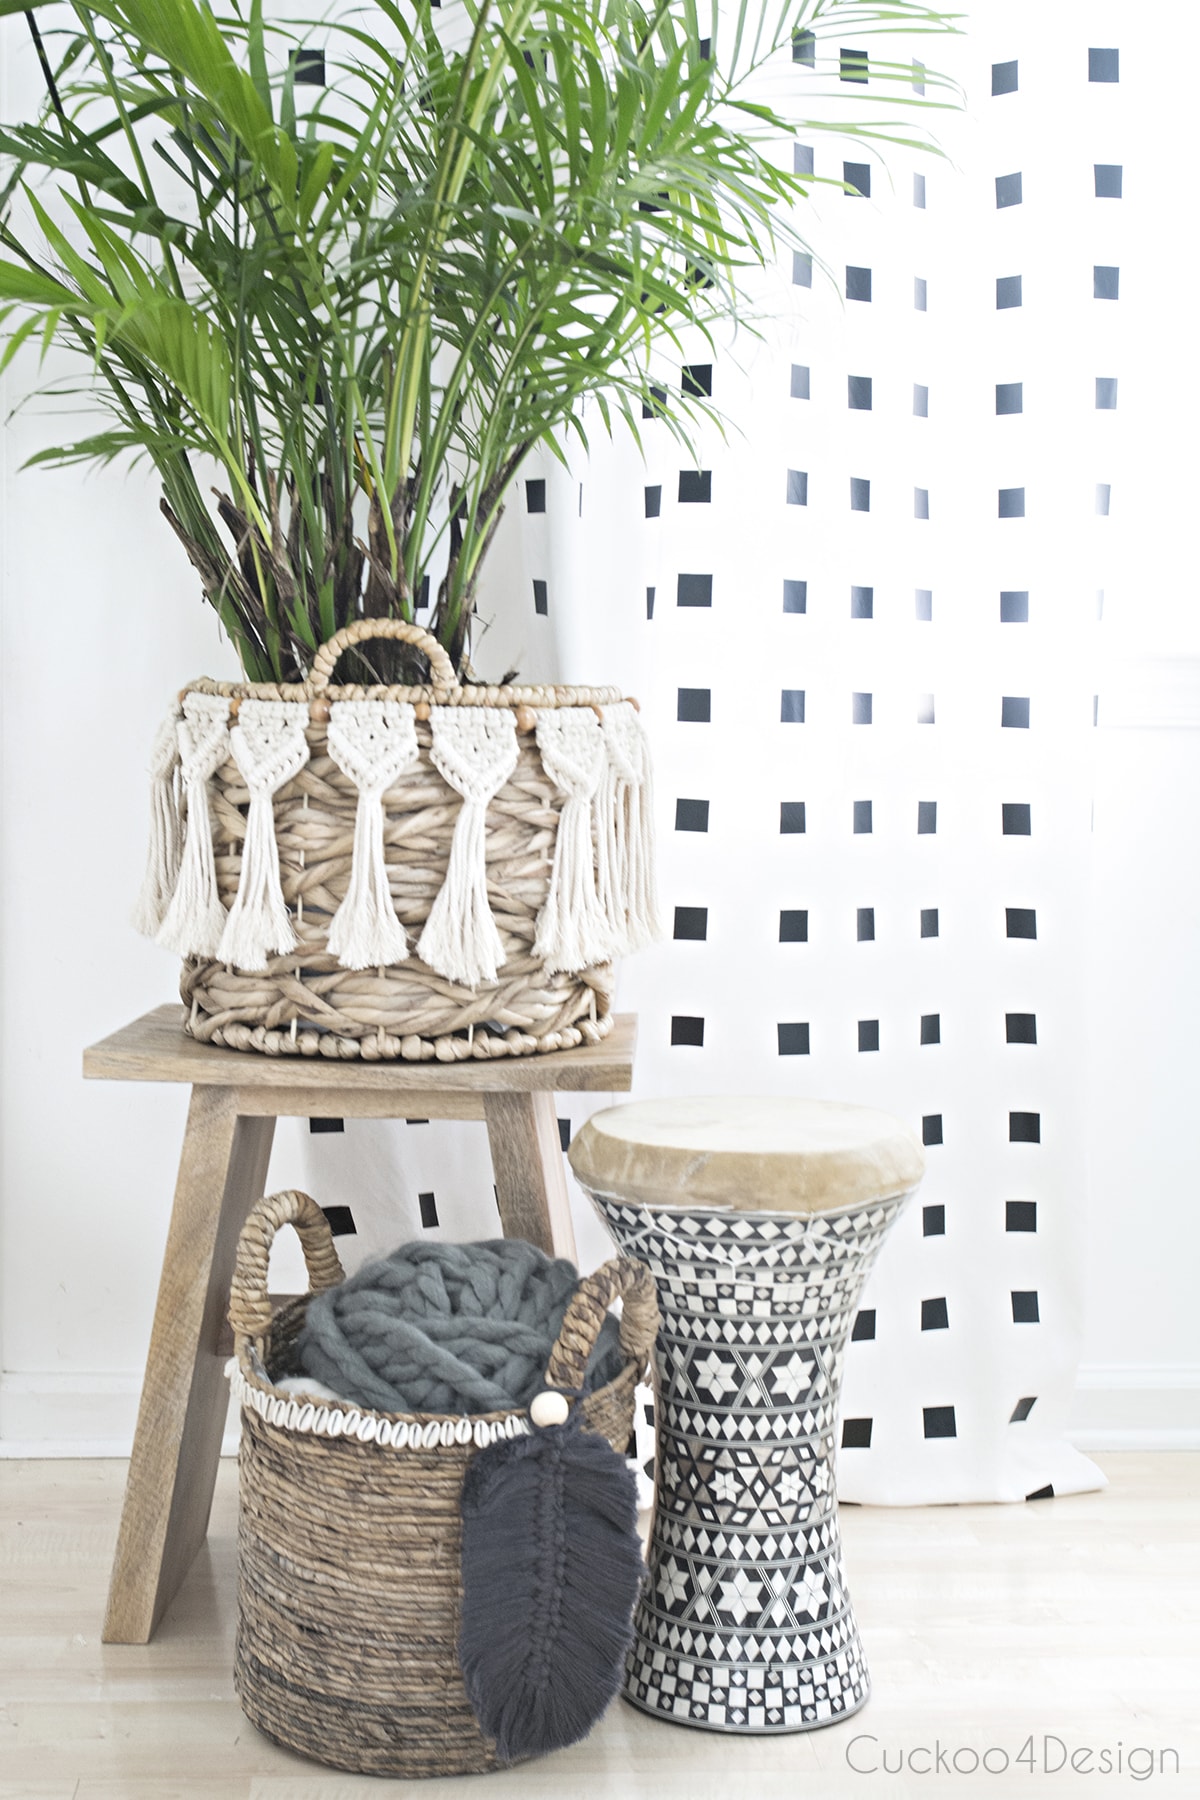
Macrame feather basket decor
I love adding some macrame feathers to my basket handles for some added interest. My easy macrame garland also looks good as a basket accessory.
I think next, I will make a wall hanging with several different-sized feathers. I love the look, don’t you?
Tschüß,

DIY macrame feather tutorial
Macrame feathers are the perfect macrame beginner project and can be used in many different ways as trendy fashion and decor accessories.
Materials
- 4mm macrame yarn for larger macrame feather and 3mm for smaller feathers
- wood beads (optinal)
- fabric stiffening spray or starch (optional)
Tools
- sharp scissors (I like using hair-cutting scissors)
- hair comb or wire pet brush
Instructions
- Create the feather center shaft
I started out by using a 20-inch piece of macrame cord. Fold that in half and lay it on a clean surface, as shown below. This will be the piece that creates the center shaft of your feather.
- Add your cords to the shaft to create the feather shape
Start out with your first two pieces of yarn that are around 8 inches long and folded in half as well. (This project is perfect for using all your leftover scraps from other macrame projects.)
The one strand that is folded in half gets placed under the longer shaft centerpiece, the way I'm showing in the photo below. (You can see the process in my video)
Place the other short string on top of the shaft. Then, thread the ends of each piece of macrame yarn through the loop of the opposite piece and pull the yarn ends tight with the feather's shaft in the center. This is called a Square Knot.
Pull it all tight. You can push these knots up to where you want them and as tightly together as you want.
Then knot the bottom/end of the long shaft string so the square knot can't slide out of the bottom.
After that, you must keep stacking the same Square Knots to achieve the desired length. You can stack them in the same direction as I did or in the opposite direction for a different look.
I made my feathers around 10 to 12 inches long. - Unravel and comb the macrame yarn
After stacking the Square Knots, unravel the macrame yarn and comb it.
When you unraveled and combed the left side and right side of the macrame feather, then you should end up with something like you see below. - Trim the macrame feather edges
Now, it is time to trim the ends of the cording to create the shape of the feather. You don't need a template for this. Every feather is unique in nature and should be slightly different. That's the beauty of them.
And at the end, you can slip a wooden bead at the end of the string.
Notes
my tips for making a macrame feather
- You can spray the macrame feather with spray starch or dip it in starch to make sure it doesn't lose its shape. I do not recommend using hairspray though because it ends up being way too sticky. When the fabric stiffener has dried completely then you can brush the macrame feather again and see if you need to trim the edges again.
- Be careful when you use a brush, especially when making smaller macrame feathers because you can hurt the shaft of the feather. The comb works better most of the time.
- I use a pair of hair-cutting scissors or very sharp small crafting scissors to cut the fringe. They work so much better than large scissors for this specific task.
- Use the right yarn for the size of the feather you are making! (See my macrame feather earrings below as a great example)
- You can use a macrame feather as a purse charm, as earrings, as a keychain accessory, as a wall hanging, as a basket decor, and as a Christmas ornament
- Macrame Combing Tip: On my larger scaled projects that involve combing macrame yarn, I solely use the pet hairbrush. I still like using the comb for smaller pieces like the macrame feathers, especially when you get close to the shaft, because the wire brush can tear at the center knots and make them look messy.
hi julia thankyou for sharing your designs is it ok i make some to sell for a charuty ? rescue cats n kitties they do lot good work and are in need of help i do crochet an stuff but love these please let me know thks again x
How wonderful! Of course you can make them for a charity. I hope people will love them.
That’s super cute!
Thank you so much 🙂
Bu I could not find the video link…
It is the image in my blog post under the phrase “You can read below or watch my short video:”. It has a triangle in the center and you can click it and play it. If that doesn’t work for you then you can find the video in my youtube channel here: https://www.youtube.com/watch?v=Ed9Tux3en00
I’m impressed! What a cute idea, and not just for a purse. I can think of quite a few places where these would be adorable. And a great project to do with my older granddaughter. Thanks! Enjoy your time in Germany. We sailed down the Rhine in December I fell in love!
Oh sailing down the Rhine river… that sounds so lovely. Have fun making them with your granddaughter.
I love these Julia – Your directions were great. I will be making one or more. Pinned!
Thanks Diane! They are addicting to make 😉
Those look so cool!
Thank you so much Ashley!
I was quite surprised at how big these were when completed. They are so gorgeous!
these are awesome!!!! what a cool take on macrame. you should make a dreamcatcher with some!
These are so cool! And I hear you about blogging while traveling….I find it very nearly impossible, though I always have good intentions….
Stunning. Am making some of these!
Love these. Finally something new. Thanks for sharing.
Like the DIY project! It looks very cool.
FUN! Adding this to my try it list.