

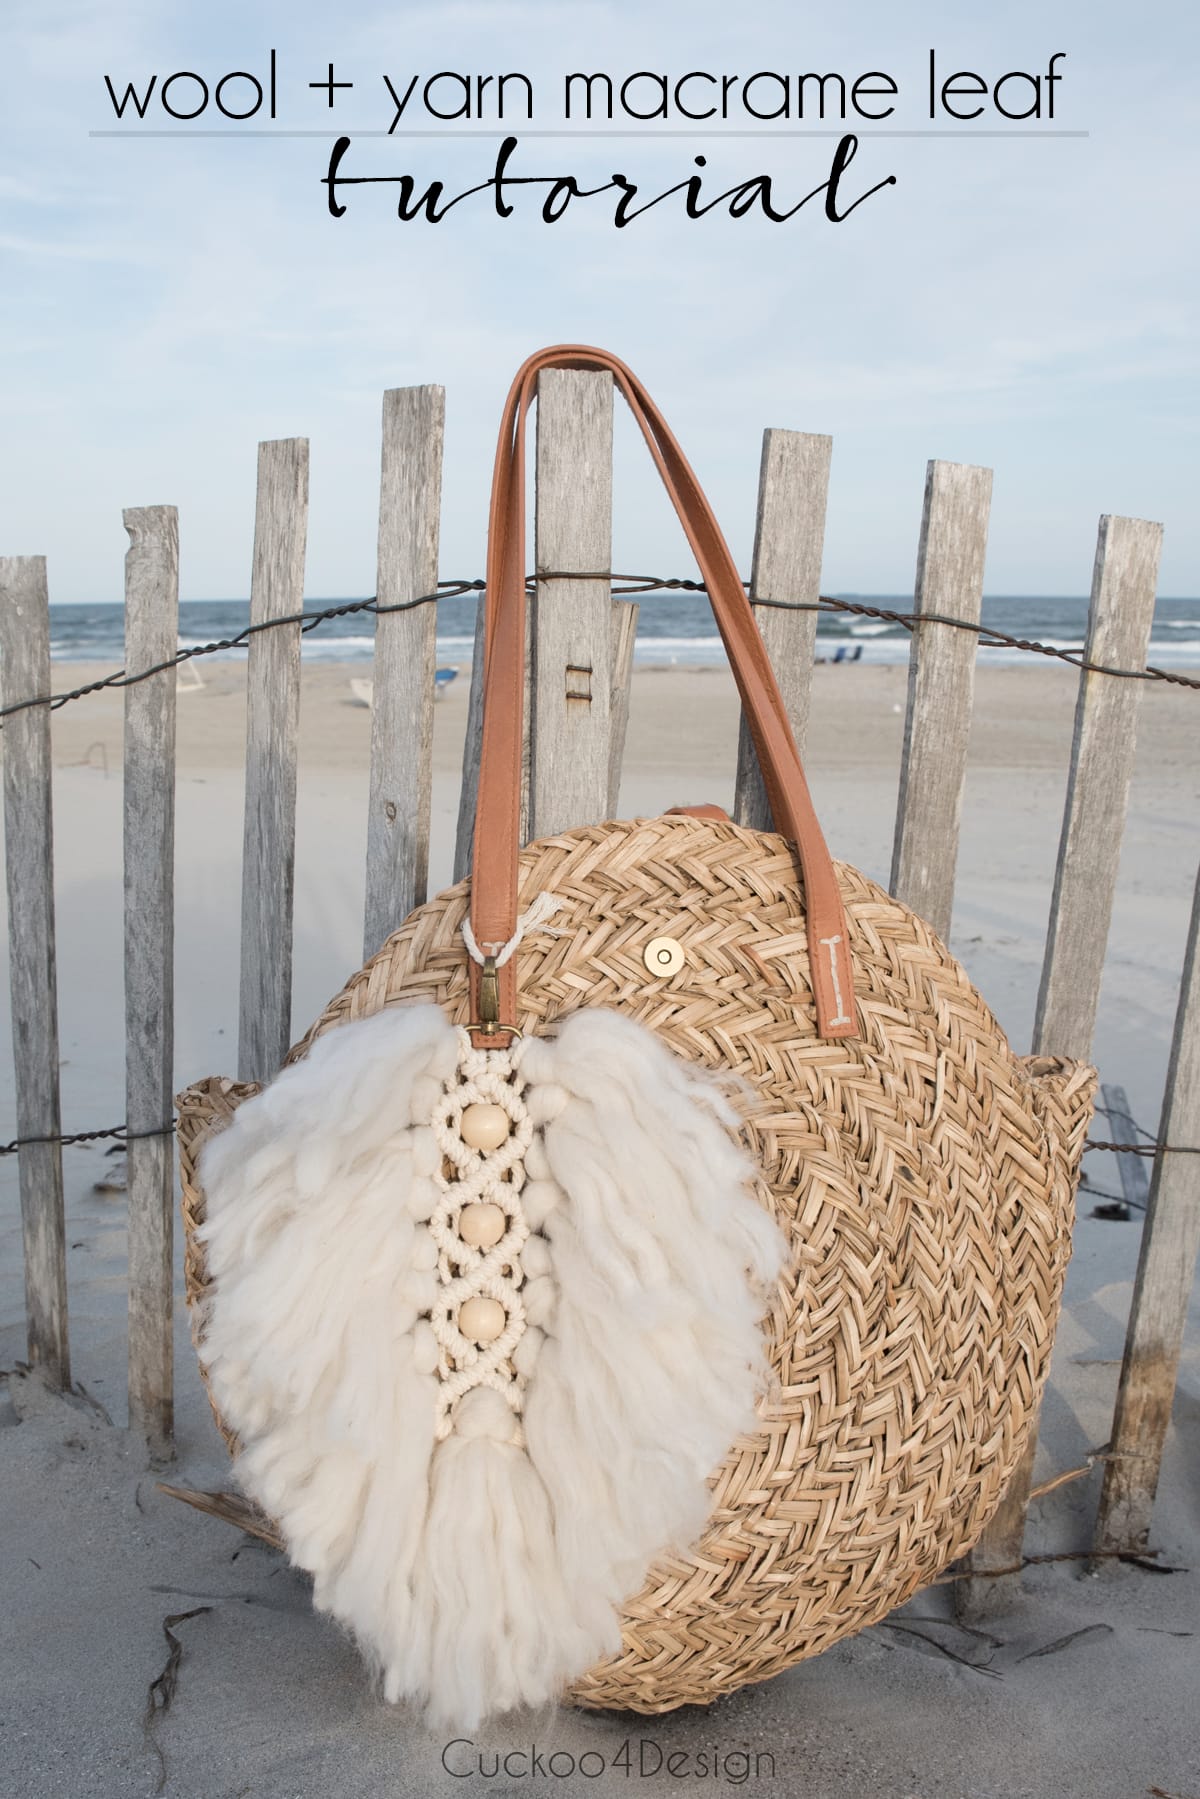
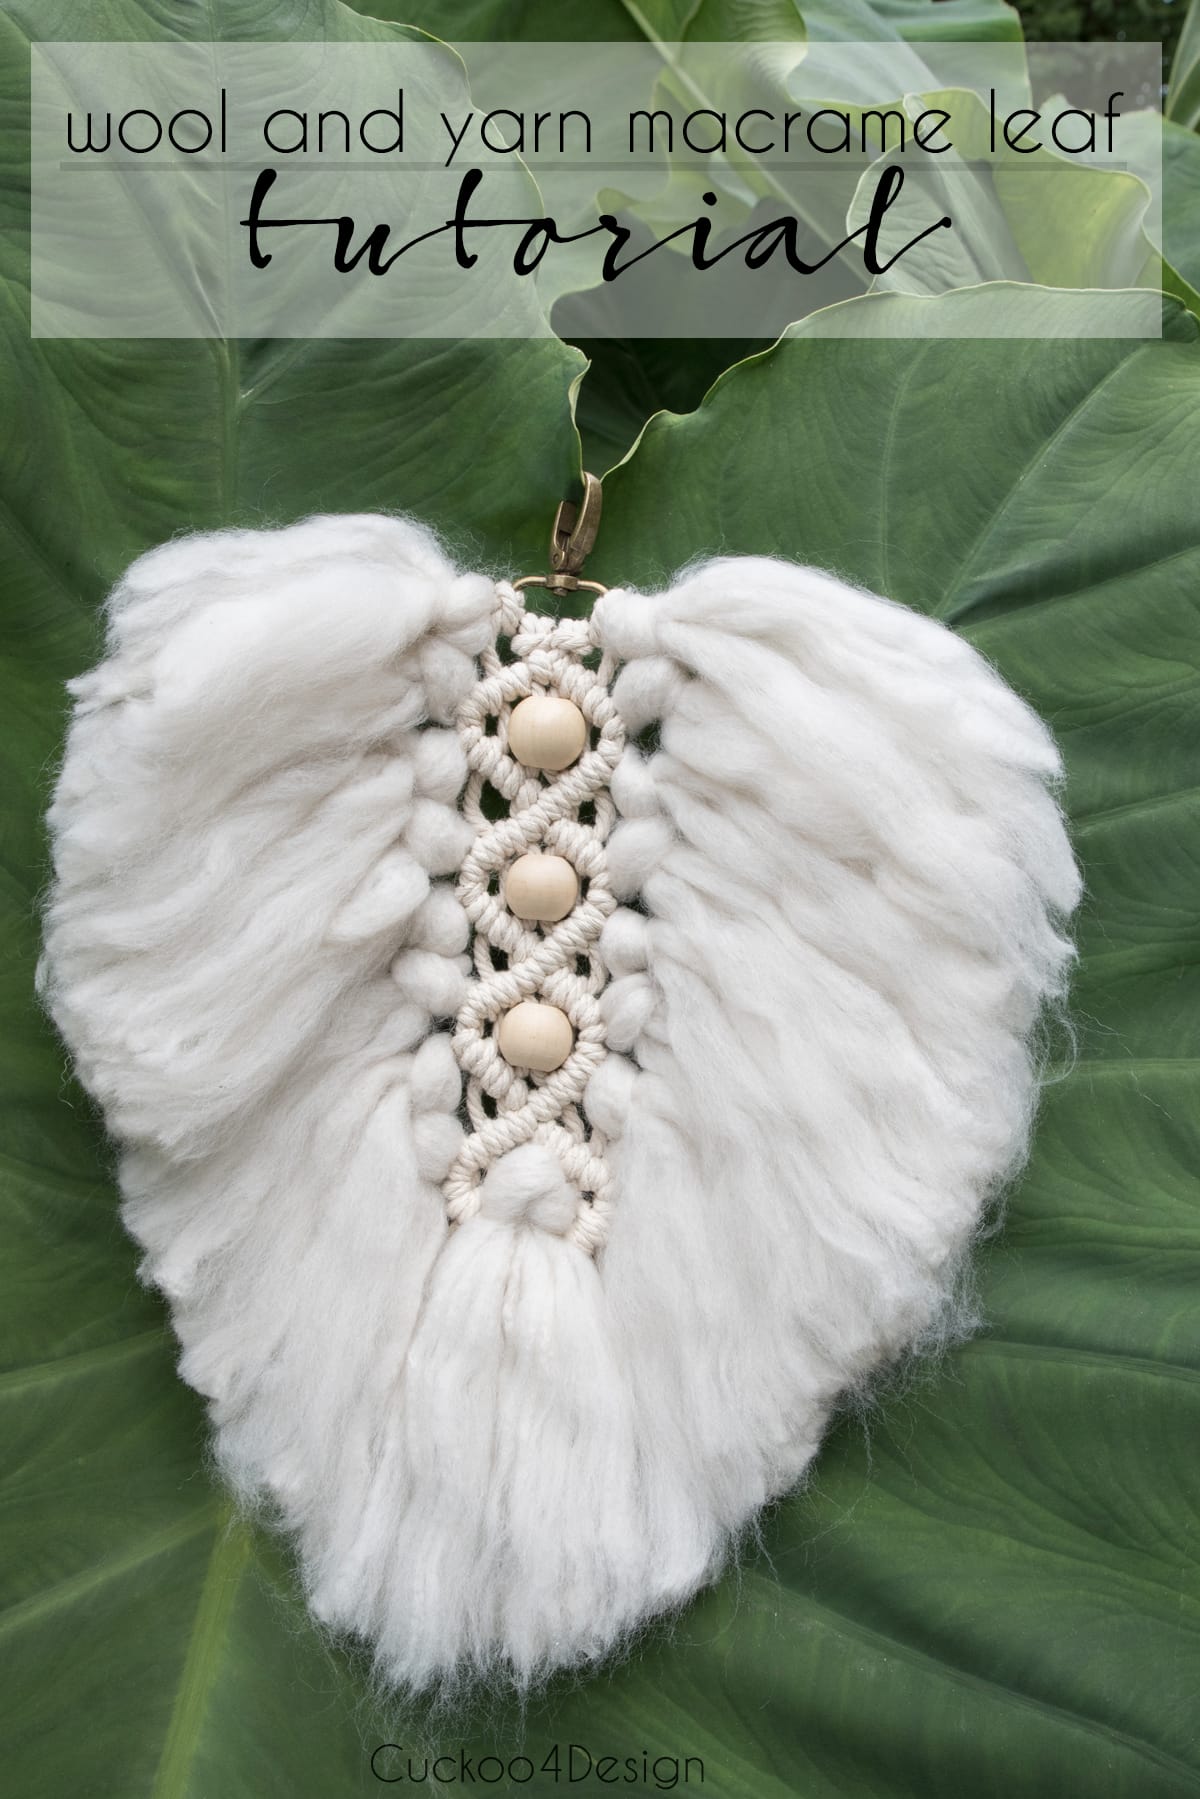
DIY Wool and Yarn Macrame Leaf Tutorial
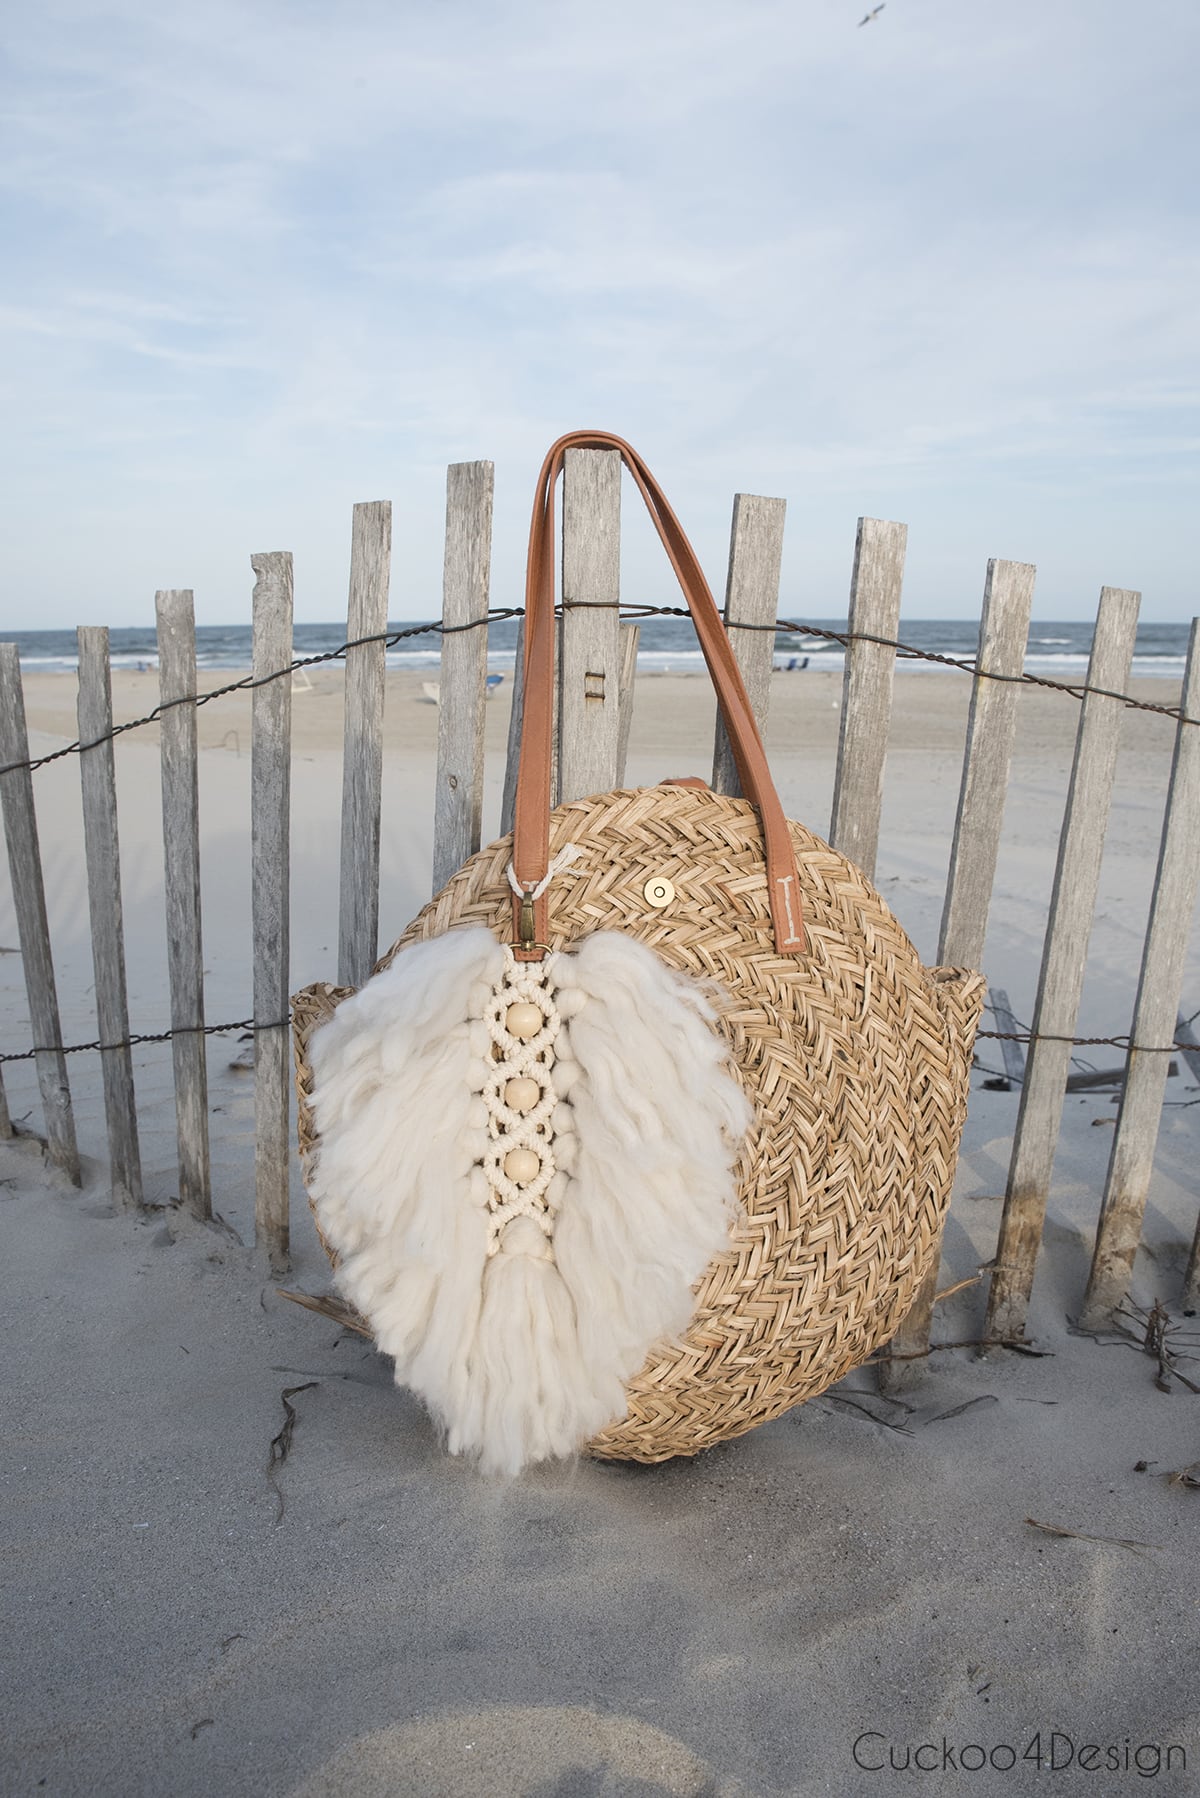
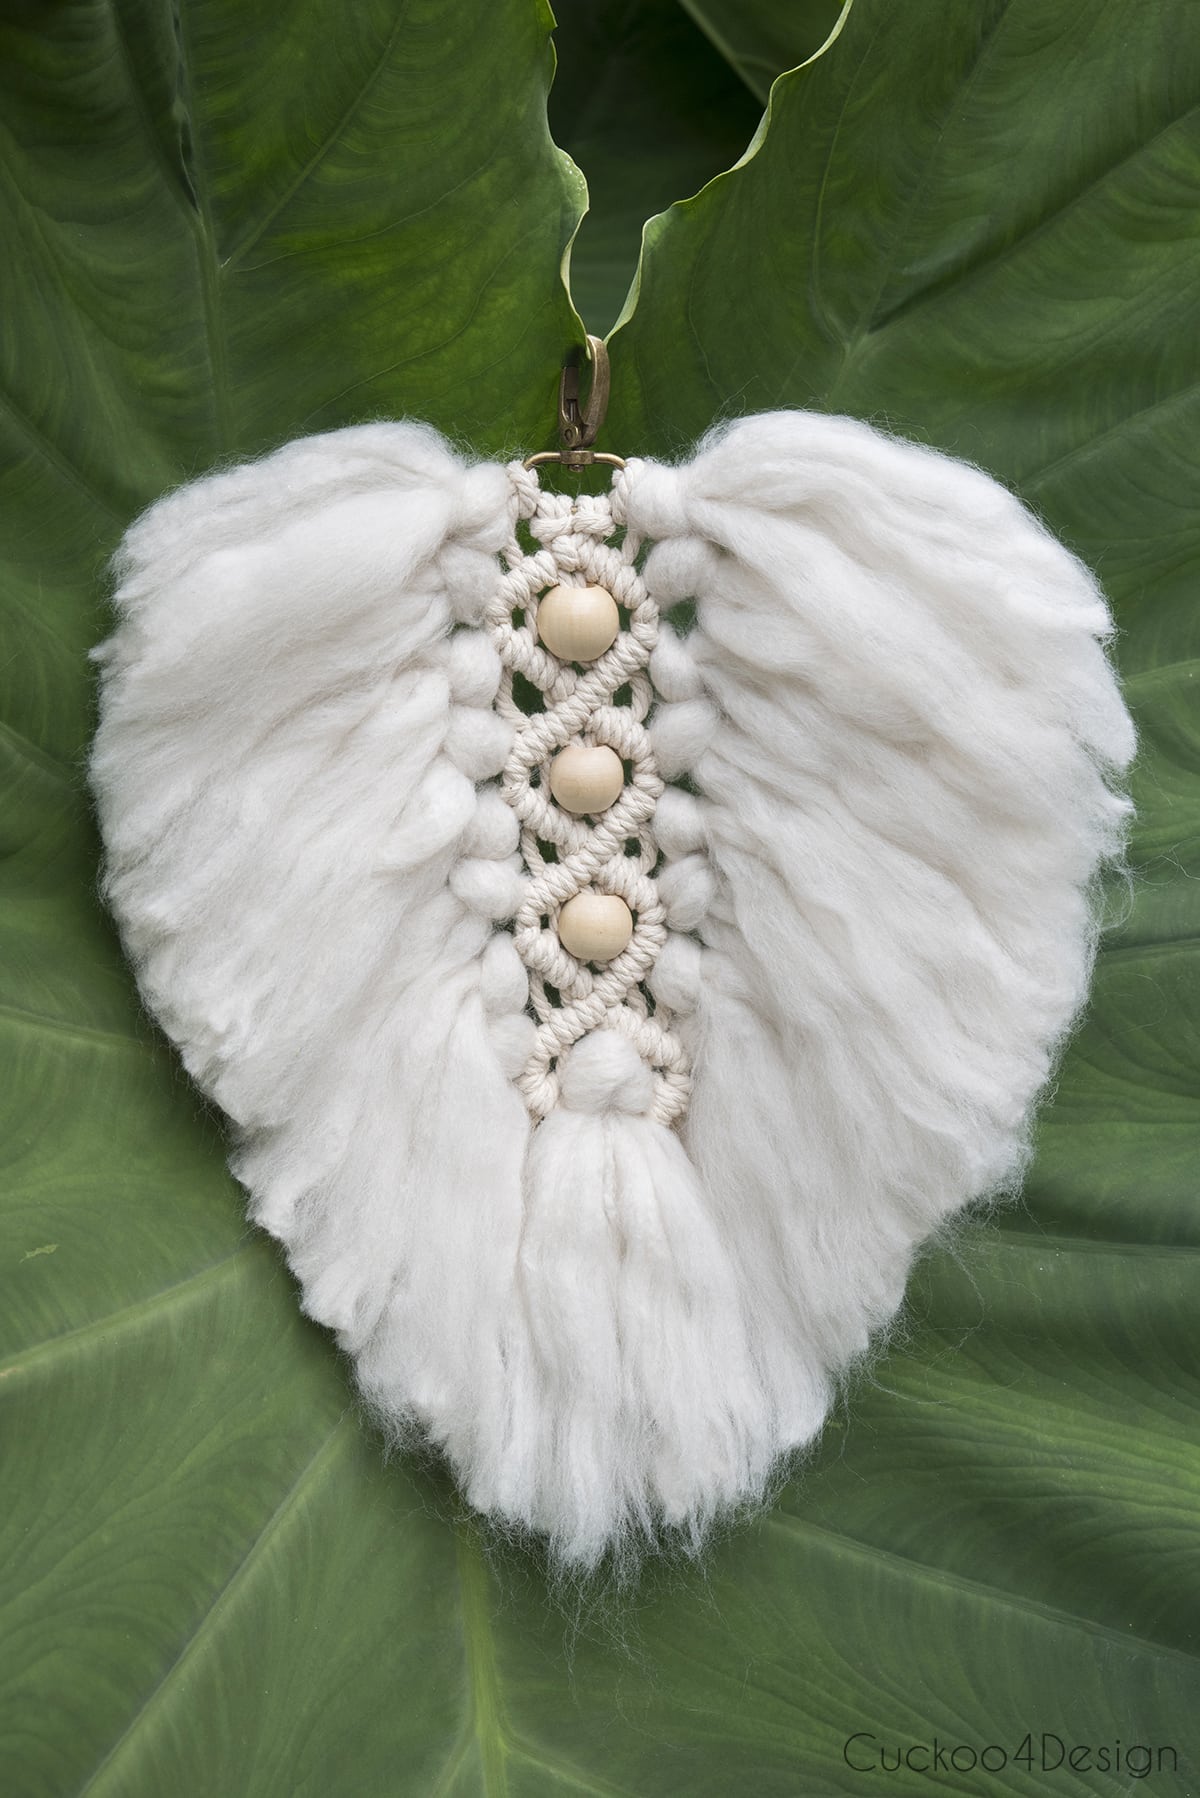
This macrame leaf is made with a combination of thick wool and macrame yarn with wood beads, which gives it a completely different look and texture than my macrame feather. It works beautifully as a bag accessory, a keychain, a macrame leaf wall hanging, and is the perfect project for using up leftover materials from other projects.
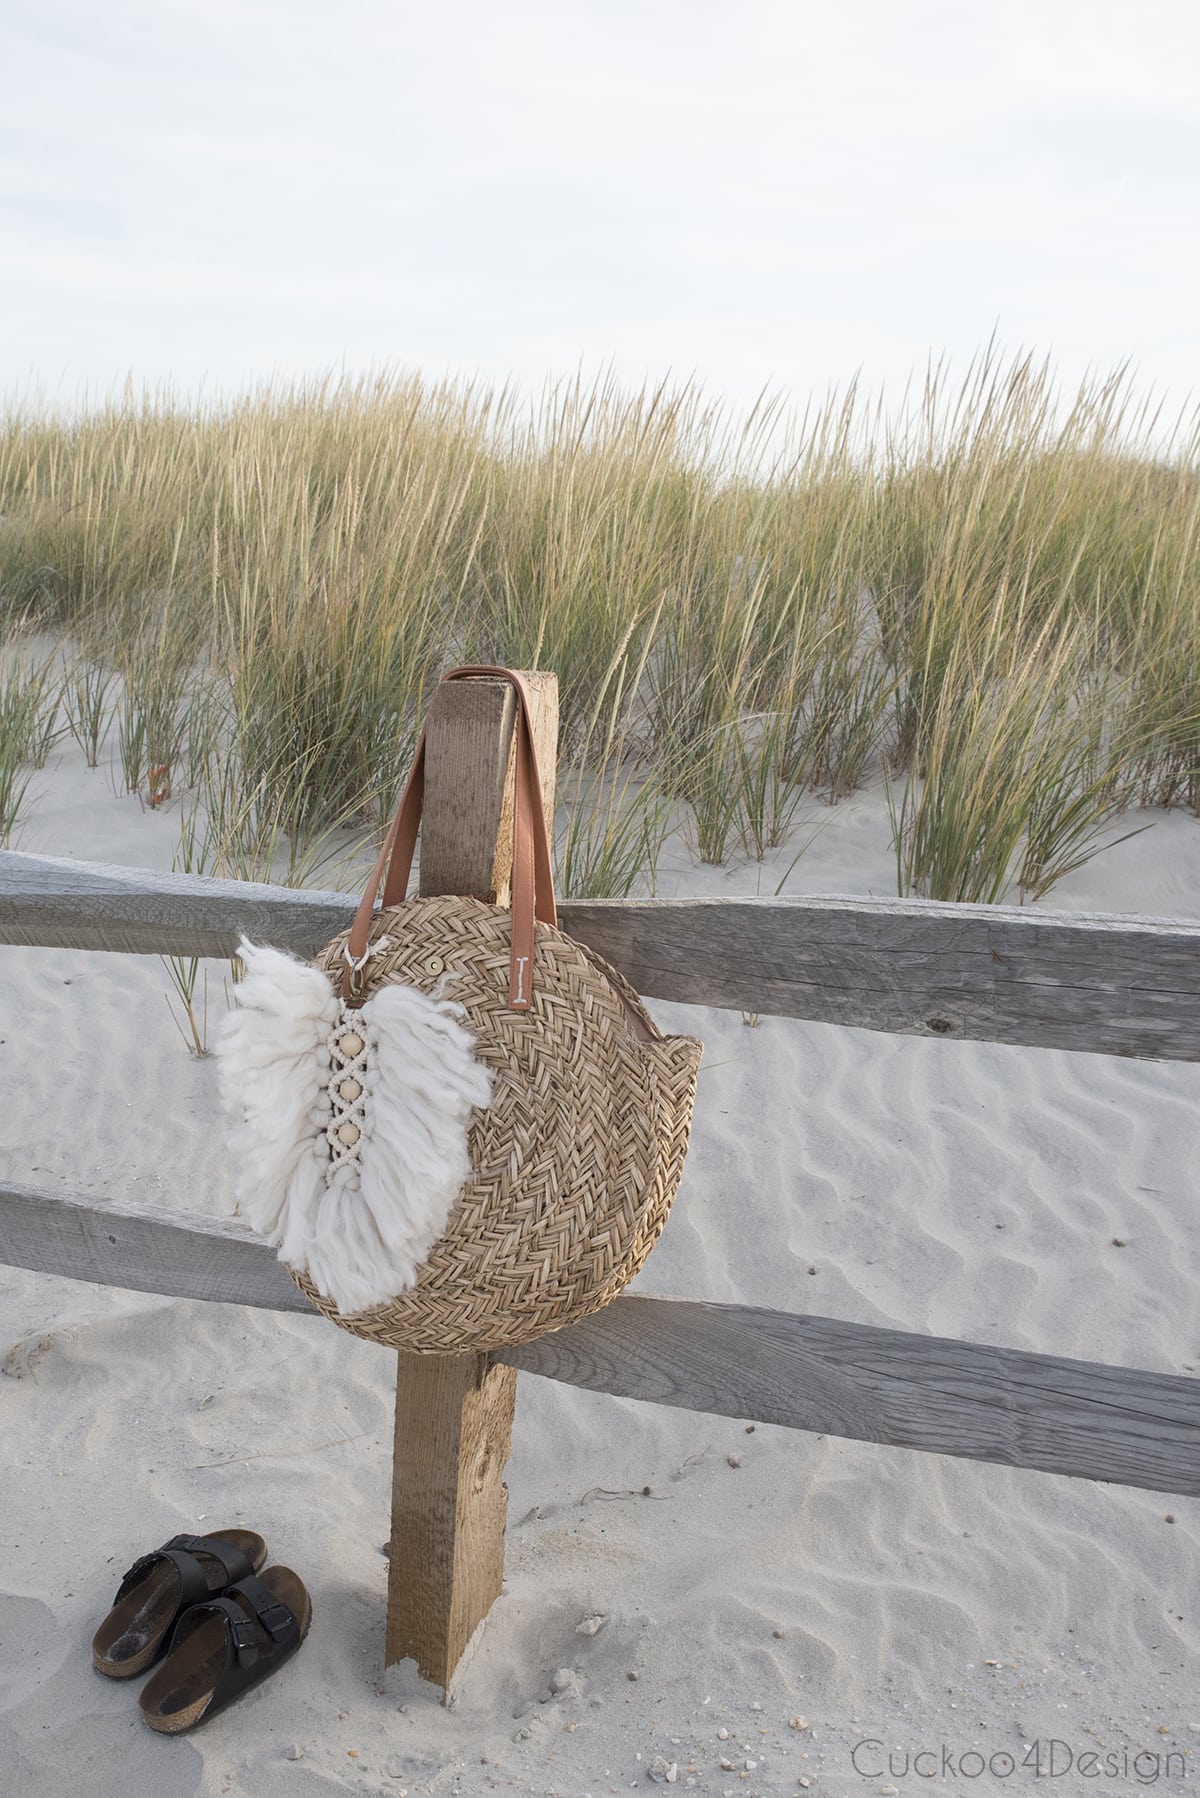
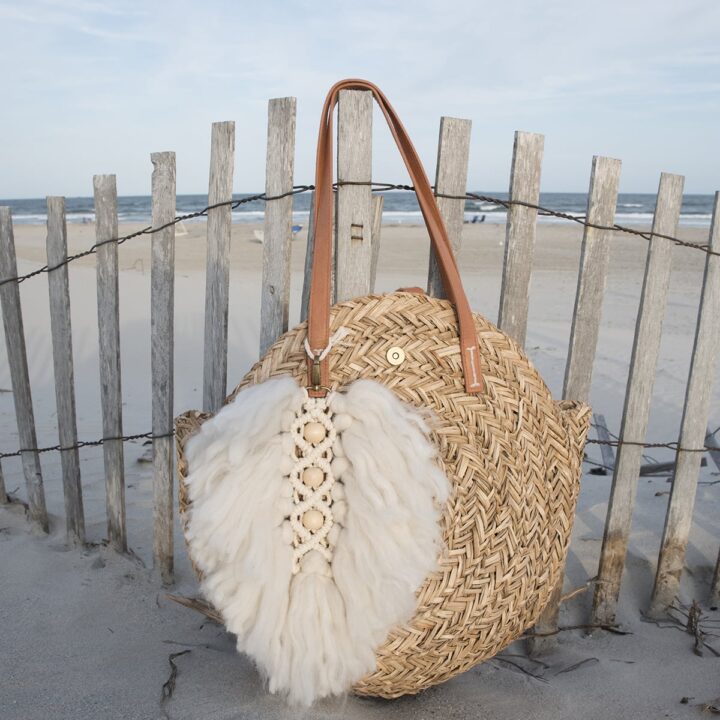
I had leftover wool from my macrame wreath and wanted to make something different for my large round beach bag. I already had my macrame feather, but wanted a different look, so I started experimenting and came up with this macrame leaf. The fluffy wool shape reminded me of the giant elephant ear leaves in our yard, which I also used as a photo backdrop.
Macrame leaf versus macrame feather
People often confuse macrame leaves and macrame feathers because they look similar at first glance, and honestly, other tutorials online don’t always help because some call a feather a leaf and the other way around.
Here is the real difference. The spine of my macrame leaf is a knotted strand with wood beads and diamond shapes, and the wool gets looped directly onto that knotted spine. A macrame feather has a much simpler shaft, just a longer strand of yarn that the short pieces loop onto. The leaf is also fuller and wider, shaped like an actual leaf, while the feather is longer and more slender. They are genuinely different projects.
How to make a macrame leaf with yarn and wool
This is a beginner friendly project, even though it looks complex. If you have leftover wool and macrame yarn from other projects, this is the perfect way to use them up.
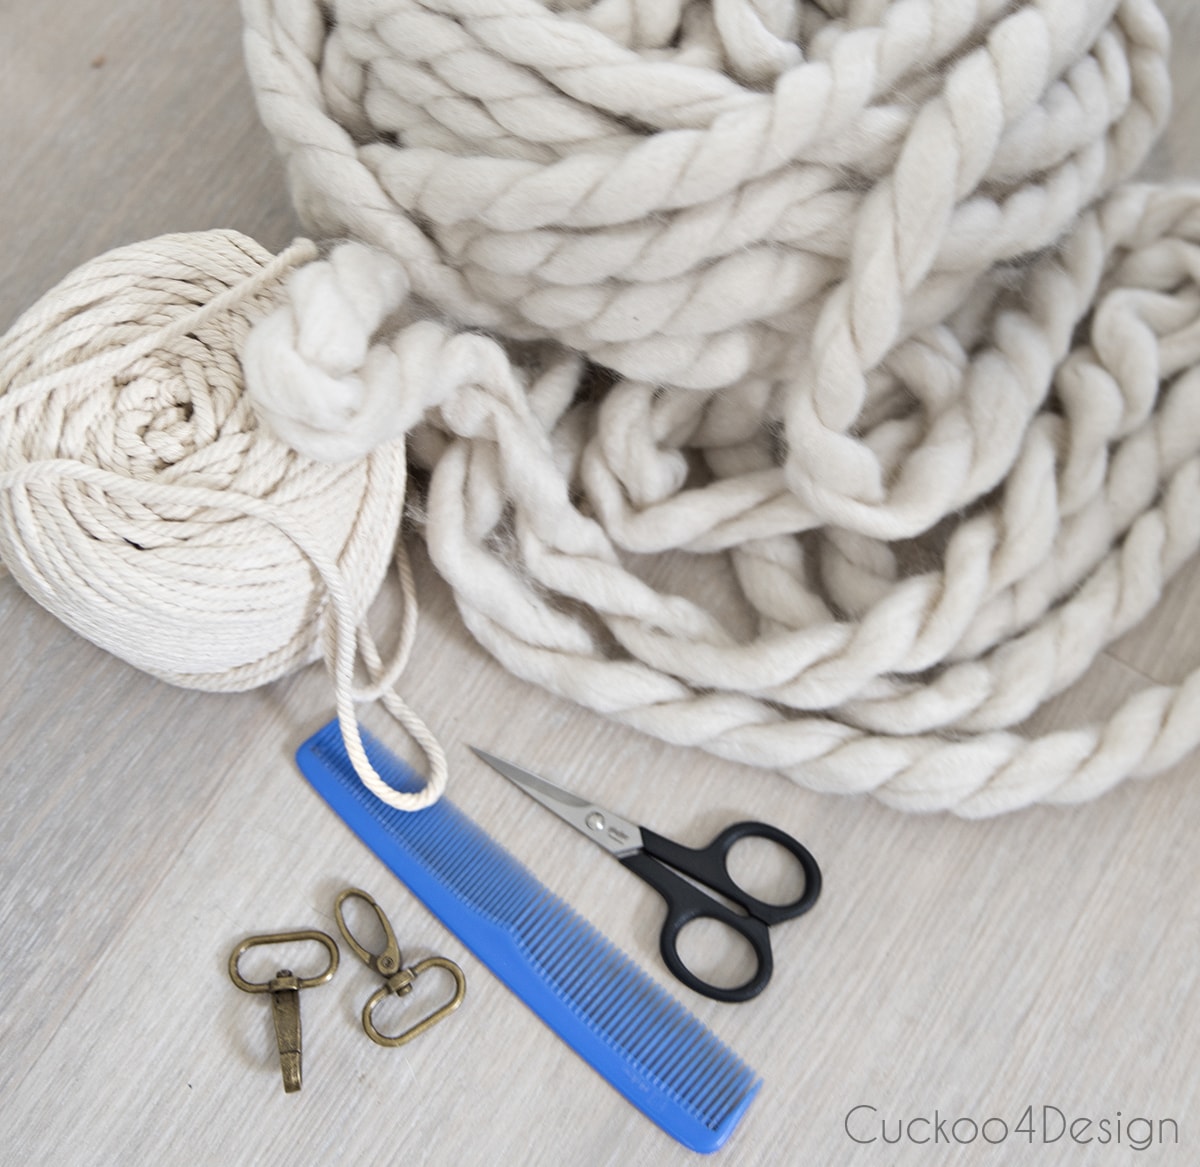
Supplies needed
- macrame yarn from Amazon (4 strands of macrame yarn at 116”)
- thick wool (8 strands of wool at 12”) or you can just use macrame yarn instead, and unravel and comb the yarn
- comb
- scissors
- small swivel hook (or anything else you’d like to hang it from, like a stick)
- wood beads
Macrame leaf video tutorial
This post may contain affiliate links from which I will earn a commission at no extra cost to you. View my full disclosure policy.
I made another video tutorial to show you exactly what I did to make this piece look more like a macrame leaf which you can see below. This time around I didn’t take step-by-step photos though because the process is so very similar to the macrame wreath. Should the video not work for whatever reason then you can also see the tutorial on my YouTube channel.
Macrame knots used in the tutorial
For this DIY macrame leaf, you only need two simple macrame knots. That’s it! Can you believe it?
You need Lark’s Head knots and Diagonal Clove Hitch Knots, which you probably know already if you ever made friendship bracelets as a child. I was obsessed with making them.
How to make a Lark’s Head Knot
How to make Diagonal Clove Hitch Knots
Step-by-step macrame leaf instructions
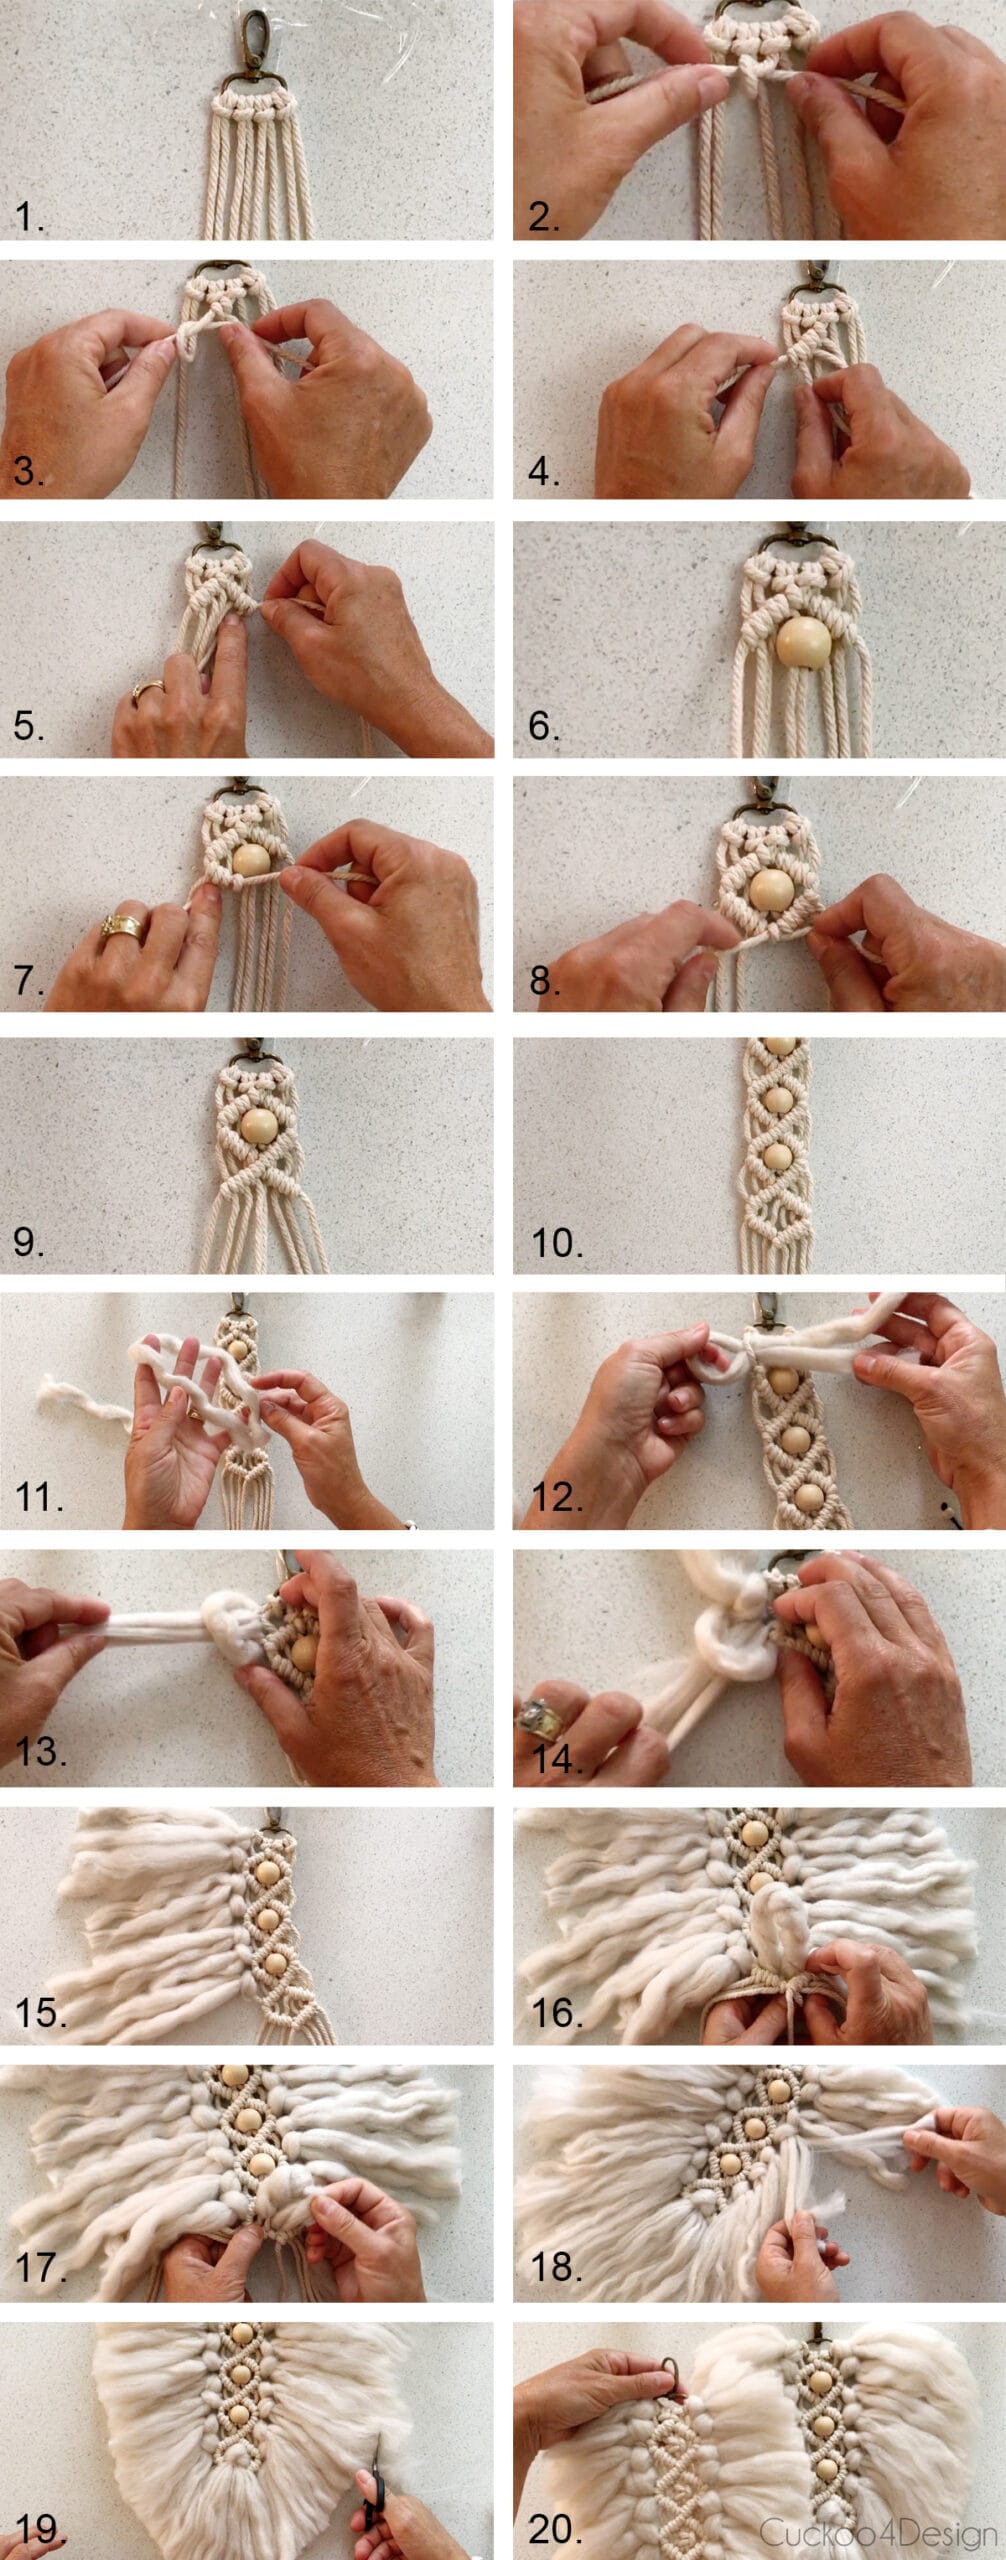
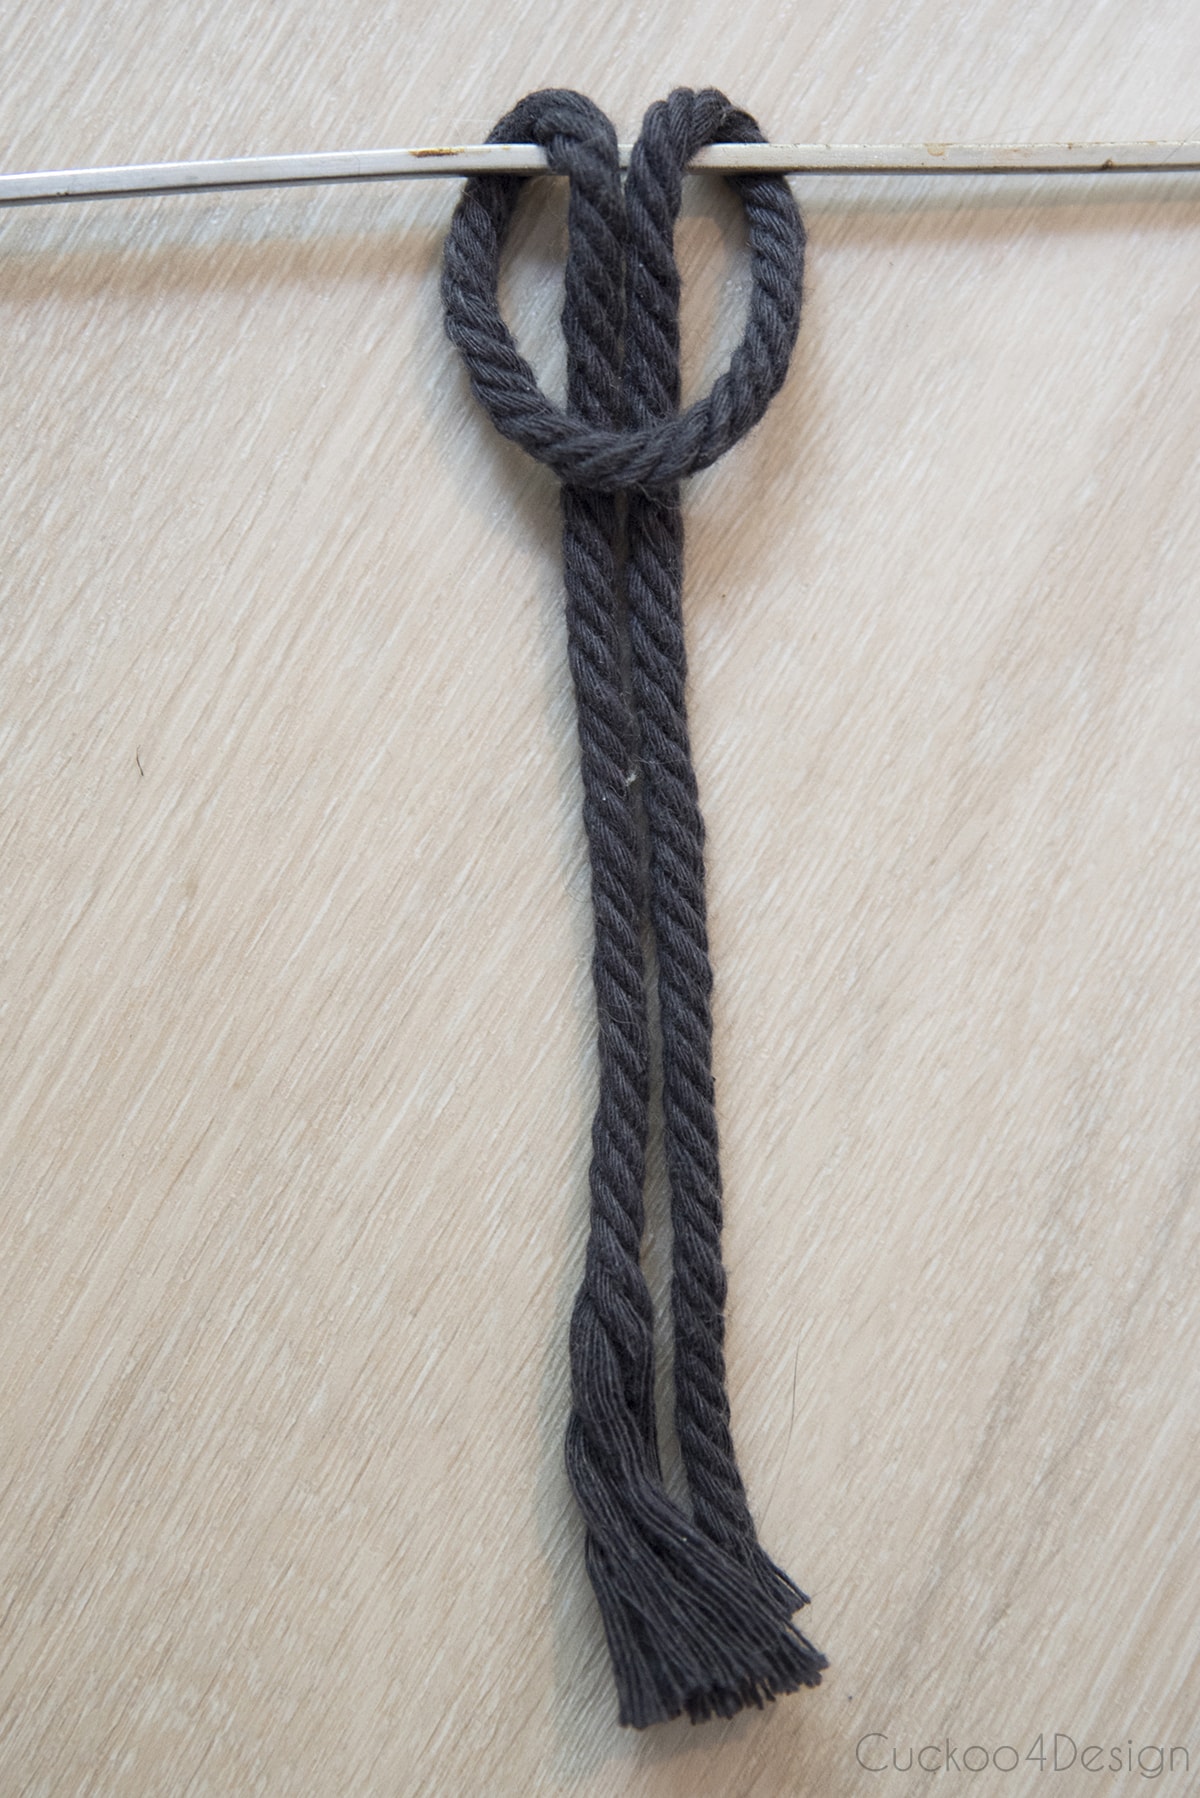
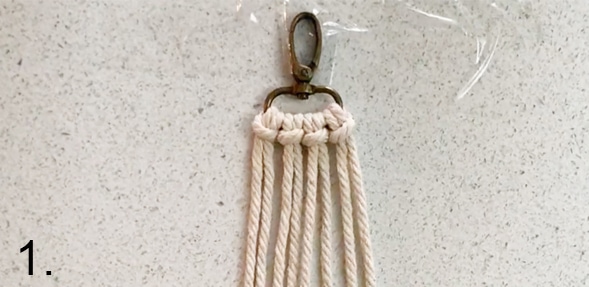
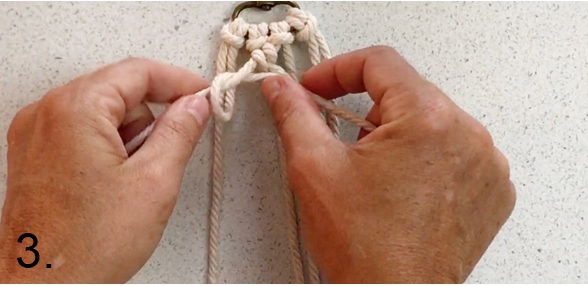
- To create the leaf spine/midrib, tape the swivel hook to a hard surface, fold the 4 pieces of 116-inch macrame cording in half, and loop them on the swivel hook with Lark’s Head Knots.
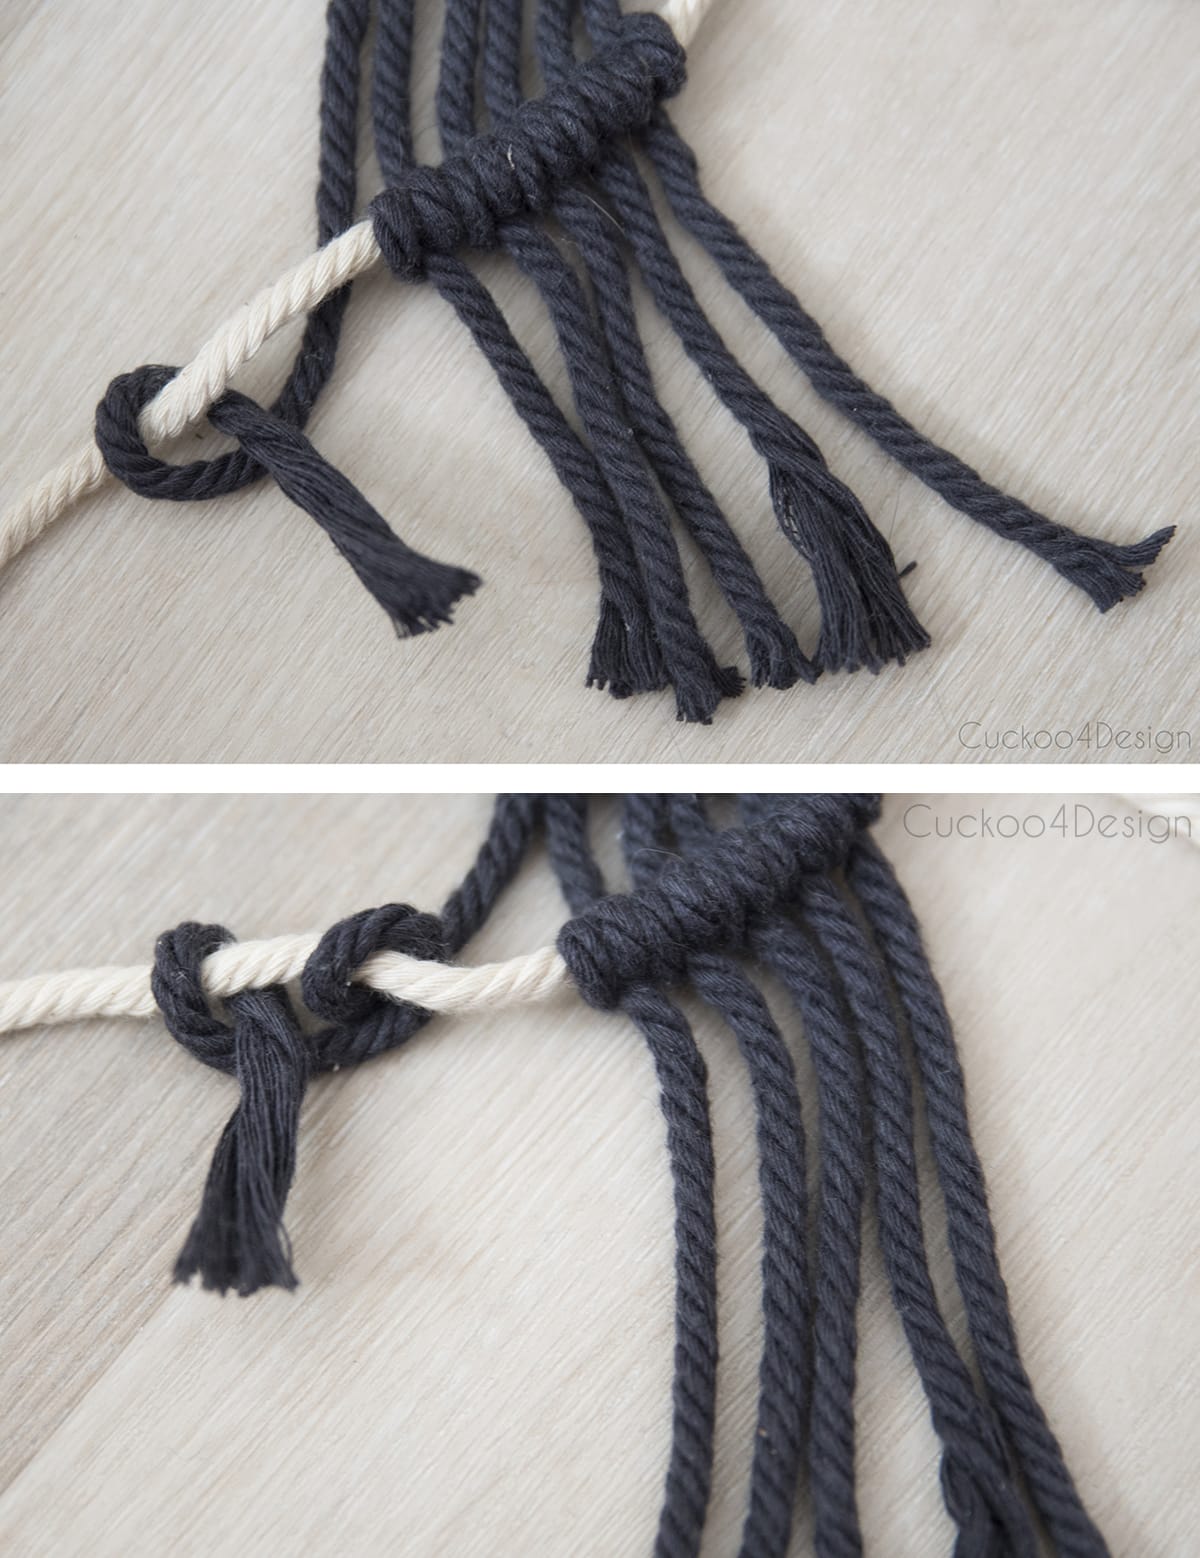
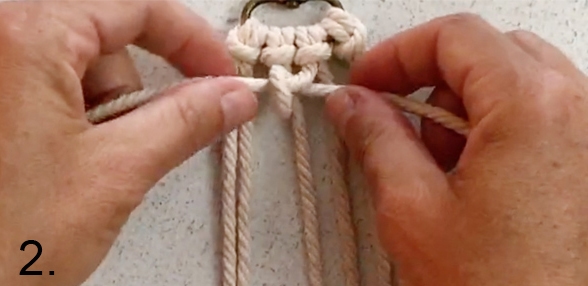
- Start with the Diagonal Clove Hitch Knots from the center towards the outside.
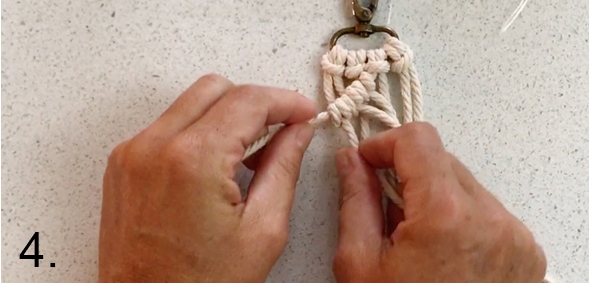
- Make sure that you knot evenly.
- The strands on the outside should be longer to create a diagonal shape.
- Repeat the same Diagonal Clove Hitch Knots on the other side.
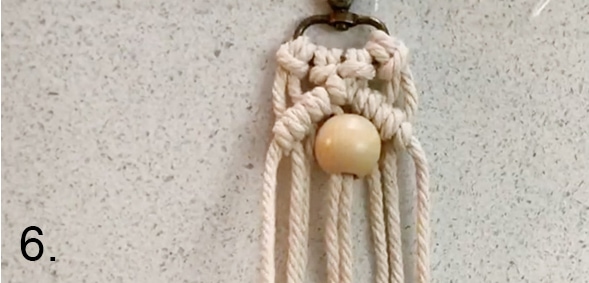
- Thread a wood bead onto the two center strands.
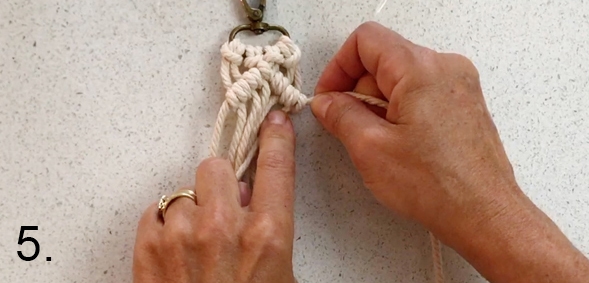
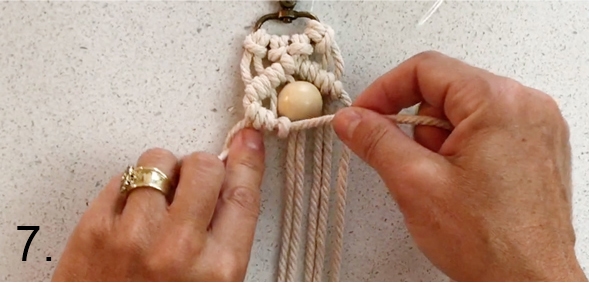
- Now it’s time for more Diagonal Clove Hitch Knots towards the center of the piece.
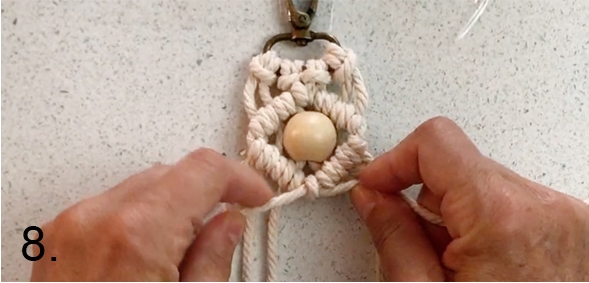
- Repeat the Diagonal Clove Hitch Knots on the other side to enclose the wood bead with a diamond shape.
- Create an X-shape with more Diagonal Clove Hitch Knots.
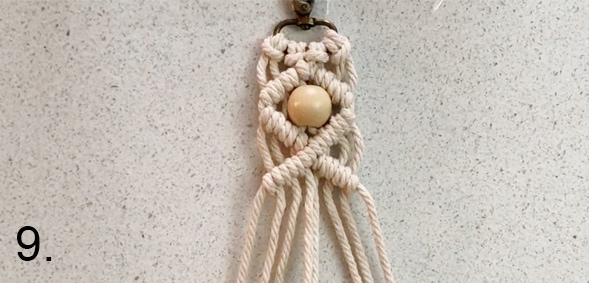
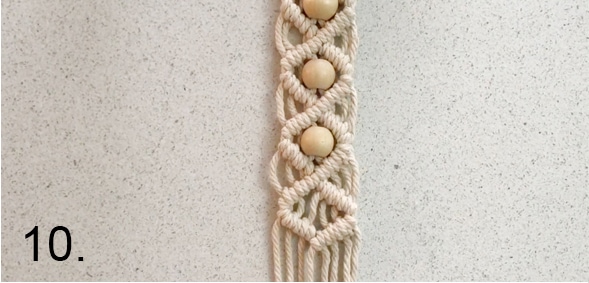
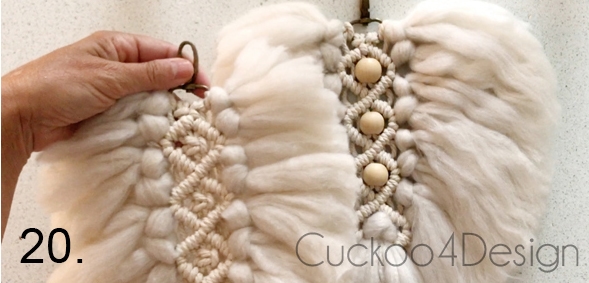
- Keep repeating the wood bead and diamond shape pattern to create the leaf spine, but do not add a wood bead to the bottom of the spine because you will add wool to that area later. (I added 3 beads and 4 diamond-shaped sections)
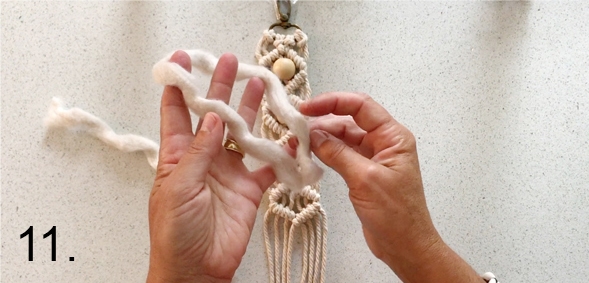
- To create the leaf blade: Fold a 12-inch wool strand in half. (Here you can use regular macrame yarn instead as well. Both work!)
- Thread the piece of yarn through outside sections of macrame yarn.
- Form a Lark’s Head knot the same way you added the yarn to the swivel hook earlier.
- Added a second piece of 12-inch yarn to that section.
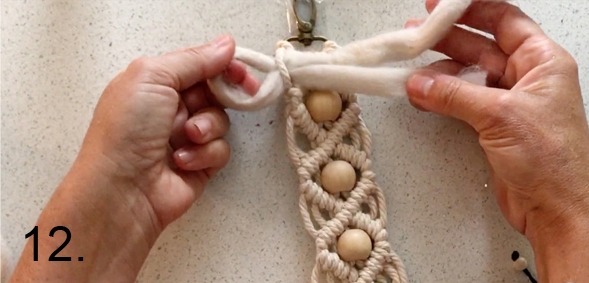
- Repeat the same method to add the wool around the entire piece.
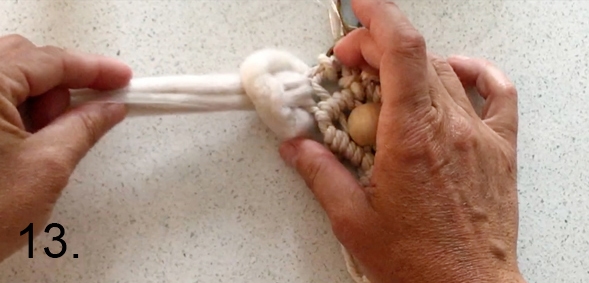
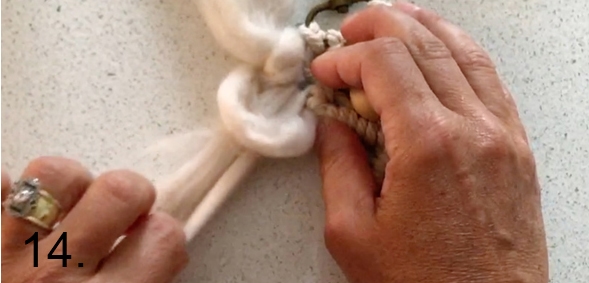
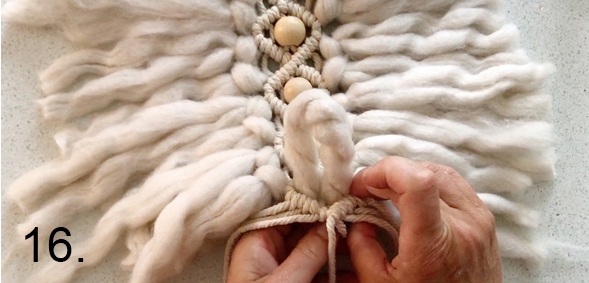
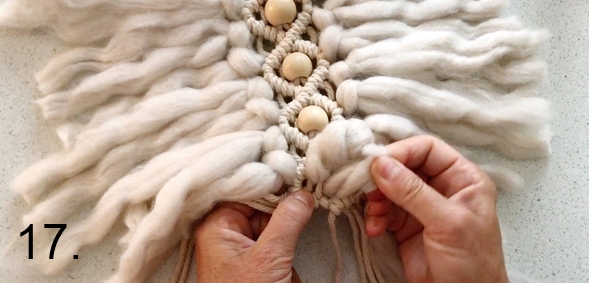
- At the bottom, you add the wool a bit differently. Thread the wool over the two centerpieces of macrame yarn in the diamond shape as shown in the video.
- Now thread and pull the ends of that piece of wool through the back to the front of the diamond shape.
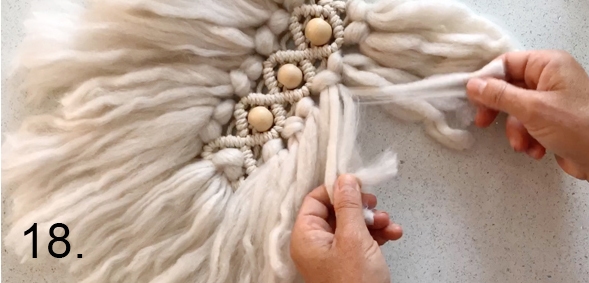
- Lightly open up the wool. Don’t use a brush because it tears the wool.
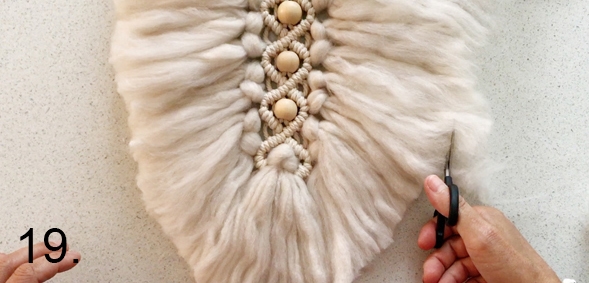
- Use sharp scissors for the final trim by cutting the wool ends and creating a leaf shape.
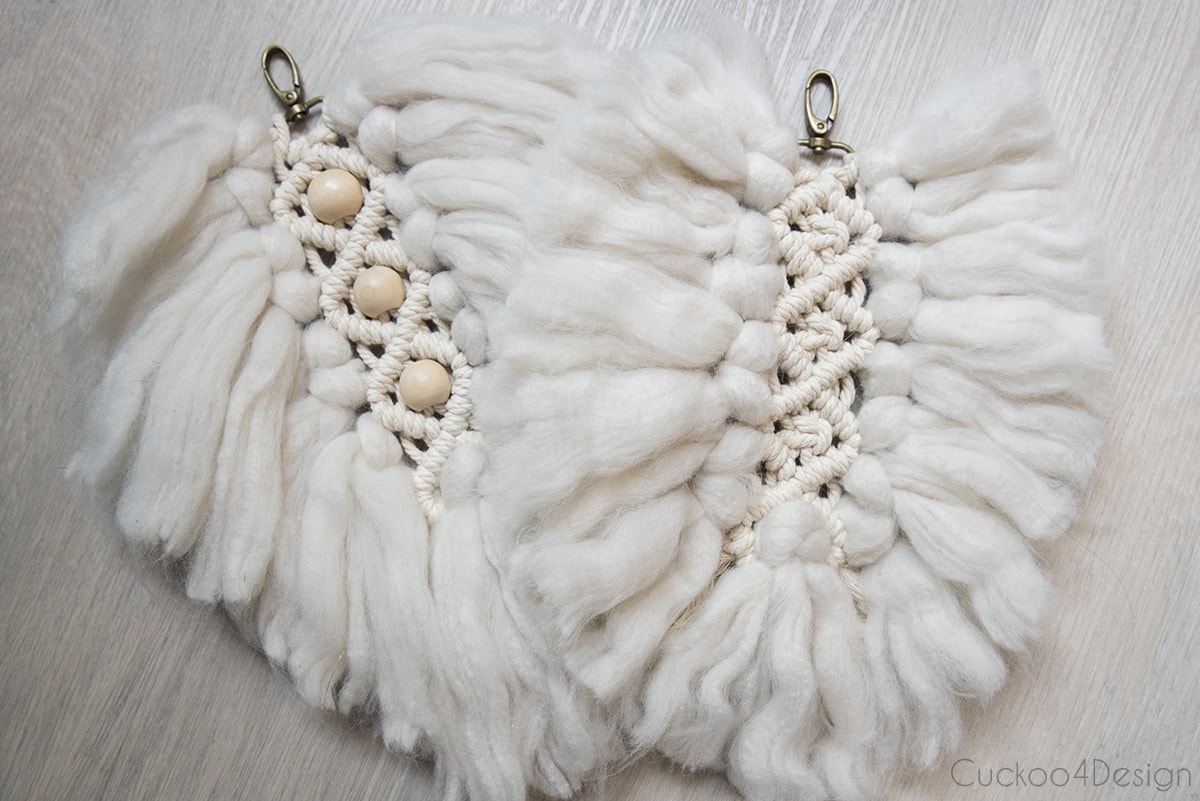
- Voila, two finished macrame leaves with and without wood beads!
Tips for macrame leaves: How to keep the shape and structure
- In my other macrame tutorials, I recommend using fabric stiffening spray. For this project, only use fabric stiffener if you use macrame yarn instead of the wool. If you use the wool like I did, then I do not recommend fabric stiffener because it destroys the beautiful, thick wool.
- When trimming the yarn/cord into a leaf shape, use actual leaves as a template.
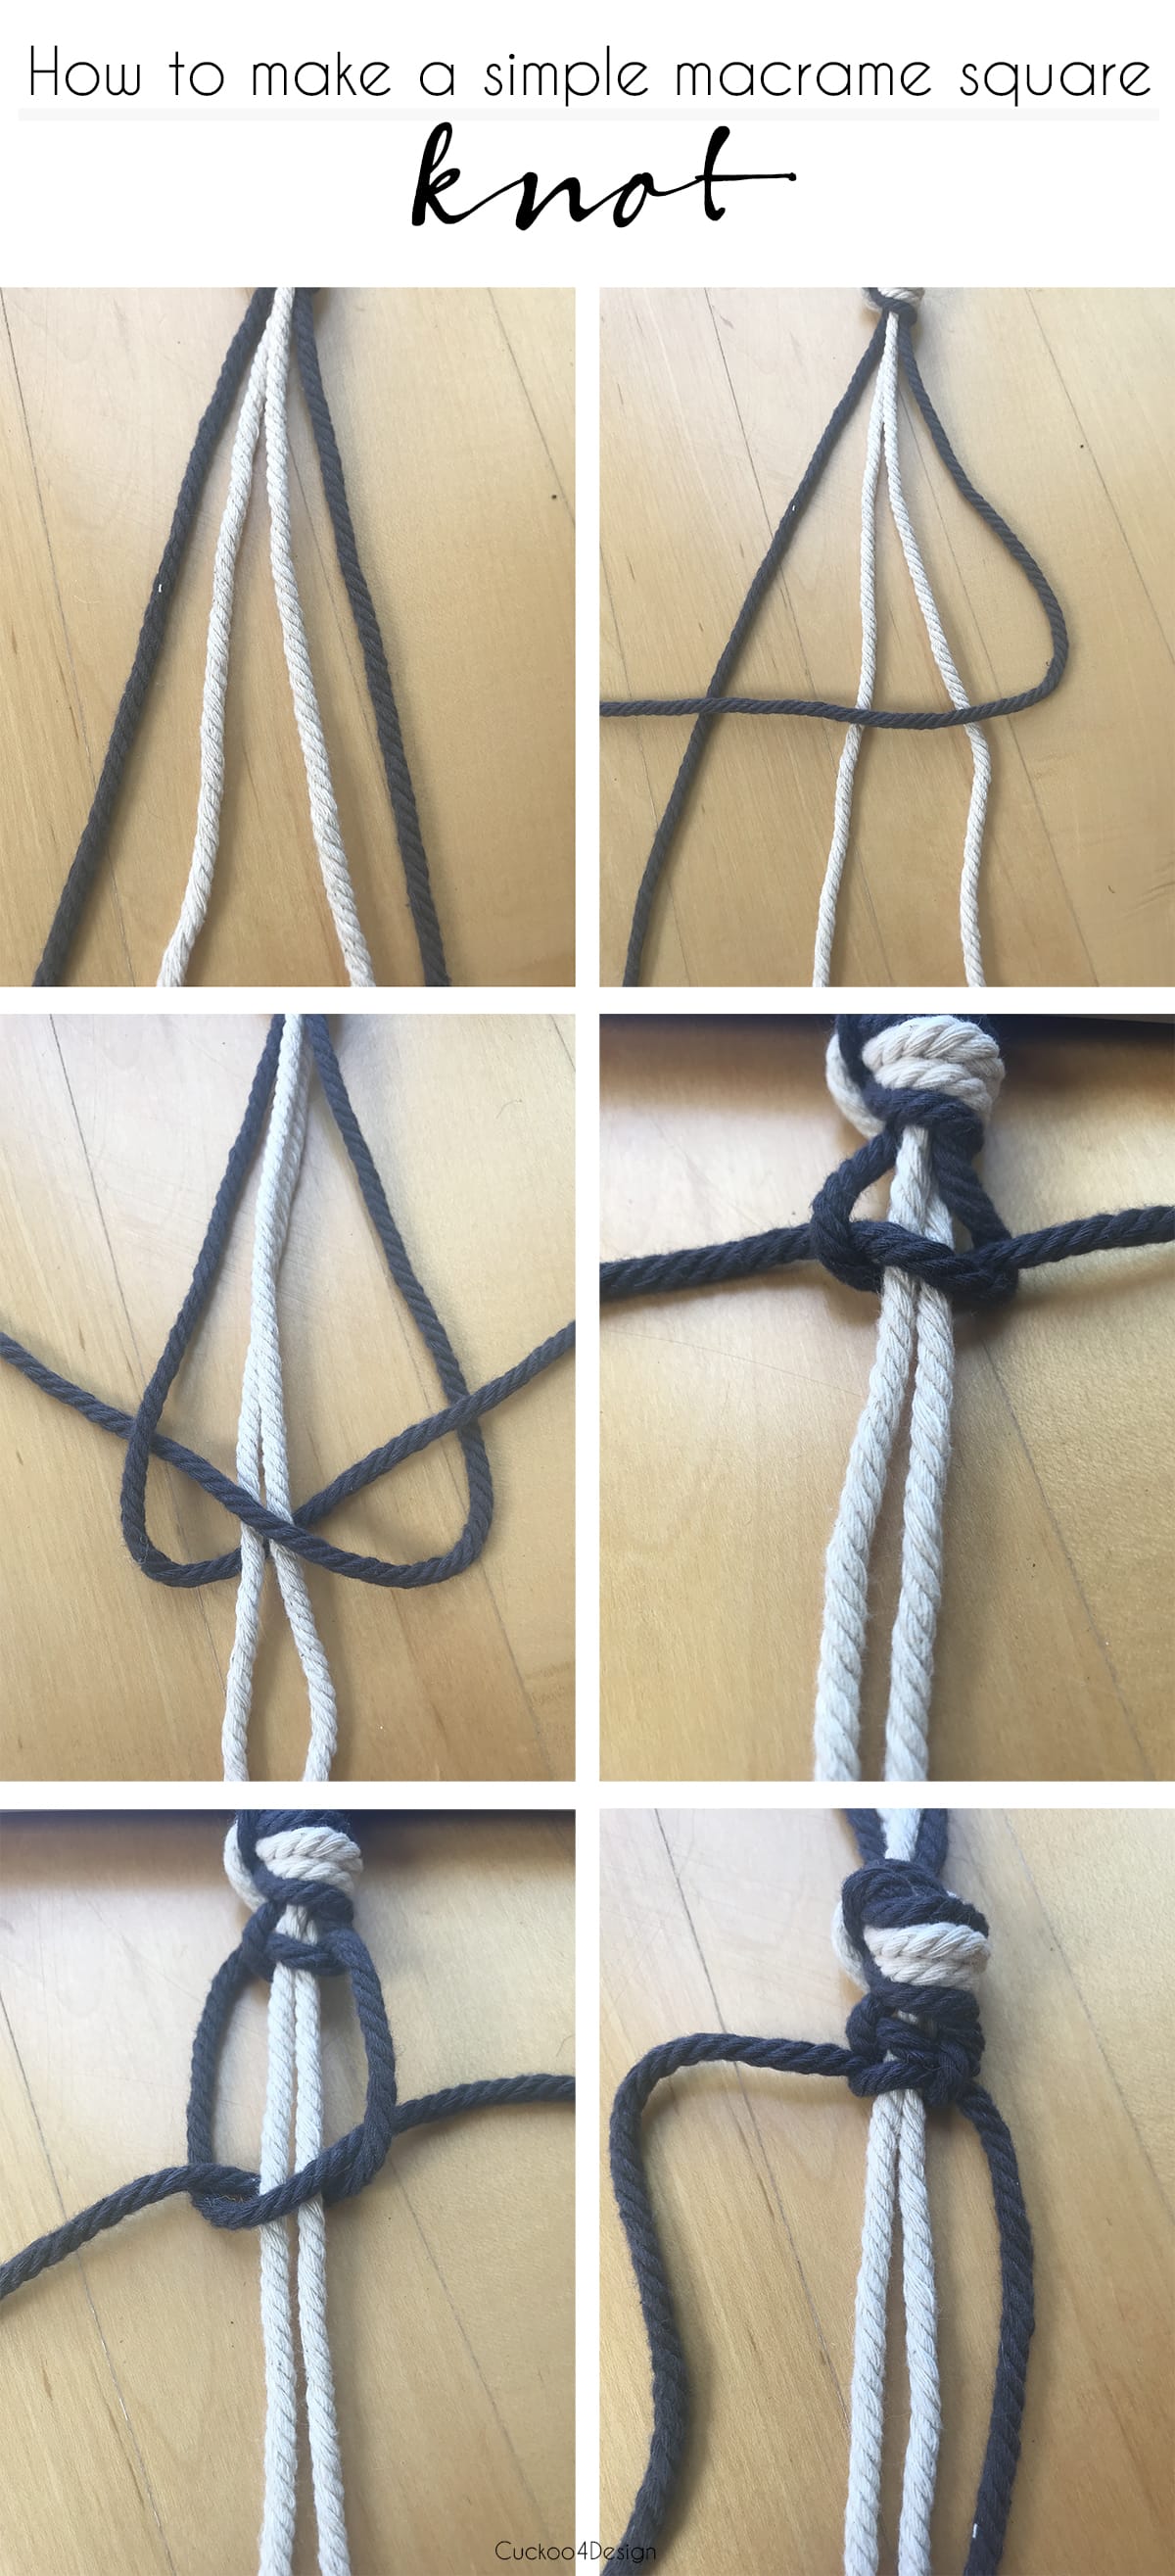
If you don’t want to use wood beads for the center part, then you can just knot the strands into a square knot.
Photos of finished macrame leaf
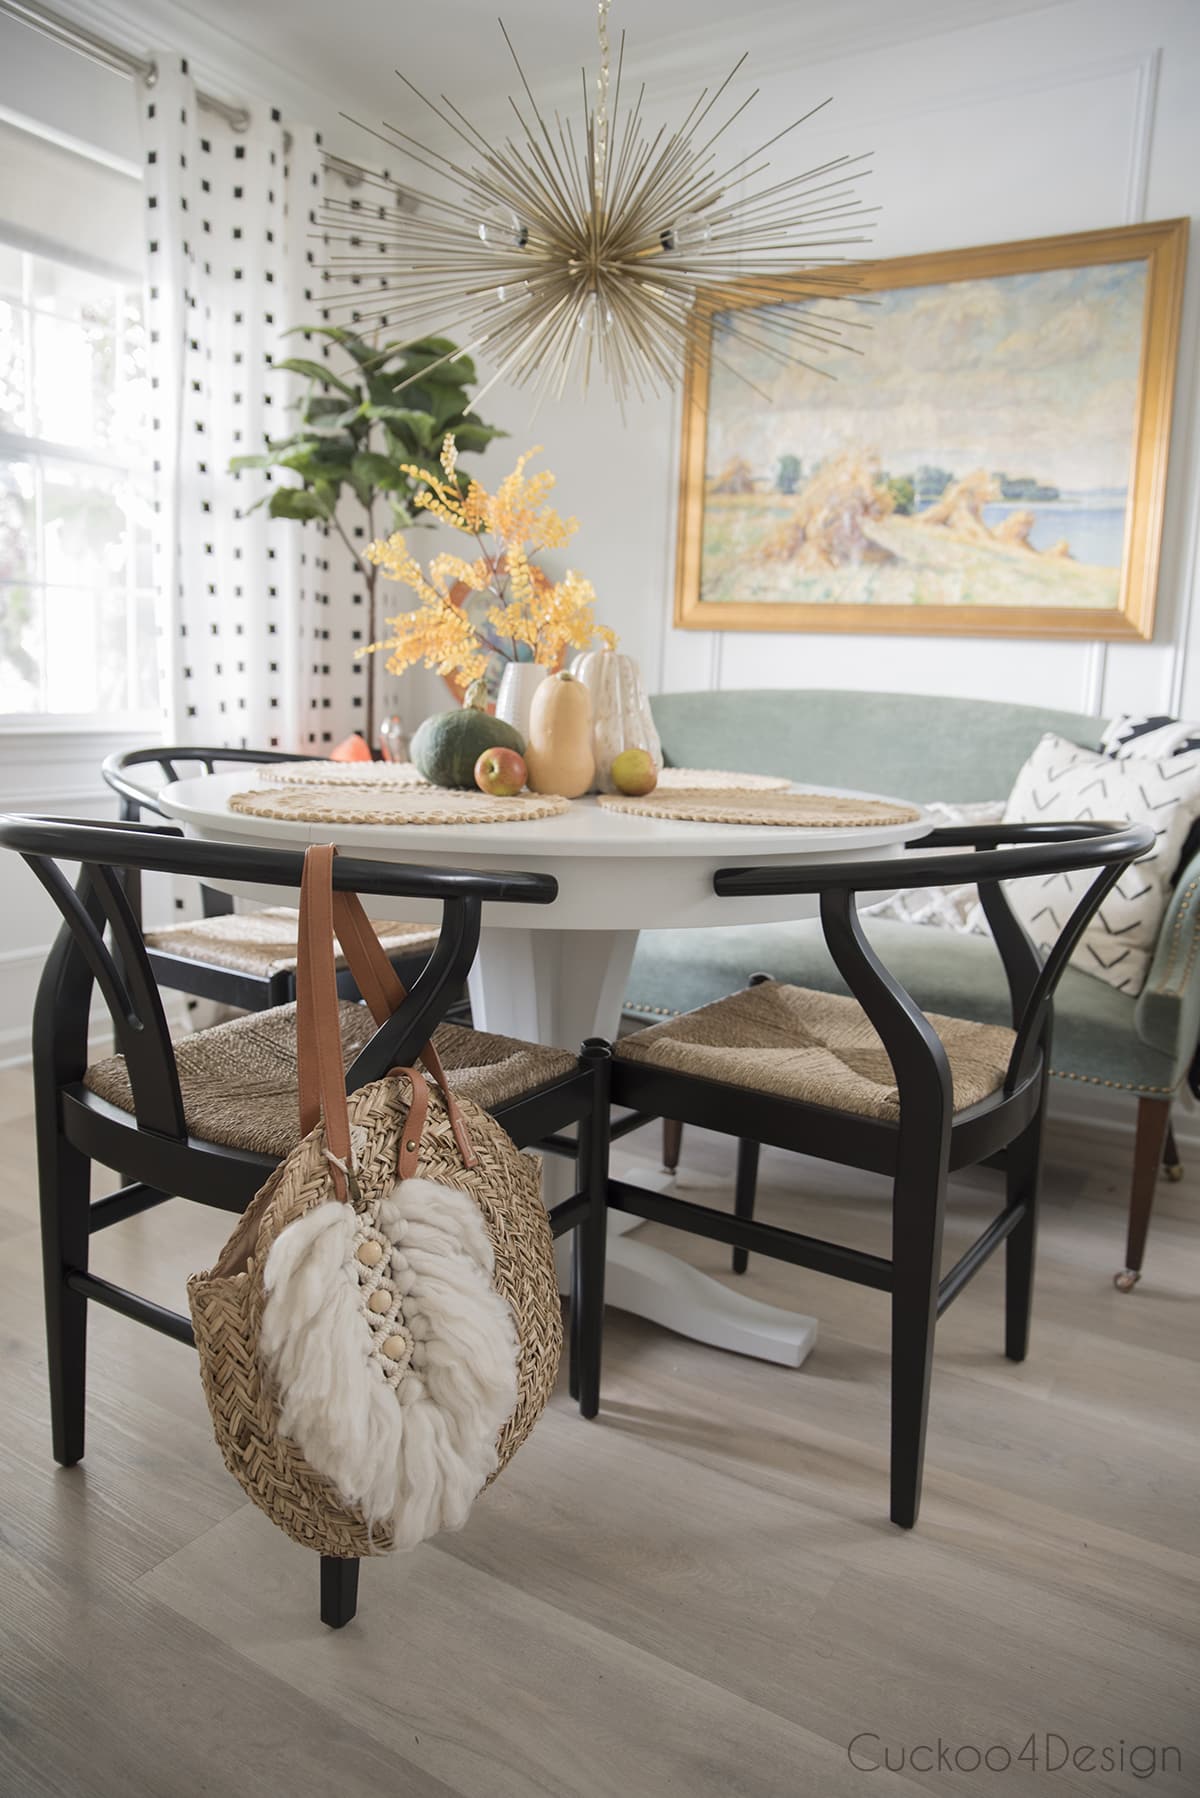
I love how it turned out and have been wearing it on my purse ever since. There are many uses for this macrame leaf, which include hanging it on a lamp harp-like I did with my stacked tassel, hanging it on a wall like a regular macrame wall hanging, or as an inexpensive and easy-to-make wedding favor to give to your guests or holiday gift.
similar straw bags:

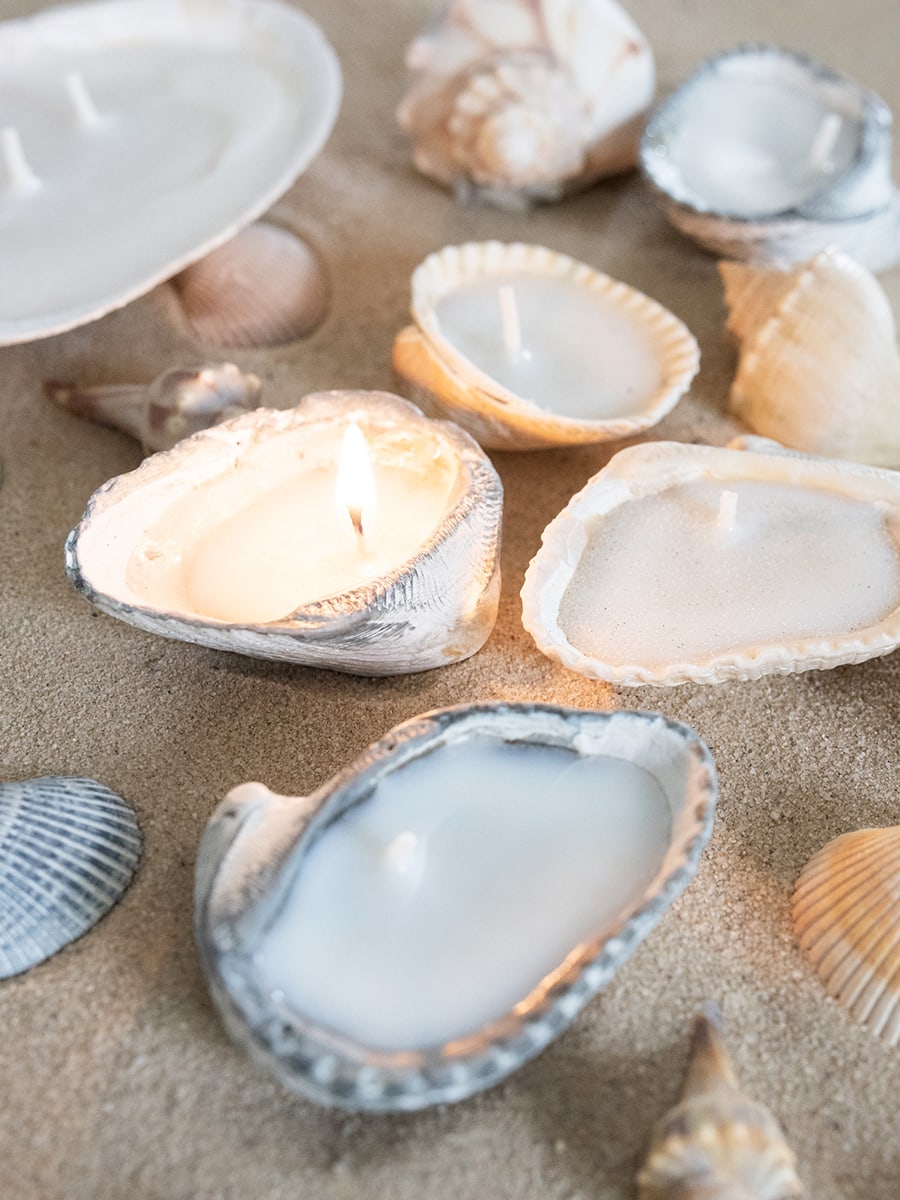
Also, check out how to make DIY tea light candles in seashells the easy way.

Does the macrame leaf look great with our giant elephant ear leaves? They are fabulous again this year and if you remember they were the inspiration for my daughter’s forest elf costume last year. Look at her under the large leaf!

It’s the perfect leaf for my fall decor too.
Ways to use macrame leaves
- This leaf looks nice as is and can be used as a macrame leaf wall hanging.
- Hang the macrame leaves on a string to form a macrame leaf garland for your mantel. (Also, check out my macrame garland.)
- Create a beautiful fall wreath by gluing these macrame leaves to a wreath form. (Also check out my DIY macrame wreath that I mentioned earlier.)
- Use large macrame leaves as table decor or place mats. (Don’t use wood beads if you want to use them as place mats)
Macrame leaves for sale
Not everyone likes to DIY and craft as I do, so if you love the look but don’t feel like making your own then you can find them beautifully handmade on Etsy. And you also get to support small businesses which I love.

More of my macrame tutorials
- Macrame Christmas tree – Learn how to make this festive little Christmas tree with added fairy lights. Perfect for small spaces that don’t have room for a Christmas tree.
- Macrame Christmas ornaments – 6 free patterns for a perfect boho Christmas tree!
- Macrame basket – This simple tutorial only uses one knot and looks super cute as a planter!
- How to make a macrame chain to be used as a wall hanging, curtain tie-backs, or Christmas tree garland.
- Macrame heart – These little hearts make the perfect gift or gift topper!
- Macrame earrings – These earrings are quick and easy to make with all the leftover cords that you might have from other macrame projects.
- Macrame cat bed – This is one of my most popular blog posts for my cat loving friends. This bed is a perfect cozy spot to hang in a window.
- How to make a macrame necklace (three different ways)
Tschüß,

How to make a macrame leaf
This is an easy tutorial about how to make a gorgeous macrame leaf with thick wool, macrame yarn, and wood beads. Perfect for decor, purse charm, or wedding favor.
Materials
- 4mm macrame yarn (4 strands of macrame yarn at 116”)
- thick wool (8 strands of wool at 12”)
- small swivel hook
- 3 wood beads
Tools
- comb
- scissors
Instructions
- Tape the swivel hook to a hard surface, fold the 4 pieces of 116-inch macrame cording in half, and loop them on the swivel hook with Lark's Head Knots.

- Start with the Diagonal Clove Hitch Knots from the center towards the outside.

- Make sure that you knot evenly.
- The strands on the outside should be longer to create a diagonal shape.

- Repeat the same Diagonal Clove Hitch Knots on the other side.
- Thread a wood bead onto the two center strands.
- Now it's time for more Diagonal Clove Hitch Knots towards the center of the piece.
- Repeat the Diagonal Clove Hitch Knots on the other side to enclose the wood bead with a diamond shape.
- Create an X-shape with more Diagonal CloveHitch Knots.
- Keep repeating the wood bead and diamond shape pattern to create the leaf spine but do not add a wood bead to the bottom of the spine because you will add wool to that area later. (I added 3 beads and 4 diamond-shaped sections)
- Fold a 12-inch wool strand in half.
- Thread the piece of yarn through outside sections of macrame yarn.
- Form a Lark's Head knot the same way you added the yarn to the swivel hook earlier.
- Add a second piece of 12-inch yarn to that section.
- Repeat the same method to add the wool around the entire piece.
- At the bottom, you add the wool a bit differently. Thread the wool over the two centerpieces of macrame yarn in the diamond shape.
- Now thread and pull the ends of that piece of wool through the back to the front of the diamond shape.
- Lightly open up the wool. Don't use a brush because it tears the wool.
- Use sharp scissors for the final trim by cutting the wool ends and creating a leaf shape.
- Voila, two finished macrame leaves with and without wood beads!

Notes
- For this project, I do not recommend fabric stiffener because it destroys the beautiful thick wool.
- If you don't want to use wood beads for the center part, then you can just knot the strands into a square knot
this is awesome! emmy is going to want to make these!
So glad to see you back on your blog – I missed you this summer. And as always, you post such pretty pictures.
I am glad you are back as well. I was kind of worried about you. Your home is always beautiful. I am not a crafty person but enjoy reading about your projects.
Awww thanks, you were worried? I was just having a great time and to busy doing other things, so I couldn’t get much of anything else done.