

DIY heart ornaments for Christmas (easy painted wooden hearts)
If you’re looking for a unique Christmas tree ornament that still feels warm and handmade, these DIY heart ornaments are such a beautiful option. I made mine using unfinished wooden hearts and added a simple folk-art floral pattern with acrylic craft paint. They’re perfect for Christmas trees, tabletop trees, wreaths, and even gift toppers.
If you’re looking for a unique Christmas tree ornament that still feels warm and handmade, these DIY heart ornaments are such a beautiful option. I made mine using unfinished wooden hearts and added a simple folk-art floral pattern with acrylic craft paint. They’re perfect for Christmas trees, tabletop trees, wreaths, and even gift toppers.

How I made these painted heart ornaments
This post may contain affiliate links from which I will earn a commission at no extra cost to you. View my full disclosure policy.
Supplies
- various brushes (I love this brush set and this pointed triangle paintbrush)
- dotting tools
- wooden hearts
- pencil
- acrylic craft paint set (this set comes with brushes)
- ribbon or twine ( I used this black and white twine)
- drill or hot glue for attaching ribbon or twine
I got the idea for these DIY heart ornaments after stumbling across a beautiful folk-art heart on Pinterest. I knew I could paint something similar myself because I love adding floral details to holiday décor and didn’t want to buy new ornaments.
The colors you choose are completely optional. When I painted my DIY easy folk art cutting board and pumpkin project, I used a dark green color as the base, which looks gorgeous under layered florals. Darker backgrounds give the flowers a more traditional European folk-art look, but lighter colors inspired by old painted books are beautiful too.
One of my favorite little tips is to use small food containers (like the kind that hold salad dressing or condiments) for craft paint. They keep the paint from drying out as you work and make color-mixing easier.
Video tutorial
As usual, I made a step-by-step video tutorial for you so you can see what my hands are doing. If the video doesn’t load for you, then you can watch it on my YouTube Channel instead.
Step-by-step instructions
This project is simple, beginner-friendly, and a great way to turn plain wooden hearts into charming heart Christmas ornaments. Below are the exact supplies I used and the easy steps to assemble and paint each ornament.
Step 1: Paint the hearts with a base color
I brushed black craft paint onto the wooden hearts with a broad craft brush. I needed two coats.

Step 2: Paint an edge border
After the base color had completely dried, I brushed on a red border with a small flat craft brush to the edges of the hearts. I also needed two coats. Make sure to paint the sides as well.
You can paint both sides of the heart or just one side. The back side is also a great place to add a message or names if you give them as gifts or gift tags.

Step 3: Line the border with dots
I used a medium-sized dotting tool to add yellow dots to the edge of the red border. Just dip the tool into the paint and keep dotting. I love the dotting tools and have used them for many projects. They are the easiest way of adding a dotted pattern (They are also great for adding details to fingernail designs.)

I used the same dotting/embossing tools for my embossed tin ornaments. I also included some free templates for you.
Step 4: Use a pencil to draw the floral heart pattern on the heart
Below you can see the floral pattern for the heart design that I drew with a pencil. Don’t worry about being too exact.


Step 5: Paint the floral pencil pattern with craft paint
This is where your painted wooden heart ornaments really come to life.
I can only recommend watching the floral pattern painting steps in my video. It definitely helps seeing what my hands are doing and the way I blend the colors.
I used my special angled craft brush for most of the floral pattern. It is such a useful brush for such details.
Photos 1-3: First, I painted the stems and leaves by simply covering them in a pre-mixed darker green craft paint and then added some yellow and white details. Don’t overthink it! It will look great. You can always add more dark green.
Photos 4-8: After that, I painted the flowers and the bottom heart with some red paint. I have also seen some similar tulip flowers painted in blue, which looks beautiful, but my color scheme matched better with the red, which you’ll see later. I added the same lighter details with white and possibly a bit of yellow, the same way I did with the leaves.
Photos 9-13: Now it is time for the dotting tool again. This time, I added white dots to the flowers and the single bottom heart. If you dip the dotting into the paint once and keep dotting, the dots gradually get smaller on their own. It’s so easy, even though it looks like it’s not. You can always practice on a piece of paper first.
I ended up painting mostly yellow daisies, and you can add some more dots to their center, too, if you like the look.

Step 6: Attach ribbon or twine
I used my Dremel and a small drill bit to drill a hole into the top of the hearts. Then I cut some twine and added some tape to the end so I could easily thread it through the hole, knot the twine, and trim it.
I also tried cutting the same twine and then hot-gluing the trimmed knot to the top of the heart ornament. Honestly, I liked that method better because it was faster and easier and didn’t add a hole to the top of the heart.
Either method works well, depending on how you want your DIY heart ornaments to hang on your Christmas tree.

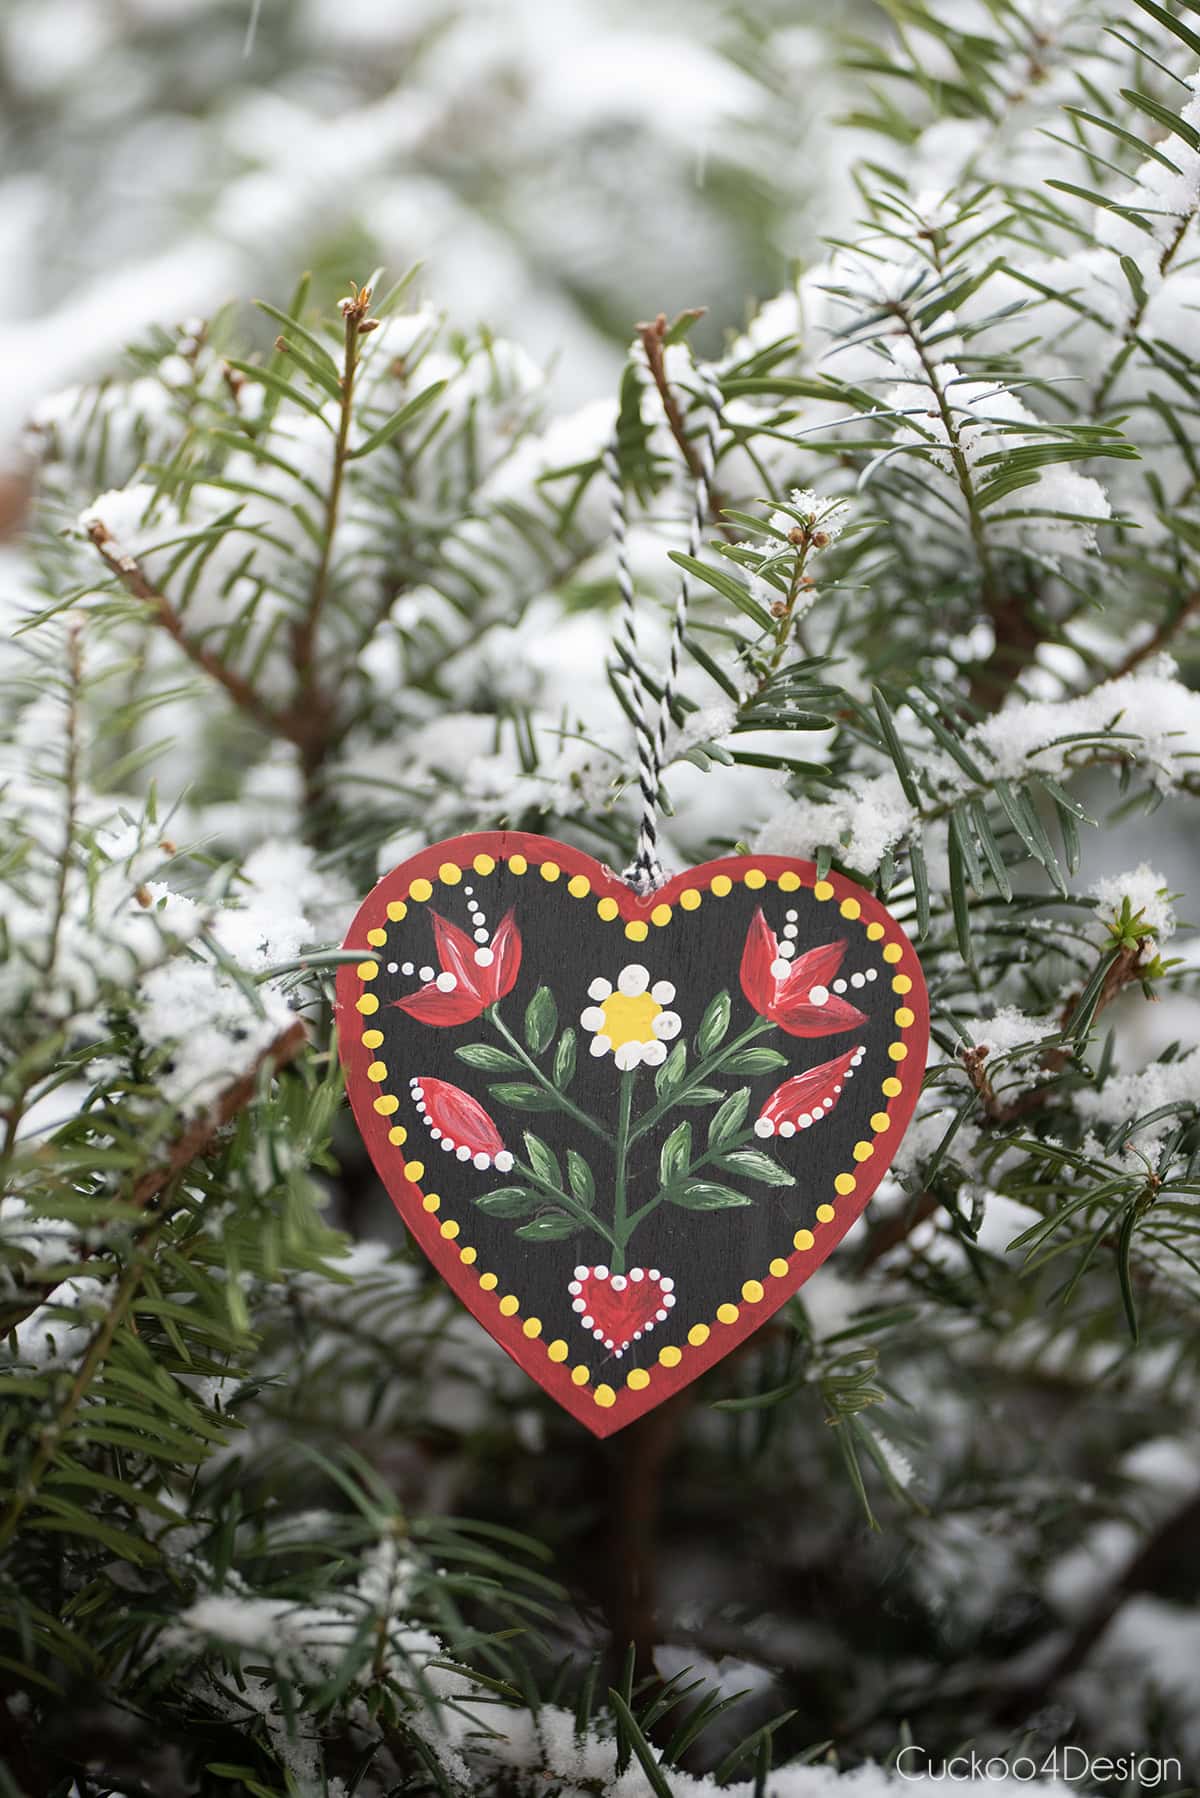
Finished DIY heart ornaments
These heart Christmas ornaments add such a charming handmade feel to any tree, whether you use them as small heart ornaments, gift toppers, or part of a themed ornament collection.
And here you can see one heart as a Christmas tree ornament outside in my pine tree, and all the finished hearts in our small dining room tabletop Christmas tree.

Can you believe that this is the first time ever that I’m using traditional red in our Christmas decor? The red ribbon bows and disco balls are the cherry on top. If you love disco balls as much as I do, then check out my DIY melted disco ball tutorial.


Related: If you like floral Christmas decor, check out my DIY Christmas flower ornament and DIY dried flower Christmas ornaments.

RELATED: Come see the rest of my Christmas home tour with bows and disco balls for this year.

I love these beautiful hearts, and they make me think of growing up in Germany.


FAQ
Absolutely. I made them as Christmas ornaments first, but since hearts work year-round, they can easily transition into Valentine’s Day décor.
I used inexpensive acrylic craft paint because it dries quickly and layers beautifully for folk-art flowers and dots.
No! You can sketch a simple floral layout with a pencil first and then fill it in with craft paint. My video shows you exactly how I blend the colors.
Yes, you can glue a short piece of twine or ribbon onto the back if you prefer not to drill.
More DIY ornament ideas
If you love making your own Christmas ornaments, especially small painted ornaments or anything with heart shapes, these DIY heart ornaments fit perfectly into a handmade Christmas theme.
- DIY gingerbread cardboard ornaments — These cardboard gingerbread ornaments include a heart template, too, decorated with simple white puff paint.
- DIY Mexican ornaments — Bright, colorful, and inspired by traditional folk art designs painted on plastic ornaments with an oil-based Sharpie.
- DIY mushroom ornaments — One of my favorites for woodland Christmas themes, painted with acrylic craft paint just like the hearts.
- DIY toilet paper roll stars — A budget-friendly way to create lightweight star ornaments from recycled toilet paper rolls.
- DIY toilet paper roll snowflakes — Another recycled craft idea, with two different snowflake styles to choose from.
- DIY paper doily snowflakes — Delicate, lacy snowflakes that come together quickly using inexpensive paper doilies.
- DIY macrame hearts — A sweet macrame project that works beautifully for both Christmas and Valentine’s Day.
Tschüß,

So pretty! Love them so much! Going to try to make some myself but I know they won’t be like yours!
Love, Kathleen Tweed
Thank you Kathleen, but don’t say that they won’t look like mine 😉 My first one was questionable and then it got better! Good luck and I;d love to see yours
Thank you! The steps look so doable. I’m going to try this and the paper bag stars with my kids!