Let me show you how I breathed new life into old plastic ornaments this Christmas with a simple baking soda paint technique. This DIY holiday décor project works even on glittery plastic ornaments, and you can mix the paint yourself using leftover paint or paint samples for an elegant, budget-friendly way to create unique Christmas tree ornaments. I love their unique matte, velvety, or even stone-like texture!
DIY baking soda paint ornaments
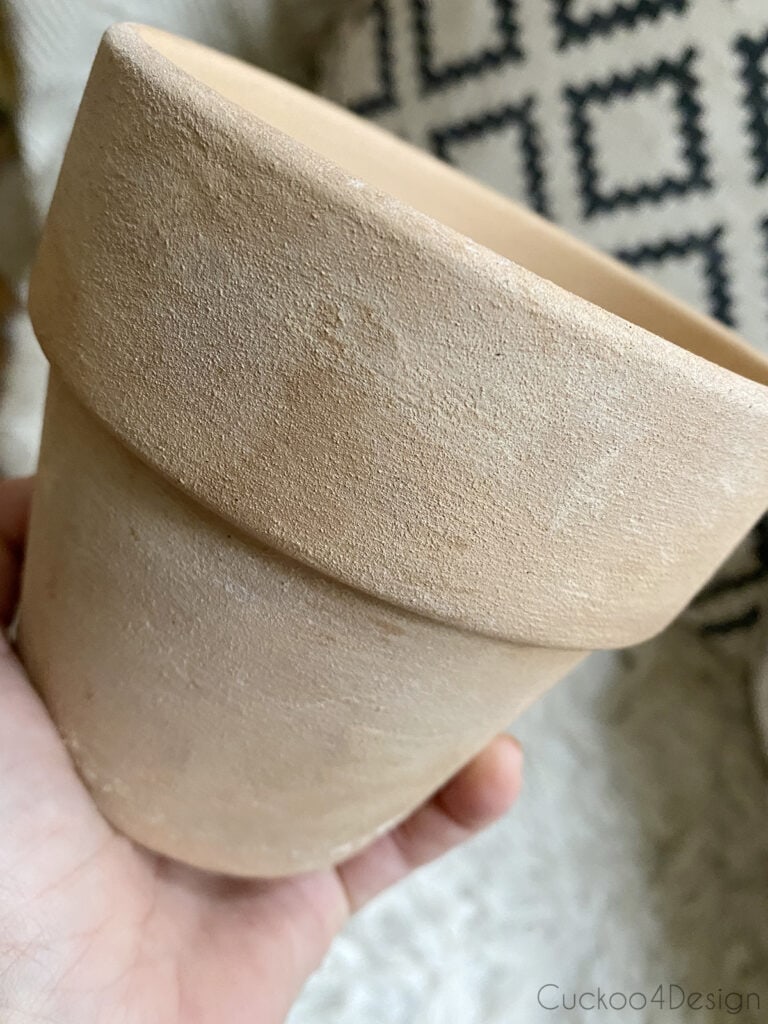
When you add baking soda to paint, it makes the paint thicker, more textured, and less shiny than it was before. The more baking soda you use the more texture you get. If you are trying to paint something to make it look like pottery or concrete then this is the way to go. It is actually a lot of fun because you can’t really mess up.
This is definitely one of those easy DIY projects that kids can help you with.
Materials needed
latex paint samples, leftover latex paint, or even craft paint, just don’t use oil paint ( I use different colors: a base color, a darker version, and white – more color details below in the instructions)
Kilz spray paint primer (I’ve seen other people skip priming the outside of the ornament but I prefer to make sure the paint adheres perfectly to the shiny plastic)
ornaments (…or pretty much anything else you’d like to paint, the possibilities are endless and you could even use glass ornaments! ,
cardboard
wooden skewers
spoon for mixing
Terracotta colors I used to paint the old Christmas ornaments
You can buy color samples for cheap in small containers, which is what I did.
Strawberry Malt by Valspar – 2008-8C (leftover paint from our bathroom makeover)
Rustic Oak by Valspar – 2007-7B (paint sample)
Ultra White by Valspar – 7006-24 (leftover paint from our house)
(Find out more about my favorite terracotta paint colors in a recent blog post that I wrote)
Step-by-step DIY baking soda paint Christmas ornaments
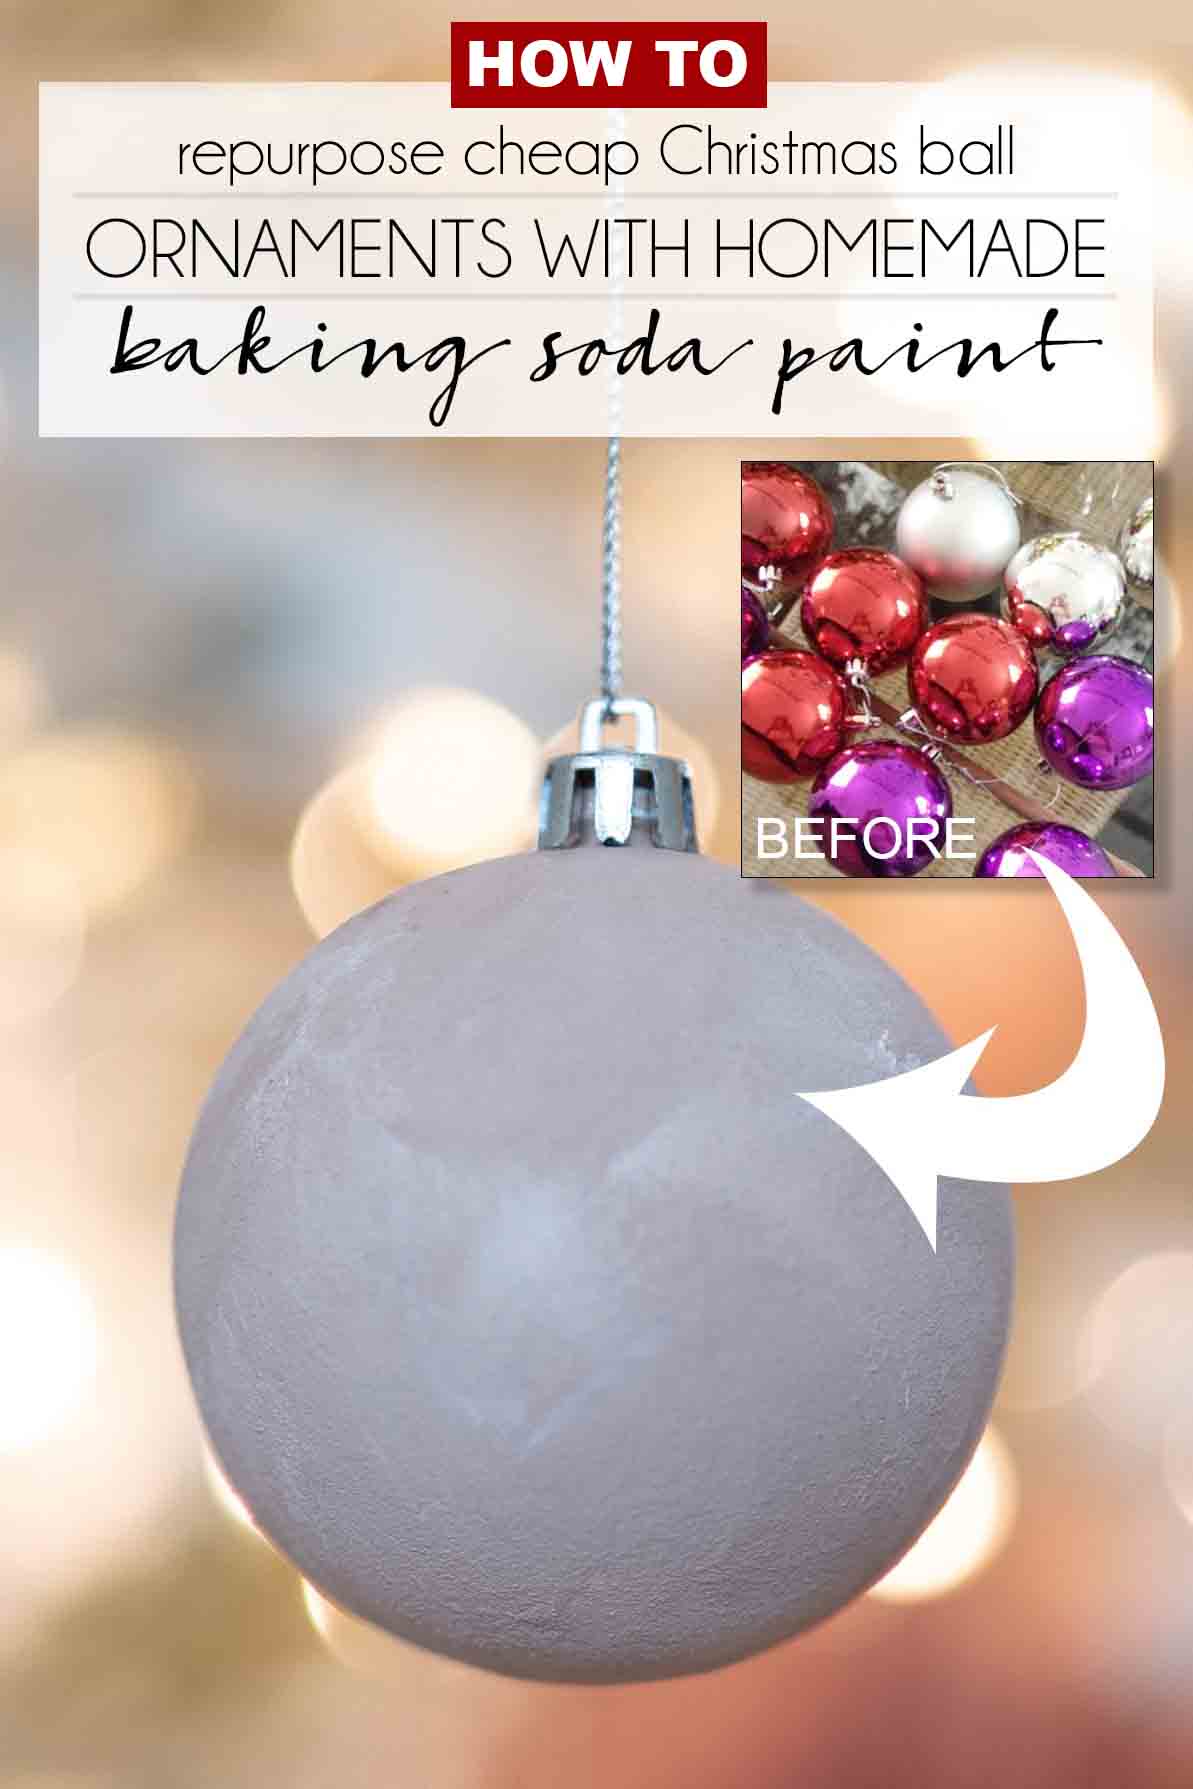
I had a ton of cheap plastic ornaments leftover that I originally painted with black and white acrylic paint (see my full tutorial on how to paint plastic ornaments). It was a fun project, but I was ready for a change again.
Step 1: Remove the tops from the ornaments
Below you can see the colors they used to be before I primed them with Kilz spray primer.
They usually pop right off! If they break, don’t worry, because you can also make your own later.
Old plastic glitter ornaments are actually perfect for this project! The existing glitter adds texture that can’t be smoothed out with regular paint, but with baking soda paint, you can enhance that texture and give the ornaments a fresh, new finish.
These ornaments used to be white and shiny glitter! Can you believe it?
Step 2: Clean your ornaments
The glitter ornaments are difficult to clean, but you can still gently wipe them down with a lint-free rag dipped in alcohol. Other plastic ornaments are easier to wipe. Just make sure they are all dry before moving to the next step.
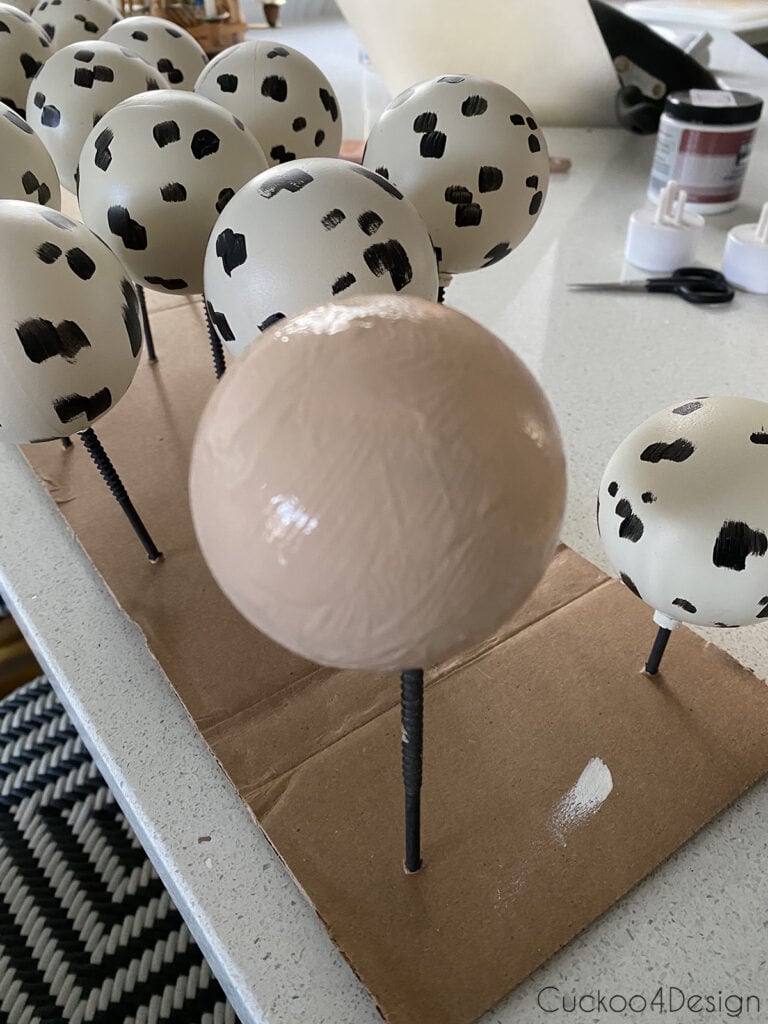
Step 3: Hold your ornaments in place for painting
I used wooden skewers pushed into a cardboard box to keep the ornaments in place. Simply stick the ornament onto the skewer upside down.
Step 4: Prime your ornaments
As always, I used Kilz spray primer. Make sure you always shake the can long and well before spray priming! The primer can get runny and clumpy quickly, but don’t panic; you can lightly sand the uneven parts when the primer is dry and redo it.
I only had to prime the glitter ornaments since the other ones were already primed from my previous ornament painting project.
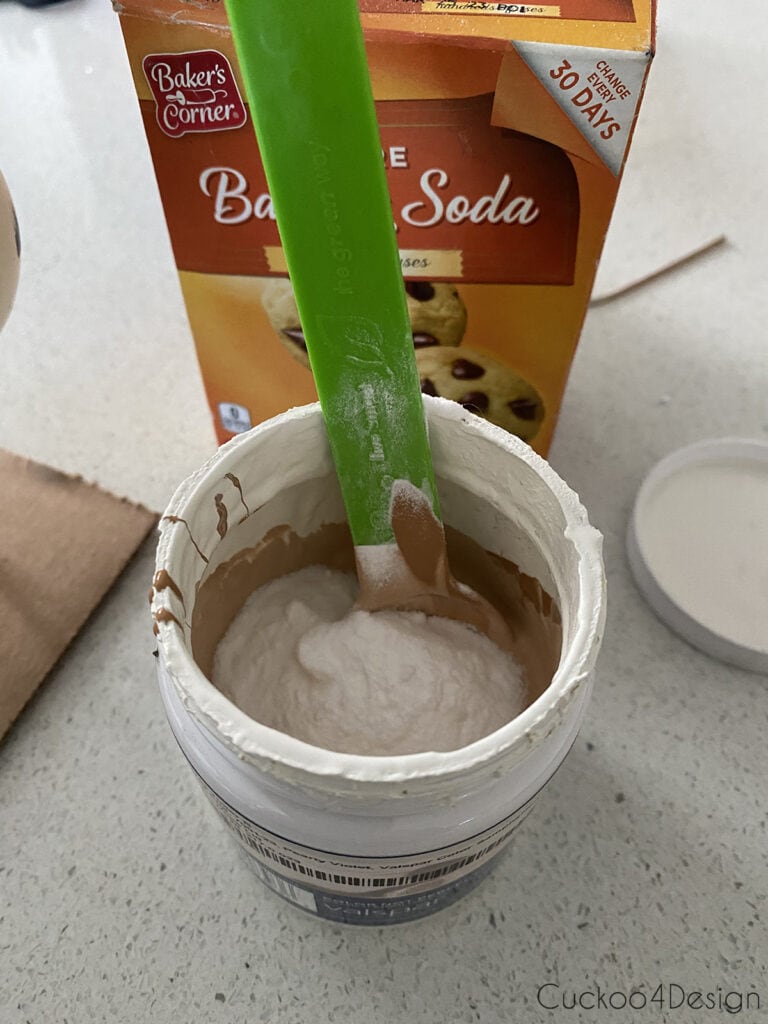
Step 5: Mix your baking soda paint
Some of the baking soda recipes out there give a certain ratio of paint to baking soda, but I don’t really like giving a specific measurement for it because the beauty of this project is that it is forgiving, and you can’t really make any mistakes.
Mix baking soda into your paint sample to get a thicker pudding-like consistency. If you want more texture and grain then add more baking soda.
RELATED: I have tried other DIY paint recipes in the past on furniture makeovers which is another great way to make affordable paint.
Step 6: Layer the baking soda paint on the christmas ornaments
Brush tip: I used this size brush from my favorite brush set.
As I said earlier, the plastic glitter ornaments are perfect for this project because the existing glitter adds texture, which the baking soda paint enhances. You can paint the primed plastic glitter ornaments directly while they’re mounted on a skewer and let them dry in a glass or other container.
plastic glitter ornament with two coats of baking soda paint
Here you can see how I simply painted over the other old ornaments.
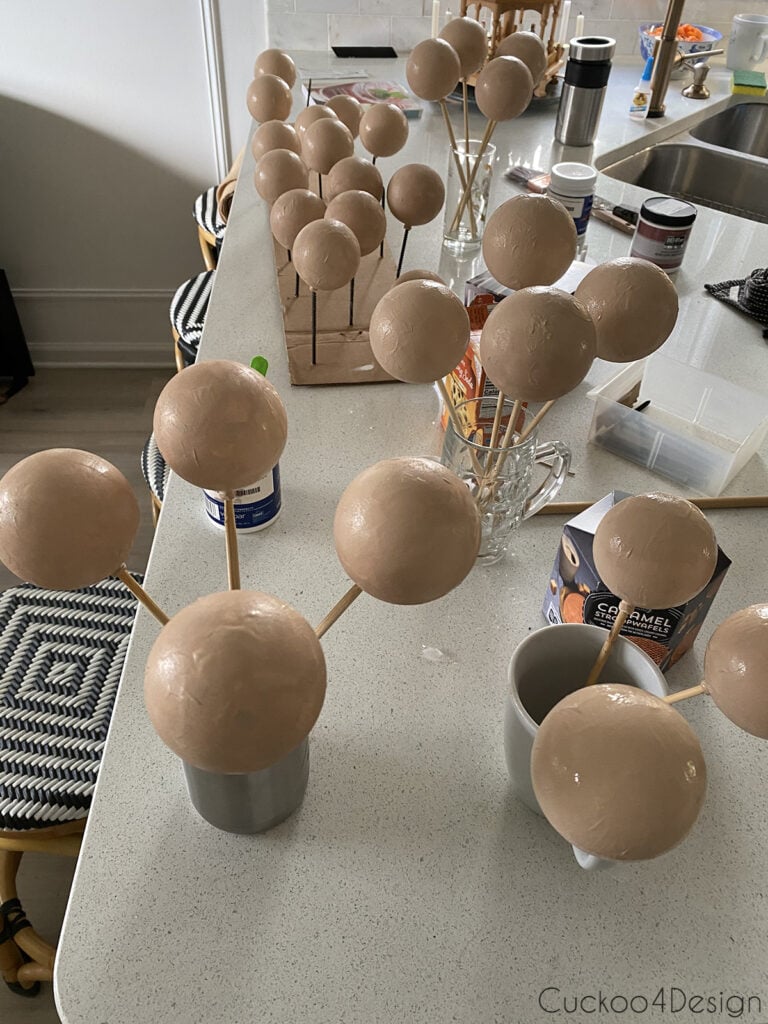
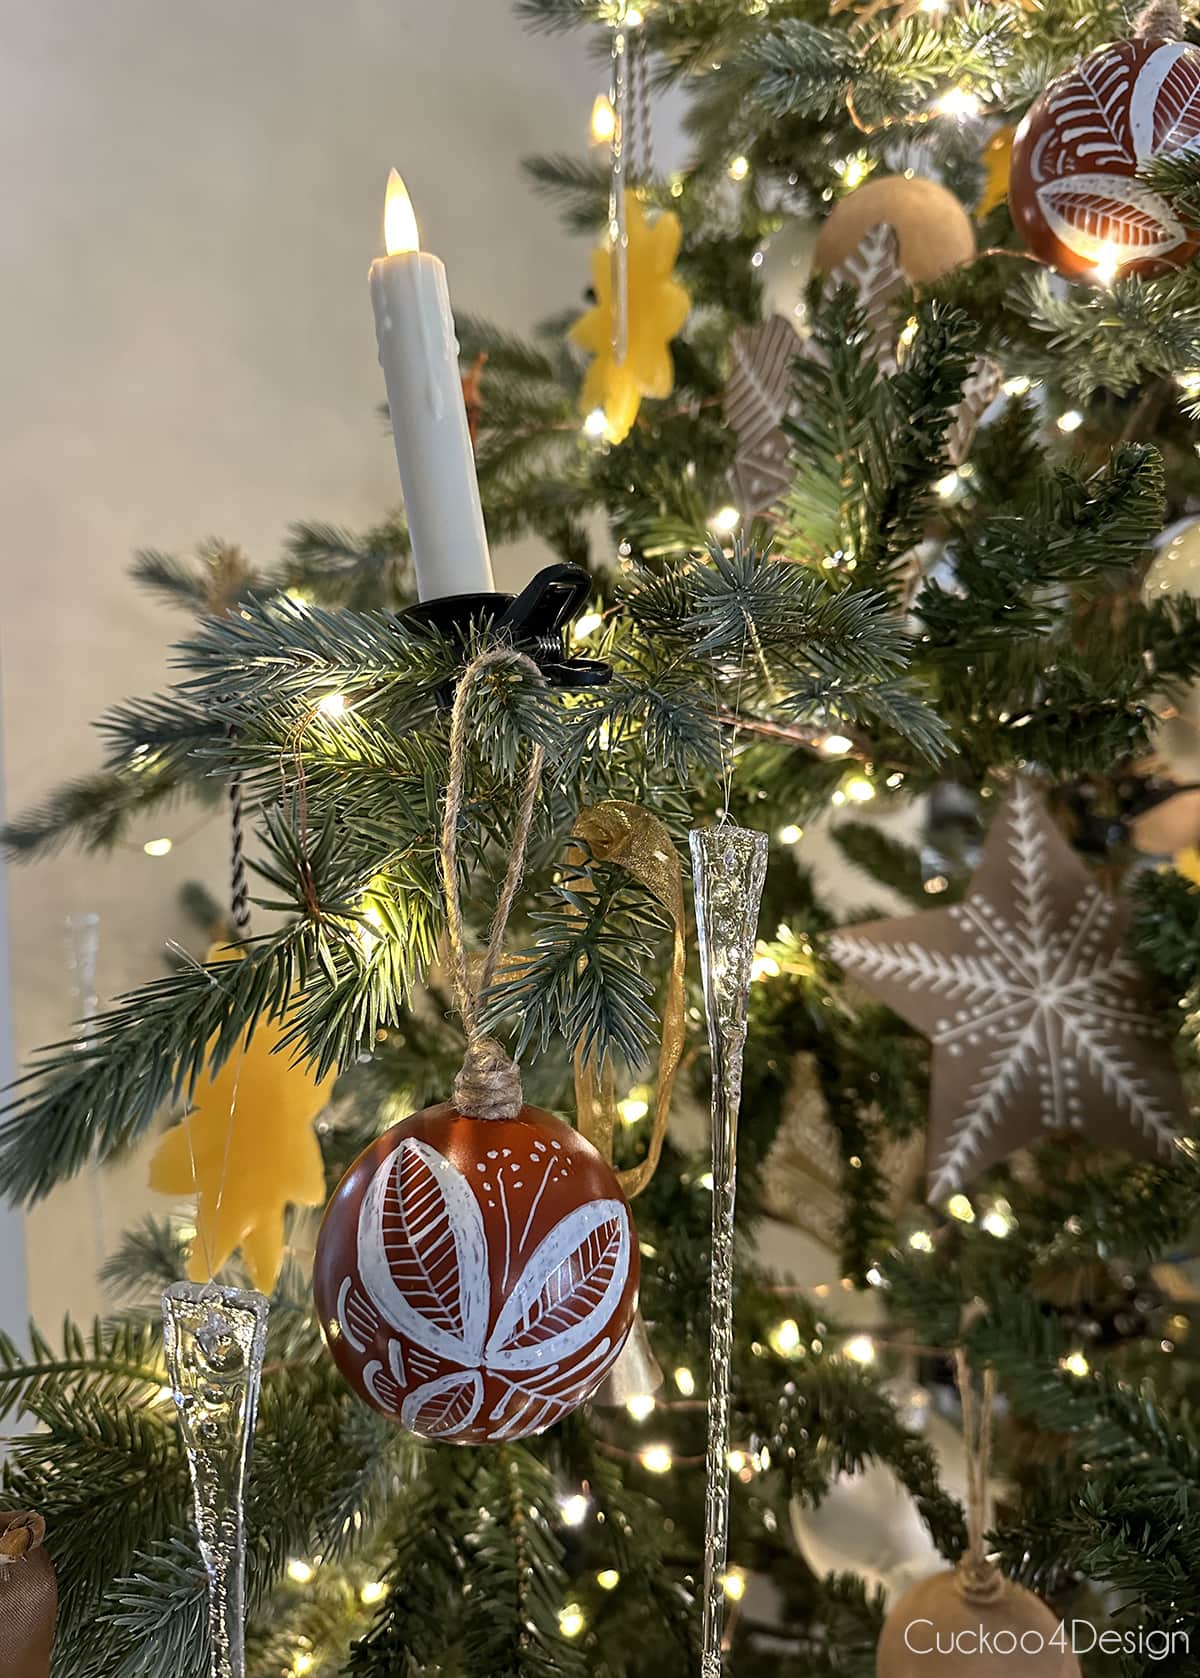
Layering the baking soda paint for a faux terracotta look:
Middle tone first: Start with your middle-toned color (I used Strawberry Malt) and apply 1–2 coats.
Add depth: Once dry, brush on a darker color (Rustic Oak for me). Dab off excess paint on a paper towel first—this keeps the layer light and textured rather than full coverage.
Highlight: When the dark layer is dry, lightly dust the ornament with your lightest color (white in my case). Use just the tips of the brush to feather it on—think “crosshatch” rather than full coverage. (I prefer this to the method of dusting with baking soda.)
Tips:
If you don’t like the result, simply add another layer—this project is very forgiving.
For comparison, I have two ornaments: one with lots of texture using multiple layers, and one with only two coats of plain baking soda paint for a simpler look.
Drying setup: Below is my full setup showing how I let them dry safely and evenly.
Step 7: Add the ornament tops
I simply stuck the original plastic top to some of the ornaments.
And I also glued some jute yarn to the top of the darker ornaments for hanging.
More decor accessories that I painted with baking soda paint
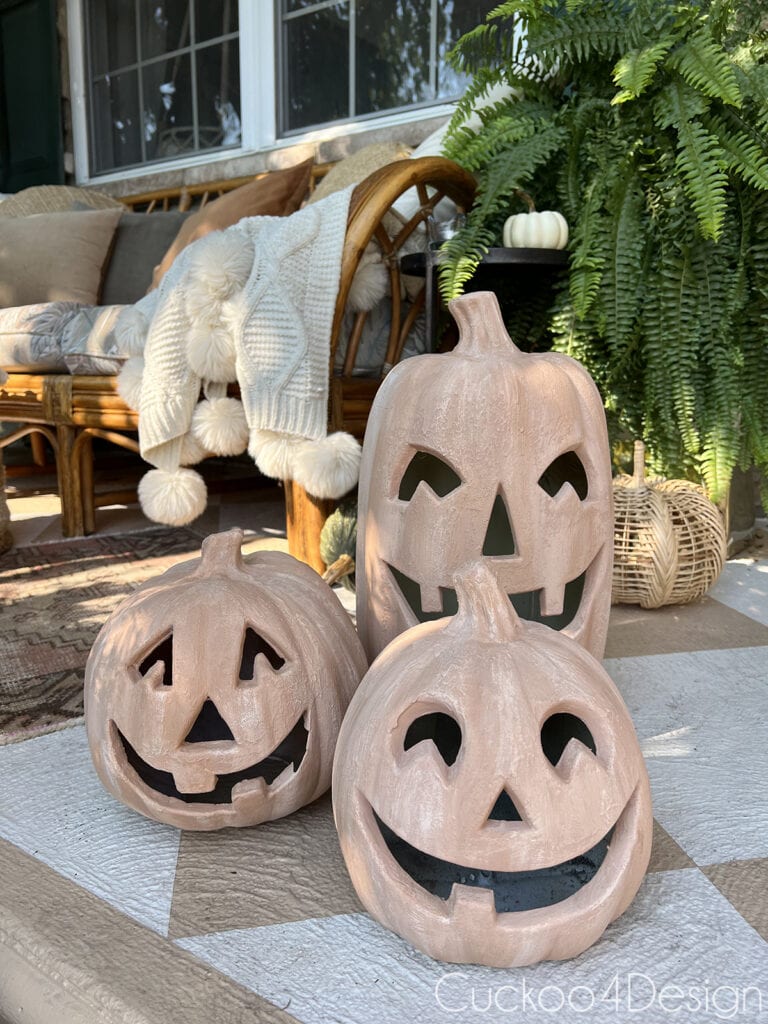
I used the same paint sample leftovers to turn some mismatched plastic pumpkins into faux terracotta pumpkins.
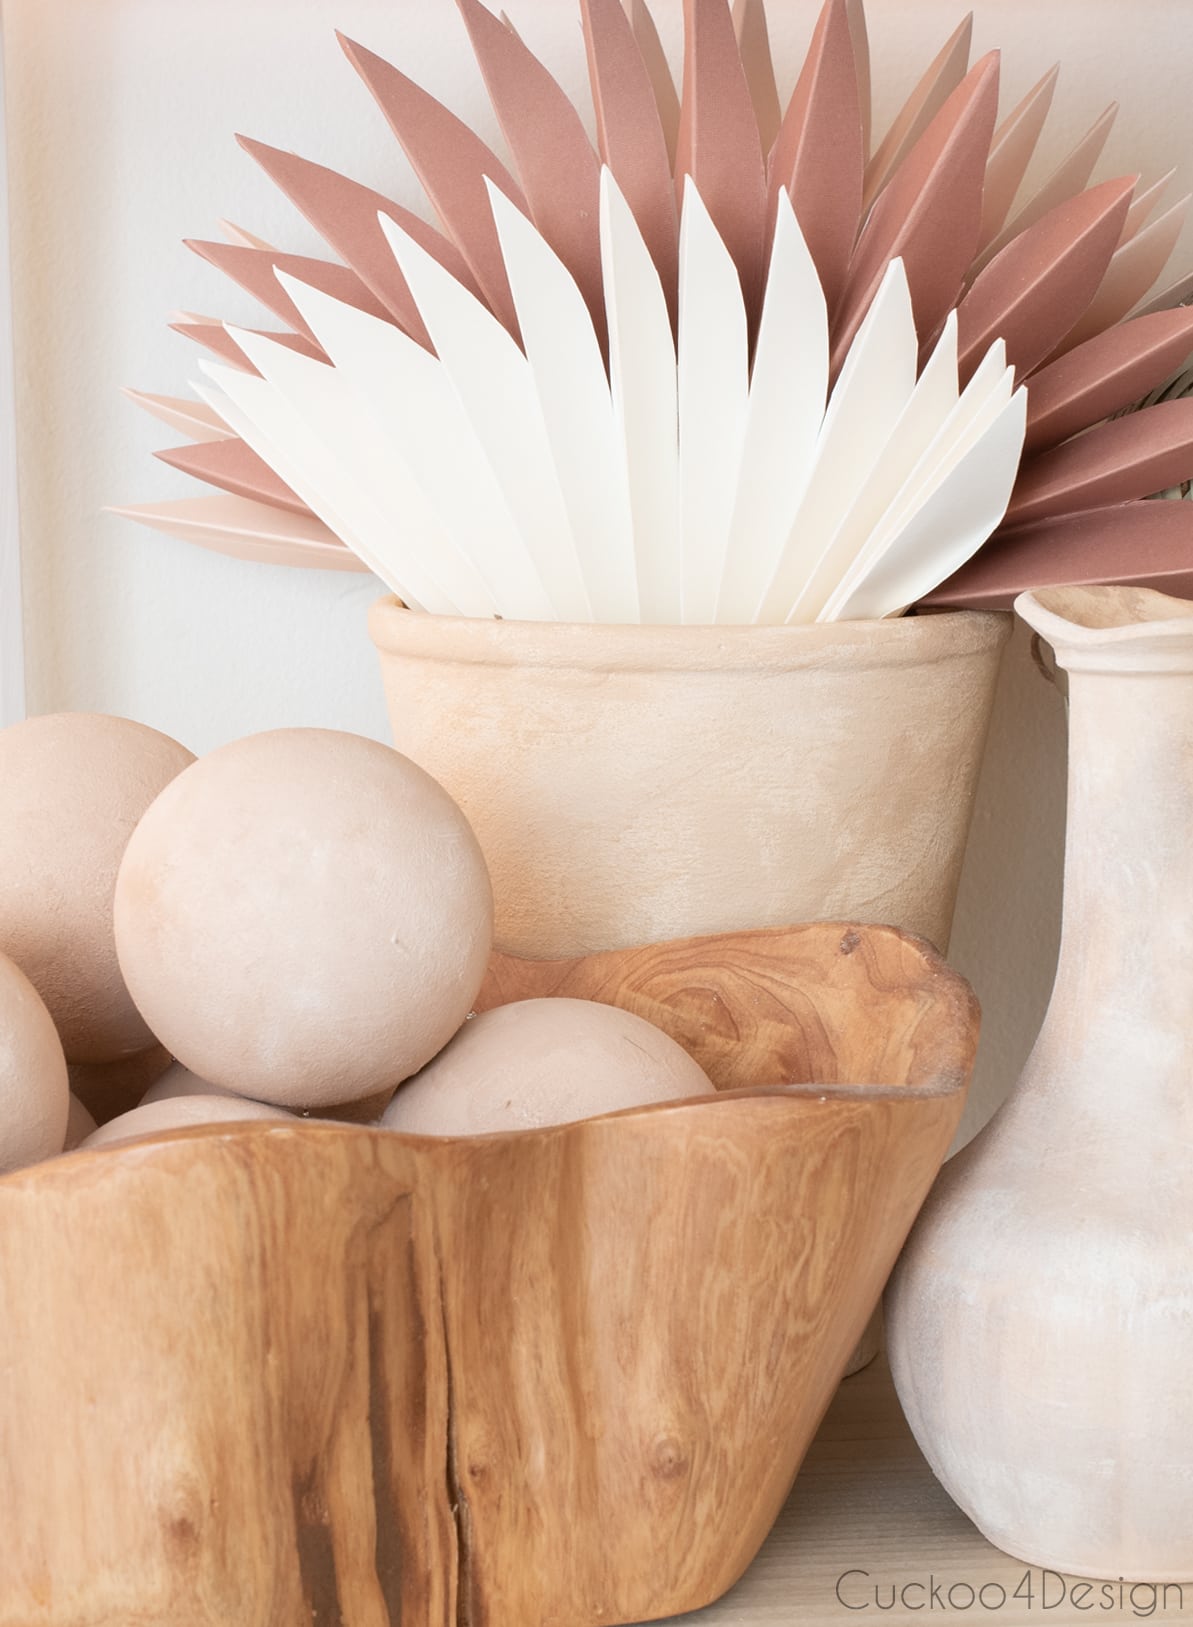
Check out the painted texture on my thrifted pot pictured below. I think they really do look like terracotta, don’t you think so?
Decorating ideas with the finished faux terracotta ornaments
This post may contain affiliate links from which I will earn a commission at no extra cost to you. View my full disclosure policy.
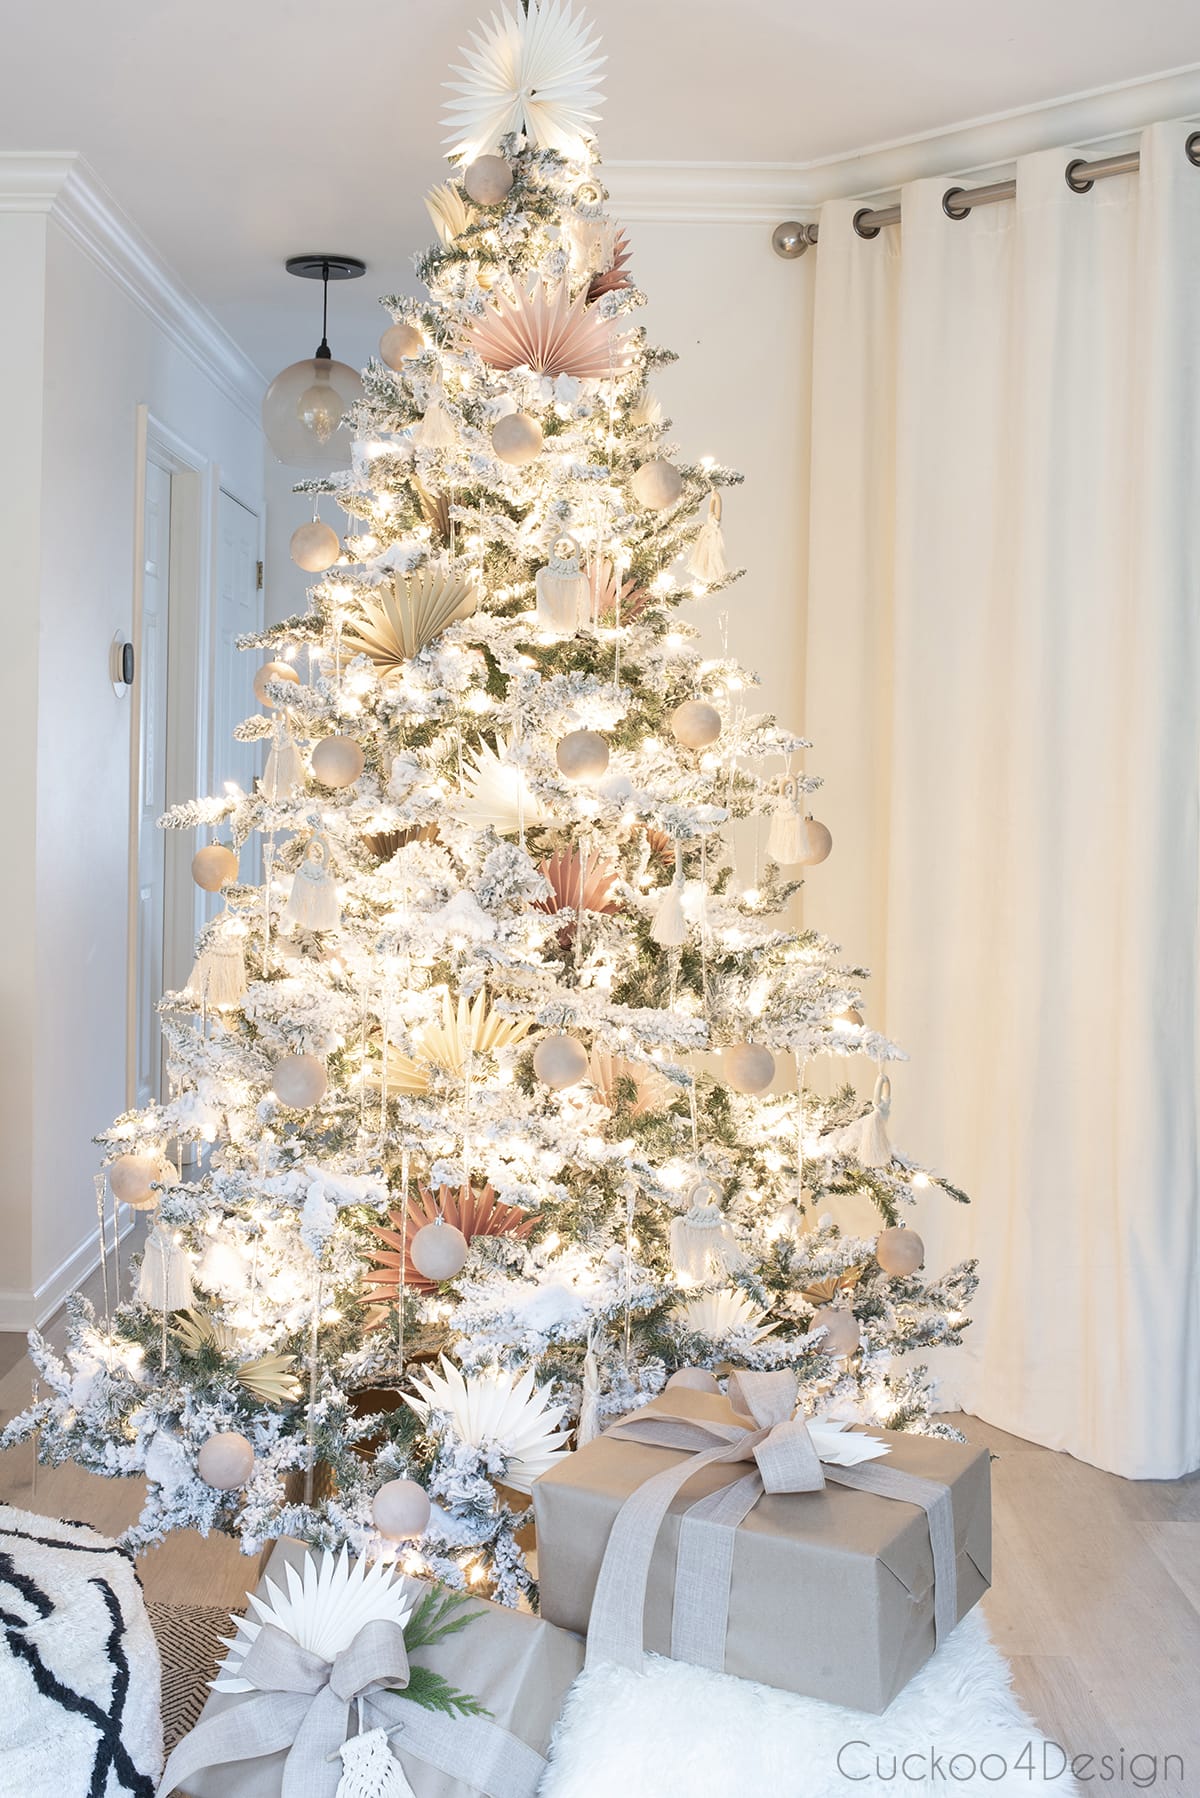
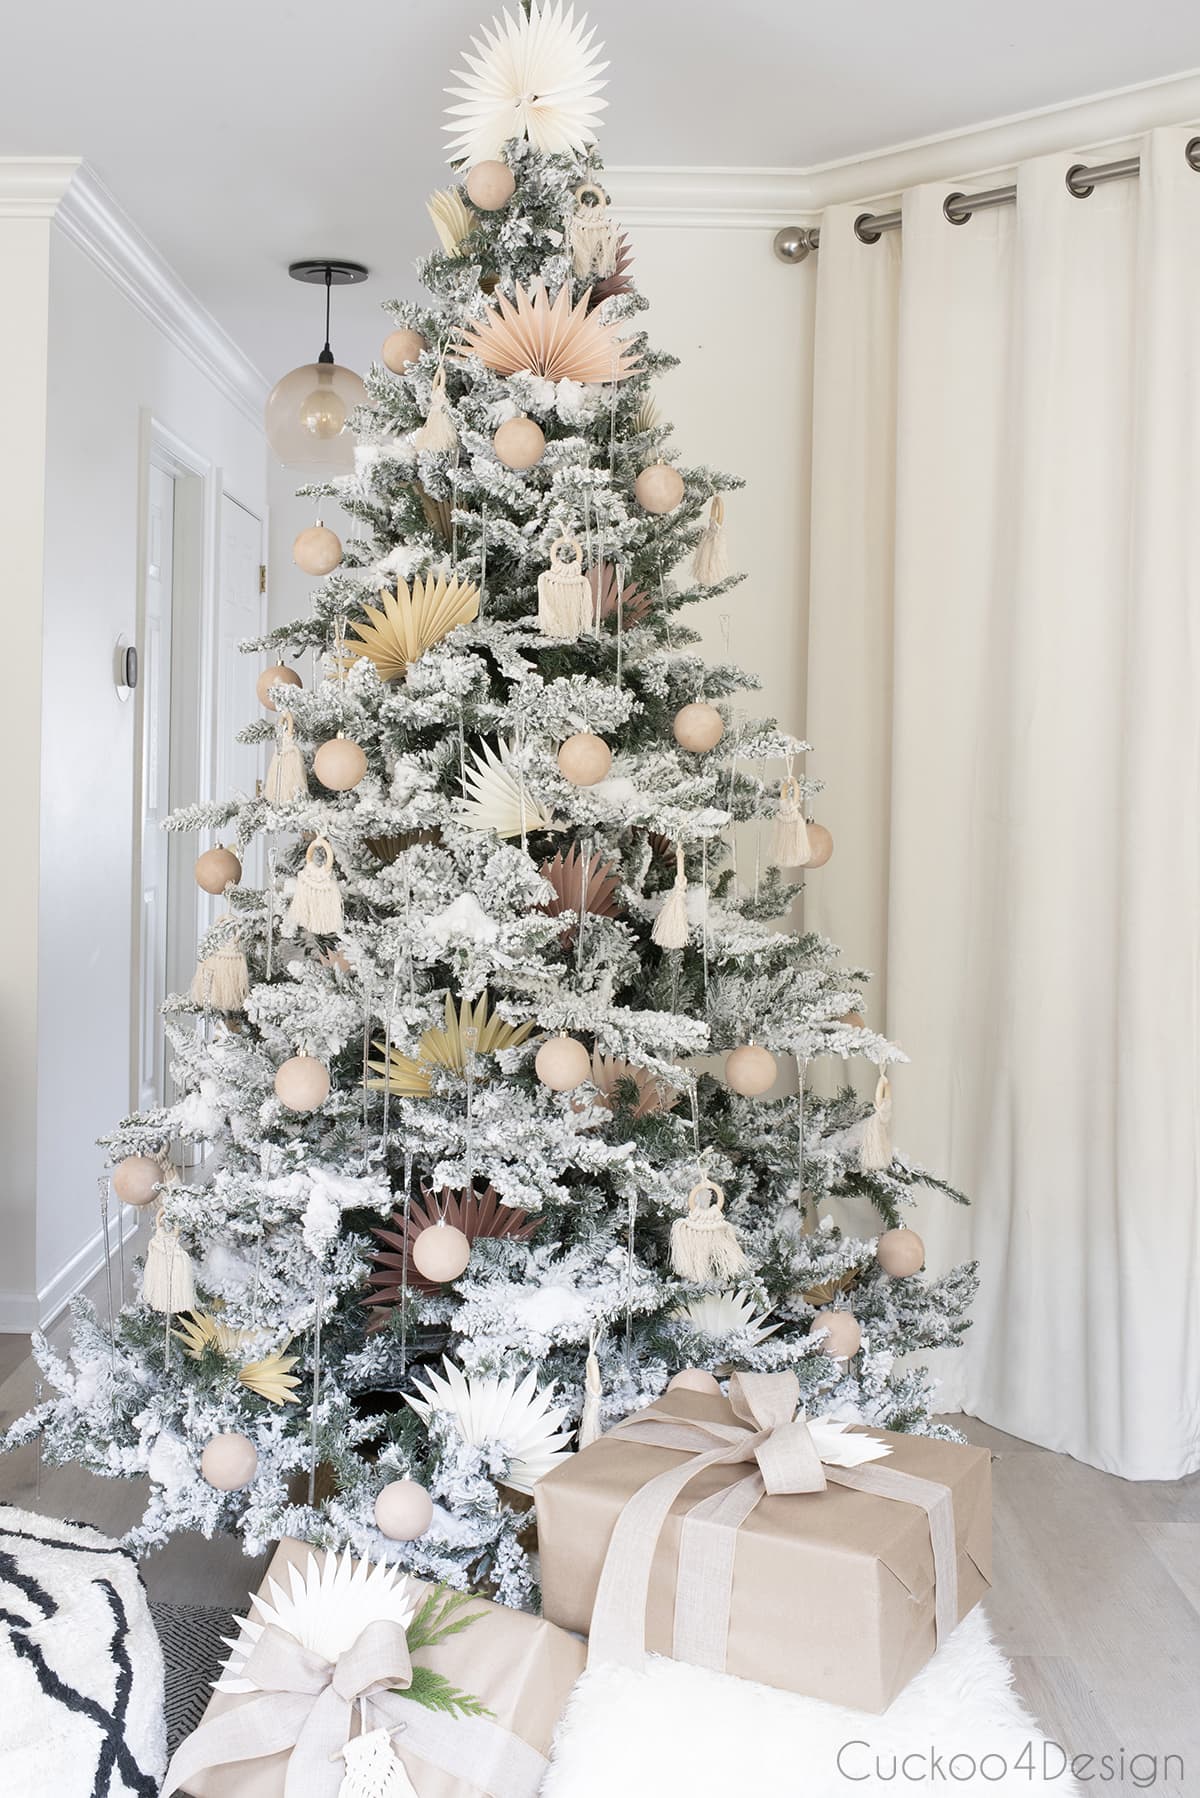
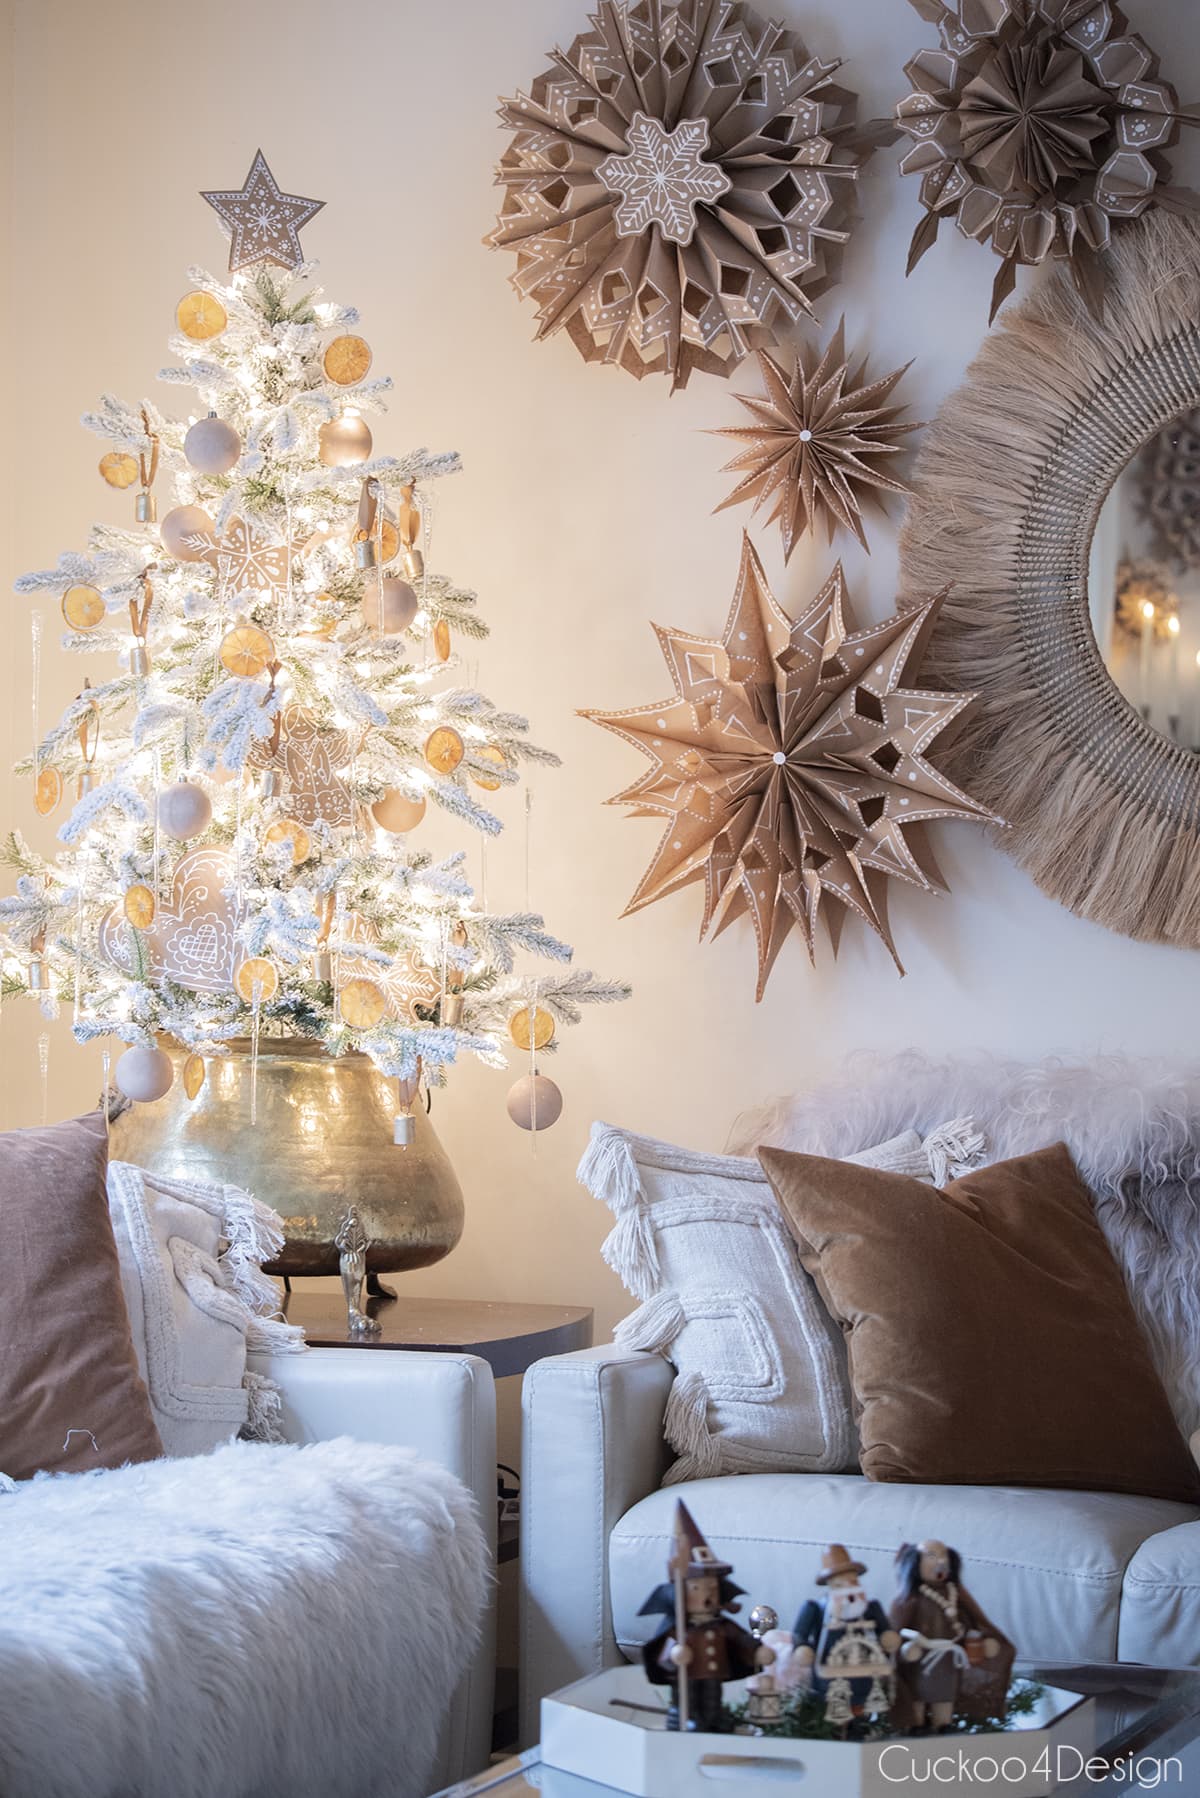
Below, you can see how the faux terracotta sphere DIY ornaments look on our Christmas tree that I revealed this week in my Christmas tour. They are subtle and pretty and can also be used all year round, which I will show you later.
I bring these painted ornaments back every year because they pair so well with most of the ornaments I have made over the years. Browse my complete collection of handmade Christmas ornaments to get some more ideas.
You can place the Christmas ball ornaments into a bowl all year as a bowl or vase filler. Just take the hooks or strings off and place them with the neck of the ball facing down. I also used my faux palm-leaf fans in a painted vase, and not just in the Christmas tree above.
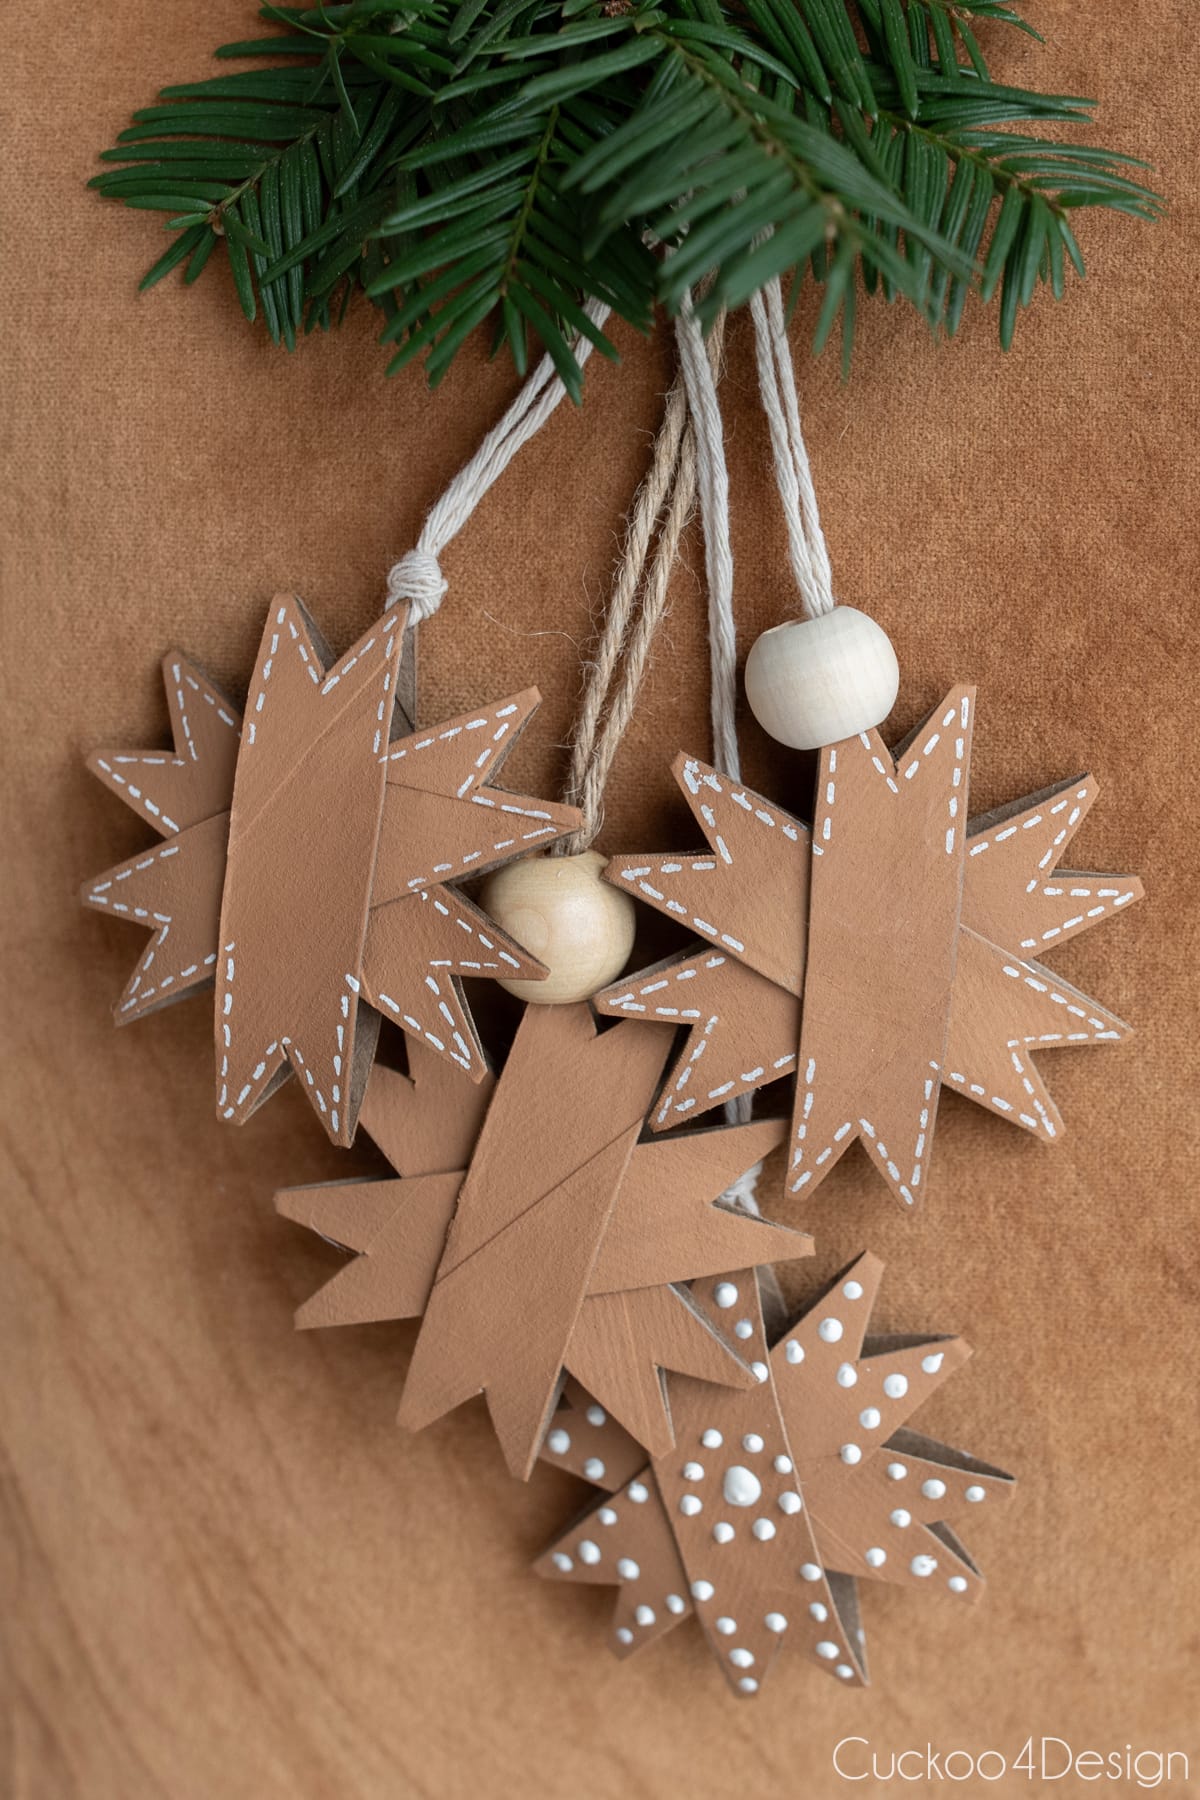
I also made toilet paper roll stars to match my favorite velvet pillows by painting them with the same type of baking-soda paint.
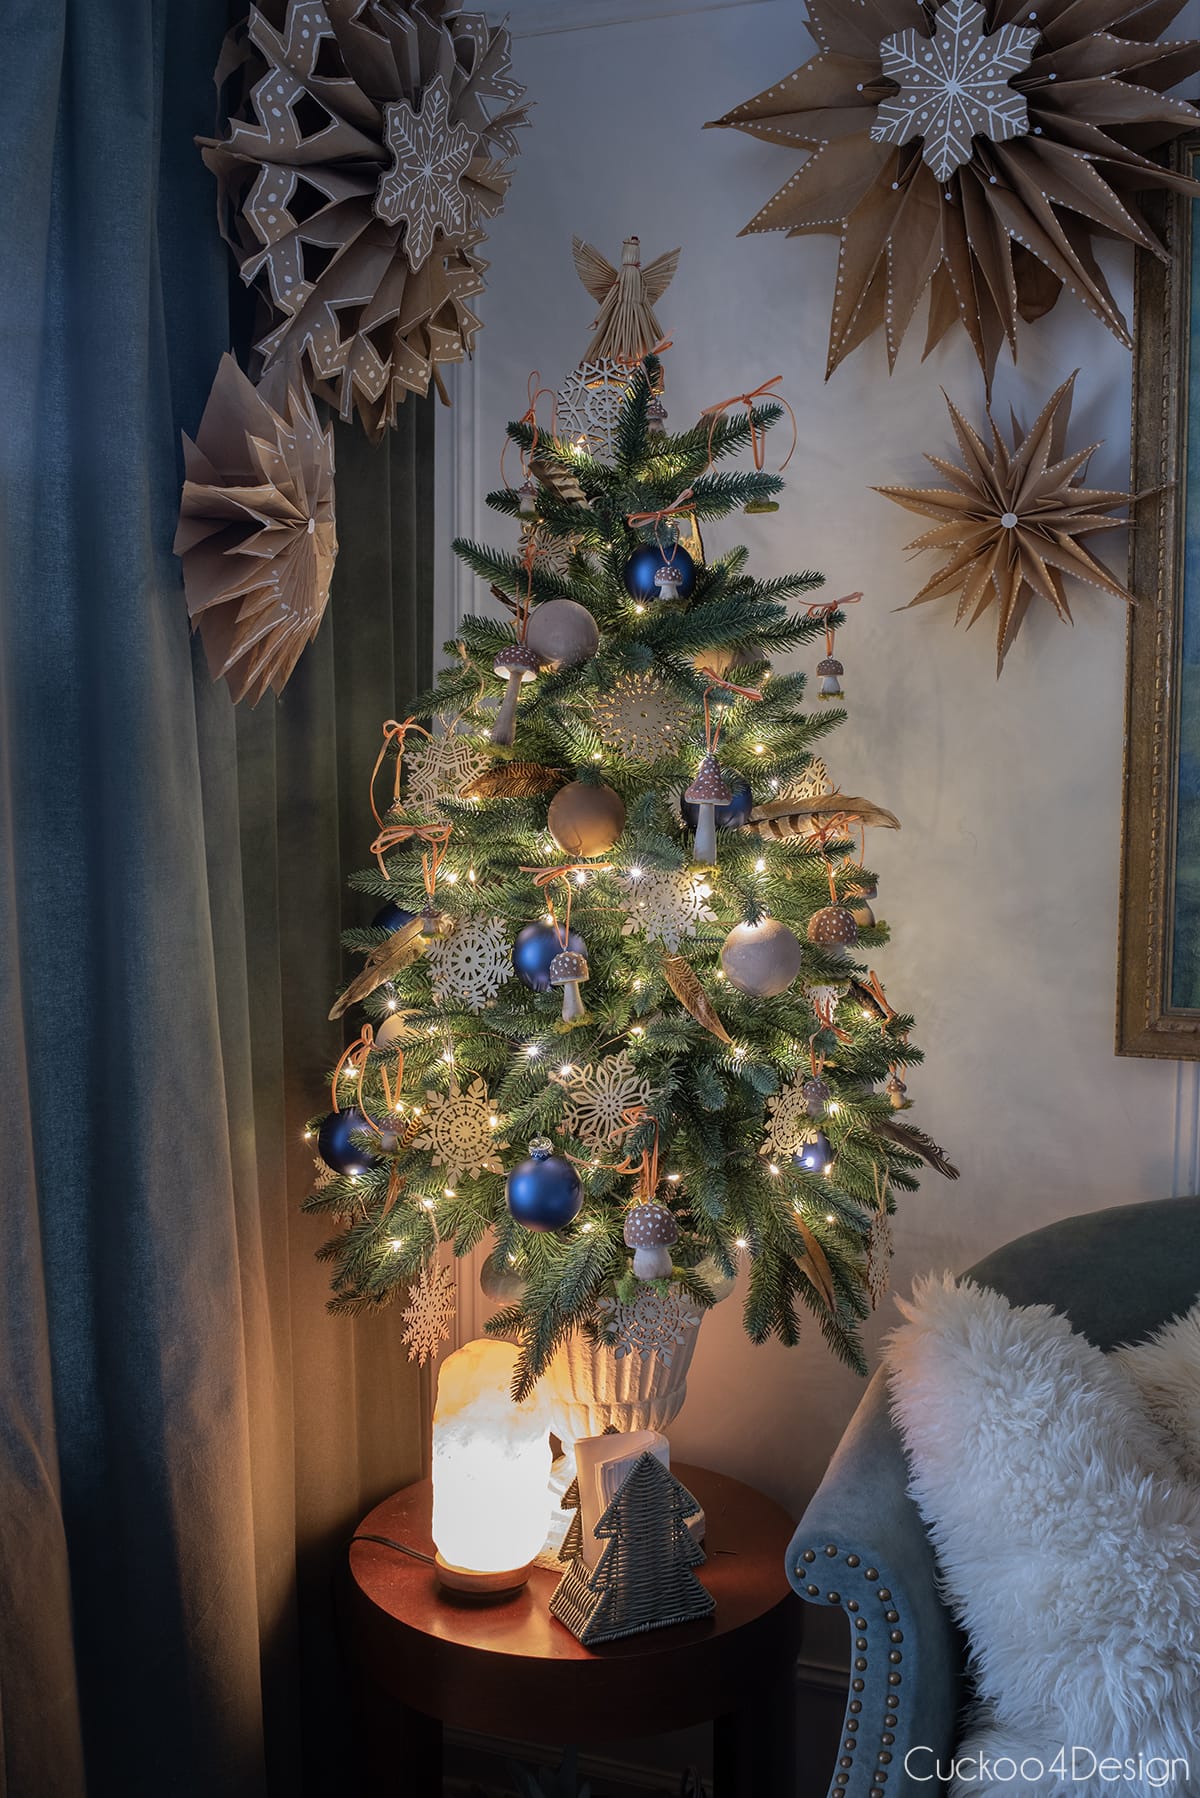
As well as the top of my DIY mushroom ornaments, which were also painted with the same color and paint. I used dotting/embossing tools for the mushrooms. I used the same tools on my embossed tin ornaments and included some free printable templates.
You can see them all displayed in my small tabletop Christmas tree in the dining room. Above the tree, I added my paper bag snowflakes again.
I also mixed in some blue ornaments, wooden snowflakes, and feathers. This is such a beautiful combo with the baking-soda paint ornaments.
Maybe I should make a video yet for this project, but there are so many out there already, since I mentioned this is kind of a craze right now. I have not seen DIY Christmas Ornaments painted this way before. So that’s a new one.
So what ya think? Is that a Christmas decoration that you’d be into? I love that you can give plastic ornaments a new life over and over instead of making them end up in a landfill.
Julia,
Thank you for this idea and I’m going to try this with paint I have left over from all the crazy stuff I have painted in the past. I like that there is no measuring and I can eyeball the texture. Thanks again and Merry Christmas to you and your family:)
Hi Doris, I mention in the blog post that I don’t like adhering to a specific recipe because it also depends on what consistency you want and how thick your paint is so “Mix baking soda into your paint sample to get a thicker pudding-like consistency. If you want more texture and grain then add more baking soda.” That’s all there is to it. Good luck!
These are so chic!
I have had a bag with a box of cheap plastic ornaments bought on clearance, just like you described. They have mostly sat in a drawer, being ignored, but taking up space.
‘Slap a coat of paint on em’ didn’t sound like a solution. But mine eyes have seen the light of *several layers of paint + baking soda*! Wow!


So clever and looks amazing!
Great idea! Merry Christmas, Julia!!!
Julia,
Thank you for this idea and I’m going to try this with paint I have left over from all the crazy stuff I have painted in the past. I like that there is no measuring and I can eyeball the texture. Thanks again and Merry Christmas to you and your family:)
they look so amazing on your tree! great idea!
How do you imagine paint pens would do to draw on these once finished? I am looking for something girl scouts can customize:)
I’m not sure because the baking soda paint has texture to it.
I could not find your recipe to repurpose things. How did I miss it or do I have to buy mixture formula? Doris
Hi Doris, I mention in the blog post that I don’t like adhering to a specific recipe because it also depends on what consistency you want and how thick your paint is so “Mix baking soda into your paint sample to get a thicker pudding-like consistency. If you want more texture and grain then add more baking soda.” That’s all there is to it. Good luck!
These are so chic!
I have had a bag with a box of cheap plastic ornaments bought on clearance, just like you described. They have mostly sat in a drawer, being ignored, but taking up space.
‘Slap a coat of paint on em’ didn’t sound like a solution. But mine eyes have seen the light of *several layers of paint + baking soda*! Wow!
Haha good luck!