

Vintage Inspired Blush Bathroom Remodel on a Budget
I’m so excited to share today’s blush bathroom makeover with you. I’ve been dreaming of improving this space for a very long time and kept waiting for a time when I could gut the space. Rip out the tub and put in a walk-in shower, replace the tile with one of the beautiful black and white patterned tiles I love so much and get a gorgeous vanity with all kinds of useful storage solutions topped by stunning lighting. Yeah, for so many reasons I realized that wasn’t going to happen. I didn’t have the budget or energy to deal with such a makeover.
After our sad saga with Anthony the cat and me spending weeks or I should say months in there together, this bathroom just made me sad. I felt like it needed a fresh start without costing me a ton of money. The thought of just working with what I had kept growing stronger and stronger in my mind. Why should this space make me so sad? I didn’t have to live with it in its current state until I finally had the budget to make it a dream space because that day might never come.
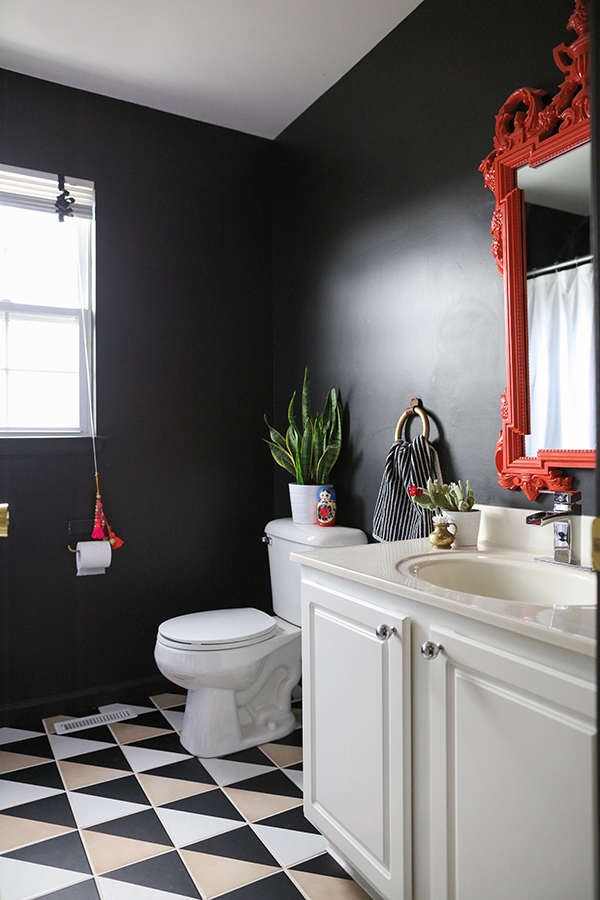
Here is a photo of the bathroom right after I applied the stickers (see post HERE) and painted it black because my daughter wanted it black. I love black walls but I realized that they weren’t for me in a bathroom. You could see all the water stains, toothpaste splashes, cat hair, and dust. It looked disgusting after a while.
I had taken pictures of the disaster but can’t seem to find them but what I do have is a glimpse of it in my recent “real life home tour” video which I linked to below. Just drag the slider to the 6:29 mark to see the bathroom mess.
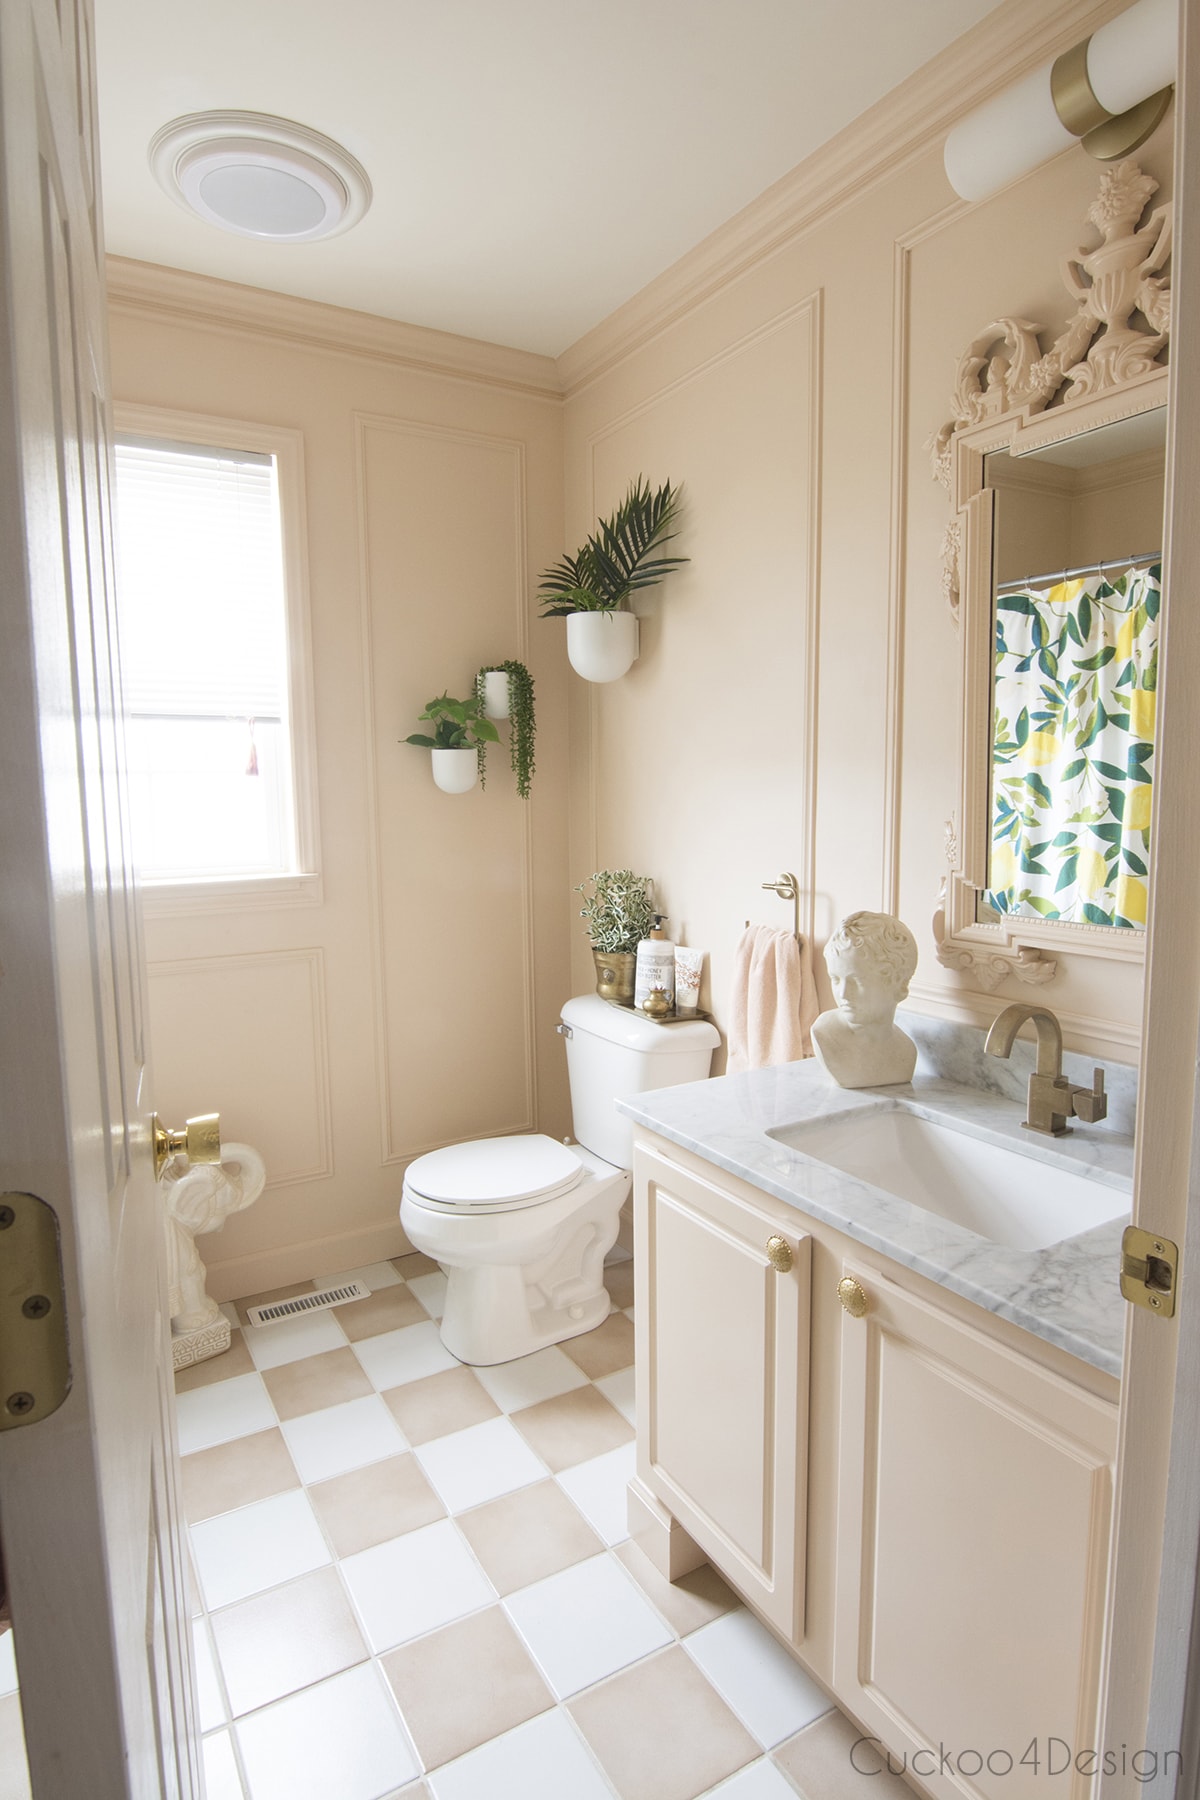
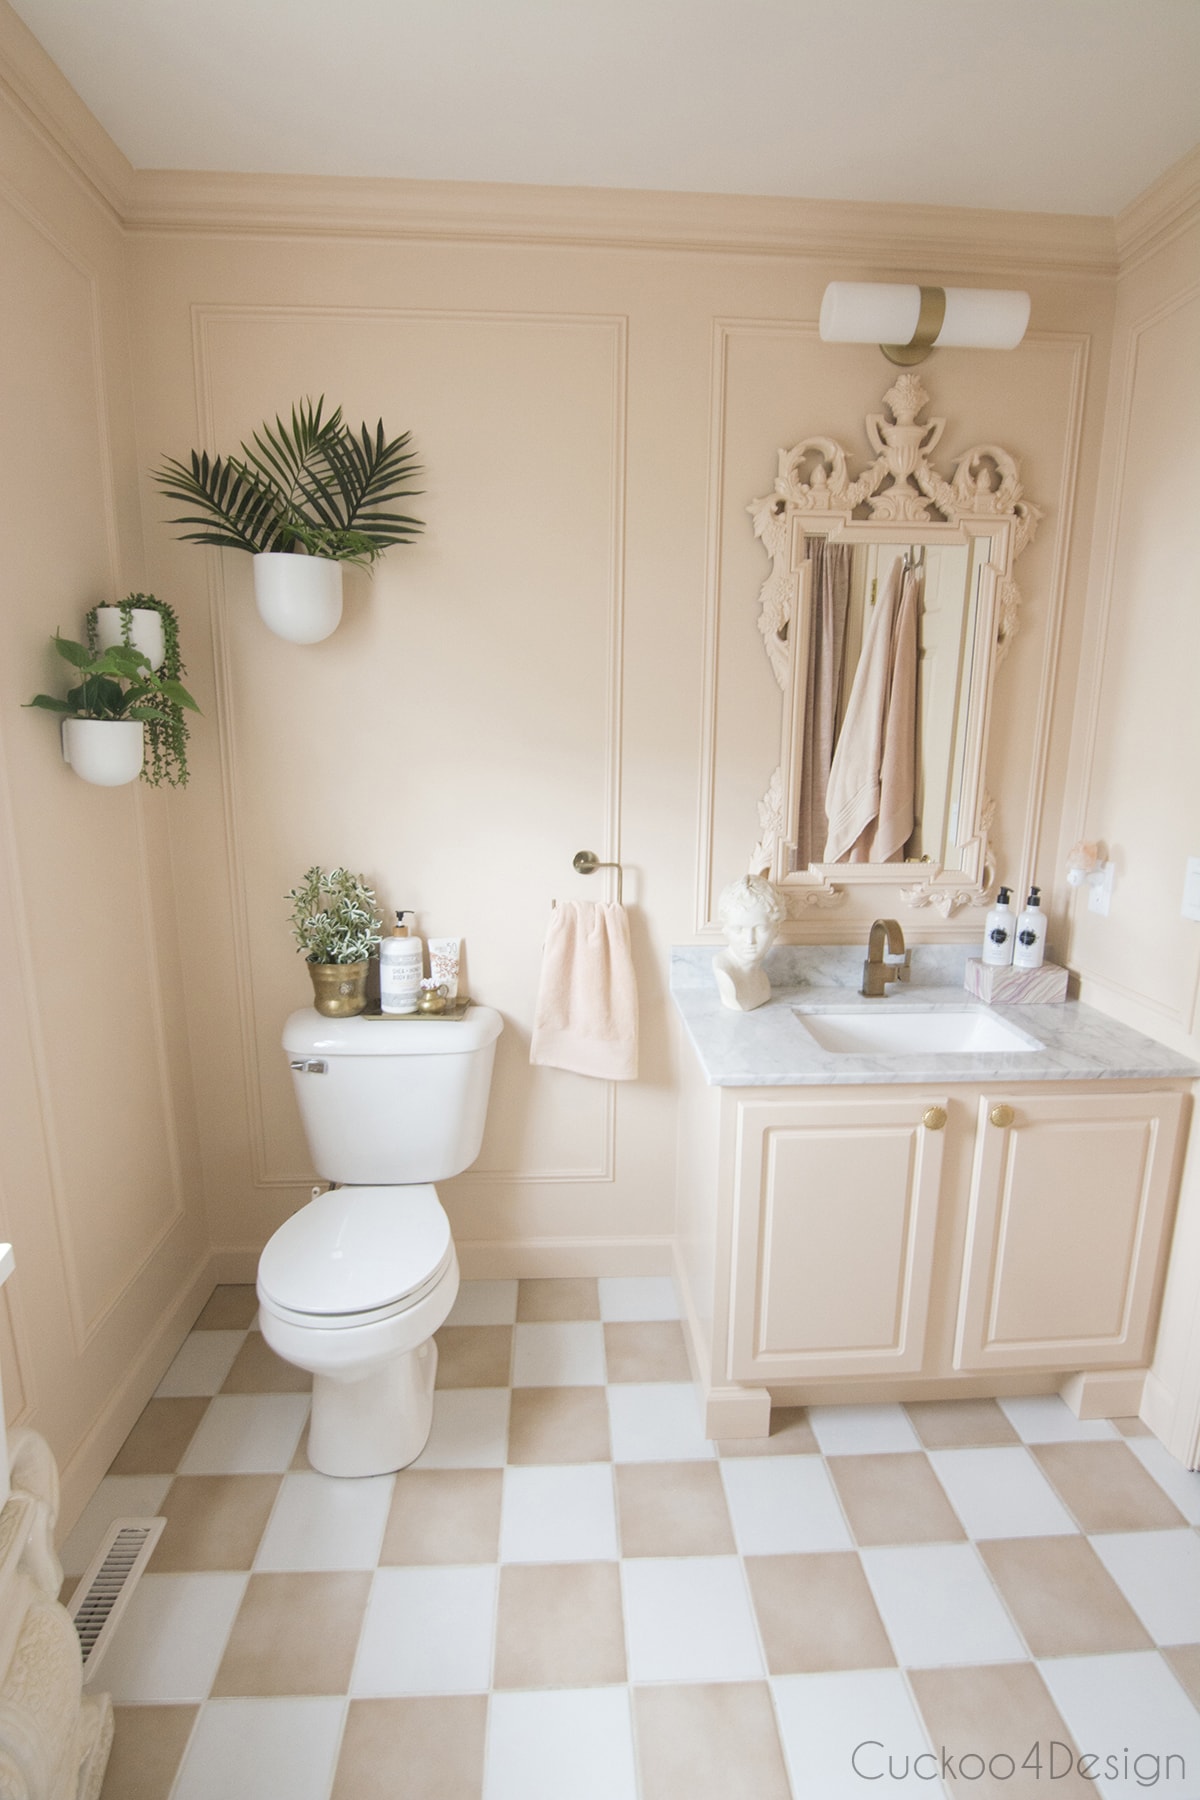
My Blush Bathroom Remodel
This post may contain affiliate links from which I will earn a commission at no extra cost to you. View my full disclosure policy.
Working with what you already have
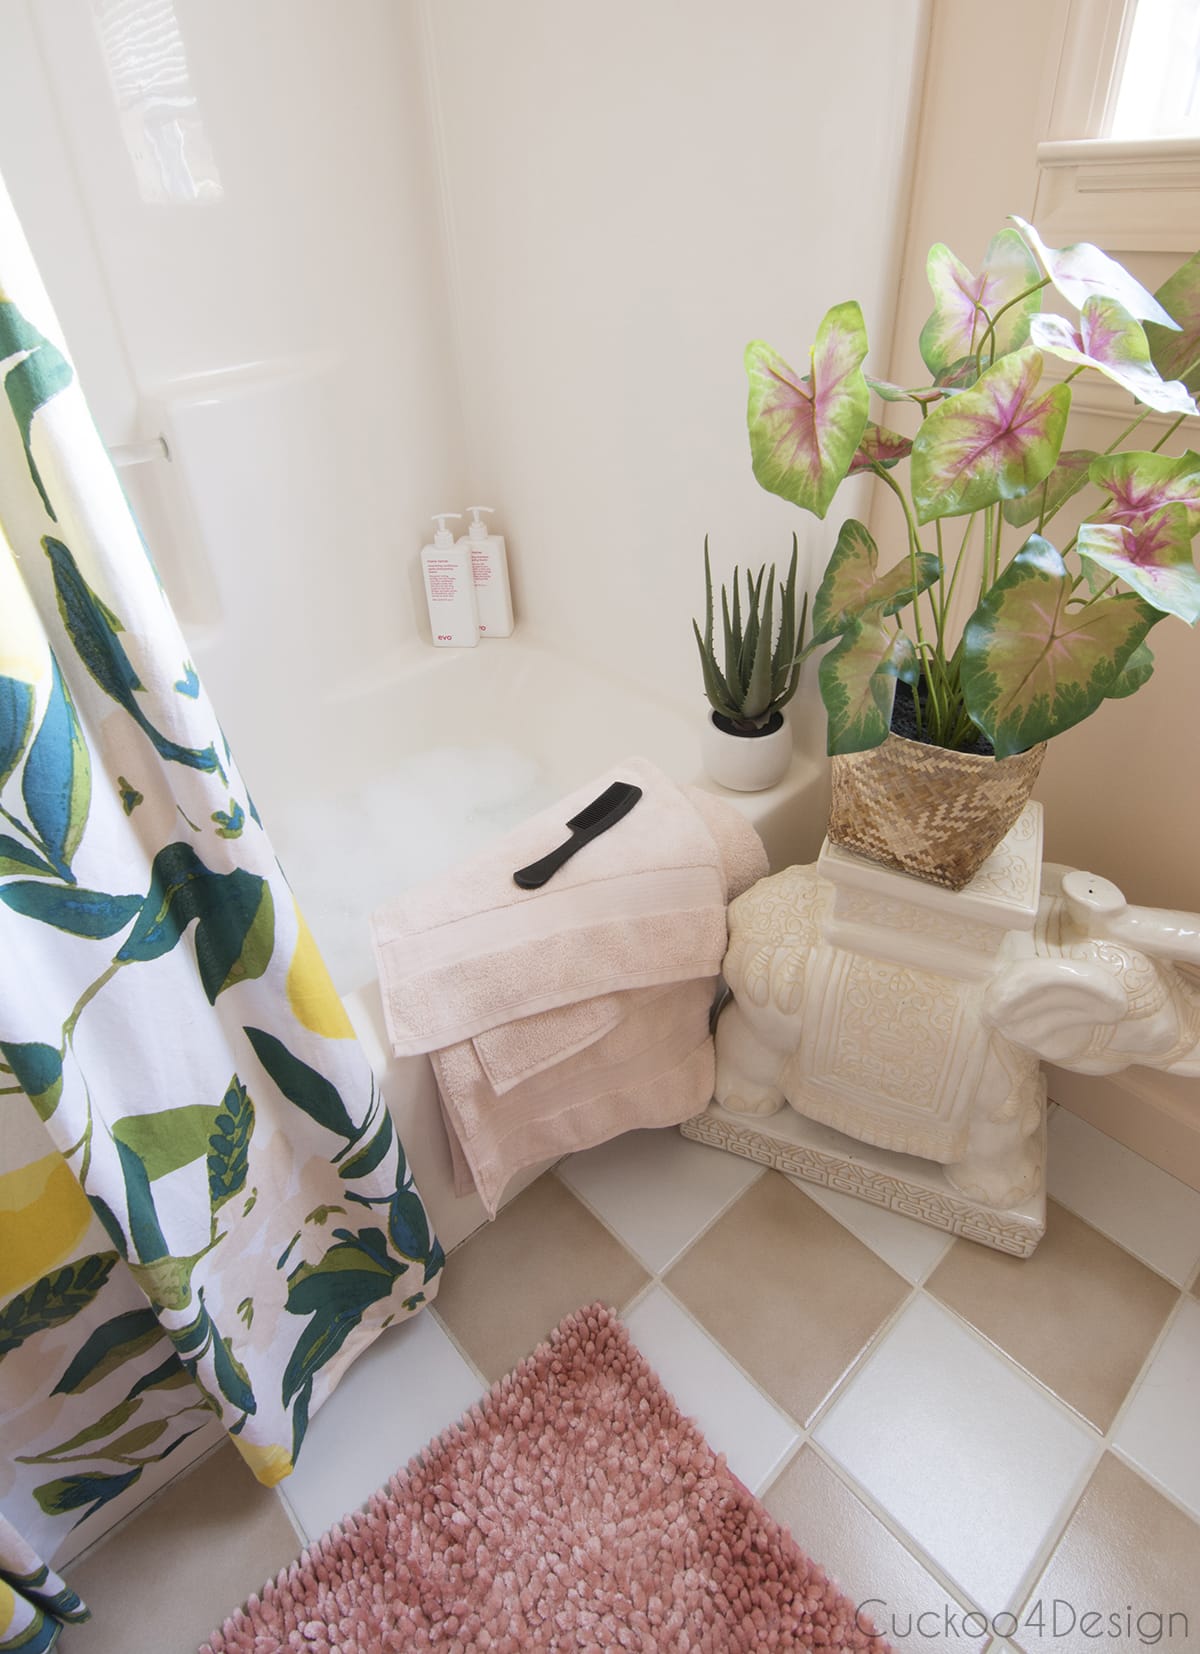
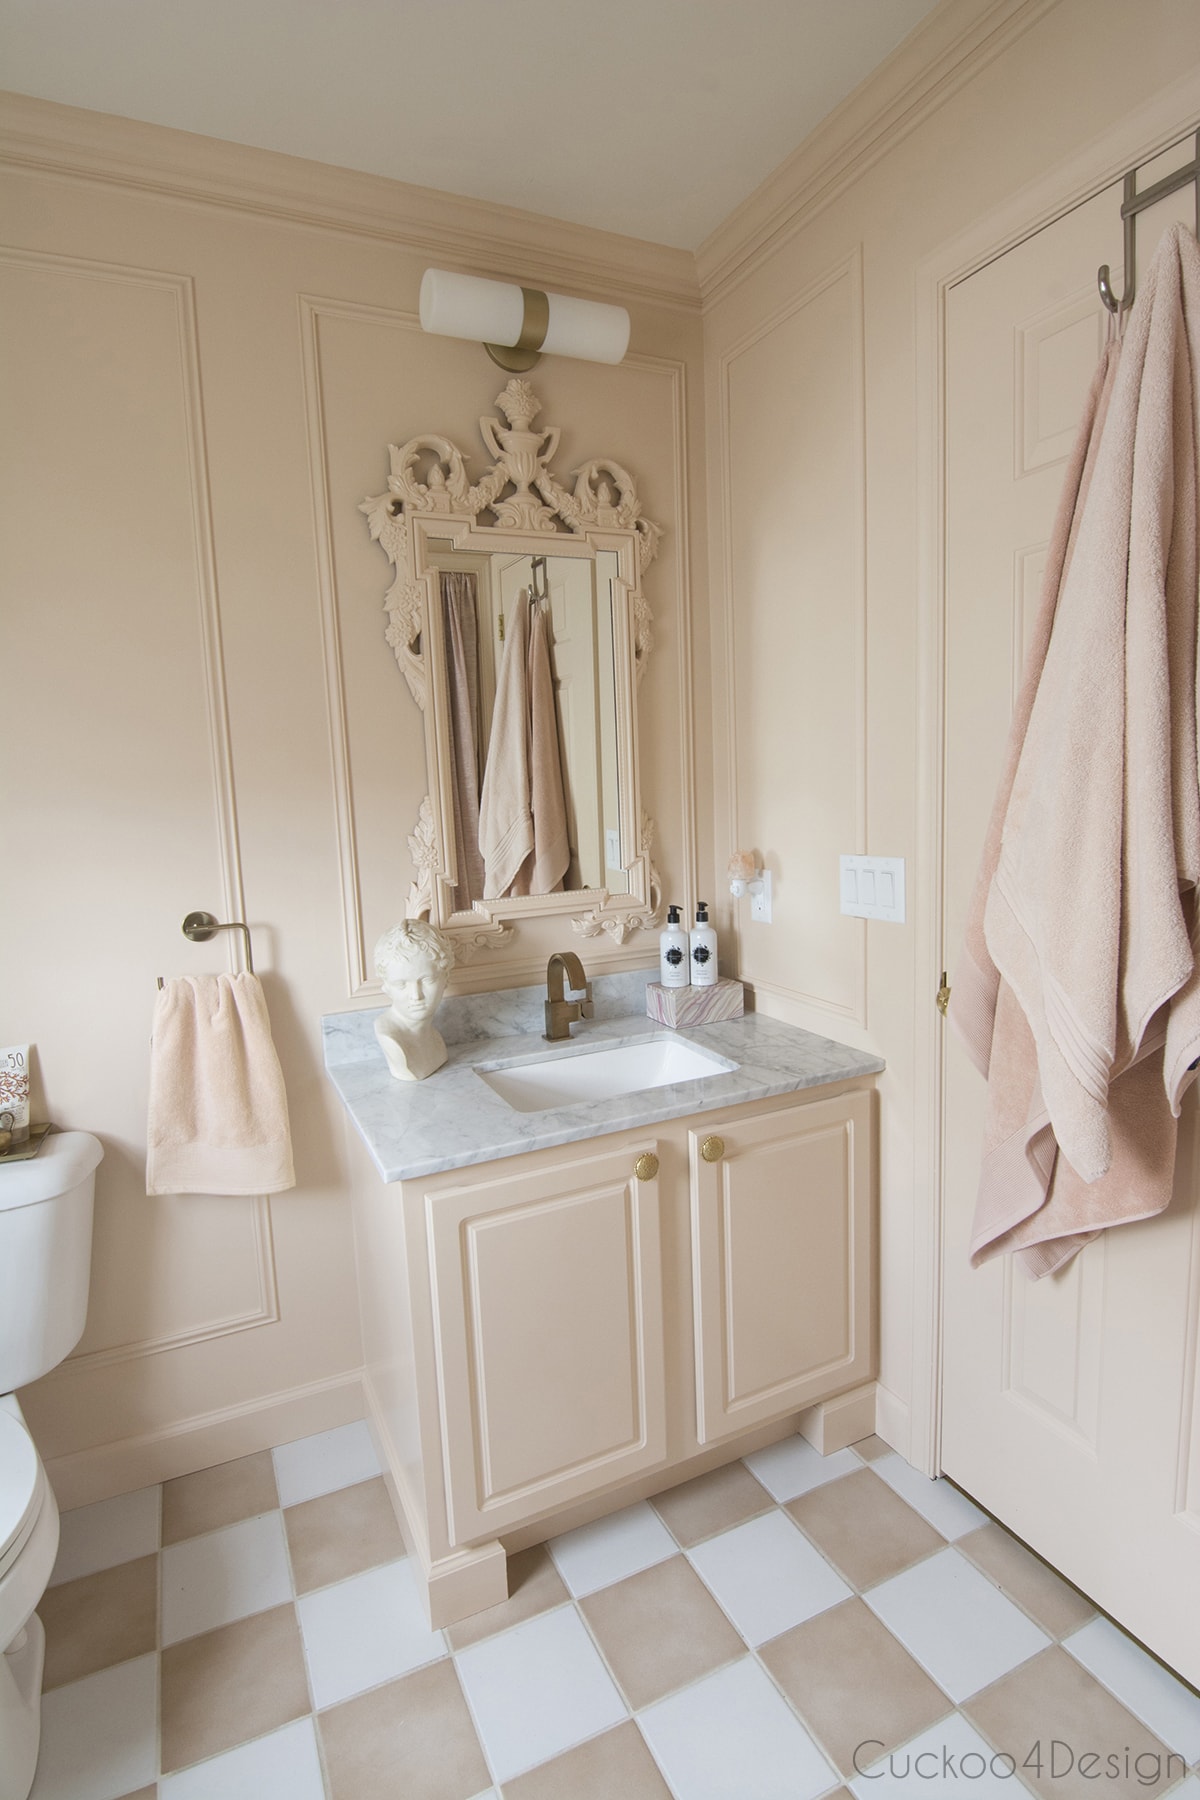
I thought to myself that the 20-year-old ceramic checkerboard tile isn’t awful, the vanity could be made over just like my powder room cabinet downstairs and my kitchen cabinets, and I could add some cheerful accents. So why not just give it a little facelift that makes me happy when I look at it? Mostly working with what you already have in place is always a good thing unless you have the money to do something bigger and most people don’t.
When the tile was installed about 20 years ago by my husband’s uncle, I had originally wanted them installed on a diagonal. I like that look so much better! But, guess what? He didn’t feel like it and it was too late when I came to inspect to change it since they were cemented down already. I was super aggravated and still think of that when I look at the tile. To this day we still have a ton of boxes left that would have been needed for a diagonal installation.
This is what I already had for the bathroom:
- the tile
- tub
- vanity
- cabinet hardware
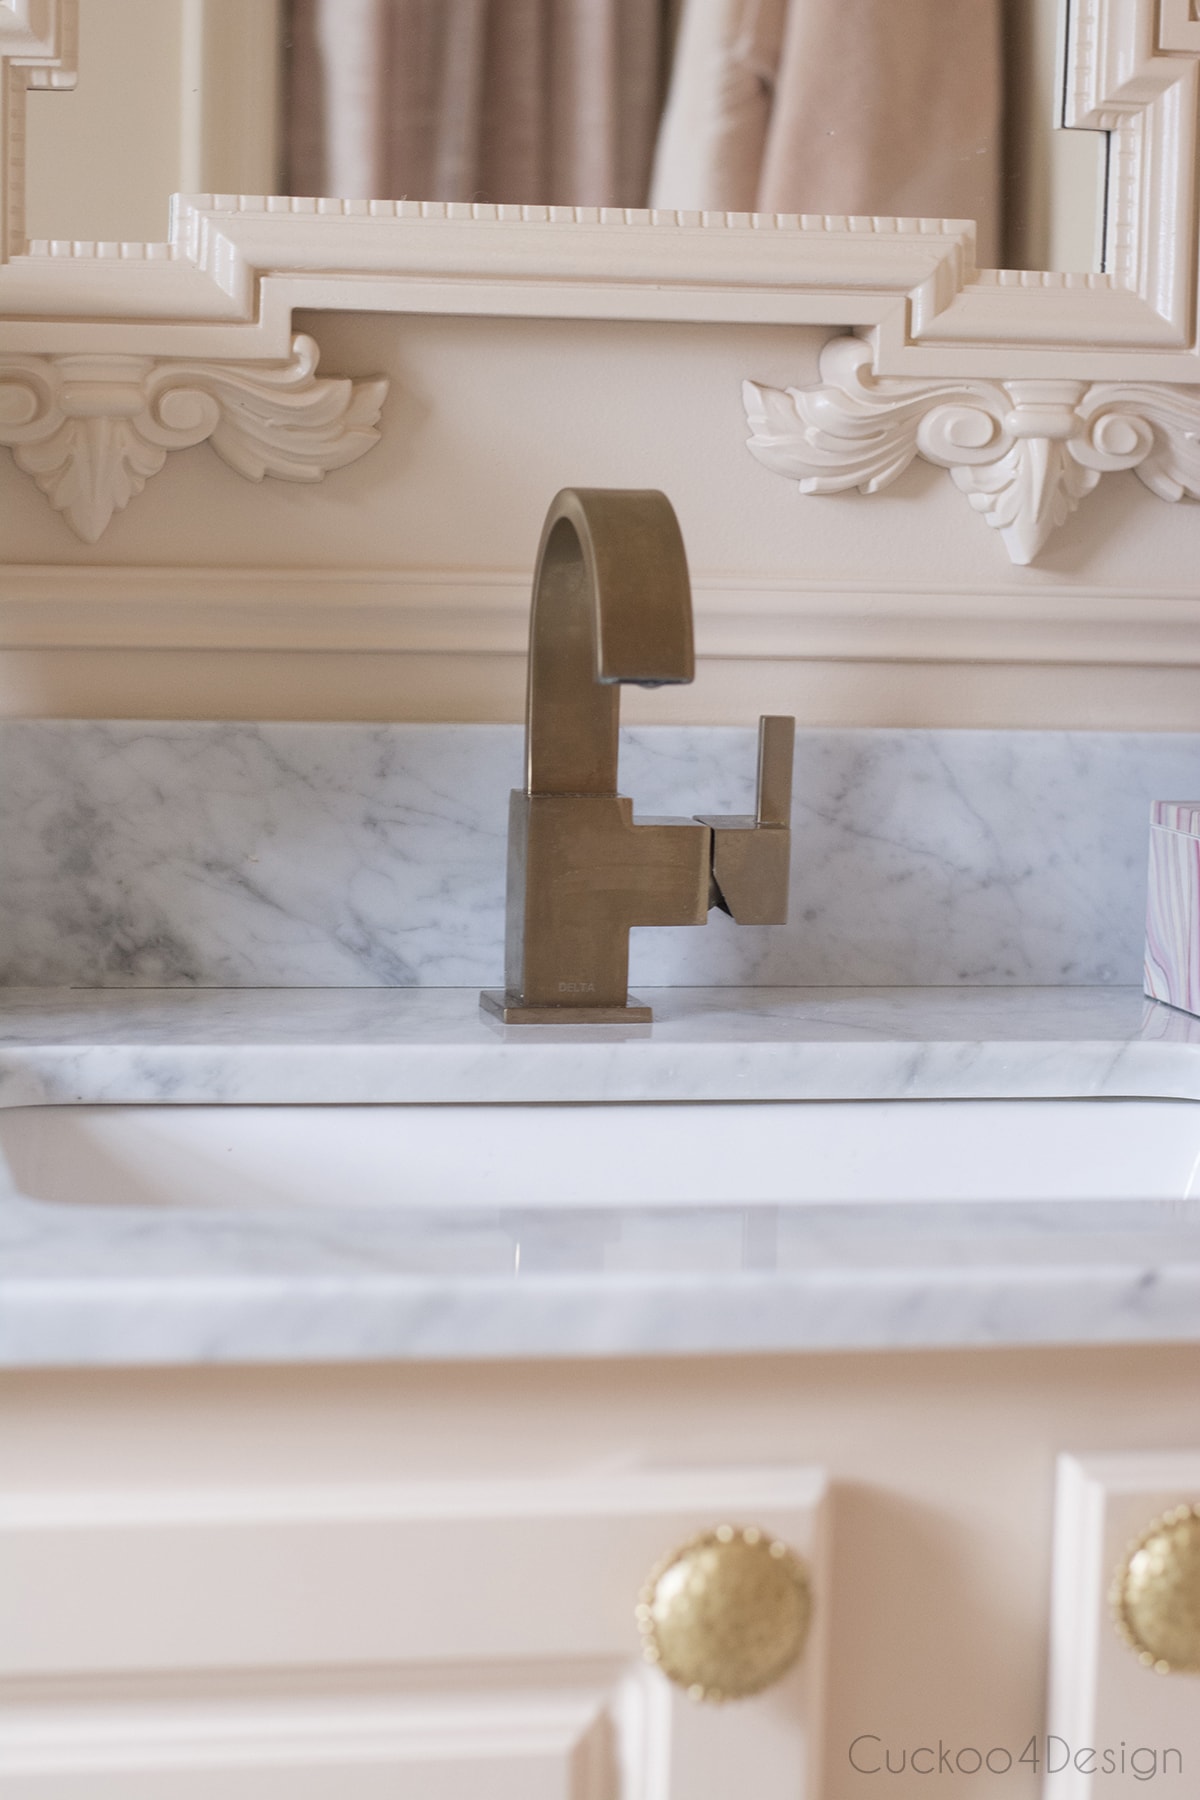
- faucet (HERE)
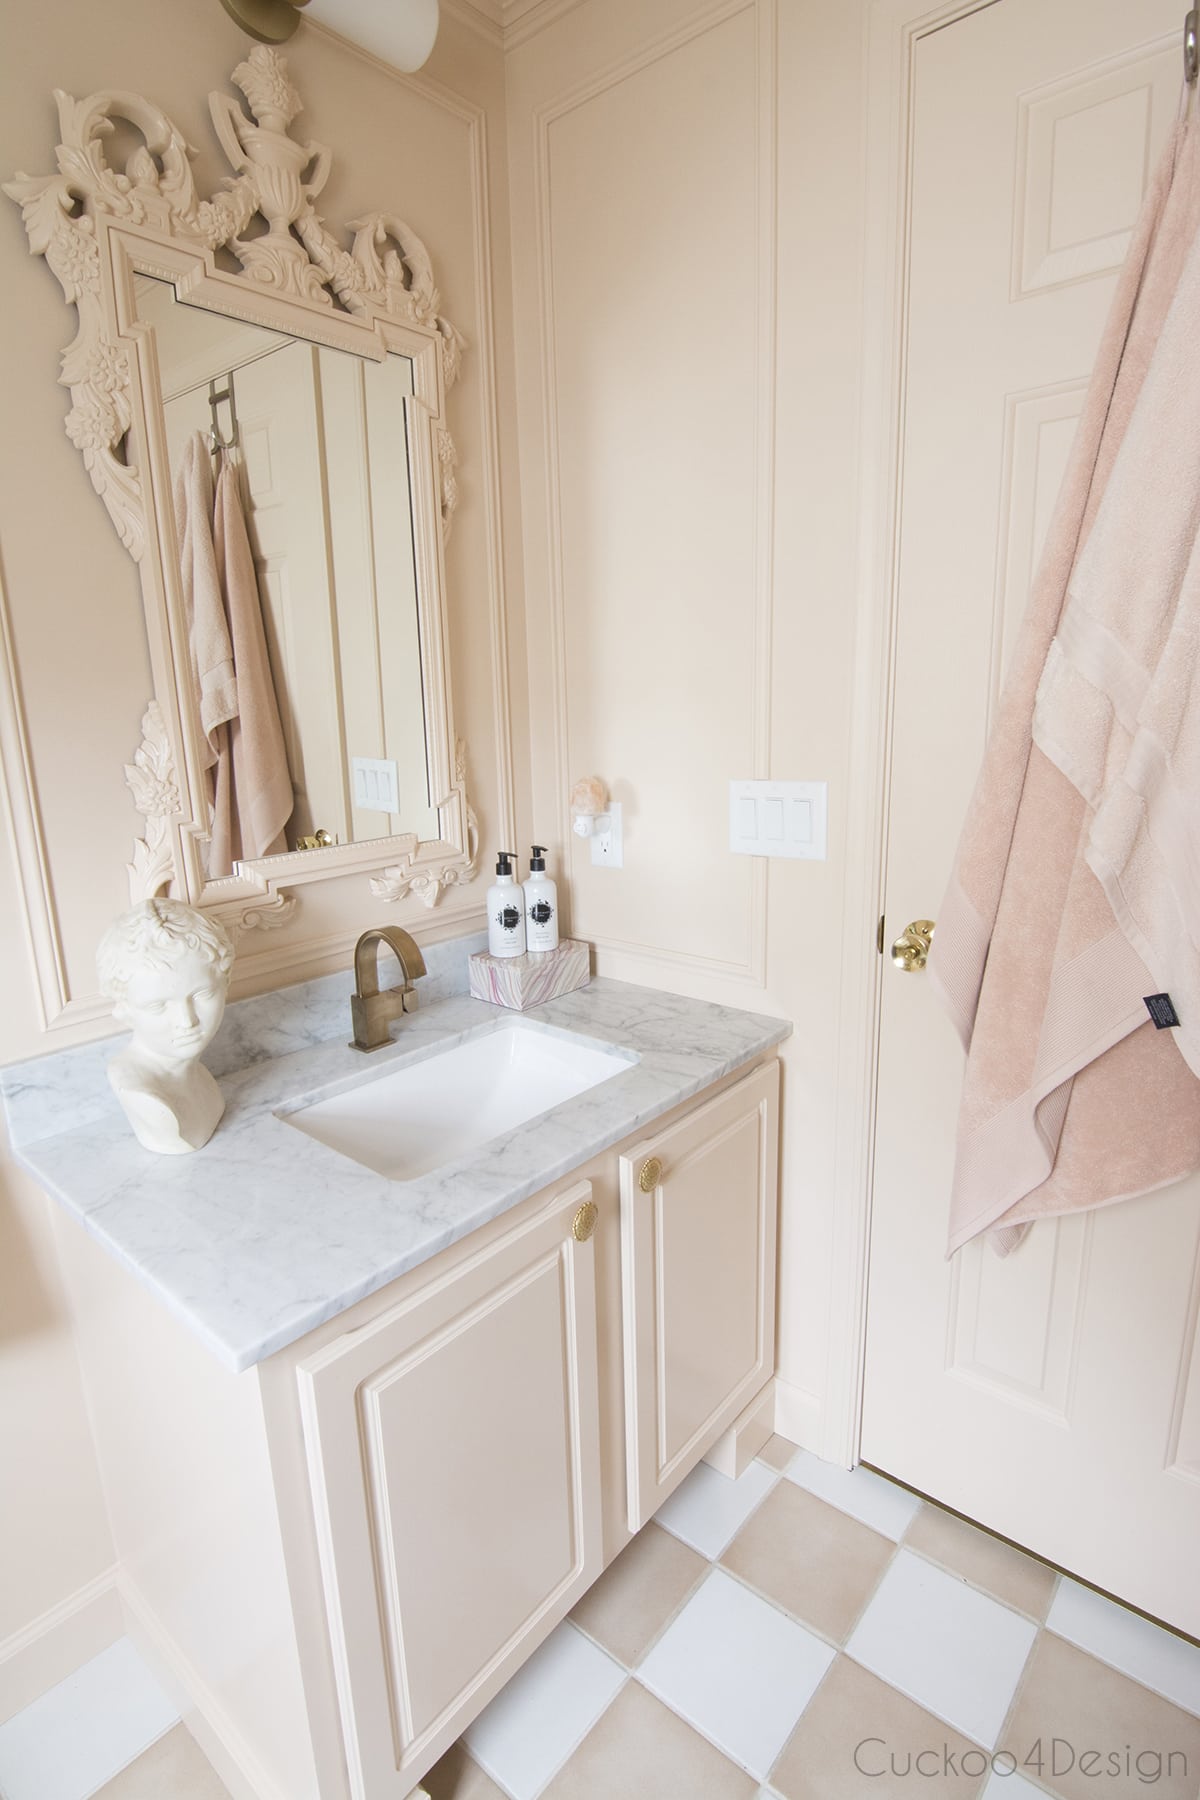
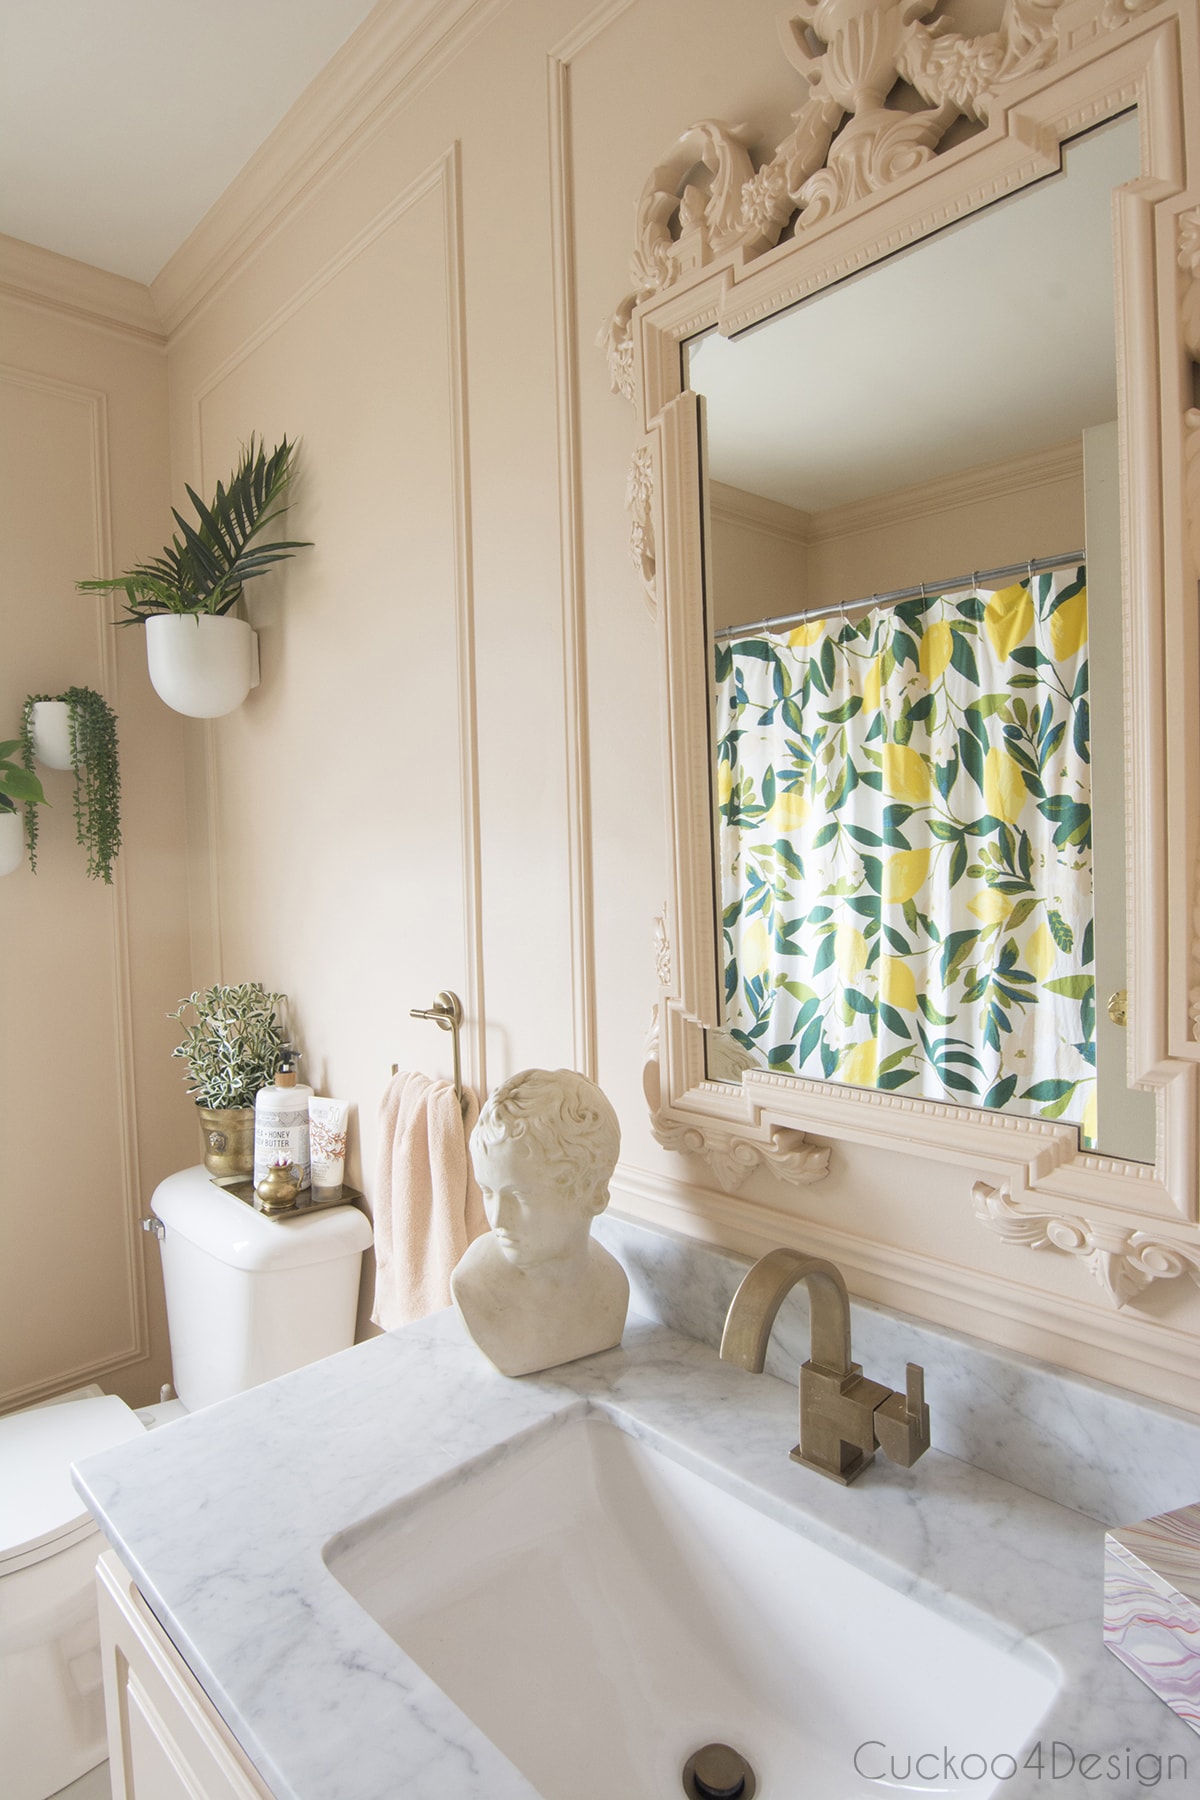
- mirror (free Craigslist find)
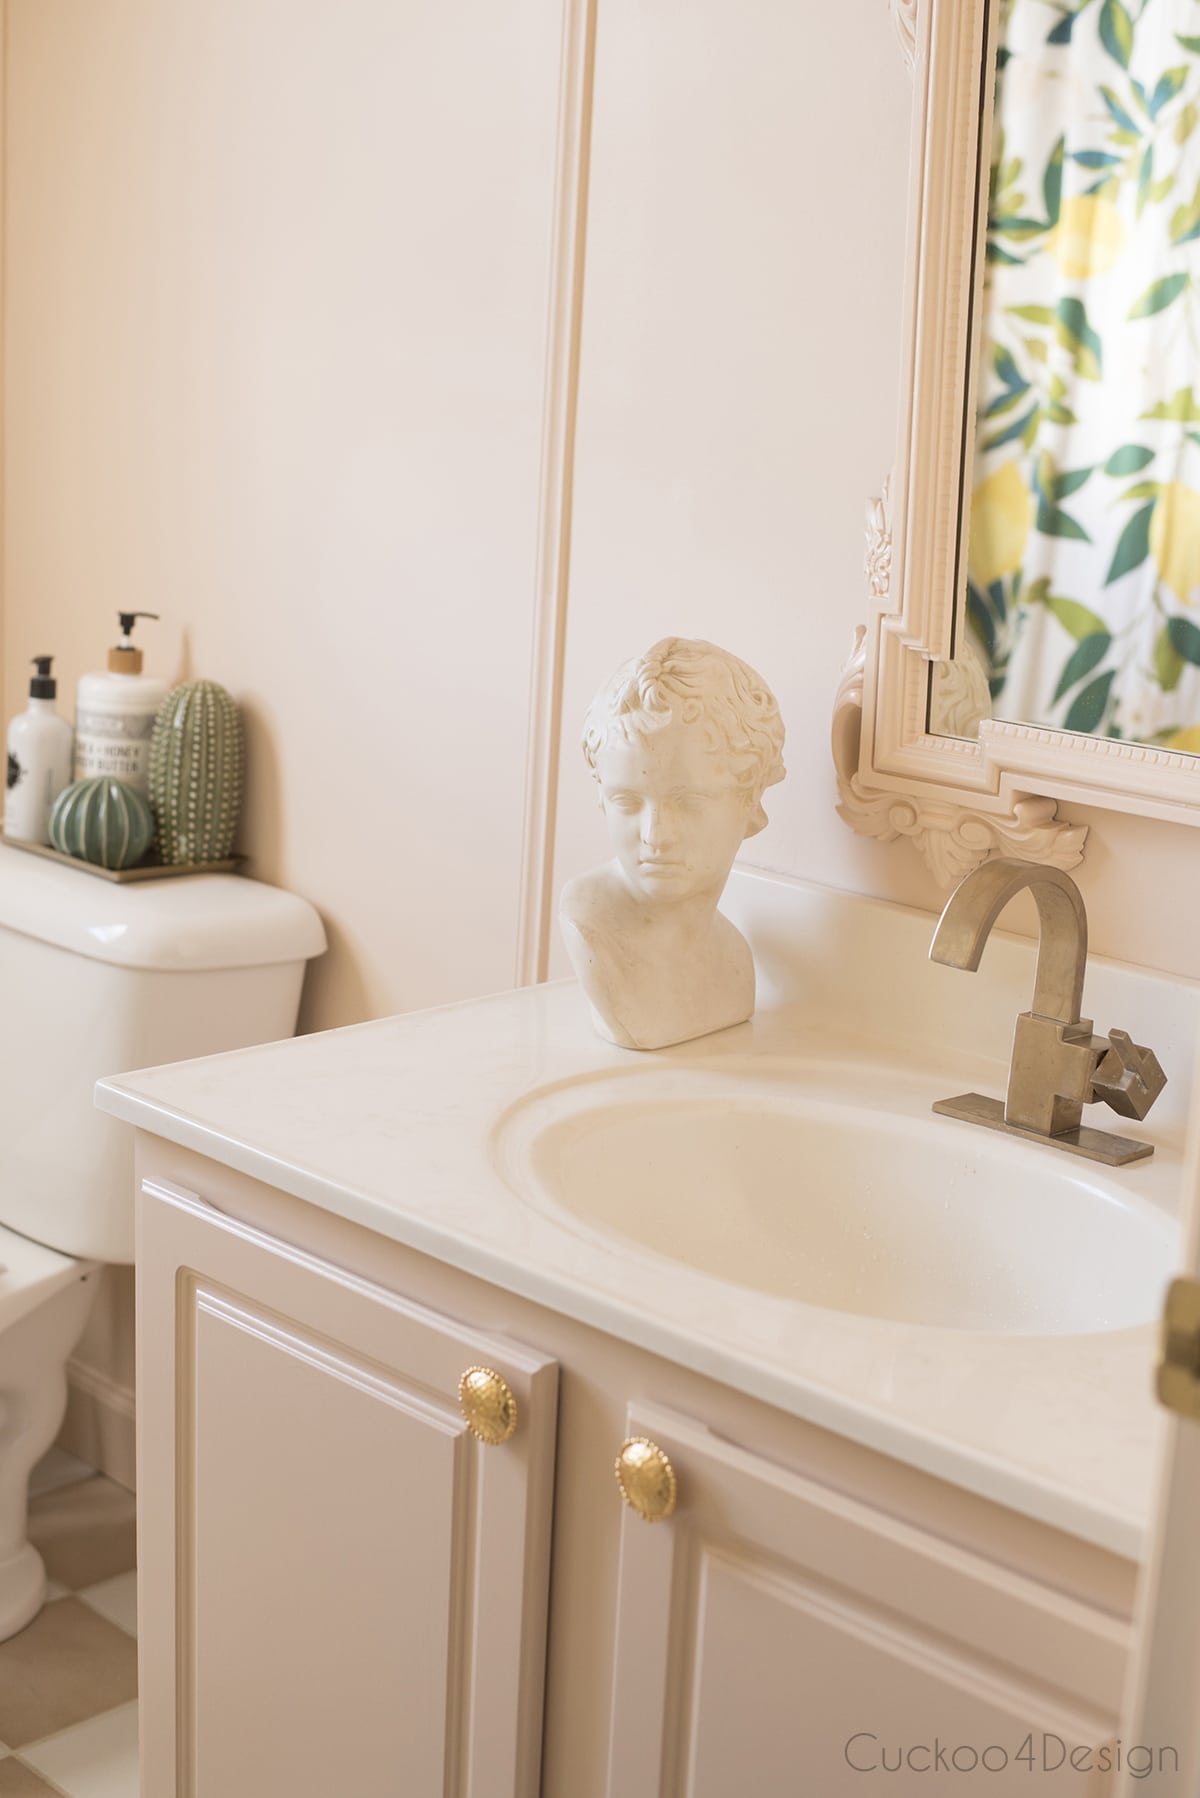
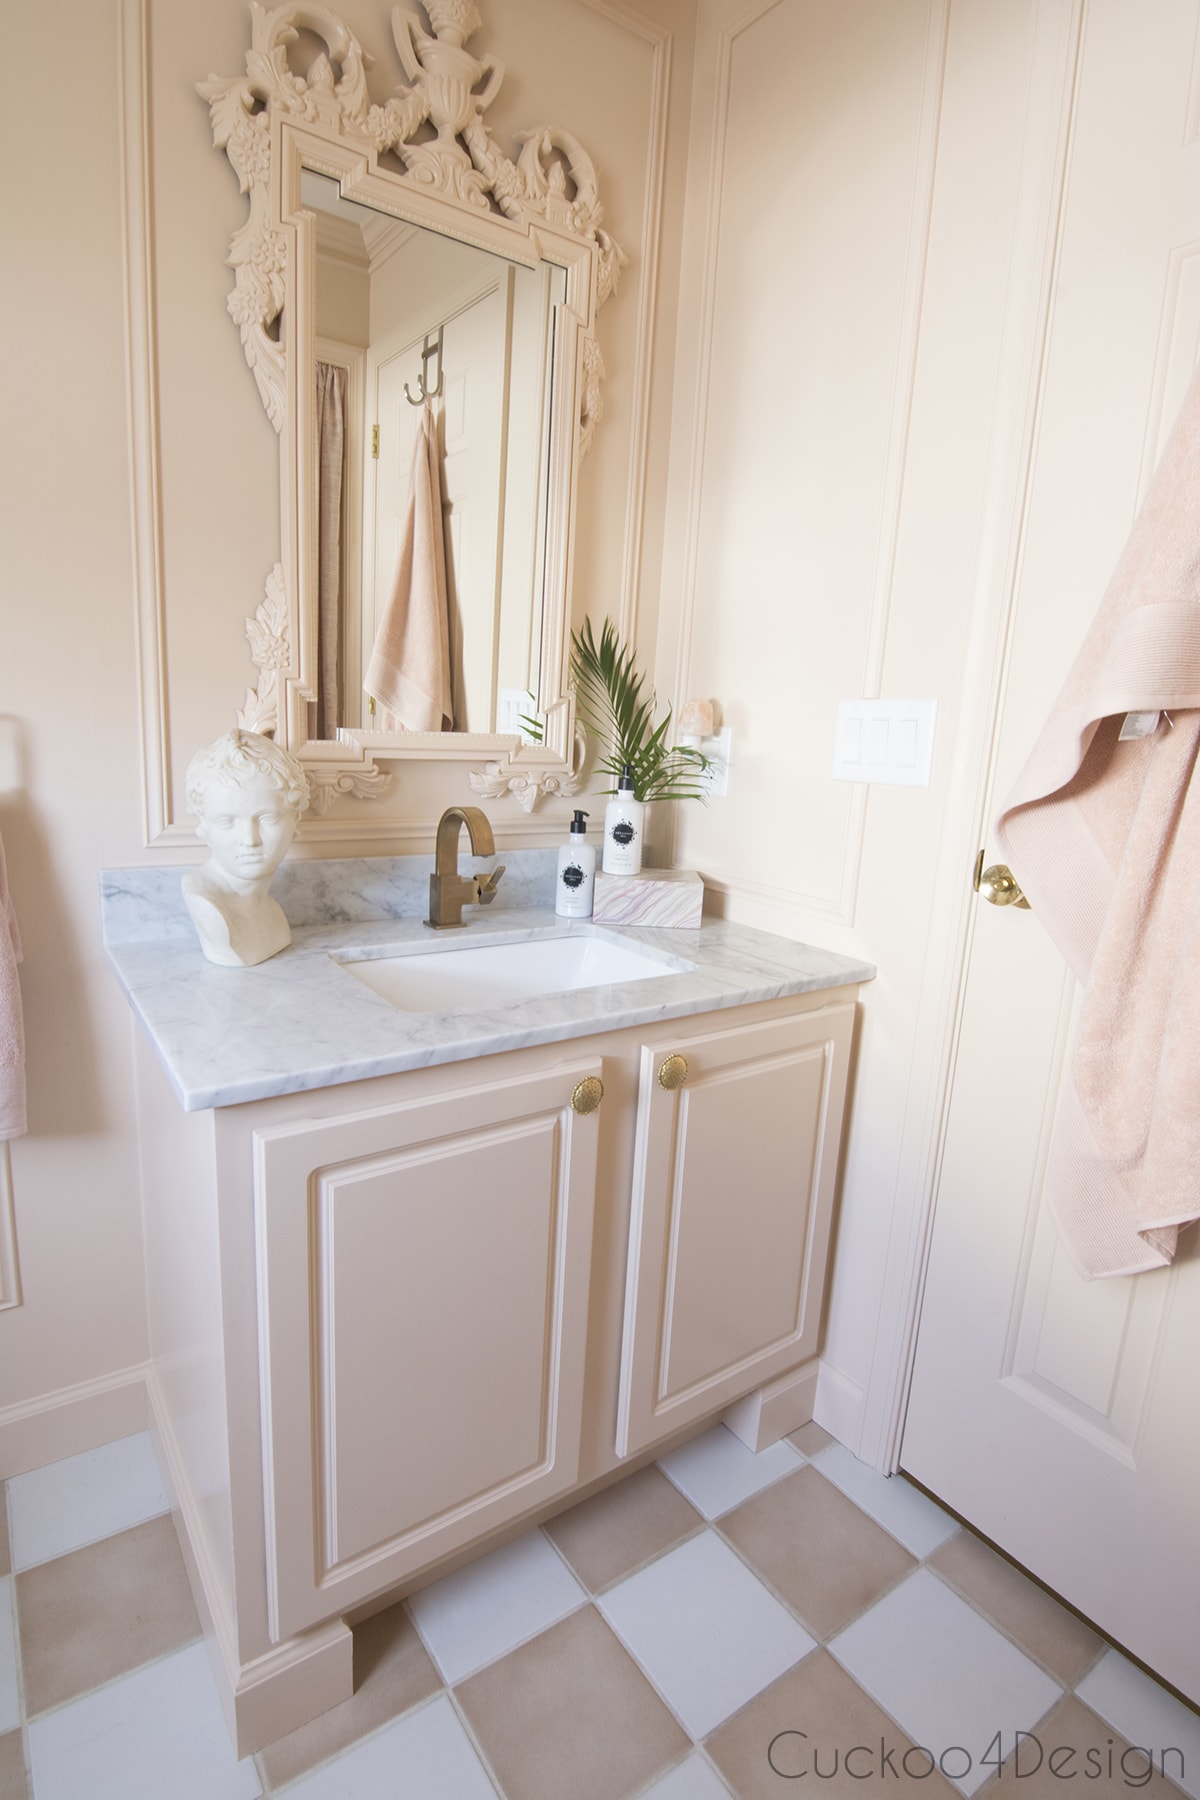
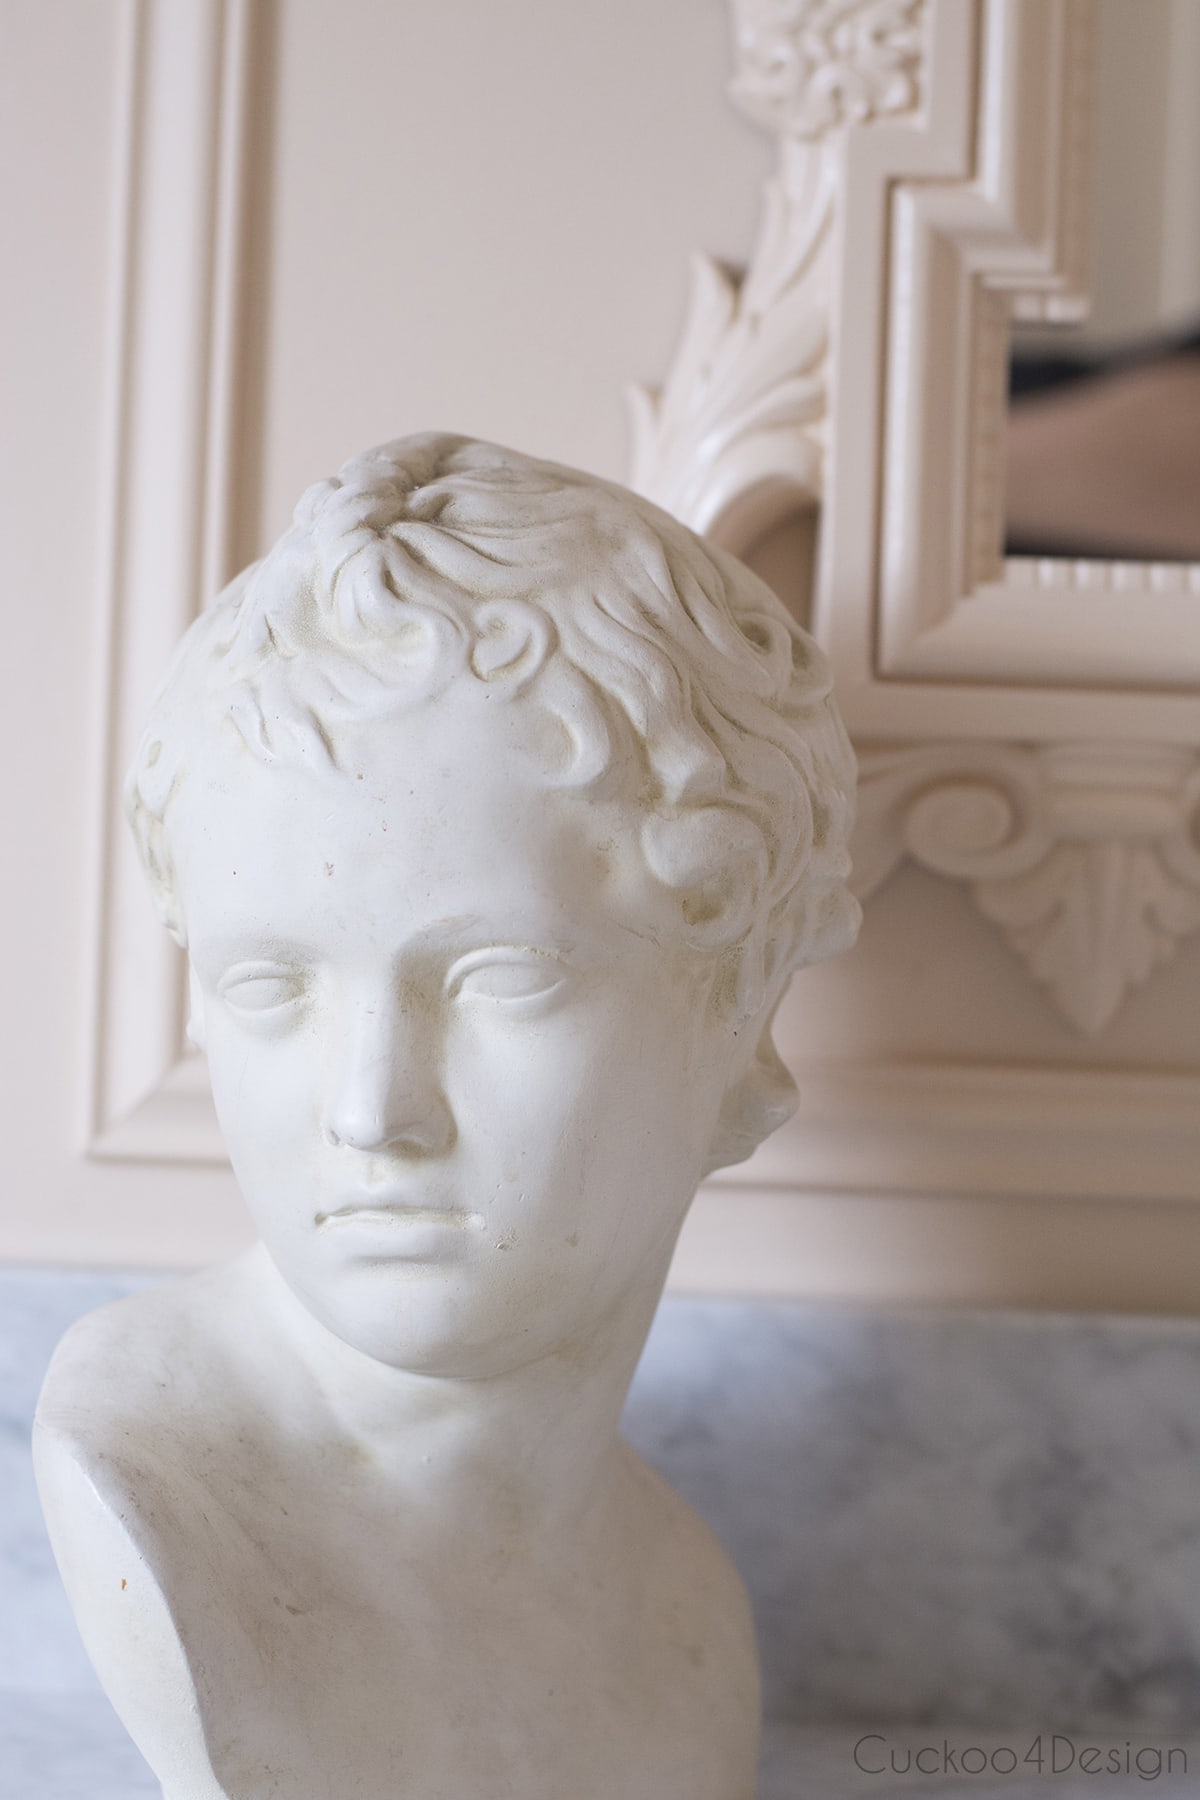
- bust of a girl (from Germany)
- window shade
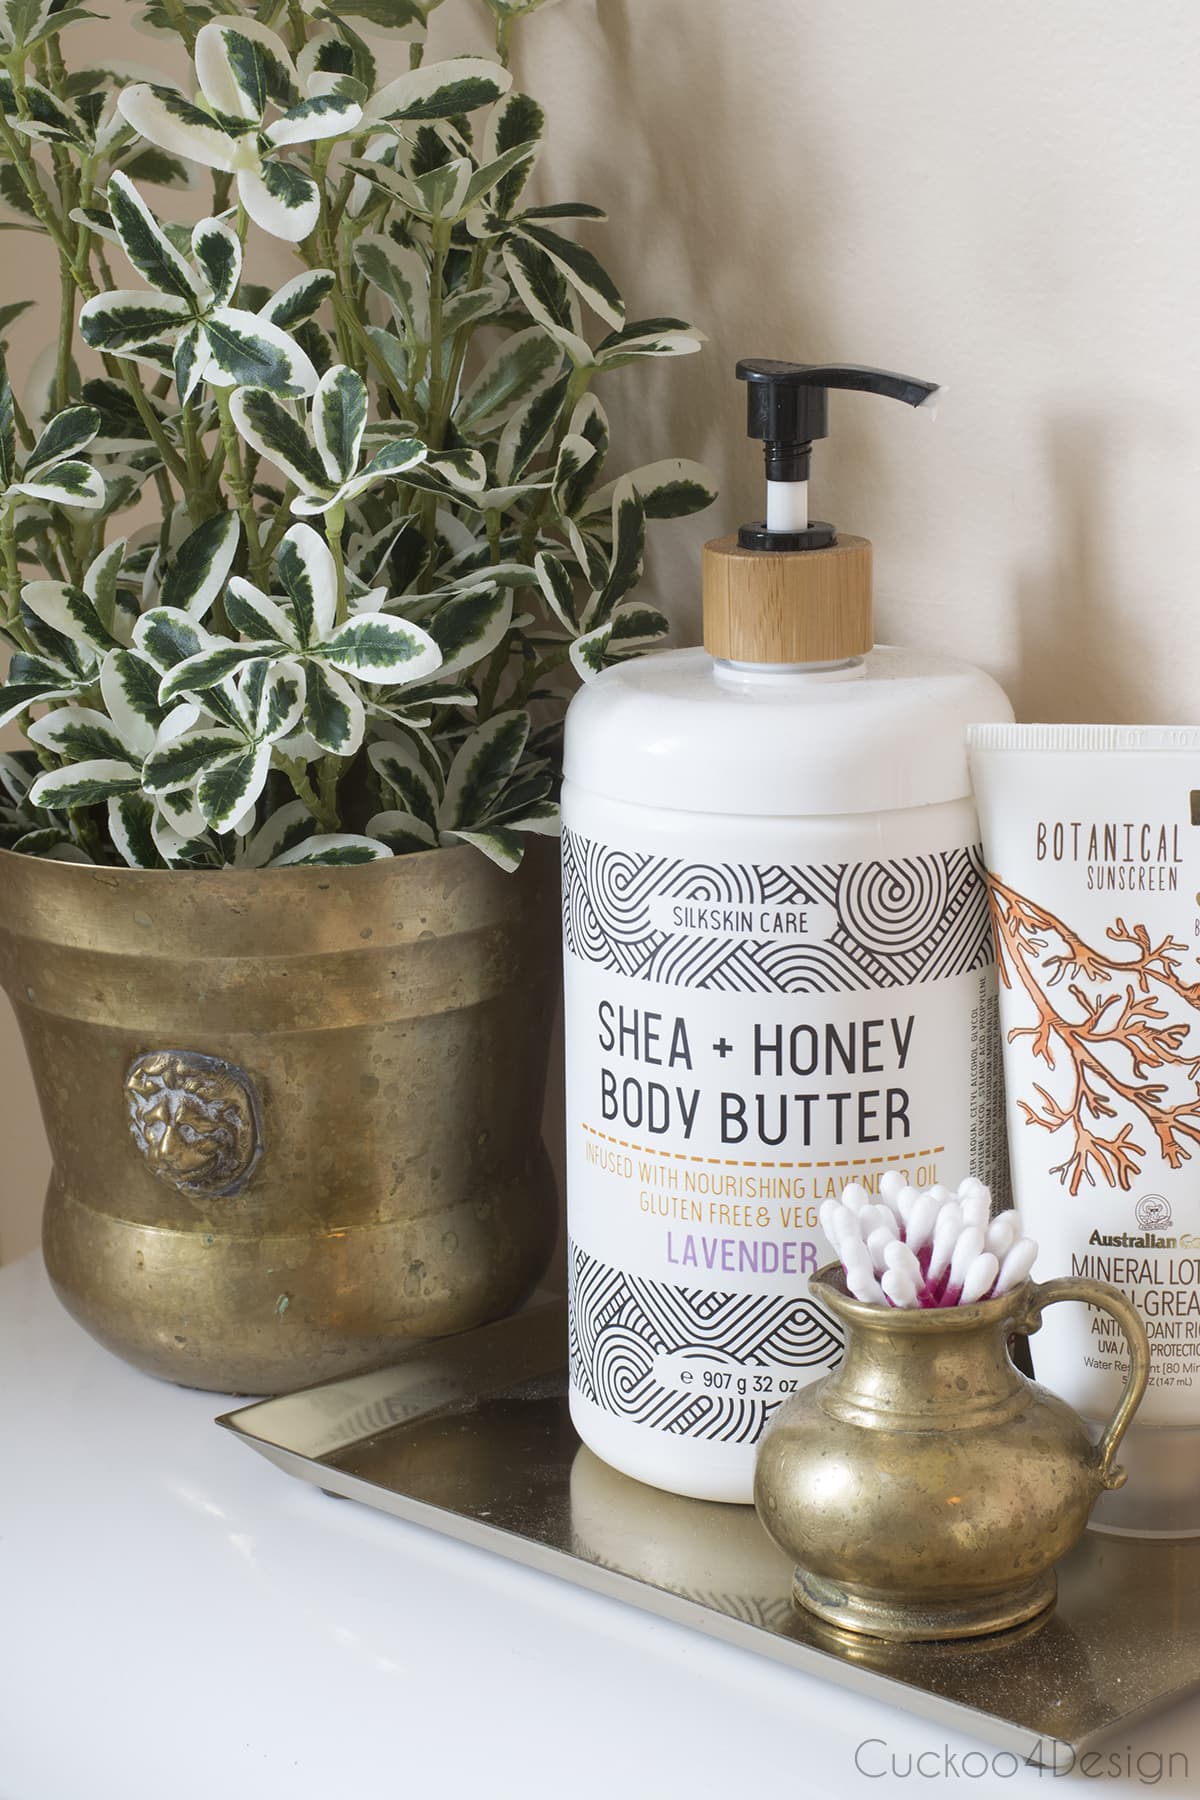
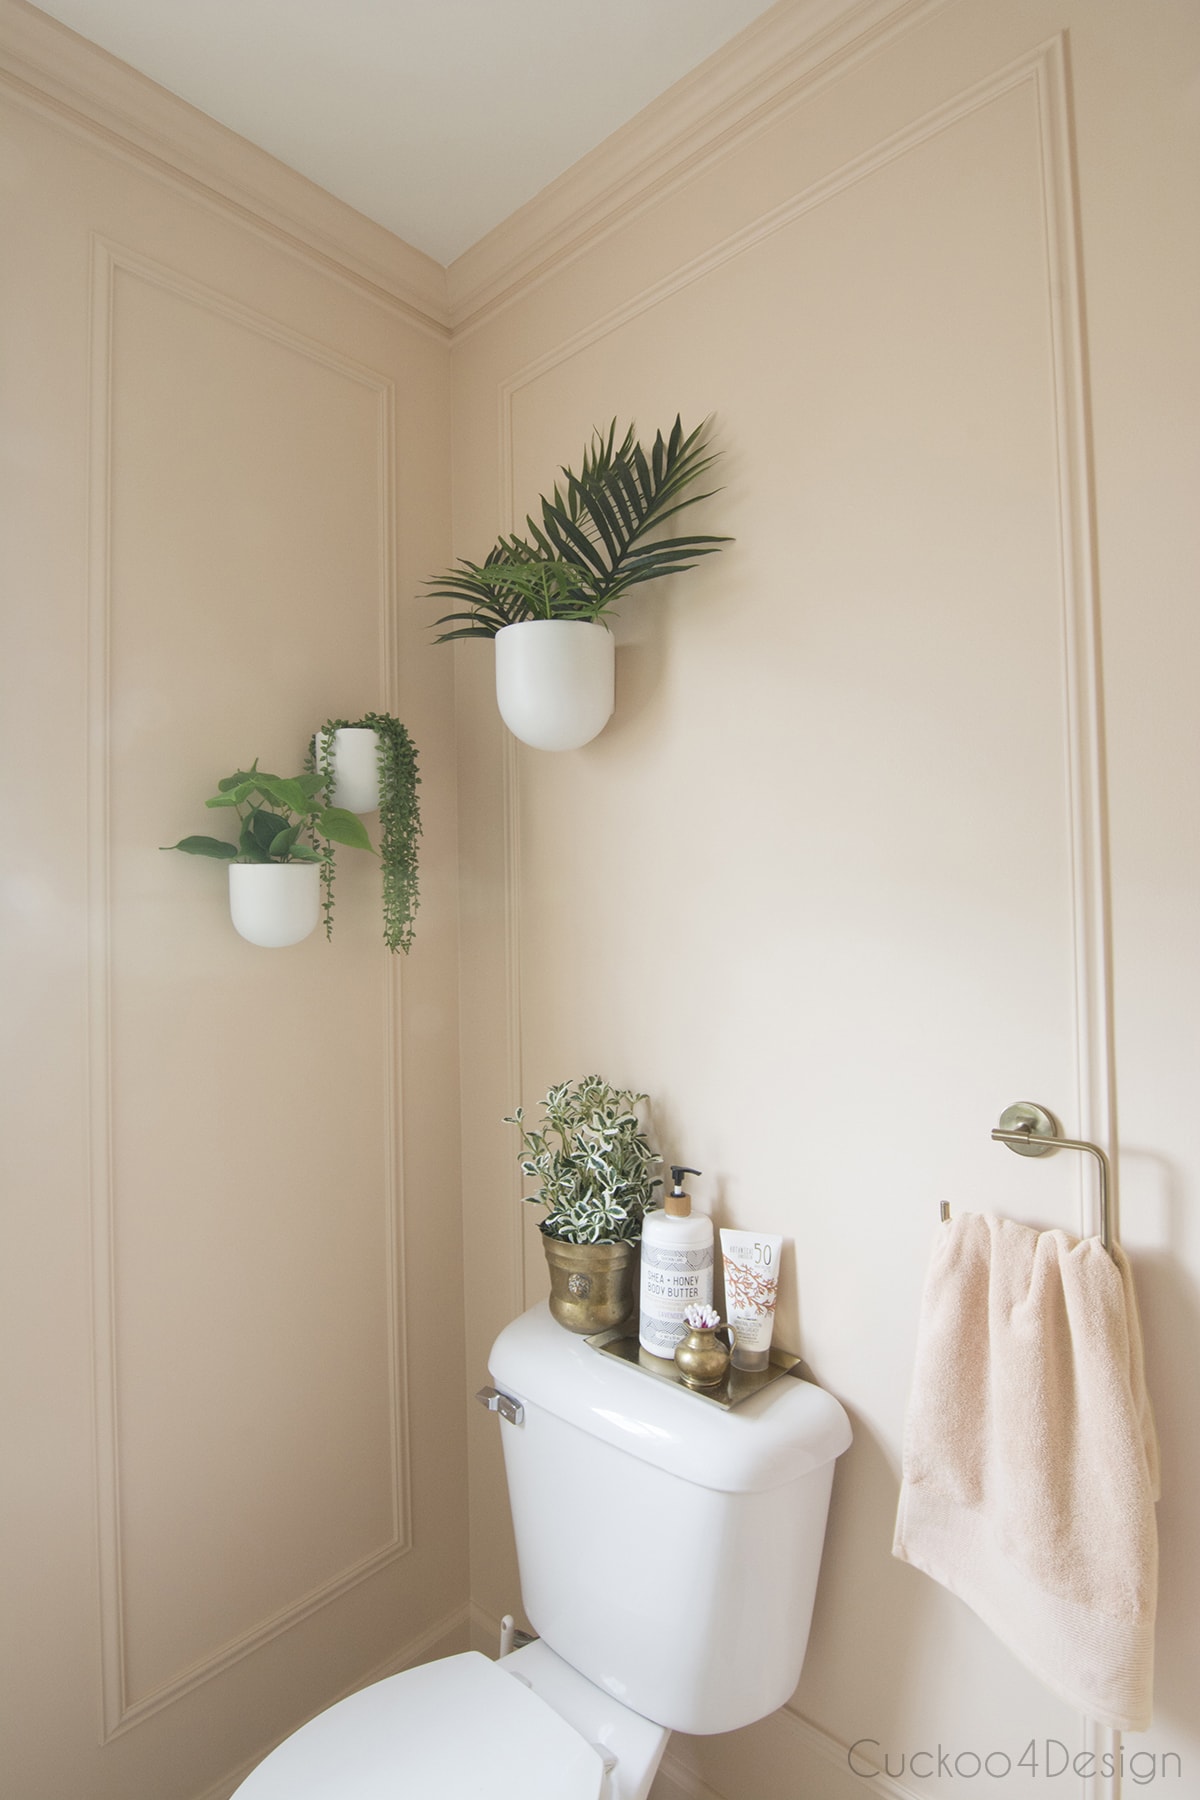
- elephant plant stand (HERE)
Here is what I bought new for the space:
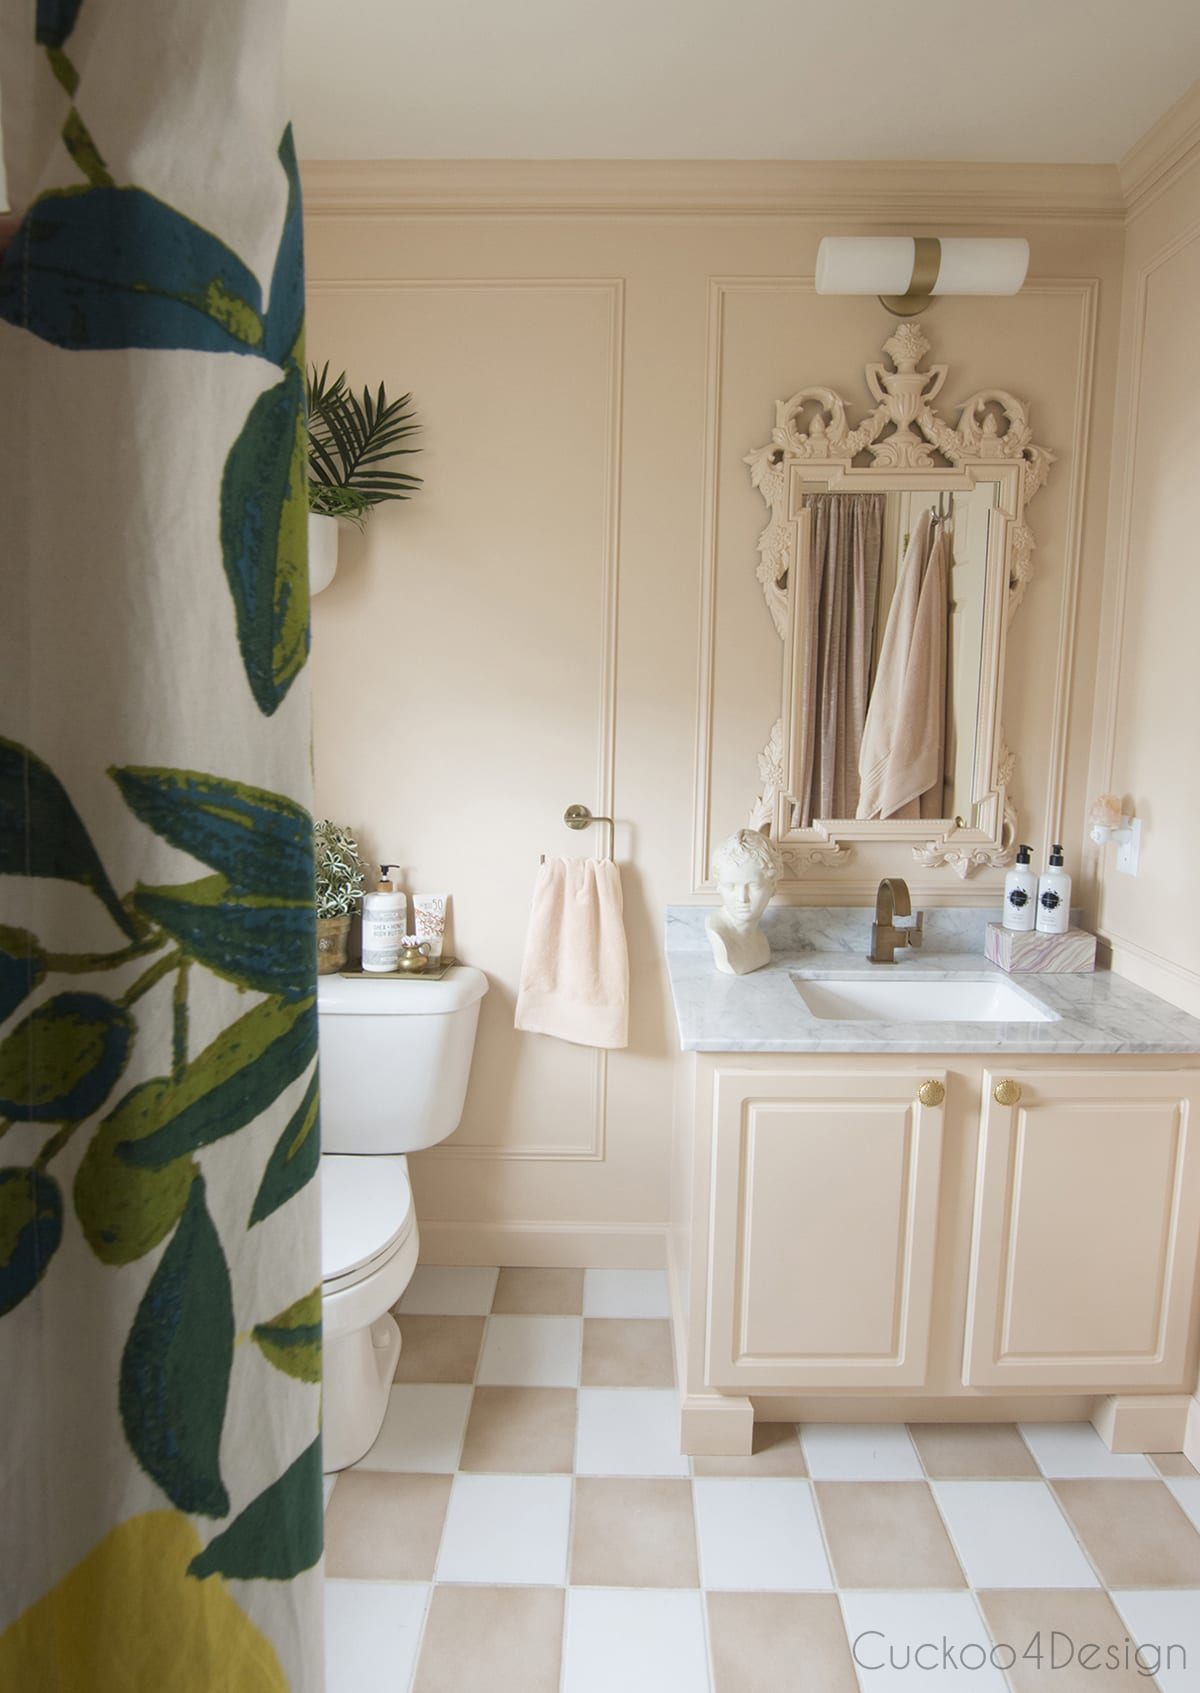
- shower curtain (HERE)
- vanity light (HERE or HERE which I spray painted gold)
- vanity top (HERE)
- paint (Strawberry Malt by Valspar)
- trim and molding
- curtain for litterbox closet (HERE)
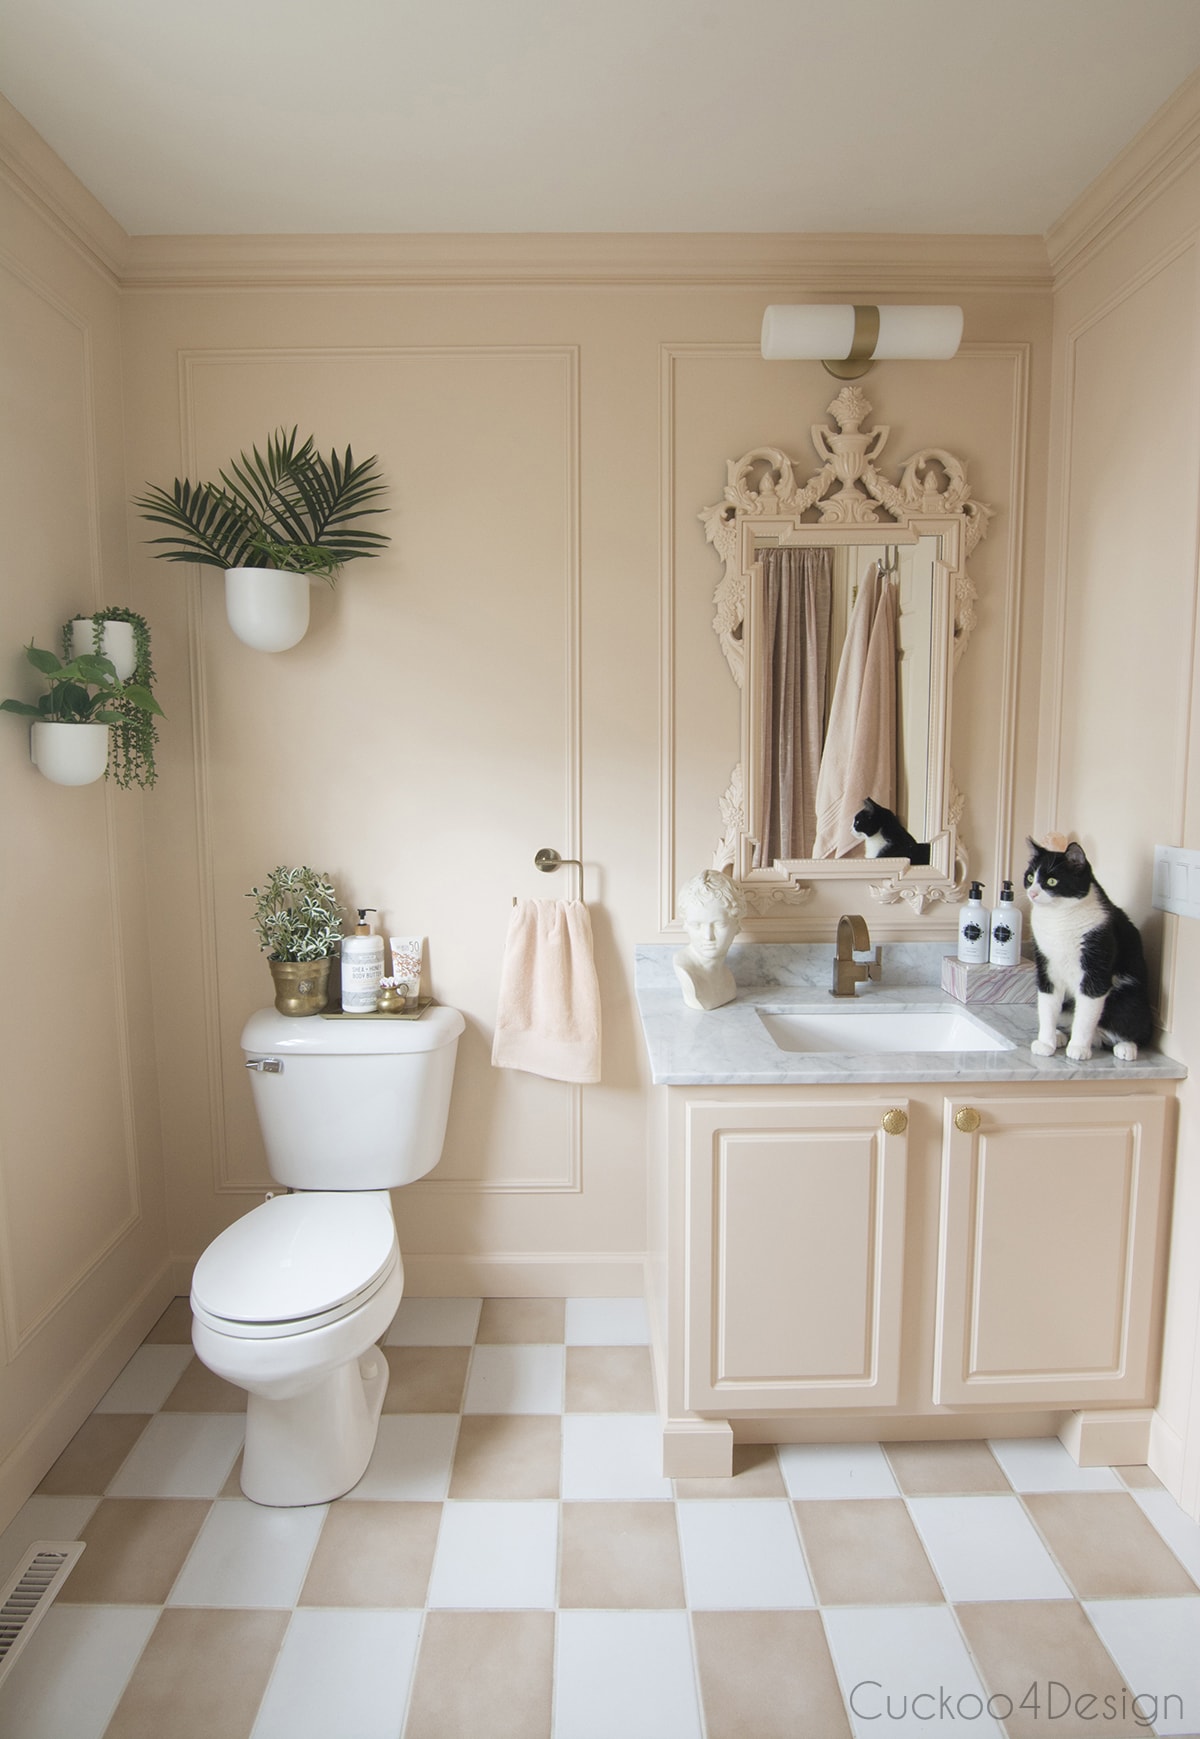
- flower pots (HERE)
- gold tray (HERE)
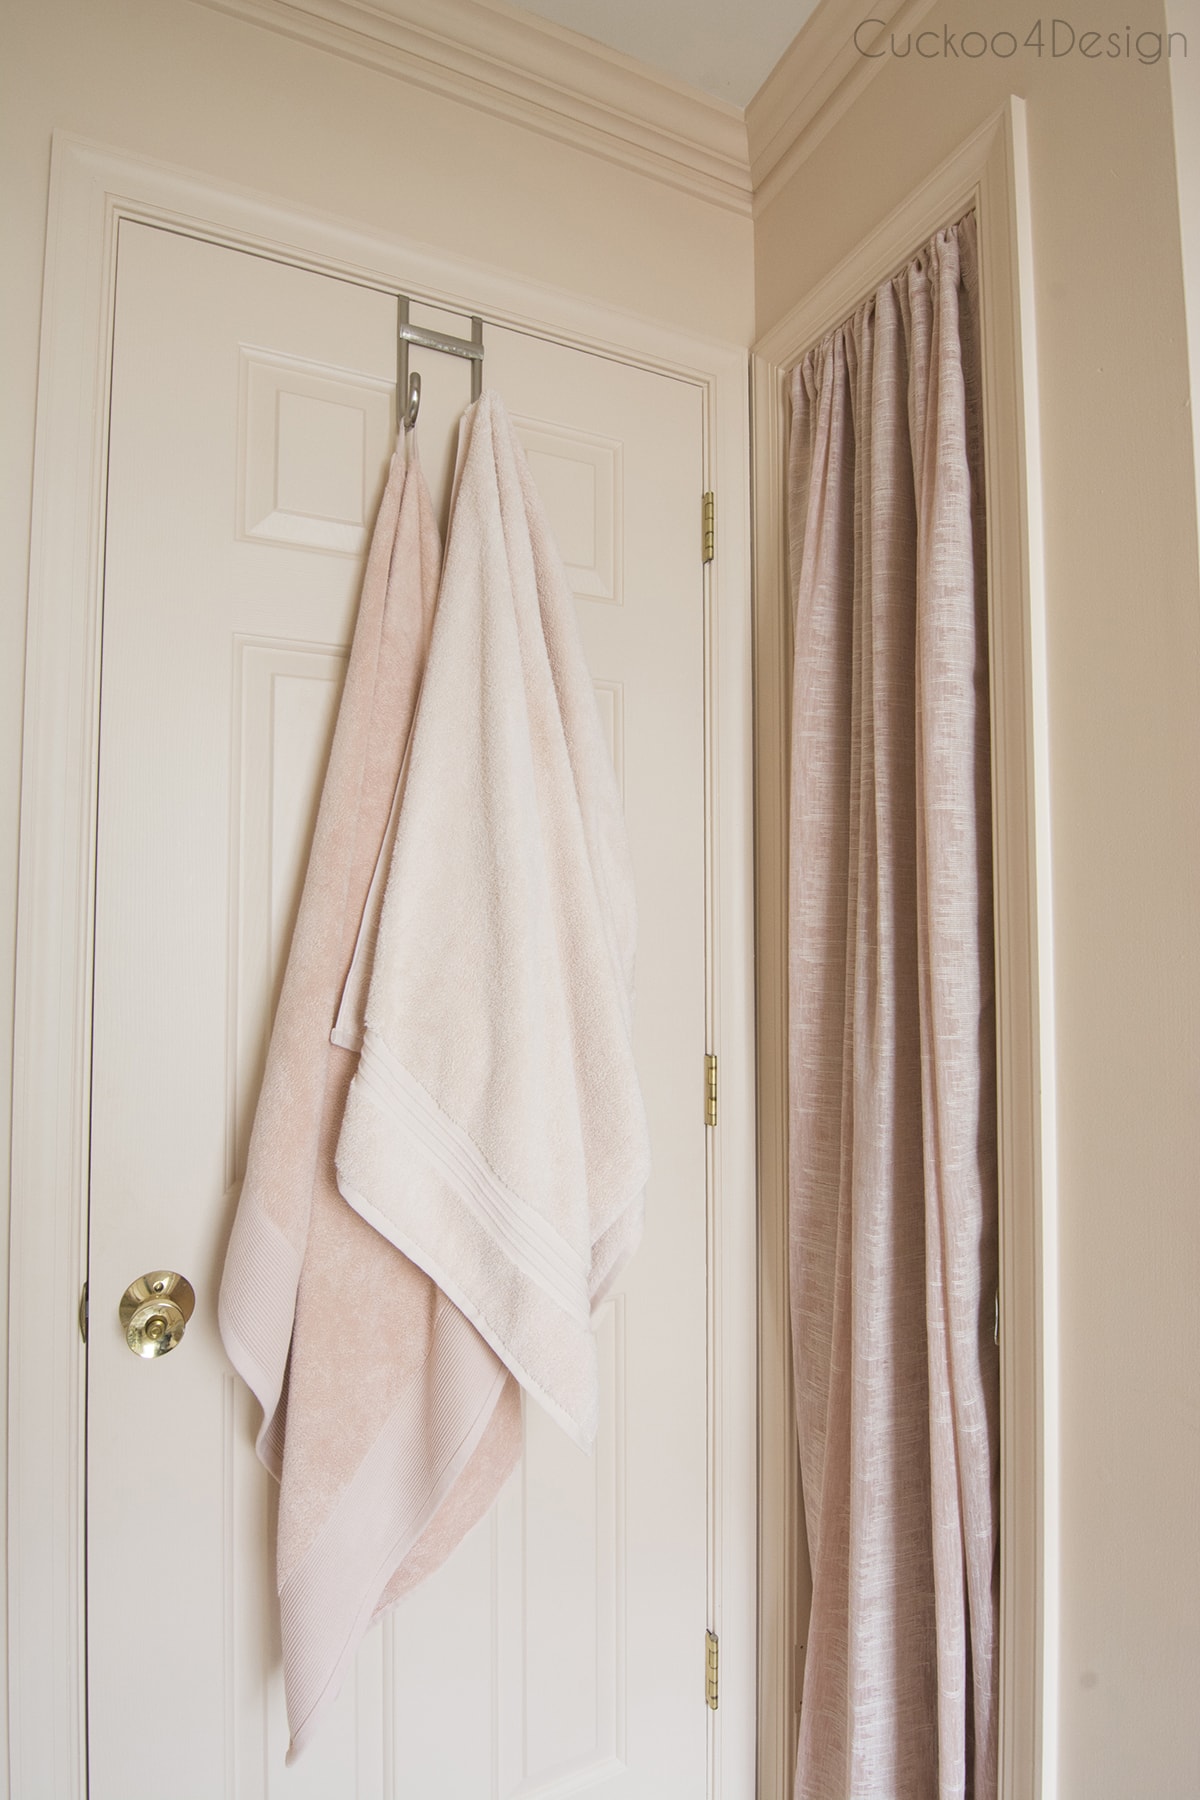
- towels (HERE)
- towel and toilet paper holder – (HERE and HERE)
- salt lamp night light (HERE)
- 2 tubes of paintable caulk (HERE)
- new Bluetooth speaker bathroom fan (HERE)
- bath rug for $9 from Ross
- grout renew but I haven’t even used that yet (HERE)
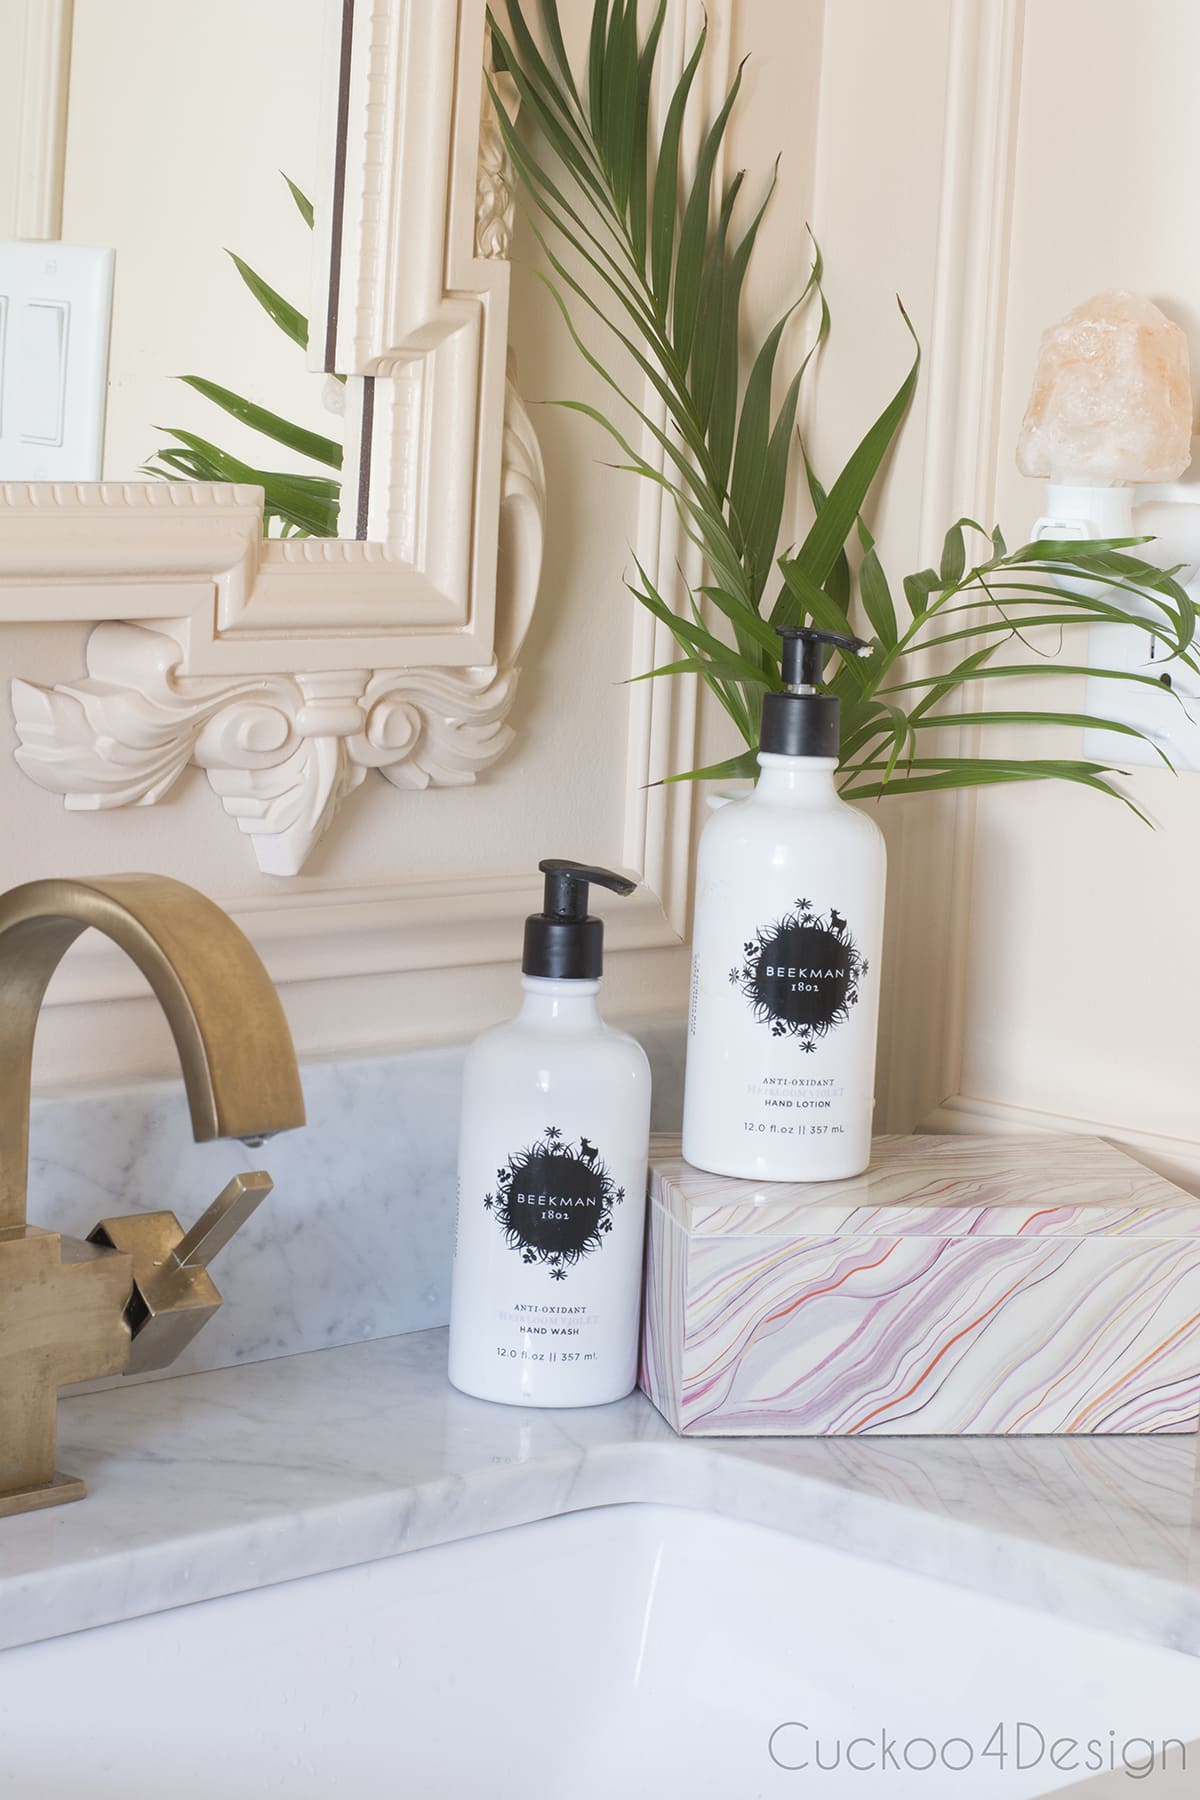
- faux plants (see my faux plant guide HERE)
To some this all might still be a lot of money spent, I know, but if you compare it to what a total bathroom remodel would cost, then it isn’t all that much. The fact that I was able to reuse the vanity base, mirror, tub, and tile saved a lot of money. And I also did most of the work myself like adding the molding, new lighting, painting, and installing the sink.
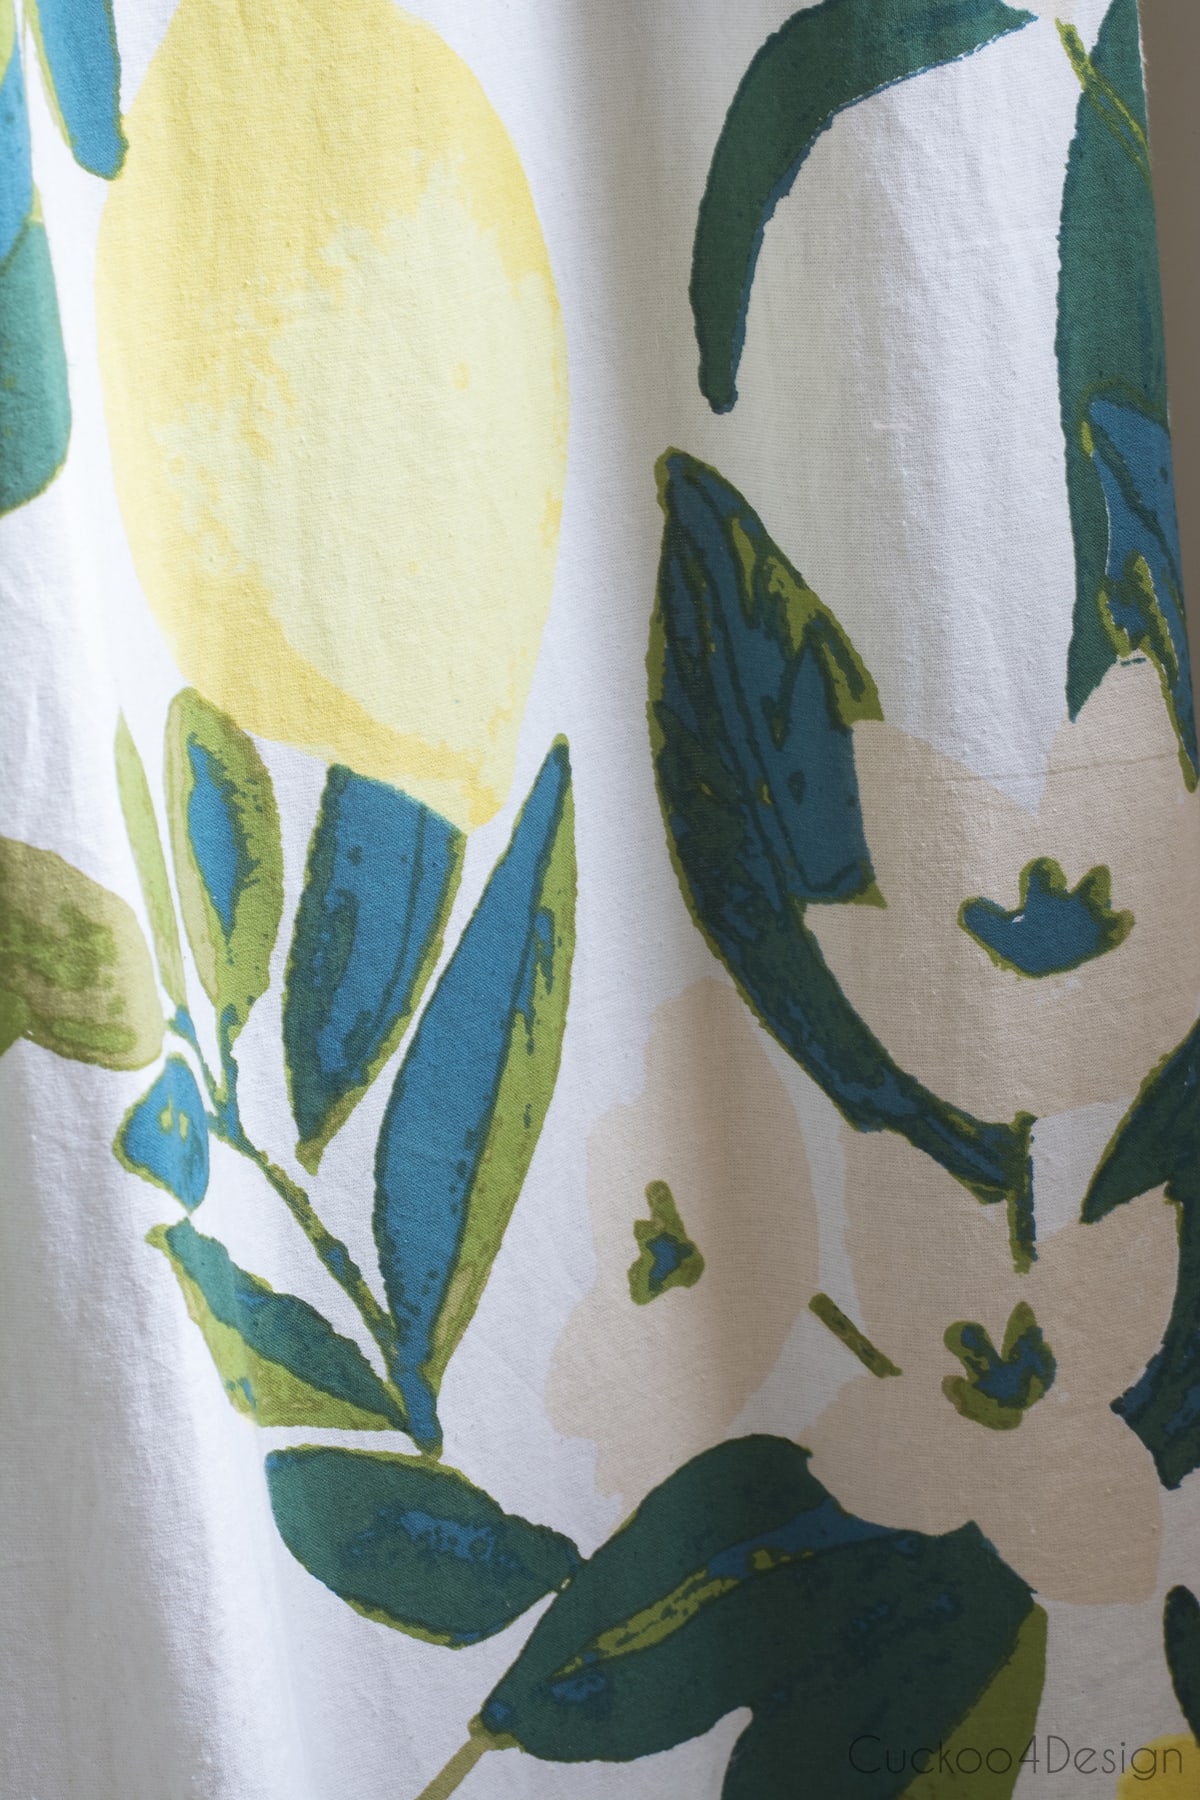
When I chose a wall color for the bathroom my daughter kept insisting that I’d pick a lime green from the shower curtains and if you watched the video above then you saw that I considered and actually added some samples to the wall but ultimately I didn’t like it.
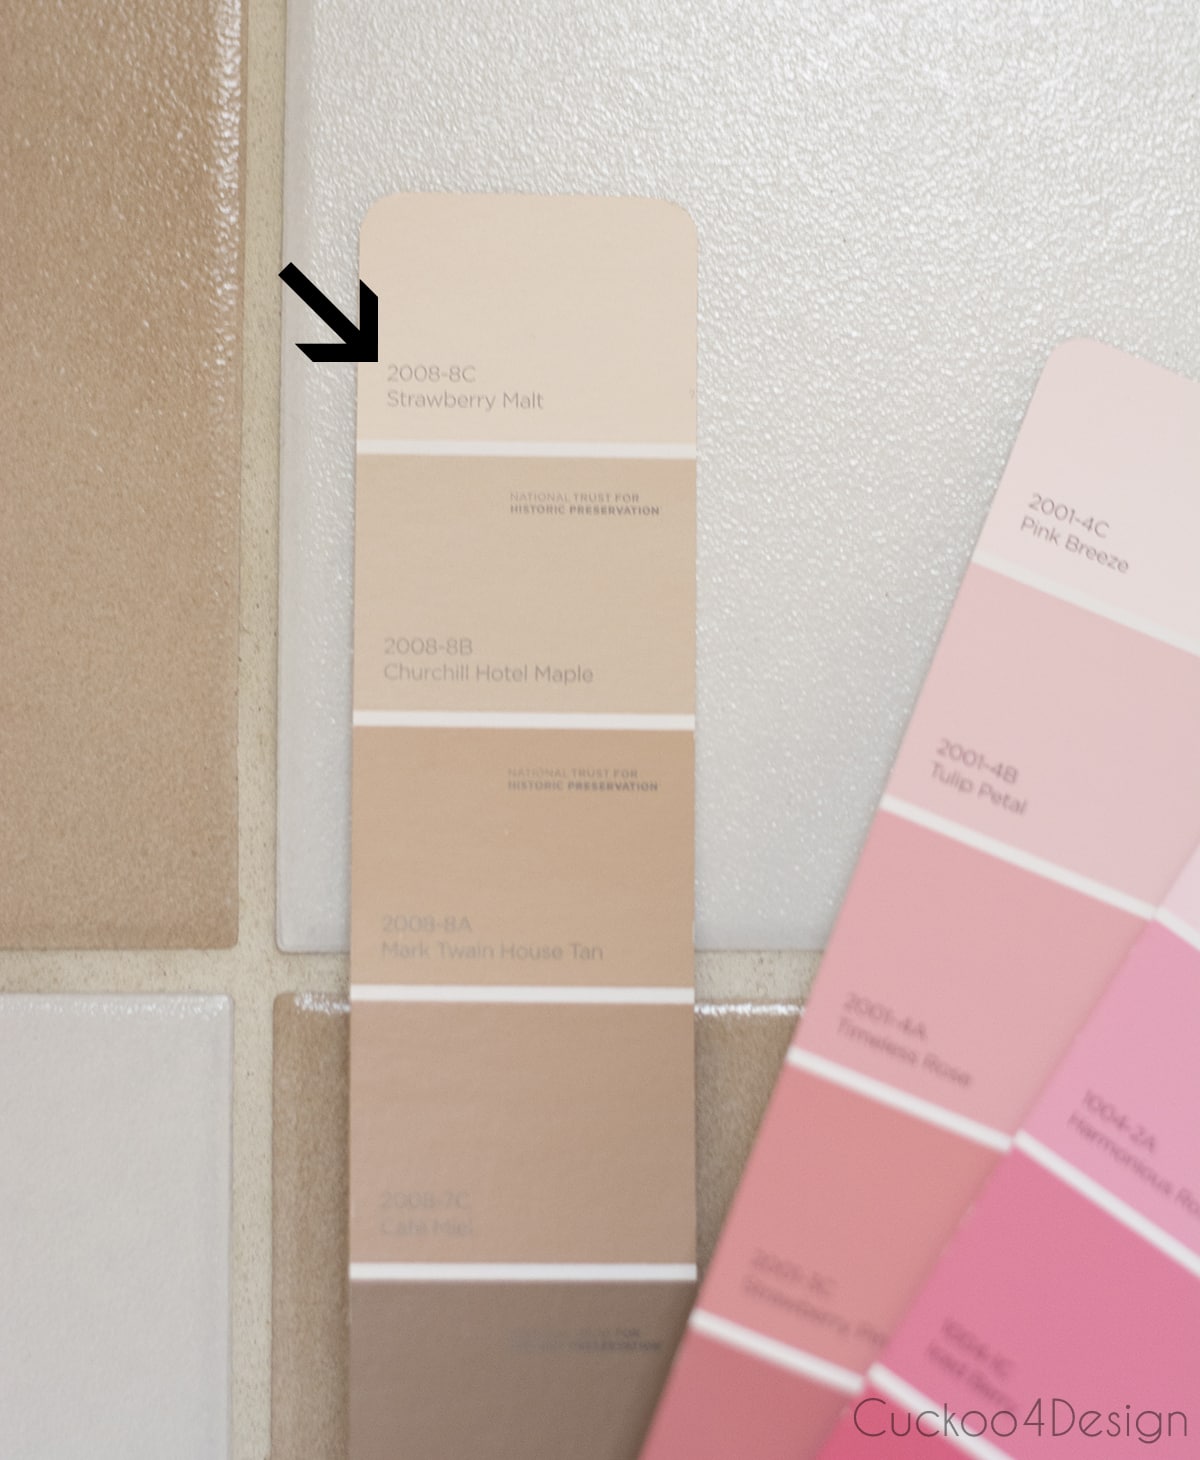
The perfect blush paint color
I also bought a sample that matched the flower in the curtain. My daughter kept calling it an “ugly pink” but as you can see below it’s actually a true shade of light tan like the tile. I put pinks next to it so you could see the difference. Strawberry Malt by Valspar is a winner and actually looks like the perfect blush when painted on the wall. I’m so so happy that I didn’t listen to my daughter. True pink walls would have been too much for me. She actually loves the blush color now too.
I mostly let the tiles guide the direction of the colors so they would look like they were intentional which I guess is the biggest tip when trying to work with what you have. In a bathroom, the tile is usually the biggest thing to look at when incorporating the design.
Wall Trim and Molding to add details and interest
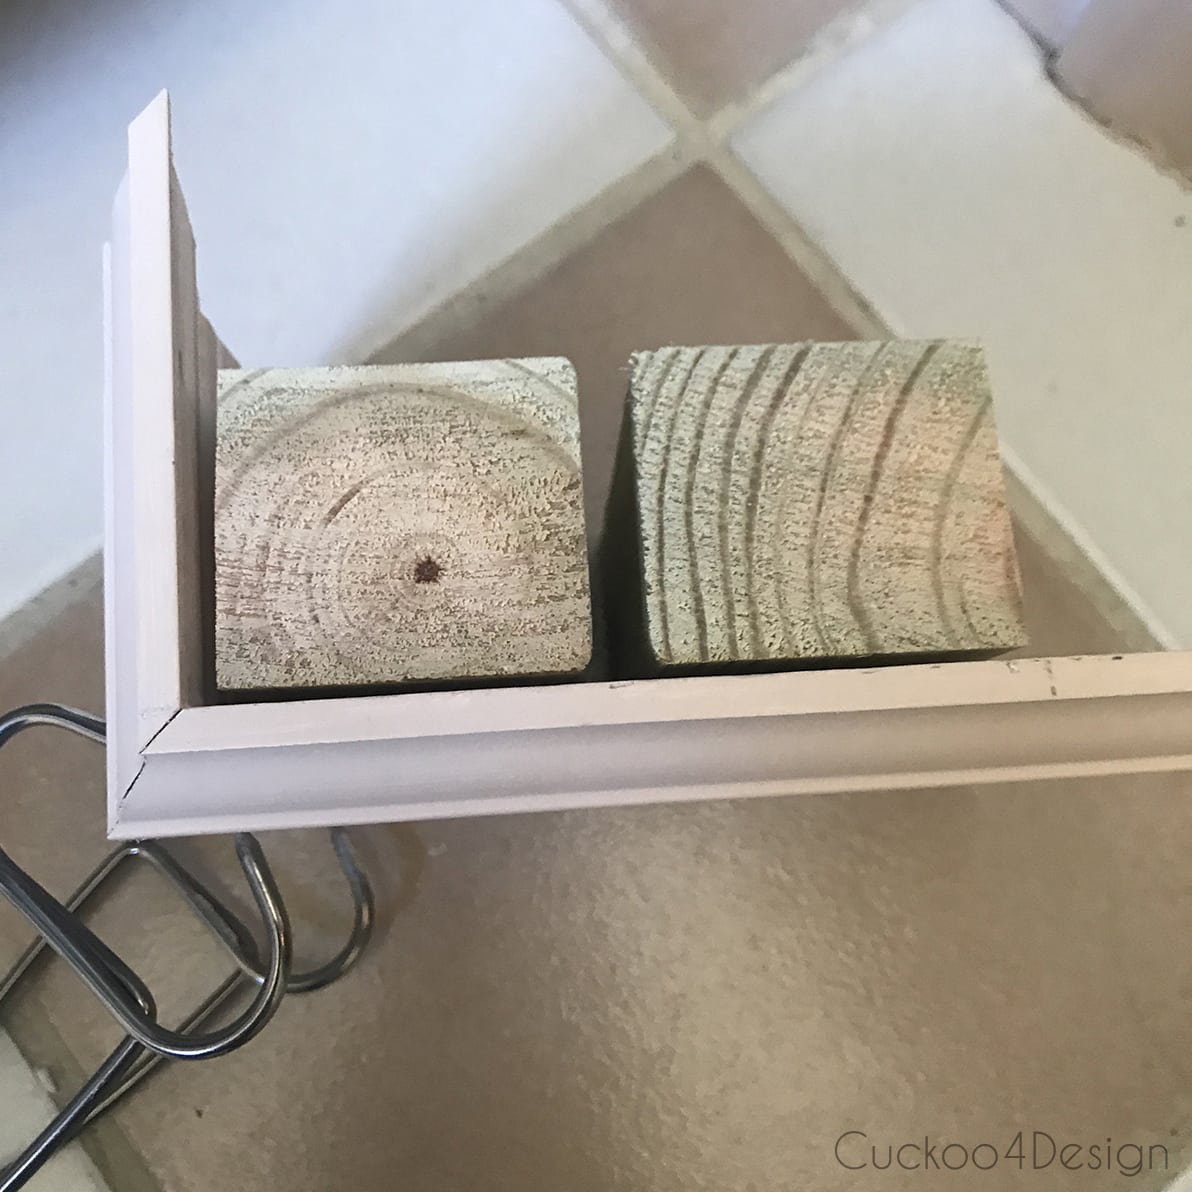
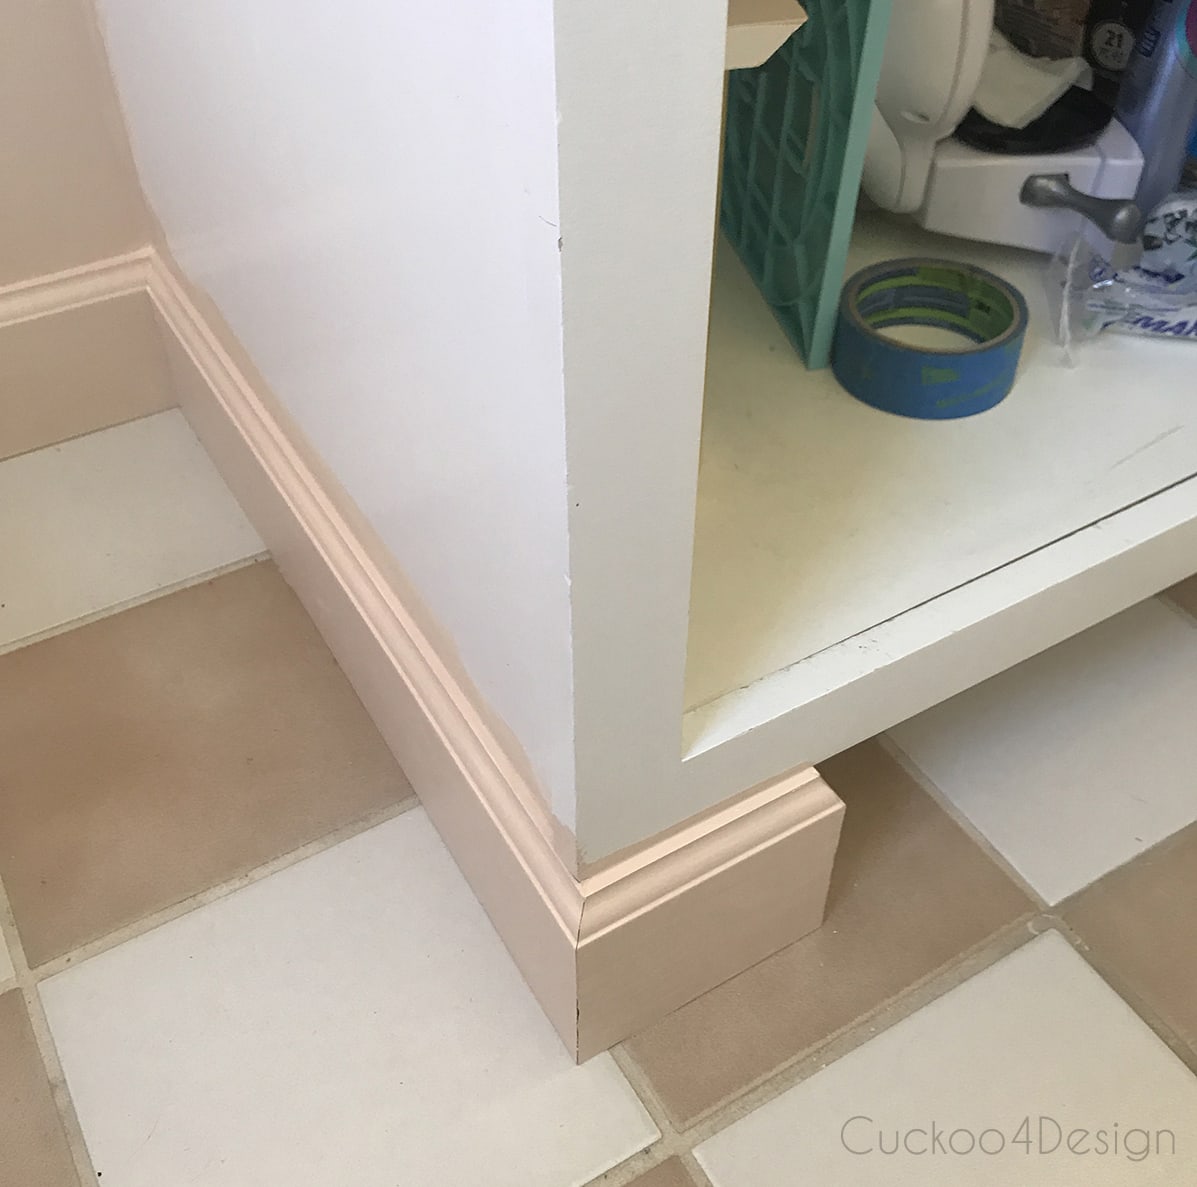
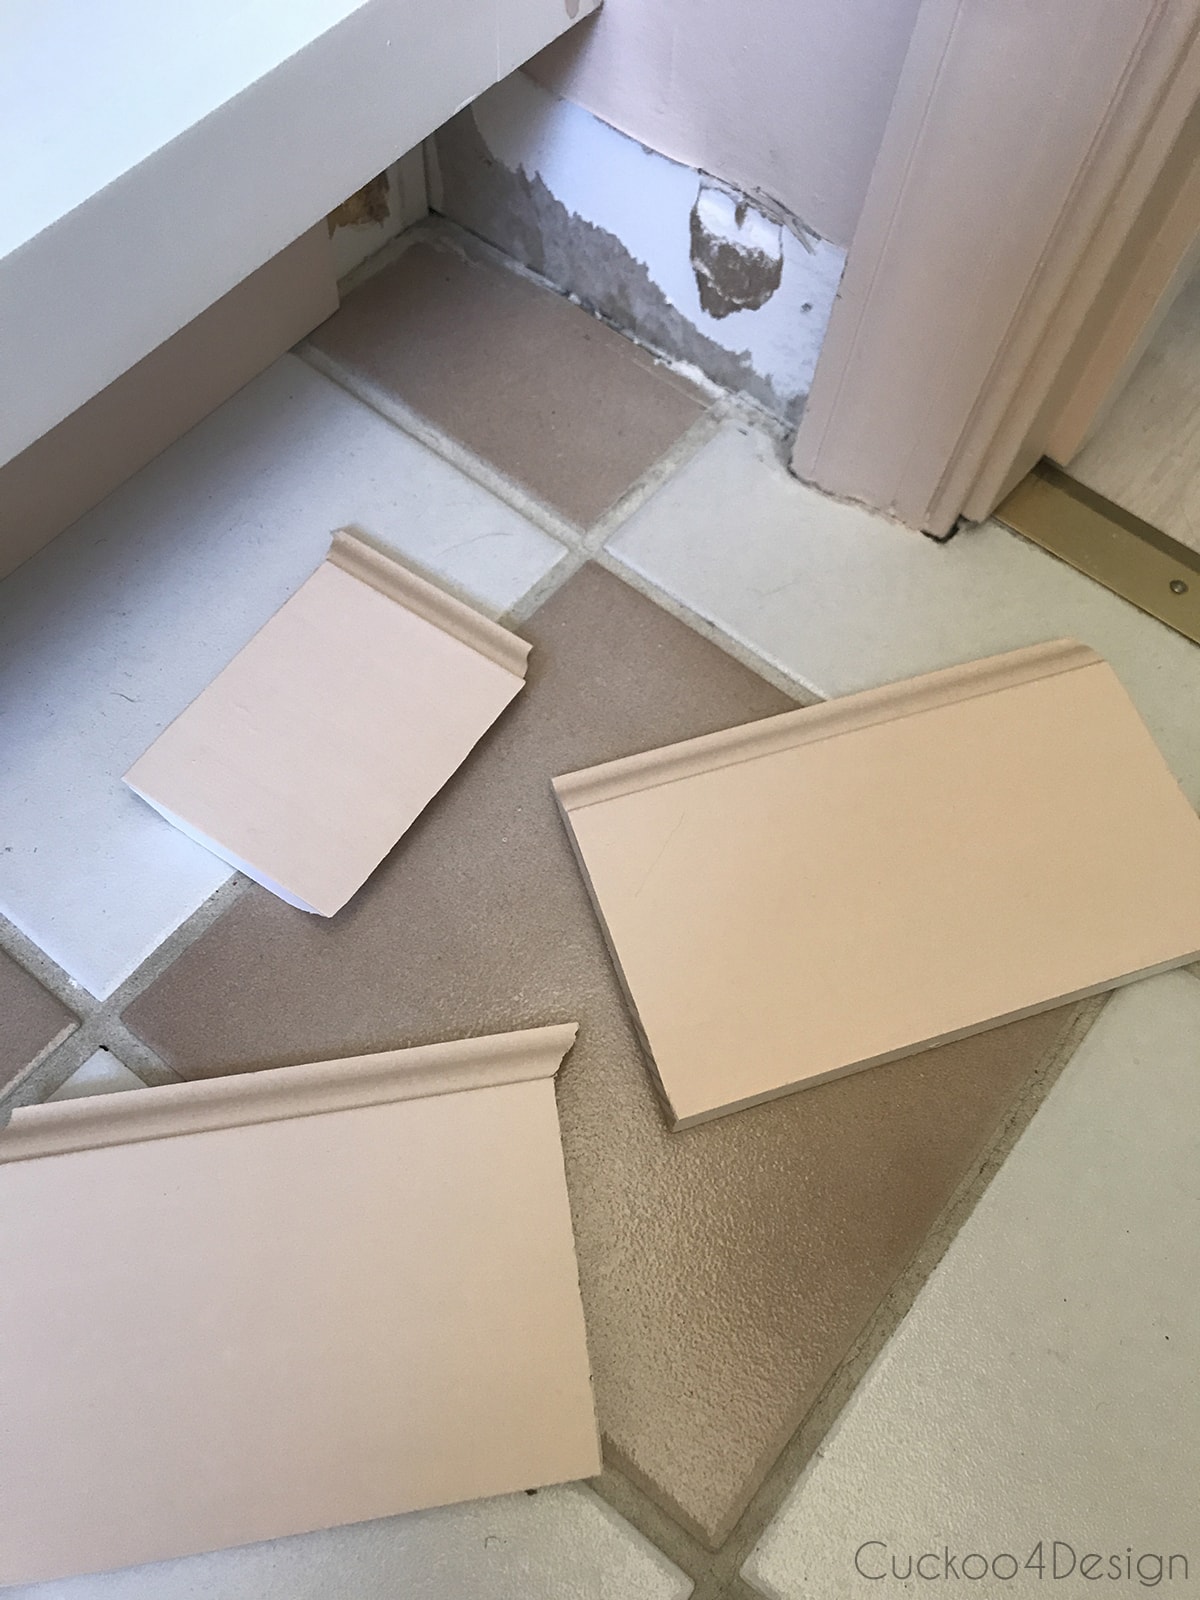
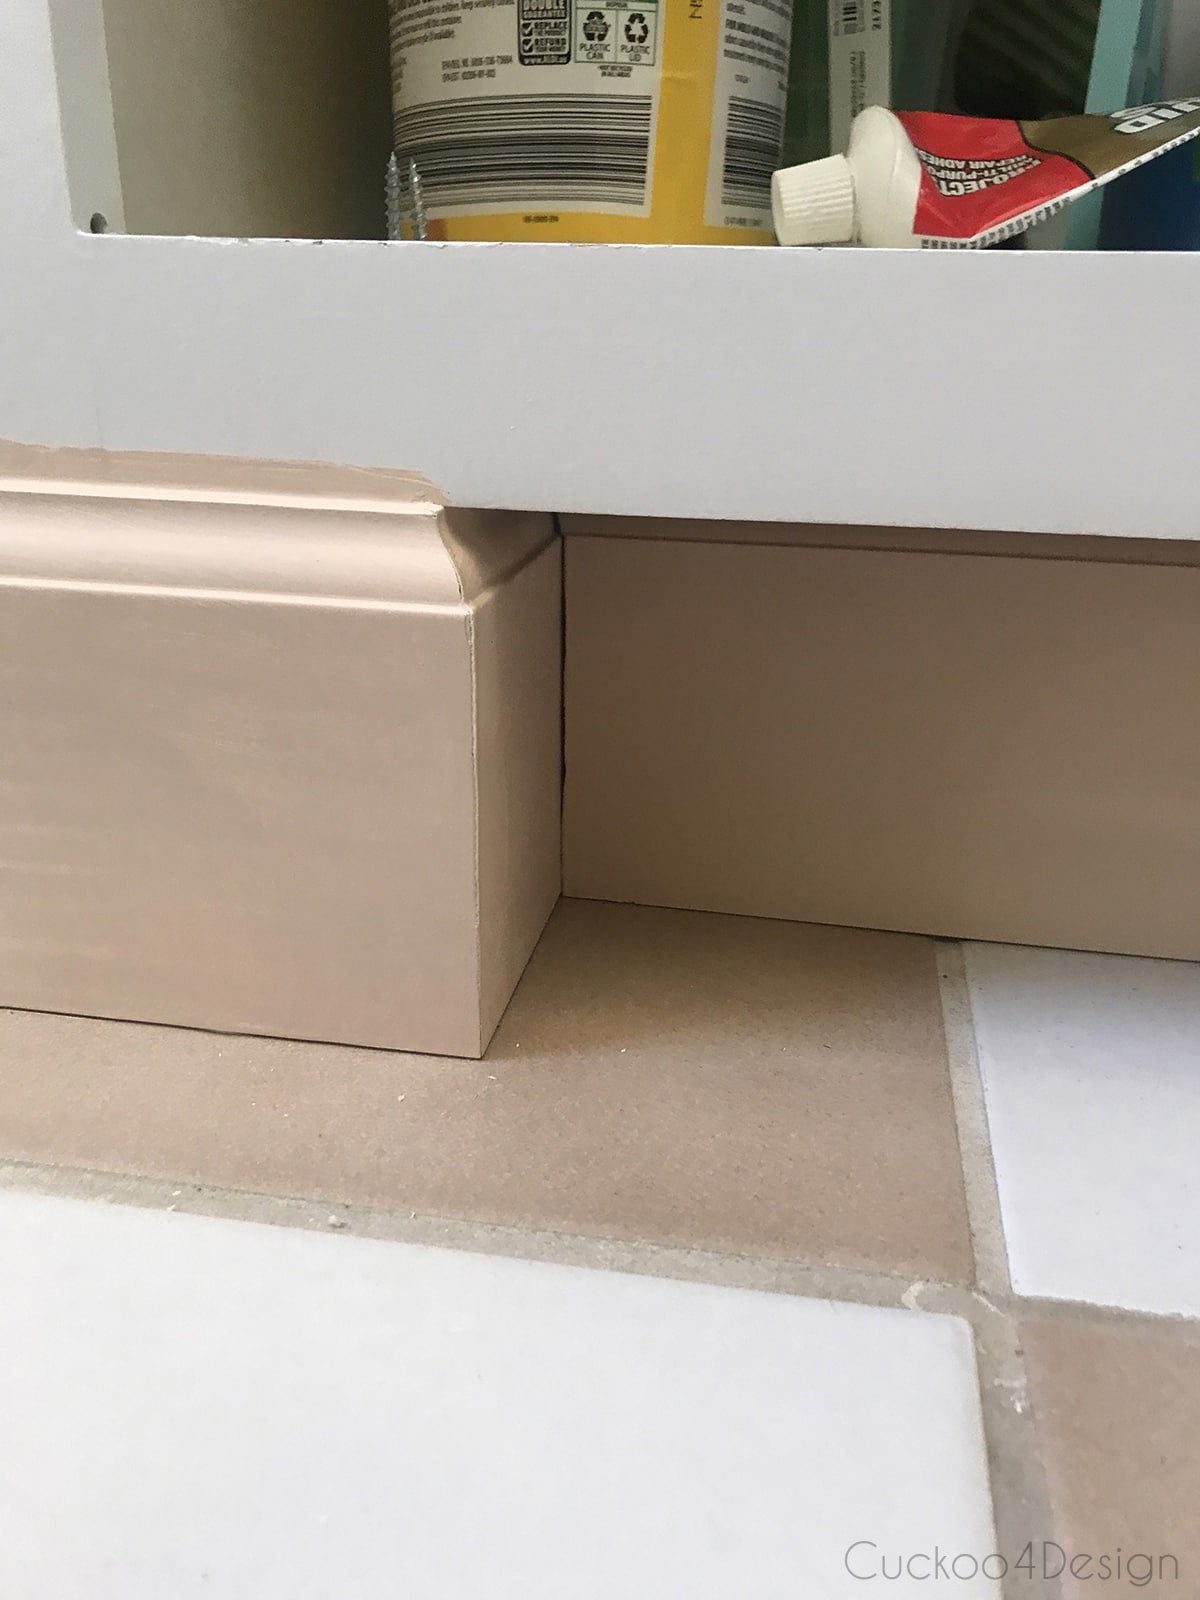
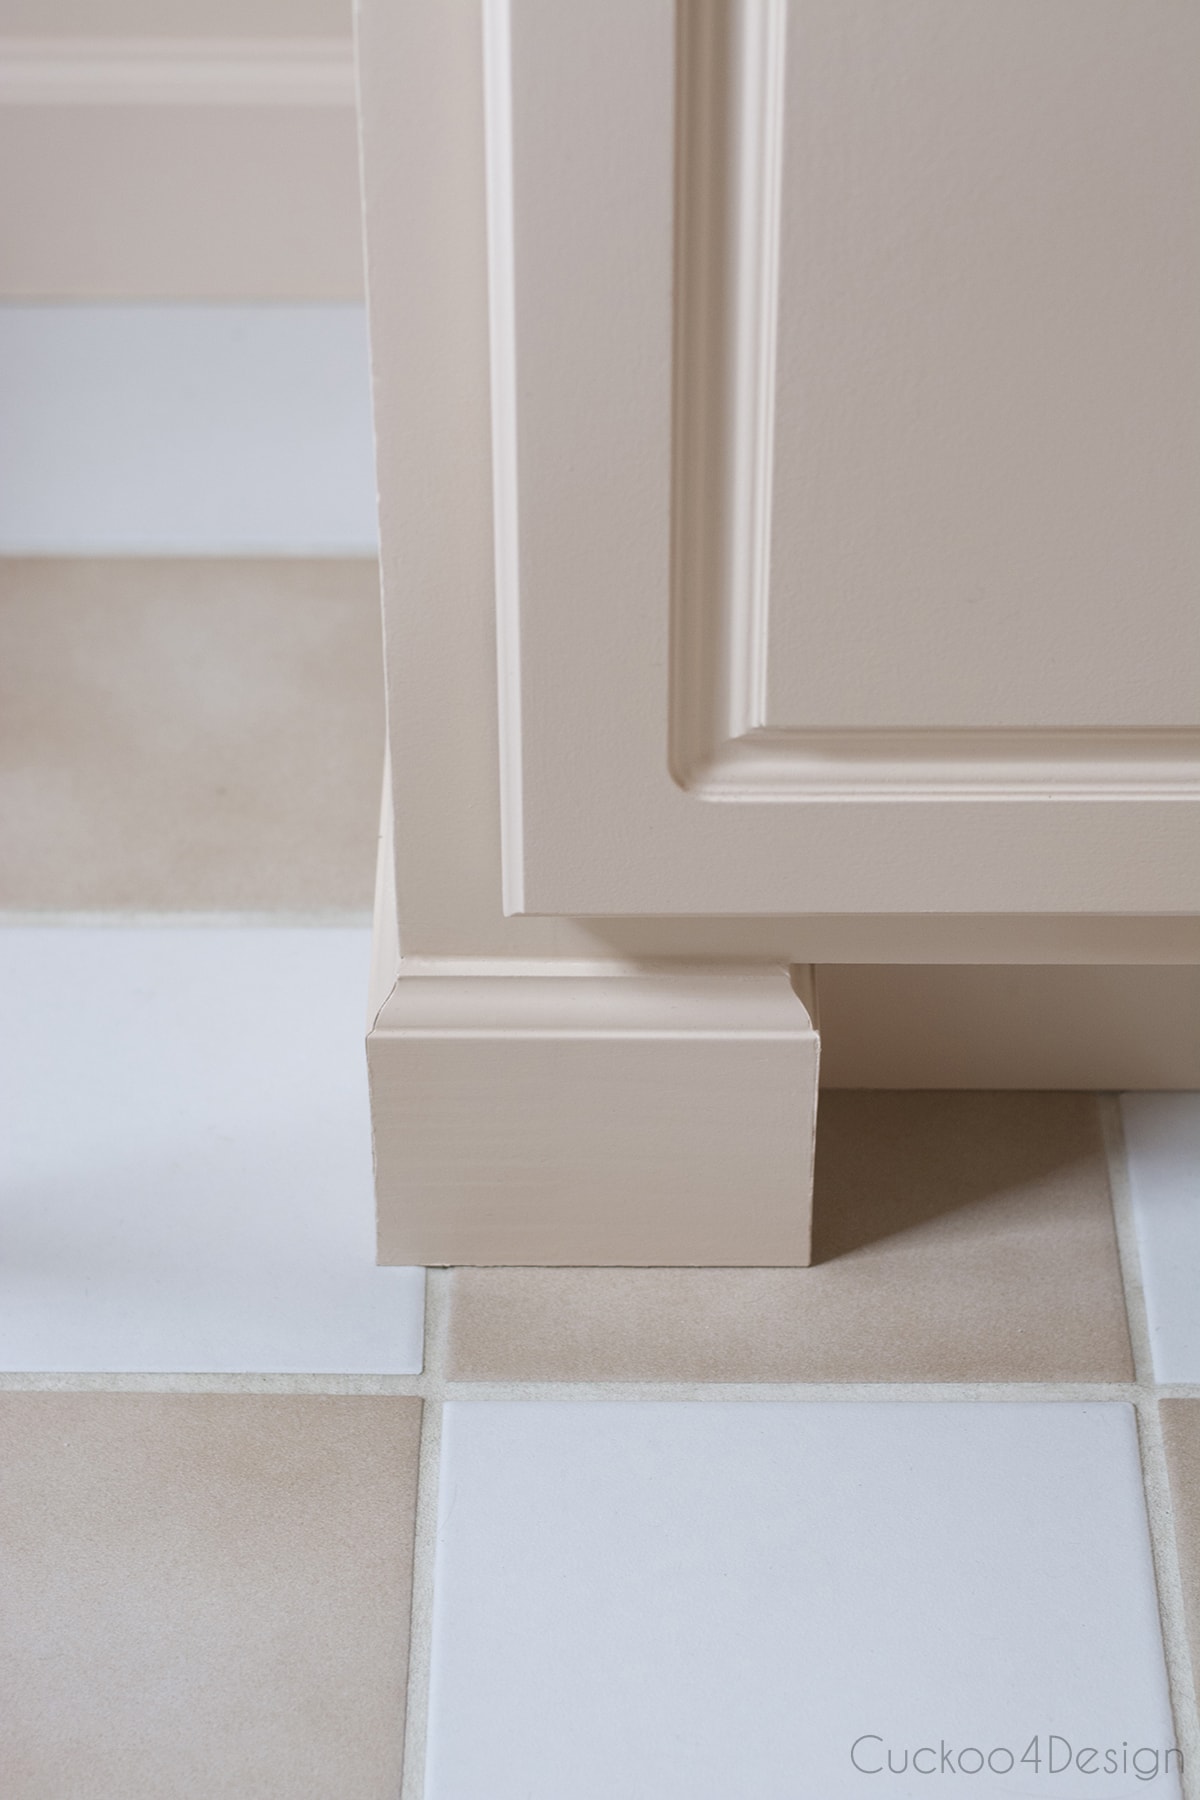
Feet for the old vanity with base molding
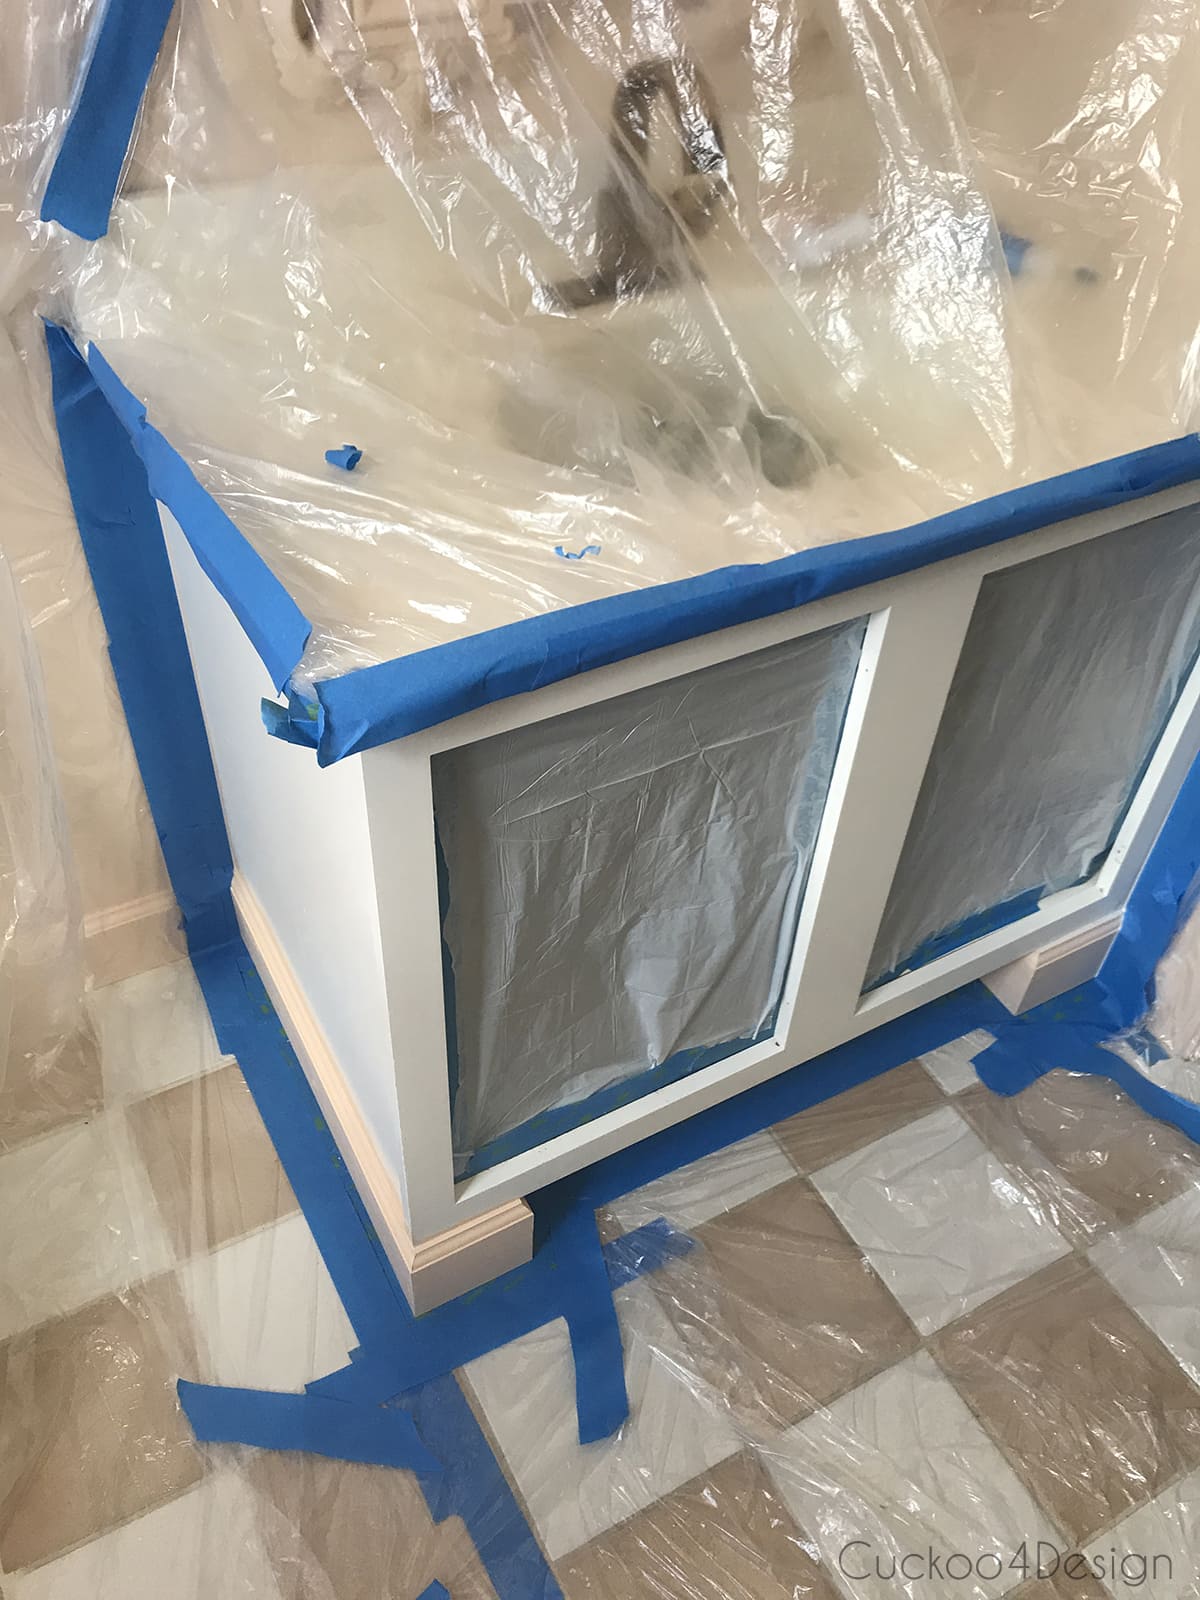
I decided to build feet for our builder-grade vanity like I did for the powder room vanity (HERE) but this time I didn’t want the entire kick plate to be gone. Unlike the powder room vanity, I had room to make it look like feet.
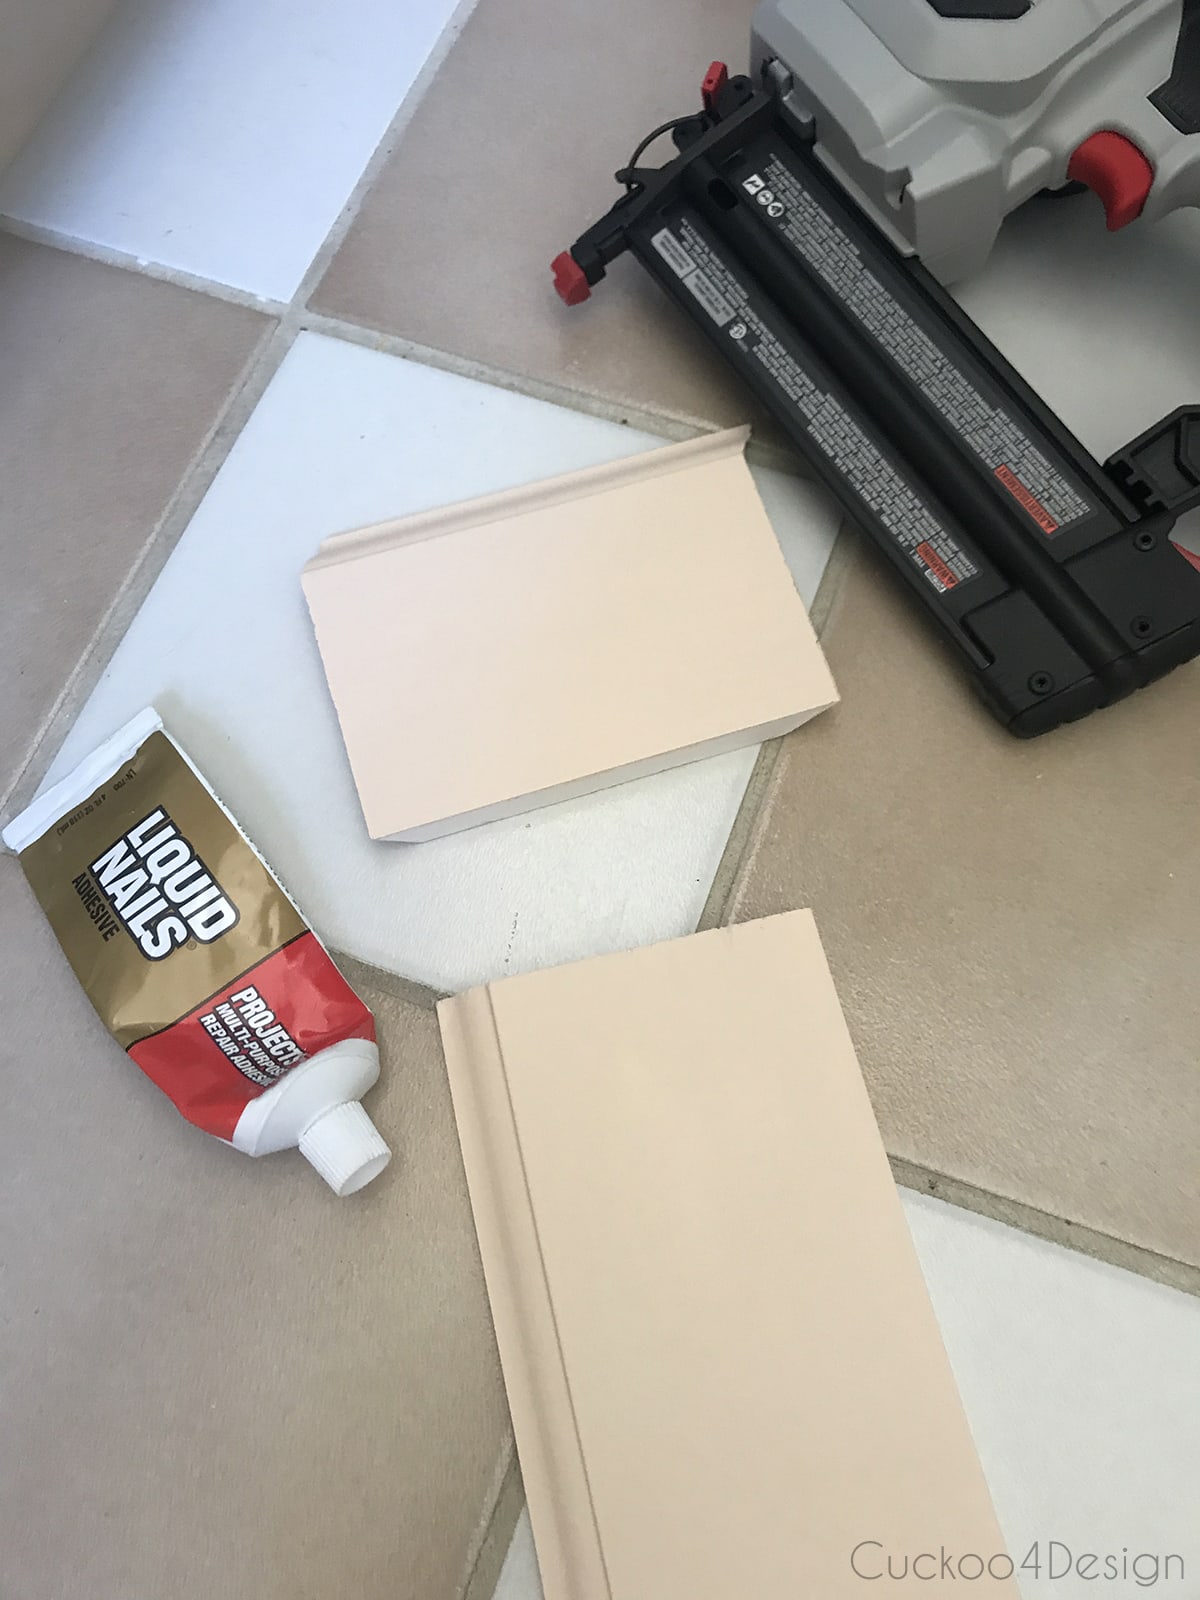
I also used my favorite new clamps for the edges (HERE) that I mentioned in my moulding post two weeks ago. They are so so handy. And speaking of handy, I couldn’t have done the bathroom without my new brad nailer (HERE). I love that thing so much.
(Eeeeew look how disgusting the grout was above before I scrubbed it with an old toothbrush and bleach pen!)
Here you can see the fake feet and kick plate:
Monochromatic Fresh Coat of paint
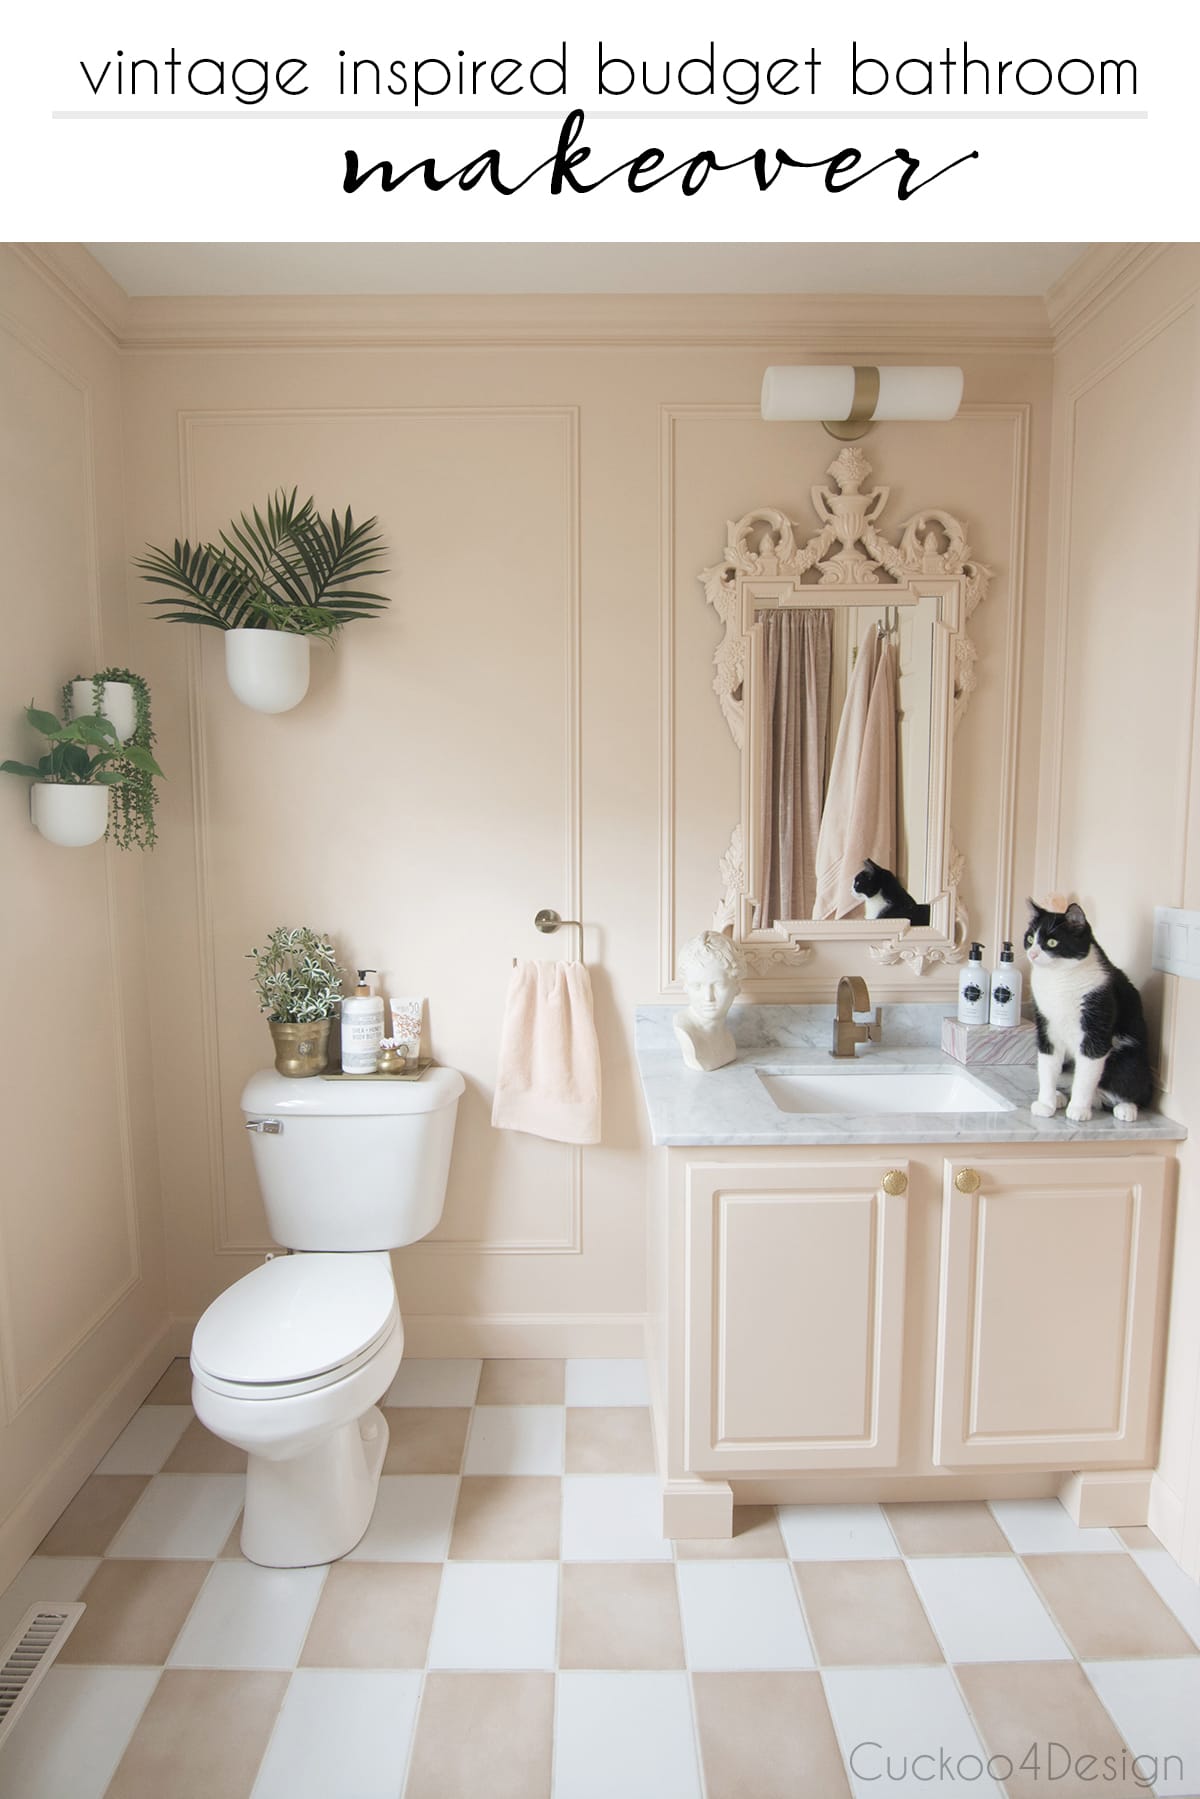
I knew pretty early on that I wanted to go monochromatic and paint the entire room, moulding and vanity the same color to make it look less busy and also larger. I also think it adds a touch of sophistication to this somewhat whimsical space.
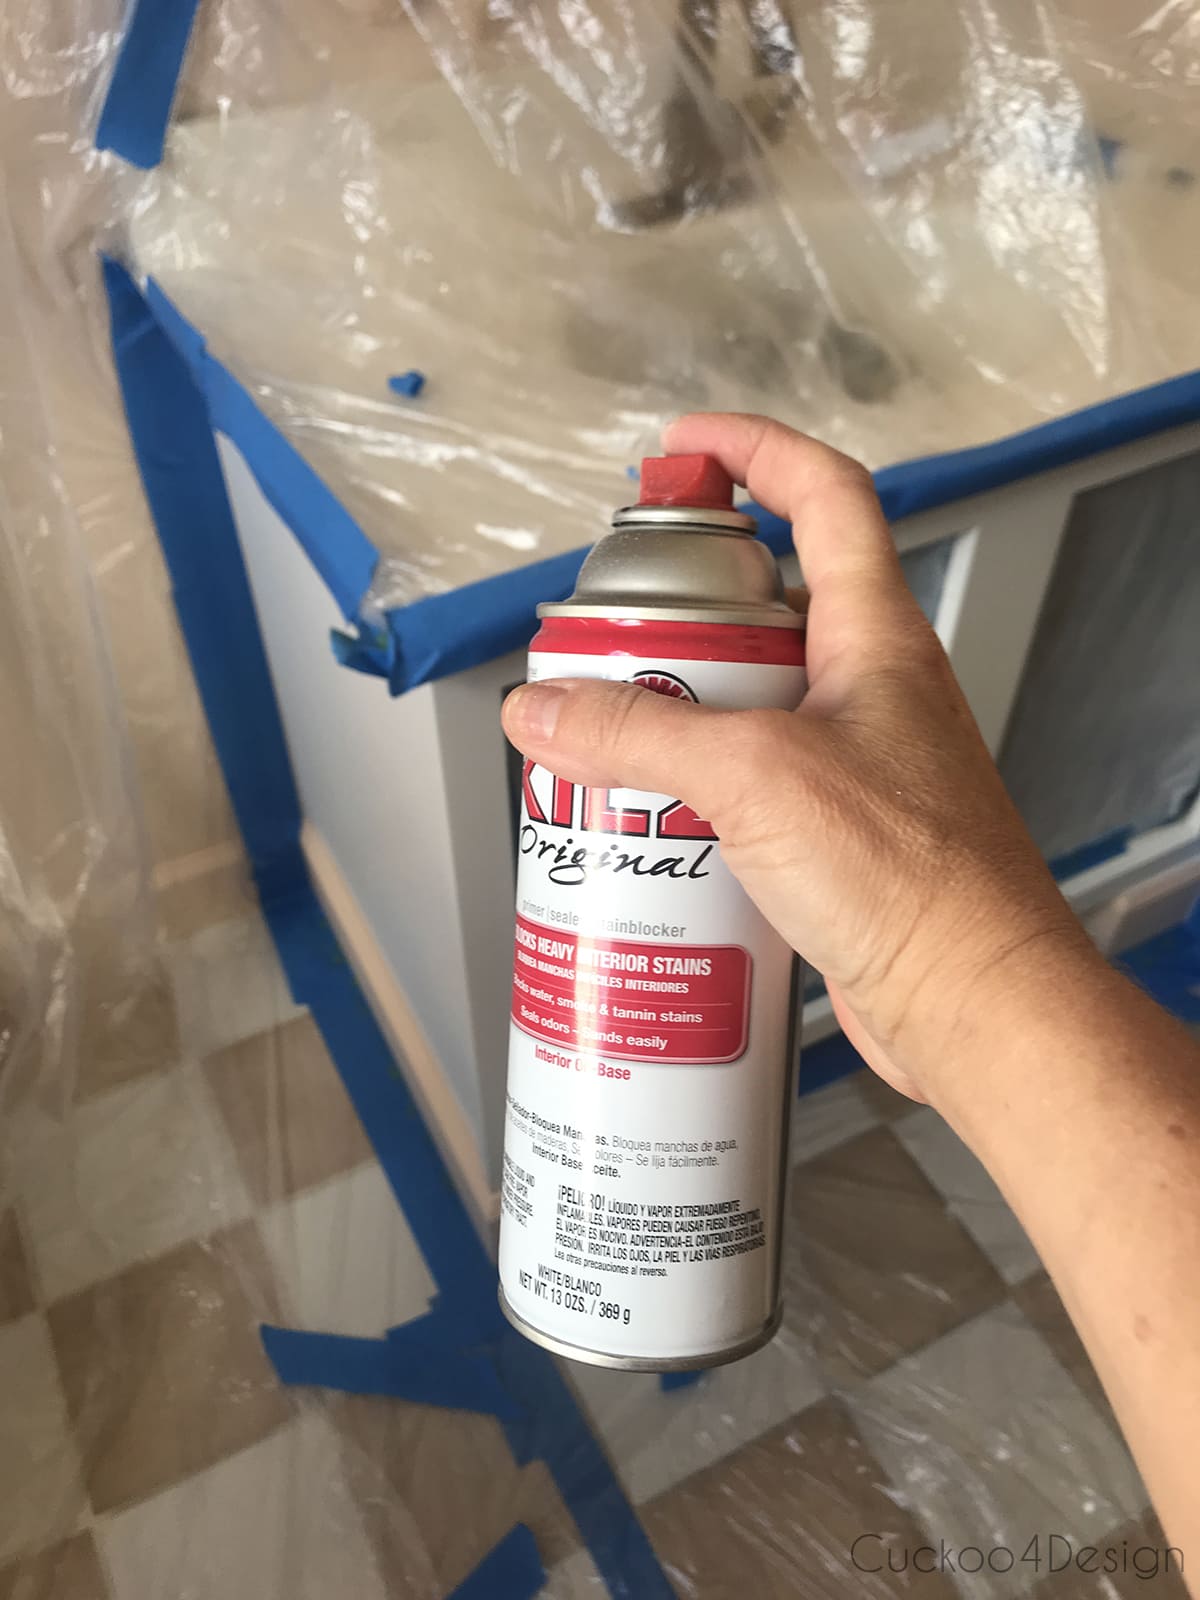
I pretty much painted the vanity the same way as I did my kitchen and powder room vanity but this time I opted to also spray the body of it and not just the doors by taping and covering everything else. Click HERE to see my cabinet painting post.
I used my favorite spray primer (HERE) and paint sprayer (HERE).
Adding Decorative Wall Moulding in Bathroom Instead of Wall Tile
Lastly, I added the decorative moulding to the walls and you can see my video and blog post about that by clicking HERE. It was the exact same process. I opted for not adding the moulidng to the top of the shower sides because there is always so much soap scum and it would make everything so much harder to wipe.
I also added crown molding to this room and used the mouldings that are made for bathrooms. I don’t have a tutorial for that however because there are so so many good ones on YouTube already. Let me tell you though and I’m not going to sugar coat it… installing crown molding is a pain in the rear. It’s not that easy but it definitely adds something really special to any space. I just love it so much.
I totally could have left the old sink in place and it would have looked great (see photo below) but I love marble so much and the price and fit of the new one (HERE) were so great. The marble also breaks up the paint color a little bit since the existing sink was almost the same tone as the paint color.
Another star of the blush bathroom is the new fan in the ceiling! We had an ugly yellowish and loud fan before. This one is a fan with a Bluetooth speaker inside. So my kids can shower and listen to music. That’s pretty much the only thing my son cares about. He could care less about what the bathroom looks like.
I had to use a ceiling medallion to cover the slightly larger cut out of the old fan. And I’m really glad I decided to hire an electrician to do that job for me because I couldn’t have done it myself, especially after discovering that my husband had crushed the venting pipes in the attic with junk that he dumped on top of it.
Let’s get to some more pretty pictures…
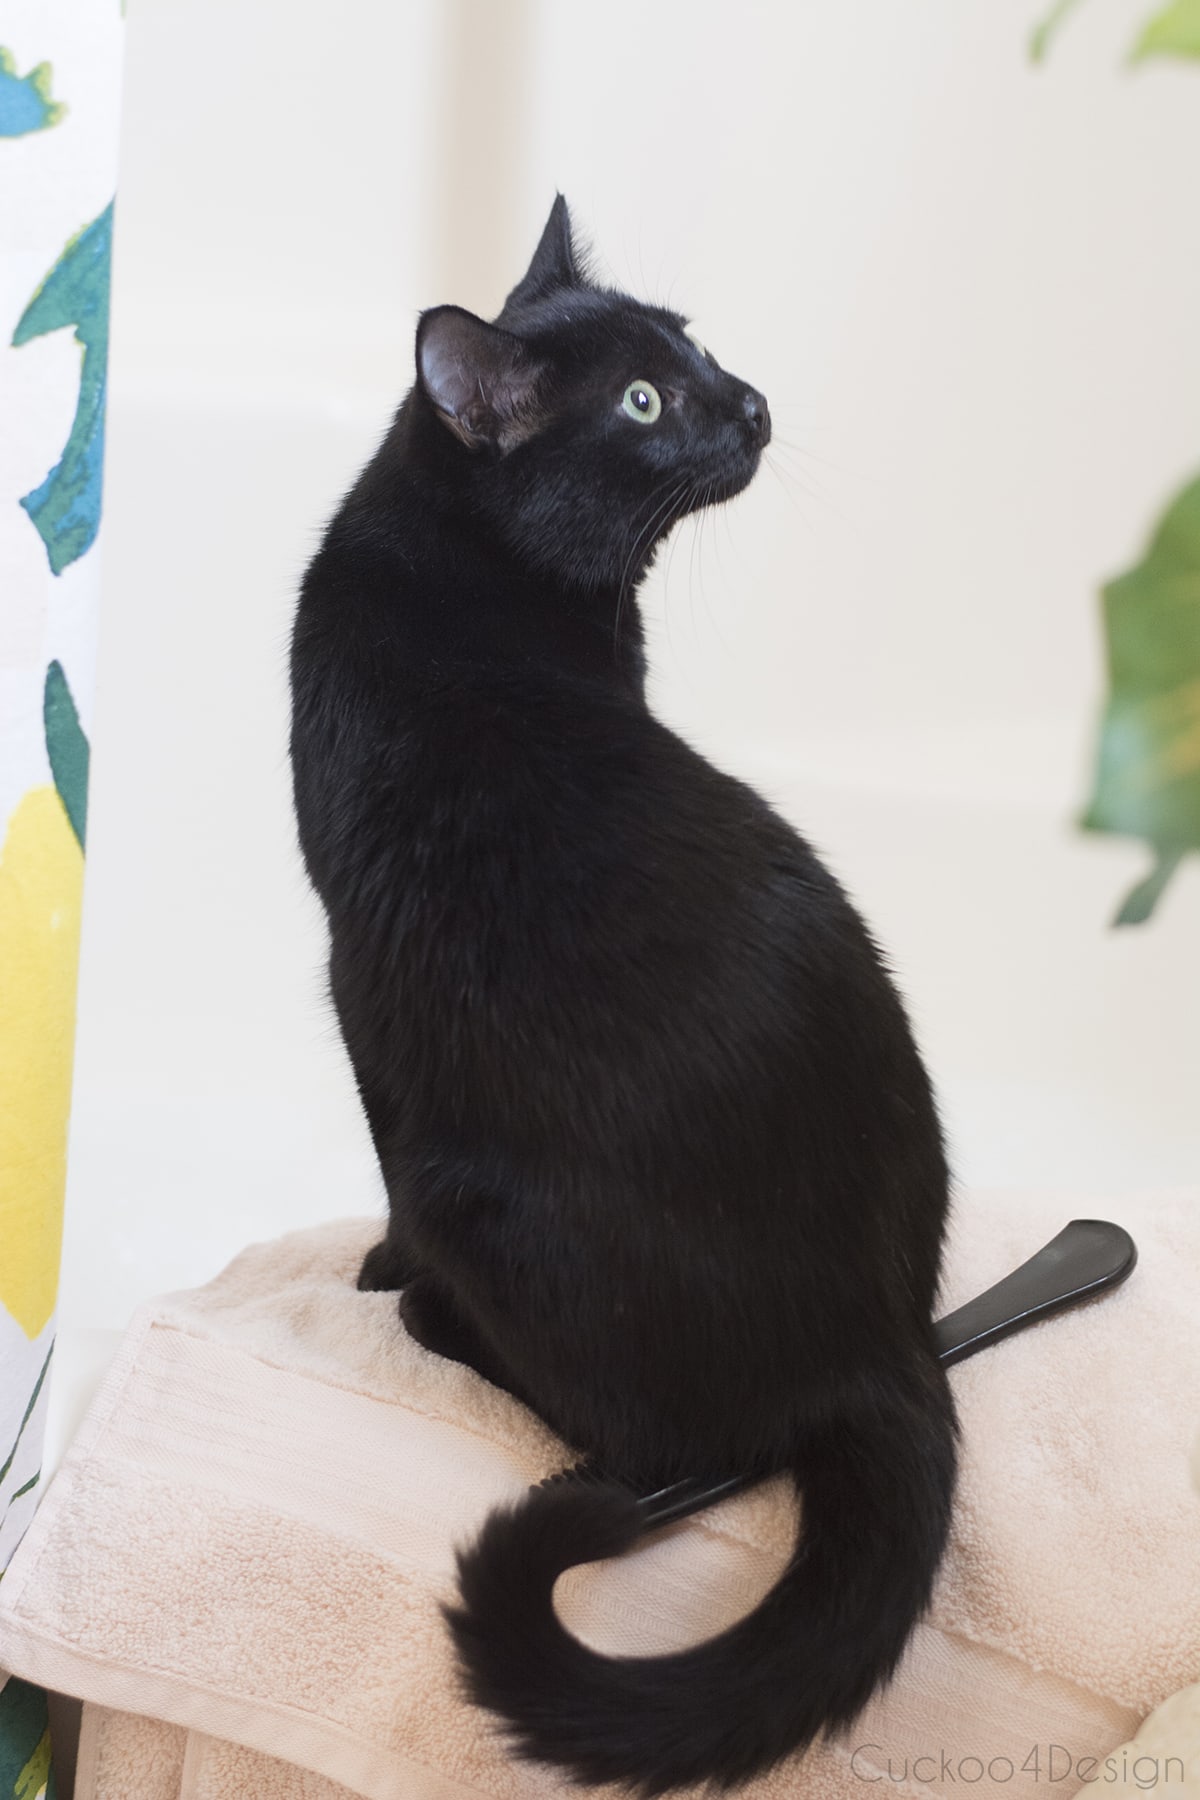
Keeping everything in a blush color palette makes it feel less busy. I love that I decided to have everything one color and I think Willy agrees. He is as always the best accessory in the room. I think he noticed that I didn’t have enough black and white in the room yet.
RELATED: Also, check out how you can update a plain tan and white checkered floor with simple DIY decal triangles.
And in case you are wondering about the toilet paper holder, well, it didn’t arrive yet but will be from the same line as the towel holder (HERE and HERE)
If you missed my post about all my new faux plants, then you can see it HERE to read all about them. The faux caladium (HERE) is definitely one of my favorites. And it just so happens that the bath towel (HERE) was the perfect color match and they are so soft too.
My handsome little man thinks the towels are soft too.
Most of you probably don’t know that we keep a litter box in the closet right next to the tub. It used to have a door on it that I took off a long time ago because it was difficult to open with the bathroom door being in the way. I so wish we had pocket doors to the bathrooms but that is definitely an expense I can’t justify at this point.
So I added a curtain with a tension curtain rod instead to hide the box and supplies stashed in the closet. This curtain HERE was the perfect match and only $20.

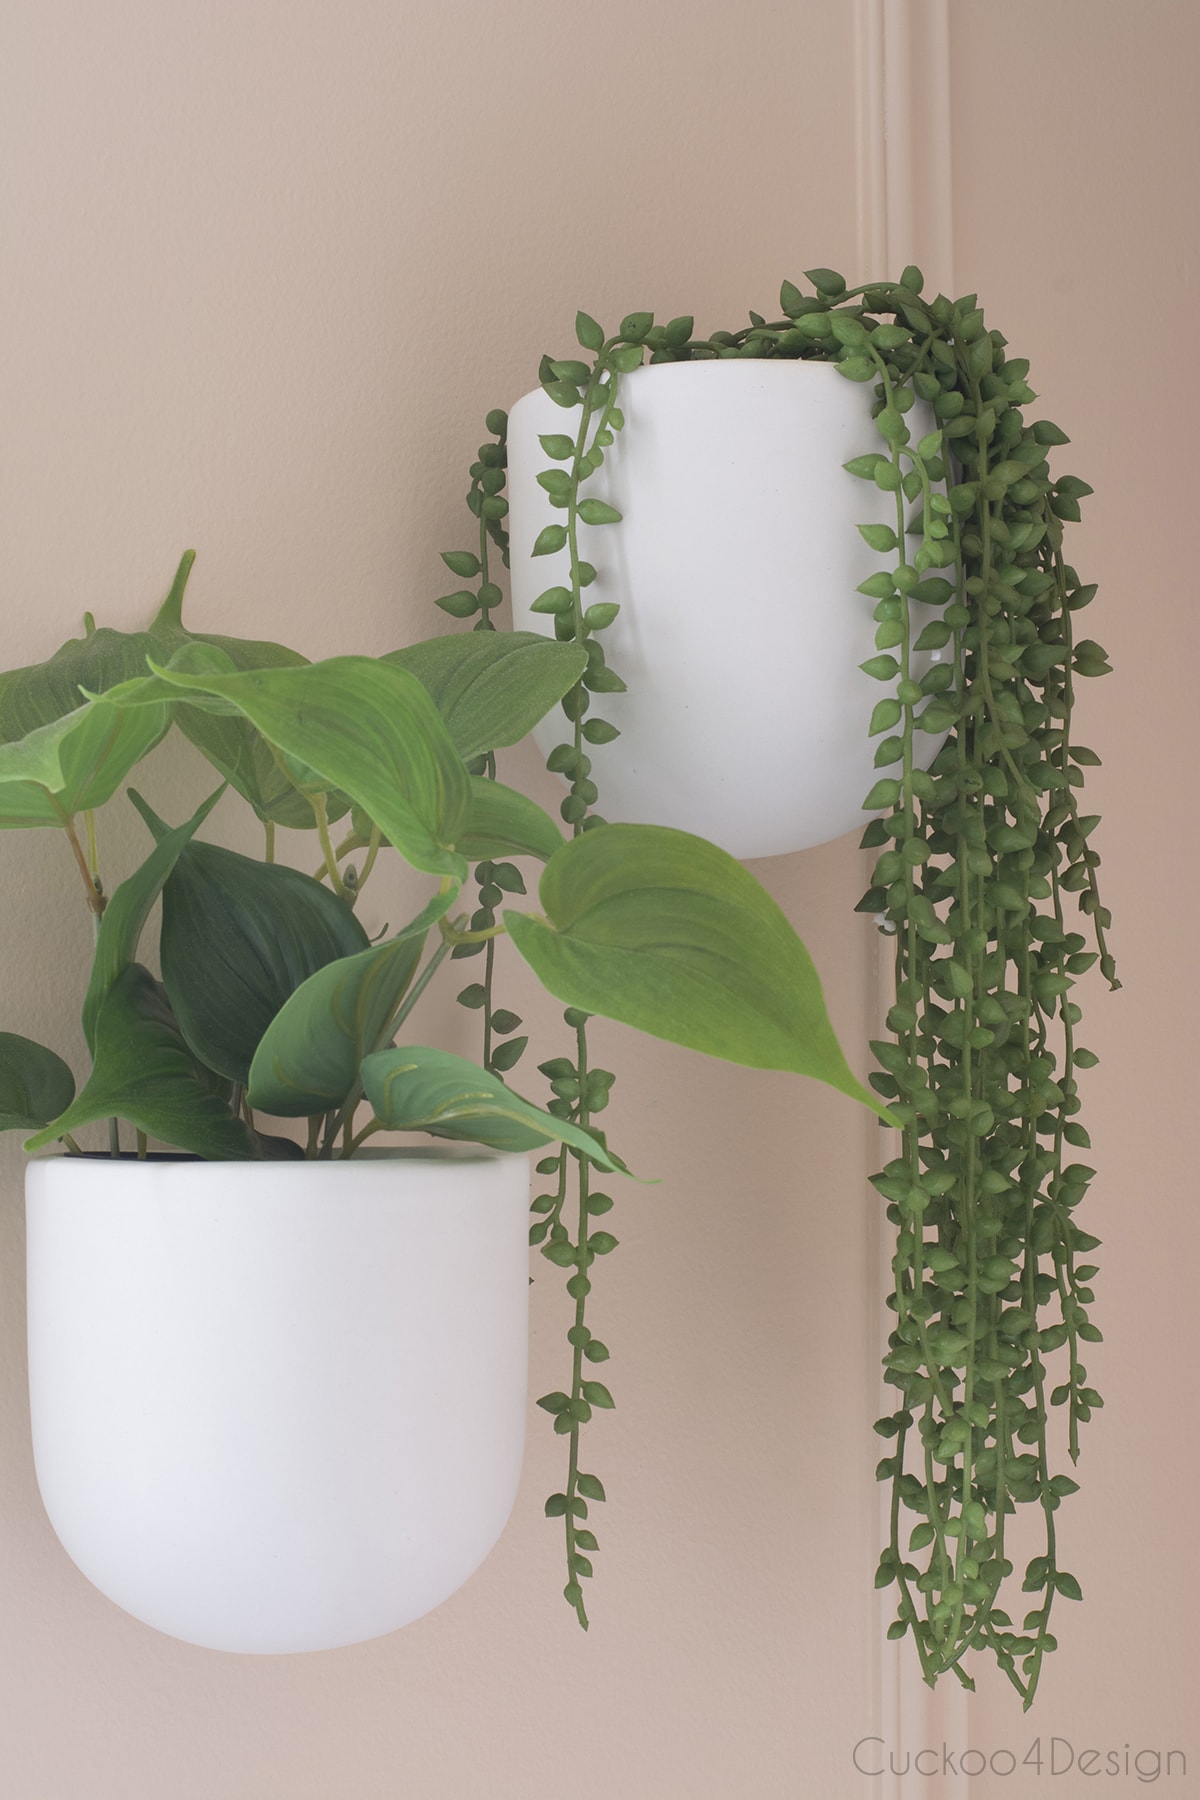
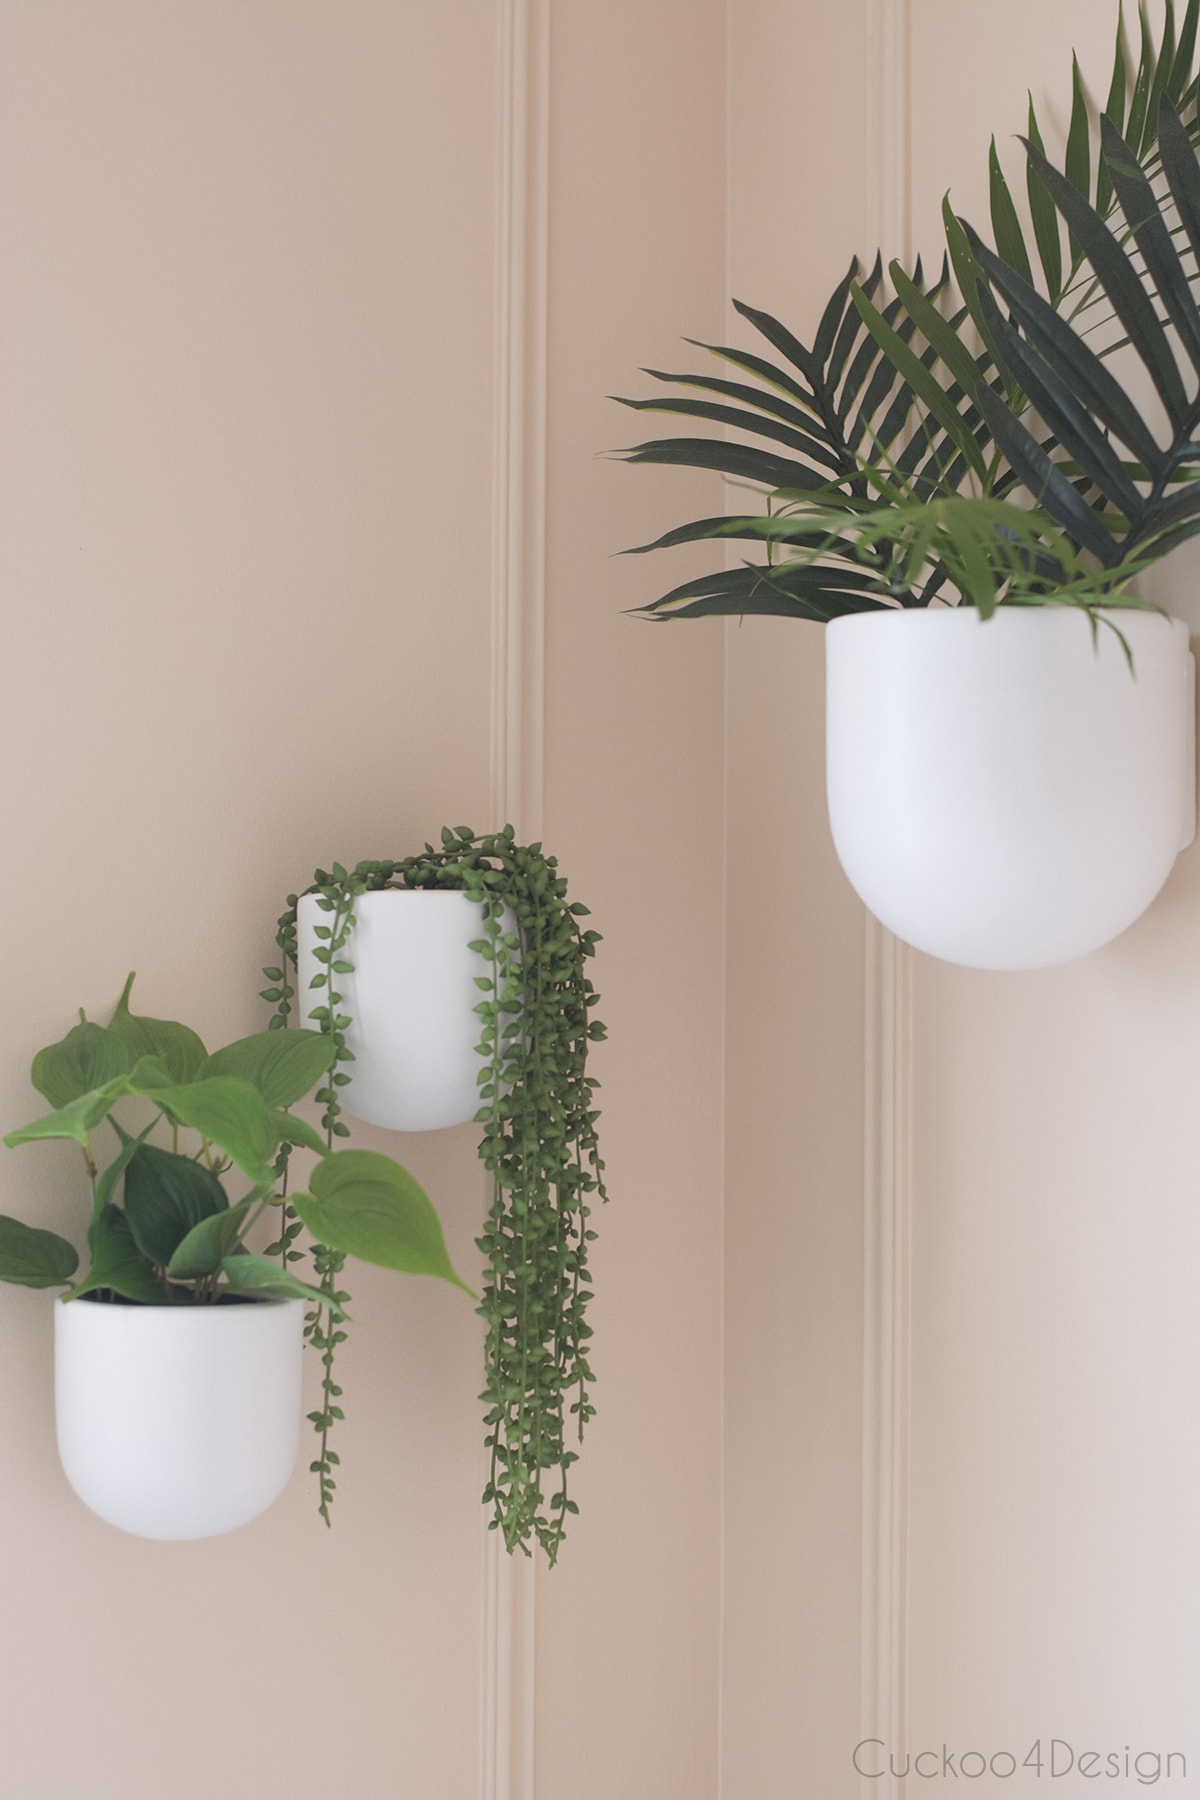
Modern Wall Planters
Since this is all a very traditional and vintage-inspired makeover, I wanted to add some fun modern accessories which I found in the below West Elm planters (HERE). I bought two small and one large one. The stems in the large one are from Target a while ago and the two plants in the smaller ones are this one HERE and HERE. I ripped the hanging plant out of its pot so I could add it to the white planter. The pot it came with was a perfect color match to the wall but so tiny and I didn’t want to hang it. And the pot, unfortunately, didn’t fit inside the white pot.

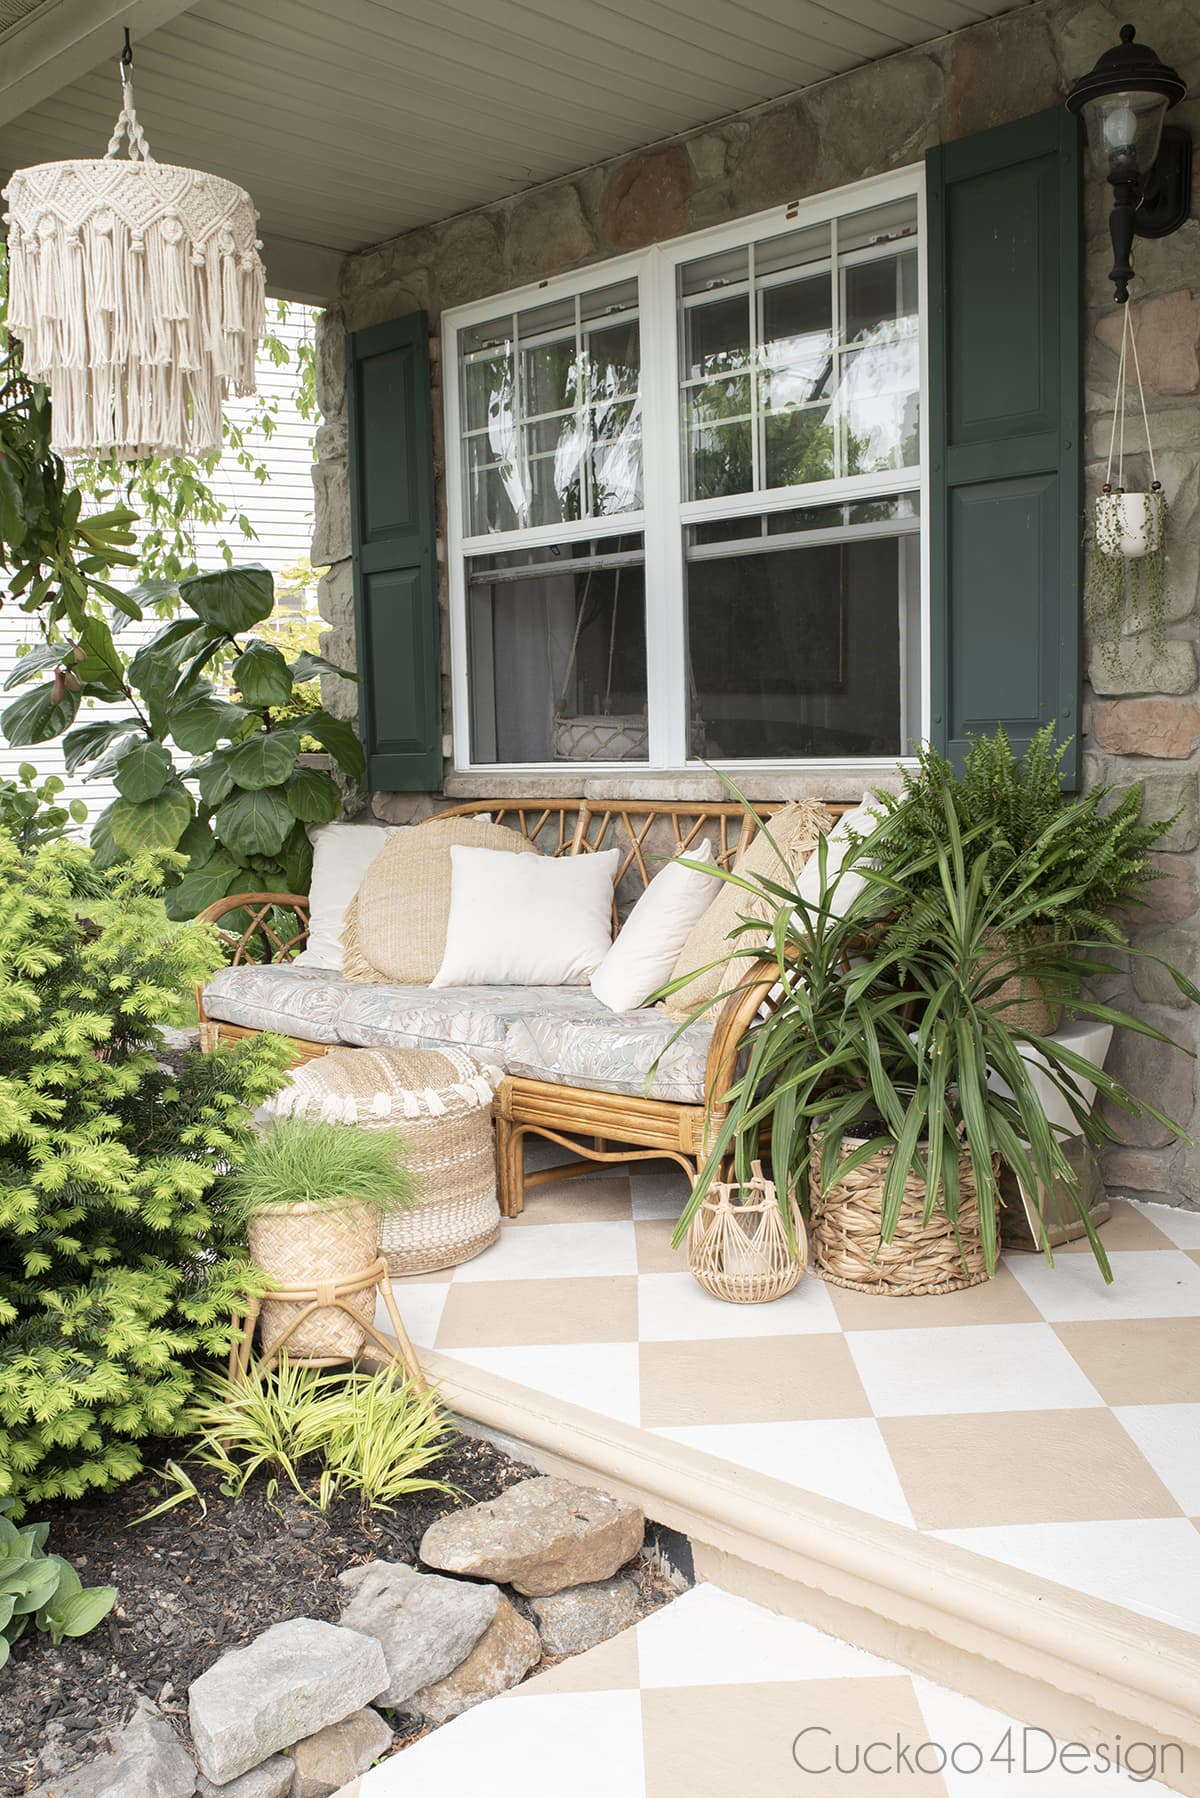
I recently gave our front porch a makeover with the same checkerboard pattern floor as the bathroom. You should check out how easy it is to actually paint a checkerboard pattern floor. Some elbow grease required 😉
More related bathroom projects:
My daughter used castles in Germany as her inspiration and I think I somewhat accomplished that without being too over the top for this bathroom design, don’t you think so?
We are all very happy with it and the blush bathroom is no longer a space that makes me sad.
I asked yesterday on Facebook and Instagram what I should name this blog post and someone said ” When life gives you lemons make Strawberry Malt” hehehe, I love that and it’s so fitting.
Tschüß,
Lovely shade of pink. Feminine without being syrupy sweet. Great remodel!
Thank you so much!
So pretty! I love the hanging wall plants.
Thanks! I’m in love with them too. I had to have them!
Great job! I love that you were able to make the old floor tile look intentional. The wall color is beautiful and the new marble top sink works really well with it.
Thank you Amy! The number one thing I wanted to do is make the old tile look like it was intentional. I’m glad that I accomplished that.
Wow, what a difference. It looks amazing. I love how you add all the molding, so pretty
Thanks Marty, I’m addicted to moulding now 😉
Love it, looks like an entirely new room and on a budget.
Thanks Linda!
Julia it’s perfection!!!!! I’m loving this shade of paint so much! The monochromatic design with the trim, moulding, and even the mirror works so spectacularly! Well done and awesome job.
Thank you Stephanie! I’m already thinking about adding more moulding in the house. Maybe ceiling moulding.
this is freaking INCREDIBLE!!!!!!!!!!! you outdid yourself!
Ha! Thanks Cassie
That makeover is one of the best I’ve ever seen! You are so talented and so lucky to be able to do this work yourself. Any kind of renovations cost a small fortune and trying to find someone competent to do the work right is very hard. Now your bathroom is bright and cheerful. The best accessories in there are the kitties though!
Wow Donna and this is the nicest compliment I have ever received. Thank you so much! And I agree they are definitely the best accessories.
First….I would have killed the Uncle. It’s one of those things….if he wasn’t going to do what you wanted, you probably would have paid someone to do the tile versus what you would up with.
I need to paint my bathroom too, it’s currently blue with a brown painted vanity. (It was in style 10 years ago.). My friend said I should paint the walls, vanity and trim all one color and I just couldn’t see it….now I can.
Unfortunately, I installed a tile floor when I moved in and I PICKED IT OUT….I created a ‘rug’ with a tile border and now I wish I would have gone with a plain floor. I need to go get a paint deck to match to the right color paint. It’s beige tones with a white geometric border. My tile is white, but it’s cracked in places and not in great shape, I have to live with it, or at least the countertop for a while longer.
Ugh Renee! It makes me so mad to just think about it. I’m glad you can envision the monochromatic look now. Have a great weekend.
It looks beautiful! Well done!
Thank you Colleen
You are so gutsy…..from black walls (yikes) to pink….it looks unbelievably great.
The floor…OMG!! It looks custom.
The cat IS an integral part of the whole room.
Thank you so much, Carol! Haha the black walls! Love my cat accessories
WOW! Amazing. Thank you for sharing!
Thank you Alisa!
It looks fantastic. I LOVE the plants. That’s something I should add to my bath. Great job with everything
The planters and plants are perfect for any bathroom. So much better than art because of the humidity always ruining everything
I love this bathroom! Love all your work. We have similar styles. I’m bad about commenting, but always read your posts!
Well thanks so much for always reading Debra and for your comment. I really appreciate it
Really amazing work! I love the wall treatment. I love the wall plants. I love that everything has the same color, which gives the chance to the depth of the 3-D shapes to shine through (i.e., mirror, vanity, even the decor pieces). The shower curtain is just the right pop of color to tie it all together and bring it to life. Even the cat-model seems perfectly designed to the space. 🙂
Thanks Ale. Willy looks perfect in any space, right?
Great job as usual, Julia!!!!
Thanks so much Jen!
Love it!! I was impressed and surprised that the prior tile held up so well. Anyhow, love the new look.
PS – could not view or find the video
Thanks Tammara. They are chipped here and there but nothing awful, so yes they held up great over 20 years.
What a beautiful job you did, Julia. I shudder to think what my results would look like if I ever attempted to do a makeover on our bathroom! You’re so talented! And I really appreciate your honesty about being on a budget – that’s the reality for most people, and I see so many bloggers who “seem” to have unlimited funds for such things, although I find that hard to believe. Naturally, I love the cat accessories. 🙂
Yes, I get baffled by how some people look like they have unlimited funds too. We certainly do not! And thank you so much
Your blush bathroom makeover is truly inspiring! It’s wonderful how you turned your dreams into reality, even without a complete gutting of the space. The decision to work within budget and energy constraints is a testament to your practical approach.