

Updating my plain tan and white checkered floor
I’m not sure if you guys know that we have two bathrooms with identical tan and white checkerboard tile flooring. I had been raking my brain about how I could update my plain tan checkerboard floor without having to remove the tiles.
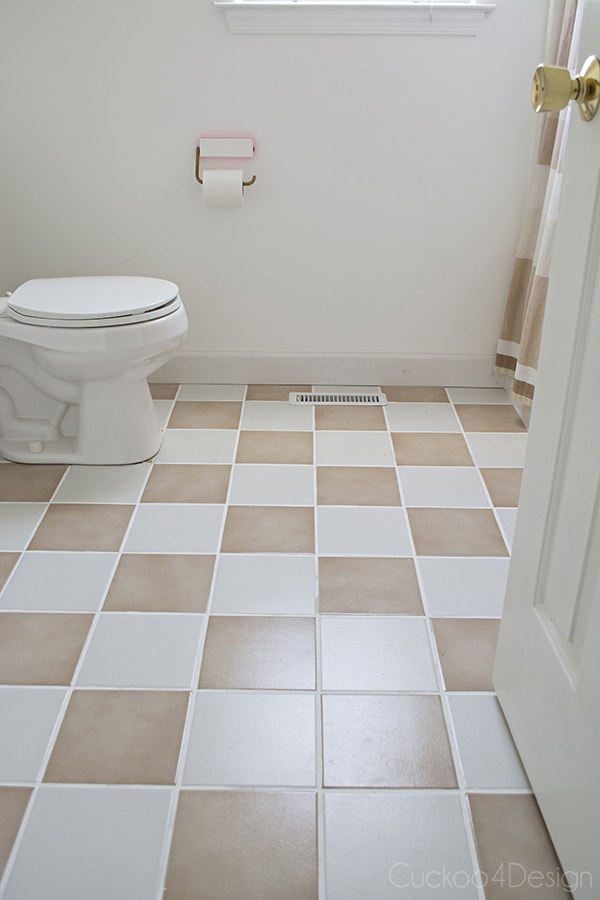
Updating my plain tan and white checkered floor with triangle decals
This post may contain affiliate links from which I will earn a commission at no extra cost to you. View my full disclosure policy.
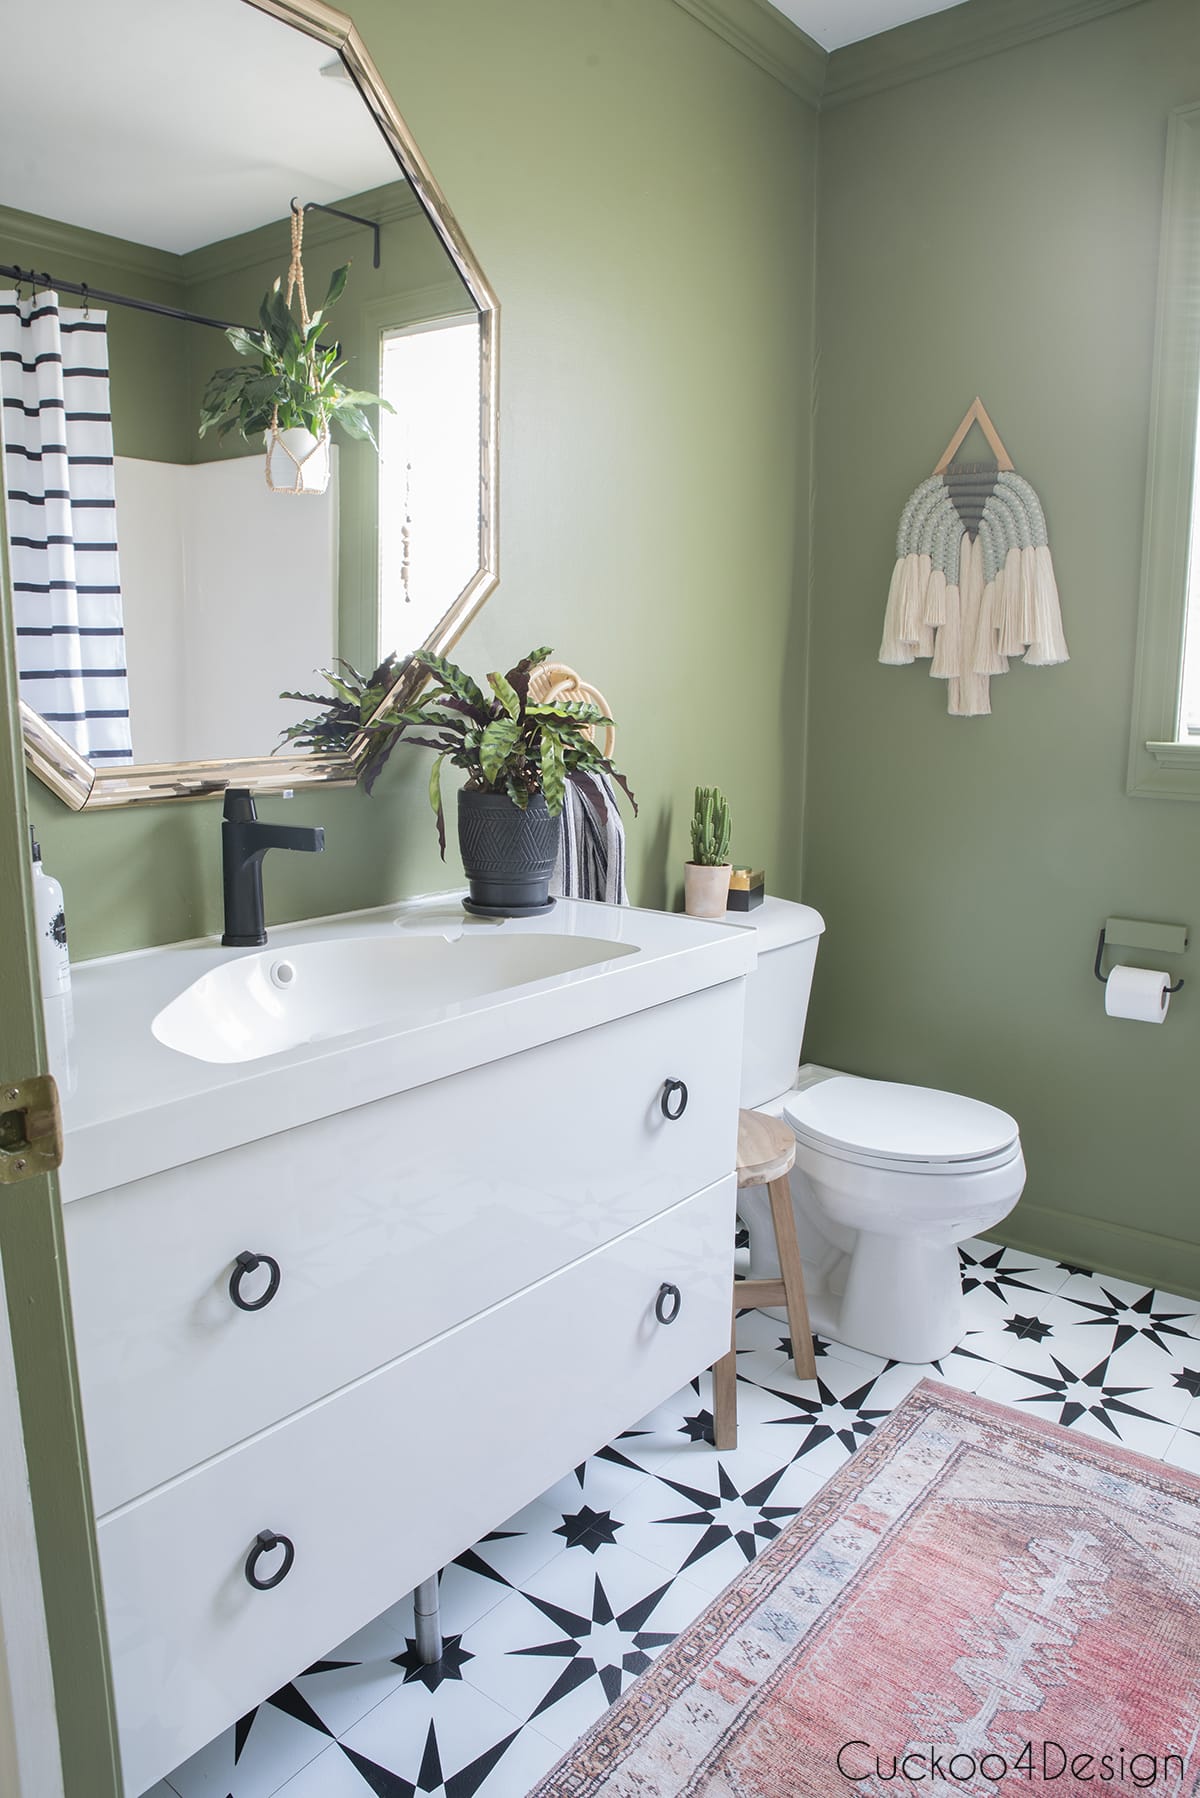
I painted the kid’s bathroom with the same flooring black last year (HERE to see more) to change it up a bit.
And since one of the number one questions I get asked in my Etsy shop is whether you could use the wall decals on flooring, I thought I’d give it a try. I never had an answer. I came up with the simplest idea.
Materials used
- craft knife
- vinyl
- metal ruler
- cutting mat
- measuring tape
- scissors
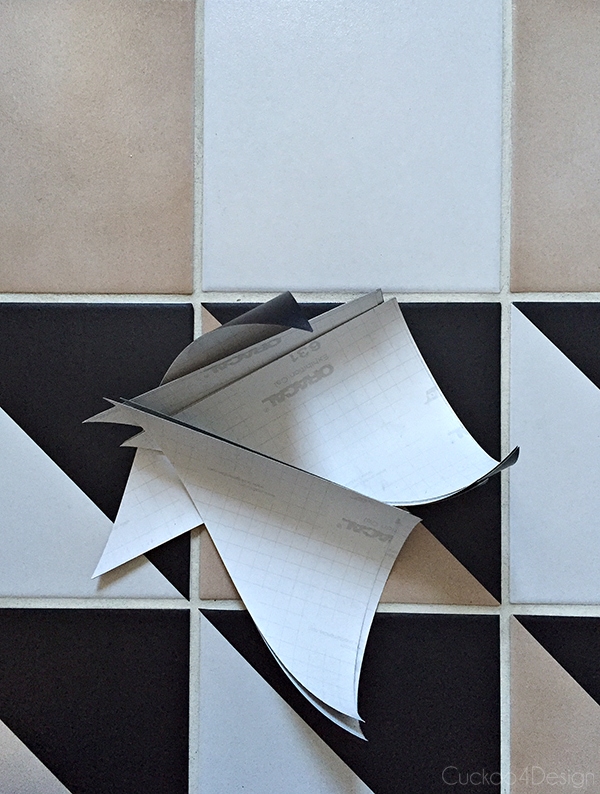
Instructions on how to update the tan and white checkered floor
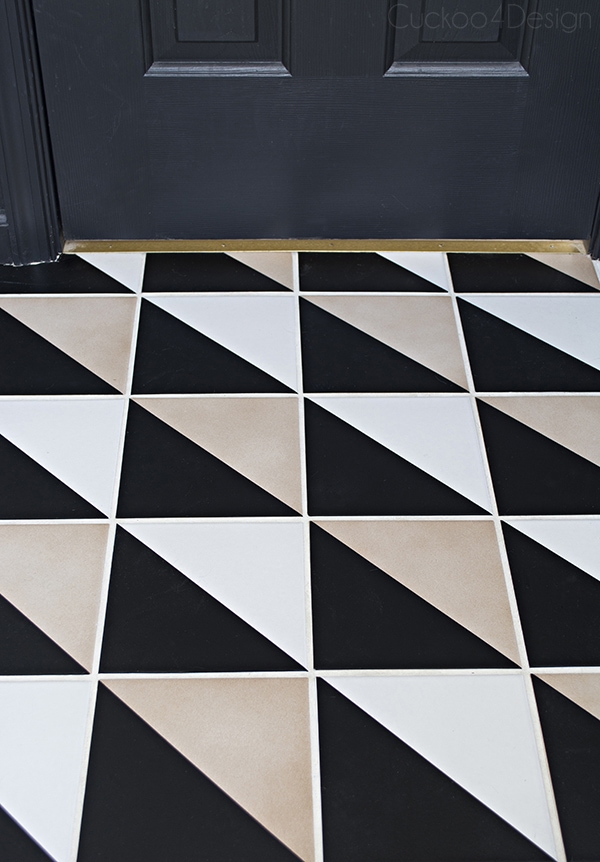
I traced one of the tiles on the back of my decal vinyl, cut out squares, and then cut them in half to get triangles.
{UPDATE: Since the vinyl I used was wall vinyl, I figured I’d try a different type after it started to peel off in some areas. I now replaced it with this stronger vinyl)
Please try out the vinyl in a hidden area first to see how it works on your floors should you try the same.
Thoroughly clean your floor and let it dry. Then I stuck them to the clean tiles.

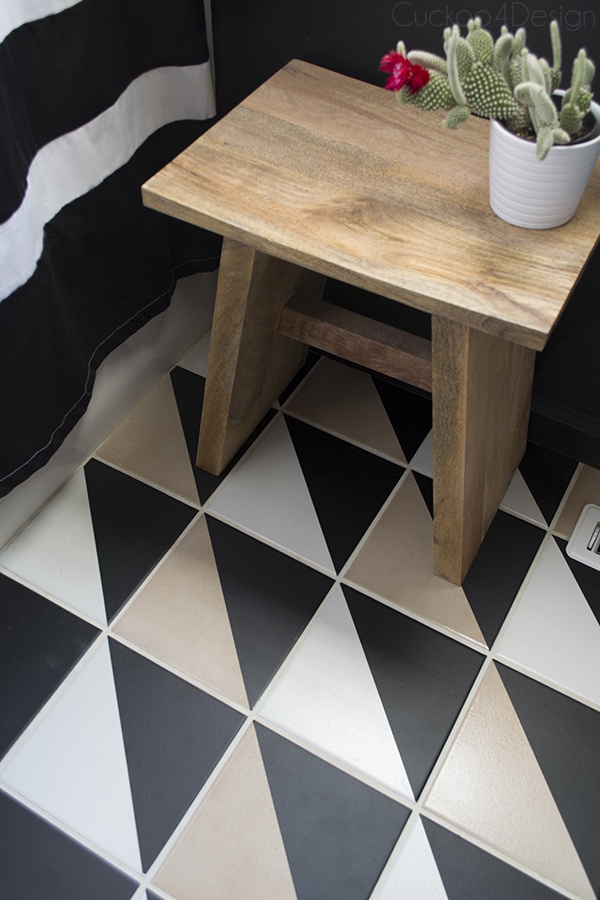
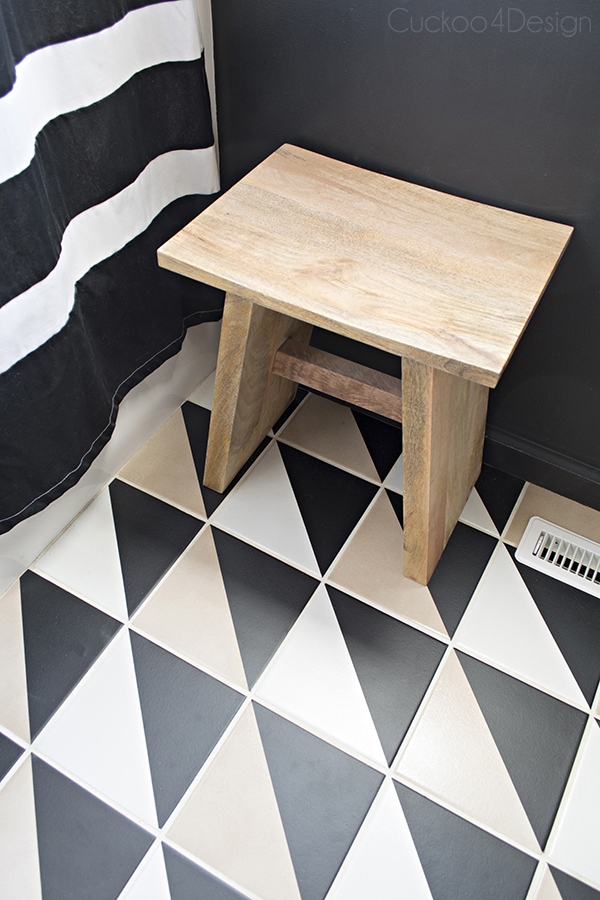
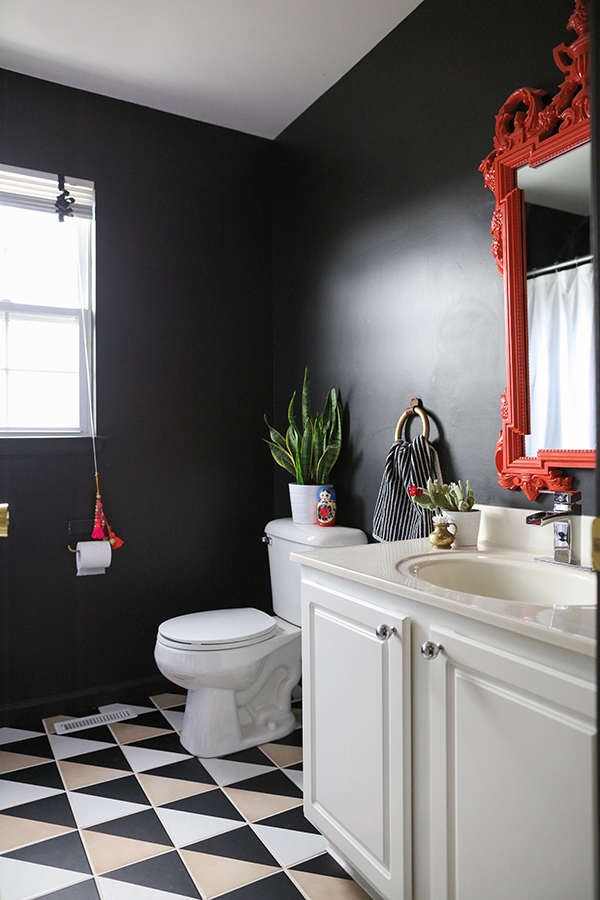
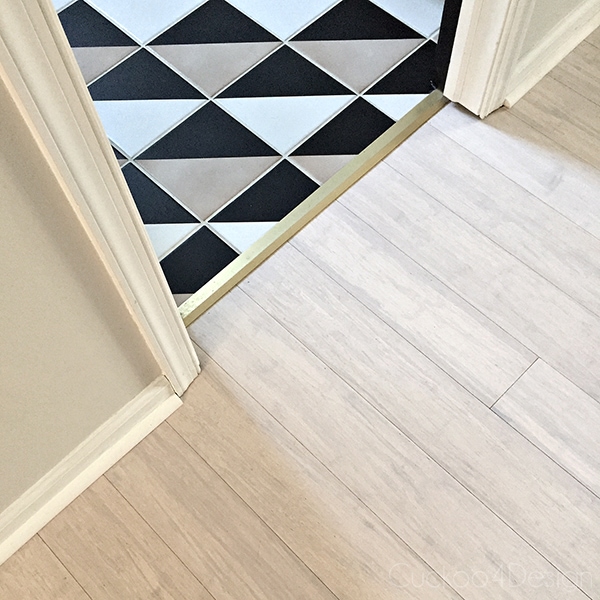
Here is what the floor looks like:
Since the checkerboard pattern trend has returned, I recently removed the decals again and turned it into a blush bathroom.
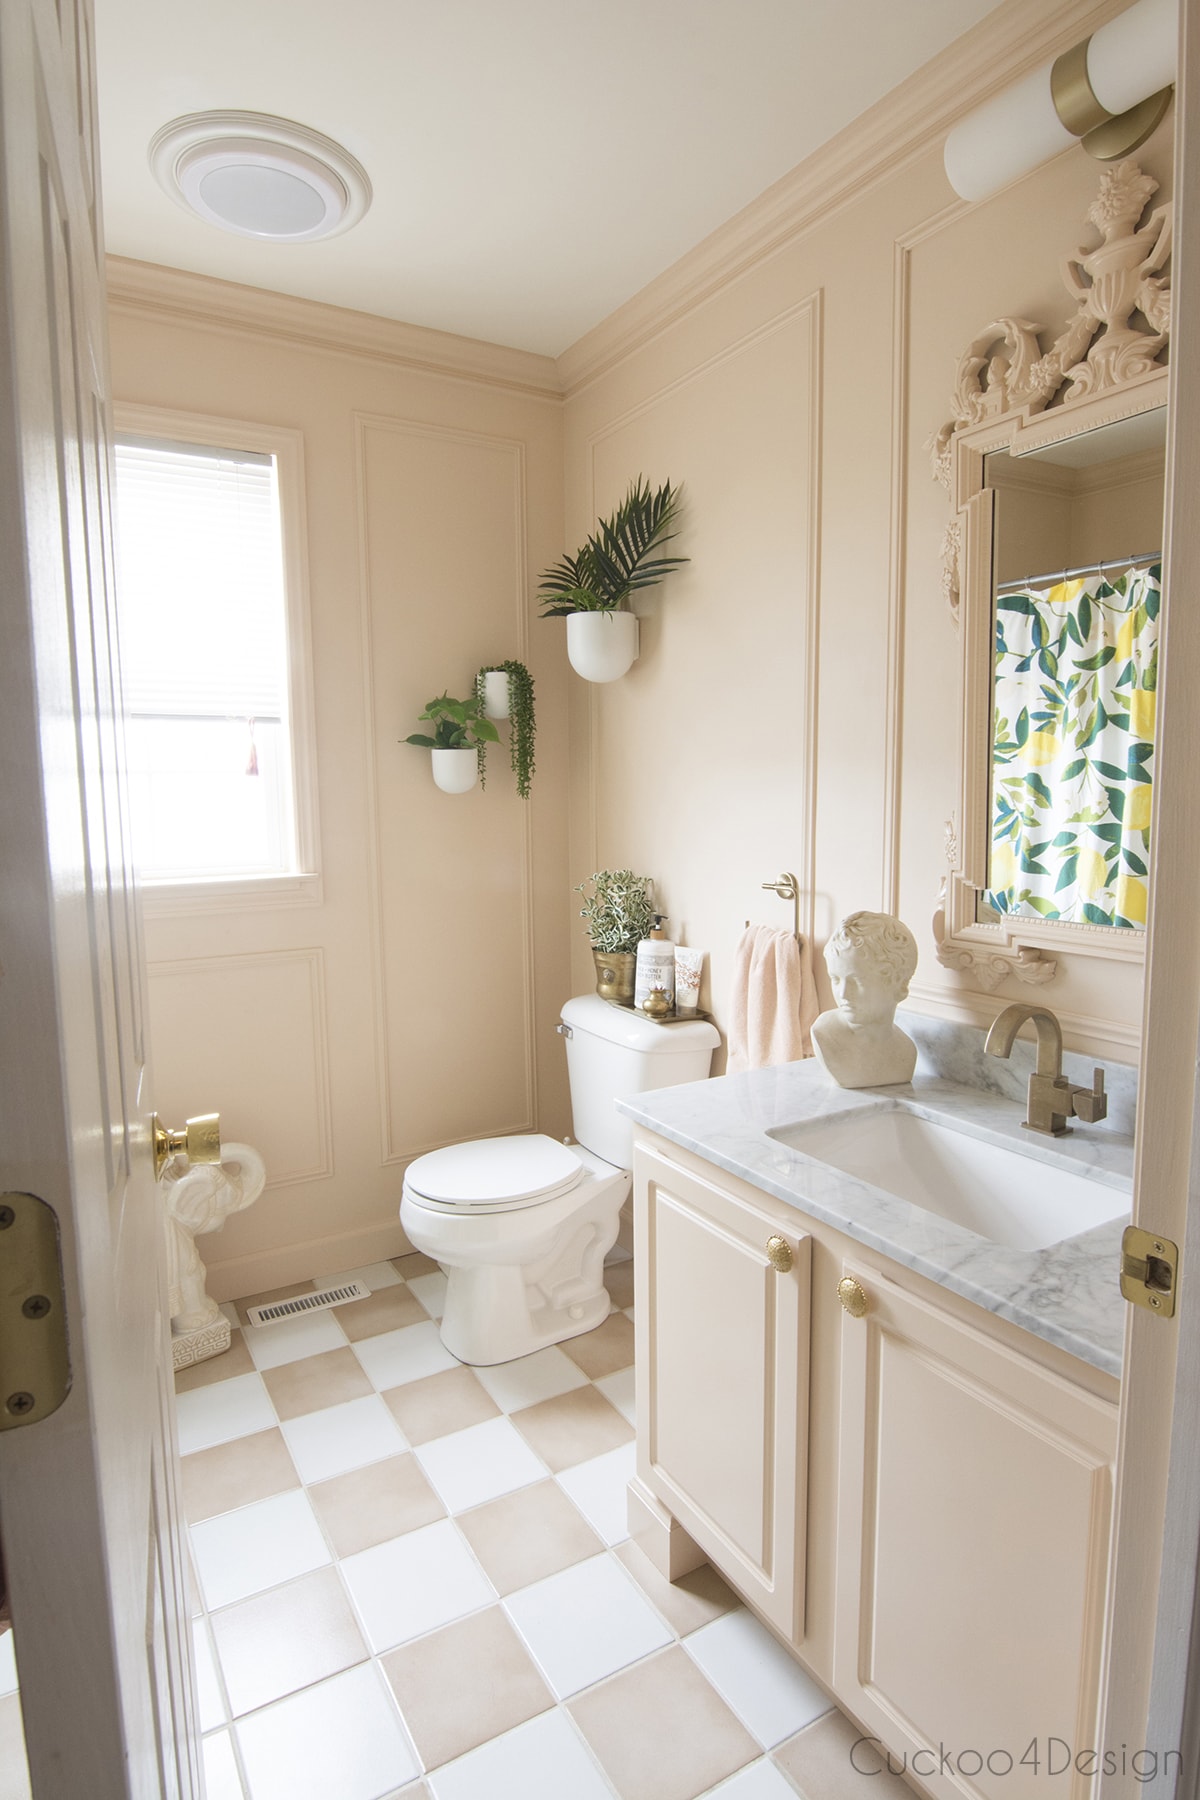

Oh and check HERE what I’m planning on doing with the other bathroom.
Here is the moodboard for inspiration:

And HERE for the progress


UPDATE: And since that makeover, I added cheap patterned floor tiles over the tile since it was chipped and I didn’t need two bathrooms with the same look and pattern. Check out my peel and stick floor tile reviews.
So now I will have to see how they wear and what my final answer will be for my Etsy shop but I certainly love how this simple update changes the look. It’s perfect for a kid’s space. And maybe if it doesn’t wear good, then I can paint the tiles. Let’s see!
Crazy how a simple pattern update can change things up though, right?
Tschüß

(Youleeya)
Oh WOW. What a great update – looks totally custom now! I love the look. I’ve been toying with the idea of painting the tile in my girls’ bathroom, though it’s not a project I’ll get to anytime soon. I’ll be very curious to hear how this wears!
Thank you Jennifer, I will keep everyone update on the wear.
WOW what a transformation! I loved the floors before but I really love them now! Totally different look!
Thanks Kathleen
this idea is brilliant, julia!!!! i LOVE it!
Thank you!
Crazy, awesome idea. Seriously, update us all with how it wears.
I love the new look. I am also looking at tile that I would love to get rid of, but the expense and mess are not what I want to do at this time. Thanks for the inspiration:)
Thanks so so much!
This is an incredible idea – such a high-end look from such a simple and cost-effective solution, love love love.
Thank you
It all looks great! Where did you get that great stool/bench?
I found the stool at Target last year but they never had it online. Not sure why and thanks so so much.
So SMART! love the way it looks! now for a pulled back shot 😉
Oh yes I need a pulled back shot but the bathroom was a mess and I was lazy 😉 And thank you so much
I love the new look. I will be interested to see how it holds up as well, let us know. 🙂
Thank you and I sure will!
Wow! That looks amazing! What a change.
If they don’t hold up on their own, I’d be tempted to try covering them with a polyurethane or some kind of epoxy.
I will be following this….
Keeping my fingers crossed and thanks so much!
What a brilliant idea Julia! Looks amazing!
Thank you Darnetha
Oh I love this!! As a renter, this is such a do-able option for me without pi**ing off the landlord!! 🙂
And I adore the new geometric pattern you created.
Thanks Vin
Pure genius!! and gorgeous!!
xo
Looks so great! Fingers crossed that it holds up for you!
The vinyl add to the tile is brilliant and makes the flooring look so high end!
It makes such a big difference and looks just fabulous, Julia! Great idea!
OMG, I love this transformation so much!!! The black and tan/white pattern is amazing and looks like it was meant to be that way – it reminds me of those super expensive patterned concrete tiles everyone (include me!) loves right now! Bravo!
Thank you! I really want some cement tile too, it’s just not been in my budget
Gosh, it looks so good, Julia! What a transformation!
Thank you so much Gwen
WOW! So very cool Julia! I never would have thought to do this! What an easy change too!
Thanks Summer, lets hope it stays nice 😉
This looks awesome! I love the pattern.
Thanks Haley!
You are such smart lady!! Love this and how much it looks like the tribal/cement tile craze but for a fraction of the cost!
Love it! Such a great idea if you are renting too! xo
Thanks my friend
I missed this somehow (!!) but what an amazing transformation! From blah to fabulous! Love this – hope they wear well 🙂 xxx
Gosh I hope so too and thanks.
That transformation is amazing Julia. I hope the vinyl lasts because that would be an awesome solution for those of us with less than desirable tiles! I have a whole foyer of 80s tile that I was thinking of stenciling. You must be very patient to lay all those triangles so perfectly!!!!!!
Thanks Lisa, I have to write an update on the floor soon. I still want to try another grade of vinyl yet too.
Any news how the floor Is wearing? Does it collect dirt at the seams? Love to hear.
Thanks
Hi Cathy, I wrote in this poster here https://cuckoo4design.com/2016/04/home-updates.html about an update. It was wearing ok but coming up in some corners so I bough this different kind of vinyl which is much better. I linked to it in the post.
Hi Julia, I stumbled upon your blog and love the modifications you made to the Ikea vanity! So much so that I would like to install the same ring pulls in our glossy grey Ikea Godmorgon vanity. I was wondering if you have any tips or suggestions on what worked for you? I’m nervous of cracking the drawers.
HI there Sarah, I’m so glad you like it. I never regretted drilling into the vanity. It was so worth it. I placed painters tape over the drawers where the pulls went before drilling. It was super easy. I shouldn’t have worried that much. Hope this helps.
Question: Did your ikea vanity cabinet come with those long ugly pulls that go at the top of the drawers? I assume it did and that you just didn’t use them and instead added pulls. I would love to do this at an upcoming project but wasn’t sure it was possible.
Thanks in advance and the room looks awesome btw!
Yup that’s exactly what I did and thanks so much. It really changes the look of the cabinets and makes the vanity look less Ikea 😉