

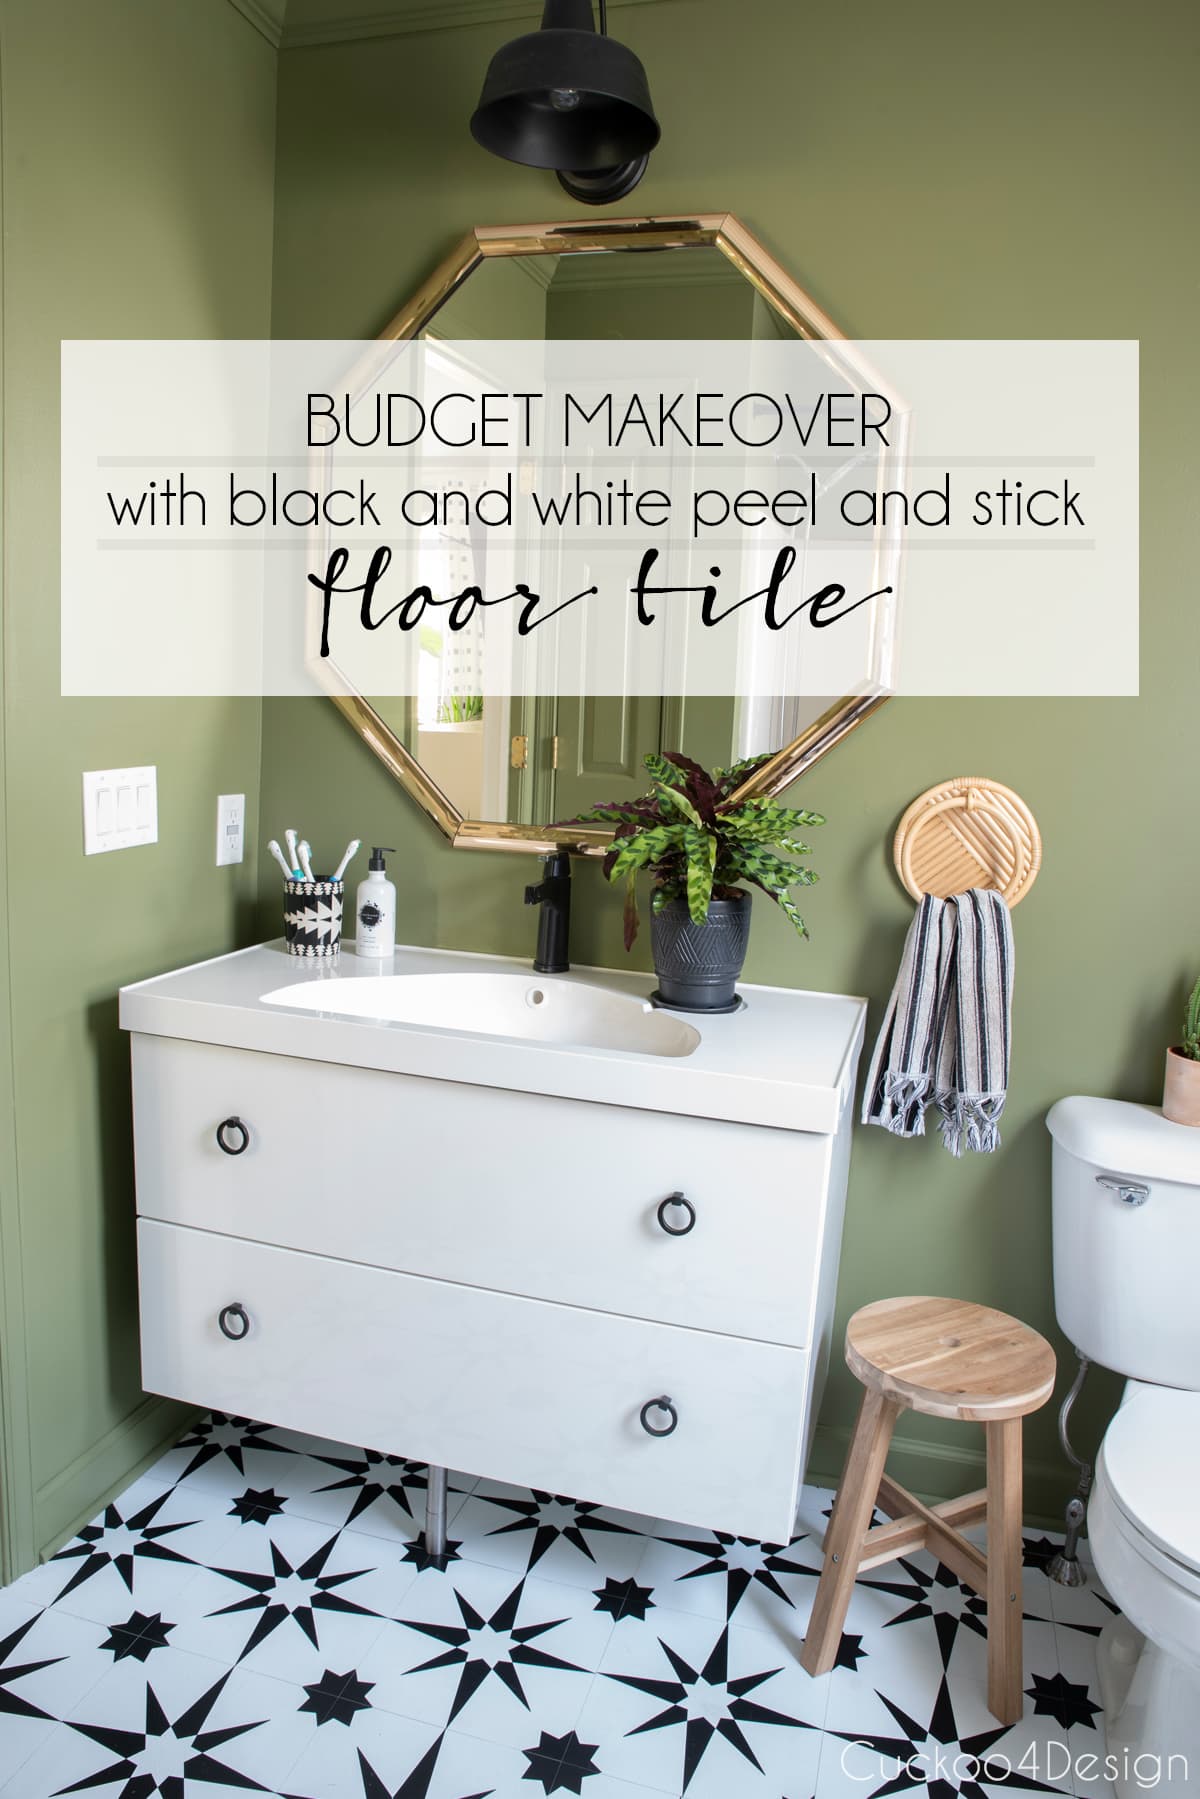
Our bathroom makeover with black and white peel and stick floor tile
You guys, today I want to finally share my budget makeover of our bathroom with black and white peel and stick floor tile. I had been wanting to give this little bathroom that is connected to our bedroom a makeover for a long time. My dream was to rip out the shower tub and tile and to finally put in a walk-in shower but to be honest, I just haven’t had the energy and budget to tackle such a large project right now.
I’m pretty sure that most of you just don’t have the budget this year either and would rather see what a mini-makeover can do for our space. You might be wondering why I wanted to give it a makeover, to begin with when it appeared to look ok in photos. So let me explain… I have been doing some explaining in my Instagram stories already but I know a lot of you don’t follow me on Instagram.
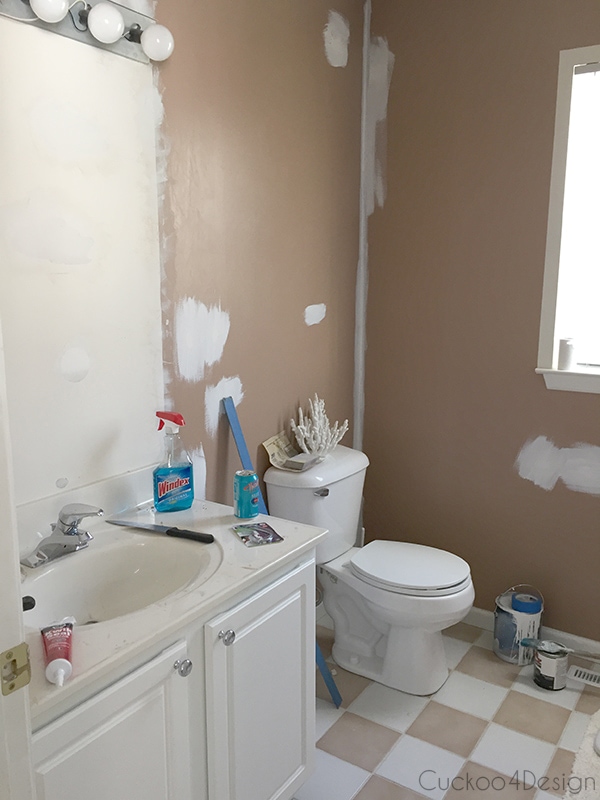
Above you can see how the bathroom looked years ago when I decided to rip out the builder standard vanity, mirror, and lighting to replace it with the Ikea floating vanity.
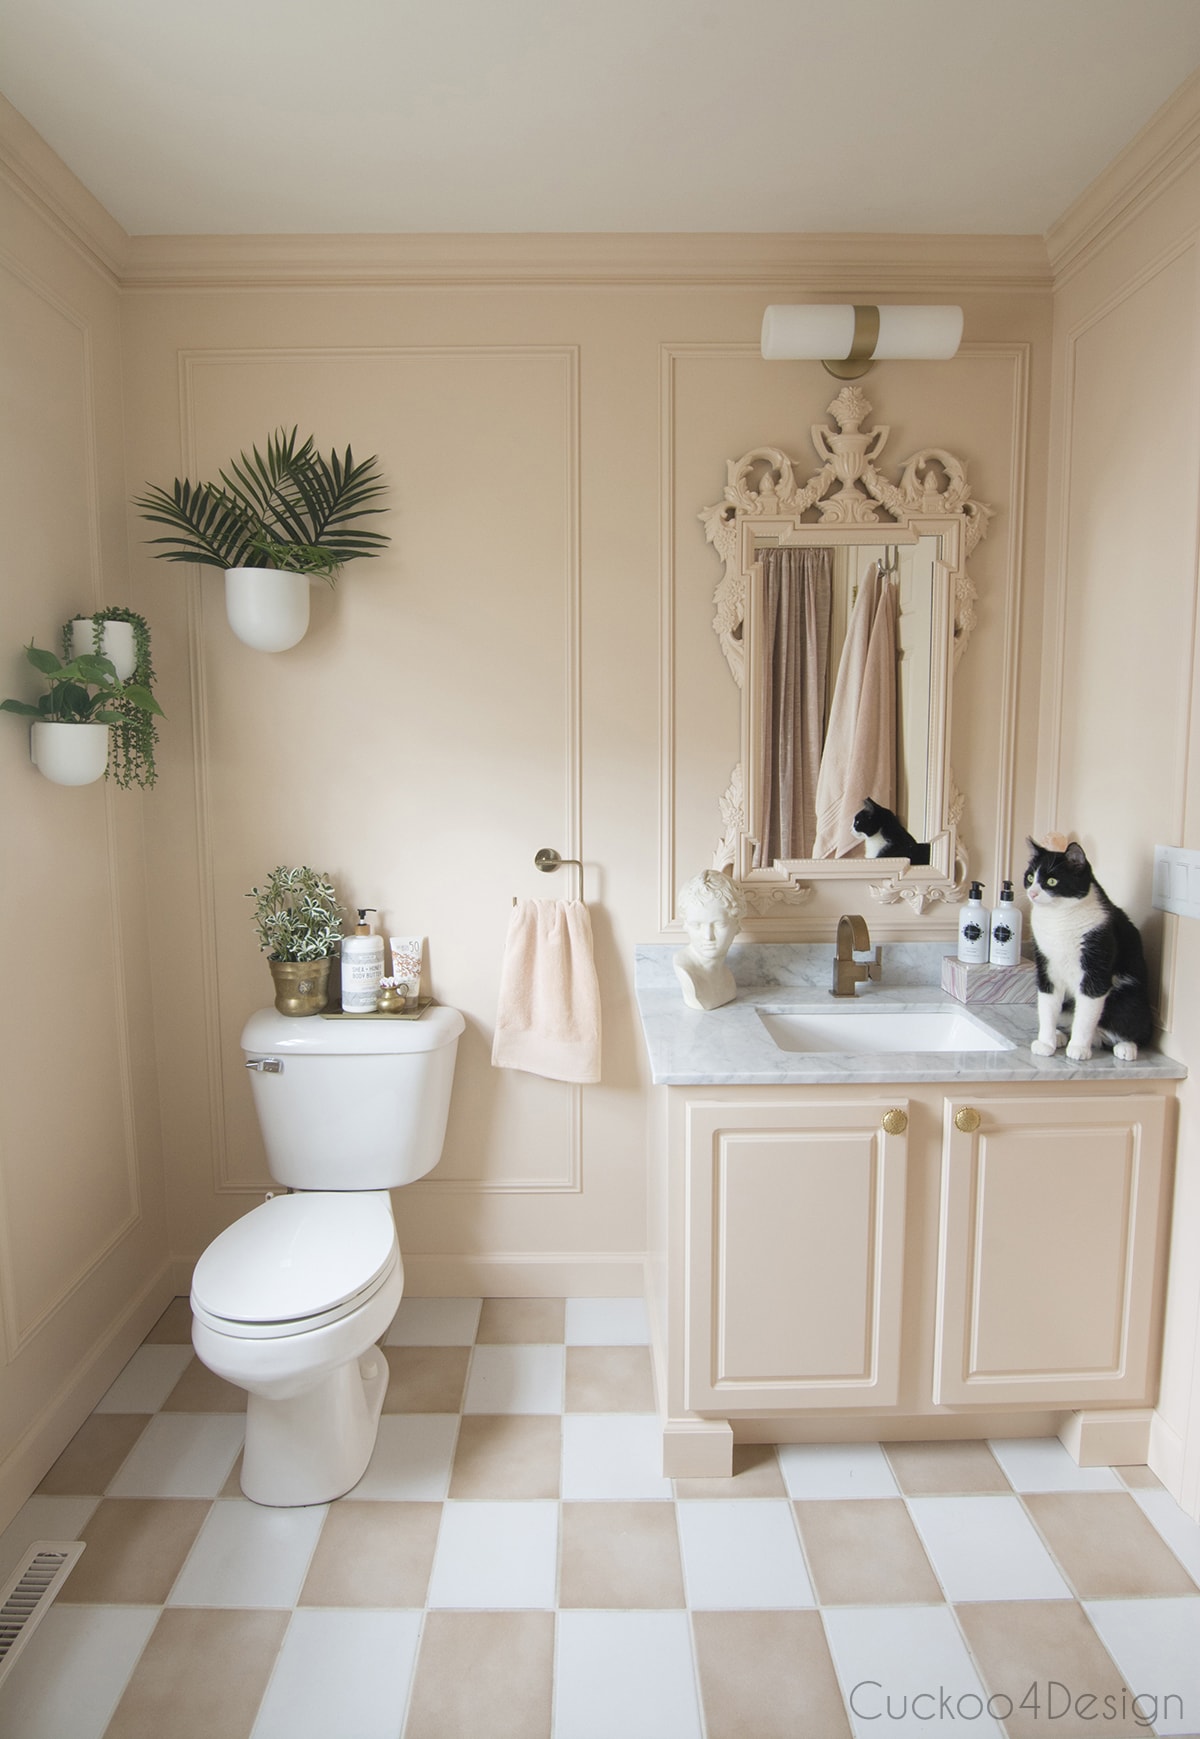
We actually have the same ceramic tan and white checkerboard tile in both bathrooms. If you can remember, I turned that into a blush bathroom with last year’s budget makeover to make the tile shine once again. That bathroom never got used as much so the 20-year-old tile still looks much better than in our bedroom bathroom.
We still adore that bathroom in its blush glory!
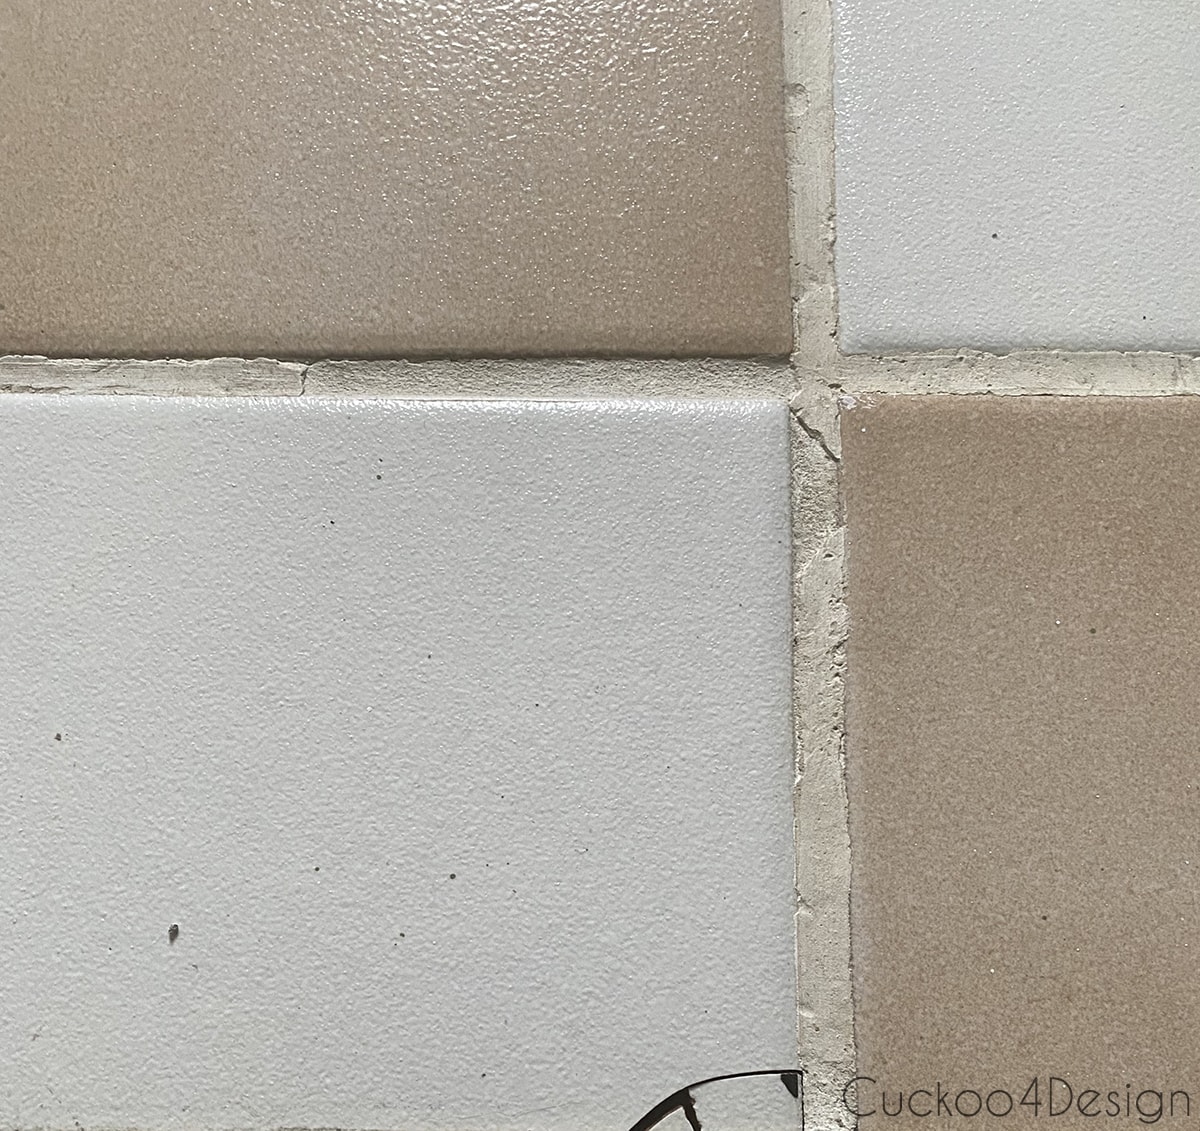
So then…. a couple of years ago I stuck black triangle vinyl sheets on the checkerboard tile to give it a unique and modern look. It looked really good for a couple of years but the grout didn’t do well at all anymore. I added tile under the floating vanity and tried to make the grout blend in with the old grout. I even dremeled out some grout and added new grout. I painted some of the dirty old grout that couldn’t get cleaned anymore. But after years of wear, it just all fell apart.
Also, the white paint in that bathroom started to look really yucky.

Below you can see how yucky it was and that there were even cracks in some of the tiles.
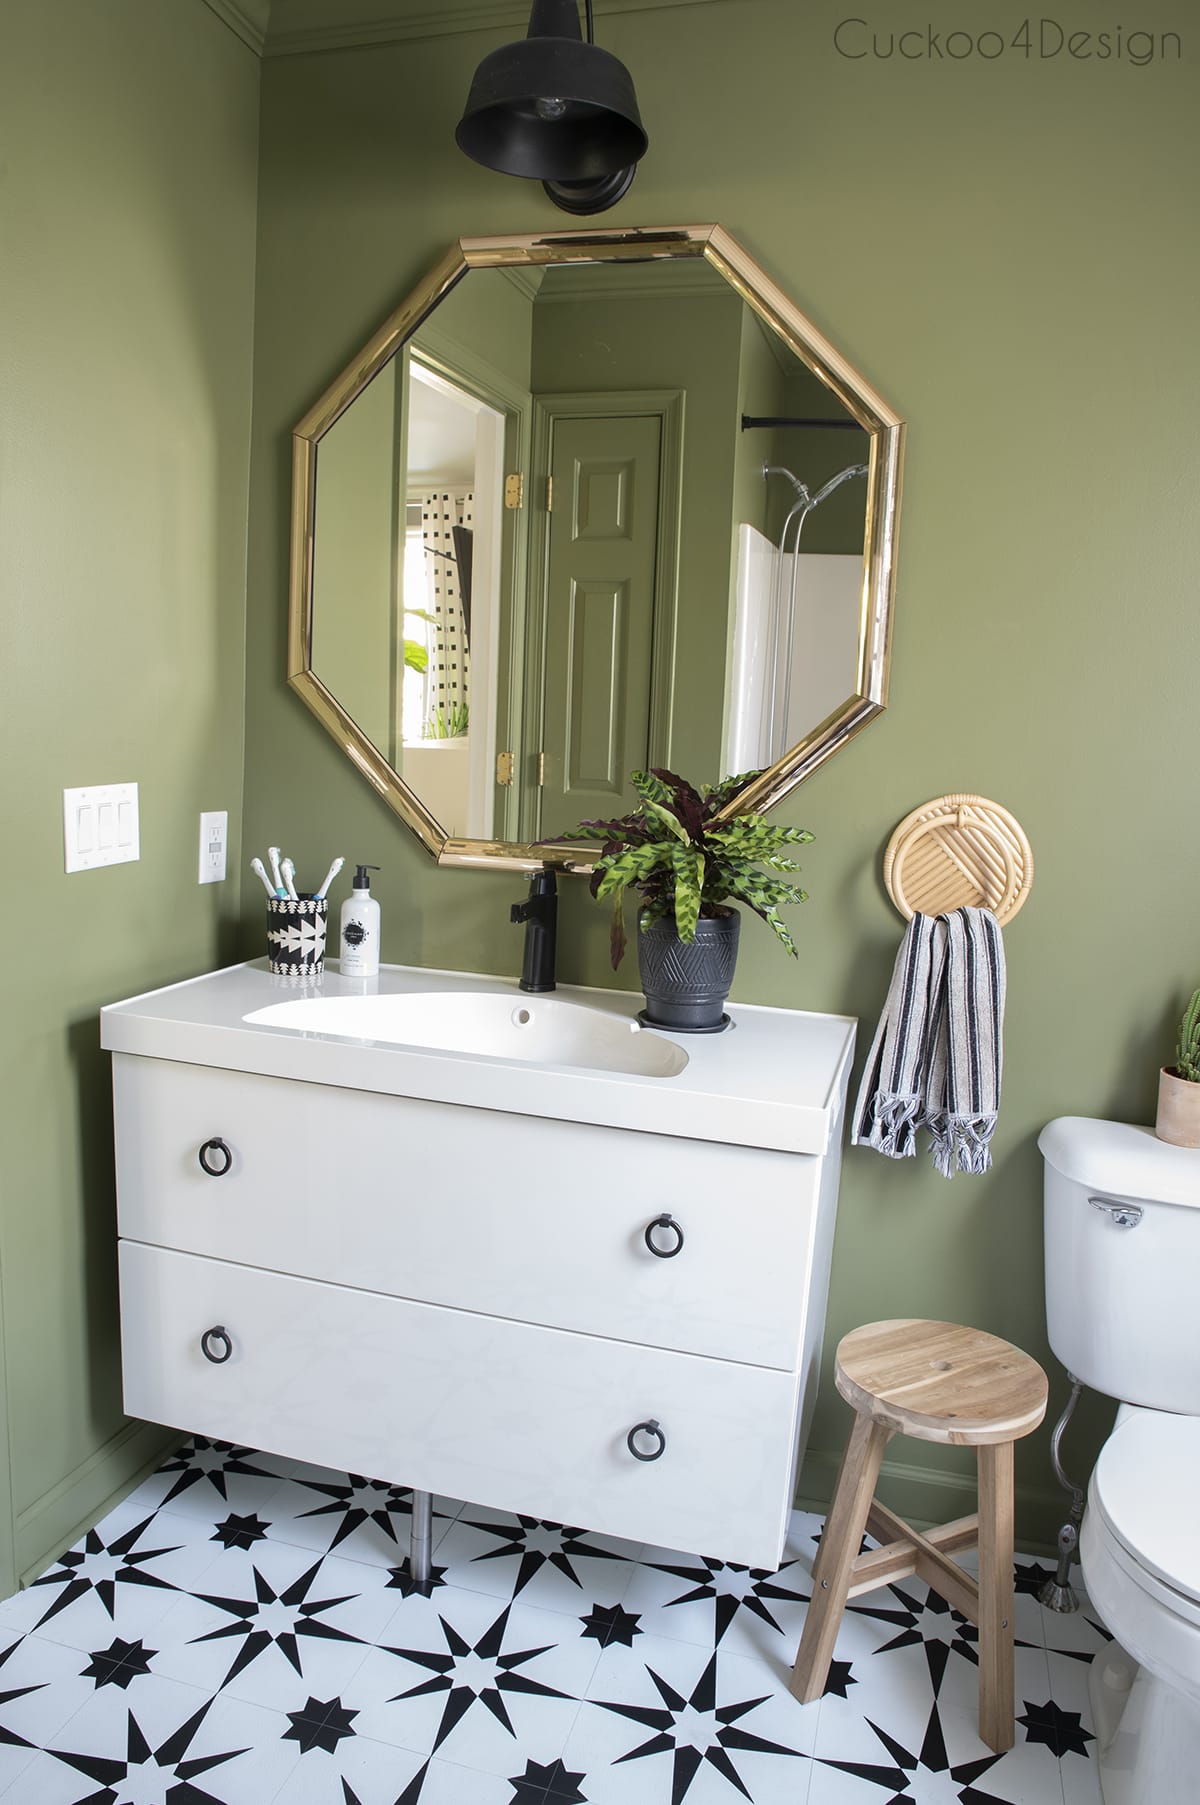
Let me show you how the bathroom looks now. I’m so so excited.
Bathroom reveal with black and white peel and stick floor tile
This post may contain affiliate links from which I will earn a commission at no extra cost to you. View my full disclosure policy.
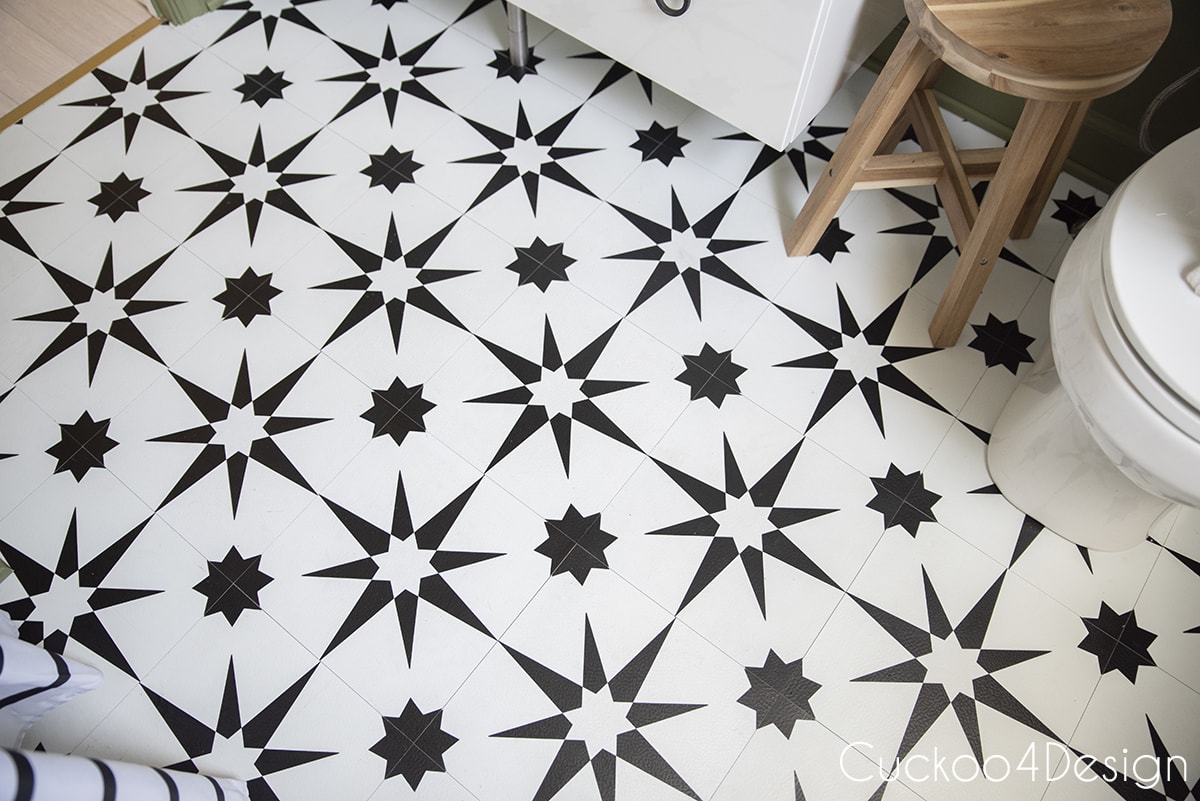
For today I just want to show you the reveal. I wrote a review post of what I exactly think of the tiles and the entire process of installing the black and white peel and stick floor tile.
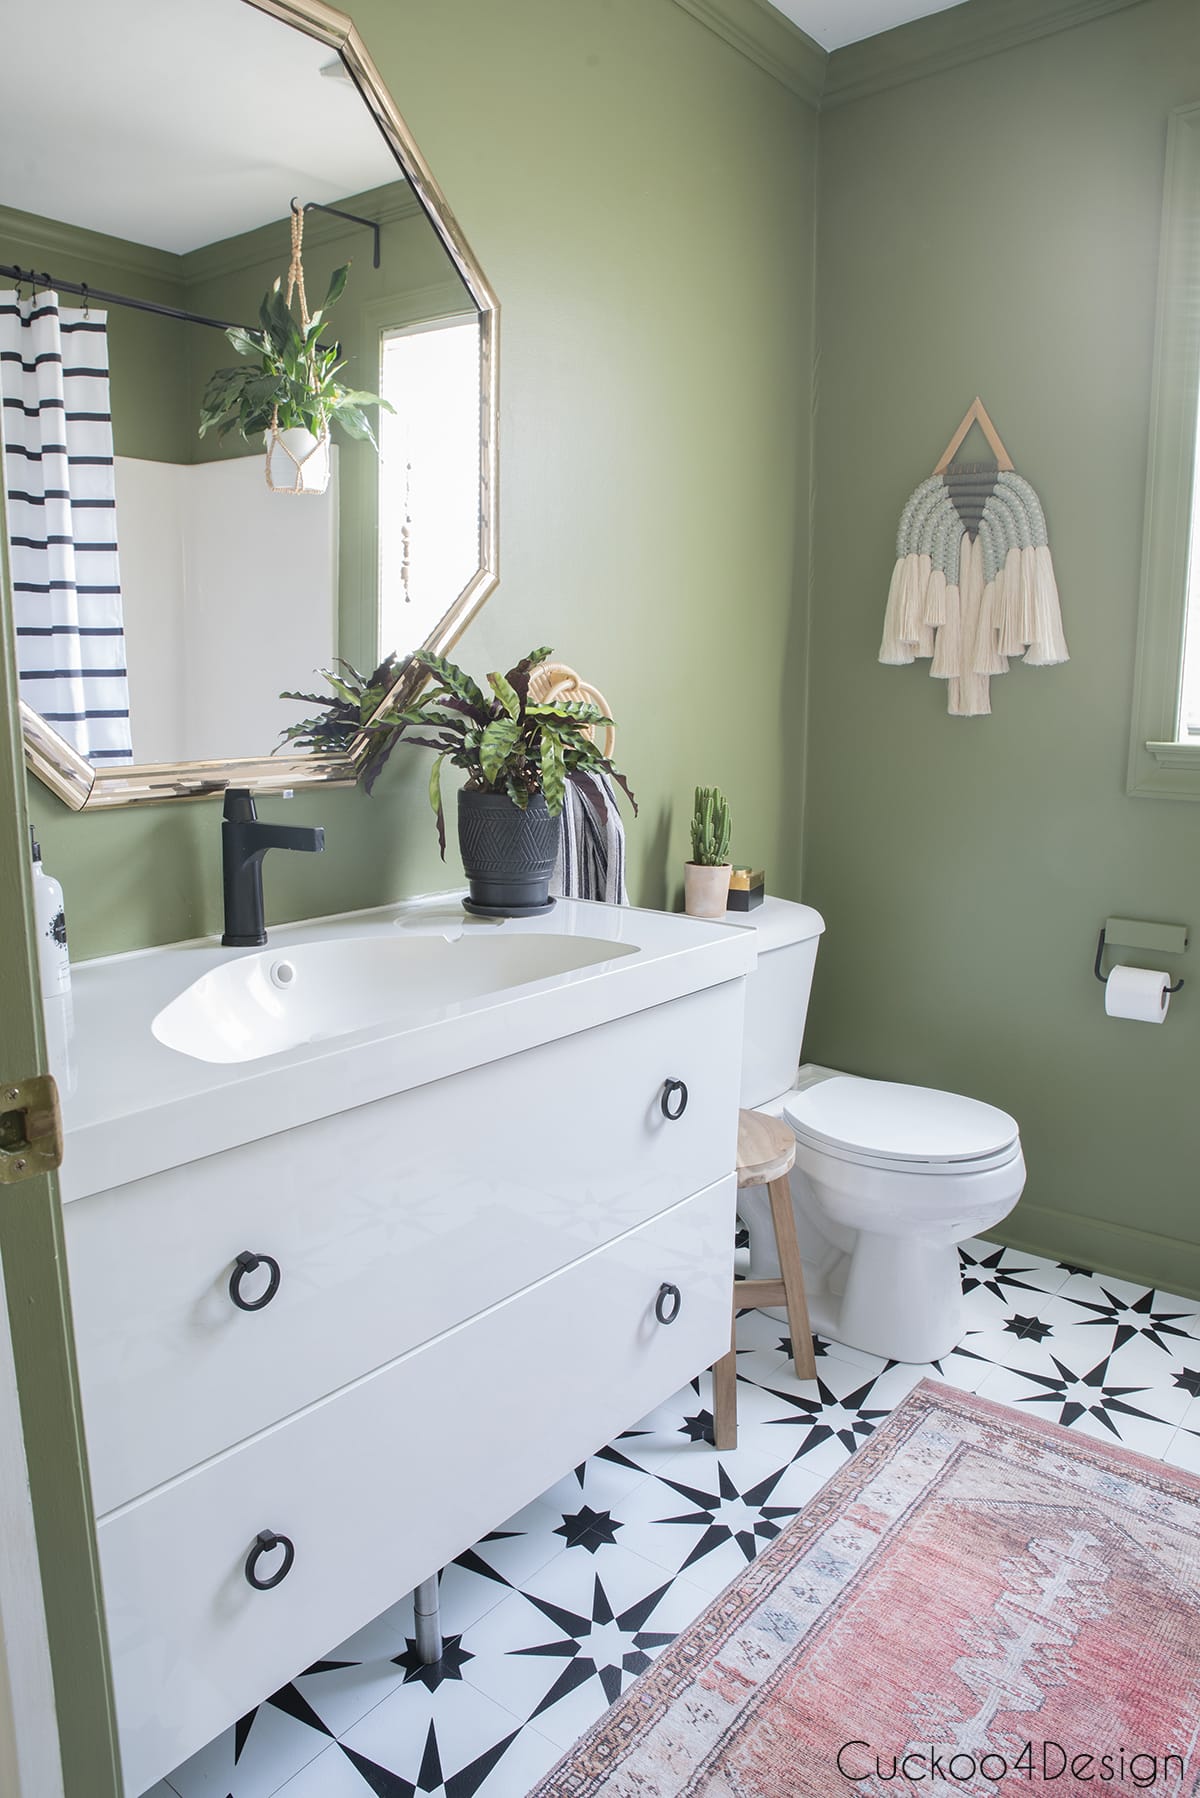
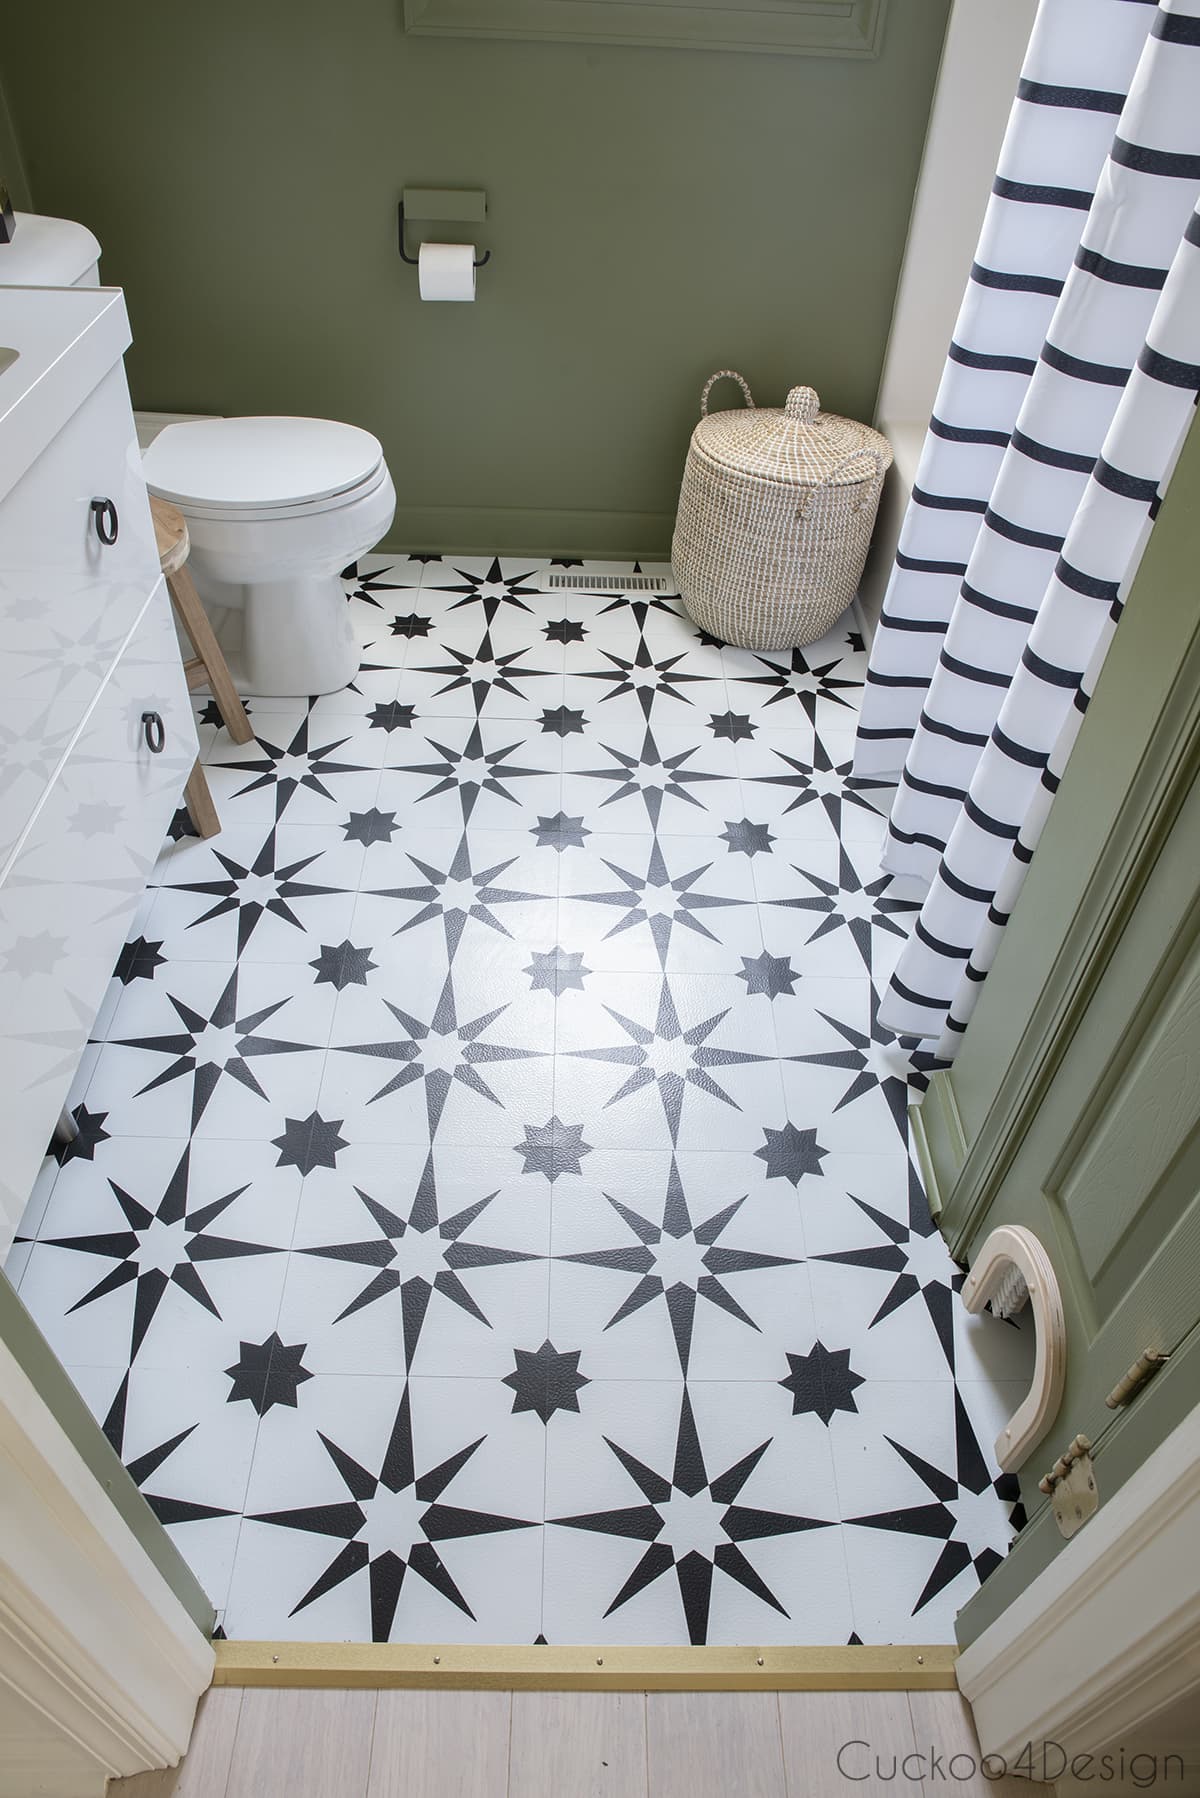
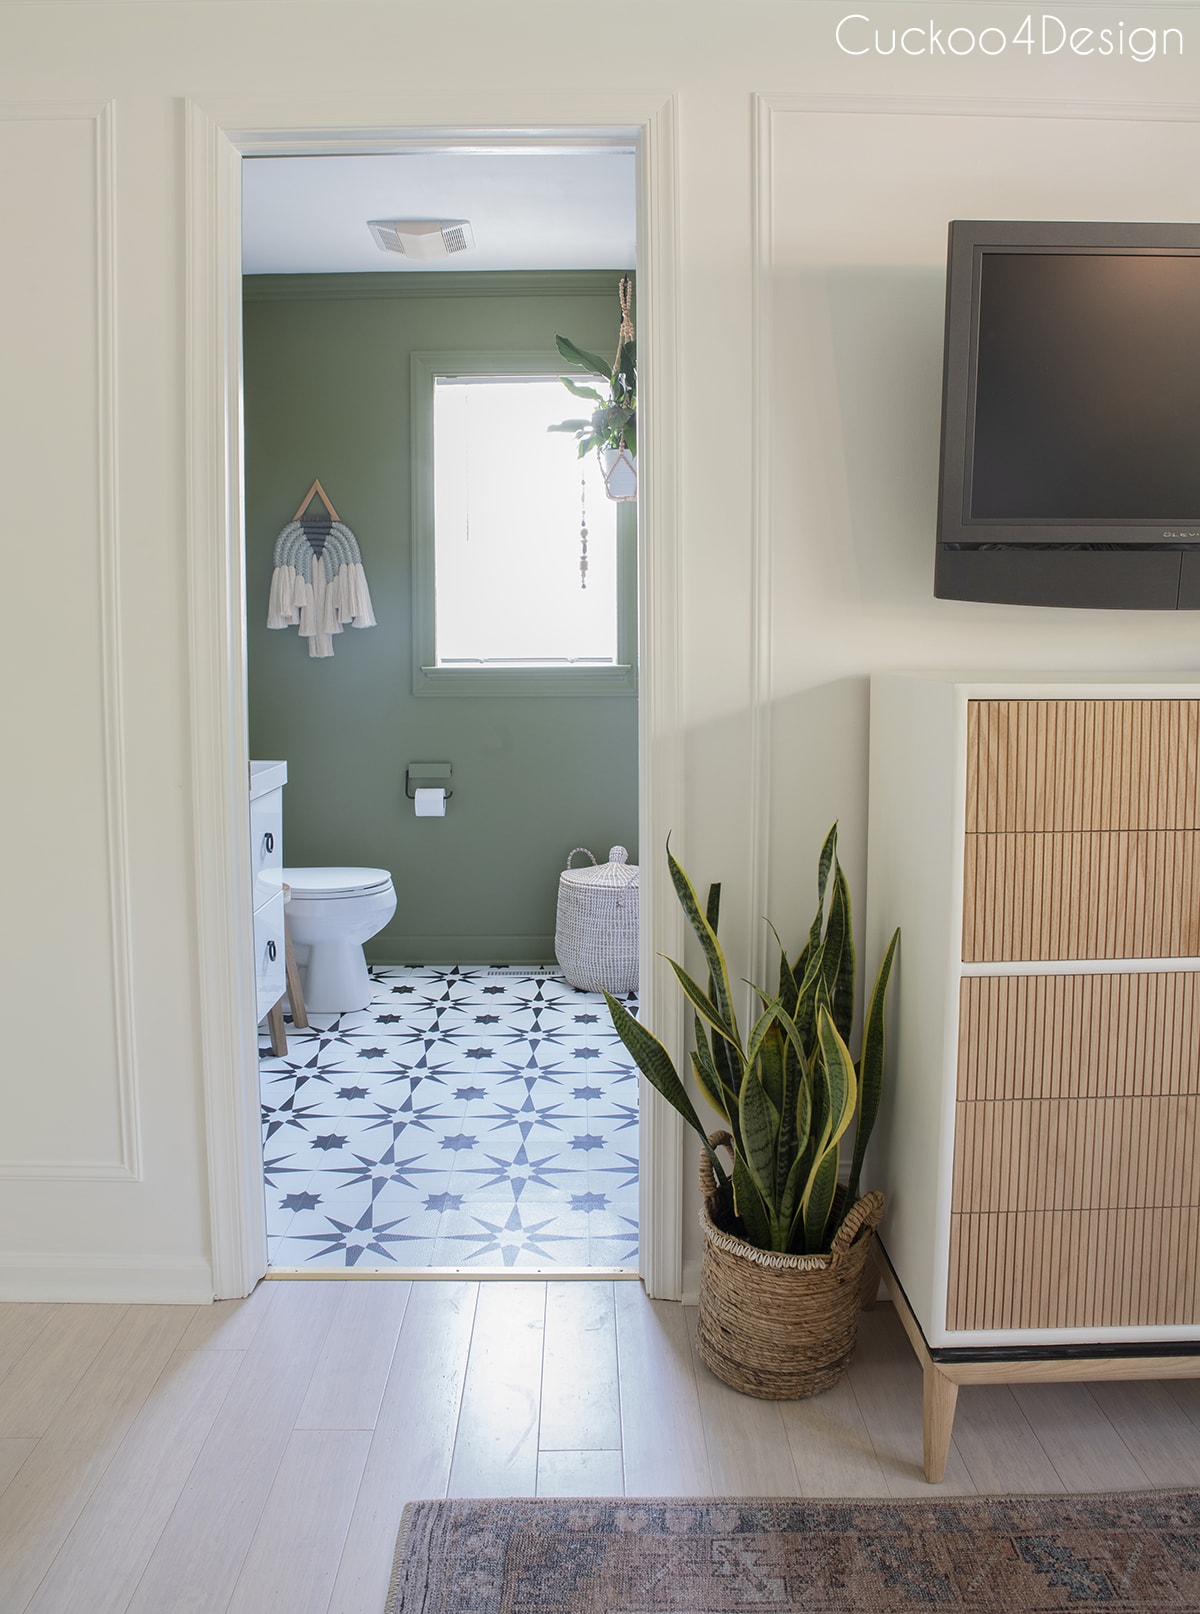
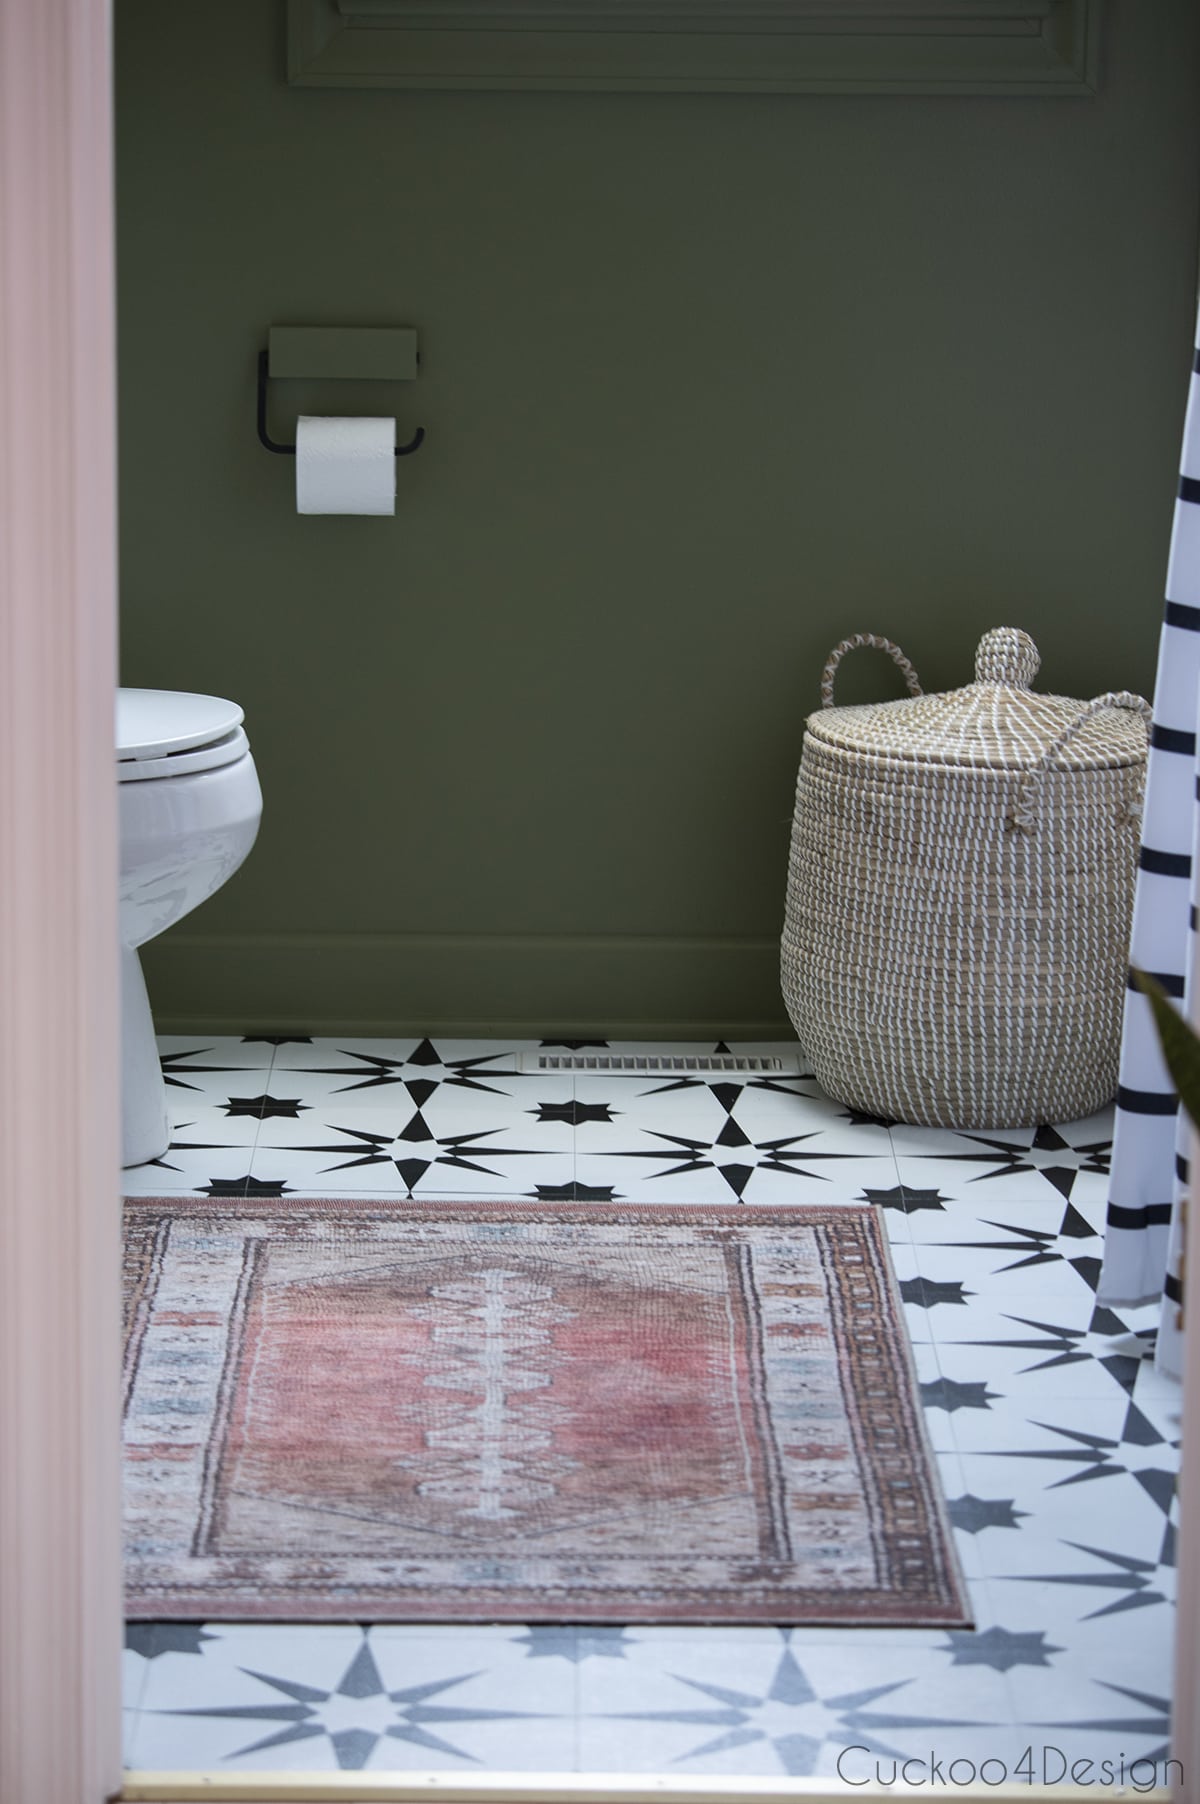
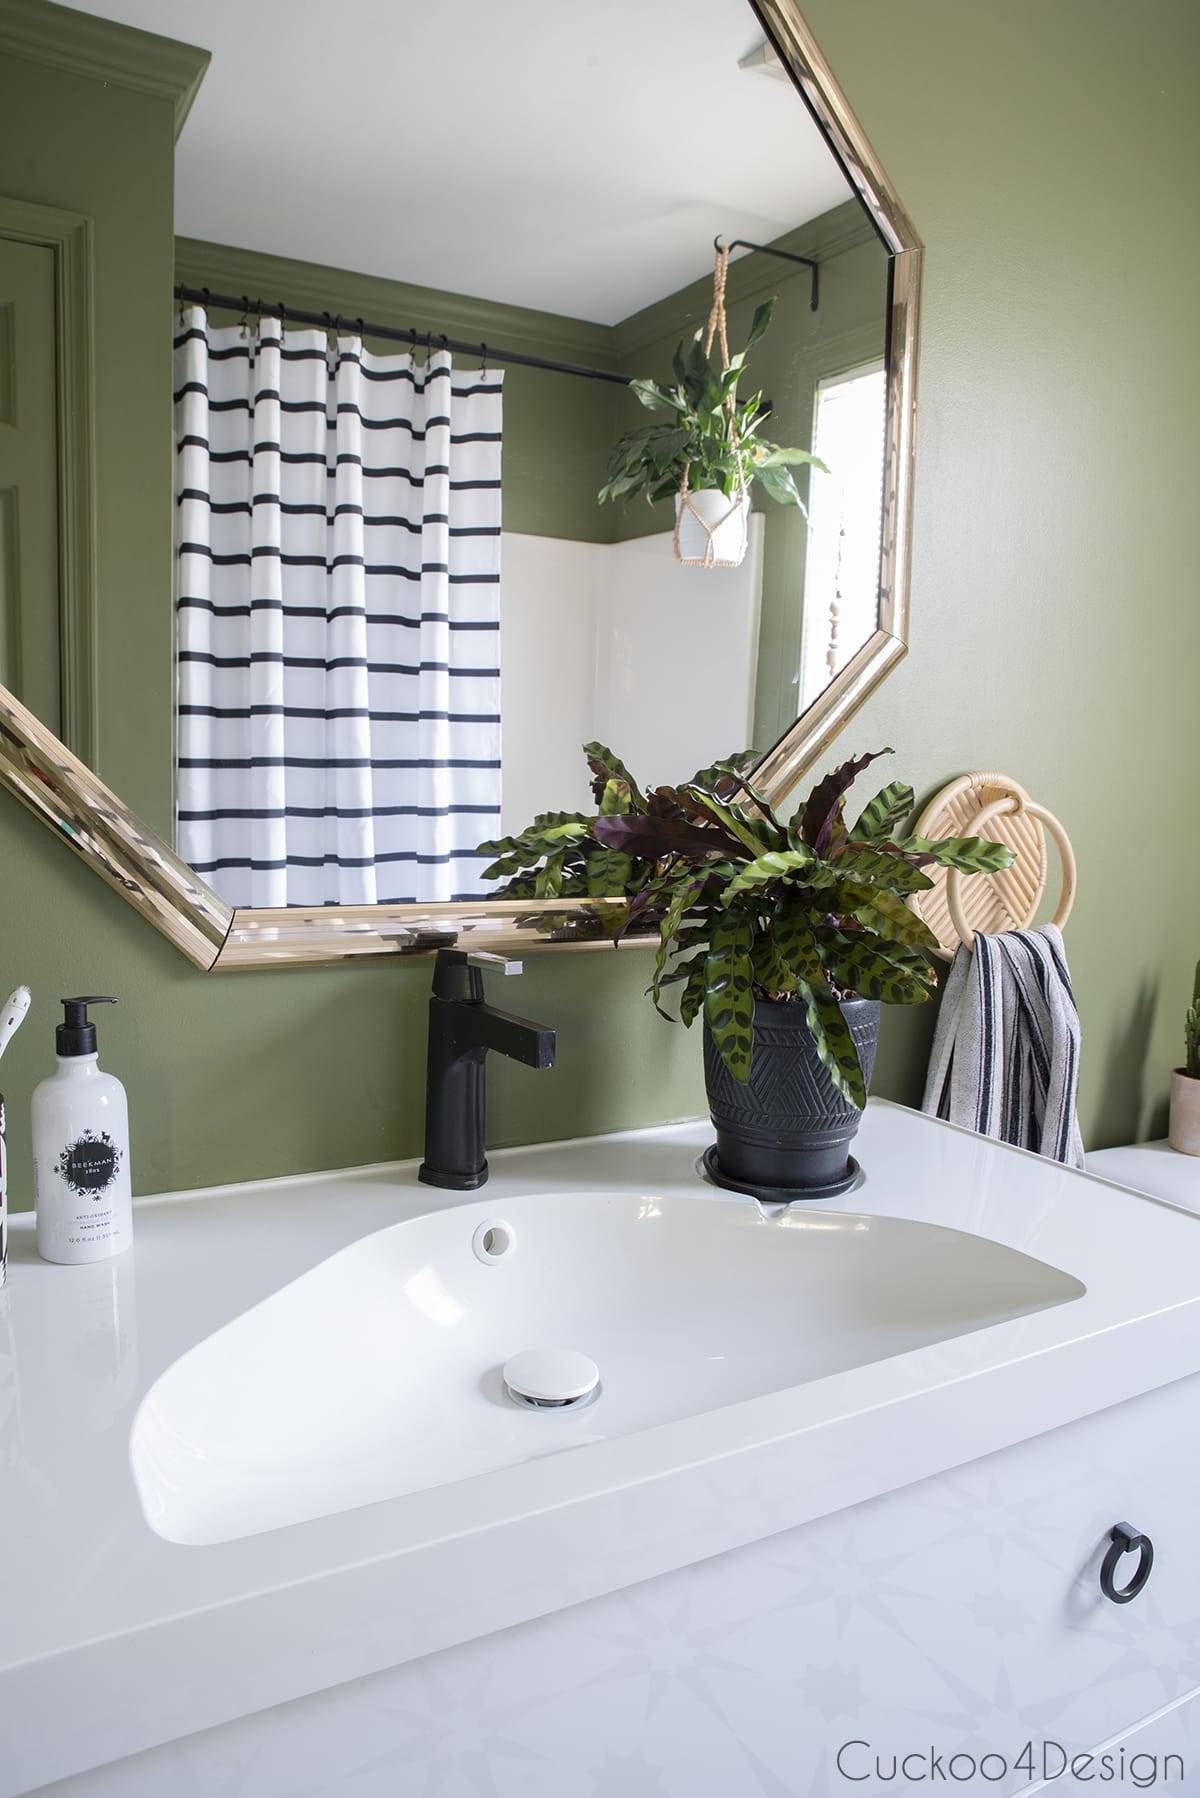
Besides adding black and white peel and stick floor tile, I also added crown molding and a beautiful olive green wall color called Gaucho by Valspar in eggshell. I had some problems with the tackiness and drying time this time around but it is all good now.
RELATED: You might also like my blog post about my favorite dark green paint colors I used throughout our own home.
For years we had a curtain on the cat’s litterbox closet but I decided to bring the door back and added a cat hole to it. It looks so much better now. This is another project that I should have tackled much sooner. (you can see the inside of the closet in my blog post HERE)
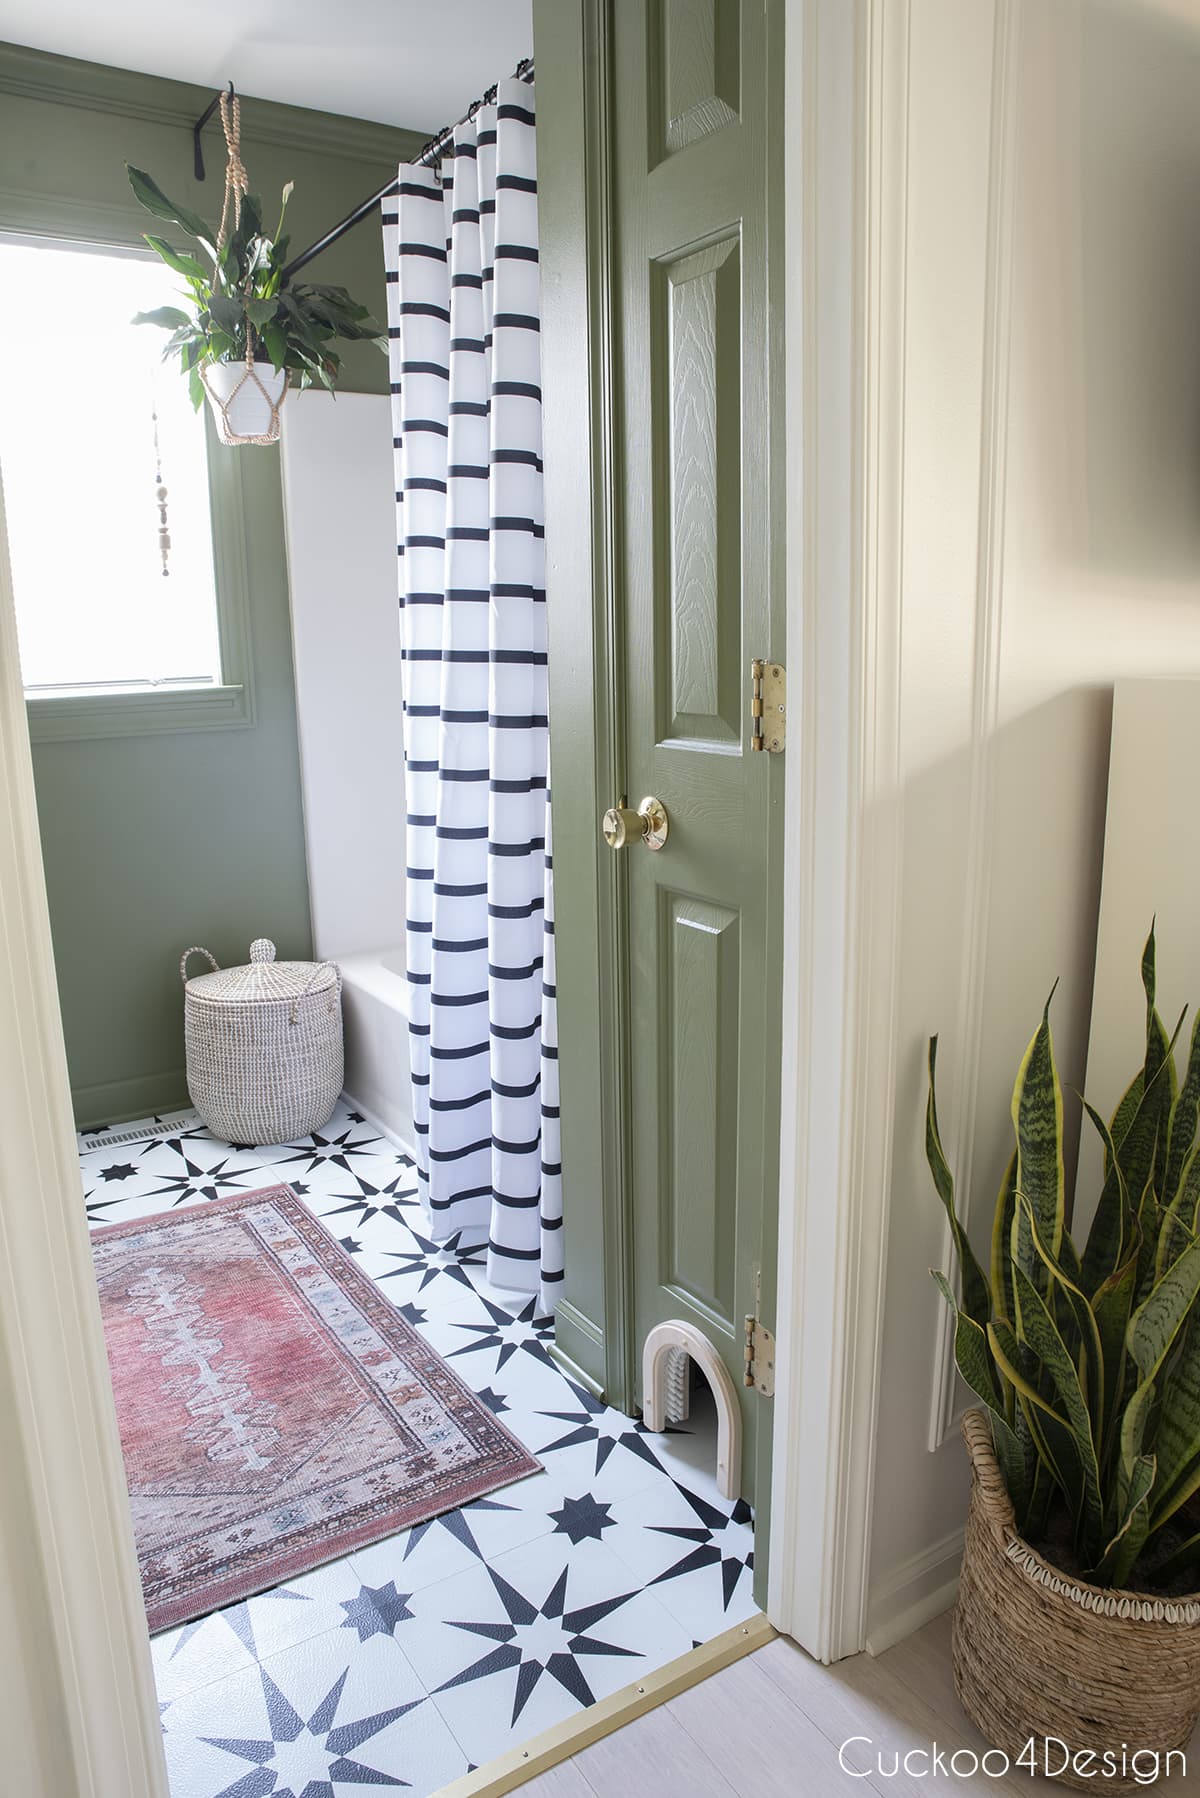
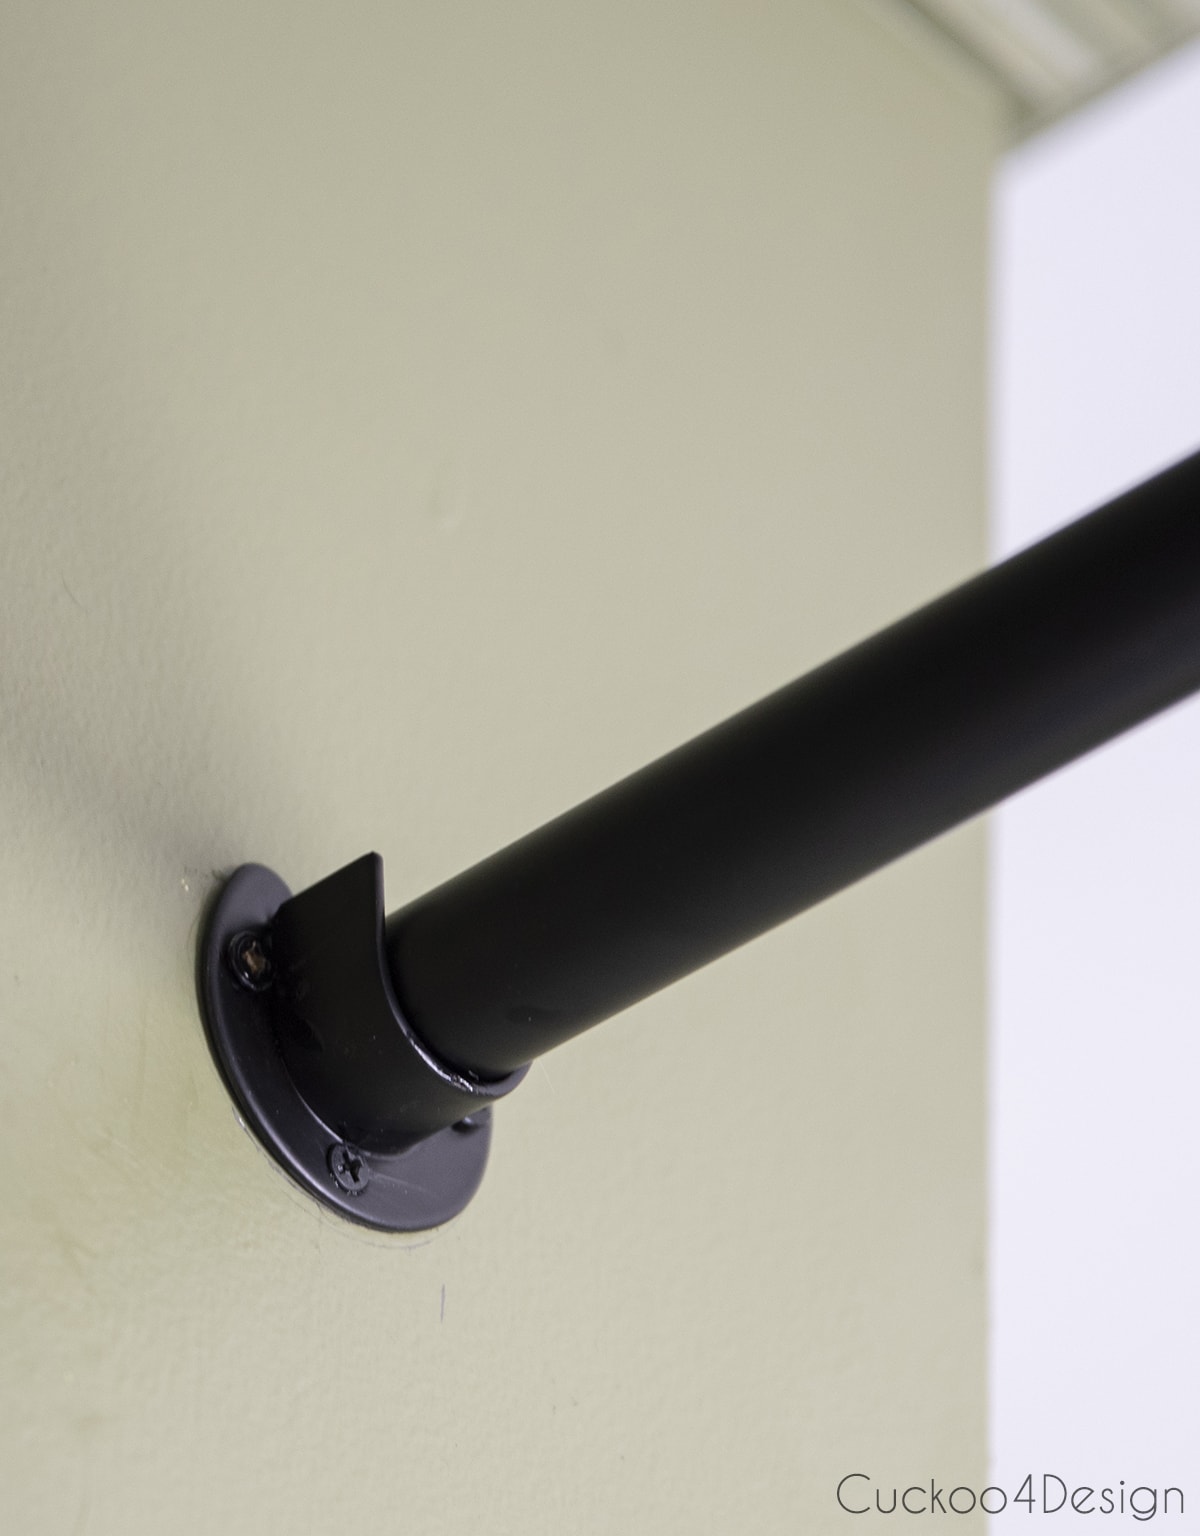
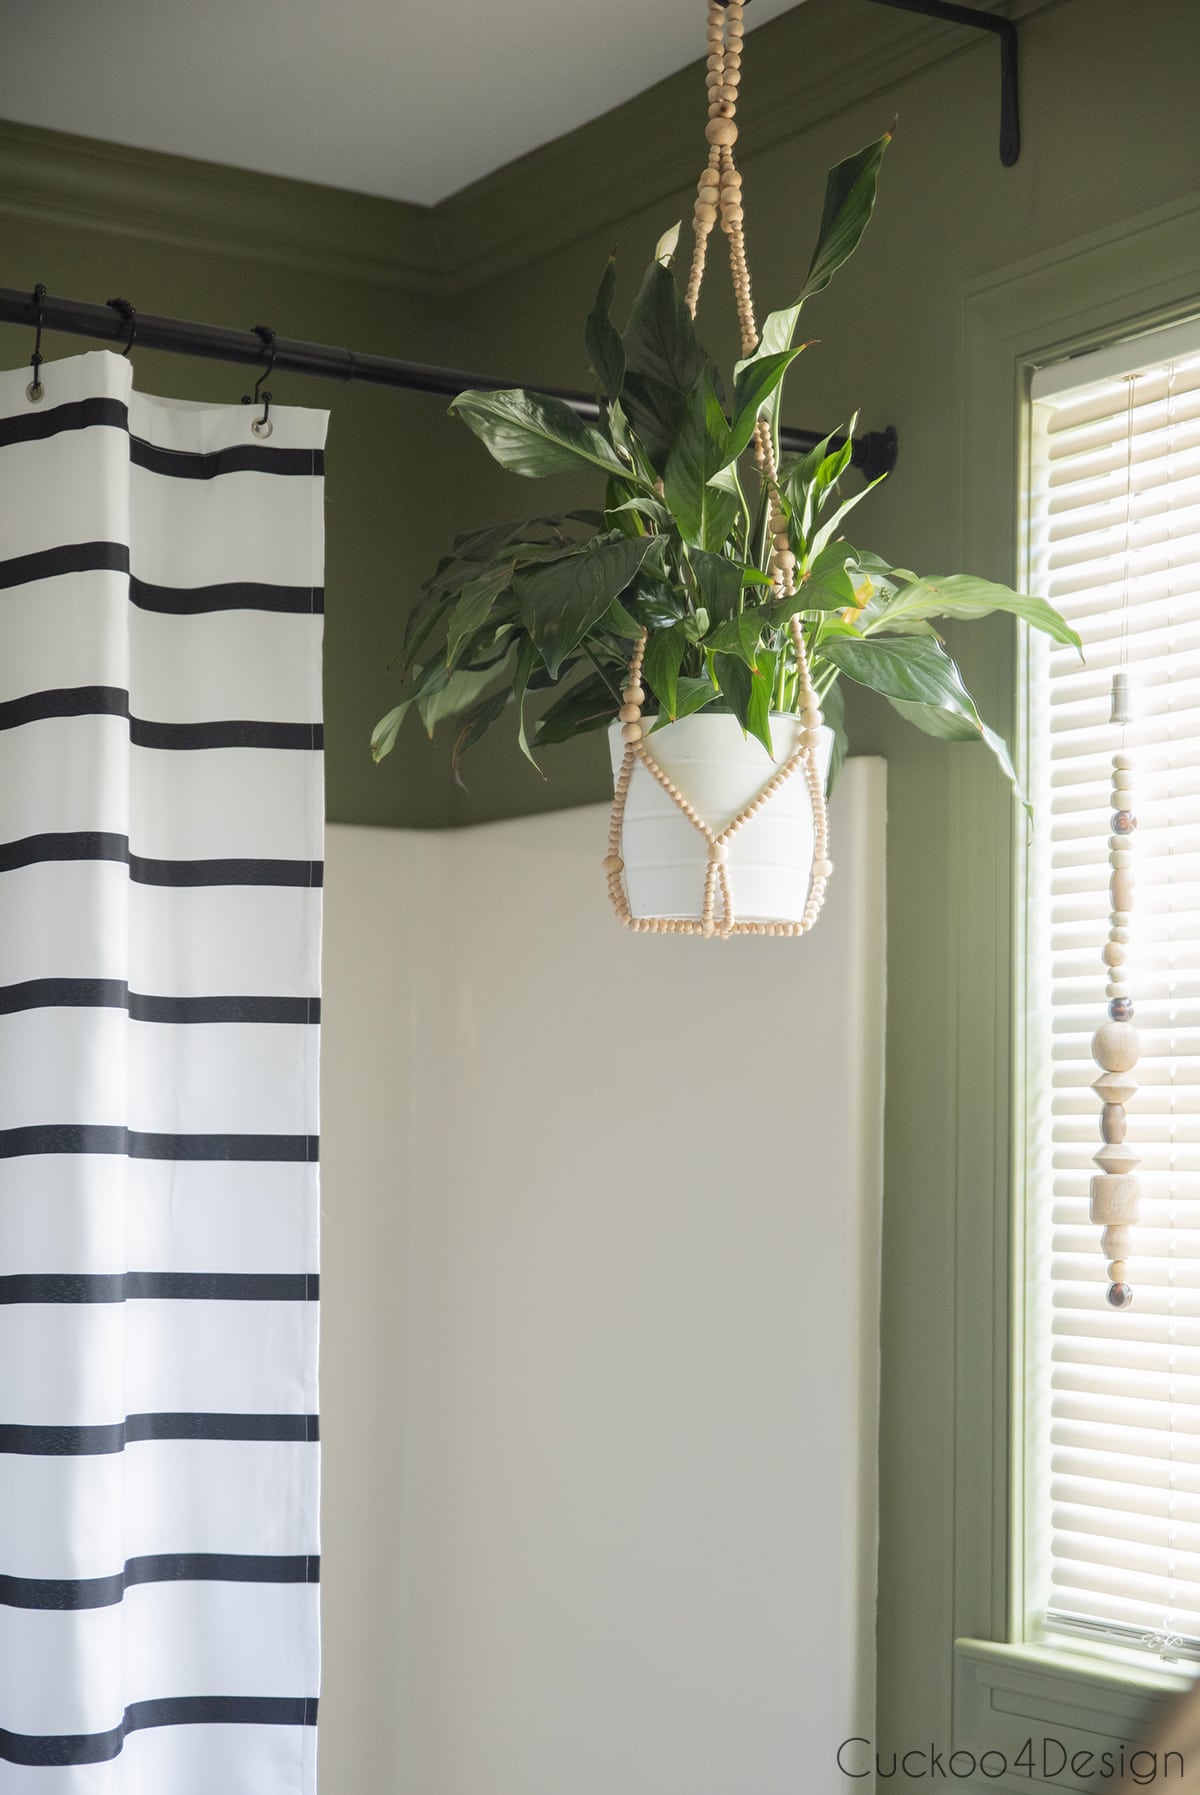
I added a new longer shower curtain and curtain rod. The tension curtain rod kept falling off so I bought these mounting brackets and screwed them into the wall. Now we finally have a solid rod with no more issues. The new shower curtain hook rings also make a big difference. I like them so much better than the old ones we had because I can easily remove the liner now on one side to wash it.
Instead of hanging a ceiling hook for my hanging plant. I added a wrought iron wall plant hook to the wall.

I kept the old Ikea toilet paper hold but painted it green. And the new molding around the window also makes a big difference.
This is the view I have from my bed now and it makes me so happy. You can see how I started to add picture frame moulding to the bedroom walls too. Check out my old tutorial. This time around I will add more detail though.
The new fluted dresser also looks so pretty in combination with the bathroom.
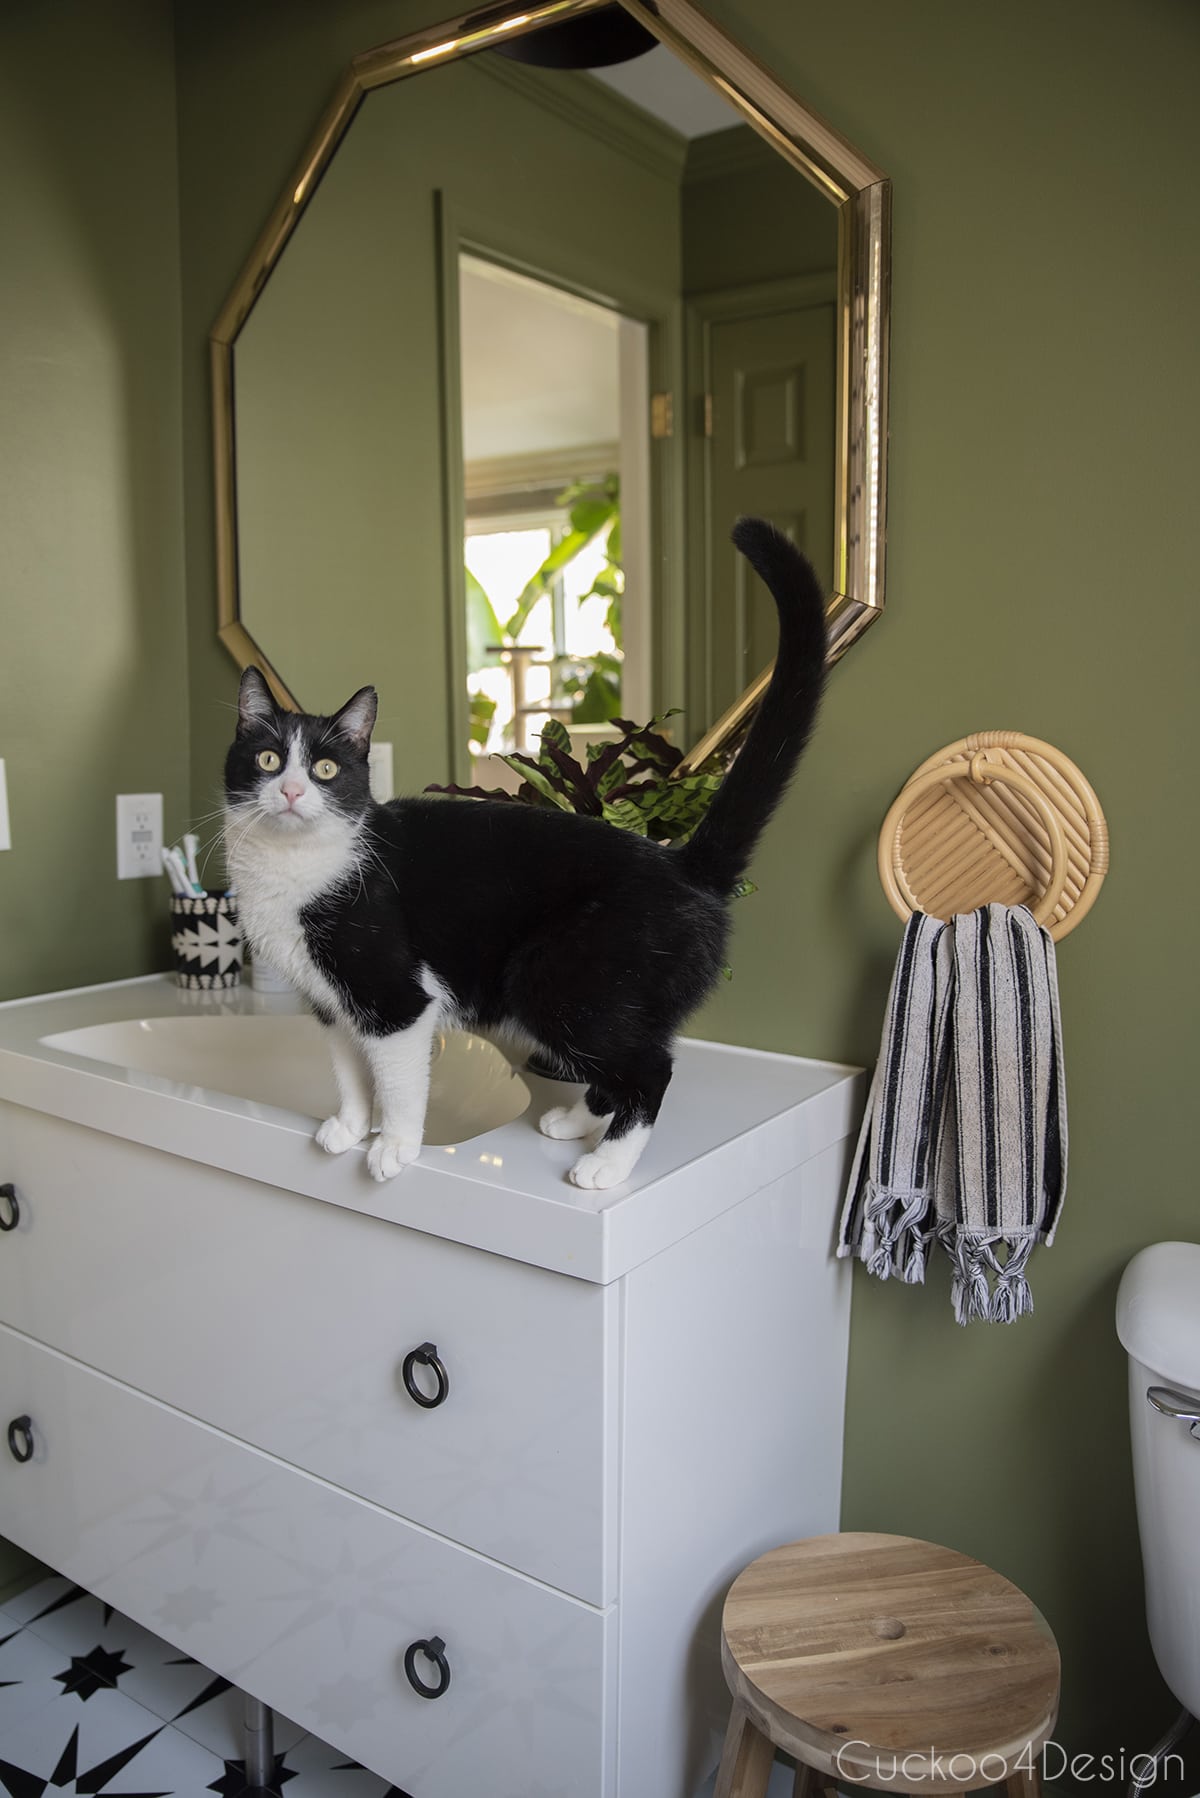
Of course, Willy needs to show you how well he matches our new bathroom. He is my best little guy and shadows me all day. Love him so much!
Use the image thumbnails below to shop:

Below you can see the mounting brackets for the shower curtain rod that I told you about.
I still have to update one more thing, do you notice it?
I actually ordered all black tub accessories which means I will be replacing the showerhead, spout, and drain.
Bathroom Sources:
black and white peel and stick floor tile or at Amazon | hand towel holder | mirror from Goodwill but here is a very similar mirror | drawer pulls | black touch faucet | Ikea Godmorgon vanity | stool from Ikea | shower curtain rod | similar shower curtain | similar light HERE or HERE | rug not available anymore | similar basket | green modern macrame wall hanging tutorial
Some of you might wonder why I kept the cheap blinds. Well, I actually don’t like how dark prettier wood or bamboo blinds would make the bathroom which isn’t good for all my plants. So the cheap white blinds really function well for letting light in. I added a little detail of wood beads to the pull. Can you see it?
Here are some more great black and white peel and stick floor tile patterns for you to consider:
Any of these patterns would have also looked great in our bathroom.

That’s it! What do you think? I hope I could show you that you don’t have to replace everything to get a new affordable look that makes a big difference. These black and white peel and stick floor tiles are so so affordable! You can read more about the installation process of these cheap peel and stick floor tiles in another dedicated blog post.
Tschüß,

Love that floor tile! Looks amazing!
Thank you Lori
love everything about your chic make over kudos to you it looks beautiful!
Thank you so much! I’m so happy with it
i LOOOVE it! I keep trying to pin it but I think pinterest is having issues. It’s SO gorgeous!
Oh no! Well, thanks so much for trying. I hope it’s not on my end because I’ve been having issues. It did work for me though.
I think it looks great. Love the color green.
Thank you Betty! I keep adding more and more green to our house. The kitchen is green, my son’s room is green and now a green bathroom 😉
What a gorgeous transformation! I love how many times you’ve switched up your bathroom. And that cat door is brilliant.
Thanks Amy, I always try to keep the budget to a minimum and still get a different look.
Looks great. Initially I wasn’t sure about the wall color but I see the wisdom of your way now.
BTW… the door that you put on the cats litter room…was that a linen closet? Is it ONLY used as a cat loo now?
Thanks Carol, I have been pinning this color on Pinterest, so I knew it was time to add it to our house 😉 The closet isn’t only used as a cat toilet. There are still shelves in it with boxes that keep things like nail polish, first aid kit, cleaning supplies, and things like that.
Great transformation!!!
Thank you Jen!
I didn’t see anywhere that states the tolal cost of this makeover. Could you tell me? This is truly fabulous and is giving me inspiration that I could do a very similar project. Just need a ballpark figure to know if we can do it now?
This was a couple of years ago and I got the tile for about $100 for the entire small bathroom. Not sure what they cost now. Plus the can of paint from Valspar at Lowes, the crown molding and the new shower head and curtain. The exact shower curtain isn’t available anymore. Since it was quite some time ago, I’m not sure how much it would all cost now but I linked to it all so you can check it out.