

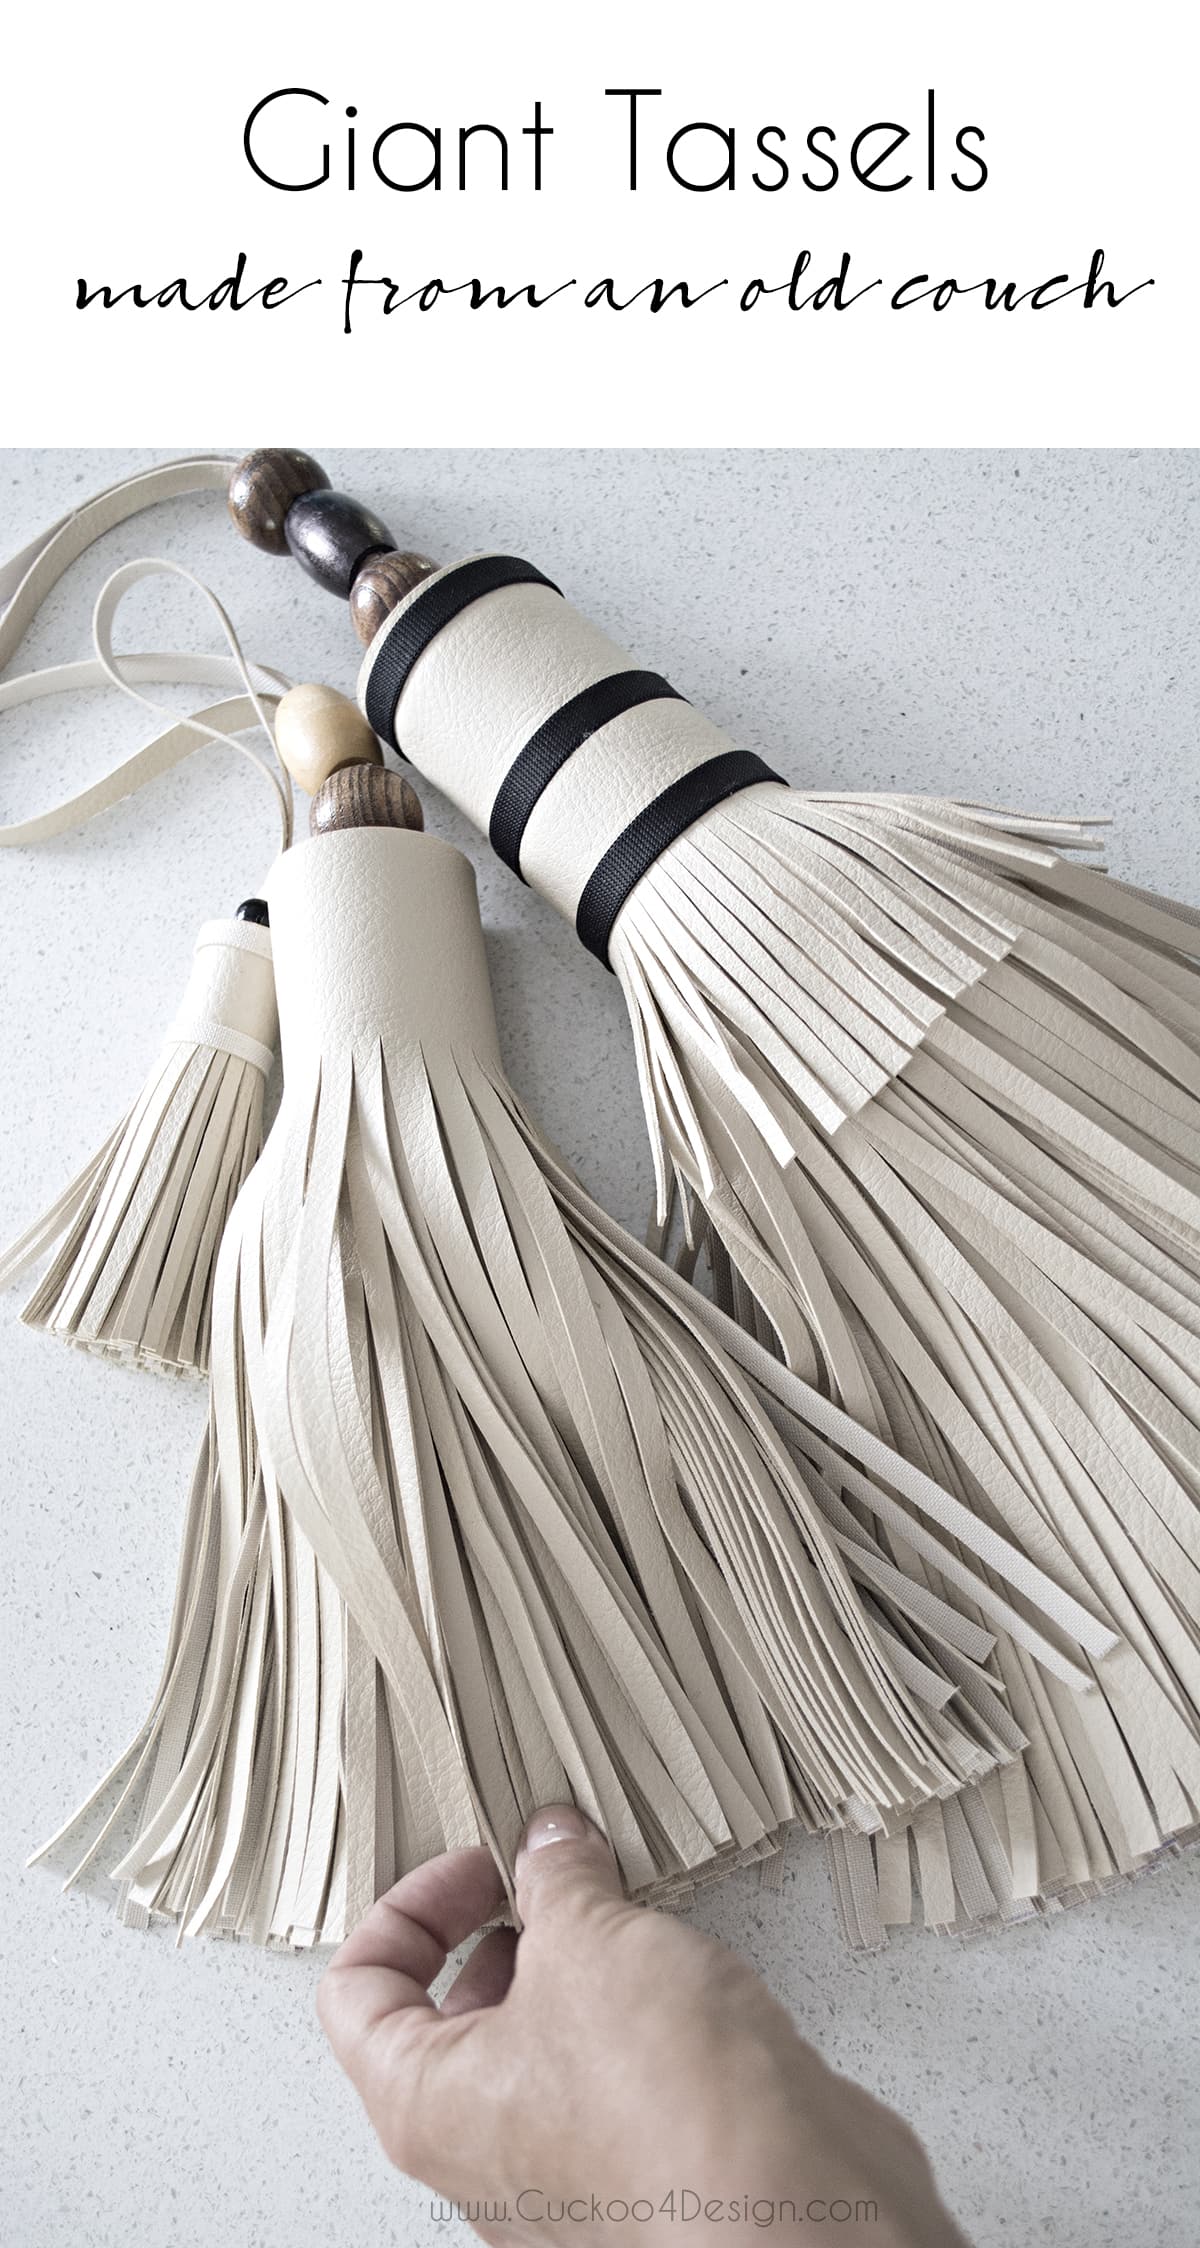
How to make a leather tassel (easy DIY using leather scraps)
Our leather sofa had been damaged by our cats, but some parts of it were still in good condition. I didn’t want to throw it all away, so I came up with the idea of cutting out leather scraps and using them to make unique leather tassels. Today, I’ll show you how to make a leather tassel, even if you don’t have an old couch or leather scraps. This DIY project is both easy and stylish, and you can use a variety of different types of leather, such as suede, faux leather/vegan leather, or cowhide. You can even find cheap, worn leather at thrift shops in the clothing or furniture section.
How to make a leather tassel
This post may contain affiliate links from which I will earn a commission at no extra cost to you. View my full disclosure policy.
Do you remember that old yucky sofa from the basement that we threw out to make room for the new sectional? It’s the huge sectional that prompted me to write a blog post about how to cut a sofa to fit it through a door. It was one of my scariest projects ever but in the end so worth it.
Anyways back to the leather tassel and scraps… Well before my husband kicked the old sofa to the curb, I told him to cut up certain sections of it that were still salvageable into wide strips for crafting.
This is certainly not groundbreaking and new by any means. There are a ton of tassel tutorials out there but I’m going to show you what I did. And the best of all is that it was completely free. You could use old jeans as well instead of leather. I love that look too.
Materials needed for a leather tassel
- leather scraps
- crazy glue, leather glue, or any other strong adhesive to secure the tassel strands (I don’t like using hot glue for this project)
- sharp scissors
- craft knife, sharp utility knife, or rotary cutter for neatly slicing the leather
- ruler
- pencil
- cutting mat
- tape or rubber band
- small wood beads or large wood beads and ribbons are optional
Step-by-step leather tassel tutorial
The below ugly old 80s sectional sofa is what I’m talking about! Pardon the yucky photo! It’s a very old photo. I cut large scraps of leather from that. Especially the backside had large pieces that I could use to make the leather tassels. This particular old sofa was part faux leather and part high-quality leather which I could both use for this tutorial.

Remember the basement looks like this now:

Step 1: Cutting the rectangle
Measure and mark a rectangle on the backside of the leather piece. A good starting point is a 4-inch by 8-inch rectangle for a small tassel. However, I wanted to go larger and cut out a wide strip of leather 66″ long x 12″ tall. You can make the rectangle any size you’d like for a large or a small leather tassel. It all depends on what you will use the leather tassel for. I wanted to use mine as a furniture and home decor accessory which I will show you later.
Using sharp scissors, carefully cut the leather following the marked lines.
Step 2: Making the fringes
Once your rectangle is cut, it’s time to create the fringes. Place the leather rectangle on a flat surface like your cutting mat, with the long edges running horizontally. Measure from the top down and draw a horizontal line across the entire length of the leather. I marked the top part at 3.5 inches down with a ruler and pencil on the backside of the leather scrap.
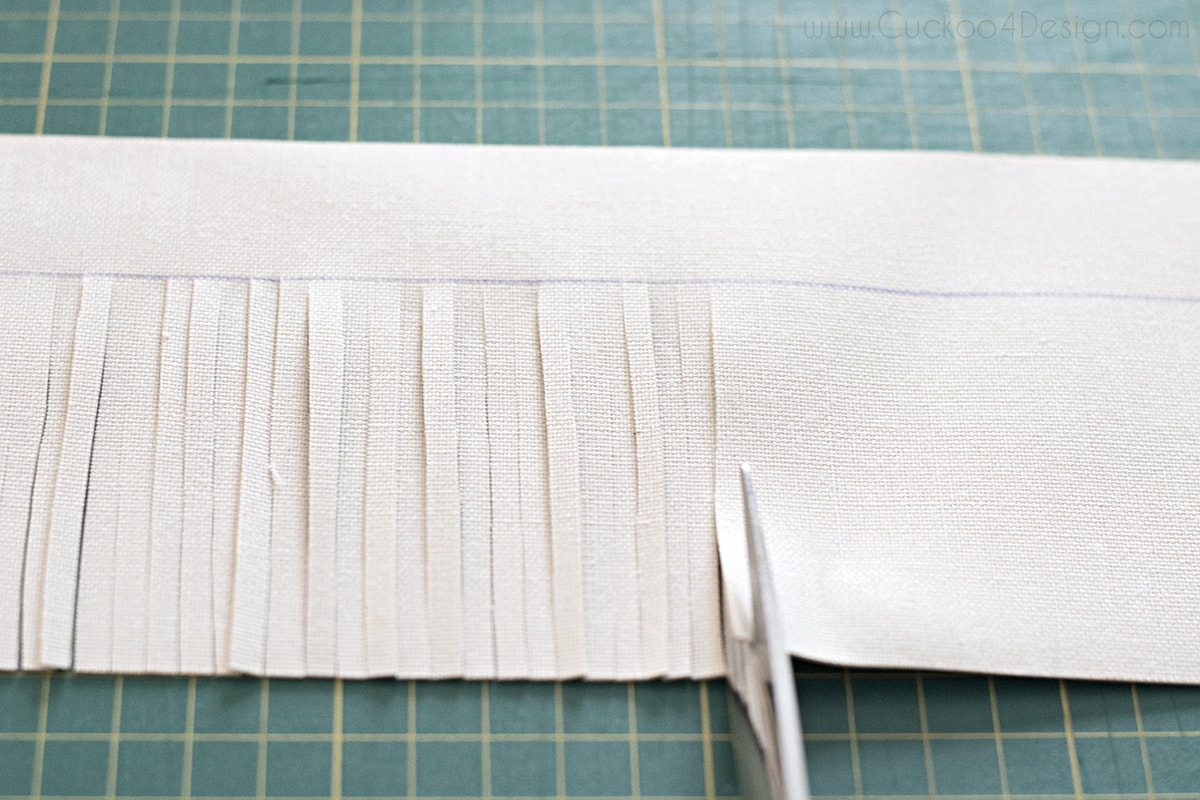
I first cut a small strip with scissors (pictured above) but then noticed that it was much quicker to cut the fringe with a craft knife and a metal ruler. Be careful not to cut yourself. The ruler really helps to keep the fringe even versus using scissors.
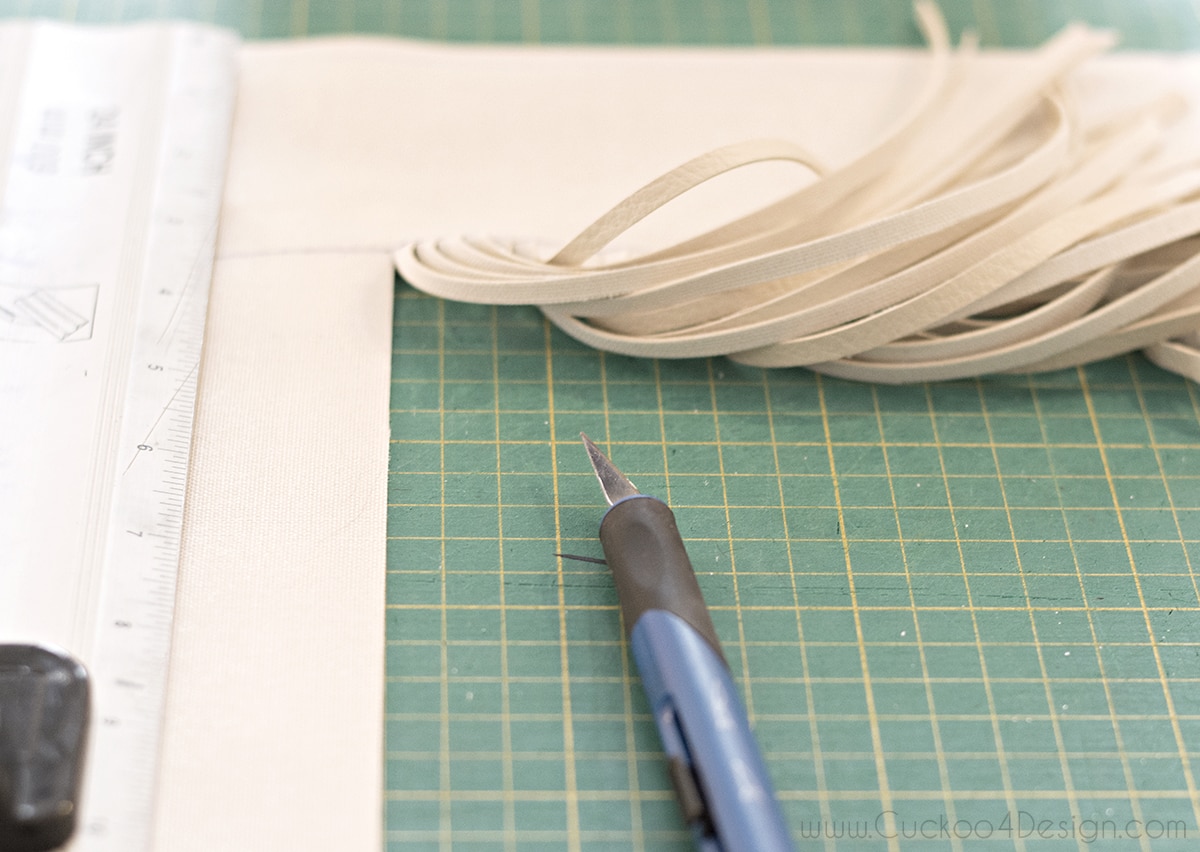
Make vertical lines that you can cut from the bottom edge of the leather up to the marked line to create the fringes. The width of the fringes can vary depending on your preference. Make sure to keep the cuts parallel and evenly spaced for a consistent look.
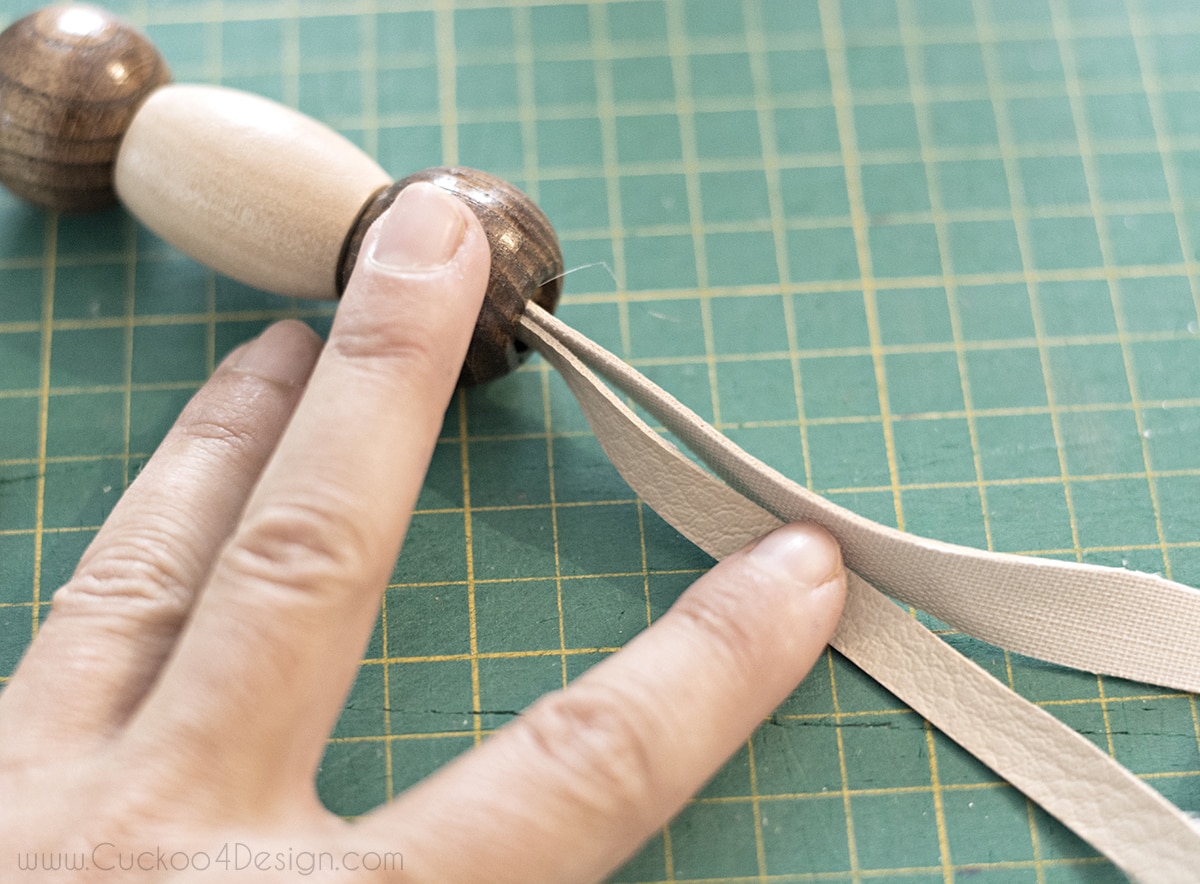
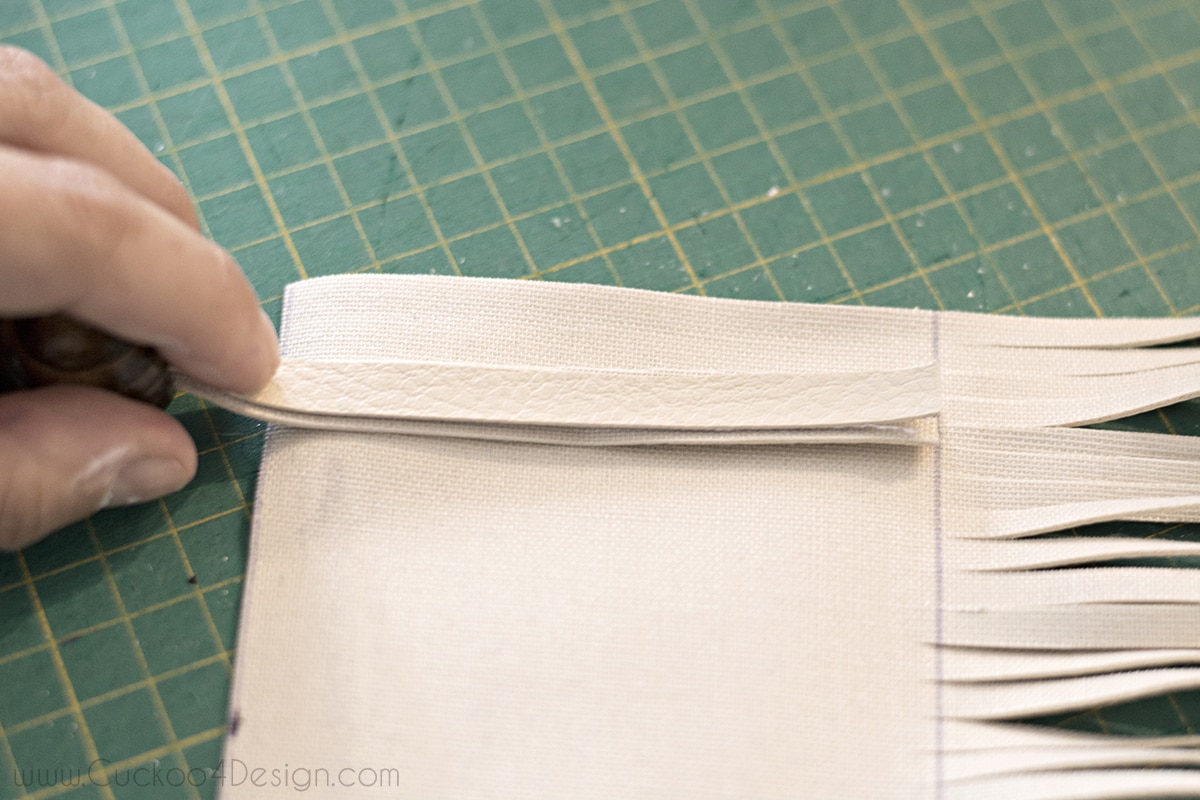
Step 3: Attaching the loop for hanging
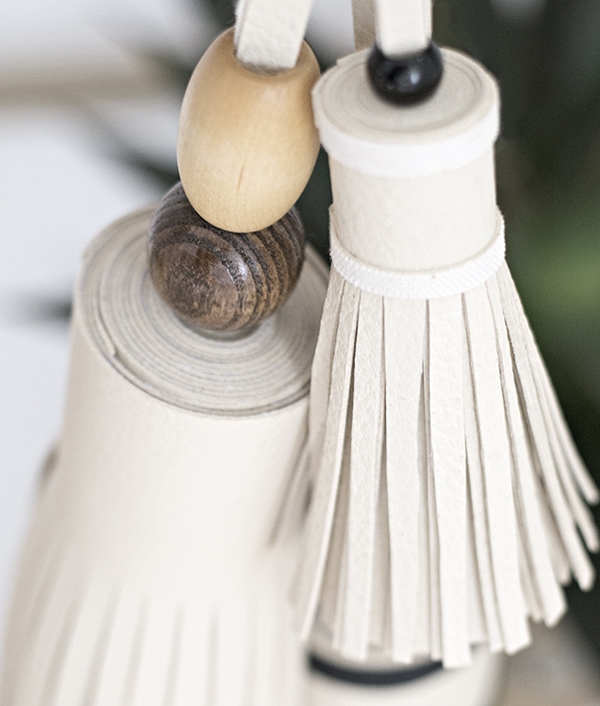
To begin assembling the leather tassel, first, prepare the loop. Cut a thin strip of leather approximately 0.25 inches wide and 3 to 8 inches long depending on the size of your tassel body. Fold the strip in half to form a loop, ensuring that the ends meet evenly. Secure the loop using a strong adhesive.
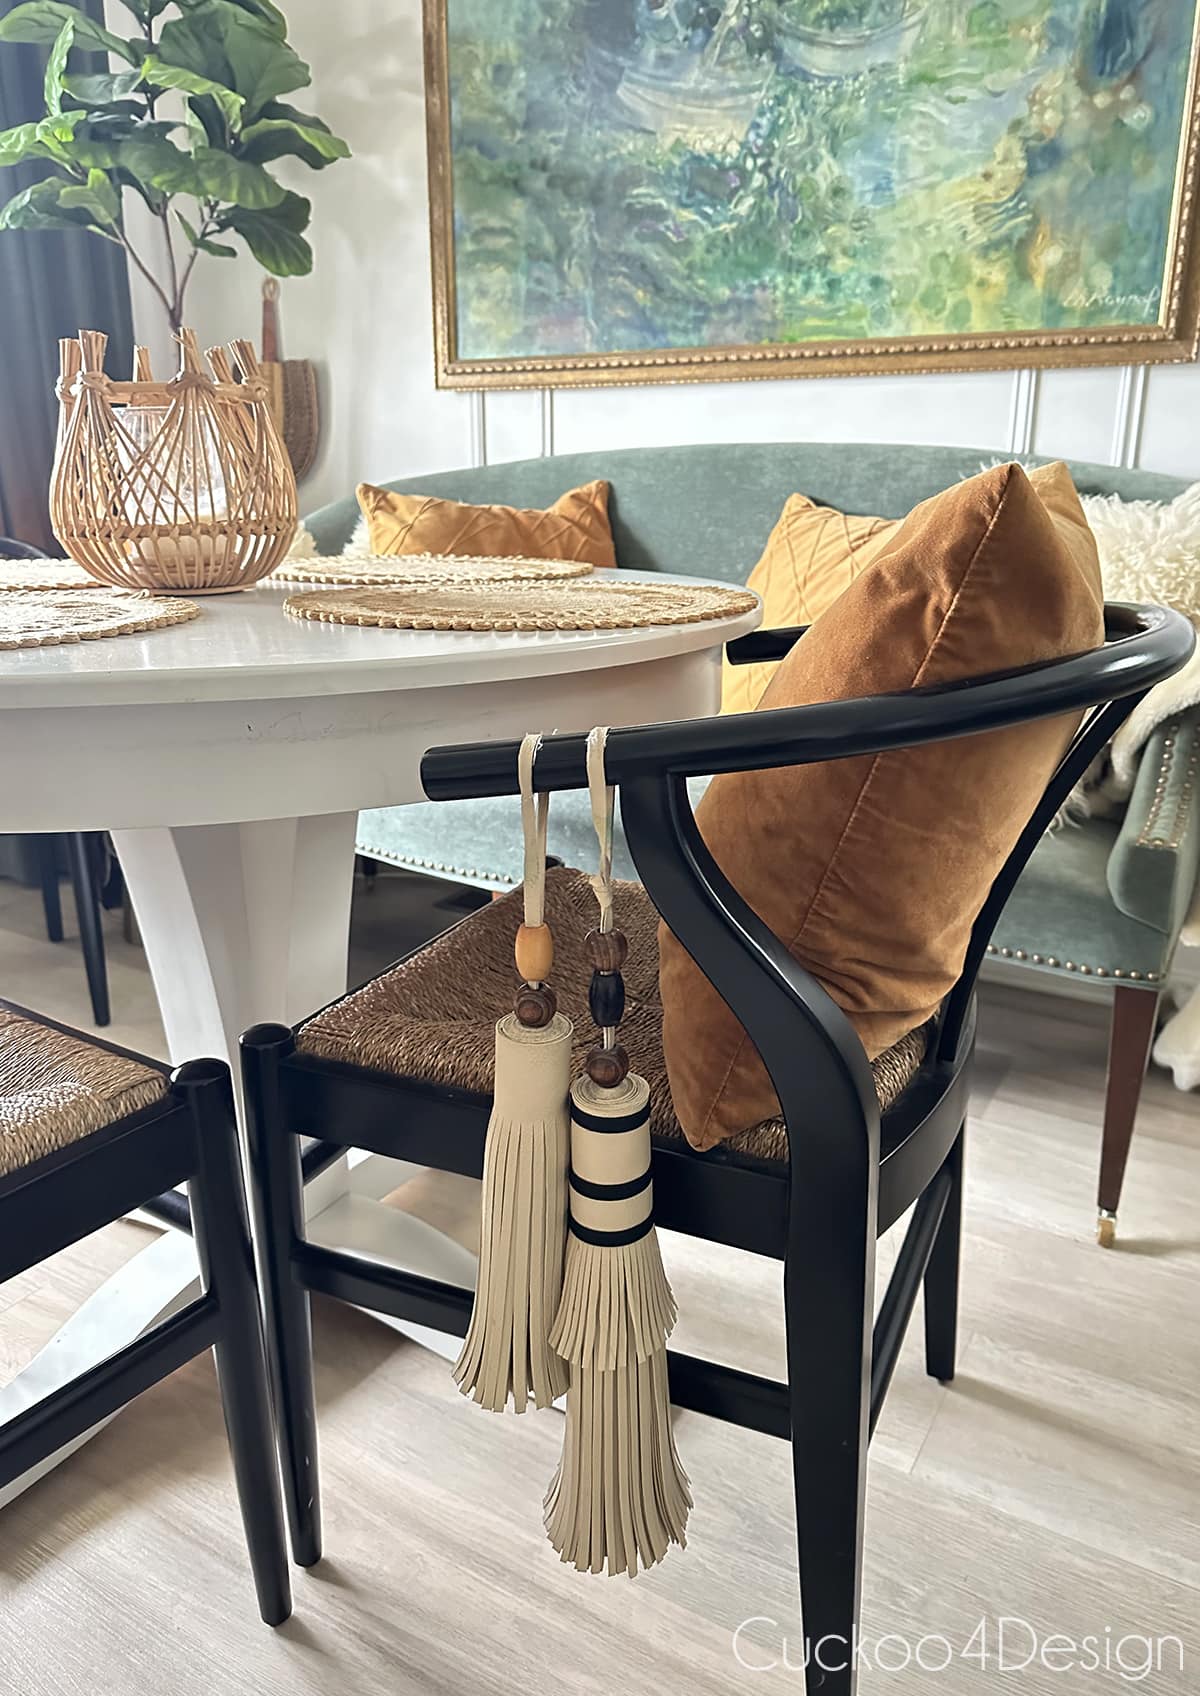
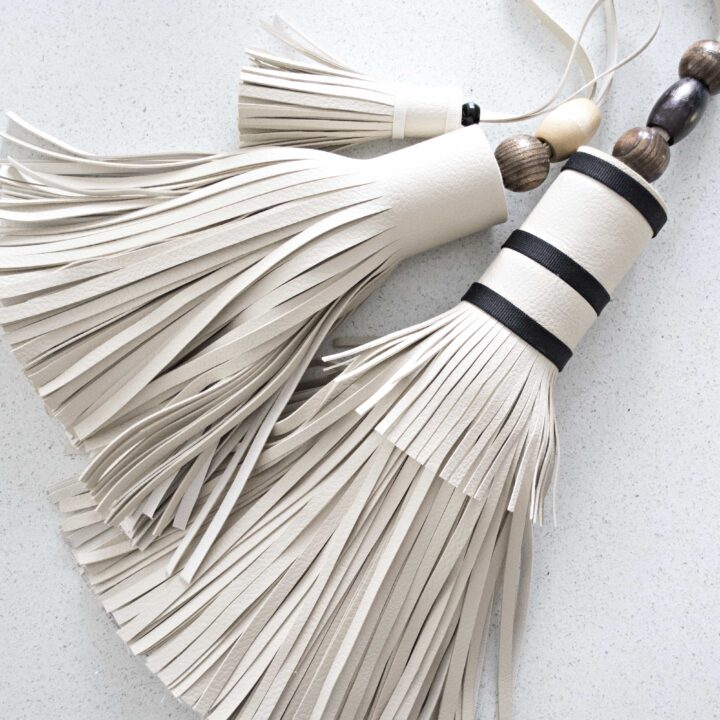
And as you can see, this is where I used some of the optional wood beads that I mentioned in the material list. You can simply slide them onto the looped leather strip if you like the look. I wanted a way to add some different colors to the tassel and this was a cute way to do it. Plus it adds some extra detail and interest.
Once the loop is secured, position it at the center of the tassel’s top edge. Apply a small amount of adhesive to the outer side of the loop and press it firmly against the tassel’s inner surface. This will ensure that the loop stays in place.
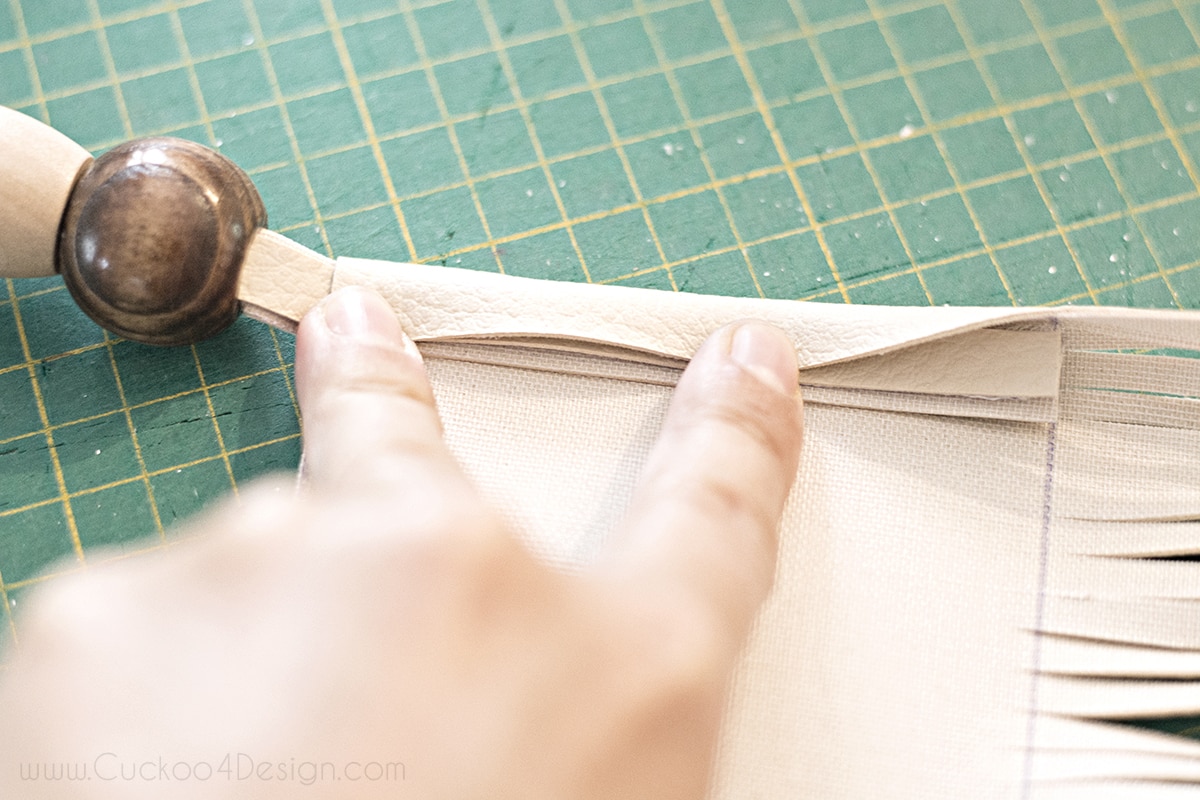
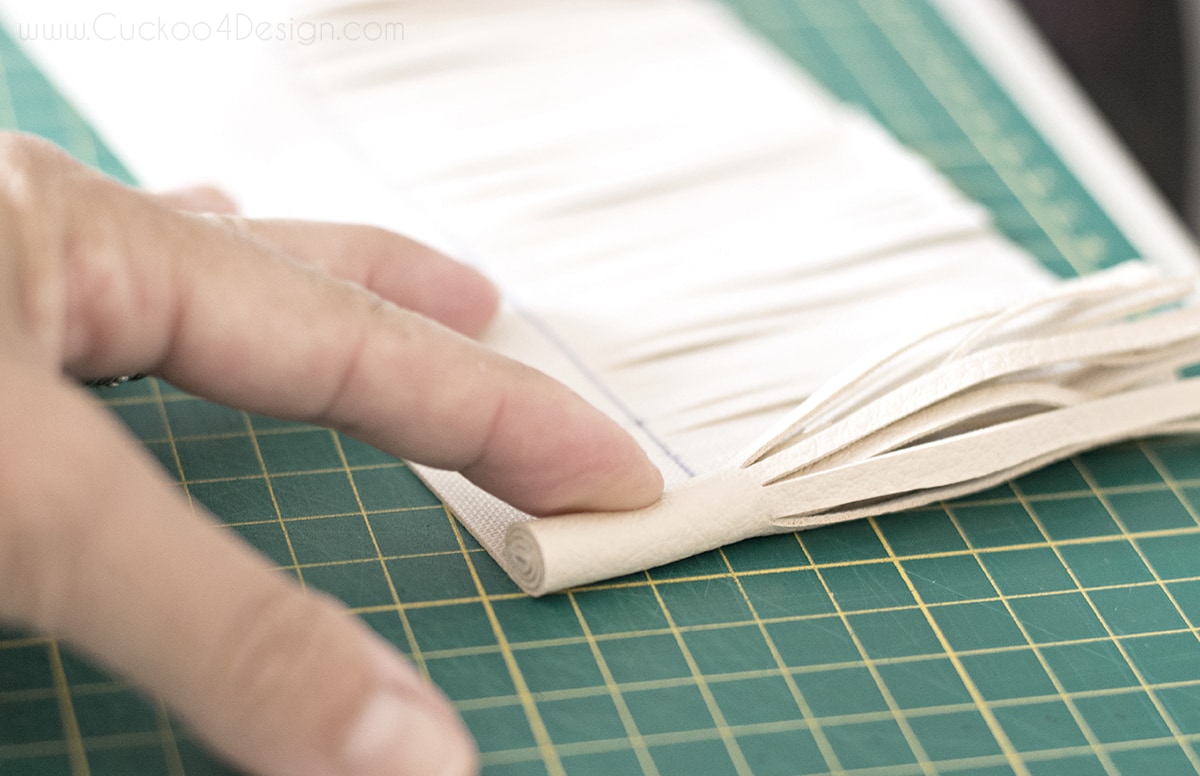
Step 4: Finishing the tassel shape
The idea of how the tassel gets put together is to roll the fringed piece as tightly as possible. Keep going until the entire strip of leather is rolled up, put a small bead of glue at the end of the piece to secure the rolled-up shape. You might need some tape or even a rubber band to secure the shape until the glue is dry.
This is what it would look like without a looped string for hanging.
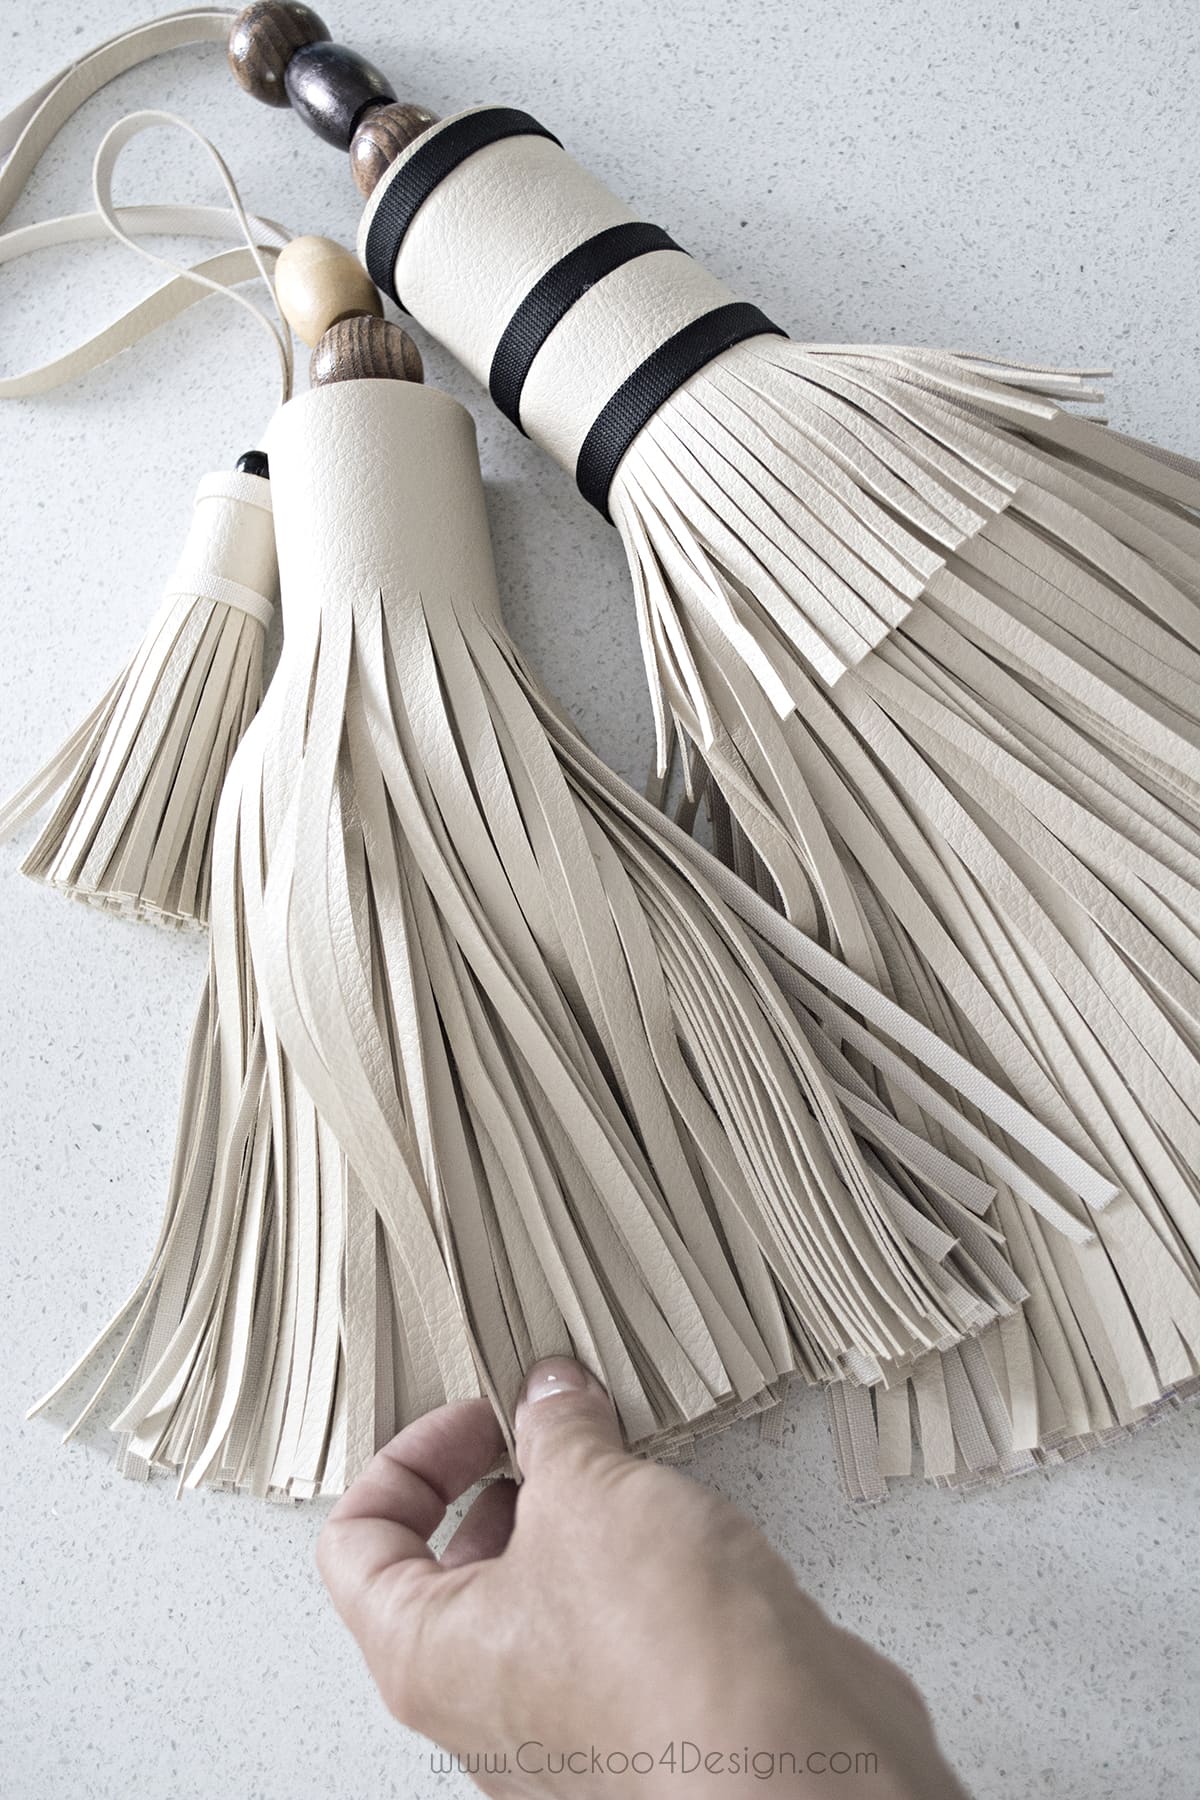
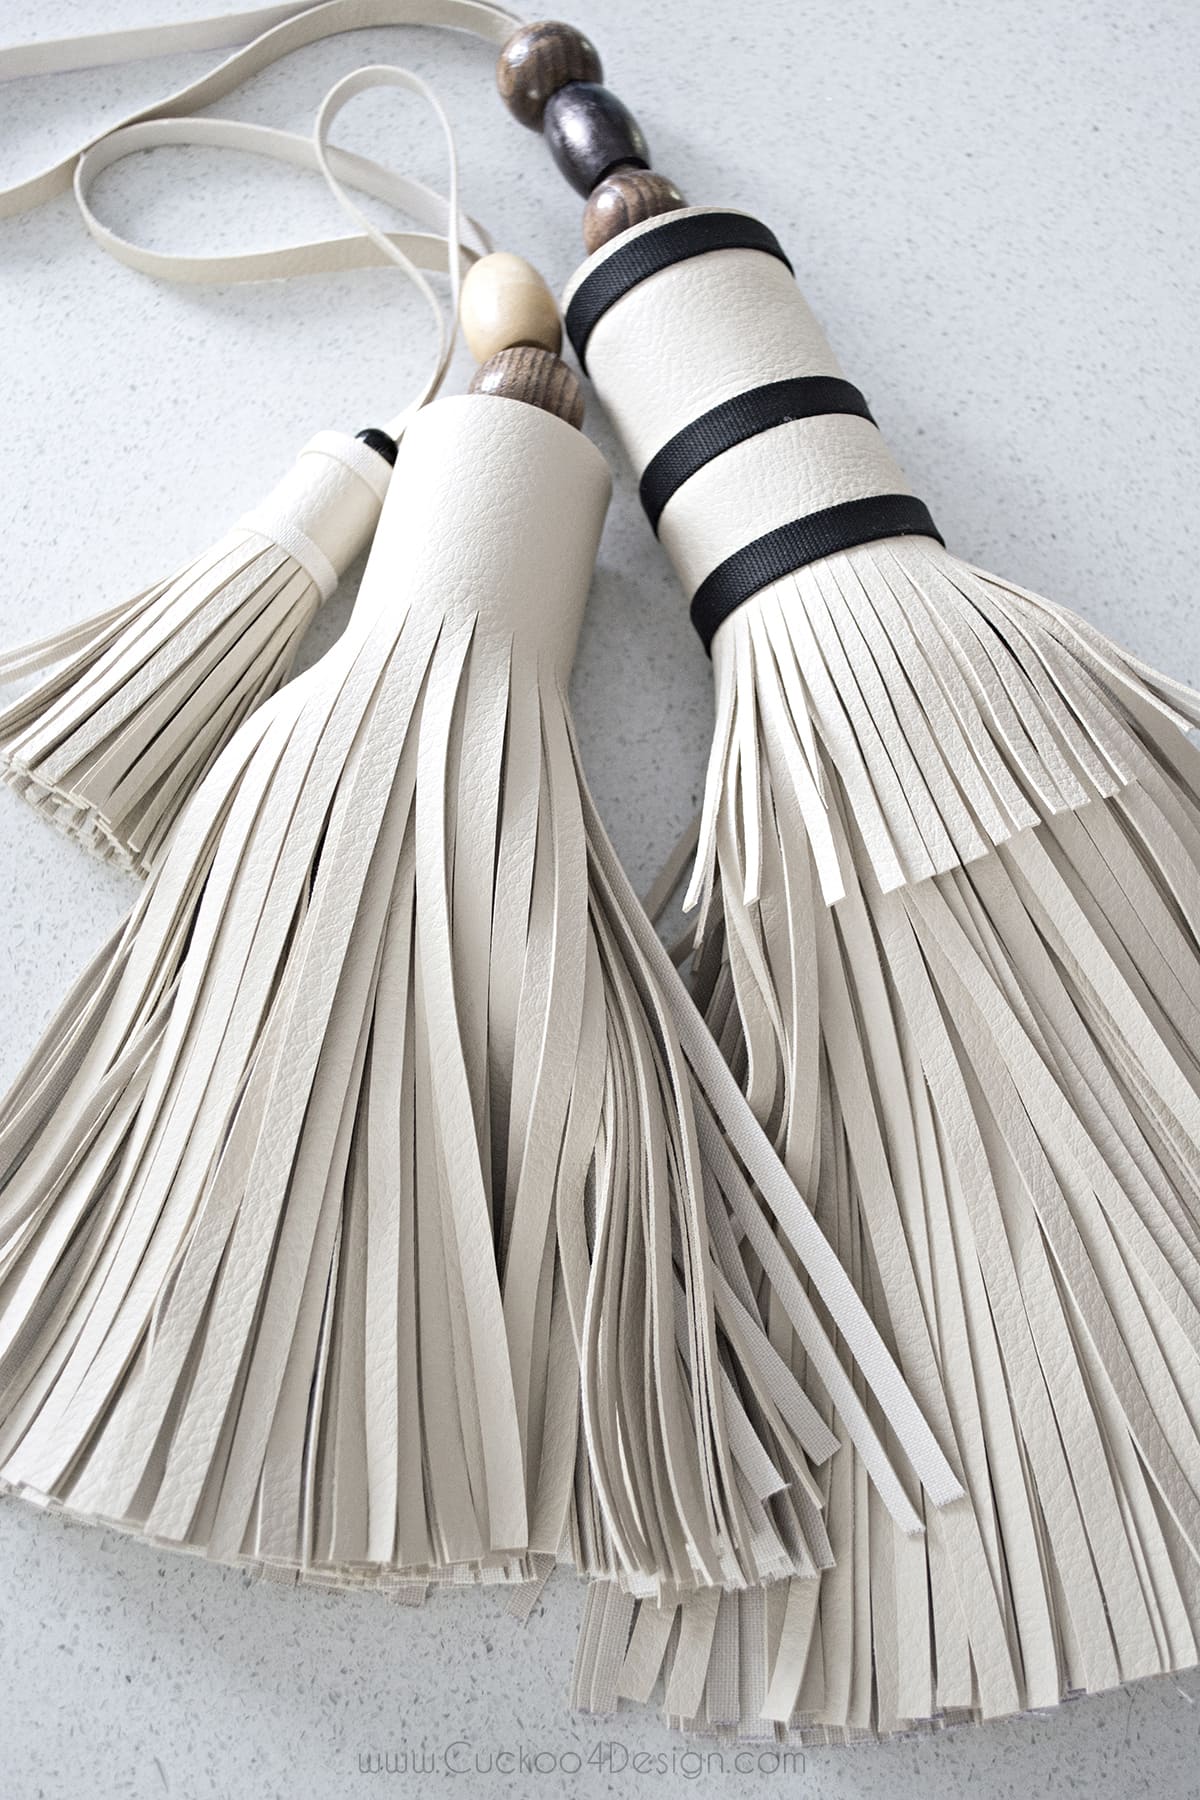
Finally, I bound the tassel with a decorative piece of ribbon (optional) or you can use another strip of leather as well. Wrap the strip of ribbon or leather around the body of the tassel and secure it by applying a strong adhesive. I repeated that 3 times for a unique look as you can see in the below photo.
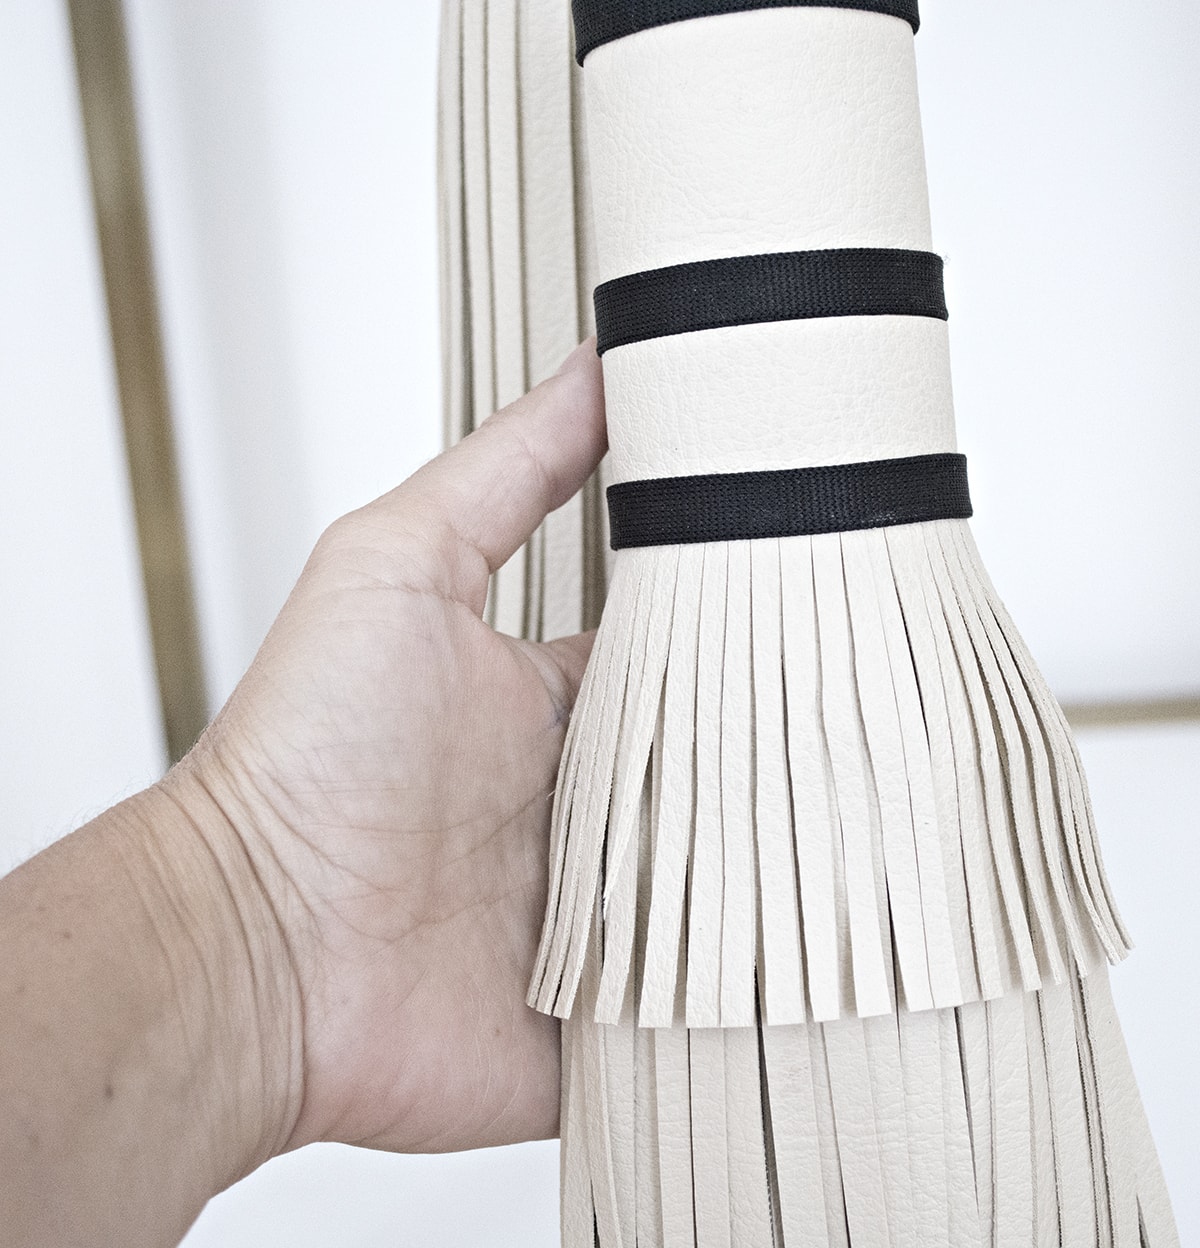
In the end, you can trim the fringe if needed by using sharp scissors and carefully cutting each fringe strip to the desired length. Maintain a consistent length!
Different uses for leather tassels
You can use smaller leather tassels as different fashion or home decor accessories. How about a leather tassel keychain, on a purse as a purse charm, or even on necklaces?! (I love making purse charms. Check out the macrame feather and macrame leaf I used as a purse charm), or as jewelry?! You could make them really small and hang them on earrings. That would look so cute.
All you have to do is adjust the leather tassel size and instead of the looped piece of leather at the top of the tassel for hanging add the keychain ring, earring hook, or any other jewelry piece.
All these different versions of leather tassels make a great gift.
Photos of my finished DIY leather tassels
And of course, I had to make more in some different sizes. They all look better in groups, right?

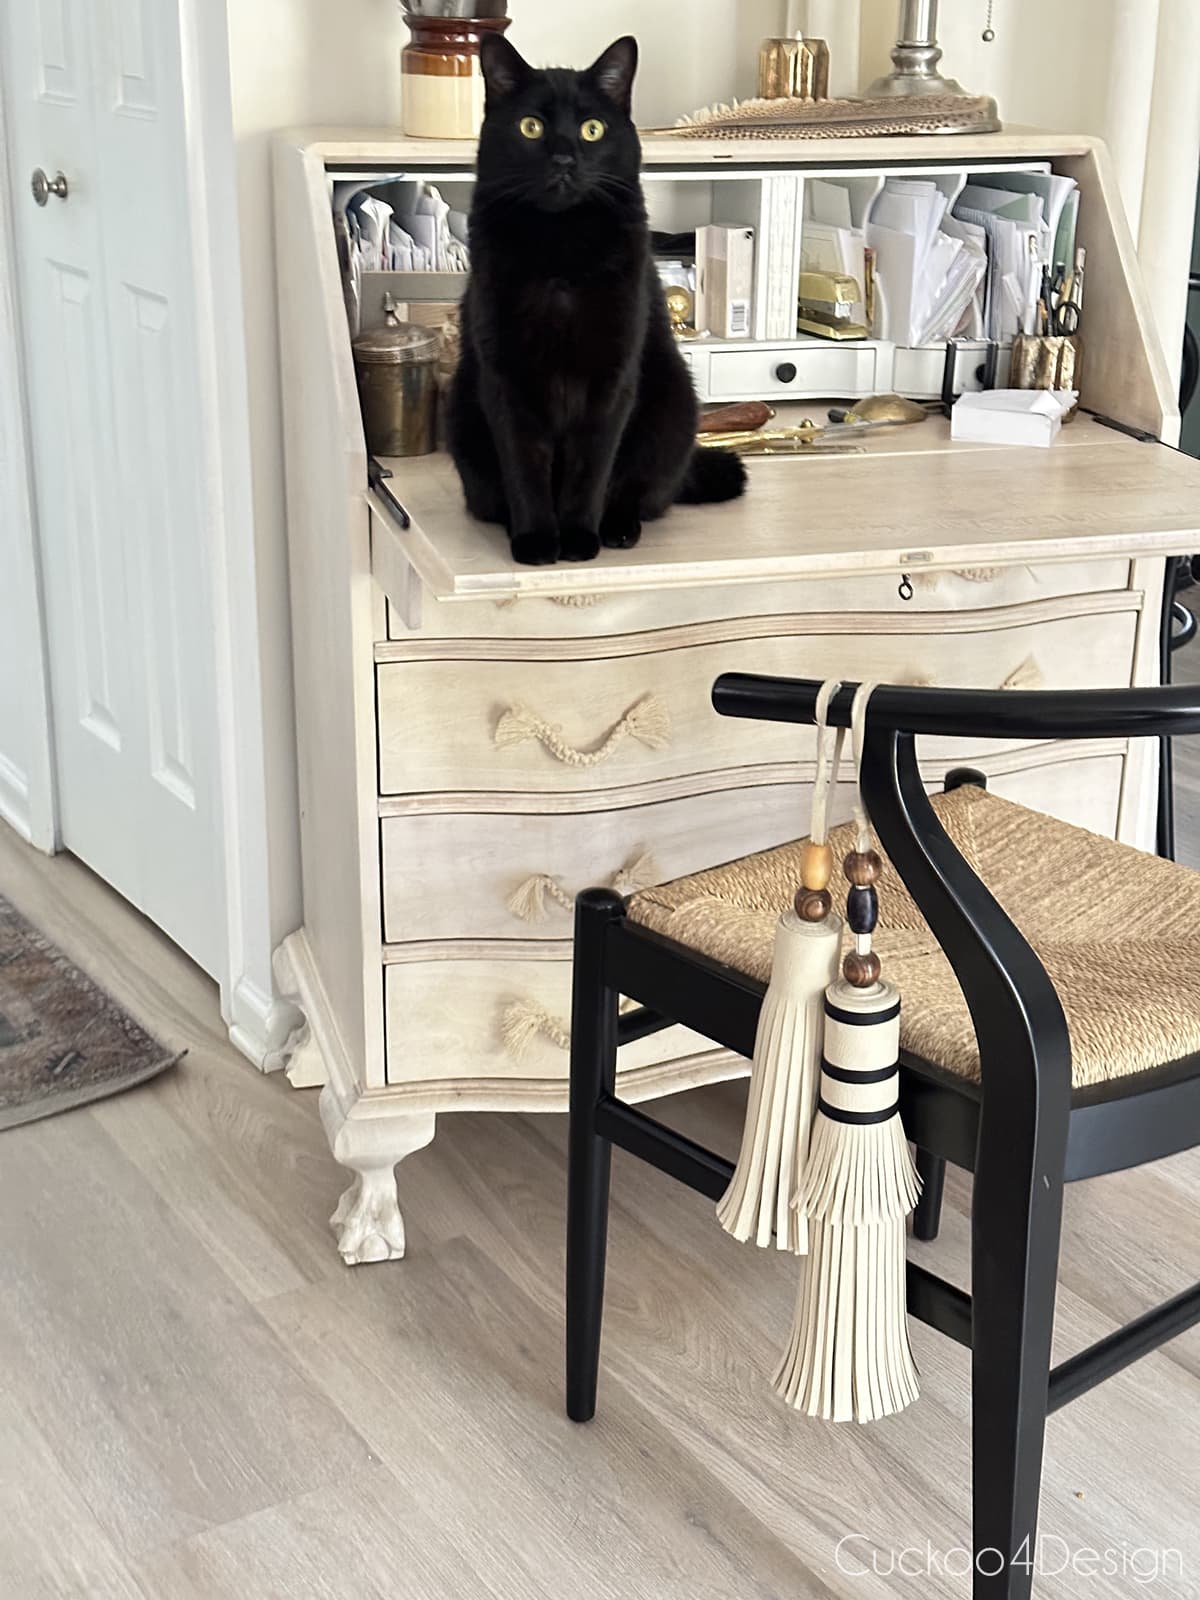
Other projects of mine pictured above and below: boho drawer pulls using macrame yarn, bleached cherry wood desk makeover, Karndean flooring review, how to install molding the easy way, DIY pendant light using jute yarn, and how to raise the height of a sofa so you can use it in your dining room.

More of my tassel tutorials
- how to make large tassels
- how to make yarn tassels
- how to make a fancy tassel called stacked tassel or layered tassel
- rope macrame tassel
- DIY tassel keychain (keyring)
- DIY tassel umbrella
- DIY tassel ottoman
- DIY tassel embellishments for a tassel sconce, lampshade, or basket


So would you make your own easy DIY leather tassel too? It was a fun project and tassels like this also make great gifts. I watched Netflix and made some tassels. Totally my kind of fun!
Tschüß,

How to make a leather tassel
Discover a simple method to create a leather tassel using upcycled leather remnants and wooden beads that can serve as a stylish addition to your home decor, jewelry, or any other fashion ensemble.
Materials
- leather scraps
- crazy glue, leather glue, or any other strong adhesive to secure the tassel strands (I don't like using hot glue for this project)
- tape or rubber band
- small wood beads or large wood beads and ribbons are optional
Tools
- sharp scissors
- craft knife, sharp utility knife, or rotary cutter for neatly slicing the leather
- ruler
- cutting mat
- pencil
Instructions
- Cutting the rectangle
Measure and mark a rectangle on the backside of the leather piece. For a large tassel, cut out a wide strip of leather 66" long x 12" tall. You can make the rectangle any size you'd like for a large or a small leather tassel. It all depends on what you will use the leather tassel for.
Using sharp scissors, carefully cut the leather following the marked lines. - Making the fringes
Place the leather rectangle on a flat surface like your cutting mat, with the long edges running horizontally. Measure from the top down and draw a horizontal line across the entire length of the leather. I marked the top part at 3.5 inches down with a ruler and pencil on the backside of the leather scrap.
Make vertical lines that you can cut from the bottom edge of the leather up to the marked line to create the fringes. The width of the fringes can vary depending on your preference. Make sure to keep the cuts parallel and evenly spaced for a consistent look. The ruler really helps to keep the fringe even versus using scissors. - Attaching the loop for hanging
To begin assembling the leather tassel, first, prepare the loop. Cut a thin strip of leather approximately 0.25 inches wide and 3 to 8 inches long depending on the size of your tassel body. Fold the strip in half to form a loop, ensuring that the ends meet evenly. Secure the loop using a strong adhesive.
And as you can see, this is where I used some of the optional wood beads that I mentioned in the material list. You can simply slide them onto the looped leather strip if you like the look. I wanted a way to add some different colors to the tassel and this was a cute way to do it. Plus it adds some extra detail and interest.
Once the loop is secured, position it at the center of the tassel's top edge. Apply a small amount of adhesive to the outer side of the loop and press it firmly against the tassel's inner surface. This will ensure that the loop stays in place. - Finishing the tassel shape
The tassel gets put together by to rolling the fringed piece as tightly as possible. Keep going until the entire strip of leather is rolled up, put a small bead of glue at the end of the piece to secure the rolled-up shape. You might need some tape or even a rubber band to secure the shape until the glue is dry.
Finally, you can bind the tassel with a decorative piece of ribbon (optional) or you can use another strip of leather as well. Wrap the strip of ribbon or leather around the body of the tassel and secure it by applying a strong adhesive. I repeated that 3 times for a unique look as you can see in the below photo.
In the end, you can trim the fringe if needed by using sharp scissors and carefully cutting each fringe strip to the desired length. Maintain a consistent length!
LOVE these, julia! the wood beads with them are awesome- what a clever idea!
Thanks Cassie! Wood beads on everything now????
So great remind me of your big tassel you brought back from Germany. Love the leather idea too.
That tassel gave me the idea. Thanks Maggie
I just love these! I just might have to make my own giant tassel soon!!!
Well you should! You never have a shortage of thrifted upholstery you could use ???? but your sofas are always way too pretty to cut apart
Oh my word how fun is this. Love them
Beautiful idea Julia! Love the wood beads, so cute! xox
What a great idea. The tassels came out fabulous…..so clever and stylish!
Thank you Diane
Another awesome diy project from you! I love yours because you always have less complicated ones that are gorgeous and clever. Thank you!
Oh thank you so much Debbie
Proof you ARE a mad genius!
LOL can I tell my husband you said that? Thanks 😉
Love this! I’m new to your blog and I’m loving your style! Thanks for sharing!
Oh thanks so so much Chelsie. Hope you stick around
That’s some seriously brilliant recycling! I love these!
Those are so cool! Absolutely love the idea and the outcome 🙂
Danke Esther
LOVE this! Now, I need an old leather couch. =)
I’m sure there are lots of other things we can find at thiftshops to make tassels out of. Maybe even an old Jacket
Love those Julia!!! You are so darn clever!
Thanks Pam, you are pretty clever yourself.
You are an evil genius
LOL thanks
I love this up-cycle from your old sofa. The tassels look perfect on your bar cart! Super pretty.
Thanks so much Kathy
These are so cool! I’m thinking I have to go hunting at our local thrift store for some leather to give a good chop!
I’m sure you can find a great piece to chop up
What a creative idea! Those tassel looks cute. Unfortunately I don’t have any old sofa right now, maybe I’d better looking for other similar materials. Anw, thanks for the great tutorial, Julia, this must be helpful to many family.
I never thought making a leather tassel could be so easy! The step-by-step instructions were super helpful, and I can’t wait to try it with my leather scraps. Thanks for the inspiration!
I loved this DIY project! I’m excited to try this out. Thanks for sharing such a fun and creative idea!
What a fantastic and simple tutorial! I love how you made it so easy to follow. Can’t wait to try making my own leather tassels with leftover scraps. Thanks for sharing this creative idea!
I absolutely loved this tutorial! The step-by-step instructions were super easy to follow, and I can’t believe how stylish my tassels turned out. Such a great way to use leather scraps. Can’t wait to try more projects from your blog!
I loved this DIY tutorial! It’s such a creative way to use leather scraps, and the step-by-step instructions were super clear. I can’t wait to try making my own tassels for my bags and keychains. Thanks for sharing!