

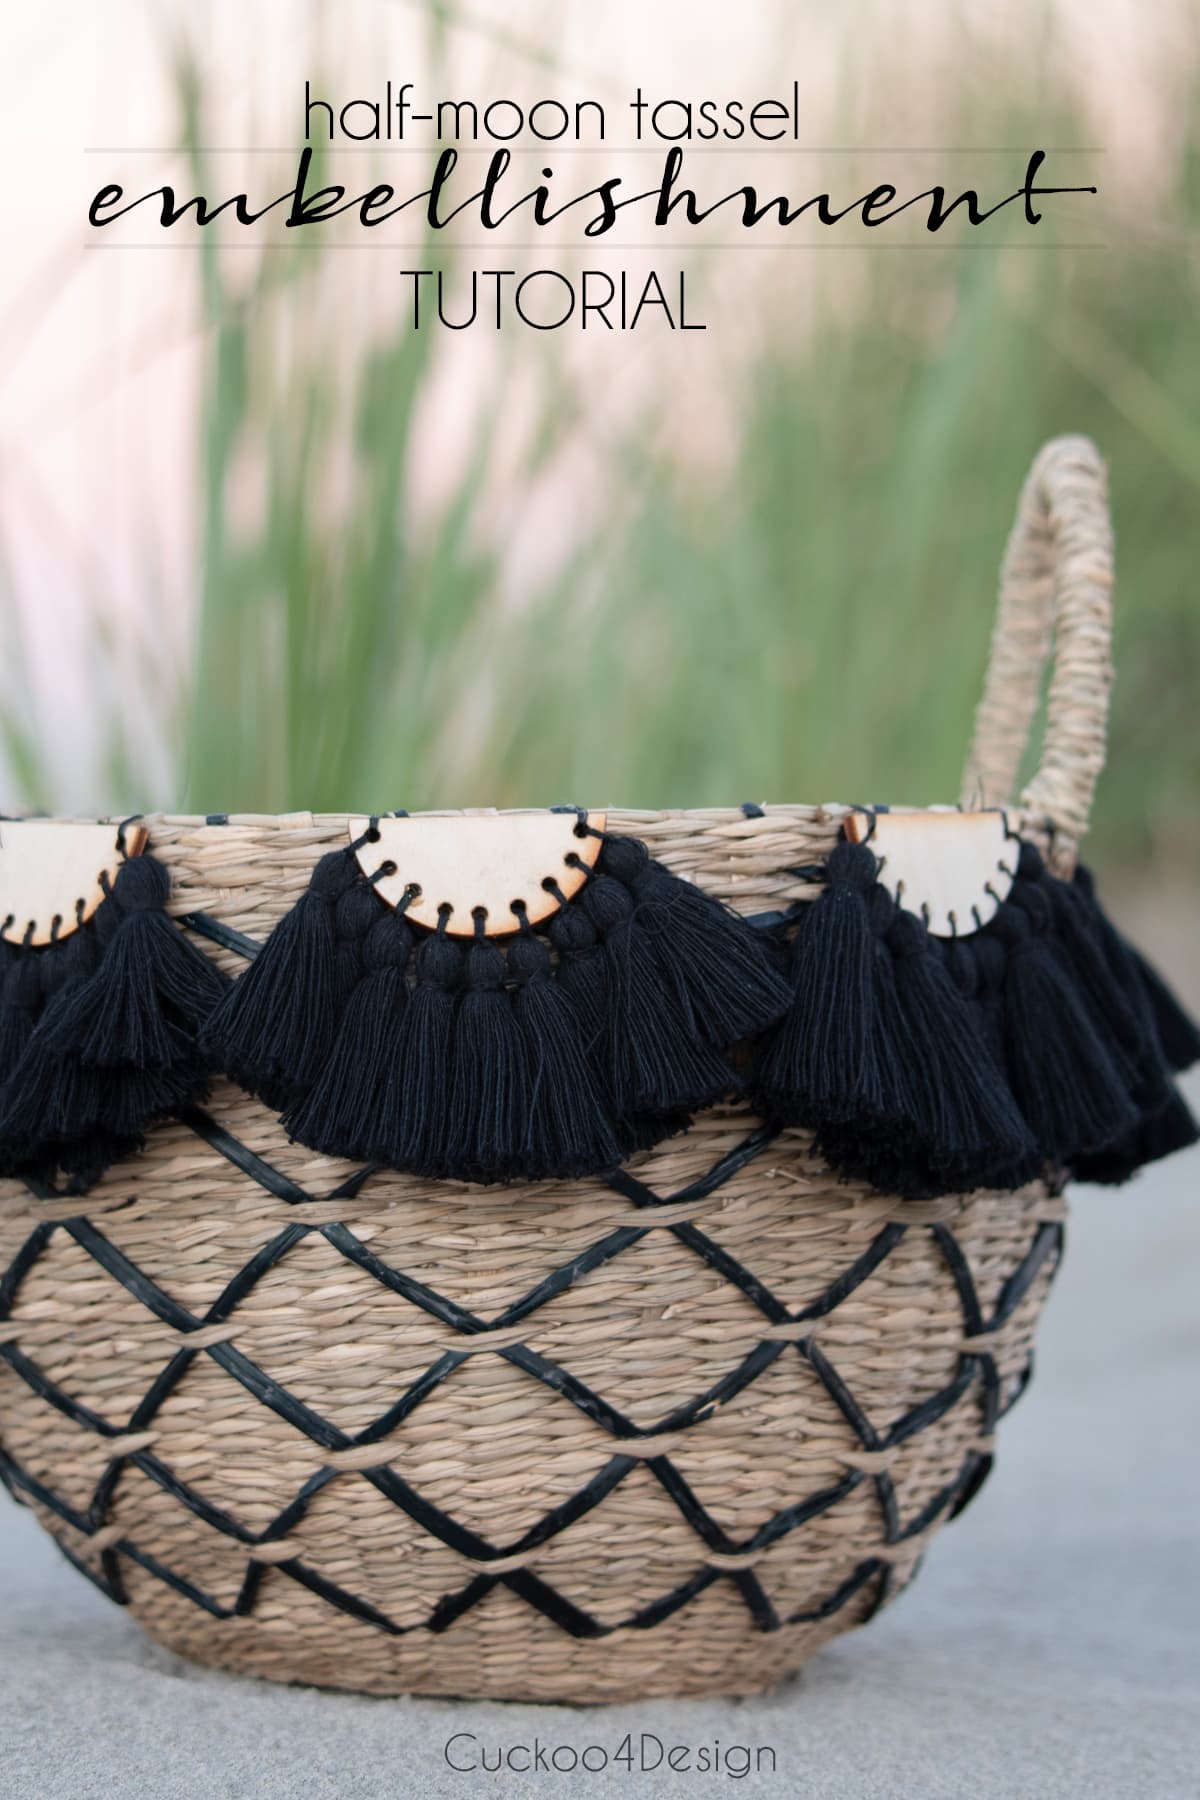
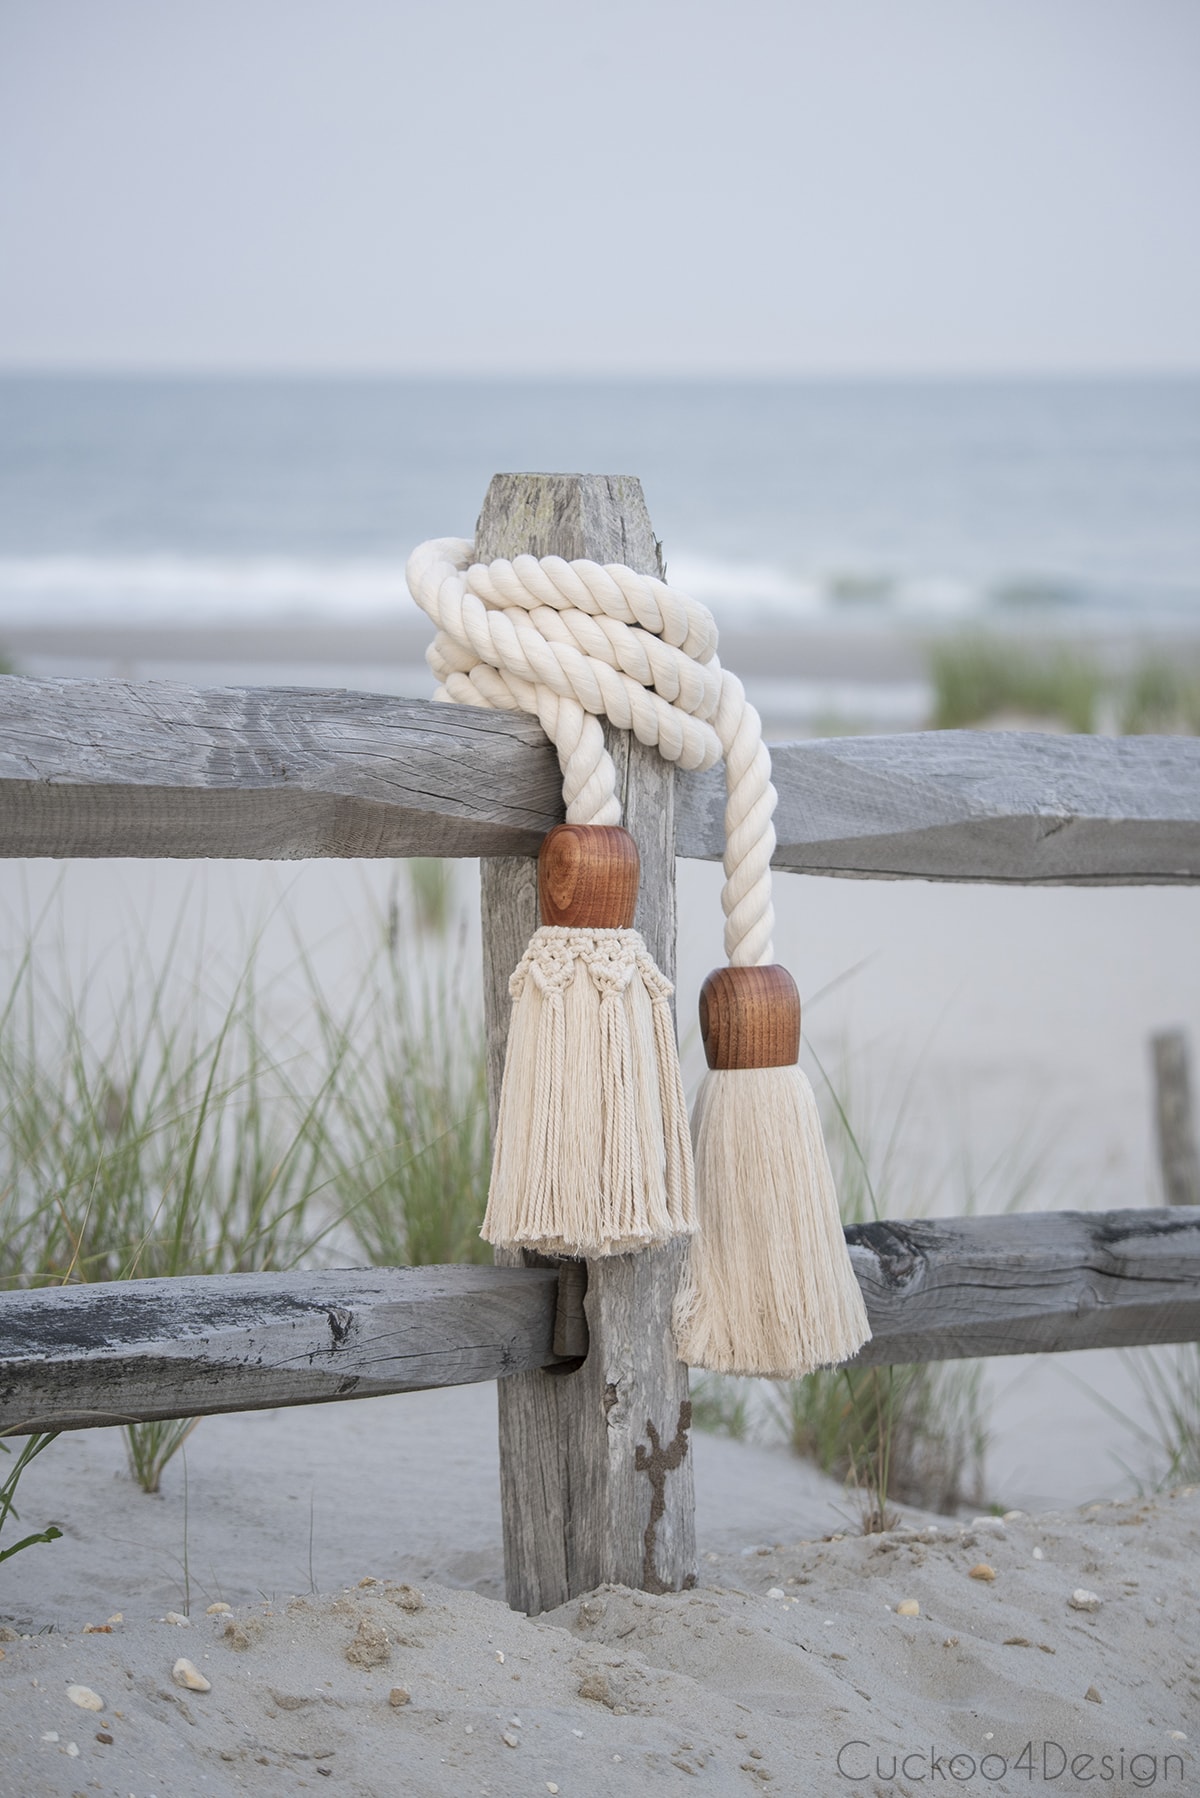
DIY tassel embellishments for a tassel sconce, lampshade, or basket
A while back I was browsing Anthropology and came across their selection of embellished lampshades. I saw their half-moon tassel embellished lampshades and suddenly had an idea of how to make my own tassel sconce or lampshade. These aren’t only great for lampshades but can be used on baskets, purses, earrings, necklaces, or whatever floats your boat.
DIY tassel embellishments for a tassel sconce, lampshade, or basket
This post may contain affiliate links from which I will earn a commission at no extra cost to you. View my full disclosure policy.
I’m mostly demonstrating the tutorial on baskets since I was at the beach and didn’t have my lampshades handy but it’s the same process. Let me show you!
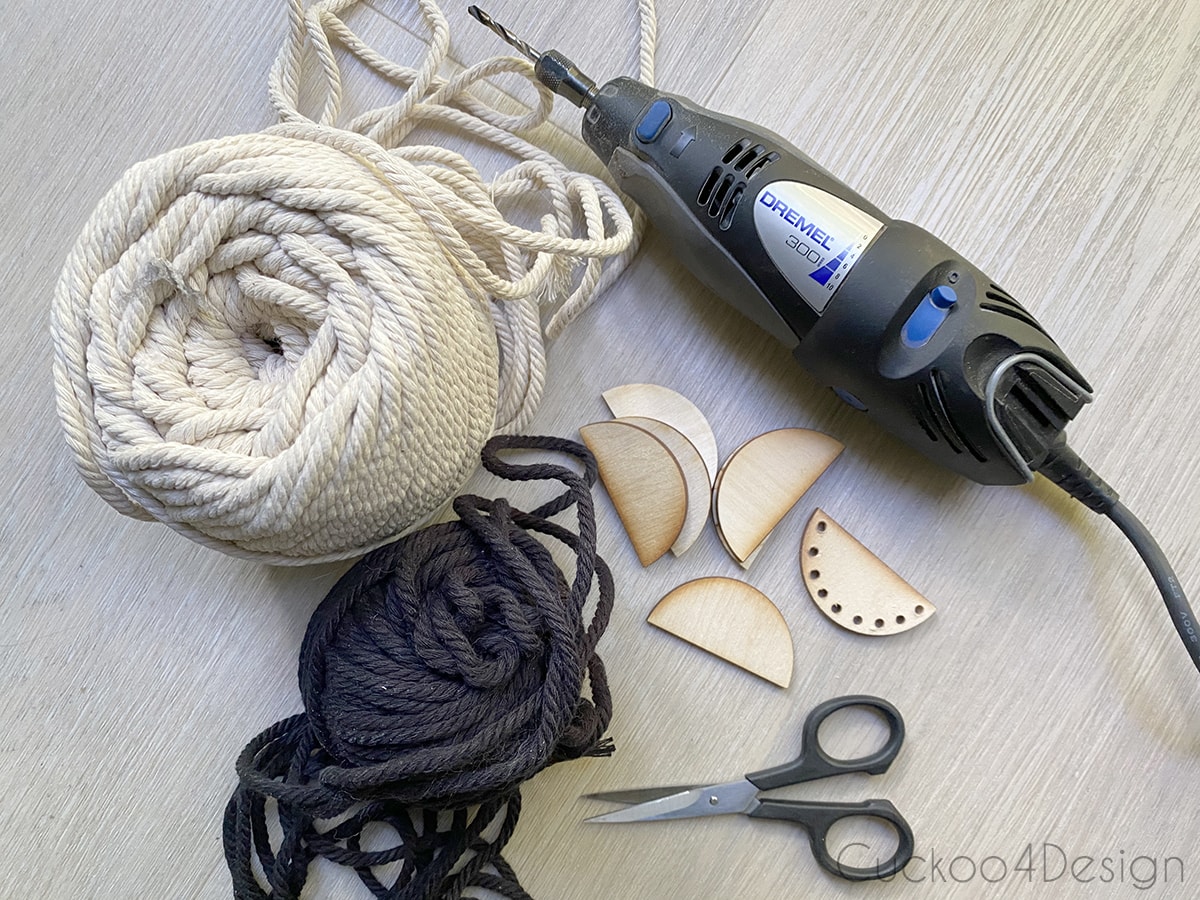
Materials needed to make the half-moon tassel embellishment
- I used ivory and black 4mm macrame yarn
- sharp scissors
- wooden half-moons
- Dremel and drillbit
- needle and yarn
- pencil
- comb
- accessories of your choice to add embellishments to
Video tutorial
Here is my video tutorial which is really good at showing you what I did with my hands. If it doesn’t load for you for some reason, you can head to my YouTube Channel to watch it there instead.
Step-by-step instructions
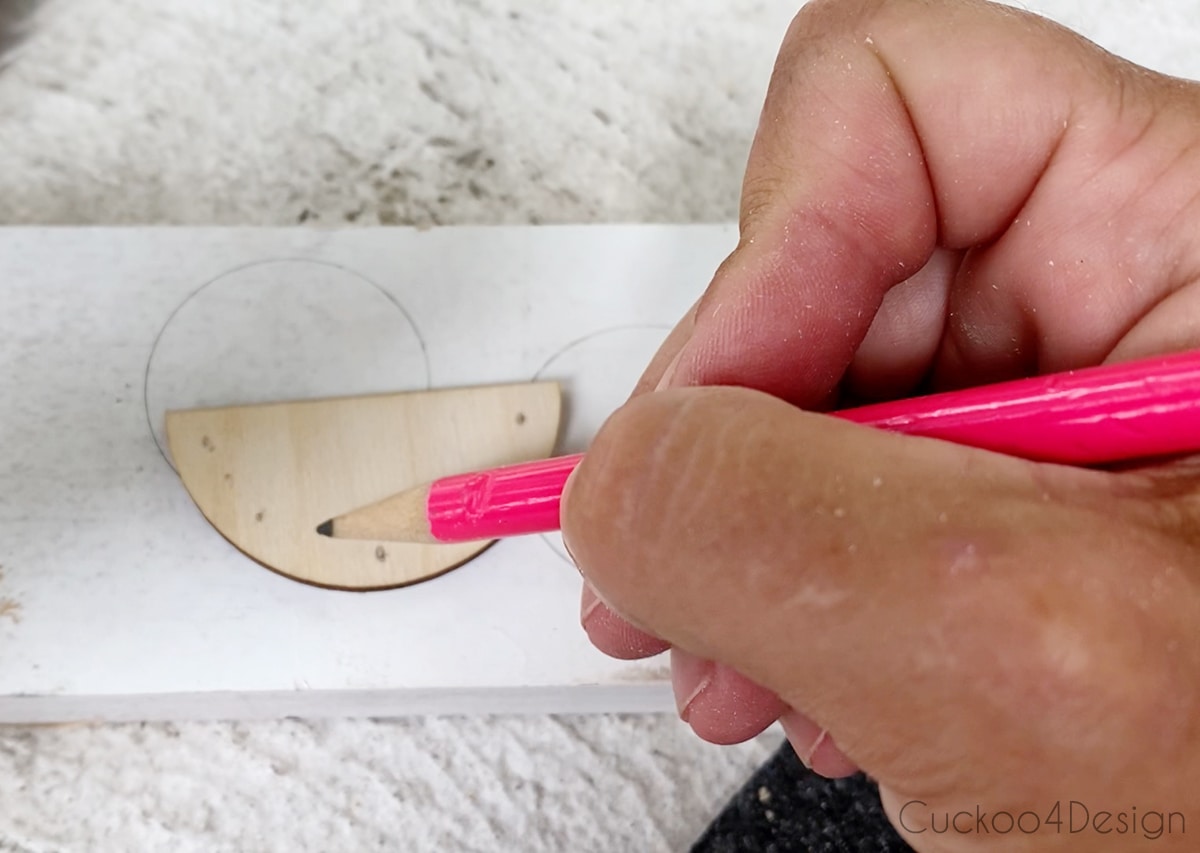
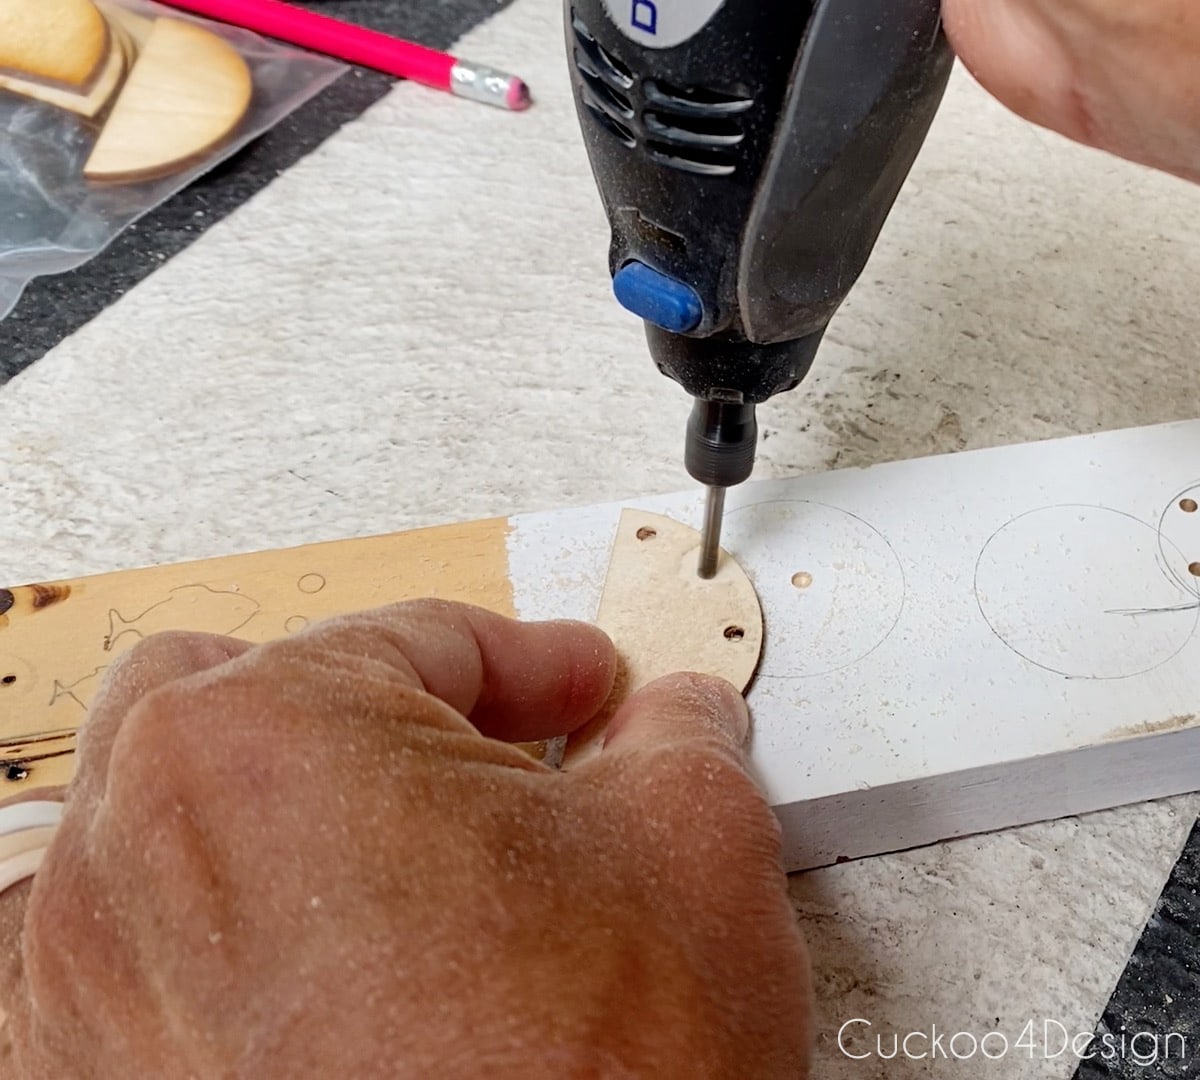
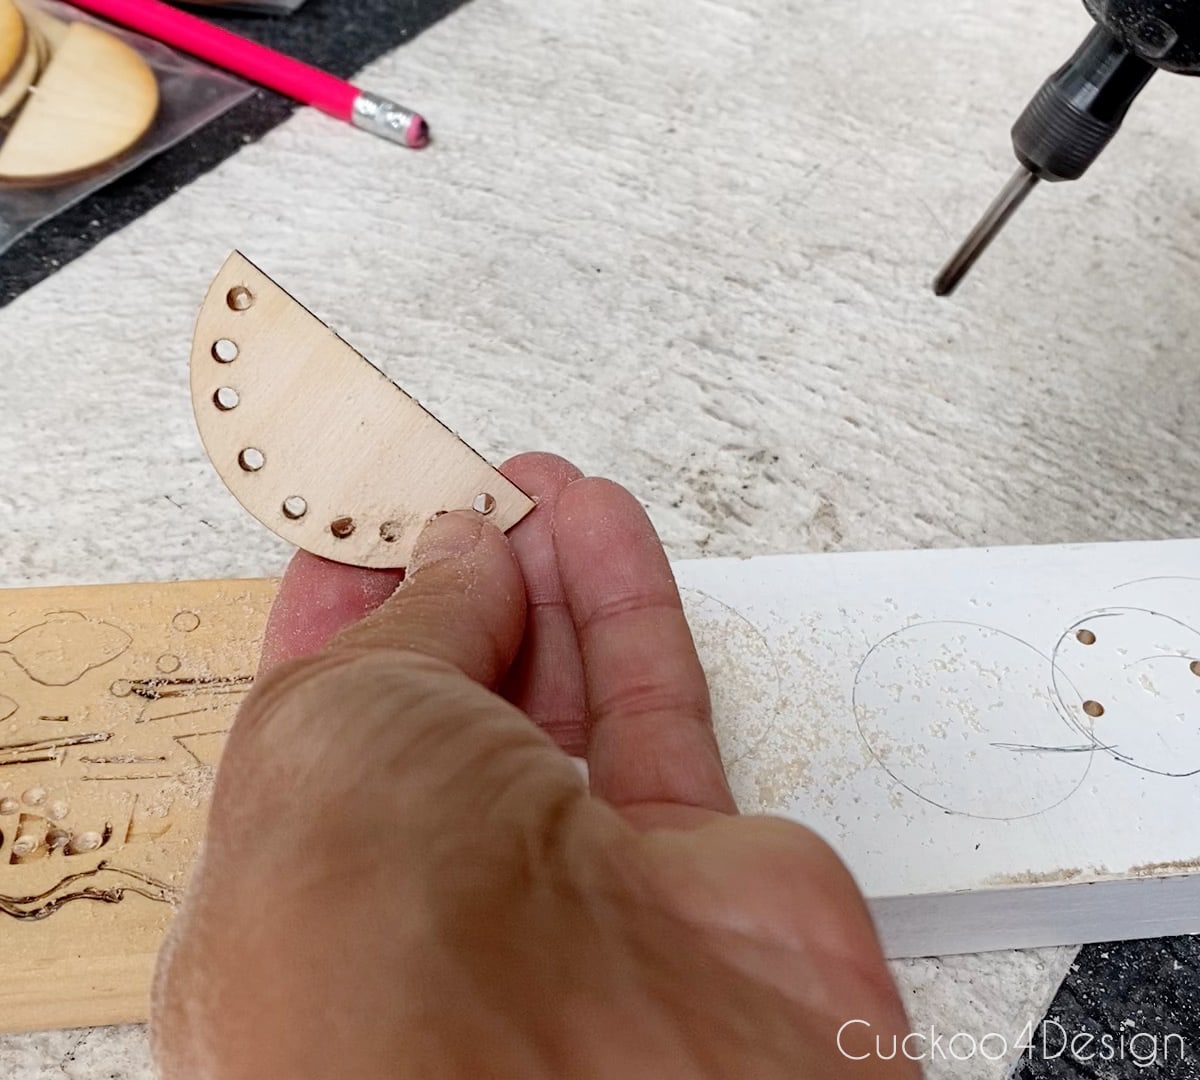
Drilling the holes
Start out by marking the placement of the 9 holes on the wooden half-moons. I marked the center and outsides first as you can see in my video tutorial and then filled in the rest which makes even placement easier.
After that, it is time to drill the holes. I placed a piece of wood scrap under the pieces so I wouldn’t damage the surface underneath. The Dremel made drilling super easy and the wood didn’t split like it usually does with a heavy-duty drill.
Tip: I tried out my woodburning tool to burn holes into the wood which worked as well, just takes a lot longer. I do like the look of the burned edges in the wood though.
Making the tassels
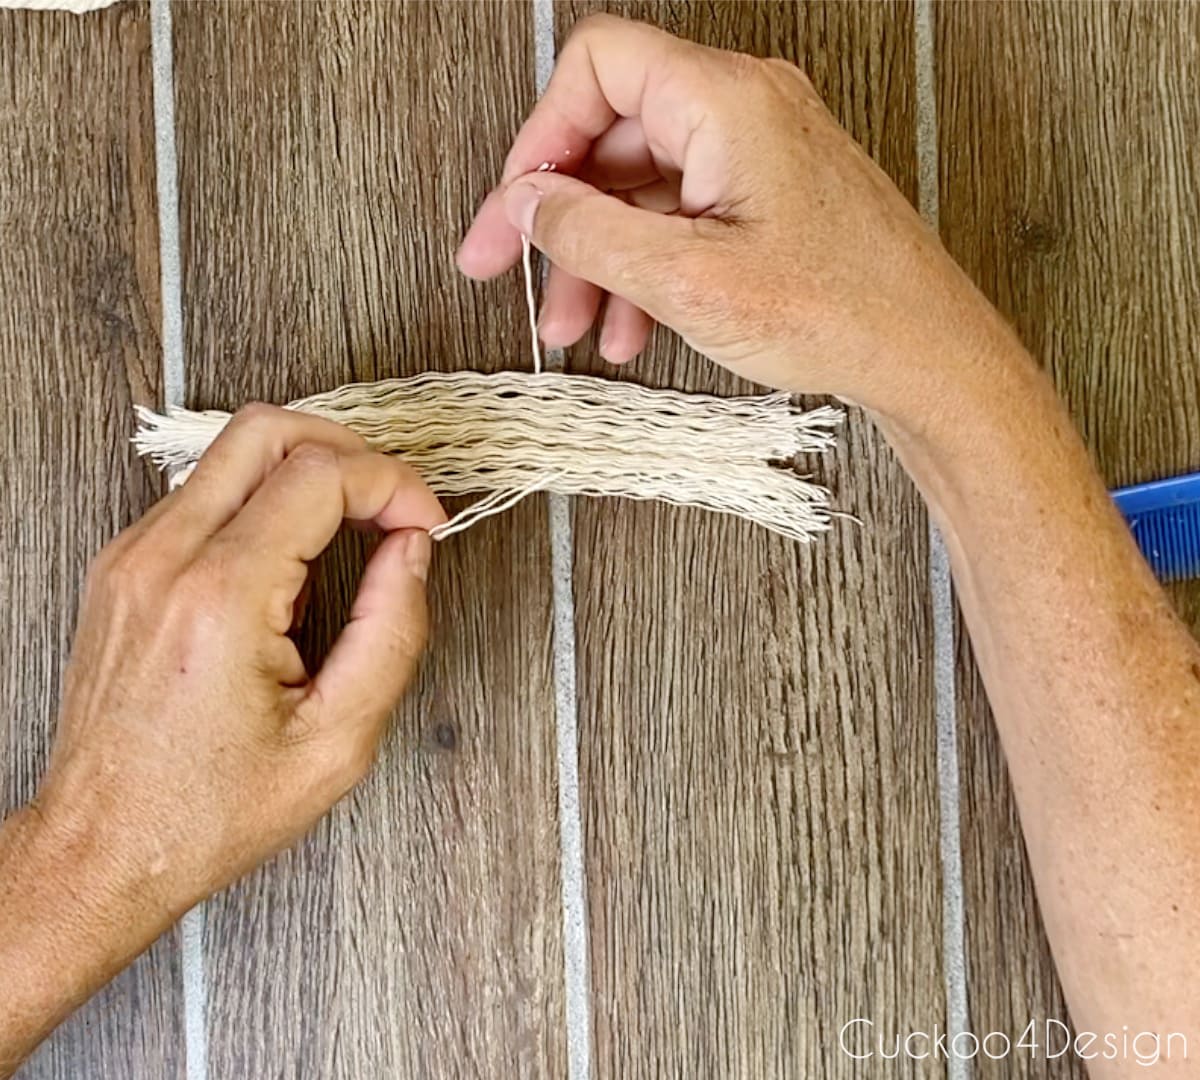
Next, I cut the macrame yarn pieces. As I mentioned above, the reason I used macrame yarn once again is mainly that I have plenty of it on hand, it’s affordable and easy to work with. You could use other yarn as well though.
I used two 5″ inch pieces of yarn per tassel and there are 9 tassels per half-moon, so you need to cut 18 5-inch pieces for each half-moon.
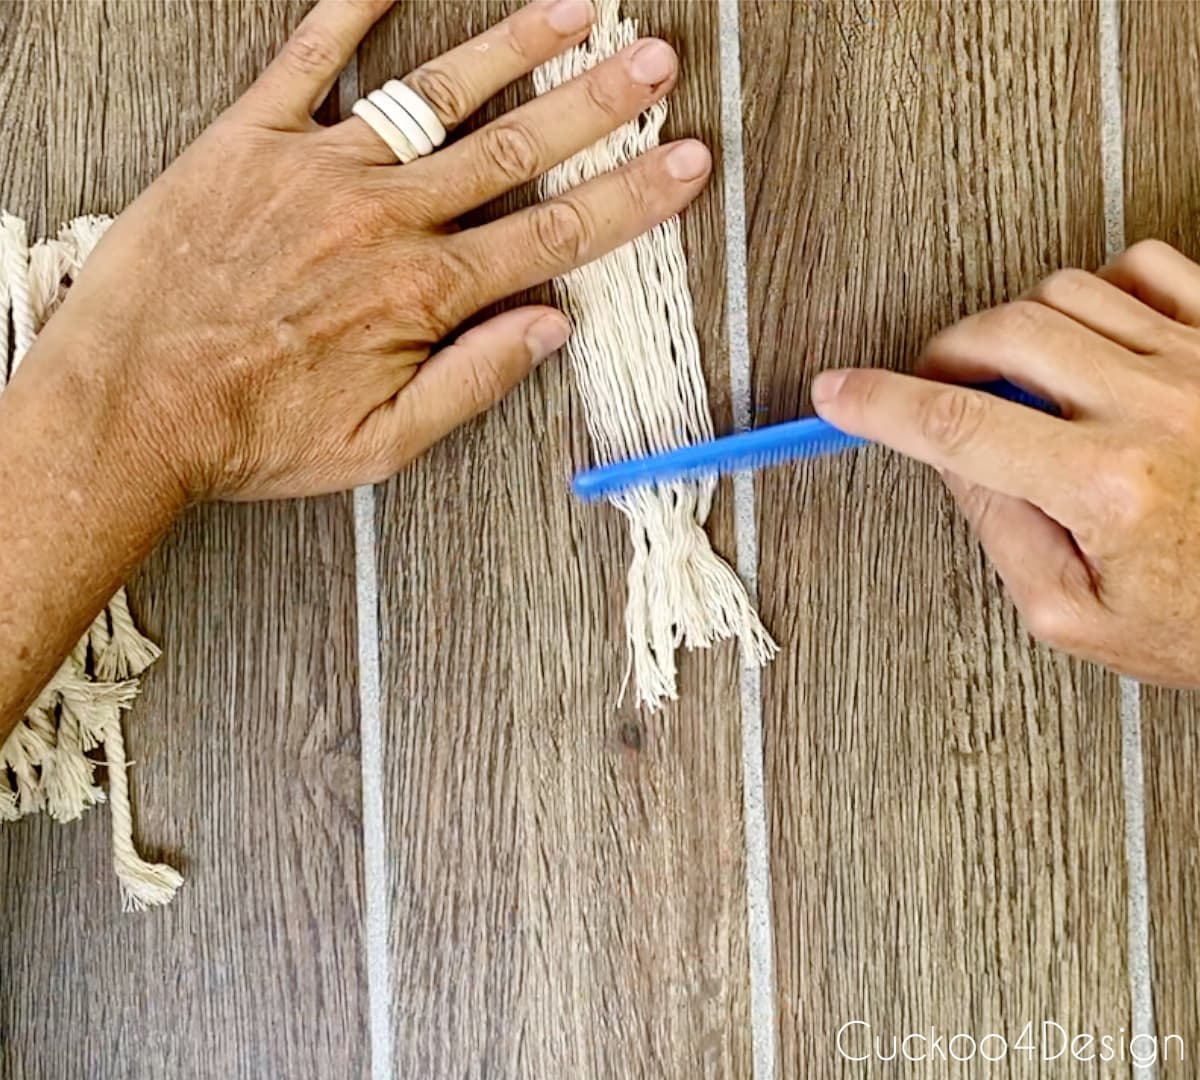
Unravel each strand of yarn into separate pieces.
If you want the tassels to be less thick then use less strands after unraveling.
Comb the two unraveled strands of macrame yarn.
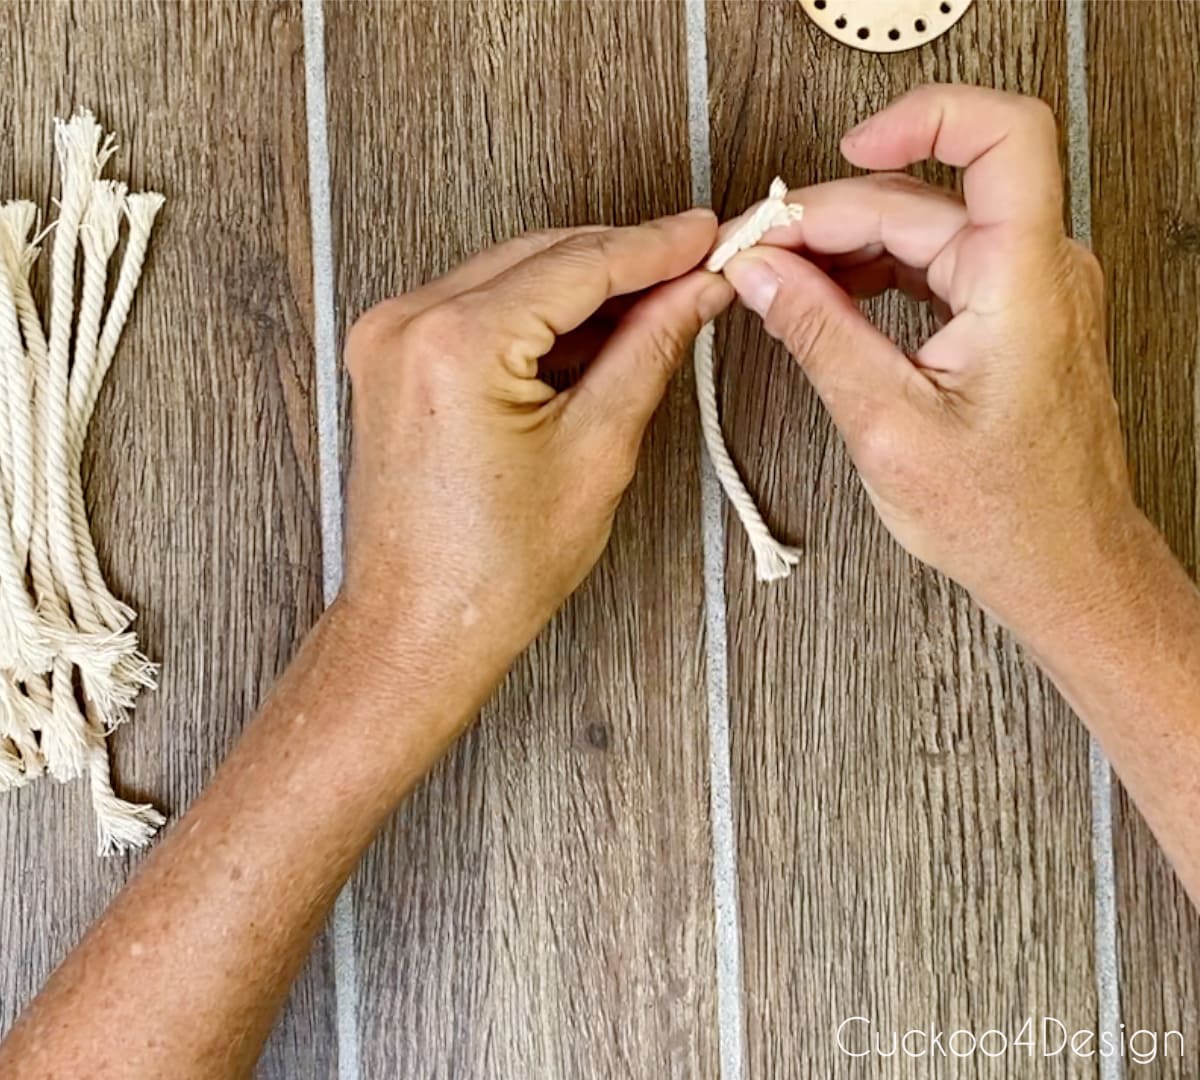
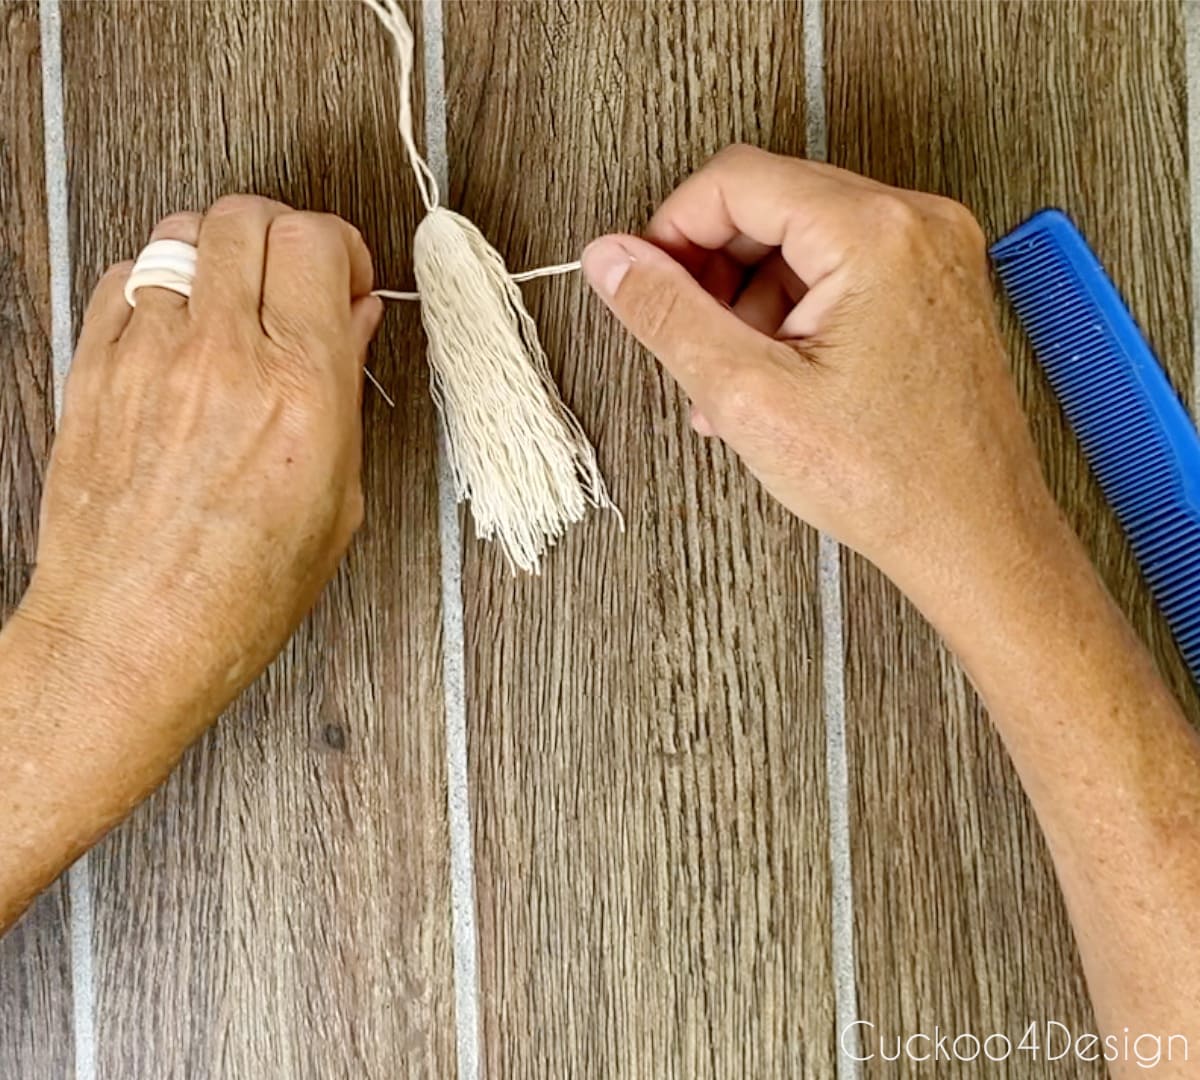
I used some unraveled yarn from a different scrap piece to tie off the tassel in the middle of the 5″ inch pieces. It’s just like any of my other tassel tutorials.
Time to tie the tassel head.
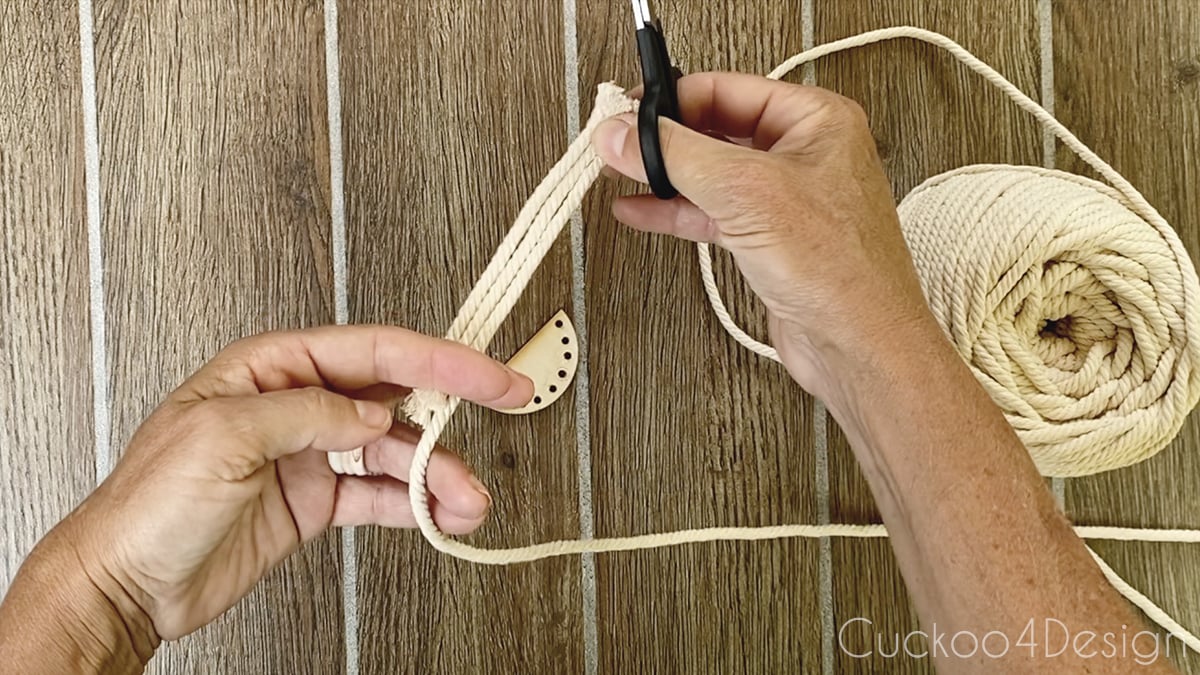
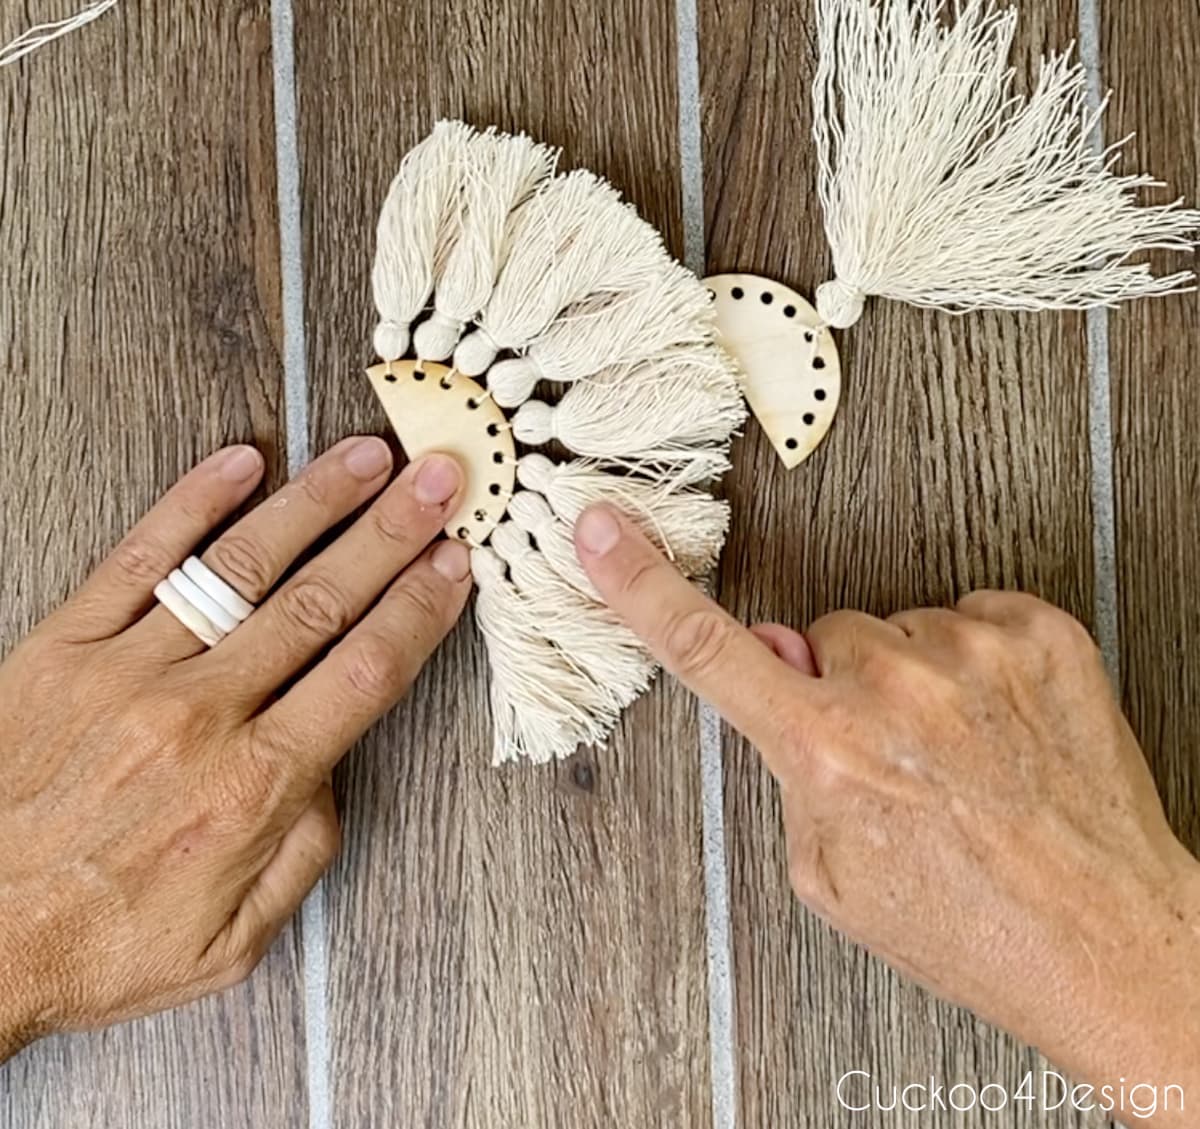
Attaching the tassels to the wooden half moon
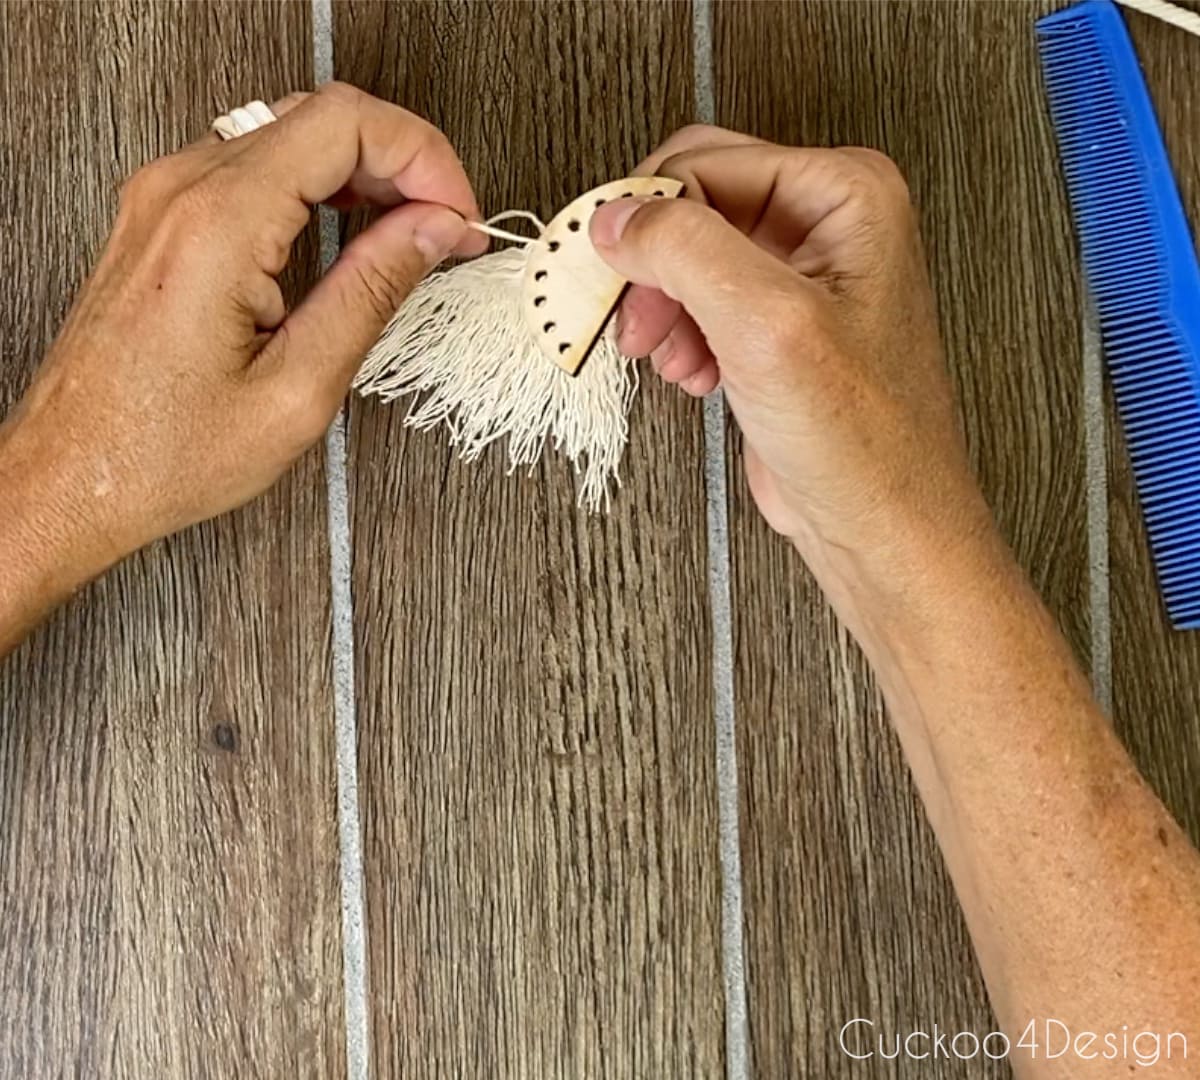
Knot the tassel to one of the holes in a half-moon wood piece.
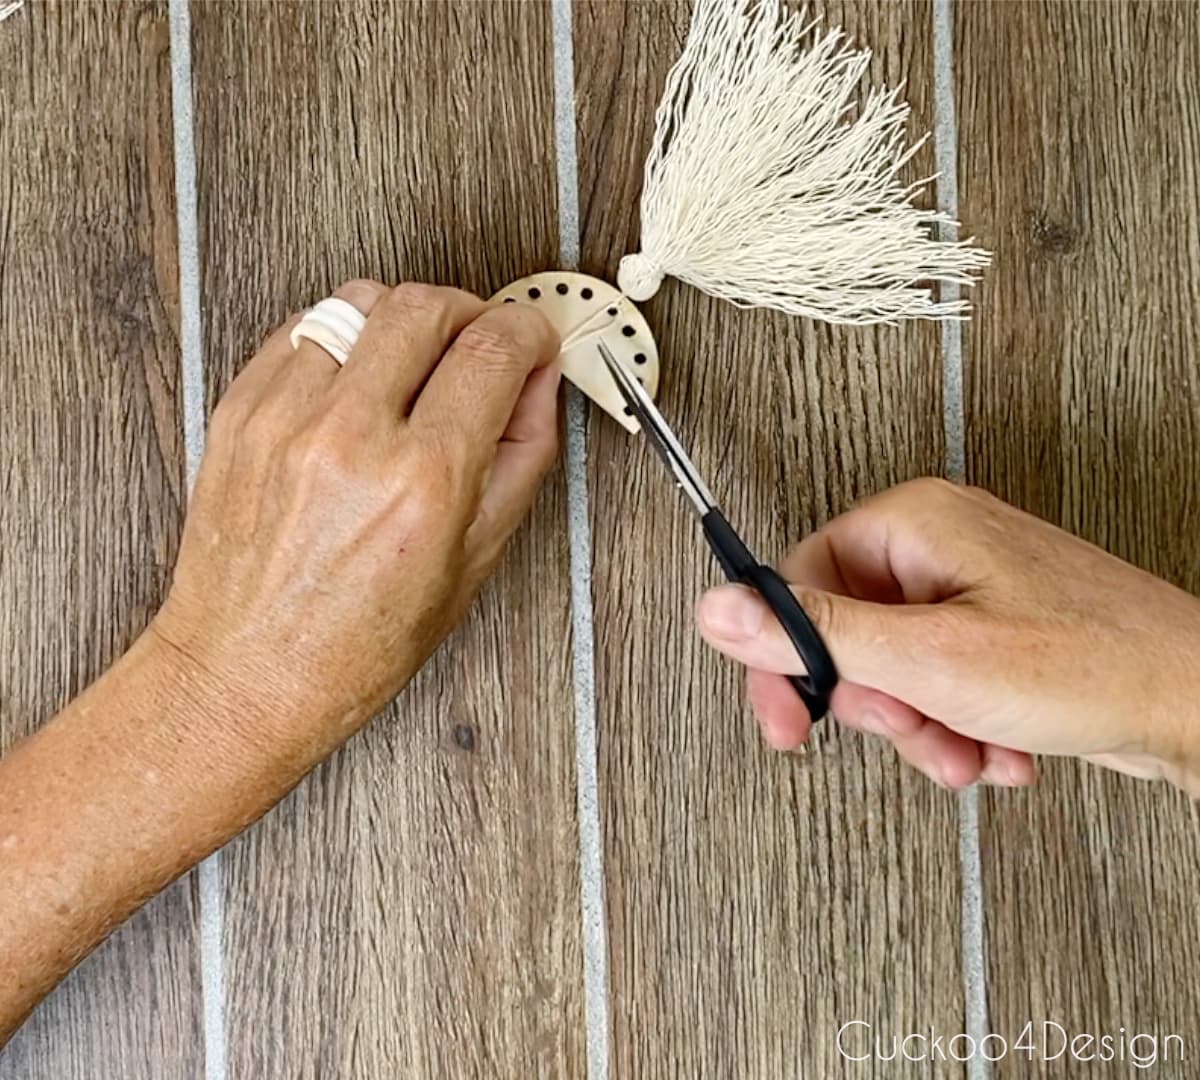
Trim the ends close to the knot but not too close.
Now repeat this 8 more times to finish the tassel embellishments but be sure that you keep the knotted ends on the same side, so the other side is clean and without knots.
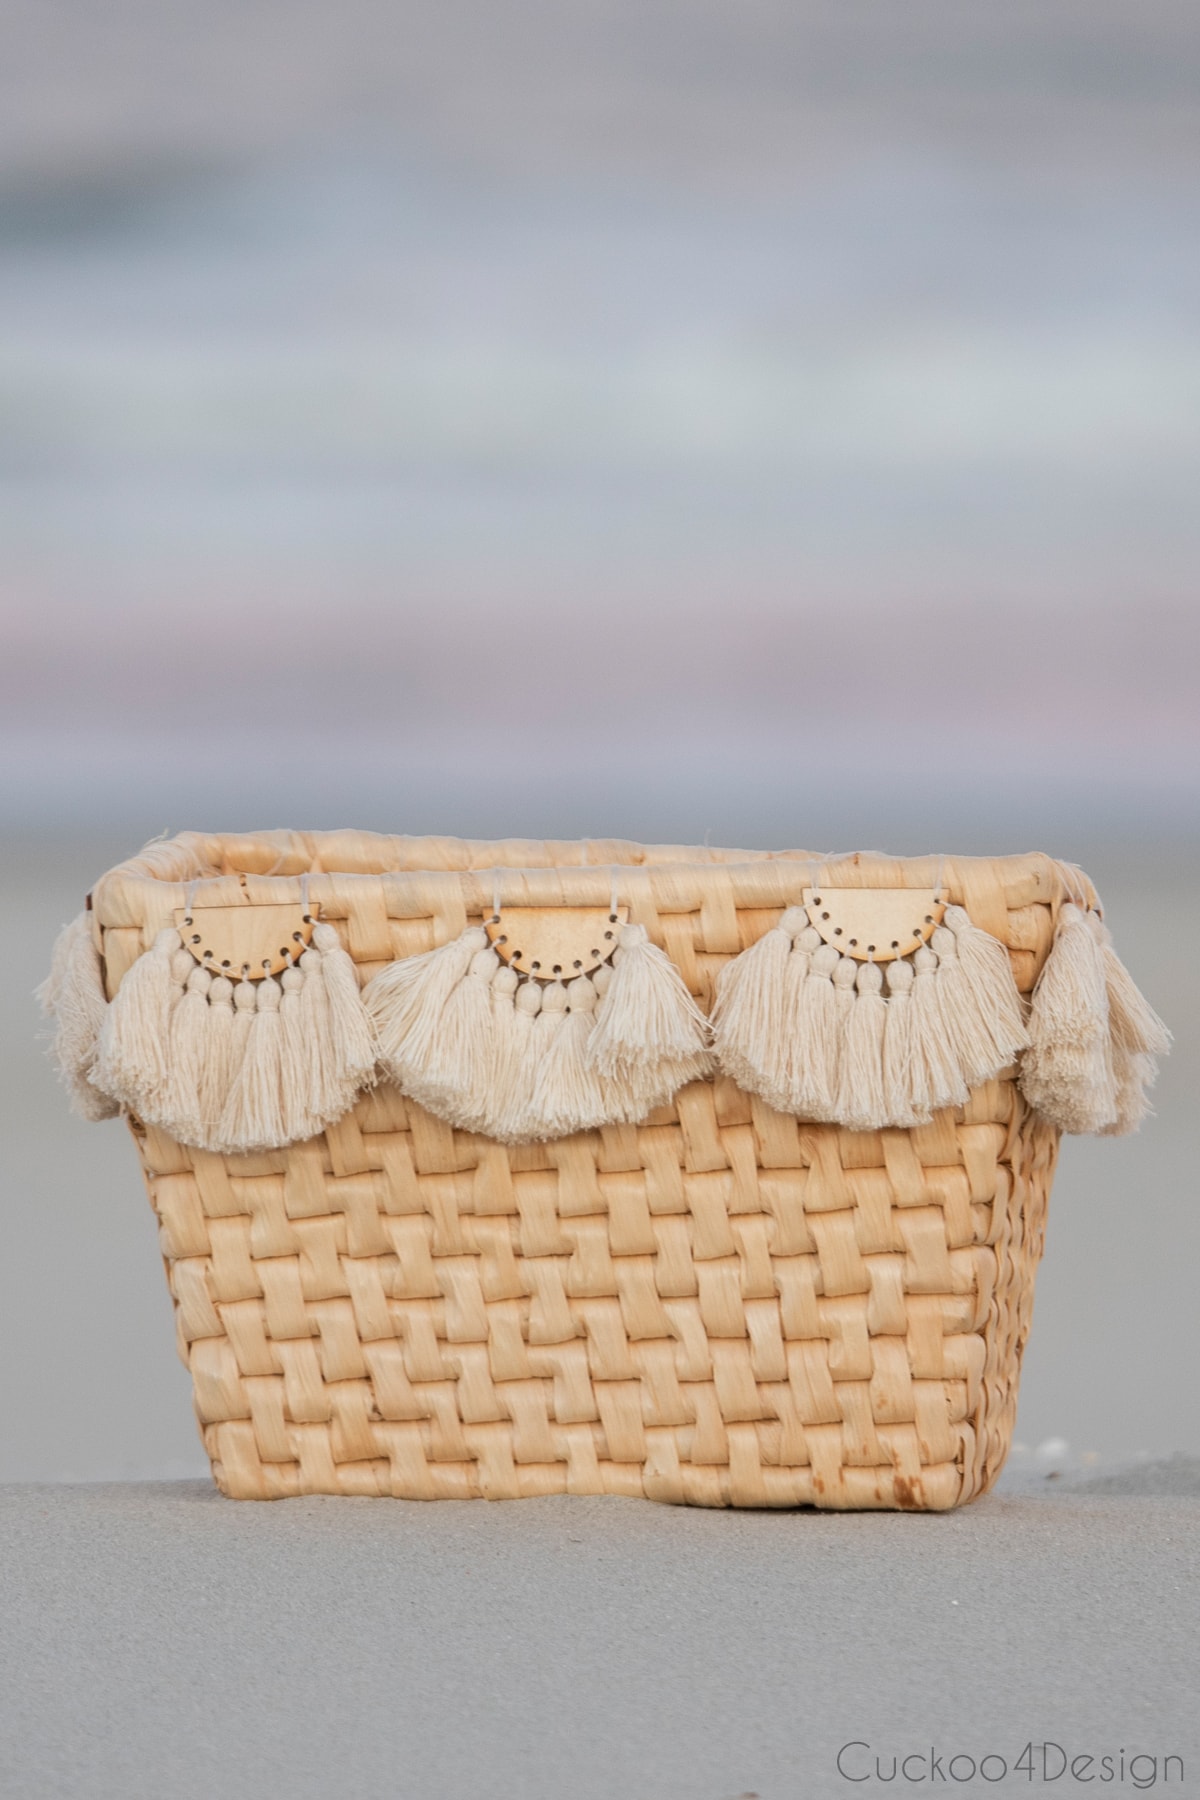
I ended up trimming all the tassels to 2 inches all the way around.
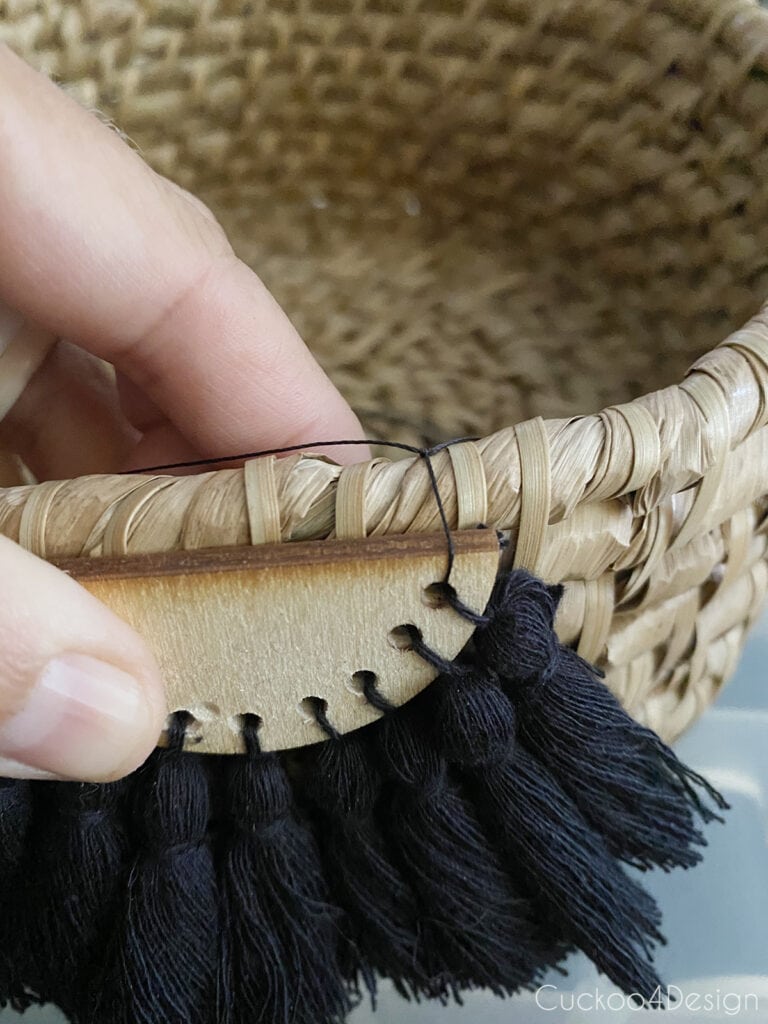
Attaching your tassels embellishments to your tassel sconce or basket
To attach the tassel embellishments to the lampshades or baskets, I used a needle and yarn like you would attach a button.
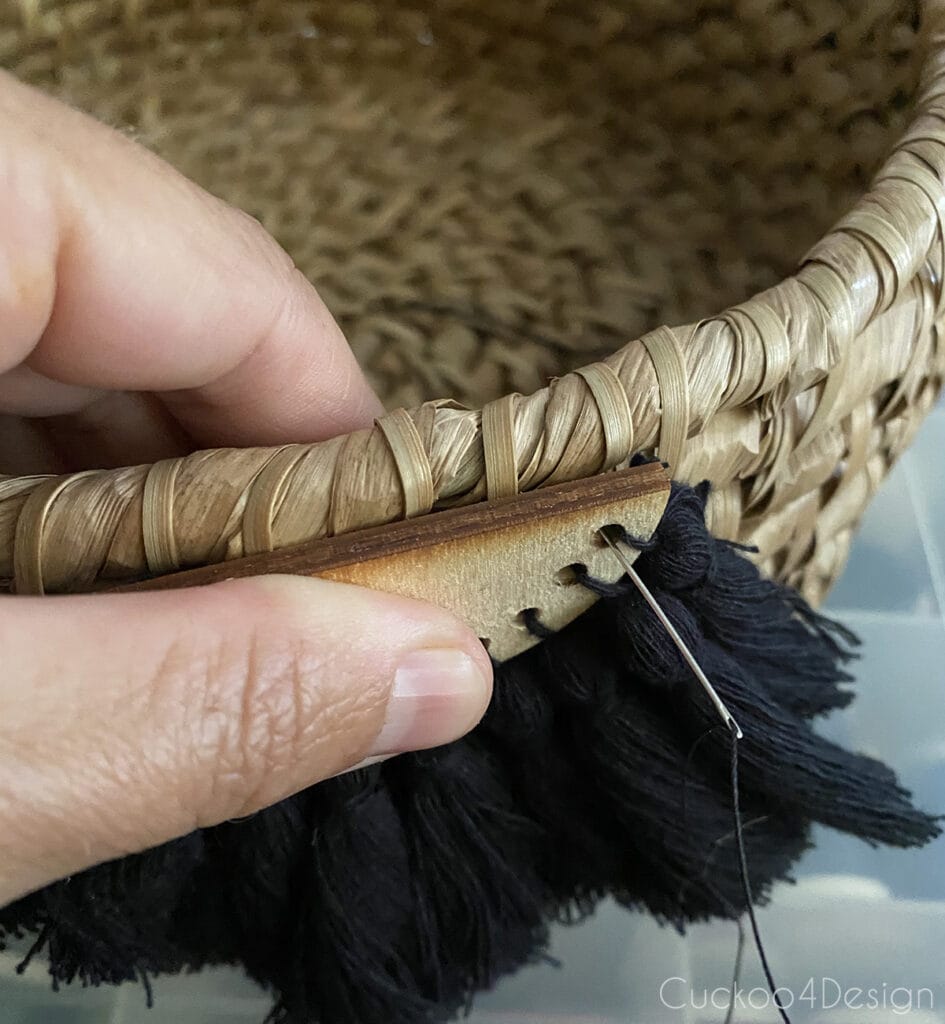
Make sure that you place the pretty side without the knots facing out and visible.
Let me show you what they look like on some sconces, baskets, and lampshades…
Tassel embellishment on tassel sconce lampshade
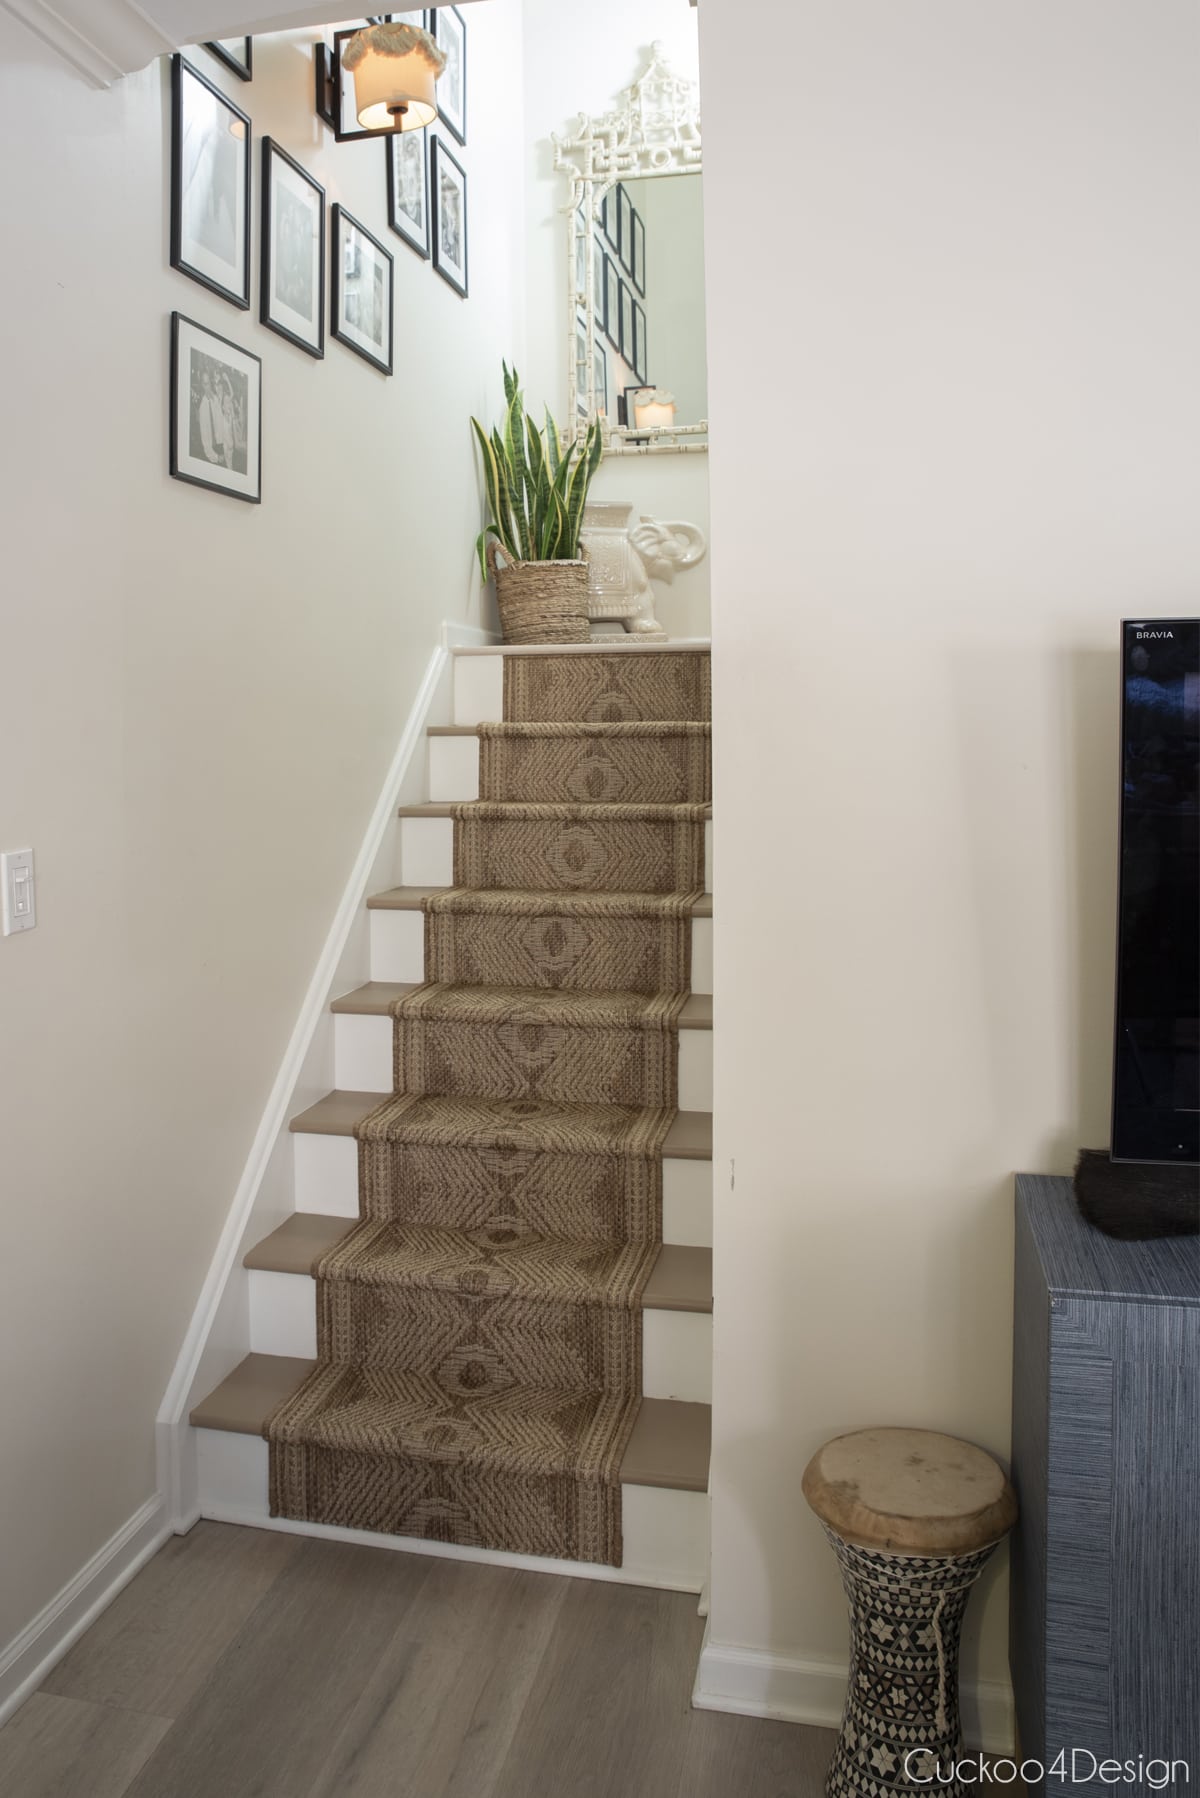
The tassel sconce in my staircase is incredibly hard to photograph because of the lighting. I love how they look and this is the spot these little tassel embellishments ended up permanently.

Below you can see what the tassel sconce looks like with the light turned on. They are the perfect little boho touch. Don’t you think so?
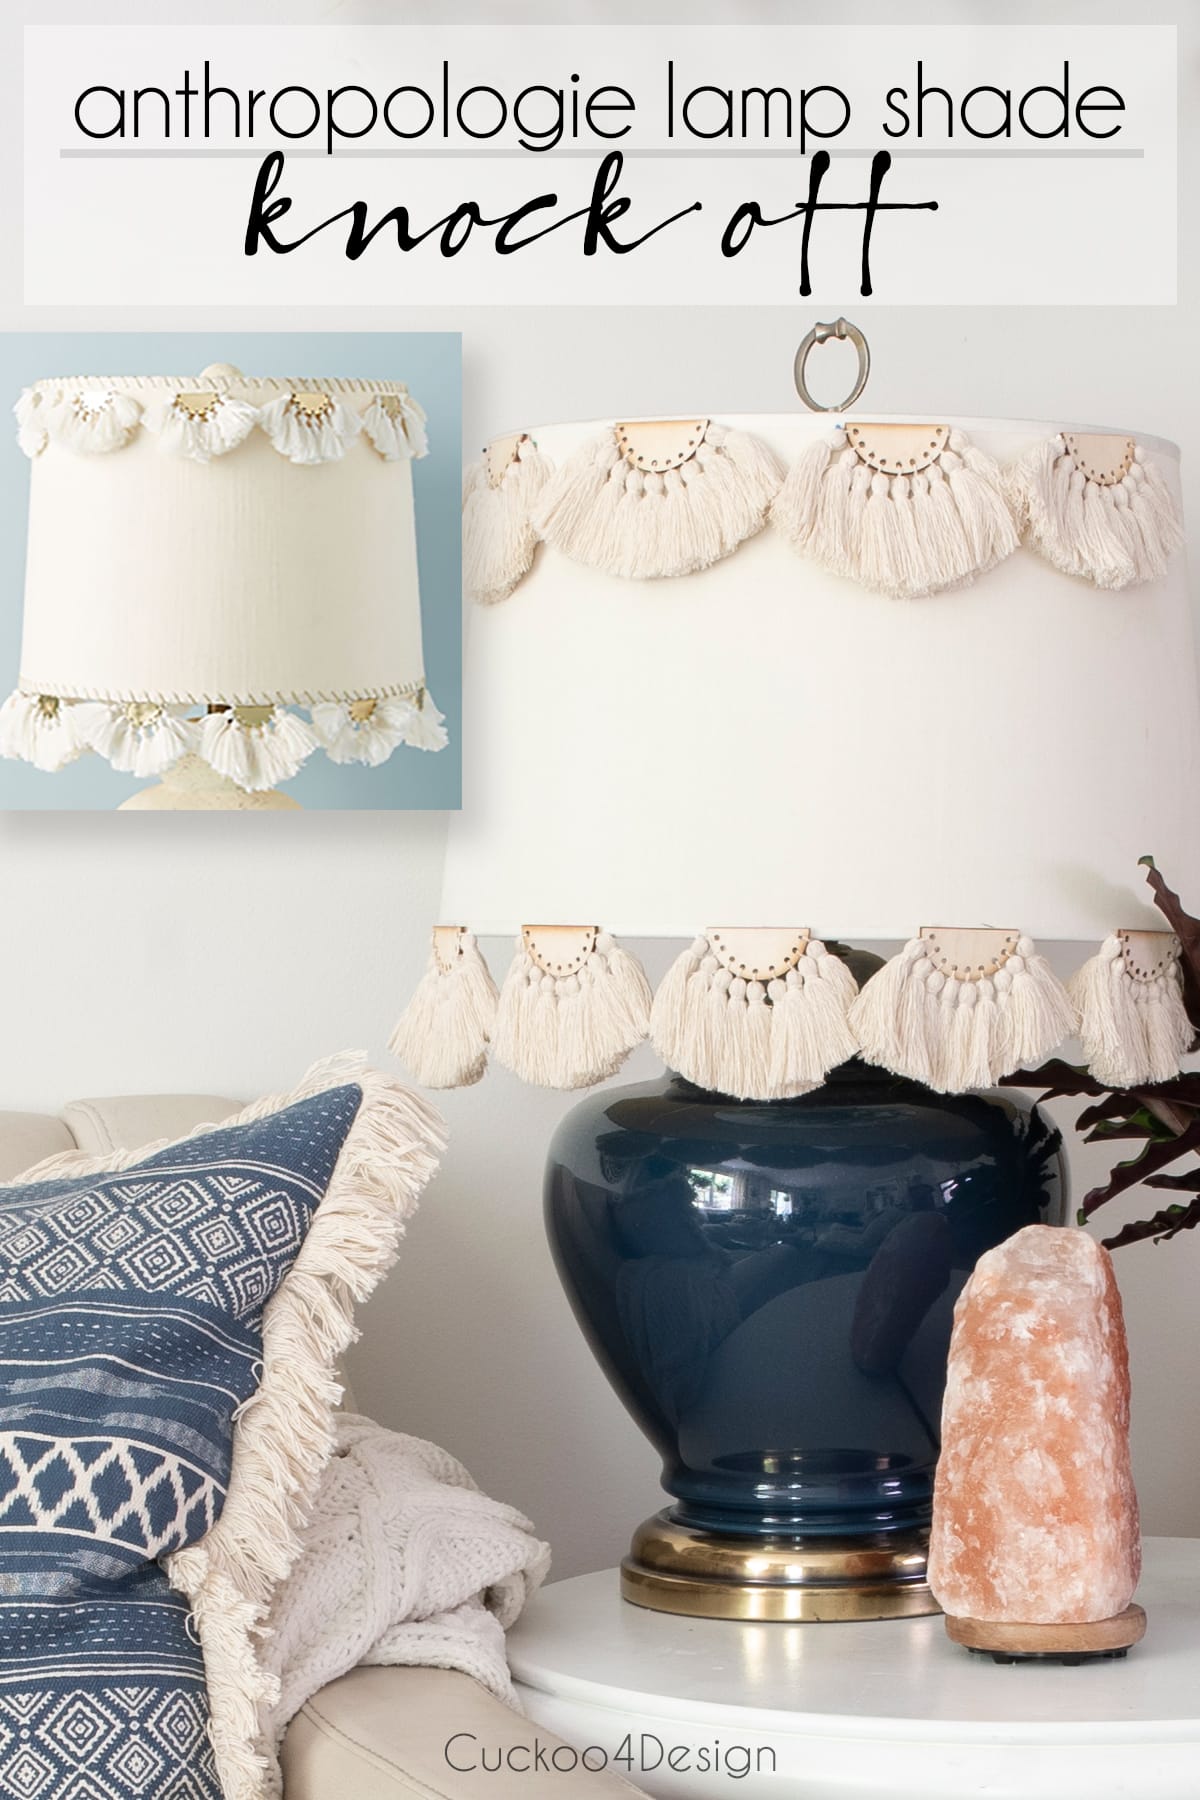
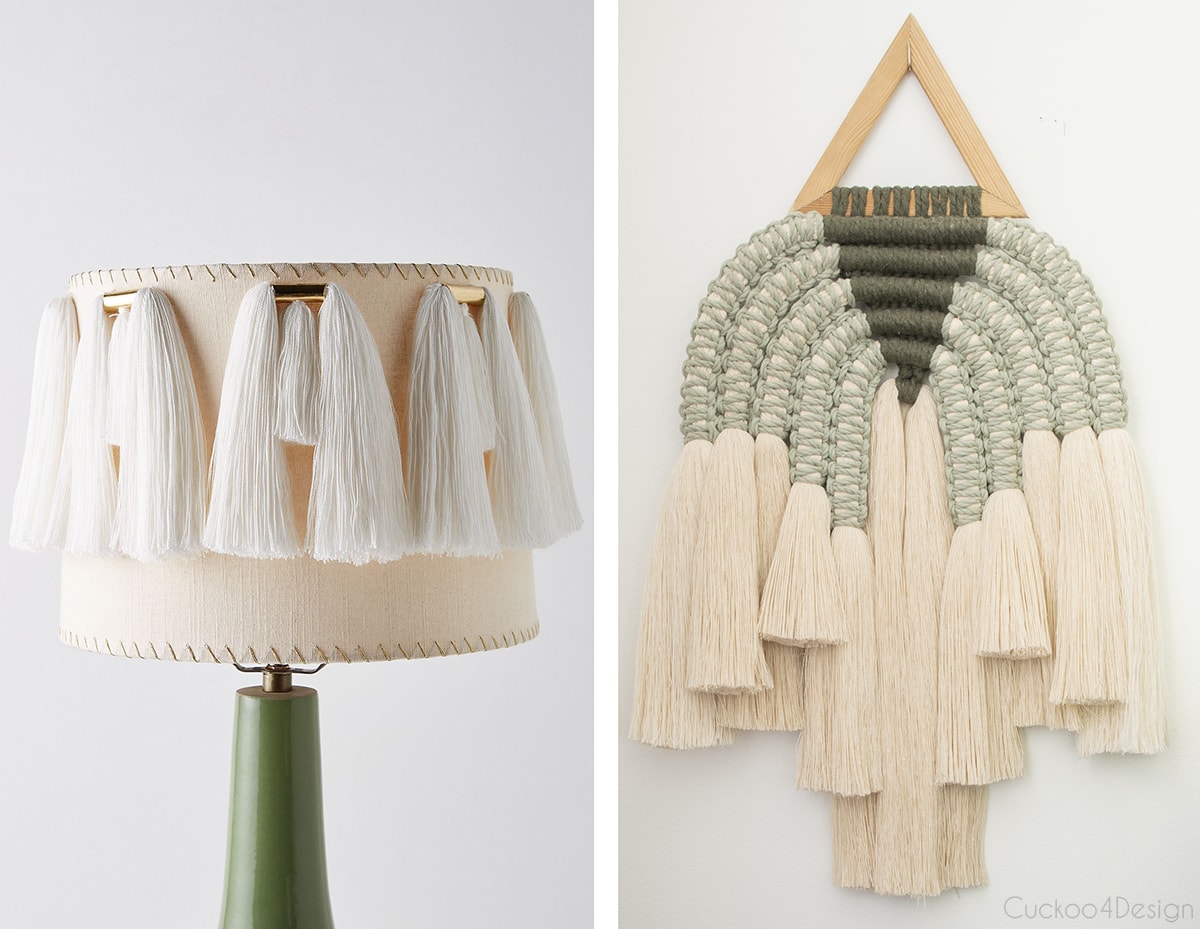
Anthropologie lampshade knockoff
As I mentioned above these embellishments were inspired by the Anthropologie lampshades which they have in ivory and gray. I ended up making black and ivory tassels instead. For their version, they used gold metal half-moons which you could also do but it would end up being a lot more expensive and I happen to love the wood look.
(For another designer kickoff project, check out my custom acrylic tray with gold spikes)
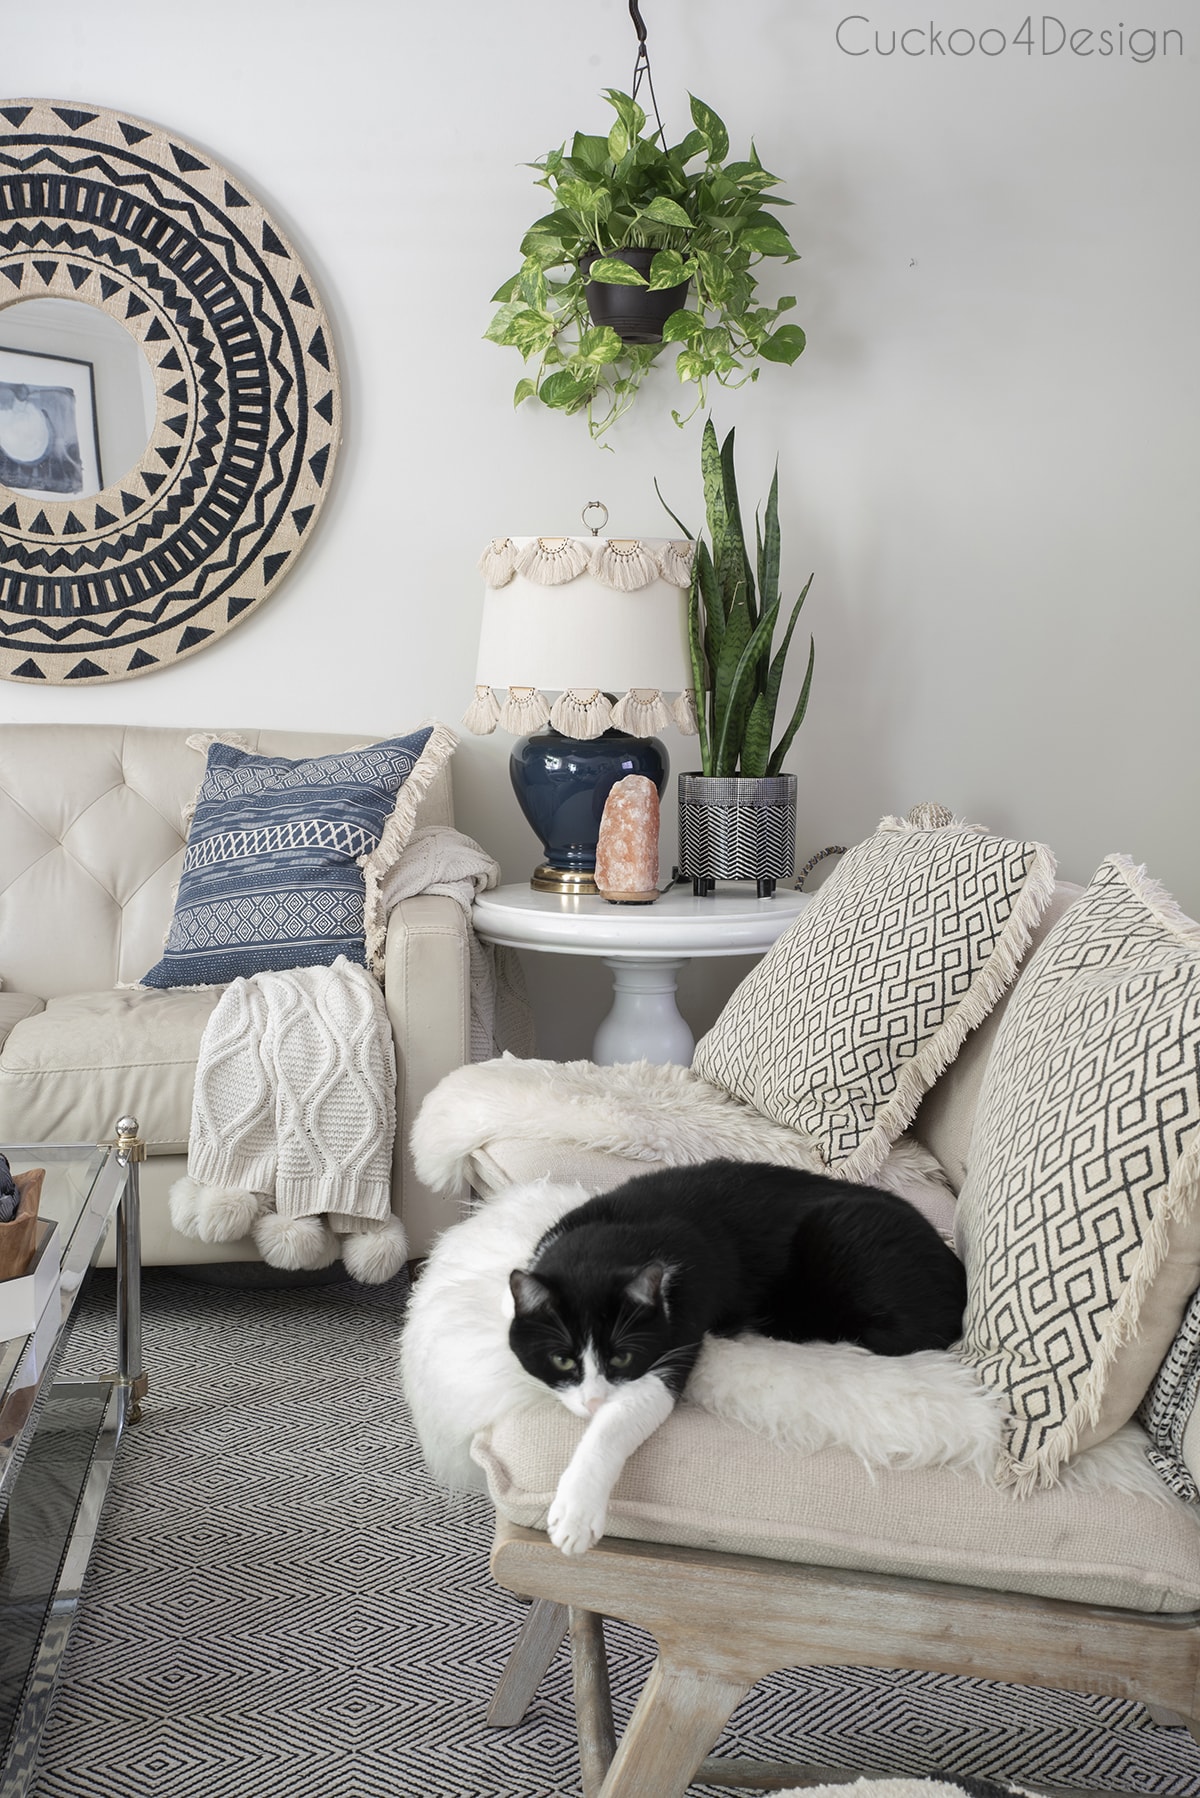
Here I have them attached to my ivory lampshade and standing on my new blue lamp.
But I also attached them to my black lampshade.

Anthropologie’s other embellished lampshade below reminds me of my recent modern macrame tutorial. Maybe I should make that lampshade as well 😉
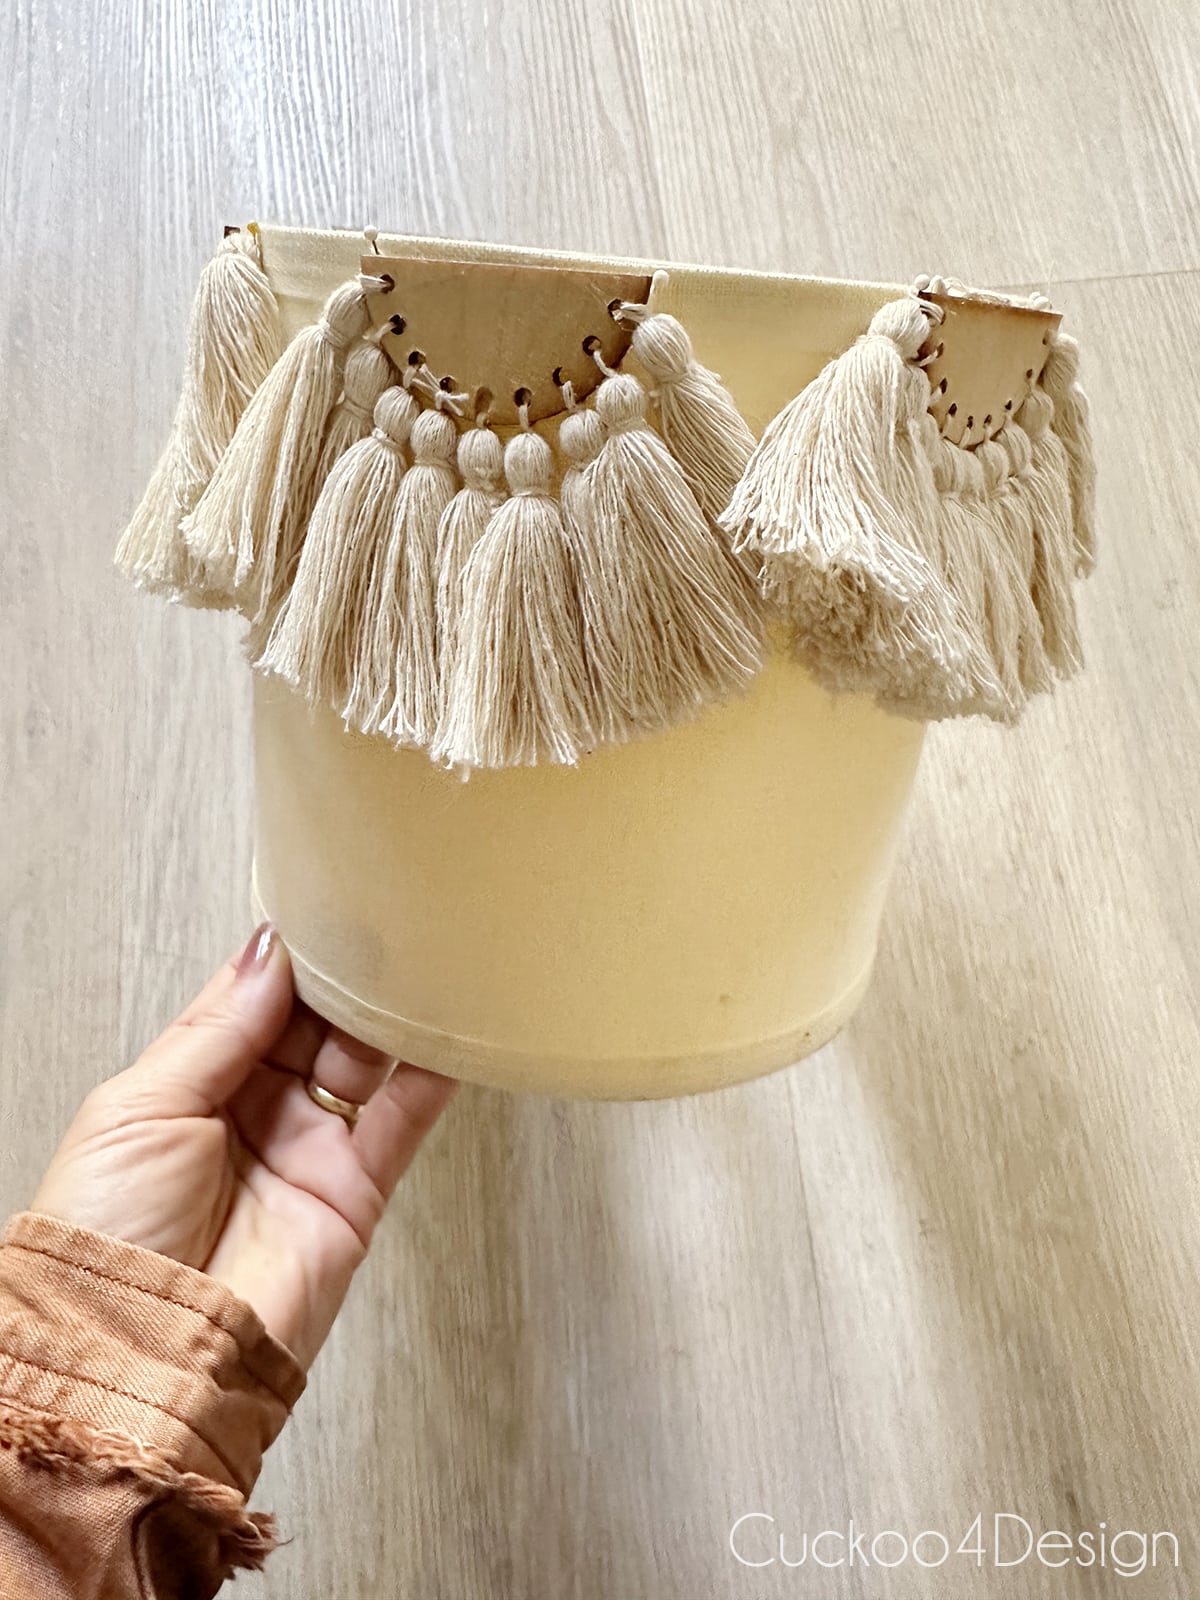
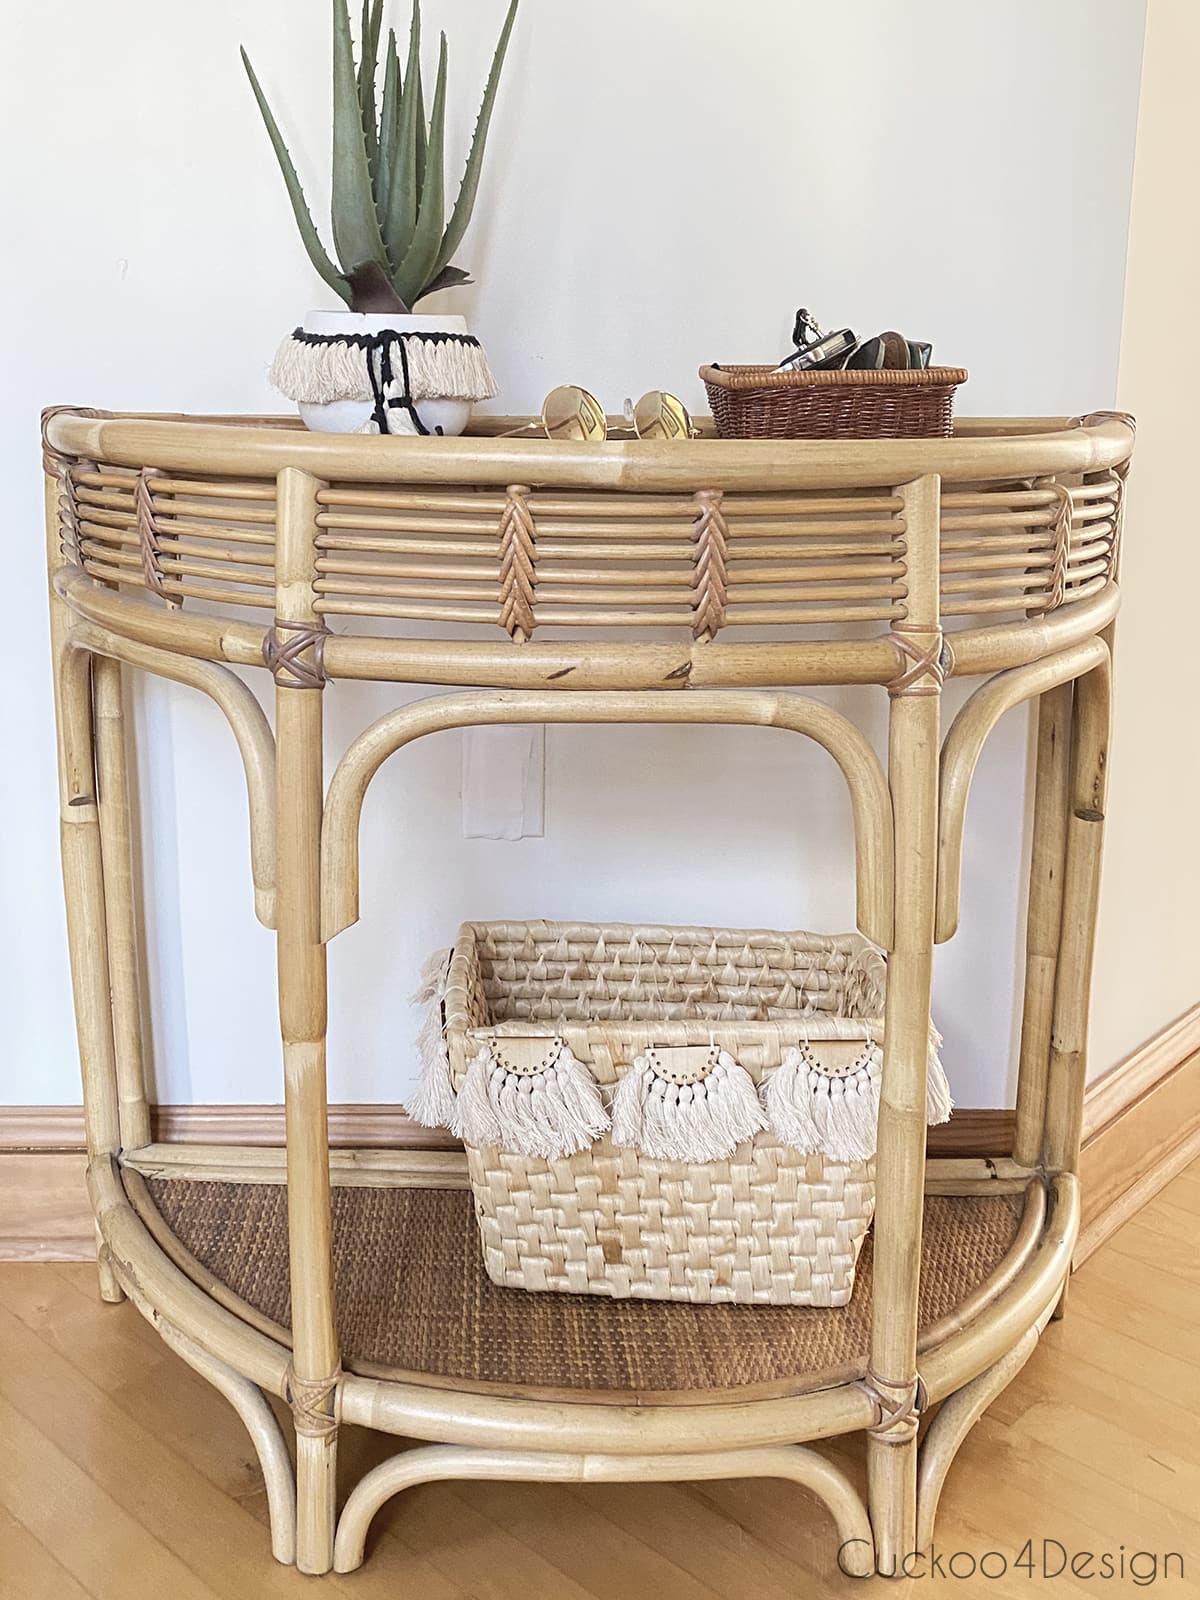
Half-moon tassel embellishments added to baskets
Ultimately I loved putting these half-moon tassel embellishments on baskets because they give them a really custom look. You could also add them to a clutch or purse.
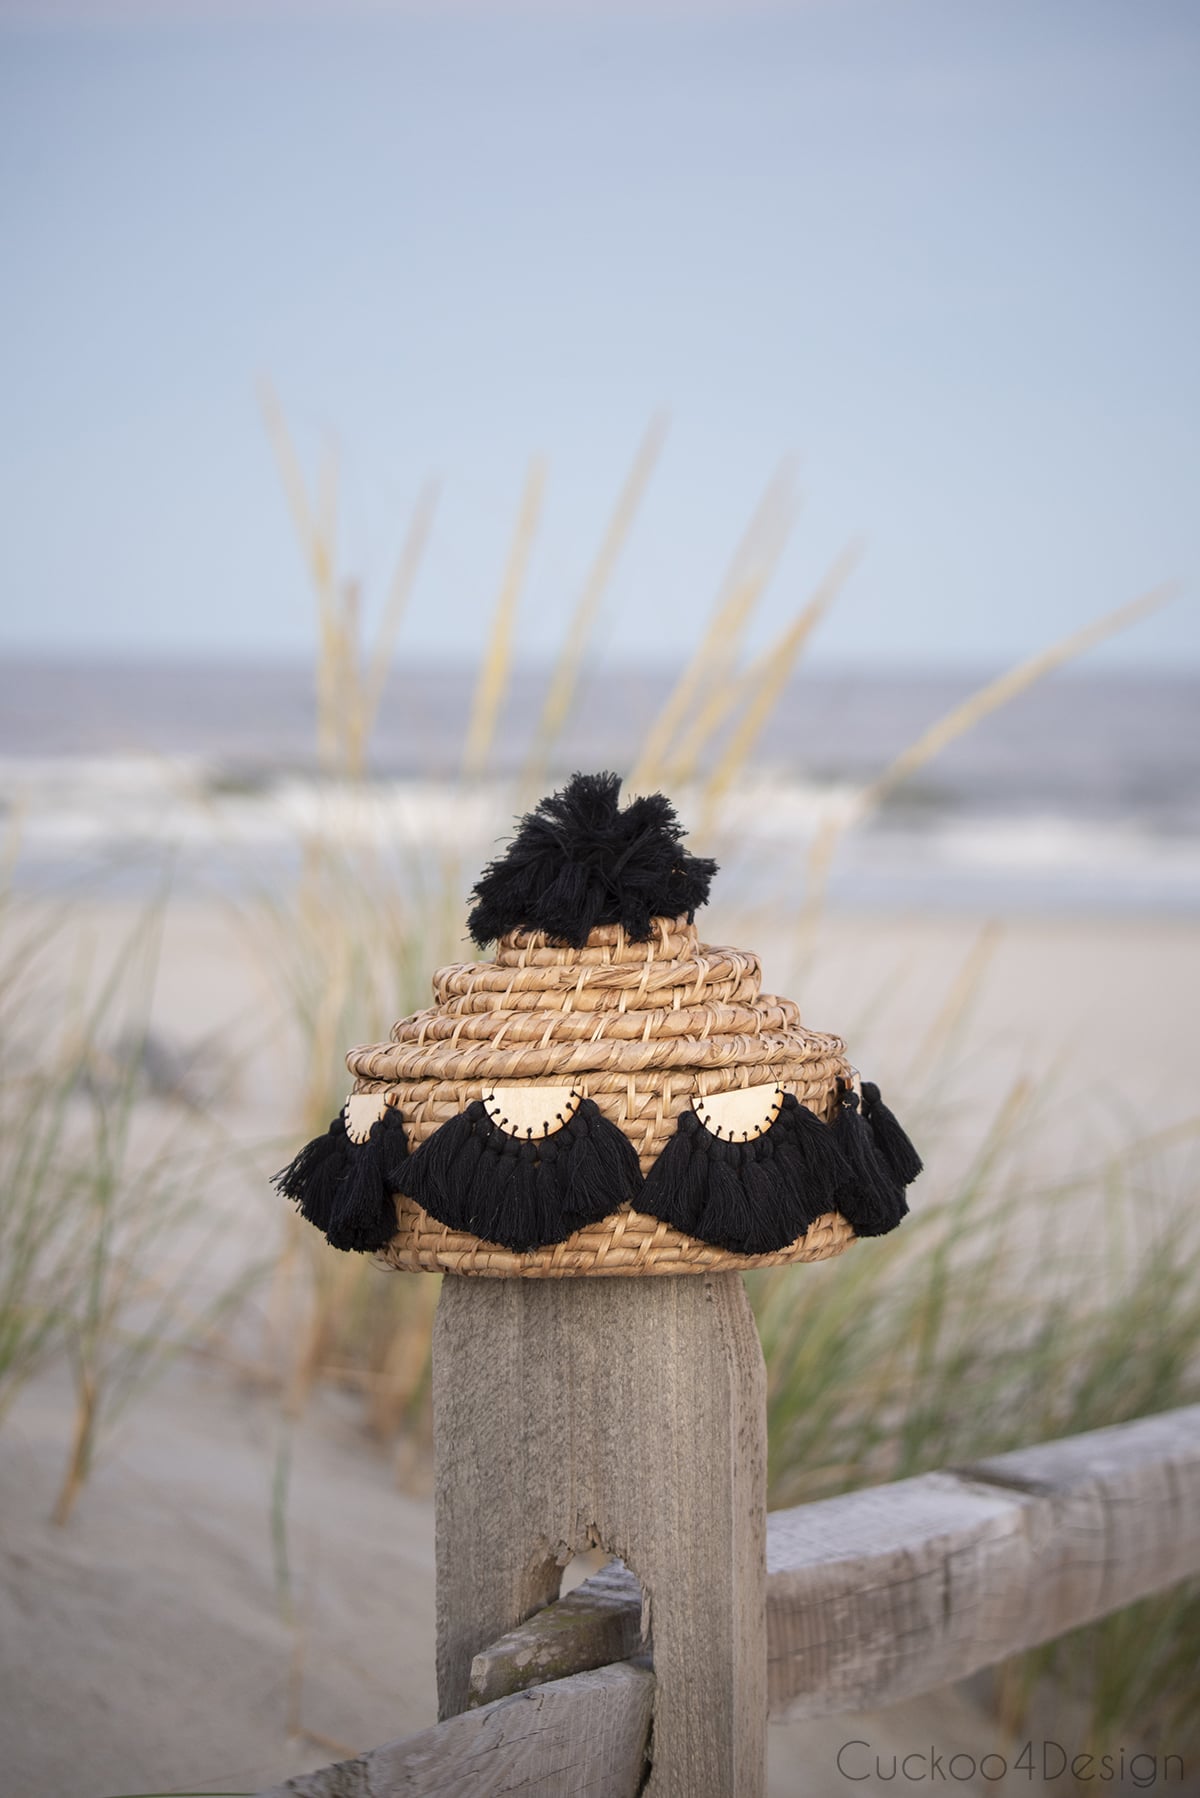
I found the below unique basket at HomeGoods and decided to add the half-moon tassel embellishments with an added pom pom to the top. I also have a blog post about my pom pom making tips that you can check out. For this pom pom I wanted a more messy and imperfect look though.
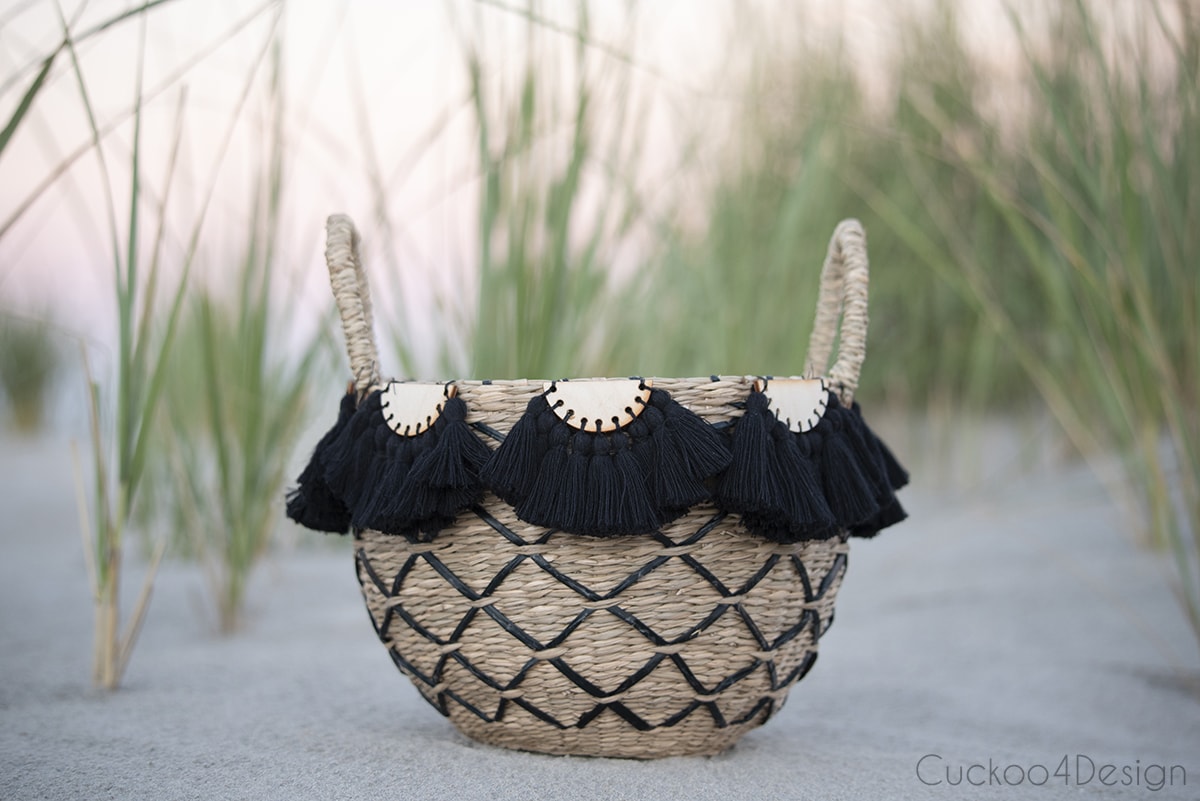
Next, I found the below basket and bought two of them. One was turned into a hanging basket and the other one got my tassel embellishments too.
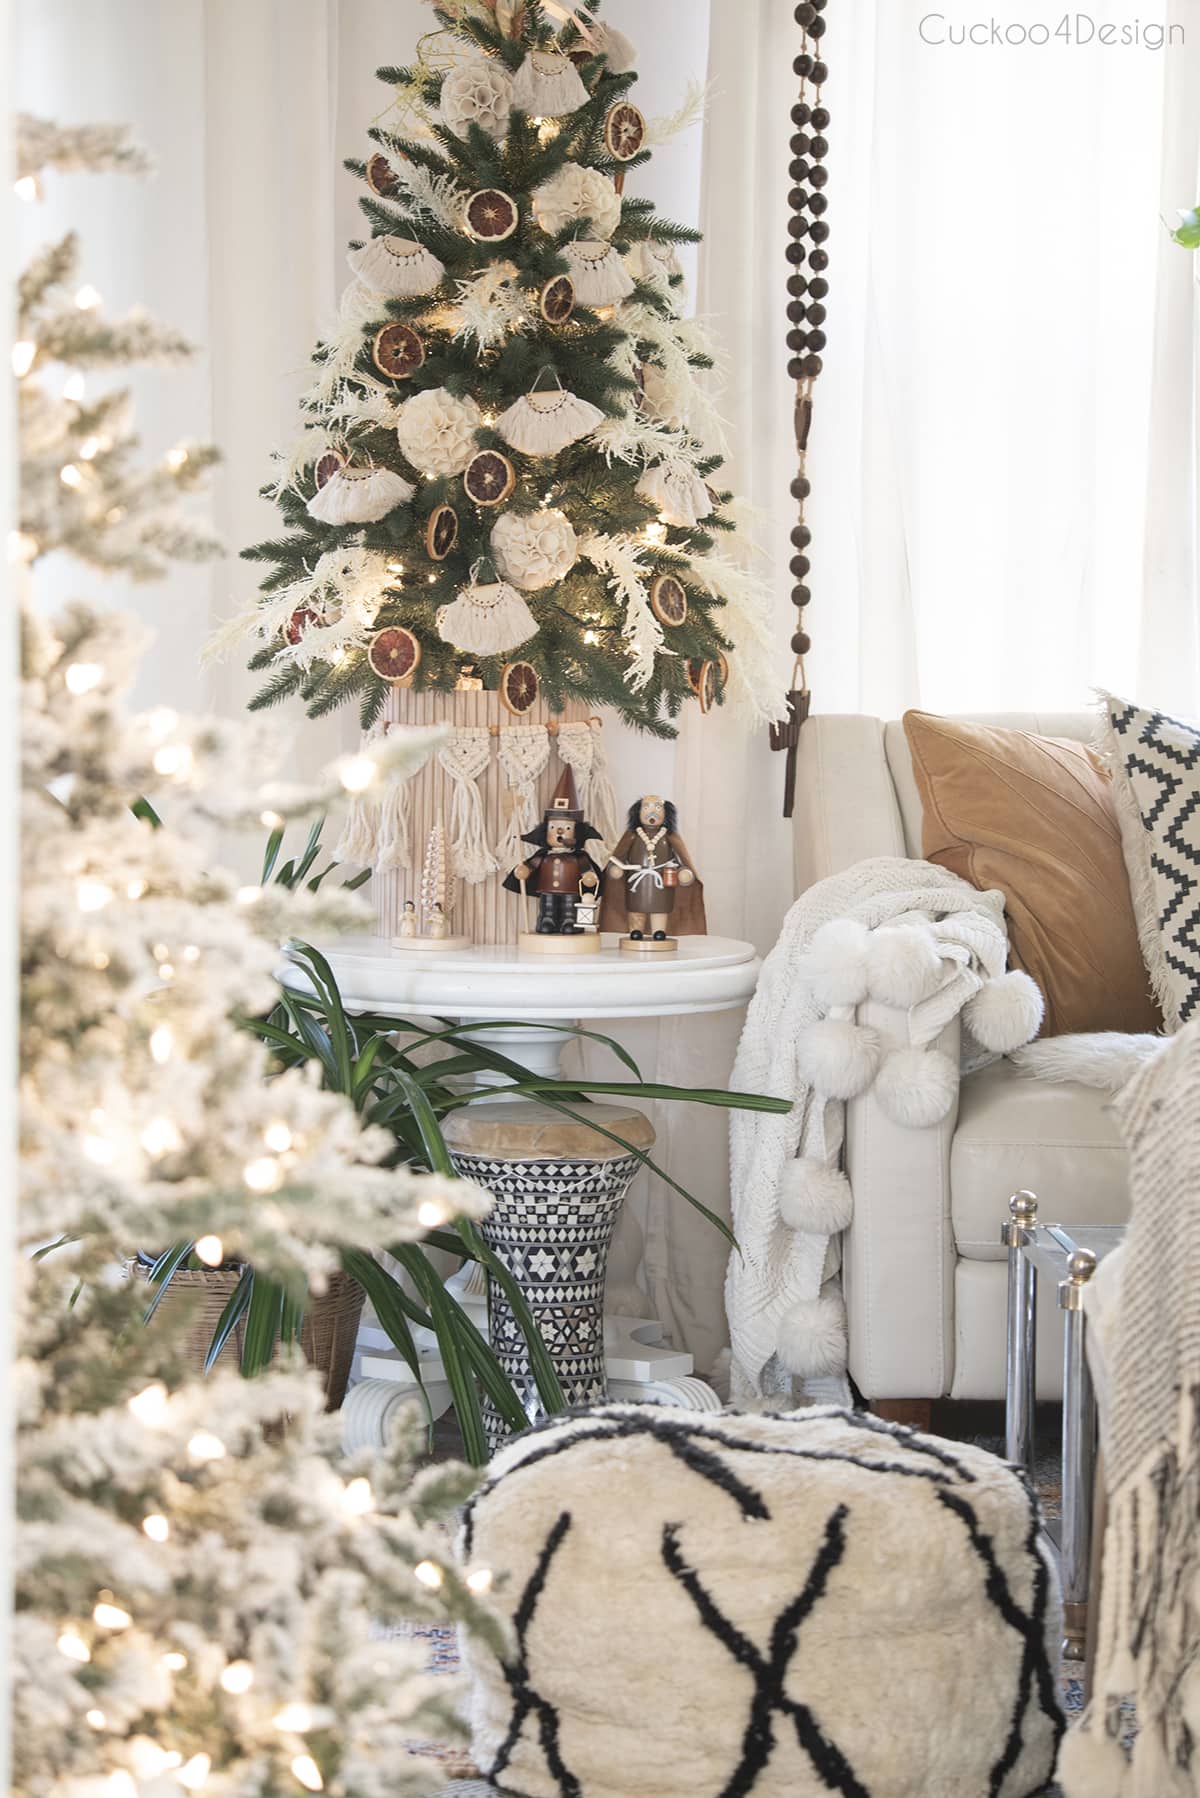
Tassel embellishments used as Christmas ornaments
I recently also turned these unique tassel embellishments into macrame Christmas ornaments and love that look as well. They were definitely worth all the work that I put into this project because you can use them in so many different ways.
More of my unique DIY tassel projects
You guys know I am a big fan of tassels and have plenty of tassel tutorials on how to make them as accessories for your home and fashion.

The end 😉 Is this something you would try to make? I love how they look!
Tschüß,

the lampshades and the baskets are all amazing. Great tutorial too.
How are you holding up? I am thinking of you often. I’m so sorry for your loss and what you are going through.
Thanks for the compliment on my project.
these are SO cool, julia! love this idea and the look!
Thanks my friend. I just keep crafting and crafting