

How to make a large tassel
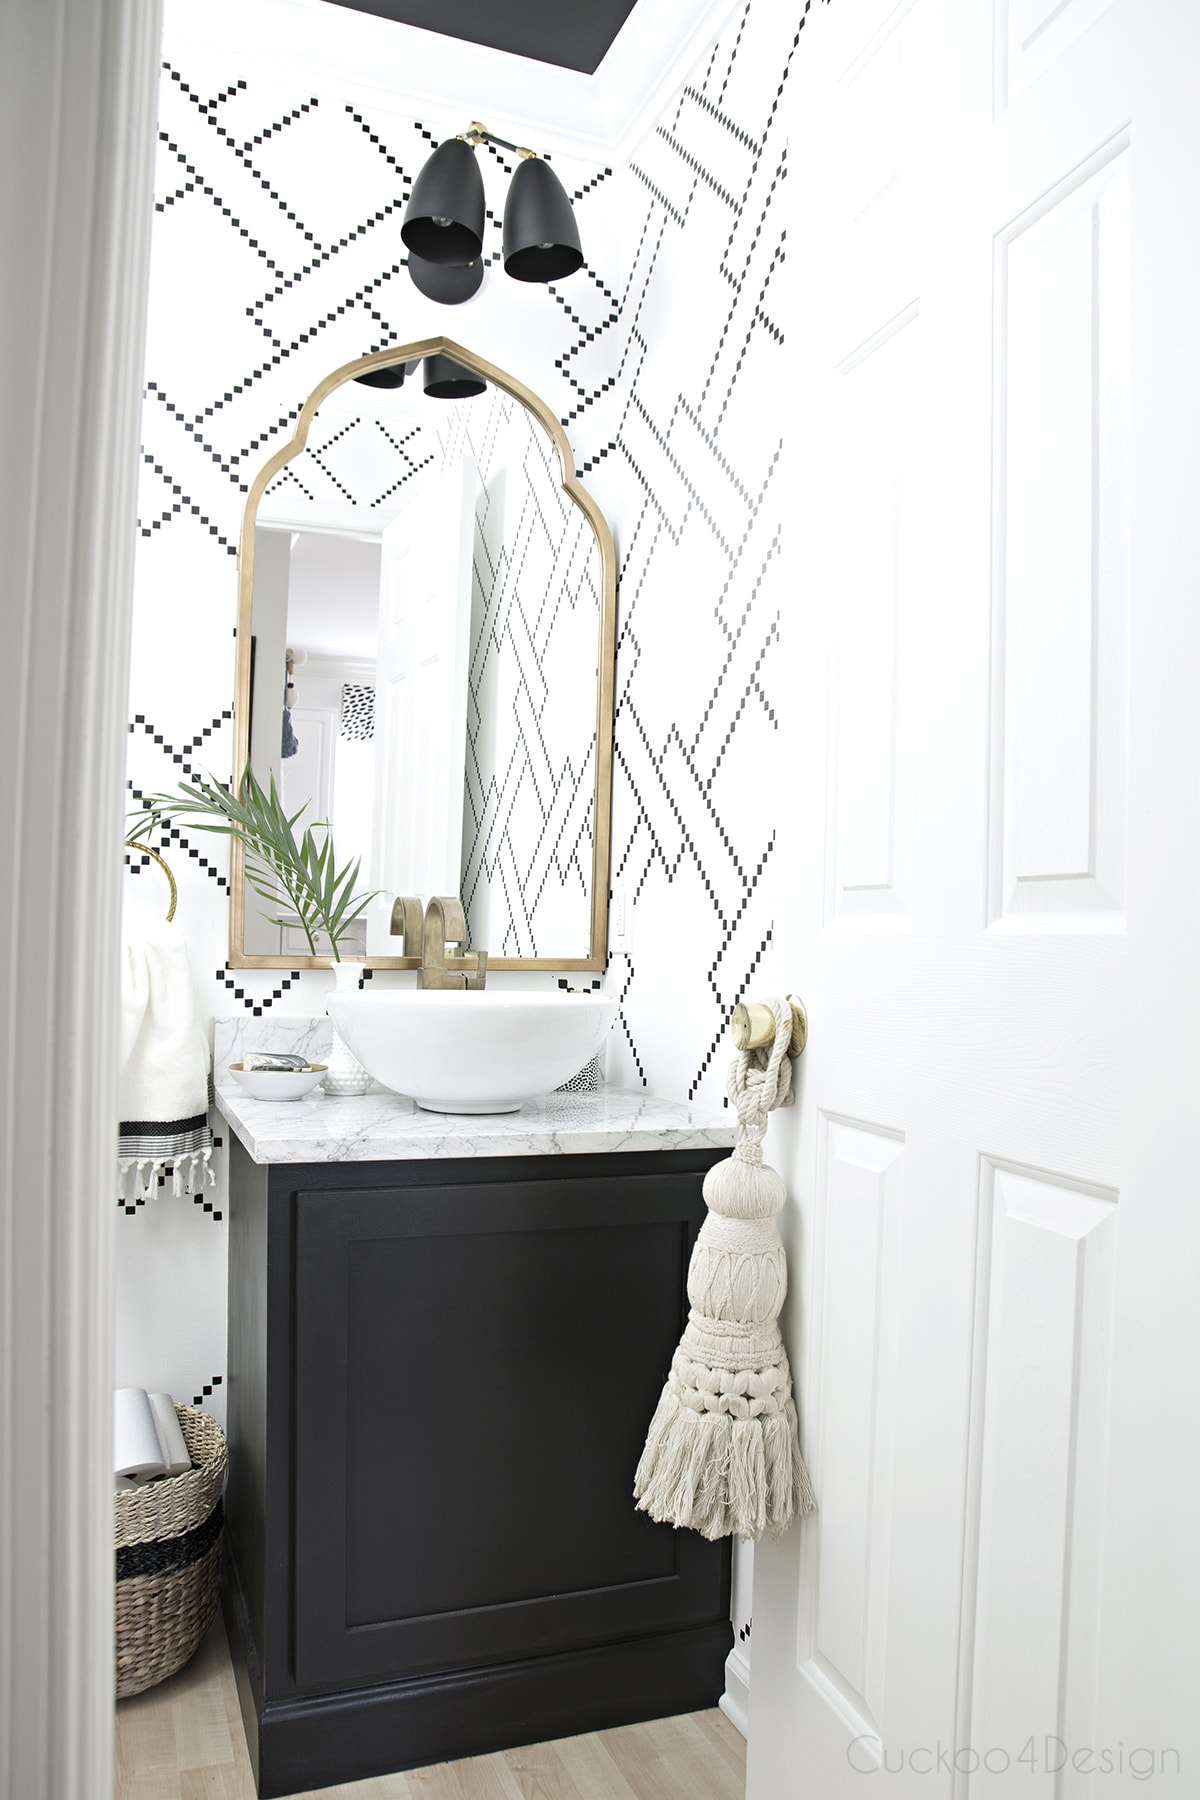
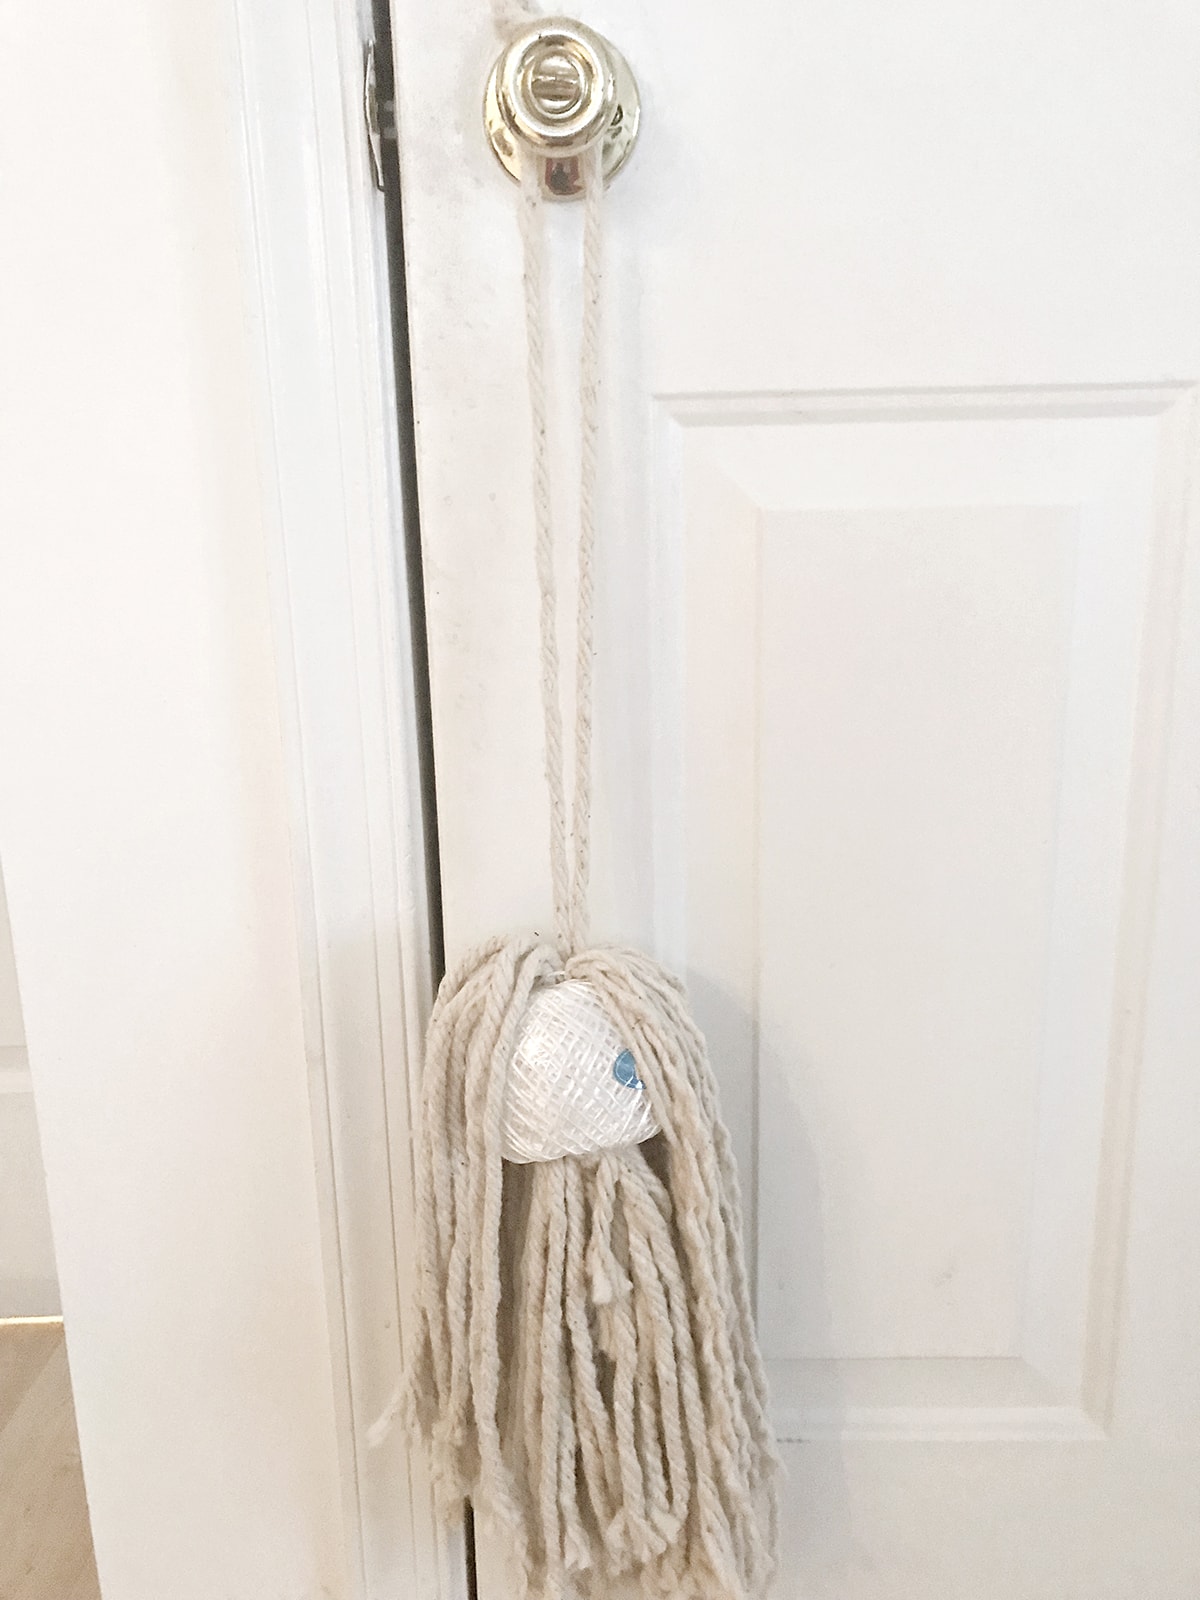
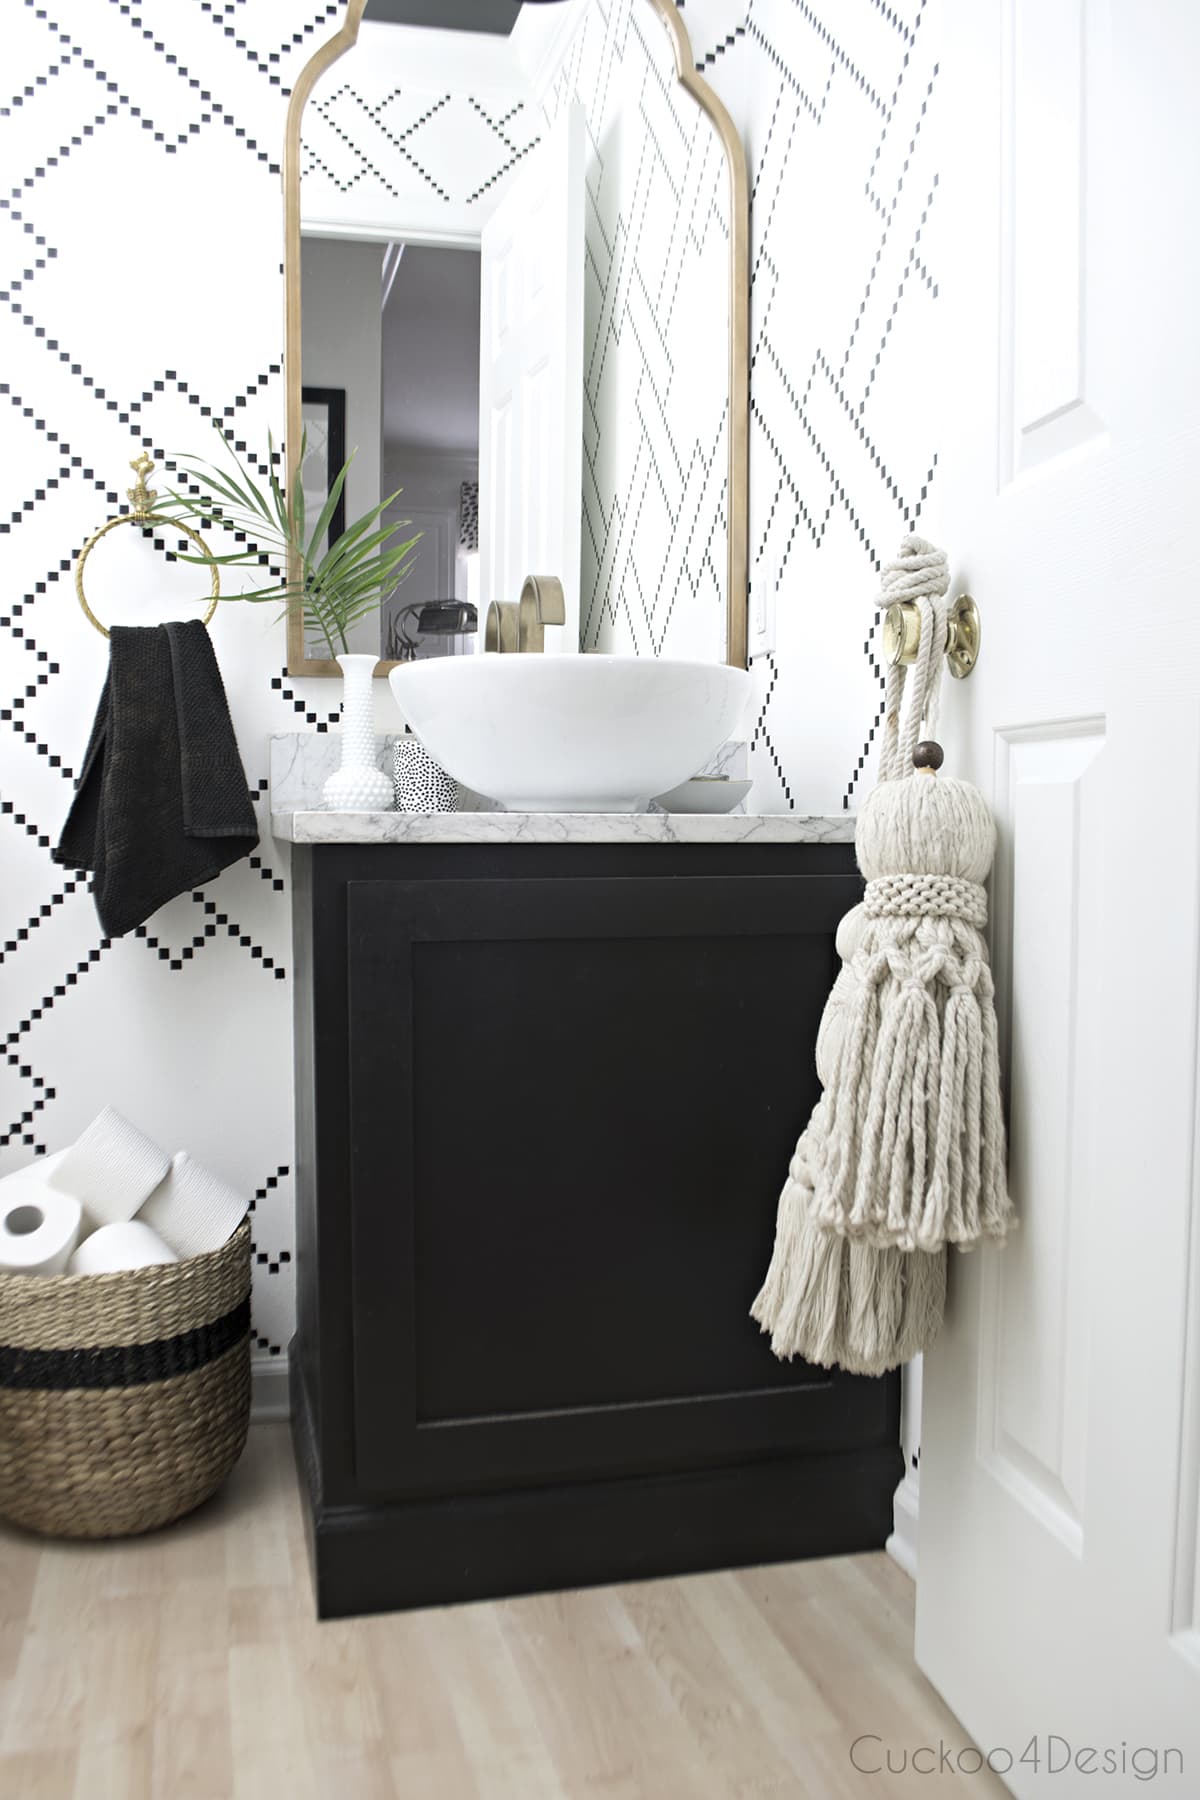
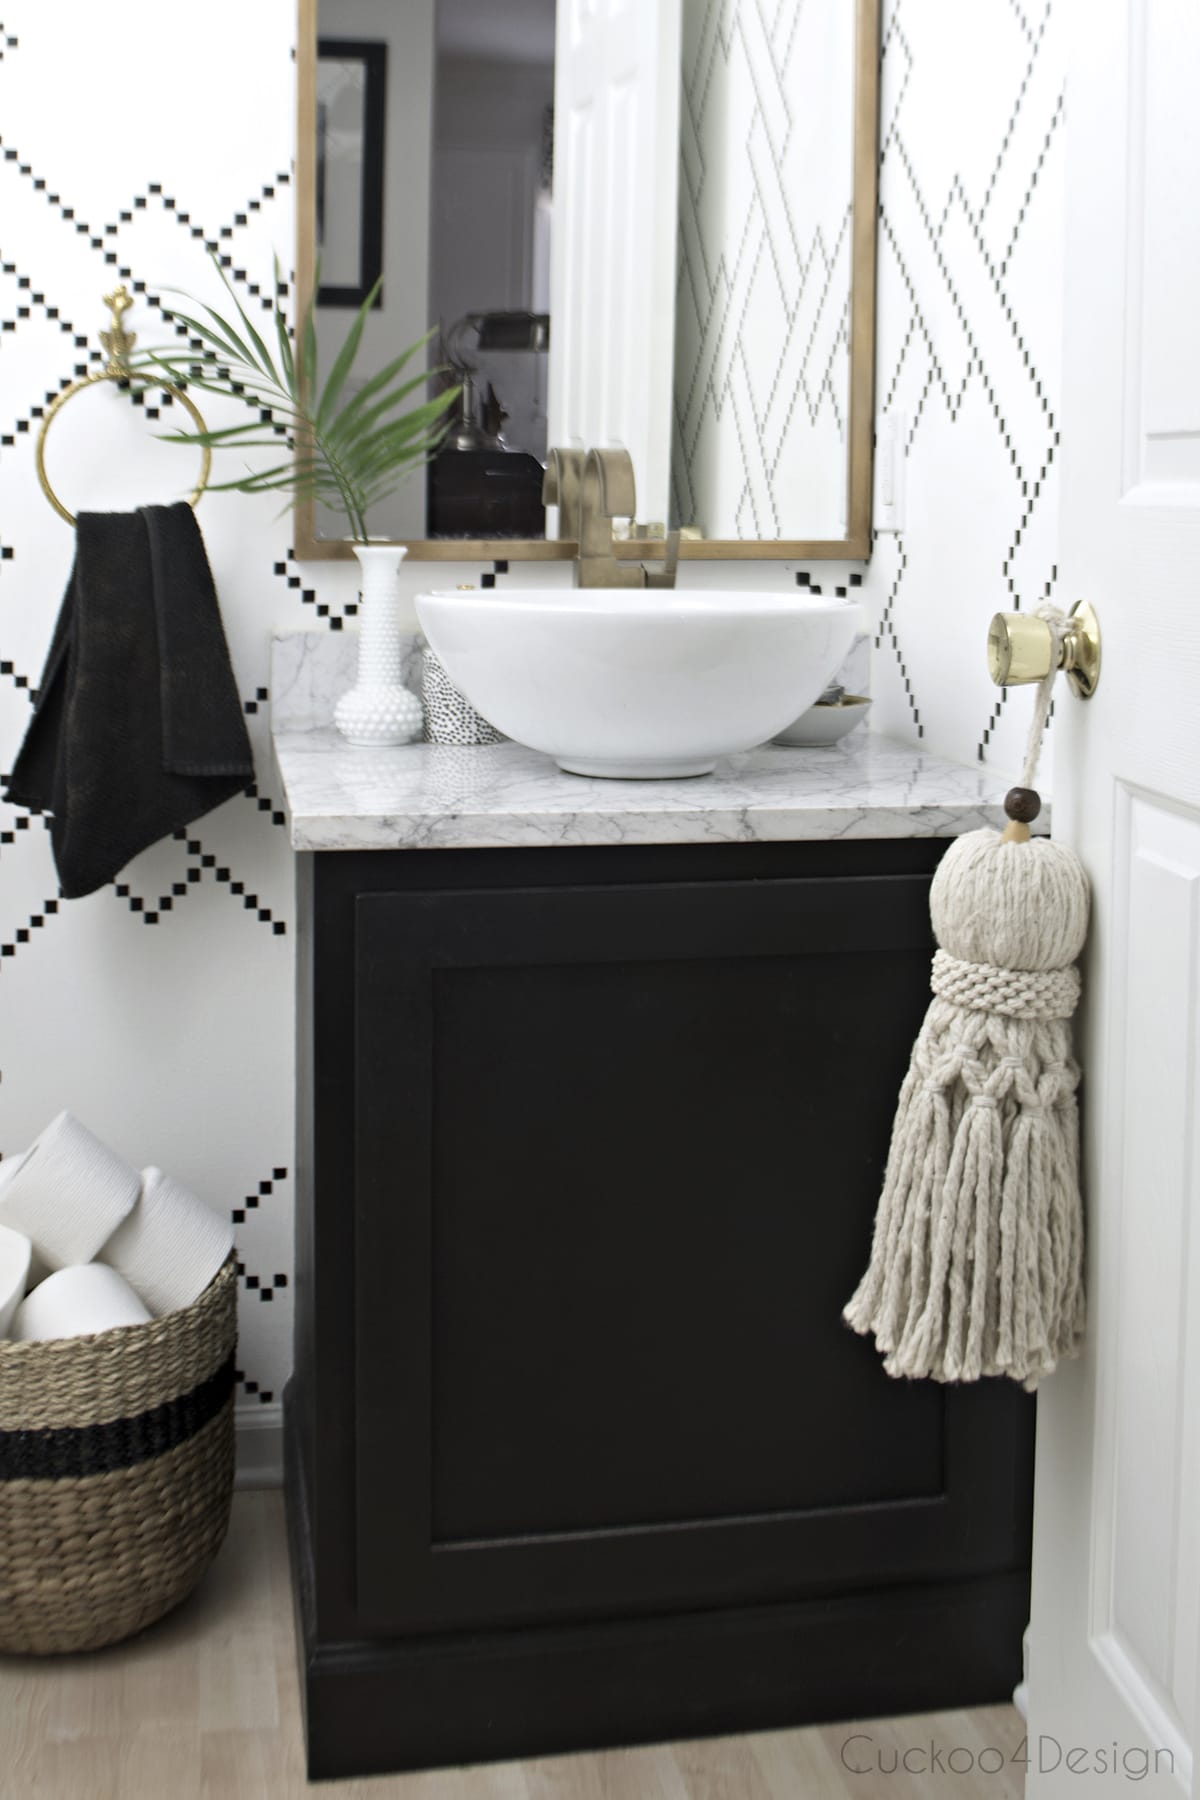
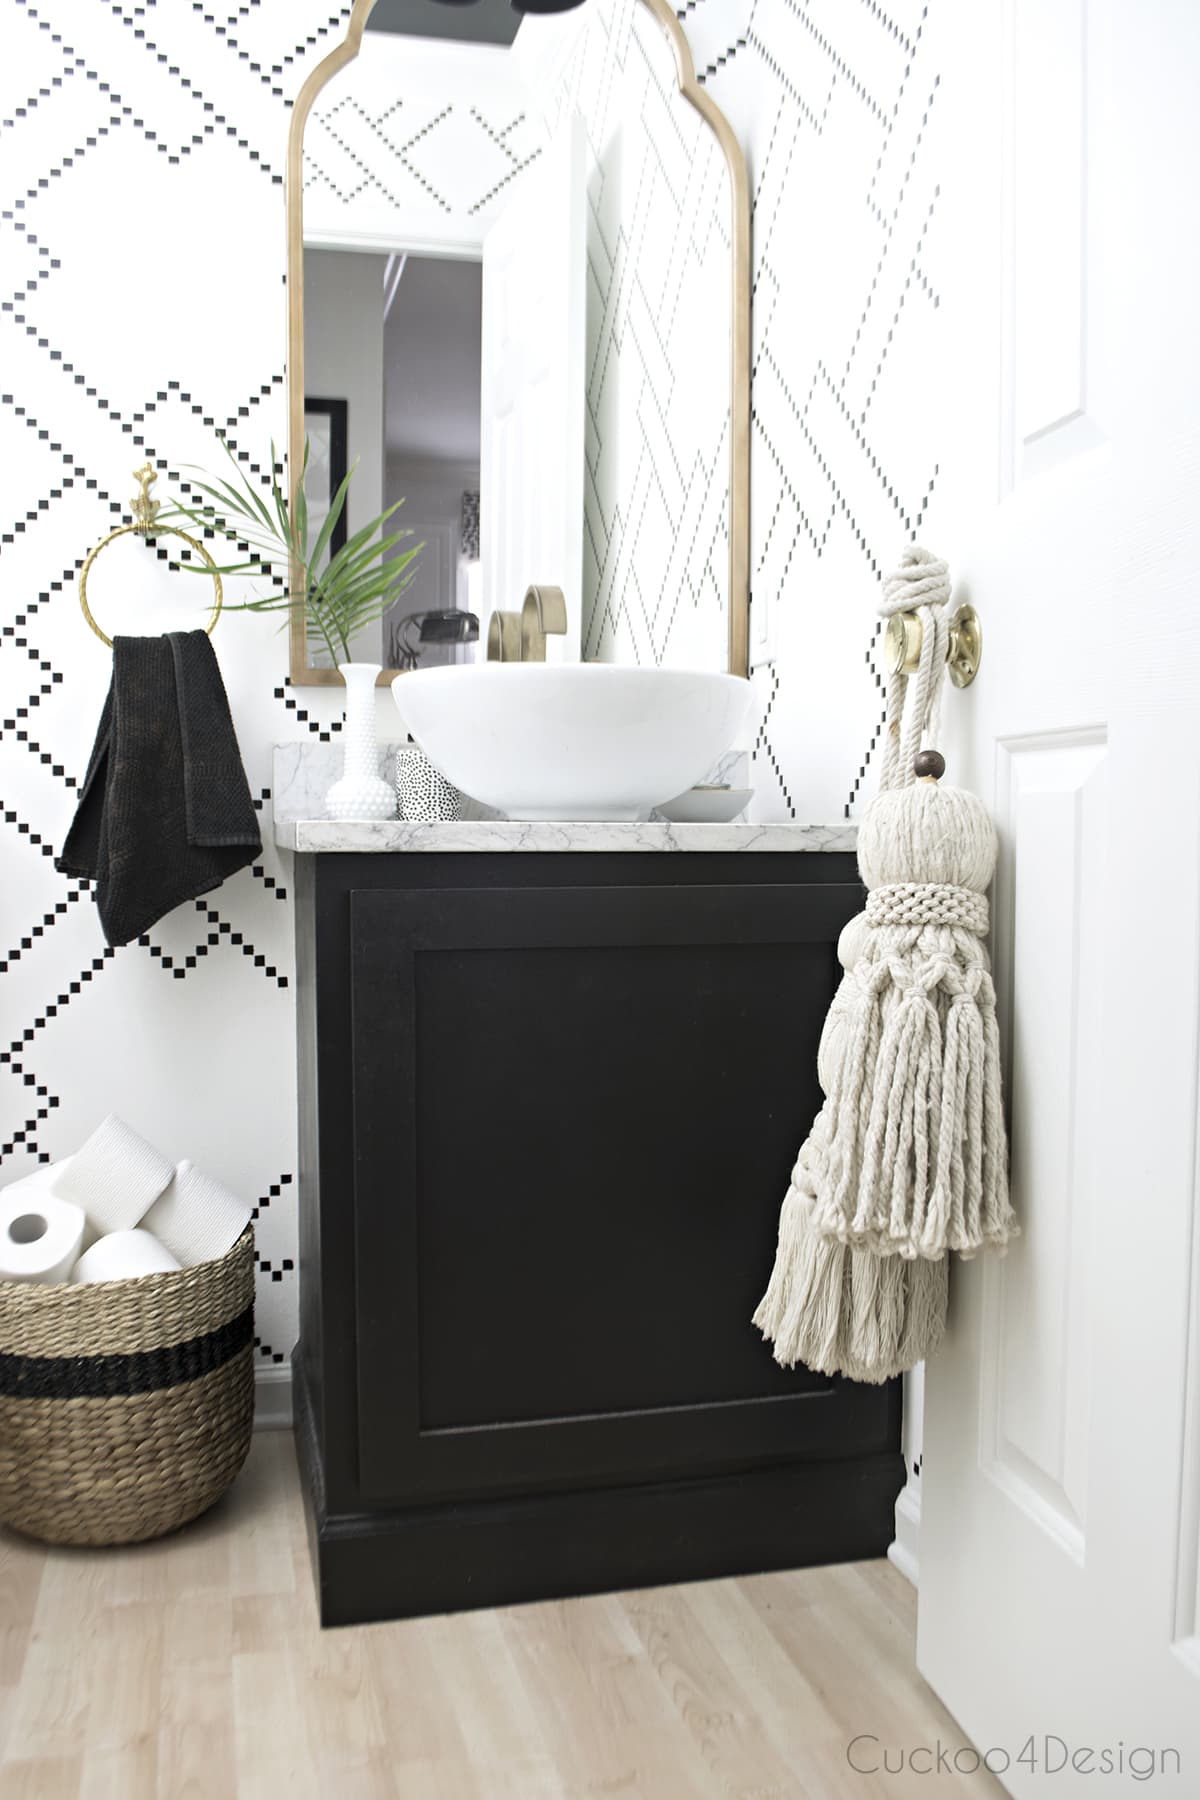
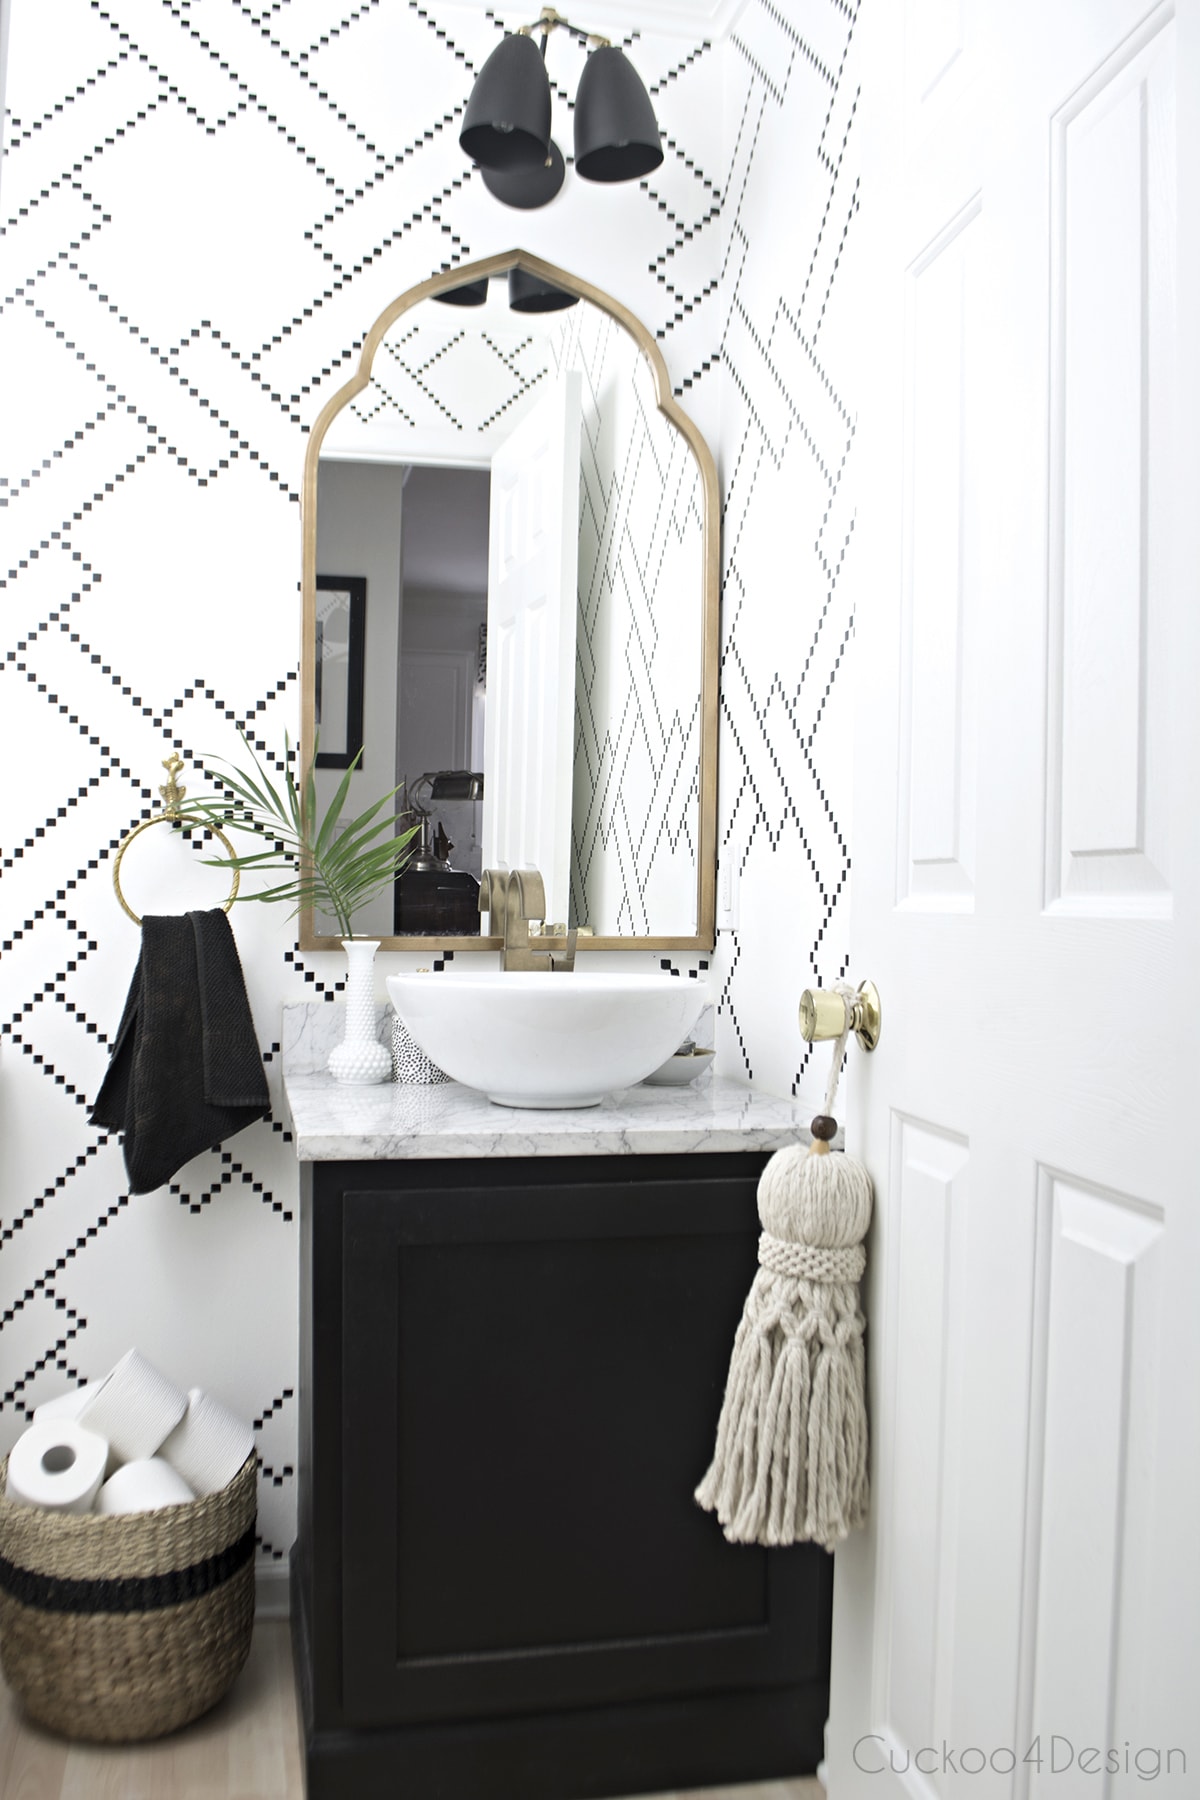
One of my most popular images of all time is the below photo of my powder room and believe it or not it’s partially due to that large tassel hanging on the door. I get asked about it all the time. I’ve been searching high and low for a similar one to send people to so they can buy one as well but I’ve had no luck whatsoever which is the reason I came up with my own tutorial about how to make a large tassel.
How to make a large tassel
This post may contain affiliate links from which I will earn a commission at no extra cost to you. View my full disclosure policy.
The other day I went to a local dollar store for something that my daughter needed and walked passed some supplies that sparked a light bulb moment.
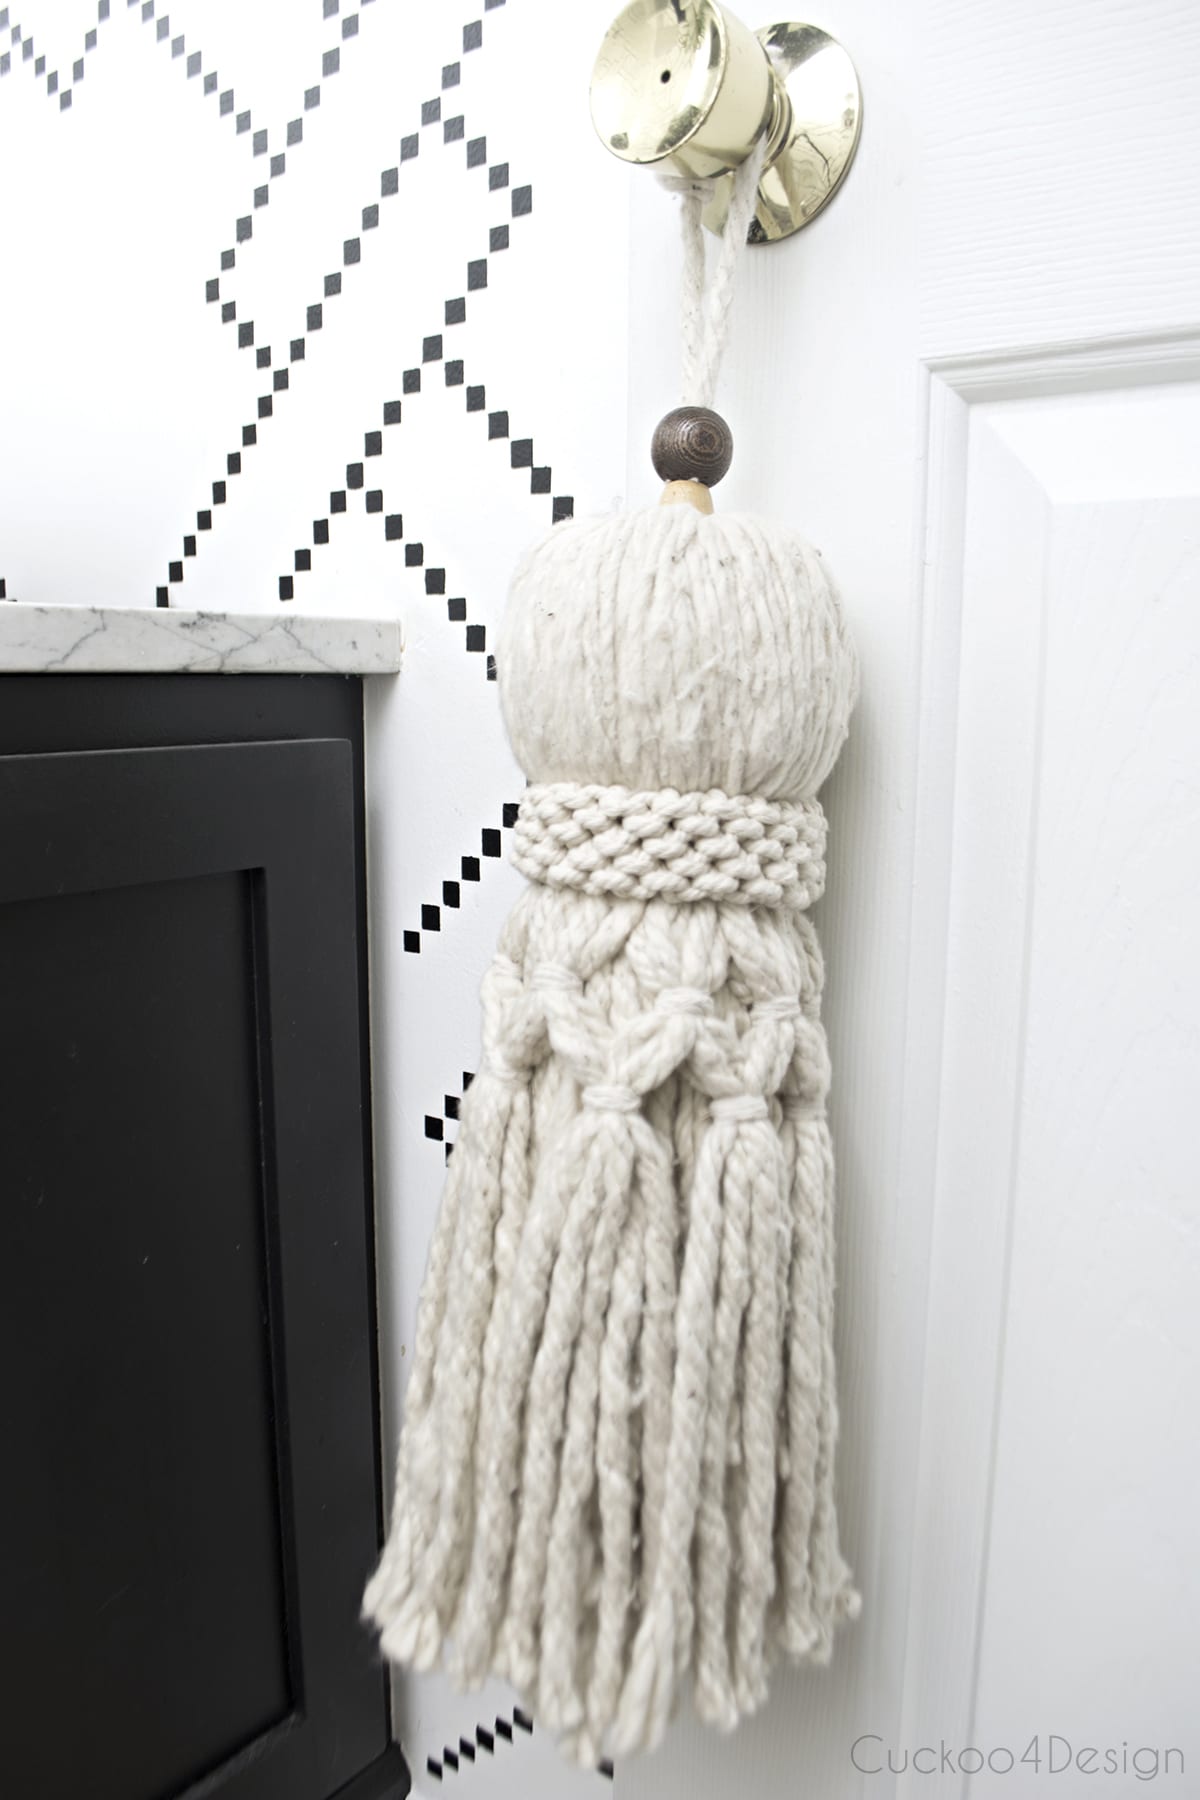
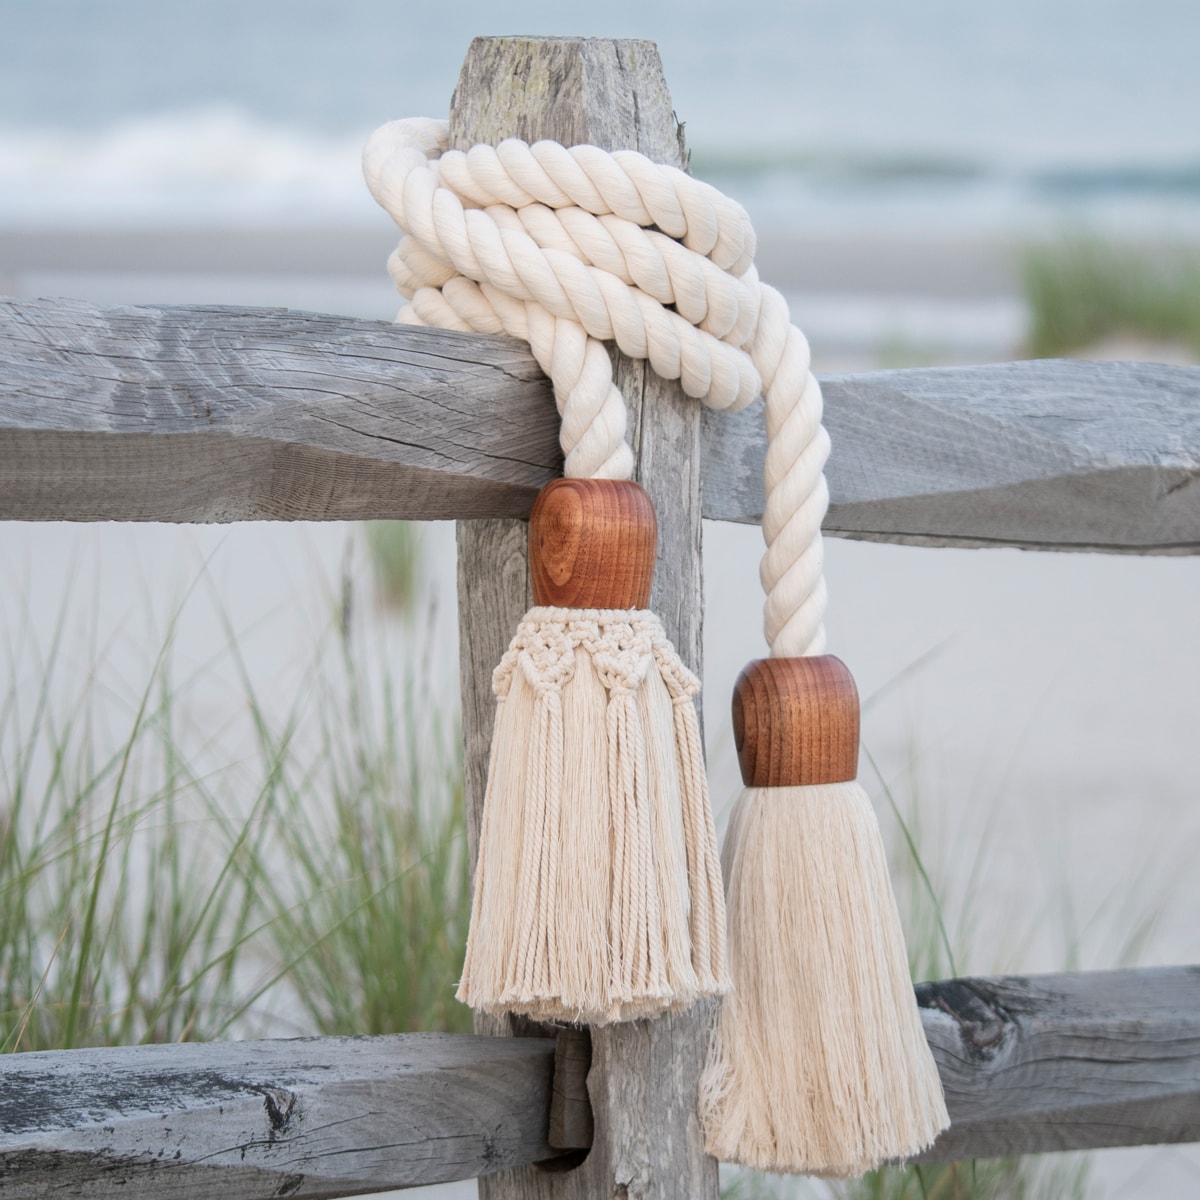
See the large tassel I have is very structured actually and the core of it isn’t twine or wool, it’s actually wood with the material draped over it.
So I wanted to find something that I could use as a structure as well and it needed to have a bigger hole in the center for it to work the way I had it in mind.
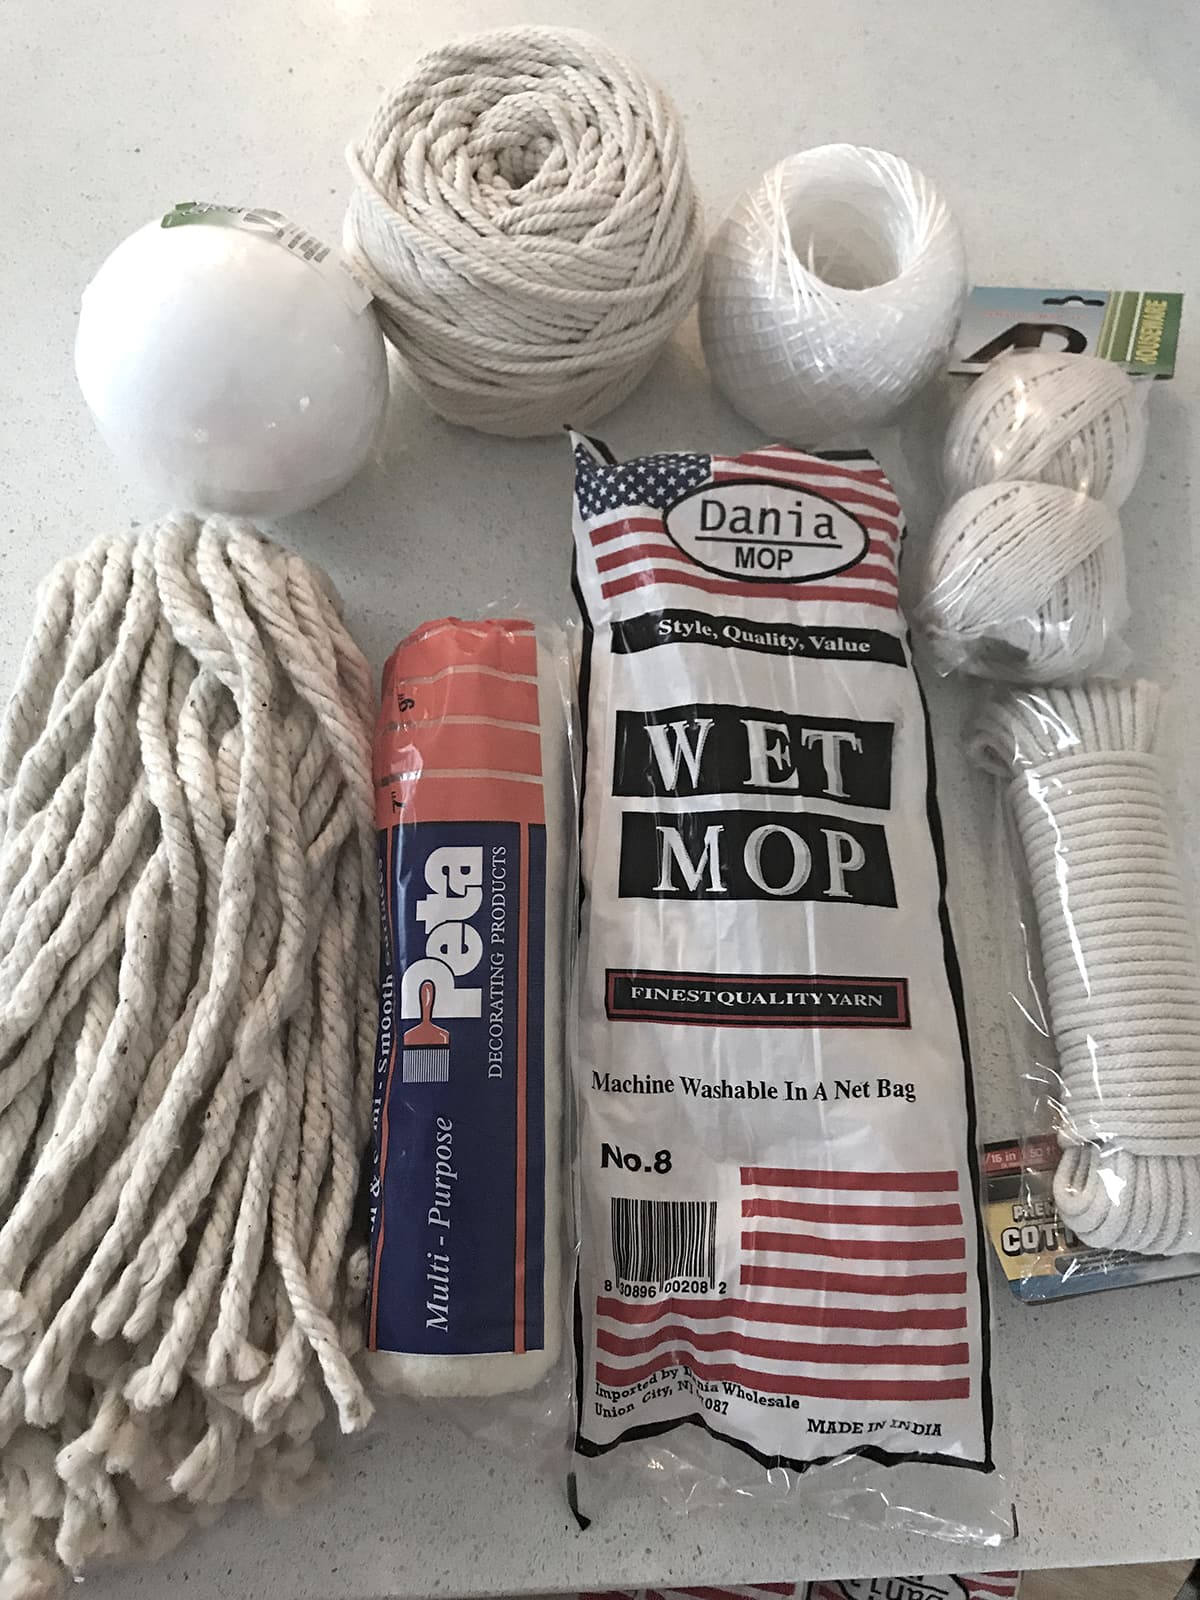
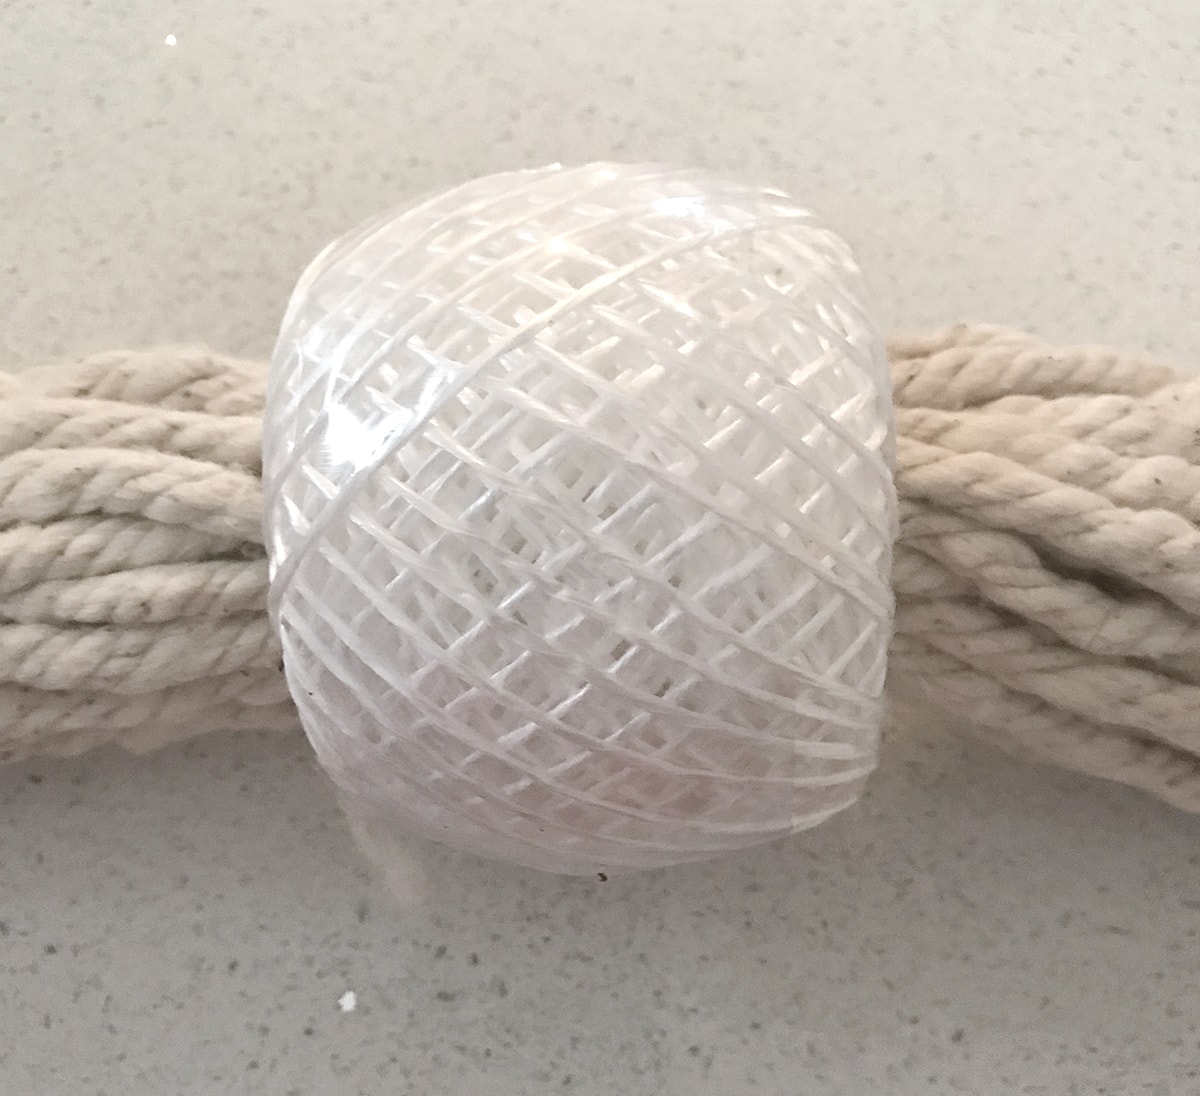
I bought: thin twine, thick twine, and really cheap synthetic twine because it had the big hole in the middle I wanted. A paint roller and three mop heads.
Materials needed for a large tassel
You can also find the below items on Amazon if you can’t find them at the dollar store.
- mop head (HERE)
- thick twine (HERE)
- thin twine (HERE)
- twine with a big hole in the center (this would work HERE)
- big needle (HERE)
- upholstery thread (HERE)
- sharp, heavy-duty scissors (HERE)
- small hair rubber bands or something similar (HERE and they are even better than the ones I used because they are clear)
- possibly one or two big wood beads (HERE and HERE)
- miter saw (HERE)
Step-by-step photos
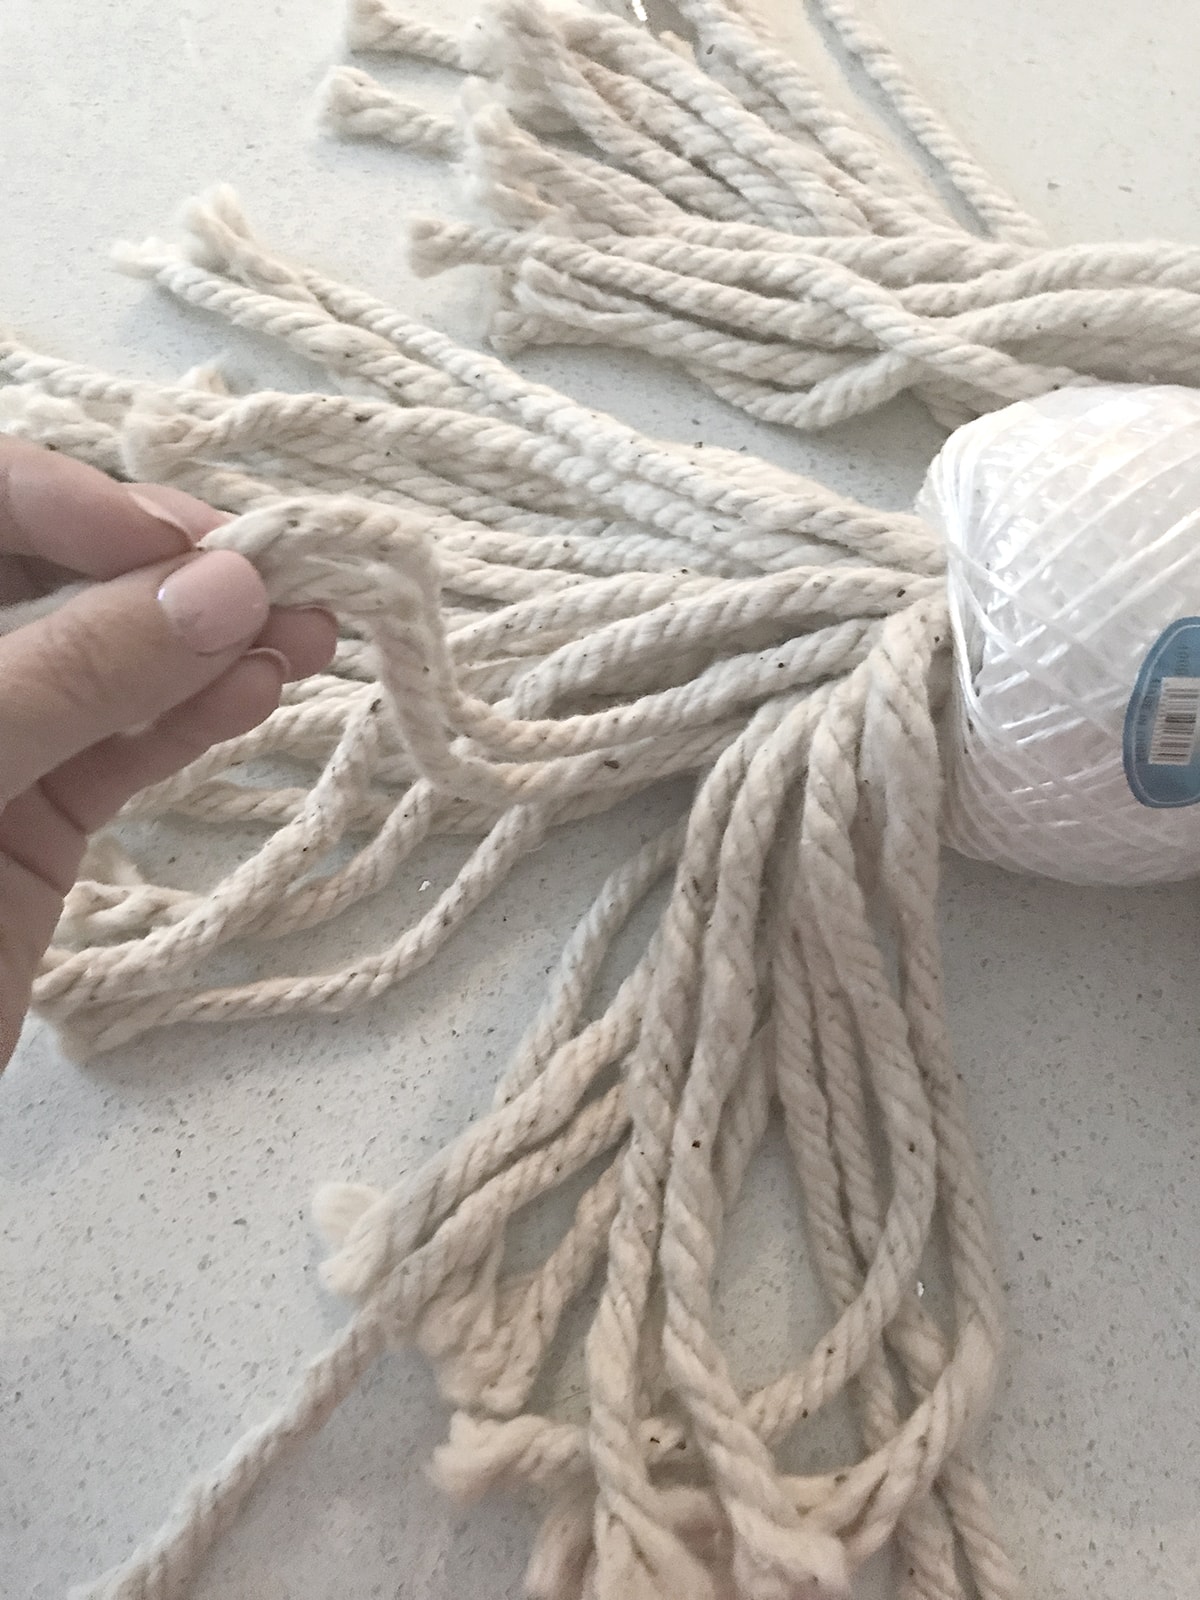
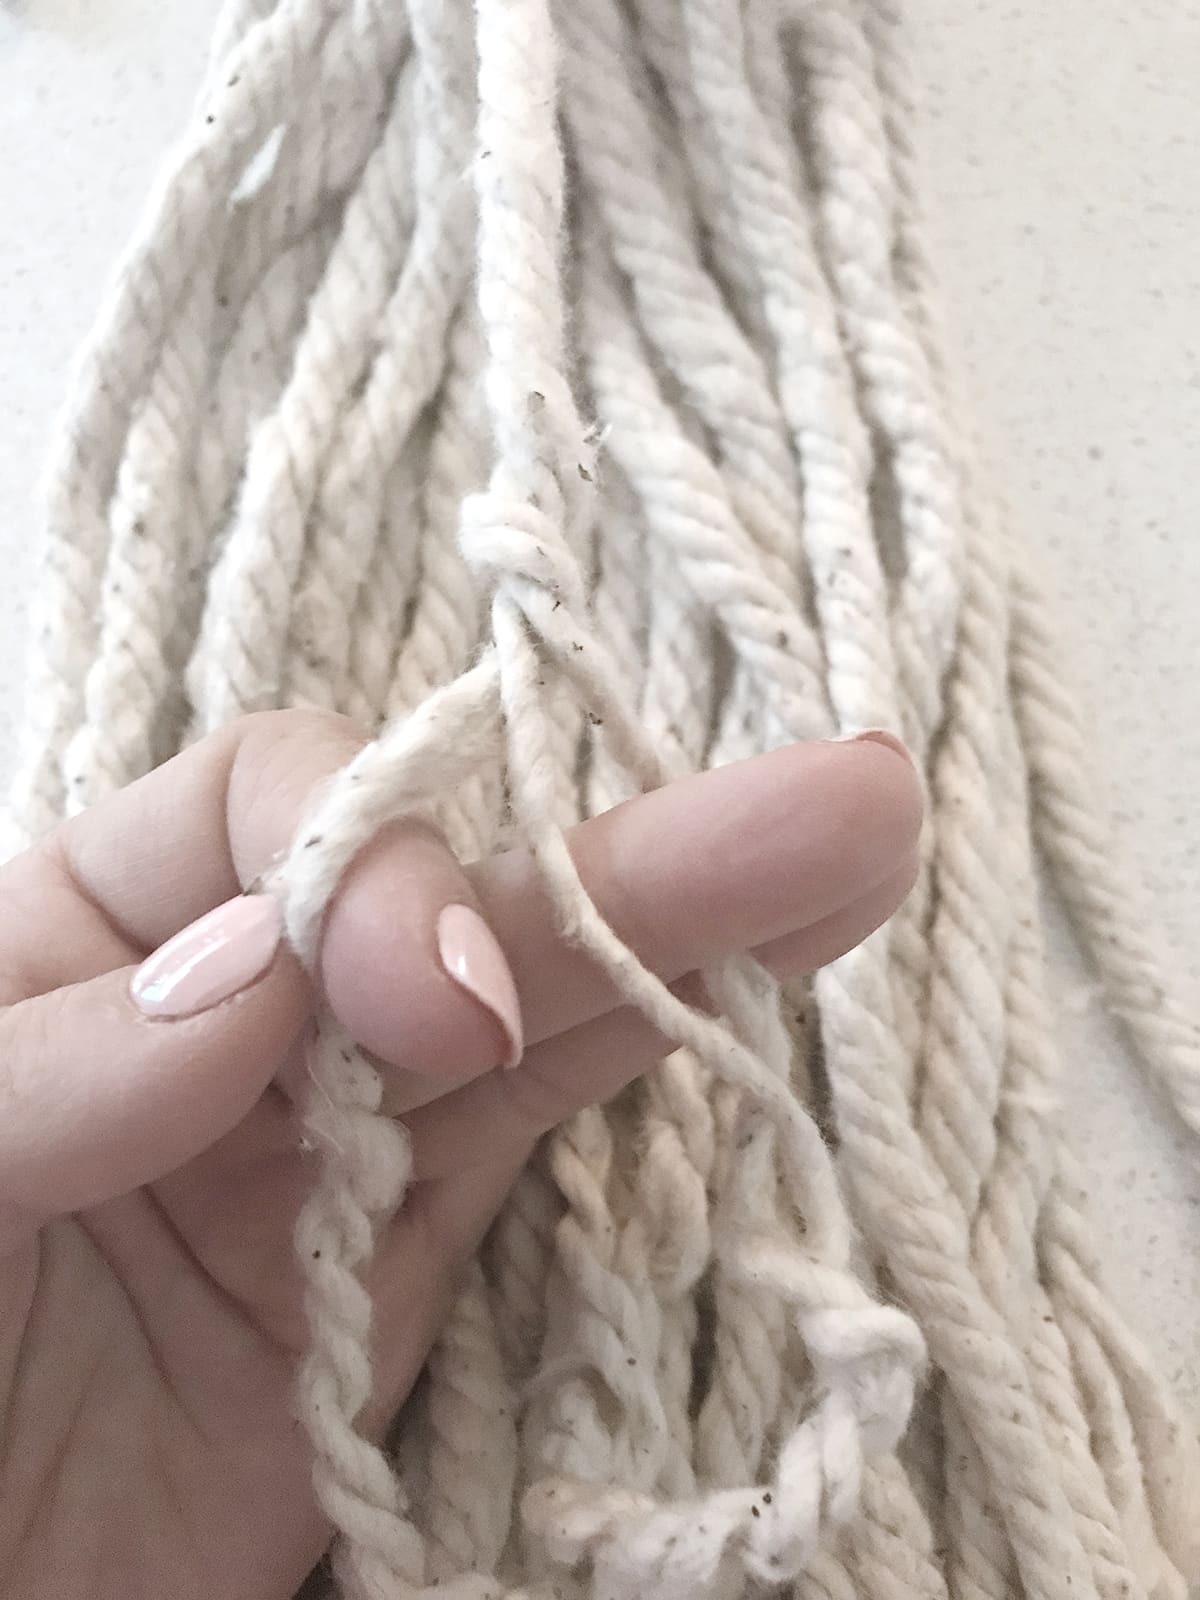
I started with the first mop head by taking the sewed middle part out which then left the same length cords.
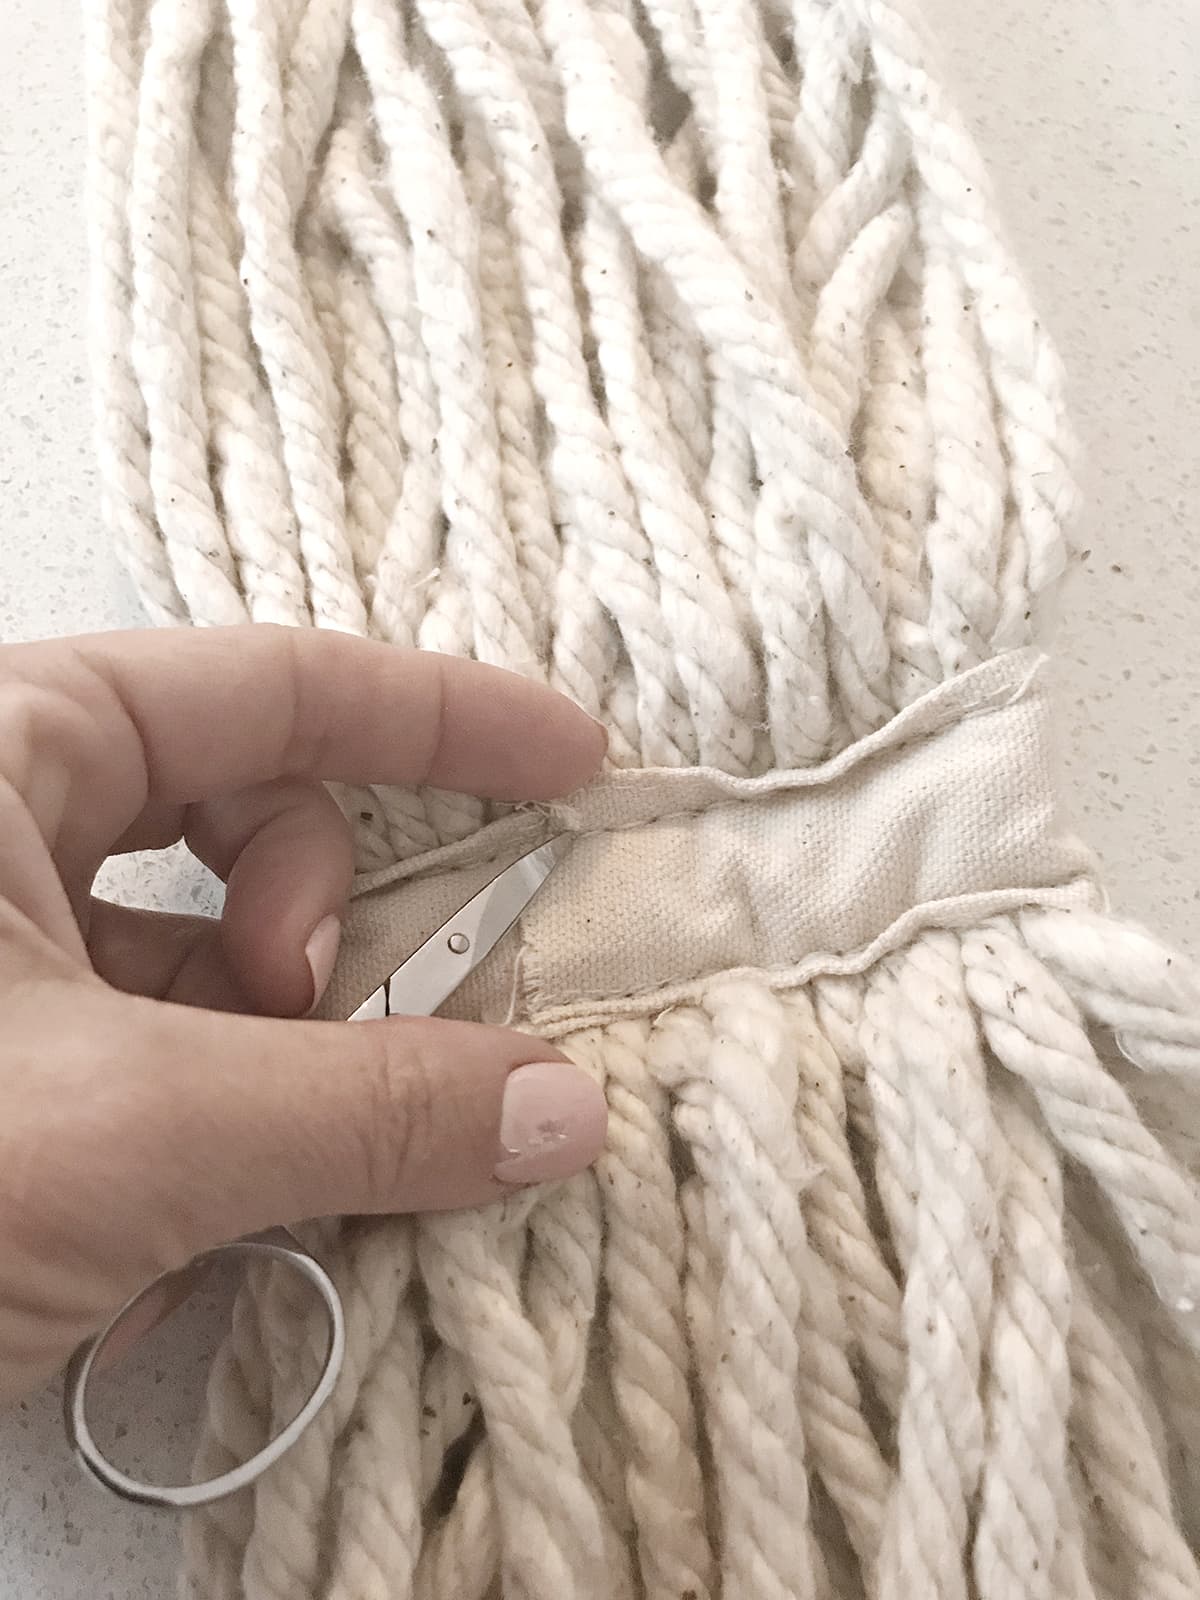
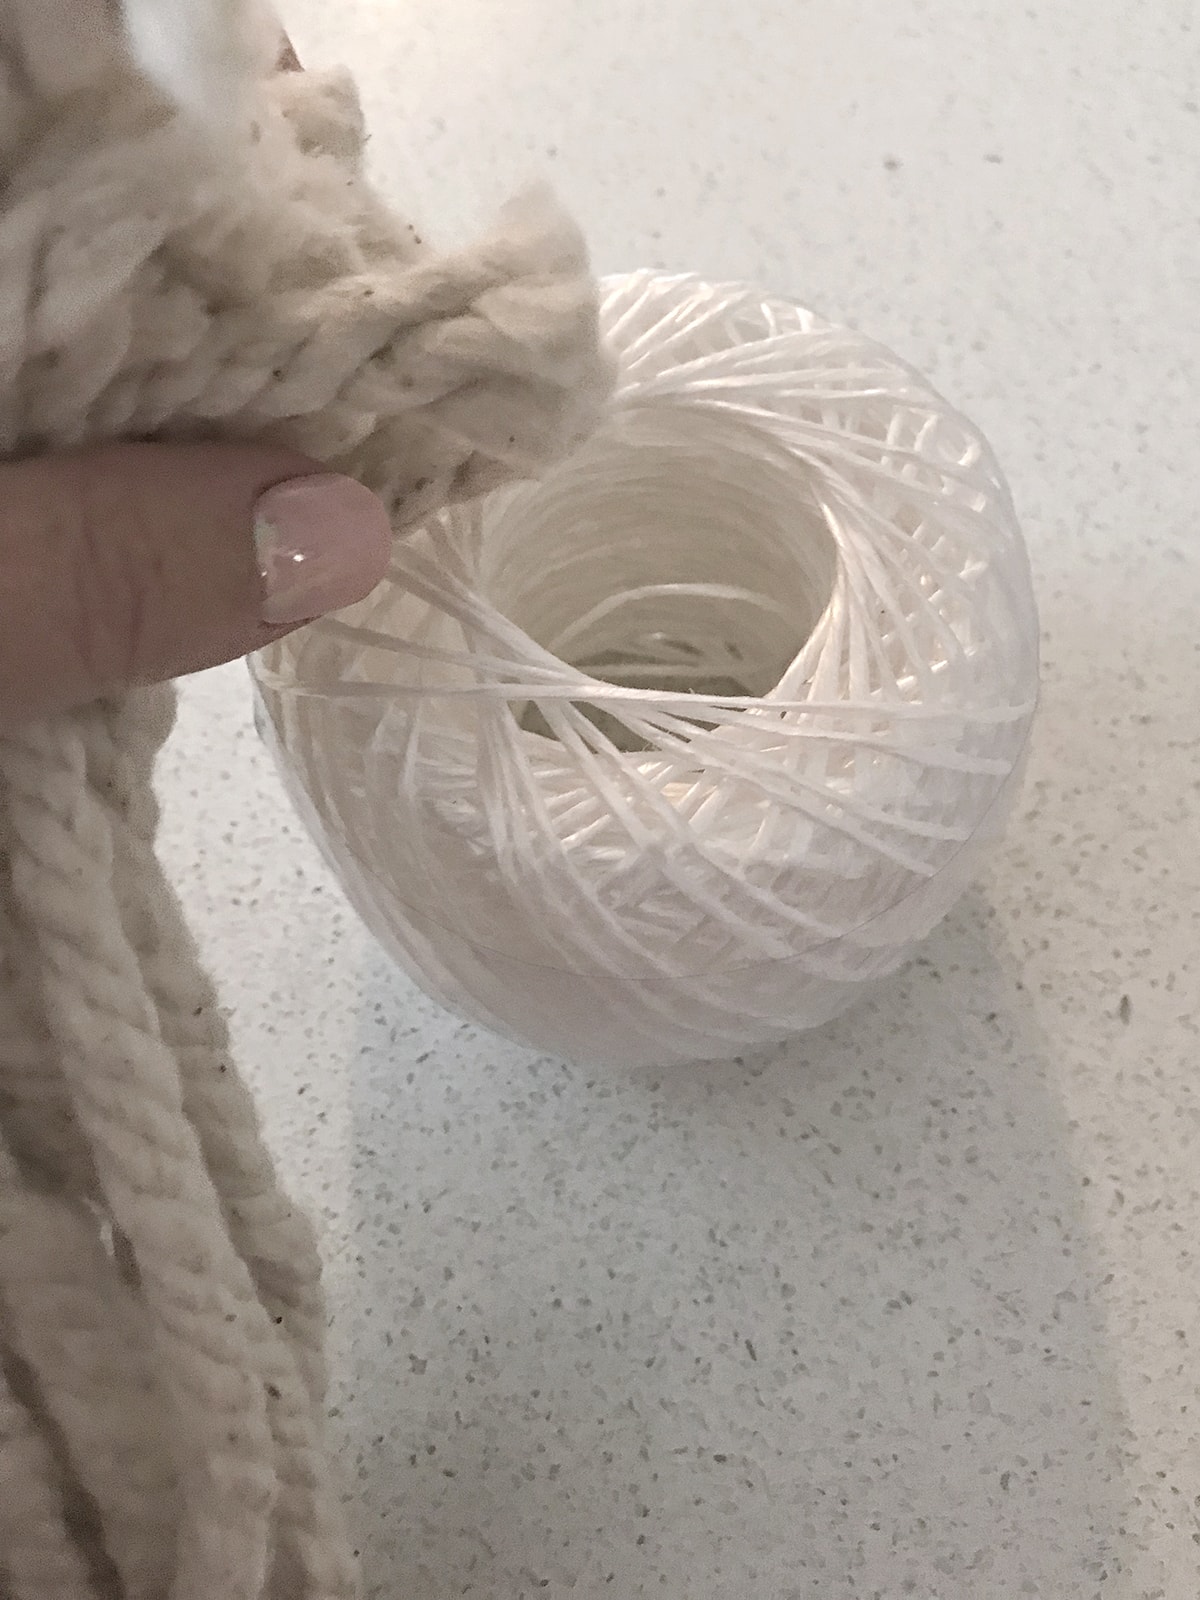
Then I took the thread ball with the big hole in it and stuffed the mop head cords through the center. In my case, the mop head fits the hole perfectly. So you might want to consider that when you try to find the right size at the dollar store.
Here you can see all the cords running through the center.
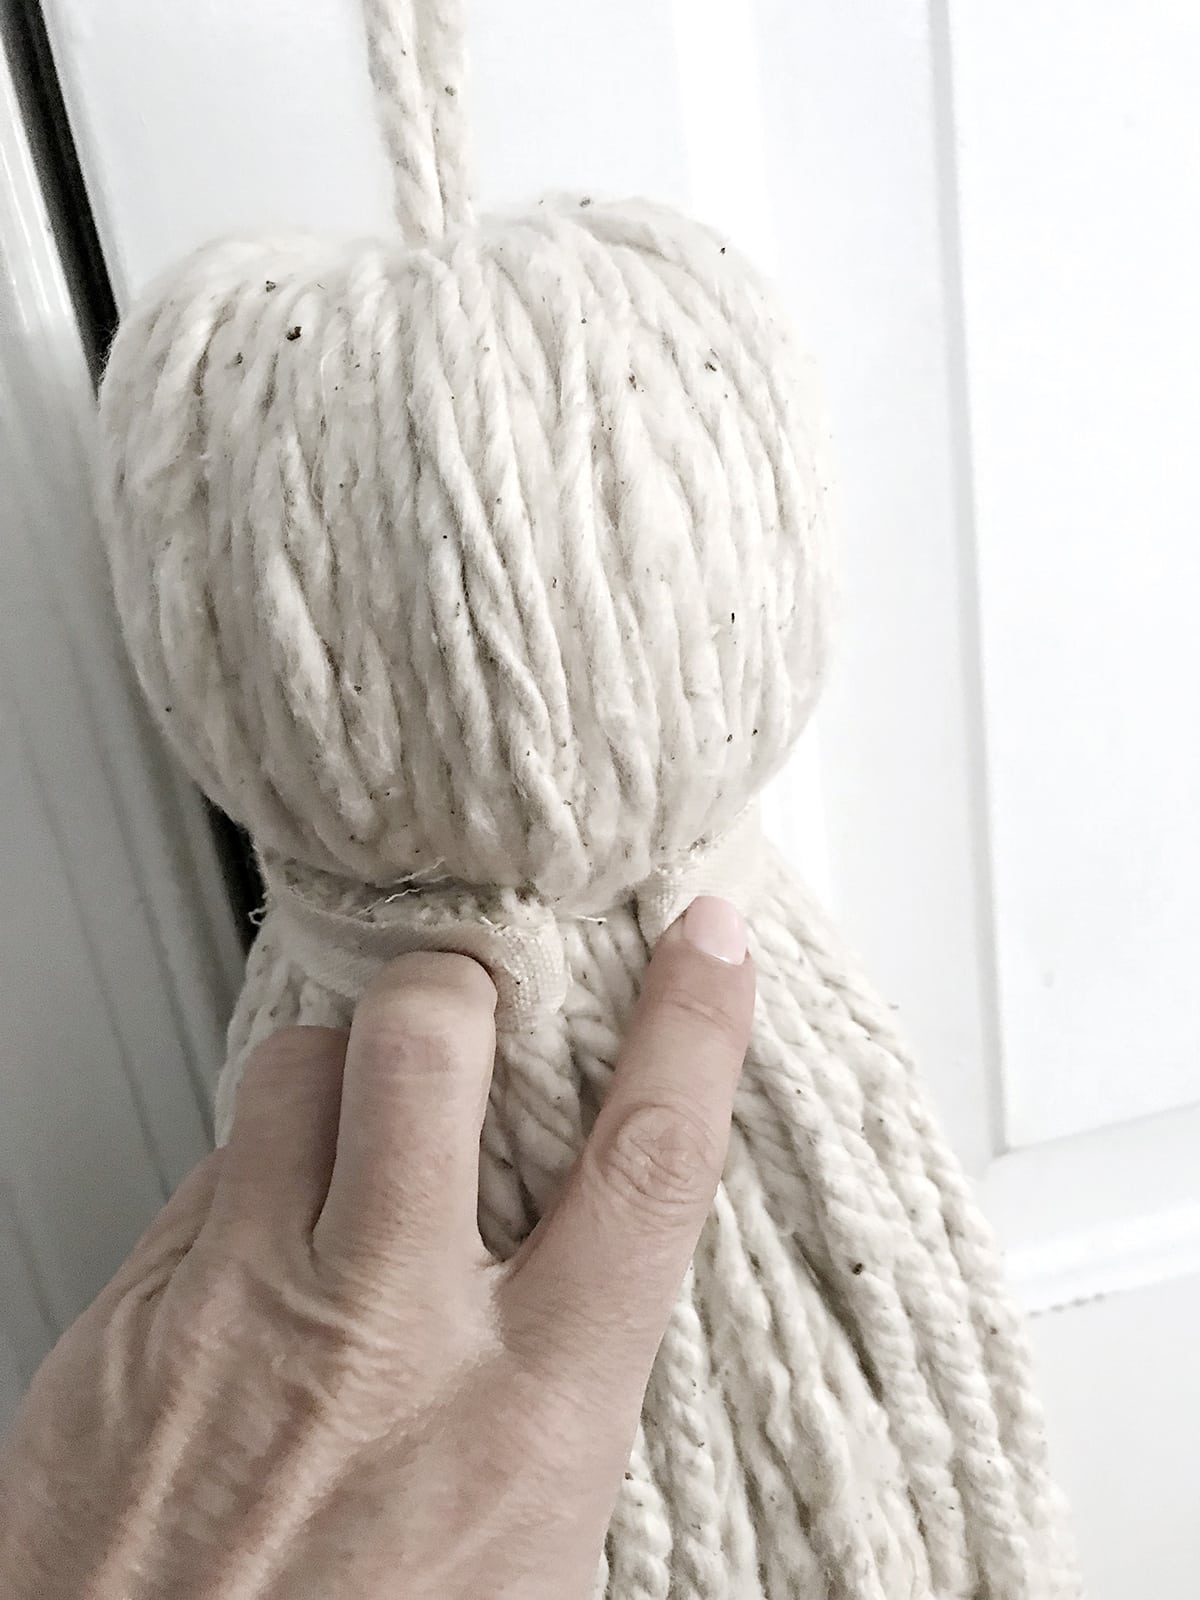
I then picked two strands out of the center at the side that will end up being the bottom of the tassel.
I tied those two strands to the tight twine. The reason for that is that you need to also find the other side of those two pieces of twine because they will be the part that you can hang the tassel from. To find the other end to the two pieces and knot them at the top.
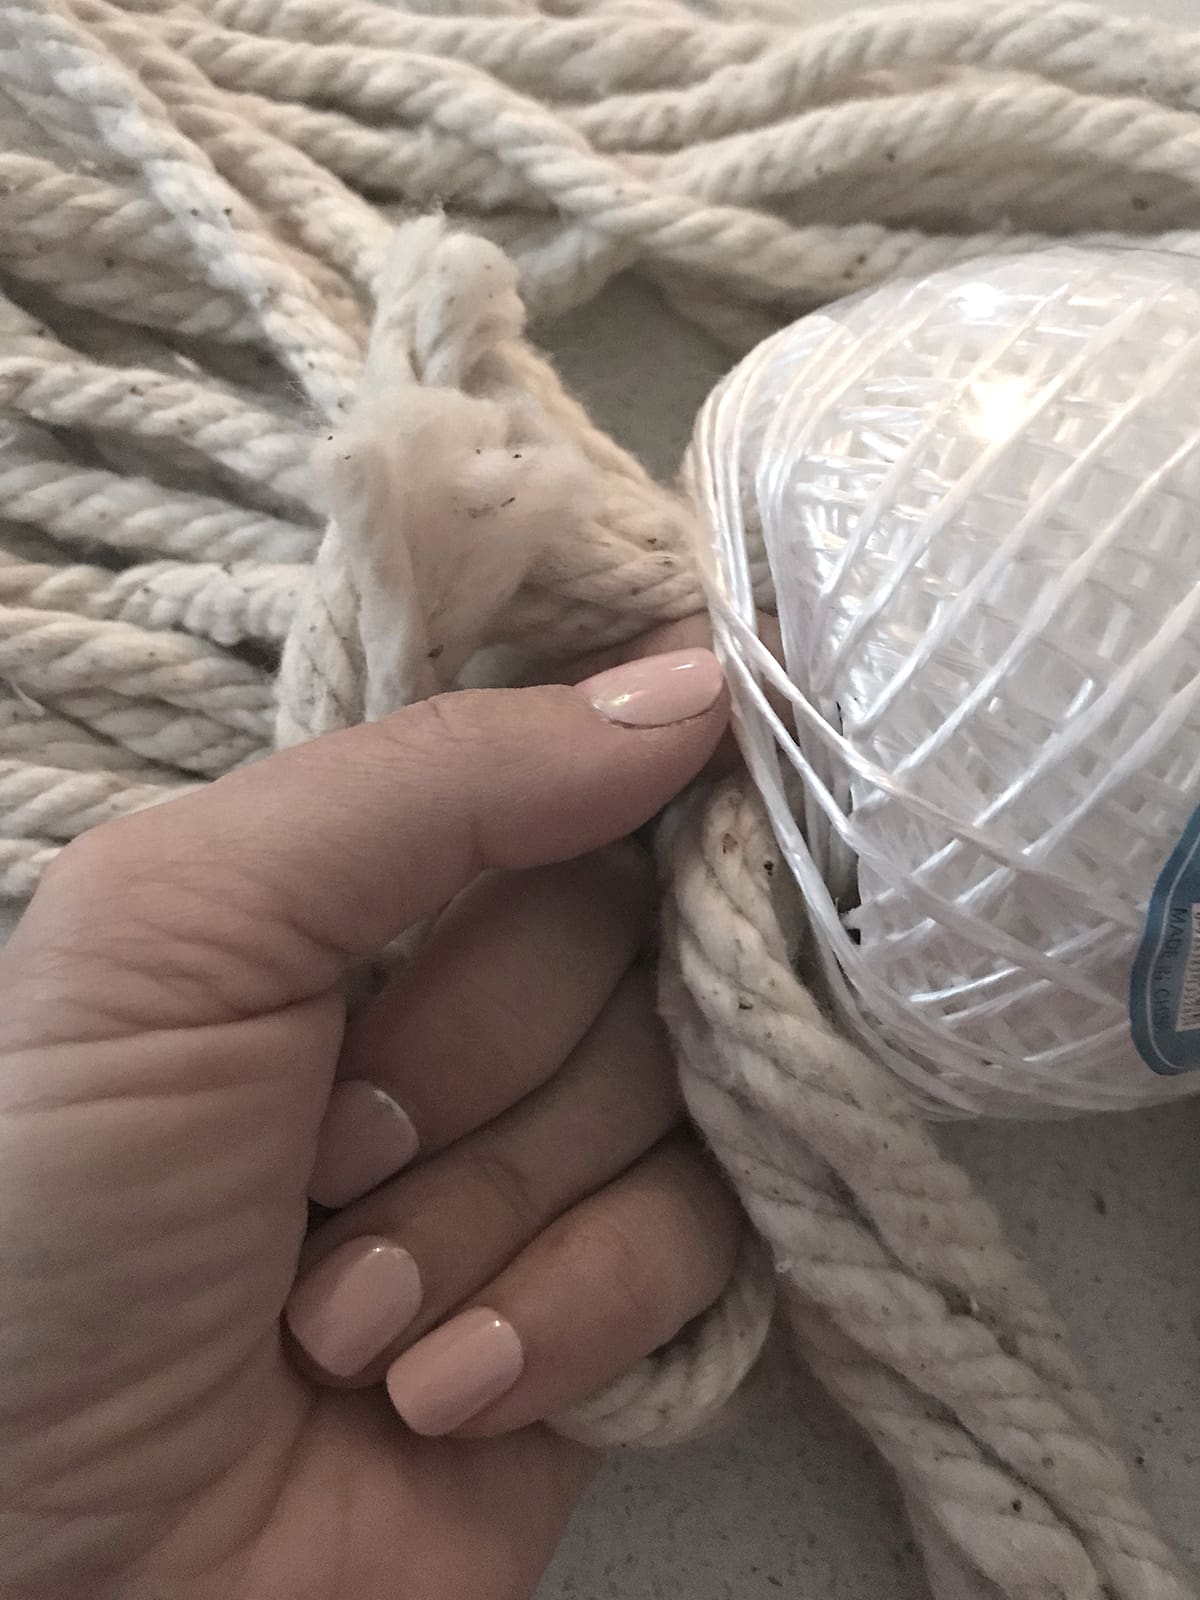
This is so you can hang it all like the below photo:
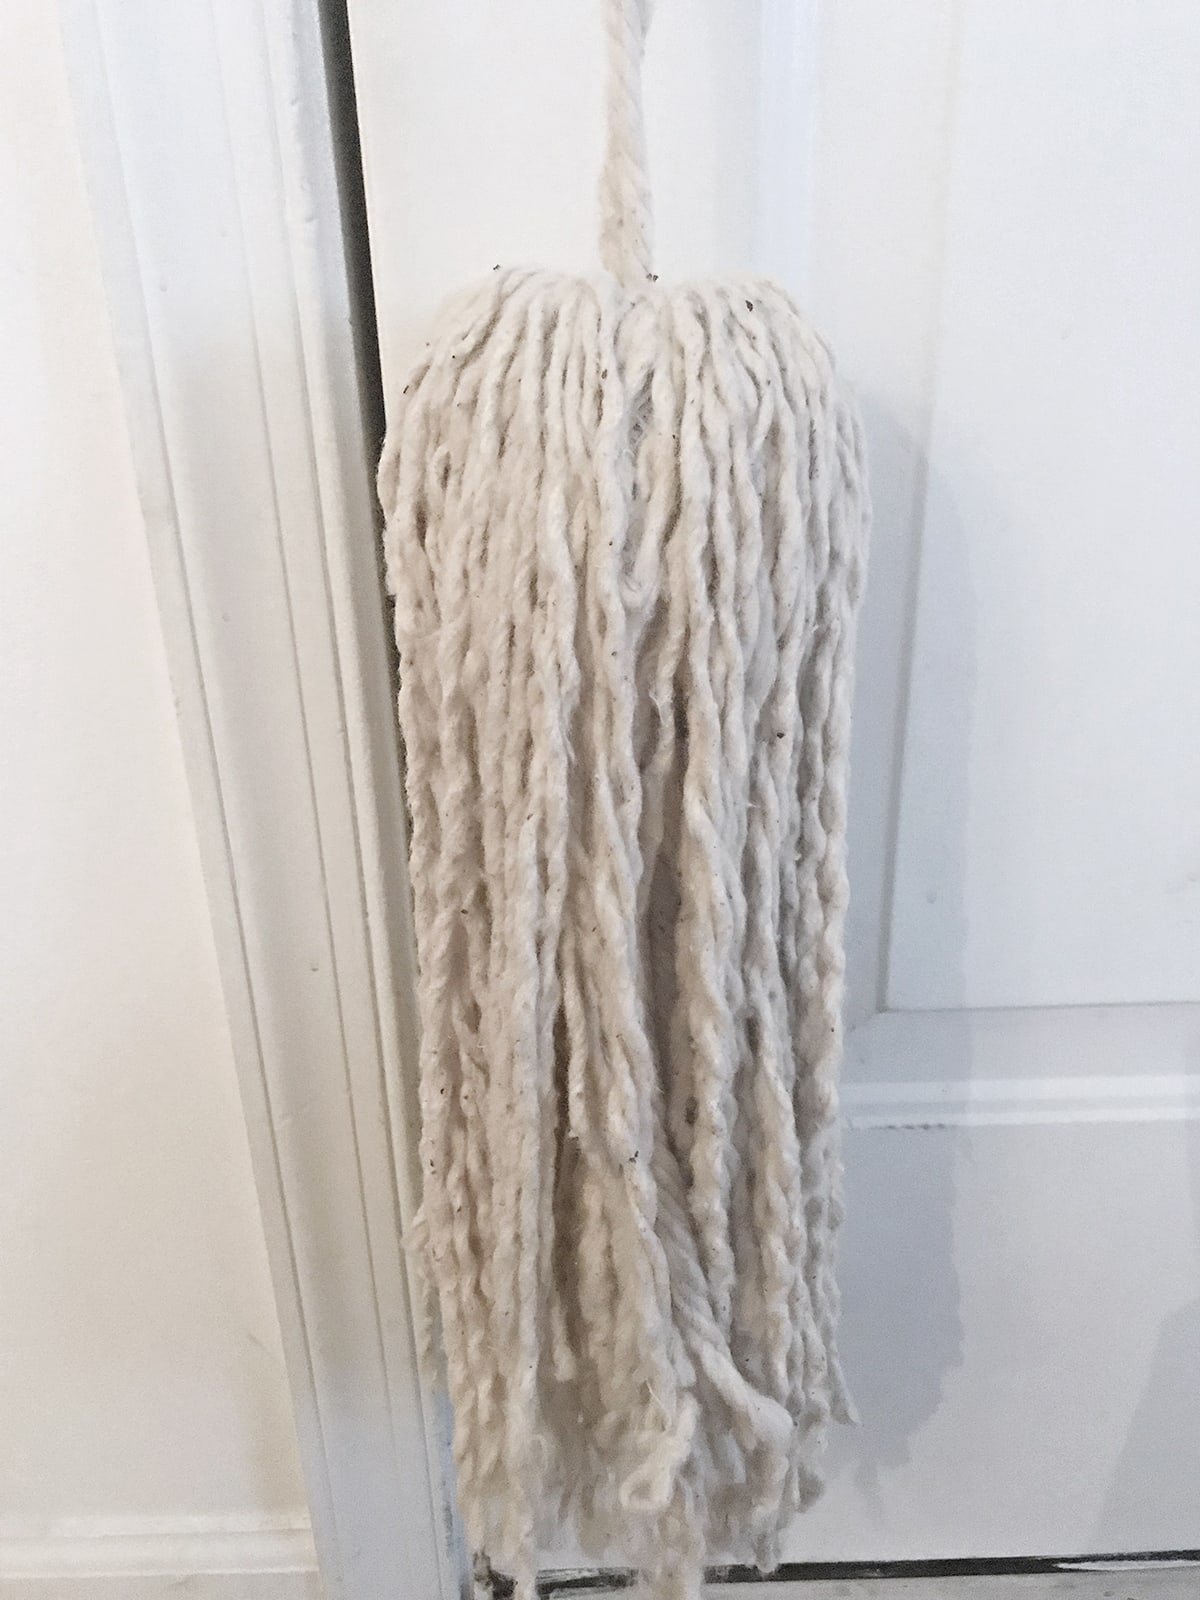
I also chose to unthread the mop threads to give it all more volume.
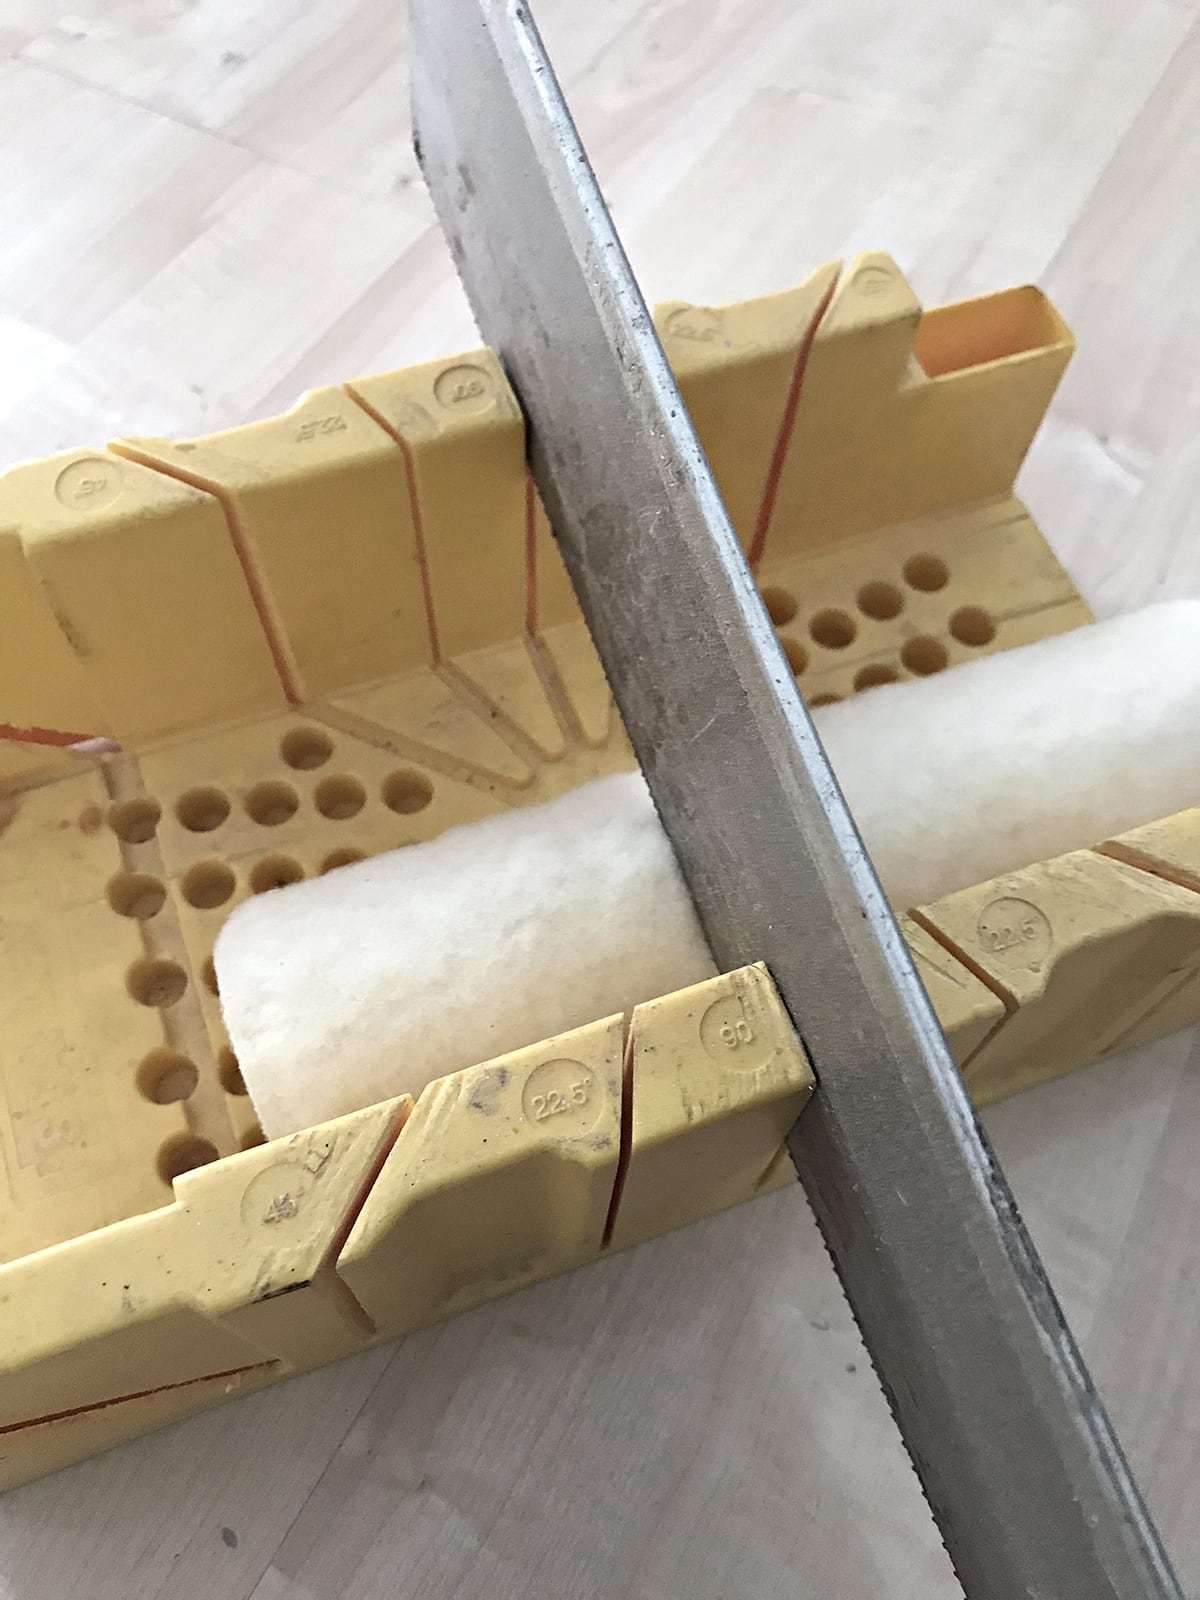
This next step is where the paint roller comes into place. I only wanted a smaller piece so I cut it off with a standard miter saw.
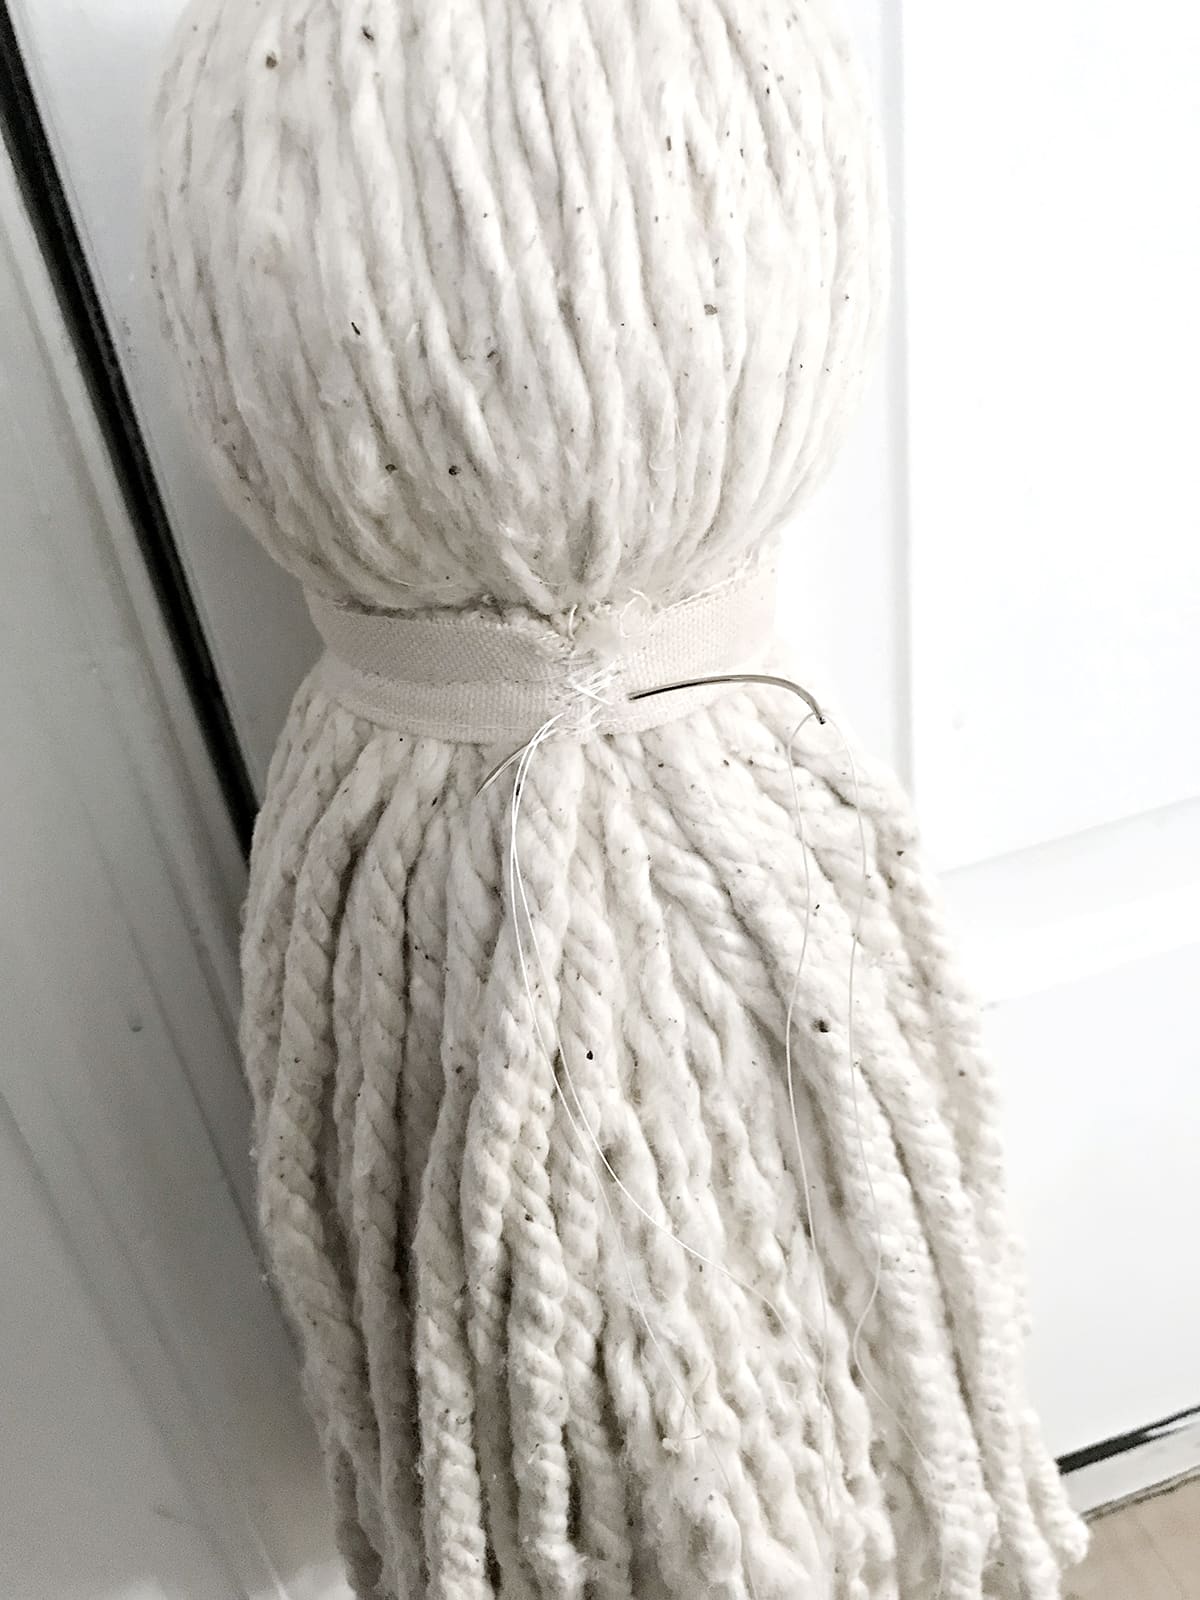
Then I took that piece of paint roller and threaded it onto the center of the tassel threads. The reason I did this is that you can tie off the tassel better and it gives it more volume and structure.
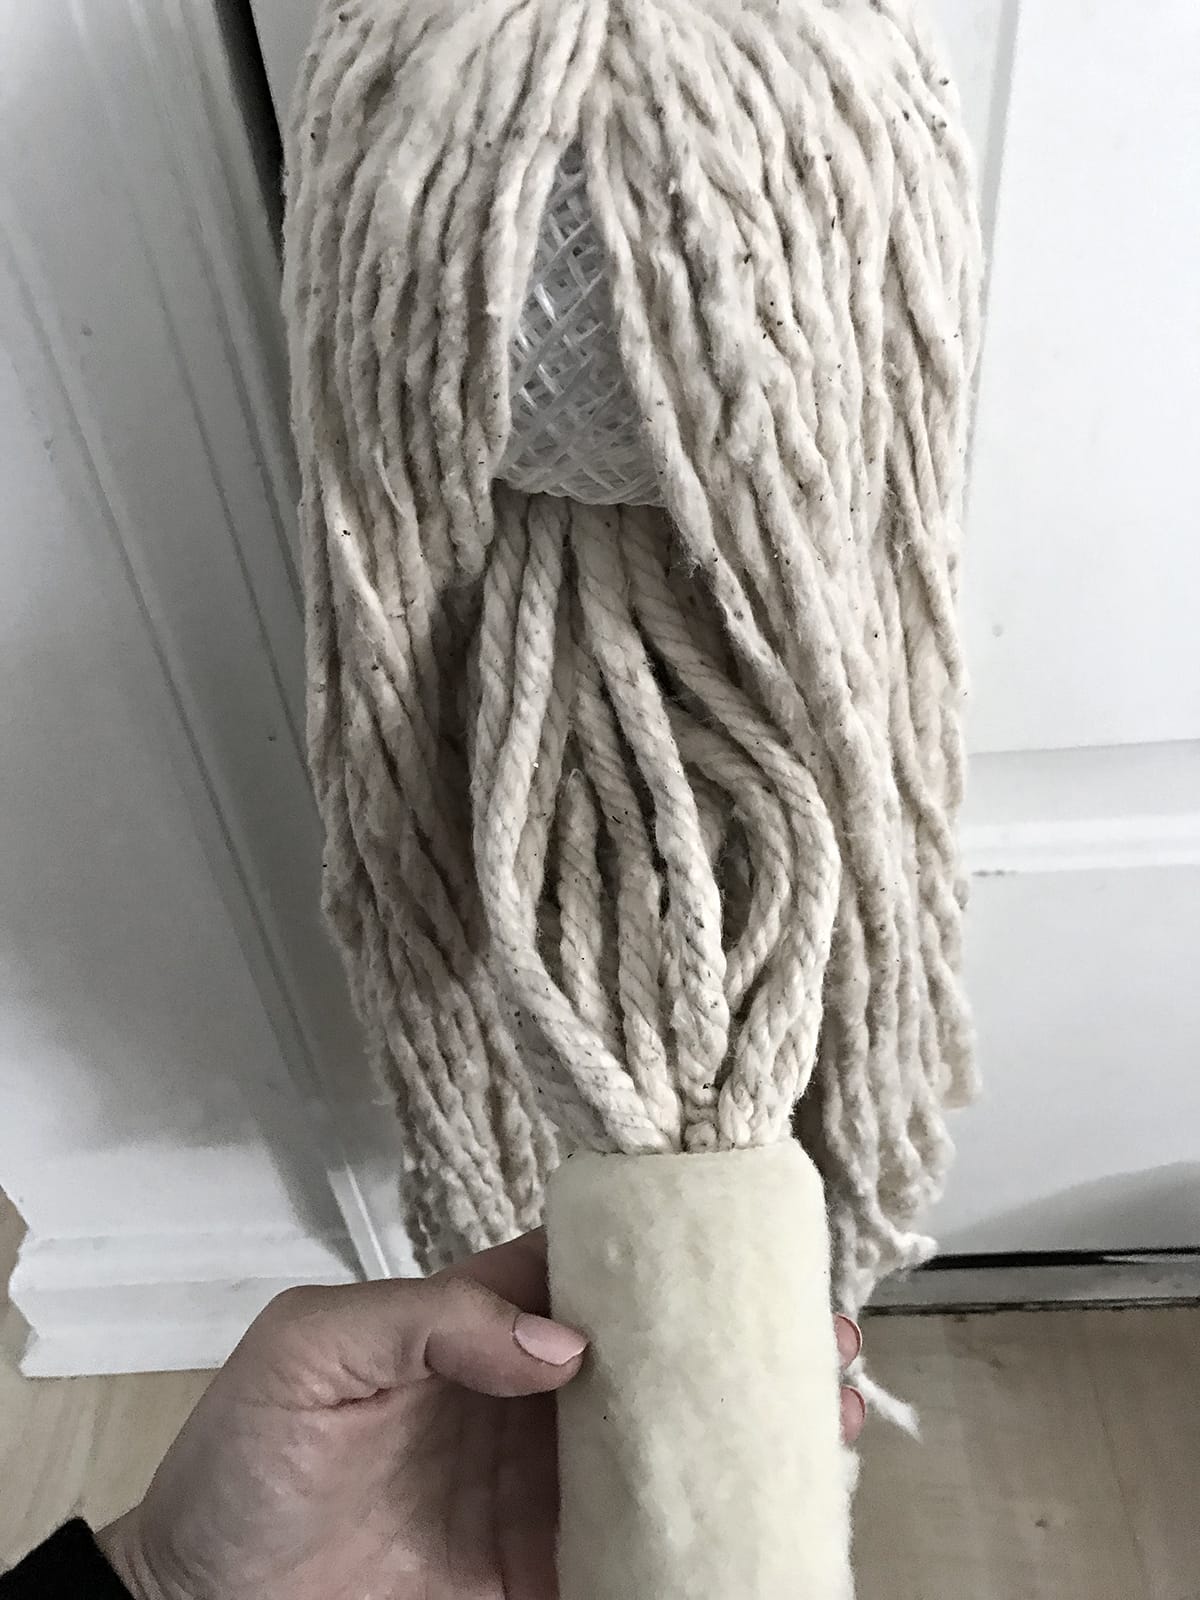
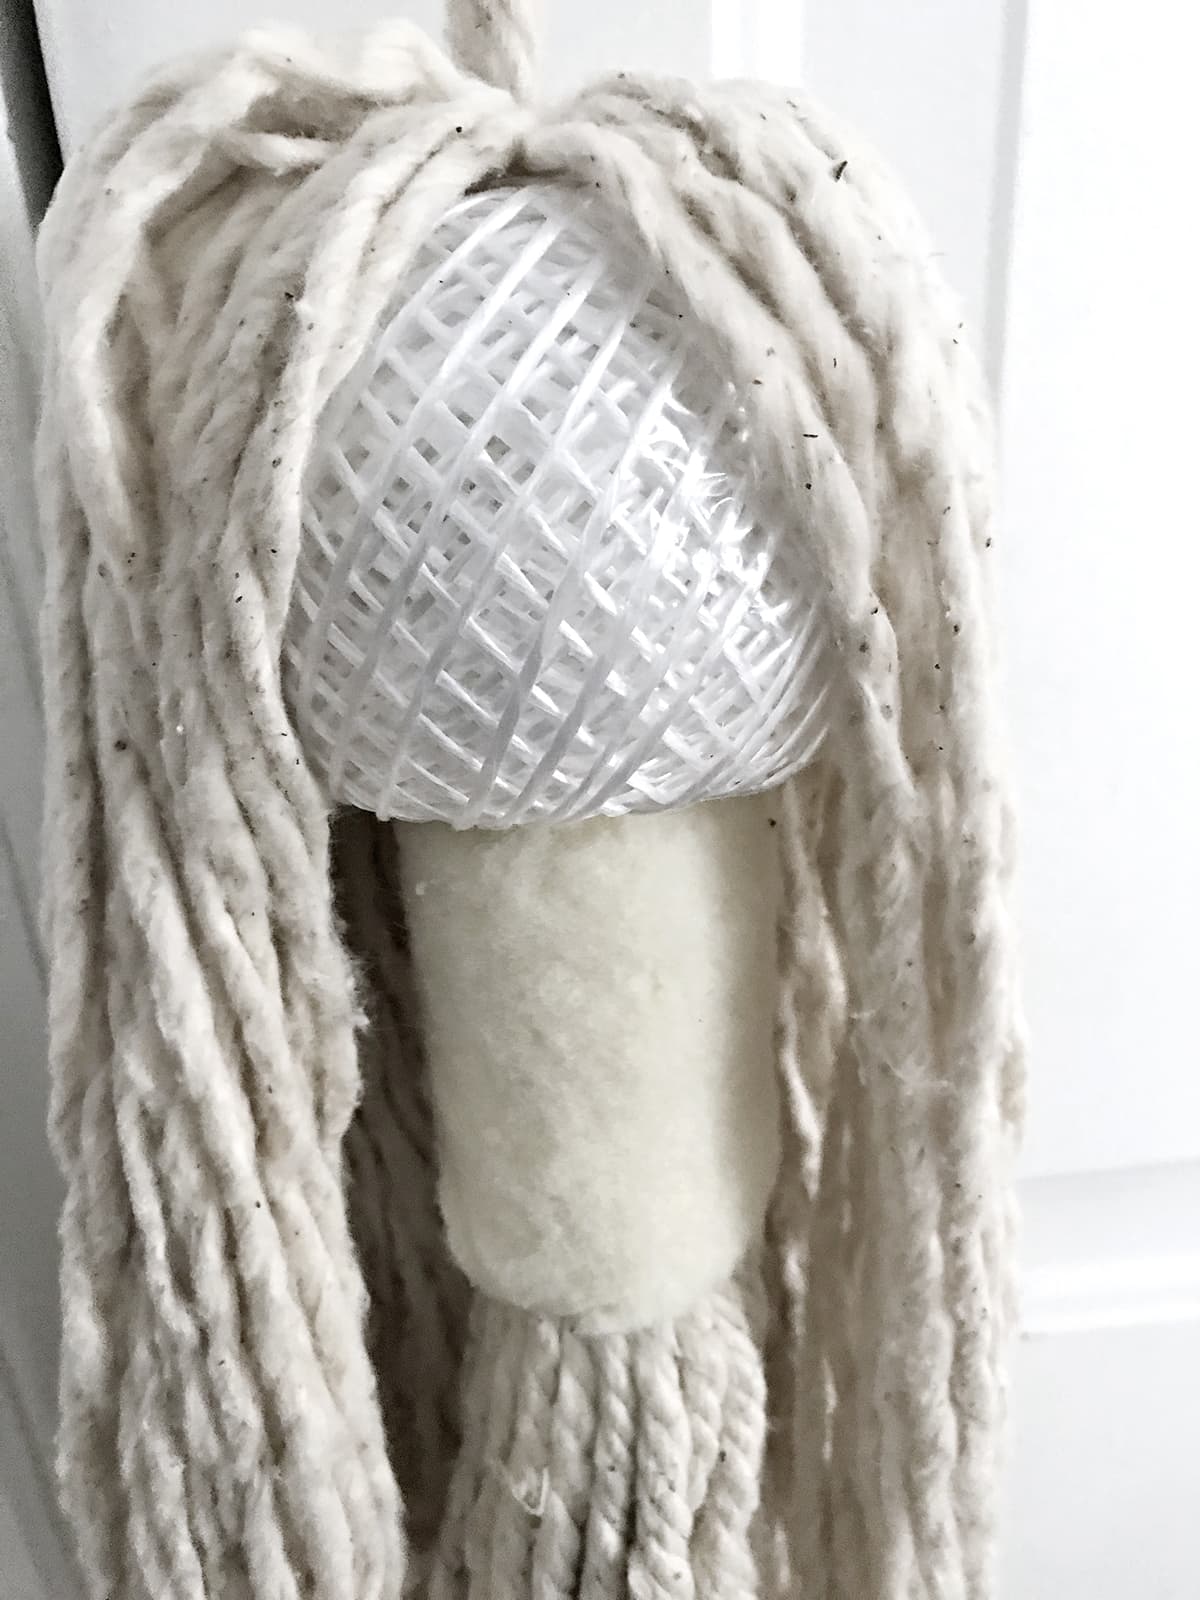
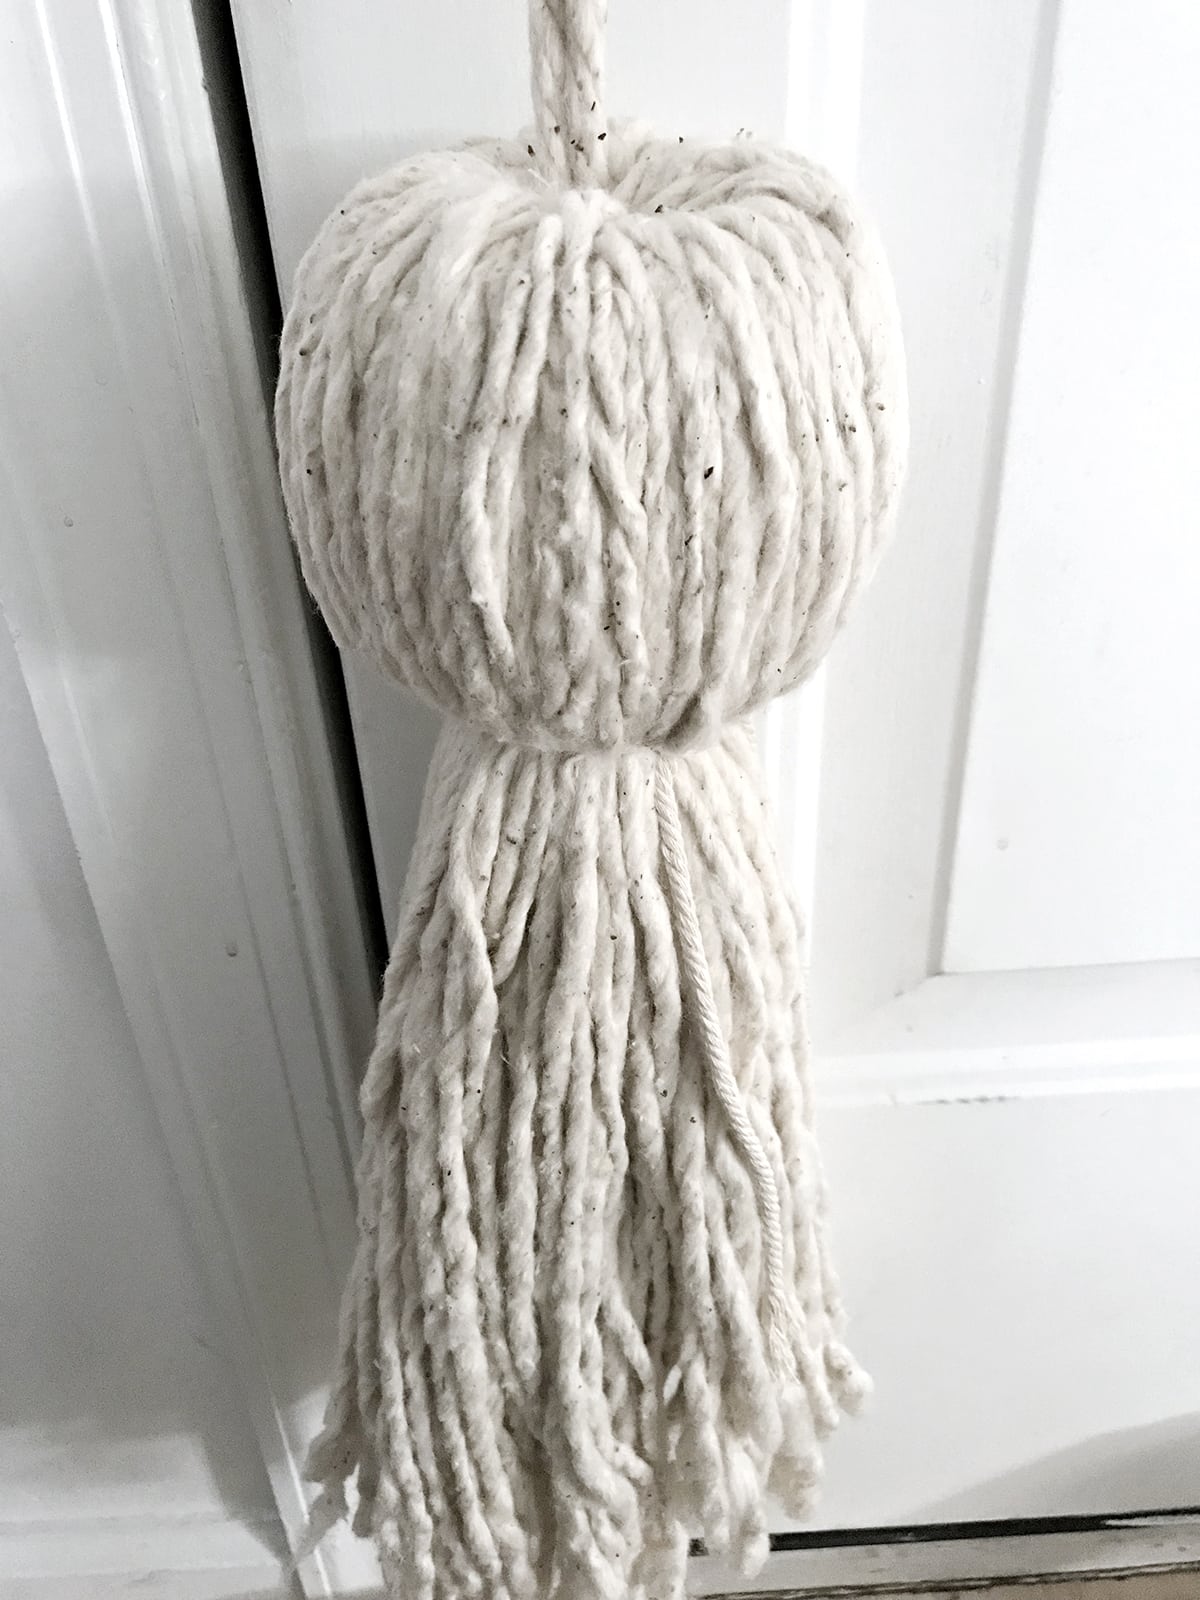
I then straightened, tightened, and tied the mop head yarn around the ball and paint roller center with the thicker twine.
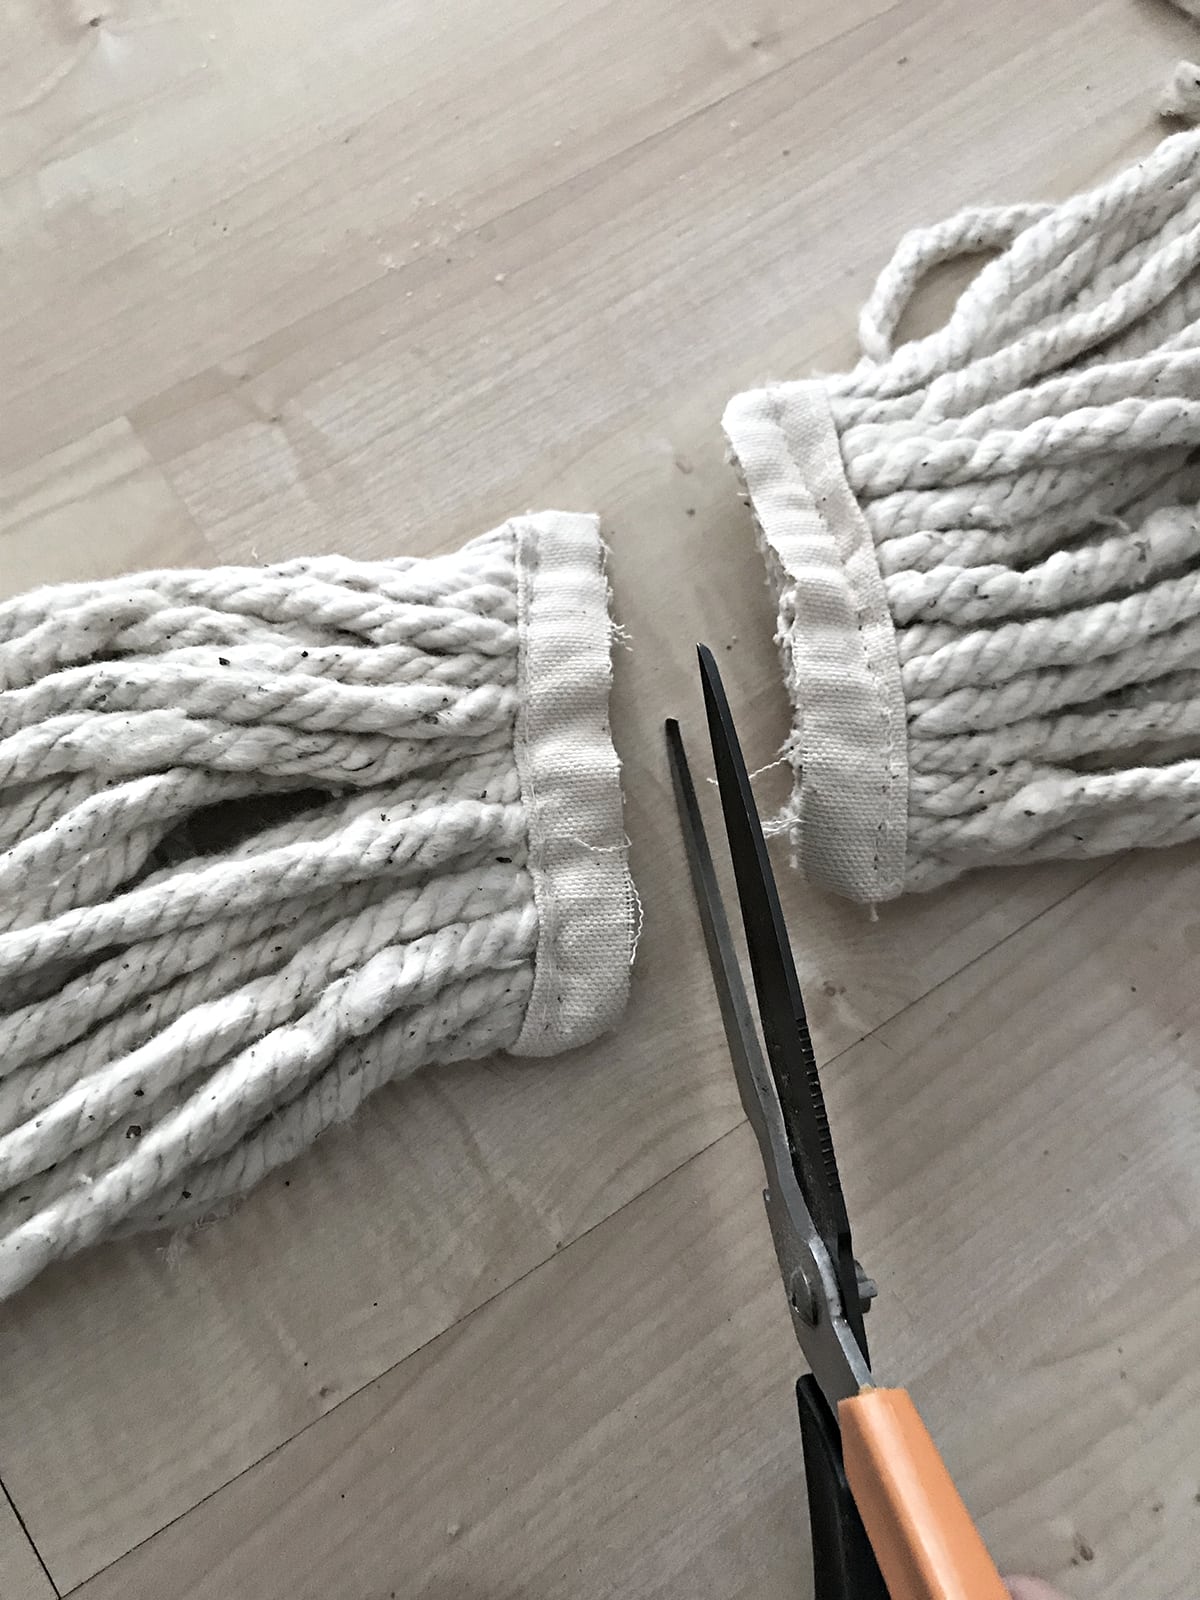
Then I took the heavy-duty sharp pair of scissors to cut the mop in half the way you can see below.
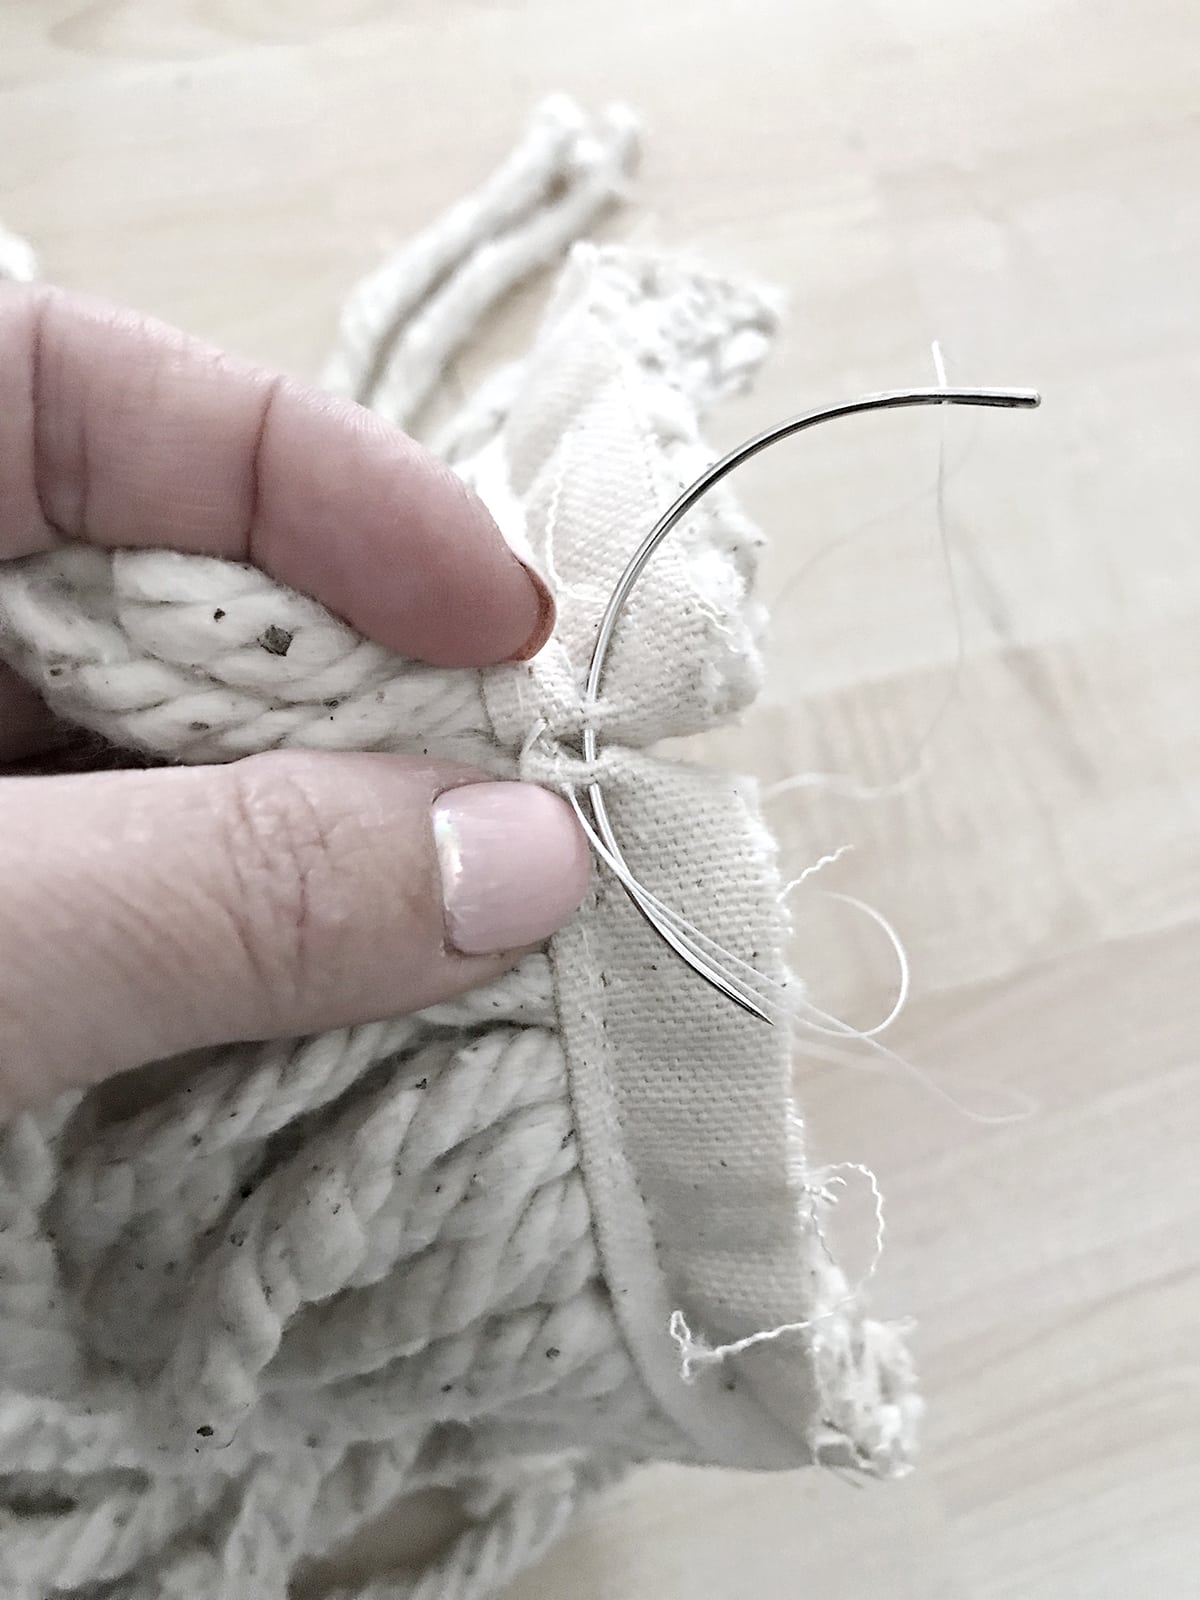
Next, I used the upholstery thread and curved needle to sew the mop edges together like you can see below again.
I then wrapped the sewn-together mop headpieces around the bottom of the tassel head. It worked out great for me because the pieces fit perfectly but you can use another mop head if needed.
Sew the edges together to make the fit tight.
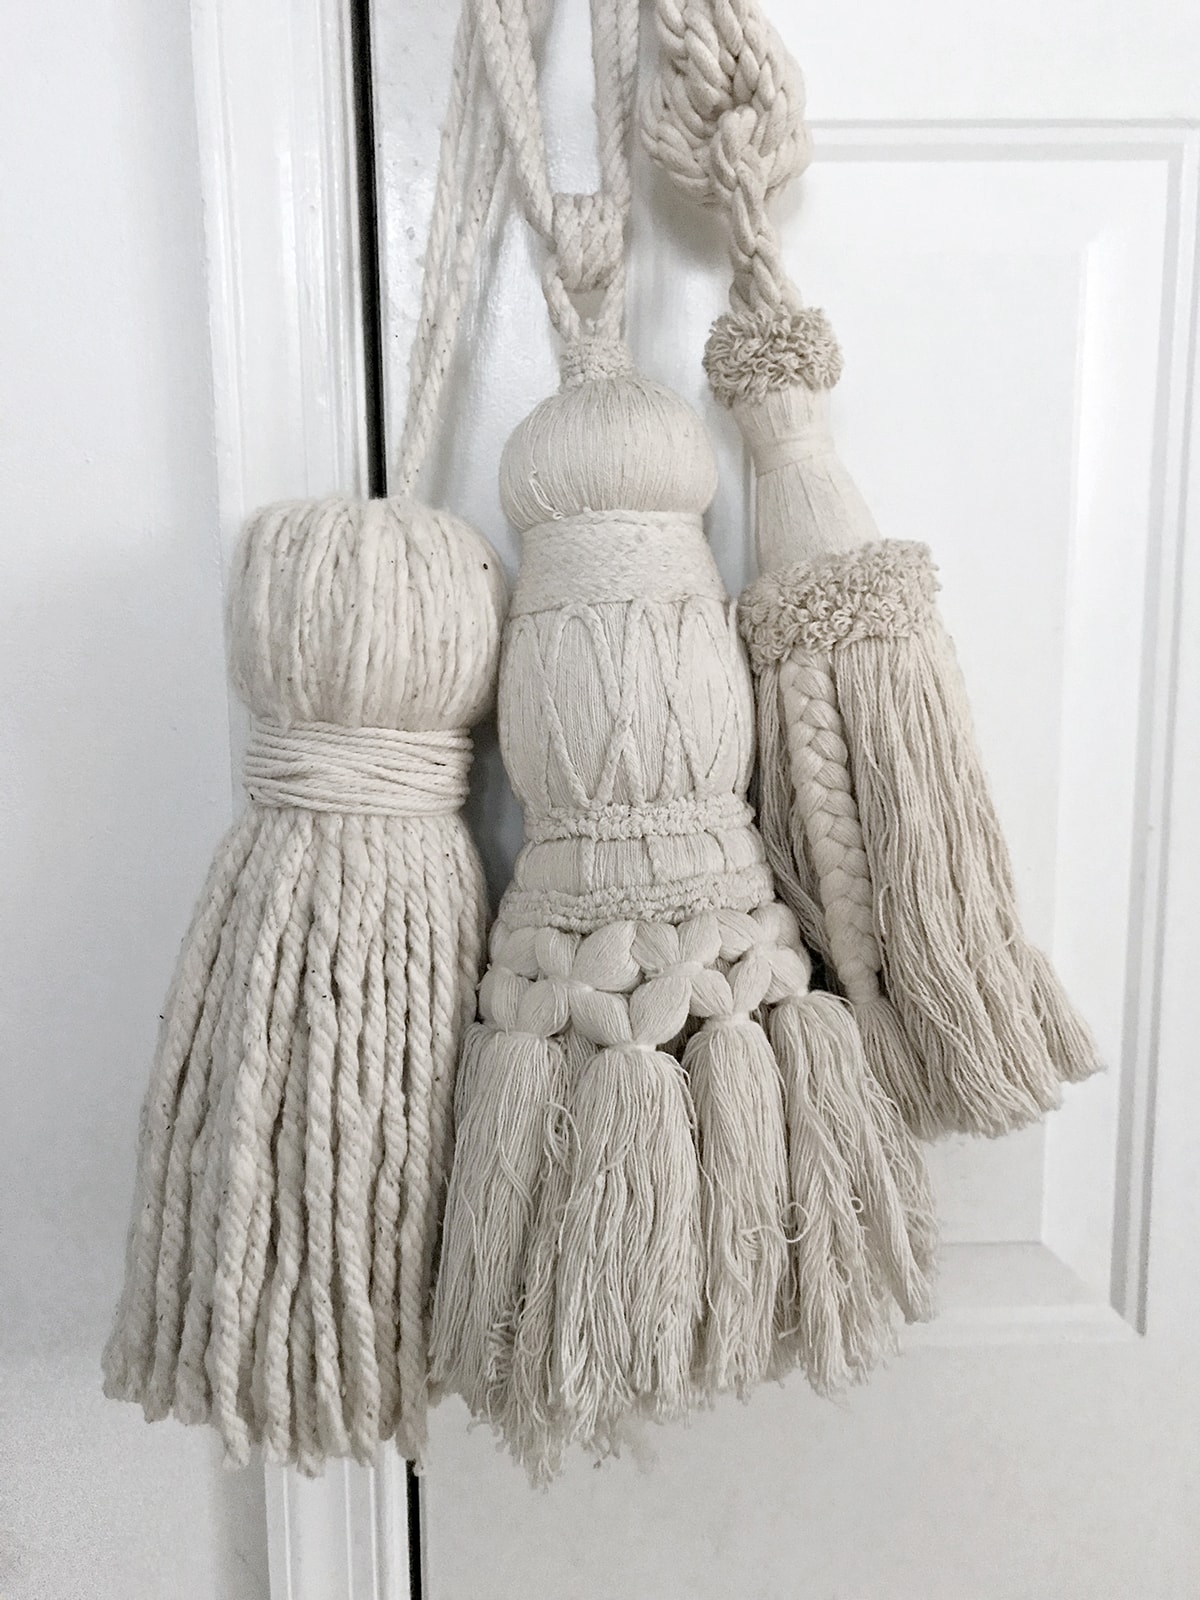
You can then just wrap a lot of twine around the neck and call it a day. I’m showing you in the below picture how that would look next to my other large tassels. (The mop head tassel is the one on the left)
However, I wanted to do more…
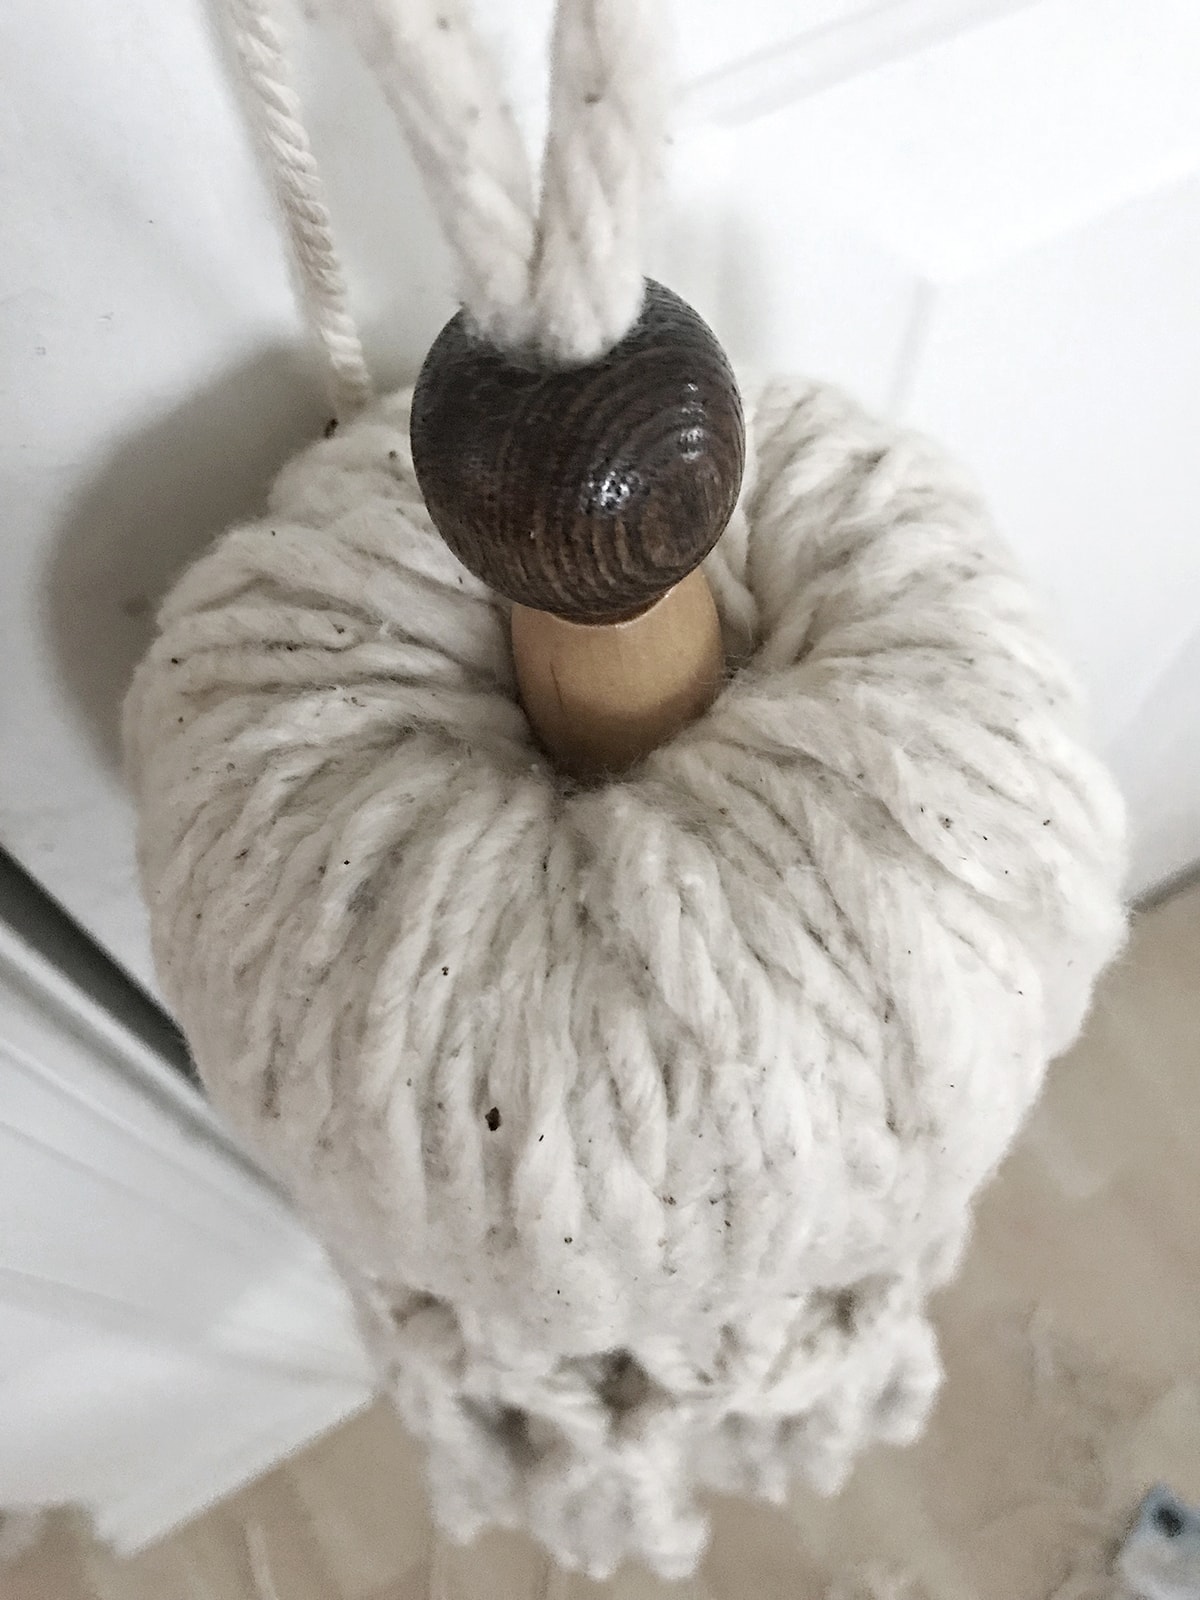
I threaded two beads onto the top of the tassel head. It actually helps keep it stable up there.
With the hair ties, I tied off the same pattern as my existing tassel has.
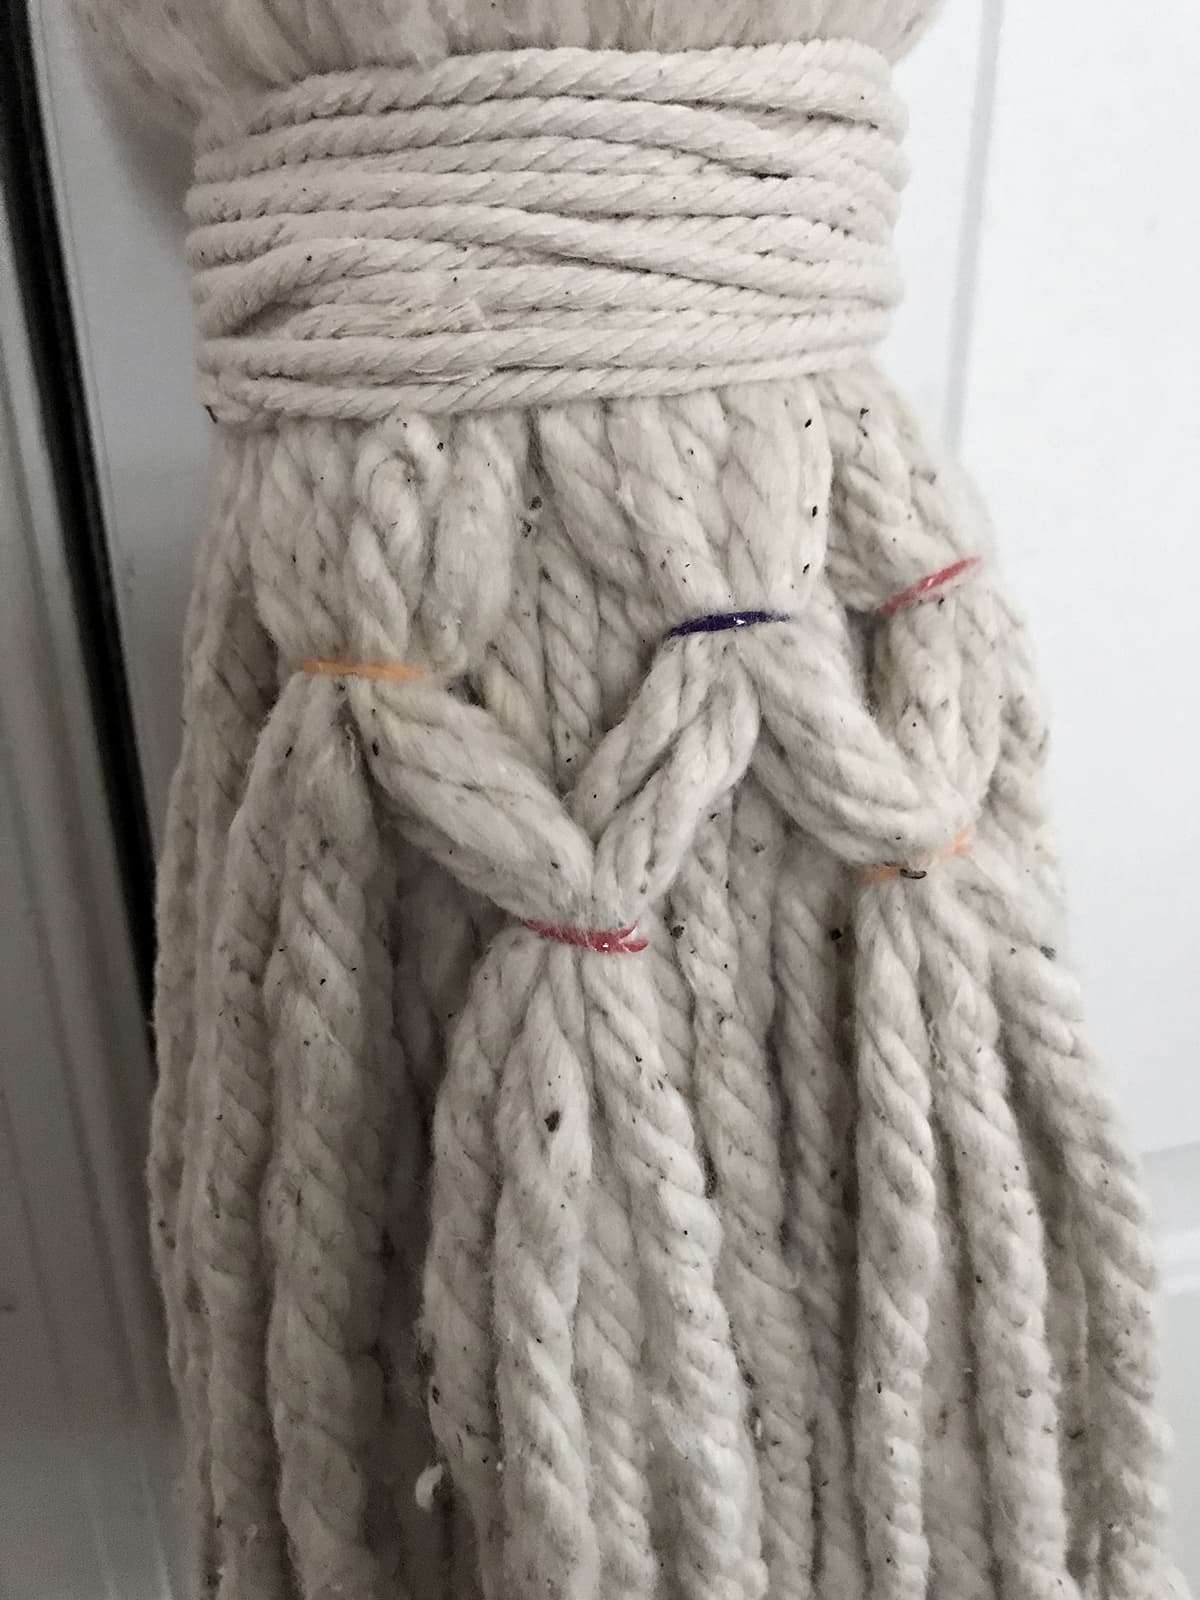
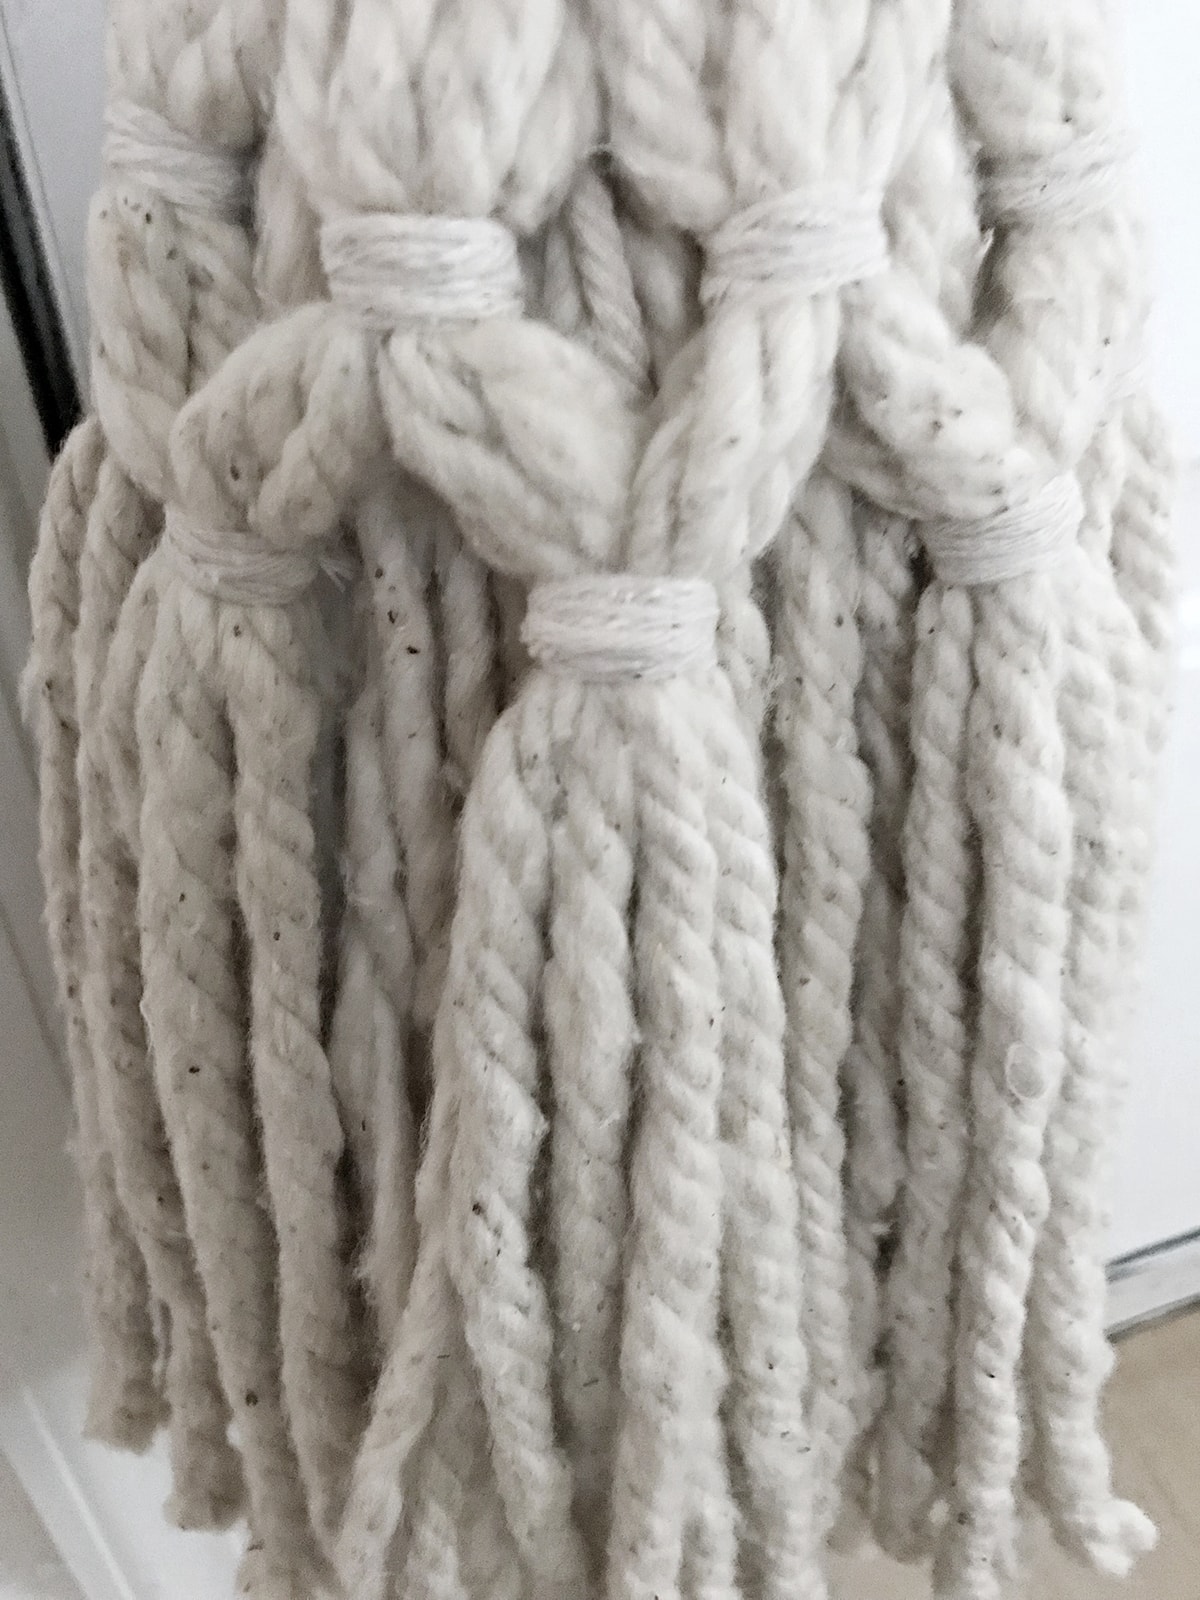
Then I took the thin twine and just wrapped and tied it around the rubber bands to hide them.
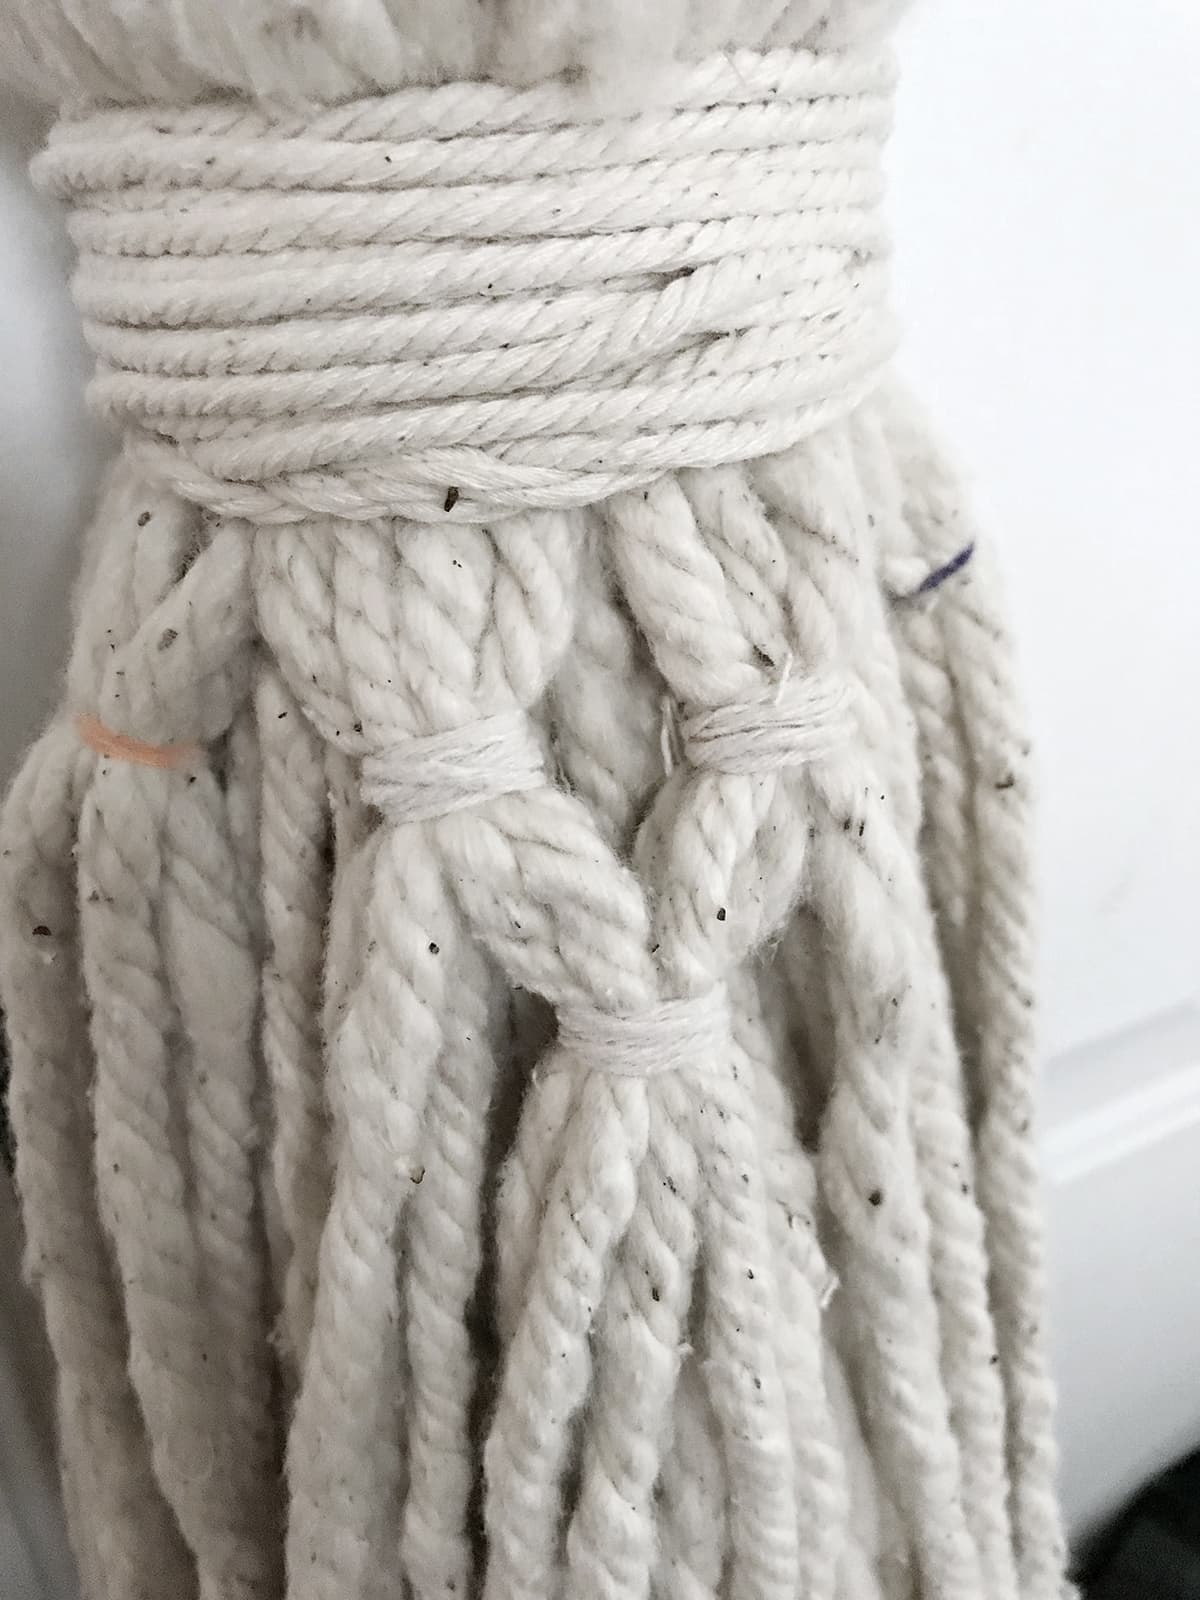
All the way around.
I wanted more than the yarn wrapped around the head of the tassel. I took that yarn off again and I decided to make a big friendship bracelet with macrame yarn. Have you made one of them before? My daughter makes them all the time and it’s actually a form of macrame if you look at it closer.
I hung the string from one side to another in the room and tied the three knots on the string the way you can see below. Do not start the way you start a friendship bracelet so you have an easier time sewing it together later.
You could also take the same steps as my macrame garland or macrame basket sleeve.
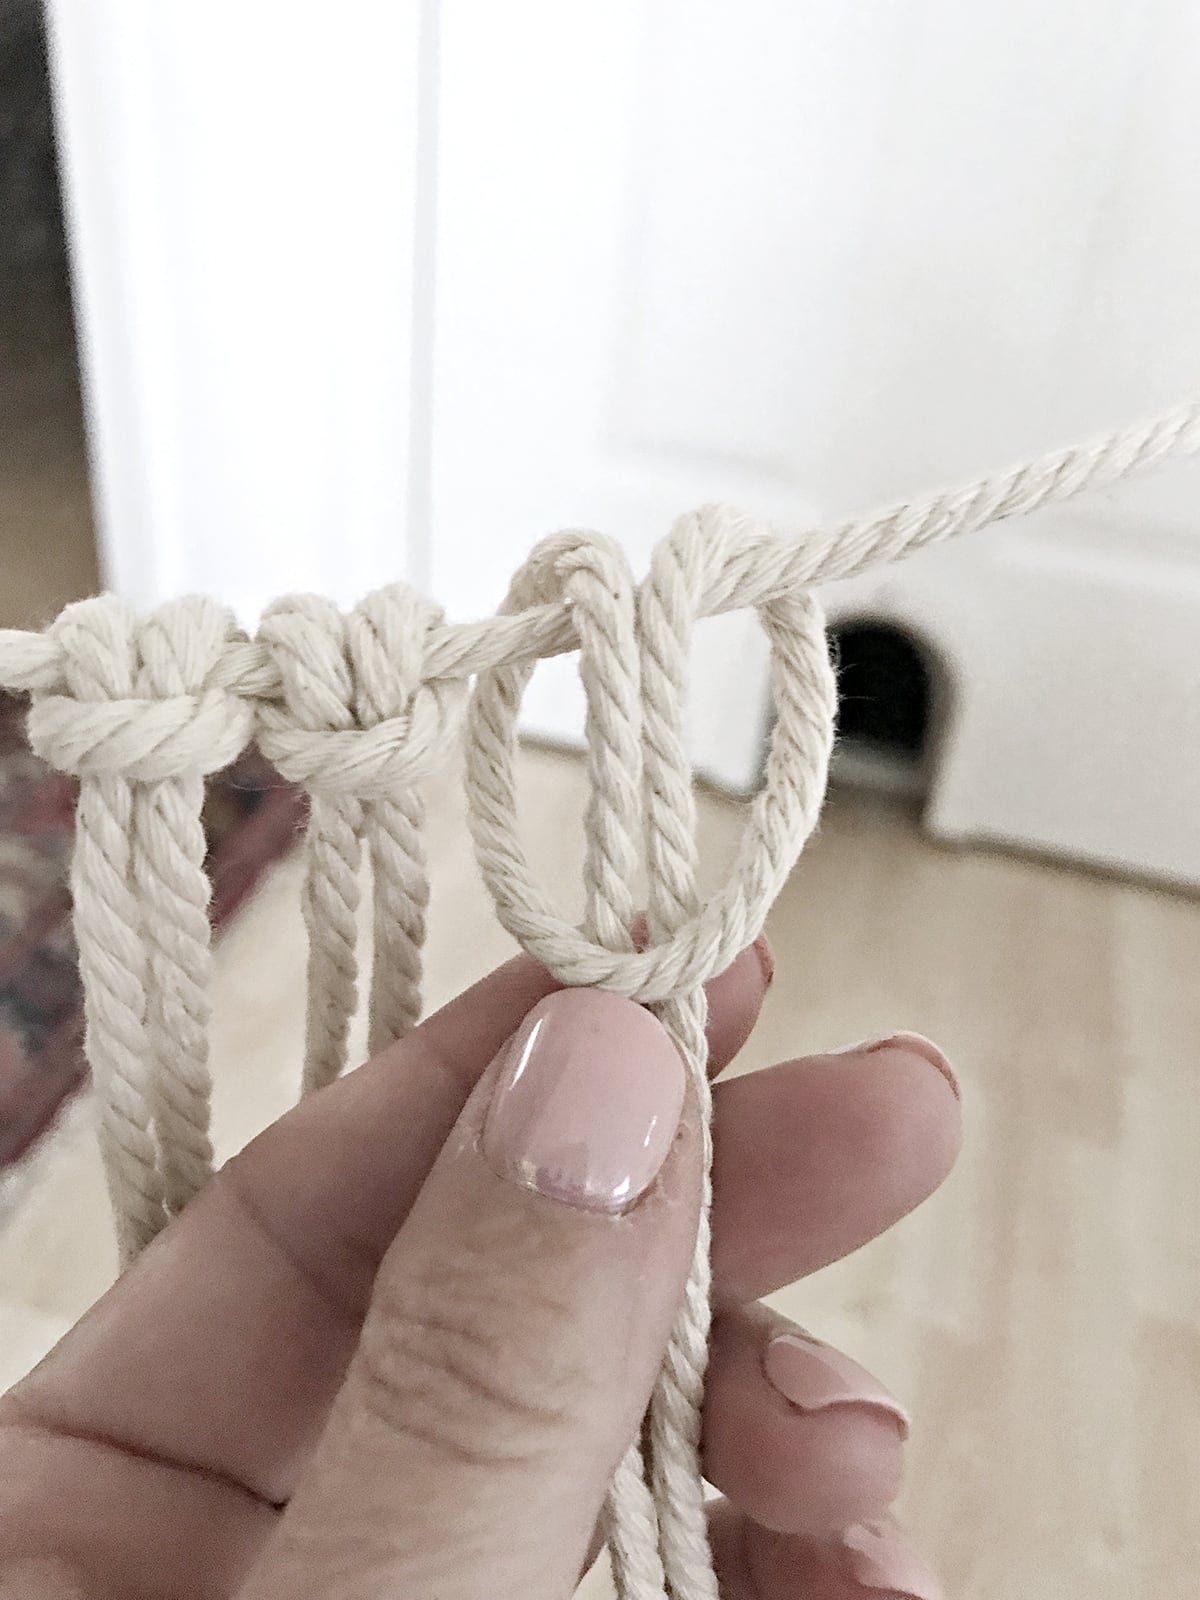
Then I did the same steps as you take with knotting the thread for a friendship bracelet.

Voila here it is!
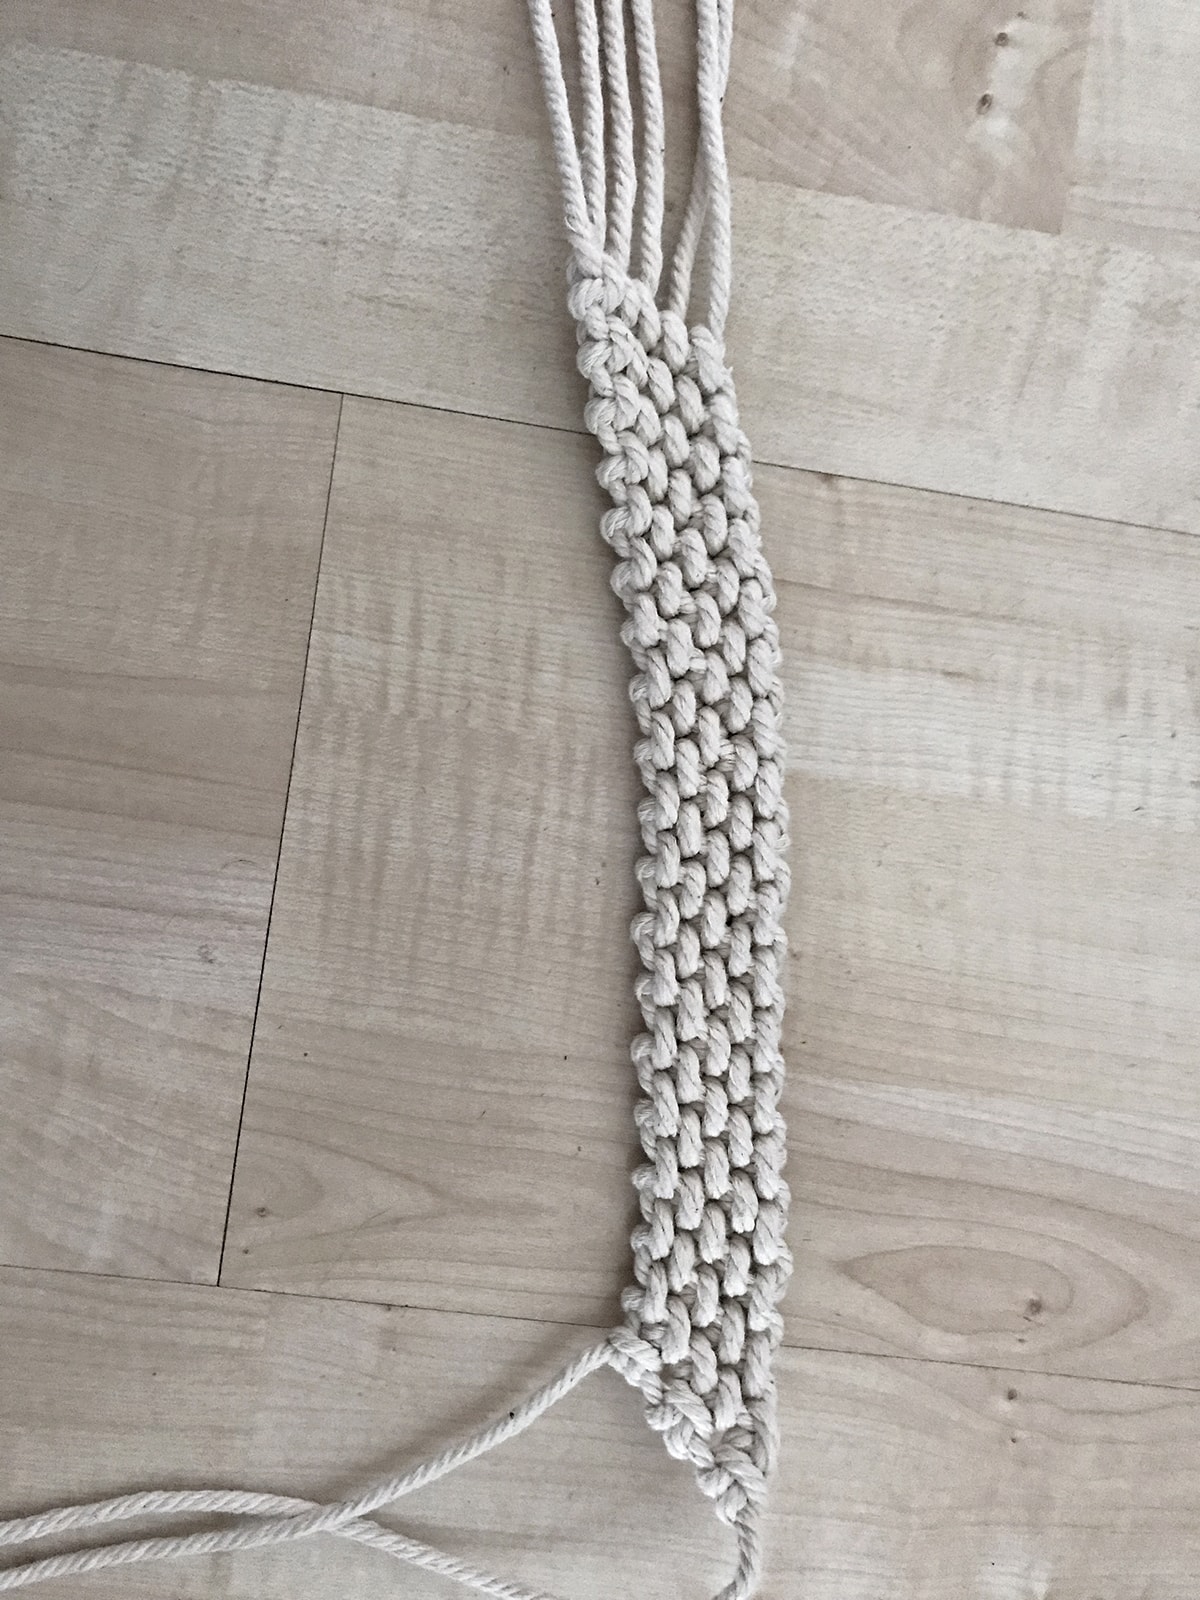
It fit all the way around the neck of the tassel and I’m sorry but I totally forgot to take a photo of the way I sewed it together. Let me explain: I cut the end with all the strings hanging off to shorter strings. And when I wrapped the piece around the tassel, I let the end that had only two strings hanging over the edge with all the strings which hid them perfectly.
Then I used the upholstery thread and needles again to sew the edges together. All you had left to do is stuff the two loose strands under the big friendship bracelet.

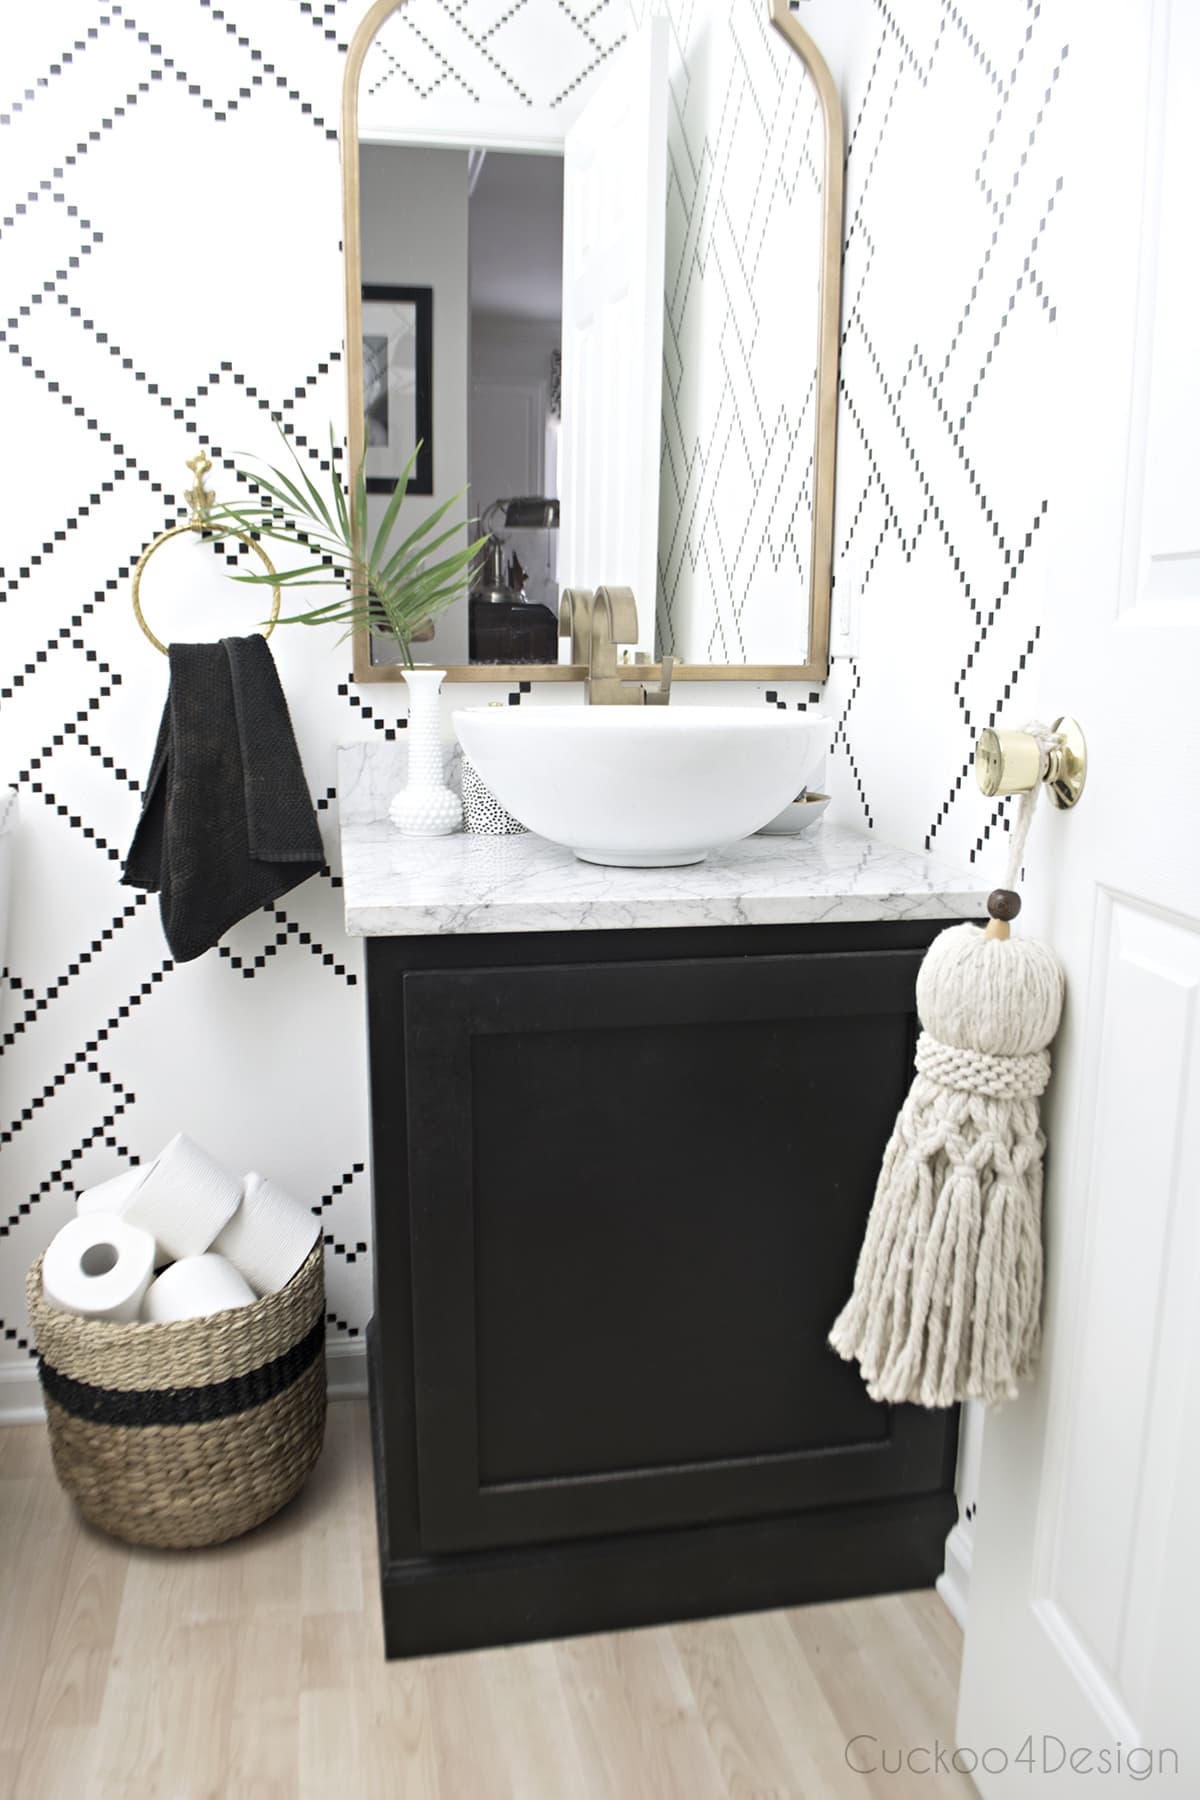
Photos of finished large tassel
There are so many possibilities in how you can make these and I’m pretty sure this won’t be my last huge tassel because I’m hooked.
Here it is hanging with my other tassel and I love them both.


Where to buy large tassels like mine
Not everyone feels like crafting! I you like the look of my tassel but don’t feel like making your own then you should check out the below Etsy shops for some stylish handmade alternatives while supporting small businesses.

More of my unique DIY tassel projects
- how to make a leather tassel
- how to make yarn tassels
- DIY stacked tassel
- DIY tassel umbrella
- DIY tassel keychain (keyring)
- DIY tassel ottoman
- DIY tassel embellishments for a tassel sconce, lampshade, or basket
- rope macrame tassel

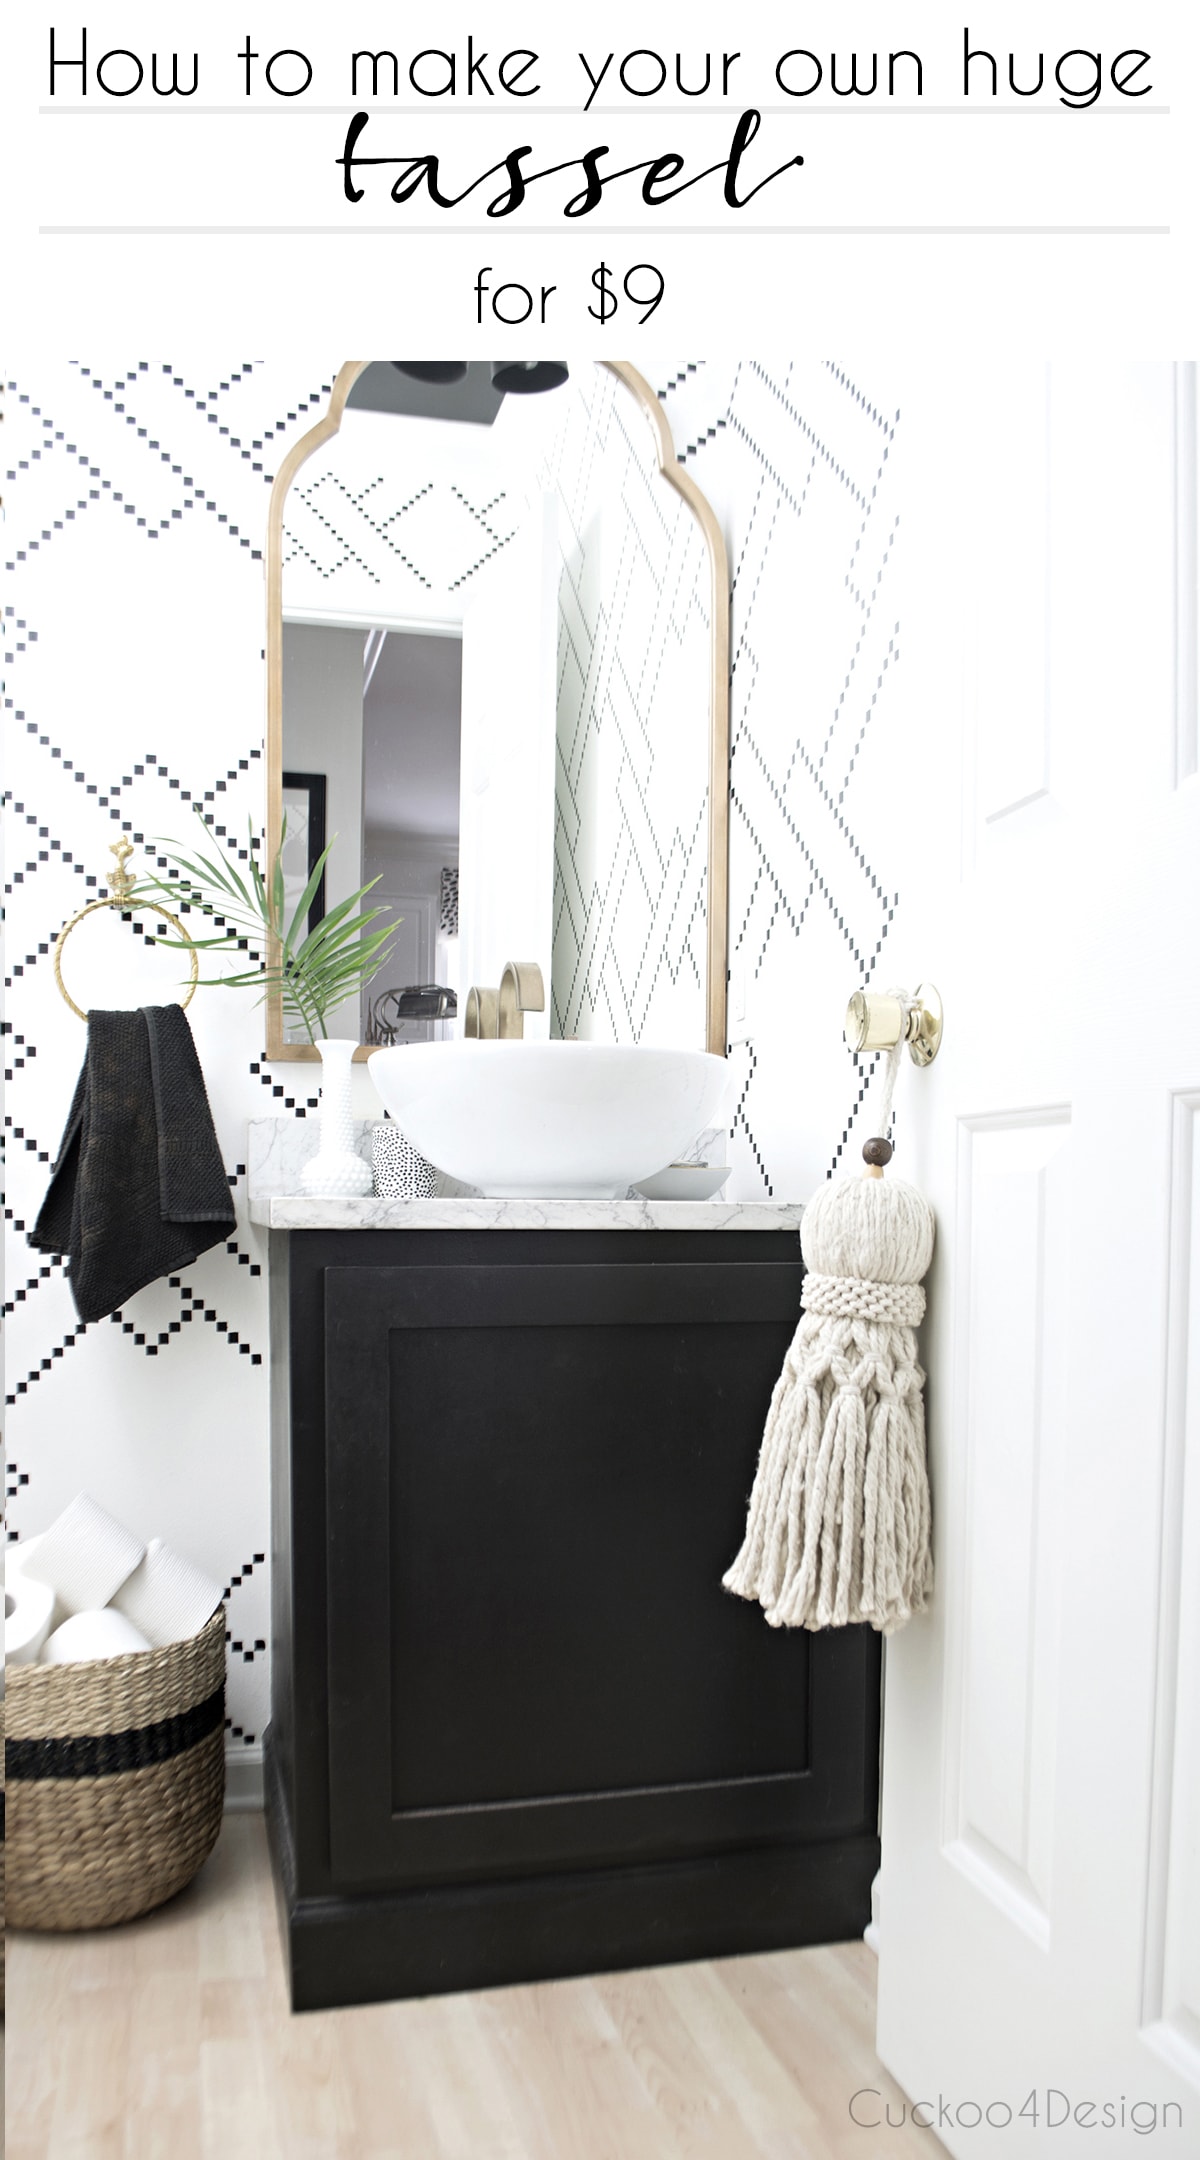
Will you try to make your own? I think $9 is pretty good for such a big statement tassel. Isn’t it?
Tschüß,

you need to be selling these in your shop! they are awesome! and you could make some pretty rad wall hangings from them, too!
I have totally thought about a wall hanging! Thank you
You are the queen of the tassels! Great tutorial but I do not think I can manage it 🙁 You made an excellent deco item once more!
I like that title, thank you!
That looks great!
thank you so much
This looks awesome! I love what you can do with a mophead.
I’ve used a mop head many times and they always surprise me. So affordable and so many ways you can use them
Thank you so much! I will be making the giant tassel for my bathroom. I will hang it on the back of the door. I love it!
Oh awesome and good luck!
This is just brilliant!!!! I hope I can muster the skills to make one too. I agree with the comments above, you should be selling these. So cool!
Thanks Brenna, they are actually not that hard to make. Good luck!
Oh my word. This is genius
Thanks Marty
Wow Wow thank you. Cann’t wait to try one or two maybe three.
Oh let me know how they turn out.
So clever!!! Love it!
I saw a large macrame tassel at an antique shop the other day and immediatly thought of you. Love these tips, usuing the whole twine ball at the top of the tassel to add bulk is brilliant.
I think you are a genius! I can’t wait to make one!
You are the queen of tassels!! These are amazing!
that’s amazing–so cool! If I had to try to come up with a way to make a giant tassel, I would be totally lost, but you make it look easy 🙂
This is just so brilliant! Pinned a ton of times!!
Hi there.
Very cool!
Any chance you can tell me where you bought the wallpaper In the powder room photo and what the name of it is?
Thanks – Erin
Hi Erin, it’s not wallpaper. It’s a stencil I made and that you can now buy. Here is the blog post https://cuckoo4design.com/little-black-squares-stencil-wall/
Did you use the string from mop head to make the “ friendship bracelet” part?
Going to try this. Thanks
Hi Kay, no I used macrame yarn for that. I updated the post and linked it.