

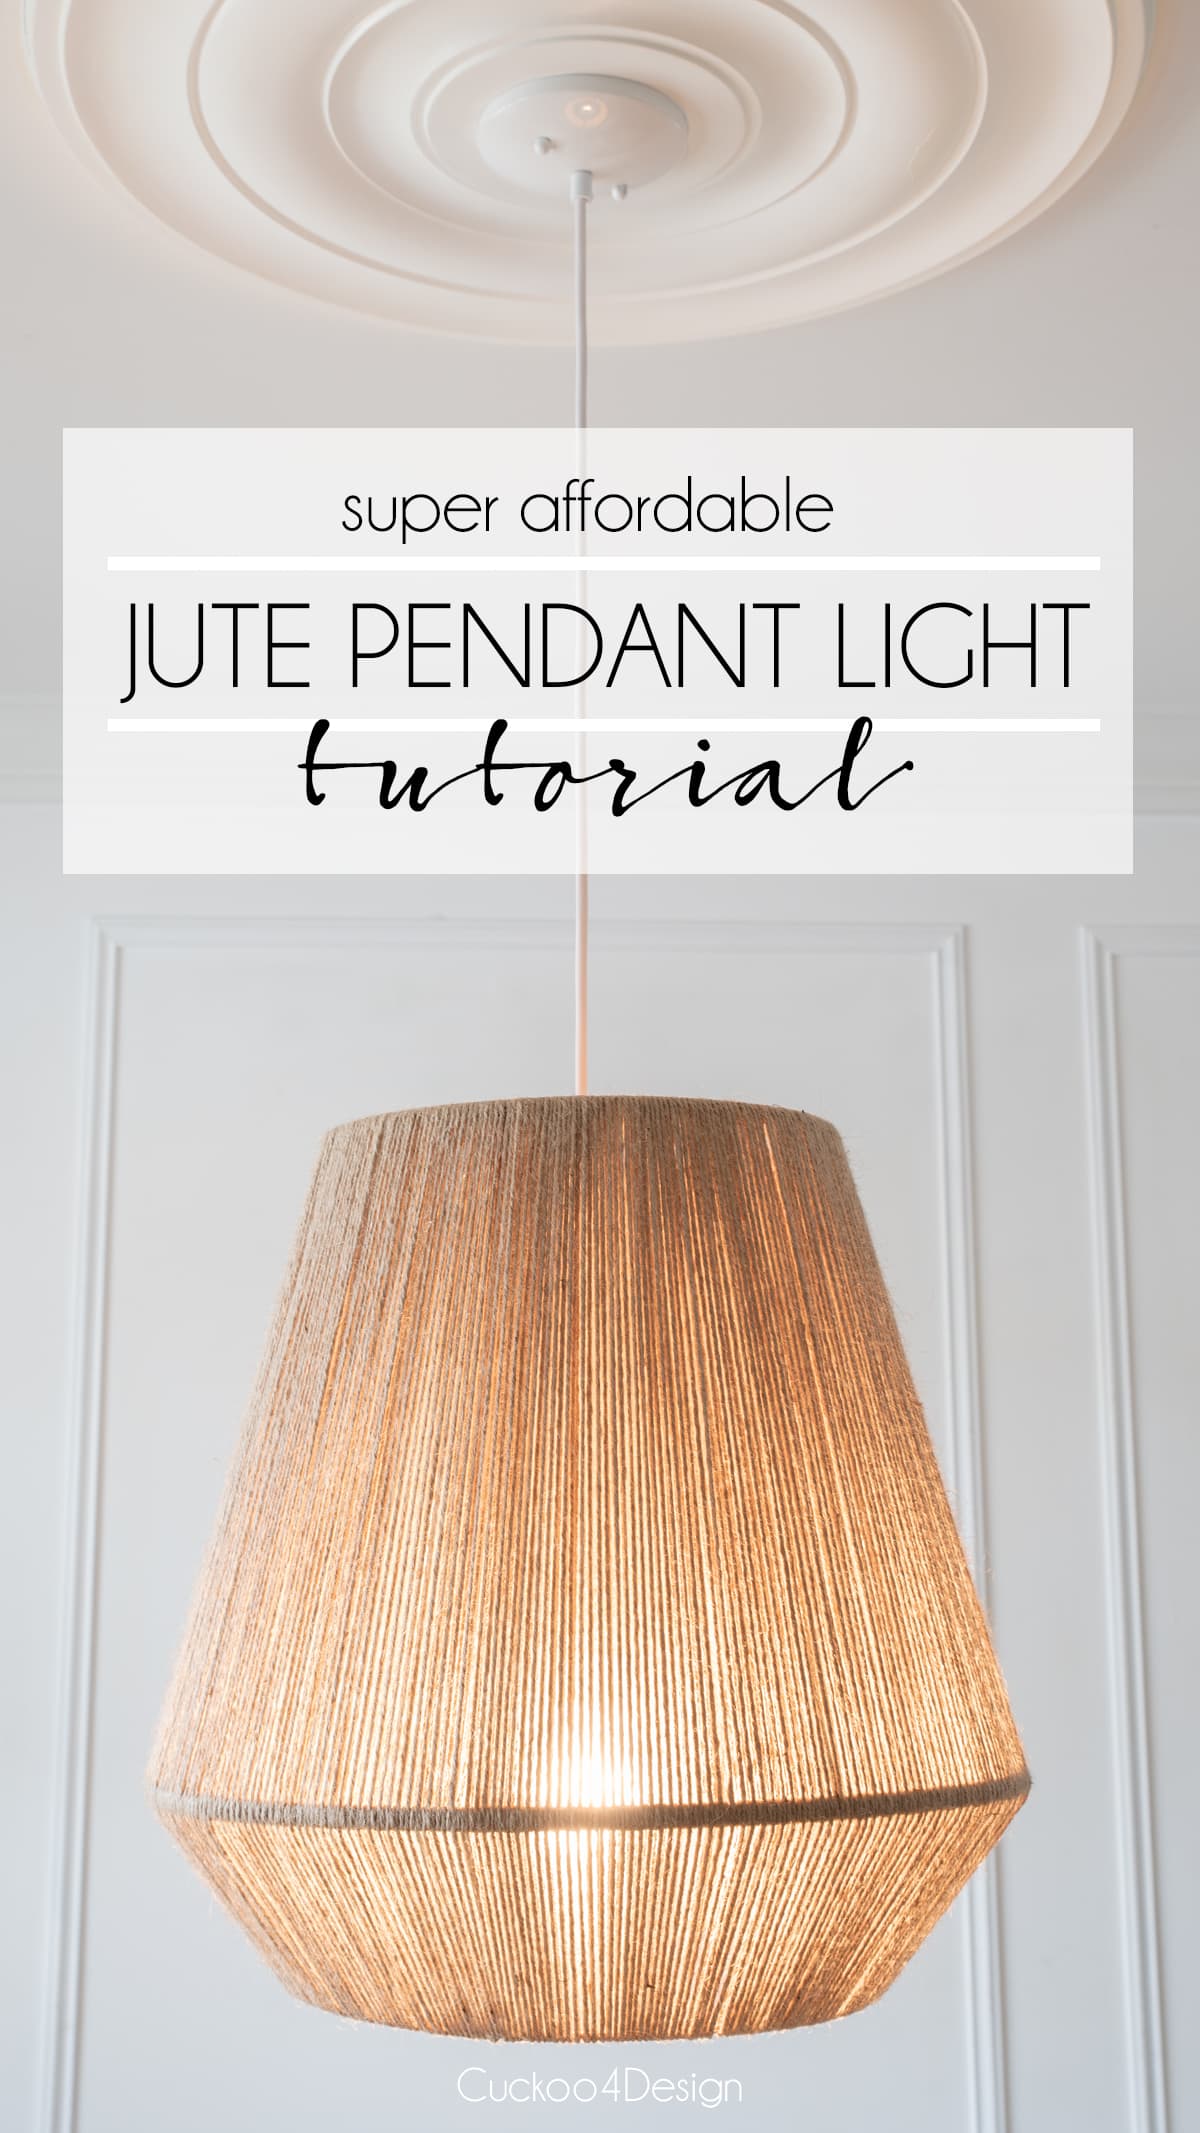
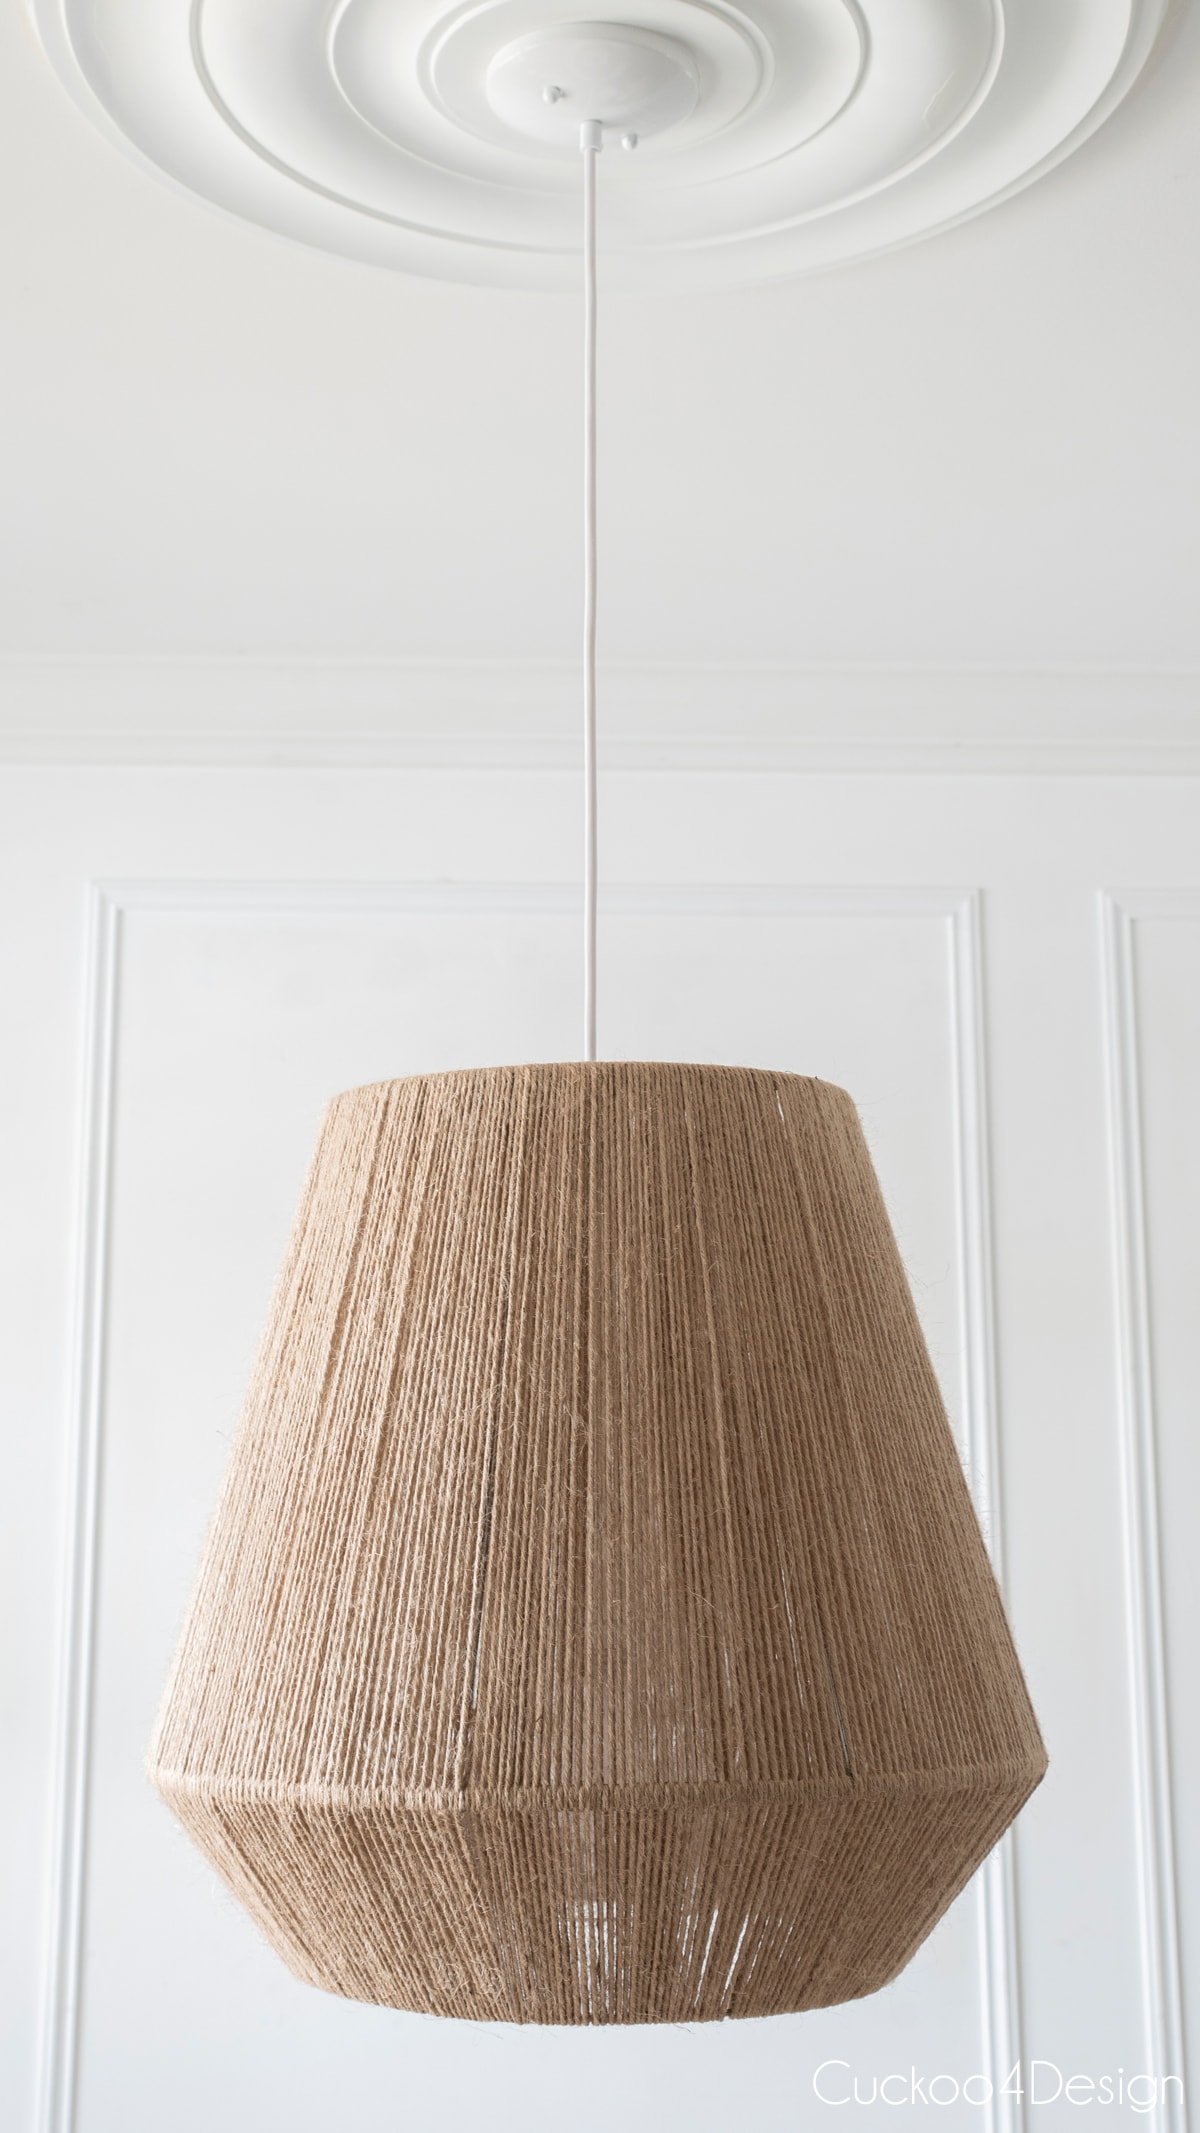
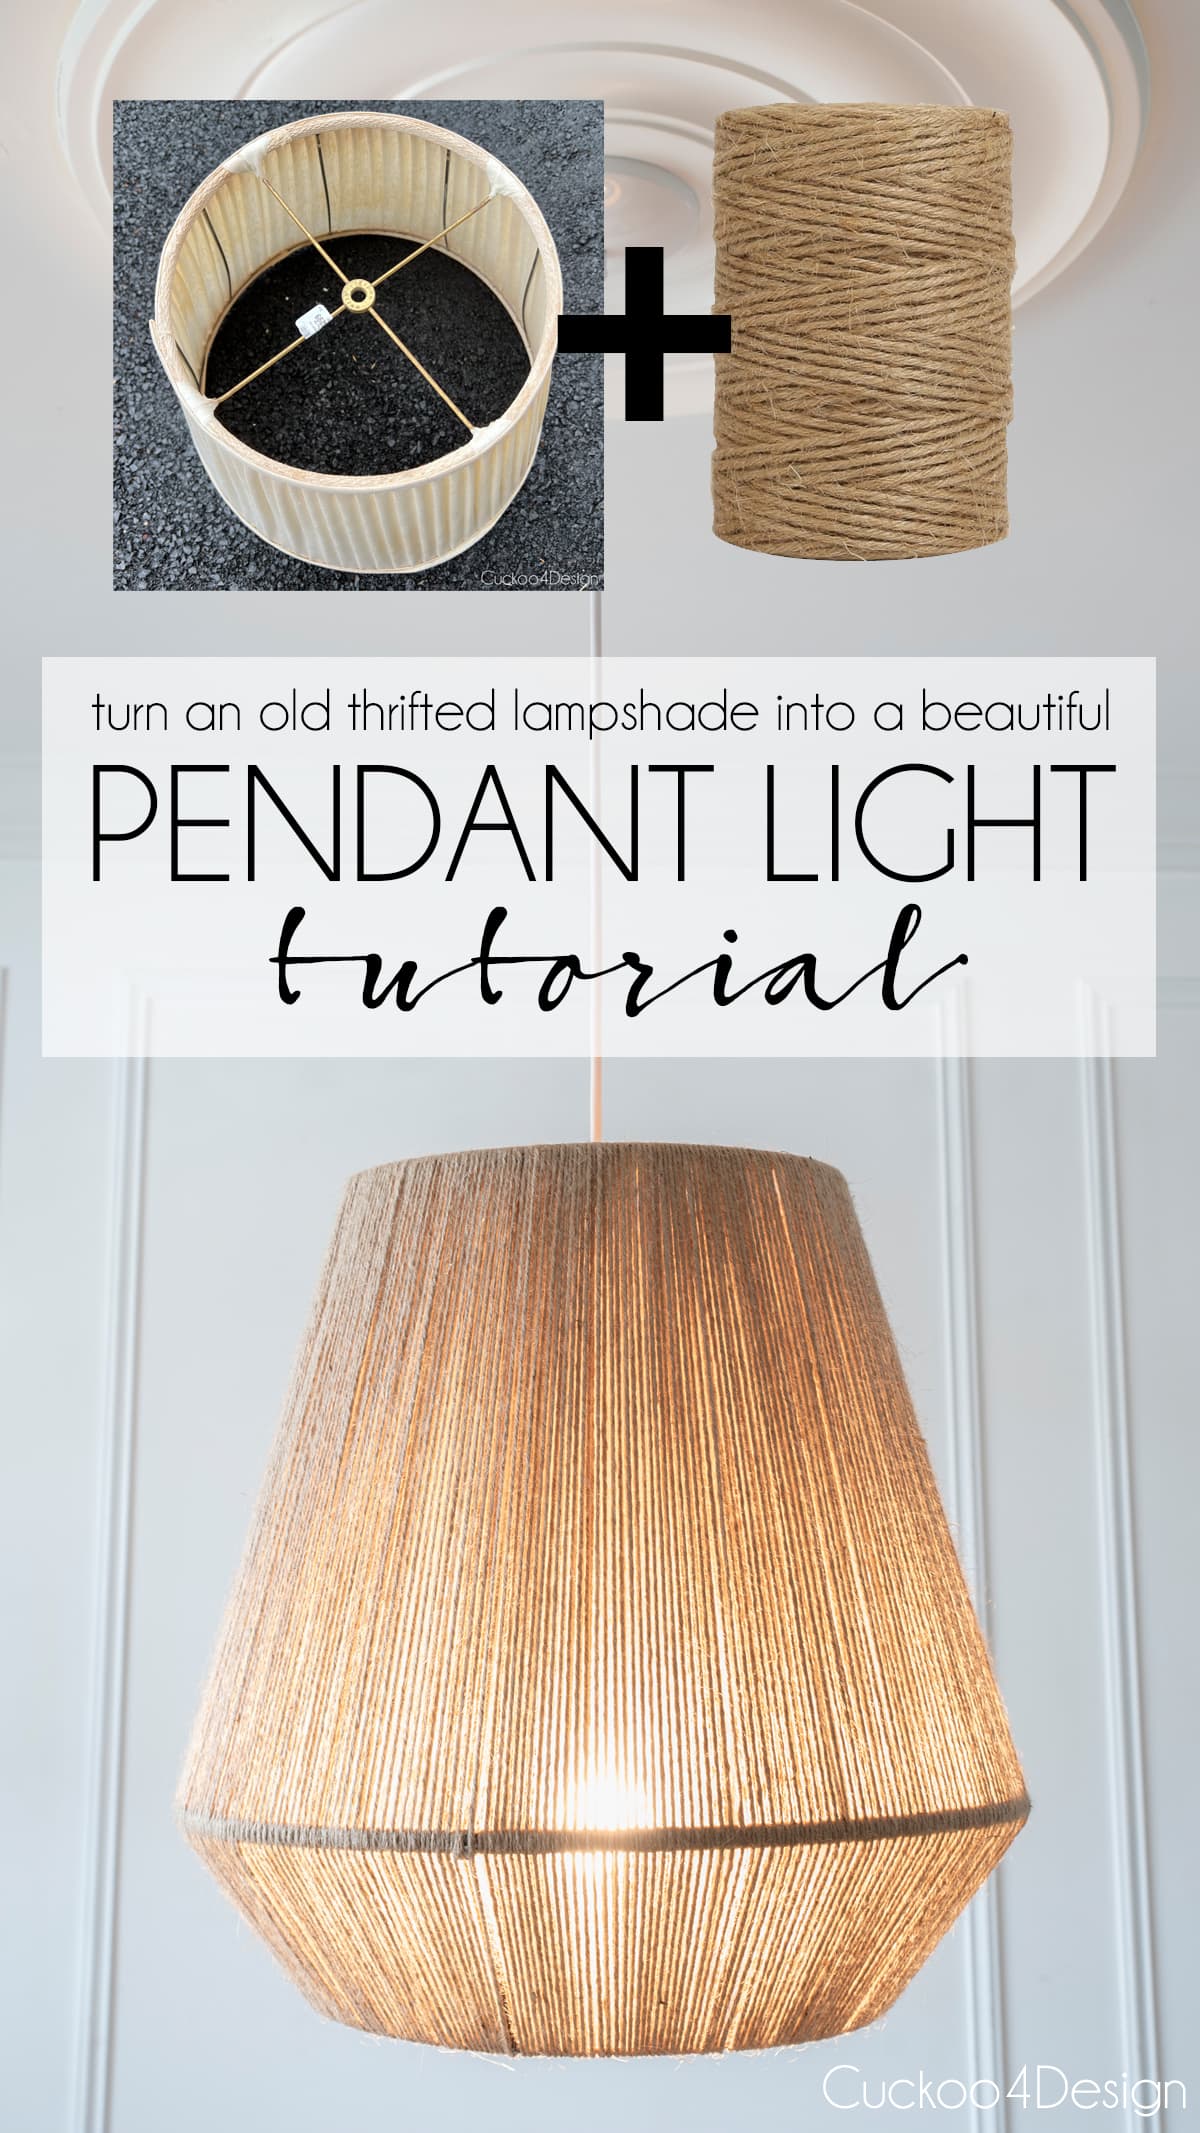
How to make a DIY pendant light with jute yarn
I first stumbled across jute pendant lights at Lulu and Georgia, which were called the Tarek Pendant Light and Walid Pendant Light, and sell for over $300. That’s when I decided to create my own DIY pendant light using thrifted wireframe shades and jute yarn. In this tutorial, I’ll walk you step-by-step, with photos and a video, on how to build your own pendant light for a fraction of the cost.
After doing some more research, I found many other retailers selling these types of geometric pendant light fixtures that consist of wireframes that are hand-wrapped with natural jute fibers or other types of cord. And today I’m sharing my own DIY pendant light tutorial using jute yarn.
DIY pendant light tutorial (How to make a jute pendant light)
This post may contain affiliate links from which I will earn a commission at no extra cost to you. View my full disclosure policy.
I just love the texture, shapes, and overall look of these types of pendant lights and wanted to replicate one at a much more affordable price. You see, we’ve had our dining room urchin chandelier for a long time. It was one of the few splurges I made in our house and I still love it. But… to be honest, I’m kind of sick of getting poked in the forehead (It missed my eyes a couple of times by millimeters). The urchin will go somewhere else in the house where it is out of reach. I just didn’t want to splurge again and since I’m not a newbie when it comes to making my own light fixtures I thought I could definitely come up with my own jute pendant light version!
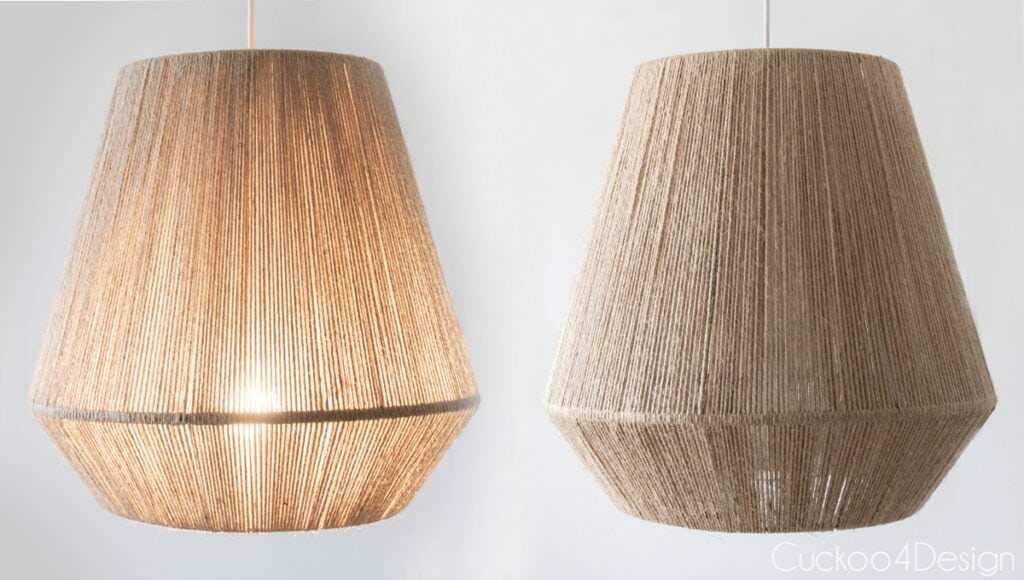
Natural fiber pendant light inspiration pieces

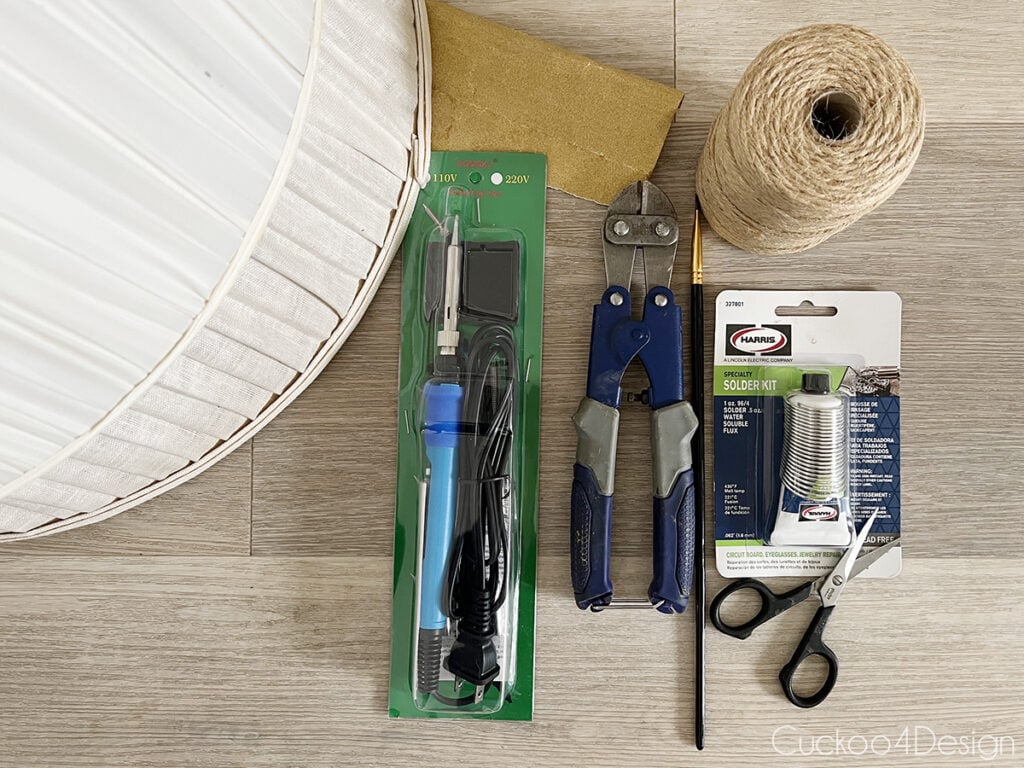
Materials and tools needed for this DIY pendant light
- jute yarn (4 rolls)
- white pendant light kit/lighting kit
- 2 thrifted vintage lampshades that have a cage frame ($2.99 and $4.99), the one I used had an 18″ bottom radius
- soldering iron
- water soluble flux and lead free solder
- finer grit sandpaper
- wire cutters
- small artist brush
- scissors
- small paper clip
- plastic pipe (plumbing section)
- glass pendant dome for bulb socket from the hardware store (optional)
Material notes and tips
- Thrifted cage lampshades are cheaper and easier to wrap than metal baskets or buying used and new on Etsy (sometimes $50+ per shade even the used ones).
- If you don’t have a spare cage to cut apart, you’ll need metal rods for soldering, which are available at most home improvement stores.
- I had some materials on hand. The total cost came to $83.51, including soldering supplies. Borrowing a soldering iron can lower costs.
- I ended up also using a 12-inch metal macrame hoop that I had leftover because I didn’t like the size of one of the lampshades that I had thrifted. (more about that later)
Project-specific FAQ
If you’re new to soldering, don’t worry! Here are a few quick answers to common beginner questions before you get started.
What is soldering?
Soldering is a type of joining process used to form a connection between different types of metals by melting solder over them. Solder is a metal intermixture usually made of tin and lead which is melted using a hot iron that is heated to around 600°- 650°F (316°- 343°C) for lead-based solder and 650°- 700°F (343°- 371°C) for lead-free solder.
I used 430-Degree Fahrenheit melt temperature for the lead-free solder I bought.
Why do you need flux for soldering?
You need flux to help prepare the metal surfaces for soldering. Flux helps clean any oxides and impurities.
Flux also improves the wettability of the metals that you are trying to solder. For example, when you place water on a glass plate, it forms water beads, demonstrating poor wettability. If you add some soap to the water, the water flows nicely. Flux works for the solder the same way as soap for water.
Video tutorial
Before we get to the step-by-step instructions, I am sharing my video on how to make this pendant with you which I definitely recommend you watch. If you are on a phone or iPad hold it horizontally for better viewing and if it doesn’t load you can also watch it on my YouTube channel instead.
Step-by-step instructions for making this DIY pendant light
Step 1: Decide if you want to solder or not
I had wanted to try soldering for a while, and this project was perfect for it. It may sound intimidating at first, but it’s similar to melting candle wax to bond two pieces together.
If you want to skip soldering, you can use two lampshade cages with the same bottom radius and attach them without soldering (as pictured below). I couldn’t do this because my cages were slightly different, so soldering was necessary.
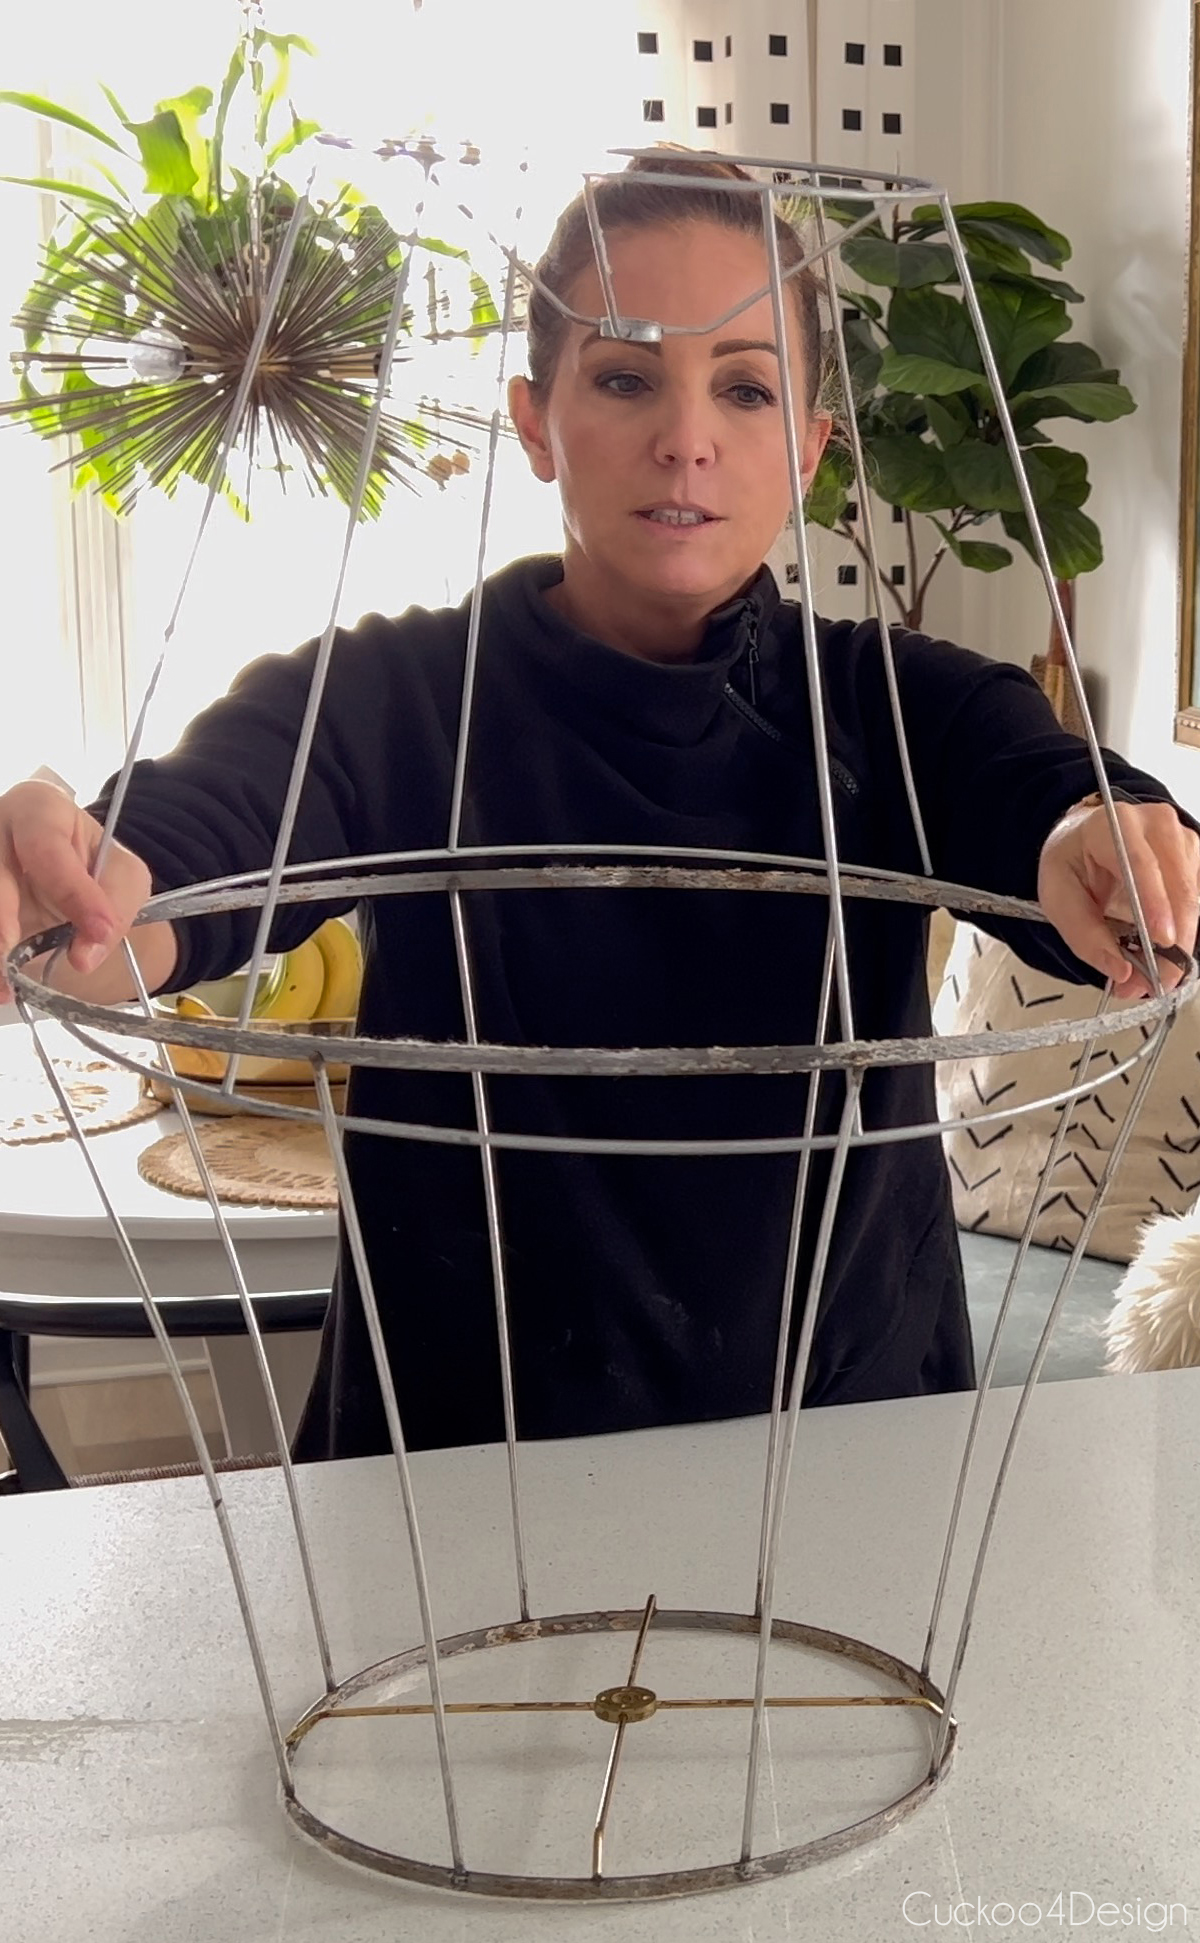
Step 2: Prepare the Lampshade Frames and other metal parts
Start out by removing the fabric from the lampshade frames and removing any remaining glue. You may need to use fine-grit sandpaper to remove it all. (images 1 through 3)
Cut rods from the spare metal frame (mine are about 5 inches long) for soldering. (images 4 and 5)
If you are using a macrame hoop (like I did), you have to sand off the gold layer with fine-grit sandpaper. (image 6)

Step 3: Solder the metal parts together
Now that all your metal parts are prepped, it is time to solder them together.
Start out by brushing flux on the spots where the rods will be attached. (image 1)
Solder 4 of the rods onto the macrame hoop (or lampshade hoop) from both sides by melting and dripping the solder onto the connection. Keep brushing on flux as needed before soldering as you go. (images 2 and 3)
Time to attach the macrame ring with rods to the top of the lampshade cage frame using duct tape to hold it in place while soldering. (images 4 through 6)
Tip: Use a broad tip on your soldering iron.

Step 4: Wrap with Jute Yarn
Place the soldered pendant shade and the jute yarn on a solid, even surface. (image 1)
Attach the yarn to the center ring, and you can untie it later. (image 2)
Start wrapping the yarn around the pendant frame, but not too tightly, to make sure the frame doesn’t collapse. (image 3)
When you get to a part where the metal rods are connected, I just used a small bundle of yarn cut off from the larger bundle so it would fit through the narrow openings (image 4)

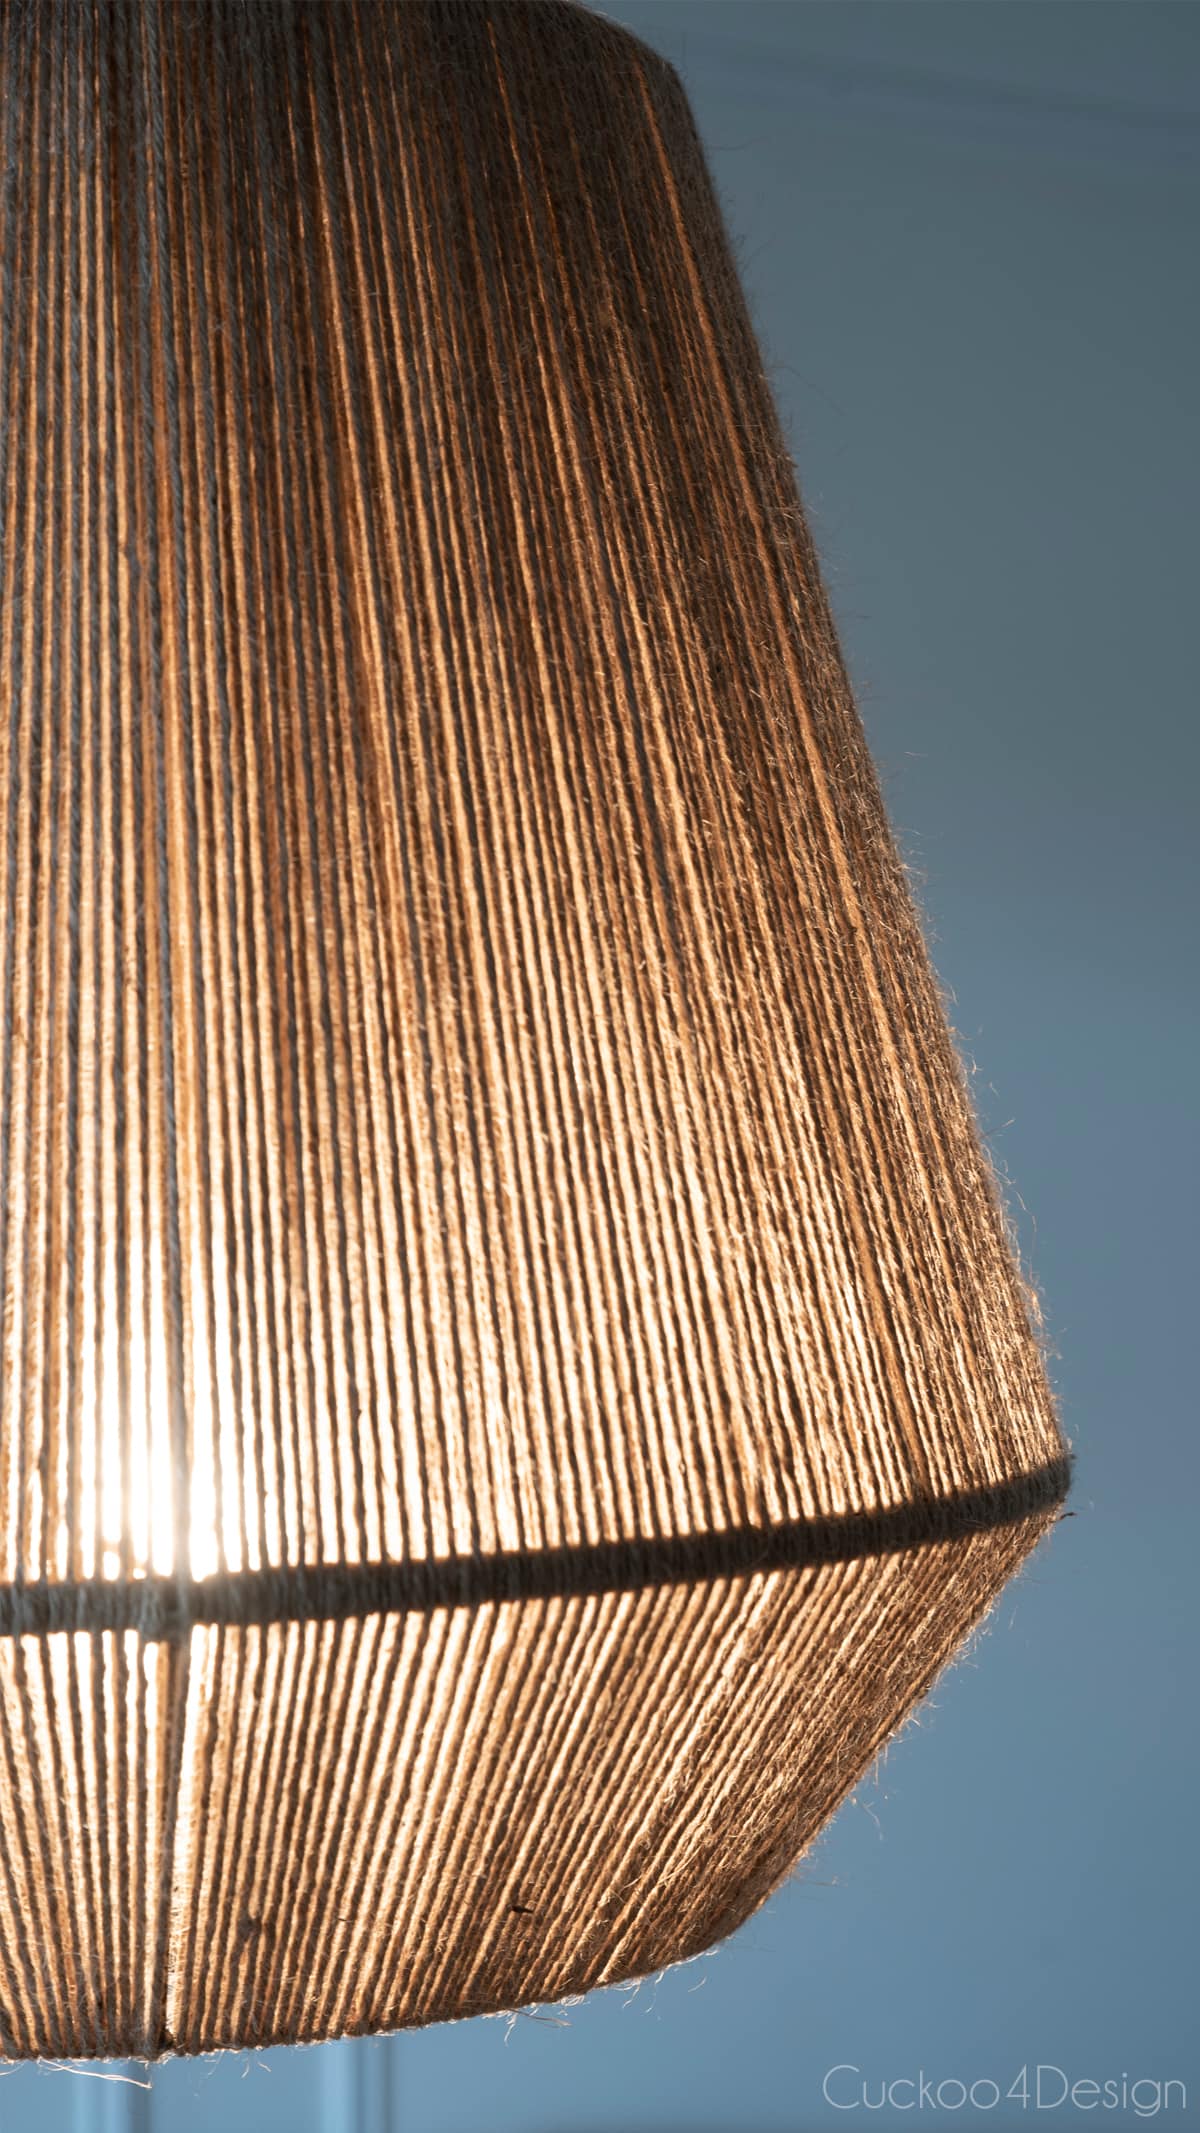
If you run out of yarn (which you will), knot the new yarn at the middle ring (image 6), not the center of the pendant, to hide the knots. (image 5) The knots would be visible later when the light is on if you don’t hide them at the middle ring.
When you wrapped the entire shade with jute yarn, untie the yarn from the center ring piece and tie it to the other piece of yarn for a nice finish. Also, hide that finishing knot the same way you hid the other knots when you ran out of yarn. (images 7-8)
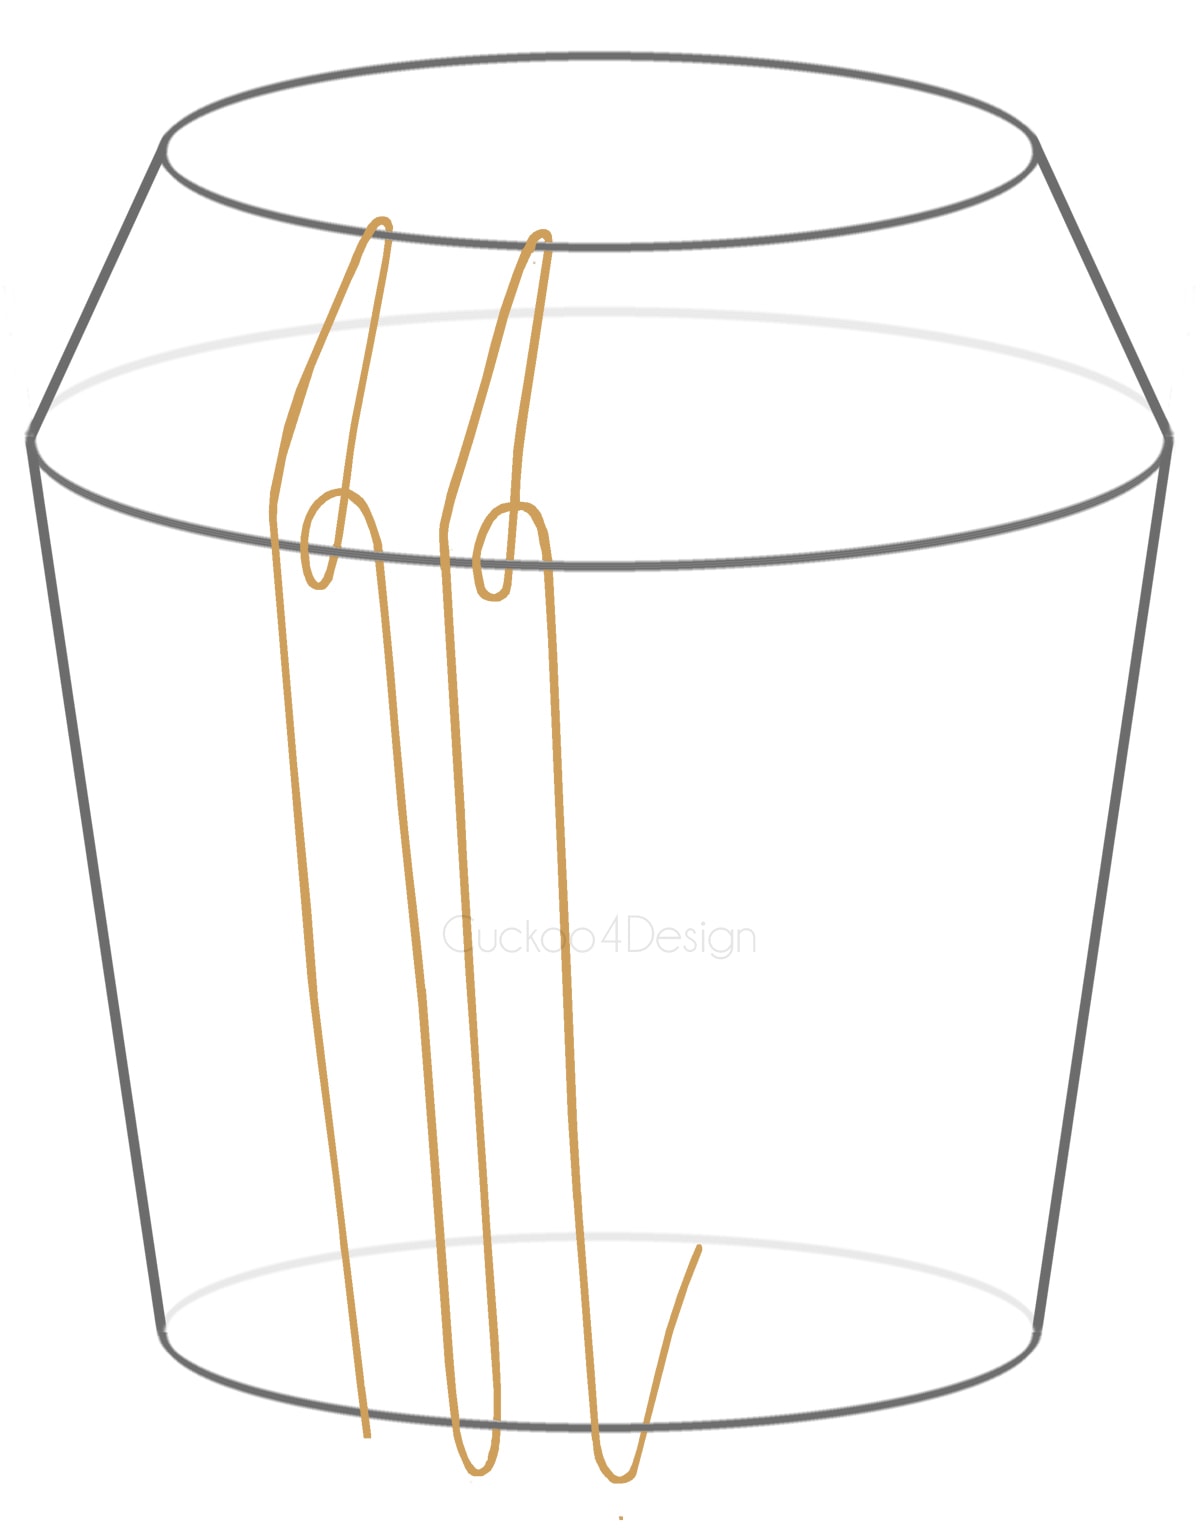
Below you can see the pattern I used for wrapping the cord around the metal frame.
TIP: You could also spray paint the lampshade frames with a color that coordinates with the jute yarn color. Or use different colored yarn and embroidery floss. Just express your own creativity with so many possibilities.
Step 5: Assemble the Pendant Light
Cut the plastic rod with a handsaw. I cut mine to 7 inches but it depends on what size of lampshade you are using and how far you want the bulb to hang down.
I bought a cheap glass pendant cover for safety reasons because I want to make sure that the hot lightbulb never has a chance to touch the yarn should it ever move.
Remove the screw at the top of the metal lid so you can thread the plastic rod onto the electrical cord.
Now thread the electric cord through the lampshade hole so the entire pendant rests on the plastic rod. Then reassemble the cord and screw through the top metal part the way it was when you bought the pendant light kit.

Step 6: Hang Your Pendant Light
Your DIY jute pendant light is ready to hang and enjoy!

I have a bit of experience with hanging new lighting and feel comfortable handling those types of electrical components. If you are new to it you might want to hire an electrician. It is honestly pretty simple to do though, just take the necessary safety precautions.
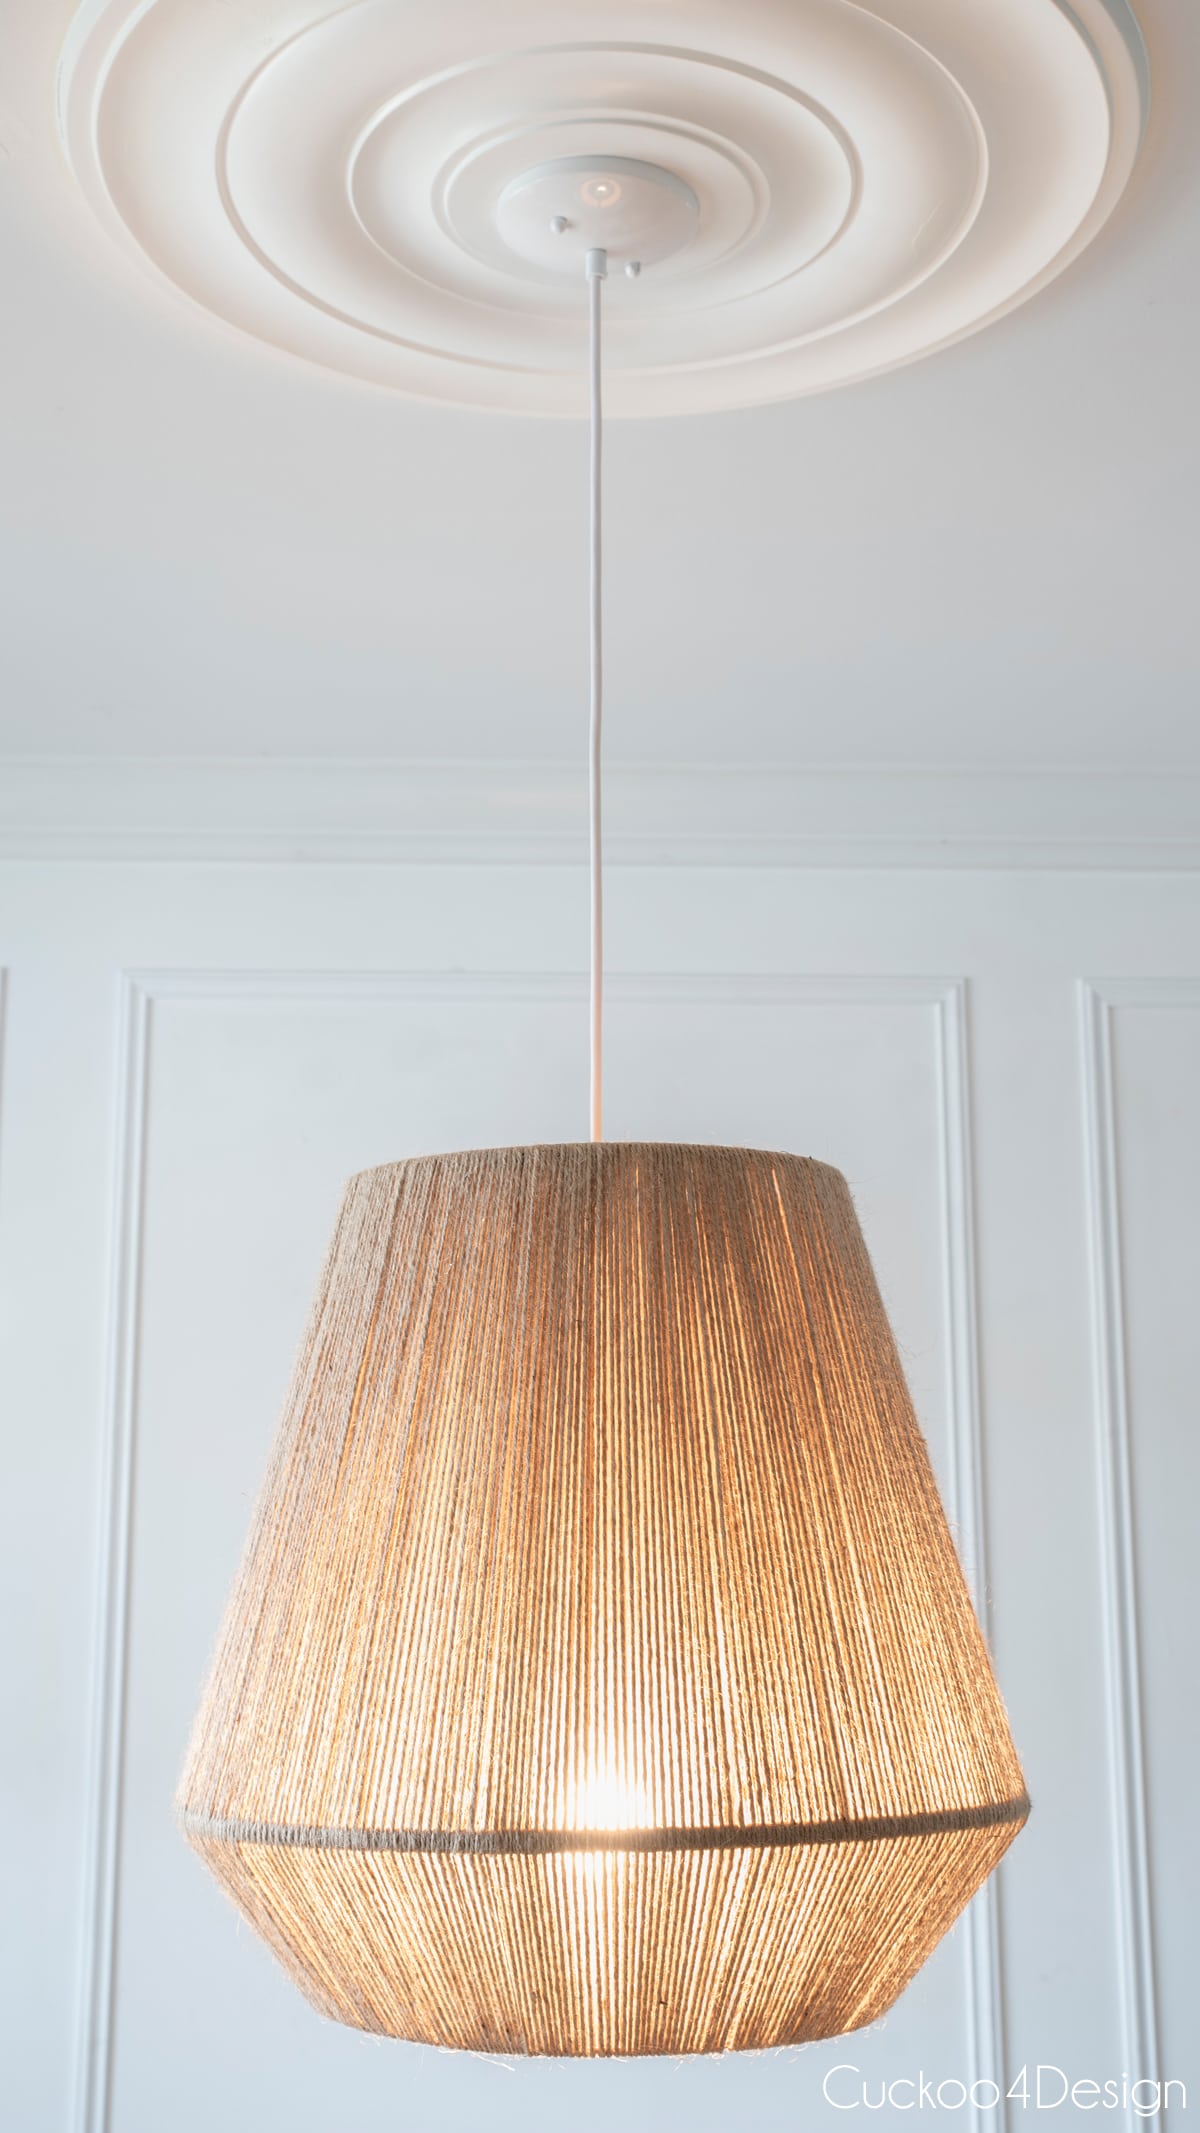
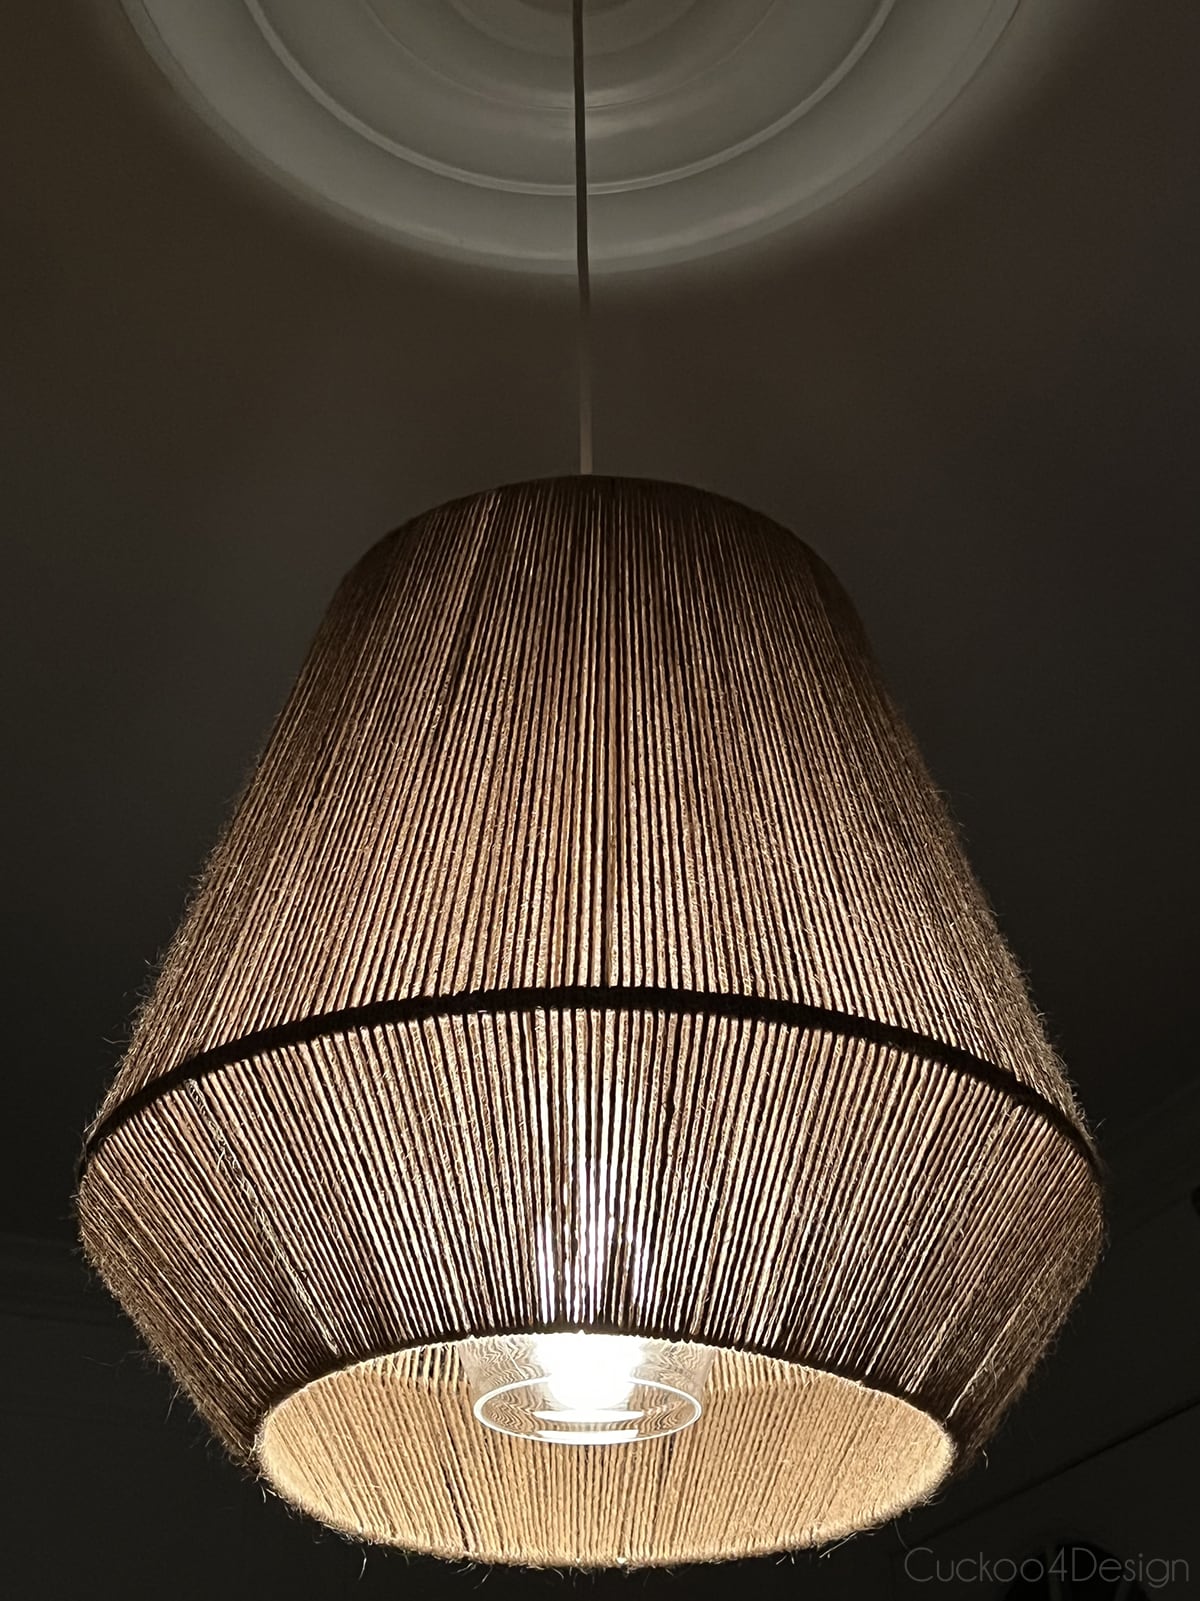
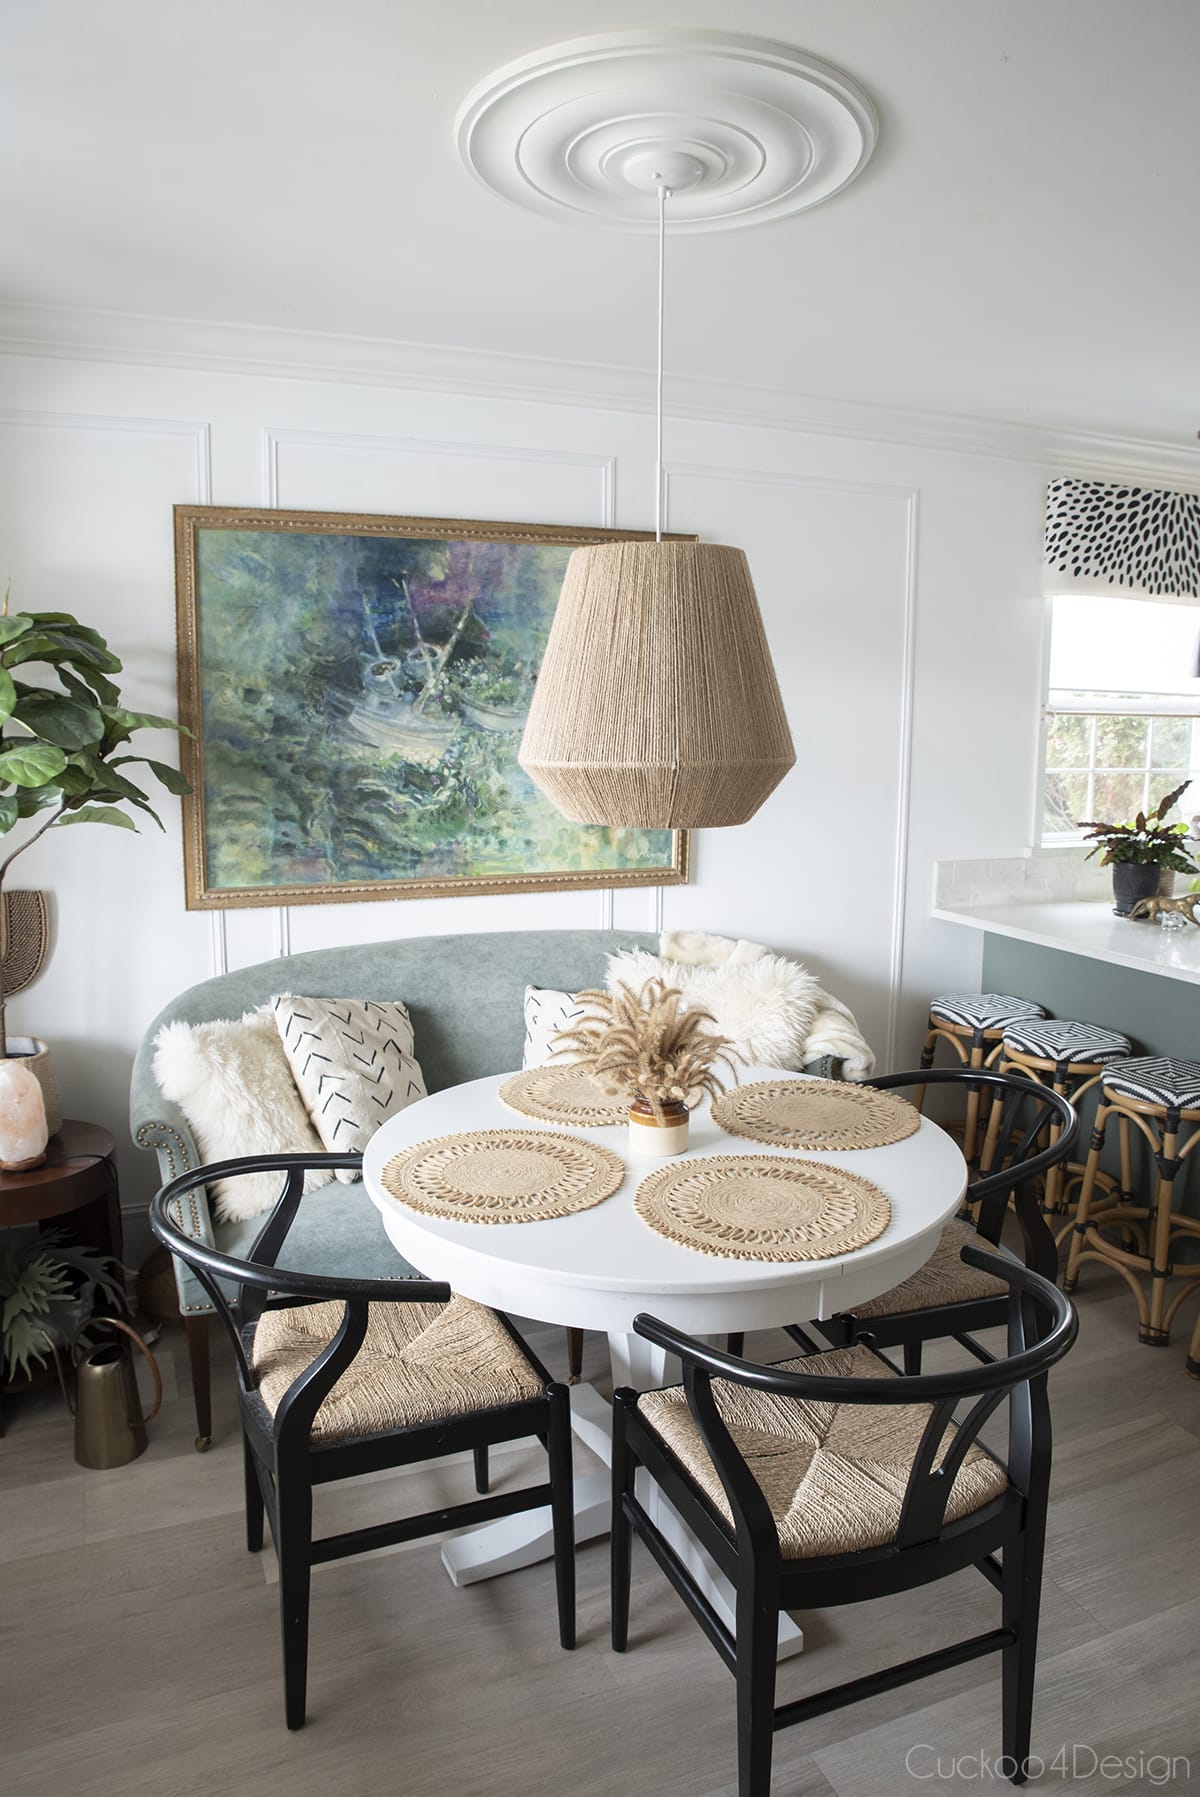
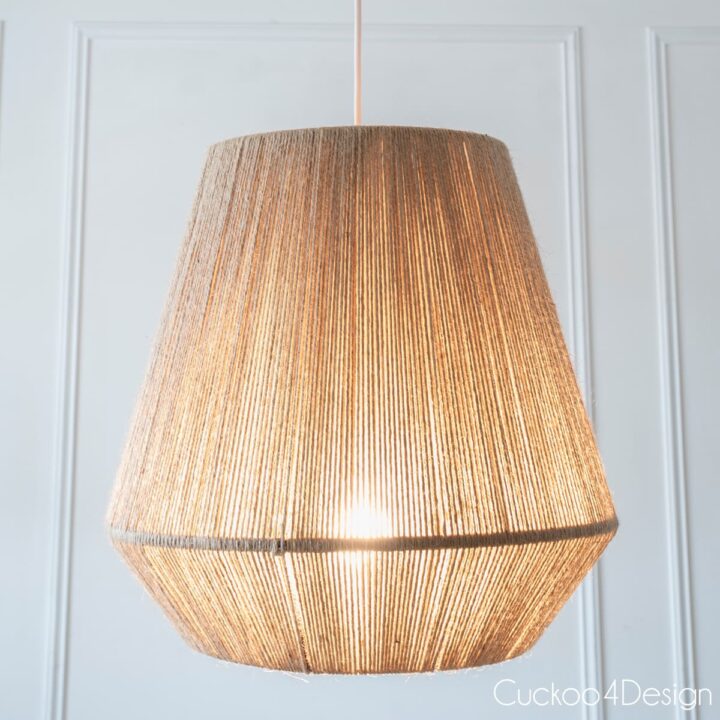
Finished jute pendant light hanging in our dining room
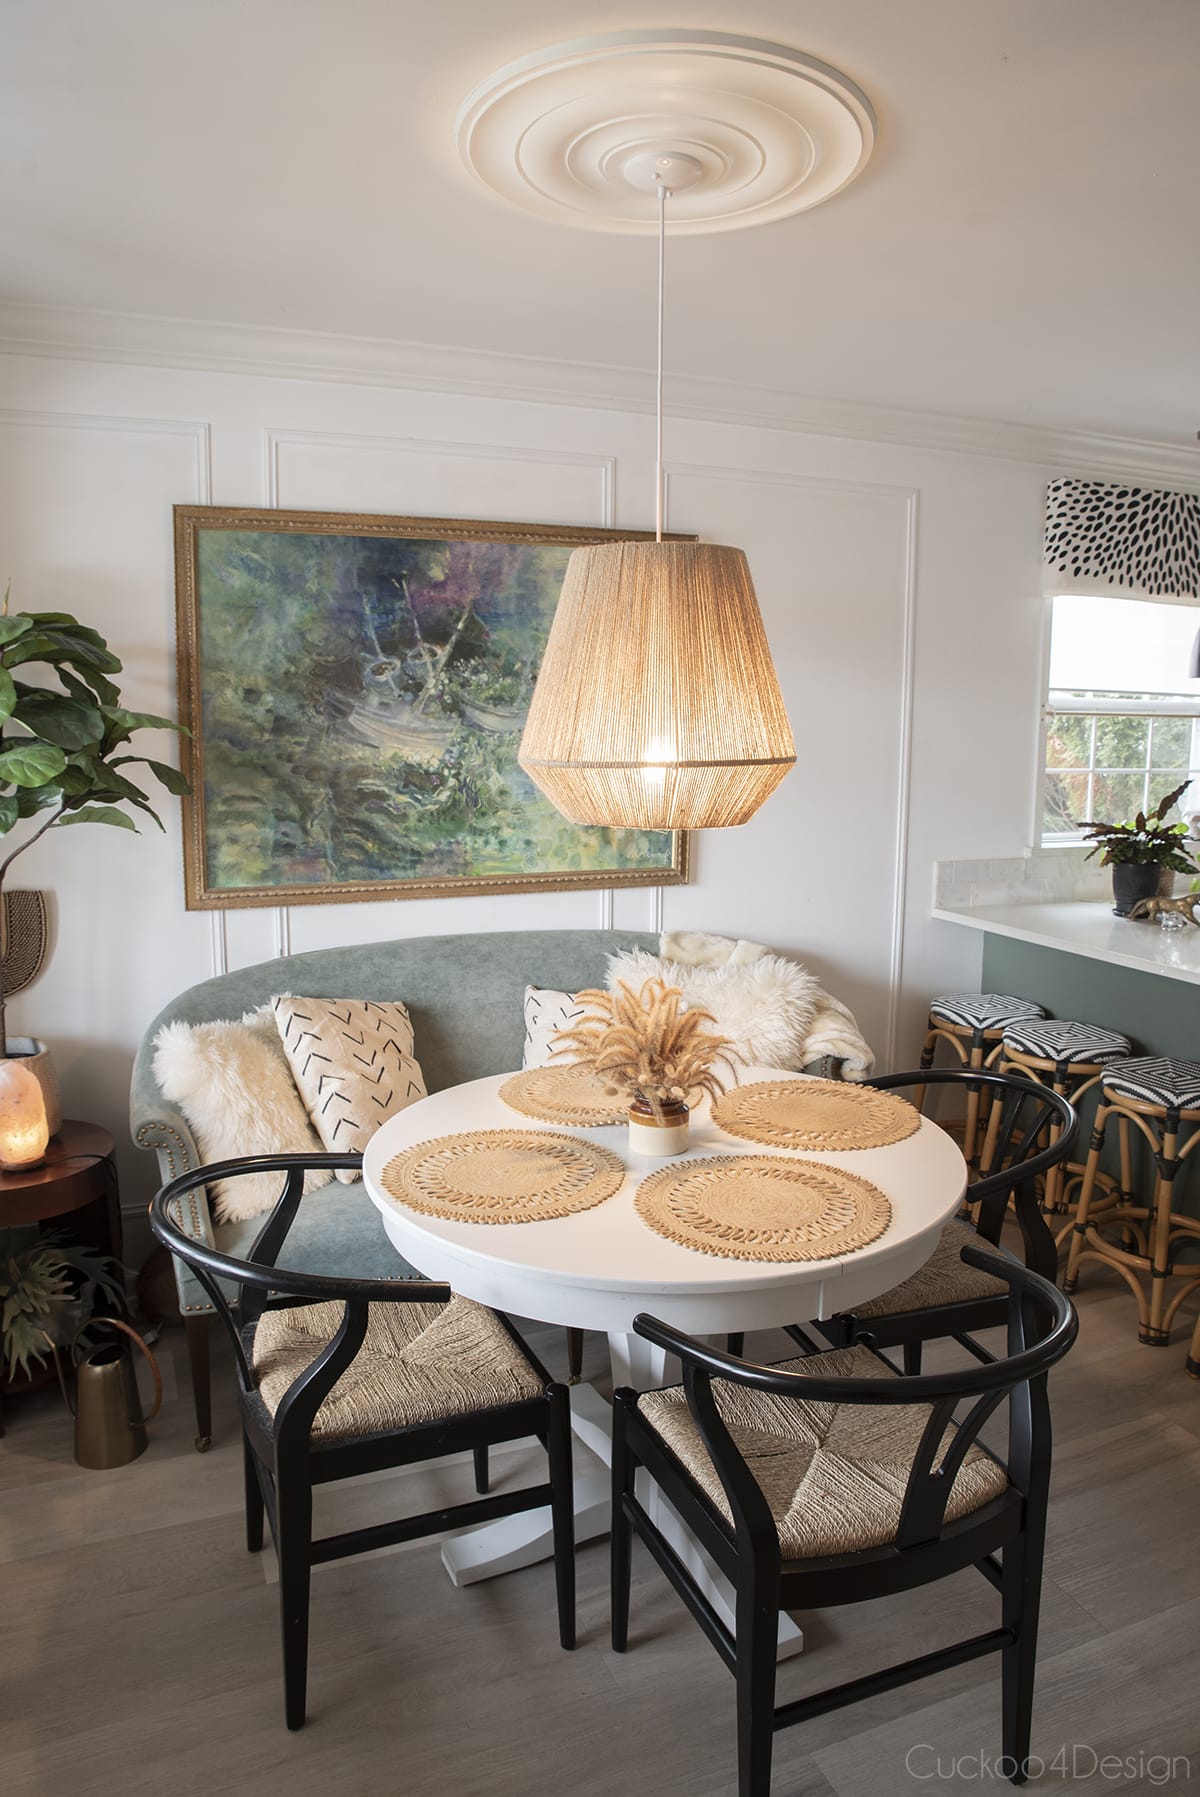
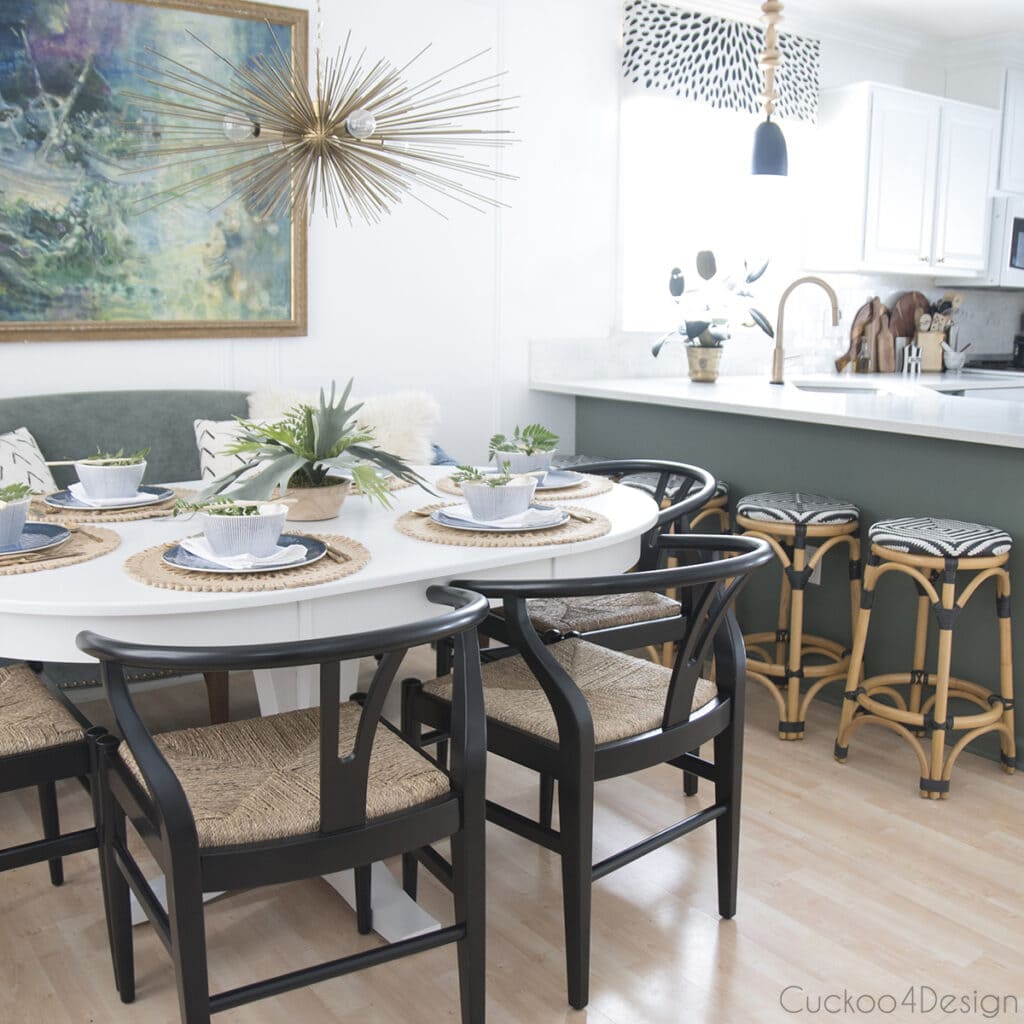
The new pendant lighting over our dining table makes my heart happy. It catches my eye more than the old brass urchin, which kind of disappeared in the painting. Below is a photo with the urchin and our dining room table pulled out into the larger oval shape.
The urchin is now in my daughter’s room. I have to retake some photos of her room, too. She really wanted a new hanging light.
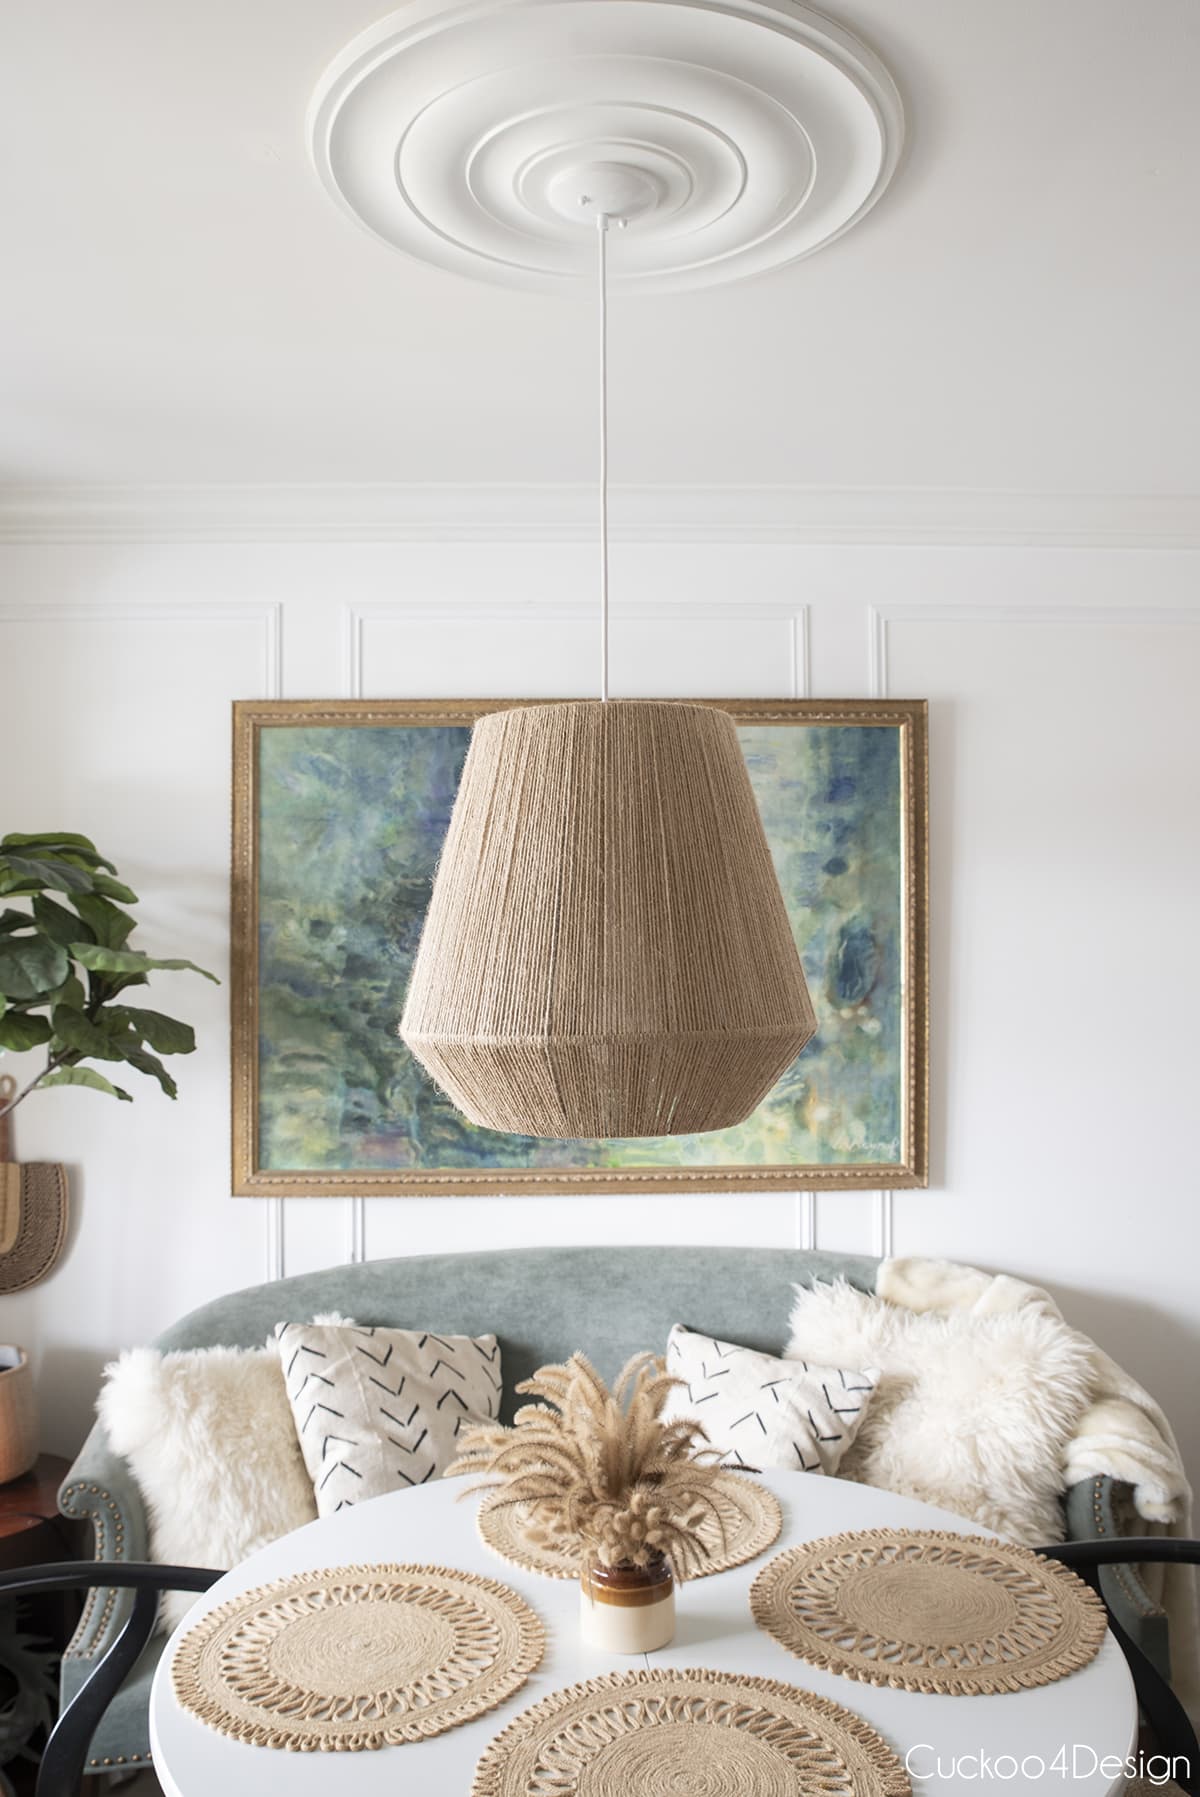
This new dining room pendant light fixture is similar in color to the gold tones of the urchin. I feel that the natural material looks much better with the rest of our decor though.
I used a lot of the leftover jute yarn to make seashell tassels. Love how they turned out.
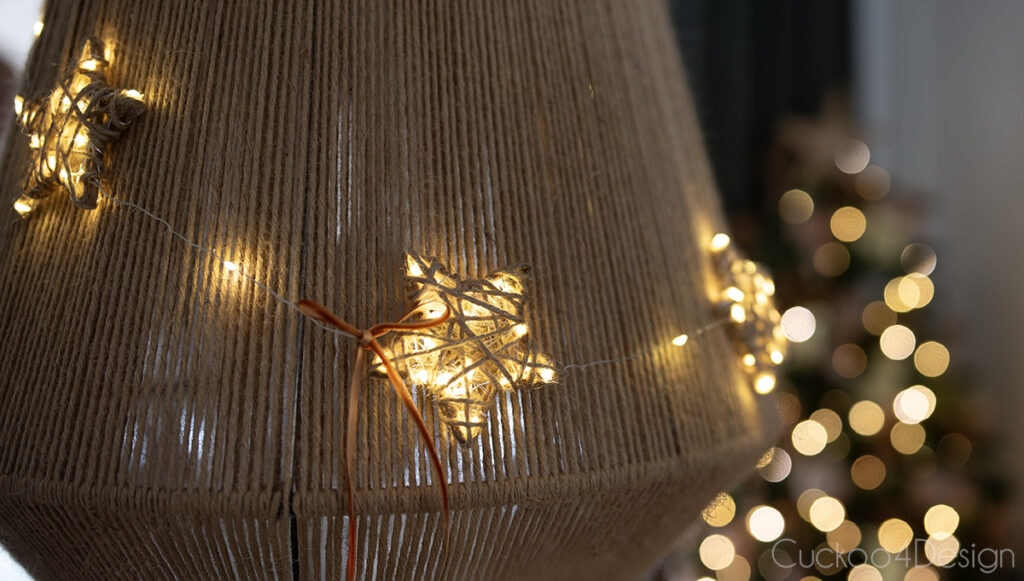
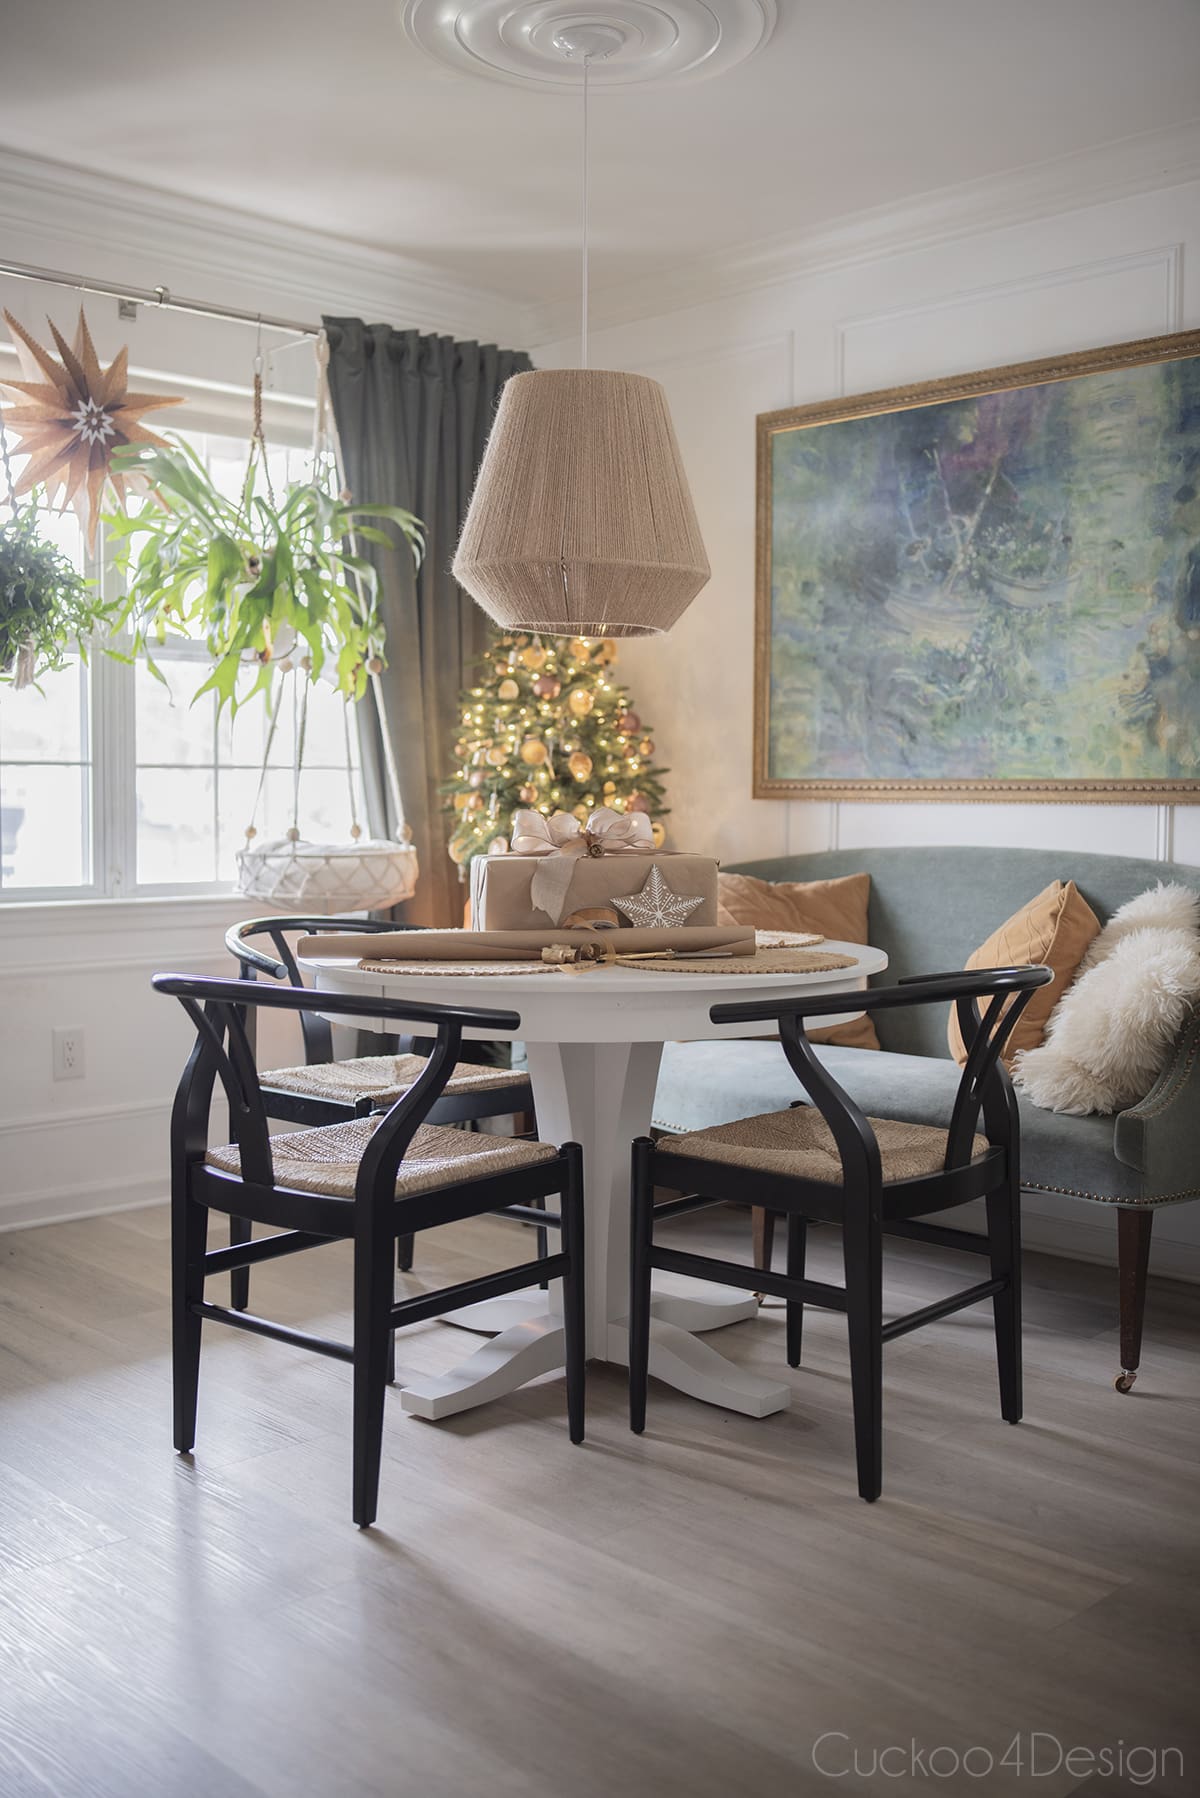
And I also used more leftover jute yarn to make DIY light-up yarn star ornaments with fairy lights, which I draped over the pendant light for Christmas. Such a pretty combo.
Don’t you think the height looks just right this way?
UPDATE: I recently added different chairs to the dining room and wrote a tutorial about how to repair a rush seat. I love how they look with the pendant light.


FAQ about general pendant light sizing and hanging
Now that your DIY pendant light is ready to hang, you might have a few questions about what size to make or how high to hang it. Here are some quick answers to the most common pendant lighting questions I get!
There aren’t really any rules to this question, just recommended guidelines. We are all different! If you have a very tall person in your family, then you might need to hang your pendant or chandelier higher.
The general recommendation for hanging a chandelier over a dining room table is 30-36 inches above the table’s surface if you have an 8-foot high ceiling.
However, I find that a bit too high. My last chandelier and this pendant are hanging 22 inches above the table, which I think looks perfect.
This is preferential, like most things in home decor. There are some guidelines, though, for people to consider should they have difficulties deciding. The size of a dining room light fixture should be about 1/2 – 2/3 the width of the table. Or the diameter of the fixture should be about one foot less than the width of the dining room table.
I always just eyeball it and don’t measure.
All these pendant light height guidelines depend on both your ceiling height and your own height. For a kitchen sink area, I like a single pendant light that’s around 10 to 14 inches wide. To determine how low to hang it, use the tallest person in your household as a guide. The bottom of the pendant should hang just above their head. Hanging it too low can feel cramped, while too high loses that cozy, focused light.
When choosing the size, consider the width of your sink as well. A good rule of thumb is for your pendant light to be about one-third to one-half the width of the sink, and to hang it roughly 3 feet above the countertop.
More of my DIY lighting blog posts
- How to make a fluted lampshade with a few office supplies
- How to make a DIY crystal lamp shade from a spout cover
- renter-friendly chandelier makeover tutorial
- Stylish DIY macrame chandelier made from planter basket
- DIY flush mount macrame light fixture
- Ugly thrift store find lamp makeover
- DIY wood bead pendant light
Behind the scenes
I can’t end this post without mentioning that my cat Willy was obsessed with this jute yarn. He actually climbed into my first, nearly finished pendant and made it crash to the floor. So I had to start over! My cats keep me on my toes with every DIY project.
Willy loves jute yarn! Just look at his content face after successfully taking my project apart.

When I write a long blog post like this, I always wonder if I forgot to write about any necessary detail. So let me know if you have any questions so I can update the blog post.
If you are wondering what project I have lined up next. Well, I want to redo our stairs again. I peeled off the stair riser decals that I added years ago, which damaged the paint. After that, I wrote a tutorial about how to install carpet runner on stairs. I love how it turned out.
Tschüß,

How to make a DIY pendant light with jute yarn
Learn how to make a gorgeous DIY pendant light using thrifted frames and jute yarn. A step-by-step tutorial with photos and video to guide you.
Materials
- 4 rolls of jute yarn
- white pendant light kit
- 2 thrifted vintage lampshades that have a cage frame ($2.99 and $4.99), the one I used had an 18″ bottom radius (an additional macrame hoop might be needed)
- finer grit sandpaper
- small artist brush
- small paper clip
- water-soluble flux and lead-free solder
- plastic pipe (plumbing section)
- glass pendant dome for bulb socket (optional)
Tools
- screwdriver
- scissors
- soldering iron
- wire cutter
Instructions
- Decide if you want to solder or not
I had wanted to try soldering for a while, and this project was perfect for it. It may sound intimidating at first, but it’s similar to melting candle wax to bond two pieces together.
If you want to skip soldering, you can use two lampshade cages with the same bottom radius and attach them without soldering (as pictured below). I couldn’t do this because my cages were slightly different, so soldering was necessary.
In this photo, you can see the glue on the metal that needs sanding off before you can solder. - Prepare the Lampshade Frames and other metal parts
Start out by removing the fabric from the lampshade frames and removing any remaining glue. You may need to use fine-grit sandpaper to remove it all. (images 1 through 3)
Cut rods from the spare metal frame (mine are about 5 inches long) for soldering. (images 4 and 5)
If you are using a macrame hoop (like I did), you have to sand off the gold layer with fine-grit sandpaper. (image 6)
- Solder the metal parts together
Now that all your metal parts are prepped, it is time to solder them together.
Start out by brushing flux on the spots where the rods will be attached. (image 1)
Solder 4 of the rods onto the macrame hoop (or lampshade hoop) from both sides by melting and dripping the solder onto the connection. Keep brushing on flux as needed before soldering as you go. (images 2 and 3)
Time to attach the macrame ring with rods to the top of the lampshade cage frame using duct tape to hold it in place while soldering. (images 4 through 6)
Tip: Use a broad tip on your soldering iron.
- Wrap with Jute Yarn
Place the soldered pendant shade and the jute yarn on a solid, even surface. (image 1)
Attach the yarn to the center ring, and you can untie it later. (image 2)
Start wrapping the yarn around the pendant frame, but not too tightly, to make sure the frame doesn’t collapse. (image 3)
When you get to a part where the metal rods are connected, I just used a small bundle of yarn cut off from the larger bundle so it would fit through the narrow openings (image 4)
If you run out of yarn (which you will), knot the new yarn at the middle ring (image 6), not the center of the pendant, to hide the knots. (image 5) The knots would be visible later when the light is on if you don't hide them at the middle ring.
When you wrapped the entire shade with jute yarn, untie the yarn from the center ring piece and tie it to the other piece of yarn for a nice finish. Also, hide that finishing knot the same way you hid the other knots when you ran out of yarn. (images 7-8)
Below you can see the pattern I used for wrapping the cord around the metal frame.
- Assemble the Pendant Light
Cut the plastic rod with a handsaw. I cut mine to 7 inches but it depends on what size of lampshade you are using and how far you want the bulb to hang down.
I bought a cheap glass pendant cover for safety reasons because I want to make sure that the hot lightbulb never has a chance to touch the yarn should it ever move.
Remove the screw at the top of the metal lid so you can thread the plastic rod onto the electrical cord.
Now thread the electric cord through the lampshade hole so the entire pendant rests on the plastic rod. Then reassemble the cord and screw through the top metal part the way it was when you bought the pendant light kit.
- Hang Your Pendant Light
Your DIY jute pendant light is ready to hang and enjoy!
I have a bit of experience with hanging new lighting and feel comfortable handling those types of electrical components. If you are new to it you might want to hire an electrician. It is honestly pretty simple to do though, just take the necessary safety precautions.
You can skip the soldering altogether if you find two lampshade cages with the same bottom radius that you can just add together. Or just use one thrifted vintage lampshade. This way no soldering would be required and the project would be super easy. If you decide to do that then skip the soldering steps and move right to the jute yarn wrapping mentioned in step 5.
Notes
- you can skip the soldering part and just use a thrifted old lampshade to make this DIY pendant light even easier and more affordable.
- You could also spray paint the lampshade frames with a color that coordinates with the jute yarn color. Or use different colored yarn and embroidery floss. Just express your own creativity with so many possibilities.
- make sure to turn off the power on the main breaker box when hanging any light or hire a professional to do the job for you
- the price of $33 is for thifted lampshade and jute yarn, and around $83.51 if you decide to solder
- the general recommendation to hanging a chandelier over a dining room table is 30-36 inches above the table's surface if you have an 8-foot high ceiling. However, I find that a bit too high, and my last chandelier and this pendant are hanging 22 inches above the table which I think looks perfect.
Great idea and looks good too!
Thanks so much Sarah!
You are a genius. The end.
I will have to Jarrid that haha.
That is VERY cool. Yours in fact looks like a neater job than the retail examples. Good skillz, you.
Thanks so much! The first one wasn’t as neat, Maybe that’s why Willy destroyed it 😉
You seriously have the best freakin’ tutorials! I don’t know how you do it, but i love it. 🙂
This light is sooo cute! I love it so much! I am wanting to do some home projects when the kids go back to school and I would love to recreate this. I am planning on doing some kitchen cabinet refinishing this month so maybe after this. Thanks so much for sharing!!!
This is the most stunning DIY light tutorial I’ve ever seen! Thanks so much for sharing this detailed tutorial. I love your technique and see how it could also translate to baskets, bowls and other decor.