

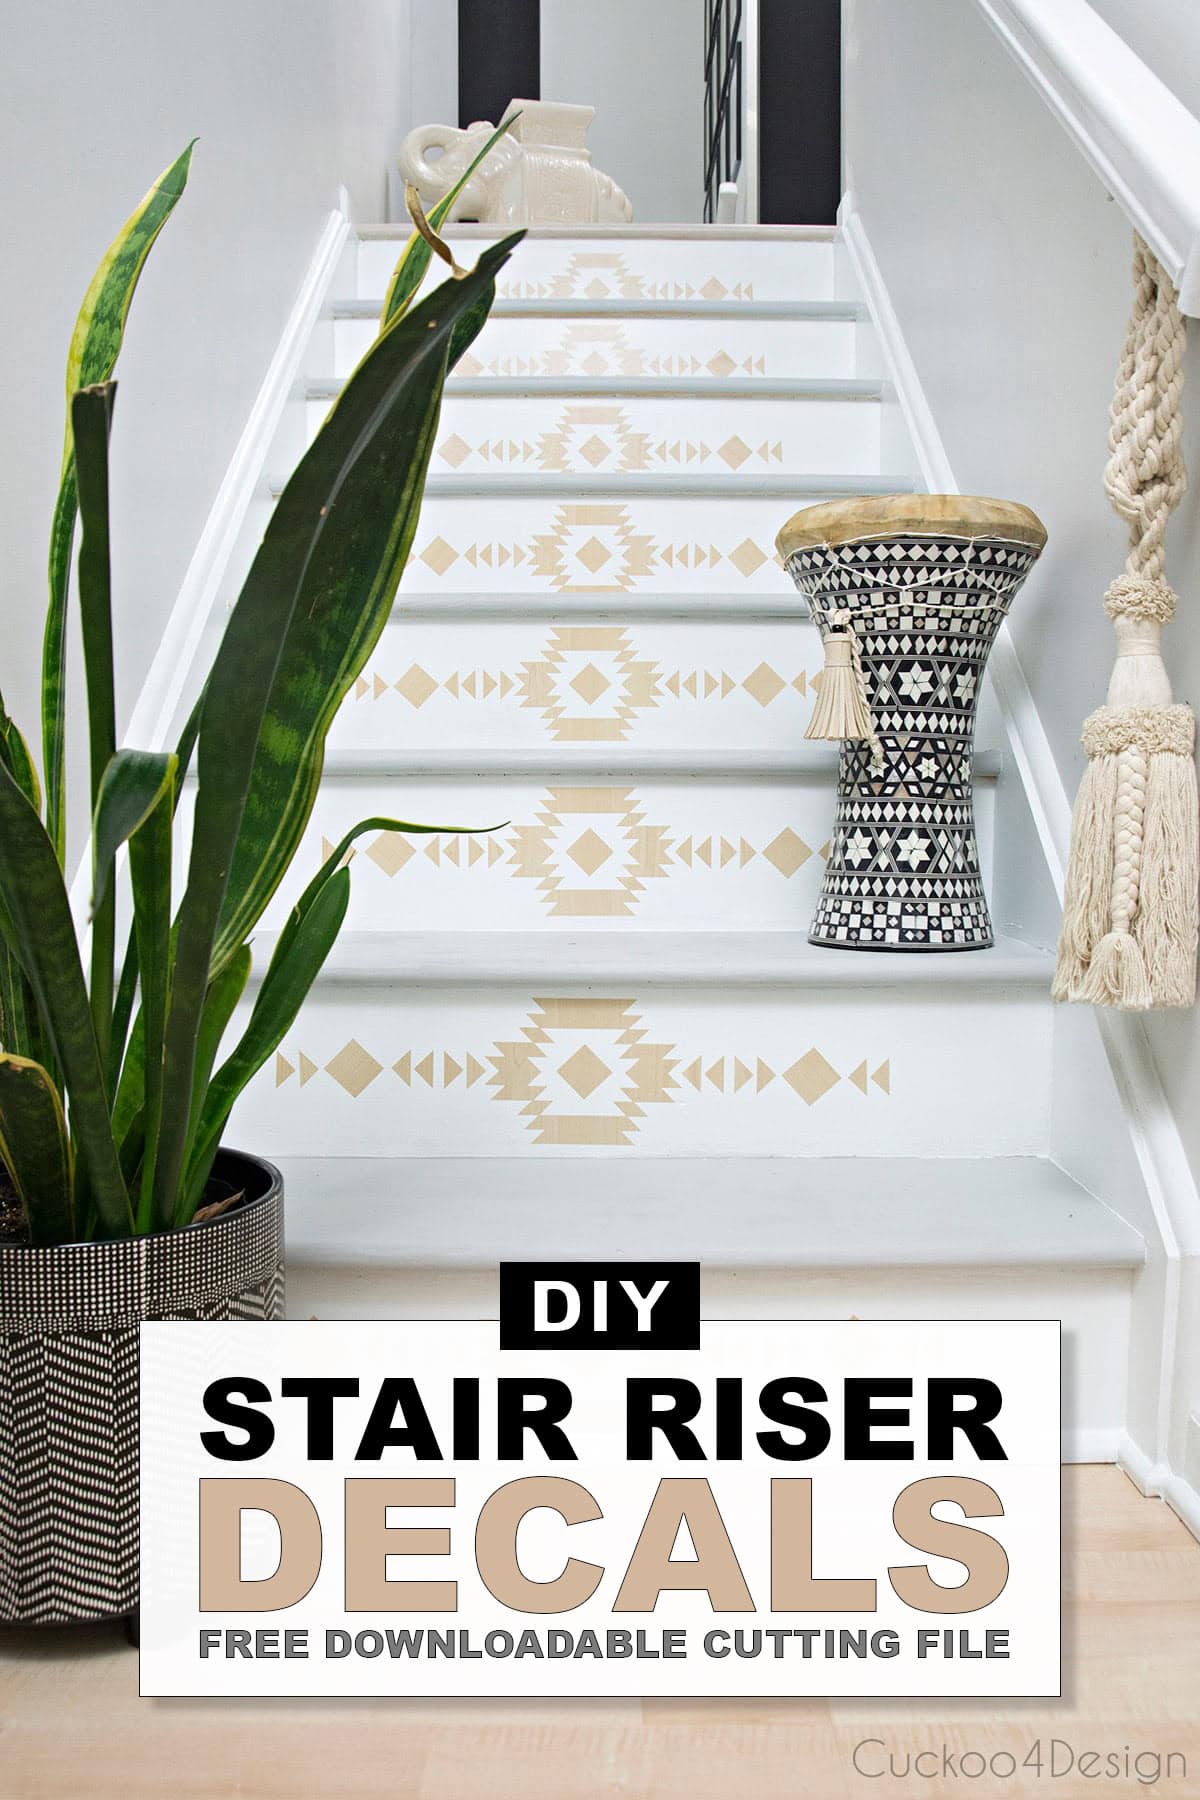
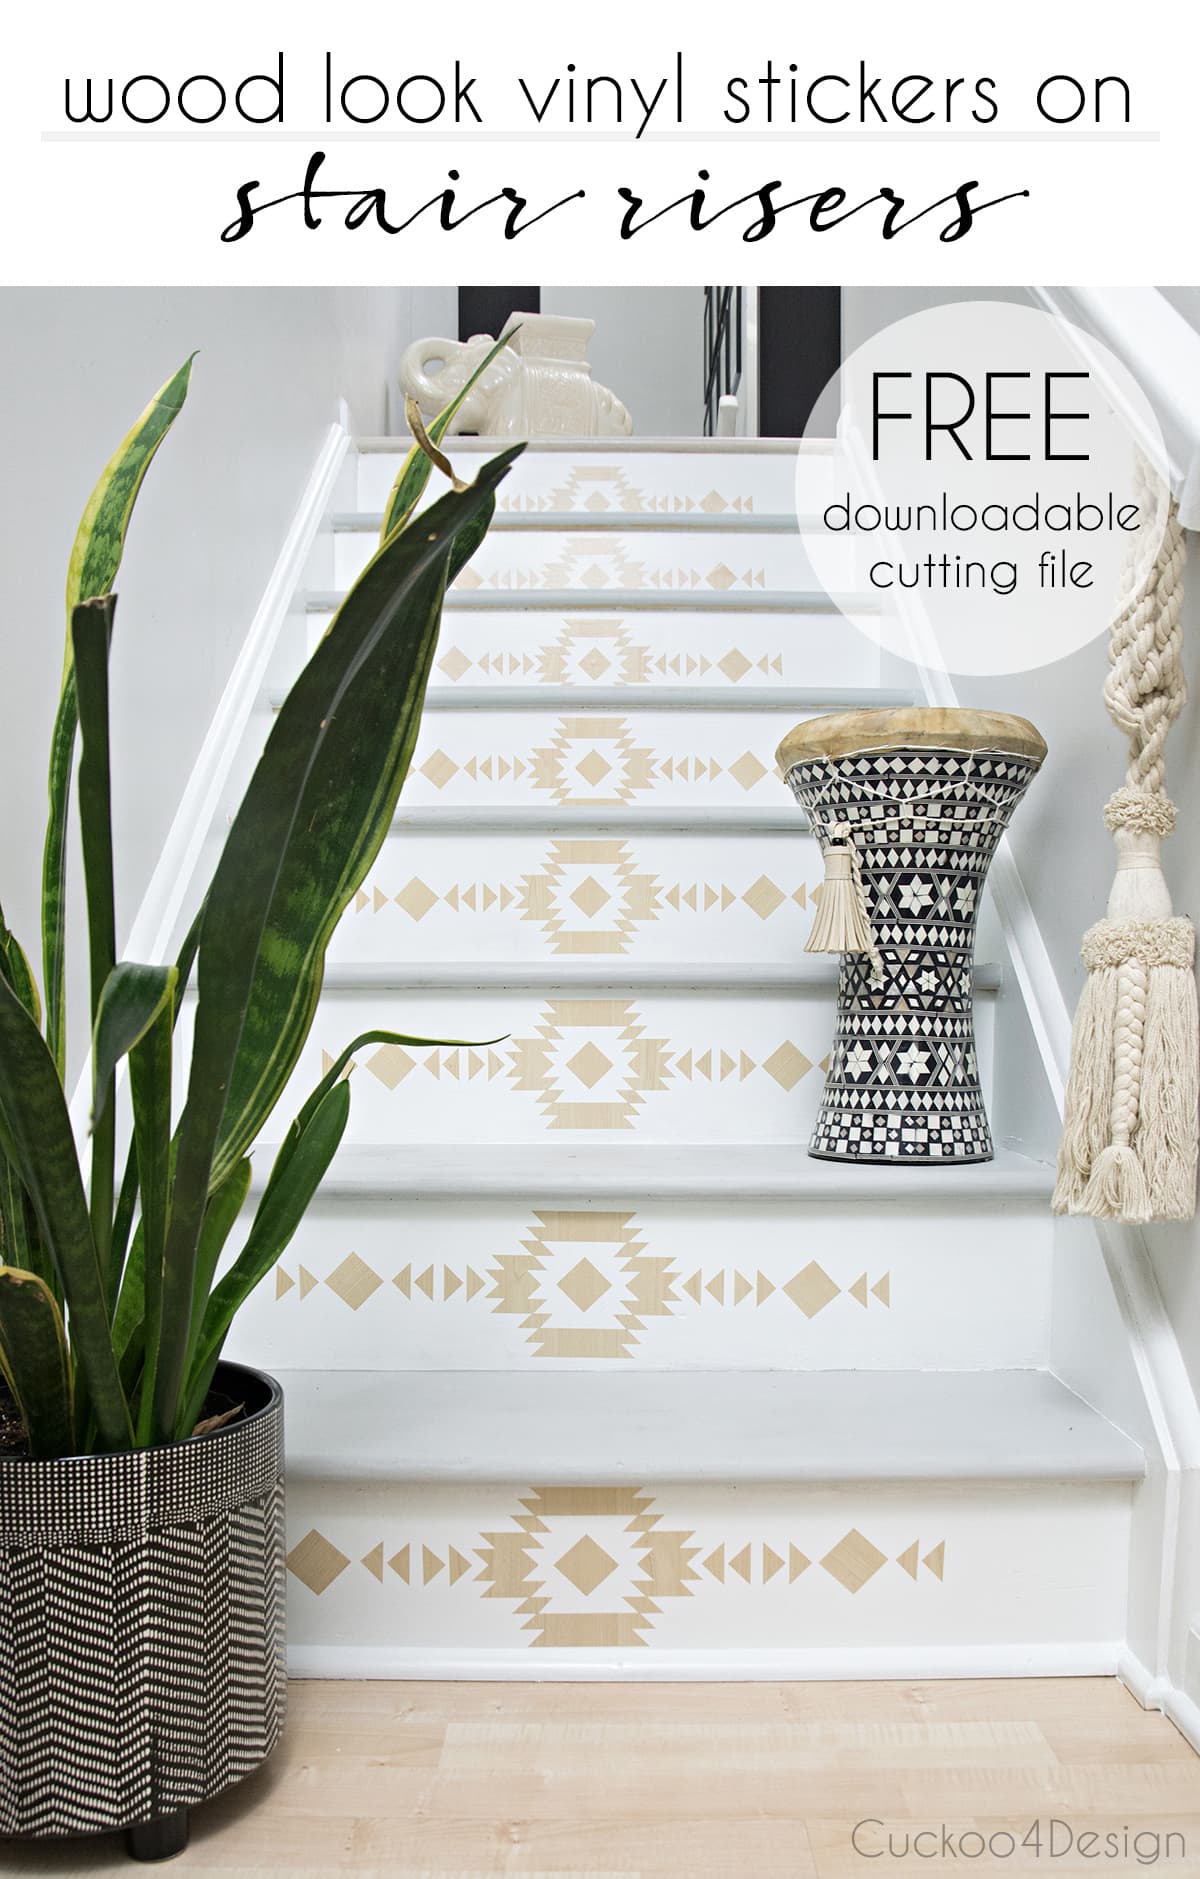
Staircase makeover with wood look stair riser decals
If you are looking to give your staircase a makeover, stair riser decals are one of the easiest ways to do it without paint or carpet. In this post, I am sharing how I made my own DIY wood look stair riser decals using self-adhesive vinyl, including a free downloadable pattern. And if you would rather buy stair riser decals ready-made, I have a roundup of my favorite options further down in the post.
DIY stair riser decals
This post may contain affiliate links from which I will earn a commission at no extra cost to you. View my full disclosure policy.
In my last stair post, I mentioned that I was sad about having to cover up the wood grain of the stair treads because they were in bad shape, and that I really wanted to incorporate wood grain again somehow.
Supplies I used
I used my Silhouette Cameo to cut the stair riser decals out of the vinyl, and you can download the DXF file and STUDIO file that I made for free from me. But you really don’t need to use a cutting machine. You could just use a crafting knife to cut out a traced pattern.
- Silhouette America or another cutter
- wood look vinyl or any other vinyl wall decal color
- crafting knife
- transferring tape
- measuring tape
- cutting mat
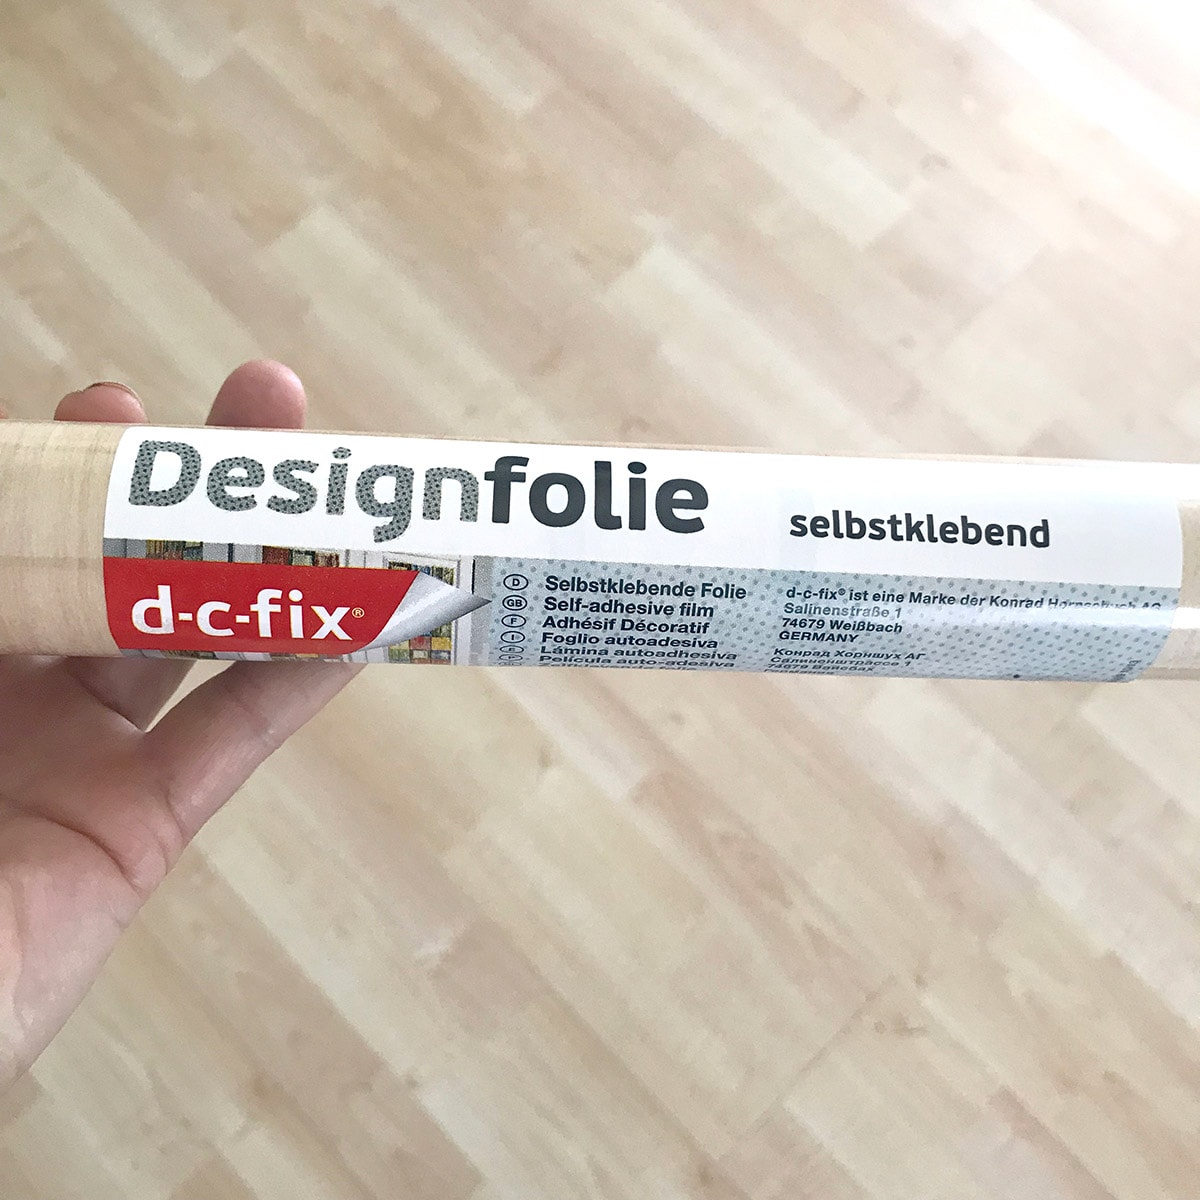
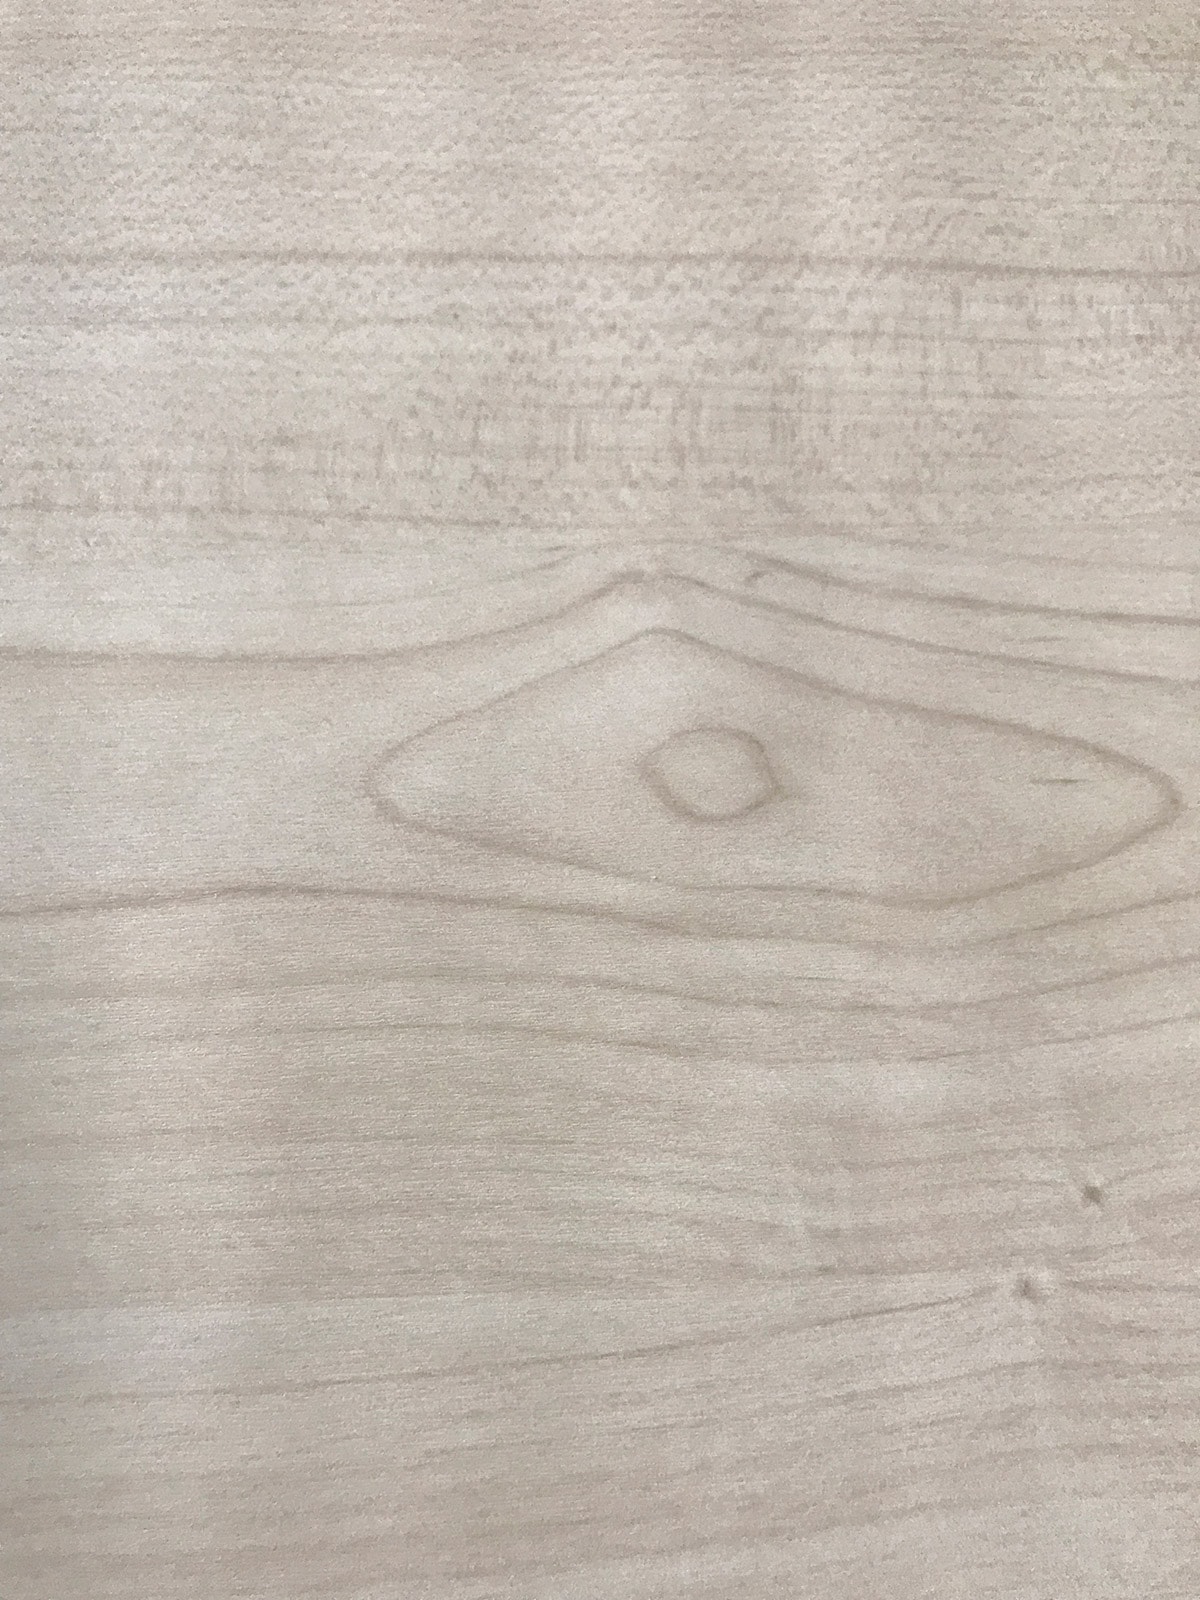
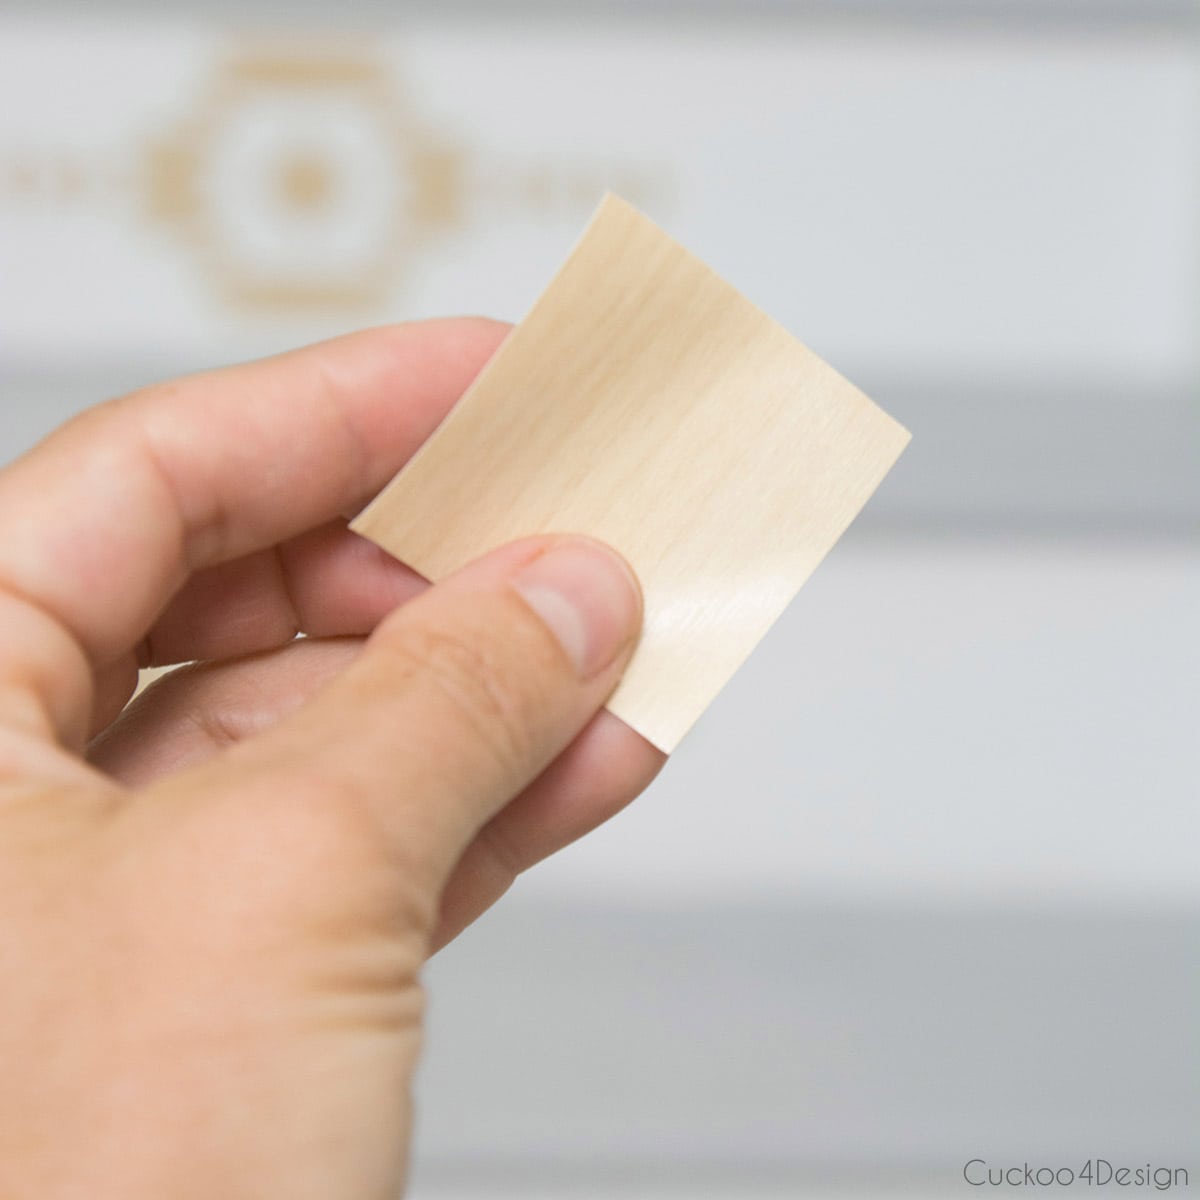
I was super excited when I finally found a self-adhesive vinyl that matched our flooring exactly. It looks so real and is of great quality. And as you can see in the photo below, it is made in Germany but available on Amazon.
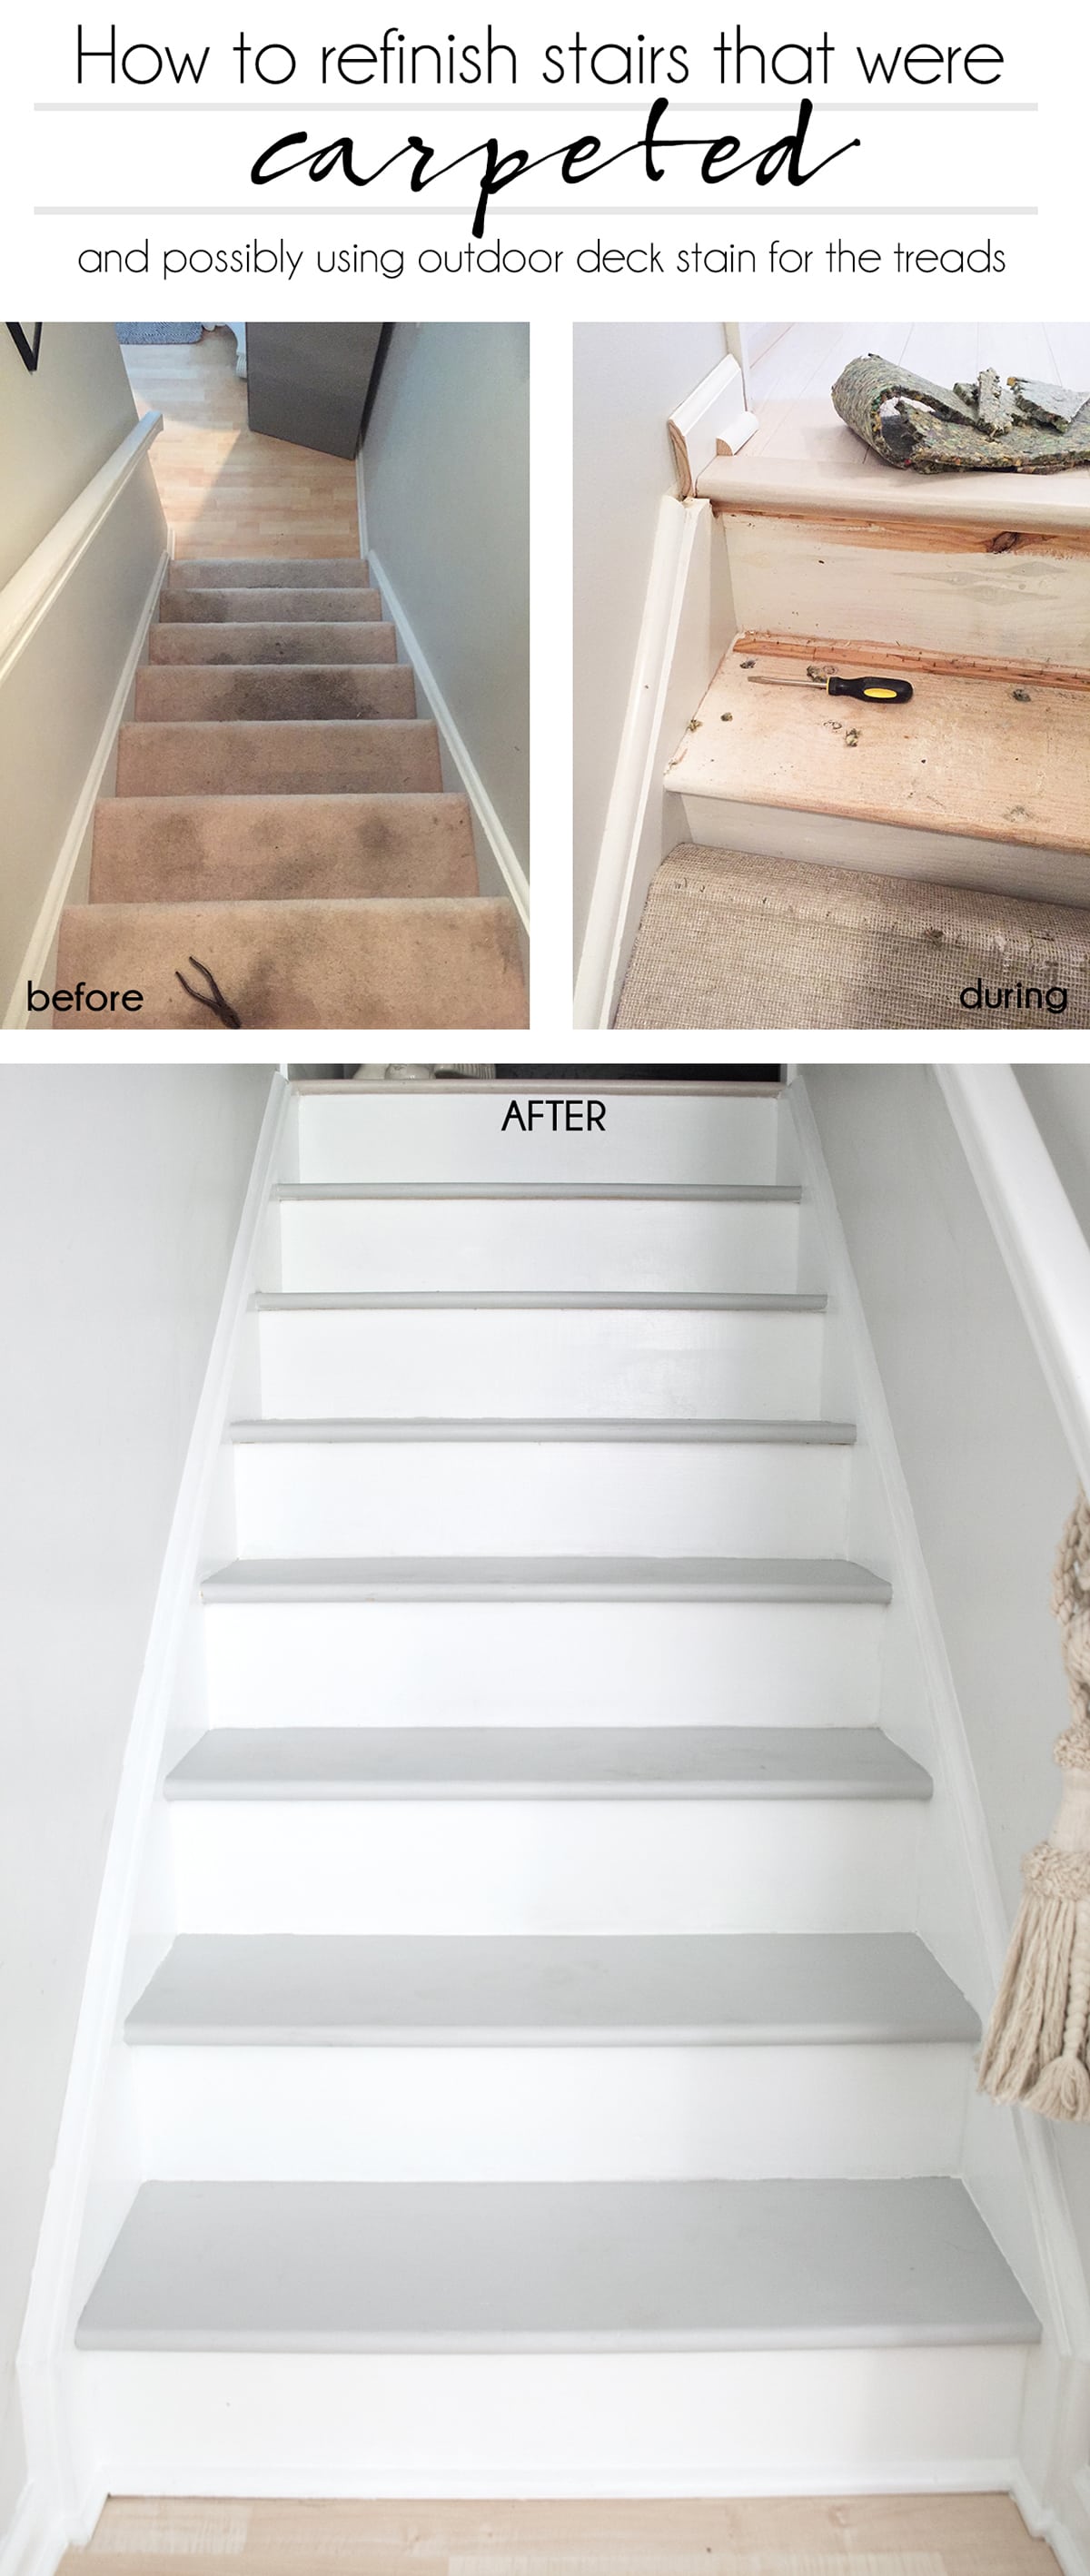
Once again, if you are new to my blog, then you can find part 1: removing carpet from stairs and part 2: how to refinish stairs that were carpeted, as shown in the photo below.
Stair riser decal instructions
It really is as easy as just making a pattern on a piece of paper, tracing it on the back of the vinyl, which has a paper backed side that gets peeled off and then cutting it out with a crafting knife on the cutting mat. You’ll just have to keep repeating that for the amount of your risers.
If you don’t want to have a more intricate pattern then you could just use some squares and triangles which are easy to cut out. I used some of them on my risers to show you.
Step 1: Measure your stair risers
Make sure you measure your stair risers and design your pattern accordingly to size. Or you just adjust my downloadable pattern file to fit your stair riser size.
Measuring and sizing accordingly is really important!
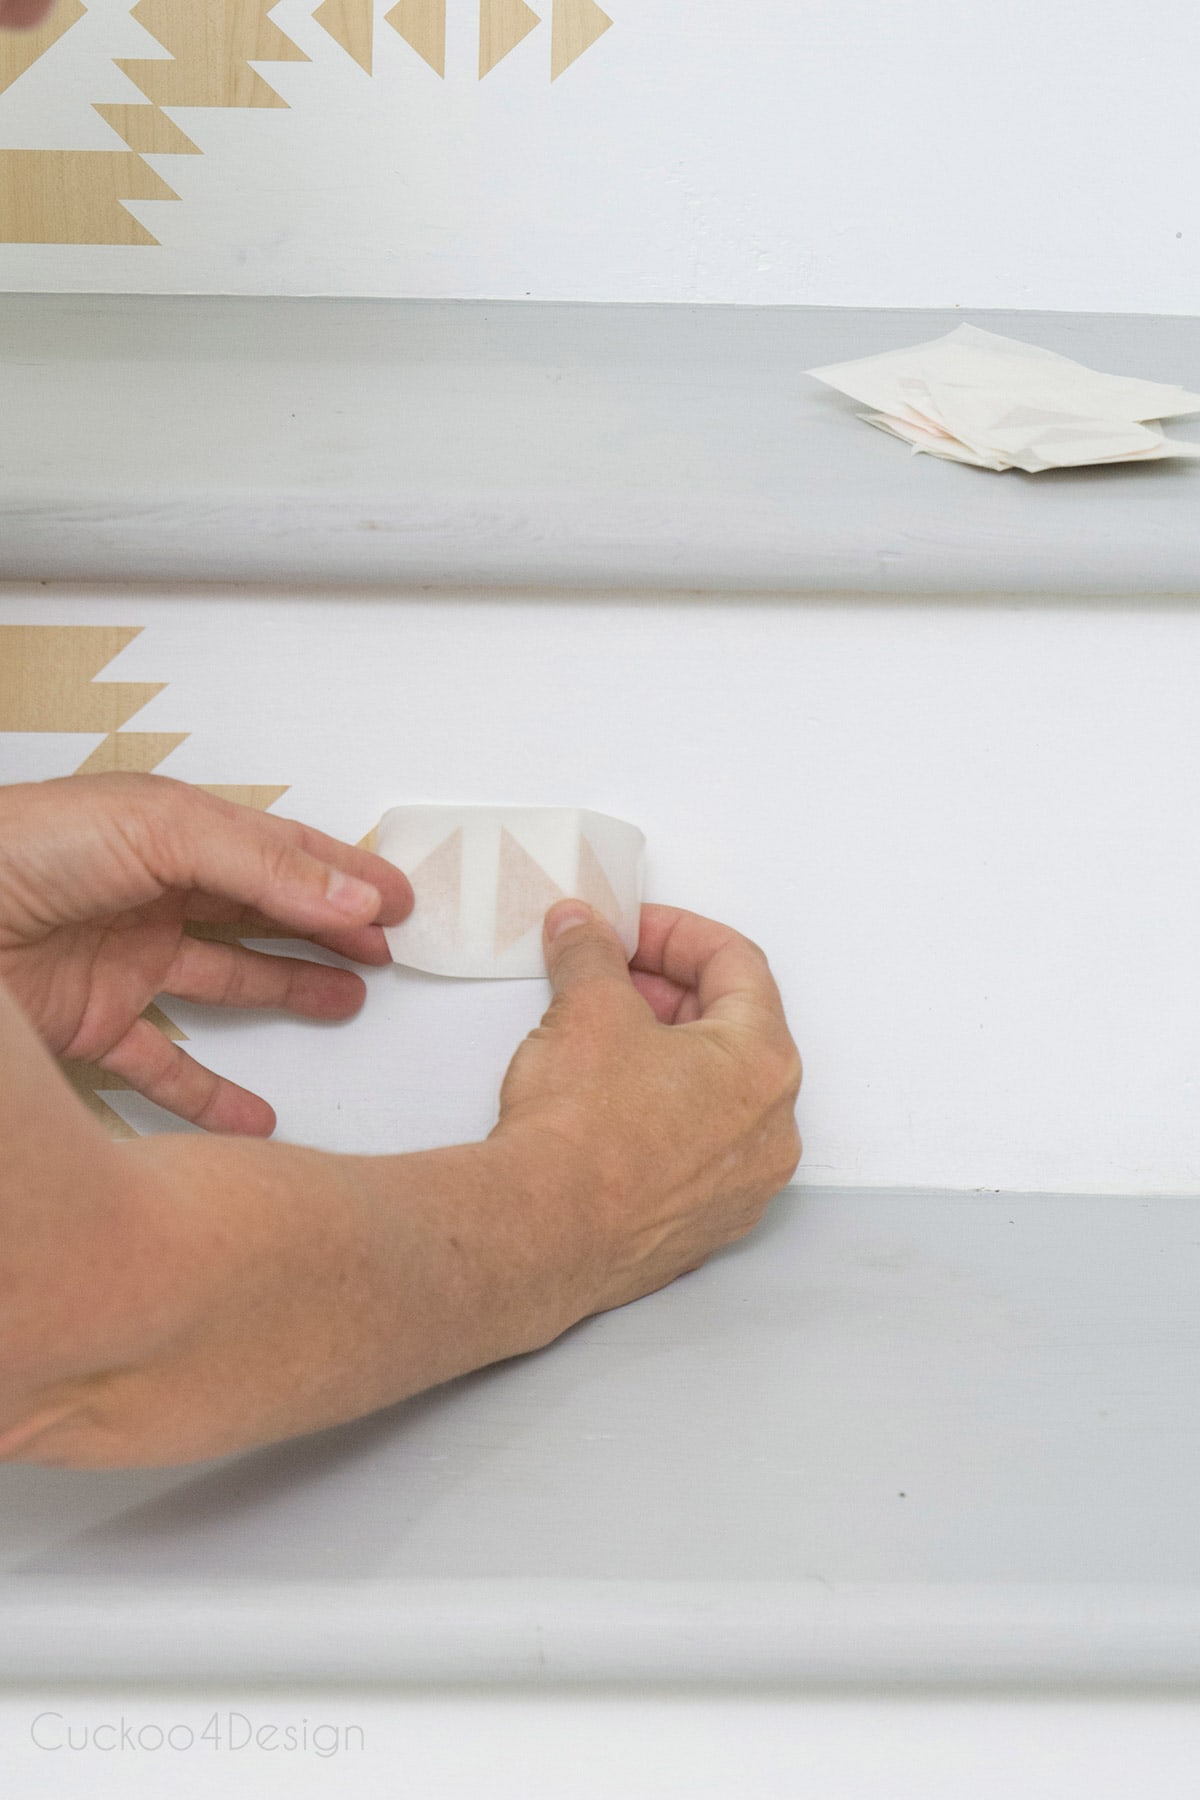
Step 3: Attach the pattern to transfer tape
Once your pattern is cut, attach it to the sticky side of the transfer paper.
Once my pattern was cut I attached it to the sticky side of the transfer paper so I could place in the center of my stair risers that I marked on each one of them.
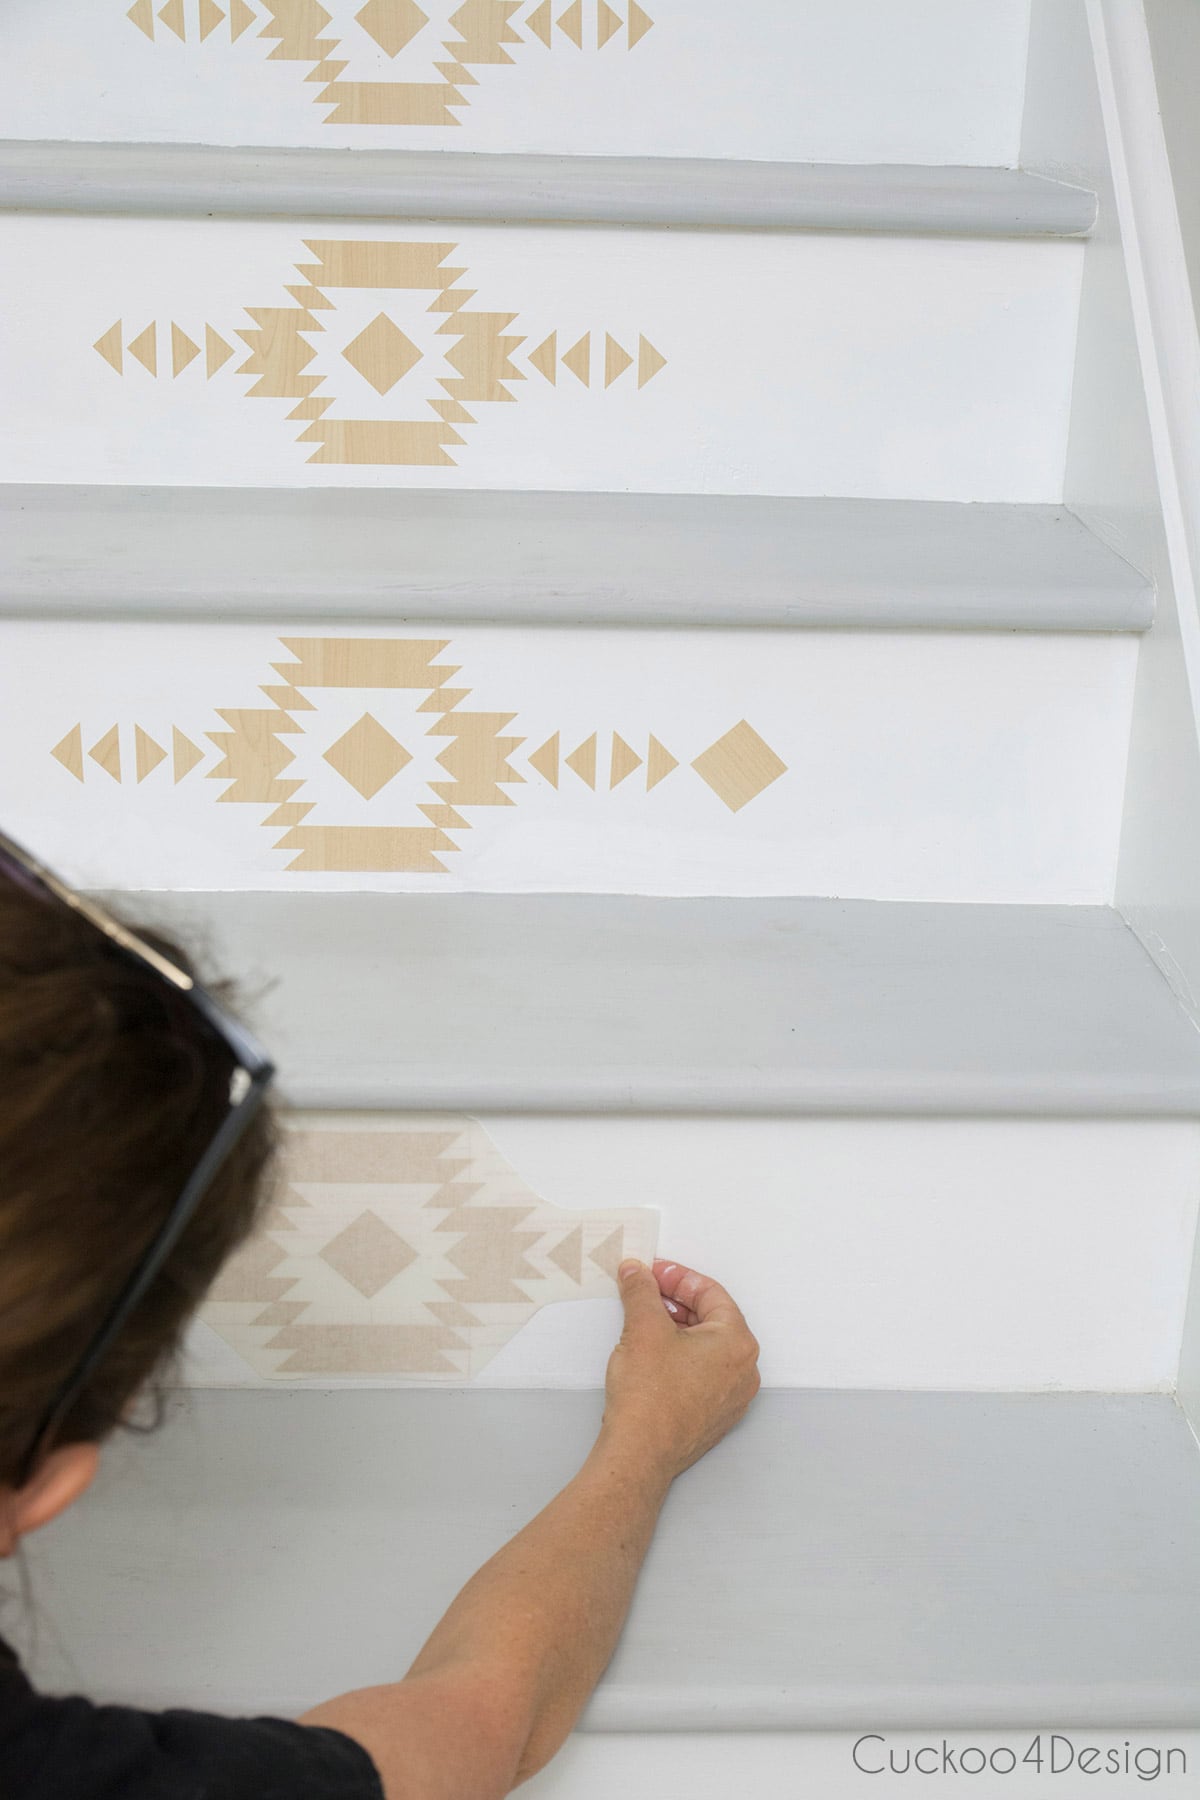
Step 4: Apply the decal to the riser
Mark the center of each riser with a pencil first so you have a guide to work from.
Here you can see the small triangles and how I placed them. The nice thing with this vinyl is that I was able to reposition it if it was a little off. I’m however not sure if it is transferable again after being stuck to a surface for a while. We’ll see about that.,
All you have to do is peel the transfer paper off and press the vinyl down again.
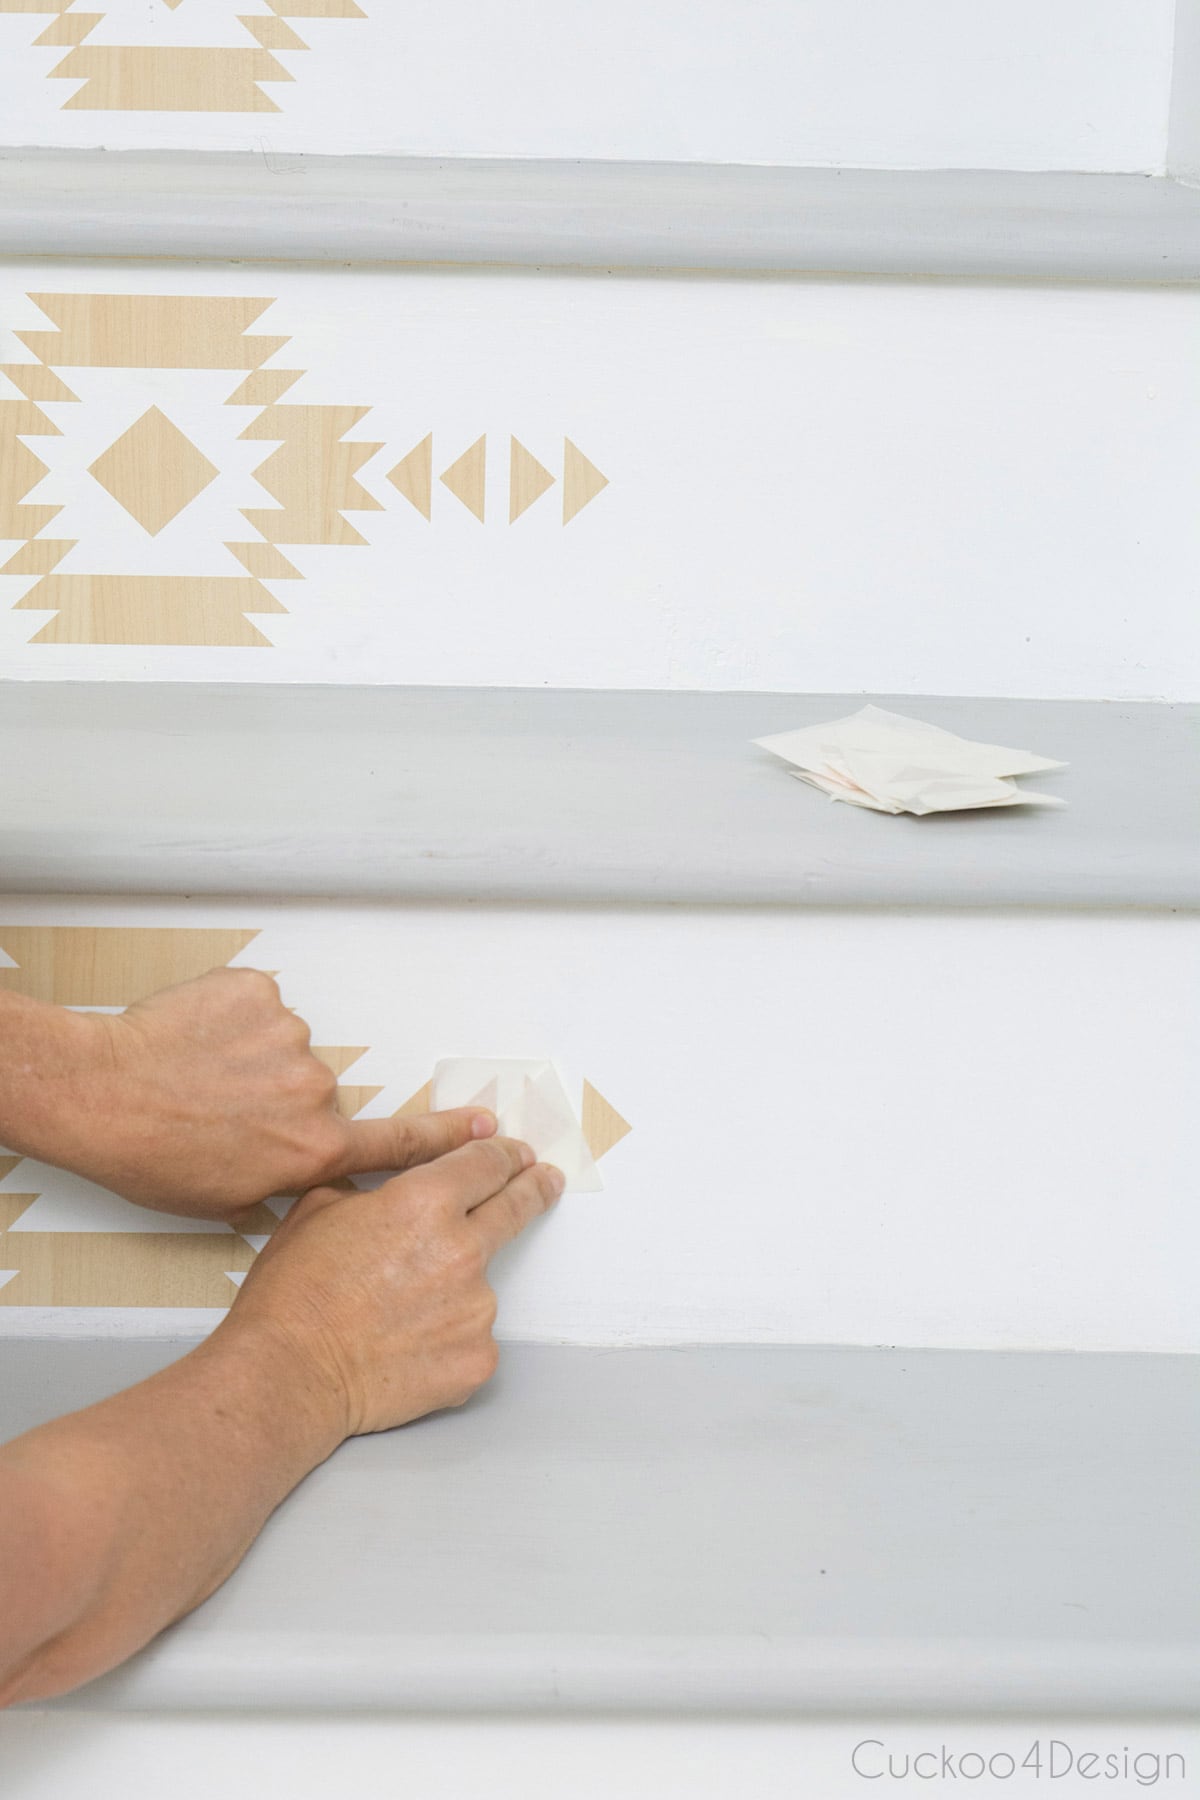
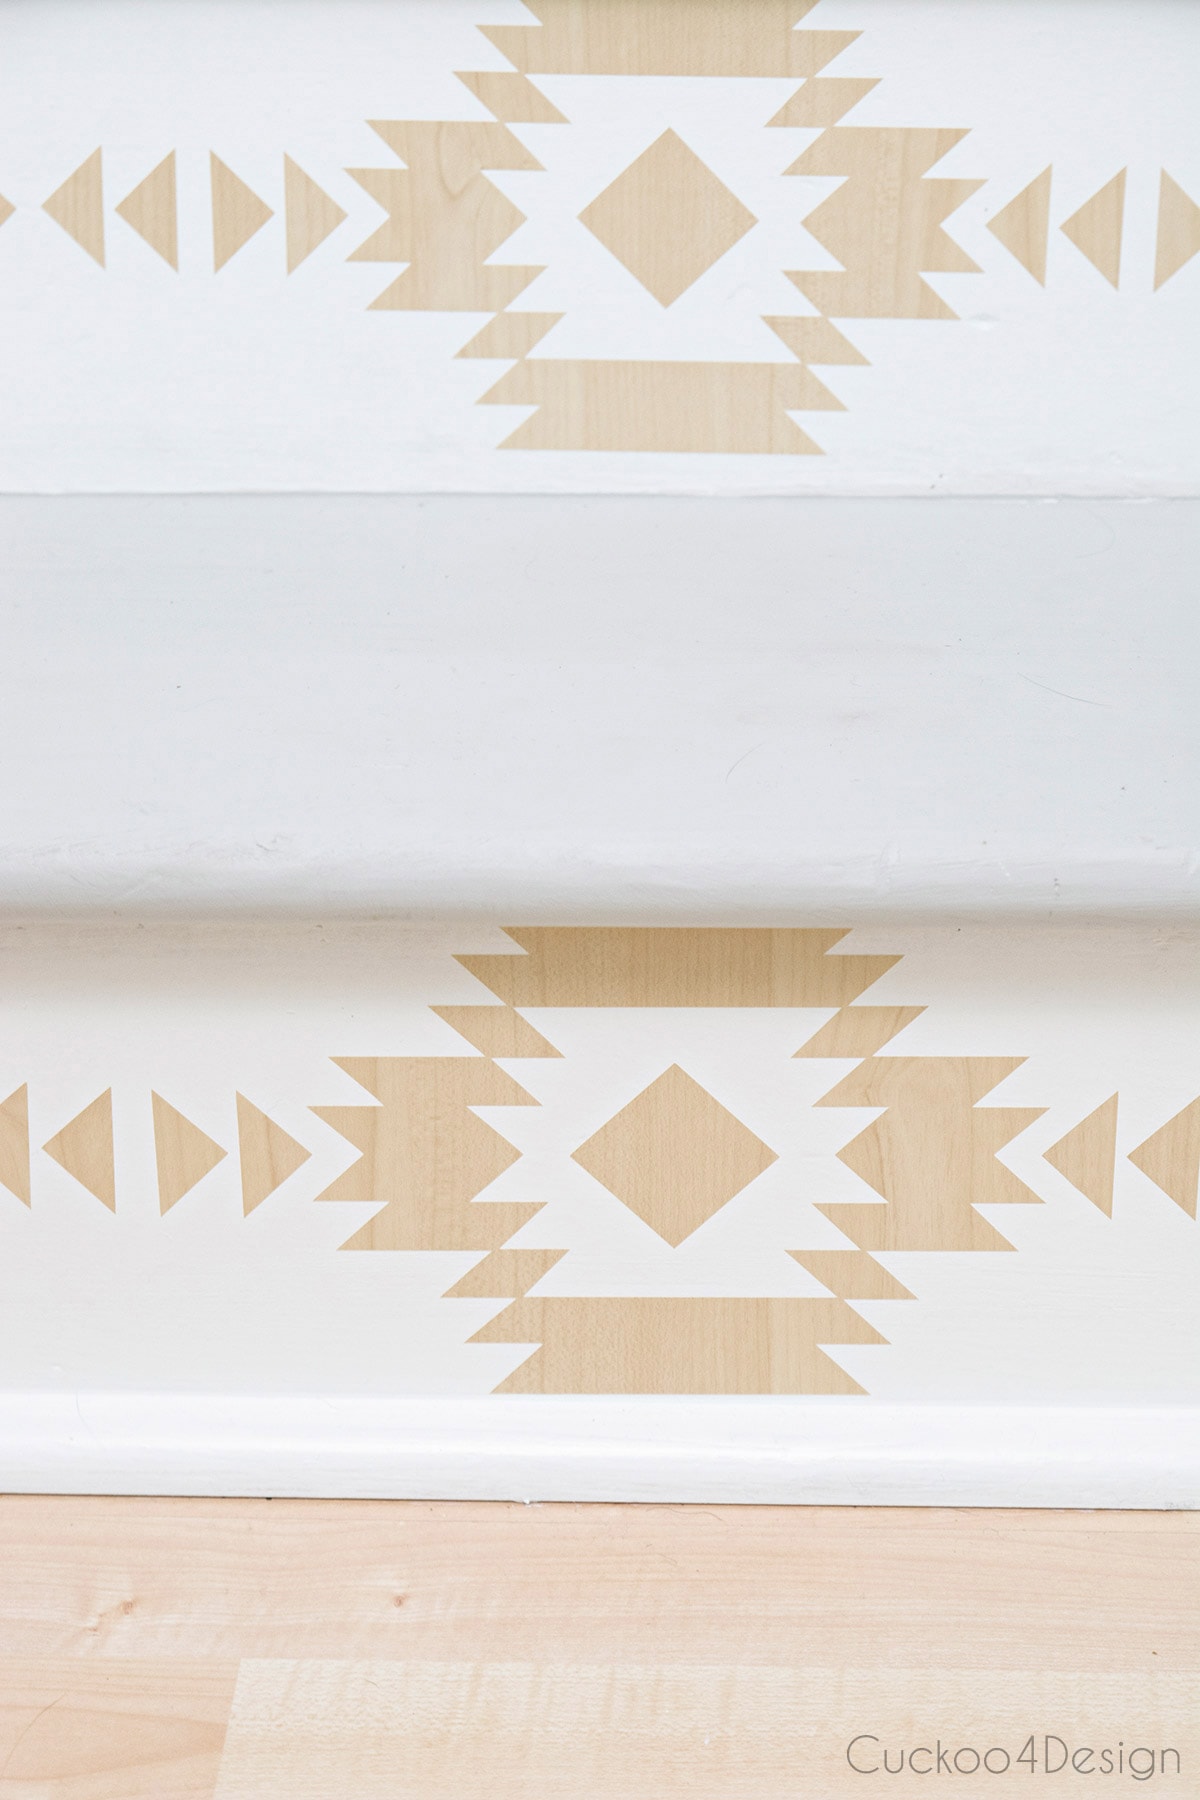
Here is a simple square and you can see that I aligned the grain of the wood pattern with the square. I just didn’t want it to be too random.
Step 5: Repeat for all risers
Keep repeating the process for the number of risers you have. Make sure to align the wood grain the same direction on each one so it does not look too random.
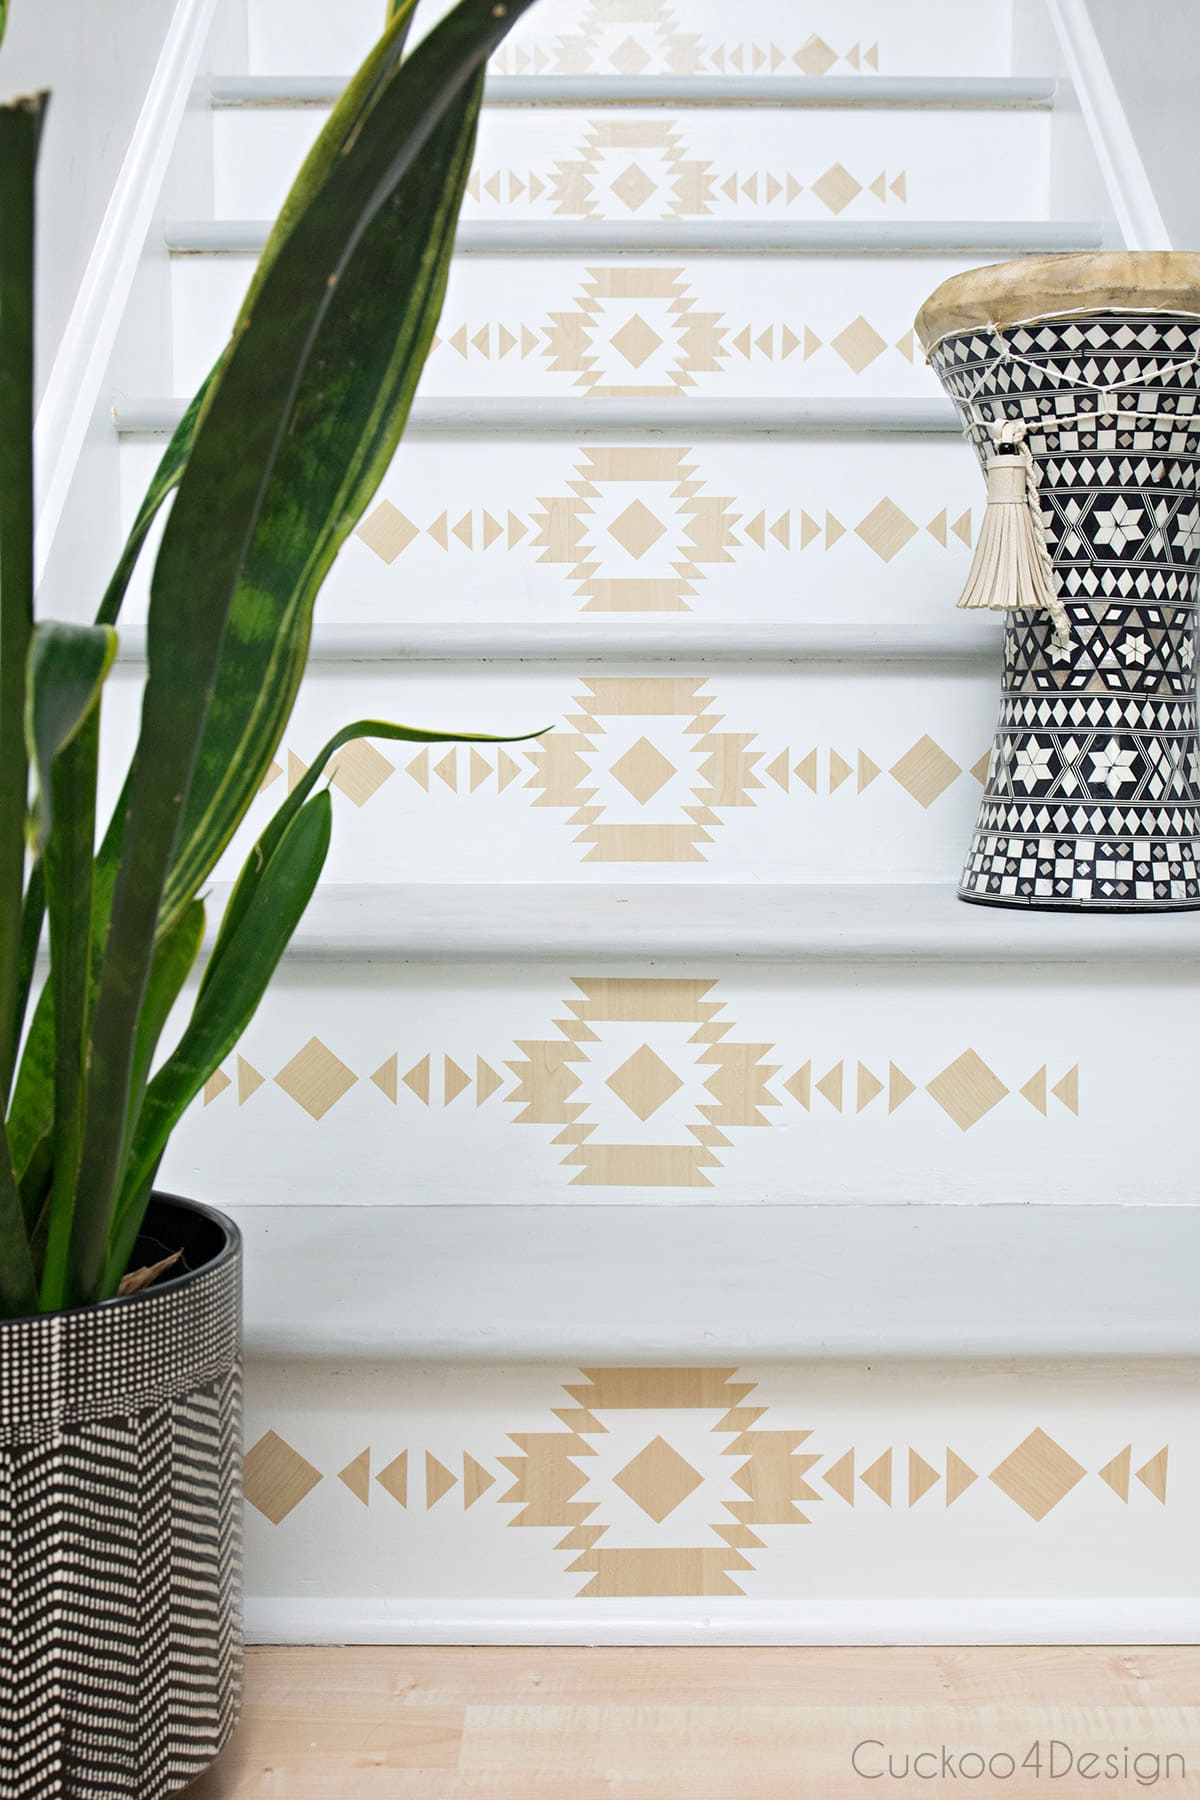
Photos of finished stairs with stair riser decals
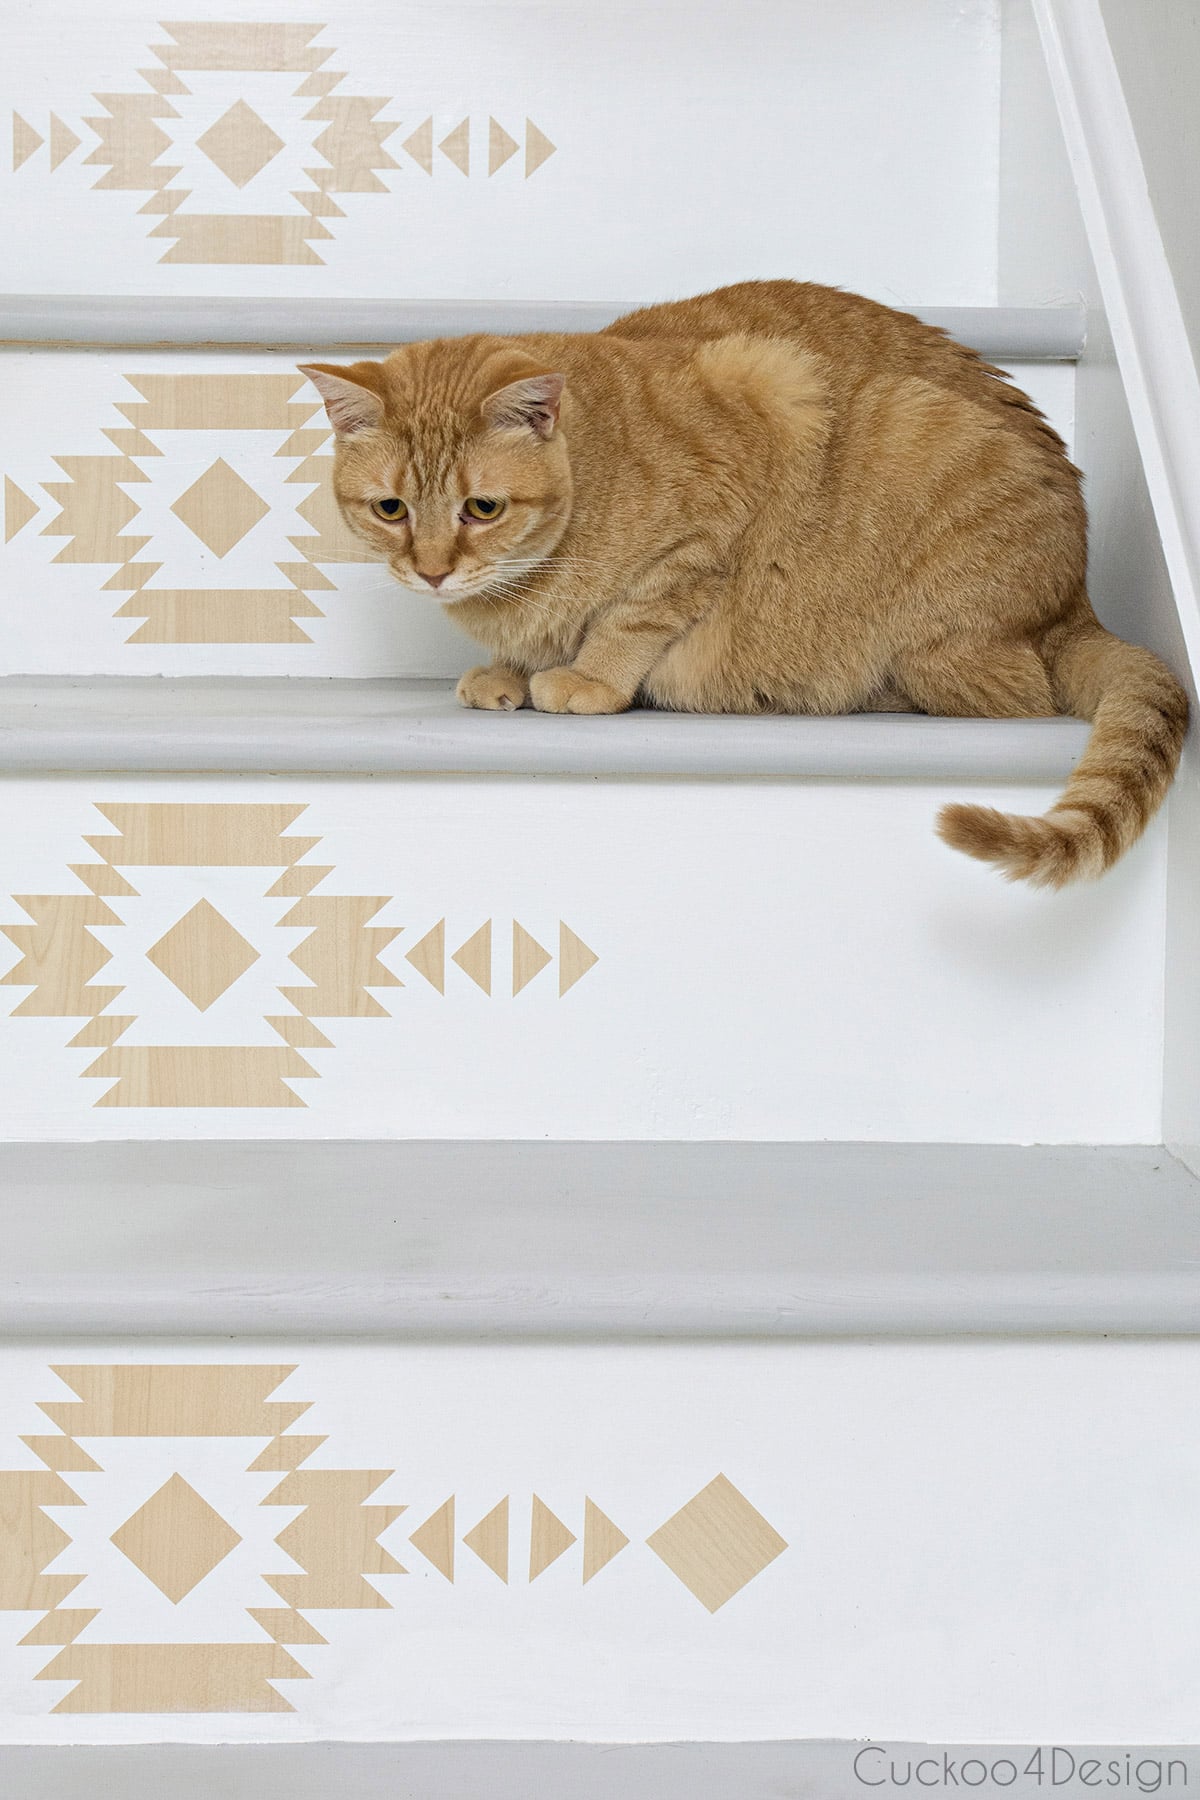
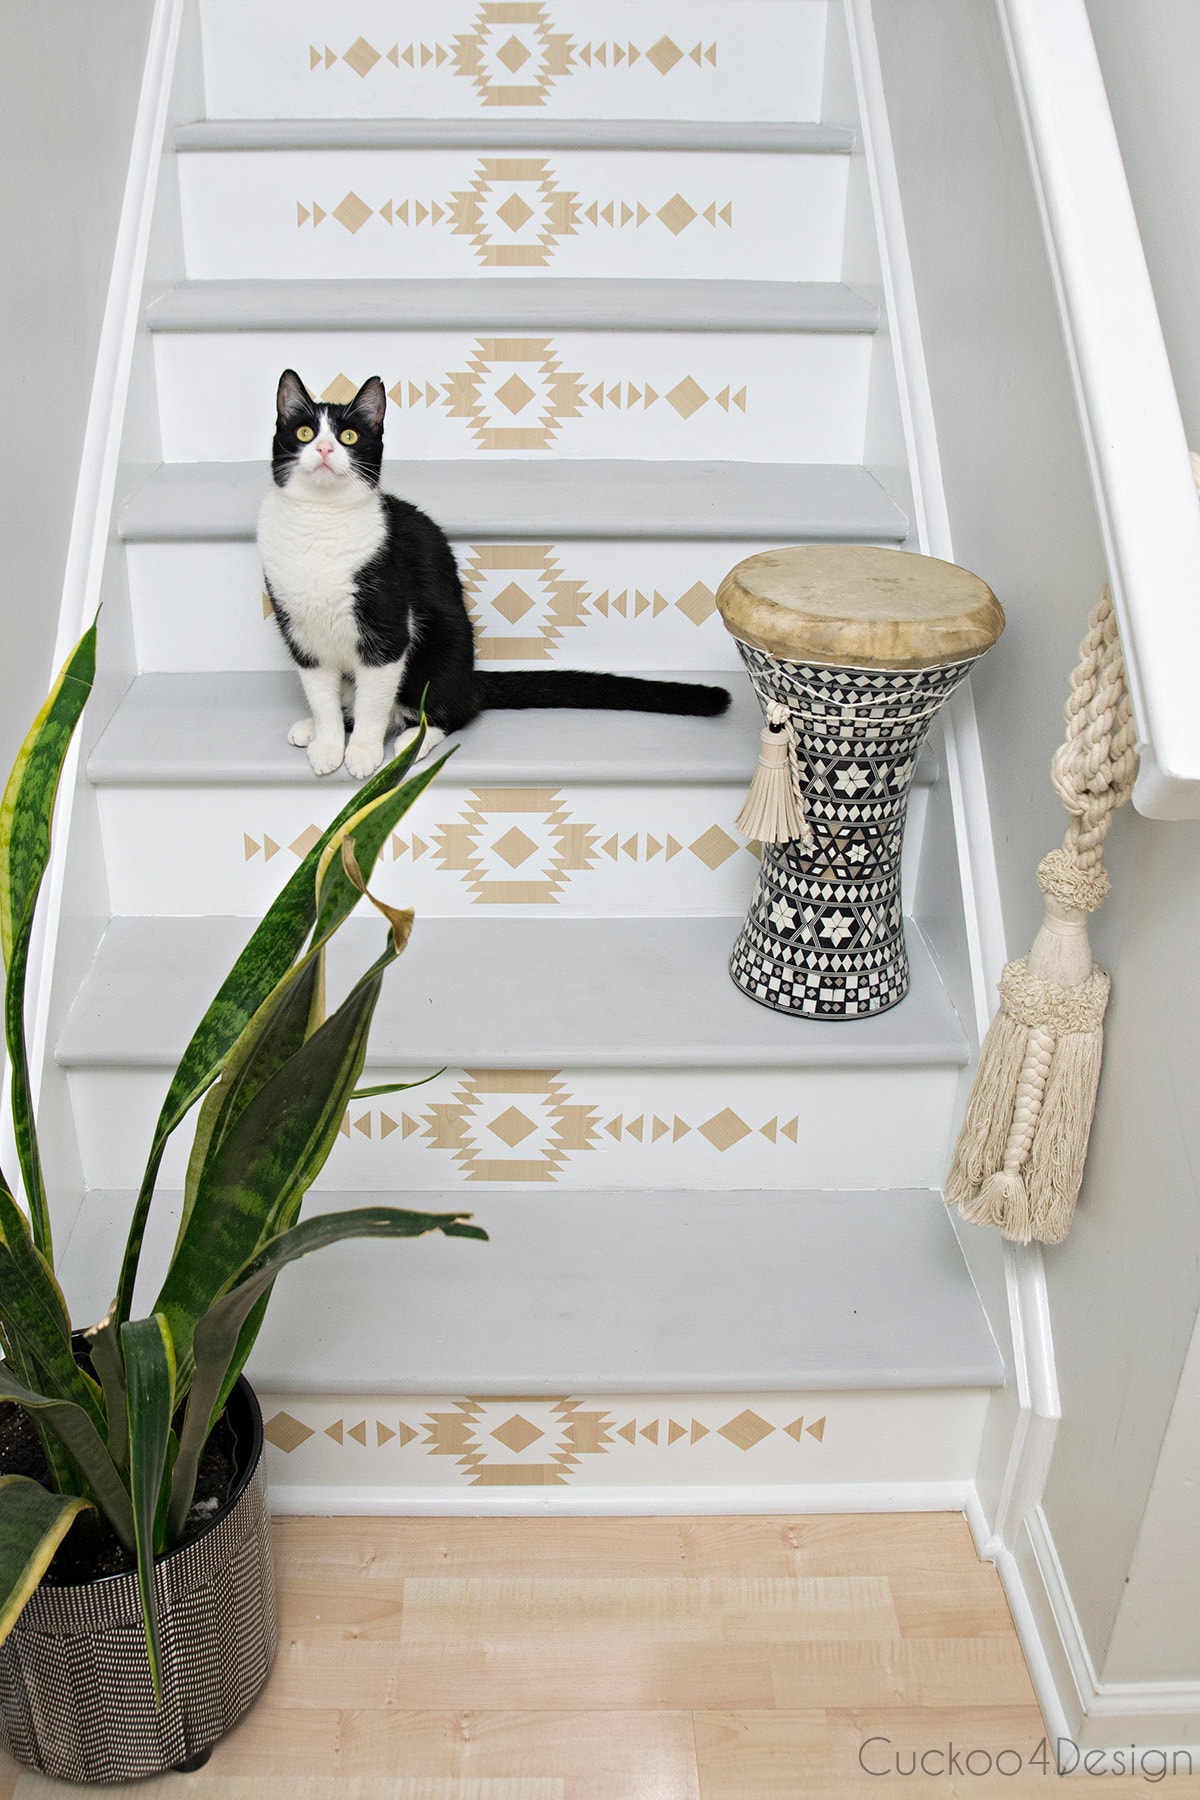
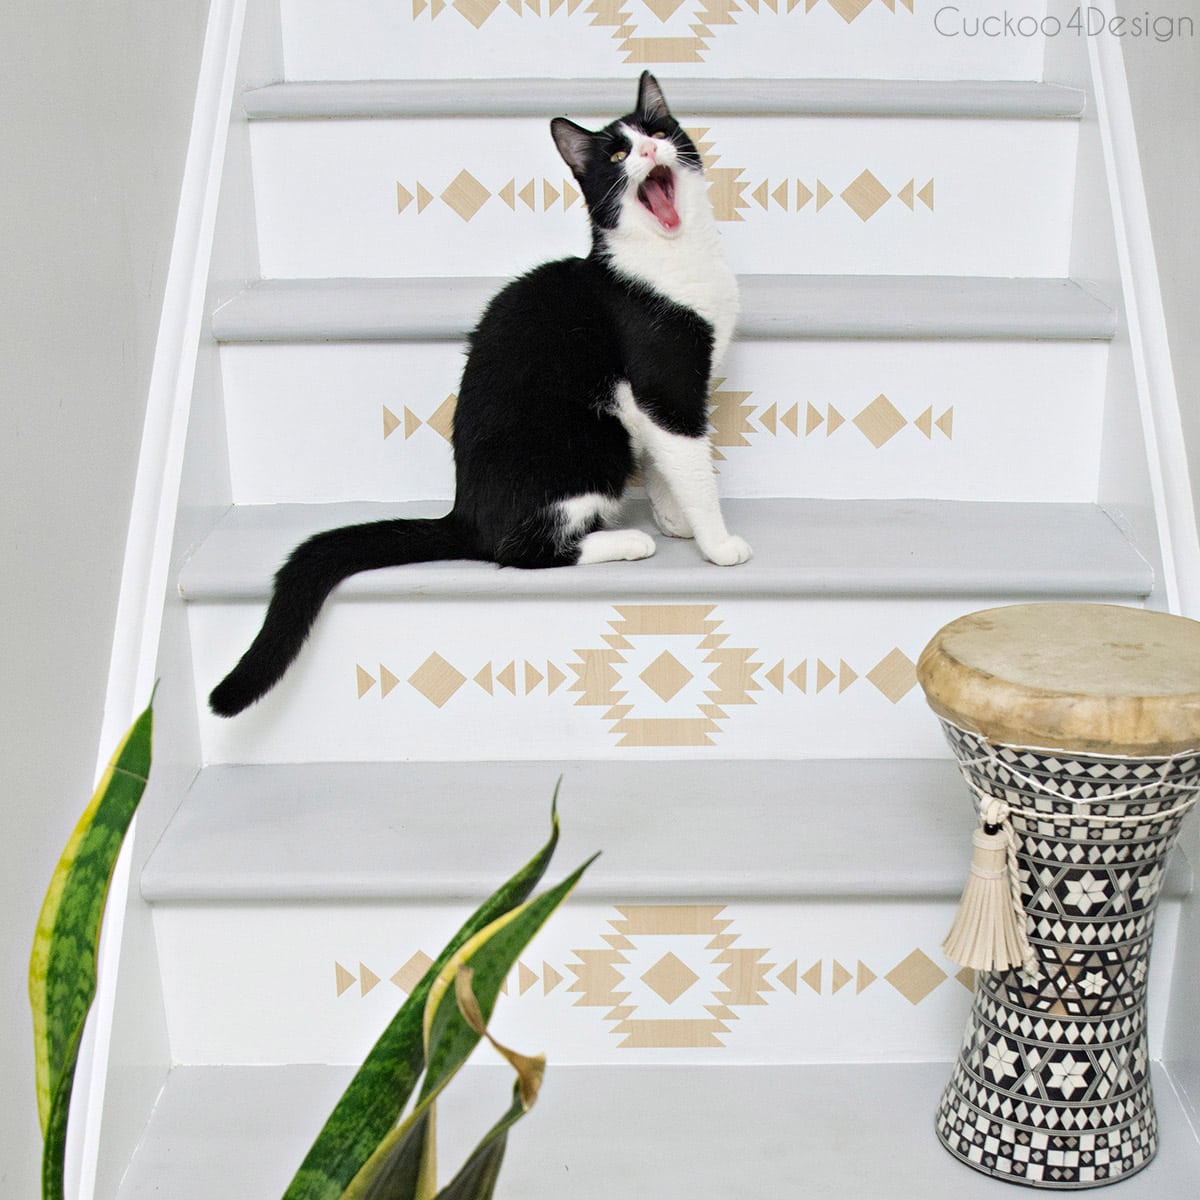
Maya matches the stairs too. Love the rolls on her tummy! All she cares about is food.
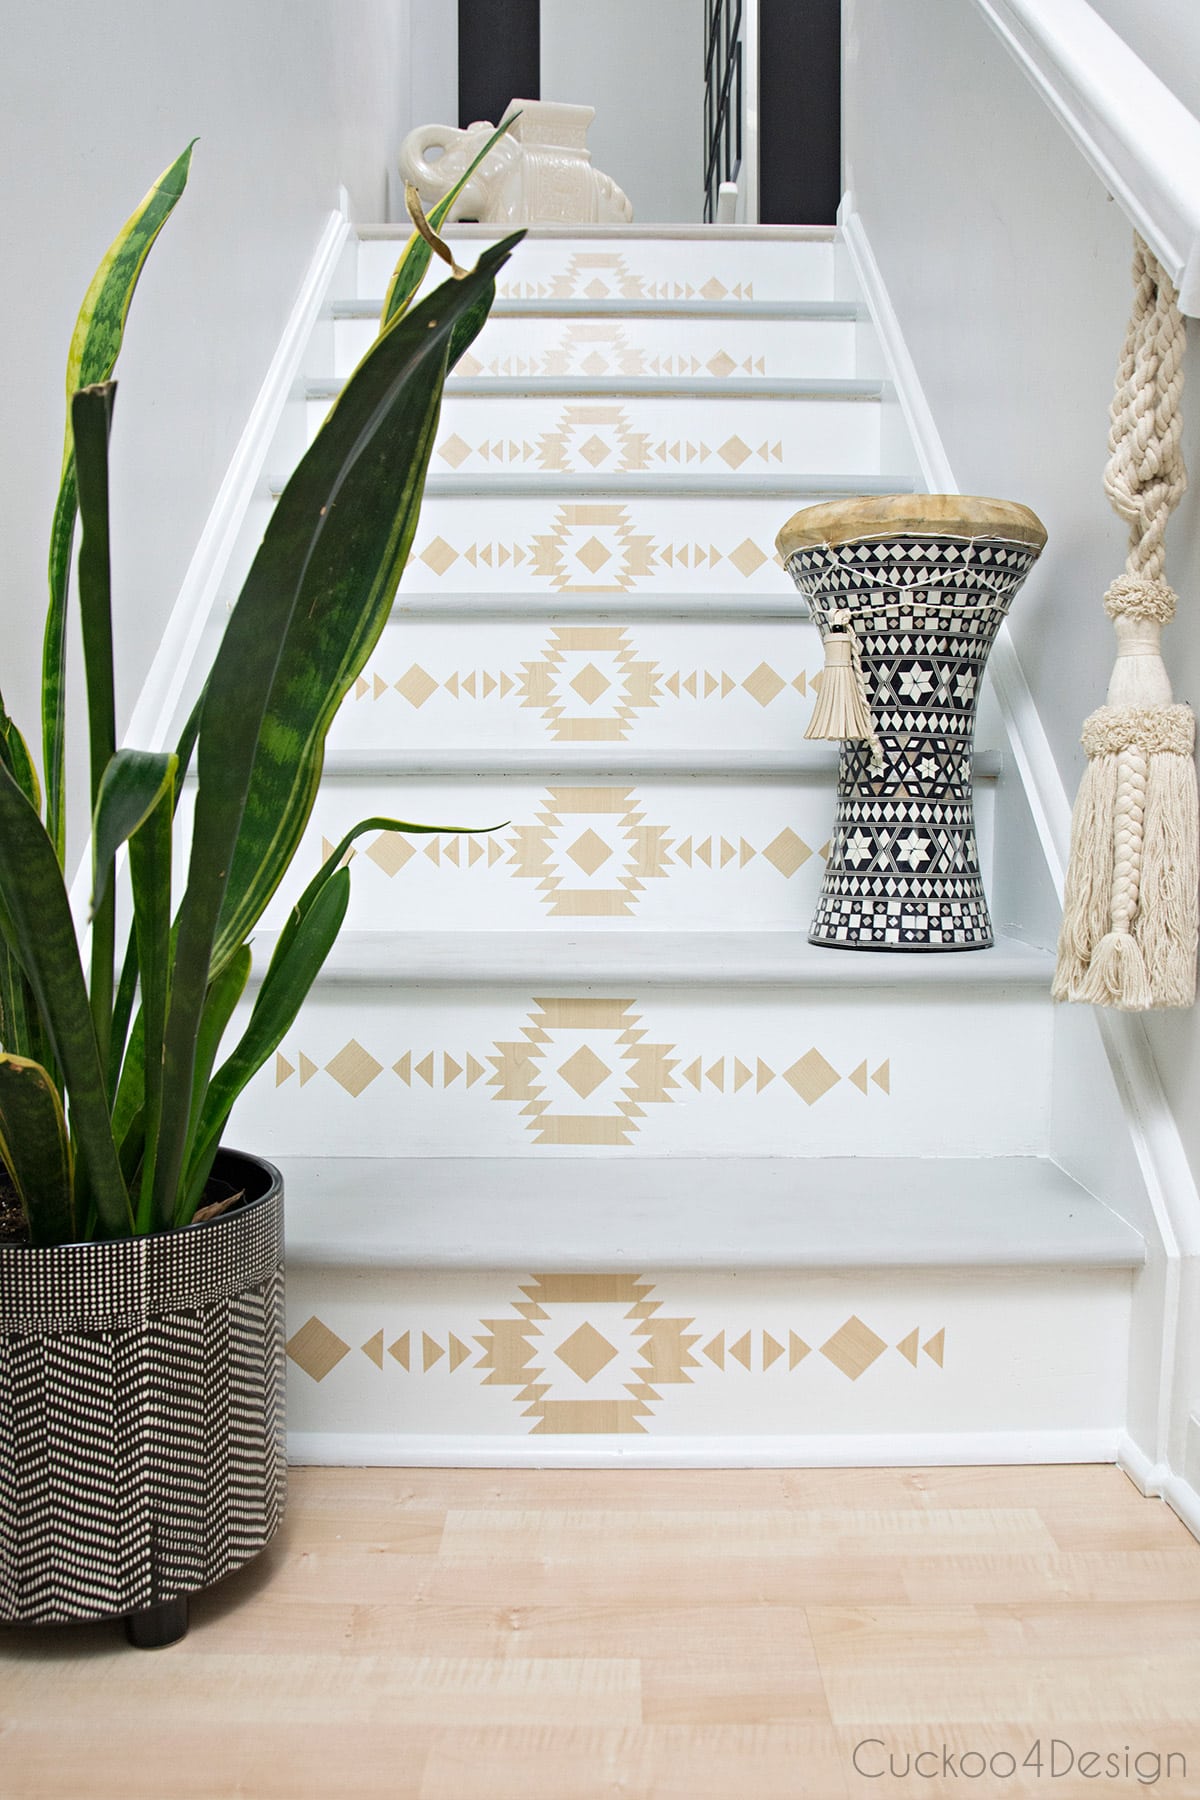
Now when you look down from the top where we have the grey bamboo flooring, you can see the grey treads but when you look up from the bottom, you can see the maple wood grain of the decals.
I was definitely inspired by my little tribal drum that I found at HomeGoods a couple of years ago which also has some other great patterns that could be used for a decal pattern. For example if you look closely you can see the star pattern that is assembled out of 6 diamonds. Diamonds are super easy to just cut out with a crafting knife.
I really couldn’t help myself again with Willy and had to photograph him. He was being such a model and loving his time in front of the camera. Just look at our ferocious little beast!
Check out my leather tassel tutorial and my DIY giant tassel tutorial.
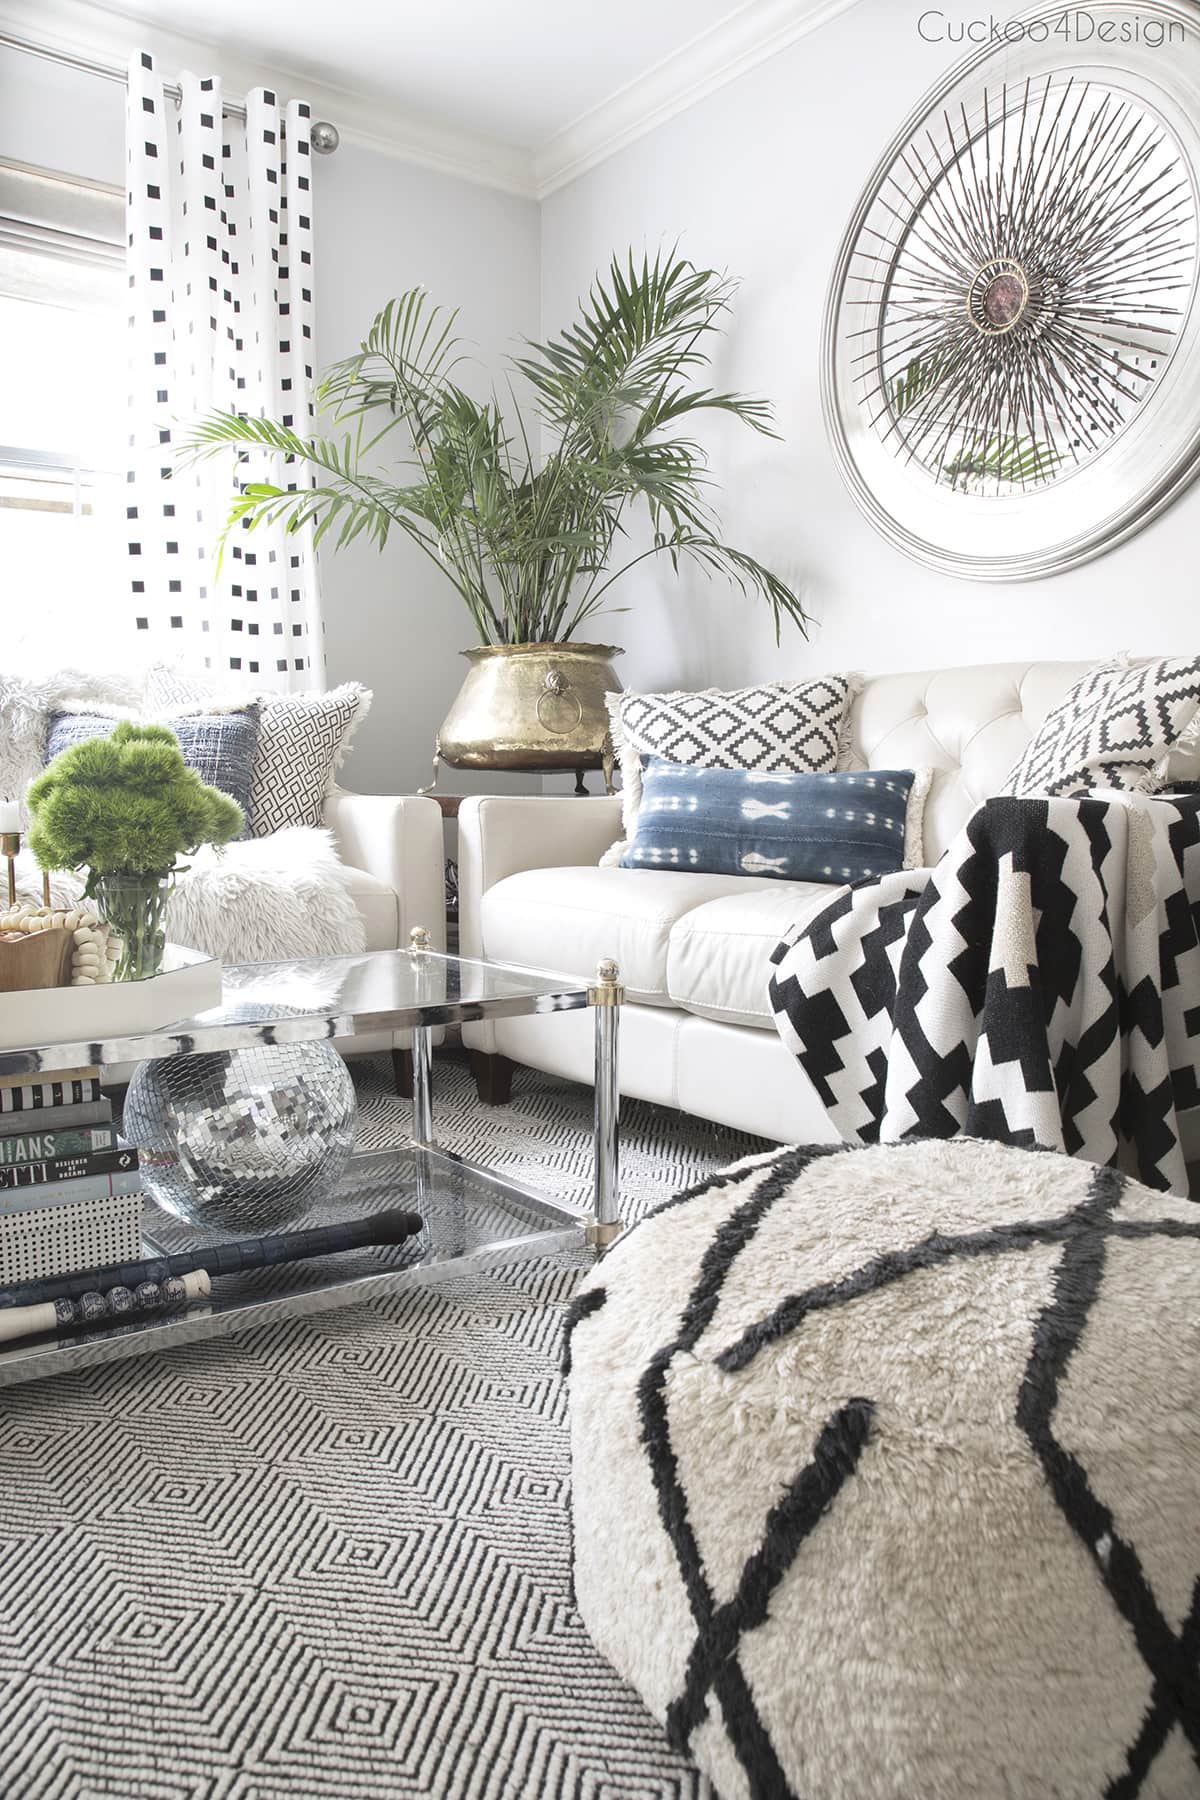
And it all ties in really great with my living room since the pattern of the stairs is similar to my favorite throw and pillows on the couch. It might be too much pattern mixing for some folks, but not for me because I love it.
UPDATE: I have since removed the decals and written a blog post about how to install carpet runner on stairs. I love this updated look so much.
Where to buy stair riser decals
Not everyone has a cutting machine, and honestly, the options you can buy ready-made have gotten really good. Etsy, in particular, has a huge variety of stair riser decals that I love in every style imaginable. There are also more budget-friendly options from larger retailers, but I like supporting small businesses on Etsy instead. I have rounded up some of my favorites below.


I have so many more ideas for what you could use this wood-look vinyl for, and this was most likely not my last project with this amazing stuff.
Tschüß,

You are so creative! I love how the stairs turned out. They look so expensive !
Thanks Kathy, I don’t know why I waited so long to finally tackle this project!
these look SOOOO good! and i love the photos of your Willy on the stairs… with his black and white coat he looks meant to be there!
He’s crazy! I love how interested he is in everything I do and that he loves being in front of the camera
Oh my word, it looks amazing.
Thanks Marty, I had to get them done for my summer tour 😉
Looks great… Good thing we don’t have stairs, else I’d probably try to copy it and fail (LOL)
NO you wouldn’t fail 😉 It’s really easy actually
This is amazing! I love this look and was surprised at how easy you made it look.
Haha thanks Stephanie, I didn’t just make it look easy 😉 it’s actually really easy.
I love that pattern Julia. Looks amazing and Willie is such a ham. ☺
Thanks Katja, yes my Willy is a ham. I’m utterly obsessed with him. And I’m surprised that his head still fits through the door LOL
The risers are amazing. What a gorgeous and unique look. Maya and Willy complement the design perfectly too. What lovely kitties! Thanks, Julia, for sharing your talent.
Thanks Ursula, the kitties are embracing their camera time.
What a cool look!!!
Thanks Jen
This seriously looks amazing!! I love the way the stain and the wood grain decals match your floor finishes. And the design you chose is so perfect!
Thanks Ashley, that is such a nice complement!
Oh wow I love your staircase makeover! The white and wood is so cool and the pattern, lovely!
Thank you Katrin