

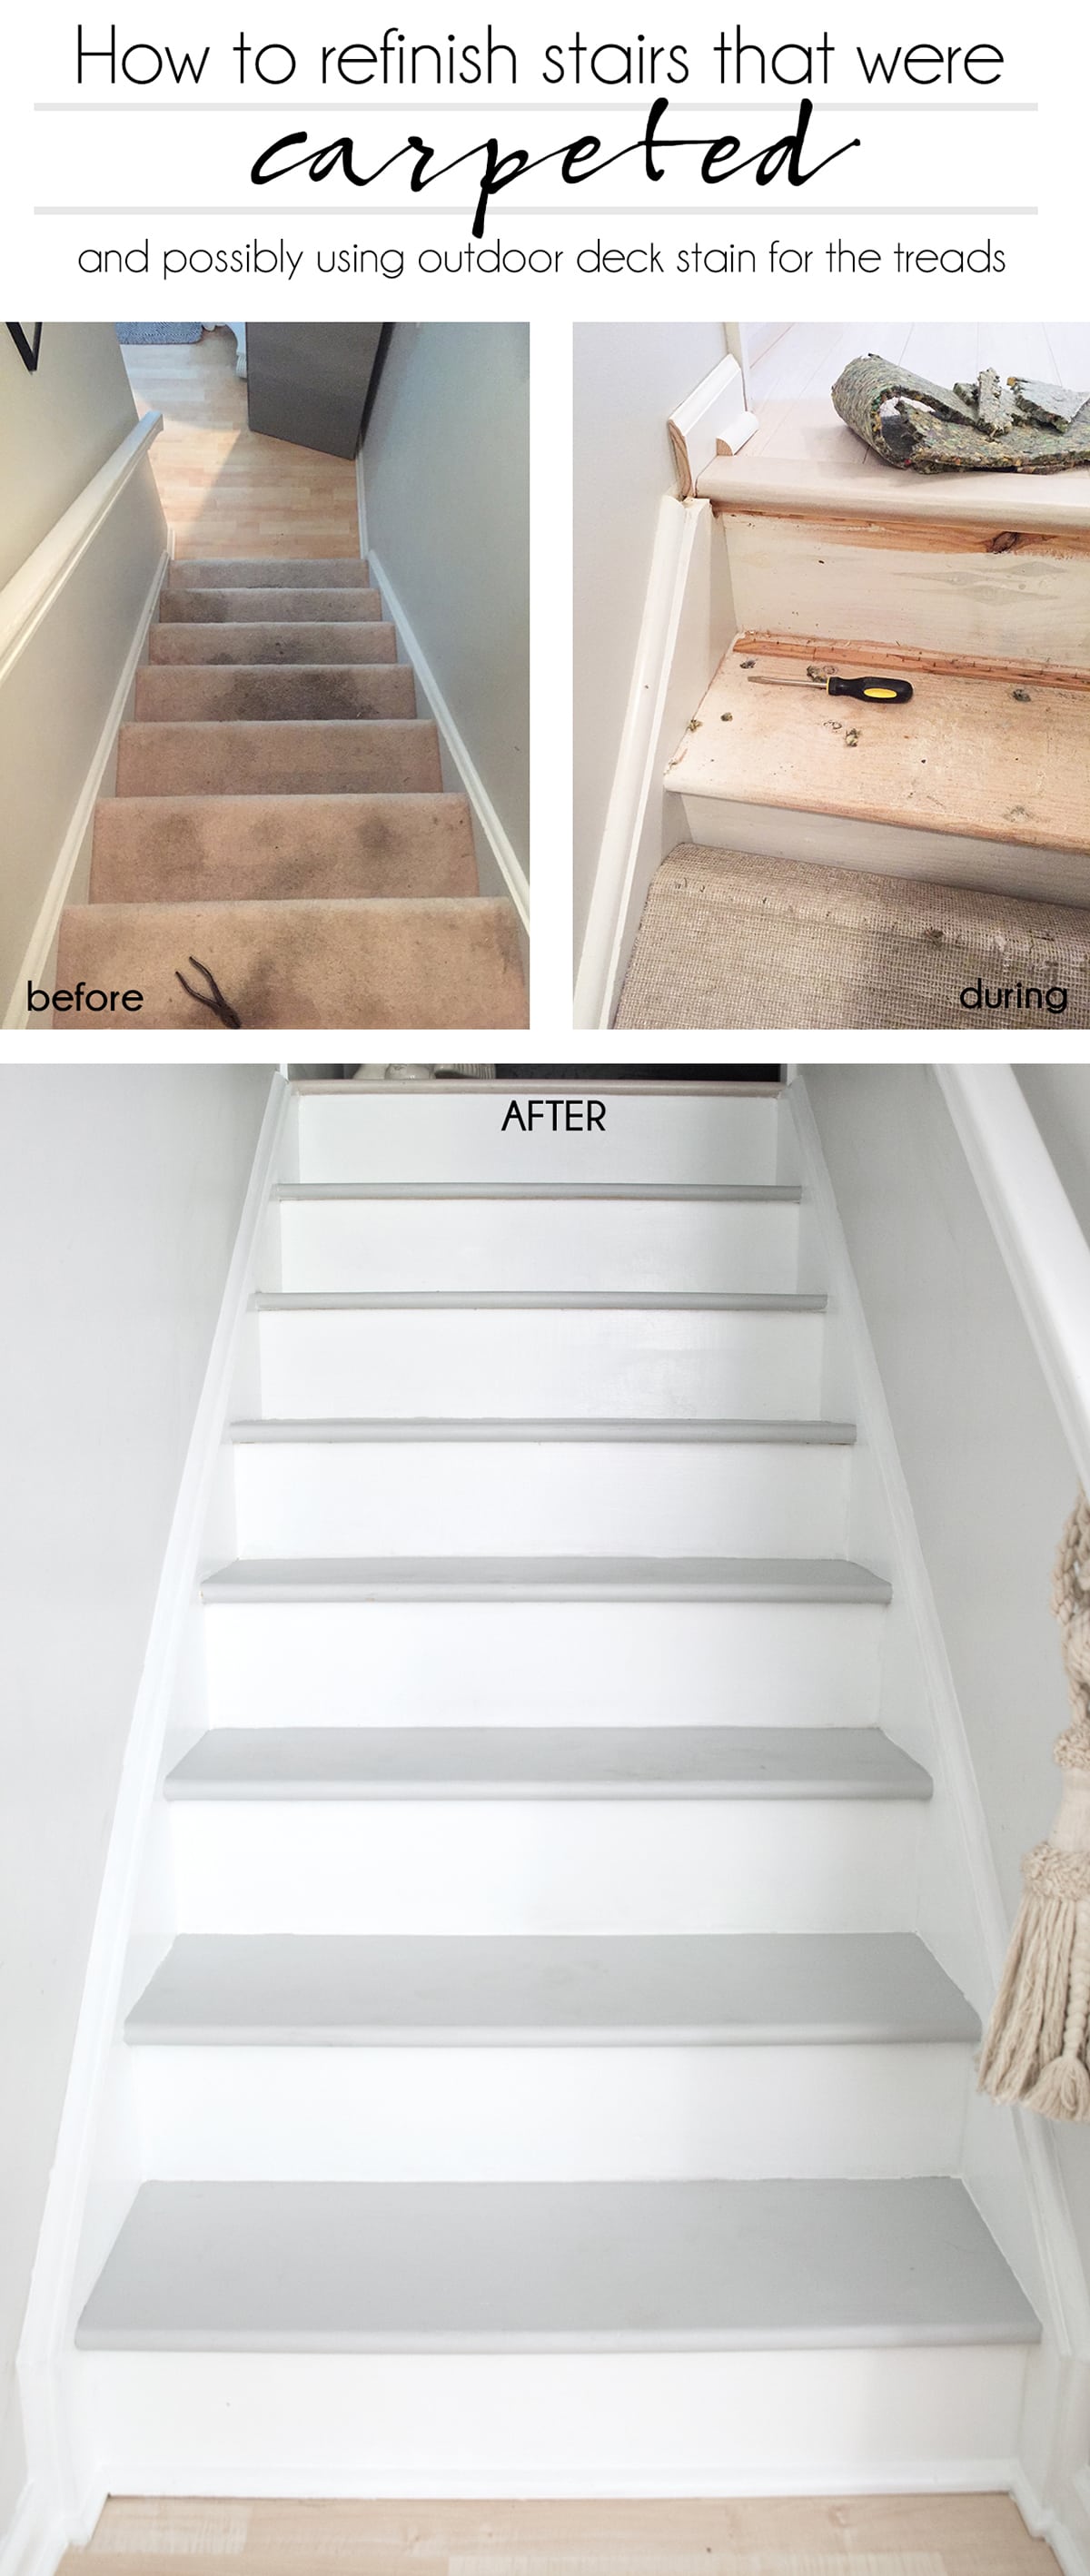
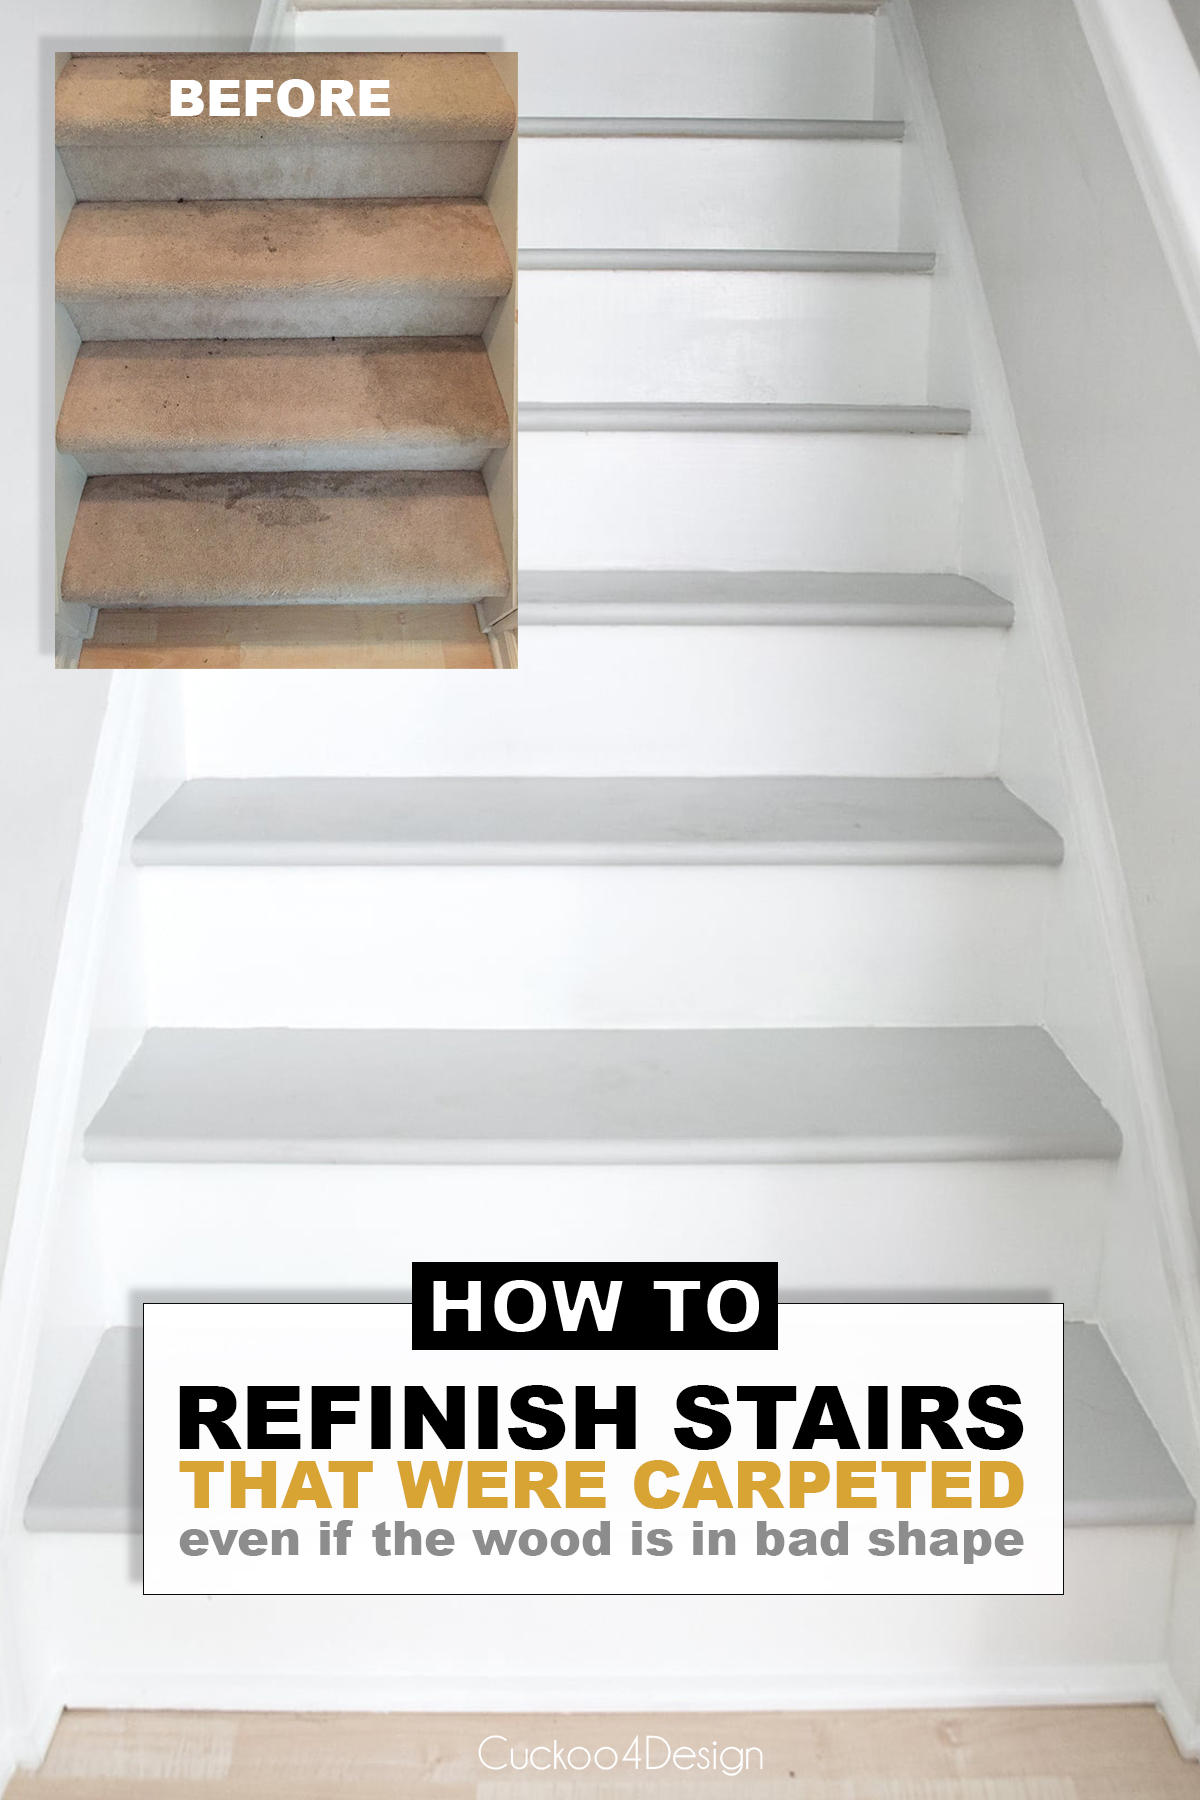
How to refinish stairs that were carpeted
Refinishing stairs that were carpeted is one of those projects that sounds simple until you pull up the carpet and see what is actually underneath. In our case, the wood was knotty, water-stained, and covered in paint drips from our builder. If you haven’t done the removal yet, I have a full post on removing carpet from stairs that covers everything, including the molding gaps. In this post, I am sharing what I did when the wood was in rough shape, what our neighbors did when their wood was in great condition, and why I ended up using an outdoor deck stain inside the house. Yes, really.
Refinishing stairs that were carpeted when the wood is in bad shape
This post may contain affiliate links from which I will earn a commission at no extra cost to you. View my full disclosure policy.
As I mentioned above already, the first part of ripping up the carpet, removing staples, removing the glue and other residue with a scraper, fixing the molding, patching the wood and priming the risers was all done in another blog post because it would have just been too long. Make sure you check out the first part of this project too.
This post simply addresses what to do with your stairs after removing carpet, if the wood is in bad shape or in good condition, so you can decide for yourself.
Supplies needed to refinishing stairs
- tinted stain (or you can buy something like this gray wood stain)
- Minwax Polyurethane for Floors Clear Satin Oil-Based Polyurethane
- brush made for oil-based paints and stains
- small rollers handle, and tray
- numerous pieces of tack cloth (to me, the most important item for this project)
- respirator mask, or heavy-duty facemask/respirator and filters
- painters tape
- rags or pads for whiping stain
- Paint of your choice for stair risers. I use one specific paint for that in my entire house for white kitchen cabinets, trim, molding, and in this case, the risers and sides. It is made by Benjamin Moore and is called INSL-X Pro Cabinet Coat. You can read more about how I also used it on my kitchen cabinets in my blog post about how to paint laminate cabinets that are peeling.
Materials used in removing carpet from stairs blog post:
- different grit sandpaper
- safety goggles
- wood filler
- putty knife
- staple remover
- scraper
- primer
How I picked my stain color
I don’t know if you remembered that I had the problem of making the downstairs maple flooring somehow transition with the upstairs light gray bamboo flooring. And also hide the cheap and damaged wood on the stair treads. So I bought several sample cans of tinted stains to test out. (Check out my post about how to remove carpet from stairs)
When I walked the aisle at the home improvement stores and browsed online, I noticed the color limitations. There was nothing that resembled the light gray floors upstairs in any way. I had pondered going with a black stain and bought one to try out…PolyShades satin classic black & polyurethane, which is a stain and protective coat all in one.
I also bought several other gray stain samples because I already knew that the black stain wouldn’t make me happy. Dirt, dust, and hair tend to show up more on dark finishes.
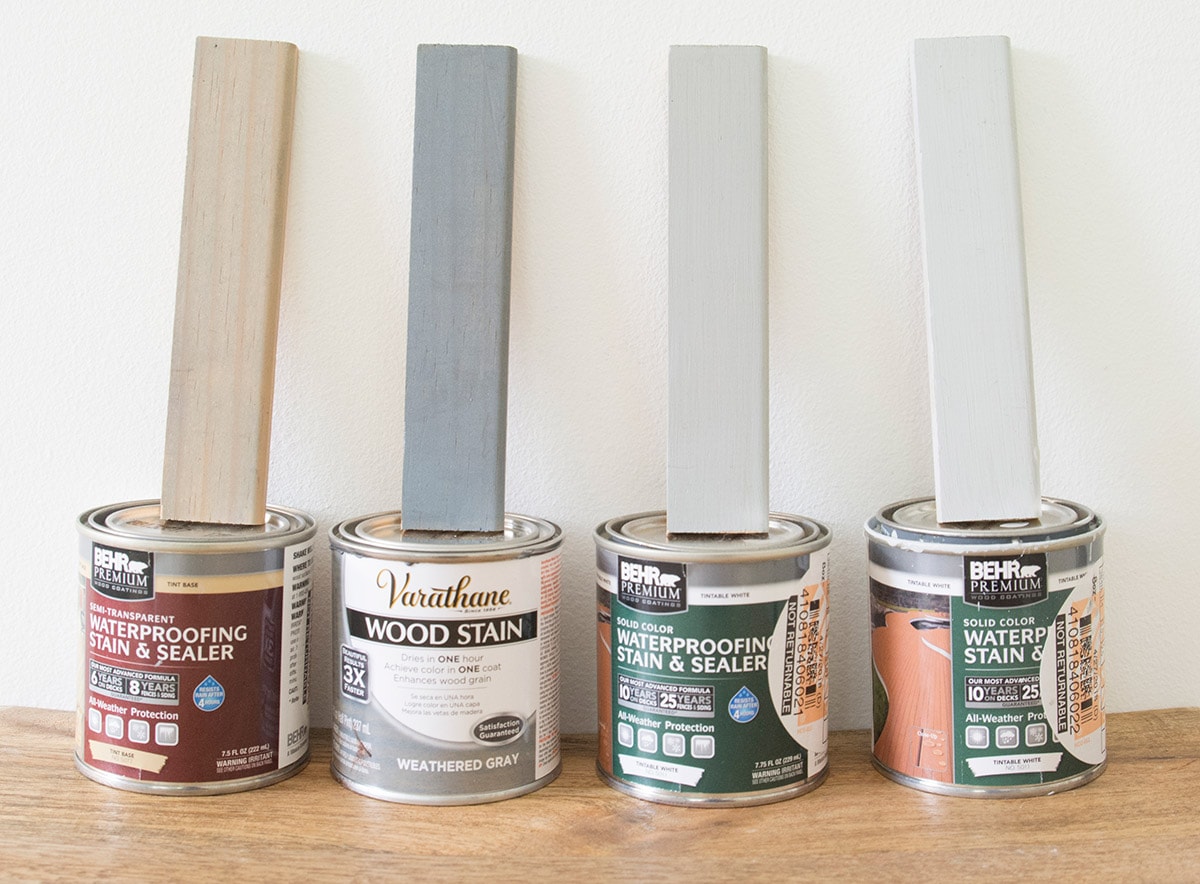
I bought from left to right: Behr Premium Waterproofing Stain & Sealer Semi Transparent (ST-125 Stonehedge), Varathane Wood Stain in Weathered Gray, Behr Premium Waterproofing Stain & Sealer Solid Color (SC-149 Light Lead and SC-365 Cape Cod Gray)
And yes, outdoor wood/deck stain snuck into my cart because I just loved the color variety. That’s where the story gets interesting or should I say iffy! The options were so much better and closer to our gray floors upstairs. They were also either semi-transparent or solid. I wanted something that would hide the awful imperfections of the cheap wood and the damage the carpet staples had done to the treads.
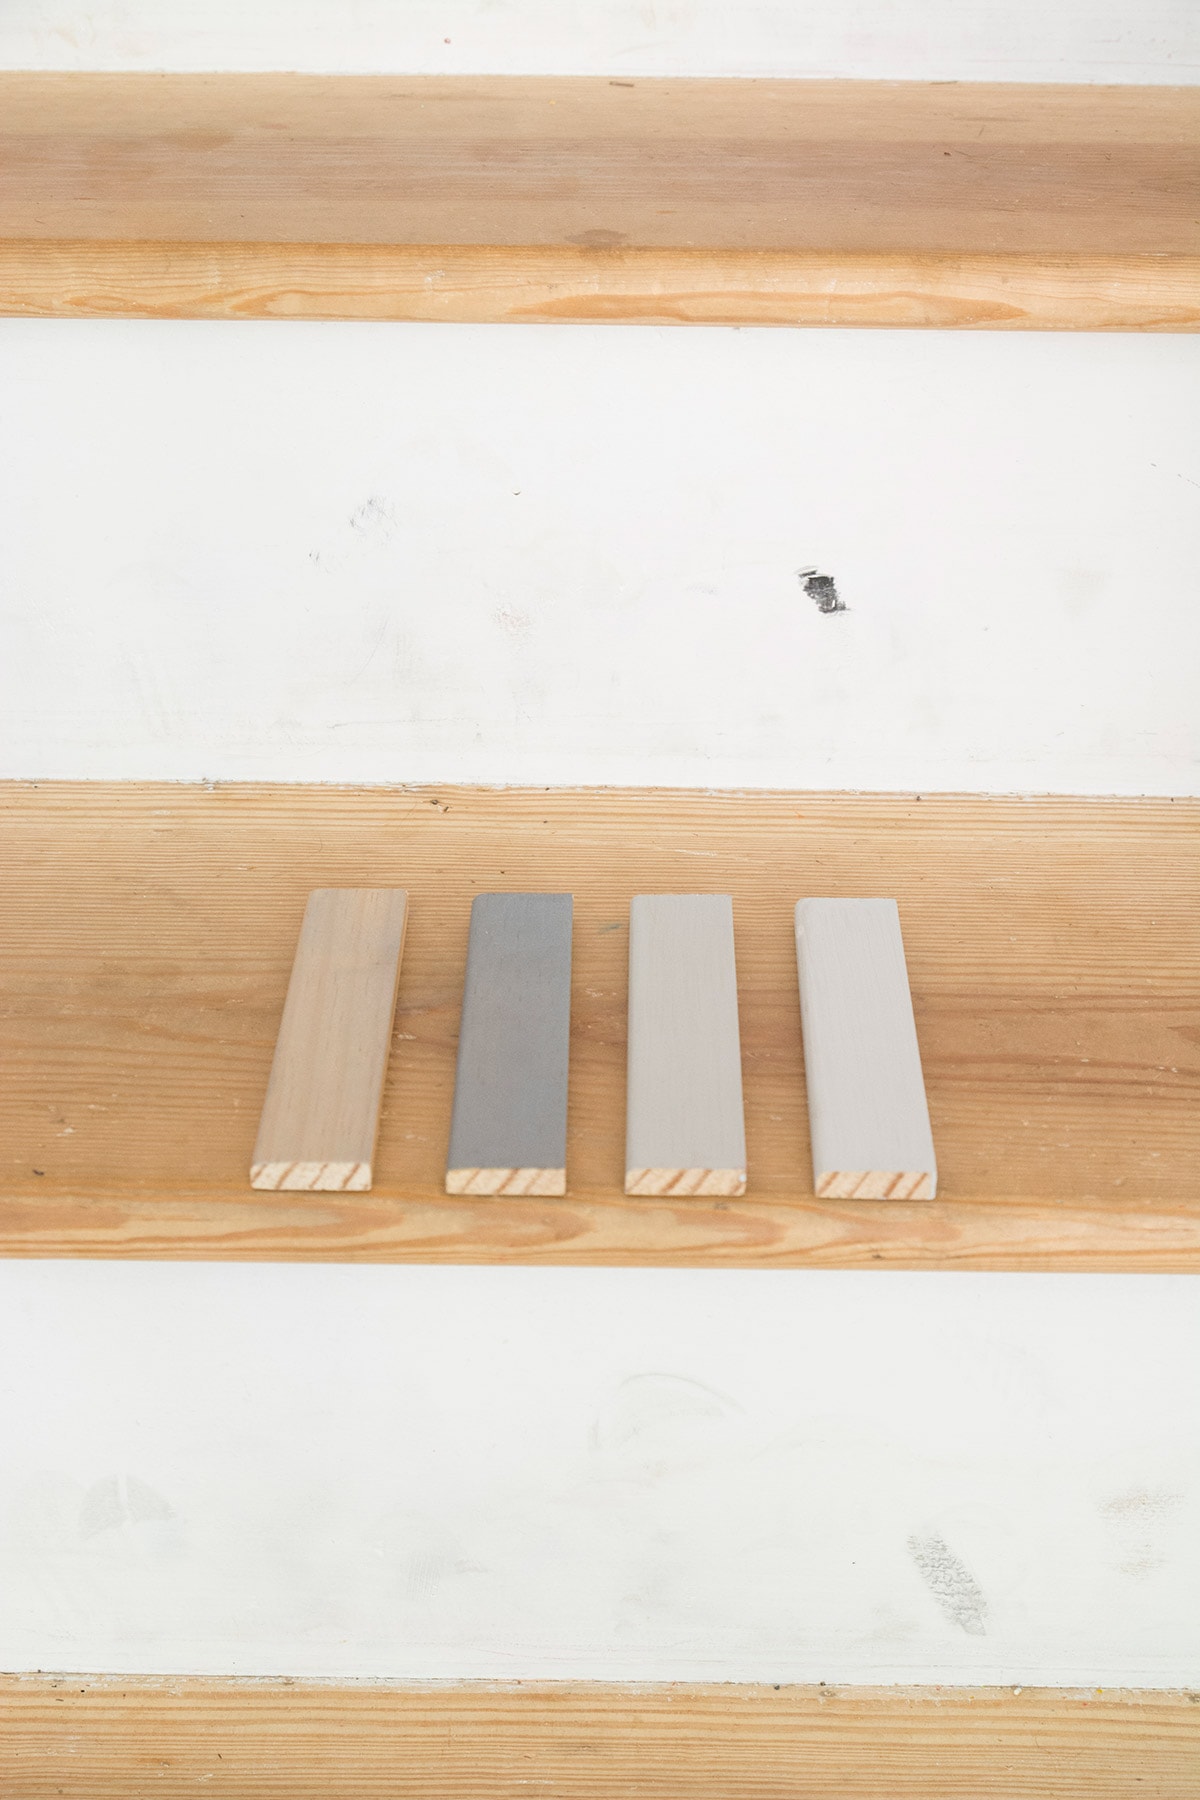
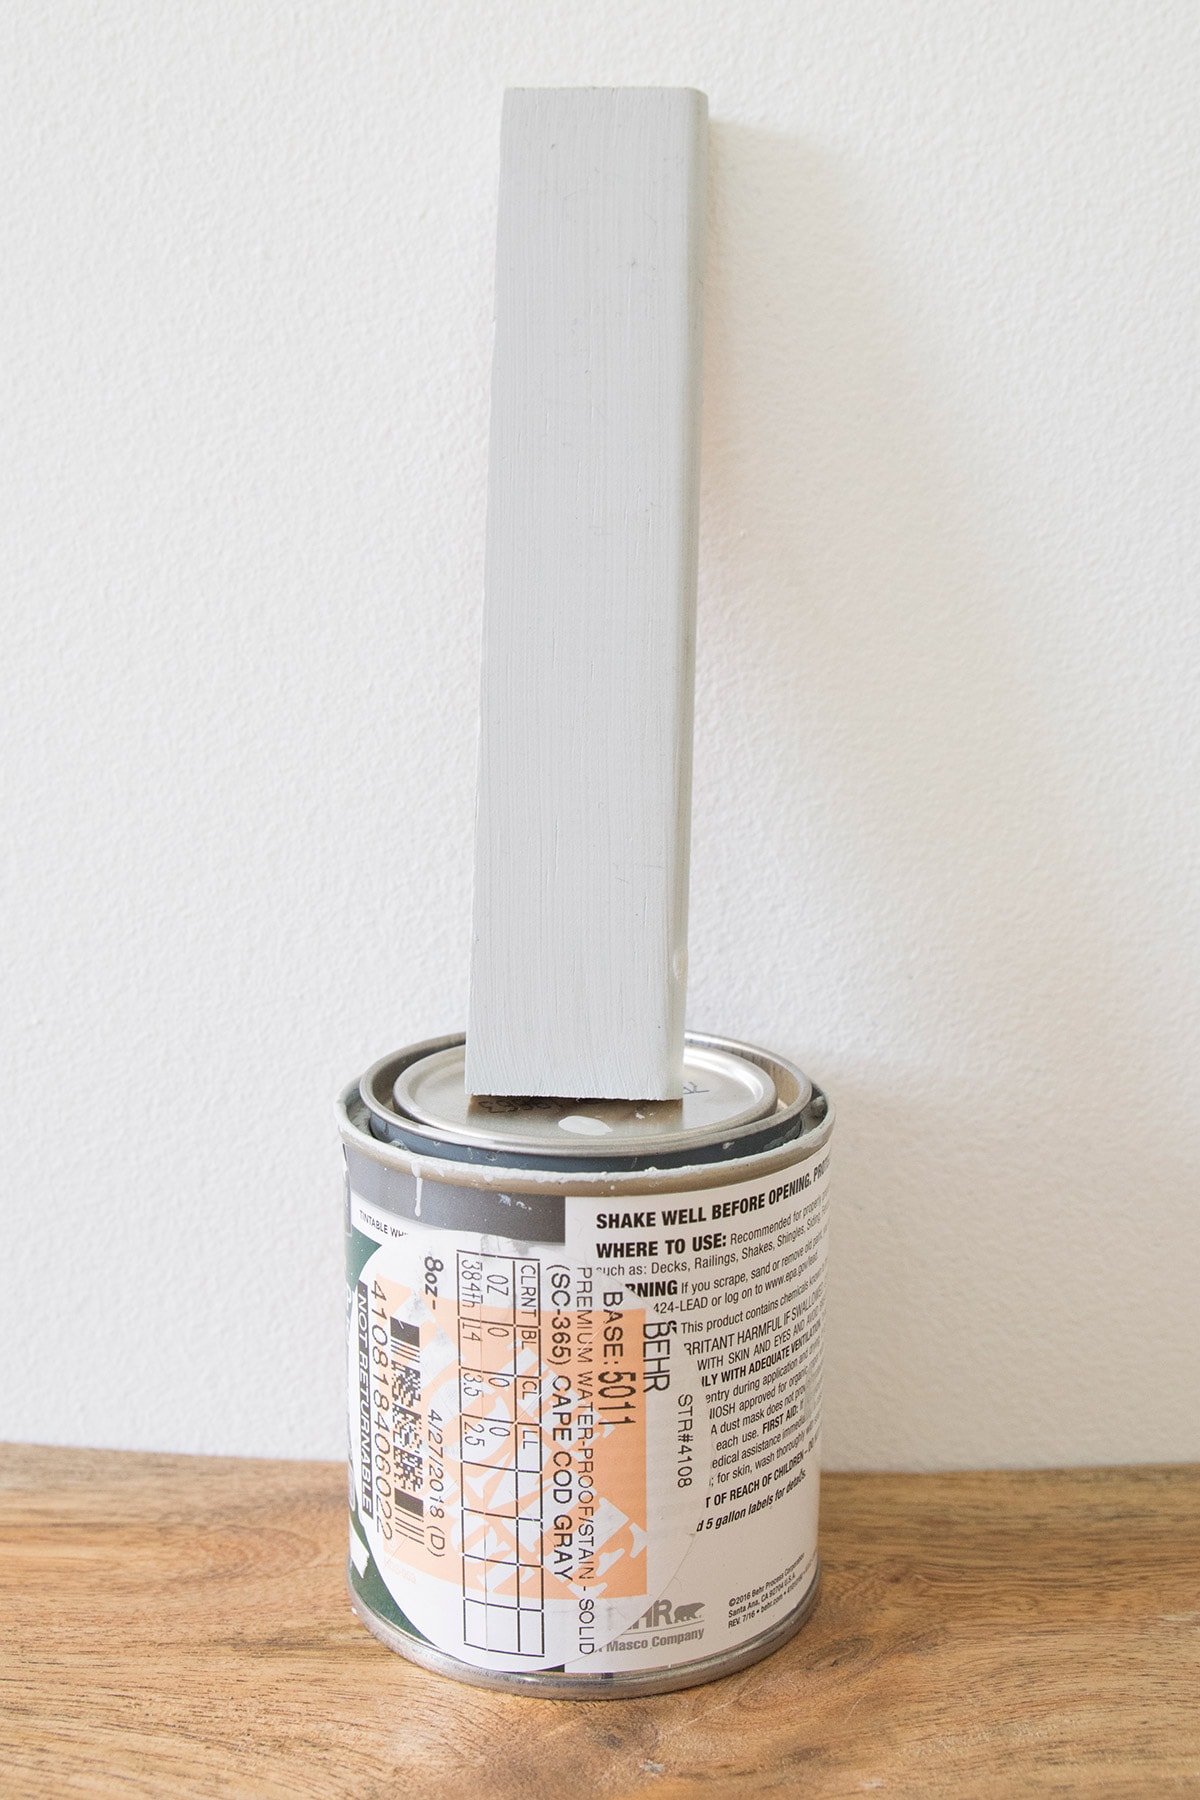
As you see in the above photo, I applied the stain samples to pieces of wood so I could test them out. I liked Behr Premium Waterproofing Stain & Sealer Solid Color in SC-365 Cape Cod Gray the best. And I was questioning if I could use the outdoor stain inside the house.
Did you see all the scuff marks and dirt above? my stairs were in bad shape again since my last post.
So I started to do some research on outdoor stain usage inside the house because of the fact that I liked the outdoor stain so much better.
Can you use outdoor deck stain on interior stairs?
Now let me get into this controversial topic of using outdoor stain inside your home a little more and the reasoning why I chose to go this route even. I did my research and based my decision on that. I’m not a professional and will not be held accountable for anyone else’s decisions.
Main Concern: Toxicity of outdoor stain
Well, let me say that both indoor and outdoor wood stains have some level of toxicity due to fumes and chemicals added to protect the wood. Exterior deck stains often incorporate additional chemicals, such as fungicides, preservatives, and pesticides.
But indoor stains are also still toxic and also contain some amount of volatile organic compounds or VOCs. You should definitely always read the manufacturer’s labels.
Even if you use indoor stain, you should never inhale the fumes of the stain and should always use a protective respirator.
Benefits of outdoor stains
A larger variety of colors and various levels of transparency of the stain to even being completely solid.
Outdoor stains are also made to be more durable since they have to withstand the elements to protect the wood.
Why I chose outdoor stain
- The area of the stair treads I needed the stain for is minimal (I only used two small sample cans, that’s it, which ended up being around $7)
- Great durability of the product.
- I used a mask while using the outdoor stain, opened all the windows and made sure my cats and children weren’t around.
- Nobody is ever concerned about walking around barefoot on decks that are stained with these types of stains, so I figured we’d be ok to occasionally walk on stair treads that are covered in the outdoor stain. I would have never used it on my entire indoor flooring!
- Another major reason is that I was just very curious to see how this stuff would work on my stairs.
- If it didn’t work out, I could still use stair tread overlays to cover my failure (they are super expensive though)
- Possibly coating the stain with a protective sealer, although it’s not required, will seal everything, whether it is an indoor or outdoor stain.
- The color options were just right. I looked at everything they had at all our home improvement stores, and there was nothing I liked that qualified as an indoor stain. None of the colors and finishes would have tied in with our grey bamboo floor with the stair treads.
Staining stairs process
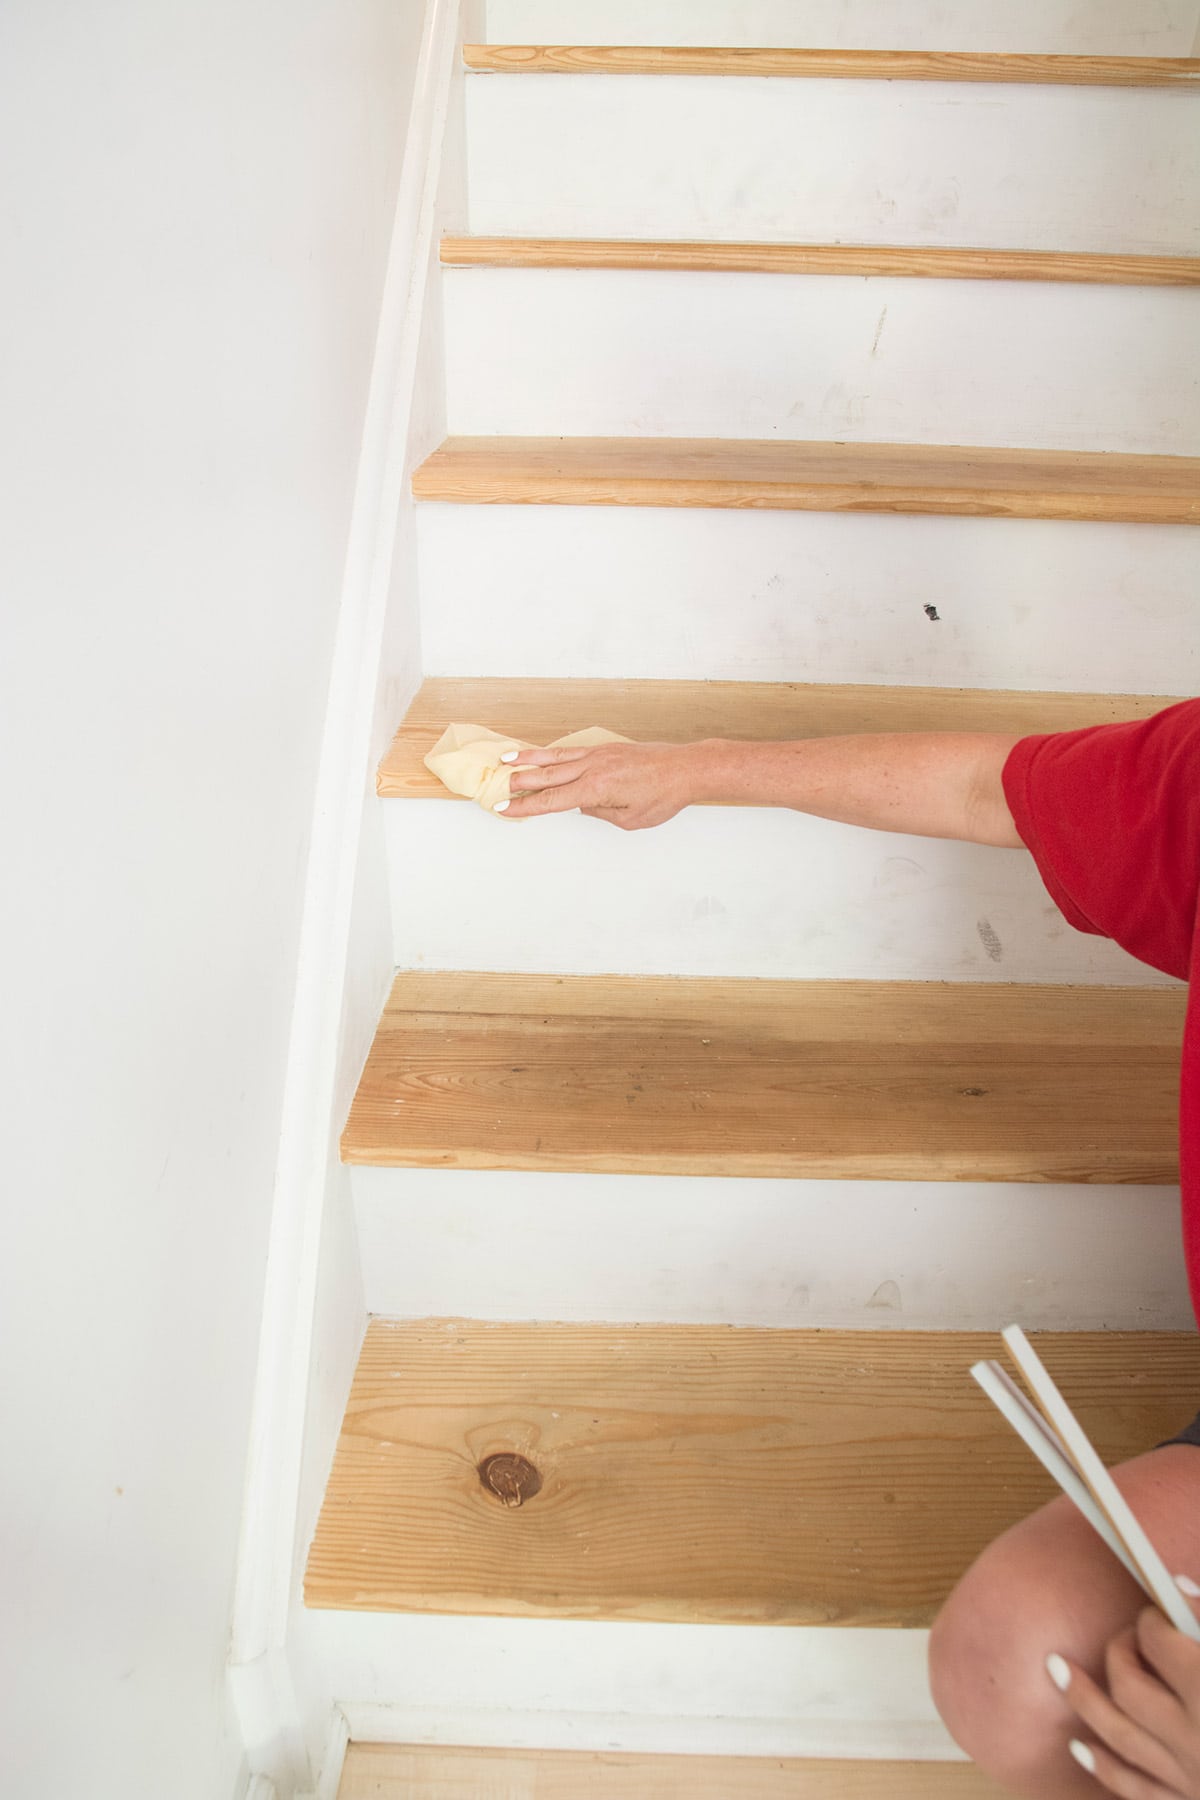
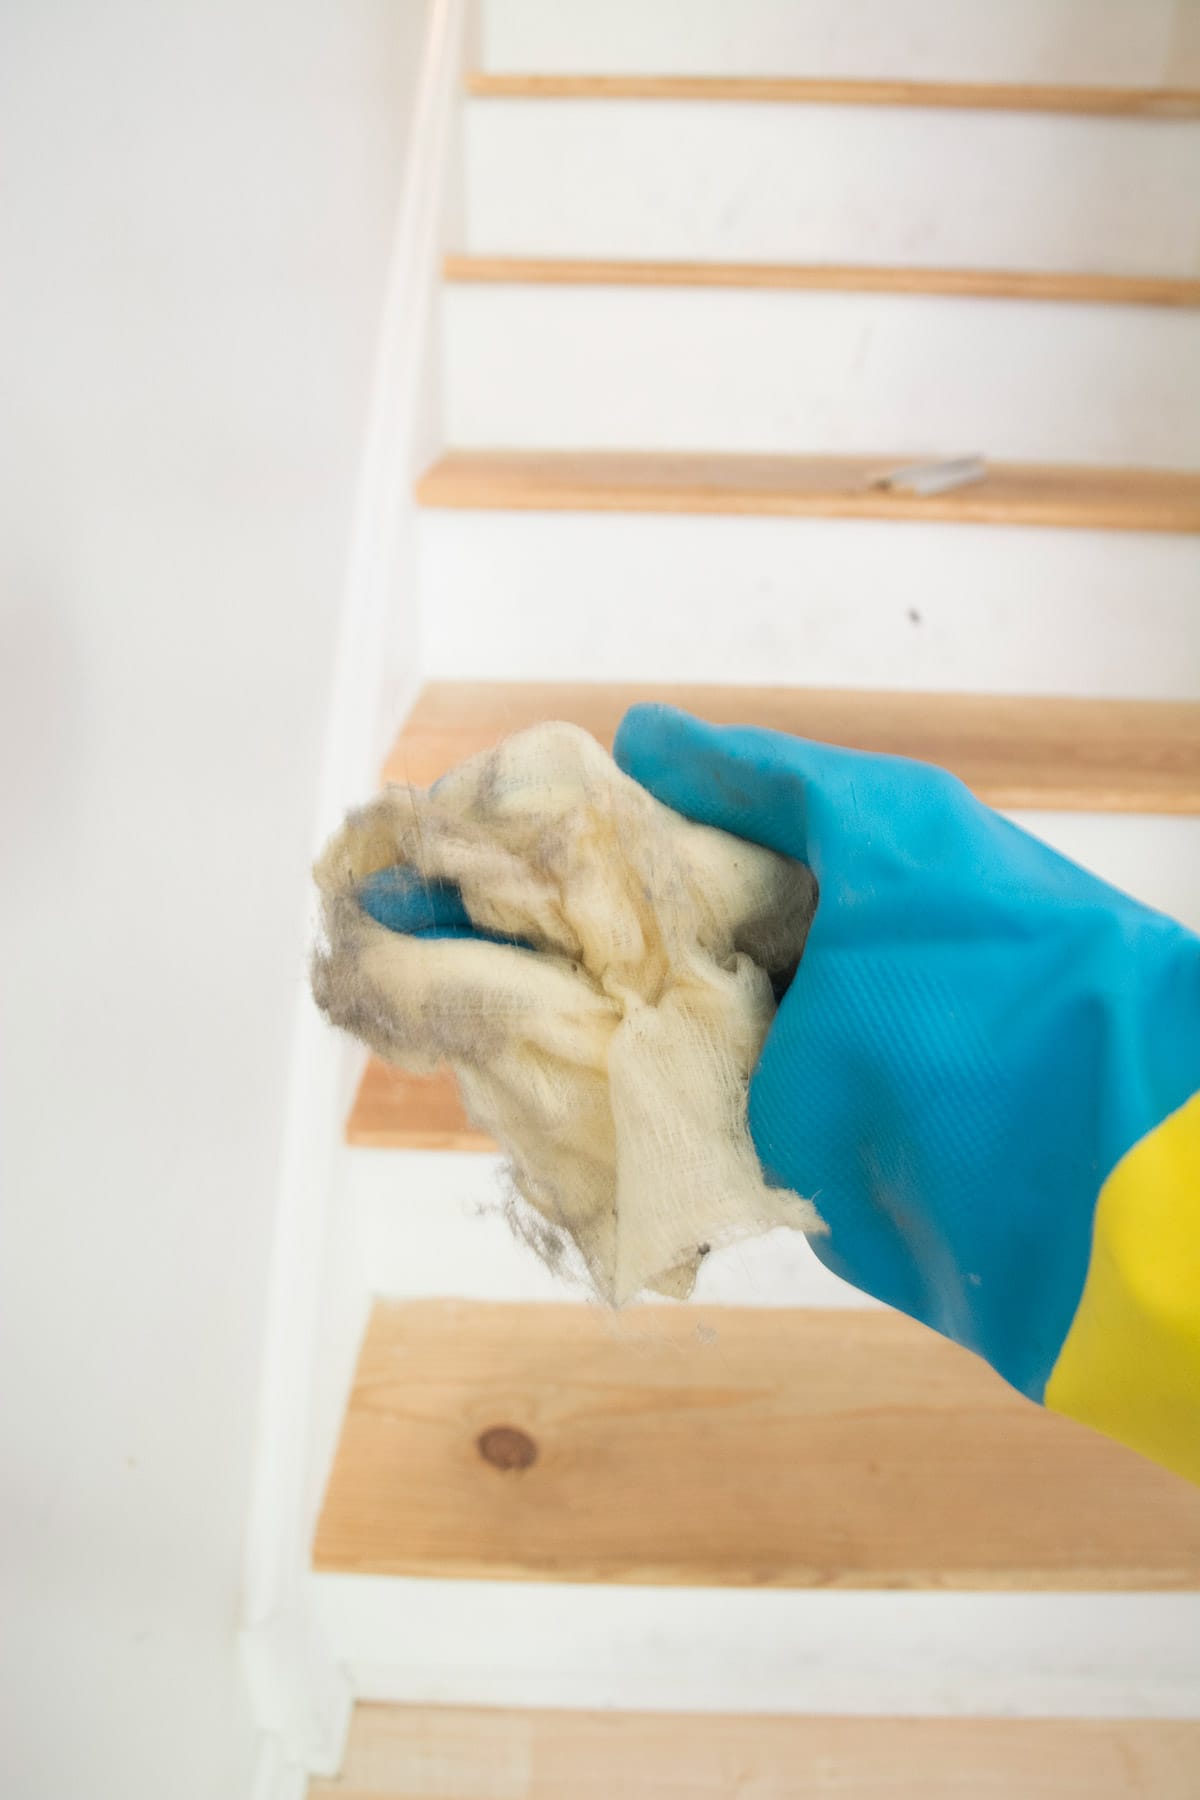
The most important part of refinishing any type of stairs is, as always, cleaning everything thoroughly before applying any product. To me, the most important little tool is the tack cloth because even after vacuuming and cleaning the stairs, I still got a huge amount of lint on the cloth. Had I not used the tack cloth on the bare wood, all that lint, debris, and dirt would have ended up in my stain and paint.
Sorry for the blurry photo 😉
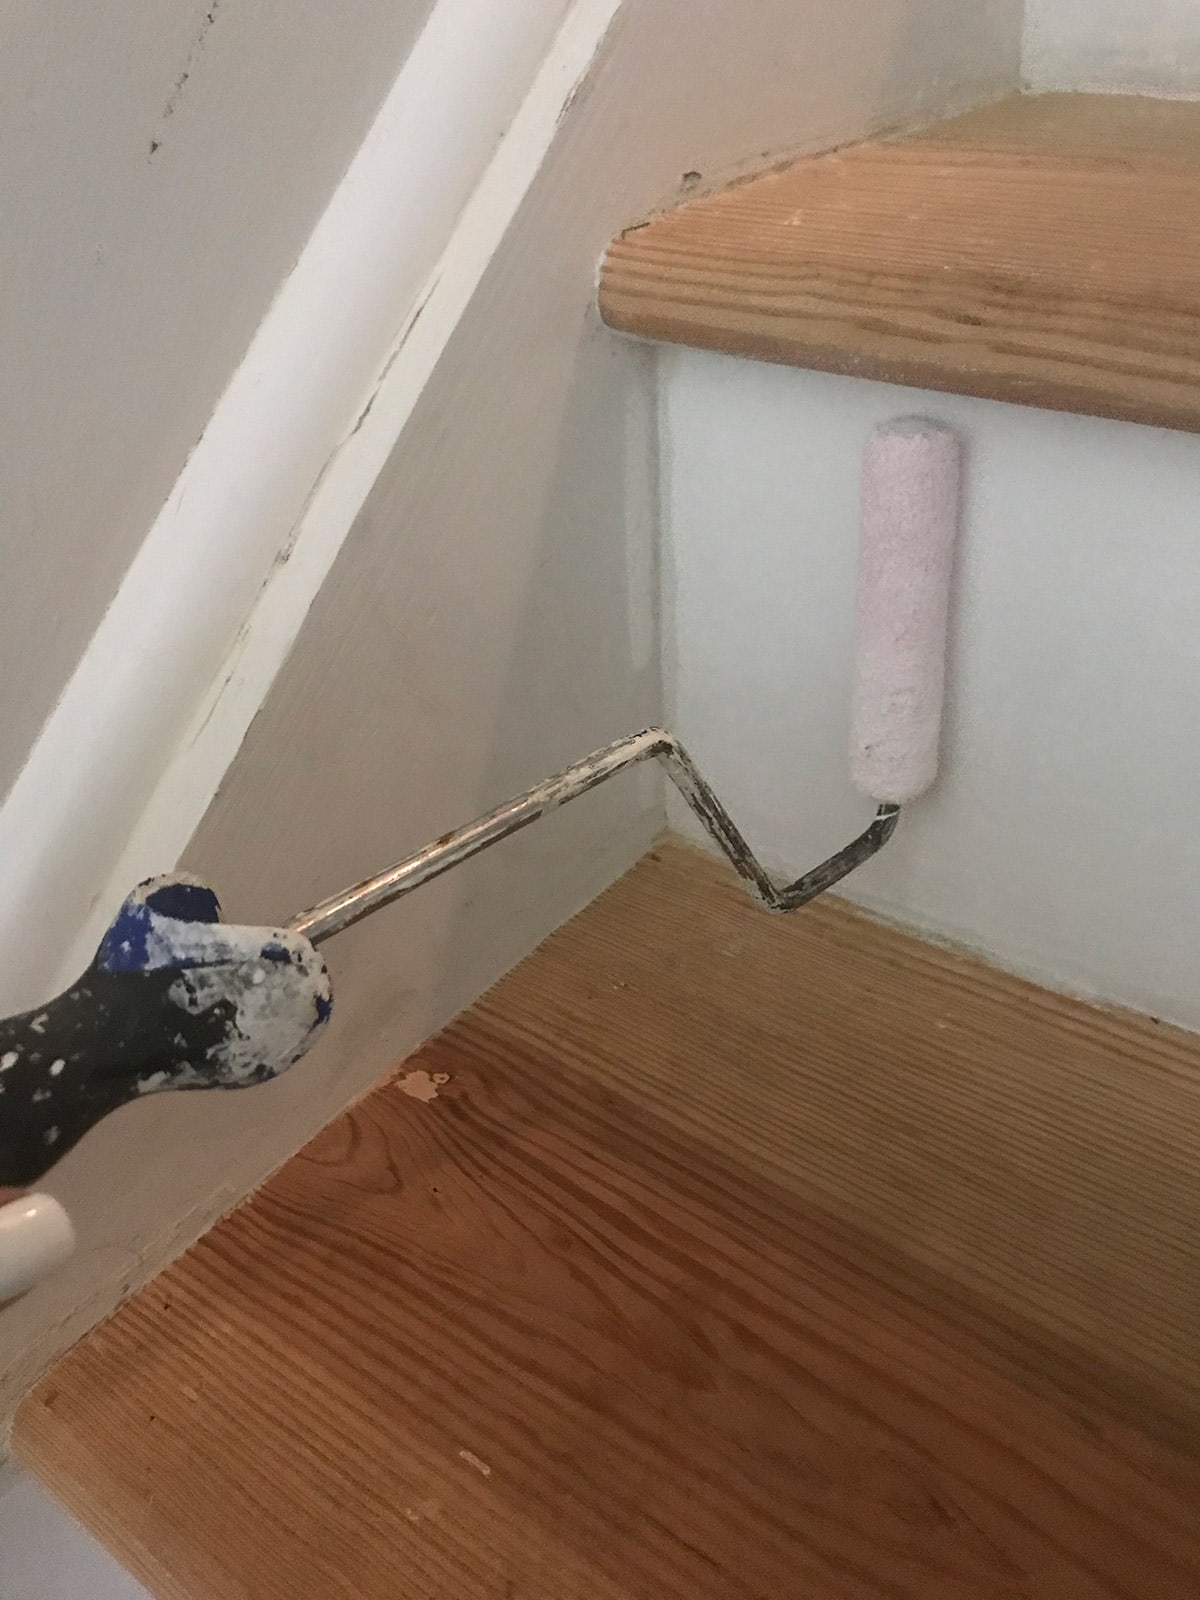
For painting the white risers, I love using the small rollers that I mentioned in my supplies list. They work really well with my favorite white paint. Remember, I had already primed the stairs right after ripping out the carpet. So I didn’t need to do that anymore.
I use the rollers on the risers and a little bit on the sides. And I cut in and painted the rest with my good brush.
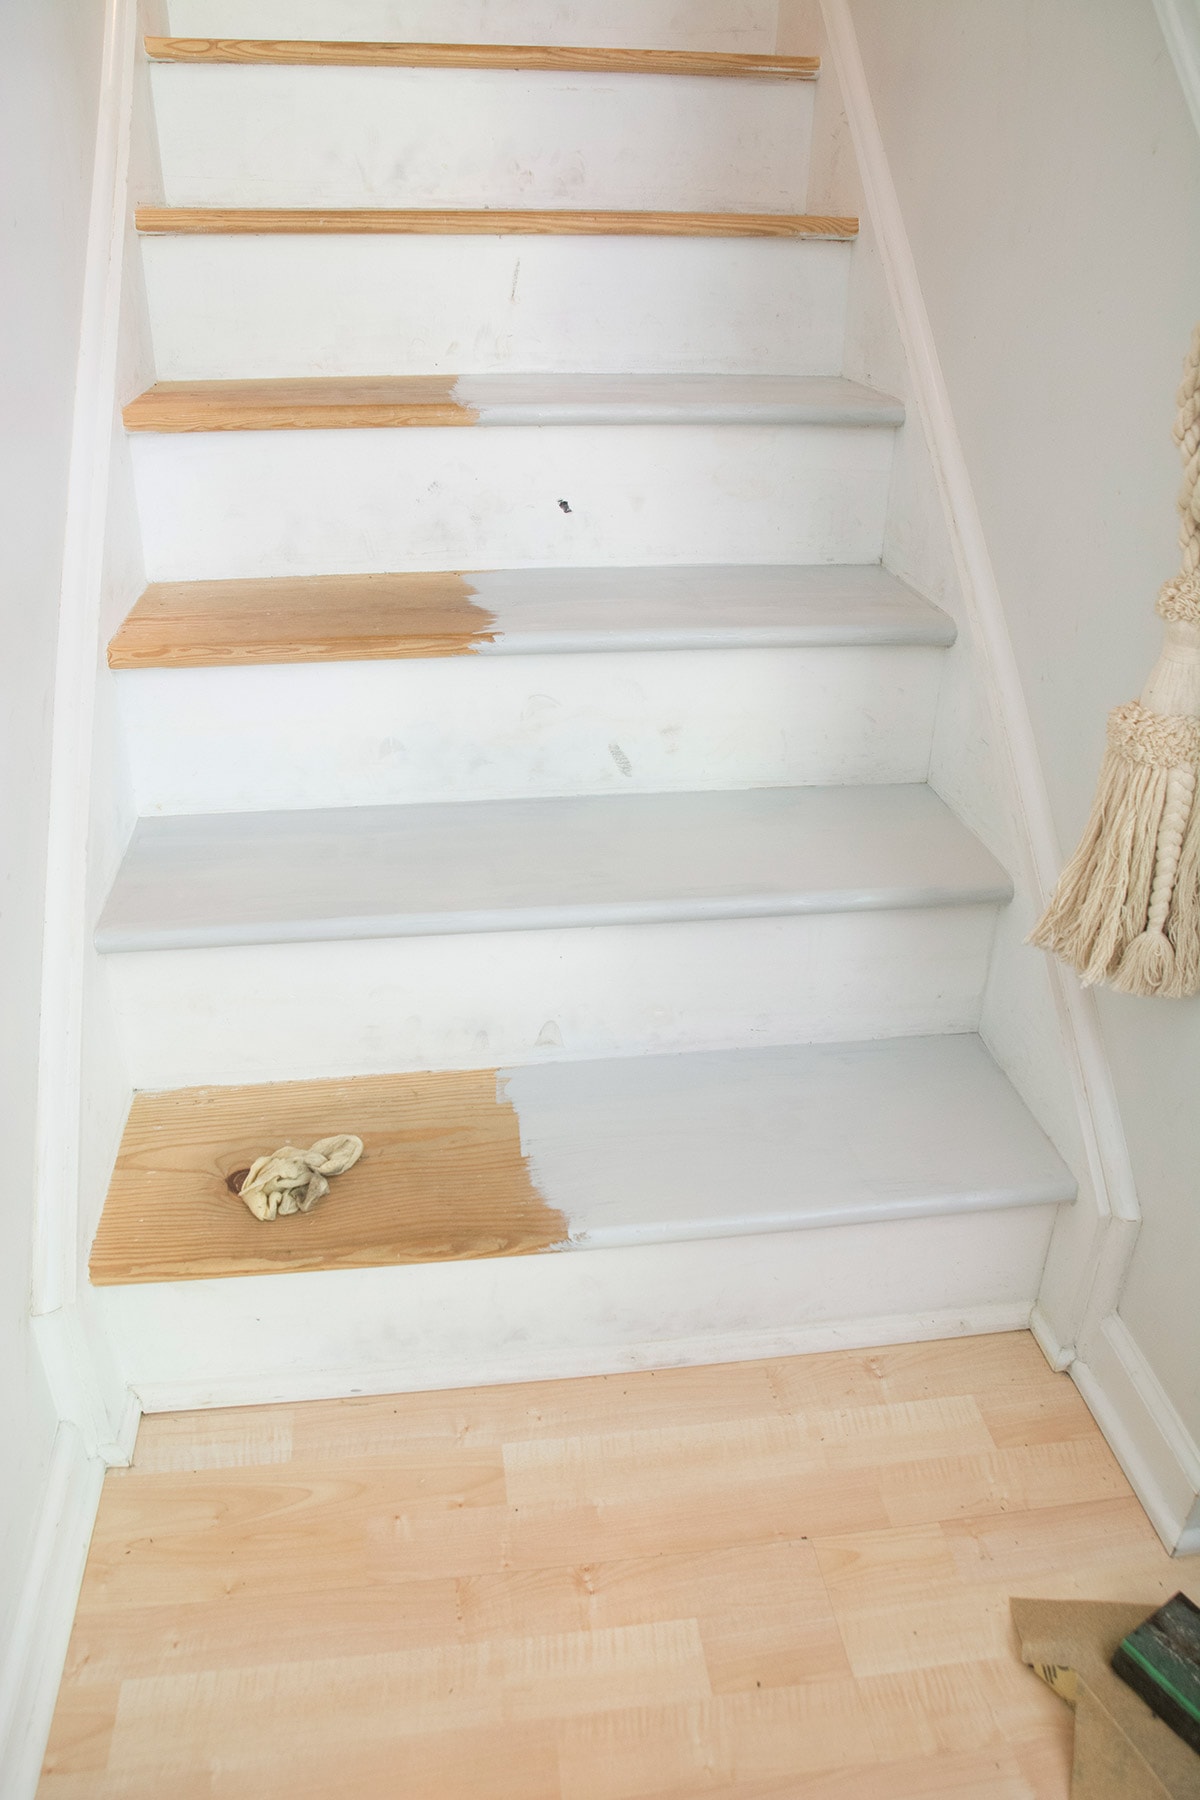
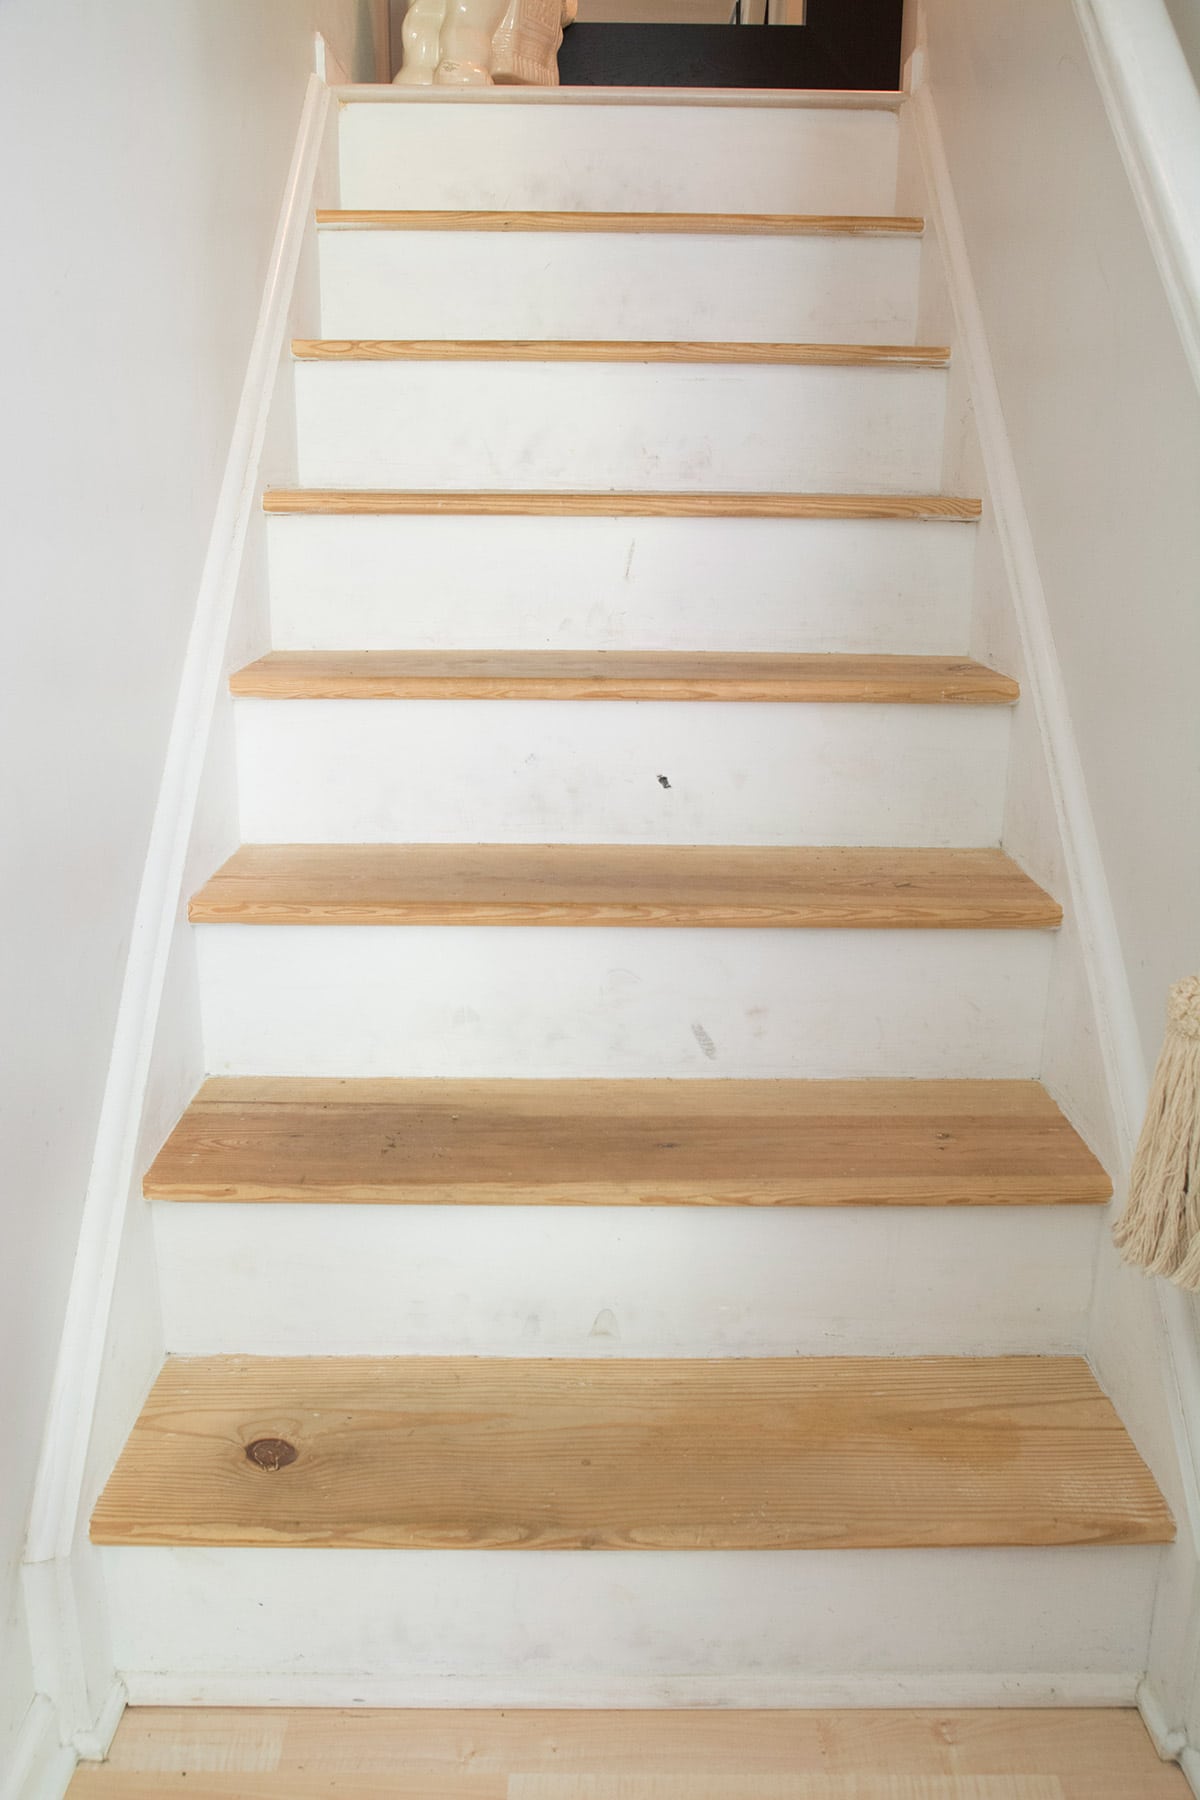
Just look at the bad shape the stairs were in:
I mentioned painter’s tape for people who like to tape before painting. I personally just cut in freehand with a good paintbrush now, when I paint certain projects. This one was one of those projects.
And before cutting in and painting in each stair tread, I made sure to use the tack cloth again. I painted (yes, this stain goes on just like paint) two layers on the right side first. That way, we could walk up the left side while the other side dried. This isn’t the best way because you could end up with a line where the sides meet. The best way would be to paint/stain every other tread, but at that time, we had small children who were incapable of walking big leaps like that. So this way was the second-best option.
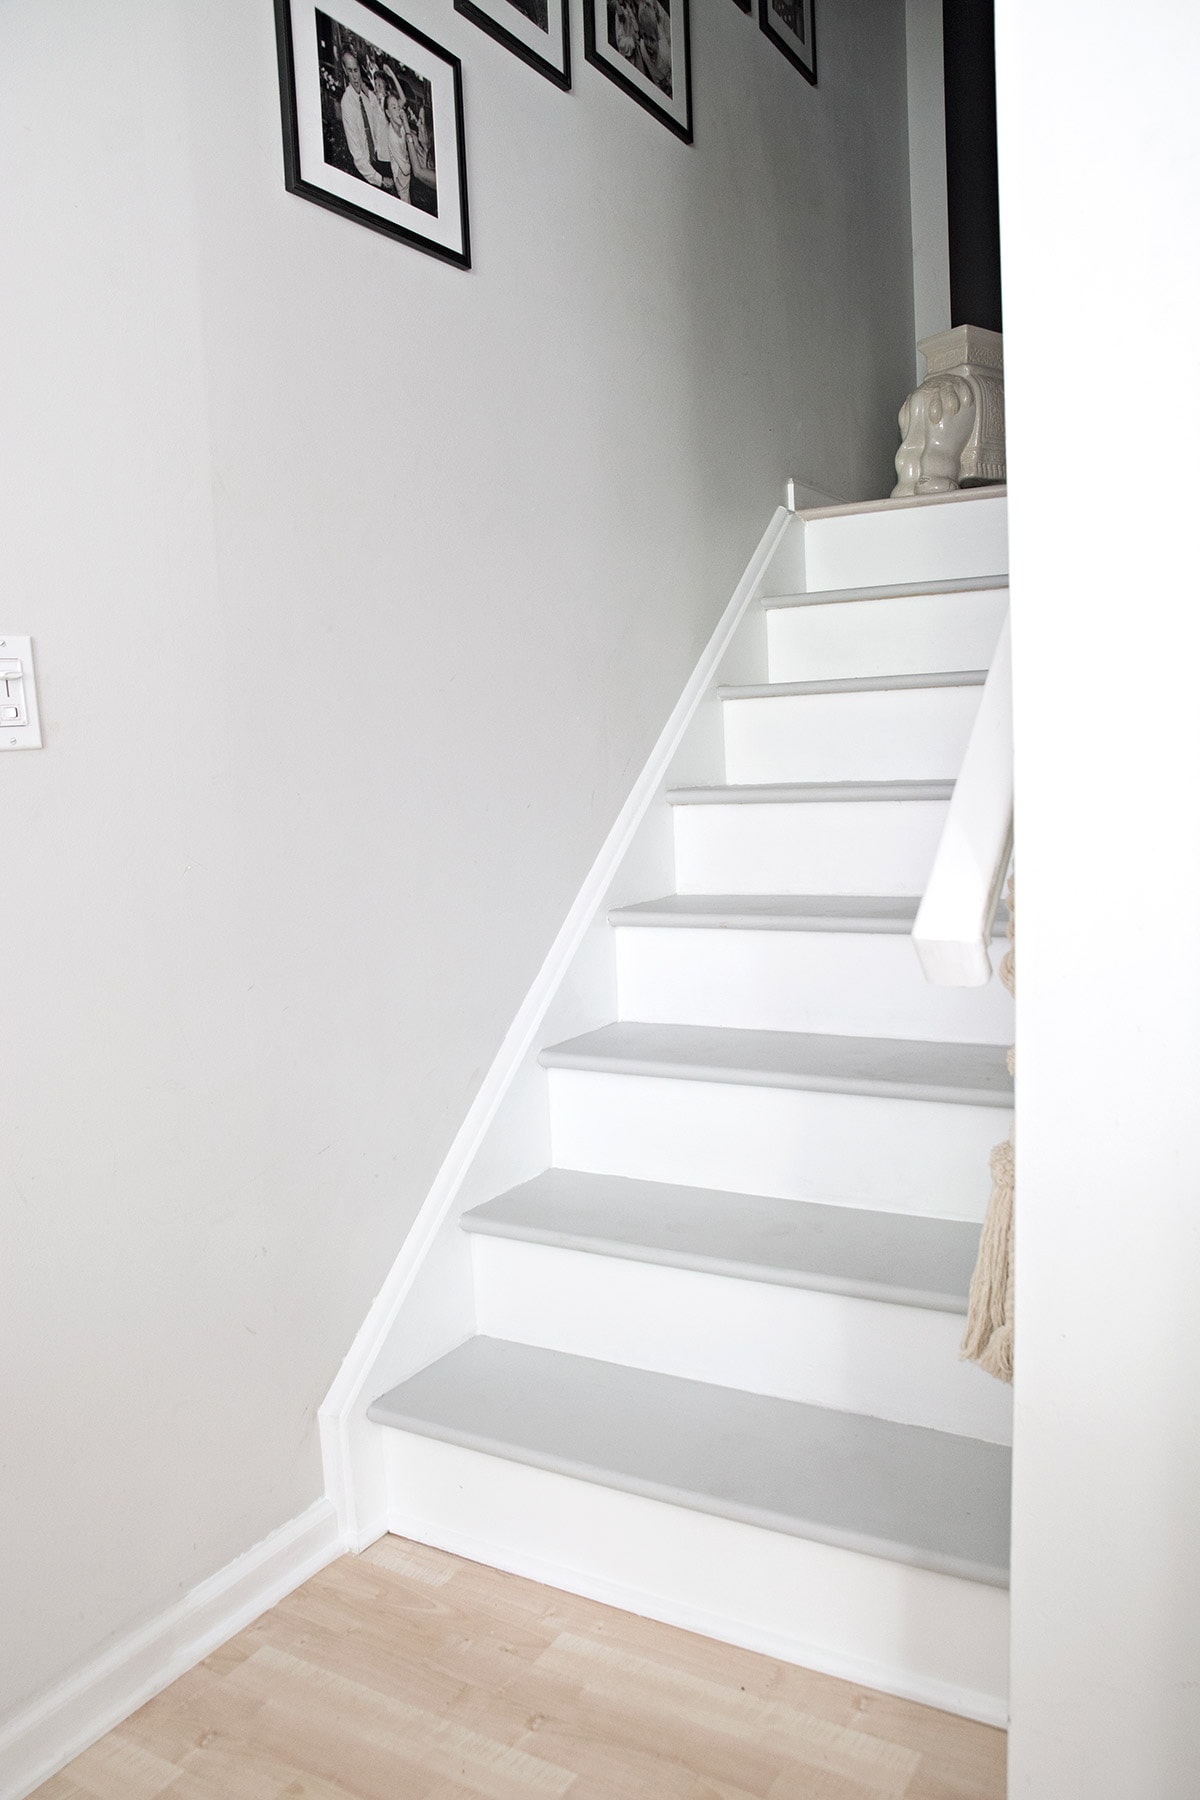
When I was finished with the stain, it was time to apply the protective coat. I used Minwax Polyurethane for Floors Clear Satin Oil-Based Polyurethane and applied it with a synthetic pad applicator and a high-quality brush made for polyurethane. Looking back, I should have done more than two coats, like my neighbors did, which I mention below.
Refinishing stairs that were carpeted when the wood is in good shape
The staircase prep is the exact same way as I mentioned in my last blog post and above, with the old carpet removal, the filling, sanding, cleaning, and priming. This time. I used the conventional wood stain and polyurethane route.
My neighbors used a natural colored stain to match their more yellow-toned laminate floor, followed by polyurethane. They applied the stain with a foam brush and wiped the excess off with a staining pad and some rags.
After putting on the first coat of poly when the stain had dried, they quickly noticed that the varnish took a very long time to dry, which presented the same issue I had: trying to figure out how to use the stairs during the project. Fortunately, they didn’t have small kids and could just finish every other tread.
They also ended up applying 5 coats of polyurethane to make sure the very high-traffic areas were protected thoroughly. In between coats, the poly tends to bubble a little bit. When this happens, use very fine-grit sandpaper to lightly sand off the bubbles. Then wipe everything with a tack cloth, and add another layer of poly.
What about plywood stairs?
If you pull up your carpet and find plywood instead of hardwood, staining is not really an option since plywood does not absorb stain evenly. Plywood is very uneven and might need extra wood filler and lots of sanding to get an even surface for painting.
Follow that up with a durable floor paint or covering them with stair tread overlays. This is actually what a lot of newer builds have, so do not be discouraged! Painted treads can look really clean and intentional, especially with white painted risers.
Our refinished stairs
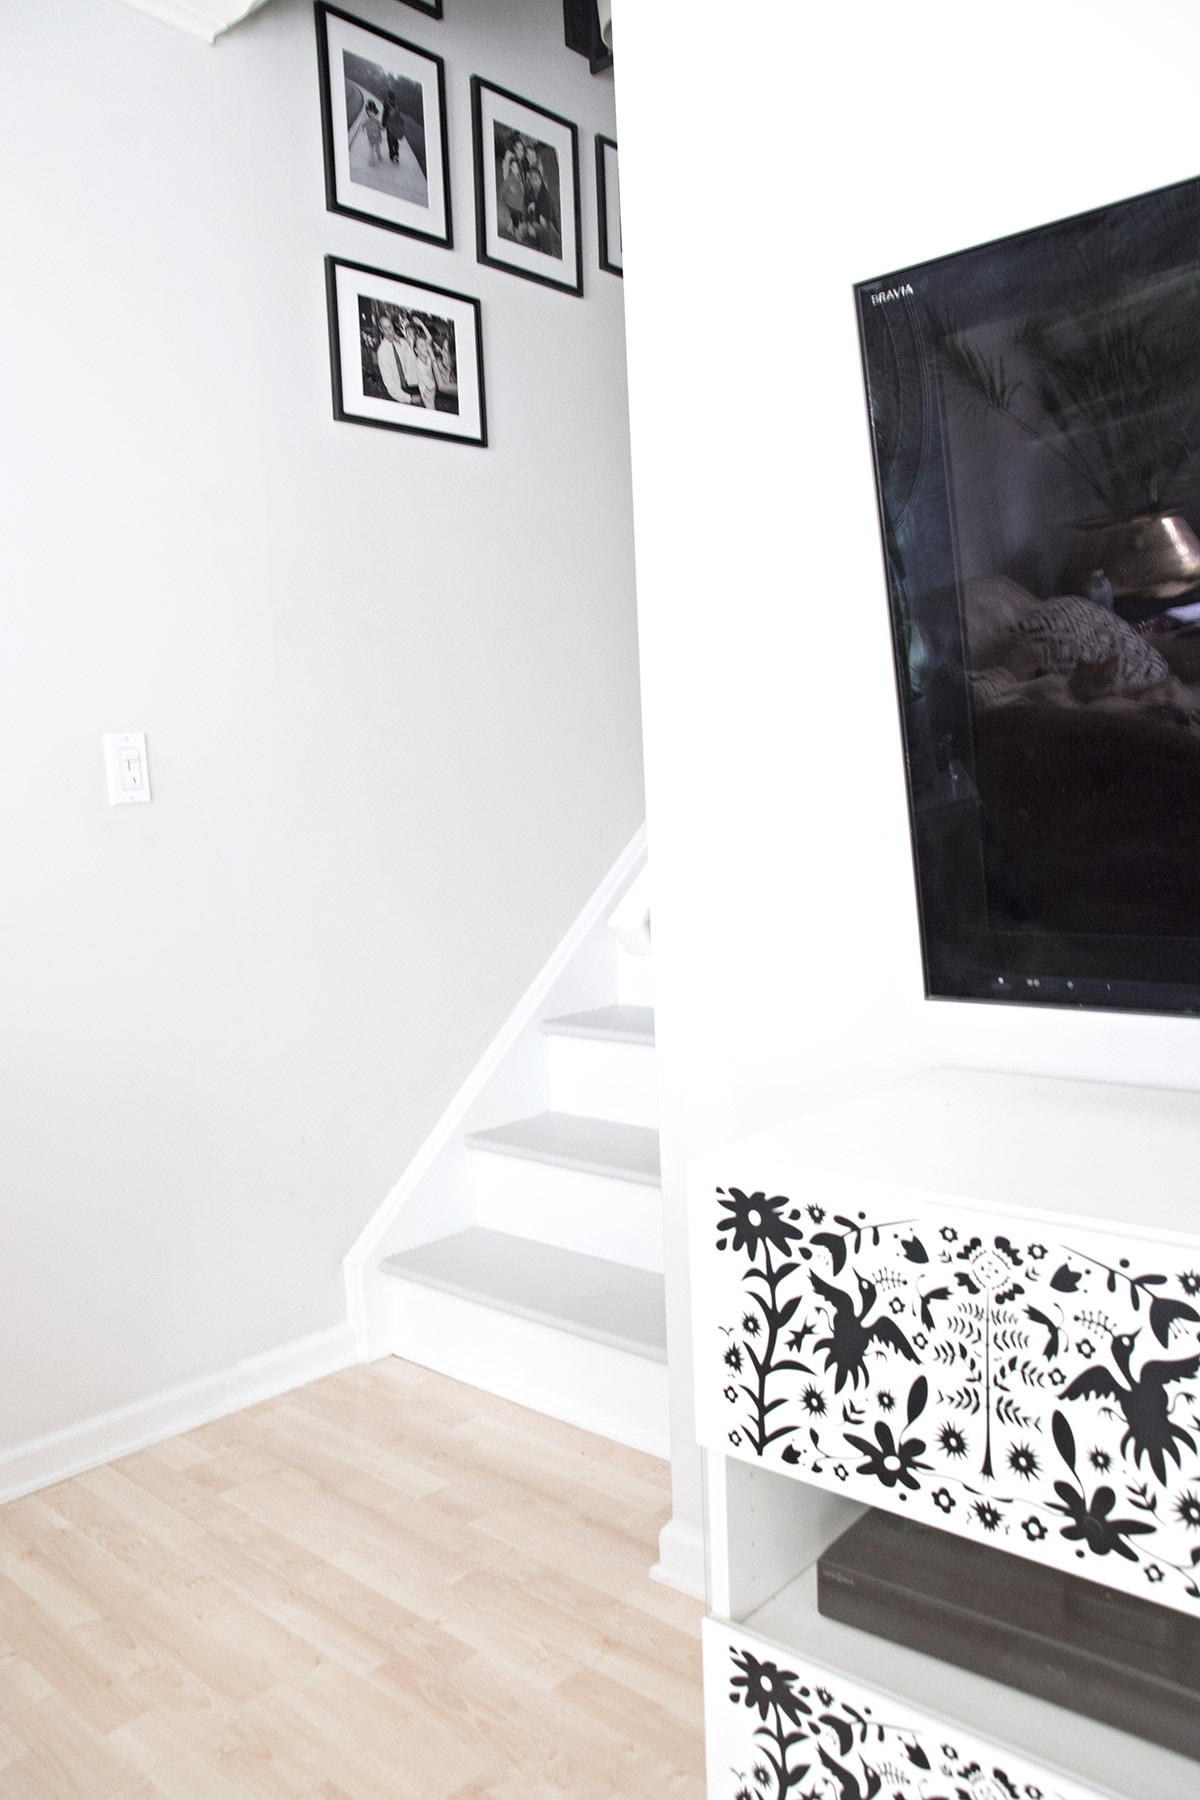
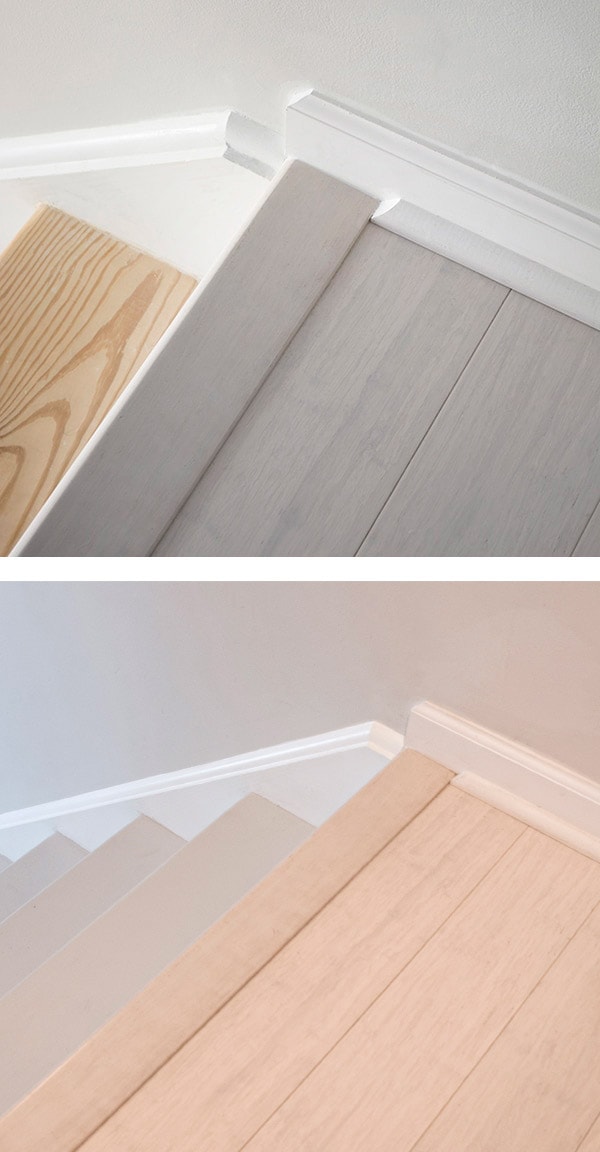
And here is the view we have right now with the gray outdoor deck stain and the gray bamboo hardwood flooring.
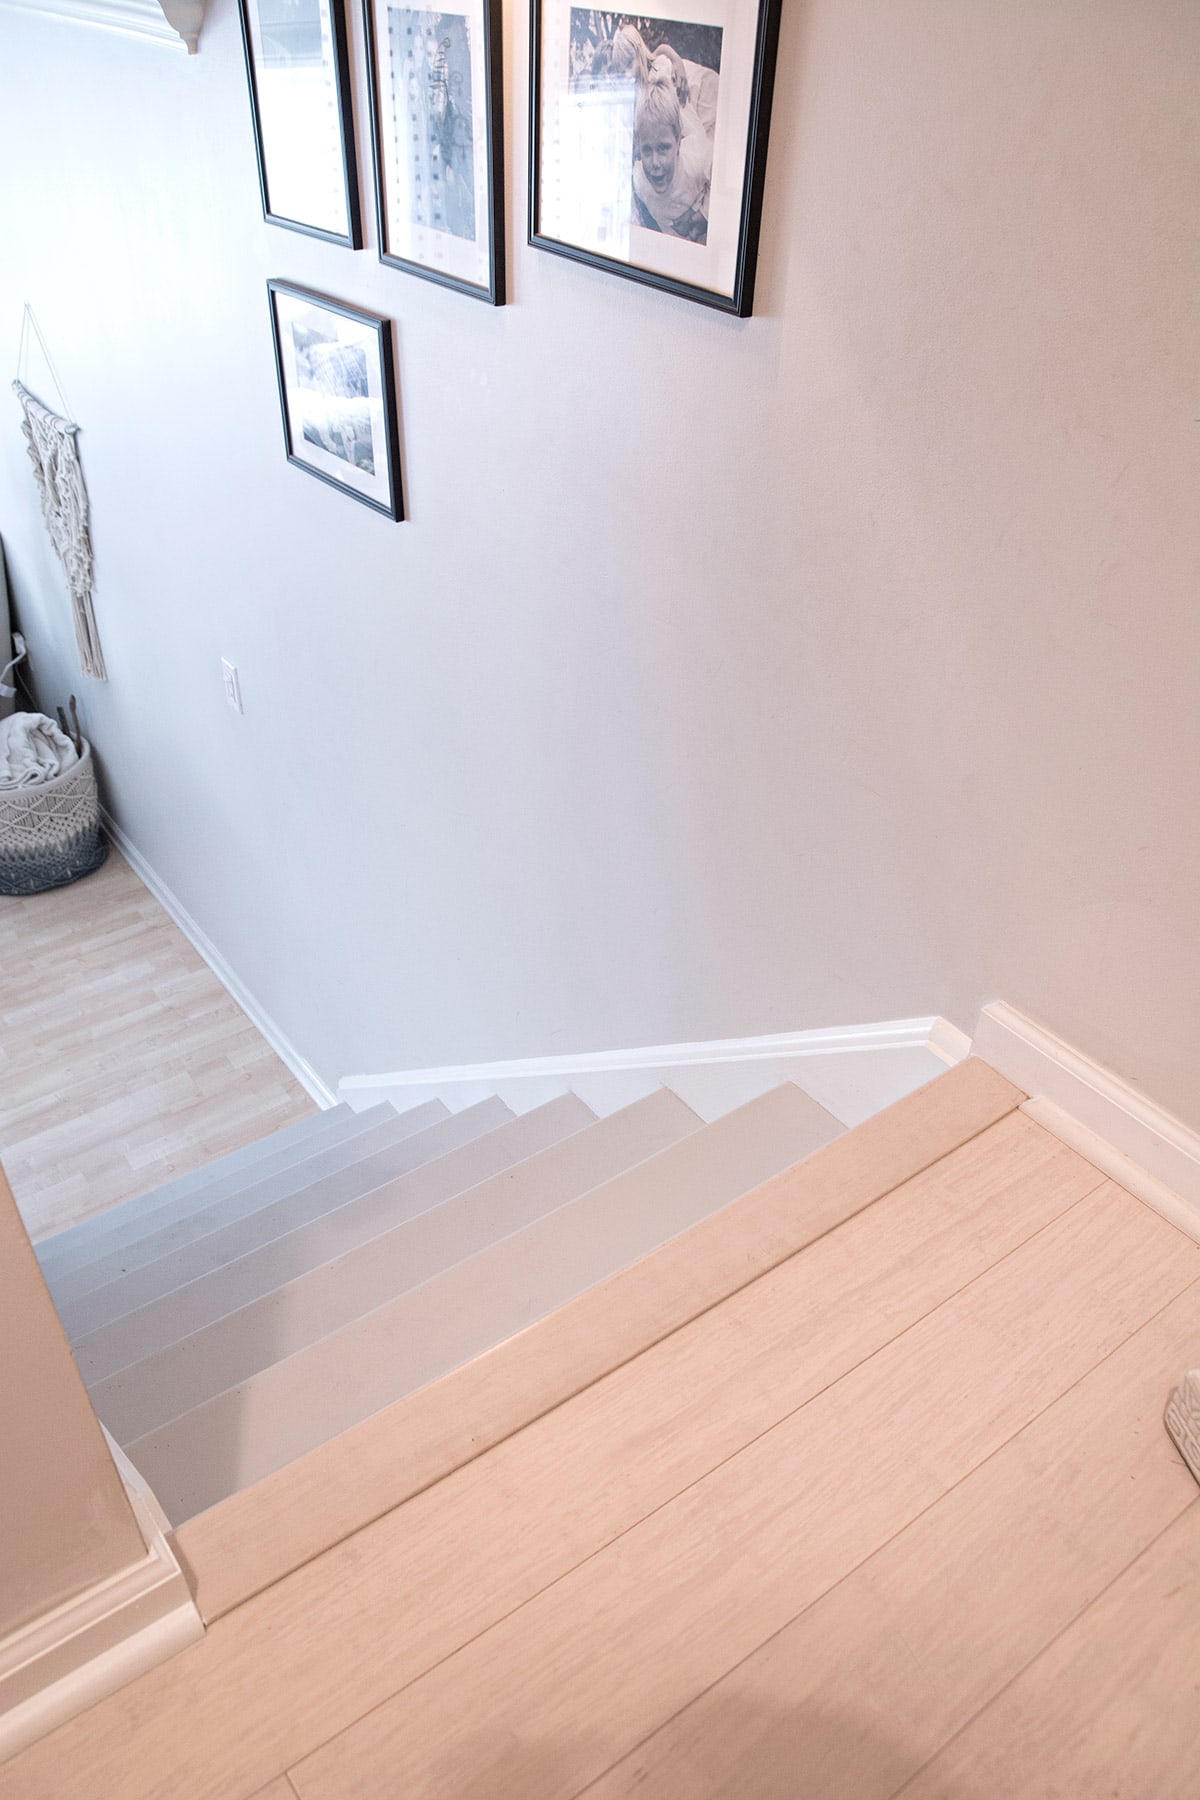
Around that corner, it goes up another flight of stairs. So it would have been natural wood downstairs, gray wood on landing, natural wood again on another set of treads, and gray wood again upstairs… which is why I wanted to make the transitions flow better somehow.

Before and after to show you how it ties in with the gray floor which is Pearl City Bamboo by Lumbar Liquidators by the way.
This is not where this story ends though. I would have loved for the stair treads to remain natural light wood like the downstairs flooring. It just didn’t look so good because of the quality of the wood and how damaged it was.
I did, however, figure out a way to incorporate some more natural light wood in this stair makeover. It will tie in with the gray floor when you look down from above. Also, if you look up from down below you will be able to see the light-colored wood. I’m just waiting for the materials to arrive and am hoping that the rest of the project will work out.
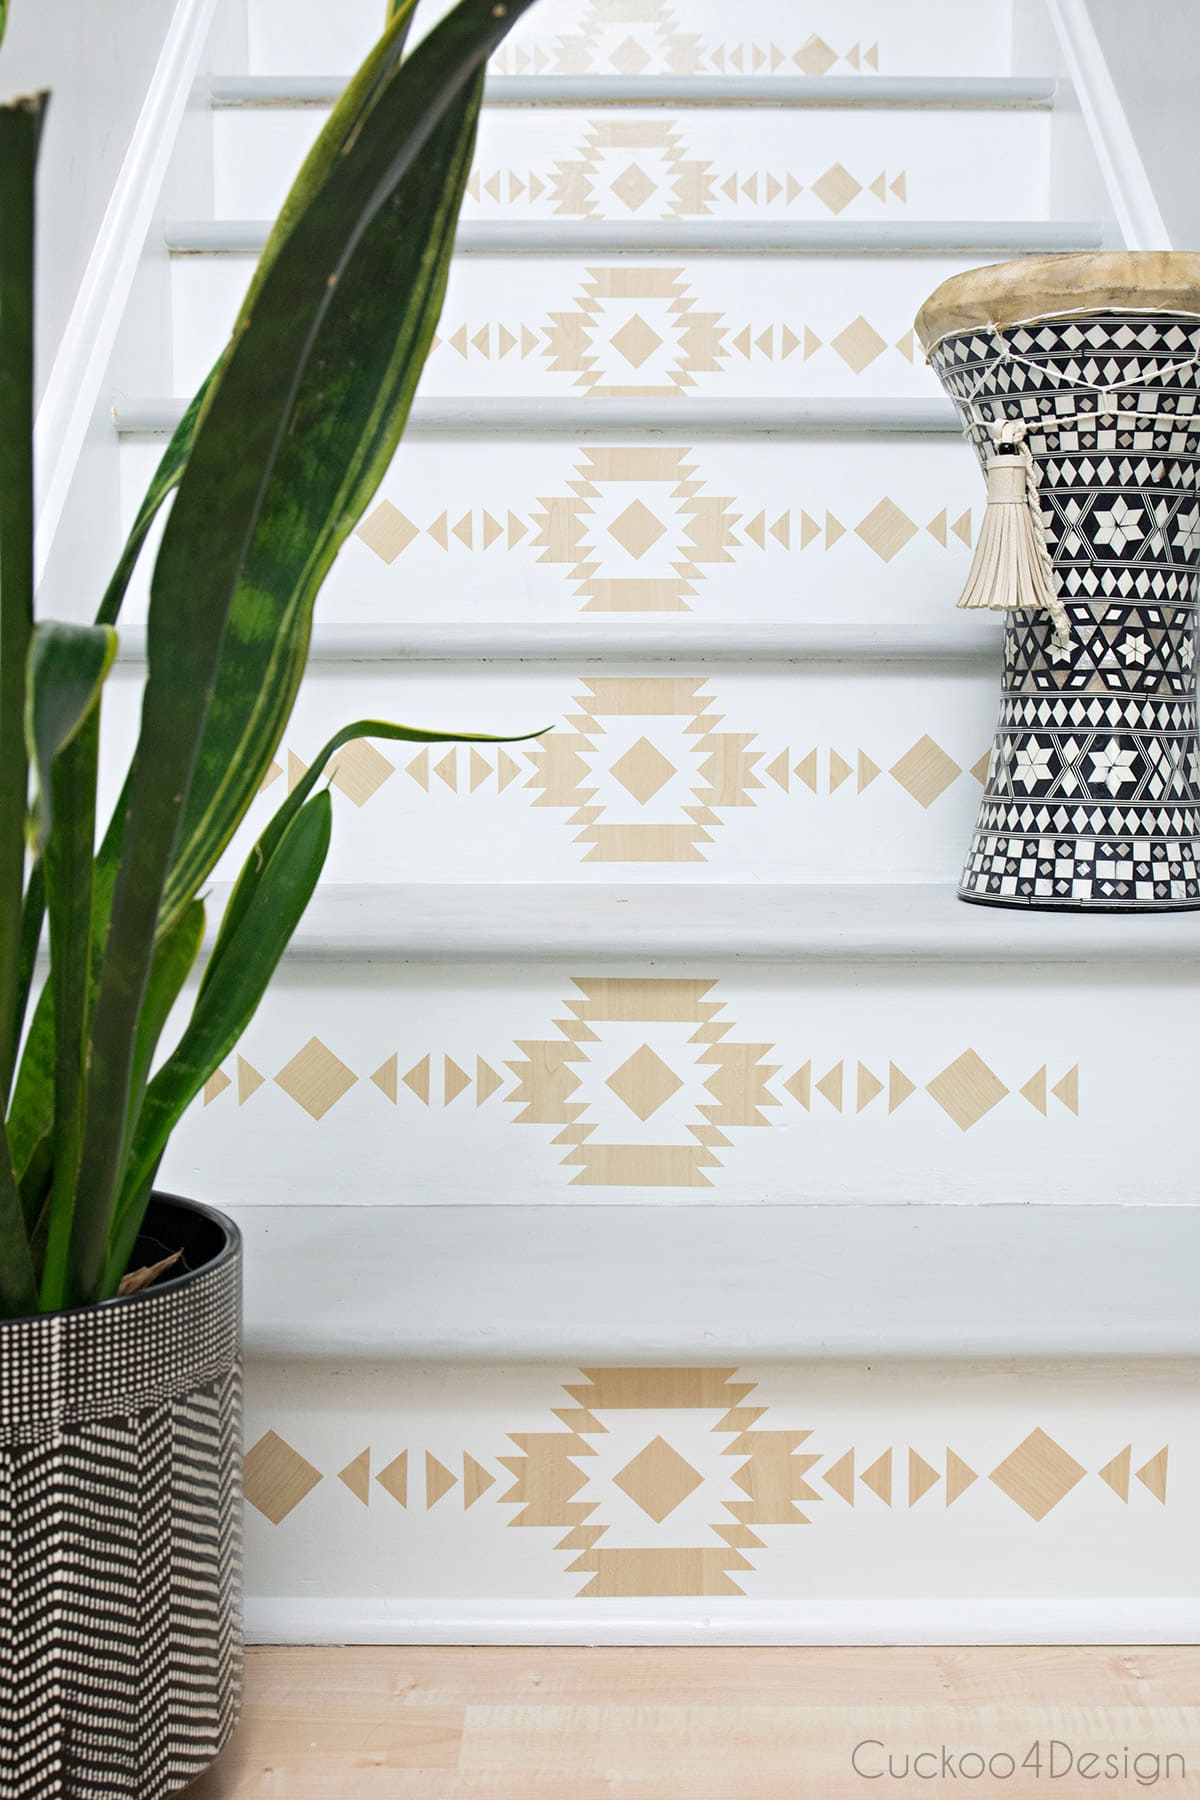
Stair refinishing UPDATE: I used stair riser decals to add some more interest to my stairs.
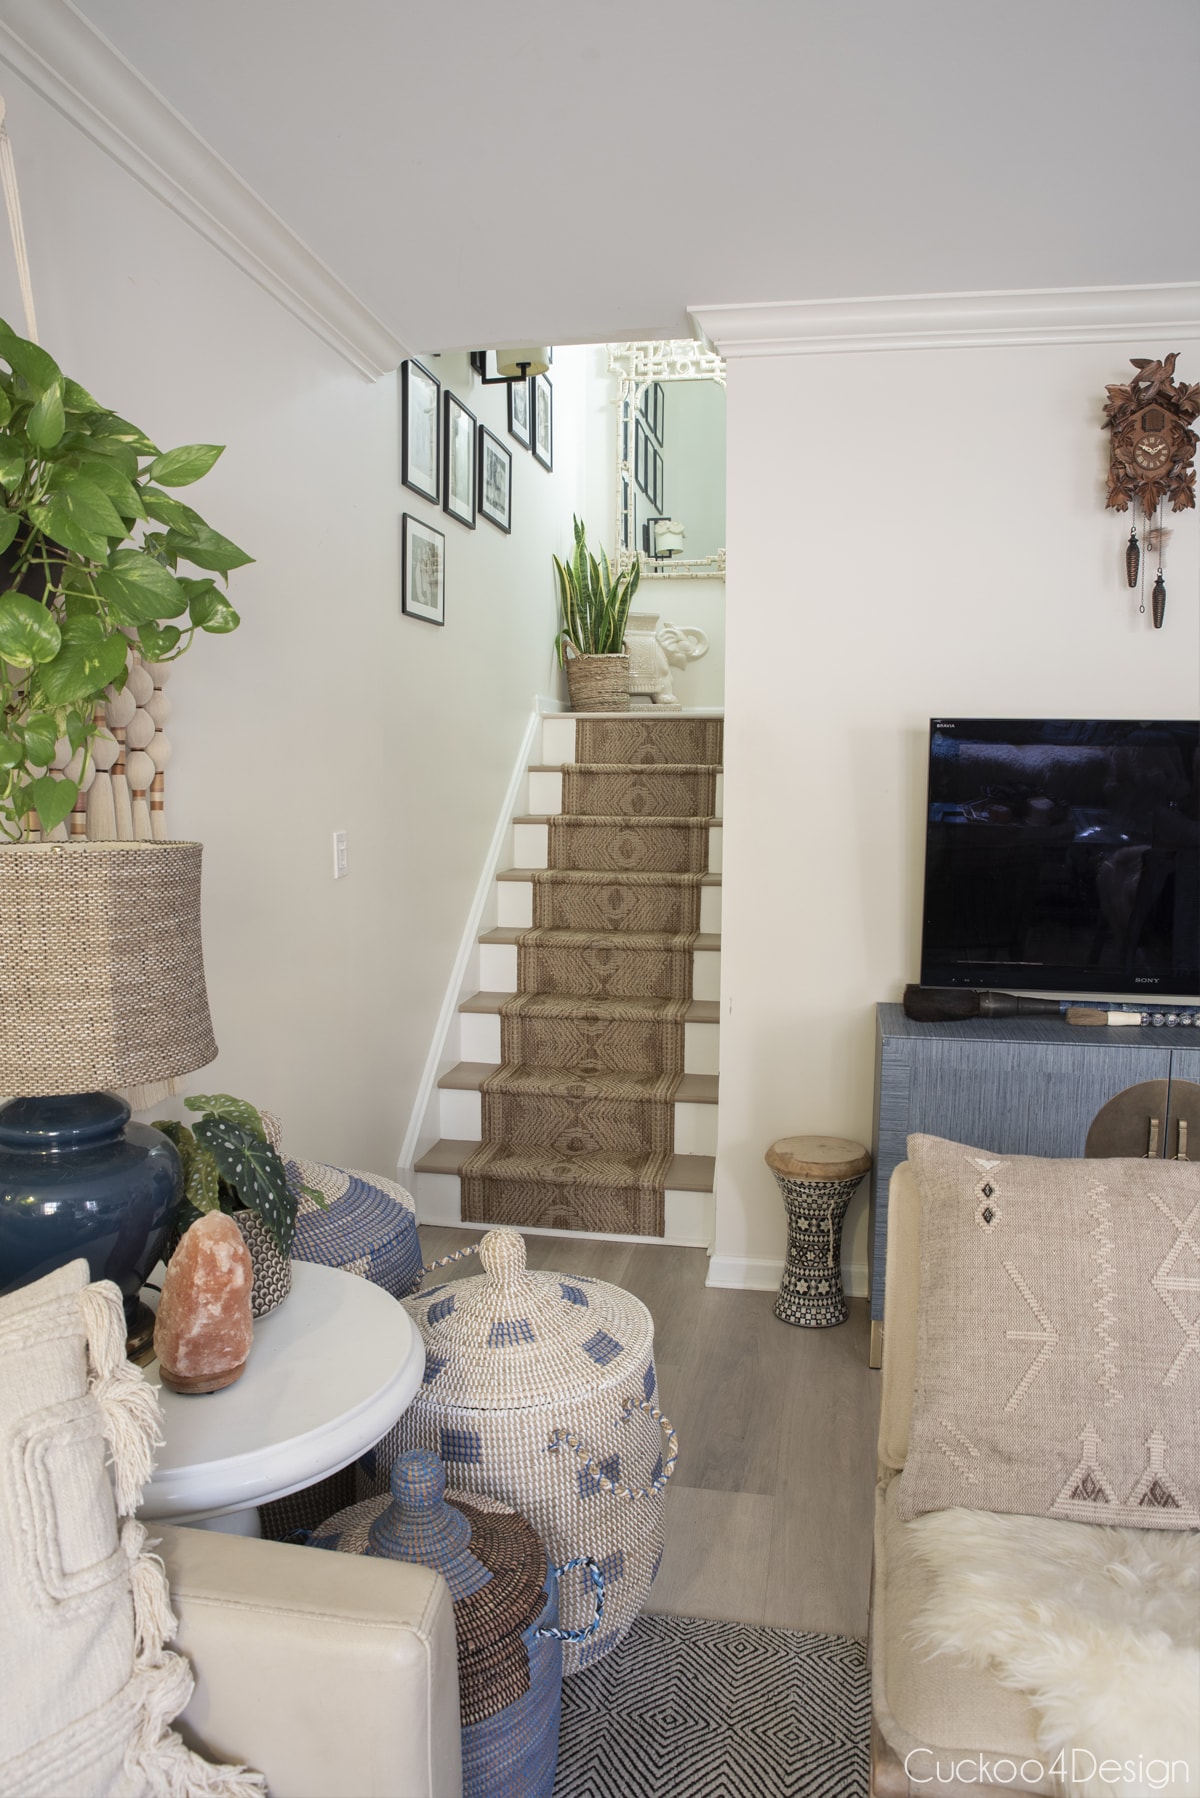
UPDATE: Since I gave these stairs a makeover, I have written a blog post about how to install carpet runner on stairs, and I love this updated look so much.
Frequently asked questions
You can, and I did. The main considerations are ventilation, fumes during application, and making sure to seal with polyurethane afterward. I cover my full reasoning and the pros and cons in the section above.
DIY is by far the cheapest route regardless of what condition the wood is in underneath. The outdoor deck stain approach I used was surprisingly affordable since I only needed two small sample cans for the entire staircase. The bigger investment is time, not materials.
At least three, ideally four to five for a high-traffic staircase. My neighbors did five coats, and their stairs held up much better than mine. Lightly sand between coats with fine-grit sandpaper and wipe with a tack cloth before each new layer.
Stairs are one of those things you look at every single day, so it is worth taking the time to get them right. I hope this helps you figure out which route makes the most sense for your staircase.
Tschüß,

Wow, looks beautiful. Makes me want to do my stairs. And personally I love the idea of outdoor stain – like you said, it is much more durable and specifically meant to be walked on.
I like it!
your stairs look so good! we have stairs to the basement playroom i have got to prettify one day!
You did a great job!
Absolutely beautiful Julia. I think you picked the perfect gray! ☺
They look SO good! That stain color is perfect!
The stairs look amazing!!
How is the stain holding up? Is it easy to clean? It looks amazing in the pictures!
To be honest now after a couple of years. I have to reapply it again which isn’t really a big deal
Thanks for the update. Could you please share a picture of how it looks before you reapply?
My stair treads and risers are mdf so am not sure if this will work.
Yes Mdf can be tricky but you can definitely paint it. I did a dresser that I sanded off too much and it revealed the MDF. I patched it and repainted it and it turned out perfectly.
Hello, I did something similar to my stairs but applied a stencil with acrylics, now I need to give it the final protection coat, something very durable for high traffic area to protect my hard work but won’t yellow over time (I don’t know how that I can add a pic to this comment section)
Hi there, that sounds really pretty. Unfortunately you can’t add a photo to the comments 🙁