

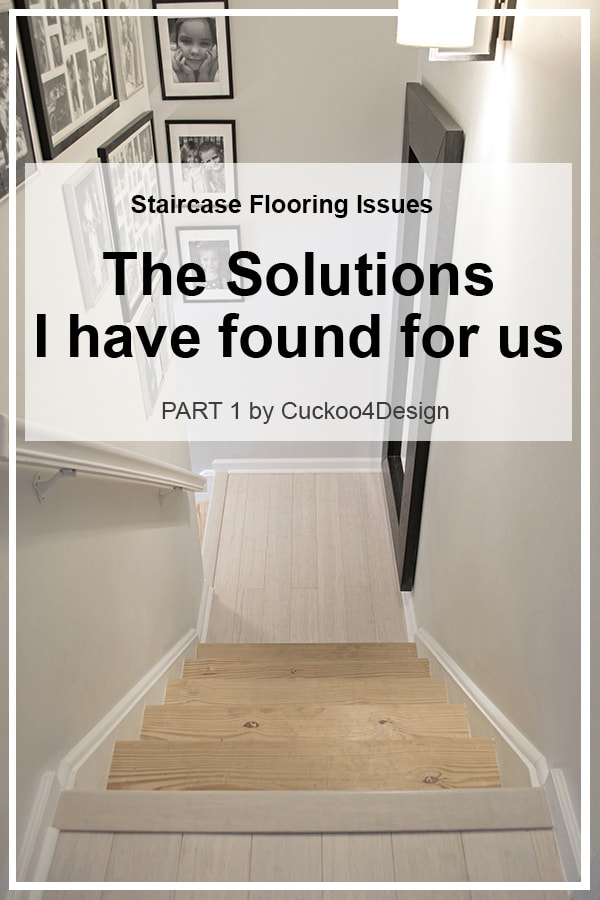
Removing Carpet from Stairs
Removing carpet from stairs is one of those projects that looks harder than it is, and the before-and-after results are shockingly good. When I finally ripped out the old carpet on our stairs, I couldn’t believe the hardwood hiding underneath had survived three kids and years of cat vomit. Mine weren’t quality hardwood either, just the builder-grade stairs that usually get carpeted and forgotten about, but honestly, it didn’t matter in the end.
In this post, I’ll walk you through the full removal process, including the part nobody talks about: what to do with the molding gaps and baseboards once the carpet is gone. I also have a follow-up post about refinishing stairs that were carpeted, where I cover painting and staining the wood once it’s exposed. And if you’re just pulling up the old carpet to replace it with new carpet, the project is a lot faster and easier, and you can skip some of the steps I describe below.
What’s under carpet on stairs?
This post may contain affiliate links from which I will earn a commission at no extra cost to you. View my full disclosure policy.
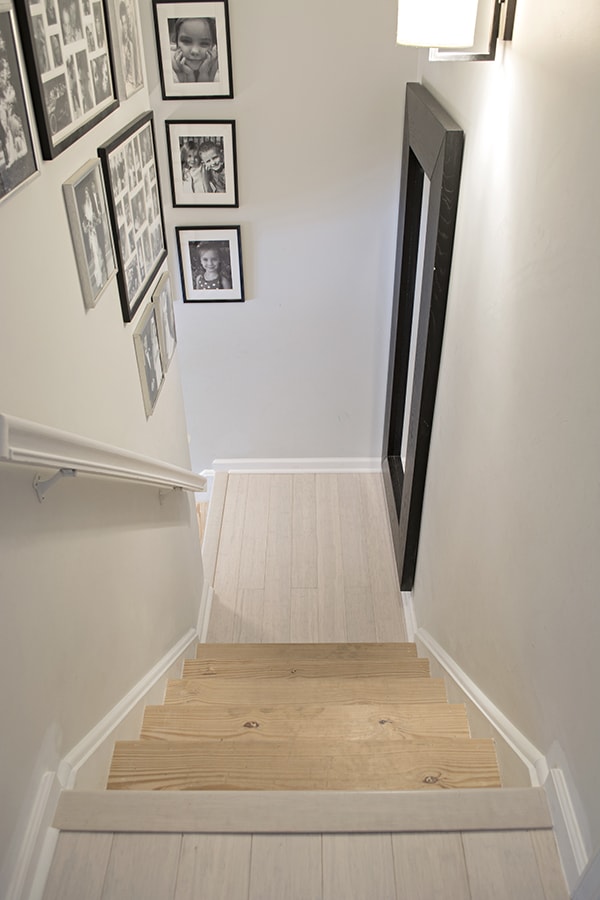
Before I started pulling up the carpet, I honestly wasn’t sure what I’d find underneath. Here’s what you can typically expect: most homes built before the 1990s have solid hardwood stair treads, usually oak, that builders carpeted over because it was cheaper and faster than finishing the wood. Newer builds more often have plywood underneath, which is perfectly functional but won’t refinish the same way.
My stairs were builder-grade, the kind that almost always get covered up, and they still came out great. The wood underneath had been protected by the carpet for years, which actually works in your favor. Even if the surface has some paint drips, staple holes, or minor damage, that’s all fixable before you refinish.
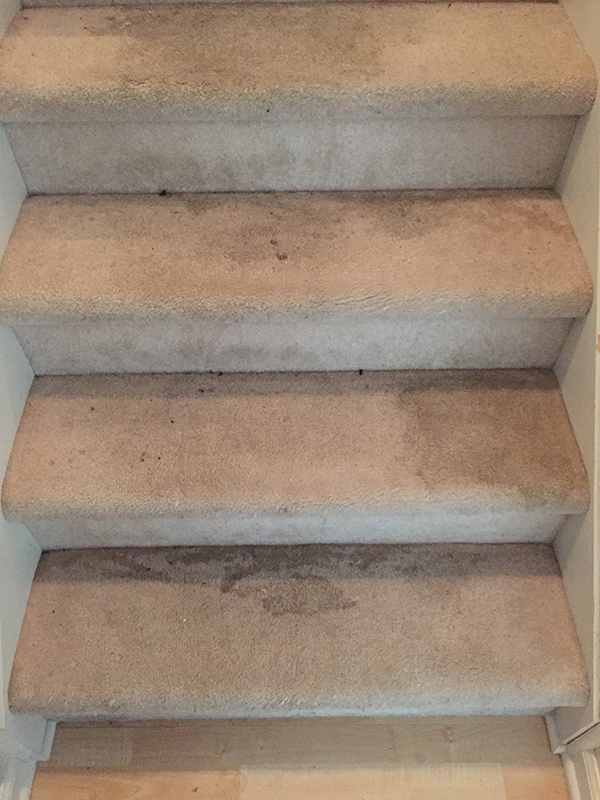
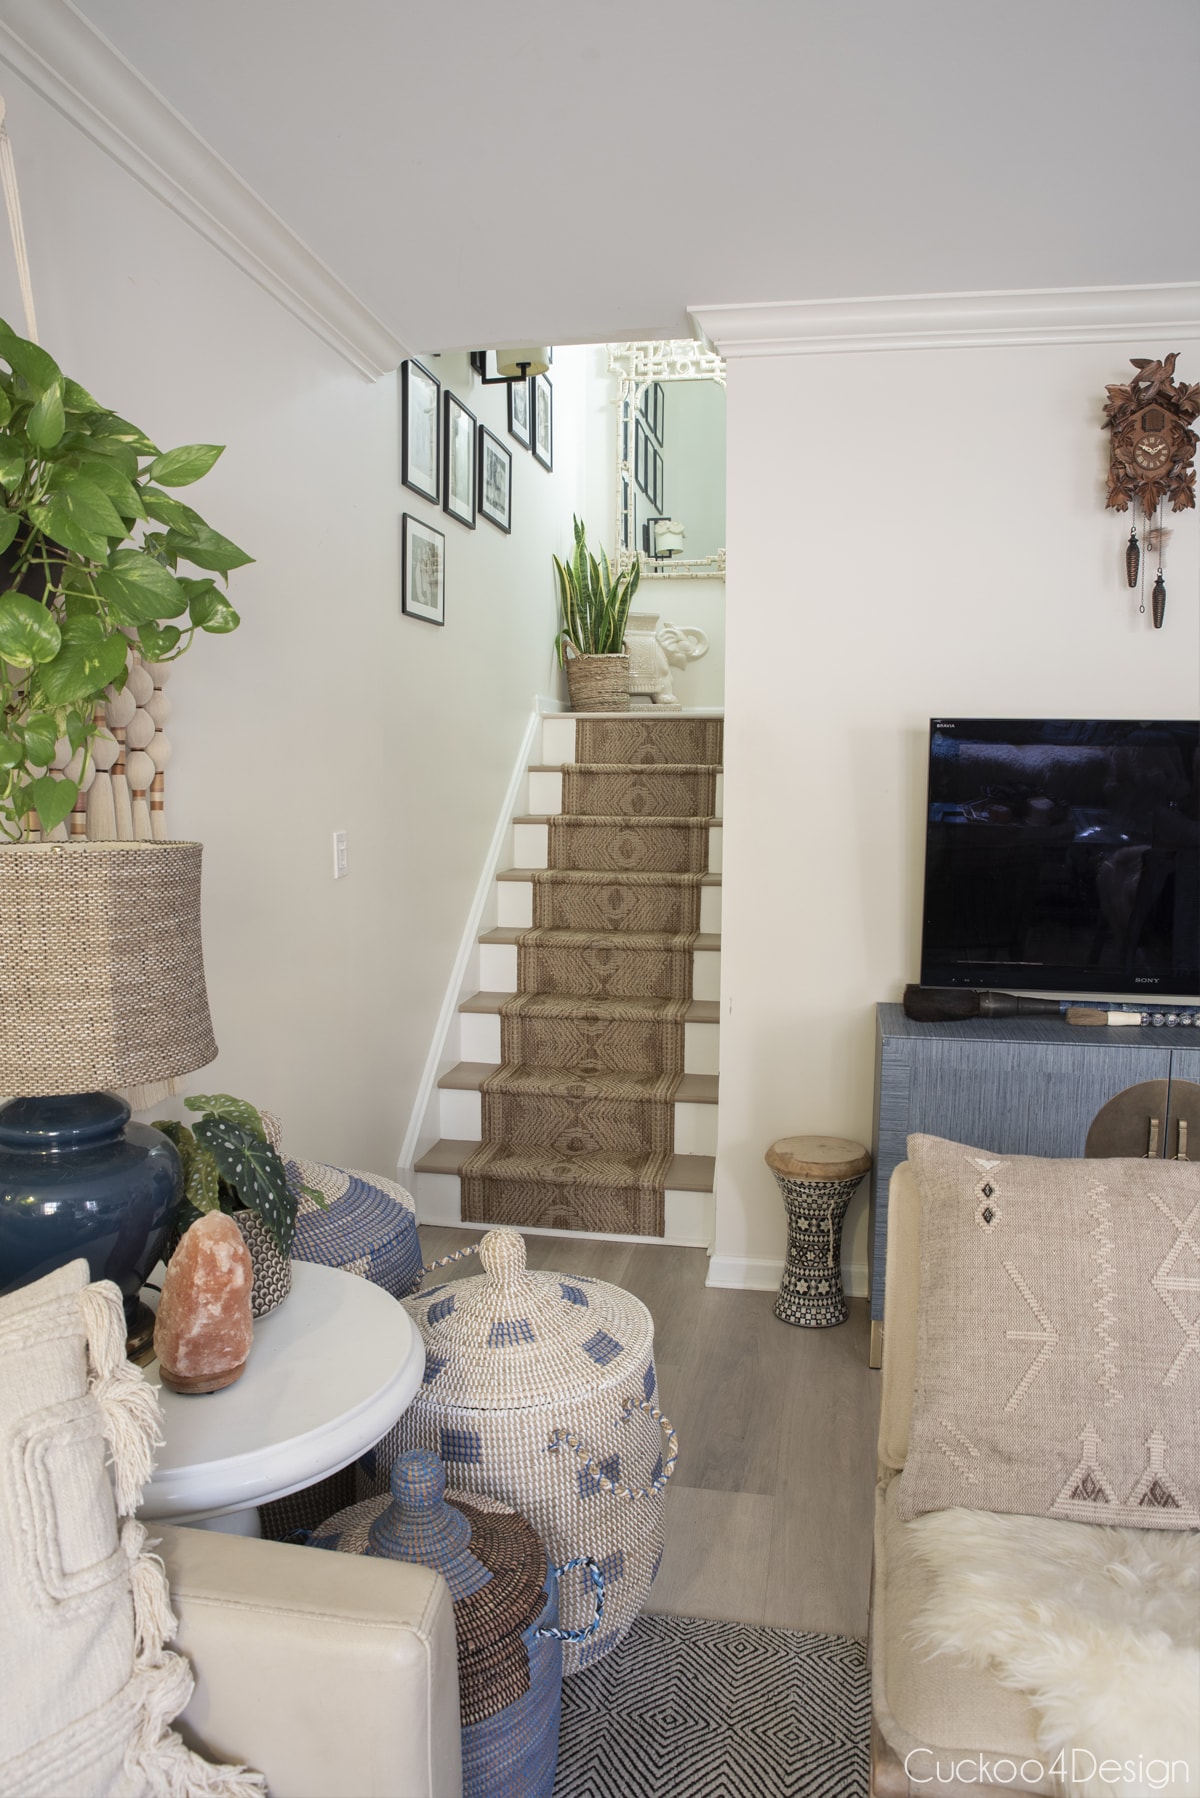
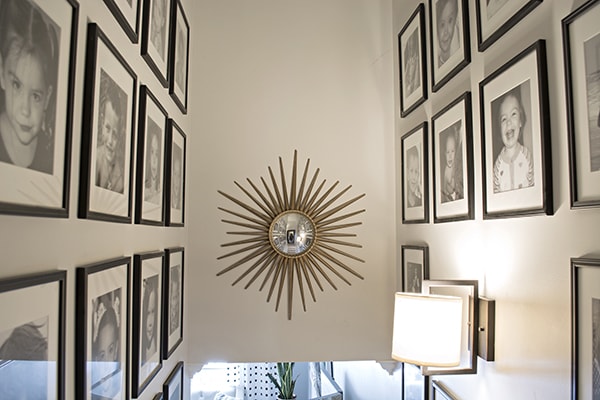
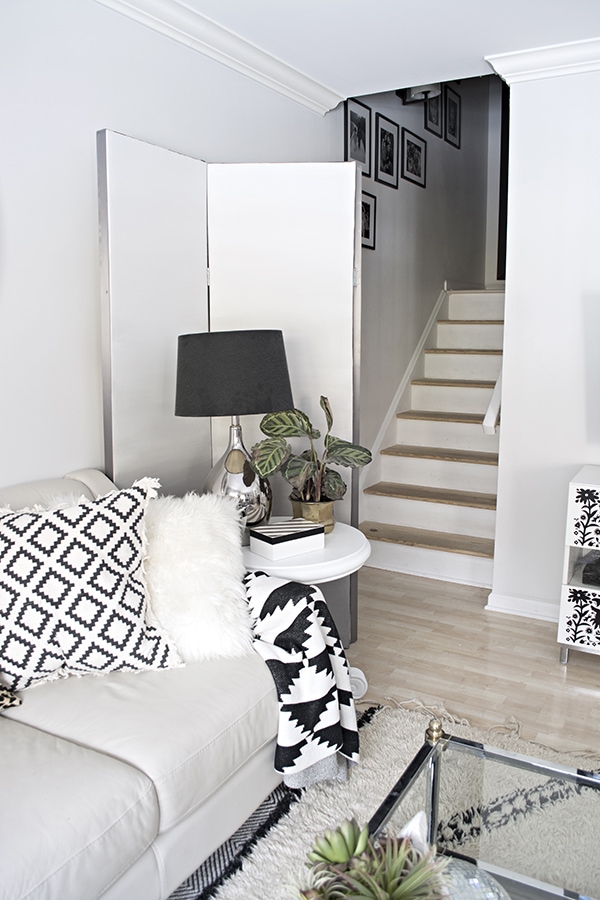
When I installed the bamboo plank floors upstairs, the stairs started to stick out like a dirty thumb. I had re-carpeted them once already, and the older the kids got, the dirtier they managed to make the stairs look, no matter how many times I cleaned them. They never listened to my rules about not taking food into their rooms and spilling so much stuff on the way. The occasional cat vomit on the stairs didn’t help either.
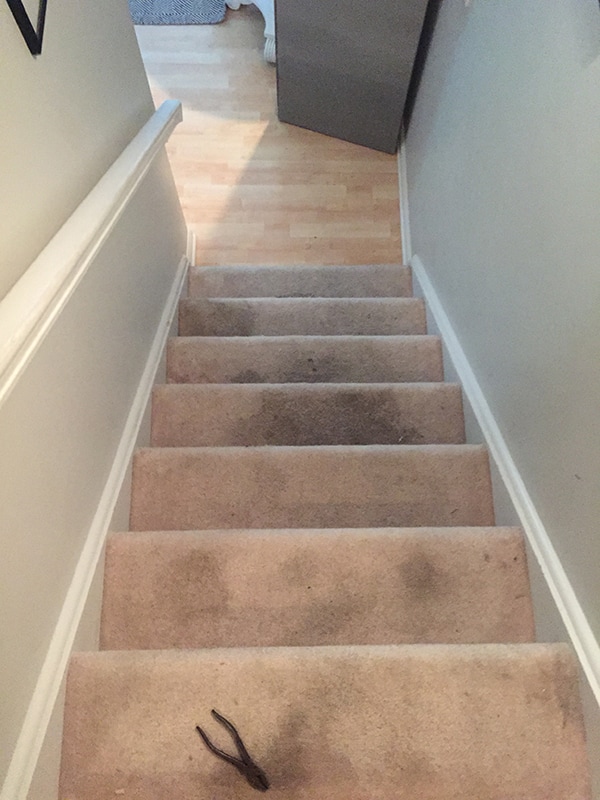
So one day I just had enough and just ripped the carpet, padding, tack strips, and staples off.
Supply list for removing carpet from stairs
- vise-grip pliers
- standard pliers
- hammer
- pry bar
- flat head screwdriver or staple remover
- safety goggles or glasses
- gloves
- dust facemask for sanding
- utility knife
How to remove carpet from stairs
If you are removing the carpet from your stairs only so you add new carpet afterward, you don’t have to be as detailed since everything will be covered again.
And if you are planning on leaving the stairs bare so you can either refinish them or add an overlay, then you should check out the entire post since you might run into some issues that need to be fixed.
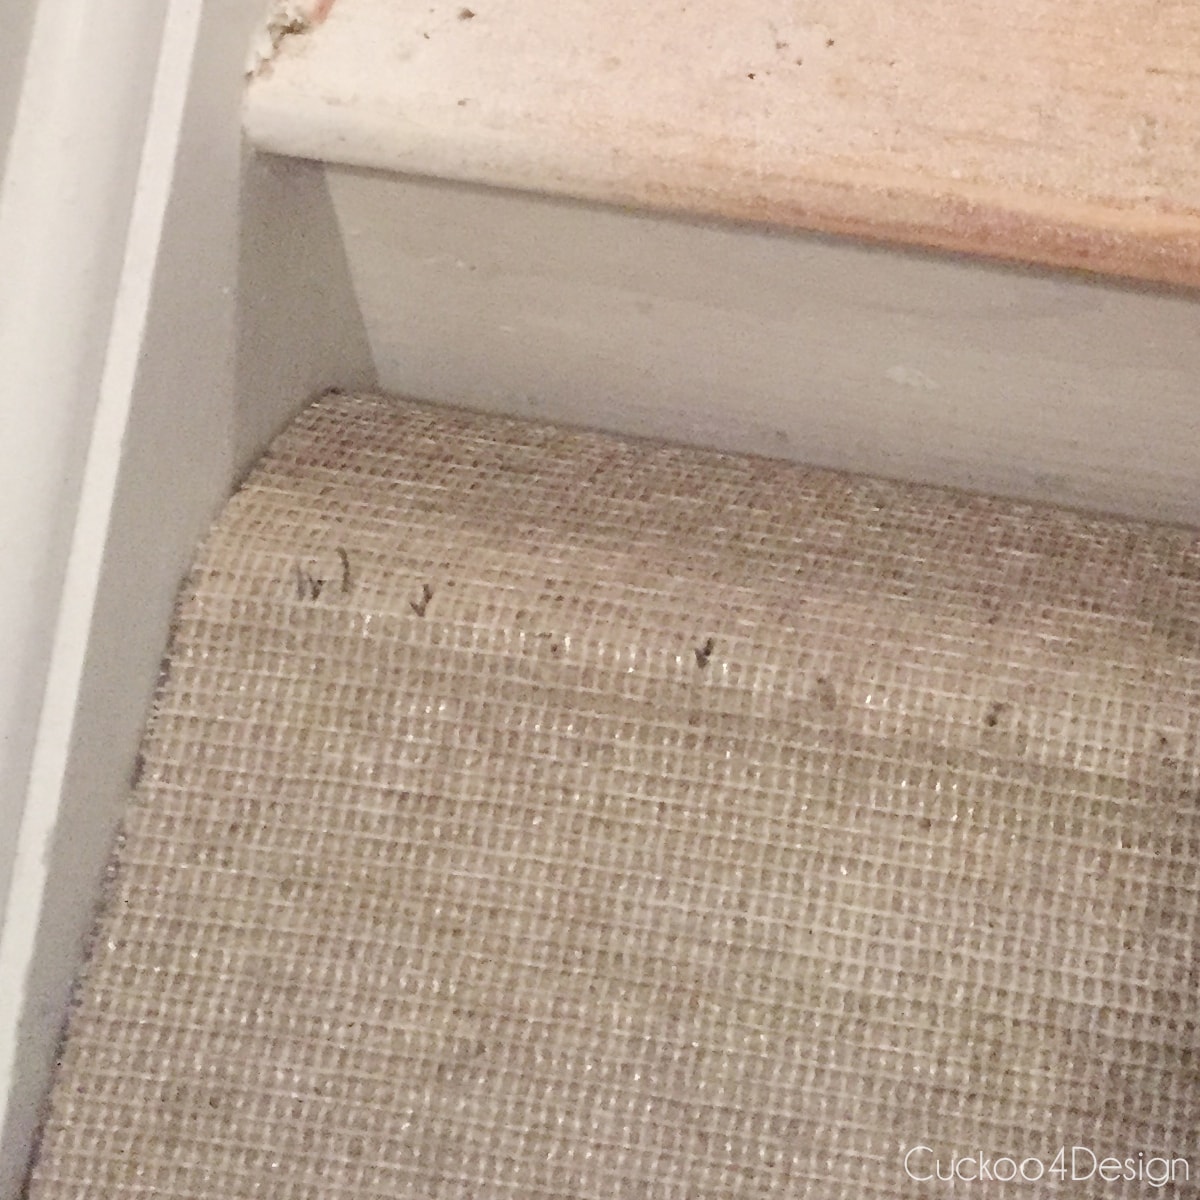
Step 1: Pull up the carpet
Wear your safety goggles and protective work gloves. Grab the corner of the carpet on the first upper thread with pliers or vice-grip pliers and pull. Removing the carpet will expose the carpet padding. Make sure you are firmly standing on the stairs so you don’t fall backward. Some carpets come off easier than others.
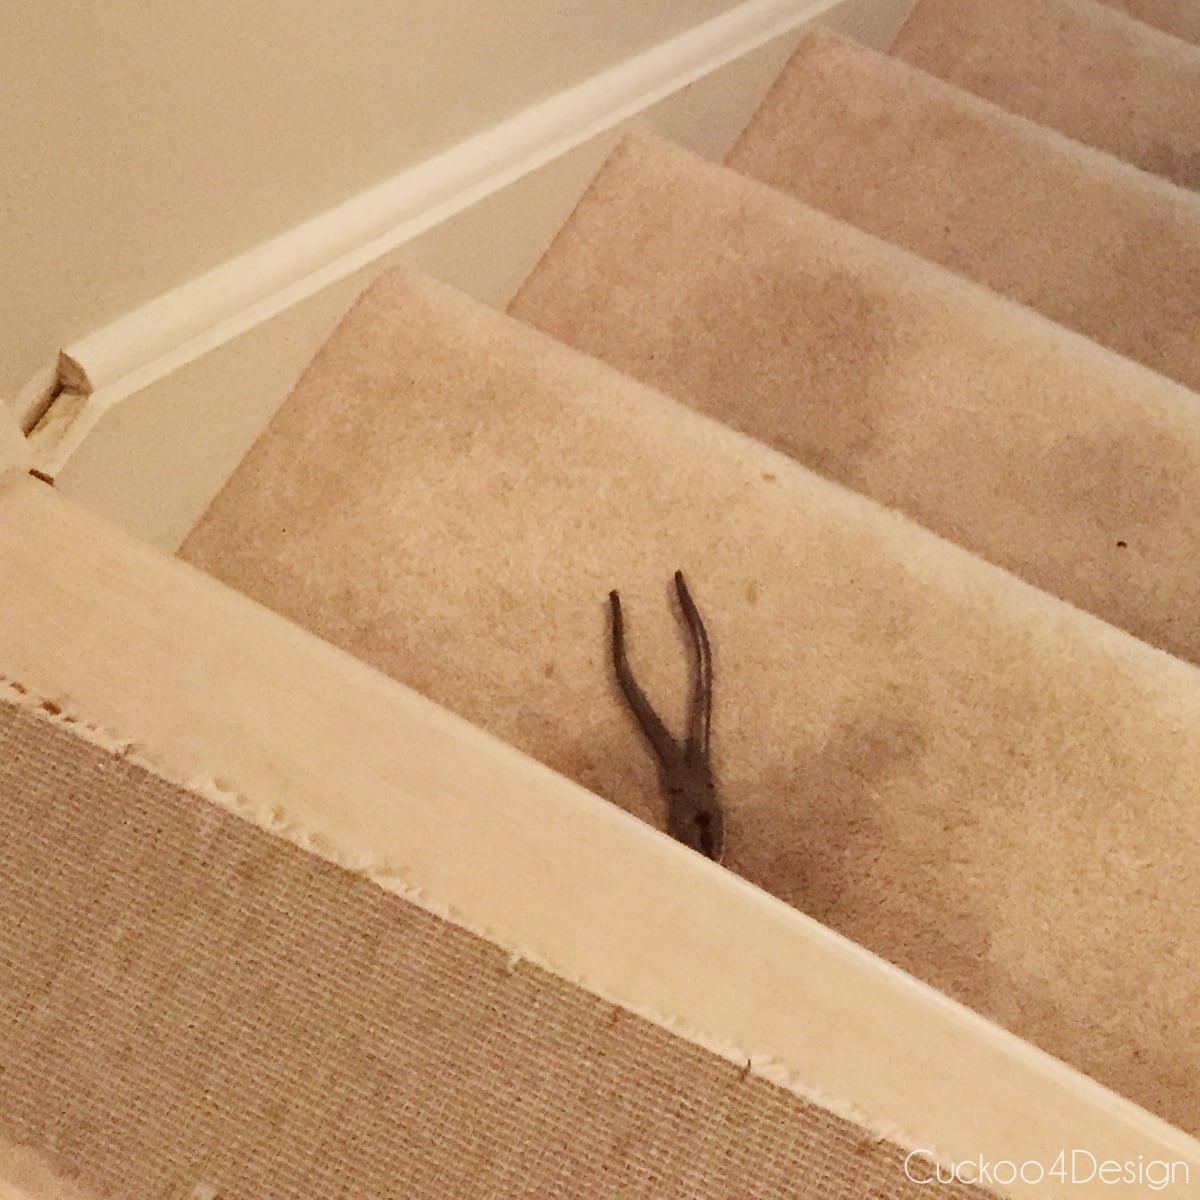
Work your way down the stairs and keep disposing of the carpet as you go. It’s best to throw it out in sections.

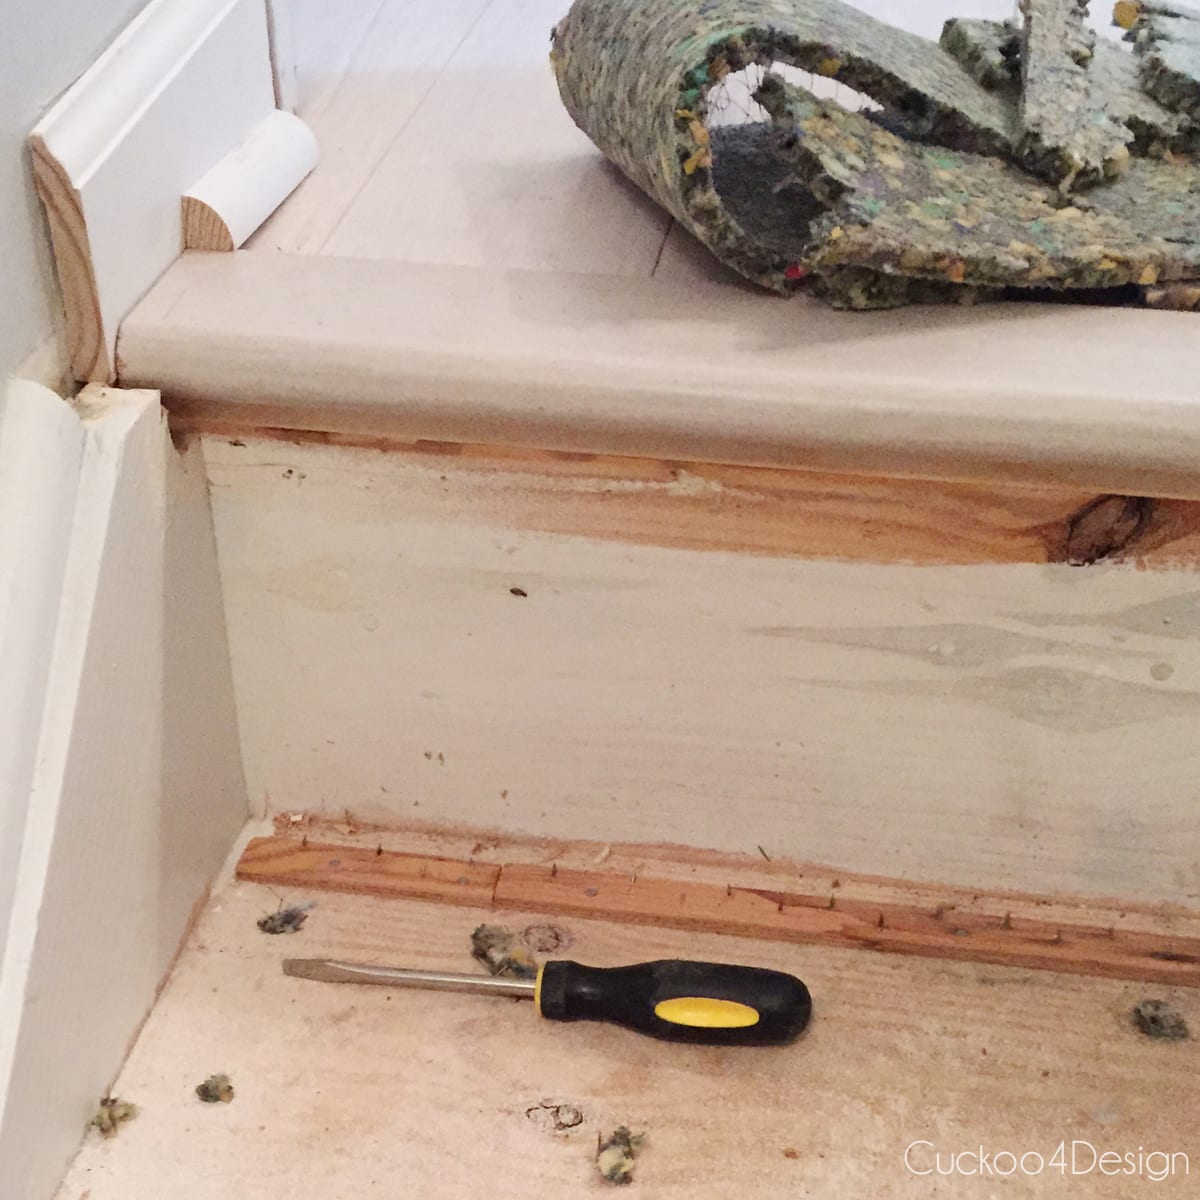
Step 2: Remove tack strips, fasteners, and padding
After that remove all the carpet padding which is attached with more staples. Use the flathead screwdriver, staple remover, and pliers for that. Removing the carpet pad from your stairs is a lot easier than the actual carpet because it is a lot lighter. Simply pull it away from the threads. It tears easily so it will most likely come apart in smaller chunks. Just have a trash bag handy to discard it right away.
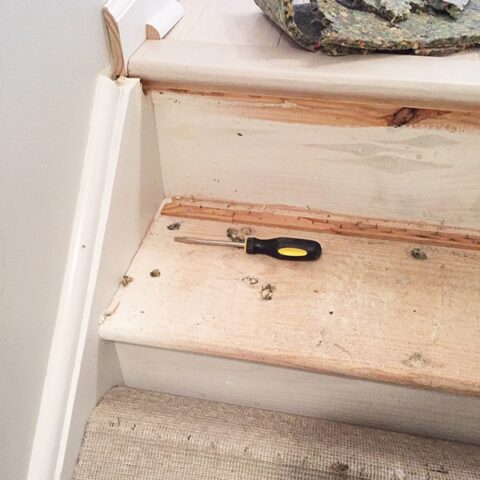
Carefully remove the tack strips, nails, and staples so you don’t damage the wood any further. Use the pry bar (in some cases the flat-head screwdriver works well too) by shoving it under the tack strip and pushing it down so the tack strip lifts up. Throw the tack strips away right away since a lot of sharp metal parts stick out of them.
Use the pliers to remove all the staples and nails from the stairs.
Step 3: Patch the holes
Use wood putty and a putty knife or your finger to fill the small holes that the staples and fasteners have left behind. Let the wood putty dry.
Step 4: Sand down the dried wood putty
Use a hand sanding block or a palm sander with sandpaper to sand down the filled wood putty holes. Make sure to wear a face mask for the sanding.

I ran into more issues and had to sand more because our builder had painted the walls of our home before adding the carpet, so we had globs of paint and drywall compound stuck to our stairs which I had to sand as well since I wanted to refinish the stair. If you are just adding carpet again, you can just skip all the sanding. This part took quite a bit of time.
Step 5: Clean stairs with a broom and vacuum
Use a hand broom to brush off all the debris from your stairs and then go over it again with a shop vacuum to make sure you get everything clean. I also like using tack clothes for the final sweep because their sticky surface really grips and lifts every tiny bit of dirt and dust.
Step 6: Inspect your work
Carefully run your hands over the stairs to see if you missed any staples or nails. Most likely you already found anything sticking out while sanding. Any missed staples and nails sticking out can cause injury to someone’s feet and you have to be 100% sure that you didn’t miss anything.
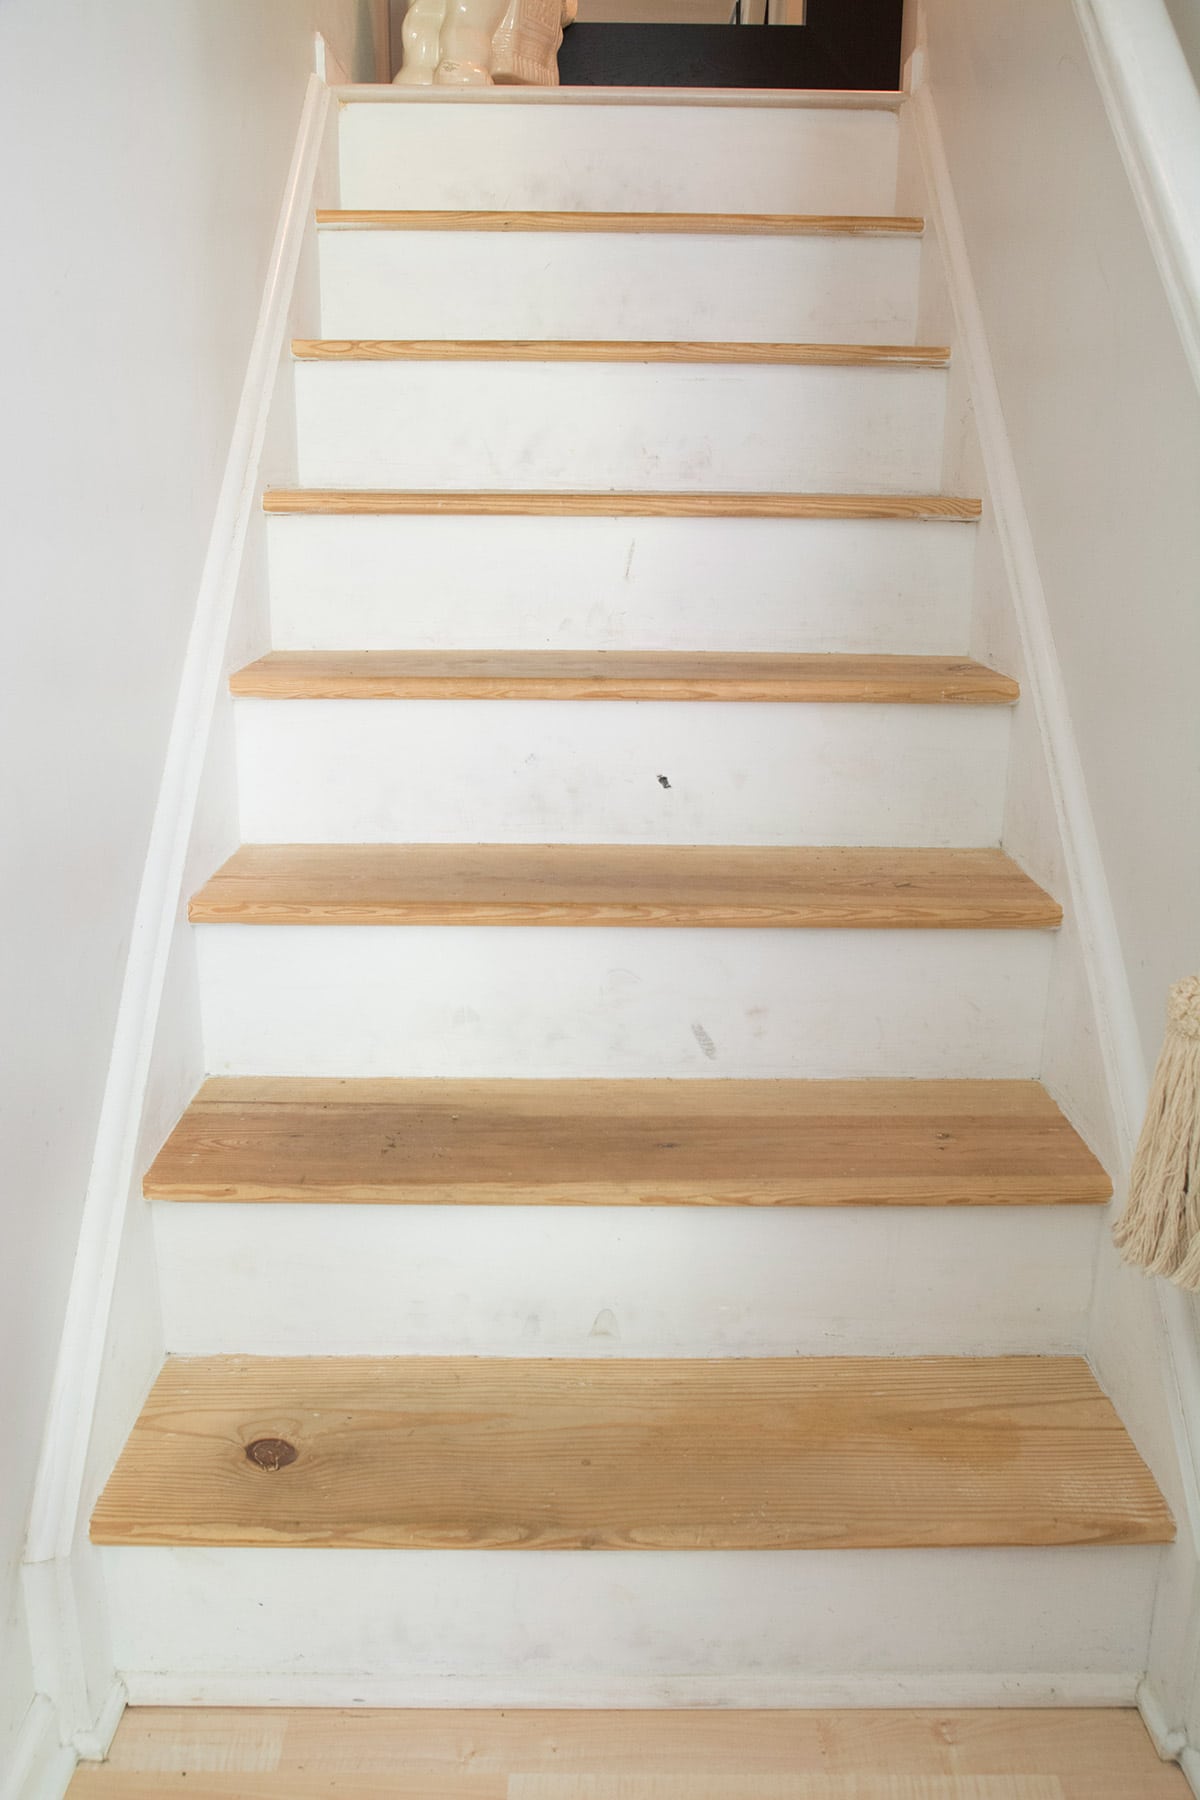
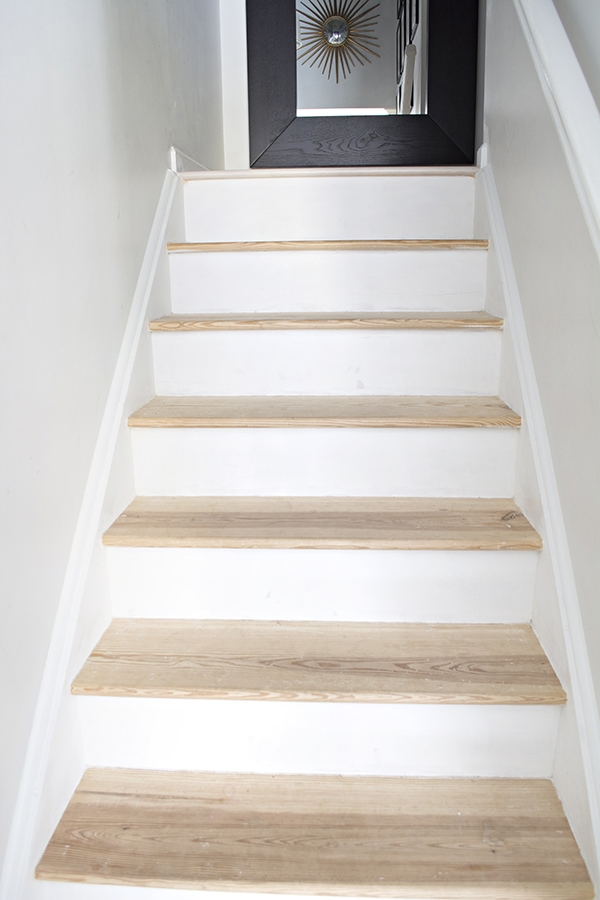
I’m not happy with how many knots are in the pine which really does make it look like cheap wood. I don’t even think we can make them work. They are water-stained as well. But even just in the raw sanded state, the stairs look better than with the dirty carpet.
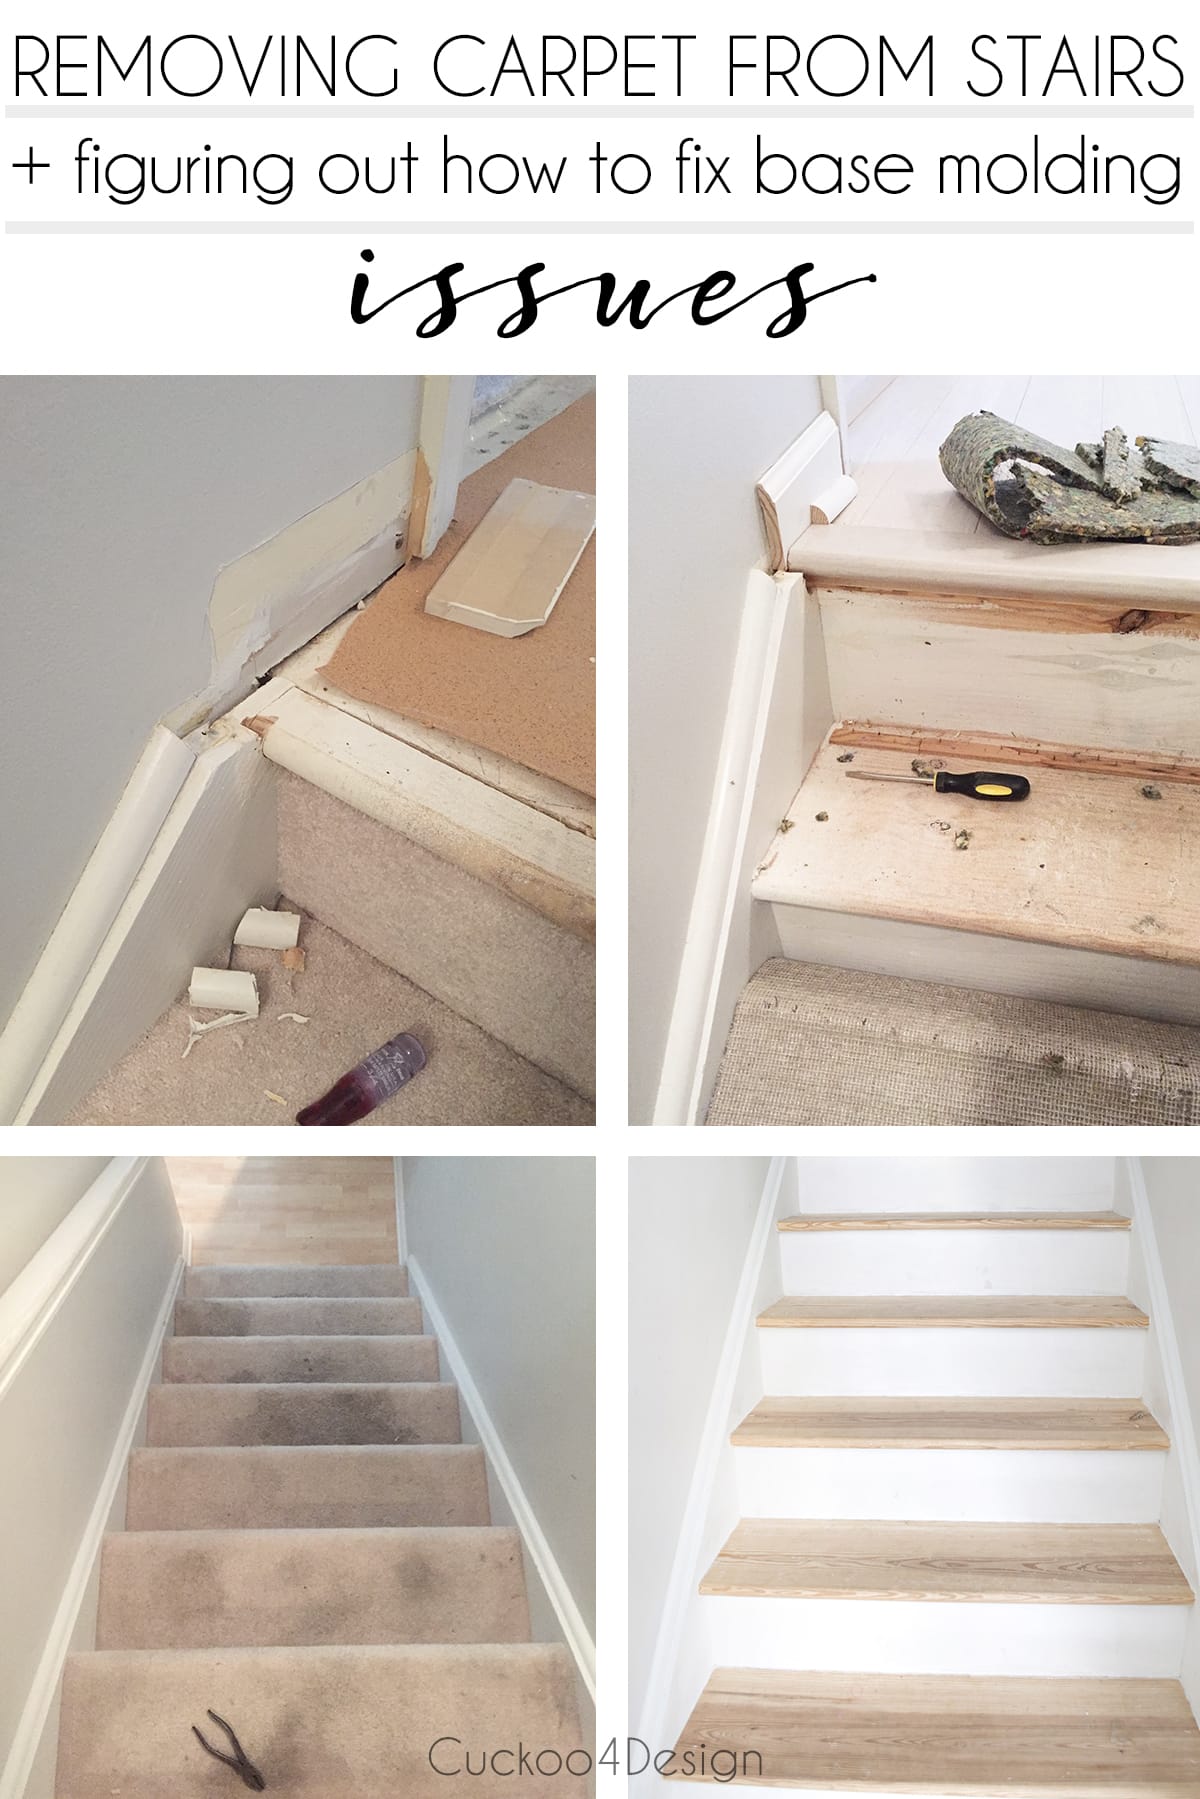
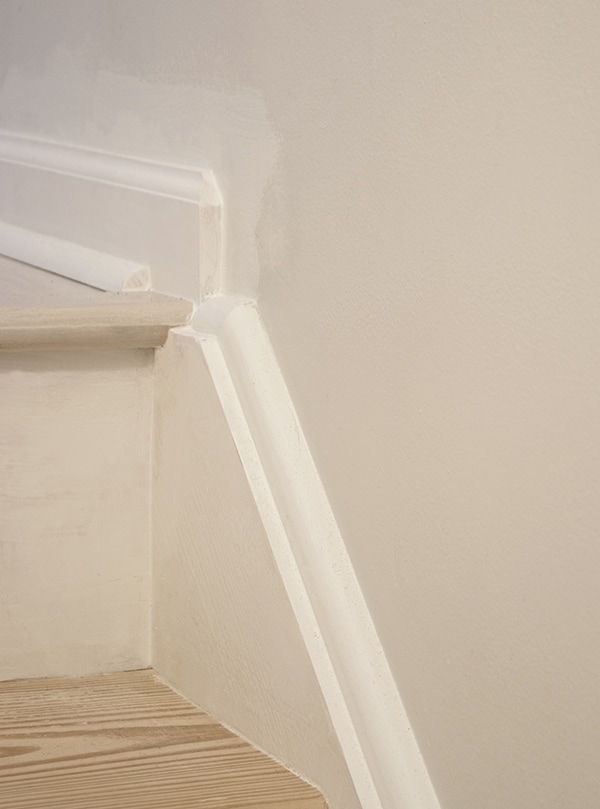
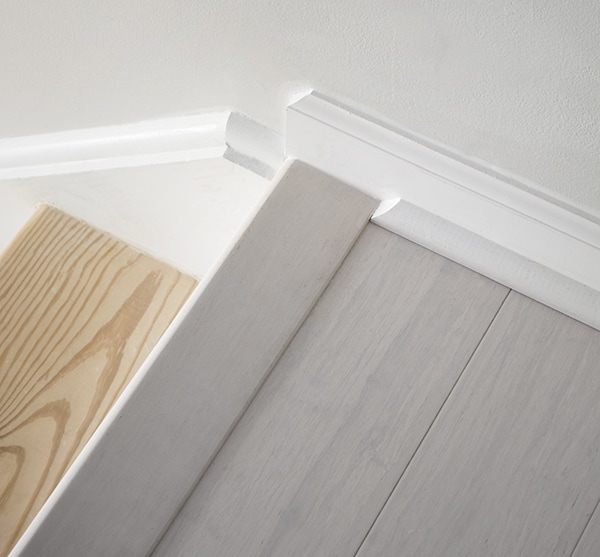
How to fix stair molding gaps after carpet removal
This part is a little hard to explain and it is probably better shown with photos.
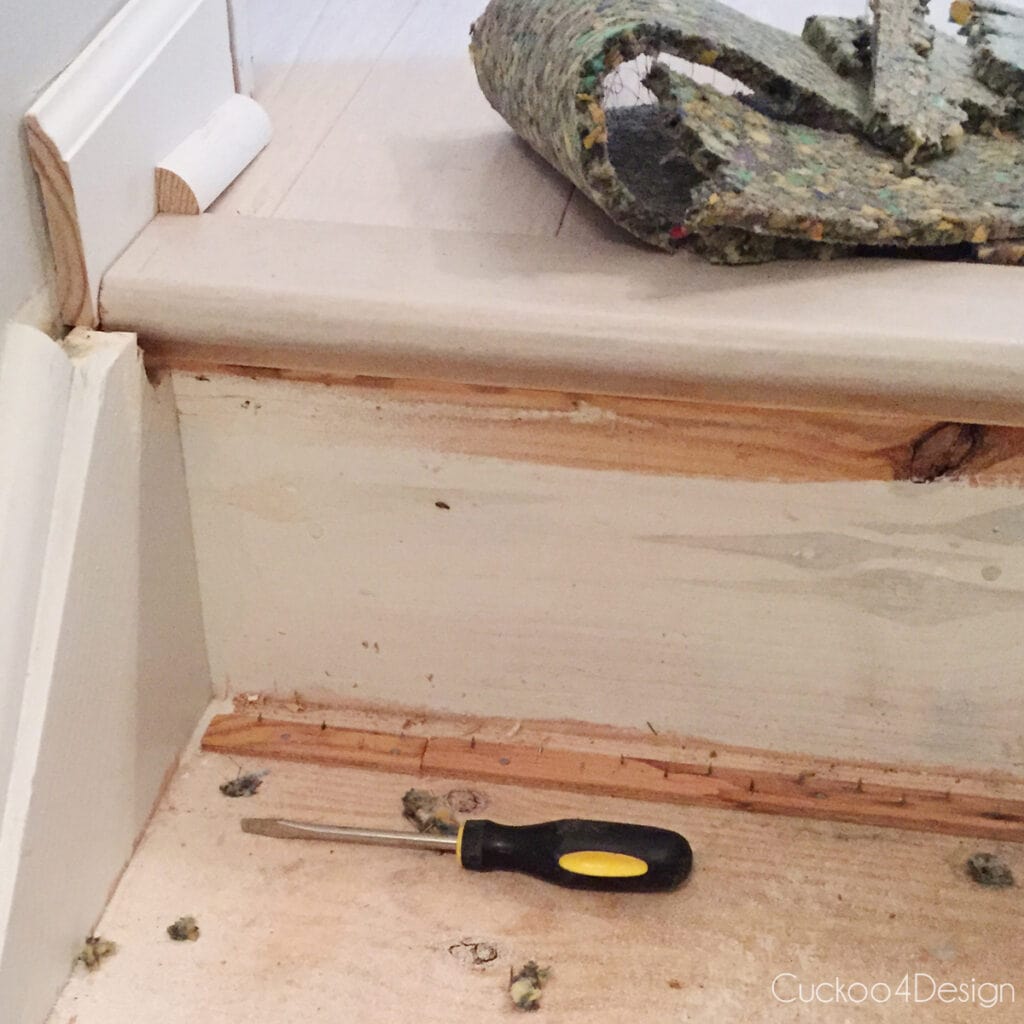
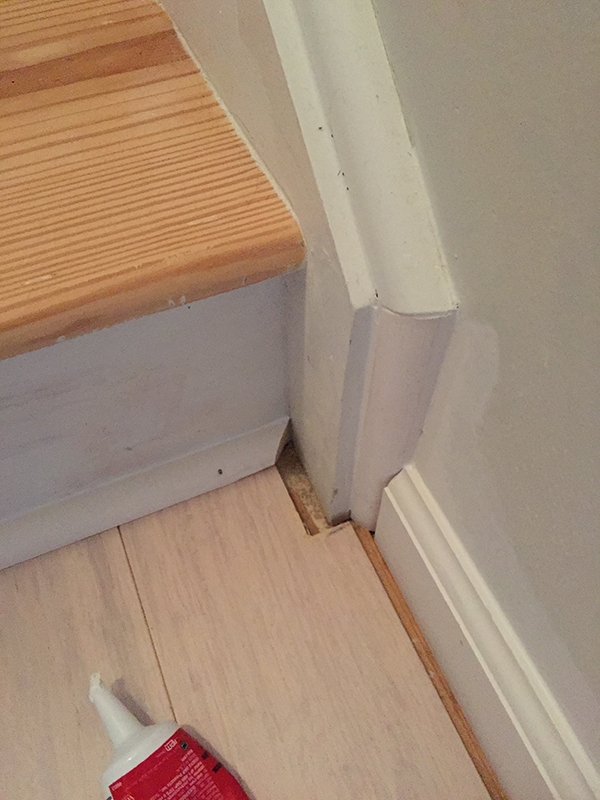
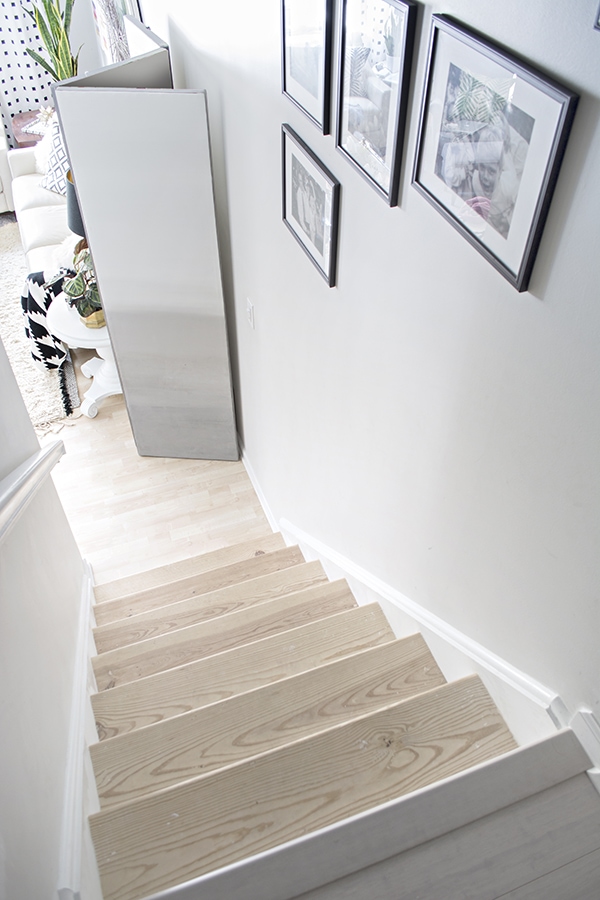
The issues were at the top of my stairs where we had a different depth in stair treads and were left with a gap at the top after removing the top tread where the bamboo wood flooring was going to go. Gosh, what a long sentence. let me show you:
The new bamboo tread was shorter than the old one and left a big gap. See below:
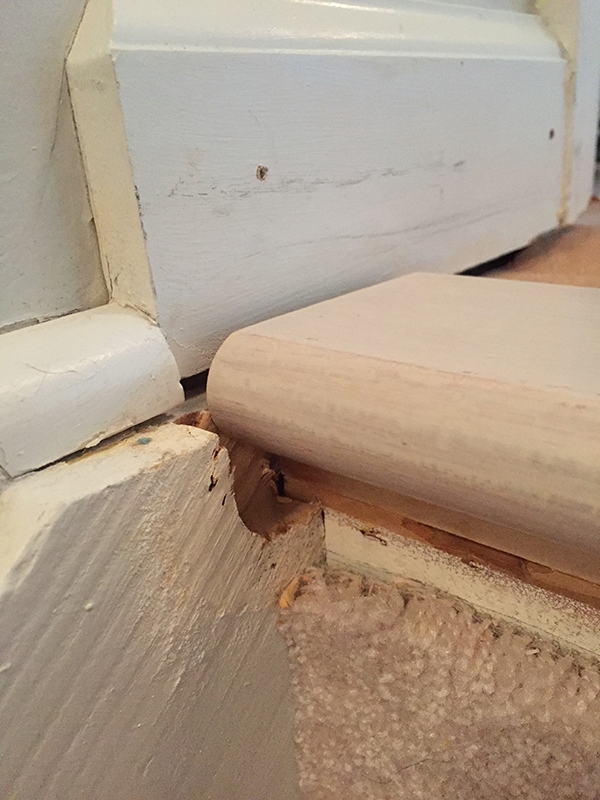
I also had to find a way to line up the molding the right way. Please see the photo below:

Let me know if you have a different way to fix a gap like this.
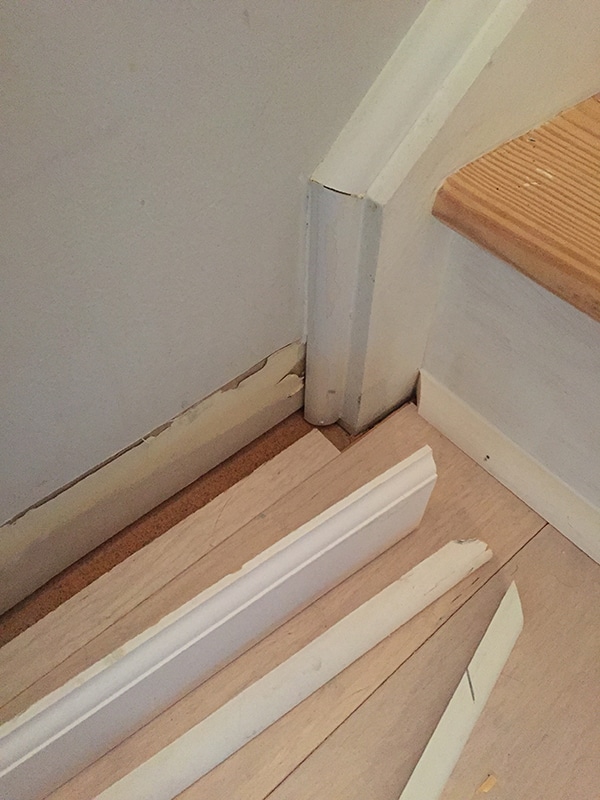
Fixing stair tread gaps
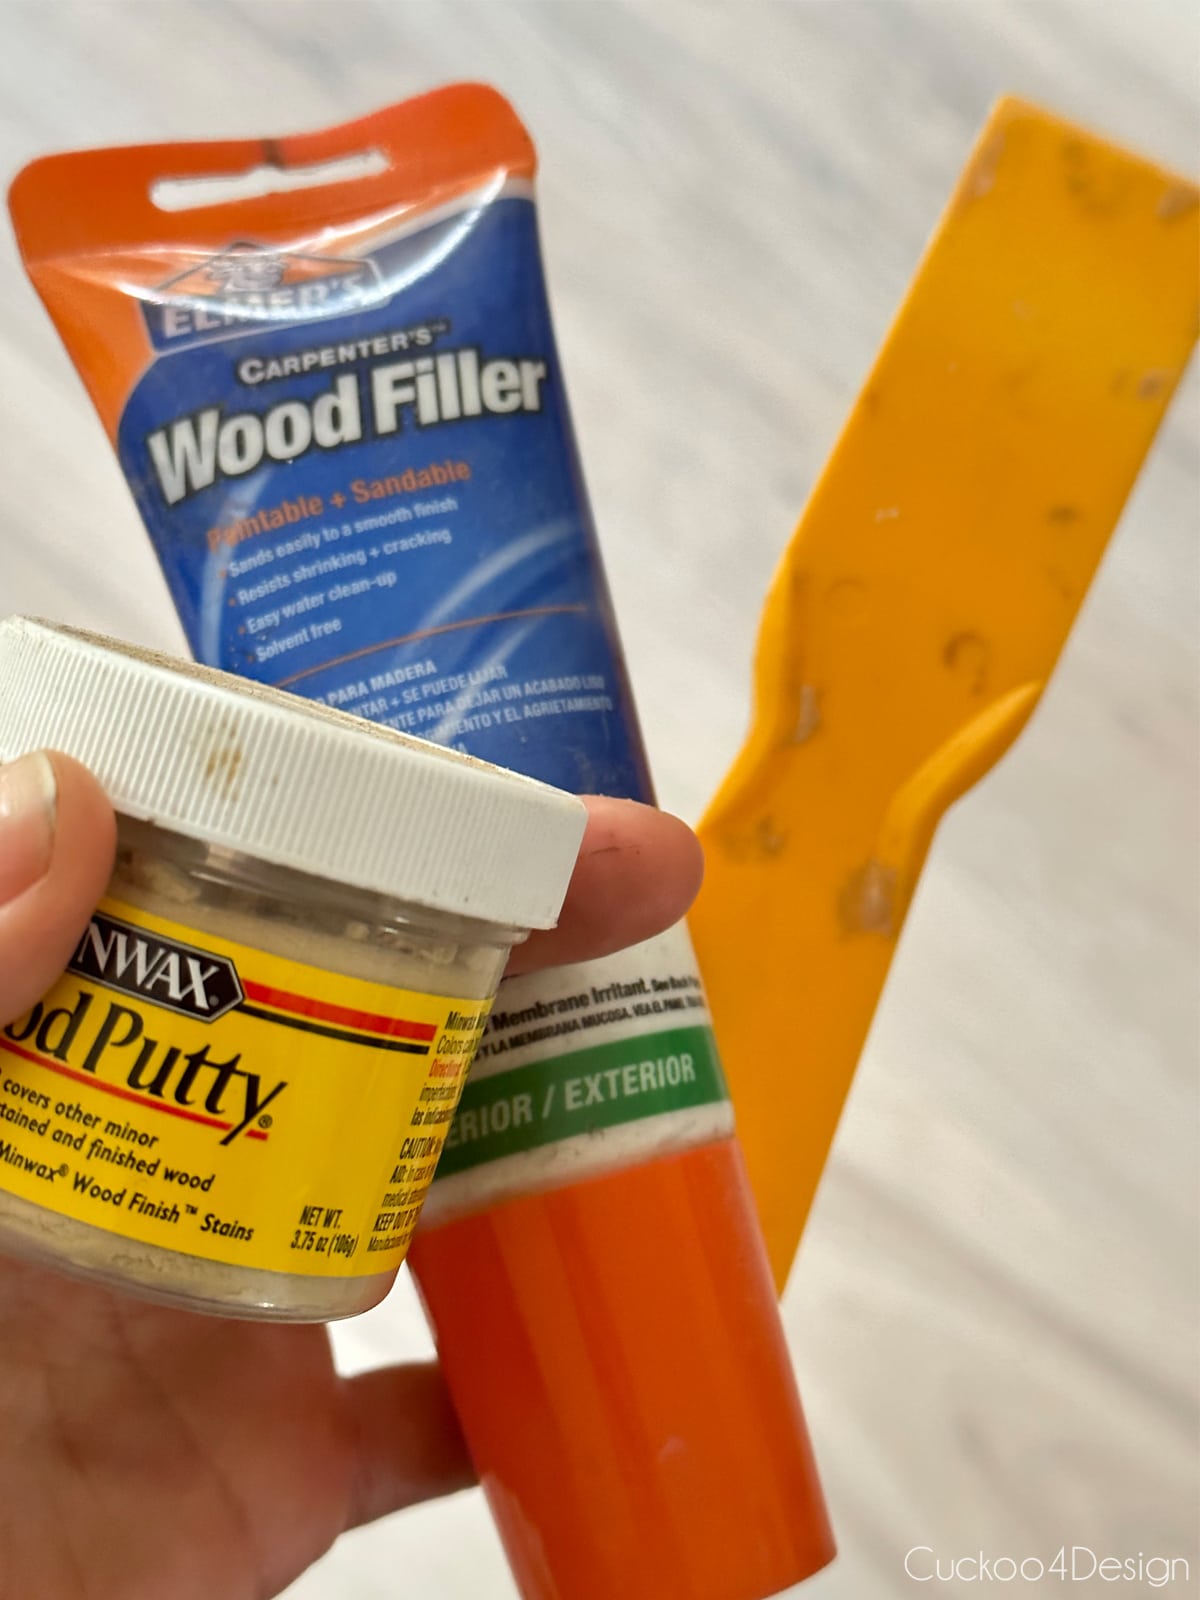
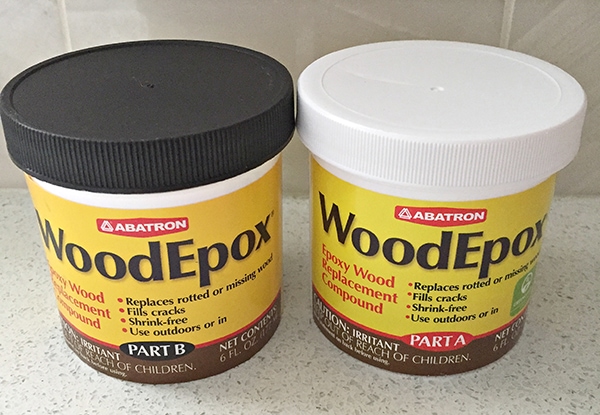
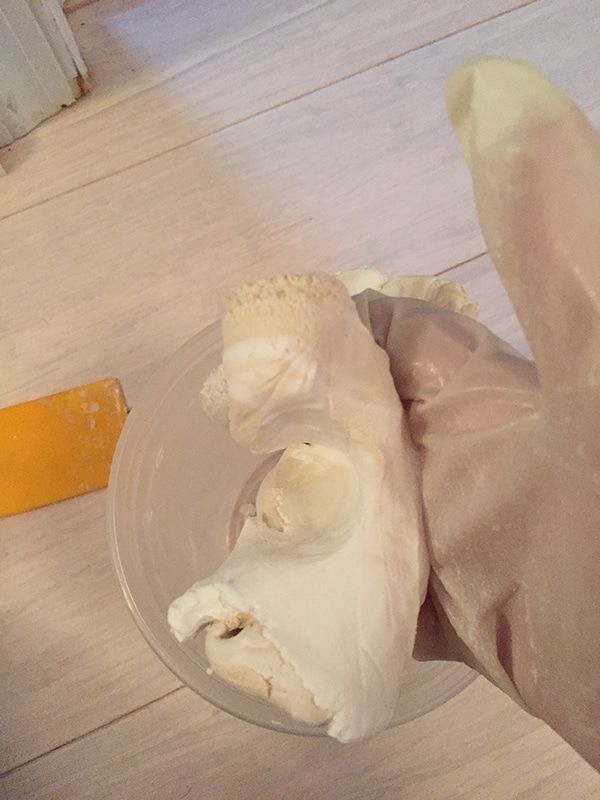
After doing some research I decided to go with Abatron Wood Epoxy that you can use to fill and reshape rotted wood on door and window frames. You have to mix the two components (A and B) together. I used my hands but don’t forget gloves. You end up with a nice doe that you just spread into the holes and gaps with your hands and a spatular. After letting it dry the recommended time, it is sandable, paintable, or stainable just like wood.
See how I mixed the two parts into a dough with my hands below:
It worked out really great and was the perfect solution which I will show you in a bit.
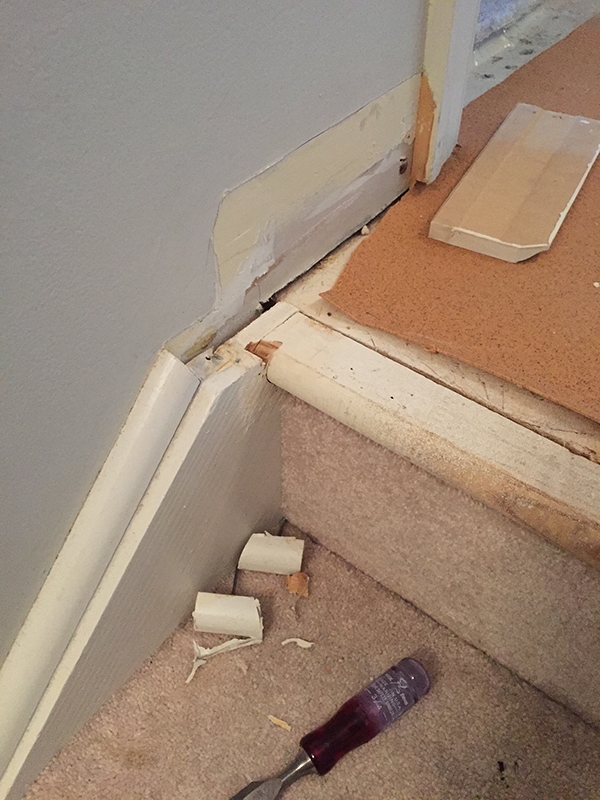
Fixing the baseboard molding
The molding or lack thereof is obviously unique to every house. When we moved into our house years ago, the sides were carpeted as well, and I ripped that off a long time ago, which meant the molding needed to be fixed.
Now that all the carpet is gone there are more molding and gap issues to be fixed.
materials
- paintable caulk
- finishing nails
- hammer
- different variety of moldings like quarter round and base molding
- electrical or regular miter saw
- coping saw
- angle finder tool
- putty knife
- face mask/dust mask
- different grit sandpaper
- electric sander
- oil-based primer (water-based primer doesn’t cover the knots in the imperfect cheap wood)
- paint brushes
- safety goggles
- wood filler
Here you can see my photos of how I made the molding line up and how it worked out for me. Determining the right size for the angles is a little hard sometimes but my little handy angle-cutting tool certainly helped with that. I should write a post about how to use that for sure.
Tip: Don’t forget to pre-drill the holes for your finishing nails before attaching the molding to the walls. It’s so important.
I spent many many hours with my iPad and Netflix working on these steps. That’s totally what I like doing. Am I the only one?
Make sure to caulk everything nicely at the end before you start priming.
What to do after removing carpet from stairs
Once the carpet is out and the tack strips are gone, you have three main directions to choose from depending on what’s underneath and what look you’re going for.
Refinish or stain the wood. If you have solid hardwood underneath that’s in decent shape, this is the most beautiful option. Sand it down, apply your stain, and seal it. I have a full post walking through exactly how I did this on our stairs.
Paint the stairs. If the wood has too much damage or you have plywood treads, paint is your best friend. It gives you a clean, finished look without needing the wood to be in perfect condition. You can do a solid color or even a two-tone look with painted risers and stained treads.
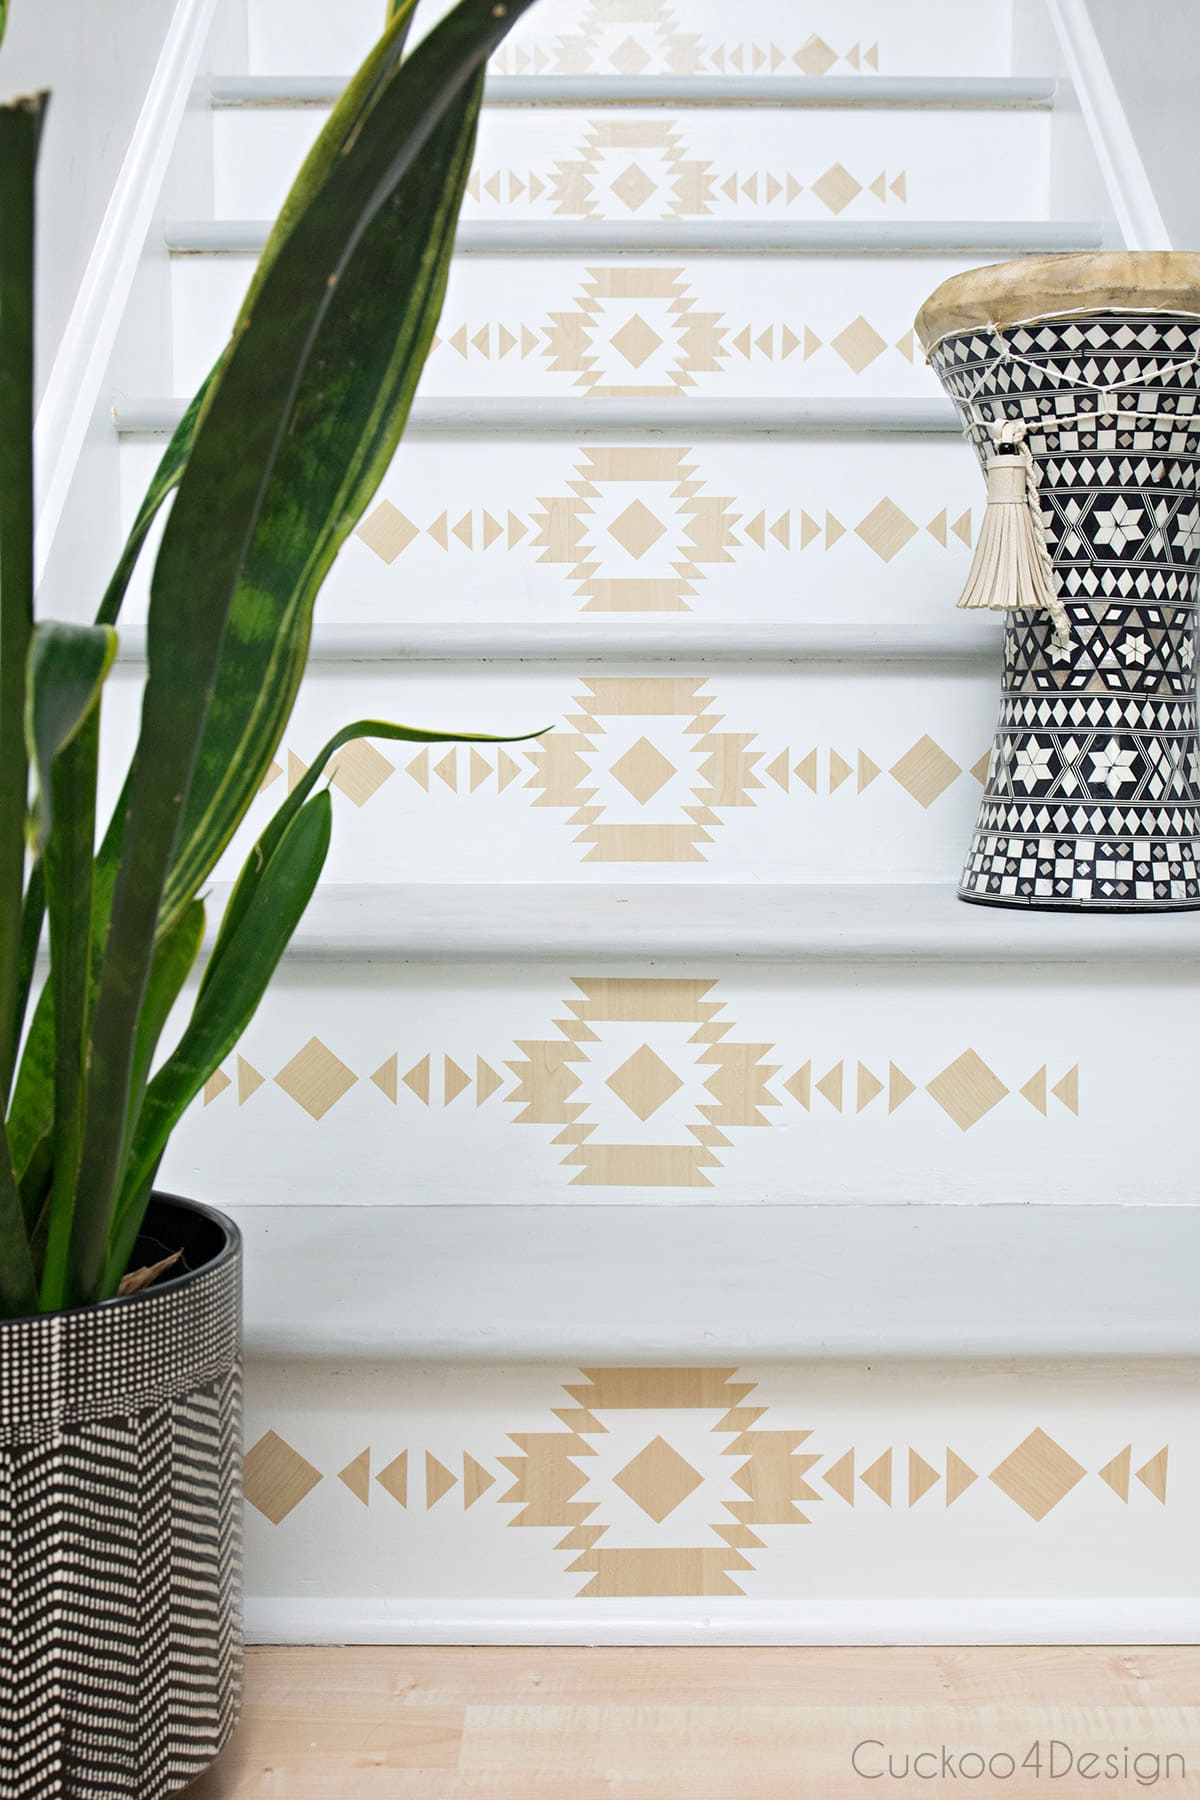
You can see what I ended up doing about refinishing the stairs and then adding stair riser decals.
Install new carpet or stair treads. If you’re replacing the old carpet with new carpet, you can skip most of the finishing steps entirely. Or if you want something in between, individual laminate stair tread covers are a great option that gives you the look of wood without the full refinishing project.
UPDATE: Since this stair makeover, I have written a blog post about how to install carpet runner on stairs, and I love this updated look so much.
Before and after photos
Look at this result so far! Doesn’t it look a million times better with only the primer?
The moral of this post is that you shouldn’t be afraid to rip off that filthy carpet because it will eventually look so much better. And I absolutely love just being able to take a dustpan and brush to clean the stairs. I’m also more relaxed because I don’t have to yell at the family members for carrying around drinks and food. I could care less now.
Frequently asked questions
No, the removal itself is the easy part. It just requires some elbow grease and basic tools you probably already own. What trips people up is what comes after, like pulling out all the tack strips and staples without damaging the wood underneath, and figuring out what to do with the molding gaps once the carpet is gone. I cover both of those in detail above.
It depends on when your house was built. Most older homes have solid hardwood, usually oak, underneath. Newer builds more often have plywood treads. My stairs were builder grade and had been carpeted for years, but the wood underneath was in much better shape than I expected. The carpet had actually protected it.
If you go the DIY route, the cost is basically just your time plus a few basic tools. You likely already have a hammer, pliers, and a pry bar. The only things you might need to buy are a staple remover, safety glasses, and wood putty for patching holes, which together run well under $30. Hiring a contractor to remove stair carpet is much more expensive.
Yes, and this is where the real transformation happens. If your stairs have solid hardwood underneath, you can sand, stain, and poly them for a natural wood look. If the wood has too much damage or is plywood, painting is the better route. I linked to my different follow-up post above.
Thanks for reading, and don’t worry about giving your carpeted stairs a makeover because it will be worth it for sure.
Tschüß,

How to remove carpet from stairs
Removing carpet from stairs may seem difficult, but it is a simple project anyone can do with a bit of elbow grease. With this step-by-step tutorial, you can tackle this DIY project yourself successfully.
Materials
- wood filler
- sand paper
Tools
- vice grip pliers
- pliers
- hammer
- pry bar
- flat head screwdriver or staple remover
- putty knife
- safety goggles or glasses
- gloves
- dust facemask for sanding
- utility knife
Instructions
- Pull up the carpet
Wear your safety goggles and protective work gloves. Grab the corner of the carpet on the first upper thread with pliers or vice-grip pliers and pull. Removing the carpet will expose the carpet padding. Make sure you are firmly standing on the stairs so you don't fall backward. Some carpets come off easier than others.
Work your way down the stairs and keep disposing of the carpet as you go. It's best to throw it out in sections. And be careful with the staples that are still sticking through the carpet. - Remove tack strips, fasteners, and padding
After that, remove all the carpet padding that is attached with more staples. Use the flathead screwdriver, staple remover, and pliers for that. Removing the carpet pad from your stairs is a lot easier than the actual carpet because it is a lot lighter. Simply pull it away from the threads. It tears easily, so it will most likely come apart in smaller chunks. Just have a trash bag handy to discard it right away.
Carefully remove the tack strips, nails, and staples so you don't damage the wood any further. Use the pry bar (in some cases, the flat-head screwdriver works well too) by shoving it under the tack strip and pushing it down so the tack strip lifts up. Throw the tack strips away right away since a lot of sharp metal parts stick out of them.
Use the pliers to remove all the staples and nails from the stairs. - Patch the holes
Use wood putty and a putty knife to fill the small holes that the staples and fasteners have left behind. Let the wood putty dry.
- Sand down the dried wood putty
Use a hand sanding block or a palm sander with sandpaper to sand down the filled wood putty holes. Make sure to wear a face mask for the sanding.
(I ran into more issues and had to sand more because our builder had painted the walls of our home before adding the carpet, so we had globs of paint and drywall compound stuck to our stairs, which I had to sand as well since I wanted to refinish the stairs. If you are just adding carpet again, you can just skip all the sanding. This part took quite a bit of time.) - Clean stairs with a broom and vacuum
Use a hand broom to brush off all the debris from your stairs and then go over it again with a shop vacuum to make sure you get everything clean. I also like using tack clothes for the final sweep because their sticky surface really grips and lifts every tiny bit of dirt and dust. - Inspect your work
Carefully run your hands over the stairs to see if you missed any staples or nails. Most likely, you already found something sticking out while sanding. Any missed staples and nails sticking out can cause injury to someone's feet, and you have to be 100% sure that you didn't miss anything.
Notes
- check with your garbage company to see how much carpet and padding you are allowed to put on the curb for trash pickup if you have a lot to dispose of.
- carpeted stairs consist of a carpet pad, nosing, tack strips, tread, riser, and carpet
i think we will be redoing our icky carpeted bedrooms and your line- the moral don’t be afraid because it will eventually be so much better- stuck out at me and i needed to hear it today!
Don’t be afraid! Haha no really 😉
Carpet is so awful! I’m glad that yours is gone and I can’t wait to see what you do next 🙂
I can’t wait too LOL
Julia I did the same thing with our disgusting stair runner a few years ago. I swear I sneezed 50 million times a day until that carpet was gone. You did such an amazing job with this project. Isn’t it crazy how wood fill, caulking and paint can hide all sorts of flaws and weird carpentry issues?? I find with every carpentry project I do there are odd little angles and spaces and whatnot, but after everything is filled and painted they disappear. Your stairs look so pretty from your living room. You must be so happy you took this huge project on!
Yes caulk and wood filler are an amazing thing! I do love looking at them now
Thank you, thank you for this post! I was really hoping you’d explain what you found under the carpet and the pictures were spot on. My cat has made my stairwell smell like old lady house but I’ve been too afraid to rip up the carpet. I’m regrouting my shower this week but next week I’m ripping up that carpet.
Good luck with it! I’m sure you’ll like it much better after
The only thing I would worry about with painting them is the paint wearing off where people walk. Unless you put a clear coat over the paint?
I totally agree that worries me too and I was planning on a clear coat no matter what. But paint probably would wear off
Thank you for your honesty and sharing your process – it’s really refreshing in the “everything is easy and the results are PERFECT” world home design. Makes feel better about doing my projects in stages and living in the process.
Oh it’s not all easy. It’s quite frustrating most of the time and takes forever 😉
I’m glad we’re not the only ones working on stairs. My husband took the day off to paint the risers. The original stairs were so bad that he tore them out and started from scratch ( it’s been an ongoing project since September). I may need to tell him about that epoxy stuff because there are gaps where he couldn’t get a perfect cut on a riser or tread. I think the hardest part is figuring out how we’re going to fix the gap between the wall and stringer. The dry wall is not even. We’re pretty proud of our stairs! Could I send you some pictures?
You sure could! Good luck with the gaps.
Hi Julia – Your staircase looks fabulous. How you fixed the gaps looks amazing. I removed the carpet from the stairs in my PA house. Now I am in the process of doing it again in the SC house. Although I just had to remove a runner, not upholstered carpet over the entire staircase.
Thanks for showing us how you used the wood epoxy. It is just want I need to fix a few gaps and holes in the flooring in my new house.
Yay! It looks amazing just with the carpet removed! I’m so jealous that you had actual wood underneath there – we have that nasty OSB under the carpet on our stairs, so it would be a MAJOR replacement if I ripped up the carpet! Hopefully one day 😀
I’m not sure how this would fit in with the flooring on the landing, but I’m always crazy for black stair treads with white risers, and the black and white combo would fit in so well with your living room! My two cents 🙂
I love the look of black and really considered it. But the darker the color the more the dirt shows and I do have a white cat and light grey cat. I think that wouldn’t be a good mix unfortunately. I wish!
Julia, you have done such a phenomenal job on those stairs already. Even if you don’t do another thing, it looks fabulous. I can’t wait to see what you decide 🙂
You are my role model. Your stairs are just so good and thanks Katja
Girl you rock!! That looks amazing!
Thank you! I’m so glad that some of the worst parts are over
I might be the odd ball here but I honestly like the natural wood…I think your other options would look good too thought! The 2nd to last picture looks like it blends in perfectly with the flooring at the bottom of the stairs. When making these big decisions I just live with it for awhile until I have my aha! moment. It will come to you.
I really want to rip out the carpet on our stairs, however, we have carpet at the top and bottom that will stay in place. The basement carpet is in great shape so no way am I pulling it up. The upstairs carpet really needs to be replaced but we have to wait awhile for that project and I want wood floors upstairs. My delima is that I have a BEIGE cheap-o large tile landing 1/2 way down the stairs. I don’t like the tile but I’m really at a loss as to what I should do with it since it goes with all of the tile in the house – gotta love builder grade crap. It’s in my mudroom, 2 bathrooms, entryway, and this landing, on the fireplaces, and similar accents in kitchen backsplash & bathrooms. I hate it!!!
That’s exactly my plan to just live with it for a little. Usually always works. Hope you can figure out your situation 😉
This looks like a lot more work than I would have originally thought but nice instructions. I’m looking forward to giving it a shot this weekend so wish me luck.
Oh it’s definitely a lot of work but so so worth it in the end. And I’m spending less time cleaning the carpet on the stairs
Wow, what an improvement already! AND you haven’t given me the boost I need to get back to work on mine. Thanks!
🙂
http://gwingal.blogspot.com/
WOW Julia! This looks AMAZING! How did you learn how to do this? Care to share which tutorials you’ve used to do this? My stairs are U-G-L-Y and I so badly want to do this!
I didn’t really use any tutorial so far since I just ripped it up and went in steps how I usually refinish furniture. Lets see when I’ll finally get to the part2 of the stairs. I have no desire to do it and they already look ok 😉
To solve your problem of not being able to use the stairs, just paint alternating treads. Not saying the cat or kids will figure out which ones to use, but at least you and your hubby will know ;))
We have three cats so that might really be difficult 😉