

DIY grasscloth dresser makeover with peel-and-stick wallpaper
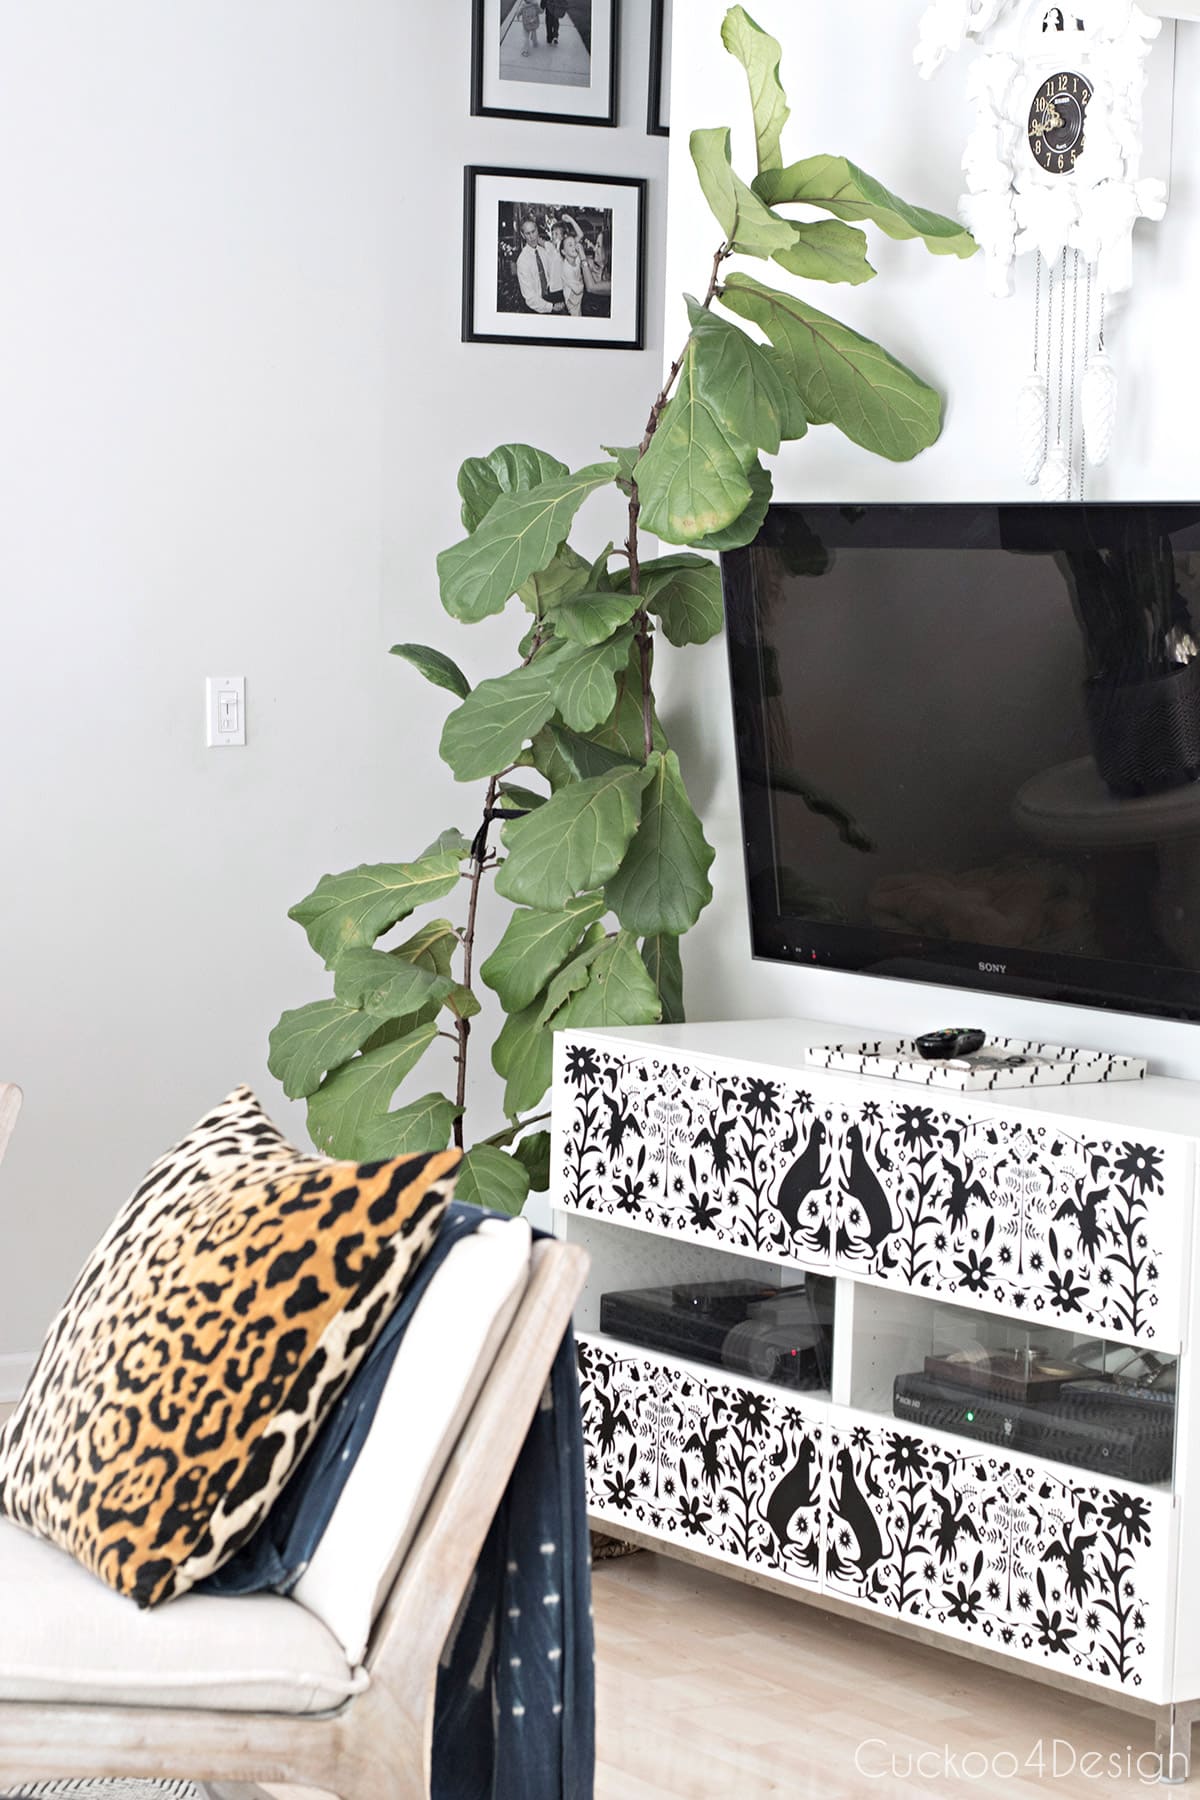
I have mentioned before that my mom always hated the Otomi decal on my Ikea Besta TV unit but that’s not why I decided to change it. It’s probably why I hadn’t changed it yet in 4 years…haha. The truth is that I was itching to change that piece since we cut the cable and didn’t need the glass windows for the cable boxes anymore. I have always loved the look of grasscloth wallpaper and knew I wanted to head in that direction by using a faux version like peel-and-stick grasscloth wallpaper. So I came up with my own DIY grasscloth dresser makeover.
I love decorating with Ikea furniture and accessories and even wrote a blog post about my 10 favorite Ikea decorating tips where you can see how many Ikea pieces I have in my home without anyone even noticing. There are also many items stored away.
I had two extra plain white doors left over and stored in the basement and had an epiphany one day with an idea of what I wanted to do.
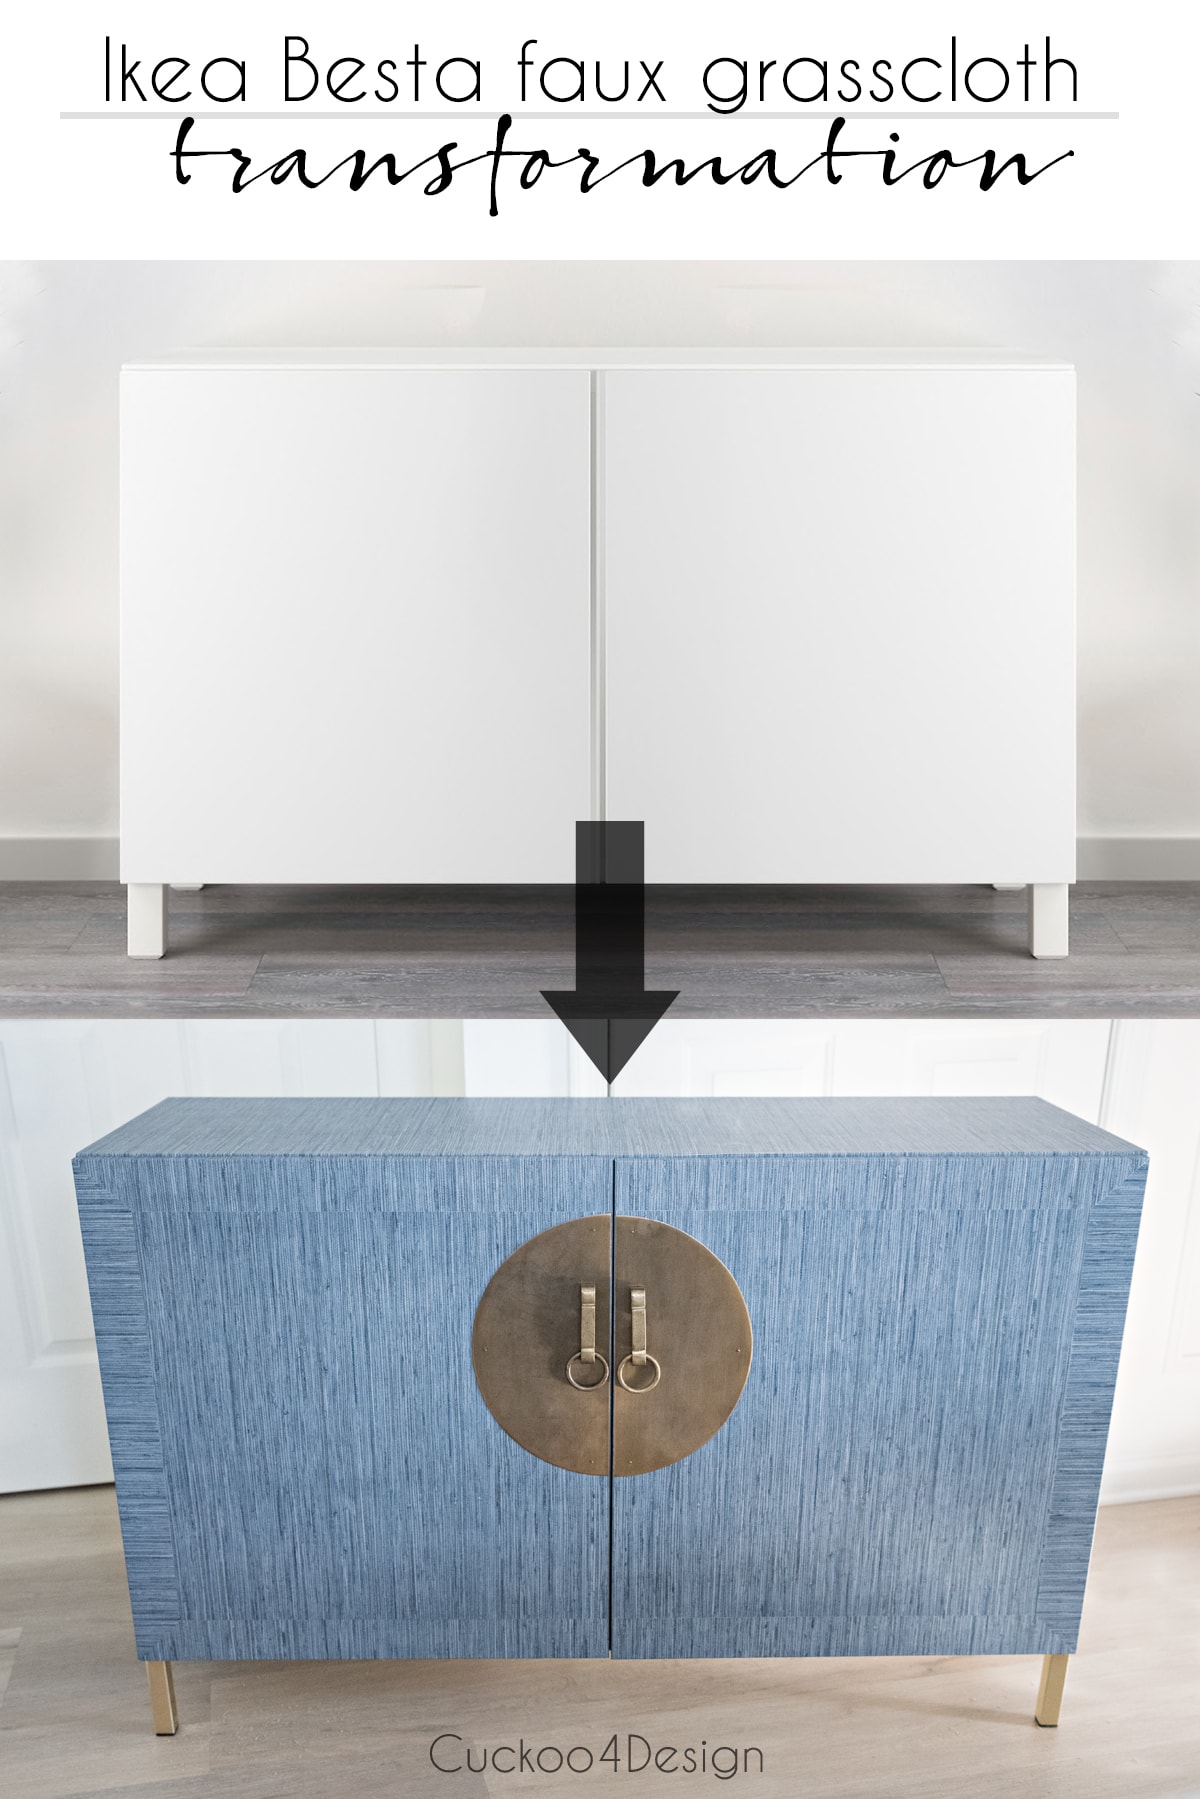
DIY grasscloth dresser makeover with peel-and-stick wallpaper
This post may contain affiliate links from which I will earn a commission at no extra cost to you. View my full disclosure policy.
I ordered 3 different papers I saw on Amazon, so I could decide at home which look felt the best with the rest of our house. The left paper, the center paper, and the right paper.
I disliked the paper on the right in person. I’m not even sure what it is supposed to look like. The left one is very pretty but I could recognize a repeat pattern when standing far away. The most realistic and perfect blue for us is the paper in the middle.

Materials needed for DIY grasscloth dresser makeover
- plain Ikea Besta unit or any other dresser
- brass legs which don’t come with screws so you have to buy #10 x 1″ wood screws
- hardware (I’ve always wanted to use Chinese brass hardware, similar piece)
- one roll of faux peel-and-stick grasscloth wallpaper
- screwdriver
- squeegee or other smoothing tool (I simply used a clean towel)
- hammer
- large ruler
- craft knife
- drill
- screw cutter

Step-by-step video tutorial
I have a video to show you the entire Ikea hack process which you can either watch below or on my YouTube channel. It is more of a short time-lapse that shows you how easy the peel-and-stick grasscloth wallpaper is to work with. It can be pulled up and readjusted over and over again which is not the case with contact paper.
Of course, my kitties keep walking in and out of the video and Walter actually came into view puking up a big hairball but I edited that part out haha.
(When watching the video, please use the pause button to have more time for reading certain sections and the mute button if you don’t like the music)
Music “Bossa Antigua” by Kevin MacLeod, License: CC BY (http://creativecommons.org/licenses/by/4.0/)
DIY grasscloth dresser instructions and project details
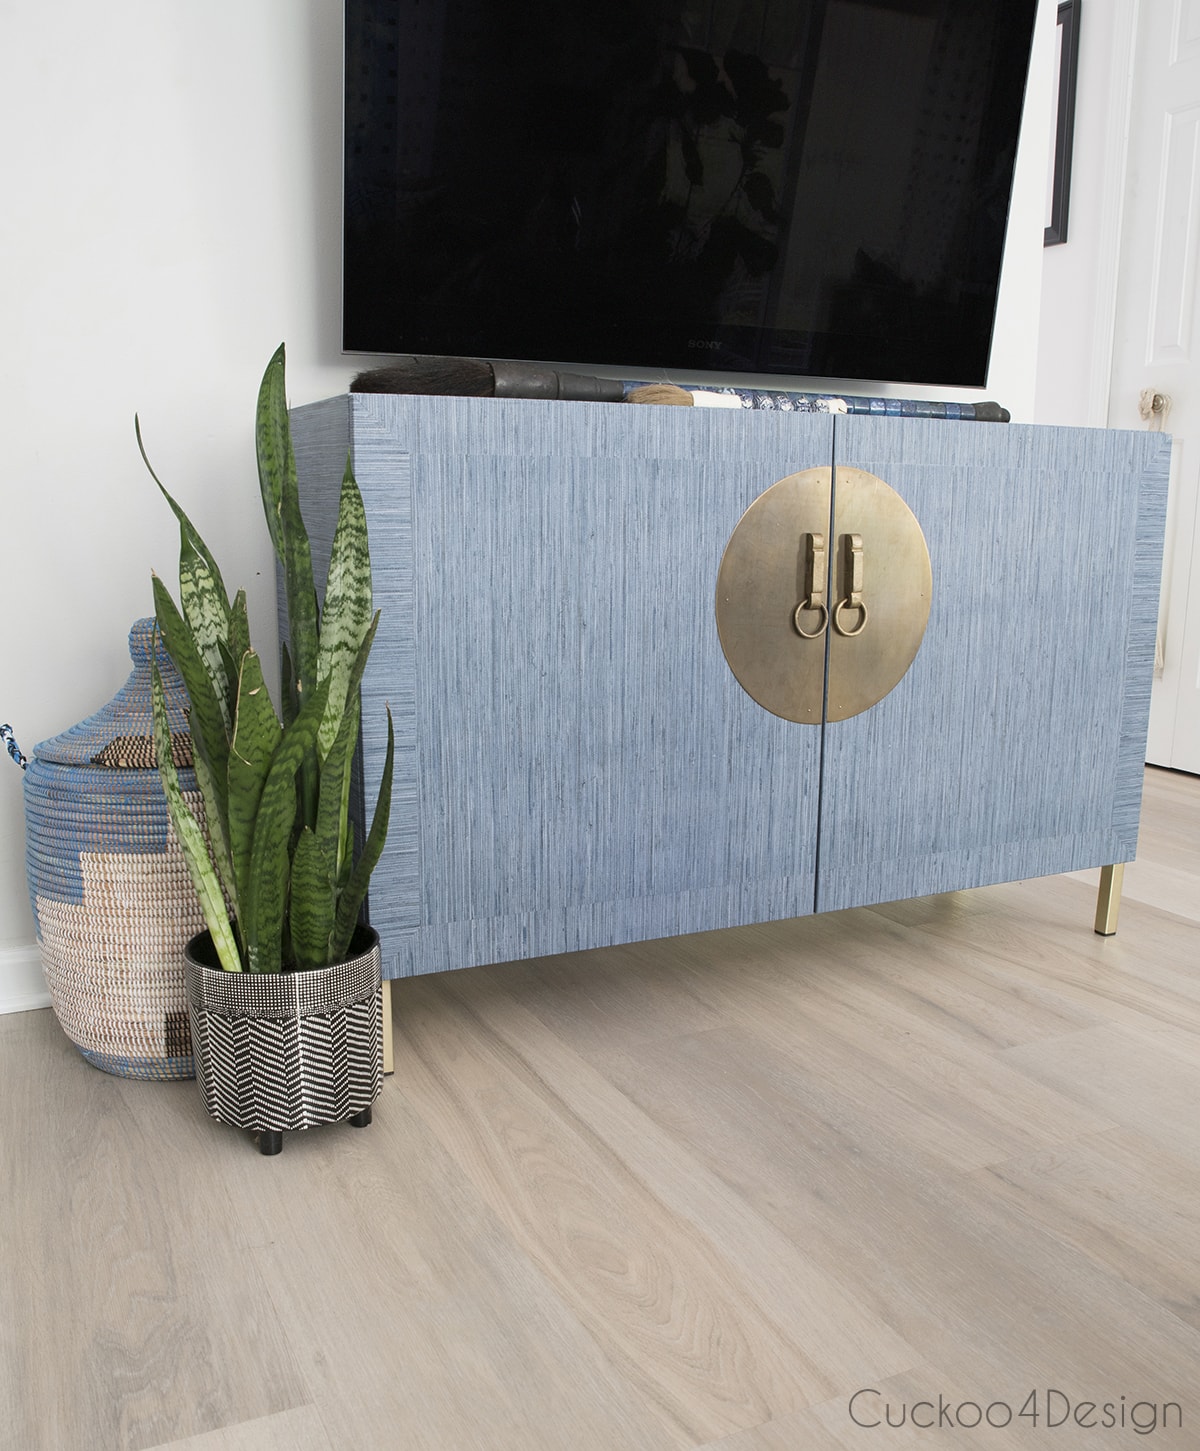
Here is an inspirational dresser (for several thousand dollars) that I liked but I still wanted to put my own spin on it. Someone on Instagram mentioned that there could be a possibility that my cats would love the texture of expensive real grasscloth and end up using it as a cat tree. I had to agree and was set to find a faux peel-and-stick grasscloth wallpaper. An extra bonus beside it being cheaper is that it doesn’t require wallpaper paste.
The mitered look of the cabinet doors is beautiful which is what I wanted to end up doing since the paper I chose wasn’t wide enough for the Besta doors to begin with. I decided to not have the miter in the middle though due to the huge brass hardware I chose.
Cutting details for peel and stick grasscloth wallpaper
I tried to have the least amount of waste and made sure that I cut pieces accordingly.
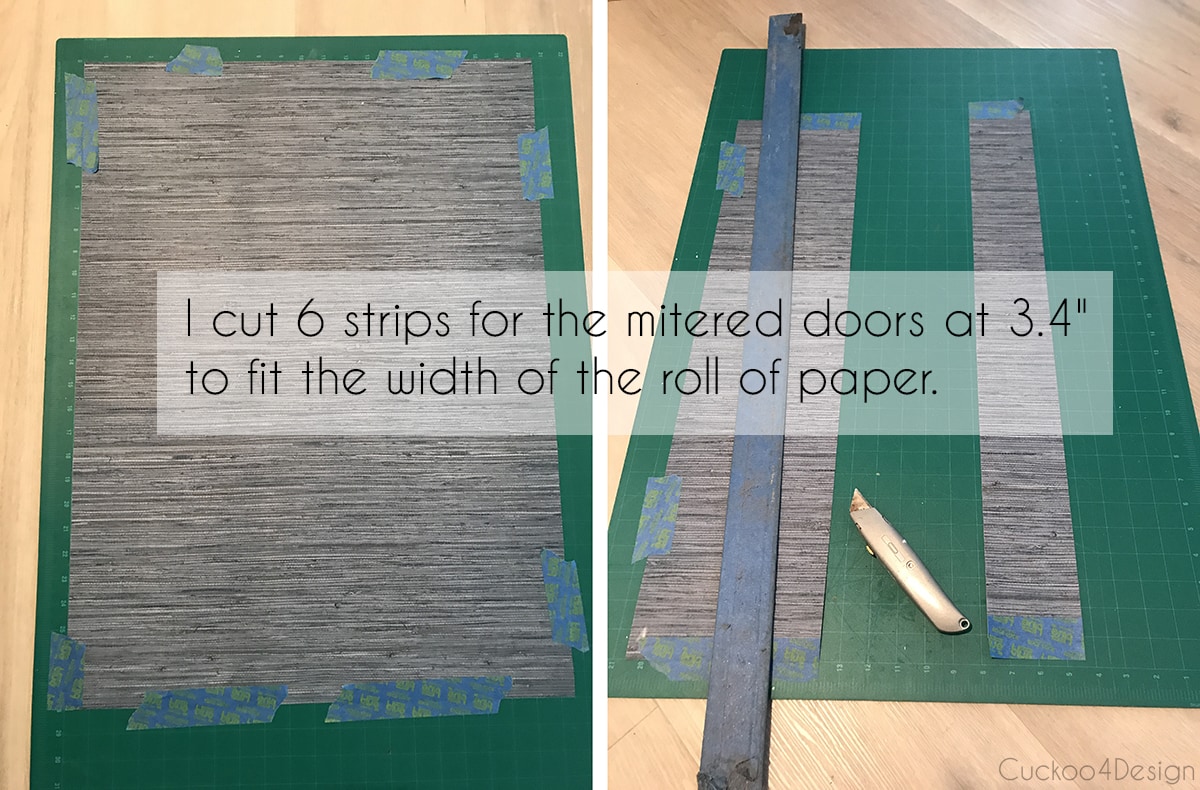
The doors’ middle pieces used the height of the roll and I cut both of them 22.5″ long. This same process can be applied to dresser drawers as well. The Ikea Besta system offers drawer fronts and doors as options.

As shown in the video, you can get perfect mitered corners by letting the strips overlap…

… and then cutting through both of them from corner to corner with the craft knife.

All you need to do is peel off the waste/excess paper to reveal perfect mitered corners.
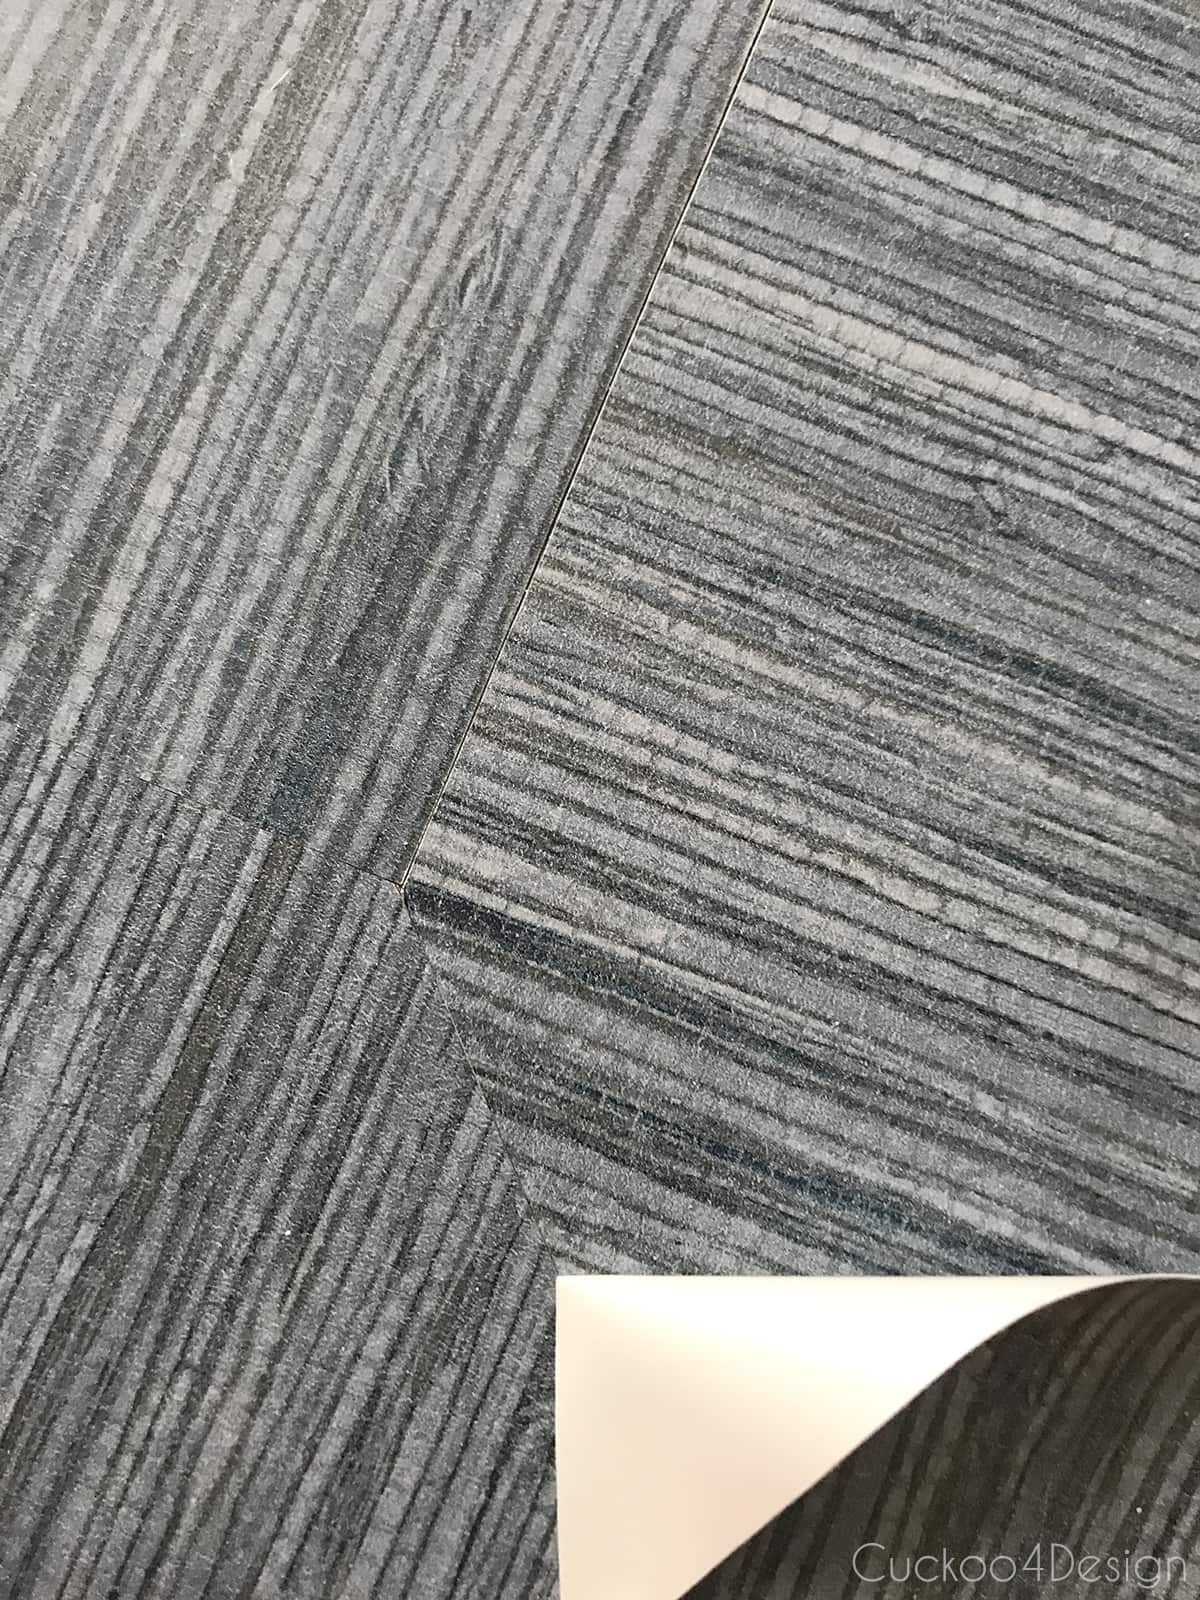
I’m not sure why the paper looks so different in my cellphone photos compared to my camera photos. It looks like two different colors. So I’m sorry about that.
How to wrap a cabinet door or drawer front in peel and stick grasscloth wallpaper
Below I’m showing how I finished the other side of the cabinet doors. Wrapping a drawer front is the exact same process.
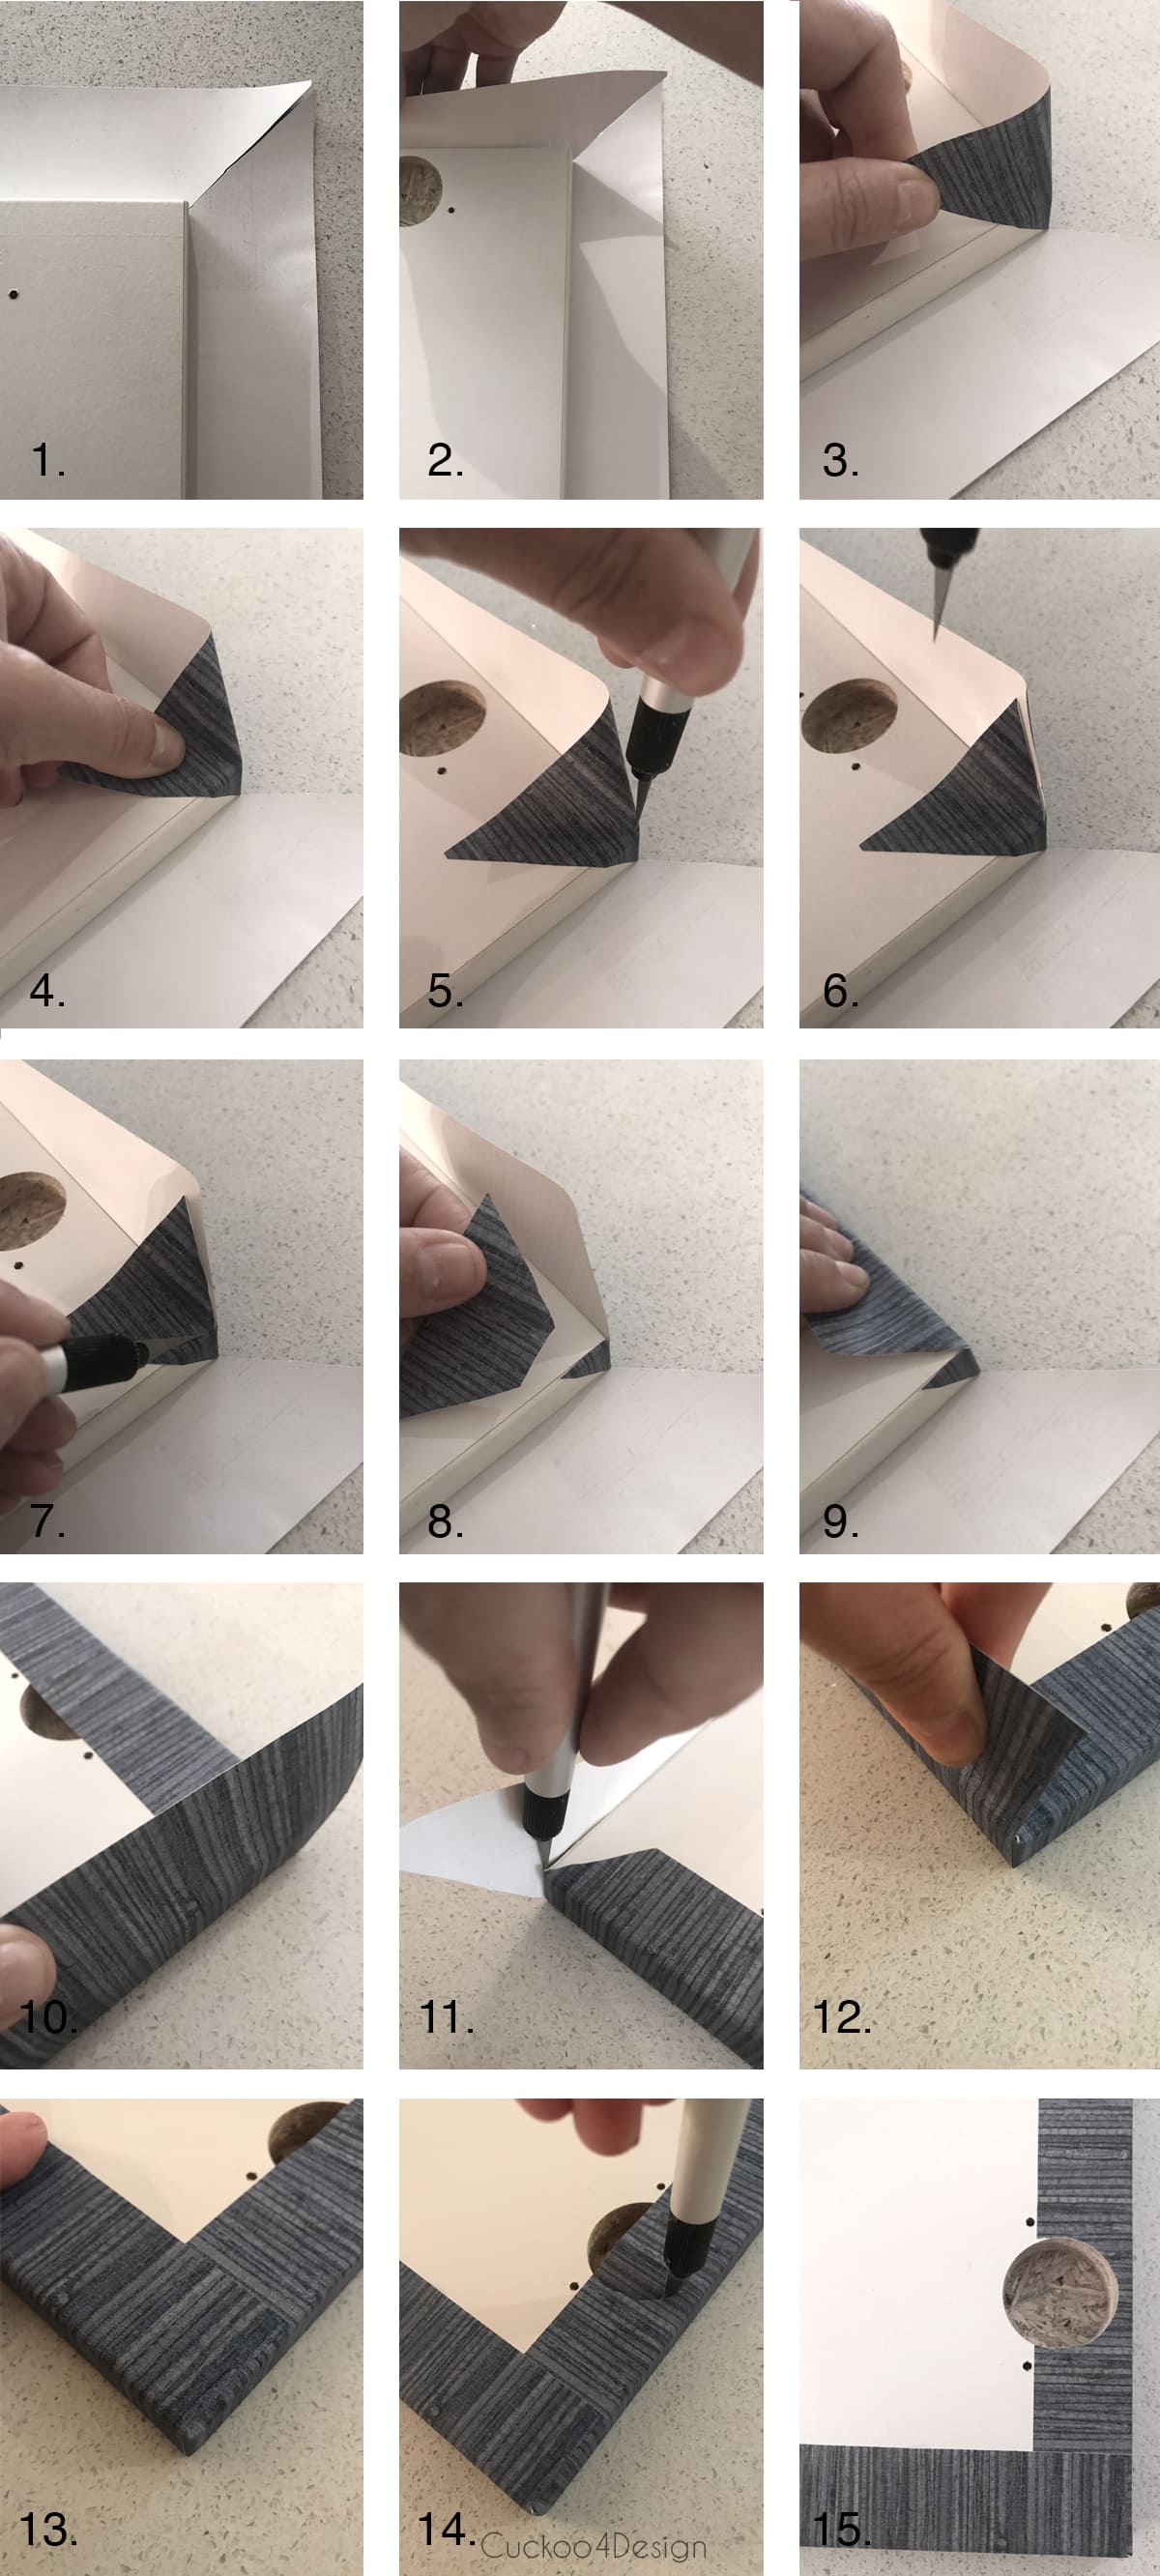
- Remove the backing from the back of the wallpaper and place the door front (or drawer front) on the sticky side of the wallpaper.
- Cut a slit into the wallpaper corners and lift and wrap one side of the paper up so it sticks to the side of the door or drawer front.
- Stick it all the way around the corner.
- Smooth the wallpaper out on the door of the door or drawer and remove any air bubbles. (This is where I used the towel but you can use any other smoothing tool) You can lift the paper again if needed.
- Cut into the paper from the corner up.
- Smoothly stick the paper down for the next cut.
- Then cut the other side of the paper.
- The previous step leaves a triangle folded over.
- Again smooth out the corner by folding it over to the backside.
- Now fold over the other side.
- Cut the corner.
- Fold the paper over to the backside
- Smooth everything out again.
- For the final step cut out the hinge holes with the craft knife.
- And you are done with your drawer or cabinet door.
How to wrap the dresser’s frame
The rest of the dresser gets literally wrapped like a present and access is cut off with the craft knife as shown in my video, so make sure you watch it. Just make sure that you have an overall smooth surface. If the paper is really stubborn you can even poke a tiny hole into any bubble with a needle or the tip of the knife and then smooth out again.
The provided hardware screws are a bit too long, you can either take the hardware to your local hardware store and they will sell you shorter screws that fit or you can cut them as I did with a cutter. I love this tool for electrical work and cutting screws. All you have to do is stick the screw in the right-sized hole and then close the grip handles.

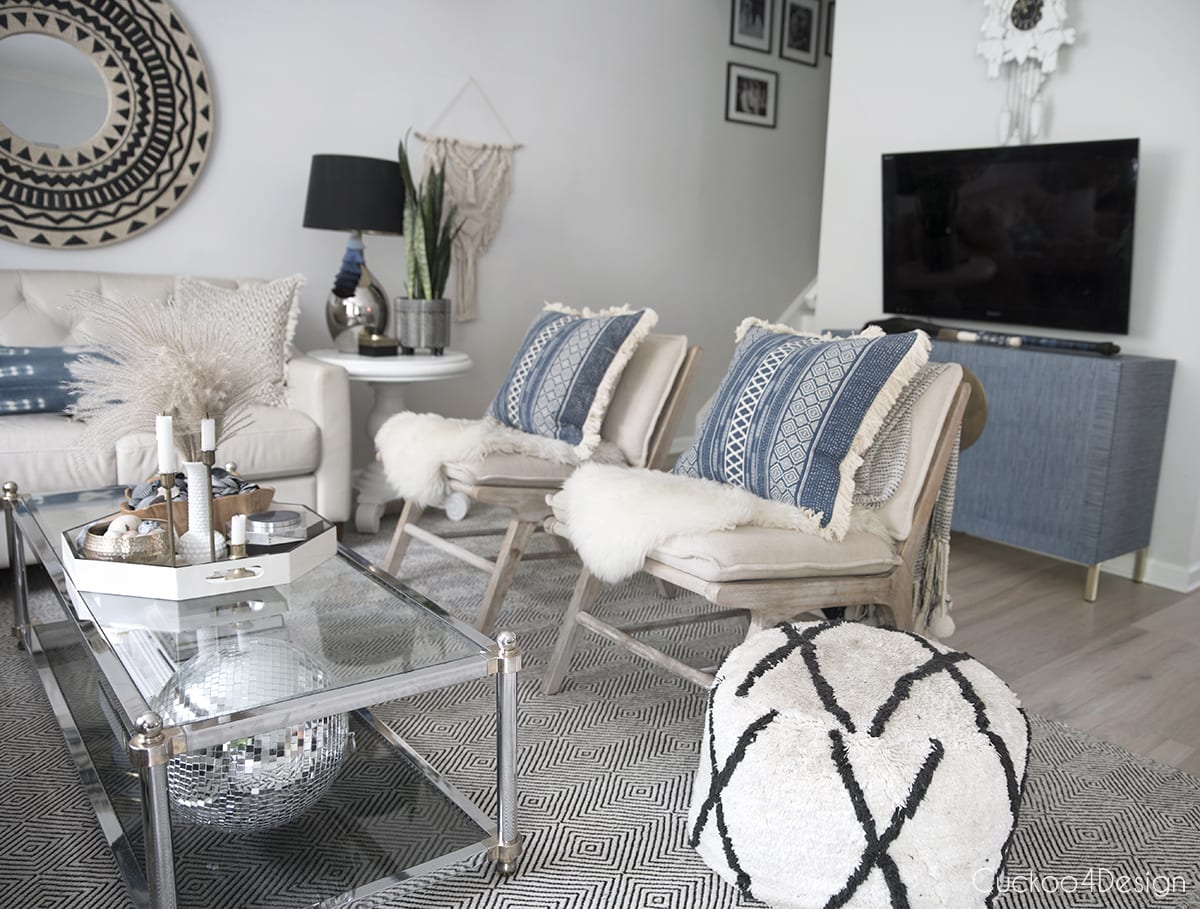
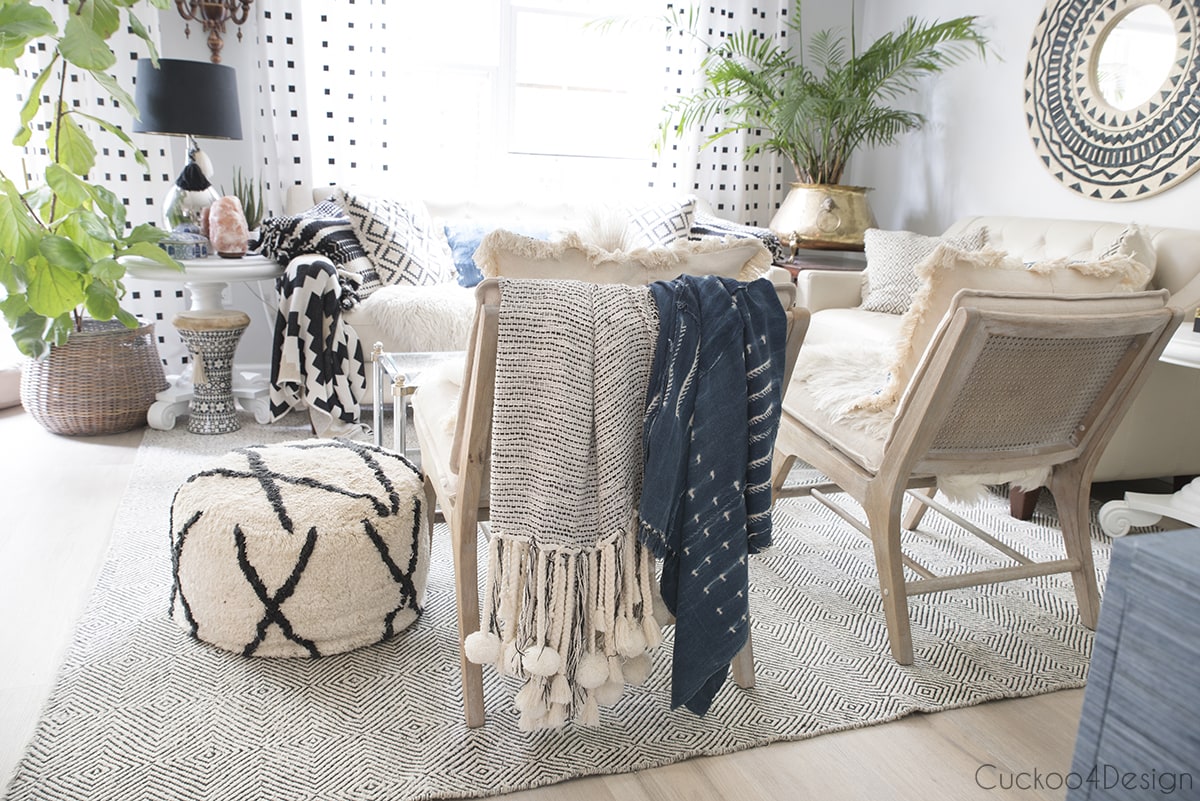
Photos of the finished DIY grasscloth dresser
I’m in love. That hardware is the absolute best. I chose not to use the locking pin to make it easier to use.


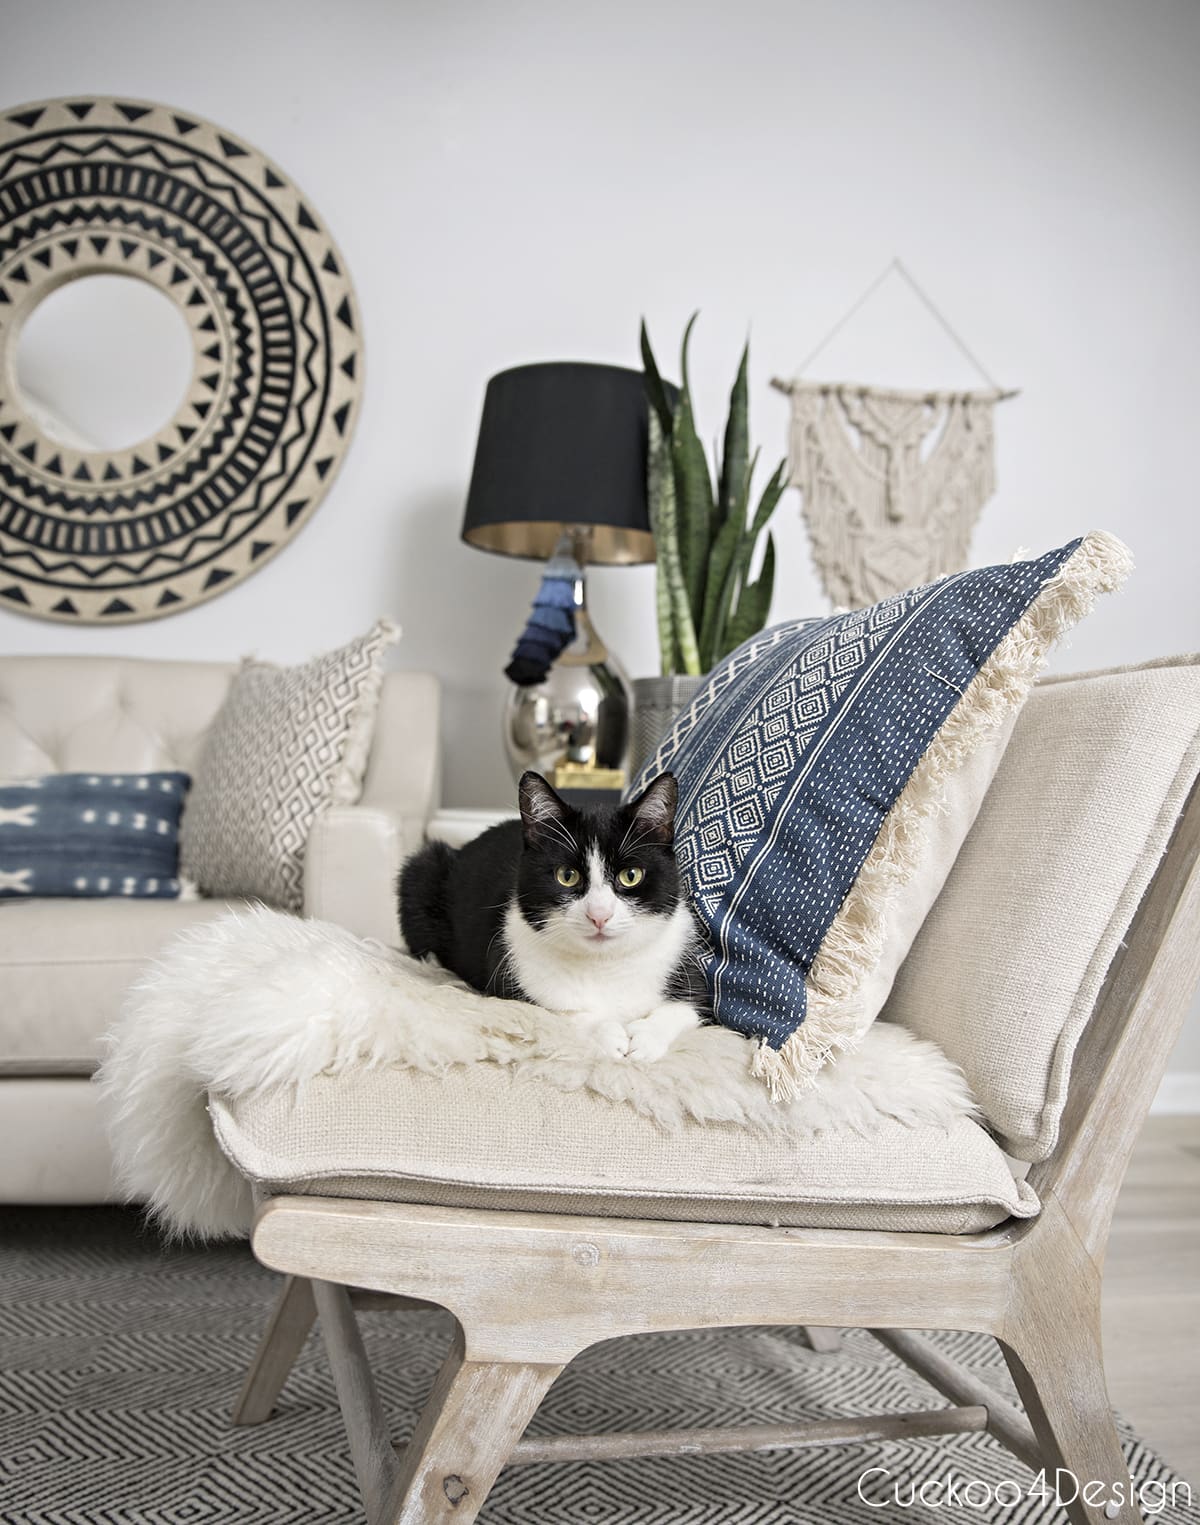

I can’t let go of my summer findings yet because I love my Jersey Shore black and grey seashell collection. The other bowl is filled with a variety of different land and sea snail shells.
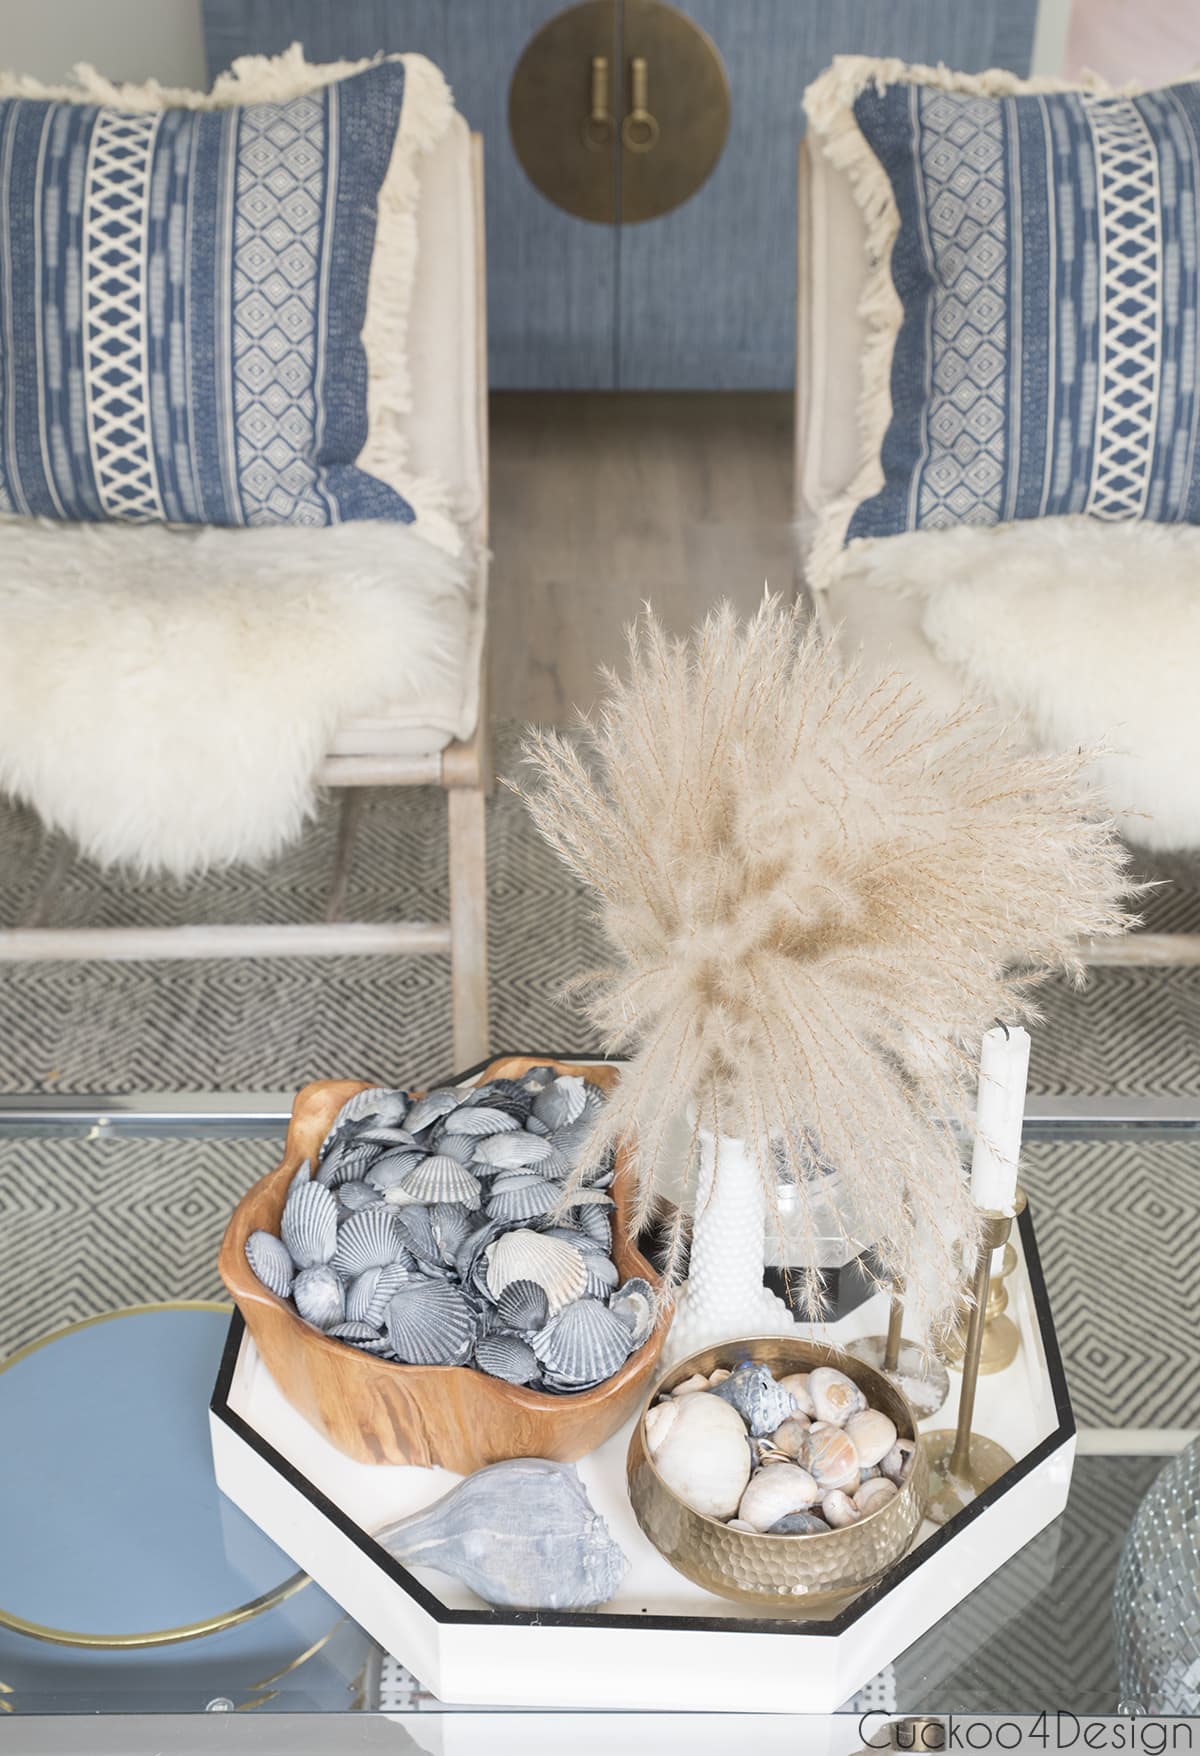

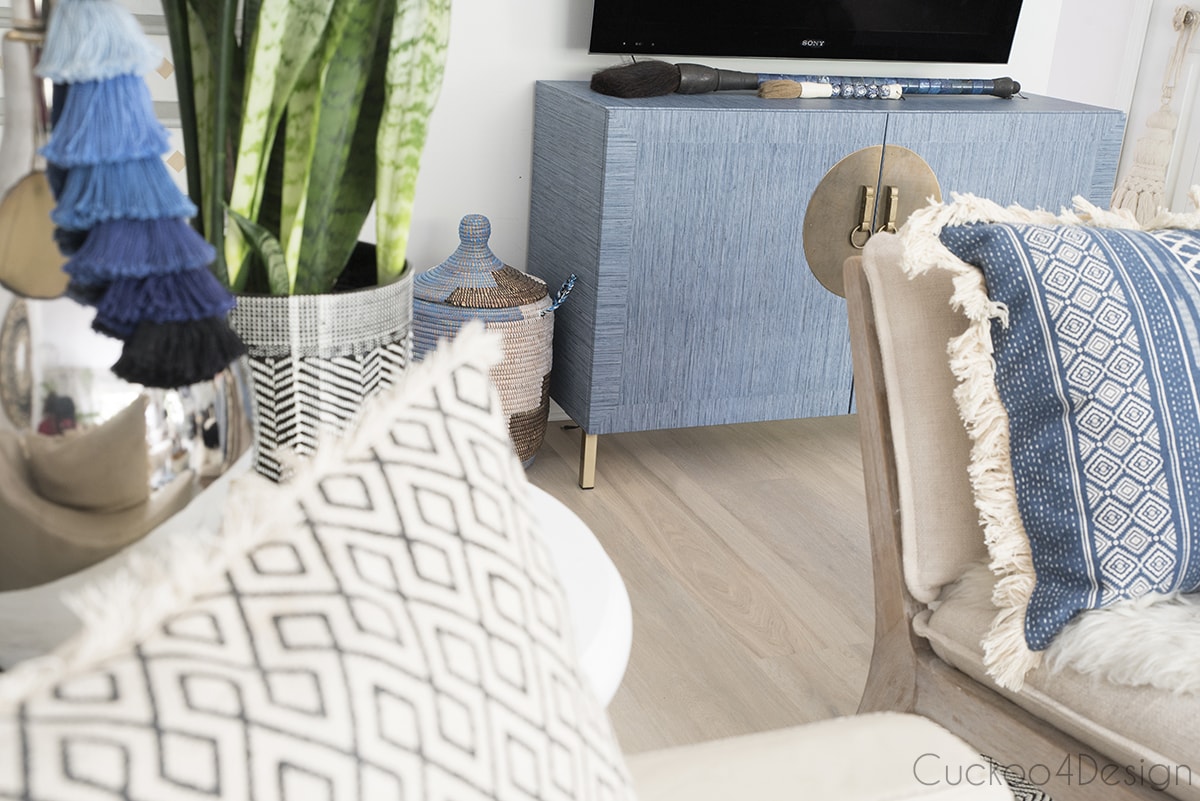
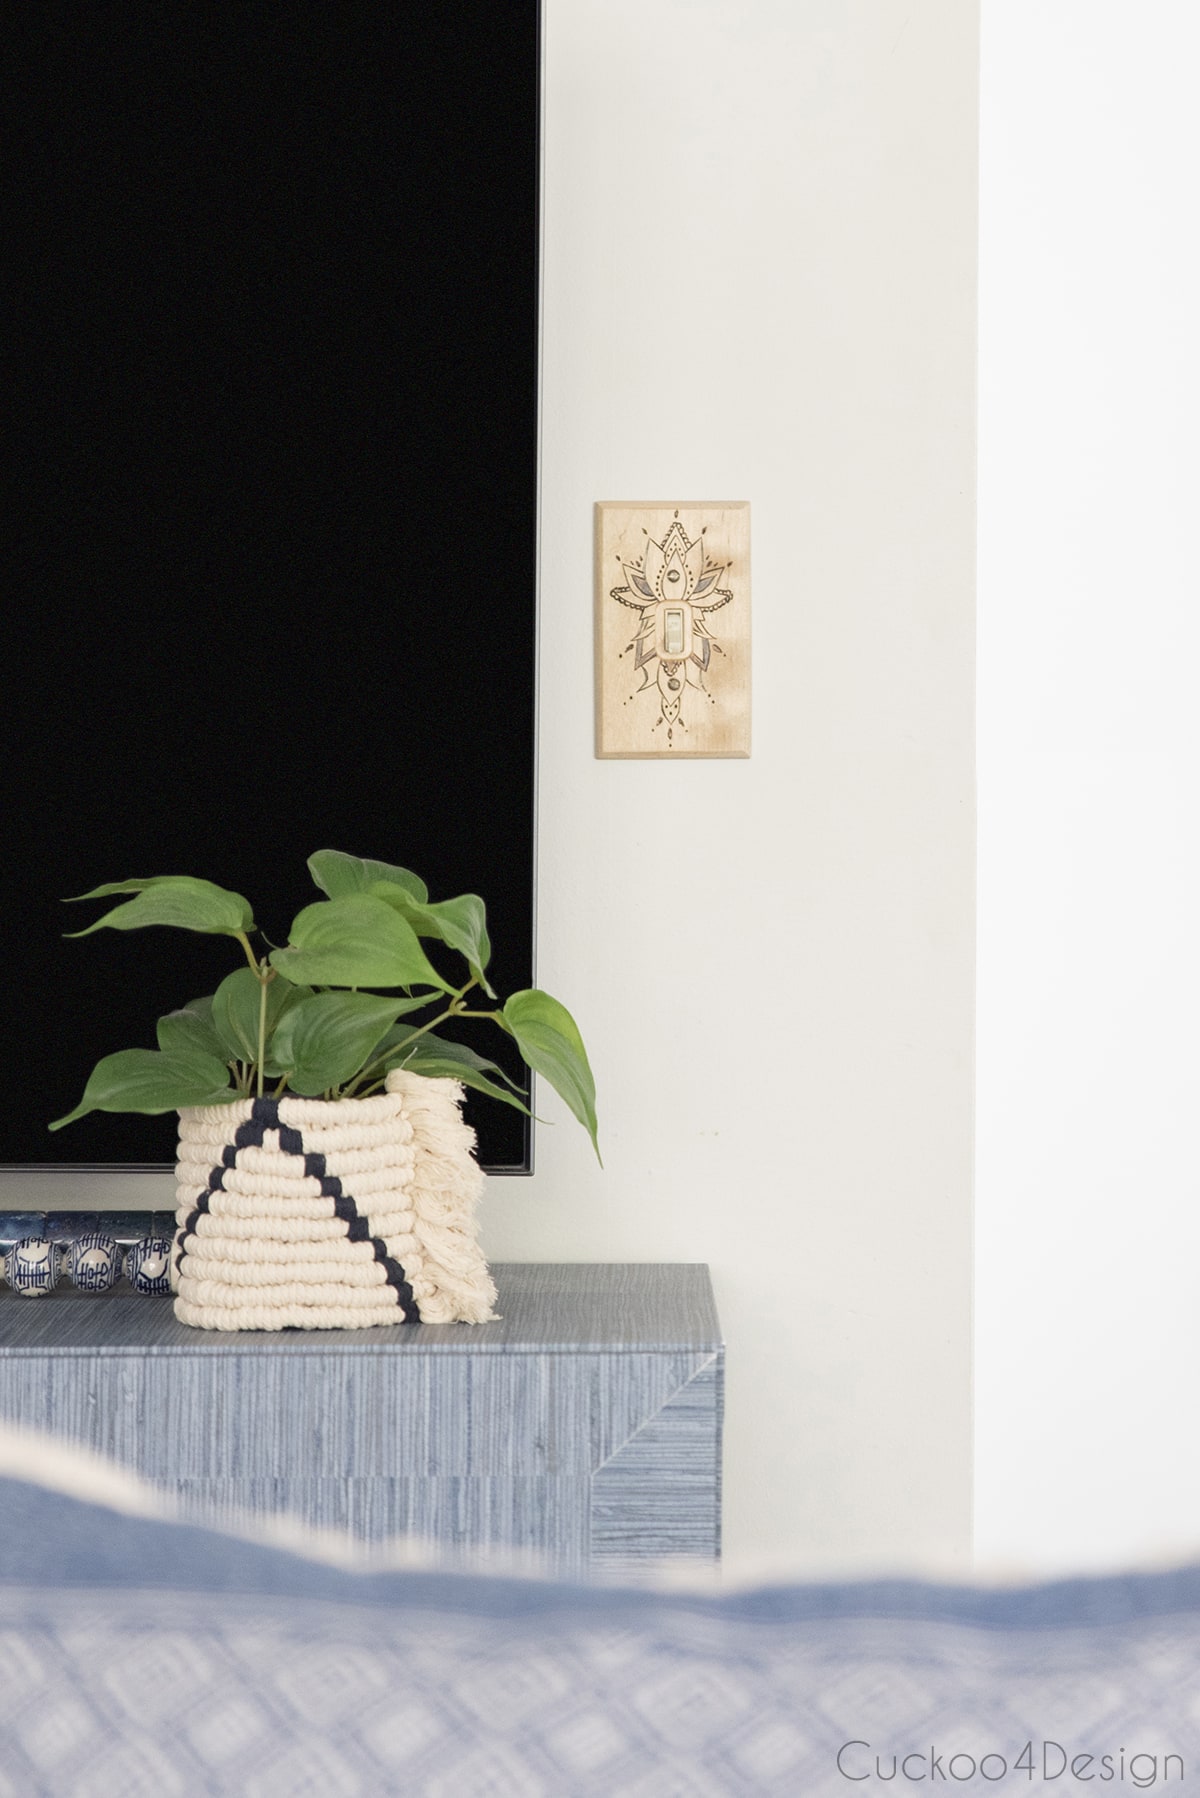
I also added some more boho charm to this area with my DIY light switch covers, as well as my macrame basket that is also pictured below.

Those two knuckleheads had cornered a bug under the basket. Crazy what they shlep inside from their catio.

UPDATE: People always ask me how the paper has held up. Below you can see a photo of the TV console 2.5 years later, and the fact that it has held up great. The photo was for a recent blog post about how to install carpet runner on stairs. I love all the different textures and overall look.
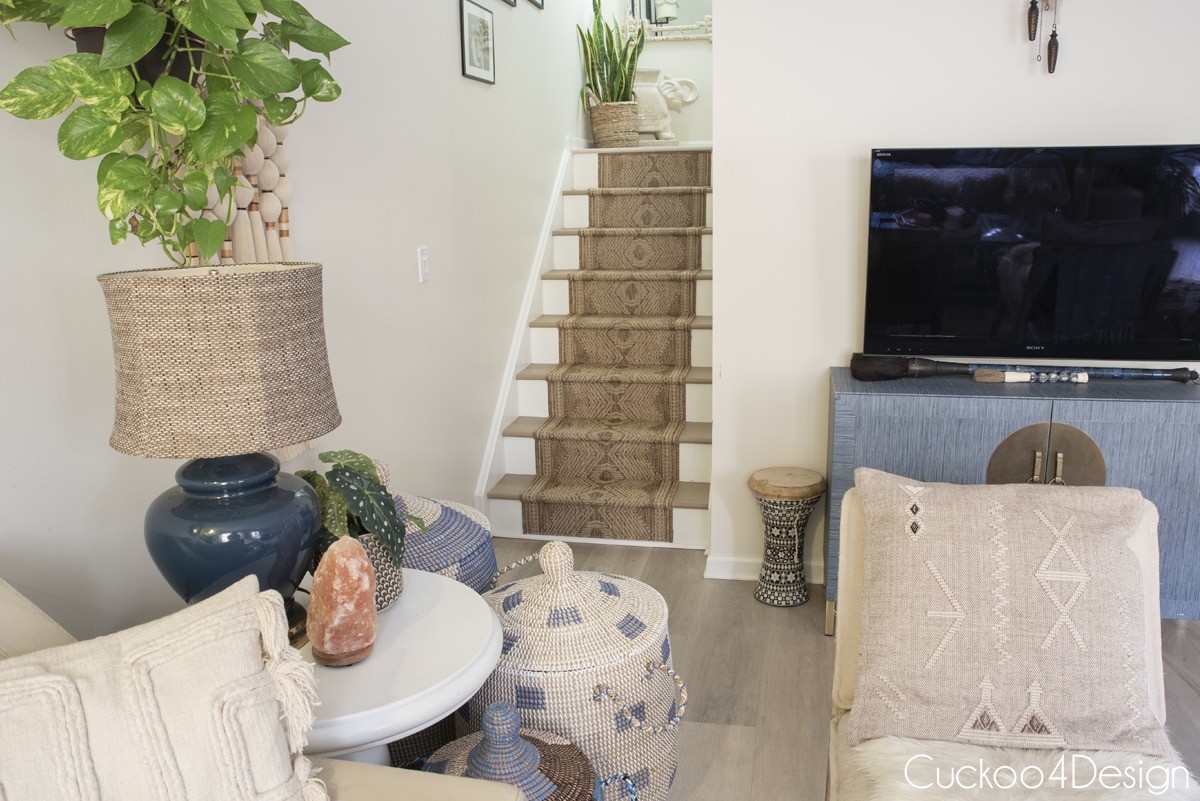
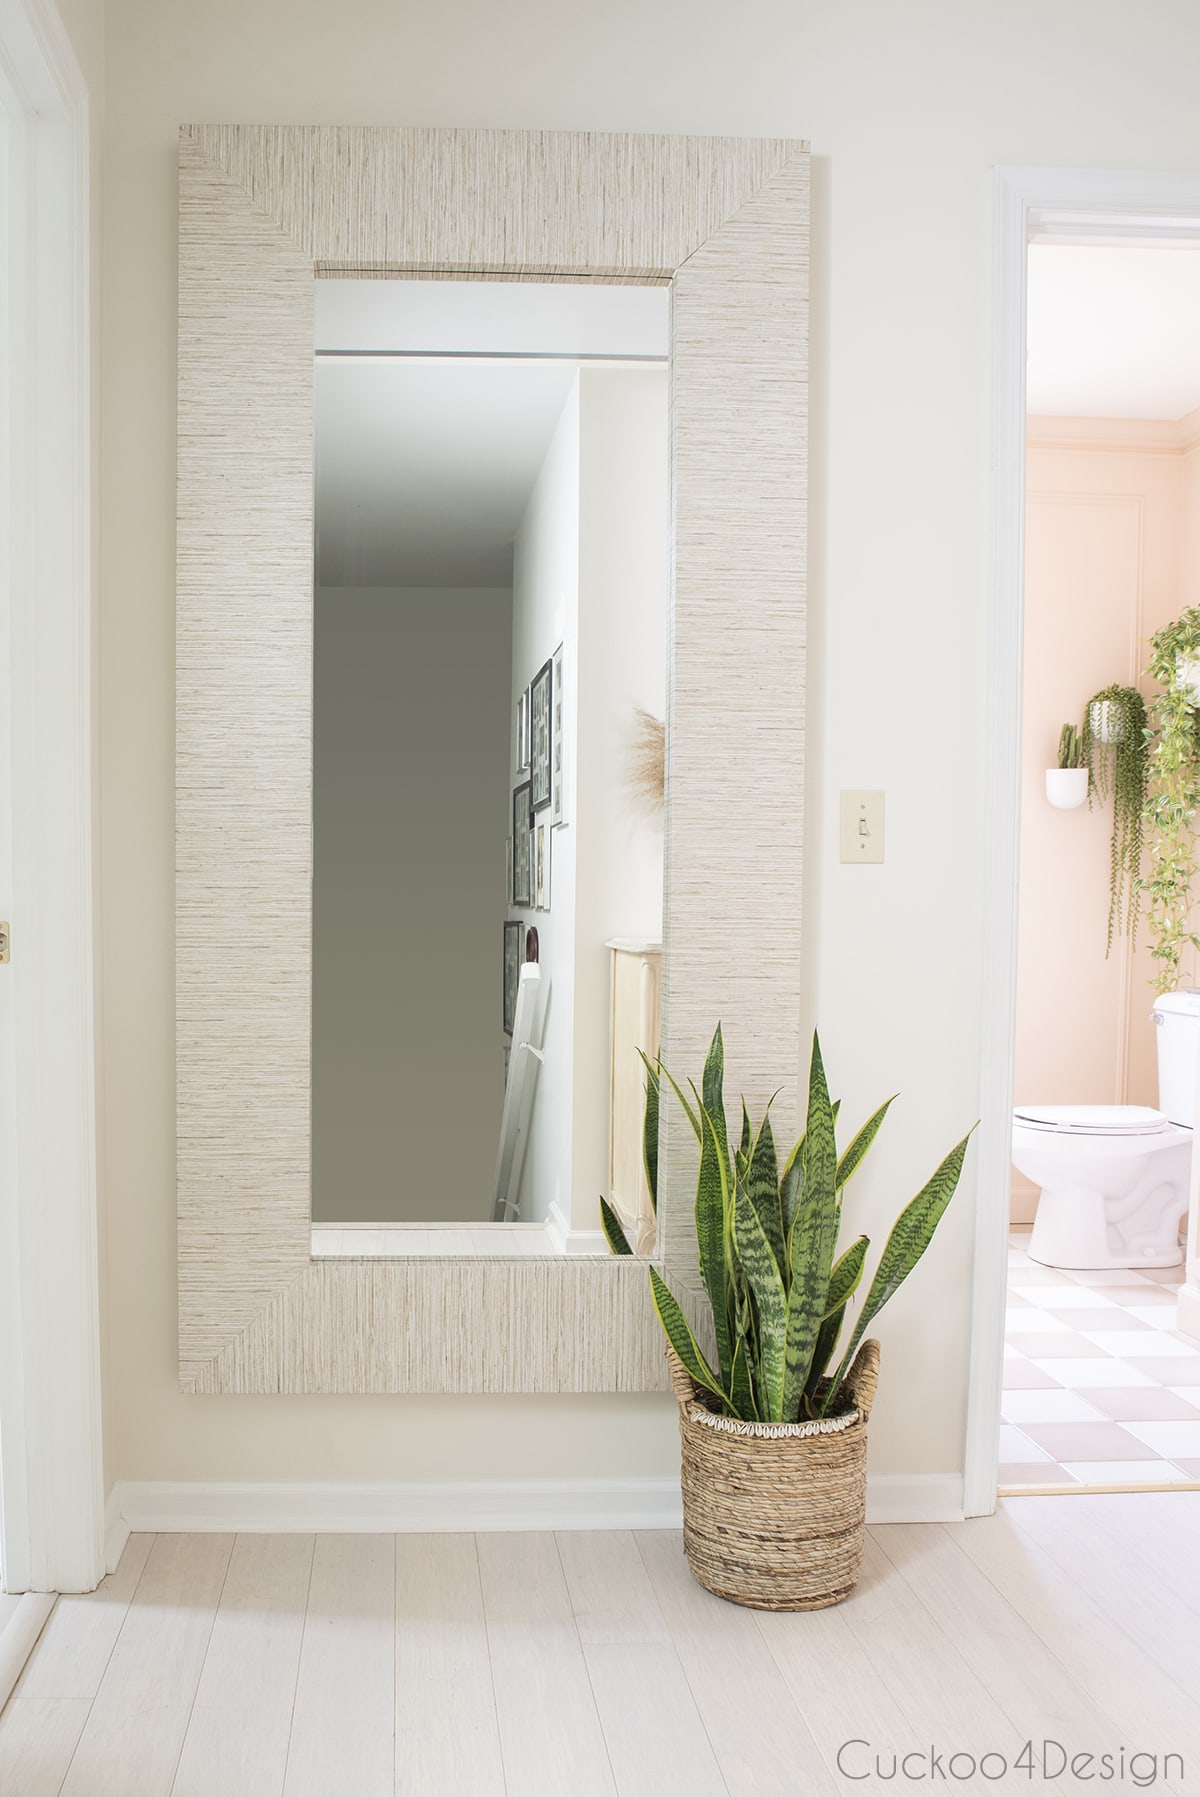
I used the same adhesive wallpaper for an Ikea Mongstad mirror makeover as well which is at the top of those stairs you see above.
More of my furniture makeovers and DIY projects
Where to buy grasscloth furniture
Grasscloth furniture is rather expensive. So giving an existing cabinet or dresser a makeover as I did is definitely more cost-efficient but if you don’t feel like DIYing a project like this then you can certainly find stunning options. Here are some of my favorites.

Do you like this DIY grasscloth IKEA dresser hack as much as I do? I think it looks like a high end piece that you see at very expensive stores and it’s only a fraction of the cost. Definitely a great way to give an old piece of furniture new life! I have thought about doing something similar to my Ikea Hemnes nightstands
Have a great week.
Tschüß,

Julia it looks fantastic!!
Thank you so much Catherine!
Wow….it looks ABSOLUTELY great. You must be tickled pink with the result.
You are soooo talented
Thanks Carol, I’m definitely really happy with it.
FABULOUS!!
Thank you Sheila
You are so talented! And as always, I enjoy seeing your kitties.
Thanks Alison, they are always part of my projects 😉
That is fabulous, I’m in awe!
Well thanks so much for the sweet compliment Karen
Love this. So creative.
Thank you!
Looks great. Love it!
Thanks Ann
The makeover is stunning, but then so is your living room. It is elegant and cozy all at the same time. Question – where did you get the ruler with the attached level? That would make life easier. Love black and black and white cats. Have 3 fosters right now that I would love to keep, but my oldie-goldies can hardly wait for them to go:-). Thank you for sharing.
I can’t even remember where I got the ruler but it is definitely something that makes my life easier for many projects. Love my black and white Willy so much. He’s the best.
This is flat-out gorgeous!
Thanks Nancy
It is amazing! It is beautiful, useful and eco friendly. I hope to try it myself.
Thanks Lisa, I’m glad I didn’t buy a new dresser and used what I had 😉
Wow beautiful!
Thank you!
Stop it. This is stunning!! Love the paper you chose, the design and that gorgeous hardware. ?
Thank you so much
this is absolutely AMAZING!!!! i am in love with the new look- you totally nailed it!
Thank you Cassie 🙂
hi Julia – I am a grasscloth lover, too. I love how you transformed the dresser. You did so much detailing – quite impressive.! All those cuts. 🙂
Thank you Diane, the peel and stick paper made the cuts actually easy because you can remove and place it over and over again.
Beautiful – as always!!! Going to pin this for possible future use!!!
Thanks so much for pinning
This is an amazingly beautiful cabinet and what a great job you did! Very creative and you did it on some kind of crazy budget that boggles the mind! You’re so talented!
Thank you June
Where did the hardware come from? it completes the chest?
Hi Lynne, there is a direct link to it in my blog post under “materials needed” – hardware (I’ve always wanted to use Chinese brass hardware so I chose this one HERE). If you click on the HERE it takes you to the hardware. Hope that helps.
This is sooooooo amazing! Love it so much xx
Thank you Danielle
Awesome Work!! I enjoyed reading. keep it up.
This is one of your coolest projects yet! Though everything you do is amazing! I loved it so much I shared it on FB and pinned! So so beautiful!
Oh thanks so so much for sharing. I really appreciate it.
This is amazing!! Can you come do mine?!
Haha, thanks!
Love this! Using this method on our dresser! Is there a glue or lacquer you suggest to put around the corners to prevent it from fraying overtime? I got textured peel/stick wallpaper instead of flat. Thanks in advance!
Hi there Brianna! Sorry but I don’t have any suggestions because my paper is flat. I would contact the manufacturer and ask them. Good luck!
This is so beautiful! I see that you completed this project over 3 years ago- has the piece lasted? Has the wallpaper come up on any of the edges? I’m afraid my toddlers would try to pull off the peel and stick paper!!
It’s held up great and is still in my living room. I’ve had no issues with it. Good luck!