

How to turn an old stove into a custom high-end colored stove
Unique colored stoves are so in style right now. Just look at the famous Cafe appliance series or Google “colored stove,” and a variety of beautiful, unique high-end stoves show up in the search results. I touched on the subject already when I transformed my dishwasher with car wrap vinyl.
For the complete vinyl wrap method and color-matching tutorial, see that dishwasher post. This stove makeover builds on that same technique but goes further with design upgrades, such as DIY wooden drawer pulls.
The colored stoves used as inspiration
As you can see, some of those stoves have mixed metallics, which I think looks fabulous. I now wish I had a stainless steel top, but since my gas range is all white, I had to compromise. I’m ok with not having mixed metallics.
I also really love the vintage-looking range styles and wanted to make sure I included thinner-looking handles in my oven makeover.
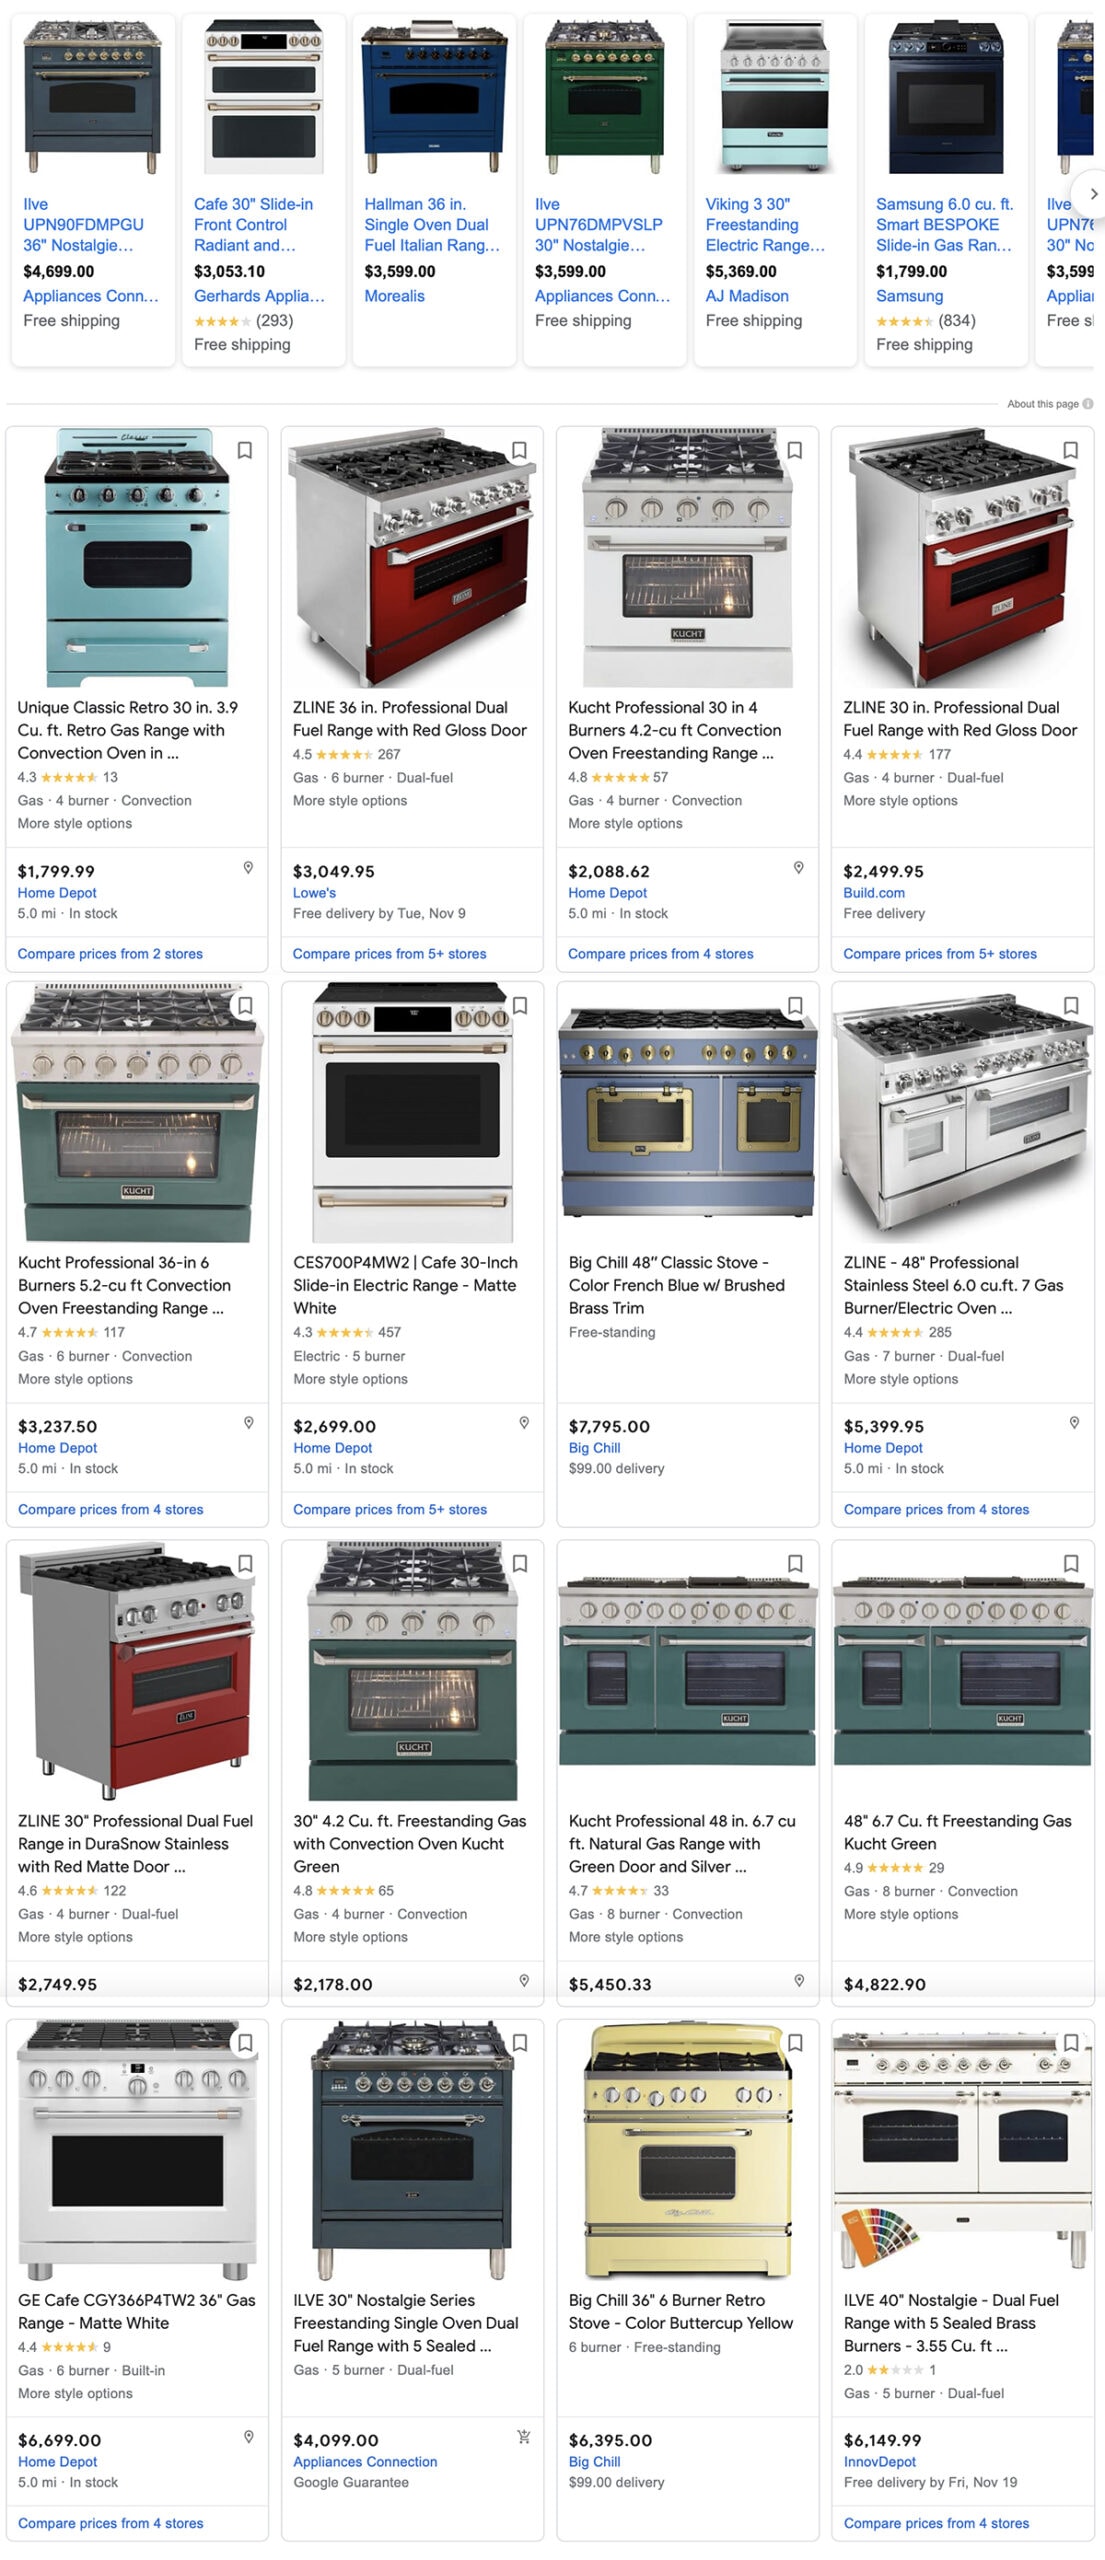
Hallman, GE Cafe, commercial-style gas ranges, Ilve, Kitchenaid, Viking, ZLINE, Kucht, Big Chill retro line, and Bluestar are some of the brands that offer beautiful but pricey gas and electric ovens. Their different color options cost several thousand dollars.

Why stoves work as statement pieces (unlike dishwashers)
Unlike dishwashers, which need to blend into cabinetry, stoves can be beautiful focal points in your kitchen. They are meant to be noticed! That’s why high-end brands offer ranges in bold colors!
However, I chose to match my stove to my cabinet color instead for a cohesive look. You could absolutely choose a burgundy, navy, or forest green accent color instead, though. Stoves have that design freedom.
DIY stove makeover instruction details
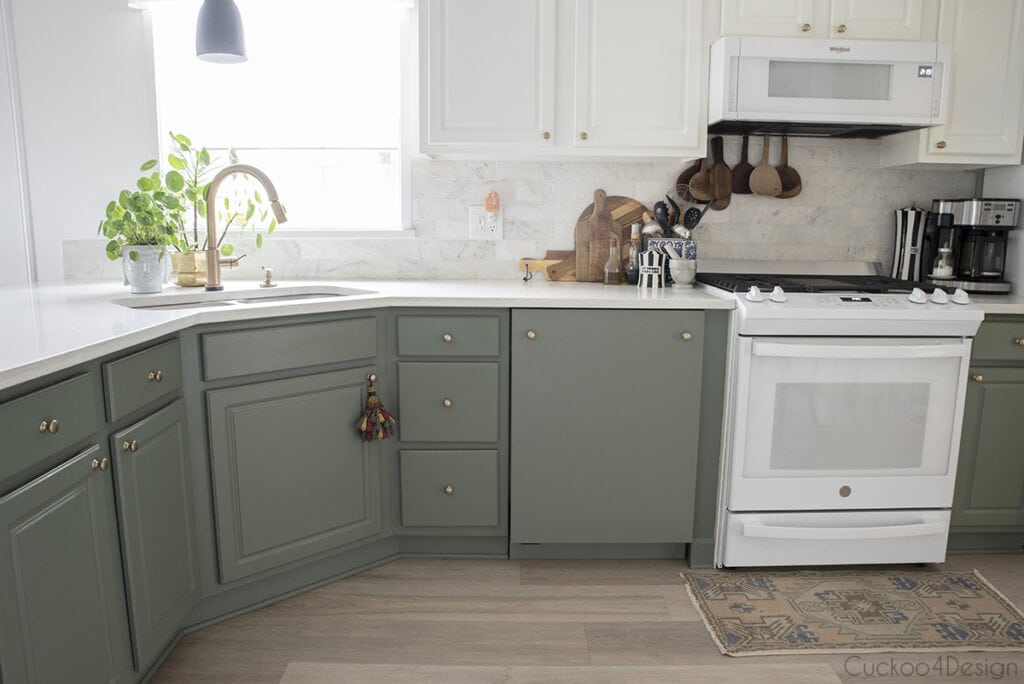
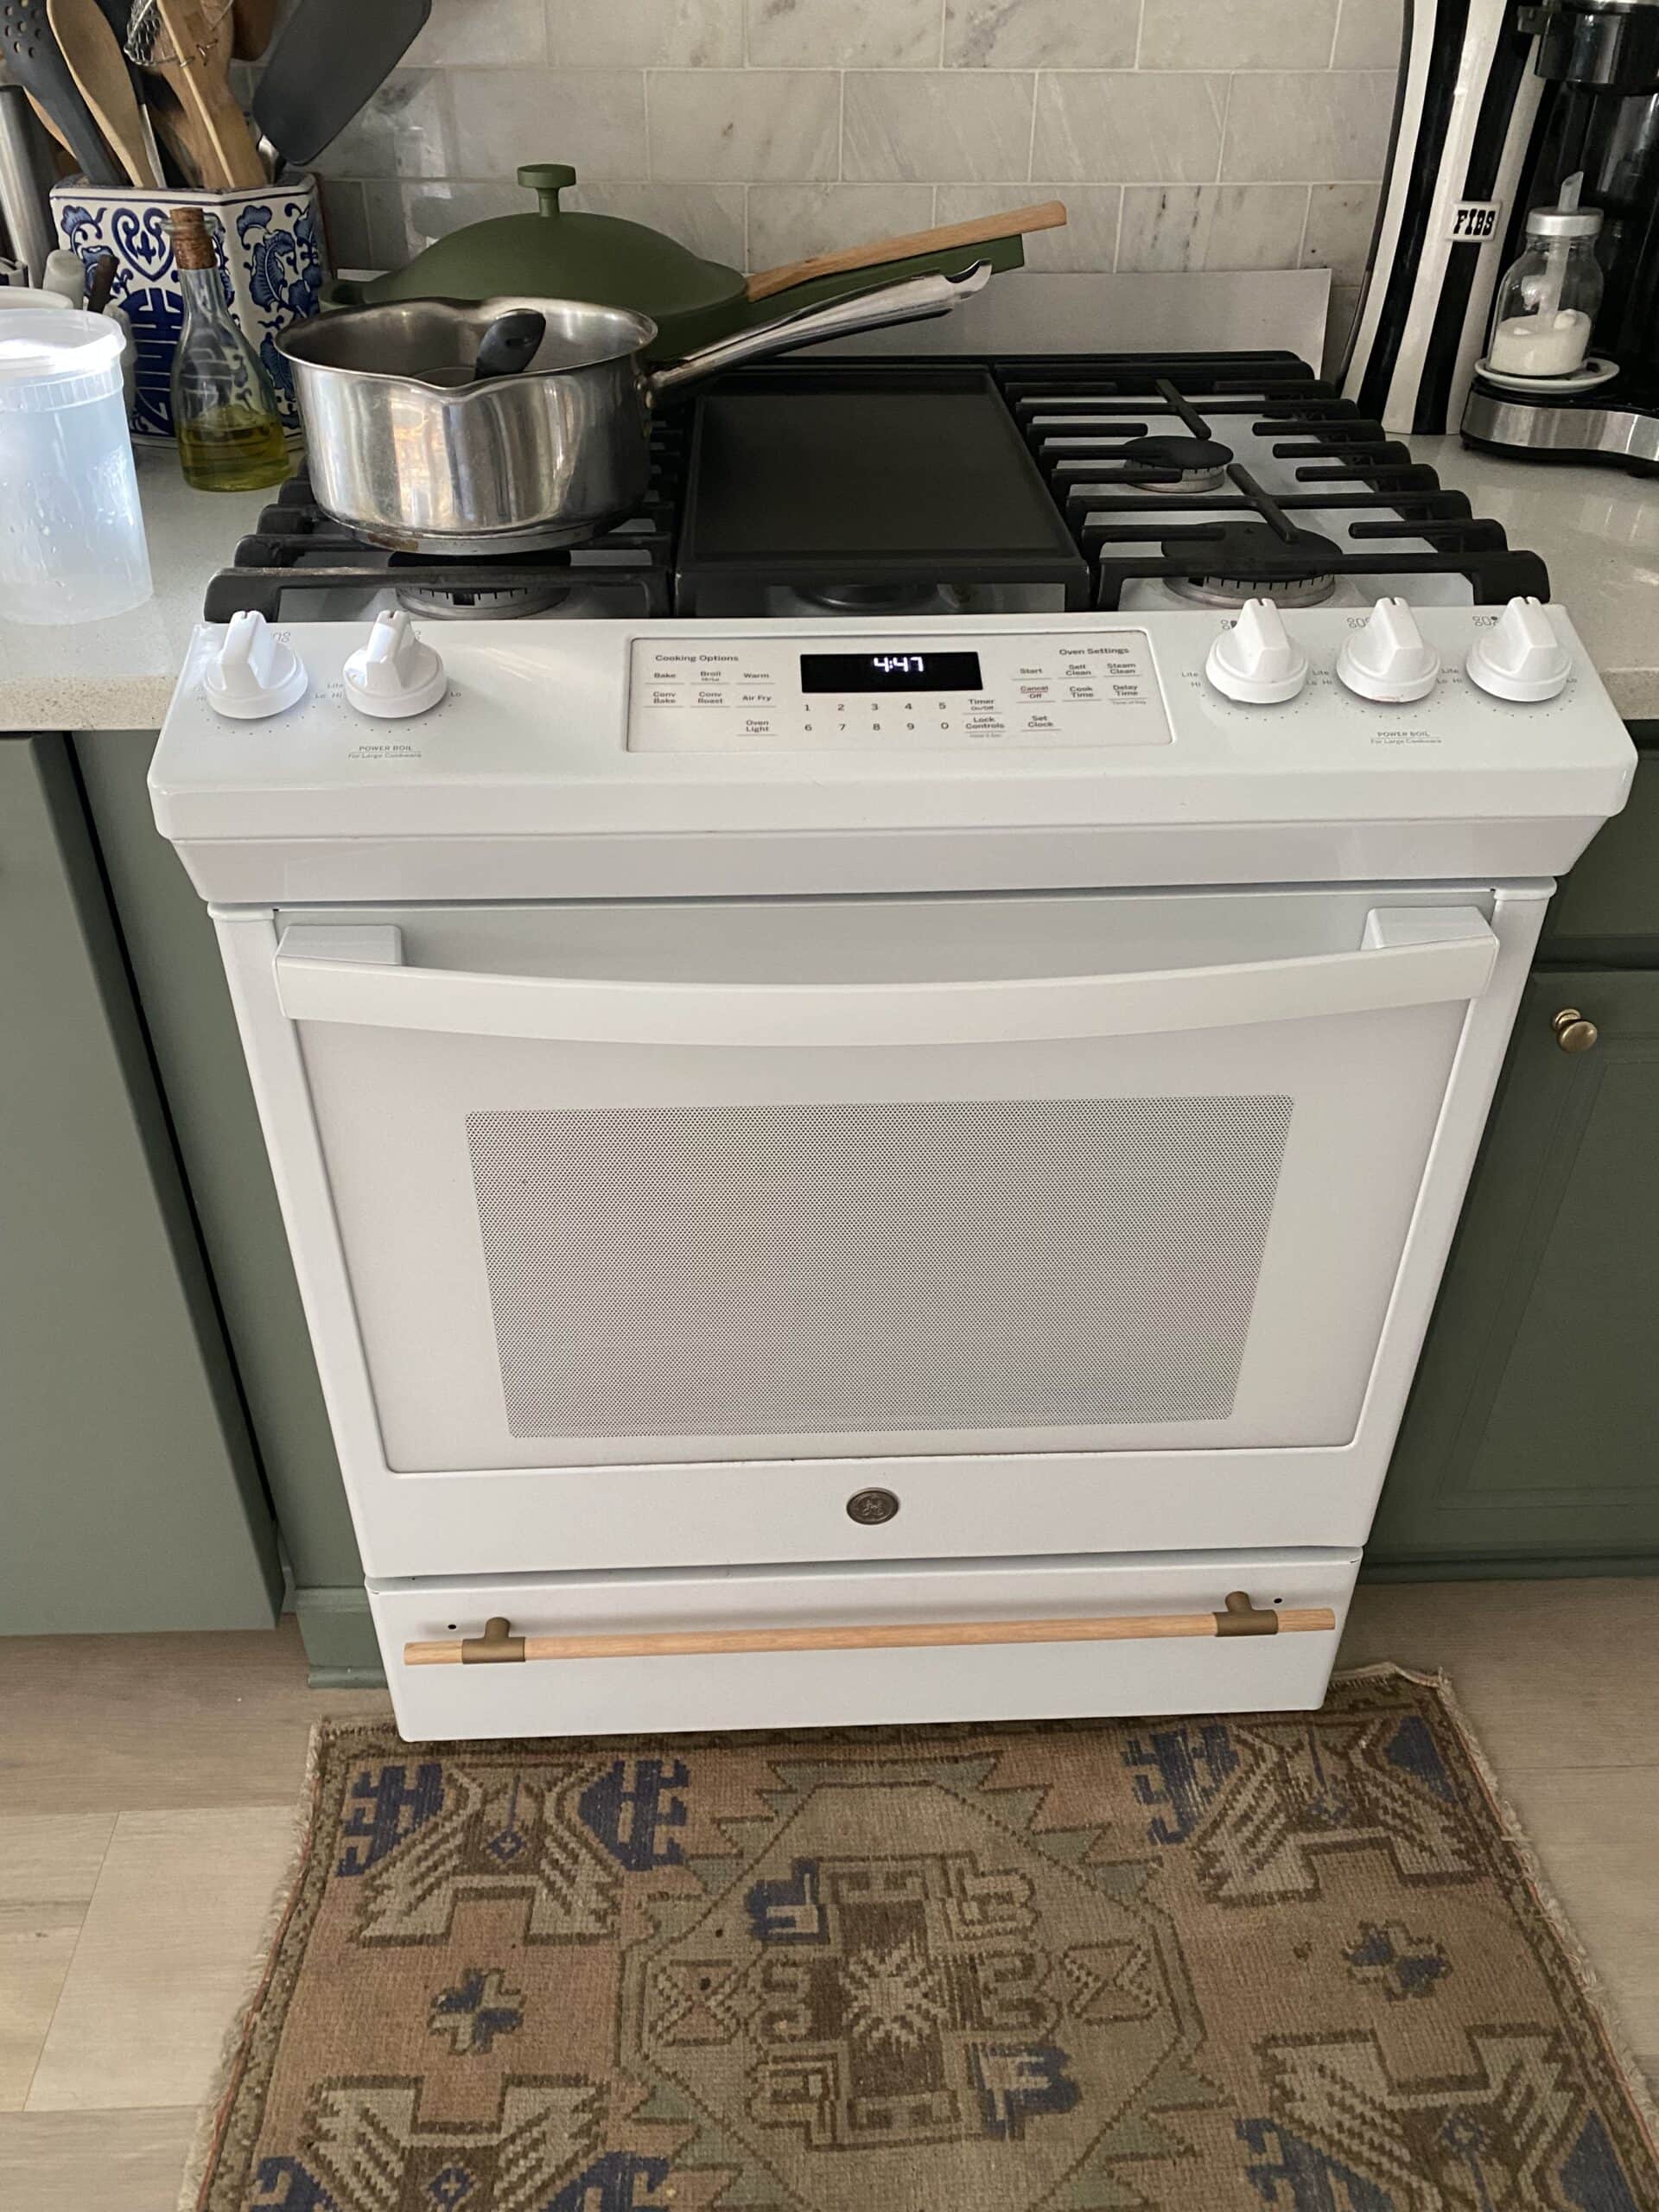
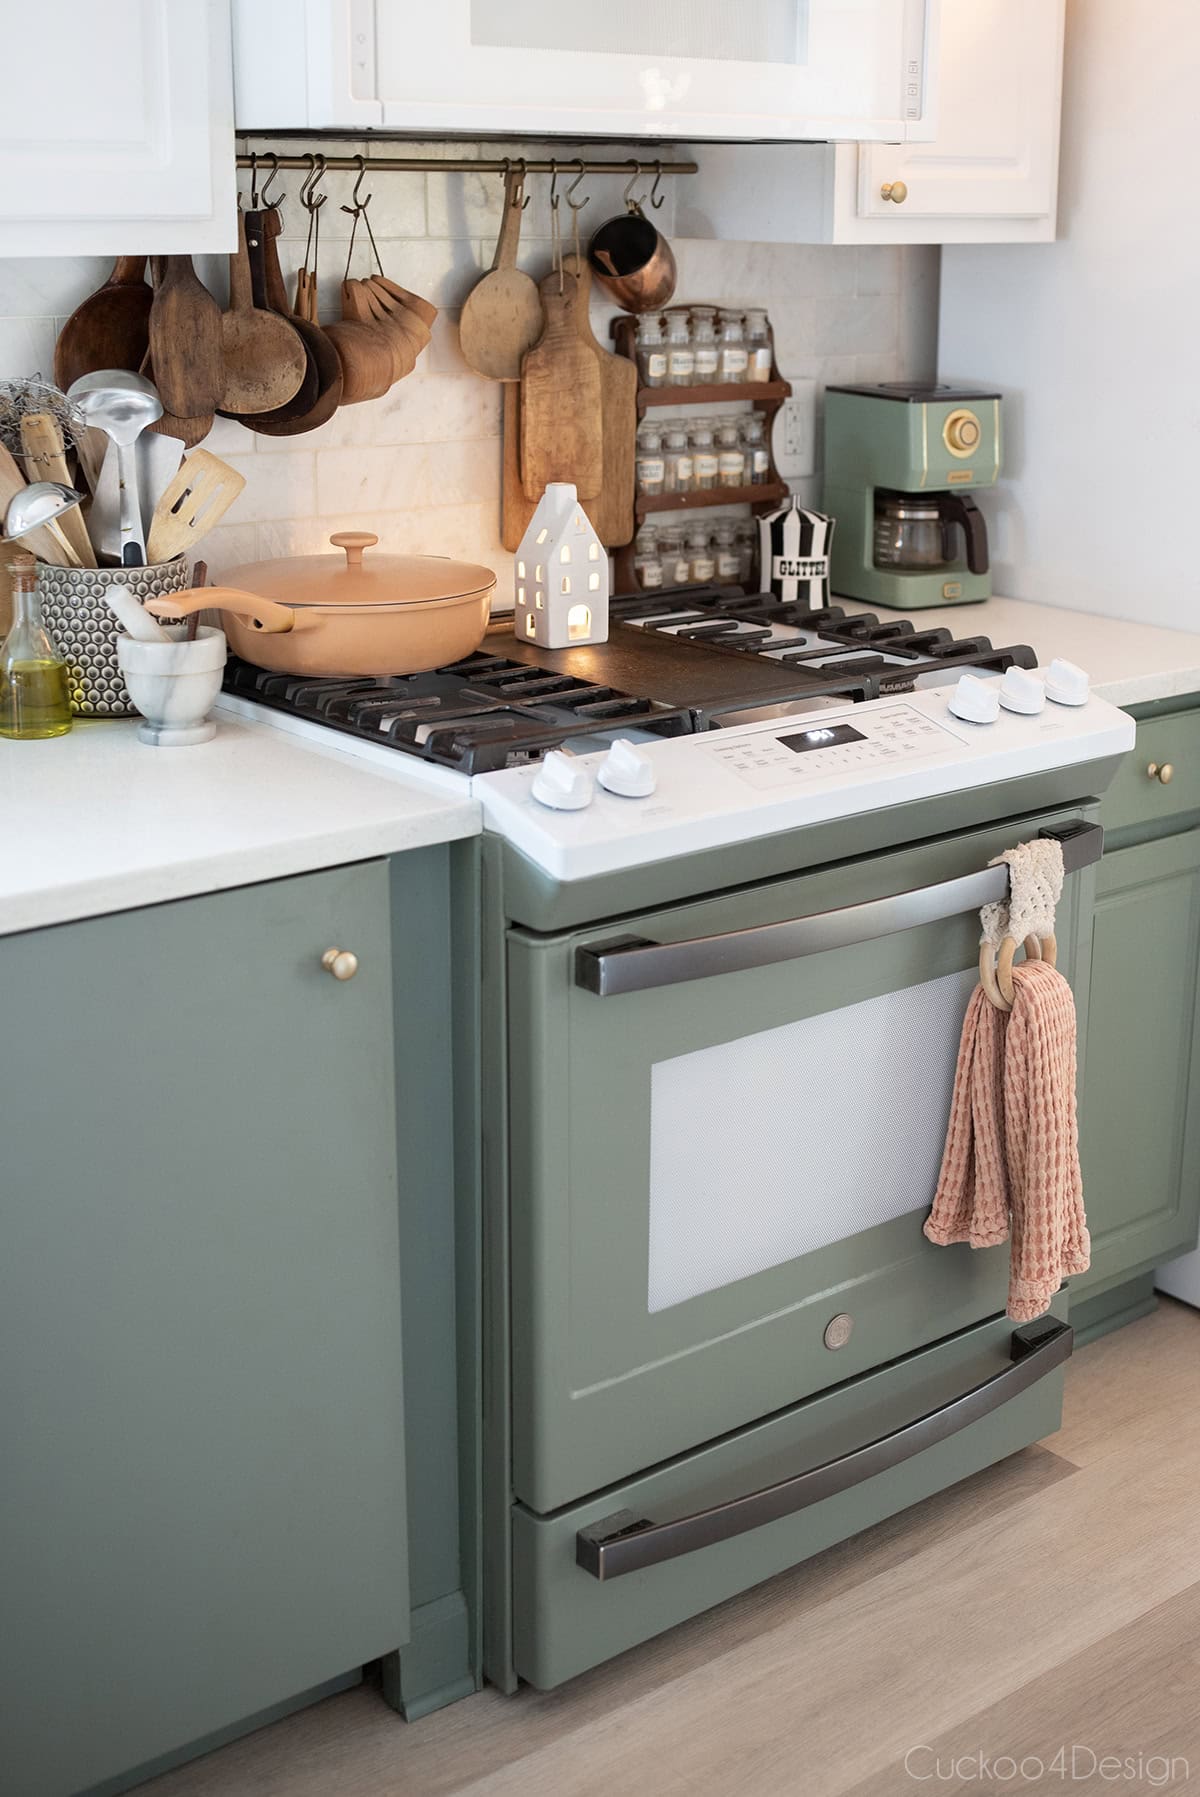
We have this GE gas stove, and while I’m happy with its features and how it functions, I was rather bored with the look of it.
When I was in the market for a new stove, I wish they had had this Kucht gas stove. It is actually similarly priced to our white stove, but the green doesn’t go with our cabinets at all. The way I customized our old stove would have worked beautifully with the plain stainless version.
Most colored stoves are so expensive and would have never been in our budget, that is for certain.
Materials needed for stove makeover transformation
I pretty much used the same supplies I needed for my dishwasher makeover
- sheet of car vinyl wrap (high-heat-resistant car vinyl to wrap your stove )
- sharp crafting knife
- 70% alcohol and lint-free wipes (degreaser like Krud Kutter if oven is dirty)
- tack clothes
- lint-free gloves (optional because I’ve seen folks on YouTube apply wraps to cars without them)
- felt squeegee tool for vinyl applications, if you are doing something more intricate than a flat-paneled dishwasher, then you will need more different tools to get into the crevices.
- screwdrivers
- a blow dryer or heat gun
- appliance owners manuals
Also, consider these items:
- Add unique appliance or furniture handles, or make your own as I did.
- If you don’t want to use car vinyl, you could use heat-resistant paint
- Buy upgraded parts like knobs (I haven’t found any yet, but if I do, I’ll update this post)
- Search for additional parts options like griddles
- Update the burners if they look old and overused
Stove makeover vinyl car wrap application
I took the stove door and bottom drawer apart according to the owner’s manual. It wasn’t difficult at all and only required me to remove a bunch of screws. I don’t have step-by-step instructions for this because every appliance brand is different, and you need to research what you have first. It really shouldn’t be difficult, and the owner’s manual will help you with that.
I slightly slid the oven out so I could wrap part of the sides too.
The vinyl wrapping process for the stove is the same as my dishwasher method. My stove has the door that needs to be wrapped, the bottom drawer, and the sides. The only difference to the dishwasher was that I had to use a sharp craft knife to cut out the window on the stove door, which was really easy to do.
For detailed color-matching instructions and step-by-step application with video (watch below), see my full appliance wrap tutorial (I definitely recommend checking out the full blog post). The instructions and video in that blog post are basically the same steps needed to give your stove a makeover. Again, if it doesn’t load, you can watch it on my YouTube channel.
Below, I’m focusing only on stove-specific challenges like the glass door and handles
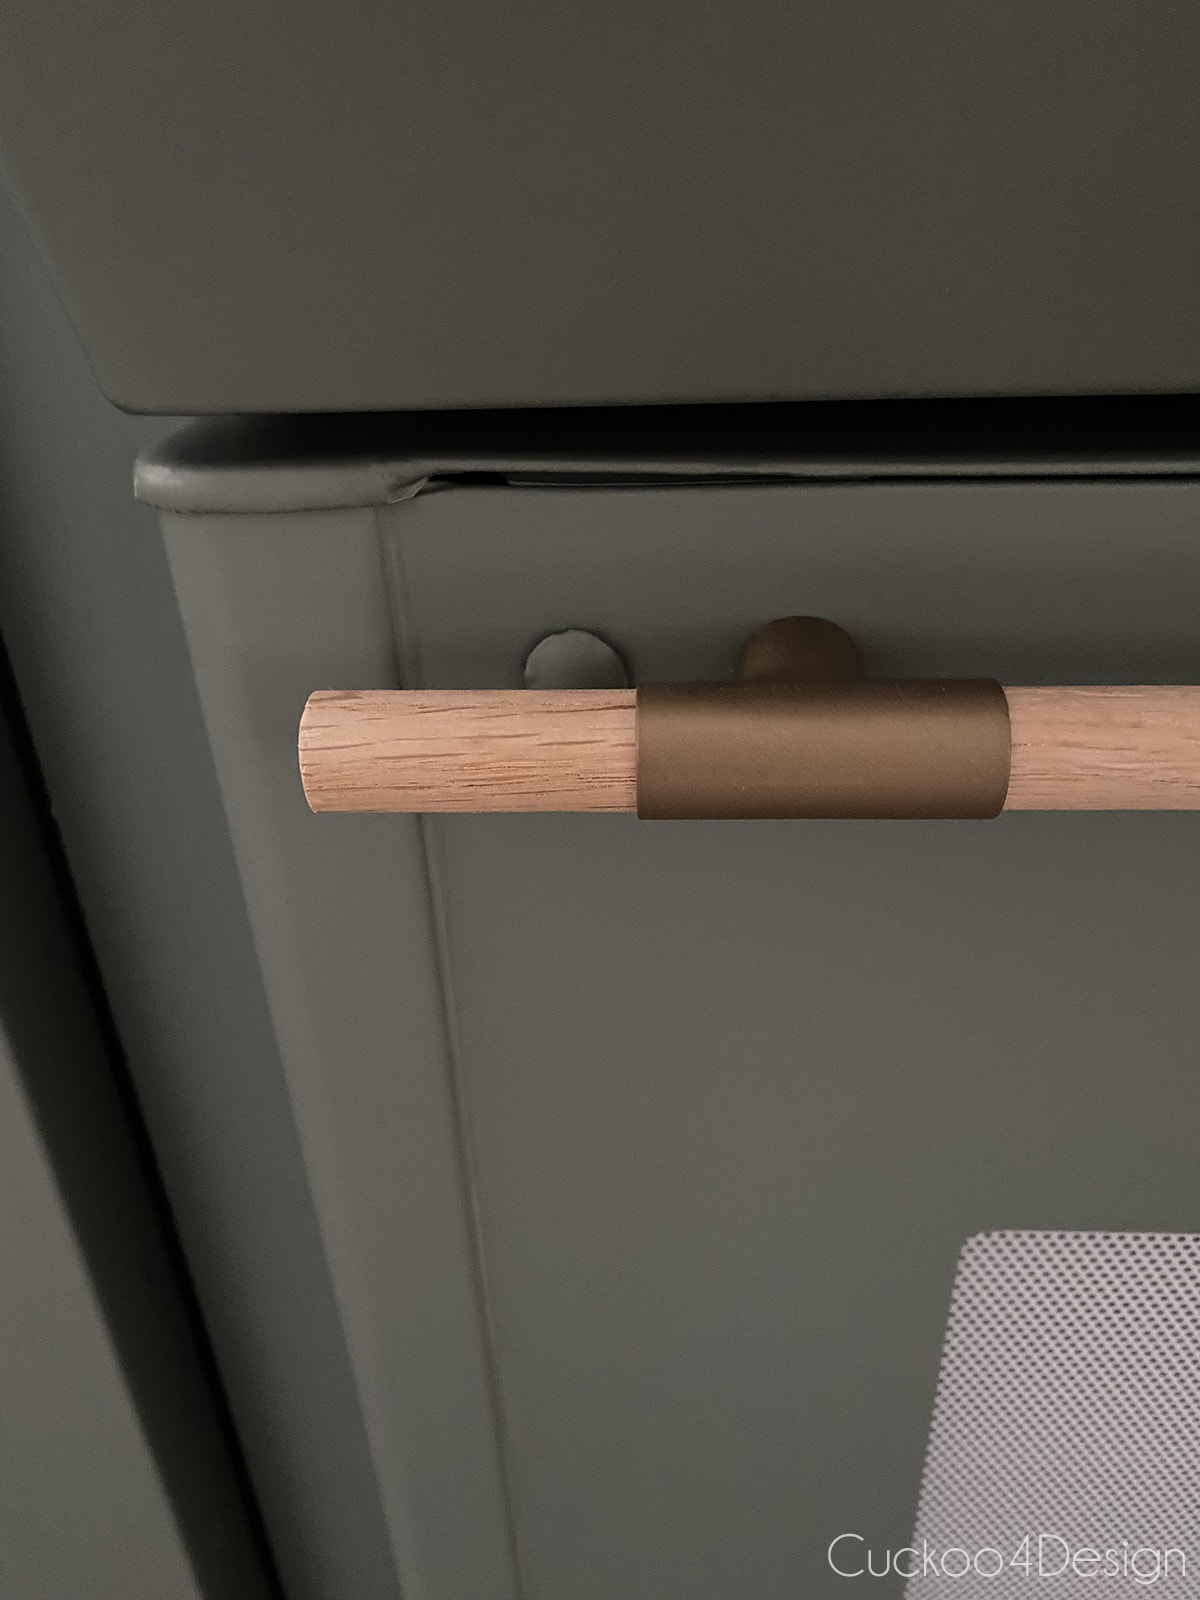
Custom stove handle instructions
At the top of my list was finding a way to try out making new handles since the old ones were boring. Any other oven hardware for sale is just way too expensive and doesn’t match up with the existing holes.
Below, I have the DIY wooden drawer pulls video tutorial for you. I was able to find a way to cover any existing holes. Also, check out my full blog post for more info. The video is also on my YouTube channel.
The only issue I had with this stove makeover
I must address the fact that our white 30-inch 5-burner GE gas range has a major flaw, in my opinion, which is that the door mainly consists of glass, and someone attached the handle to that glass. No one should ever drill into the glass. The manufacturer painted the glass on our door white, so why not make it white metal to begin with?!?! Baffles me!
I have heard from several people (friends and followers on Instagram) that they have had issues with this as well. Whether it was a frozen chicken nugget falling on the open door, a knee banging into the door, or simply tightening the loose oven door handle to the stove.
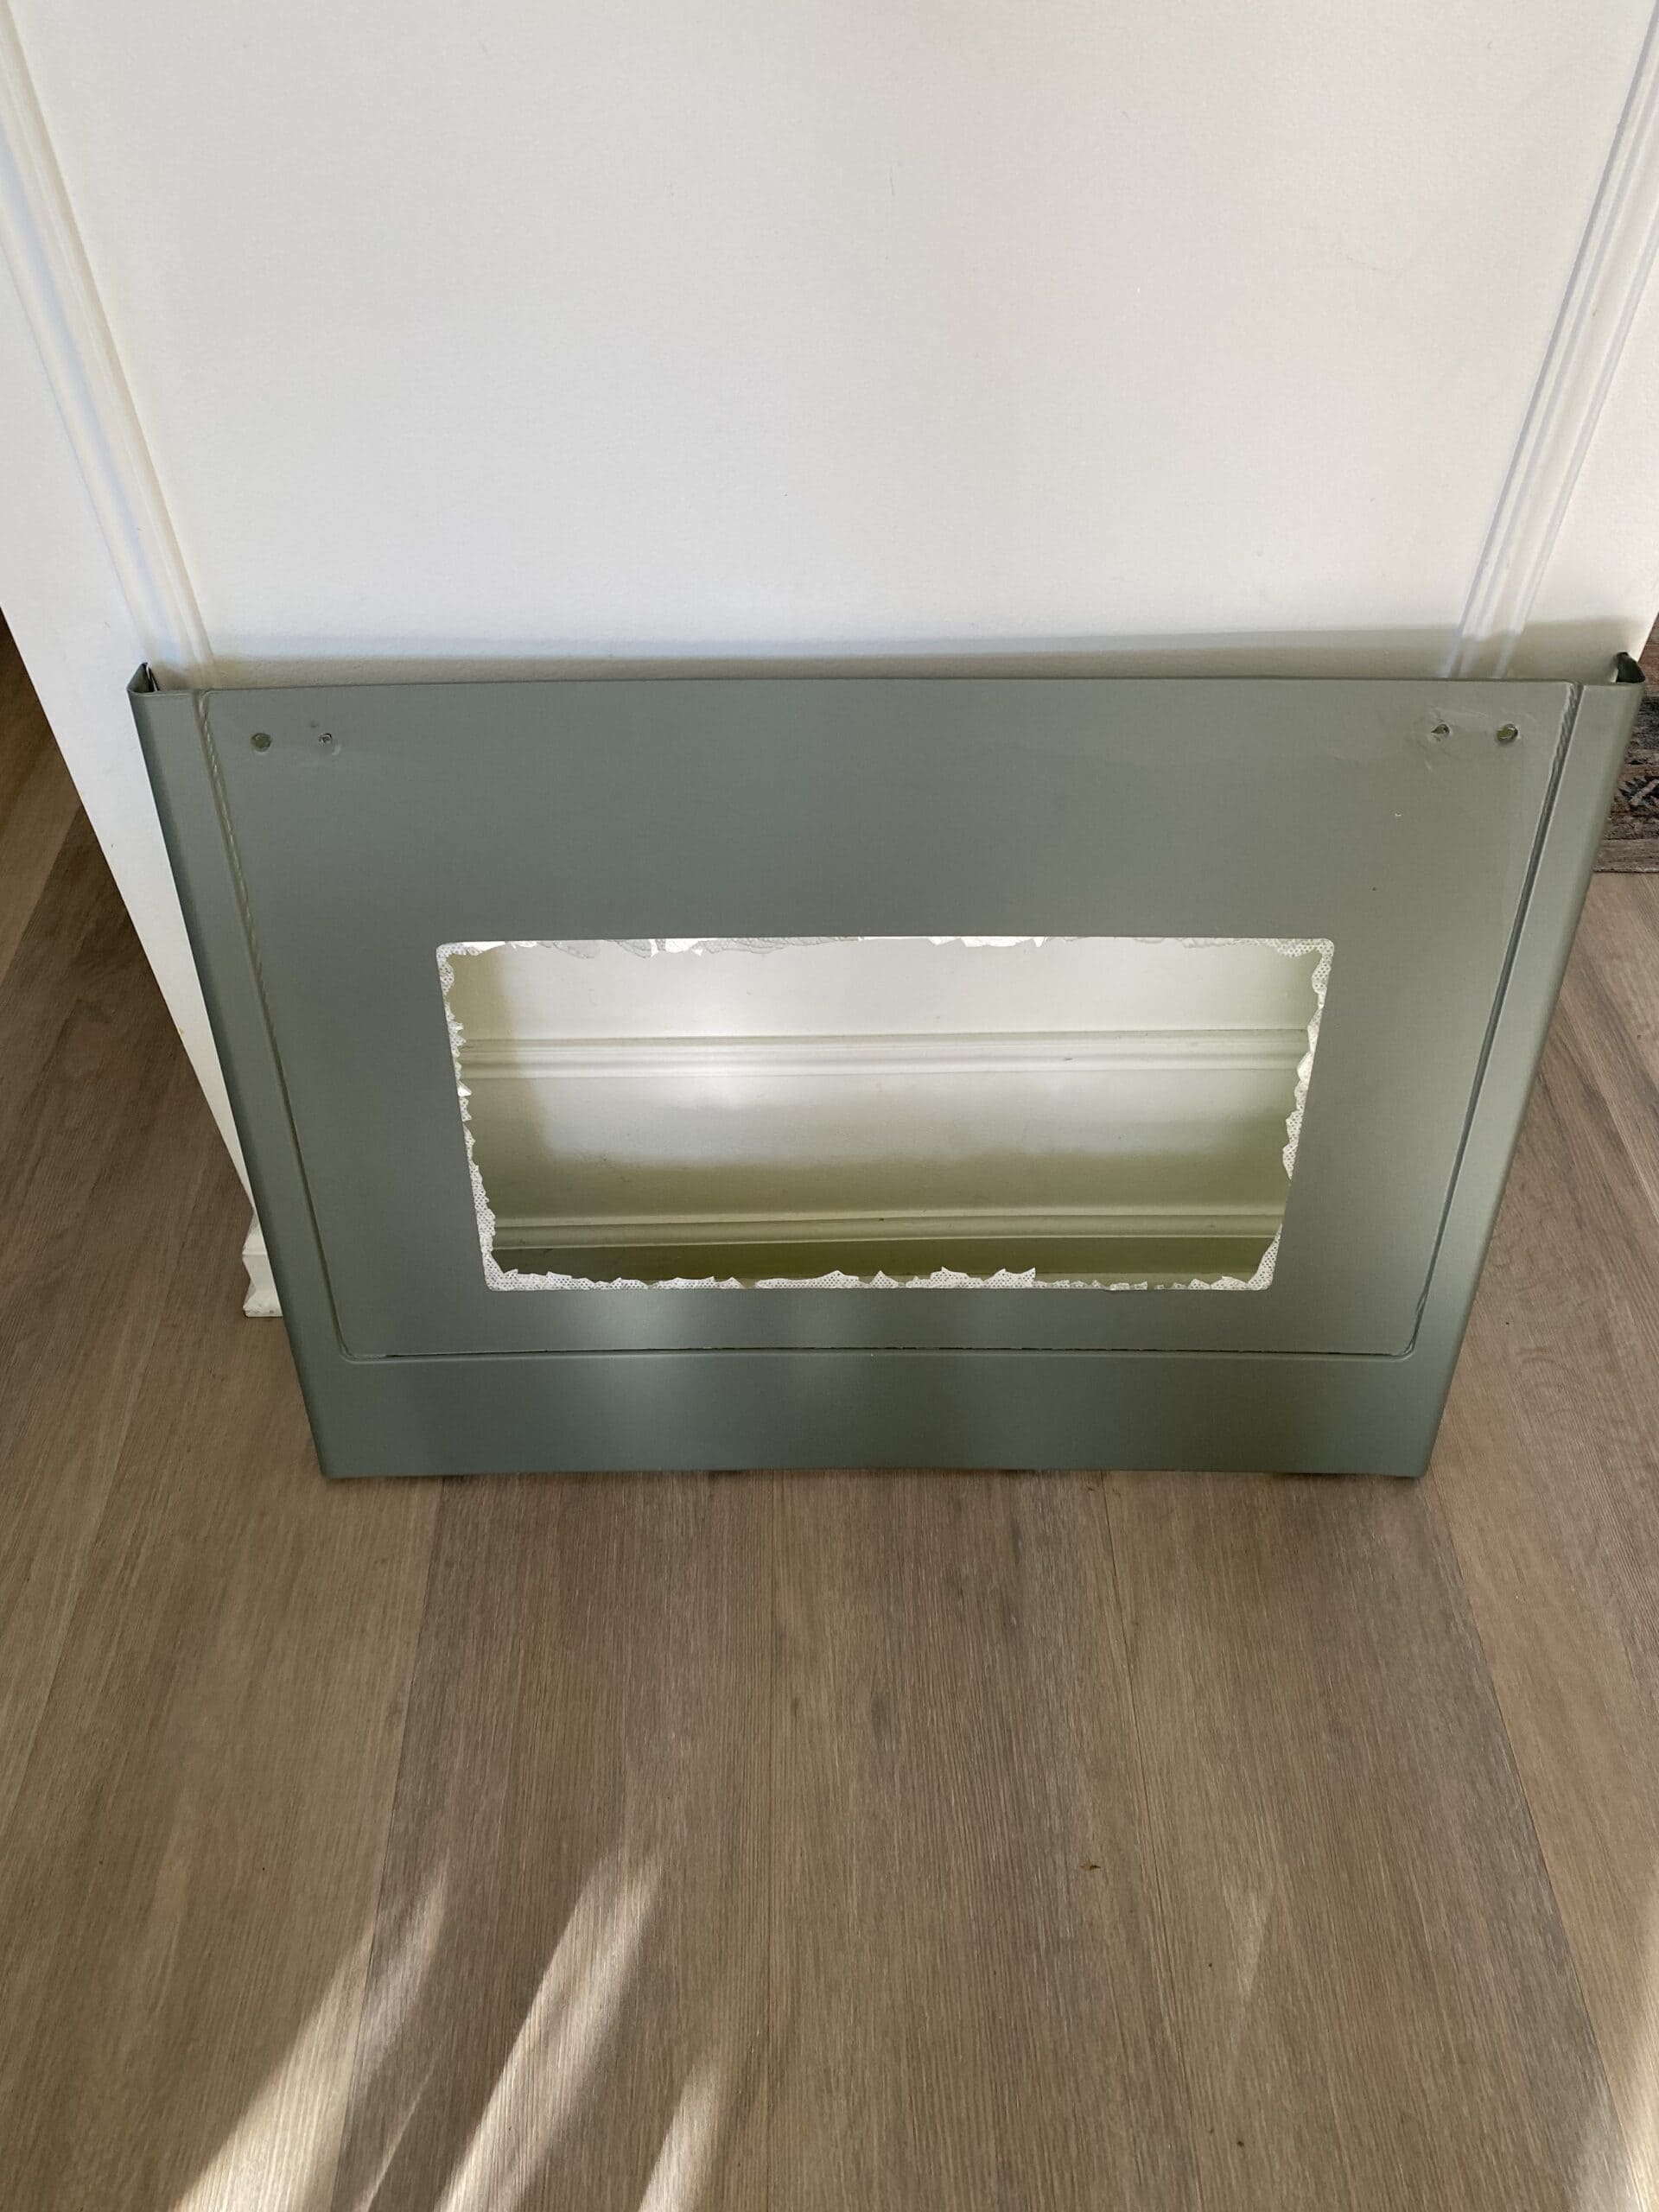
With that said, right after I finished wrapping my mostly glass oven door, it burst into a million tiny glass pieces, as you can see in the photo below. The glass pieces stuck to the vinyl, and thankfully, I only had to clean up the middle section. Unfortunately, this was a very pricey accident, and I had to buy another piece of vinyl and a $150 oven door, which upset me quite a bit, as you can imagine. So, depending on your style of gas stove (or electric), you have to be super careful.
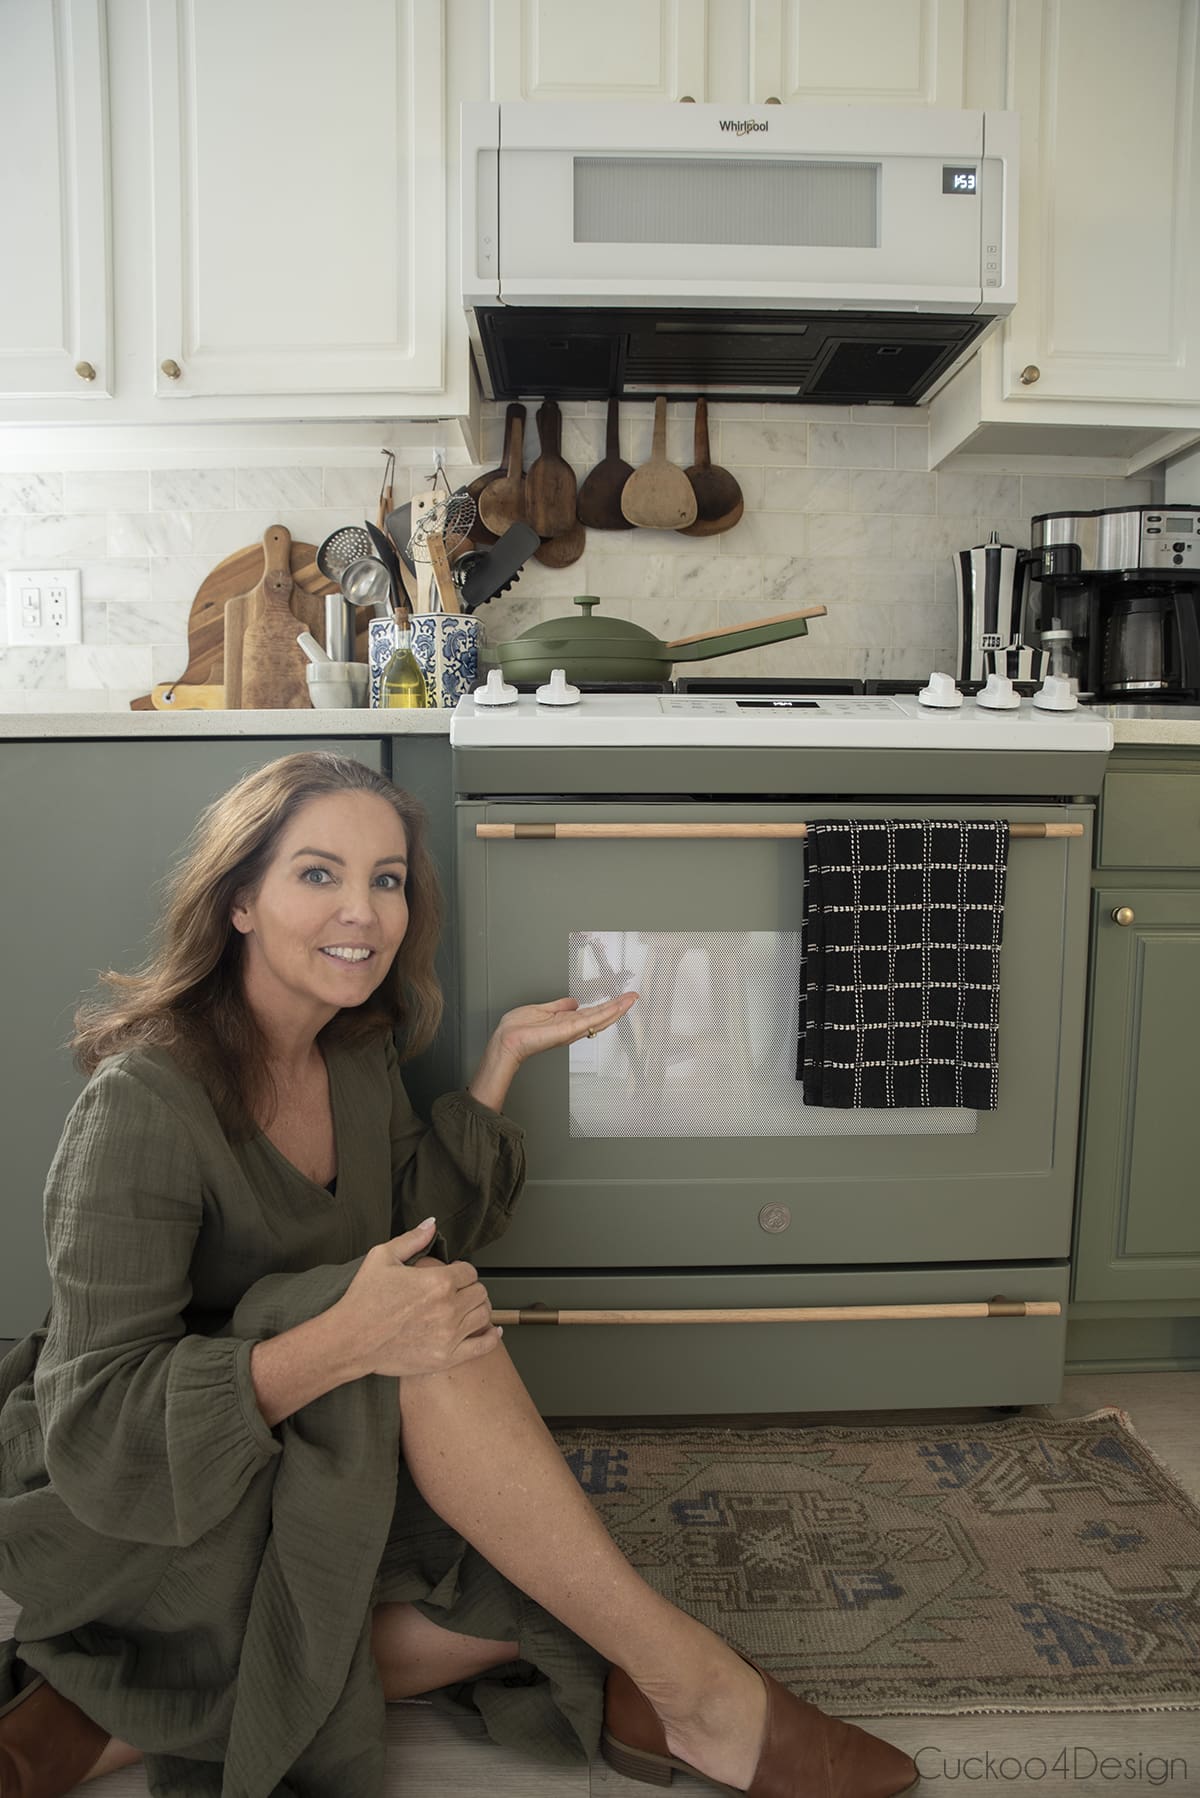
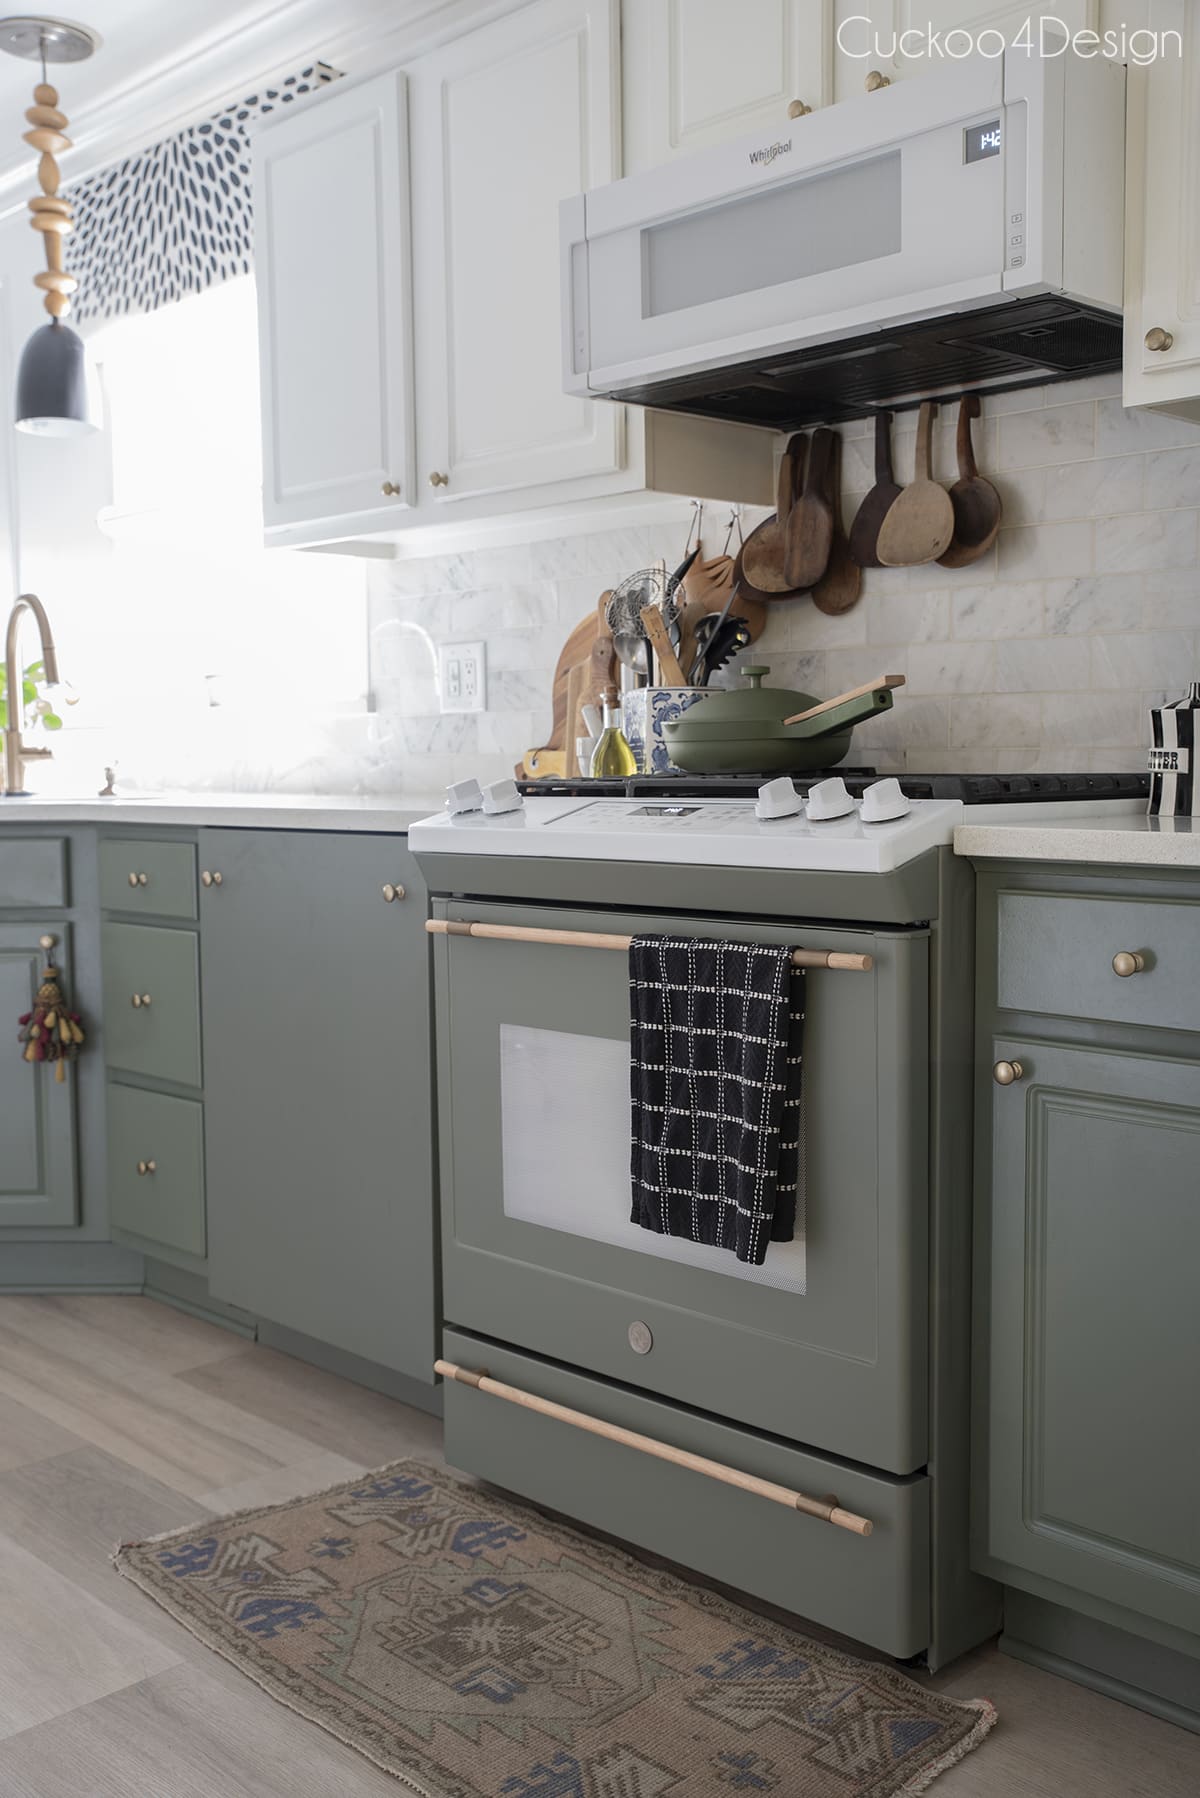
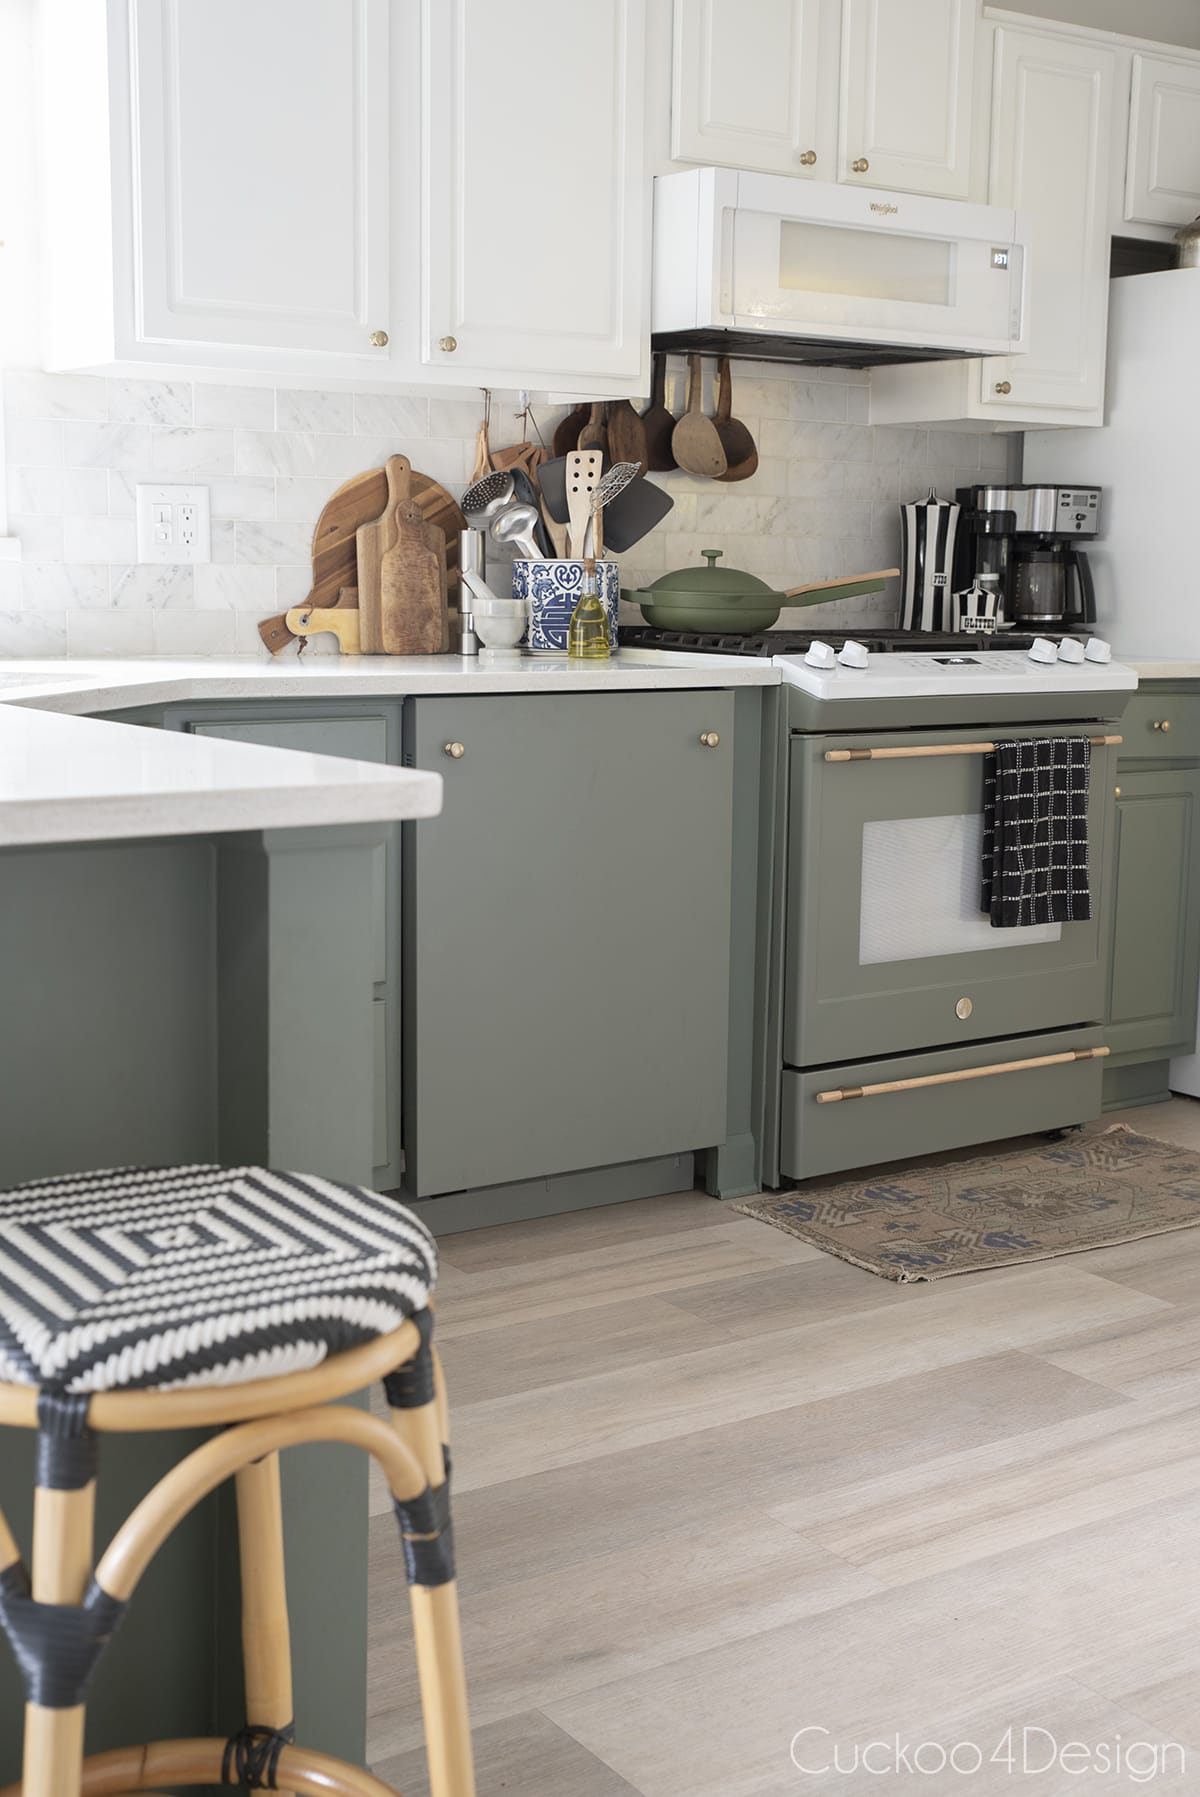
My finished customized colored stove in our kitchen
This post may contain affiliate links from which I will earn a commission at no extra cost to you. View my full disclosure policy.
The occasion called for a matching green dress LOL! I’m just so darn happy with it.
Also, check out how to install a marble backsplash. We’ve had it for years and still love it so much.
If green kitchen cabinets aren’t your cup of tea, then check out my best friend’s gray and white kitchen blog post, where I’m also showing her kitchen island pendant lighting ideas.
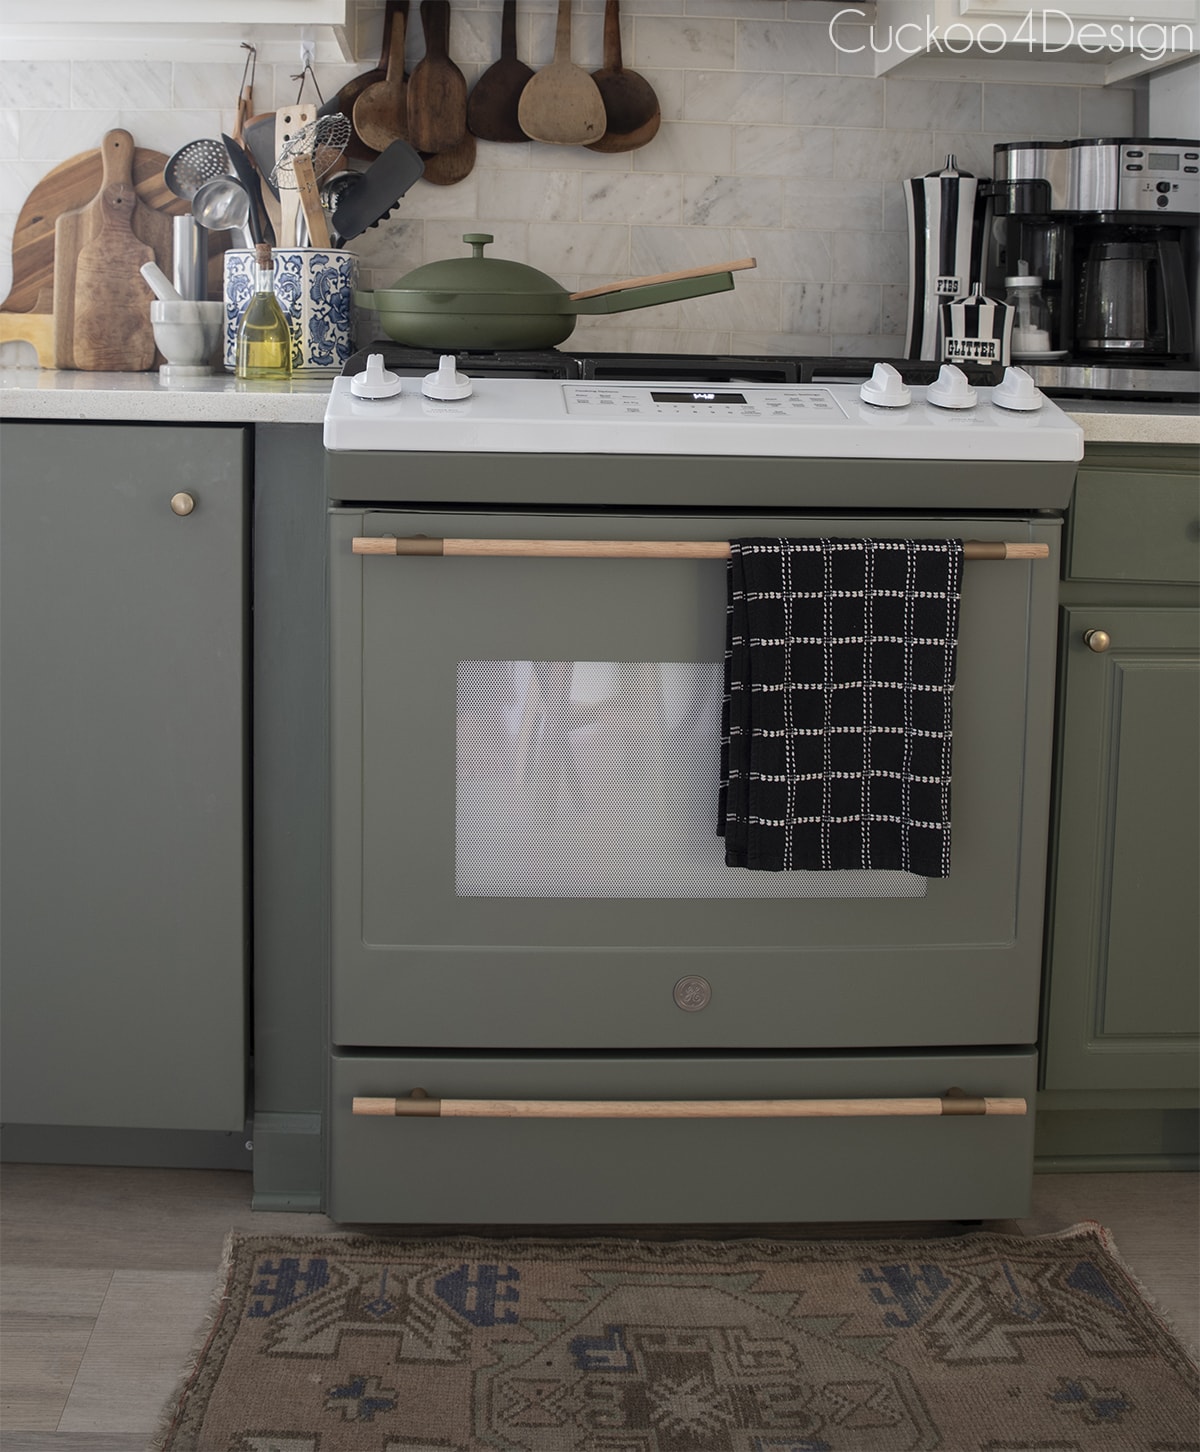
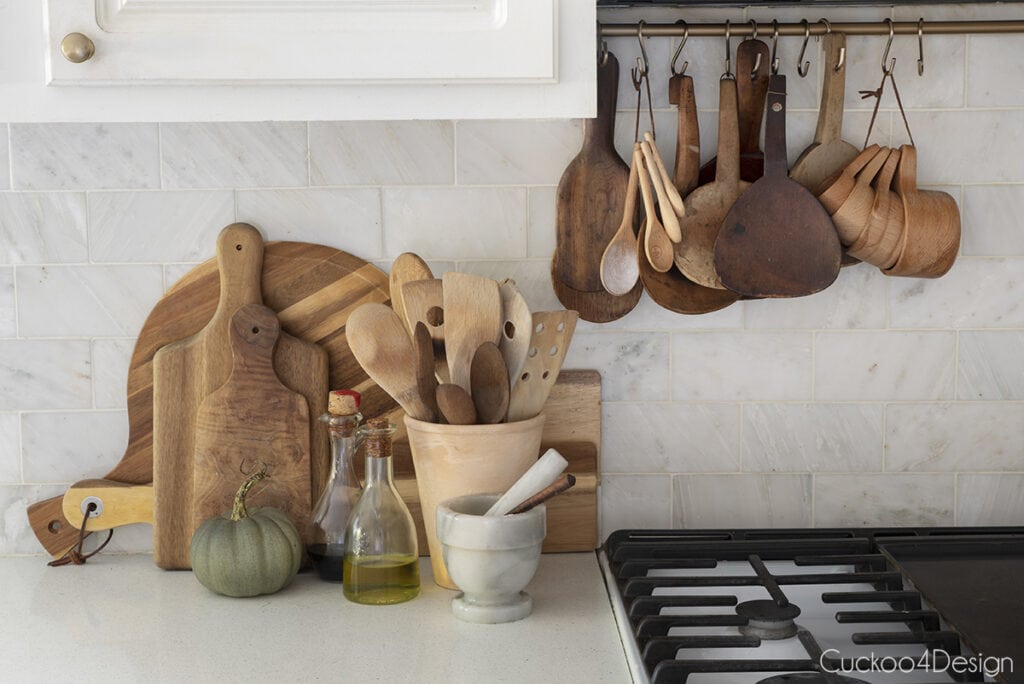
I also recently added a DIY utensil holder above the stove. It adds another unique touch to our kitchen that was once builder-grade.
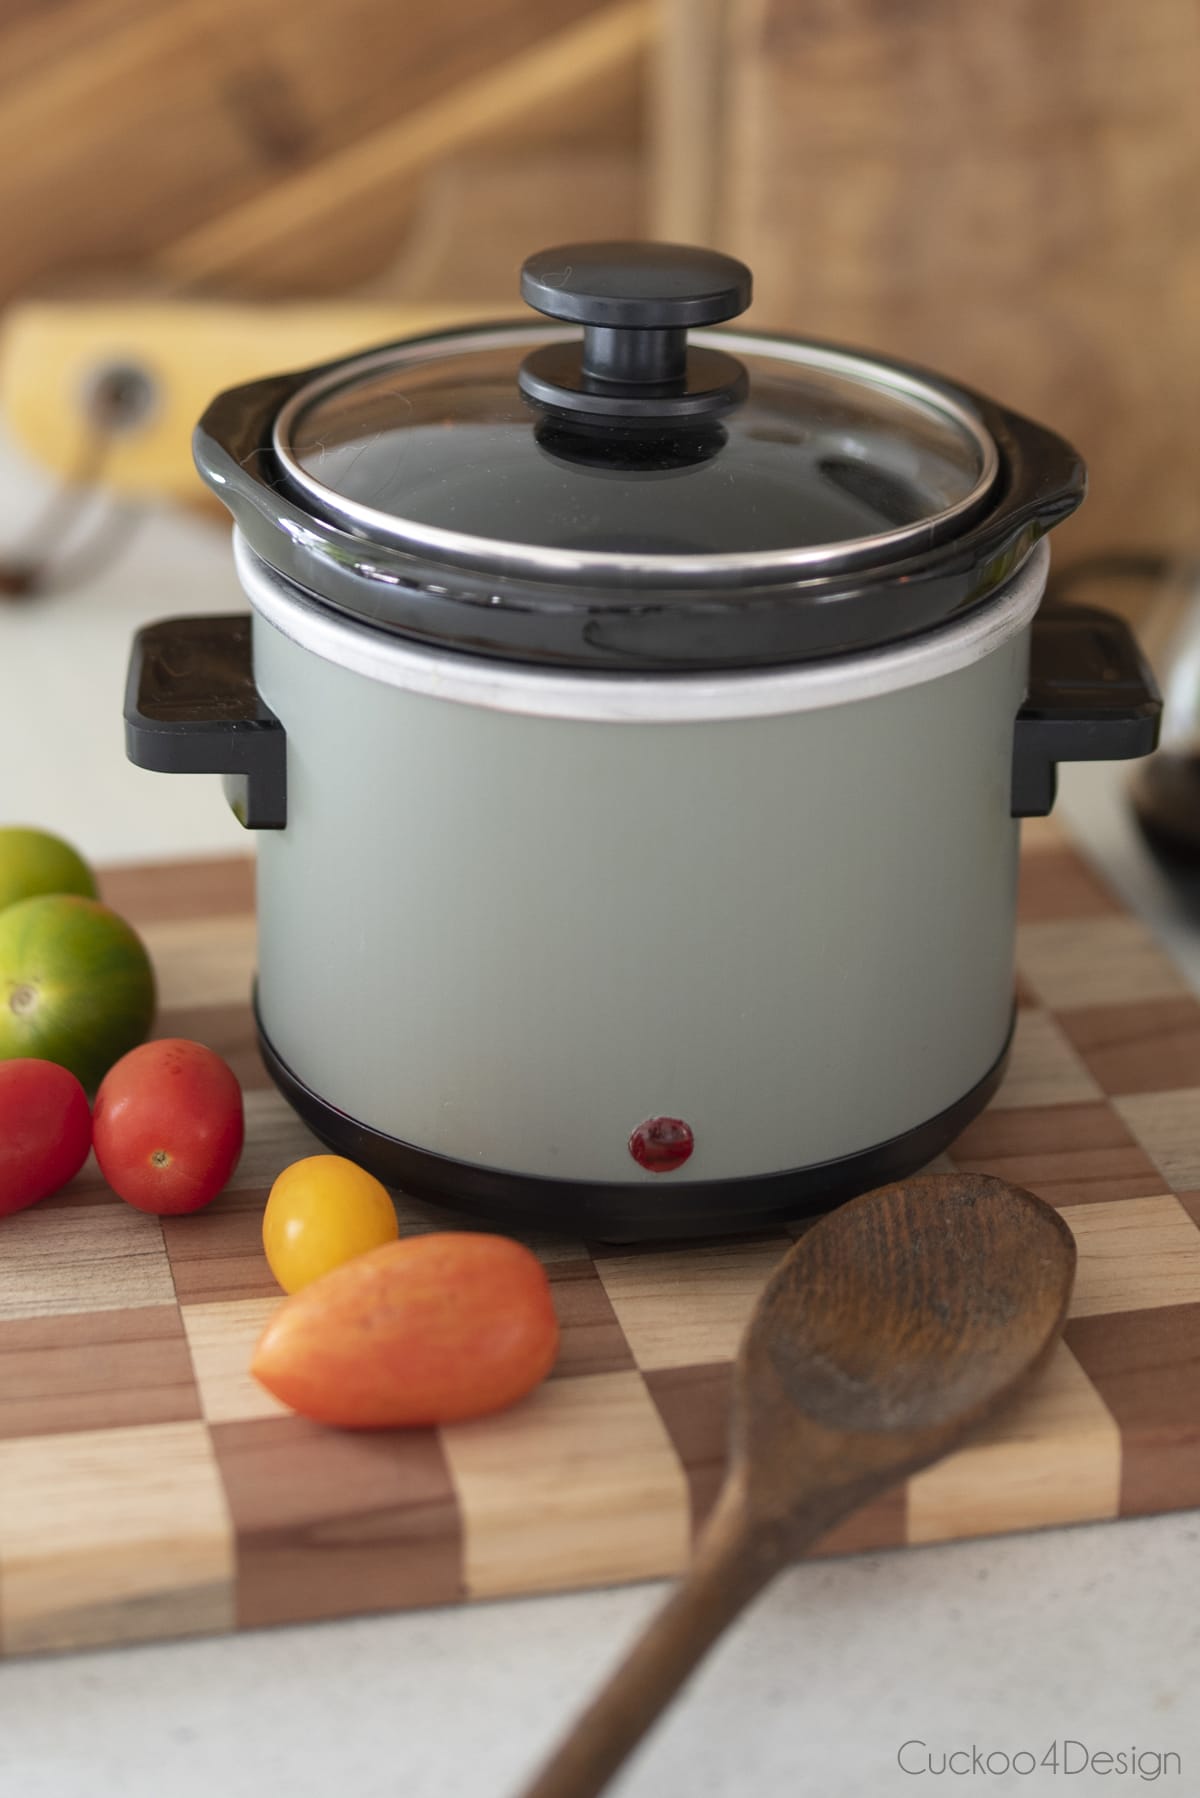
In case you are wondering what I did with the leftover vinyl pieces, I came up with a crockpot makeover idea. Such a great use for small scrap pieces of vinyl.
I recently painted a cutting board with traditional German easy folk art and hung it on the utensil rack.

Our kitchen has come such a long way. I have blog posts for you about what I did with the peeling laminate cabinets, how I gave our kitchen a white and green kitchen makeover, how I made the wood bead pendant, and how I cut down the half-wall kitchen counter to create a kitchen island.
All these DIY ideas and some of my friends’ ideas are gathered in an extensive blog post about updating a kitchen without replacing the cabinets. I’m sure you can find an idea to use for your kitchen remodel.
I also recently wrote a tutorial about how to make a sink skirt without sewing. It changed the look of the kitchen again. I know this look isn’t for everyone, but I like the change for now.

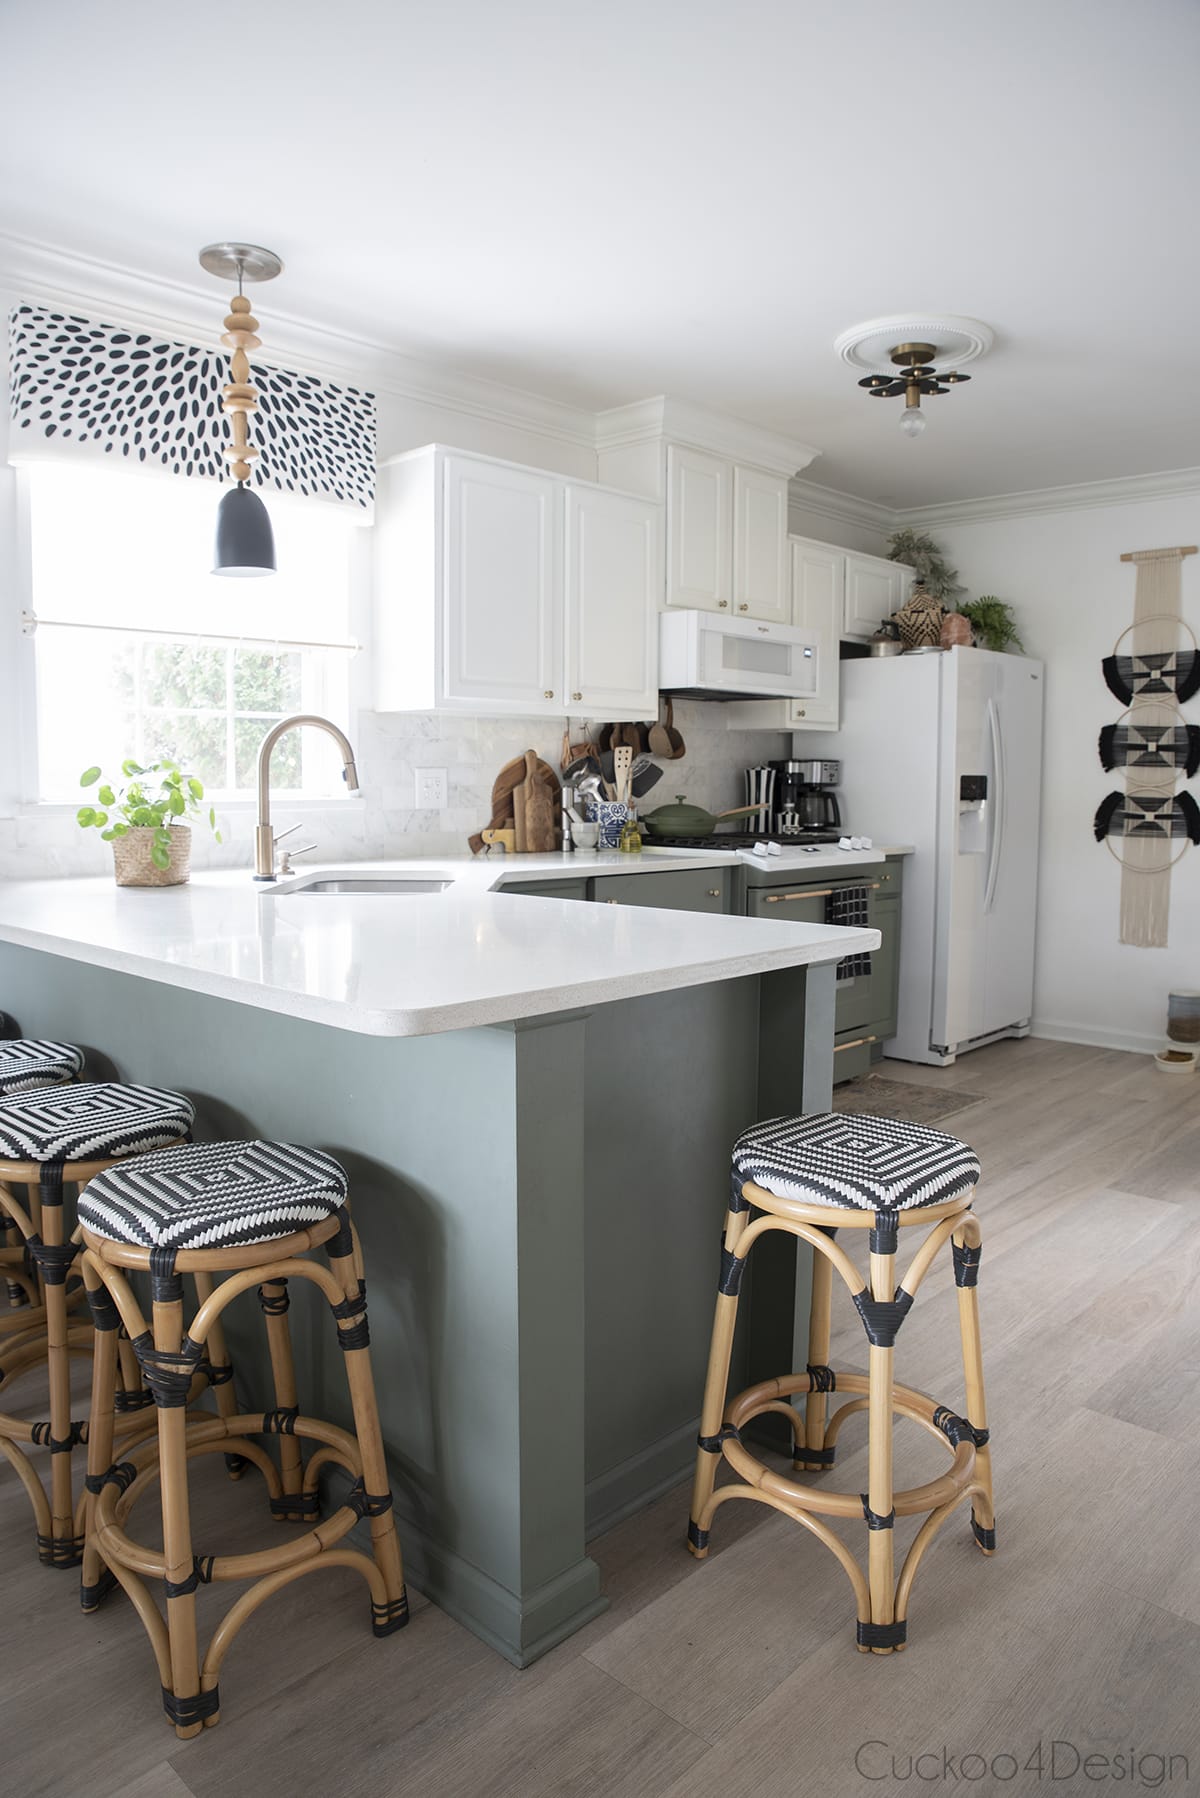

I think this project really updated the look of our kitchen, and I couldn’t be happier. Let’s just hope that I don’t change my mind any time soon about the green. But I’ve had it for several years already and still love it.
As you can see below, I added dark gray handles recently.

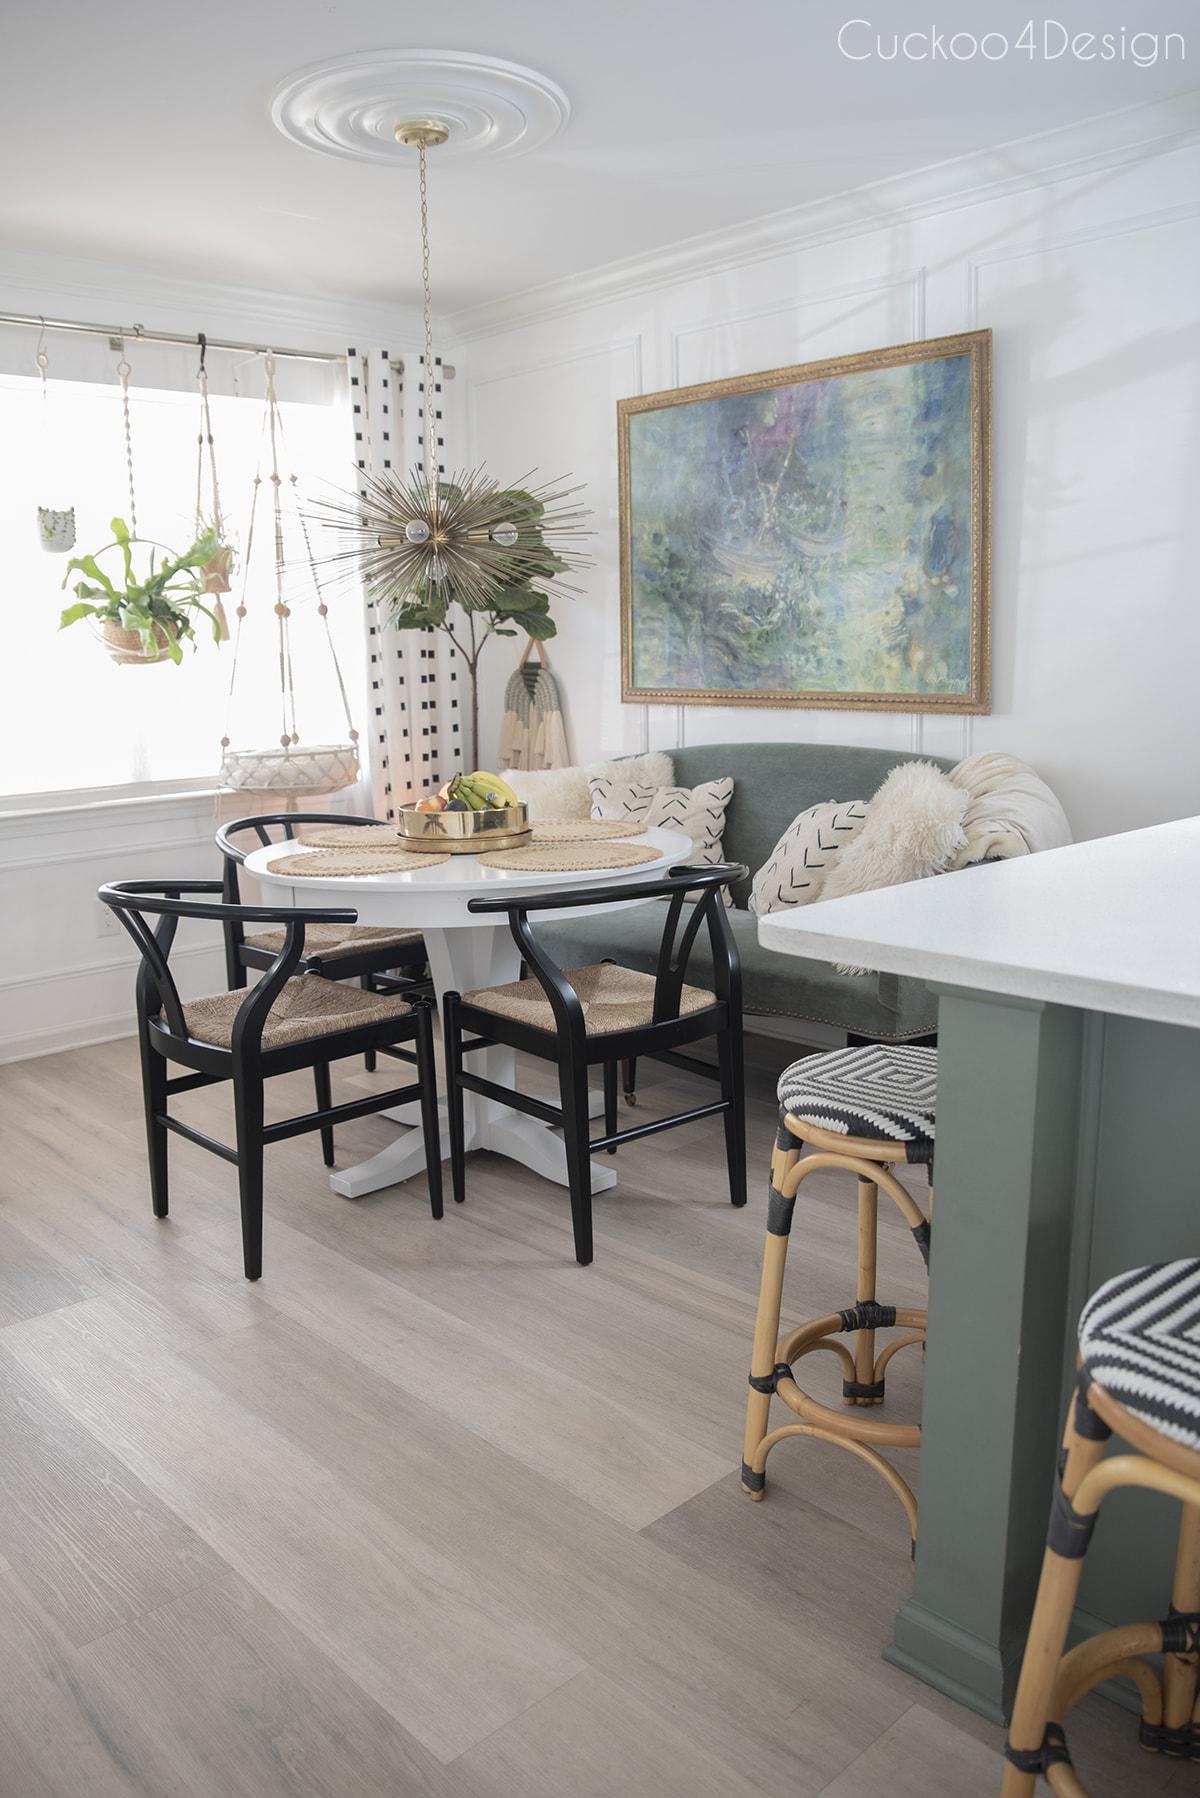
The other side of the kitchen with the old urchin chandelier.
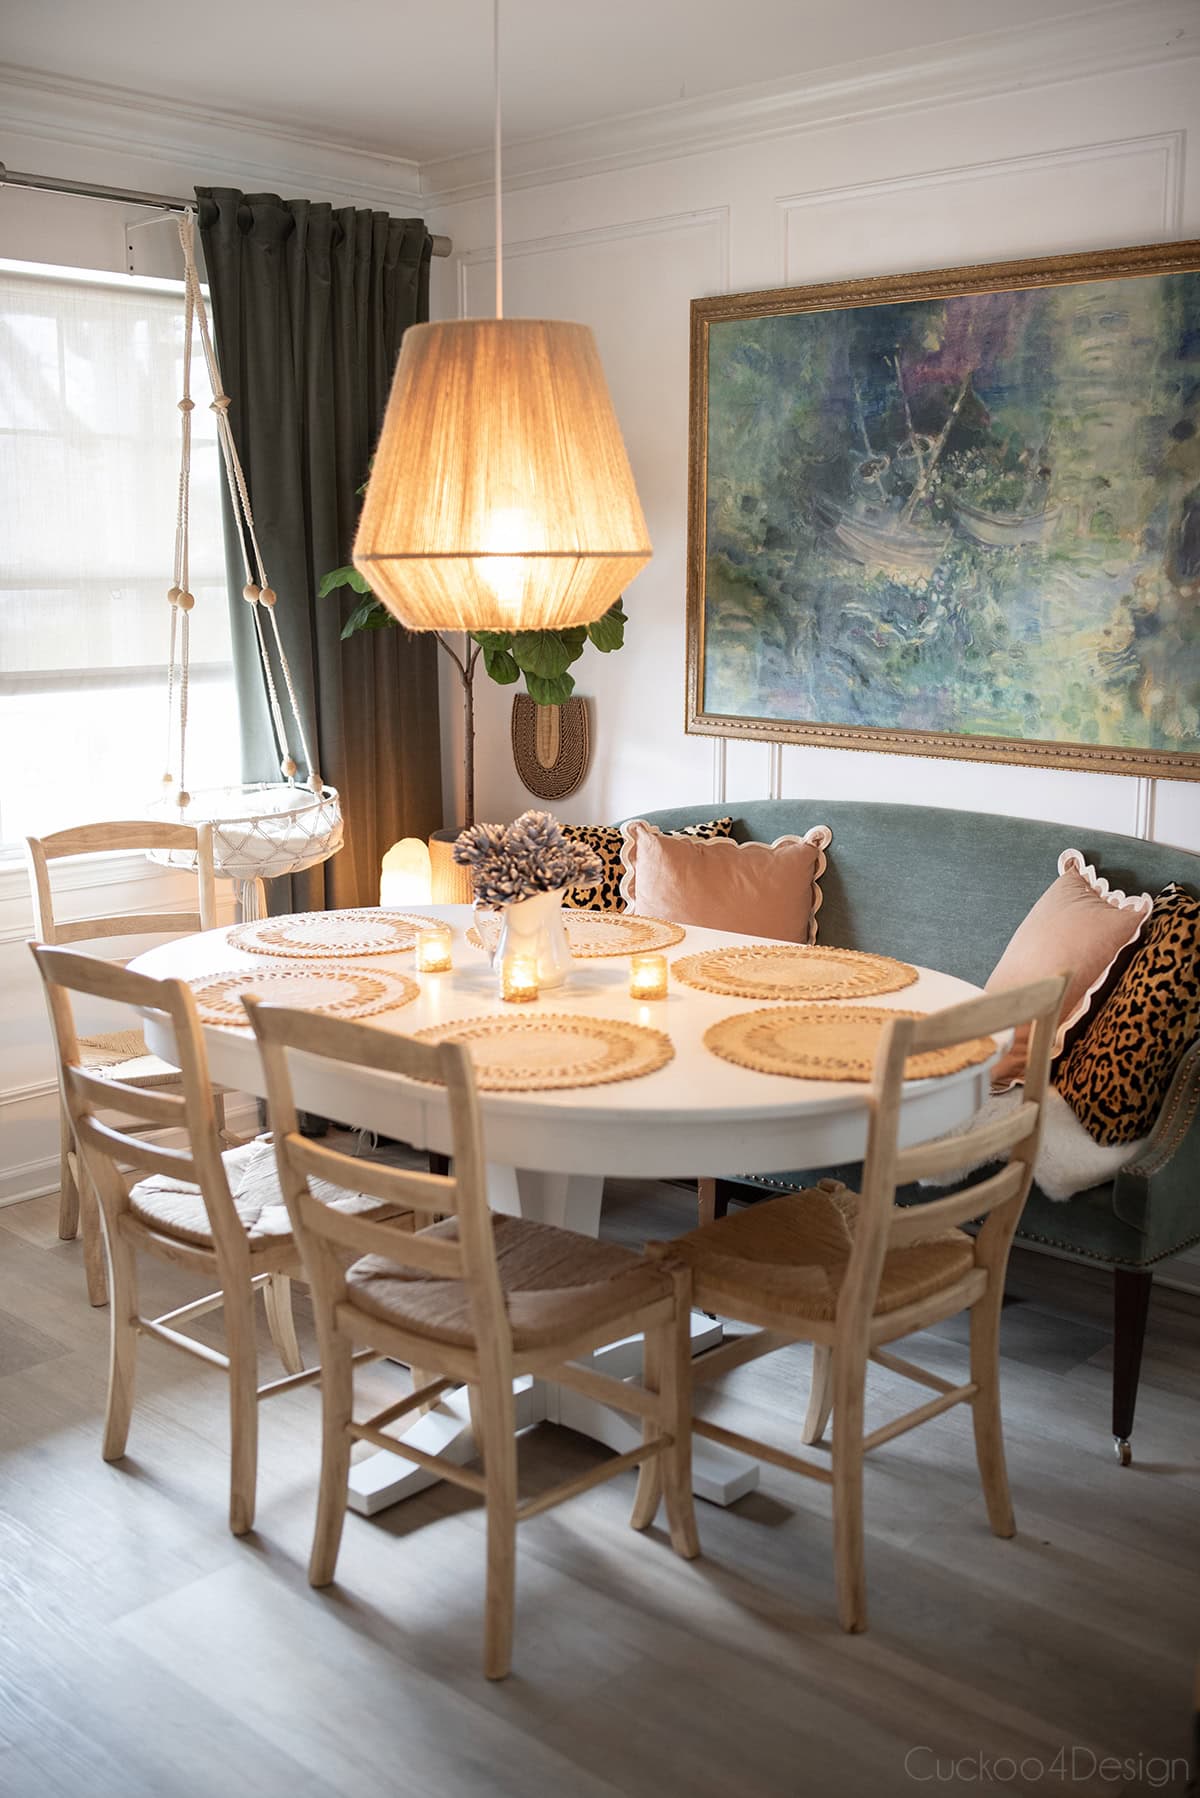
Followed by new curtains and the new DIY pendant light I made.
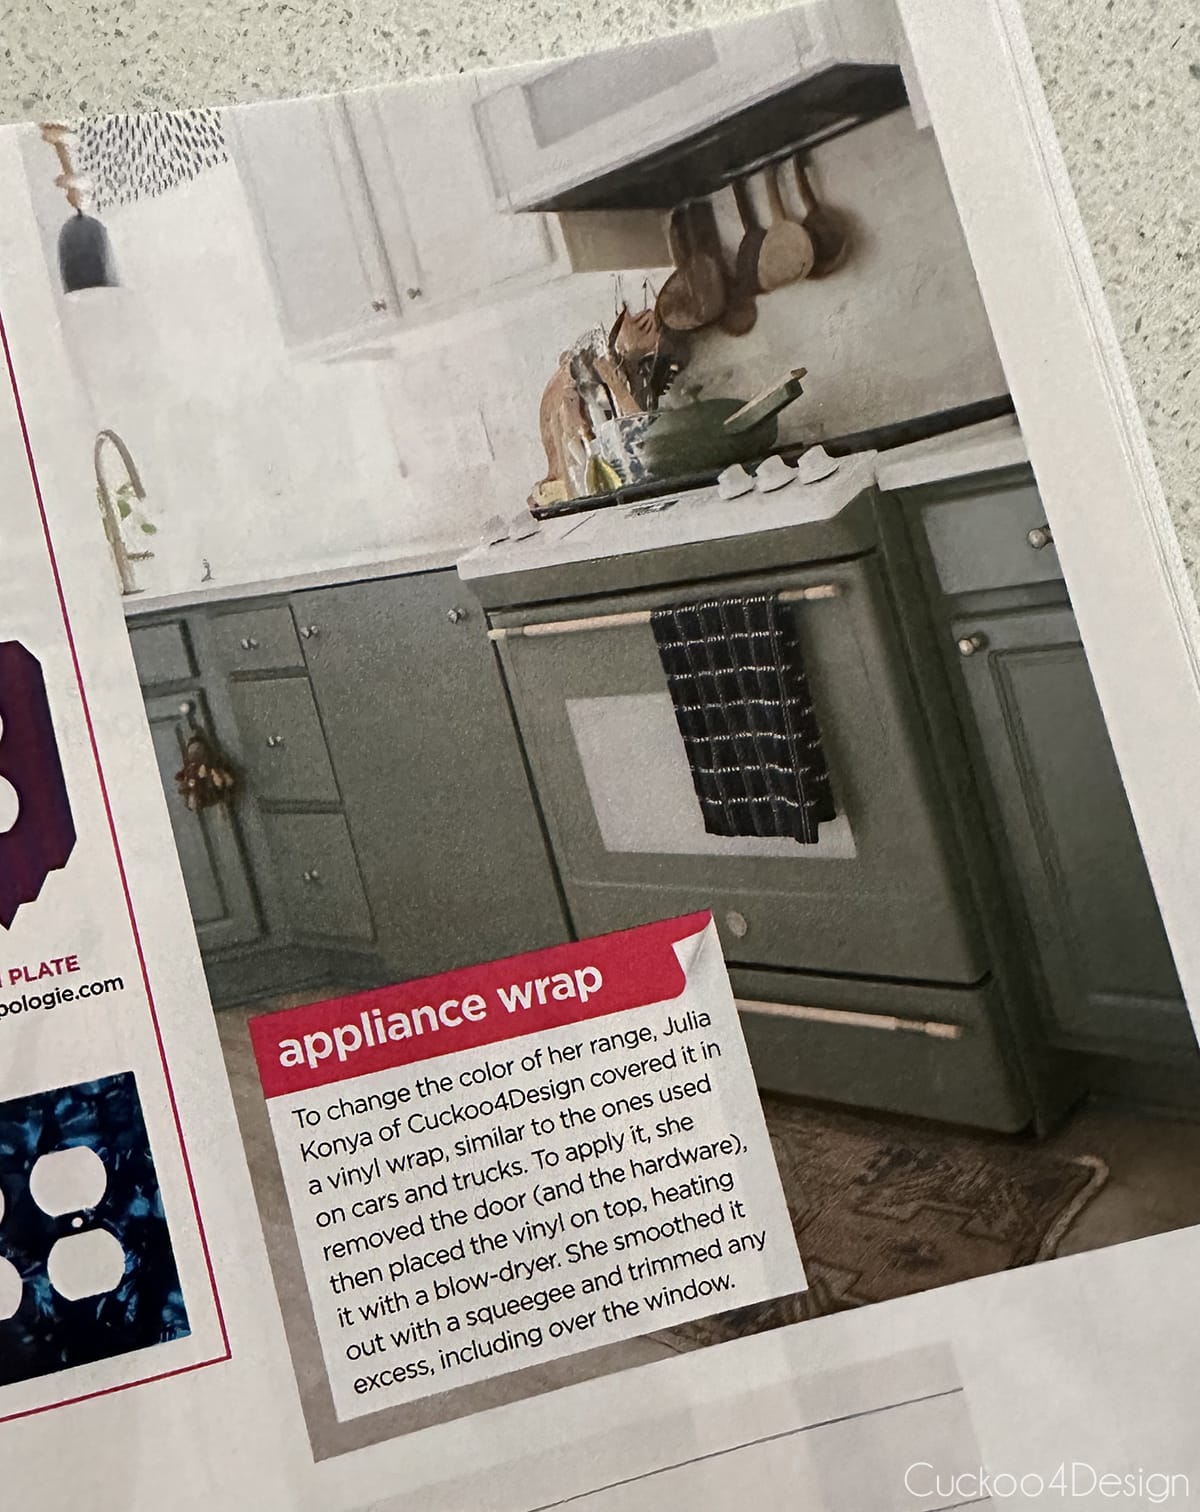
My DIY stove makeover featured in HGTV magazine
My stove makeover even caught the attention of HGTV Magazine, which featured it in their publication. It’s proof that you don’t need to spend thousands on designer appliances to get a custom, high-end look in your kitchen.
Below you can see a snapshot of the feature page.
I think this project really updated the look of our kitchen, and I couldn’t be happier.
UPDATE: We’ve had the stove wrapped in this vinyl since November 2017. That’s over 7 years now, and it still looks as good as the day I finished it. The color hasn’t faded, the vinyl hasn’t peeled, and I still love the green.
This proves that vinyl car wrap isn’t just a temporary fix! It’s a legitimate, long-lasting solution for transforming appliances. For under $400 (including the custom handles), I got the custom high-end colored stove I’d been dreaming of without the designer price tag.
If you’re ready to tackle your own stove makeover, remember that the detailed vinyl wrap method and color-matching process are in my dishwasher tutorial. This post focuses on the stove-specific challenges and custom handles. Both together will give you everything you need for a complete transformation.
Tschüß,

great job!
Thanks so much Lisa.
Wonderful! Thank you for inspiration!!
Glad you like it Gigi. Thank you!
I am a fellow German citizen living in Central Texas. I love, love, love your ideas!! I hope I’ll be able
to transform my fridge and stove because the stainless steel’s protective coating is coming off and the appliances look as if I never clean them. Keep the ideas coming!!
Sylvia
Oh vielen Dank Sylvia! Good luck with your fridge and stove 🙂
Oops I meant kitchenaid!
Though colored wrap is great, and you should “go for it” On stainless that is losing or lost its protective coat. Windex or glass cleaner with ammonia. Spray down the appliance, rub off with a cotton dishtowel. You may have to repeat the process a few times. Once the coating is completely off, keep a spray bottle of window cleaner handy for your daily cleaning. Works like a charm. I have a kitchenmaid Range and Dishwasher and a blue Big Chill Pro Range ( that I absolutely love because it is not electronic). Best of luck with the appliance wrap!-Jana
I absolutely love your willingness to tackle tricky projects. The finished product looks custom and definitely high-end. I can barely wrap presents, never mind appliances. 😉 You continue to inspire me.
You can do it too 🙂 the nice thing is that you can take the wrap off several times and redo it again 😉
Julia, this looks FANTASTIC! You are so creative!
Thanks Lori! 😉
Wow, Julia!!!! I’m so impressed by your creative solutions to design problems! Your stove looks so nice with the wrap! It really makes your kitchen look custom. It’s sucks that the first attempt didn’t go as planned, but so cool you shared this with readers so they can avoid an accident. Thank you for sharing your beautiful and cool projects!!!
I feel like most projects don’t go as planned 😉 LOL and thanks so much.
Stunning! You are so creative!! Love the change. Not a fan of GE products, but hey, you deal with what ya got. Love it!! Will be looking at your peeling cabinets blog, cause that’s what happening to my cabinets, they are to expensive to replace.
Yes I wish I had a different stove but ours broke during the height of COVID and there was nothing else 🙁 The peeling cabinet post is one of my really old ones and I wish I had taken more photos but I still have the same cabinets, I just keep repainting them and it is working out great. I thought about wrapping them as well ? The vinyl wrap is just so great.
This is insanely good and only you would think to do this! LOVE!
How did you match the vinyl wrap color to your cabinet color? I’d love to wrap my stove BUT I don’t think it will match my mushroom Sheridan. Williams color!
Hi there, I explain in my dishwasher transformation that I linked to in this blog post how I matched the color. Hope that helps!
What a game changer. I love this so much and I think I’m going to try it after the holidays. I have almost the same stove. Thanks for the detail and transparency in your post, what a bummer about the shattered glass.
Oh I’m glad you like it and good luck!
OH my I’ve always wanted a copper colored metal looking stove….Just wondering how that would look?
Hi Rebecca, I saw there are metal wraps out there and you could try it 🙂 If you do let me know how it went!
Any advice on vinyl wrapping a microwave? Is it safe? I can’t seem to find much about it. Your stove is amazing.
Hi Lila, I’m not sure about a microwave. I’d think that you couldn’t wrap it around the corners. I would definitely keep the material away from the inside of the microwave. And thanks!
Im so excited to try this. But im confused about how you went around the glass. Did you remove the glass and put it back in?
Hi Rena, no I left the door as is with glass and just stuck it to the entire metal and the glass and then cut out the window part. Good luck!
Why did the glass on the oven door break? Just curious before I try this myself. Thanks!
HI Claire, I overtightened the handles that I made myself while attaching them. If your handles are attached to metal then you don’t have to worry at all. If you make your own then watch if they are attached to glass.
Please tell me where you got the hardware for the handles…or the entire handles. I have been searching for months for the stuff to make the kind of handle you made.
Hi Angela, I made them and linked to them in the blog post called DIY drawer pulls. I can also email you the link of you can’t find it.
It’s an amazing job ( I always dreamed of having appliances with the same color), but I do have a question: stove. Paper installation, isn’t the paper direction say max heat 225F?
Please let me know, I need to shop for paper ?. Thank you
Hi Ella, the vinyl has been on my stove for several years and is doing great. It is only on the outside of the oven which doesn’t get nearly as hot as 225. I’m not sure how warm the oven gets on the outside but you are able to touch it everywhere so that means it’s fine. Good luck!
Can you share the paint colors for the cabinets? Or was it all vinyl wrap? It’s hard to read the post because I keep getting pop ups, so I apologize if you addressed this in the blog
Hi Thea, it is Lush Sage by Valspar
Hi there! Absolutely love the transformation!
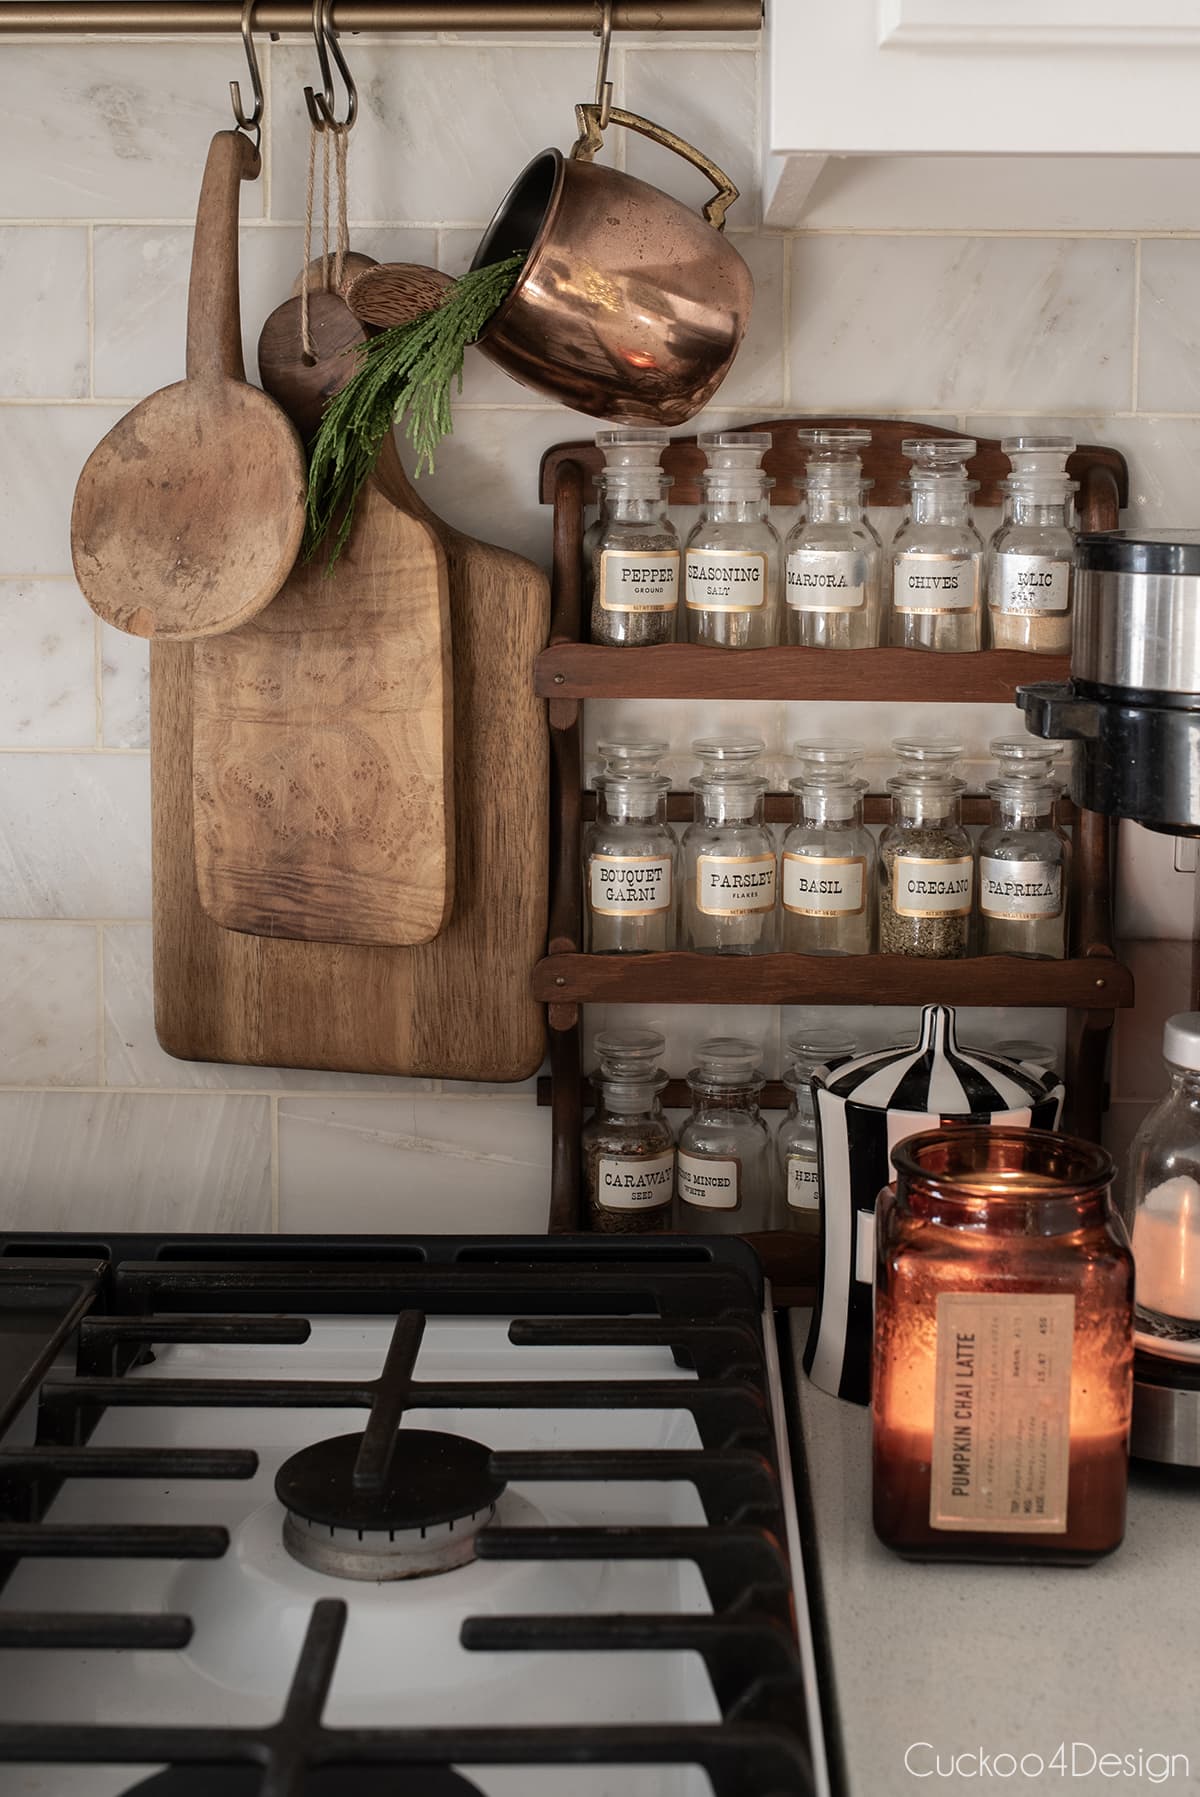
Random question and I apologize if it was already answered: where did you get your apothecary looking spice jars? I love them!
Hi Heather, the spice rack is a funny story because it is an American-made vintage spice rack and I brought it home from Germany. My mom brought this spice rack home with her on one of her visits to Pennsylvania before I was born. It hung in their kitchen ever since but was never used.
When I visited them last year, I told them that I liked the spice rack and my parents told me to take it with me back to Pennsylvania. It is a John Wagner & Sons spice rack from Ivyland, PA with the original labels. Sometimes they are available on Etsy or Ebay. Good luck!
What an inspiring transformation! I can’t wait to try this on my yucky old stove. Wish me good luck!
Hi, Julia. I am moving into a rental while we build our house. I am worried about the oven glass breaking. Do you think it would help if I put a back plate on the door before attaching the handle? Do you think metal (brass look, etc.) or a stained wood one? I’m wondering if this would help spread the pressure where the handle is attached. Thoughts?
Hi Renee, sorry that I’m seeing your comment so late. I’ve been getting a lot of spam comments and it was buried. Honestly the glass was fine when I installed the original handle again. I only had issues with a different handle. I hope that helps.