

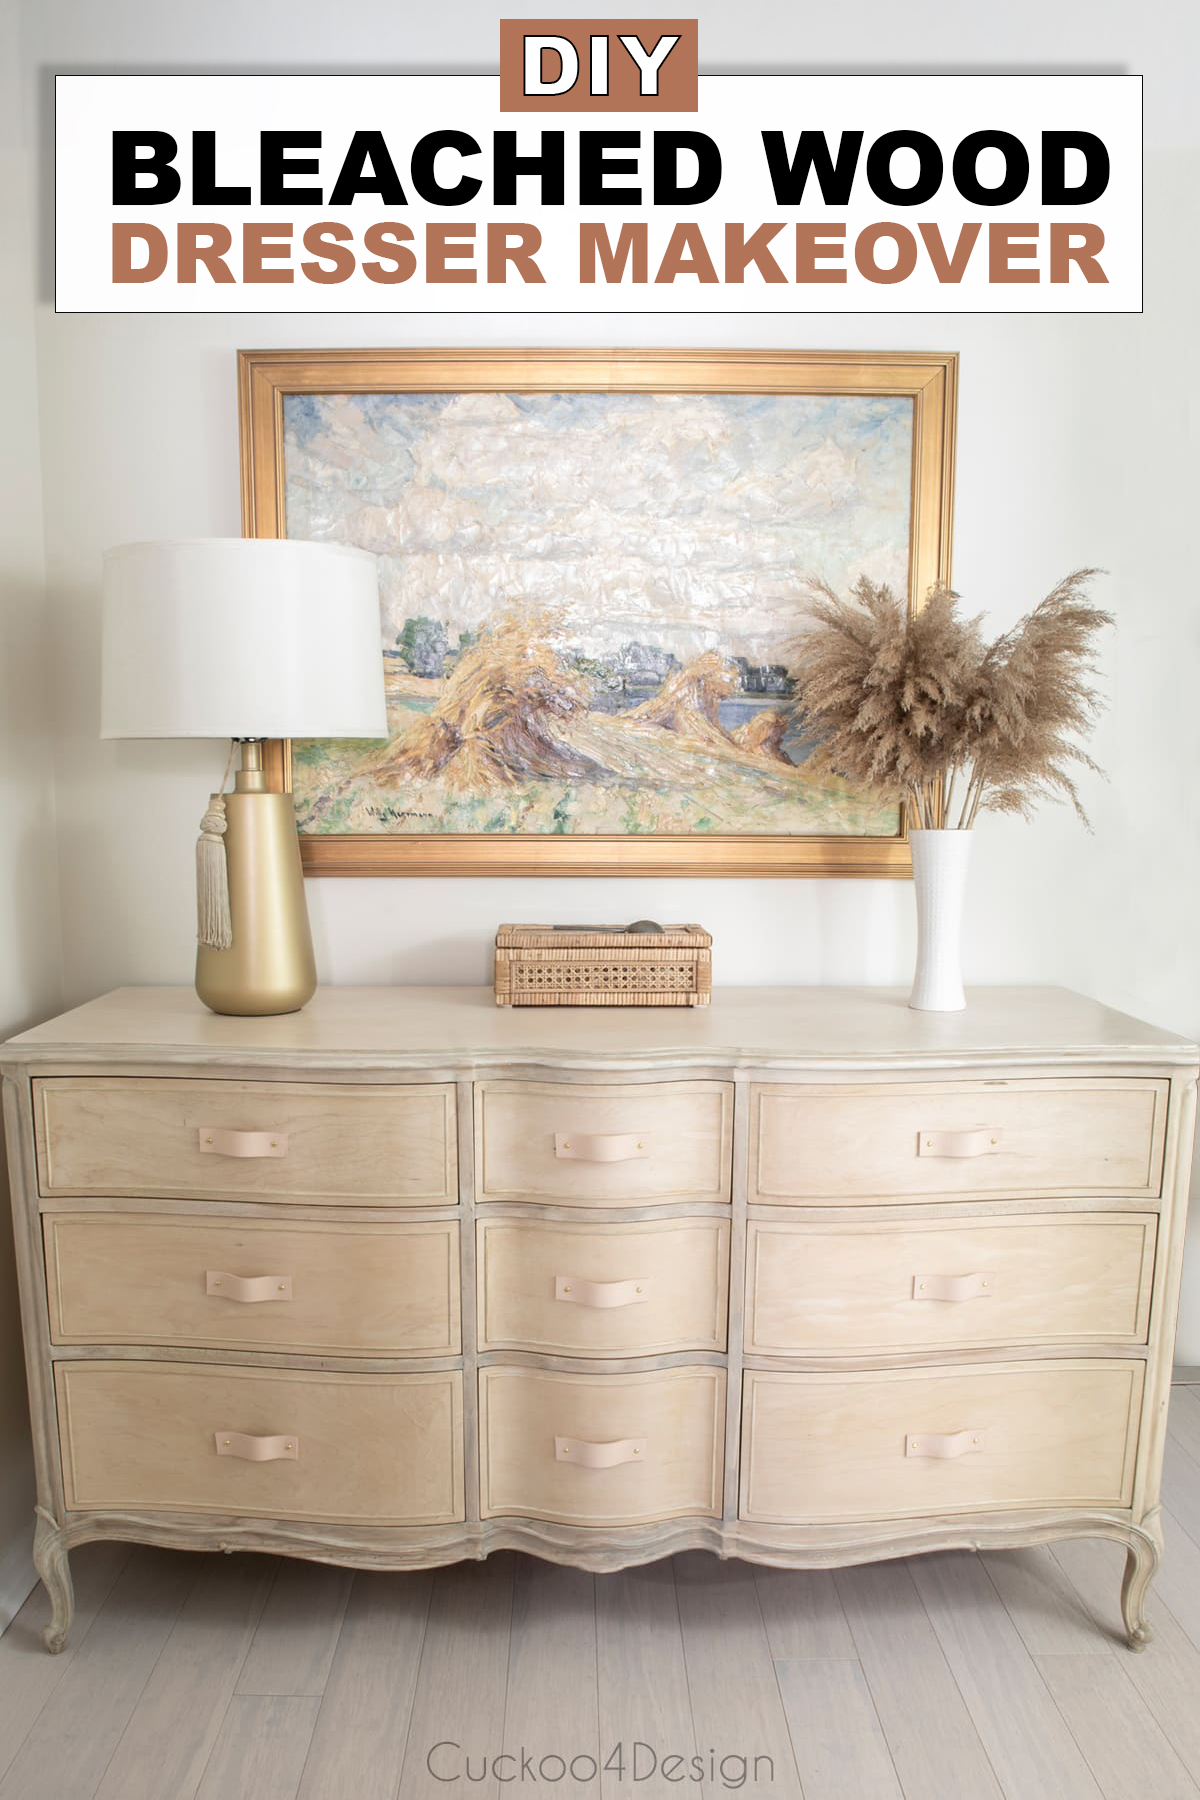
French Provincial wood bleach dresser makeover
This bleached wood dresser is a French Provincial Drexel dresser that had been through several paint jobs and was looking pretty rough. I wanted to strip it back to raw wood and use a two-part wood bleaching kit to even out the tones and give it a light, natural finish. Today, I’m sharing exactly what worked for me and what I did differently from other tutorials out there.
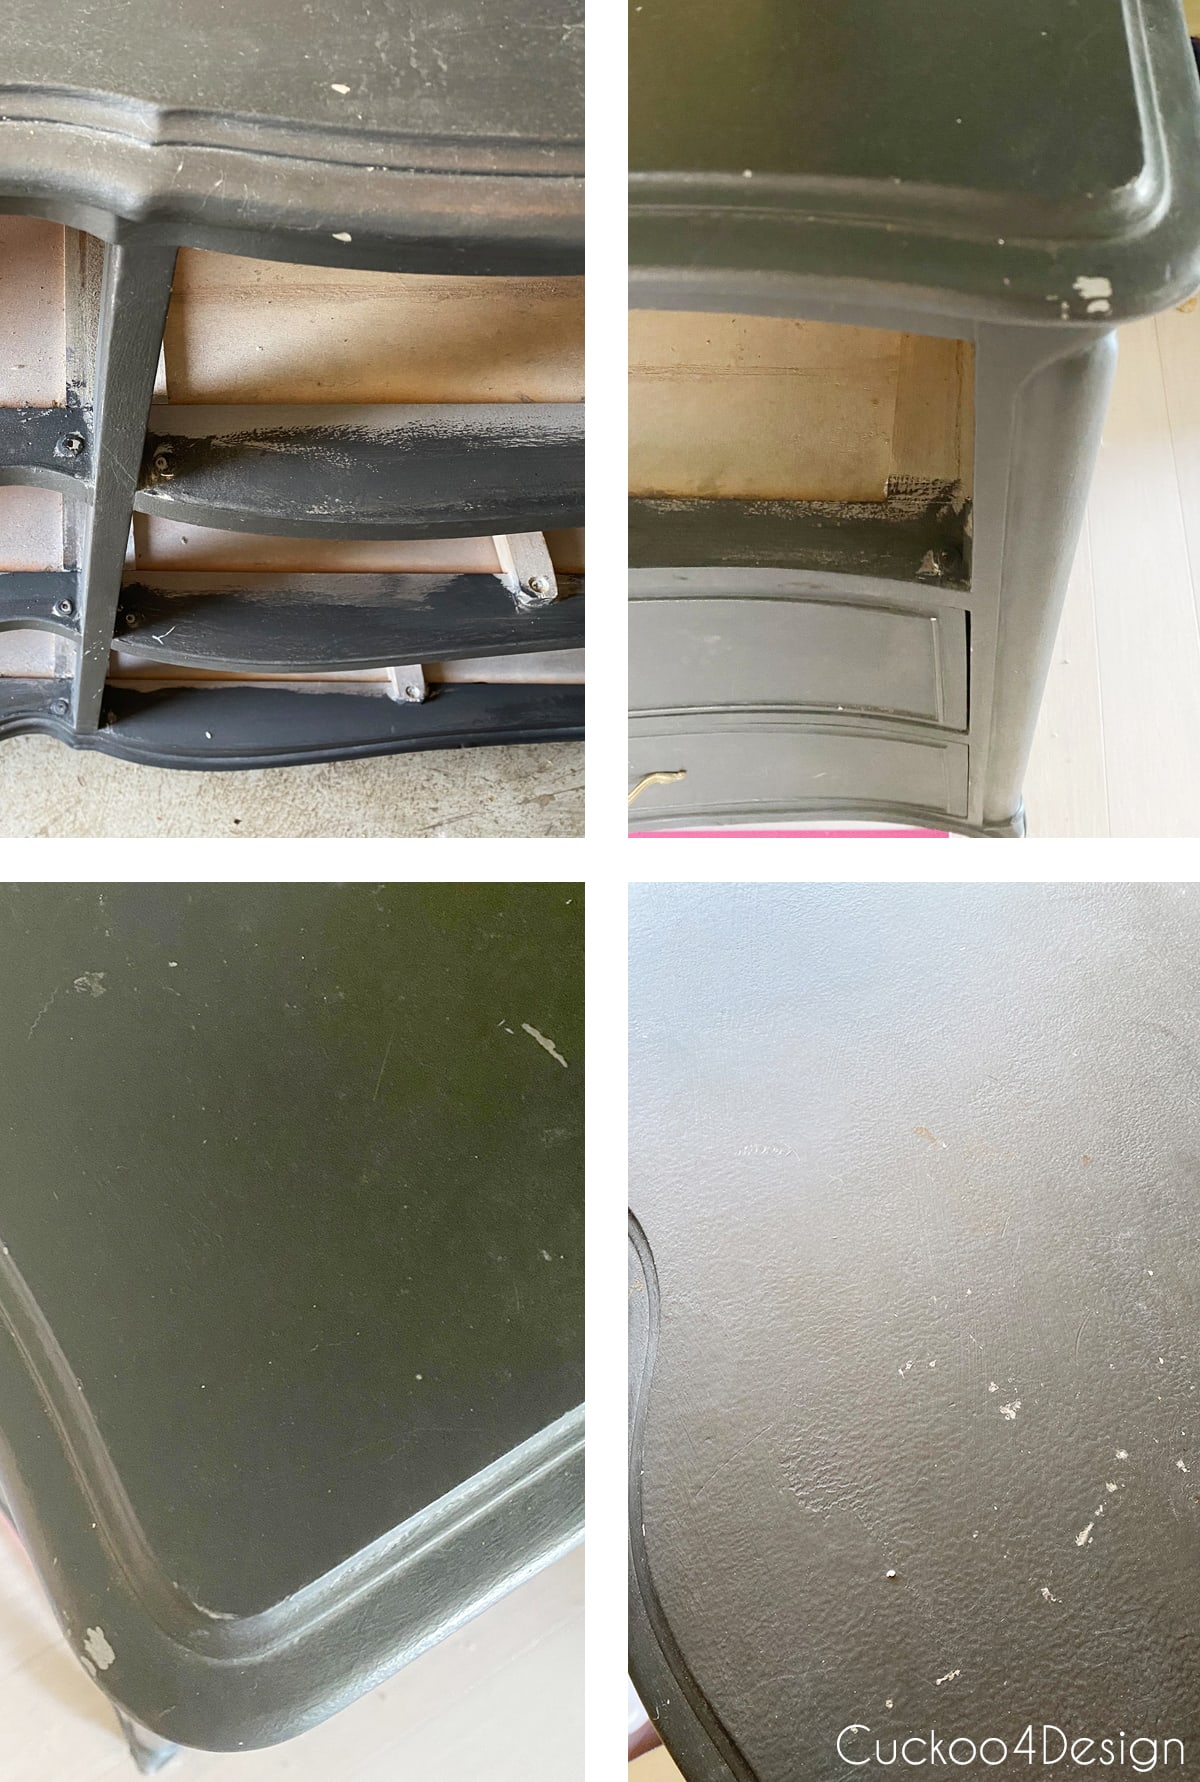
Dresser before makeover
The Drexel French Provincial dresser had been in our upstairs hallway for years and had gone through several makeovers. First, the silver paint that flaked off, then Annie Sloan graphite chalk paint, which didn’t hold up to my kids. I always wondered what the wood underneath would look like in its natural, raw state, and when I started noticing bleached wood furniture everywhere, I decided it was finally time to find out, because I didn’t want to buy anything new, and the dresser is the perfect size for our hallway.


When I was done stripping the dresser, I found a blog post on Pinterest by Amy of The Coastal Oak, who had done something similar with her French Provincial dresser using leather strap handles. I did a few things differently, though, like keeping the veneer, using a two-part wood bleaching kit instead of household bleach, skipping conditioning and staining the wood, and making my own leather handles.
Materials used for the wood bleached dresser makeover
- paint stripper
- protective mask and glasses
- various different paint scrapers and knives (HERE, HERE and HERE)
- rags
- old toothbrush
- white vinegar
- bucket
- two-part wood bleaching kit (I used 2 kits)
- different sanders (Dremmel, Riobi detail sander, palm sander) and different grades of sandpaper from 80 to 220 grit to fit the sanders
- clear matte polycrylic
- spray gun or paintbrush
- tack clothes
Step-by-step instructions
Make sure you have wood under your paint layers and that the paint isn’t lead with a test kit.
Remove dresser hardware and take out the drawers.
Time to strip the wood, so make sure you wear your protective gloves, goggles and mask. Since I had so many layers of paint, I used a heavy-duty chemical stripper brushed onto smaller sections at a time. This was such an awful job, not going to lie. The intricate areas of the legs and drawers made the stripping more difficult. After letting the stripper soak in, I used the old toothbrush to scrub those areas. I had to add stripper several times to the same areas to get everything off.


After stripping you have to sand the wood with different sanders for the appropriate areas. A big palm sander for the large flat areas and the detail sanders for the smaller areas. I always try to test out the sandpaper strength first on a more hidden area since the different type of wood reacts differently to the grid. I had pretty soft wood and mostly sanded with 120 grid.
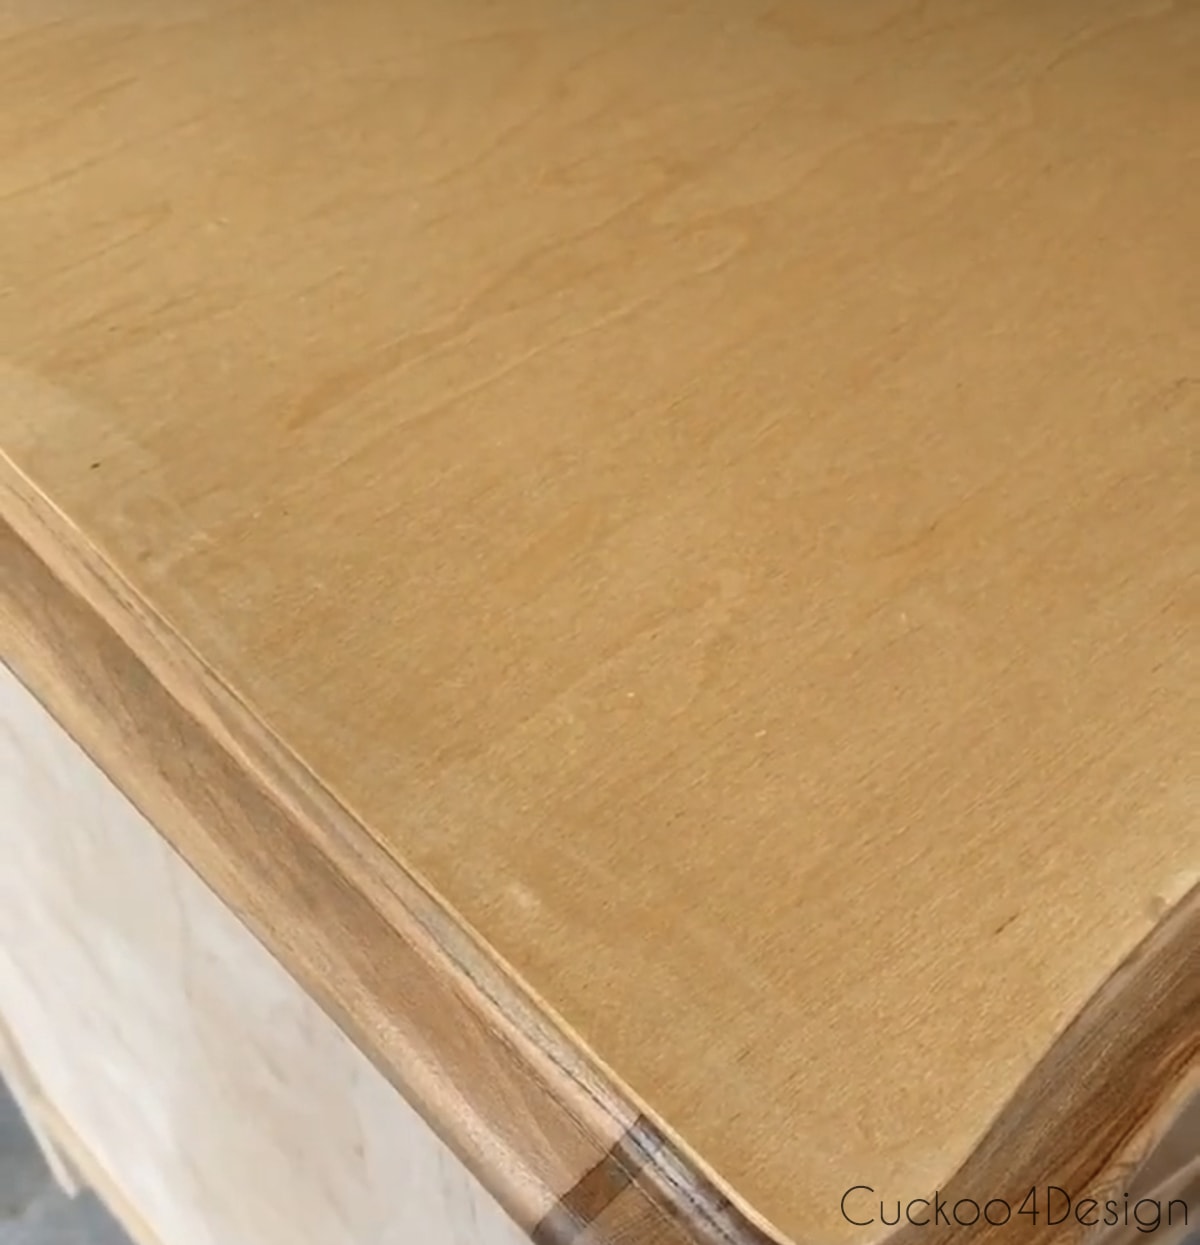
In Amy’s tutorial, she sands the layers of veneer off to reveal the wood underneath. I chose not to do that because I would have had to sand the drawer veneer off too which would have ruined the molding detail. In order to keep that detail, I decided to keep the veneer. Another reason was that only one odd leg of the dresser also had the soft yellow wood of the veneer.
My favorite detail sanding tip
Below is one of my favorite ways to sand little corners and details. I trace Dremel discs on adhesive-backed sandpaper, stick them together, and attach them to the Dremel disc attachment. Be careful though, this gadget is powerful and if the wood is soft, it can really take off layers of wood quickly.

For other detail areas, you can use abrasive cords, peel and stick sanding gloves, sanding detailers, steel wool, and sanding sticks which look like Q-Tips.
How to bleach wood
A lot of other wood bleaching tutorials use standard household bleach and putting the piece out into the sun to dry between coats of bleach just like Amy’s tutorial. When I tried the standard bleach I put it in an old Windex bottle and just sprayed it on the wood evenly.
I found a blog post on Bob Villa that mentions that “Two-part” A/B peroxide-based wood bleaches cause a chemical reaction that can also alter the color of the wood itself which is what I wanted to do. My dresser happened to have so many different types of wood in different colors. Like I mentioned above, the top veneer, drawer veneer, and oddly enough the one leg are very soft and yellow wood. The sides had an orange-tinted wood and the front parts are grayish. I was looking for a bleach that would take the color out of the wood to create a little more cohesive look. (Oxalic acid wood bleach is another option but is considered highly toxic by some, so I didn’t even consider it.)
I tried standard bleach on my dresser and compared it to the results of the bleaching kit. My findings were that the standard bleach ruffed the wood up more as well and that the bleaching kit definitely worked better for what I wanted.

I followed the instructions on the box of the Zinsser wood bleach kit by wiping on Part A first and then Part B with a clean rag. I had used a sponge first but that didn’t work so well.
Make sure to read the instructions! Don’t mix ahead of time. In Bob Villa’s blog post is mentioned to neutralize the wood between bleaching steps but the box doesn’t mention that, so I didn’t either. I literally bleached the heck out of the dresser and feel that placing everything in the sun also helped with the two-part bleaching process. You can tell how the tone changes when the wood is wet. I applied a clear coat too early and it was still very yellow which frustrated me severely because I had to strip those areas again. Sigh!

Here is a photo of the dresser when I applied the varnish too early.
So I stripped it again and bleached some more. Next time I will always test the areas with some water again because that’s how it will look when varnish gets added to the wood.


When I was happy with the results of the numerous coats of two-part bleach, I neutralized the wood by wiping on a 50/50 water and white vinegar mixture onto the entire dresser and letting it dry before moving on.

Here is the dresser before the varnish. If I wouldn’t have to protect the wood from my family, I would have loved to keep it just like this because it looked so pretty. The varnish did change the color again slightly.

Make sure to wipe down the dresser well with a tack cloth. They are my favorite when removing hair, dust, and lint from a piece before the final varnish step.
I use the sprayer to evenly spray light coats of varnish.
Any type of stain or conditioner changes the color of the raw wood towards yellow tones again which I was trying to avoid. So I skipped the steps of conditioning or sealing the wood before applying a clear coat. I did read however that wood pore sealer increases the smooth feeling of wood but is mostly needed for heavily grained woods. Tightly grained wood, such as birch, beech or maple, will not really need a sealer and I’m pretty sure that this dresser was mostly made out of tight-grained wood. I have also seen other blog posts where people skipped these steps.
Now I don’t know if me jumping straight to clear matte Polycrylic after neutralizing the wood will harm the wood in the long run. I dried out the wood with the bleach and didn’t add moisture back. So we’ll see how it will hold up.
Just like Amy’s tutorial, I sealed my wood with Minwax Polycrylic Clear Matte Protective Finish but I used my favorite paint sprayer. It just works so much better than a paintbrush for this runny varnish. Since it is waterbased the clean up of the sprayer is super easy too.
Before settling on the clear matte Polycrylic finish, I tried out a semi-gloss Polycrylic (which you saw in the photo above) and two different clear wax types. I didn’t like any of them.
When working on a piece of furniture like this, I think the hardest part is figuring out what is the right way for you and your piece. There are so many tutorials out there but every piece is unique with different types of wood and what worked for someone else might not work for you. This was definitely a test of my patience but I am glad I didn’t give up in the end and I love the dresser this way again with my grandmother’s painting above it.
I also gave the wall behind it a much needed new coat of paint. The color is called Quail Egg by Valspar and I also started to paint the living room that way which hasn’t gotten any new paint since 2012. Too many holes, dents, and stains everywhere. I’m not sure how I feel about this color in the living room yet though. It is the exact color of my new velvet curtains.
How to decide if you should use household bleach or a two-part wood bleaching kit to lighten your furniture?
After trying both on parts of my dresser and the desk that I started, I believe that if you are happy with the underlying tone/color of your wood then you can definitely use standard household bleach and putting your piece of furniture in the sun while letting it dry.
If like me, you are trying to take out the tone/color then I think you should use the two-part wood bleaching kit. I really liked using it and the results it provided on my dresser.
Photos of finished French Provincial wood bleached dresser
This post may contain affiliate links from which I will earn a commission at no extra cost to you. View my full disclosure policy.
For hardware, I added my DIY leather drawer pulls to the dresser. You could also use my boho drawer pulls using macrame yarn or my DIY wooden drawer pulls if you don’t like the masculine leather look.
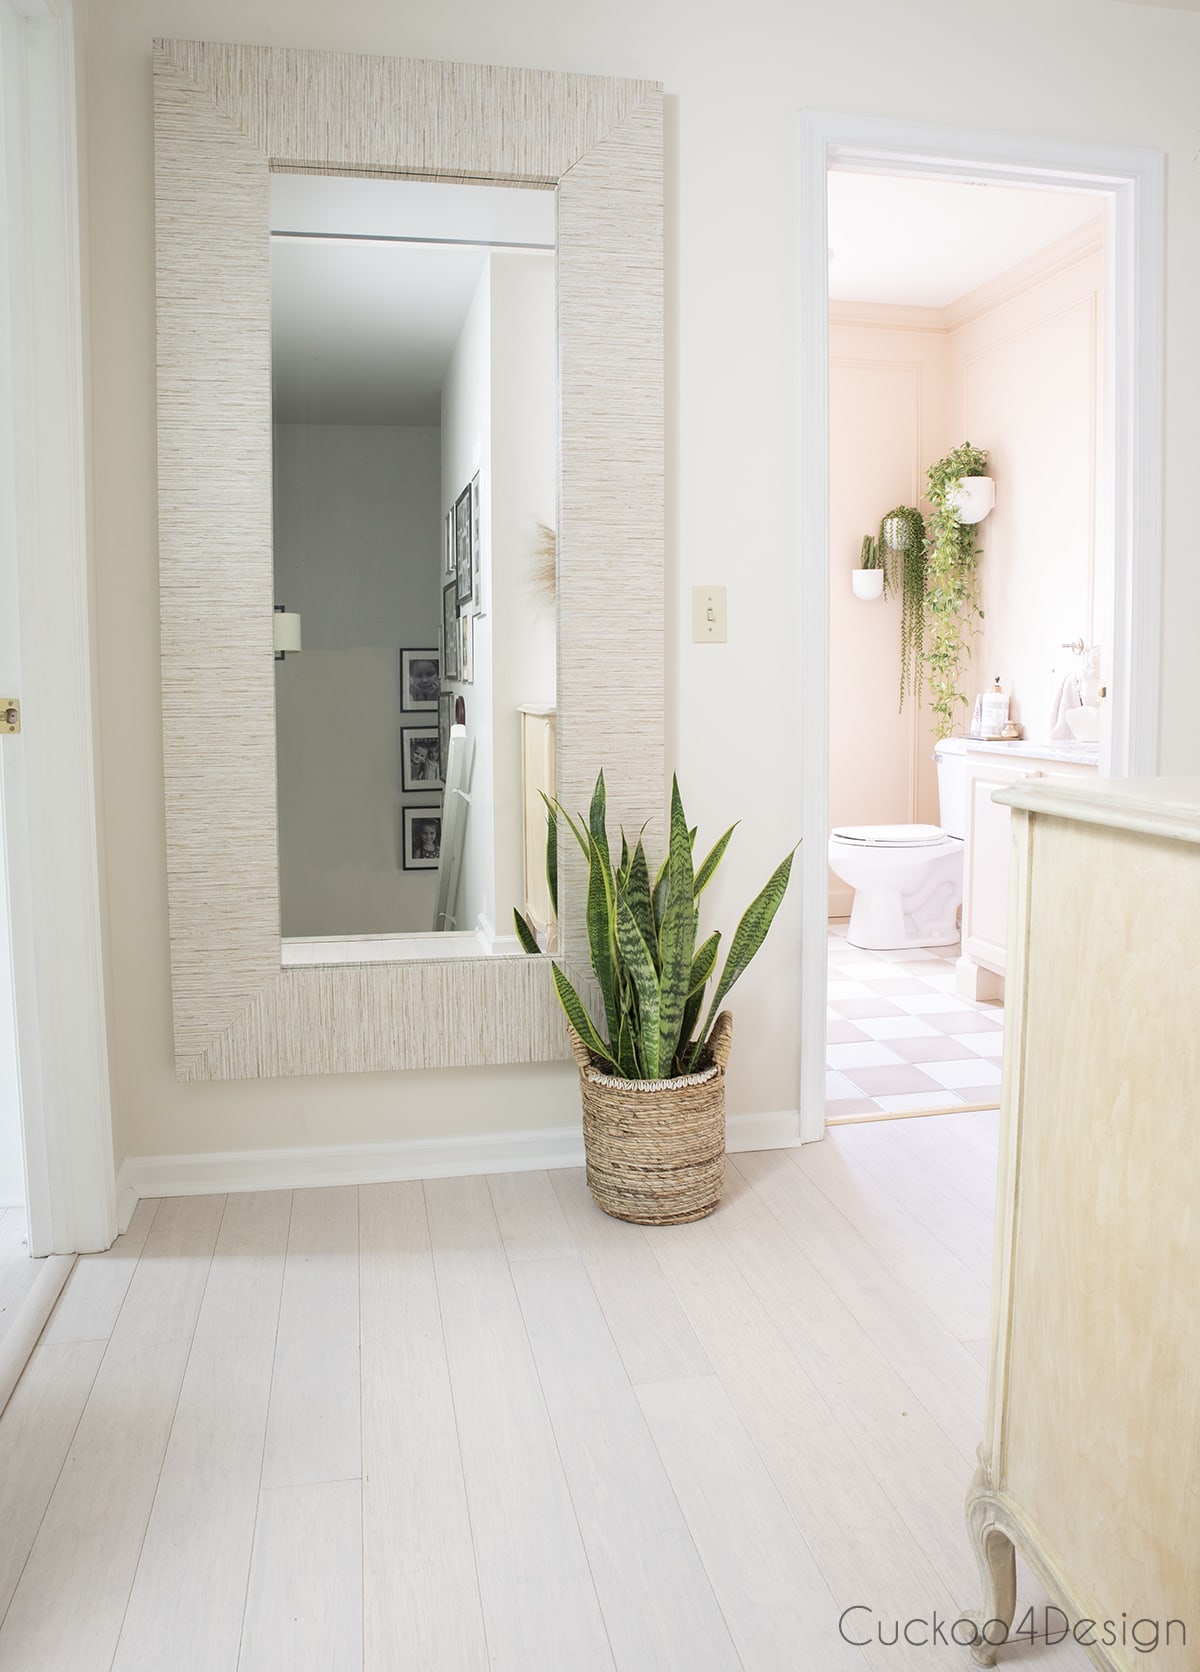
Now I walk back into my hallway happily because I love the look.
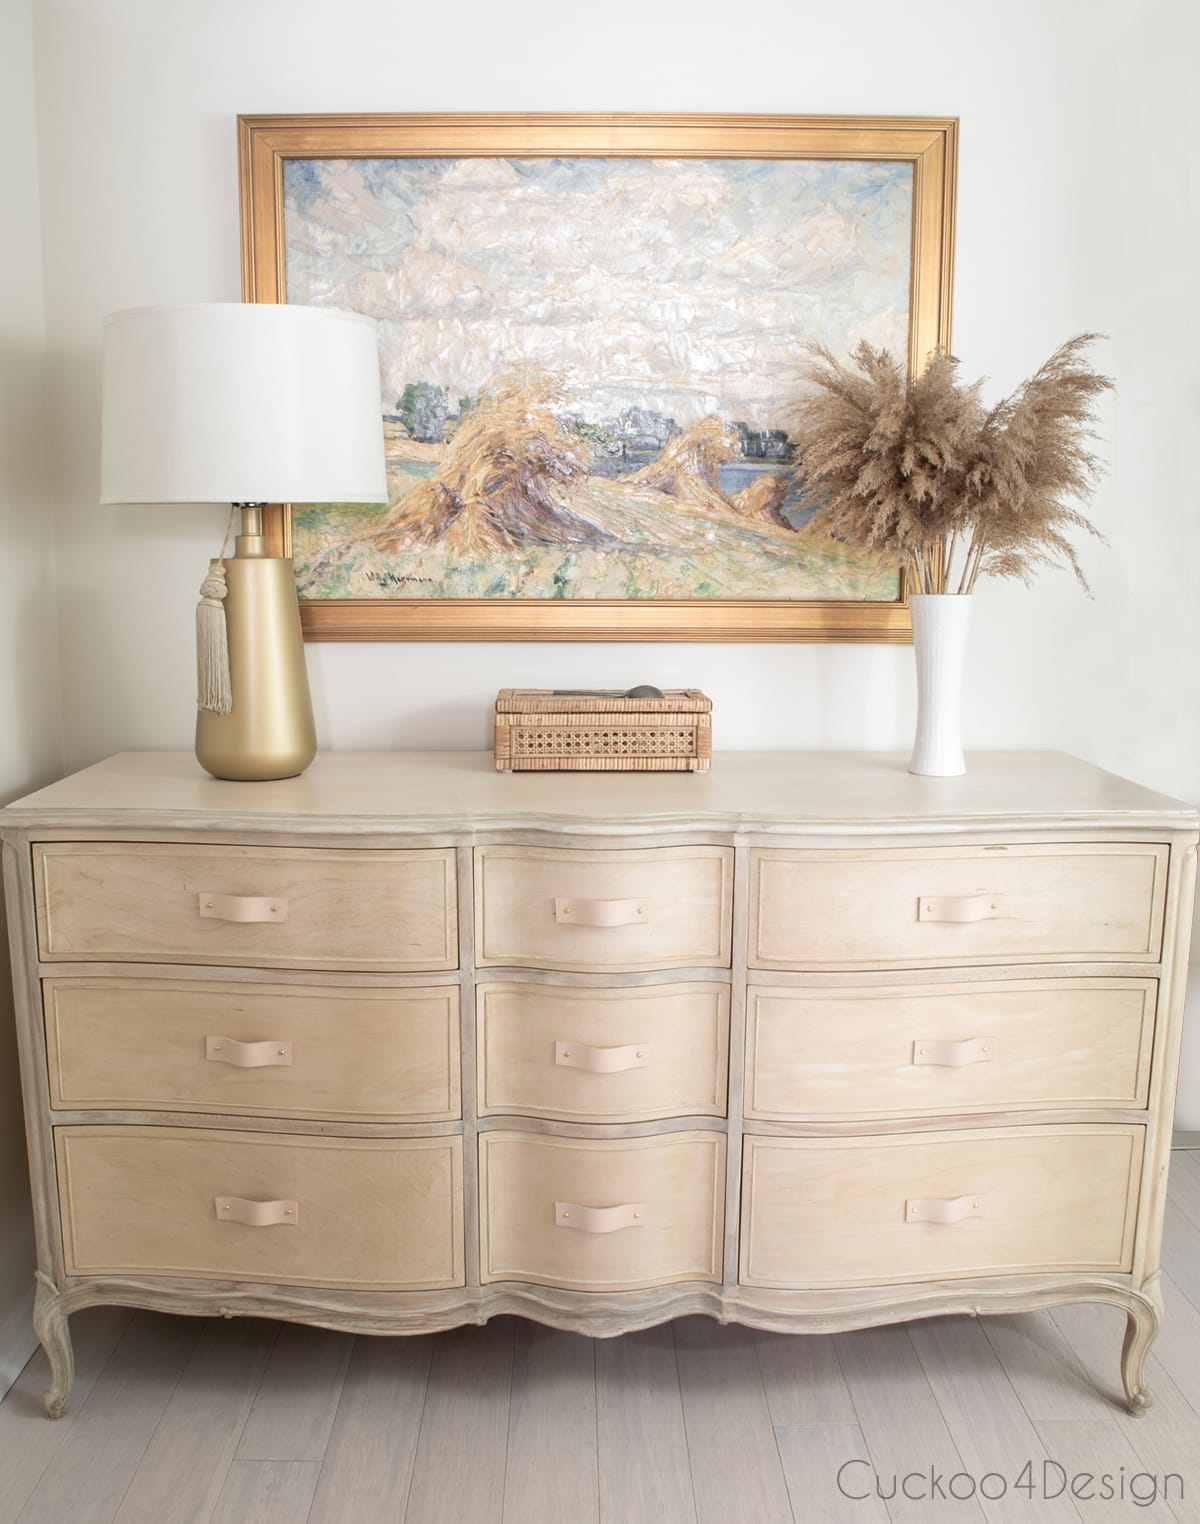
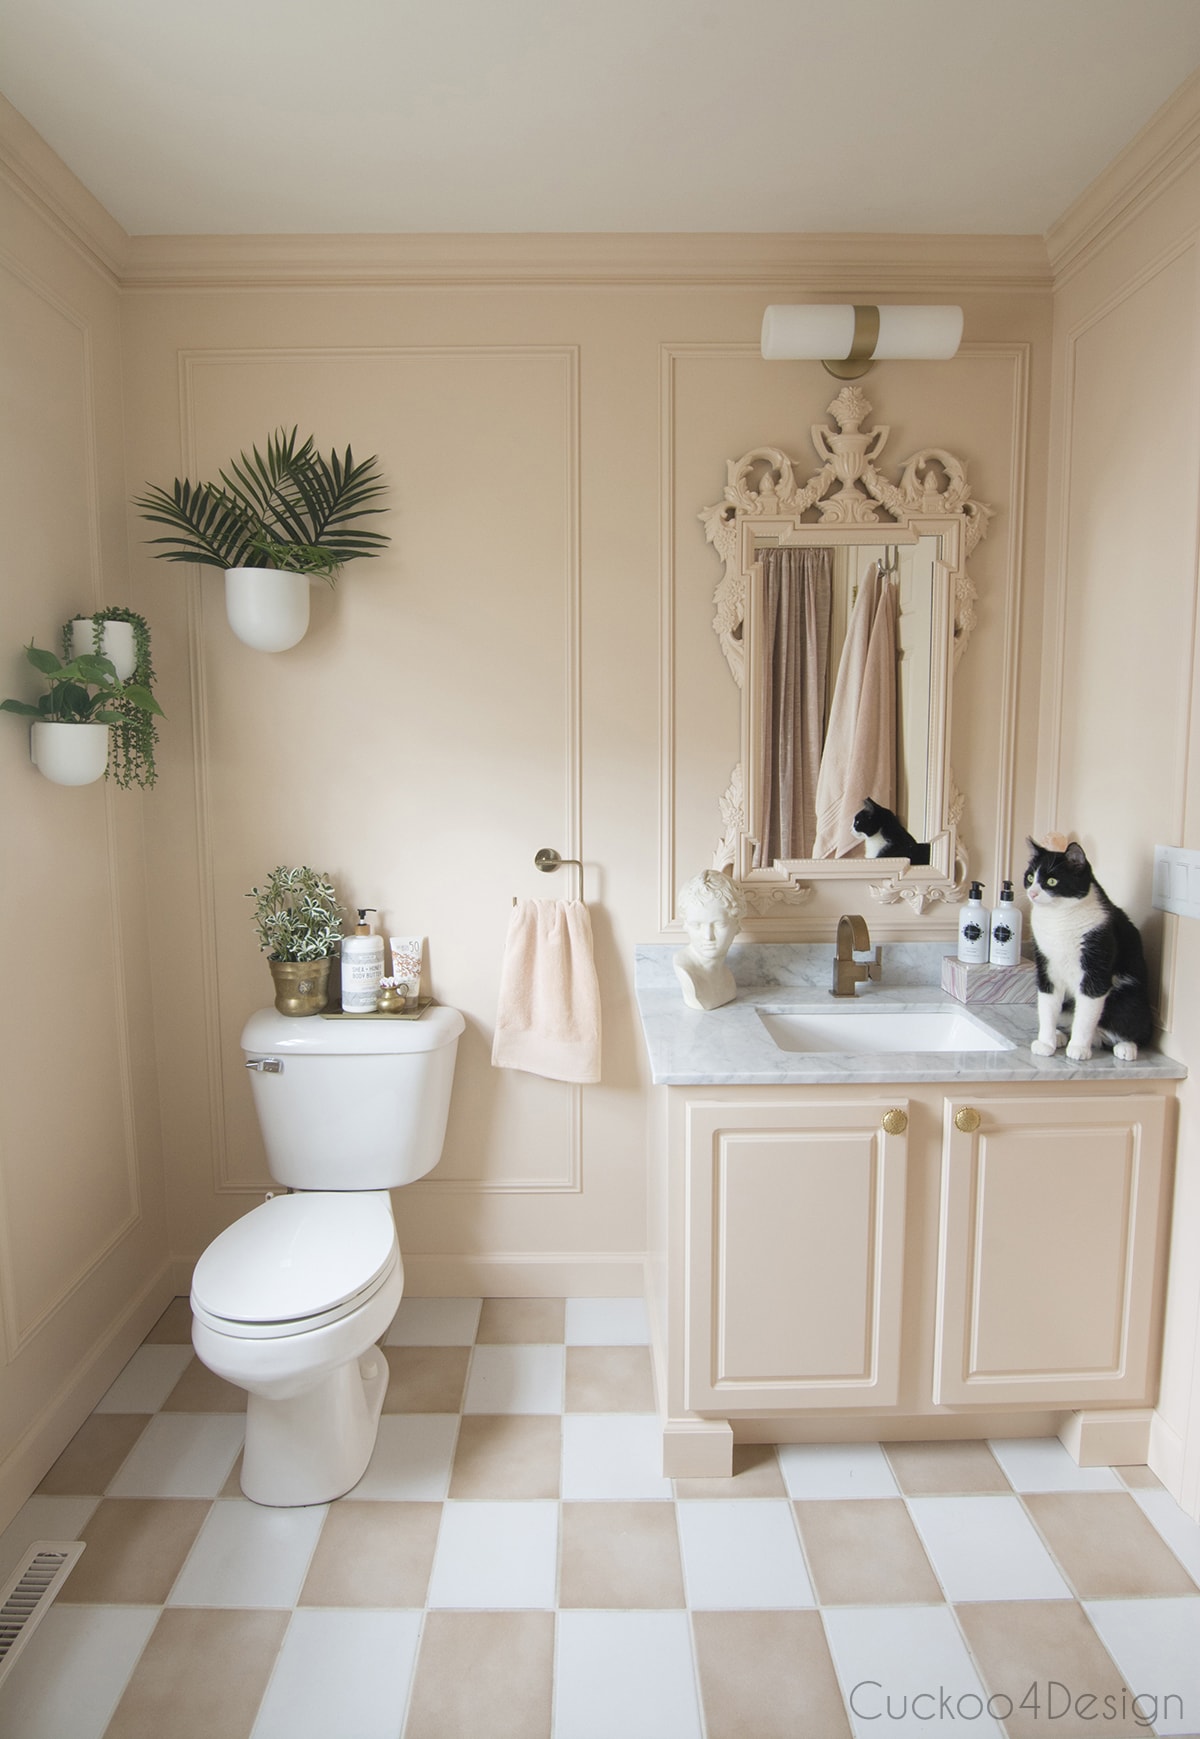
It is the hallway that leads to our kids’ blush pink bathroom and our bedrooms. Look how well the hallway looks with the bathroom!
My DIY grasscloth mirror is hanging on the outside of the bathroom, facing the bleached wood dresser.


I now love how the tone of the wood looks on the top. No more yellow and you can still see the grain.

Somehow Maya figured out that she matches everything.


RELATED: If you like the beachy light light-colored wood look like this then you might also like my new old chairs in the dining room. I wrote a blog post about how to repair a rush seat and to seal natural wood instead of bleaching or staining.

{UPDATE: check out how the bleached cherry wood desk turned out. It’s all done!}

Some of you have noticed that I have rustic pieces sneaking into my home lately. Like my wood bead garland, burnt wood art, and other things along that line. I attribute that to my new Karndean wood vinyl flooring, which is a little rustic as well, and I just love it so, so much.
Tschüß,

More of my furniture makeovers
- Super easy fluted molding hack for DIY fluted dresser makeover
- Peel and stick grasscloth wallpaper furniture makeover
- Painting tips and tricks for kitchen cabinets
- Raising a sofa with furniture casters to turn it into a dining settee bench
- Upholstering a button tufted chaise
- How to take apart a sofa to fit through door
- DIY upholstered headboard using curtains for our daughter’s room
Let me be perfectly honest! Your blog is incredibly interesting and informative. The hours you spend getting everything down perfectly just blows my mind! And that’s after exhausting hours doing the project. All I can say is THANKS!!
Wow thank you so much! I definitely love hearing that!
This is an amazing tutorial! So much attention to detail and loved your comparisons. You are my favorite blogger and look forward to your daily stories on IG, too! It is so ironic because I don’t ever do DIY projects or crafts!
Love how your dresser turned out! I’m also a fan of your leather pulls! I can’t wait to see your desk transformation!
Thanks Debbie, that is the nicest compliment!
Can this be done with MDF? If not, what are your ideas for updating MDF furniture? Thank you for your informative blog.
Hi Ann, sorry but this can’t be done on MDF. I think your only option is painting MDF furniture. I peeled the laminate off of my MDF cabinets and painted those. https://cuckoo4design.com/peeling-kitchen-cabinets/
Thank you
That dresser is so beautiful. You did an amazing job. It looks like an Anthropologie dresser! I love how you gave tips and explained what went wrong so that others don’t take the same steps and regret it. Great tutorial.
Thank you! I was ready to pull my hair out when things went wrong and I don’t want that to happen to others 😉
This sounds like A LOT of work but the dresser looks fantastic. I love the leather drawer pulls, as well.
Thanks Cindy! It is a ton of work
Looks great, Julia! I have a couple of pieces I’d consider trying this on, but lots of work!!!
Thanks Jen, yes it is a ton of work for sure
Wow, that looks like a ton of work! I have stripped dressers before and not my favourite thing to do. But your end result is amazing! I also love your painting above it, is that from Germany?
Thank you Autumn, it’s definitely not my favorite thing to do either. And yes the painting is from Germany. It used to belong to my grandmother. My great-grandparents were friends with the painter. His name was Willy Hermann (1985-1963)
I would never have thought to strip and bleach that style of dresser. Great idea and it looks so fantastic!
Thank you Arli!
Your hard work paid off. That is absolutely stunning!
Thanks so much Gina
Julia, What a beautiful job you did on this dresser! Thank you so much for the very detailed post on what to do and what NOT to do! It truly is a gorgeous piece and BRAVO on a job so well done!
Thank you so much Ashleigh
I love the way your dresser turned out, and I also love the leather handles you made for it! I love the color of the bleached wood. I can’t wait to see how your desk turns out!
Thanks Heidi, I’m waiting for products to arrive so I can finish the desk. That waiting drives me crazy 😉
this piece is SO incredible! I love the new look and love the hardware!
Thank you Cassie
Wow, what an absolute stunning transformation! Makes me want to try it out although I’m not sure I have the patience or talent for it! And like some others have said, it is so nice of you to have such complete detailed written instructions of what you did and tried.
Thank you Susan
Hi
I love the look of the dresser now! Congratulations on one amazing job.
I wonder how long did the whole process take?
I am always afraid of the commitment it would be to even start dong something like this.
Which part of the process was the most tiring?
I have some cabinets on the walls in my house – things that people used to do 50+ years ago.
Everything is wood, but it has this brown-redish tone and such a glossy layer of varnish painted on top of the wood.
I have been thinking of stripping this varnish off, and I would love to get a bleached look like yours, but I am just afraid of how much work it could be.
I had a woodworker look at it once and he said it would be easier to just make new cabinet doors throughout.
(between you and me, I think he was just lazy and thought his profits would be higher by making it from scratch).
I do not want to through away real wood – it is such a waist.
Hi Alessandra and thank you! It is definitely a lot of work but totally doable. You should check out my friend Jaime’s post on Instagram https://www.instagram.com/p/CAa8U1HpwvY/?igshid=krc75cjqi58n she is currently working on transforming her old cabinets in her laundry room. I can’t wait to see her blog post. But she is using a different product and I love the finish. She sealed them with rubiomonocoatusa in cotton white. I couldn’t use that same product because I had used a chemical stripper. I talked to the company and was told that for their product, you have to sand the finish off which was too late for me already. Her cabinets now have a bleached look and I love the door she shows in her post.
I agree your contractor/woodworker was probably not interested in stripping the cabinets for you. Good luck!
What a great job you did on that dresser! I’m waiting with baited breath for your feedback and tips on restoring your bureau (secretary’s desk). I have started to sand my one back, but haven’t progressed beyond that. I’m not sure what wood it is but it looks like an oak veneer. Do you have any tips on sanding back veneer?? At the moment I’m sitting on the fence about finishing, as I’m leaning toward the raw timber look. Looking forward to following your journey. Cheers heather x
Hi Heather, I’m dying to finish my dresser. It’s been sitting here in its raw state and I’m waiting for a lime wax I ordered on Amazon and that is stuck somewhere a town over at UPS since Friday. I’m so annoyed. I will try the wax on the side of the drawers first. Mine has some cherry wood that keeps staying red no matter how much I bleach and I’m trying to take that down a notch. Hope it hets here soon.
Hi Julia. That’s frustratingly near, yet so far. Please do share the deets of your bureau’s restoration journey when you finally get there. I imagine that, it being made from a red wood, it’s bound to present a few challenges to bring it down a notch, but I can’t think of anyone better equipped to sort out that particular blip, but you! Good luck, my friend. 😀
OMG…I’m so happy you decided to remove the paint. My husband & I worked thru the 1970’s stripping all of our “cheap” wood garage sale finds that the prior generation had painted. Its all full circle and wood furniture (re imagined) will take the place of the IKEA crap.
Yes, all that paint needs to come off again for sure. My daughter still wants the Ikea crap for her room and I’m fine with that LOL. She will probably end up ruining it again anyways like she did with the one she has right now. Thanks Barabara.
This is such a cool technique. I would love to do something like this on our kitchen table here in Draper, UT. We are doing a mini kitchen makeover this month with some professional cabinet refinishing, and fixing up our table like this would be the perfect finishing touch for the space. Thanks so much for sharing!!