Hi friends! I know I usually don’t post on Thursdays but yesterdays post (click HERE) would have just been way too long, so I decided to split it into two.
I would not call this a tutorial since most upholstery pieces are slightly different in some way and I learned along the way.
I had many mishaps during this project.
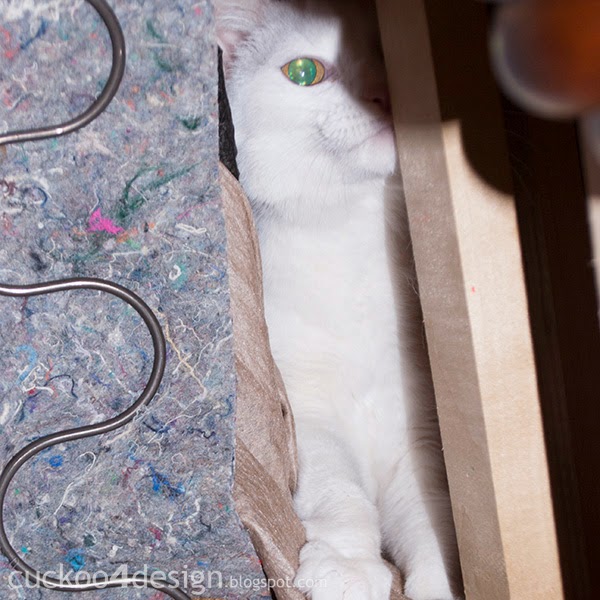
One of my most nosy cats got stuck in the frame while exploring and she was really panicking too. It took me a while to get her out:
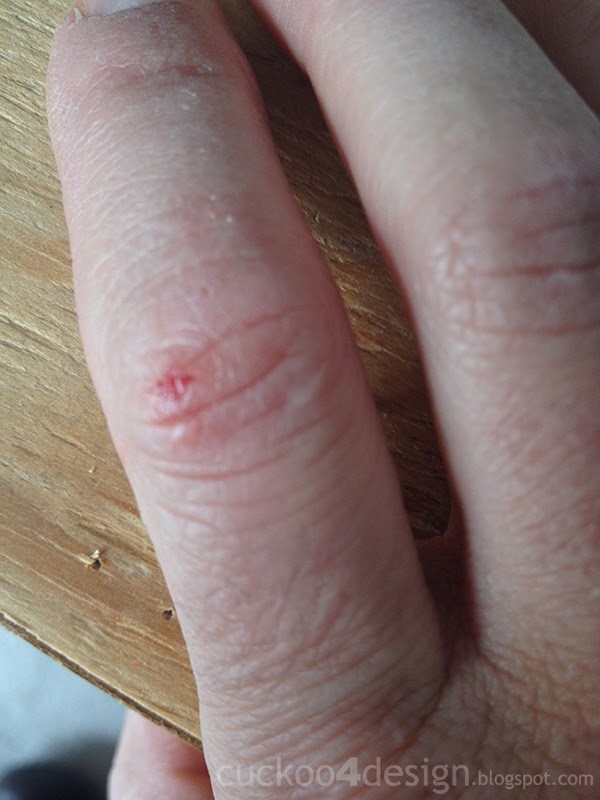
Another major thing I just noticed three nights ago is that I lost all the photos of the disassembly process which is in true Julia (Youleeya) fashion. I paid such attention to the disassembly process and even sketched it out which so came in handy. It took such a long time to take this chaise apart. And my knuckles looked like this after removing all the staples with theupholstery pliers:
I was glad to have my little sketch to show me what to do when it was time to put it back together. And it is my biggest advice to anyone who wants to attempt to upholster anything: PAY ATTENTION TO THE DISASSEMBLY PROCESS. 🙂 Ok?
And I’m trying to share some of the details of what I actually did.
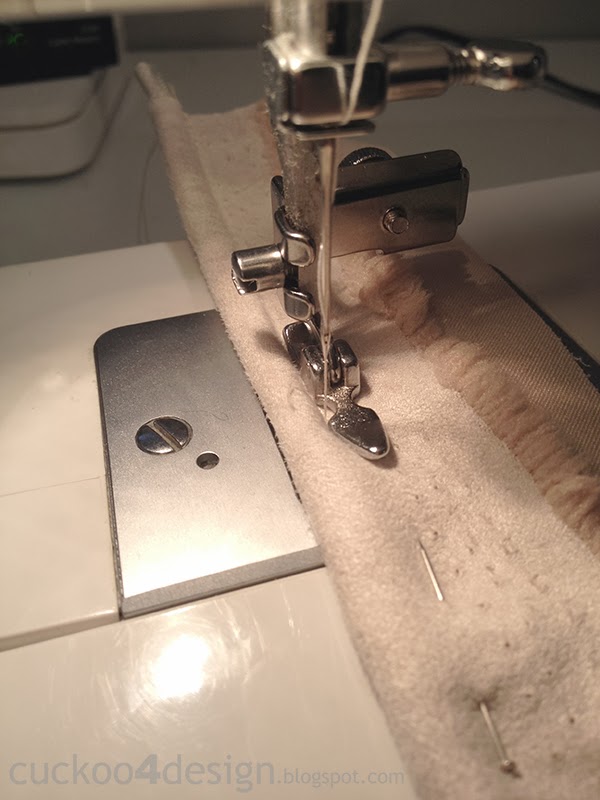
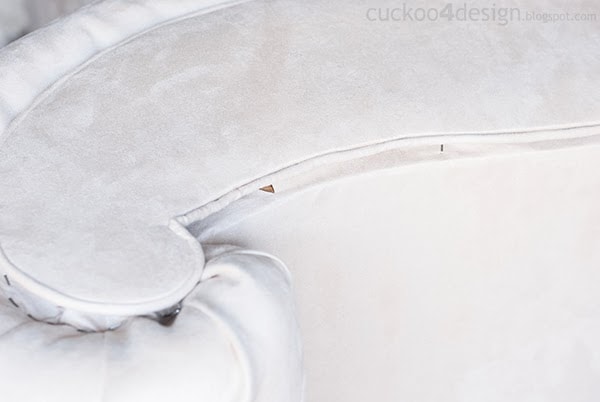
I had to learn several things along the way and I’m glad my blog friends were there to share their experiences with me. My first issue was trying to find a sewing machine foot to sew the piping. I’m glad I listened to my friends who told me that a zipper foot would work too and it sure did:
Click HERE for a great tutorial on how to sew welt cording.
Another one was finding sturdy upholstery buttons. The ones you can find at the craft and fabric store are made out of plastic and I didn’t want that. I know I was going to have to put a lot of pressure on them and was afraid that plastic couldn’t handle it. So I asked around and my friend Jennifer from “Dimples & Tangles” told me to just have them made at a local upholstery shop since they have the large metal button presses.
I was lucky to find a local upholstery shop in town. I could have stuck around there for days to acquire some knowledge from the nice owner who does some amazing work.
He made me the buttons:
And after attempting to sew my seating cushion and realizing that my sewing machine couldn’t handle the multiple layers I decided to have him make that for me as well.
And I’m so glad I did. The buttons and seat cushion were the only thing I didn’t make myself and I’m really glad. At $85 for the cushion and buttons I’m really happy.
This is a way for anyone to make an upholstery project doable and affordable. Have you ever gotten an estimate for an upholstery job? It’s so expensive! But after doing this myself I have to say the price is so justified. It’s so much work!
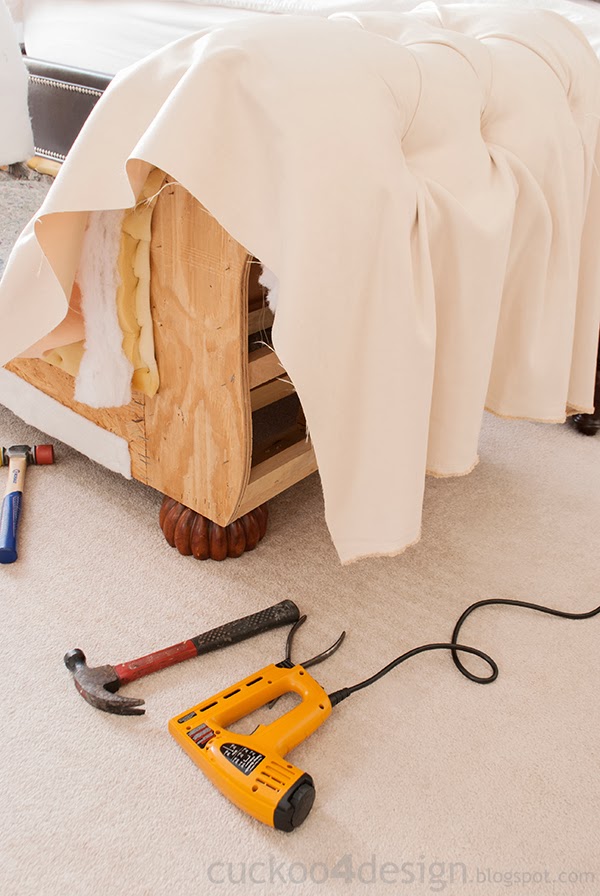
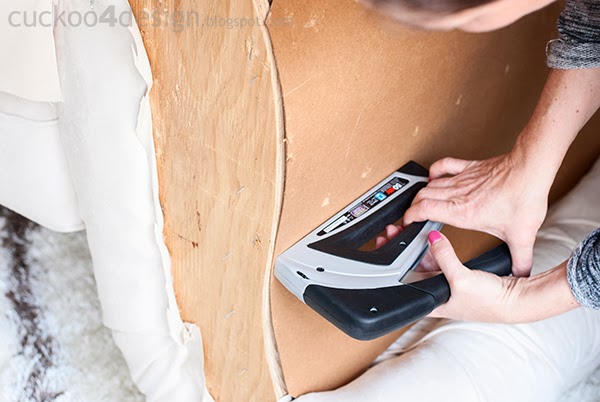
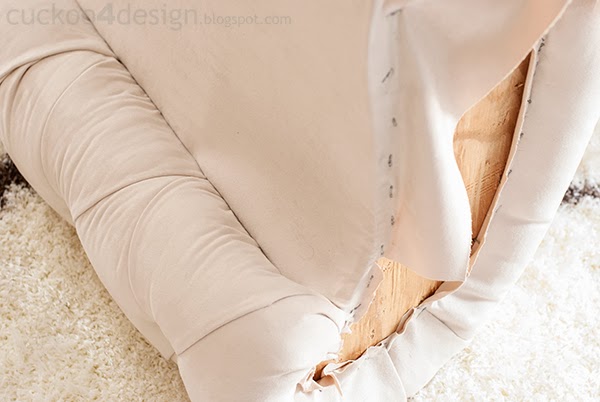
I also had to rebuild one of the arms since it had collapsed and the wood had to be repaired and attached again:
When it was time to start with the upholstering, I started with the arms. One of the arms had to be redone because I accidentally poked a hole into the fabric. Yikes, can you hear me use bad language?! I wasn’t happy at all.
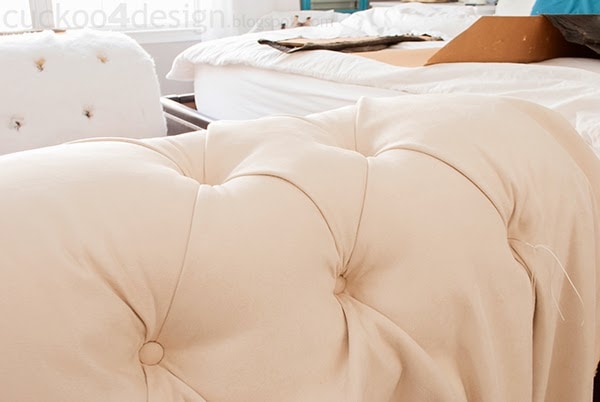
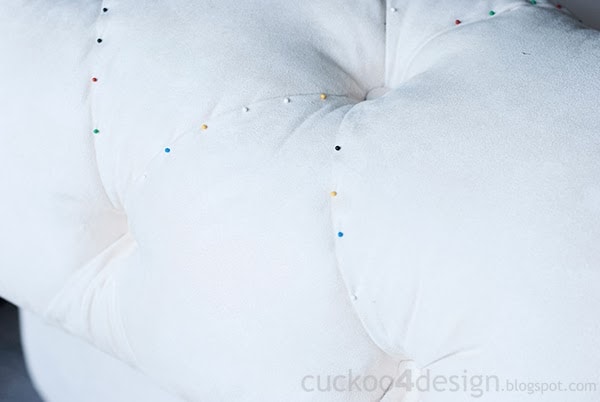
I worked my way from the center out with the tufts:
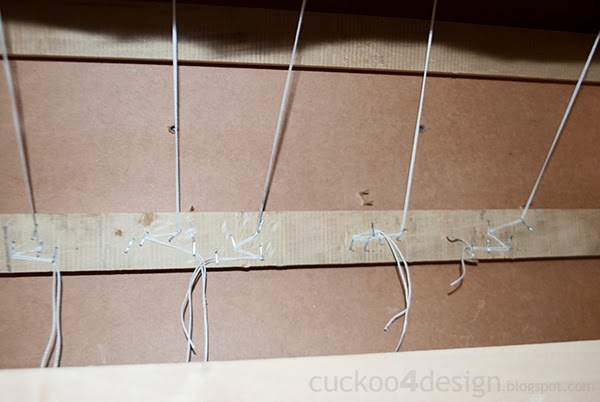
And I used pliers to pull the button strings tight.
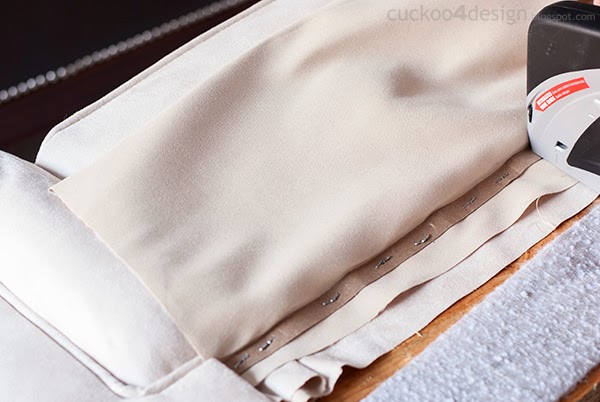
I used two types of staple guns for the job. One electrical one and one hand held one because it was easier to get into tight spaces with.
The diamond shape of the tufting falls into place pretty naturally. When the arms were done, I went over the tufting again and actually used fabric glue to seal the pleats. The original diamond upholstery of this chaise had been sewn but I wasn’t going to attempt that and I learned that fabric glue is my new best friend.
I held the seams in place with needles while the glue was drying. You have to be so careful not to make a mess with the glue.
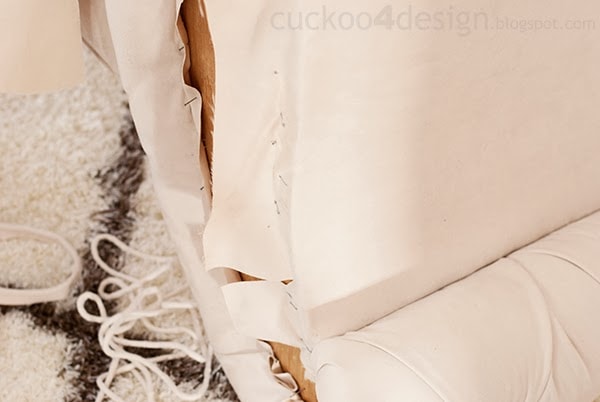
Then I moved on to the sides.
I could barely hold the stapler with my tiny hands. I wear ring size 4.5! Yup they are small!
Then it was time to attach the front of the chaise:
Some of the staples didn’t go in so nicely. Can you tell?
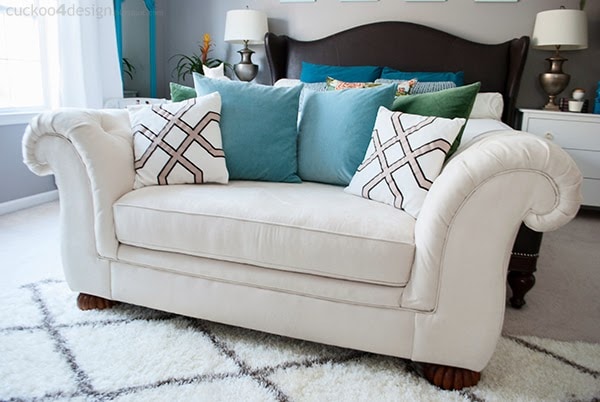
But after this last step the chaise was all done.
I don’t like how I wasn’t able to match the seams on the front the same way it had been before but I did the best I could.
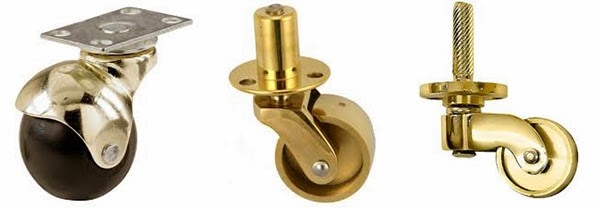
I would still love to replace the feet with some brass furniture wheels like you can see on some Chesterfield sofas. Wouldn’t that look cool? But I don’t want to spend around $100 for them 😉
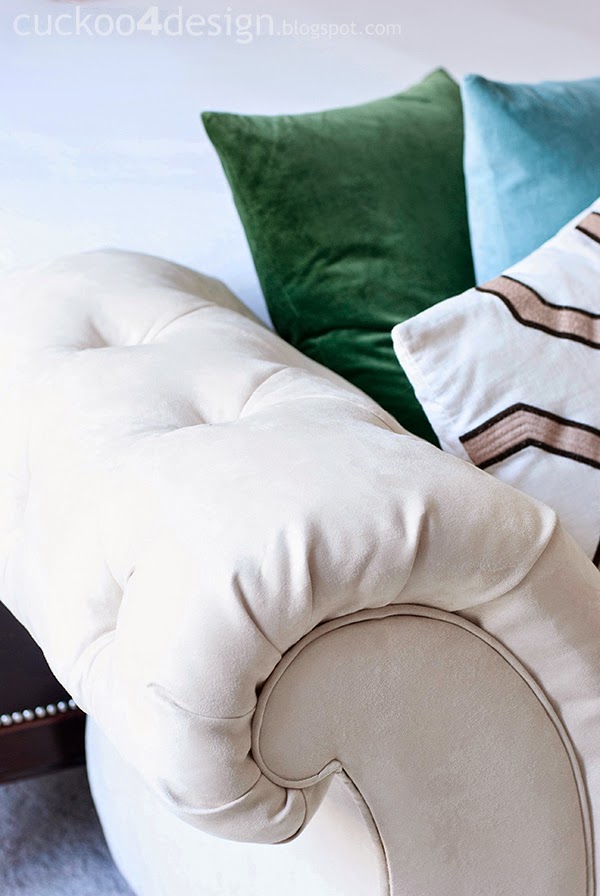
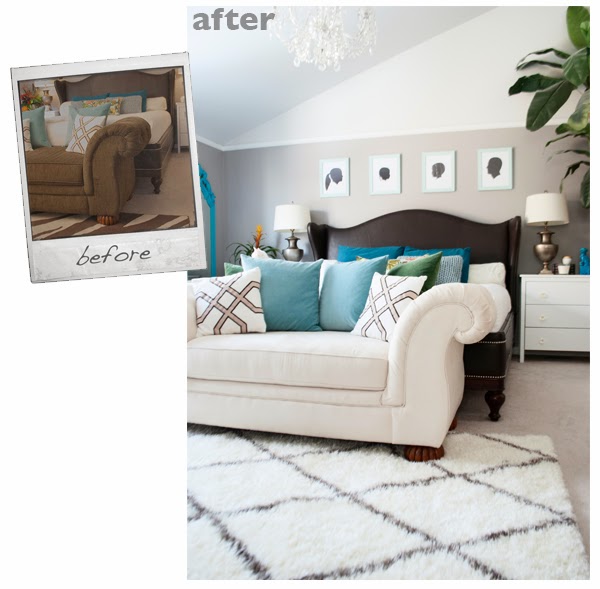
Click HERE to see more bedroom photos in yesterday’s post.
If you expected a full blown tutorial, then I’m sorry but it was hard trying to concentrate on what I was doing an trying to come up with a tutorial.
There are some more small changes to come in our bedroom so stay tuned.
Talk to you tomorrow.
Tschüß
(Youleeya)
25 Comments
I wish you could see me scrolling back through this post over and over…I’m stunned—-like jaw dropping —eyes popping out of my head, stunned! Holy cannoli woman! You are AMAZING!!!!!!! I love this more that I can tell you…wow. wow. wow. xo
Looks beautiful! Thanks for all the information! I did some chairs for my entryway about a year ago and I thought it was super hard. Now, after reading through this…it’s bringing it all back. I got a new/old mid-century chair that I was debating on whether to do it myself or hire it out…HIRE it out has now won. It looks great Julia!
You are completely amazing. I wouldn’t even know where to begin. And I totally agree that wheels would be perfect. And your poor kitty!!! That picture is priceless!
WOW I’m so impressed. We have done small upholstery jobs… nothing quite like this. Pinning this to show my husband later whom I’ve deemed the master tufter. He will be super impressed. Great job again.
BEAUTIFUL!!! Great job Julia! It was definitely worth all the skinned knuckles and arm re-do! I’m wayyy to chicken to try a sofa, let alone a Chesterfield.
Three cheers for perseverance! You definitely had some obstacles with that one. I crack up every time I see that photo of your cat! Thanks for the mention, I’m glad you found someone to do them!


I wish you could see me scrolling back through this post over and over…I’m stunned—-like jaw dropping —eyes popping out of my head, stunned! Holy cannoli woman! You are AMAZING!!!!!!!
I love this more that I can tell you…wow. wow. wow.
xo
Totally in awe of you 🙂 Amazing job!
Amazing job! The button tufting is so beautiful. I think the brass feet would look really cool but it is also great just the way it is.
Looks beautiful! Thanks for all the information! I did some chairs for my entryway about a year ago and I thought it was super hard. Now, after reading through this…it’s bringing it all back. I got a new/old mid-century chair that I was debating on whether to do it myself or hire it out…HIRE it out has now won. It looks great Julia!
You are completely amazing. I wouldn’t even know where to begin. And I totally agree that wheels would be perfect. And your poor kitty!!! That picture is priceless!
Angela @ Number Fifty-Three
SO impressive, you are the queen of DIY!!
you have been elevated to hero status in my eyes!
Wow! How’d you get the piping so straight?! Great job. Love how fresh it looks now. 🙂
WOW I’m so impressed. We have done small upholstery jobs… nothing quite like this. Pinning this to show my husband later whom I’ve deemed the master tufter. He will be super impressed. Great job again.
Oh my gosh, that is a ton of hard work!!! Looks wonderful!! And so glad your kitty got out of there okay… 🙂
Julia, I know how hard it is to reupholster something and this is a very complex piece! You did an incredible job and it looks fabulous! Well done!
great job! I agree, it’s best to share tips verse a tutorial because everything piece is different. 🙂
Wow that is an amazing job you did. What a difficult piece to learn on too. I am so impressed. It looks supar awesome!!!
AWESOME, AMAZING, BEAUTIFUL ……..I could never, ever attempt such a project. Congratulations!
super impressive! seriously!
BEAUTIFUL!!! Great job Julia! It was definitely worth all the skinned knuckles and arm re-do! I’m wayyy to chicken to try a sofa, let alone a Chesterfield.
I can’t believe what you were able to accomplish! Good for you : ]
How amazing! And I know I saw some castors at ACE hardware. Granted the wheel was black but the metal was gold and I think that’s good enough!
Seriously – awesome. This piece looked like it was a beast to do, plus your stuck cat, and fabric hole mishap. Consider me impressed!
Three cheers for perseverance! You definitely had some obstacles with that one. I crack up every time I see that photo of your cat! Thanks for the mention, I’m glad you found someone to do them!
Wow!!! I can so appreciate all the work you put into this and I’m in awe at how it turned out!
I’m so impressed by your upholstery skills and your willingness to even tackle such a big project! Well done lady!!
I had no clue that tufting should/could be sewn or glued! I’m so glad you shared this! You did such an amazing job Julia!
Wow that looks like a lot of work! I bet you are so glad to have it done! You should feel extra proud of yourself. You did an amazing job 🙂
I think it’s beautiful. What an accomplishment!