

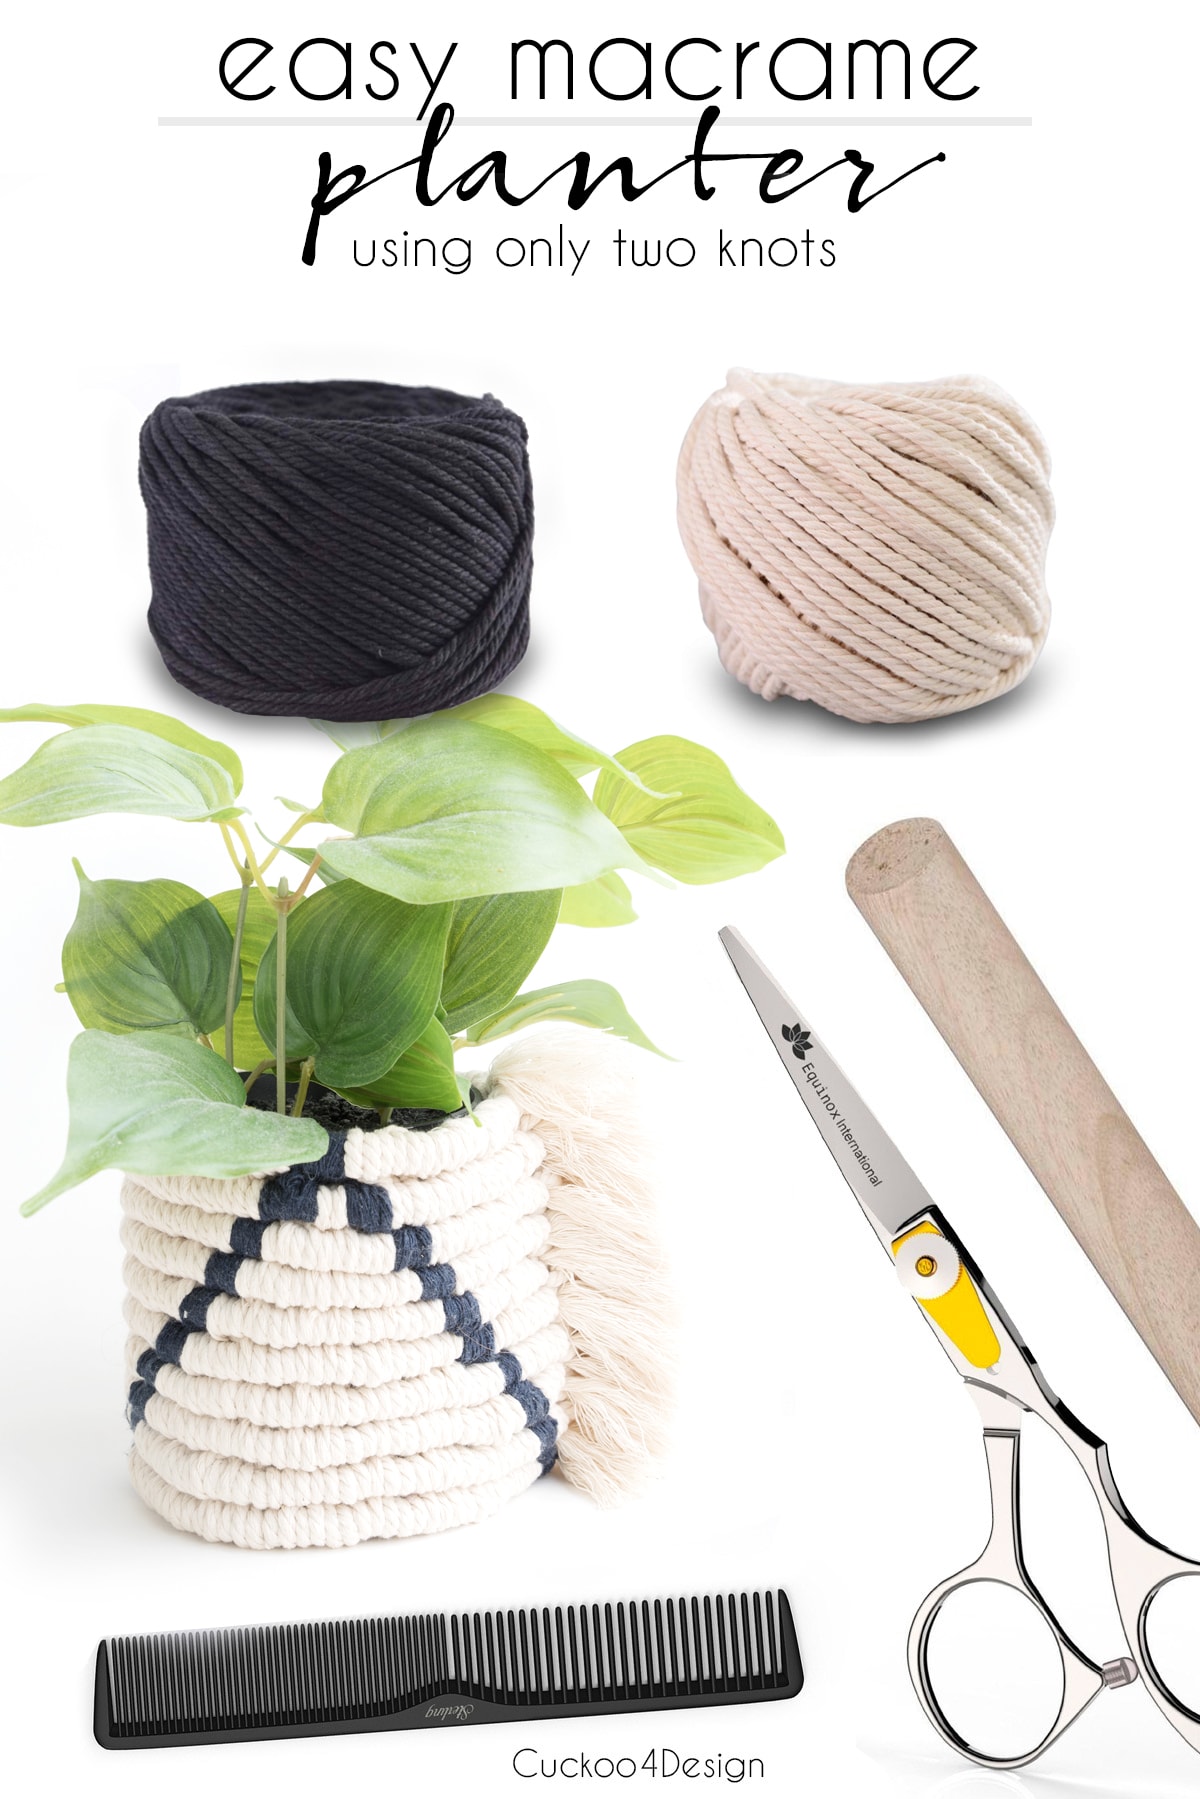
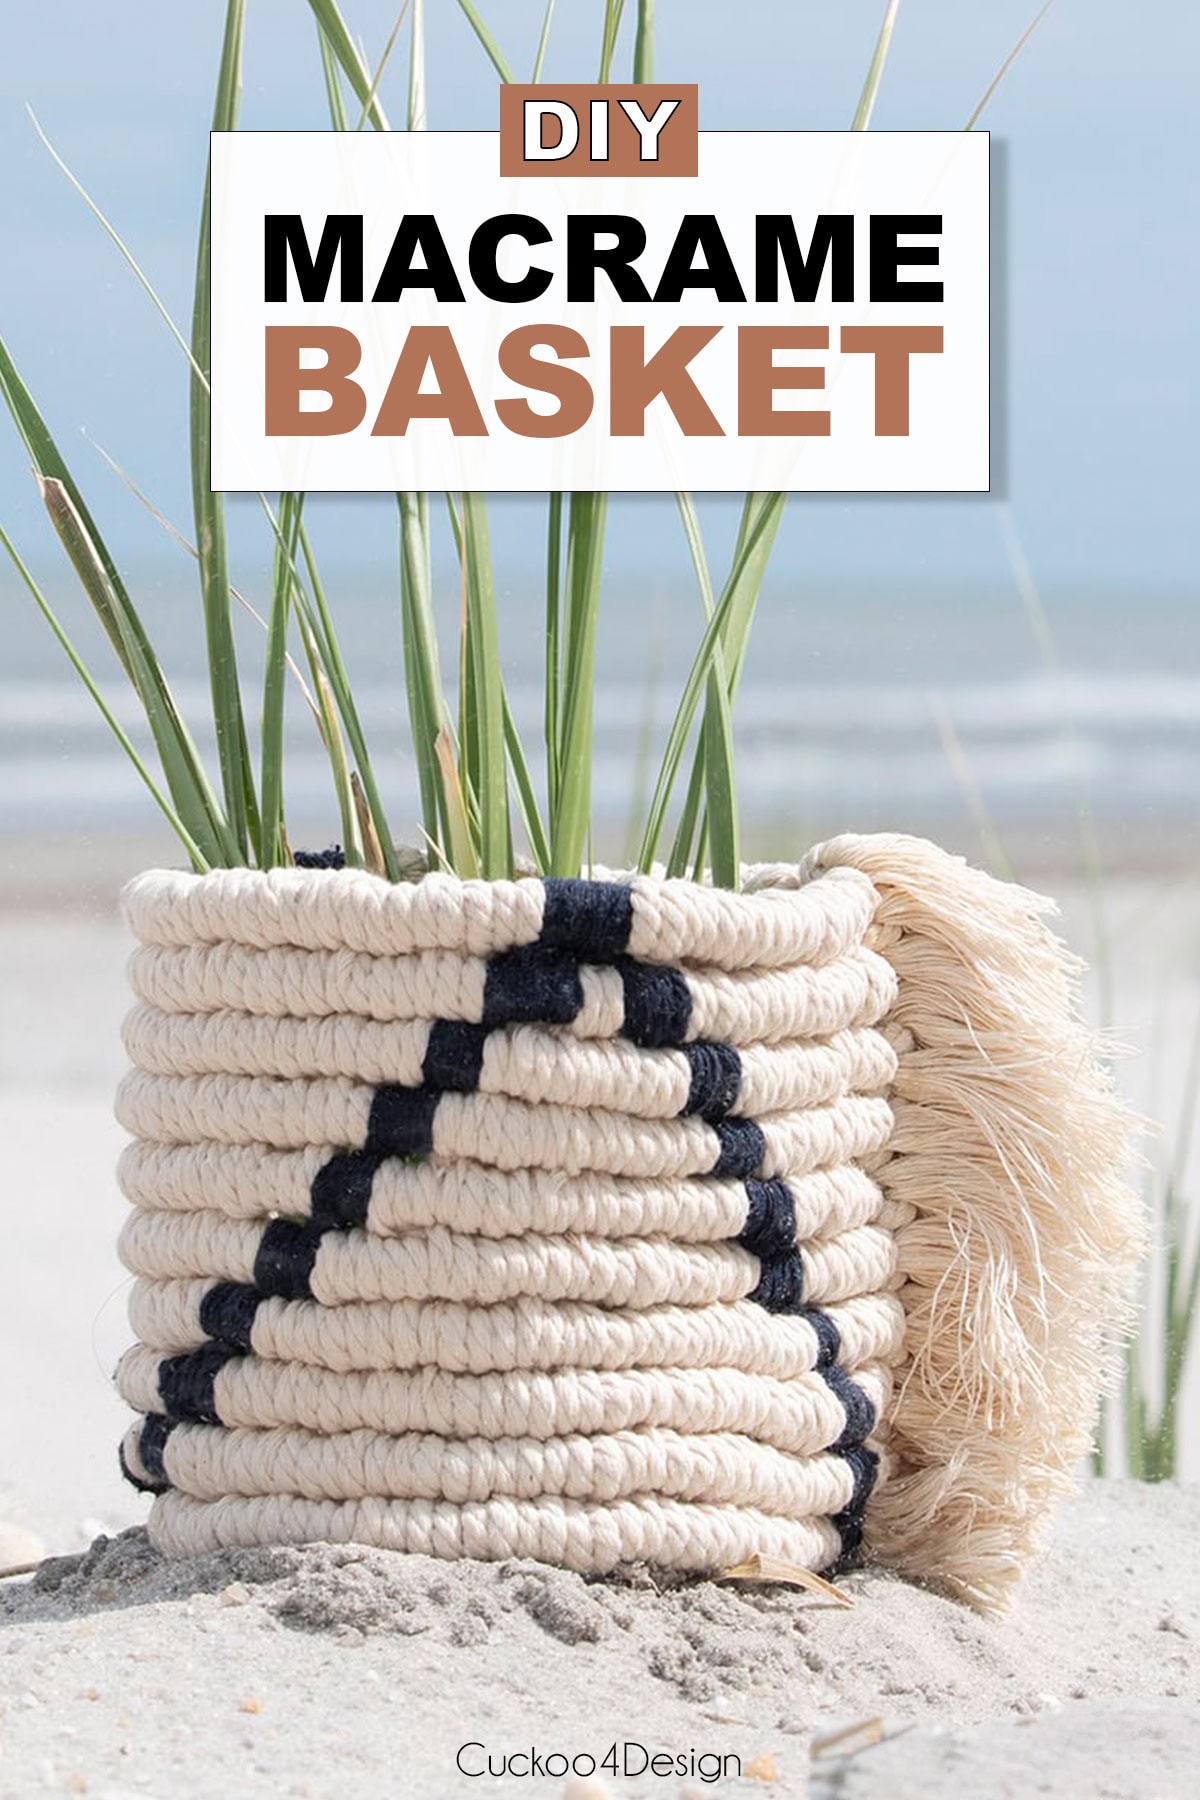
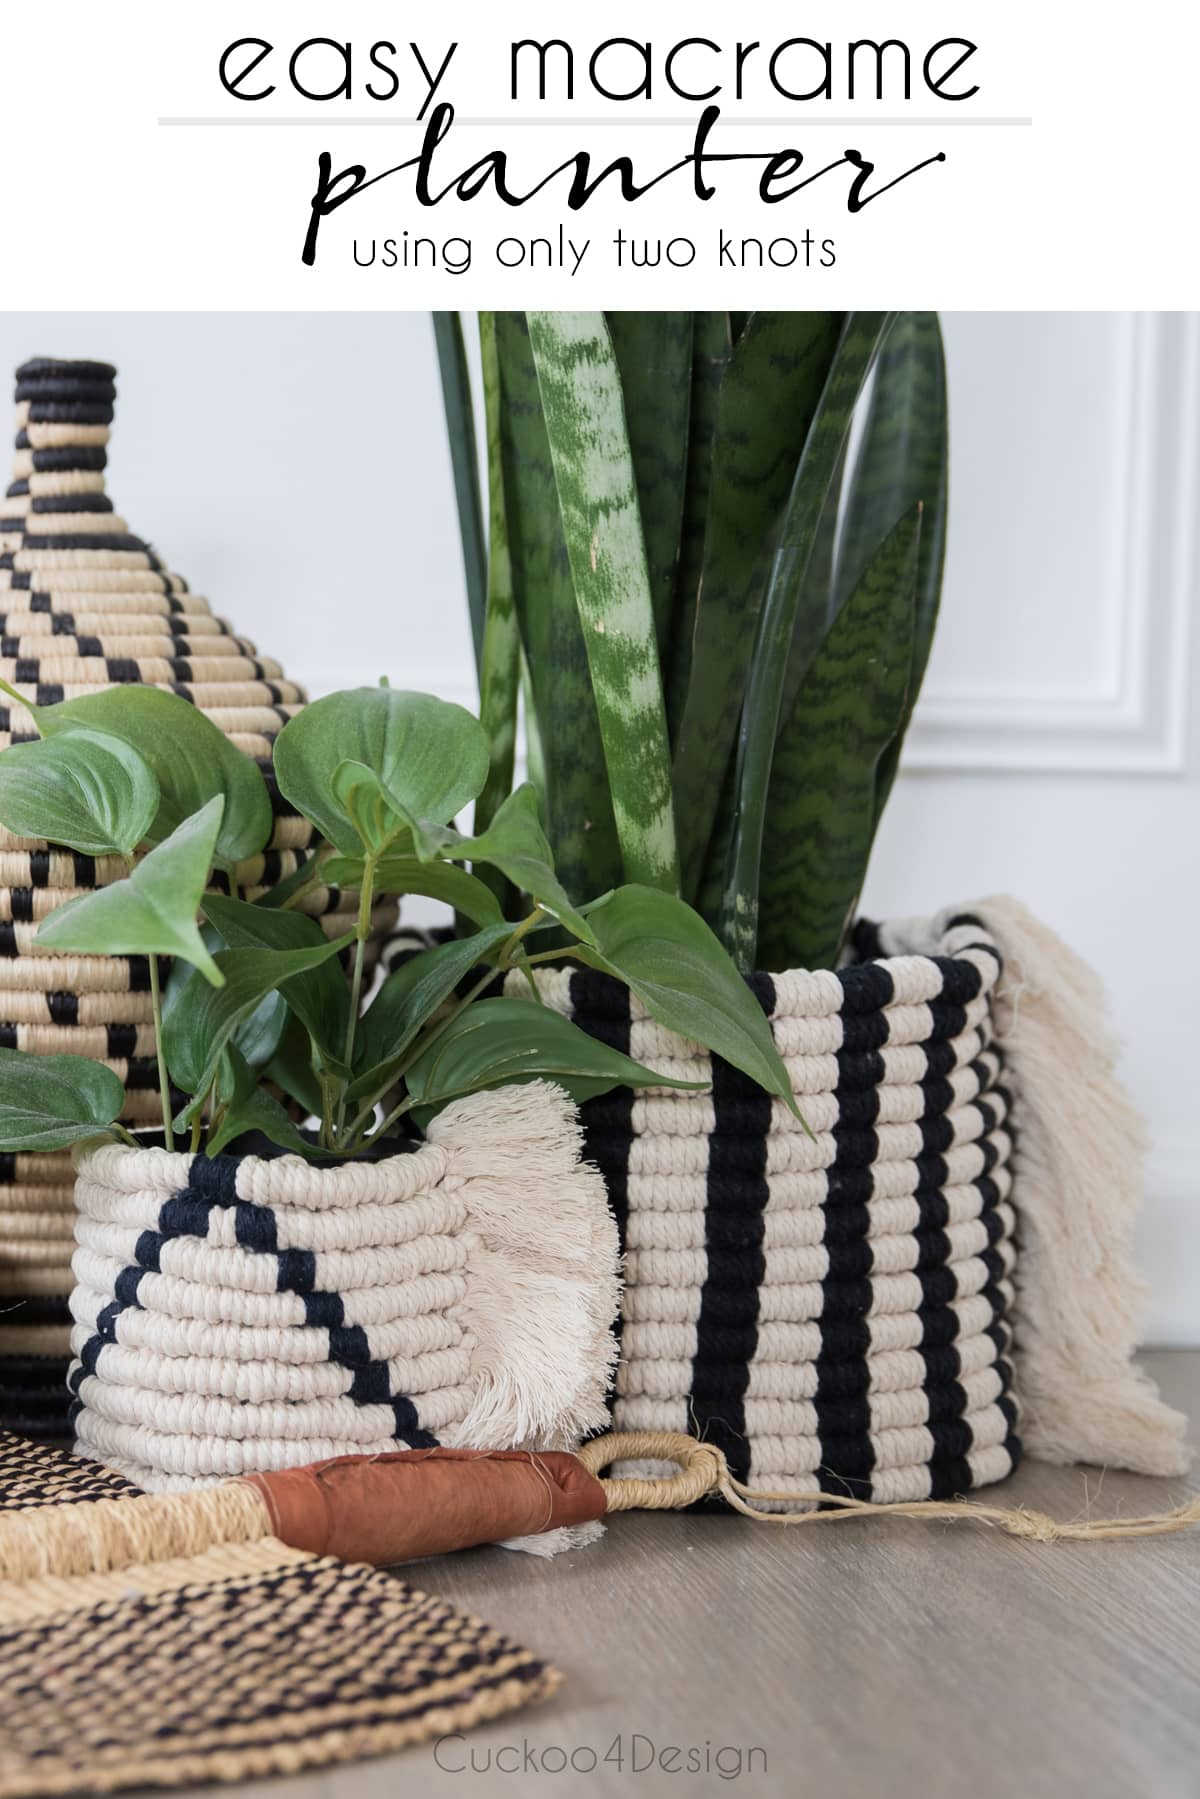
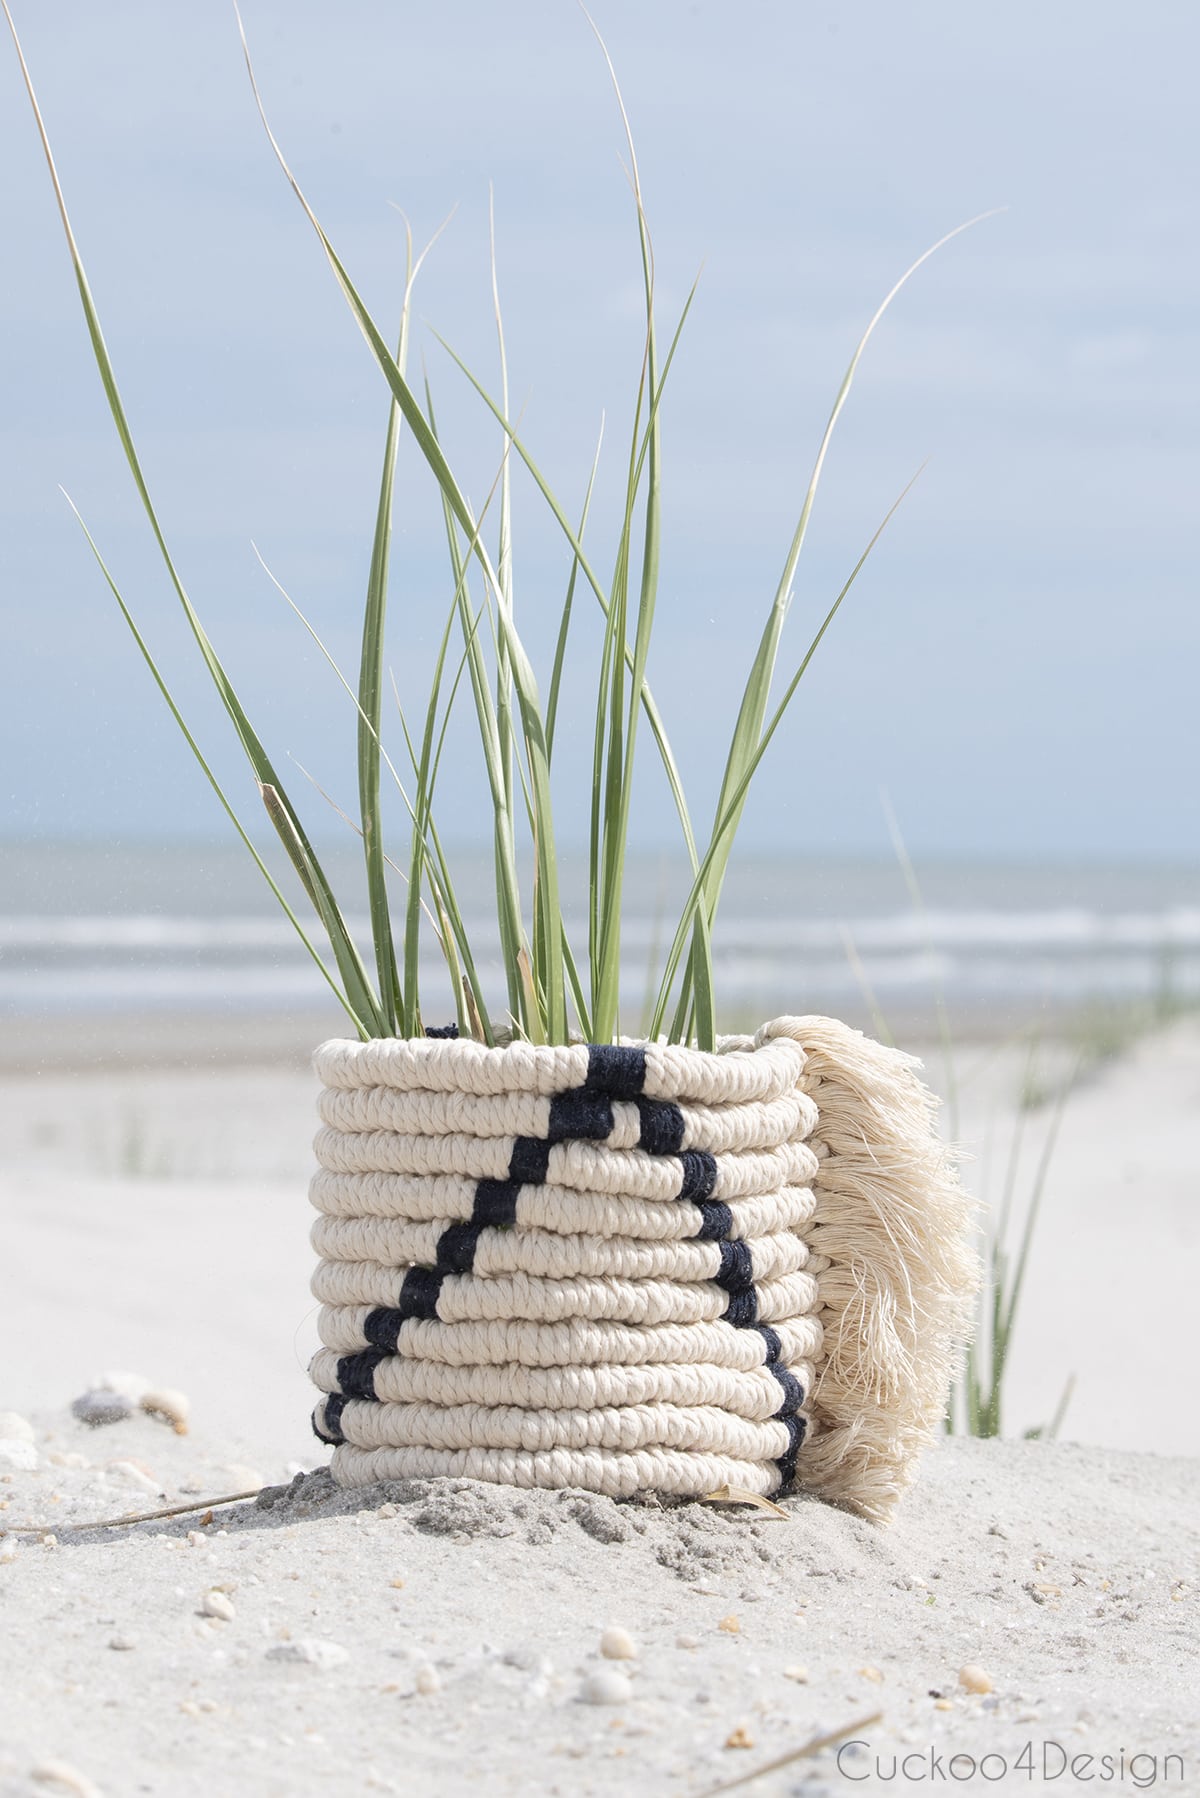
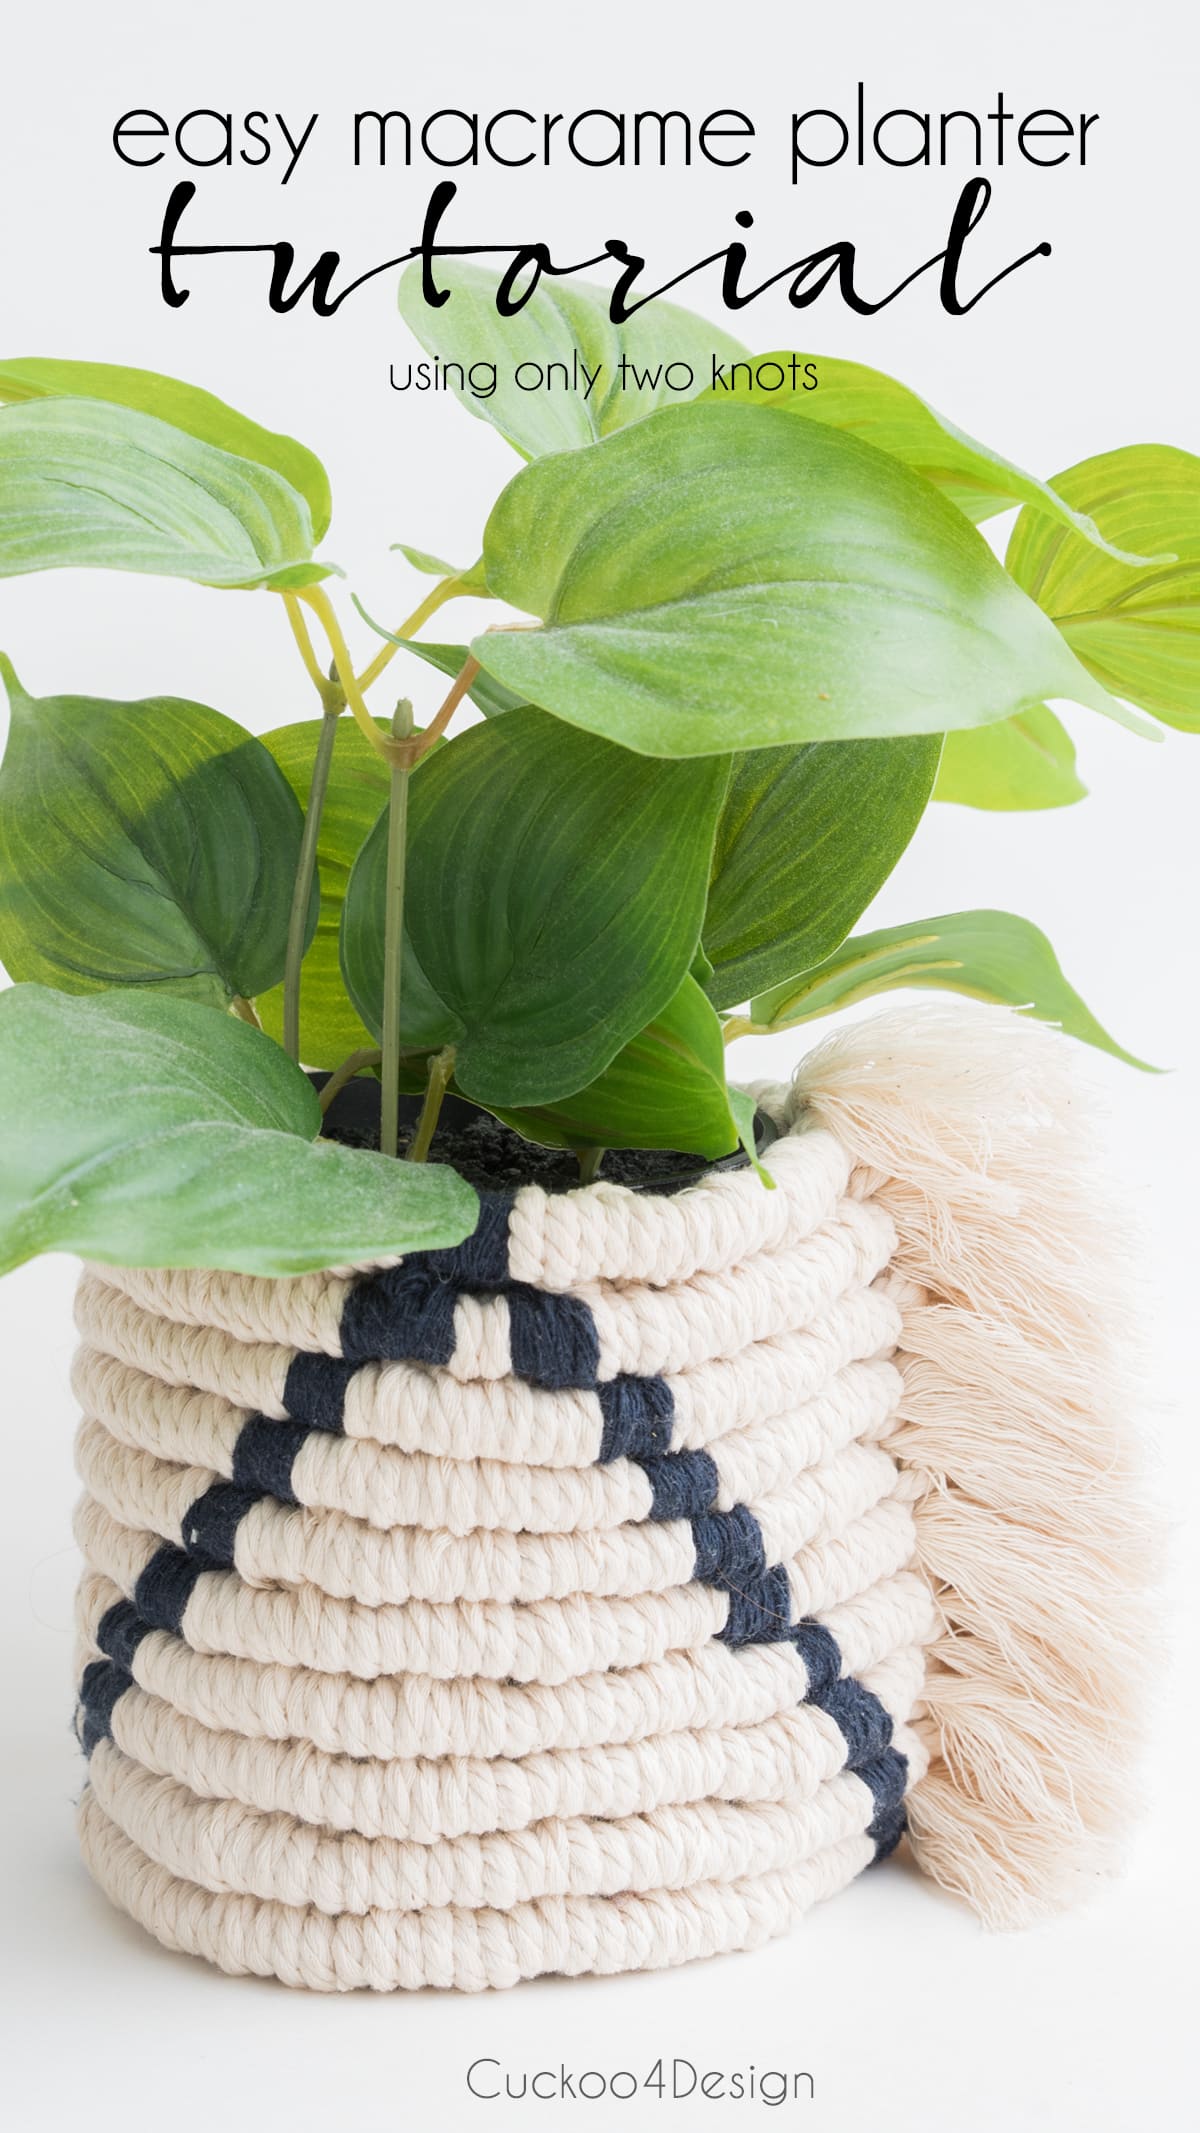
Easy DIY Macrame Basket Using Only Two Knots
This easy DIY macrame basket uses only two simple knots and can be made in any size to fit any existing pot. Free pattern and video tutorial below. You can create different macrame basket patterns and color combinations depending on how you arrange the knots. It is inspired by my favorite black and white African woven baskets and works as a planter sleeve that slides over an existing pot with an open bottom. The best thing about macrame is that you can just unravel everything and start over if you make a mistake, so don’t worry about it. Check out my other beginner macrame tutorials, like my macrame feather and simple macrame plant hanger, for more ideas.
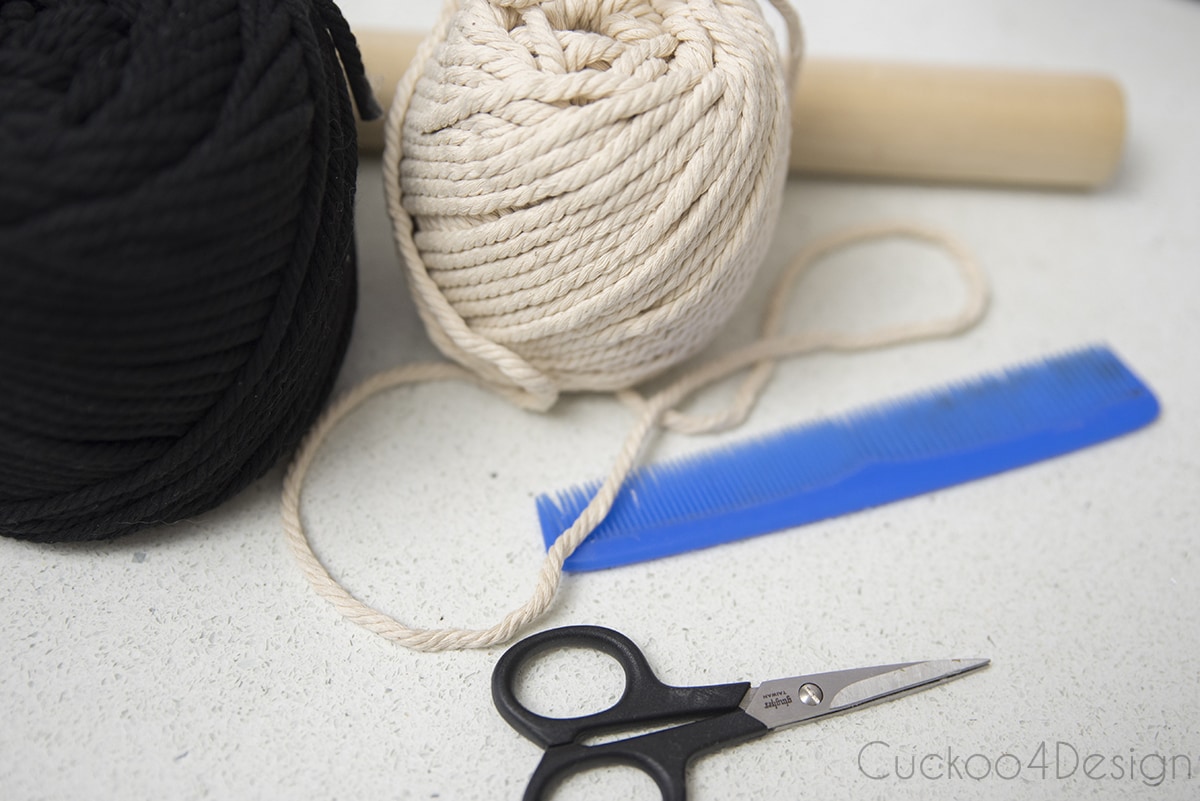
Craft supplies needed for this easy free macrame basket pattern
This post may contain affiliate links from which I will earn a commission at no extra cost to you. View my full disclosure policy.
- macrame cords (I use two different 4 mm cord colors; my favorite combo is always black and white/ivory)
- craft scissors
- comb
- 1″ or 1.5″ wooden dowel rod
Video Tutorial
Below you can find the step-by-step-video tutorial. If it doesn’t load for you for some reason, then you can watch it on my YouTube Channel instead.
Music from https://filmmusic.io: “Bossa Antigua” by Kevin MacLeod (https://incompetech.com) Licence: CC BY (http://creativecommons.org/licenses/by/4.0/)
Step-by-step macrame planter basket instructions
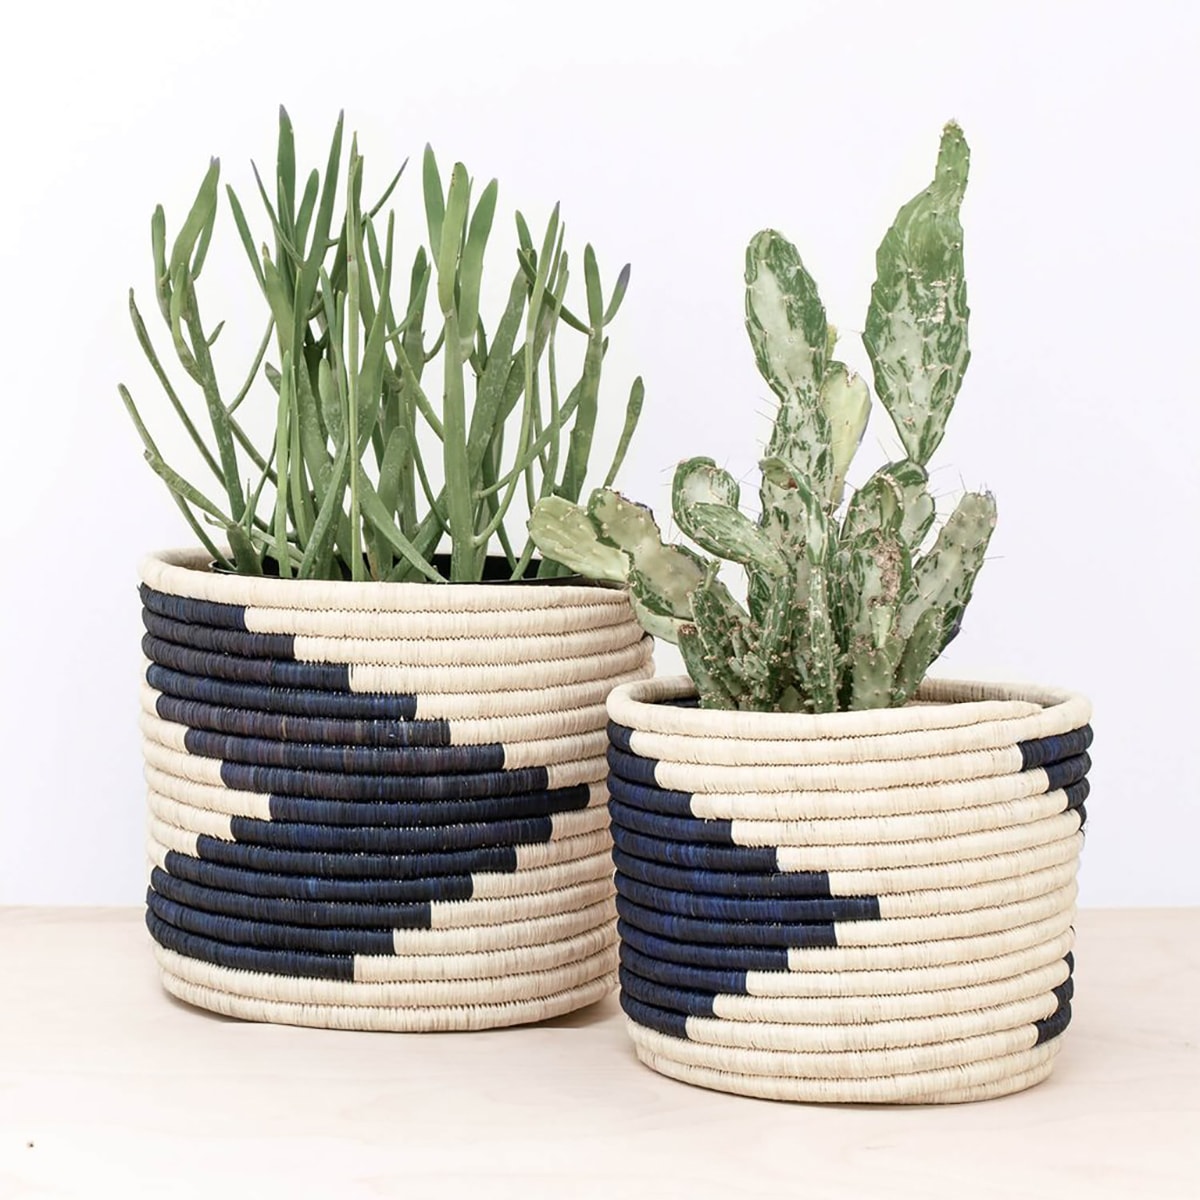
This macrame basket pattern is inspired by my favorite black and white Rwanda Kiondo baskets that I have in several spots of our home. This macrame basket tutorial uses a repetitive technique, which actually makes it perfect for an evening in front of your favorite show. I always use cotton cord for my projects since the feel and look are much nicer, though synthetic cord works well for outdoor versions like my macrame solar lantern, since it doesn’t rot.
The project is as simple as lining up a row of Lark’s Head Knots on the dowel rod and then following those up with rows of Double Half Hitch Knots, also known as Vertical Clove Hitch Knots. Only two knots are needed for the entire basket.
Note: I am not giving specific cord lengths in this macrame basket pattern because the size depends entirely on your pot. Measure the circumference and height of your planter before you start, and cut accordingly.
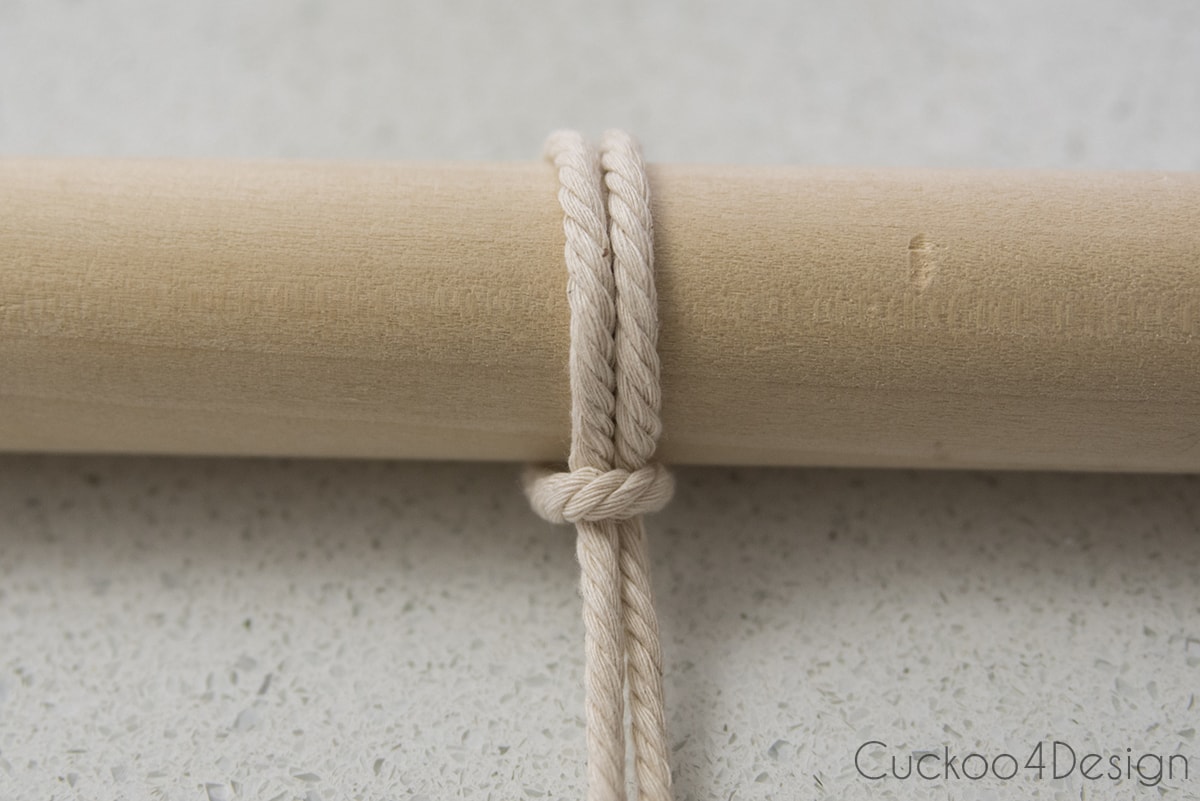
Step 1: Attach cut cords to the dowel rod with Lark’s Head Knots
Cut your cords and attach them to the dowel rod with Lark’s Head Knots. Below is a Lark’s head knot tied so you can see how to set it up.
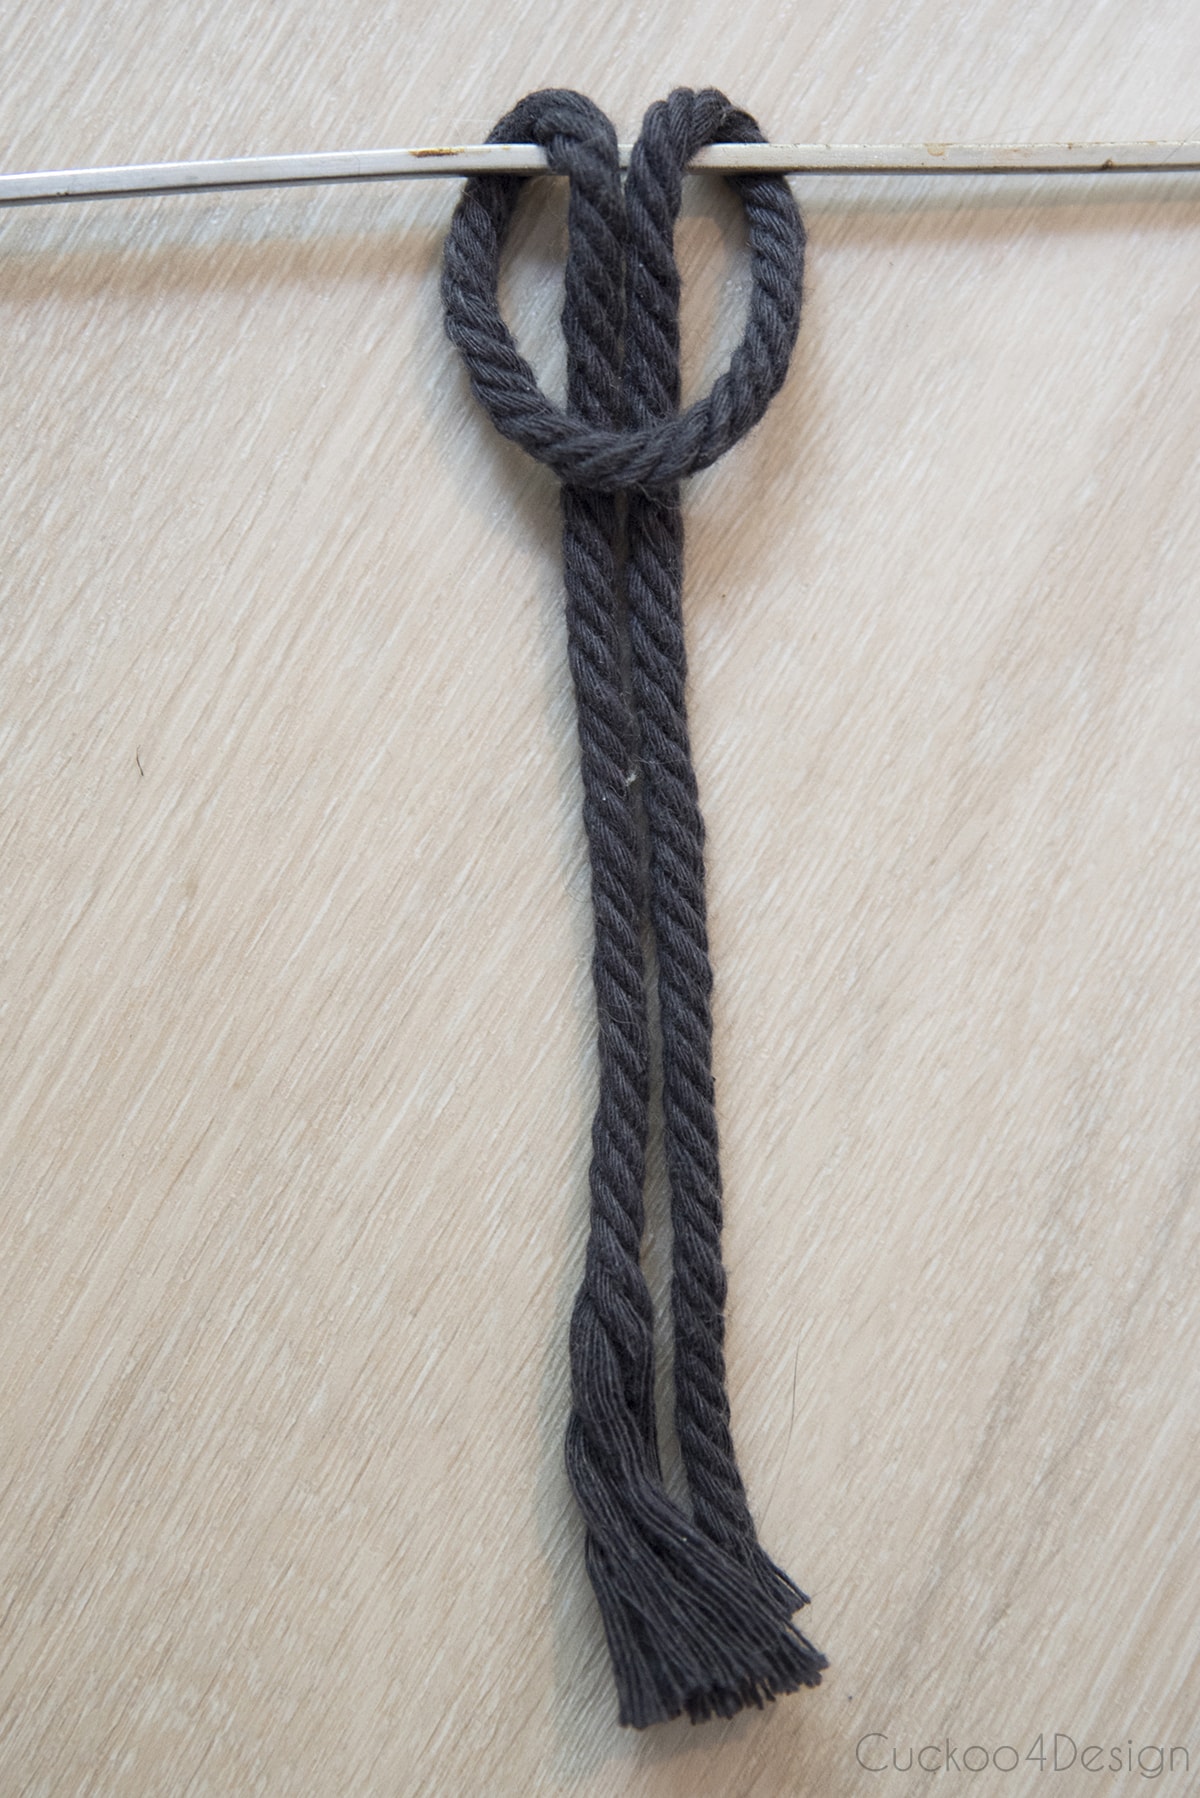
And here is a Lark’s head knot tied to the dowel rod. You can see it all better in my tutorial video.
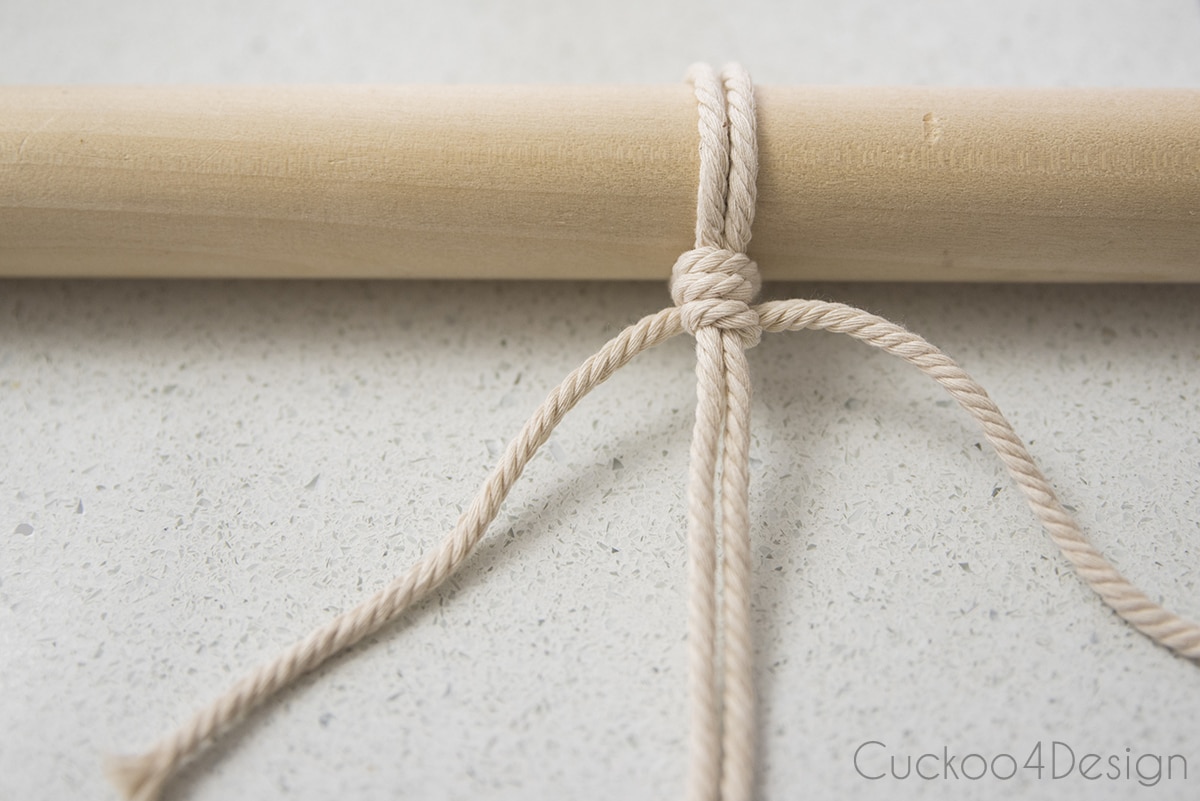
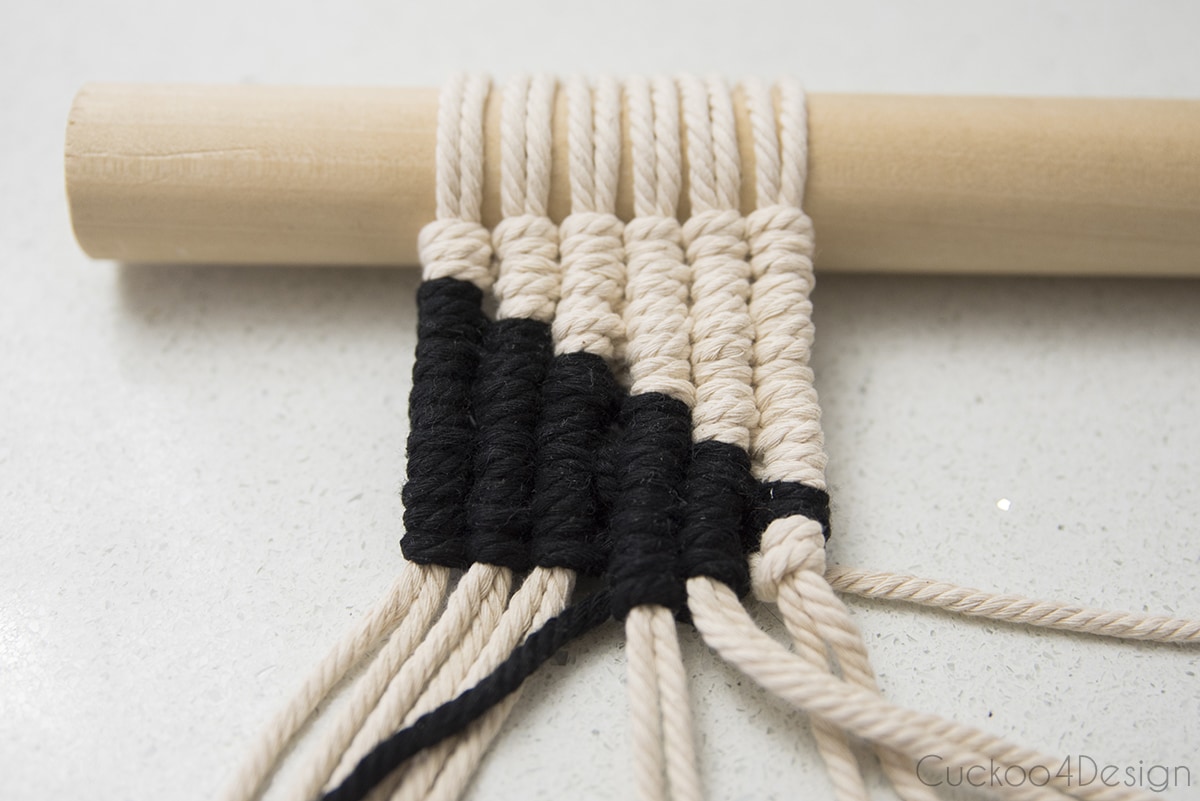
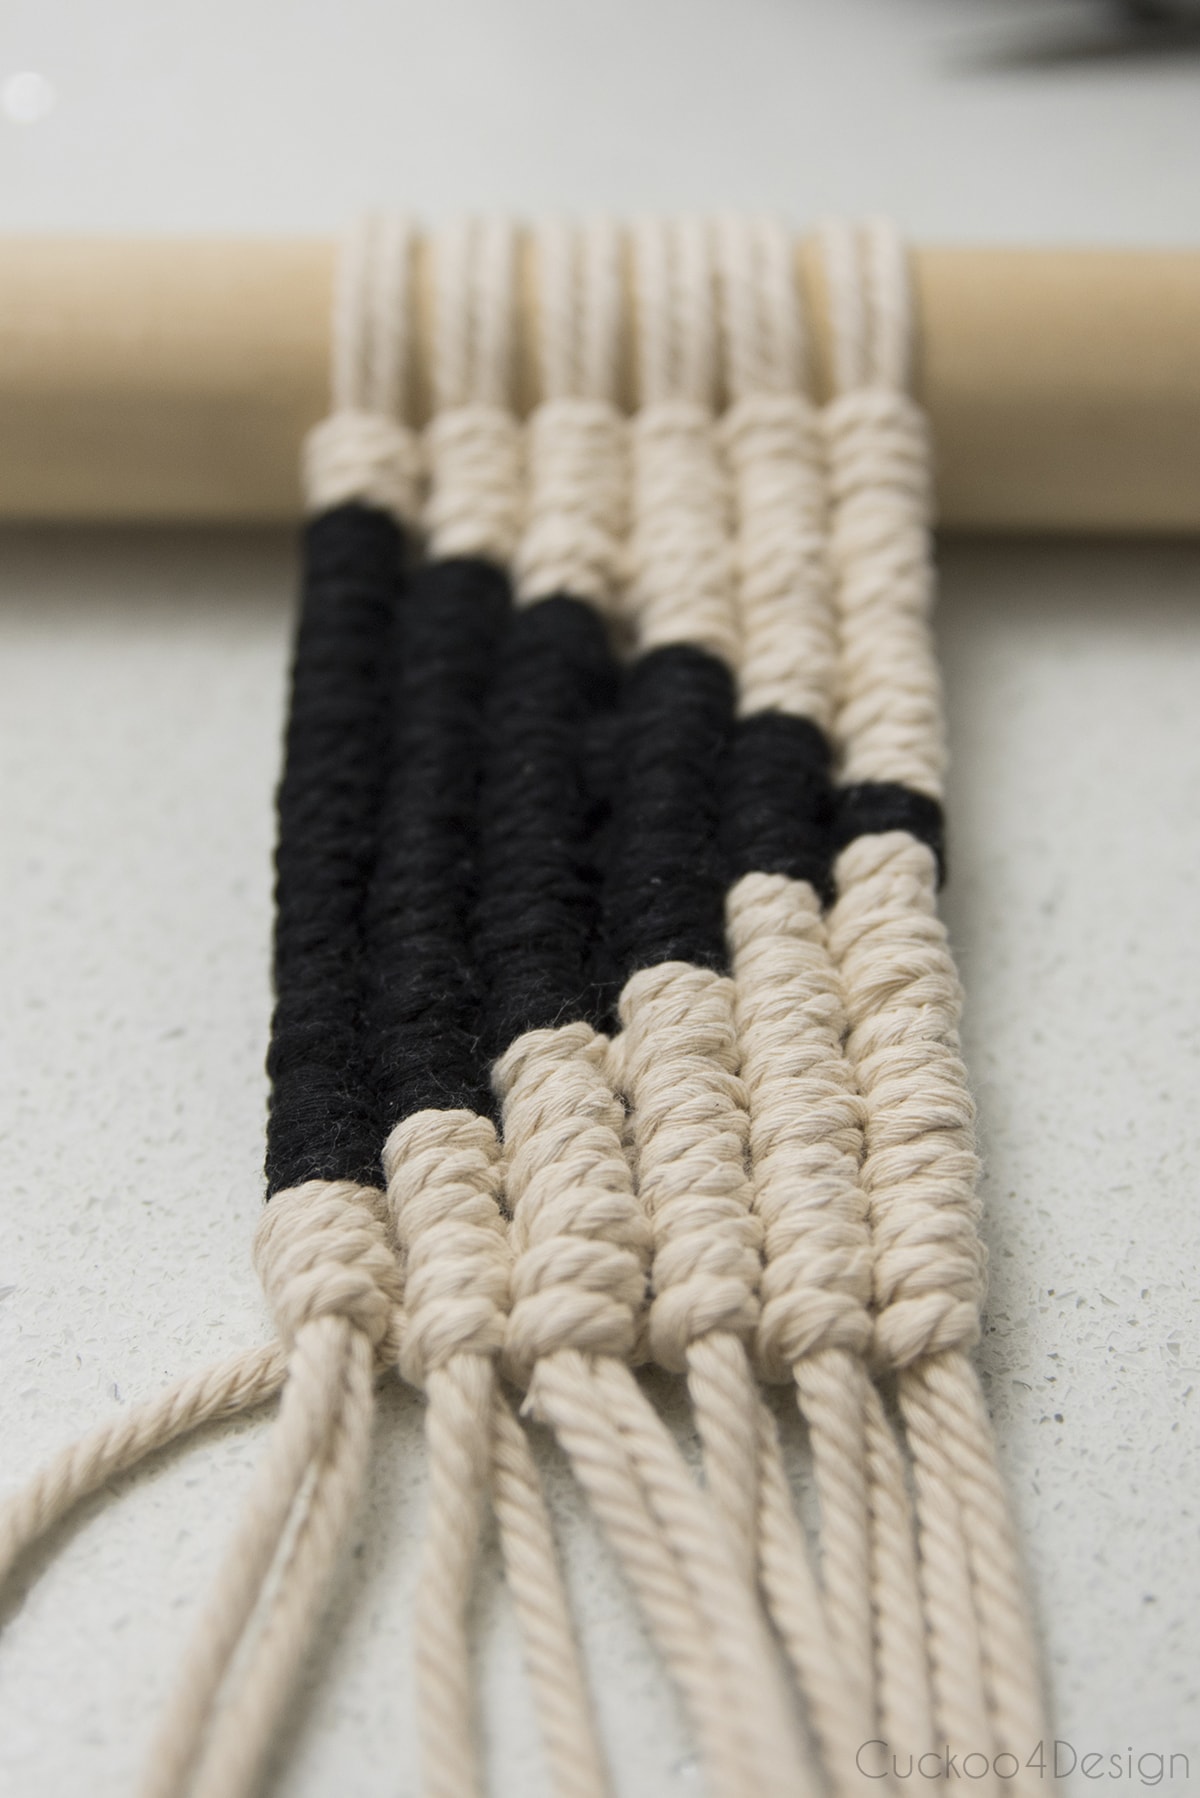
Step 2: Knot rows of Double Half Hitch Knots into a pattern
Let’s get to the Double Half Hitch Knots, also known as Vertical Clove Hitch Knots, which you start out the way I’m showing below.
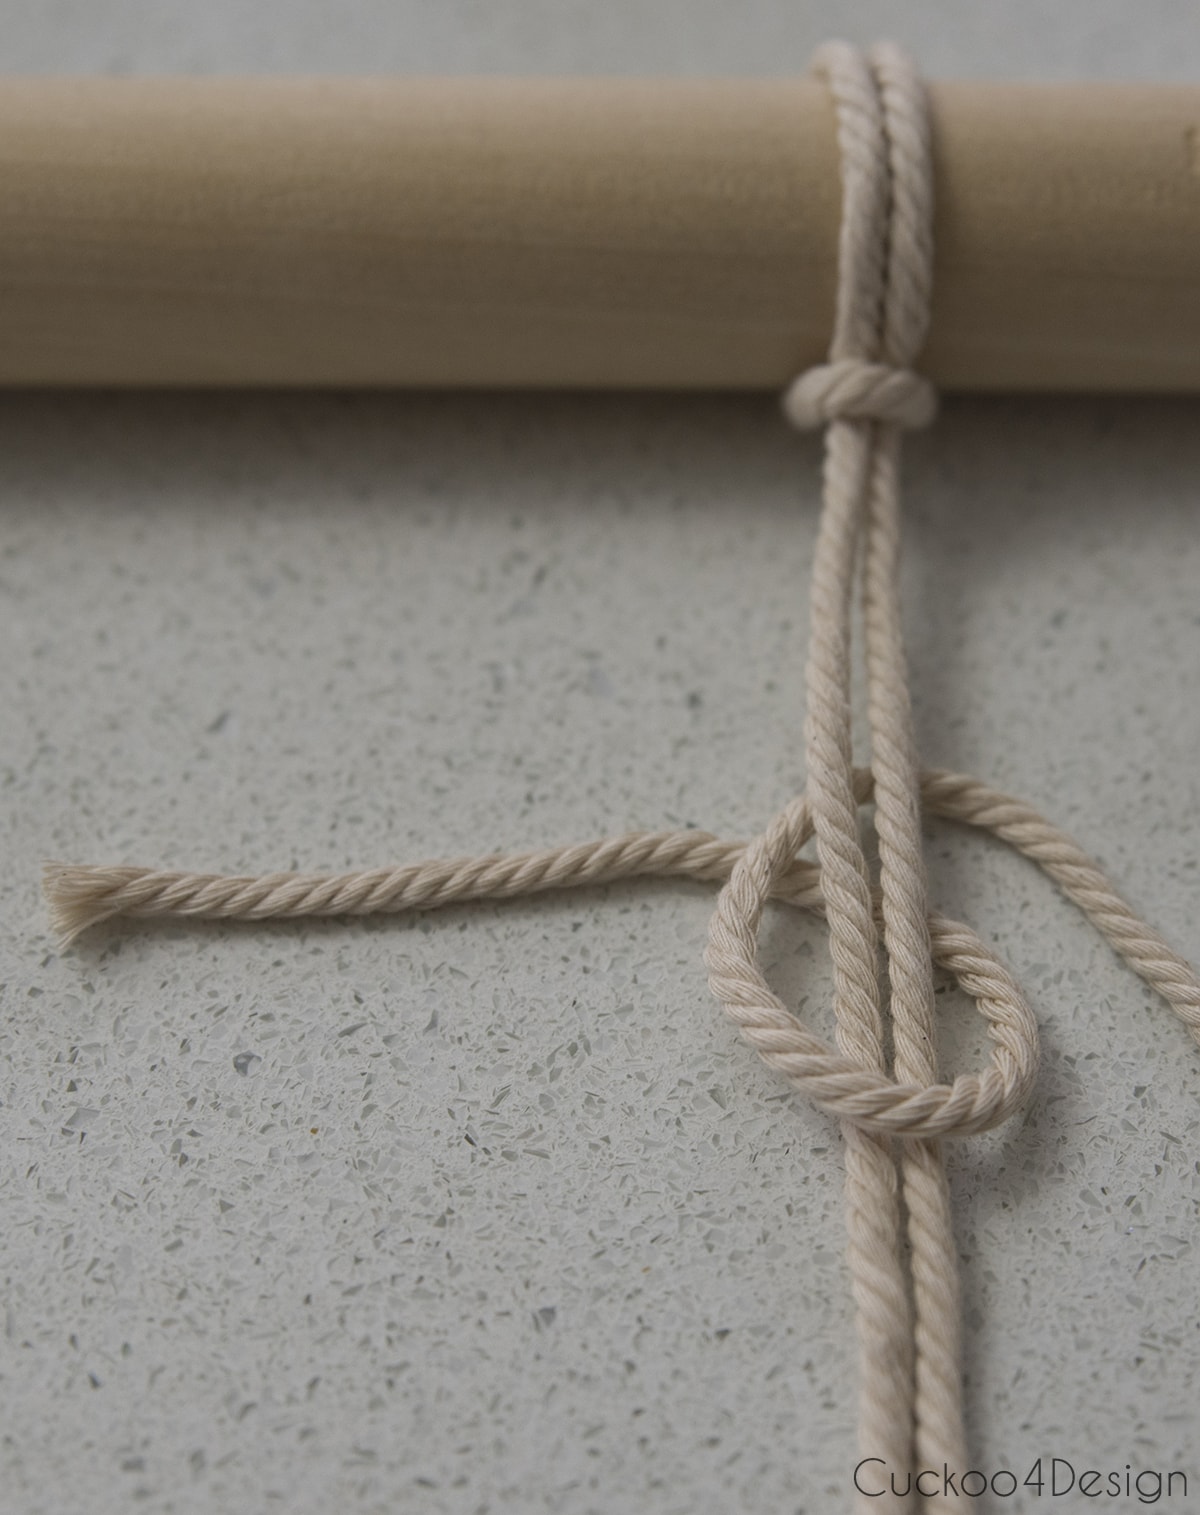
Followed up with the next loop. I always keep telling myself in my head “behind/under the string and over” for the first loop and “over and behind/under” for the second loop.
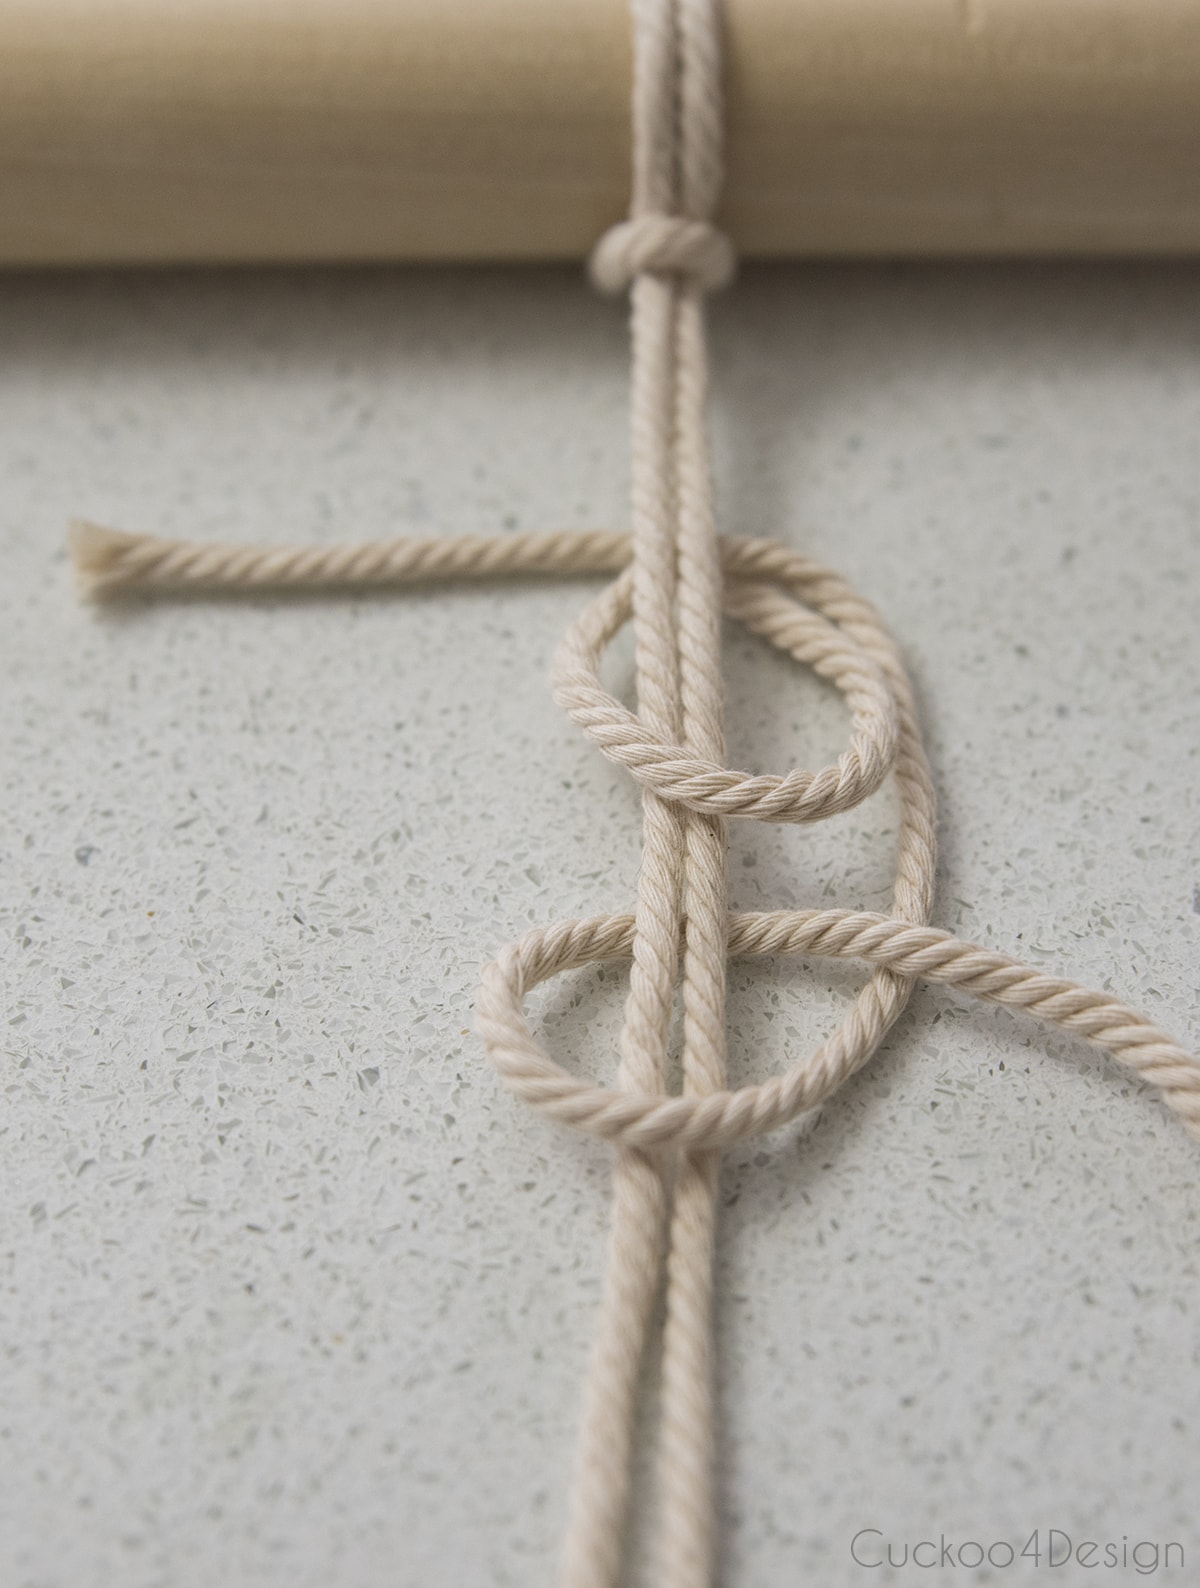
Pull both of those loops up and tighten them for the Vertical Clove Hitch Knots.
To make a planter or wall hanging, you need a full row of Lark’s Head Knots along the dowel rod, not just one. The number of strands depends on the size of your pot.
If it is a planter or vase, then make sure that you have that item ready to measure how much macrame string Lark’s head knots you need on your dowel rod.
Tip: If you run out of cord or want to add a new color, you knot the new strand in the same way. Jump to timestamp 2:29 in the video to see exactly how I did it.
In my video, I only made a cover for a small object. I just didn’t want to film the entire making of the large macrame planter because the video would have been very long 😉 After all, a large macrame planter took me several days to make.
I did, however, take photos while I was making one of my larger planters, which I’m showing below.
Maya thinks it is a rug for cats!

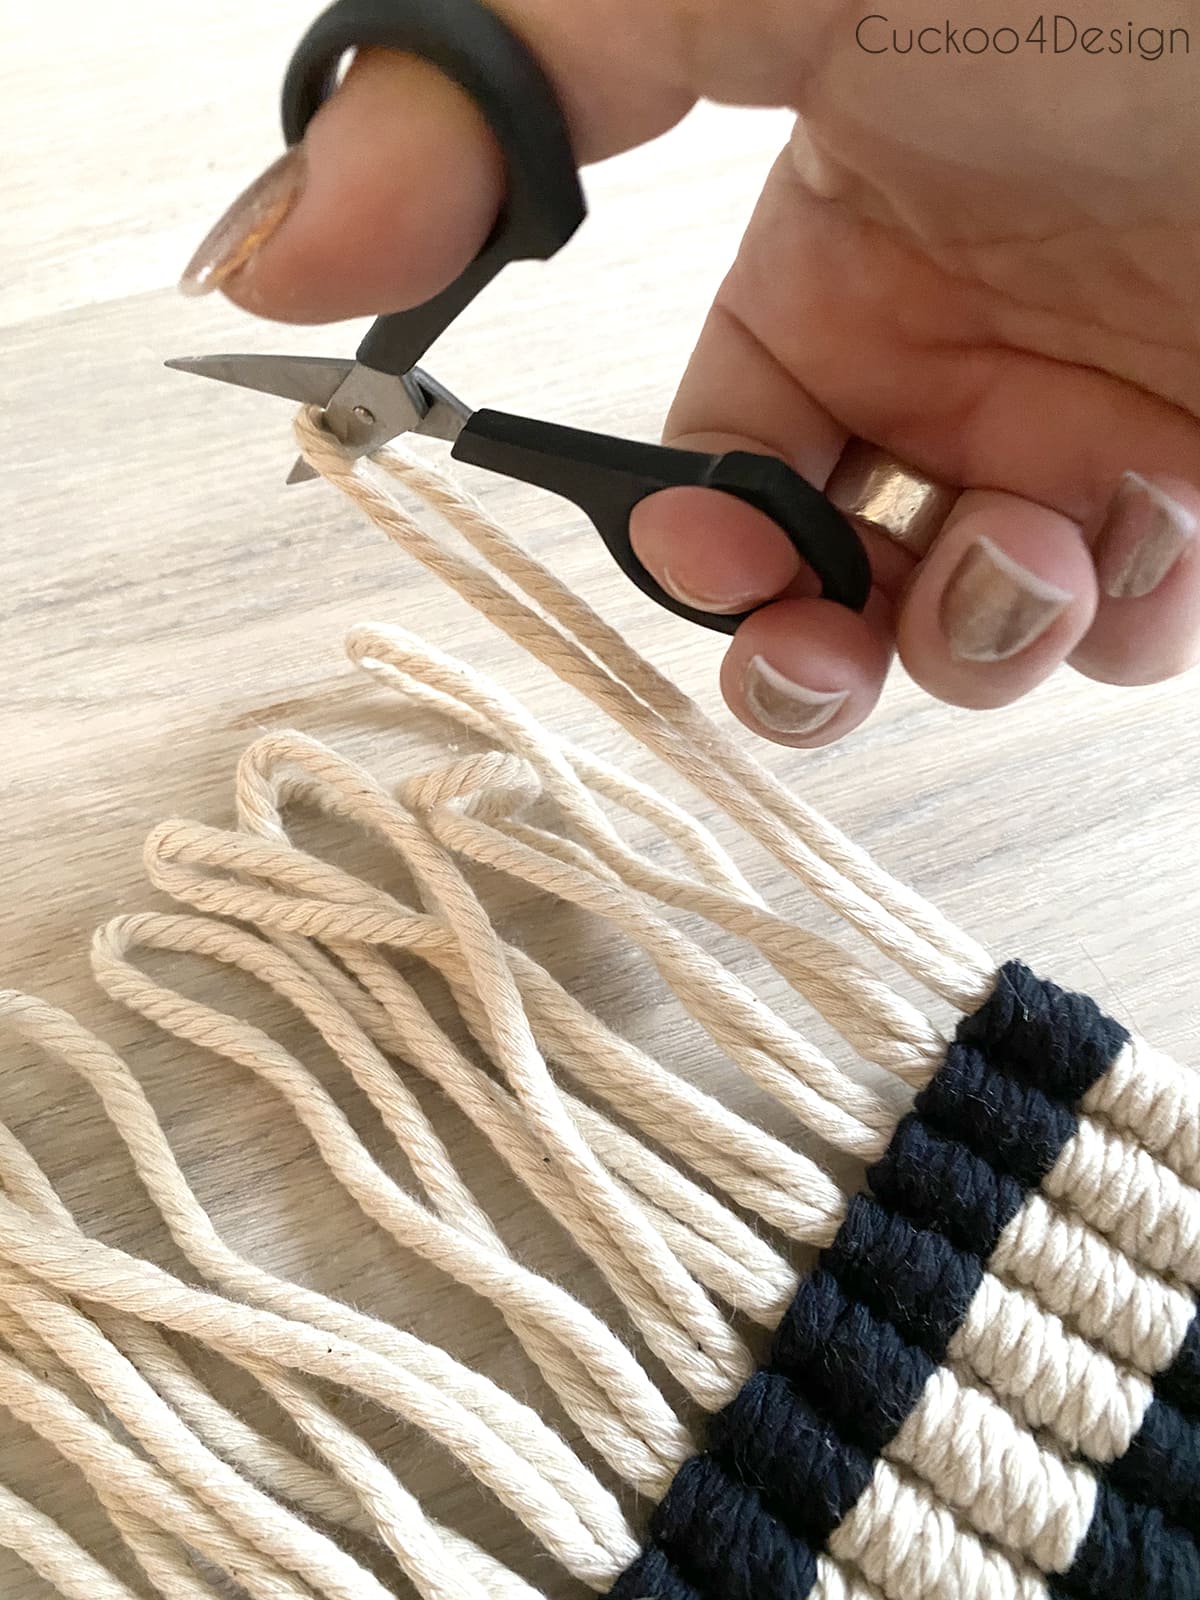
Step 3: Slide the weaving off the rod and cut the loops
Next, slide the weaving off the rod and cut the loops at the top with your craft scissors.
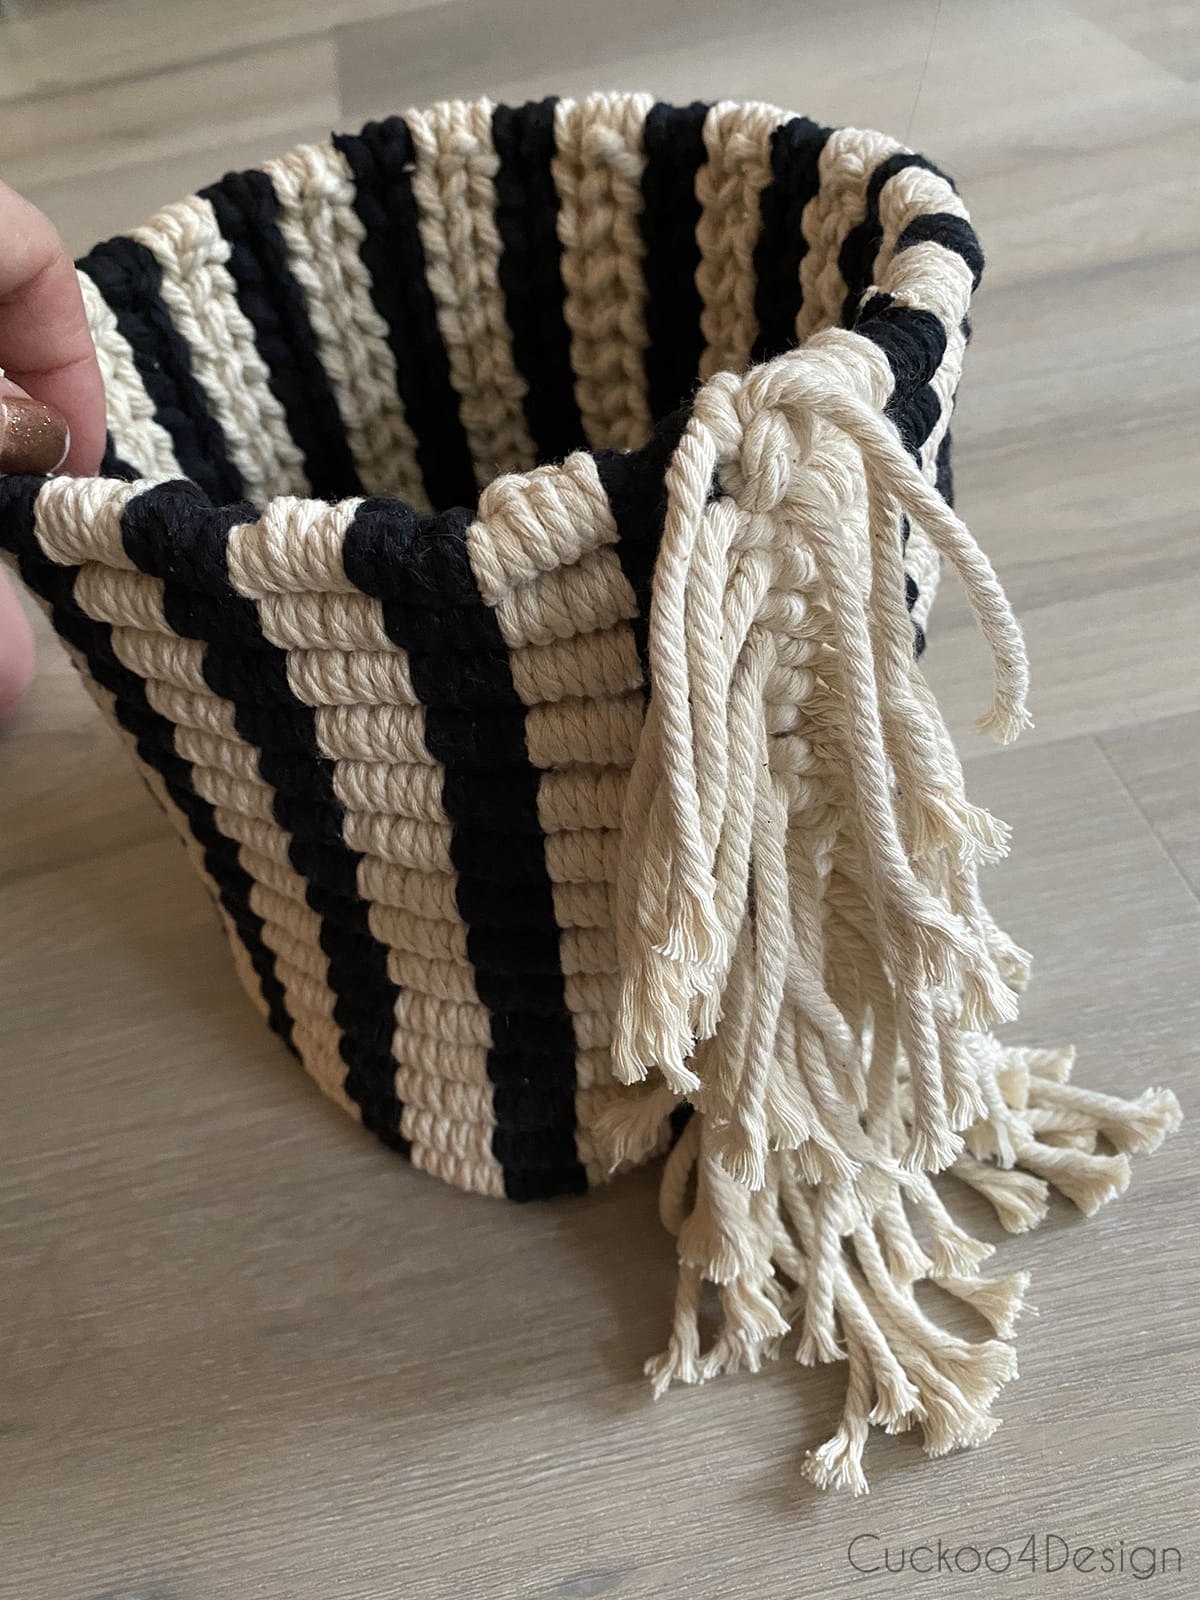
Step 4: Tie the ends together to form the basket shape
After that, you tie the ends together with the pretty side of the Vertical Clove Hitch Knots showing.
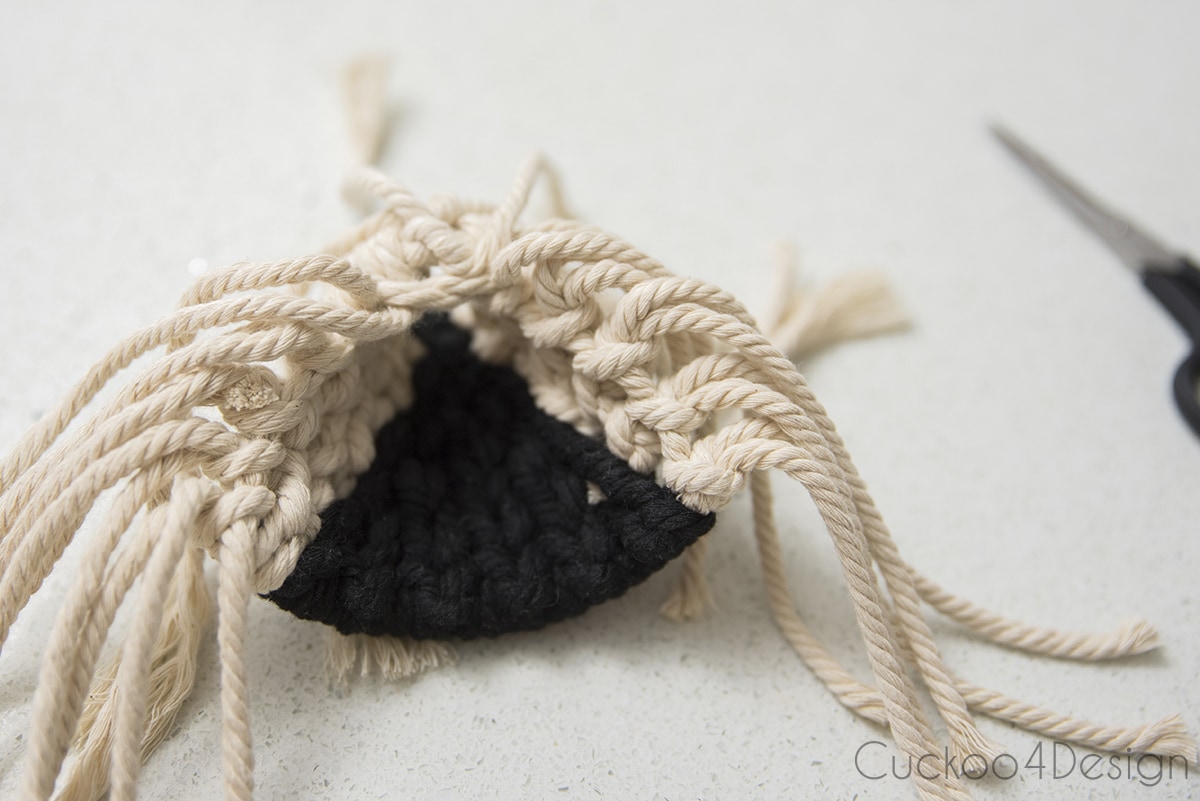
You can see it better on the larger DIY macrame basket.

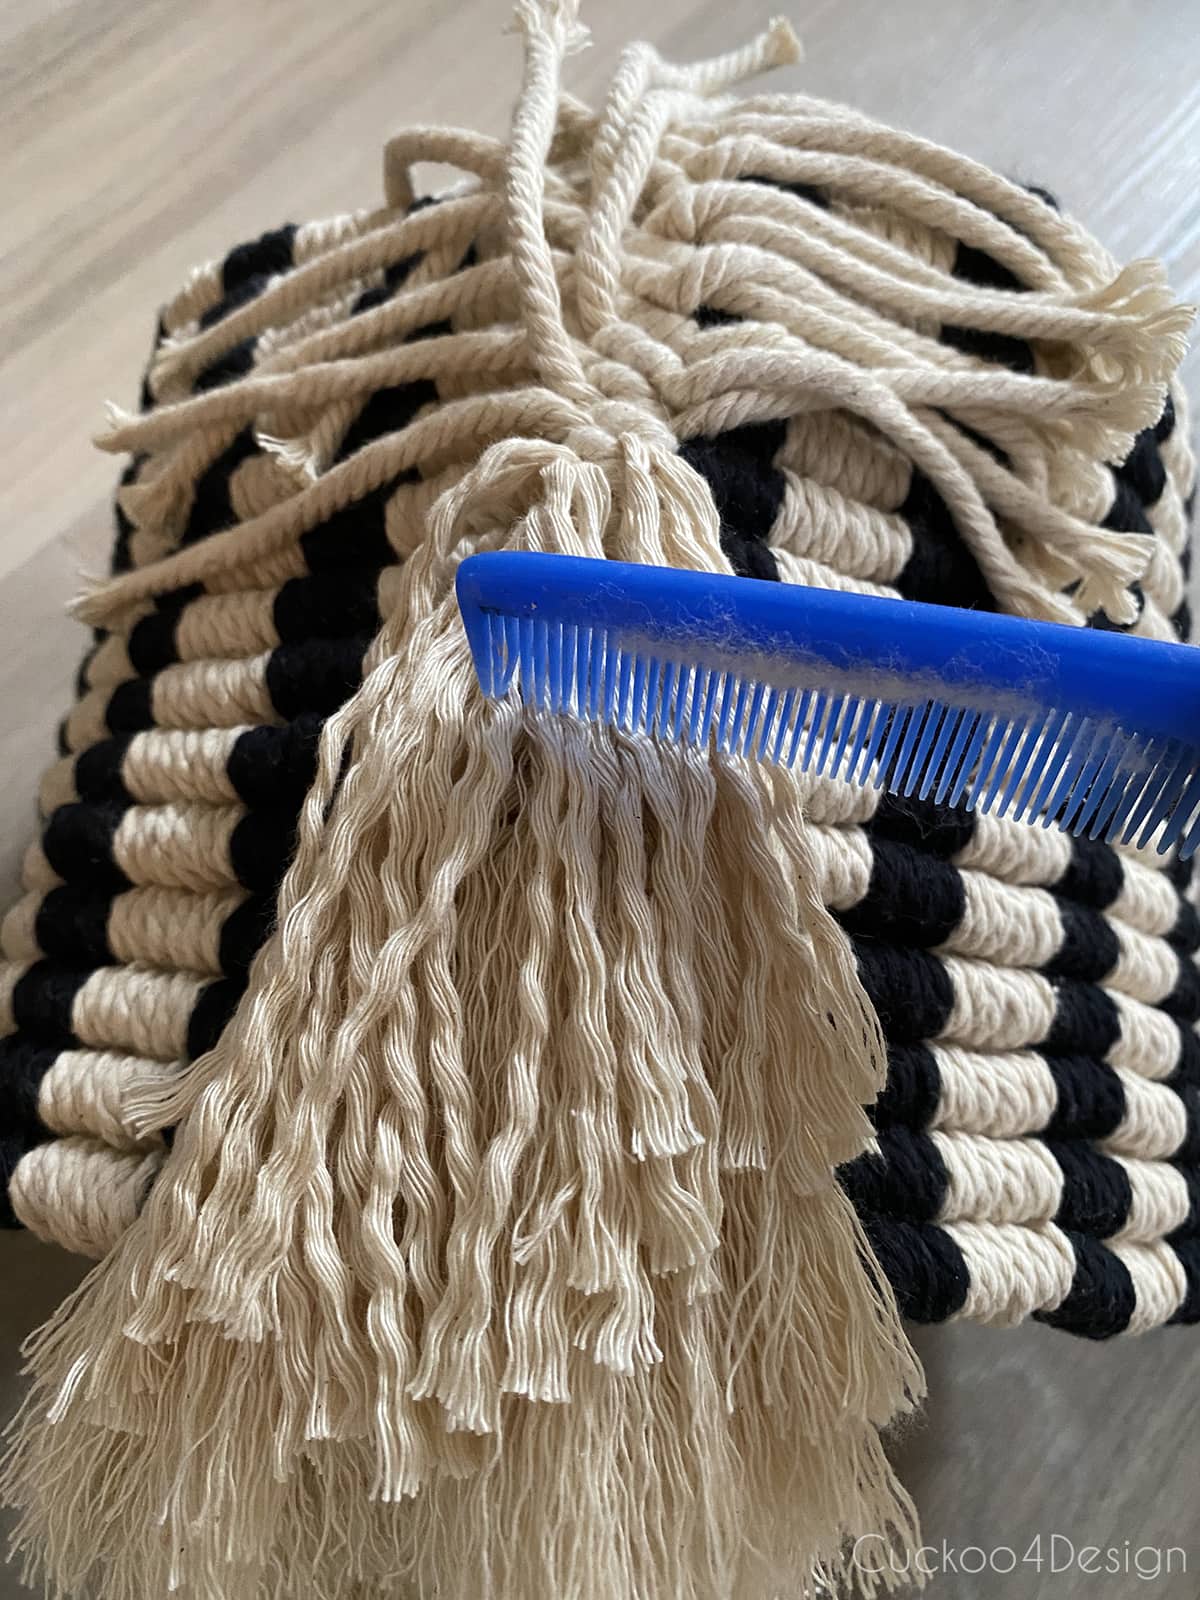
Step 5: Unravel, comb, and trim the fringe
The next step is to unravel all the macrame yarn and comb it, then cut it into the desired length. Giving the haircut is my favorite part.
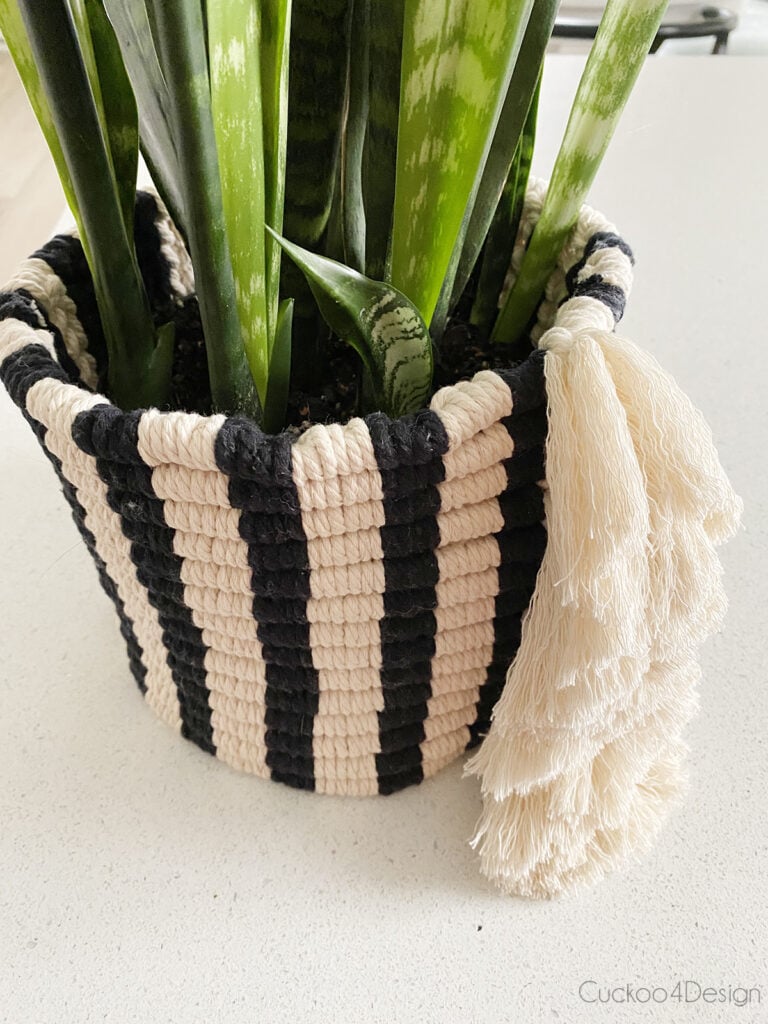
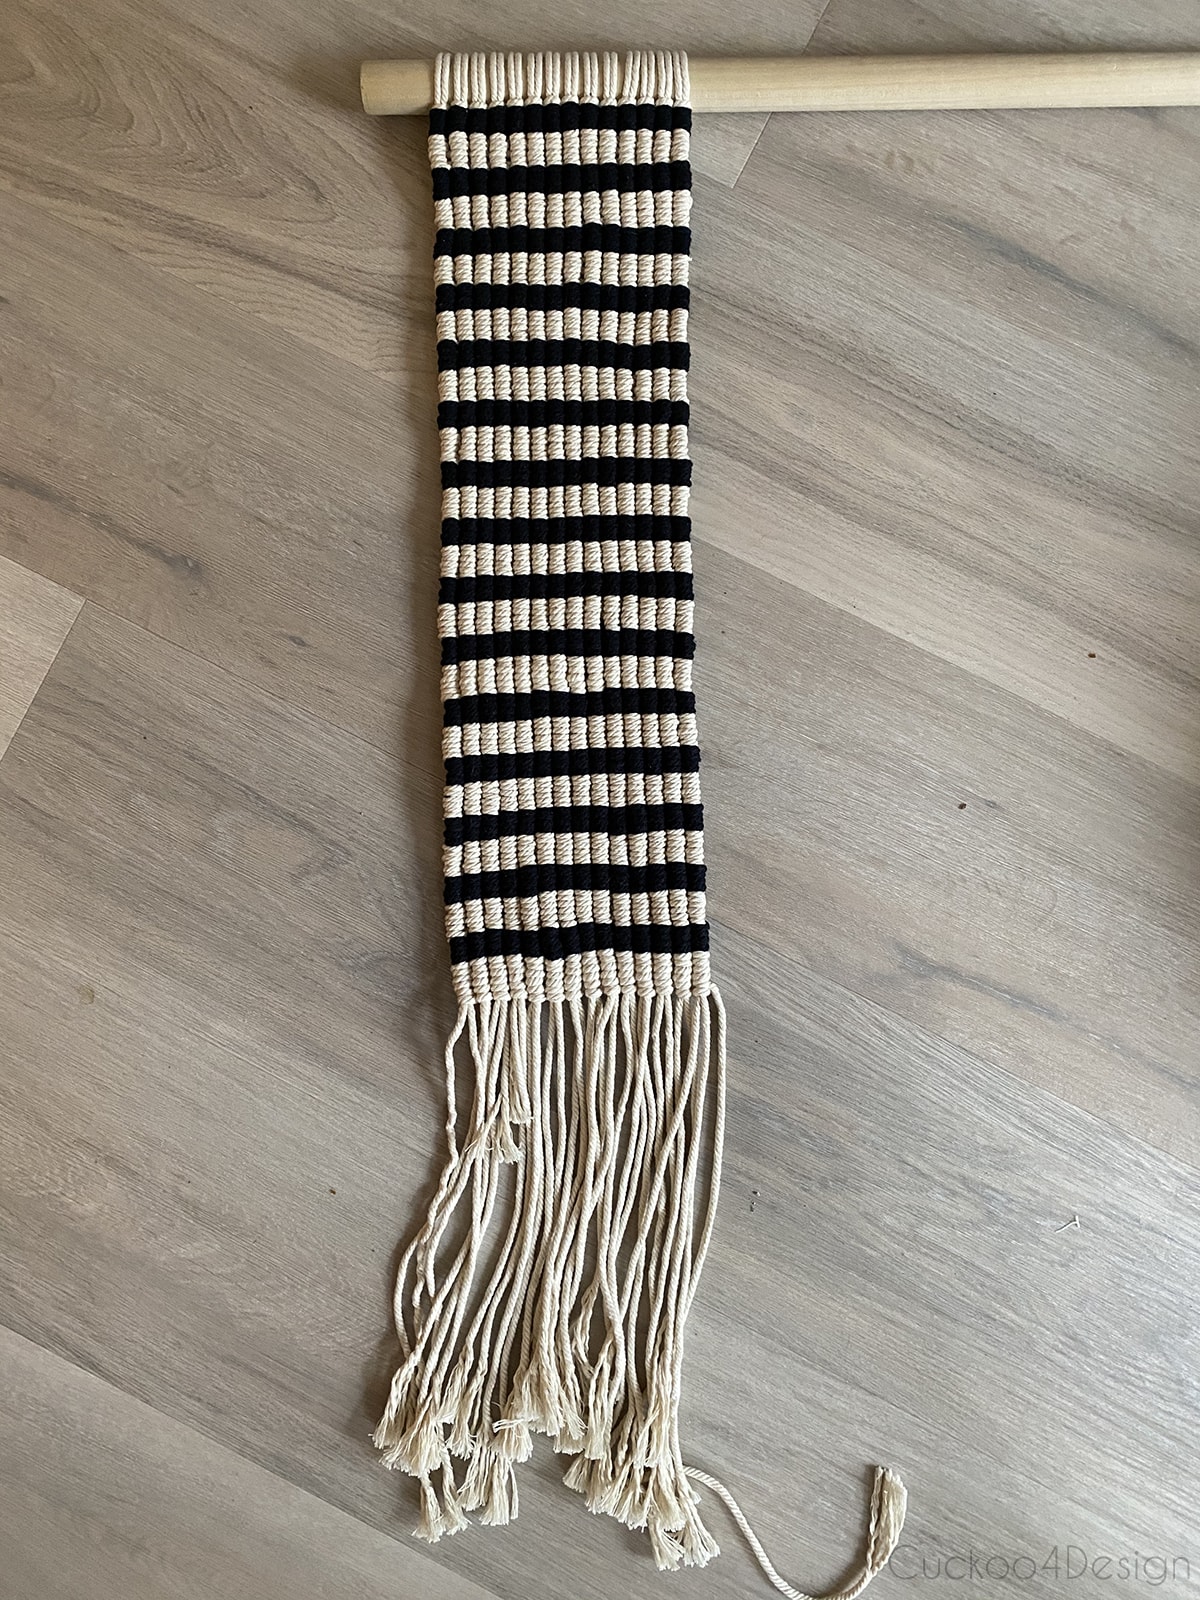
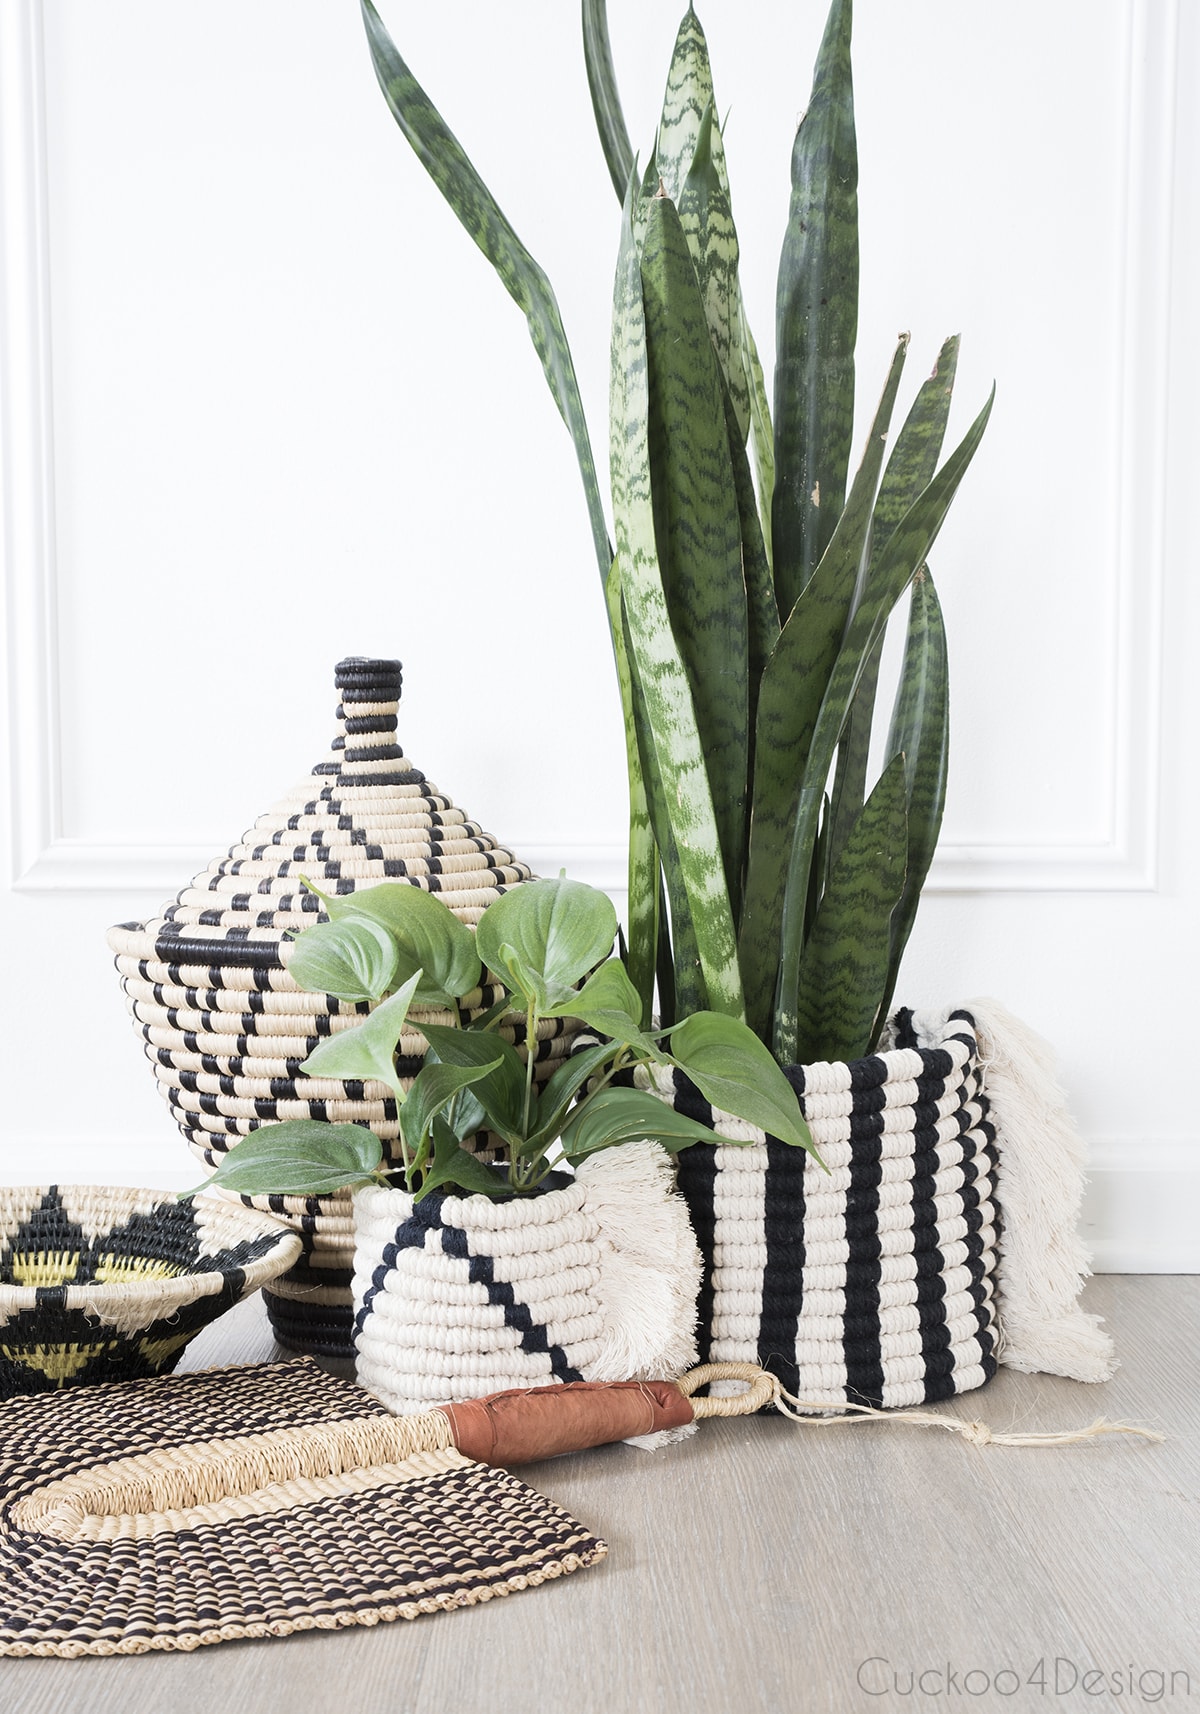
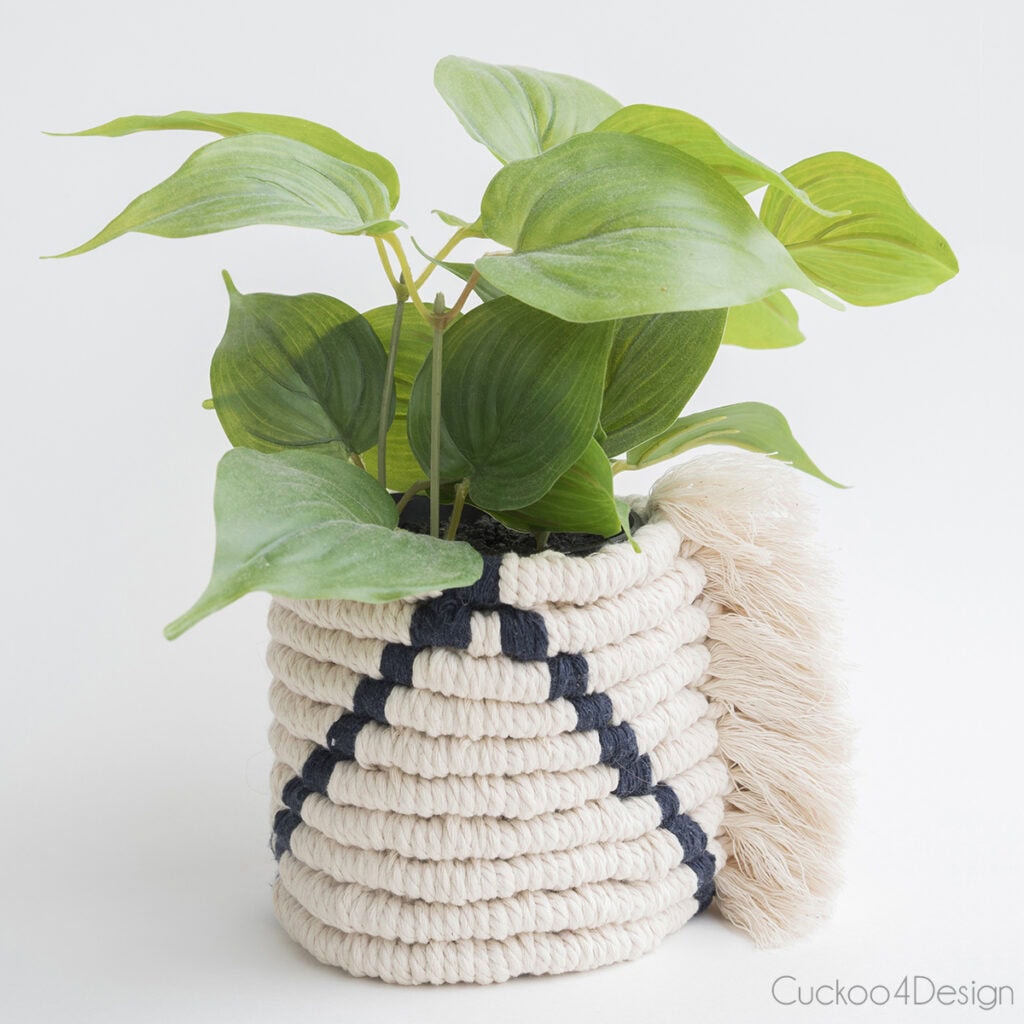
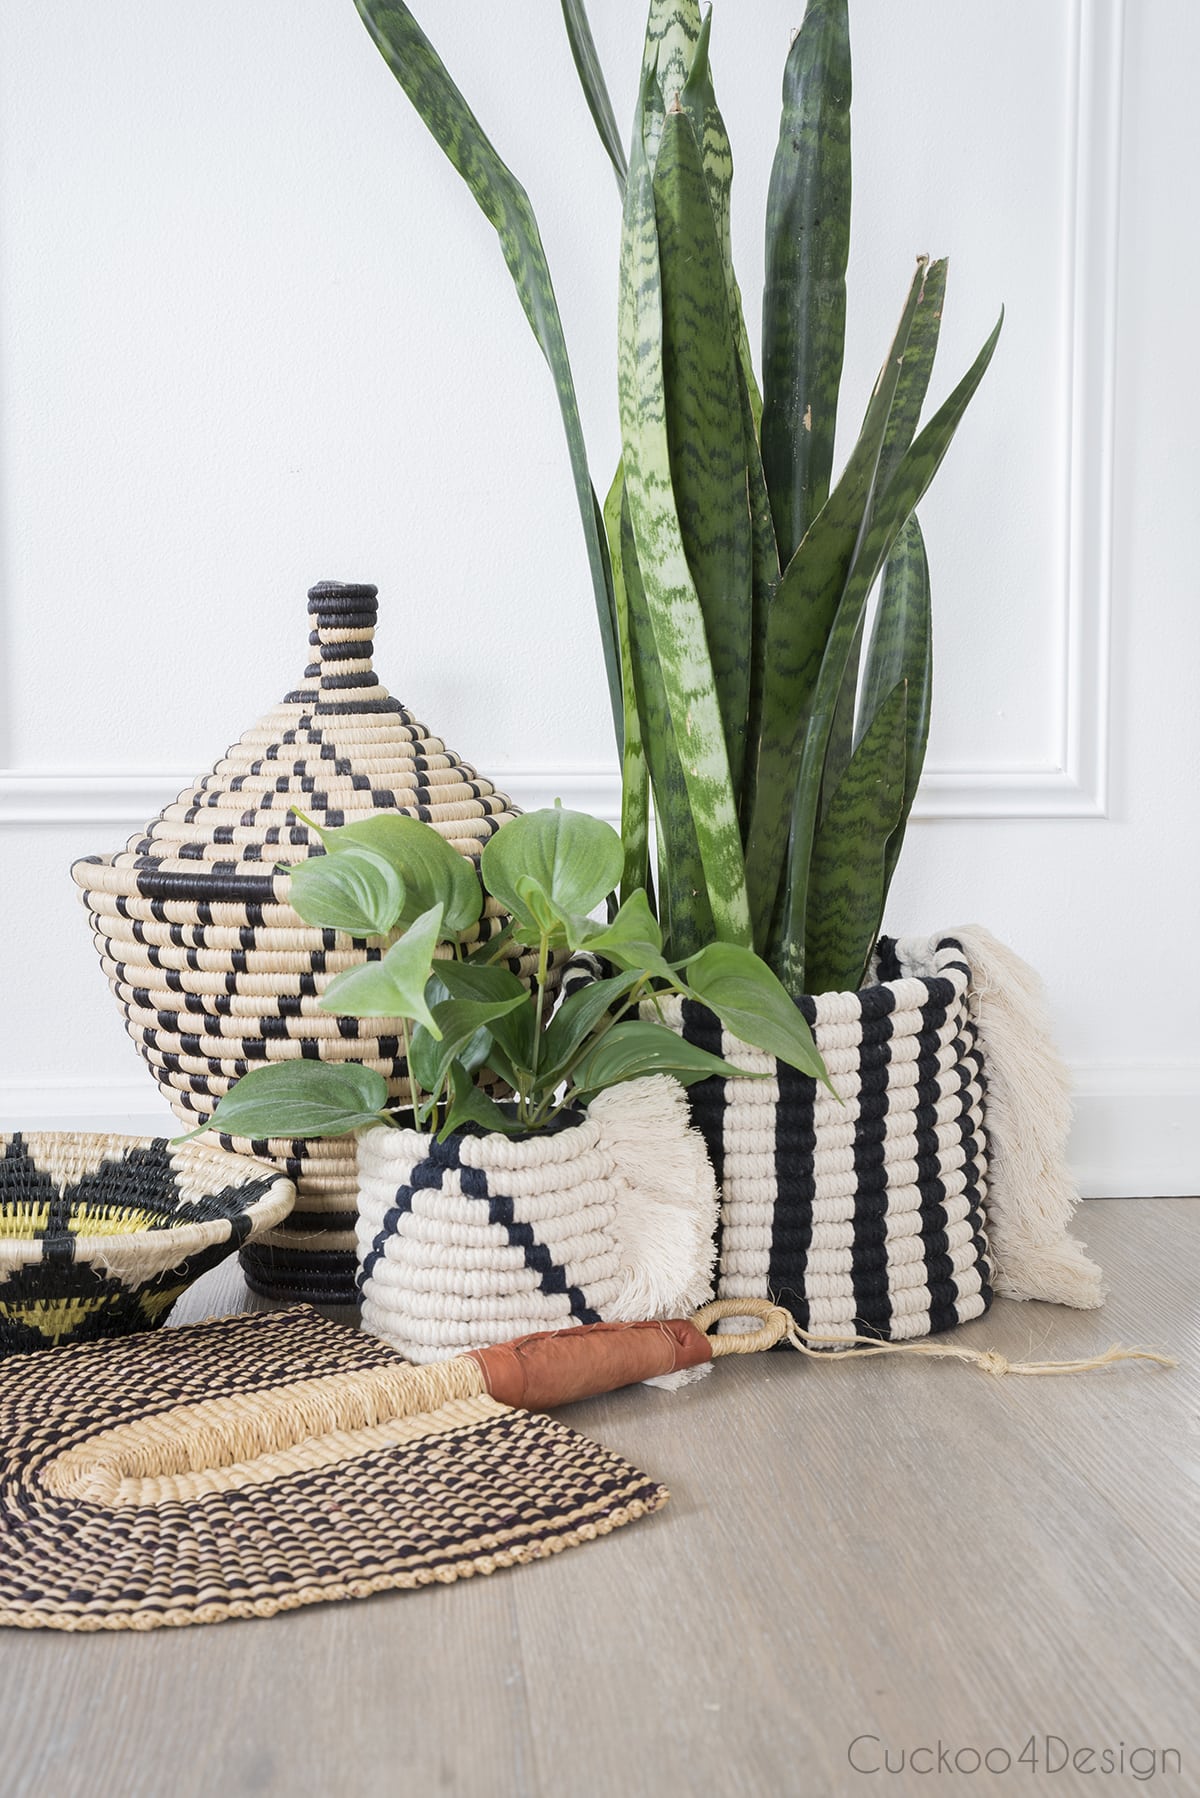
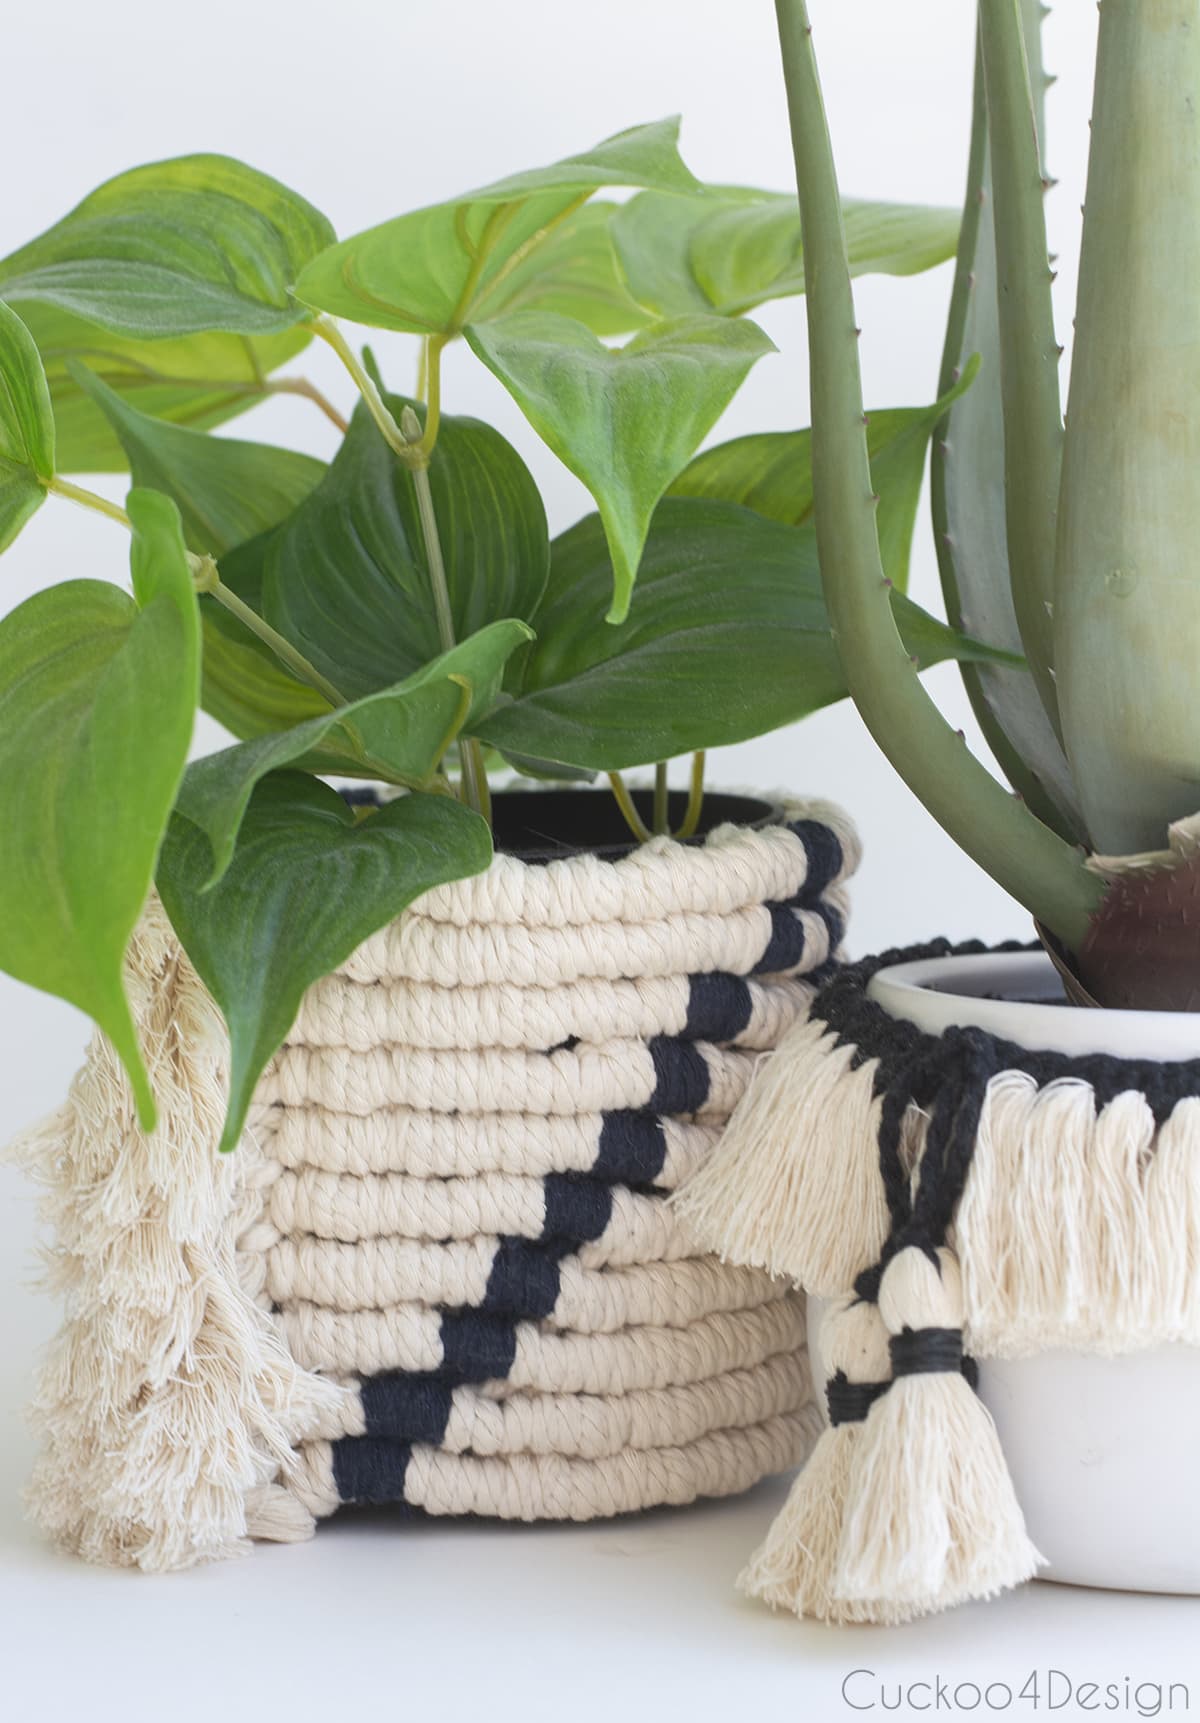
Finished macrame basket
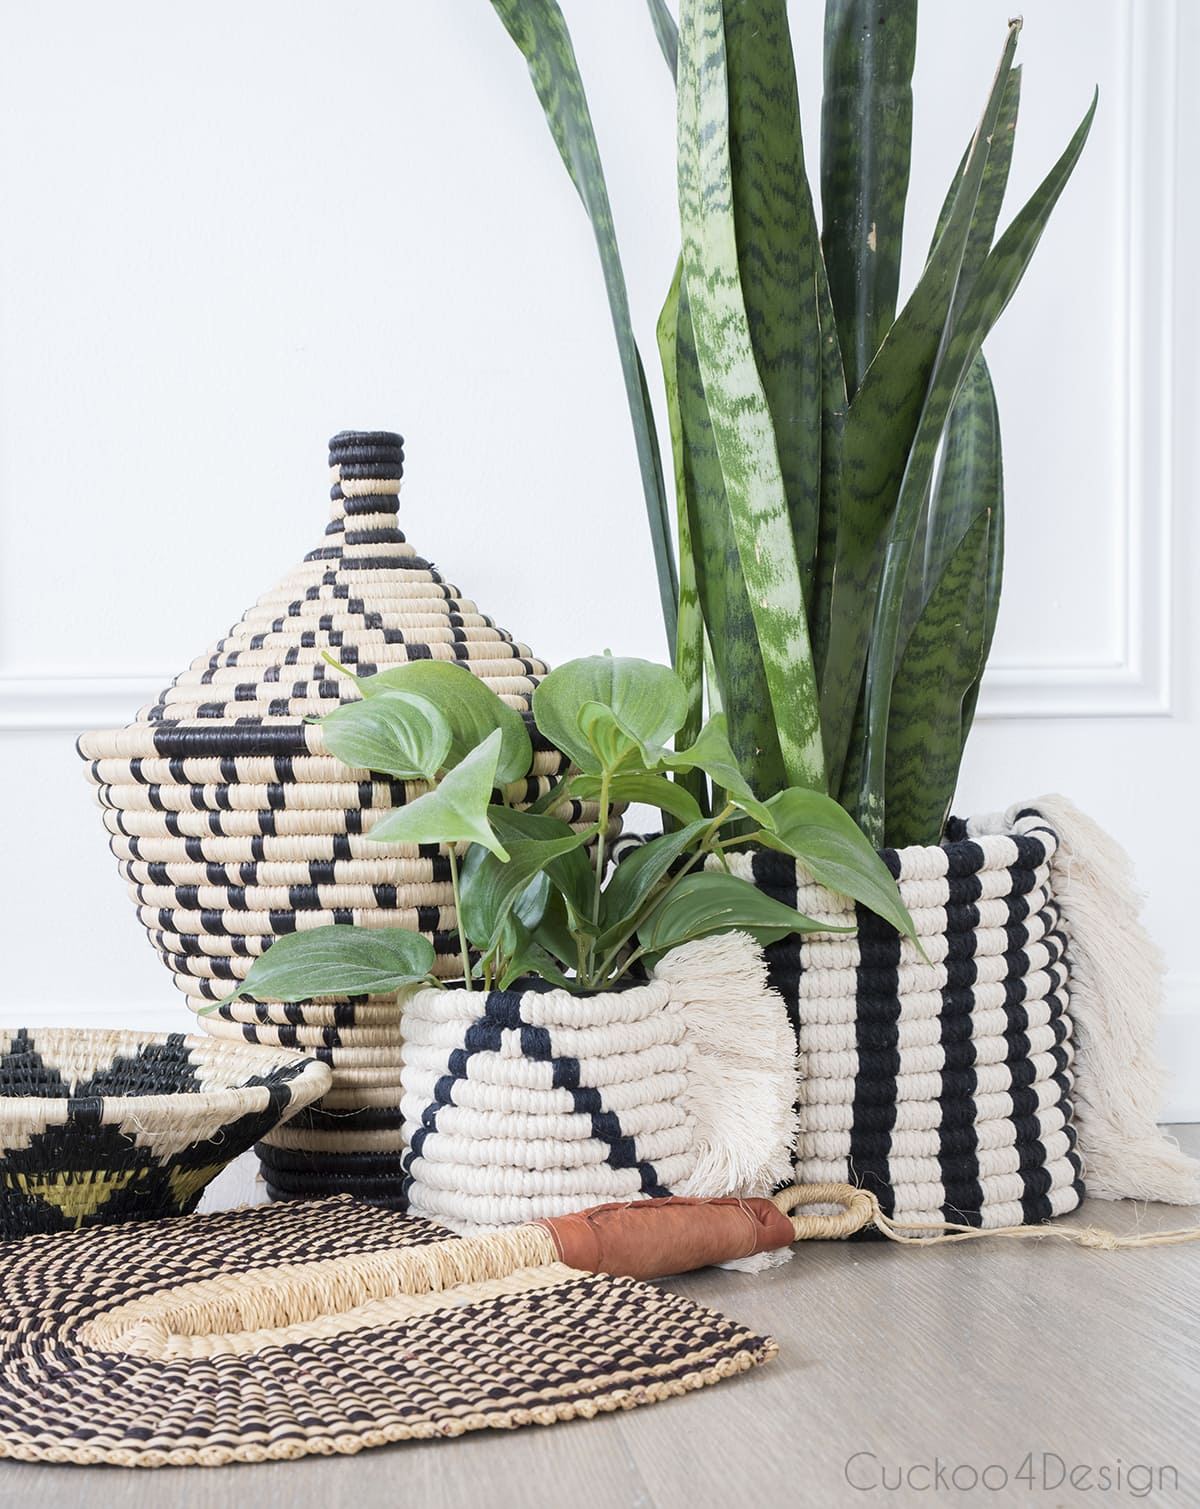
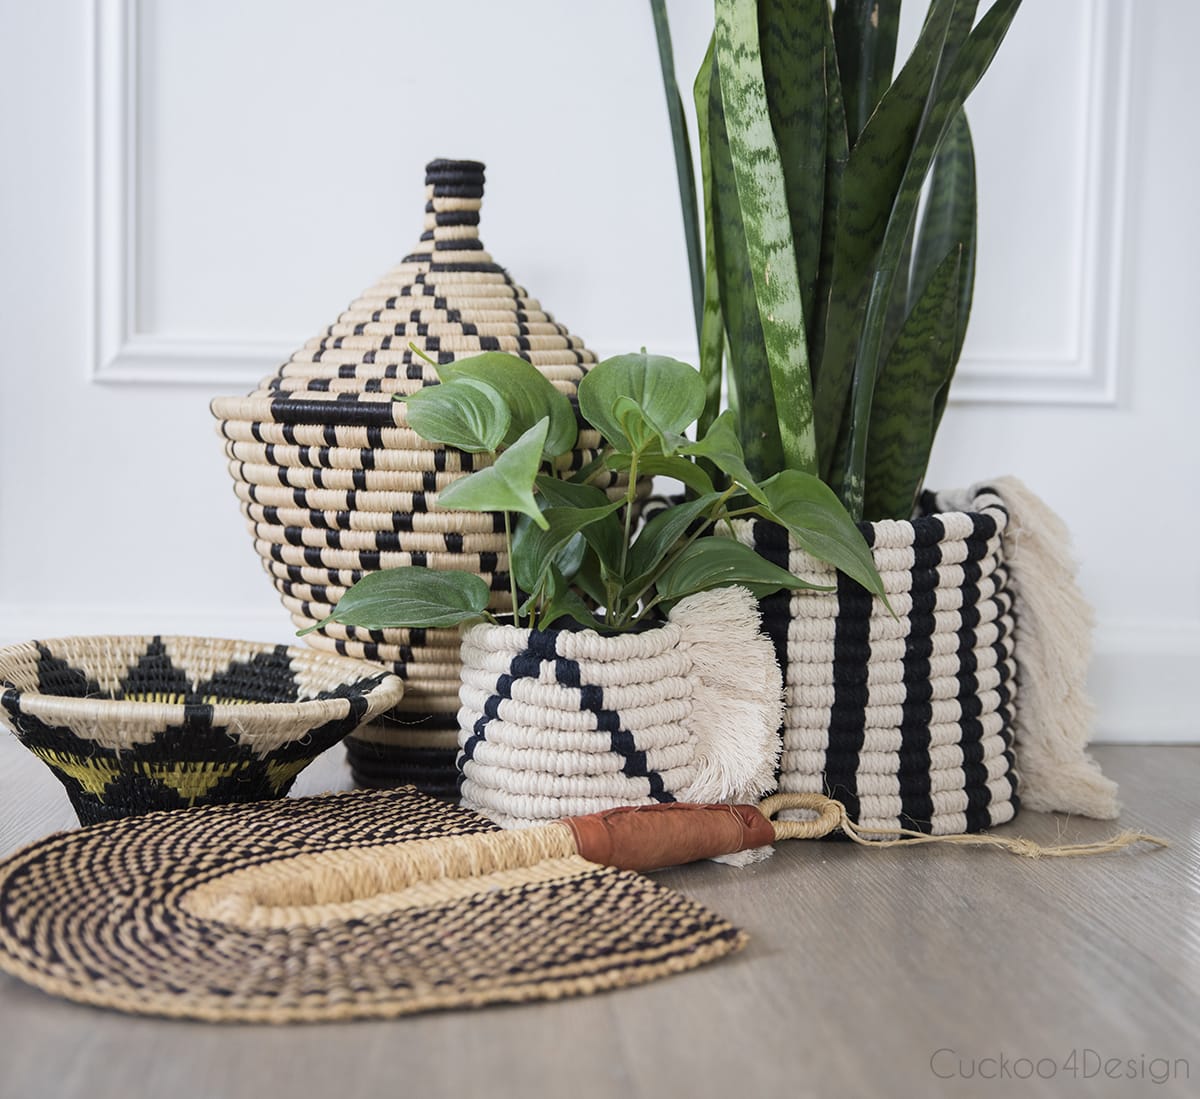
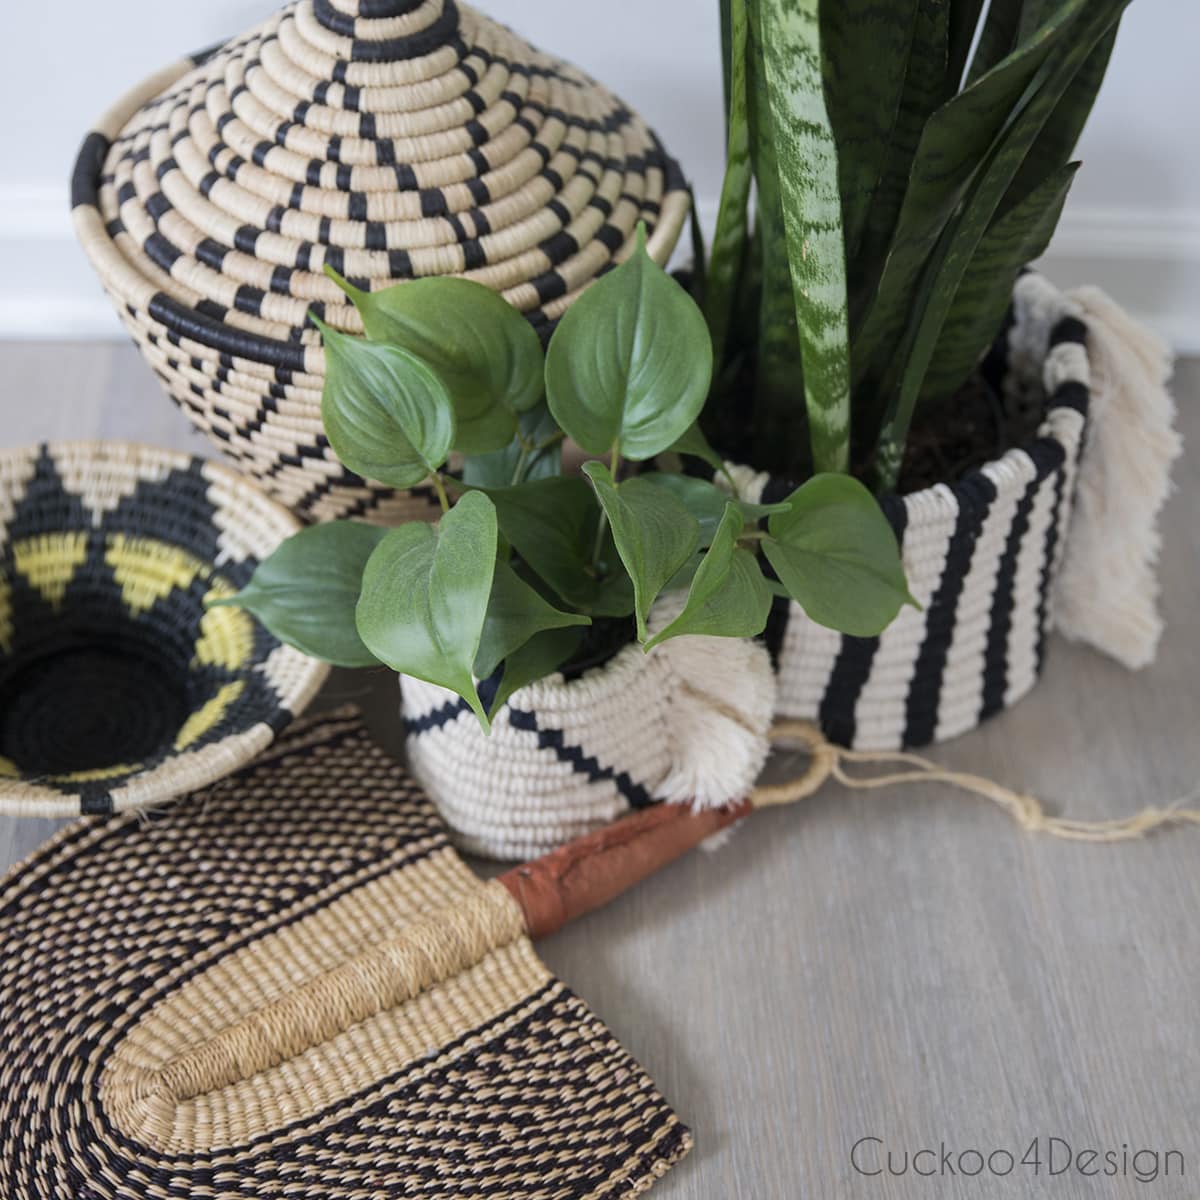
And here are two of the finished macrame planter baskets in a grouping with my African baskets. I love the pattern of the smaller basket.
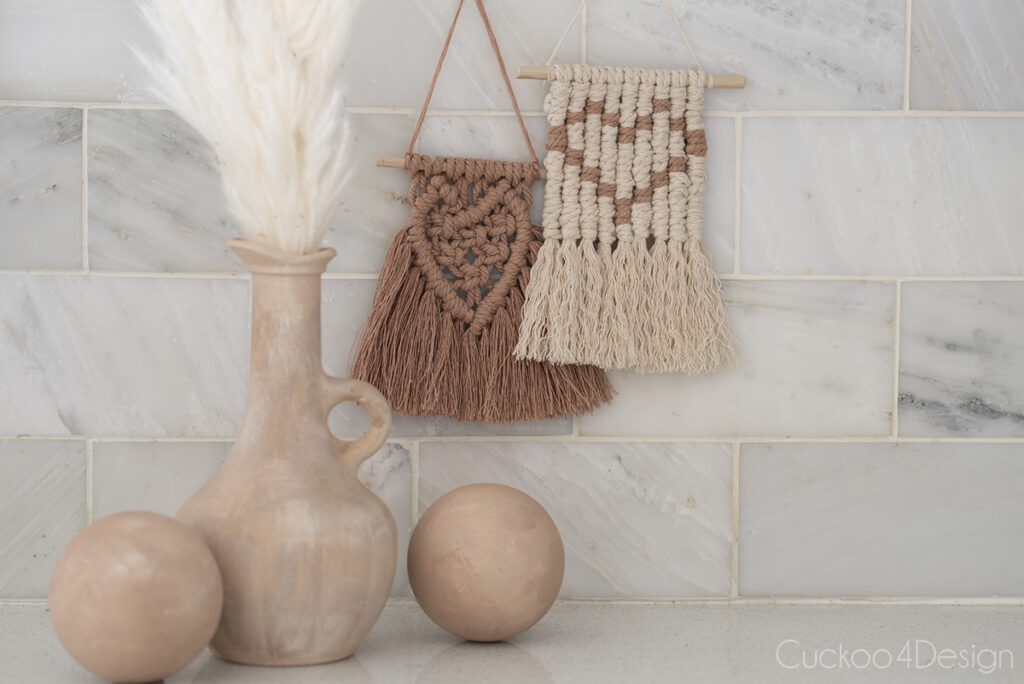
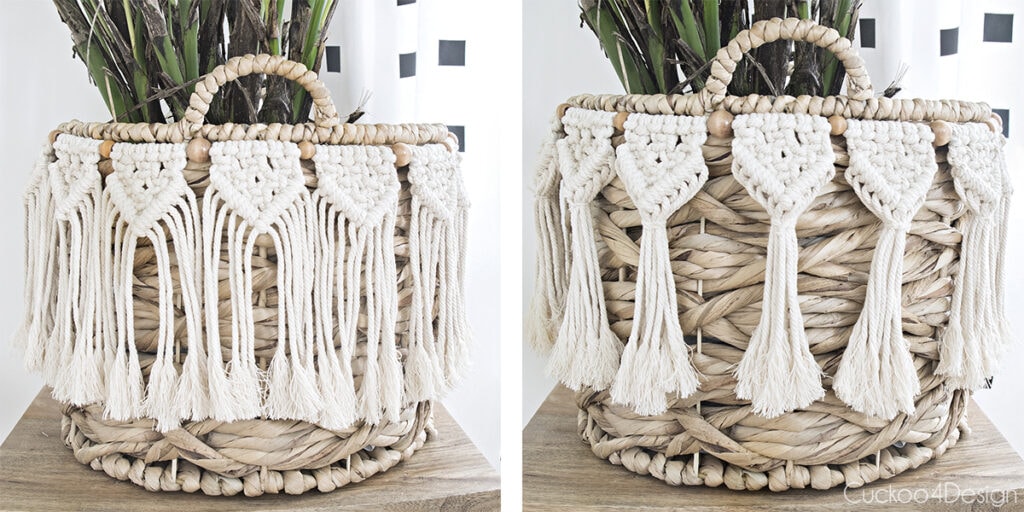
Check out my macrame heart tutorial where I’m also showing a version made with this tutorial used as a wall hanging which you can see below.
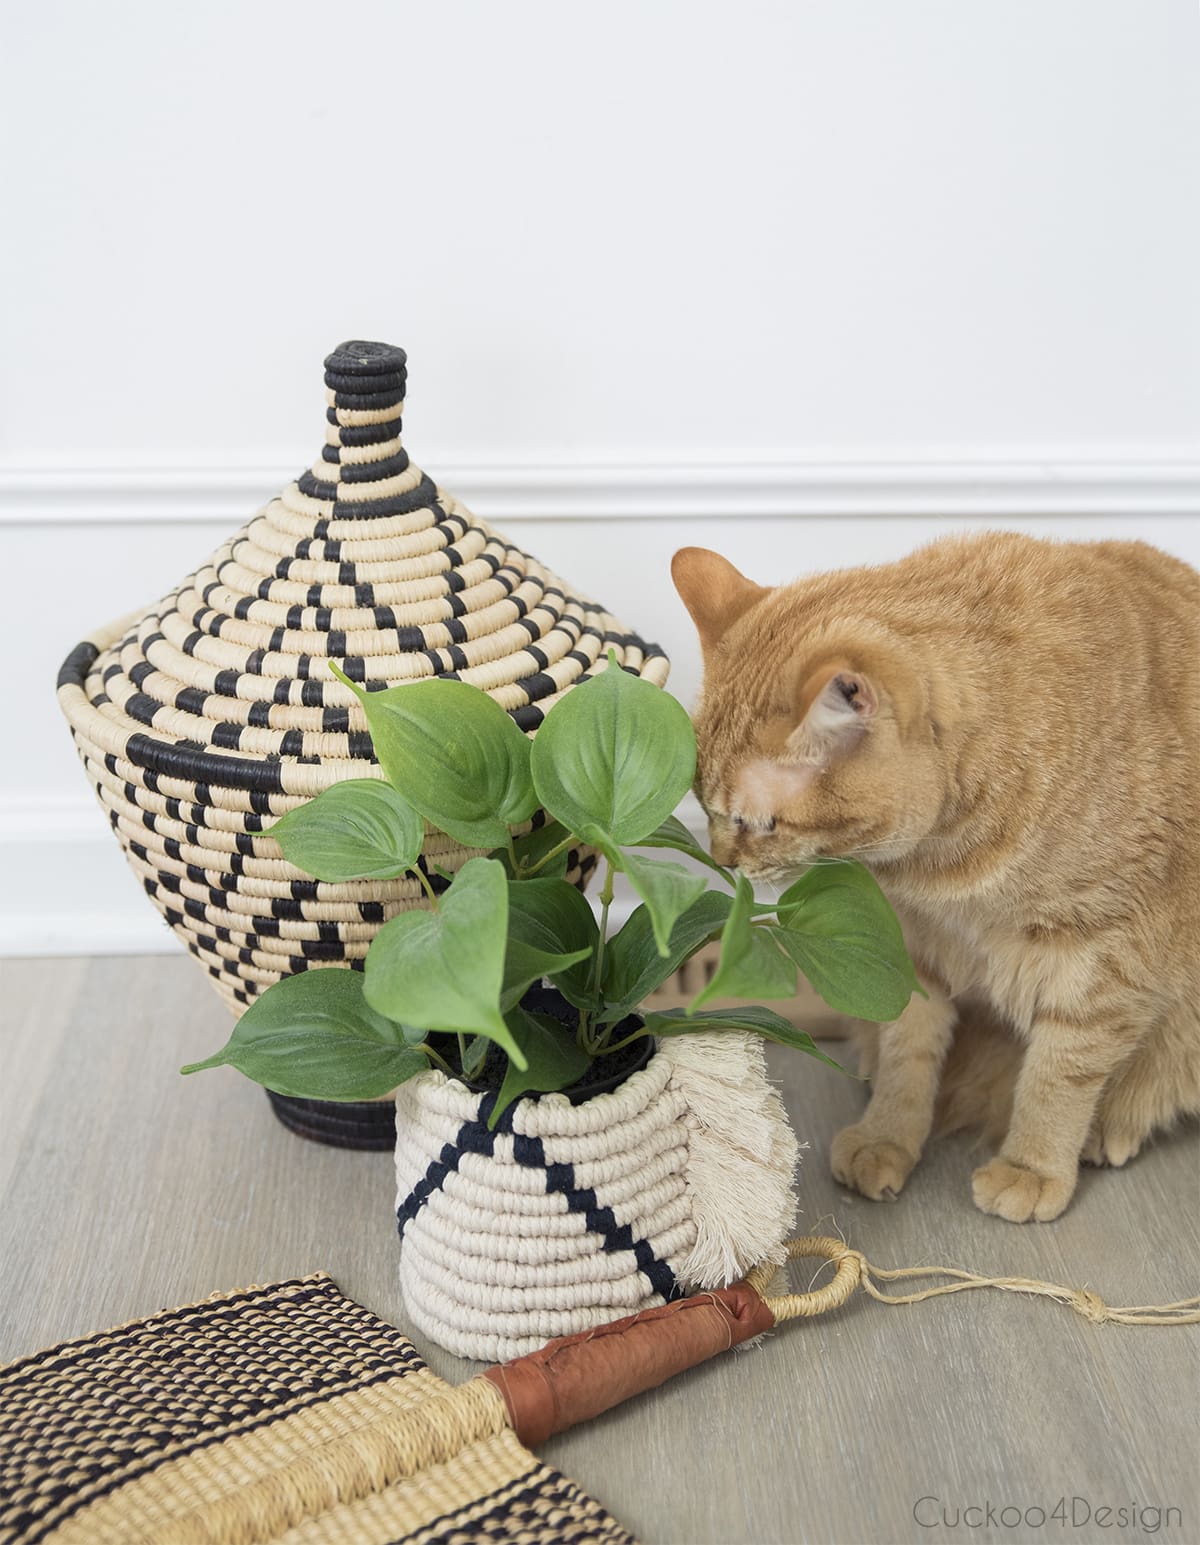
Maya is sniffing my faux plant. My kitties are the reason I had to get mostly faux plants. Thankfully, there are so many great faux plant options now, and I wrote about how to choose artificial house plants.
“If it fits it sits” and in the case below Willy does not fit in the basket:
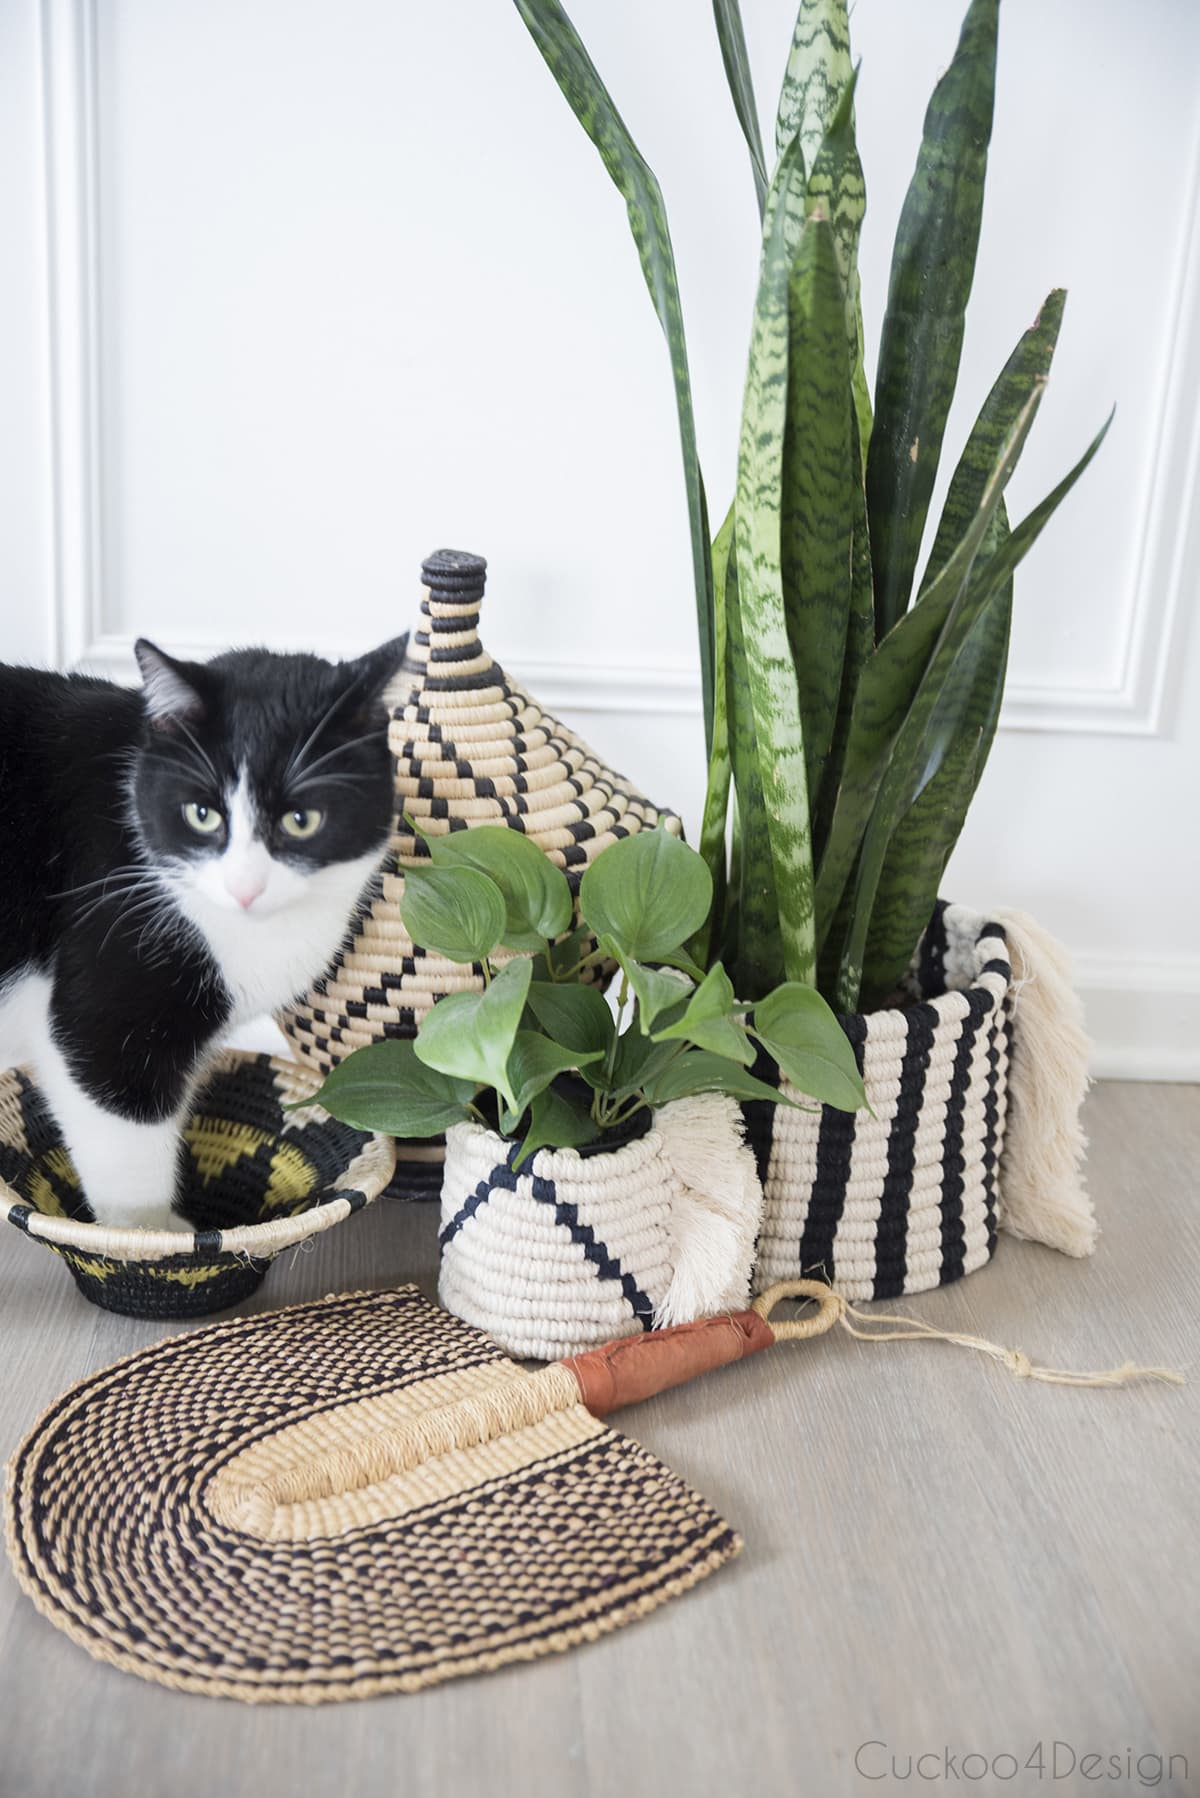
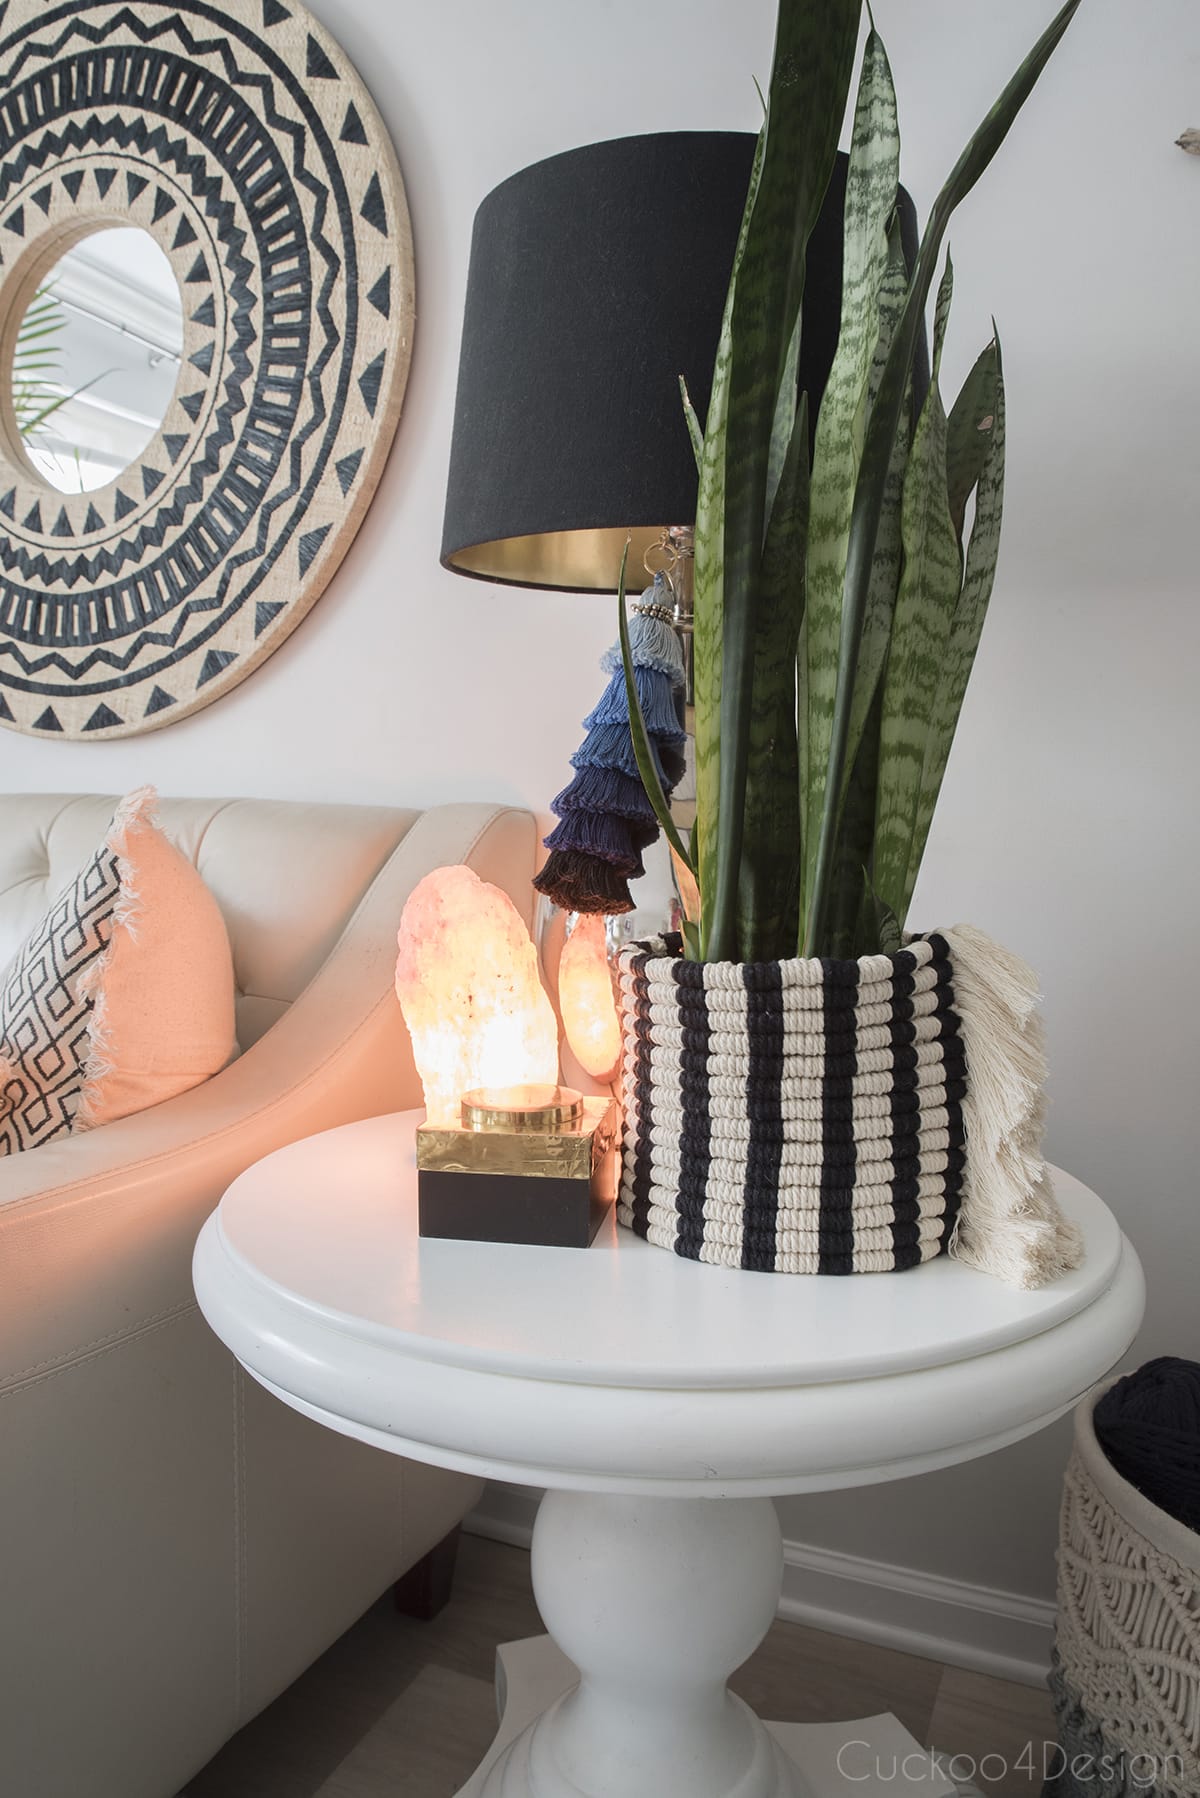
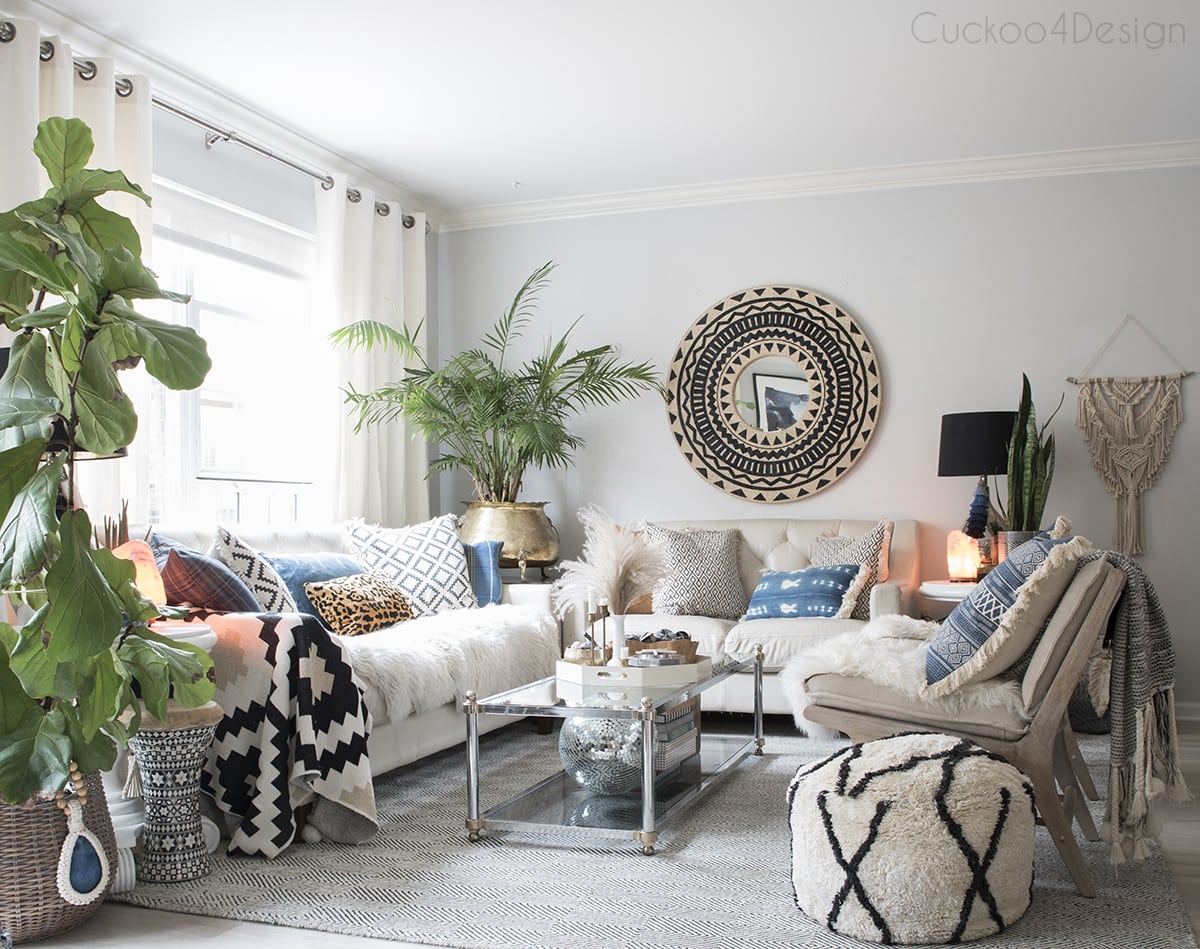
They fit right in with the rest of my decor!
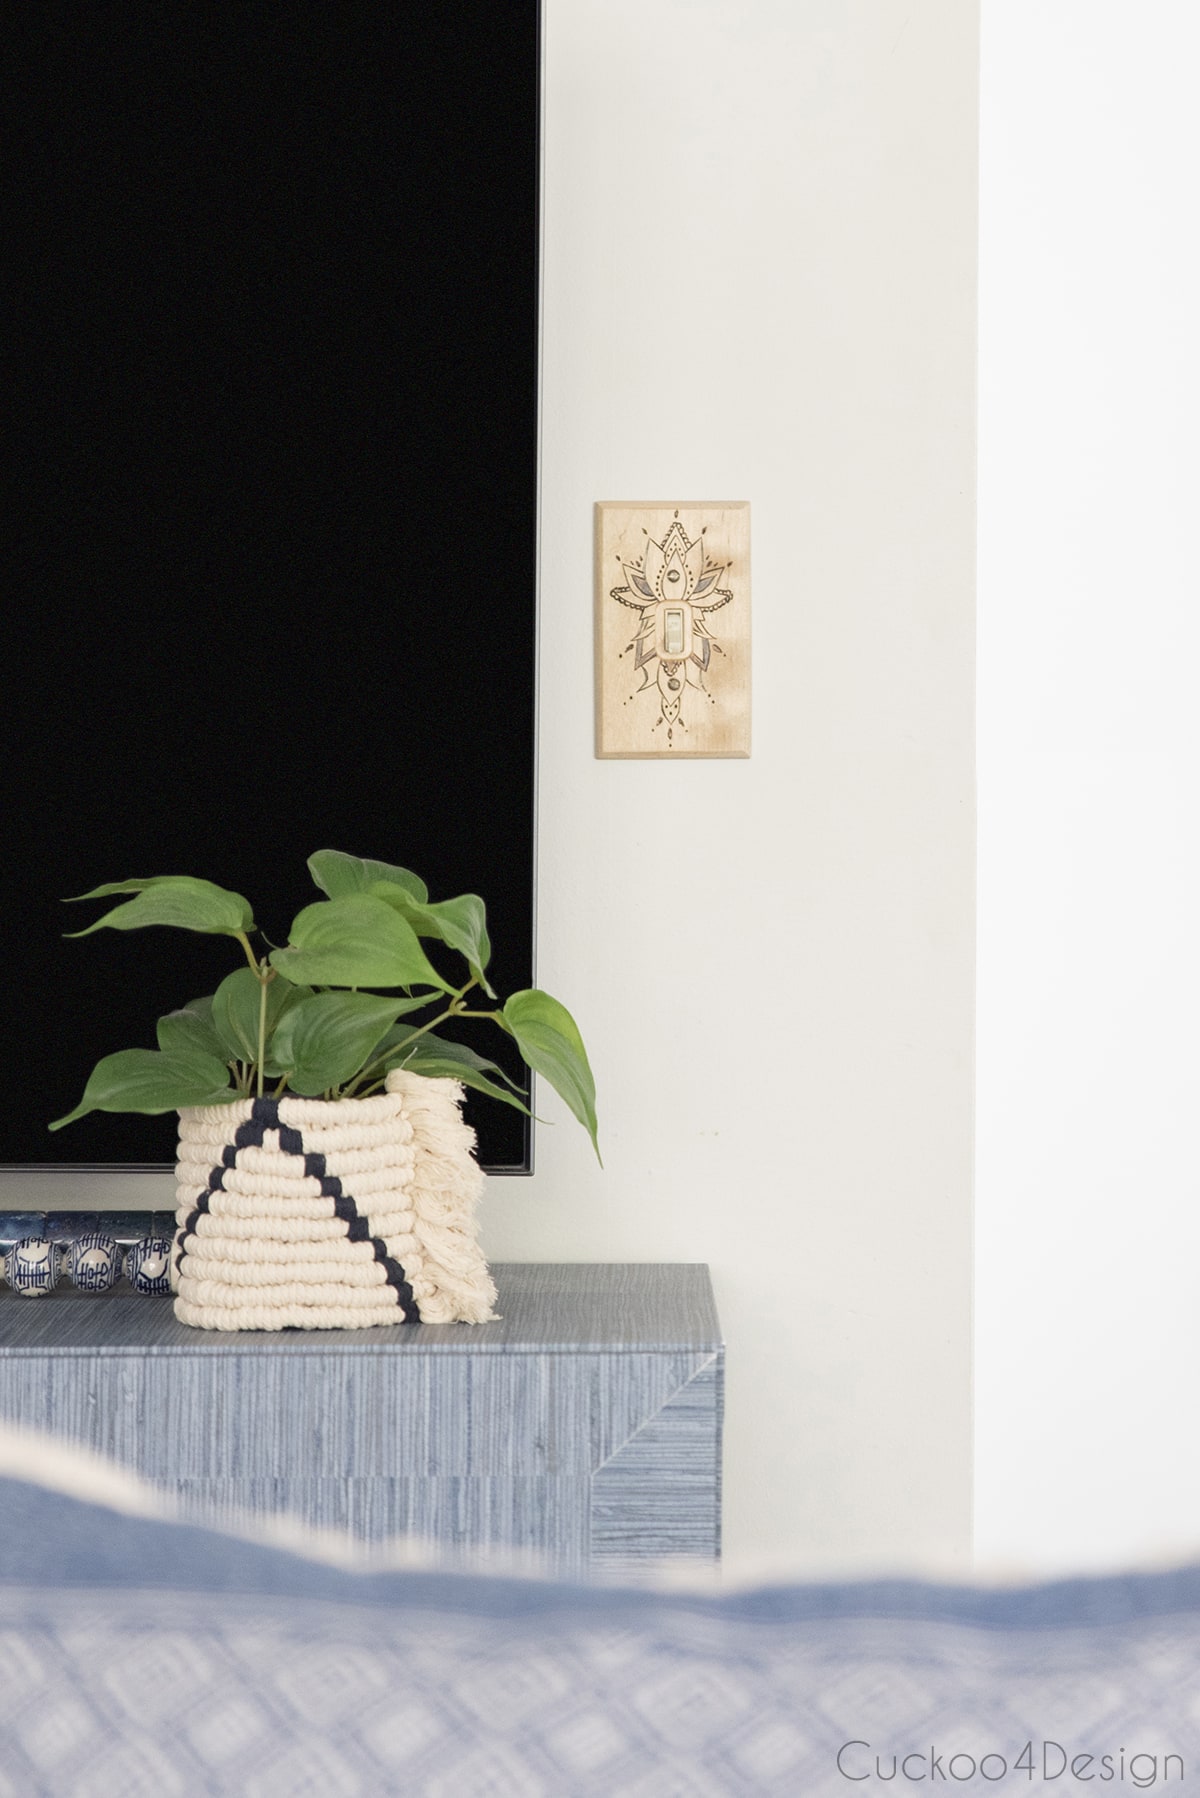
Also, check out my boho DIY light switch covers that you can see in the photo below hanging on the wall above my macrame basket.
You might also like my macrame Square Knot bracelet that can be used as a fringe garland around a planter as well.
My macrame garland can also be tied around a planter as pictured below.
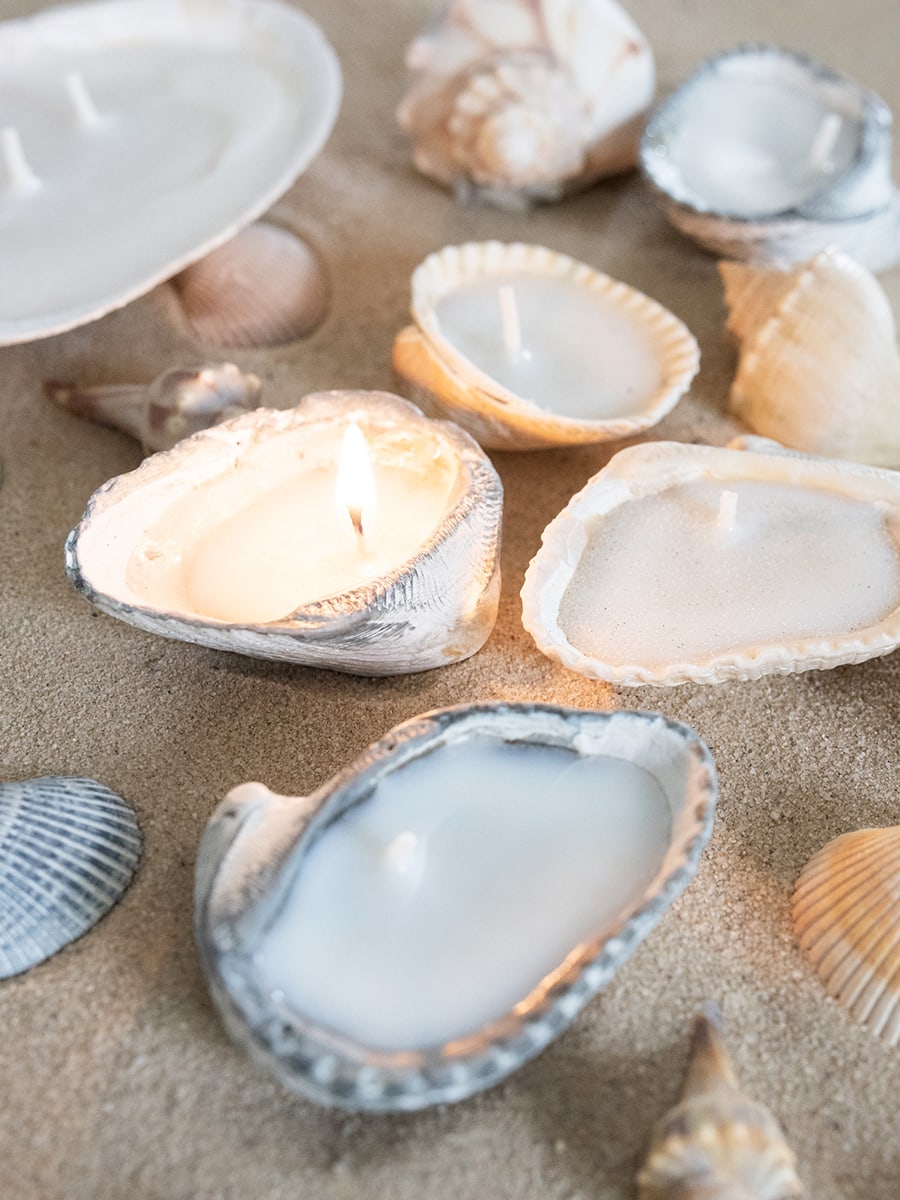
RELATED: If you like beachy decor, then you might also like my DIY seashell flower if you are looking for more seashell craft ideas.

Also, check out how to make DIY seashell candles the easy way.
Similar African baskets for sale that I love

Some of my other craft and macrame projects
- Cute DIY macrame Christmas tree wall hanging tutorial
- How to make macrame ball wall hanging using combed macrame yarn and embroidery floss
- DIY macrame earrings on hoops
- A macrame leaf with bead detail that can be used as a wall hanging
- A stunning macrame wreath with chunky wool detail that can be used all year long
- A large macrame stone wrap that you can hang on a wall or on your purse
- Stylish DIY macrame chandelier made from a planter basket or macrame light fixture using the same metal planter as a base
- How to make a DIY hanging basket with embroidery hoops
- Super easy and cheap DIY boho drawer pulls using macrame yarn
These macrame basket planters are still some of my favorite projects I have ever made, and they look just as good years later. The black and white combination never gets old.
Tschüß,


Easy DIY Macrame Basket Using Only Two Knots
Learn how to make a macrame basket planter sleeve in any size using only two easy knots. Free pattern and video tutorial included.
Materials
- 4mm ivory macrame cord
- 4mm black macrame cord
- 1" or 1.5" wooden dowel rod
Tools
- craft scissors
- comb
Instructions
- Attach cords to the dowel rod with Lark's Head Knots
Cut your cords to size based on the height and circumference of your pot. Fold each cord in half and attach to the dowel rod using Lark's Head Knots.

- Knot rows of Double Half Hitch Knots into a pattern
Start knotting rows of Double Half Hitch Knots, also known as Vertical Clove Hitch Knots. For the first loop, go behind and under the string, then over.
For the second loop, go over, then behind and under. Pull both loops up and tighten. Keep knotting rows and switch colors to create your desired pattern.
Pull both of those loops up and tighten them for the Vertical Clove Hitch Knots.
To make a planter or wall hanging, you need a full row of Lark's Head Knots along the dowel rod, not just one. The number of strands depends on the size of your pot. If it is a planter or vase, then make sure that you have that item ready to measure how much macrame string Lark's head knots you need on your dowel rod.
- Slide the weaving off the rod and cut the loops
Once you have reached the desired height, slide the weaving off the dowel rod and cut the loops at the top with sharp scissors. - Tie the ends together to form the basket shape
Tie the ends together with the pretty side of the Vertical Clove Hitch Knots showing on the outside to form the basket shape.
You can see it better on the larger DIY macrame basket. - Unravel, comb, and trim the fringe
Unravel all the macrame yarn and comb it out, then trim to your desired length.
I love these. They look so good. I really need to try making some of your projects, at least start whit one. You make it look so easy.
Thanks for sharing
Thank you, Diane! Give it a try, it really is easy once you get the hang of it. And you can always open it again if you mess up which is so nice.
Oh my word, this is incredible. I love it. Great tutorial
this is pretty much genius. you always have the best DIYs!
Thanks Cassie
This is great! I am entertaining thoughts of making a basket like this to hold toys – do you have any idea on how I could add in a base?
I’ve been thinking about what to use for a base for a while. Probably something braided into a circle and then attached.
Love these! Unfortunately I’m not crafty at all. Do you mind if I ask you advice on how to stop a kitty from clawing your furniture? Out of my three she is the only one to do it. She will be seven this year and I have been inconsistent in getting her to stop (ie: yelling at her, chasing her, squirting water) but I am super motivated because I will be buying some new furniture soon. Of course I have a nice scratching post that she sometimes uses. Your home is beautiful and dosen’t appear scratched up 🙂
Donna
Good morning Donna,
I don’t mind at all. I actually talk about this often in my Instagram stories. Maybe I should write a blog post about it too.
In the mean time, until I write a blog post, I have made a small change in our home that has made a huge difference and saved our furniture.
I bought small scratching posts and placed them throughout my home in areas where they liked scratching the furniture.
They absolutely love them and I just replaced the sisal last week because they shredded the posts.
Here is my favorites page with a link to the scratching post that I have purchased and some of my other favorites that I use for our cats. I have 3 of them:
https://www.amazon.com/shop/influencer-d188fe57?listId=2NQEHUO6Z0ST1&ref=cm_sw_em_r_inf_list_own_influencer-d188fe57_dp_RastnFjfKoaLv
It’s the first one on the list.
They want to scratch and I can’t stop them from scratching but I can give them something else to dig into 😉
Oh and those planters are really easy to make even if you aren’t crafty 😉 They could even be turned into a cat bed.
Have a great week.
I am so excited to try this! What size cord did you use?
Oh yay, you should, yes! It’s the exact cord that I linked to in the supplies list.
Hi! I’m excited to try this! How many yards do I need to make one of these?
Thanks!
Did you make the fan, because it is amazing and I would love to do the same!
Hi there, and thanks! No I bought the fan on Etsy which is a great place to find them.