

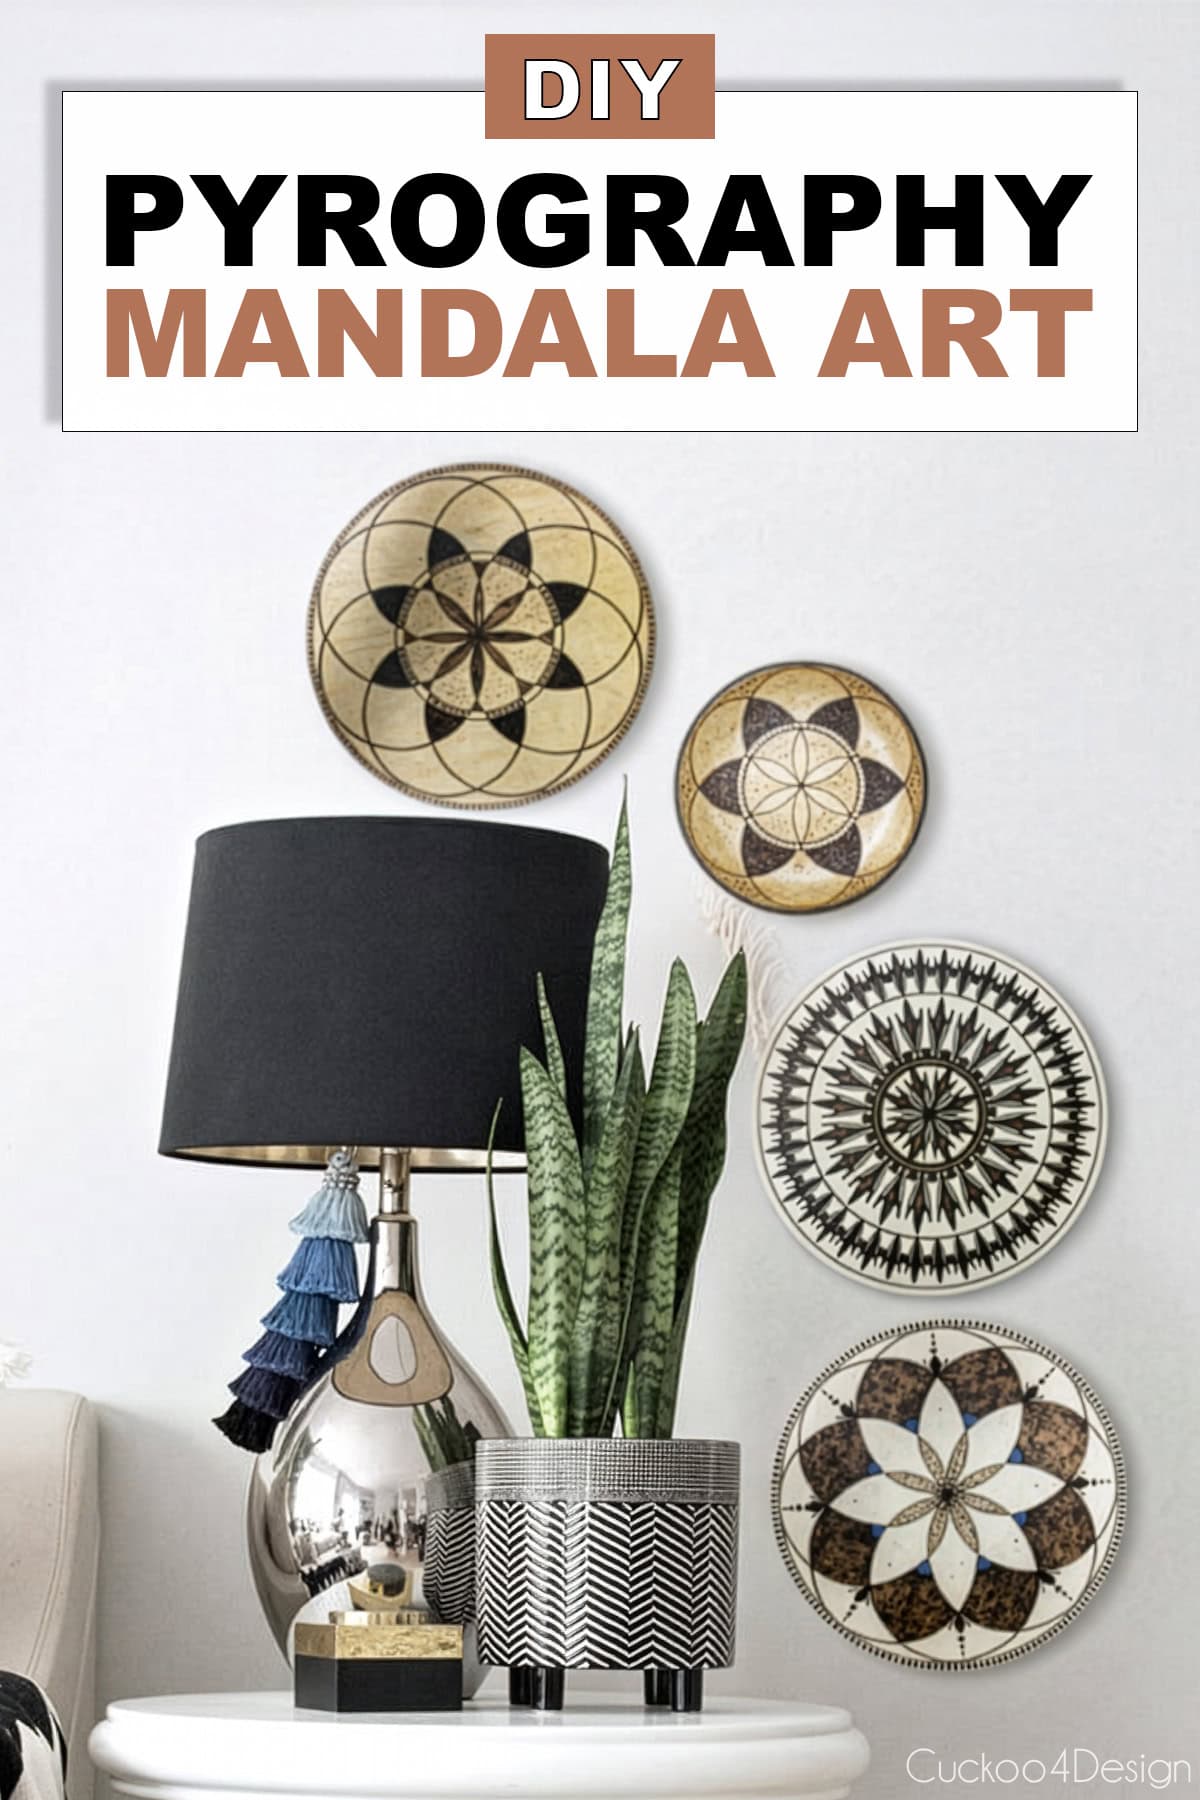
How to DIY geometric wood wall art (video tutorial included)
If you love the look of boho mandala wall art but don’t want to pay the price for it, making your own DIY geometric wood wall art is the answer. I got completely addicted to this project and ended up making a whole grouping of them, first for our living room and eventually for our outdoor fence by the stock tank pool. This tutorial covers everything from drawing the mandala pattern, to transferring and wood burning it, and how to hang the finished pyrography mandalas. I also have a video walking through the whole process.
My inspiration for this tutorial
This post may contain affiliate links from which I will earn a commission at no extra cost to you. View my full disclosure policy.
My first inspiration comes from a catalog I paged through where I saw the below lacey circles metal wall art at Grandinroad which is pretty expensive even on sale. As always, I love the black-and-white pattern but since I already have so much of it in my house, I wanted to do something a little different. When I discovered the wood-burned plates and a bottle at the thrift shop in Germany, I knew immediately that this was the route I wanted to take.

The catalog calls them lacey circles but I would call them mandalas which are geometric mostly round patterns.
What is a mandala?
The literal meaning word Mandala means circle and circle mandalas are definitely more common. They are simple geometric shapes that are made from even divisions of the circle.
Mandalas originated in Hinduism and Buddhism and are spiritual symbols. Old scriptures describe mandalas as symbols of great power or strength, the womb of creation, and the connection with your inner self.
These geometric patterns are definitely something that has been done in countries all over the world and not just in Hinduism and Buddhism for hundreds of years. These types of geometric patterns and not just repetitive circle patterns appear in many different cultures and countries. There are Celtic, Indian, Asian, European and even the Pennsylvania Dutch hex signs are in the form of geometric patterns on circle backdrops but all with their own twists and designs which probably all relate back to the beliefs of sacred geometry. Even our common doilies come in similar patterns and looks.
What are pyrography and woodburning?
Pyrography means writing with fire, which doesn’t necessarily have to be done on wood and can be done on other materials as well. Woodburning is, as the name says, only done on wood with a hot burning tool, which is also a soldering iron.
I watched a lot of videos on YouTube about woodburning and I loved Kate’s video so much. She has a store on Etsy and she is very knowledgeable.
Materials needed to make geometric wood wall art
- protractor
- woodworking compass
- printed geometric shapes (or free downloads)
- clear tape
- respirator masks to protect from burning fumes
- pliers
- pencil
- ruler
- colored pencils (optional)
- carbon paper for transferring patterns
- unfinished wood circles (I bought 10″ and 12″ pieces)
- wood burning kit
- plate hangers or hot glue and string as shown in the video for hanging the geometric wood wall art pieces
- piece of scrap wood

Video tutorial
Check out my video to see what I did exactly with my hands. Should it not load for some reason then you can head over to my YouTube Channel to watch instead.
Step-by-step instructions
It shows in our home’s decor and previous design decisions that I love repetitive geometric patterns. I also love creating my own artwork pieces.
I have two versions in this tutorial. One is the symetrical mandala and the other is the straight geometrical piece.
How to draw a mandala (a symmetrical geometric circle shape)
There are many ways how you can draw a symmetrical geometric circle shape but I want to show you how I prefer to do it. It’s a simpler, less intricate, and easier version than some of the downloads that I also showed in this post. (in my video I create a different circular shape than below but very similar)
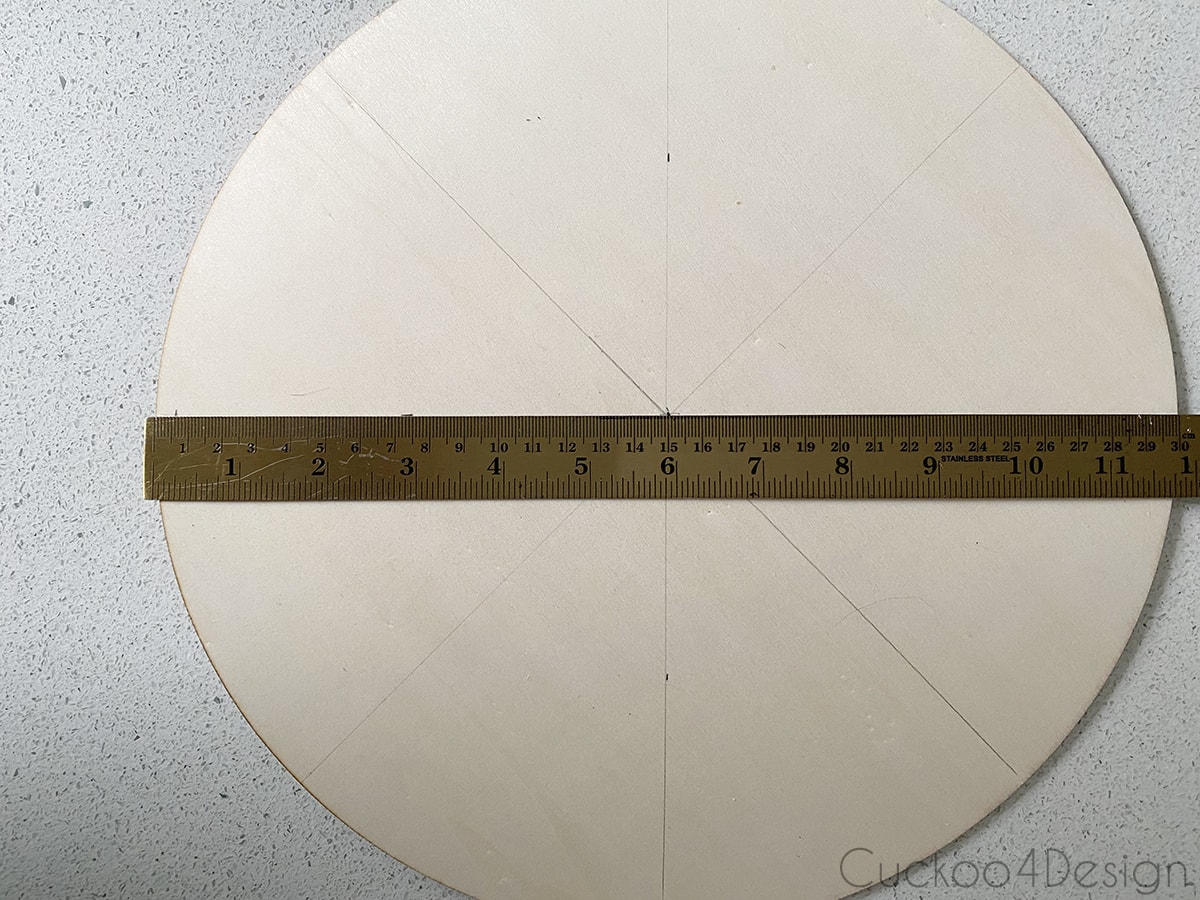
Mark the center of the wood disc and draw a line

Draw another line through the center in a 90-degree angle.


then mark 45-degree angles through the center

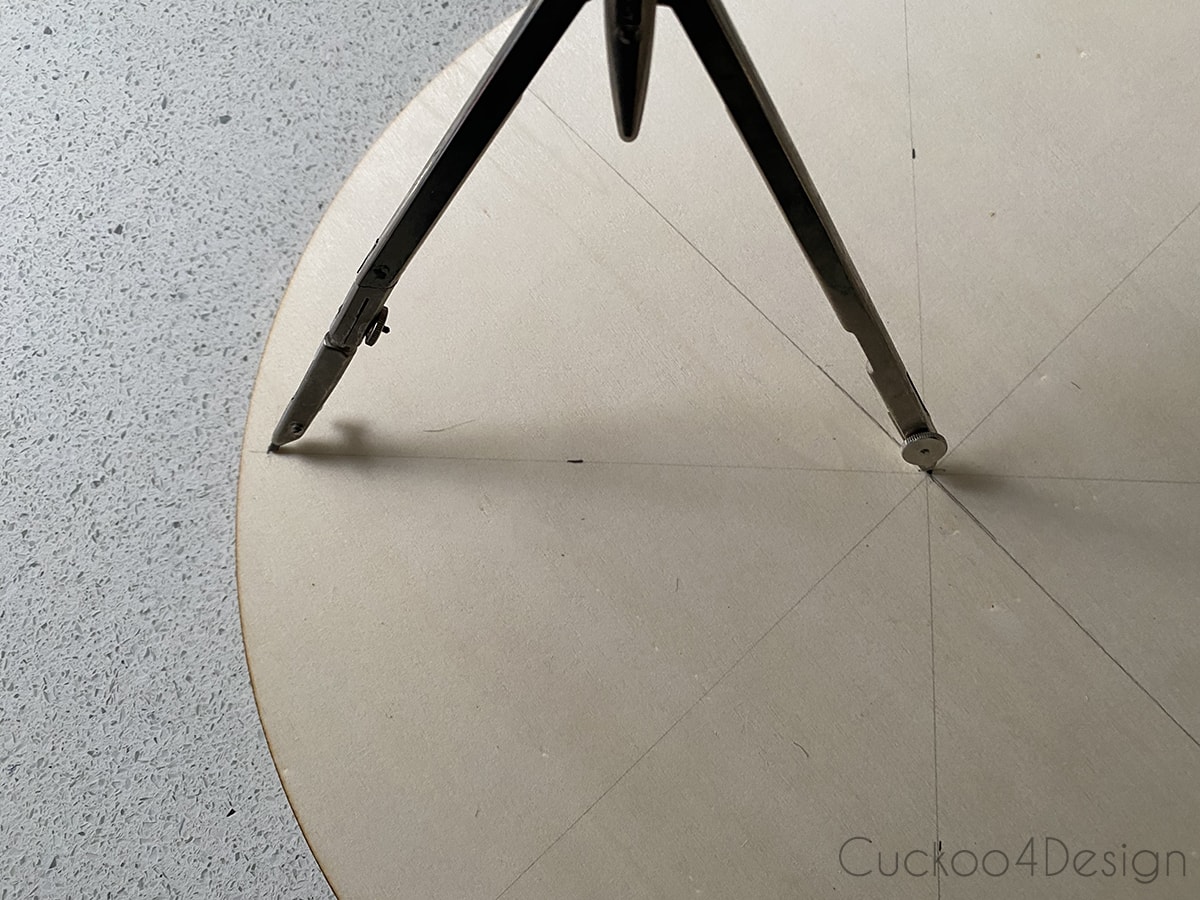
The next step is to mark the circles that will cut through the center lines

Use your compass to draw the circle.
You can see the measurements I used for the different circle sections in the below photo:

draw all the circles
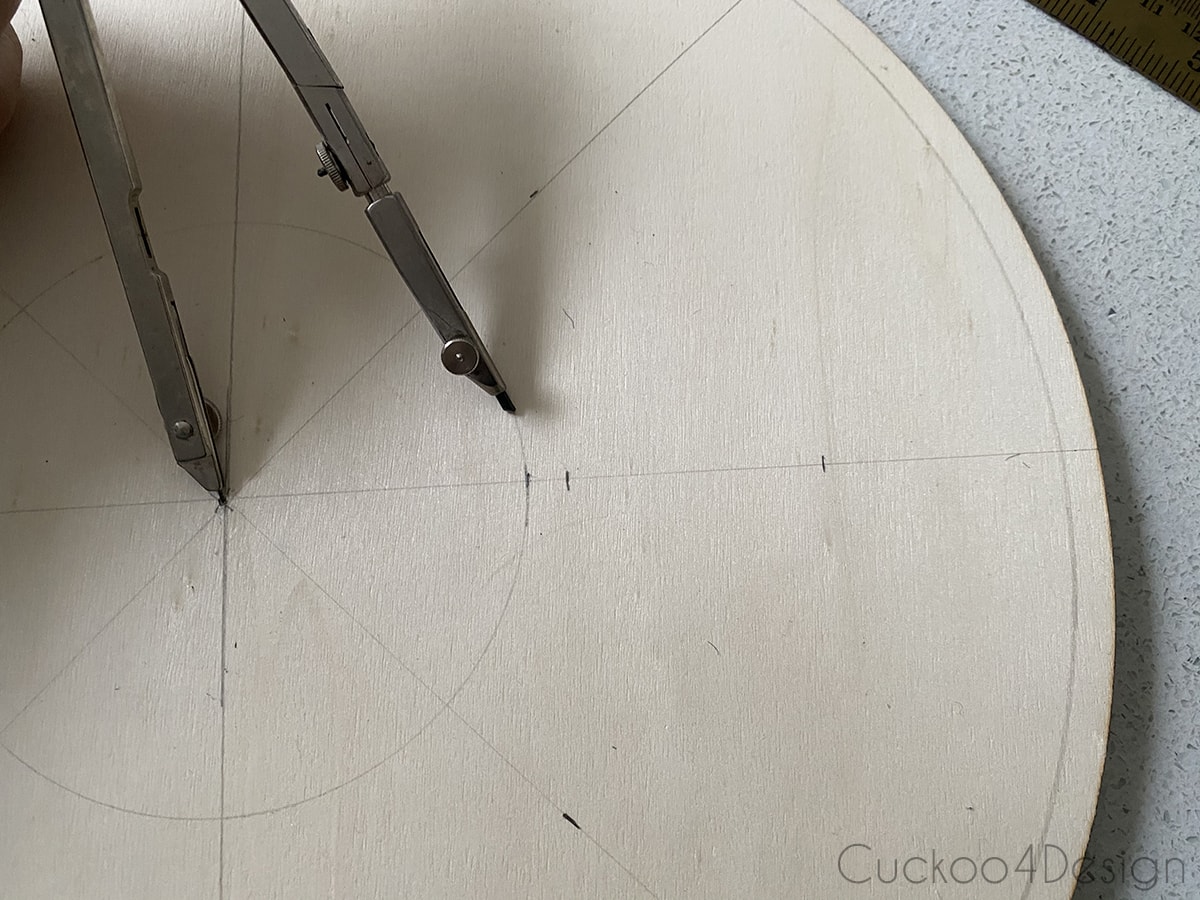

I decided to make smaller center circles that cut over each other as shown below…
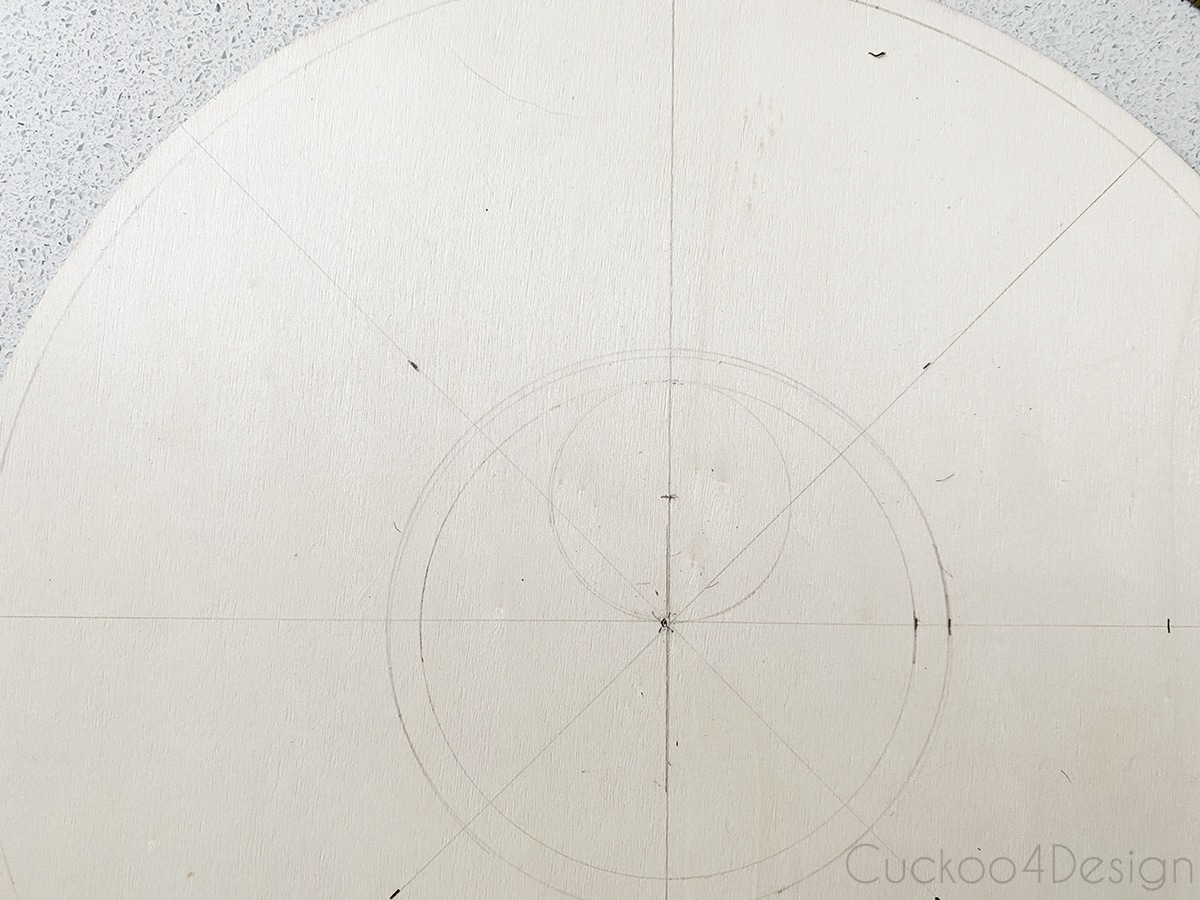
I marked the center for the next row of outer circles.

And then drew them with the help of the compass

Below you can see the pattern before I drew in some more details by hand.

I started by connecting some of the circles starting from the centers to the outside.

And then drawing in some decorative loops.


As another detail, I drew in larger circles to the outside circles. It’s basically circled on circles and circles!


Here is the finished pattern before I started with the woodburning.

Tracing a geometric wood wall art pattern
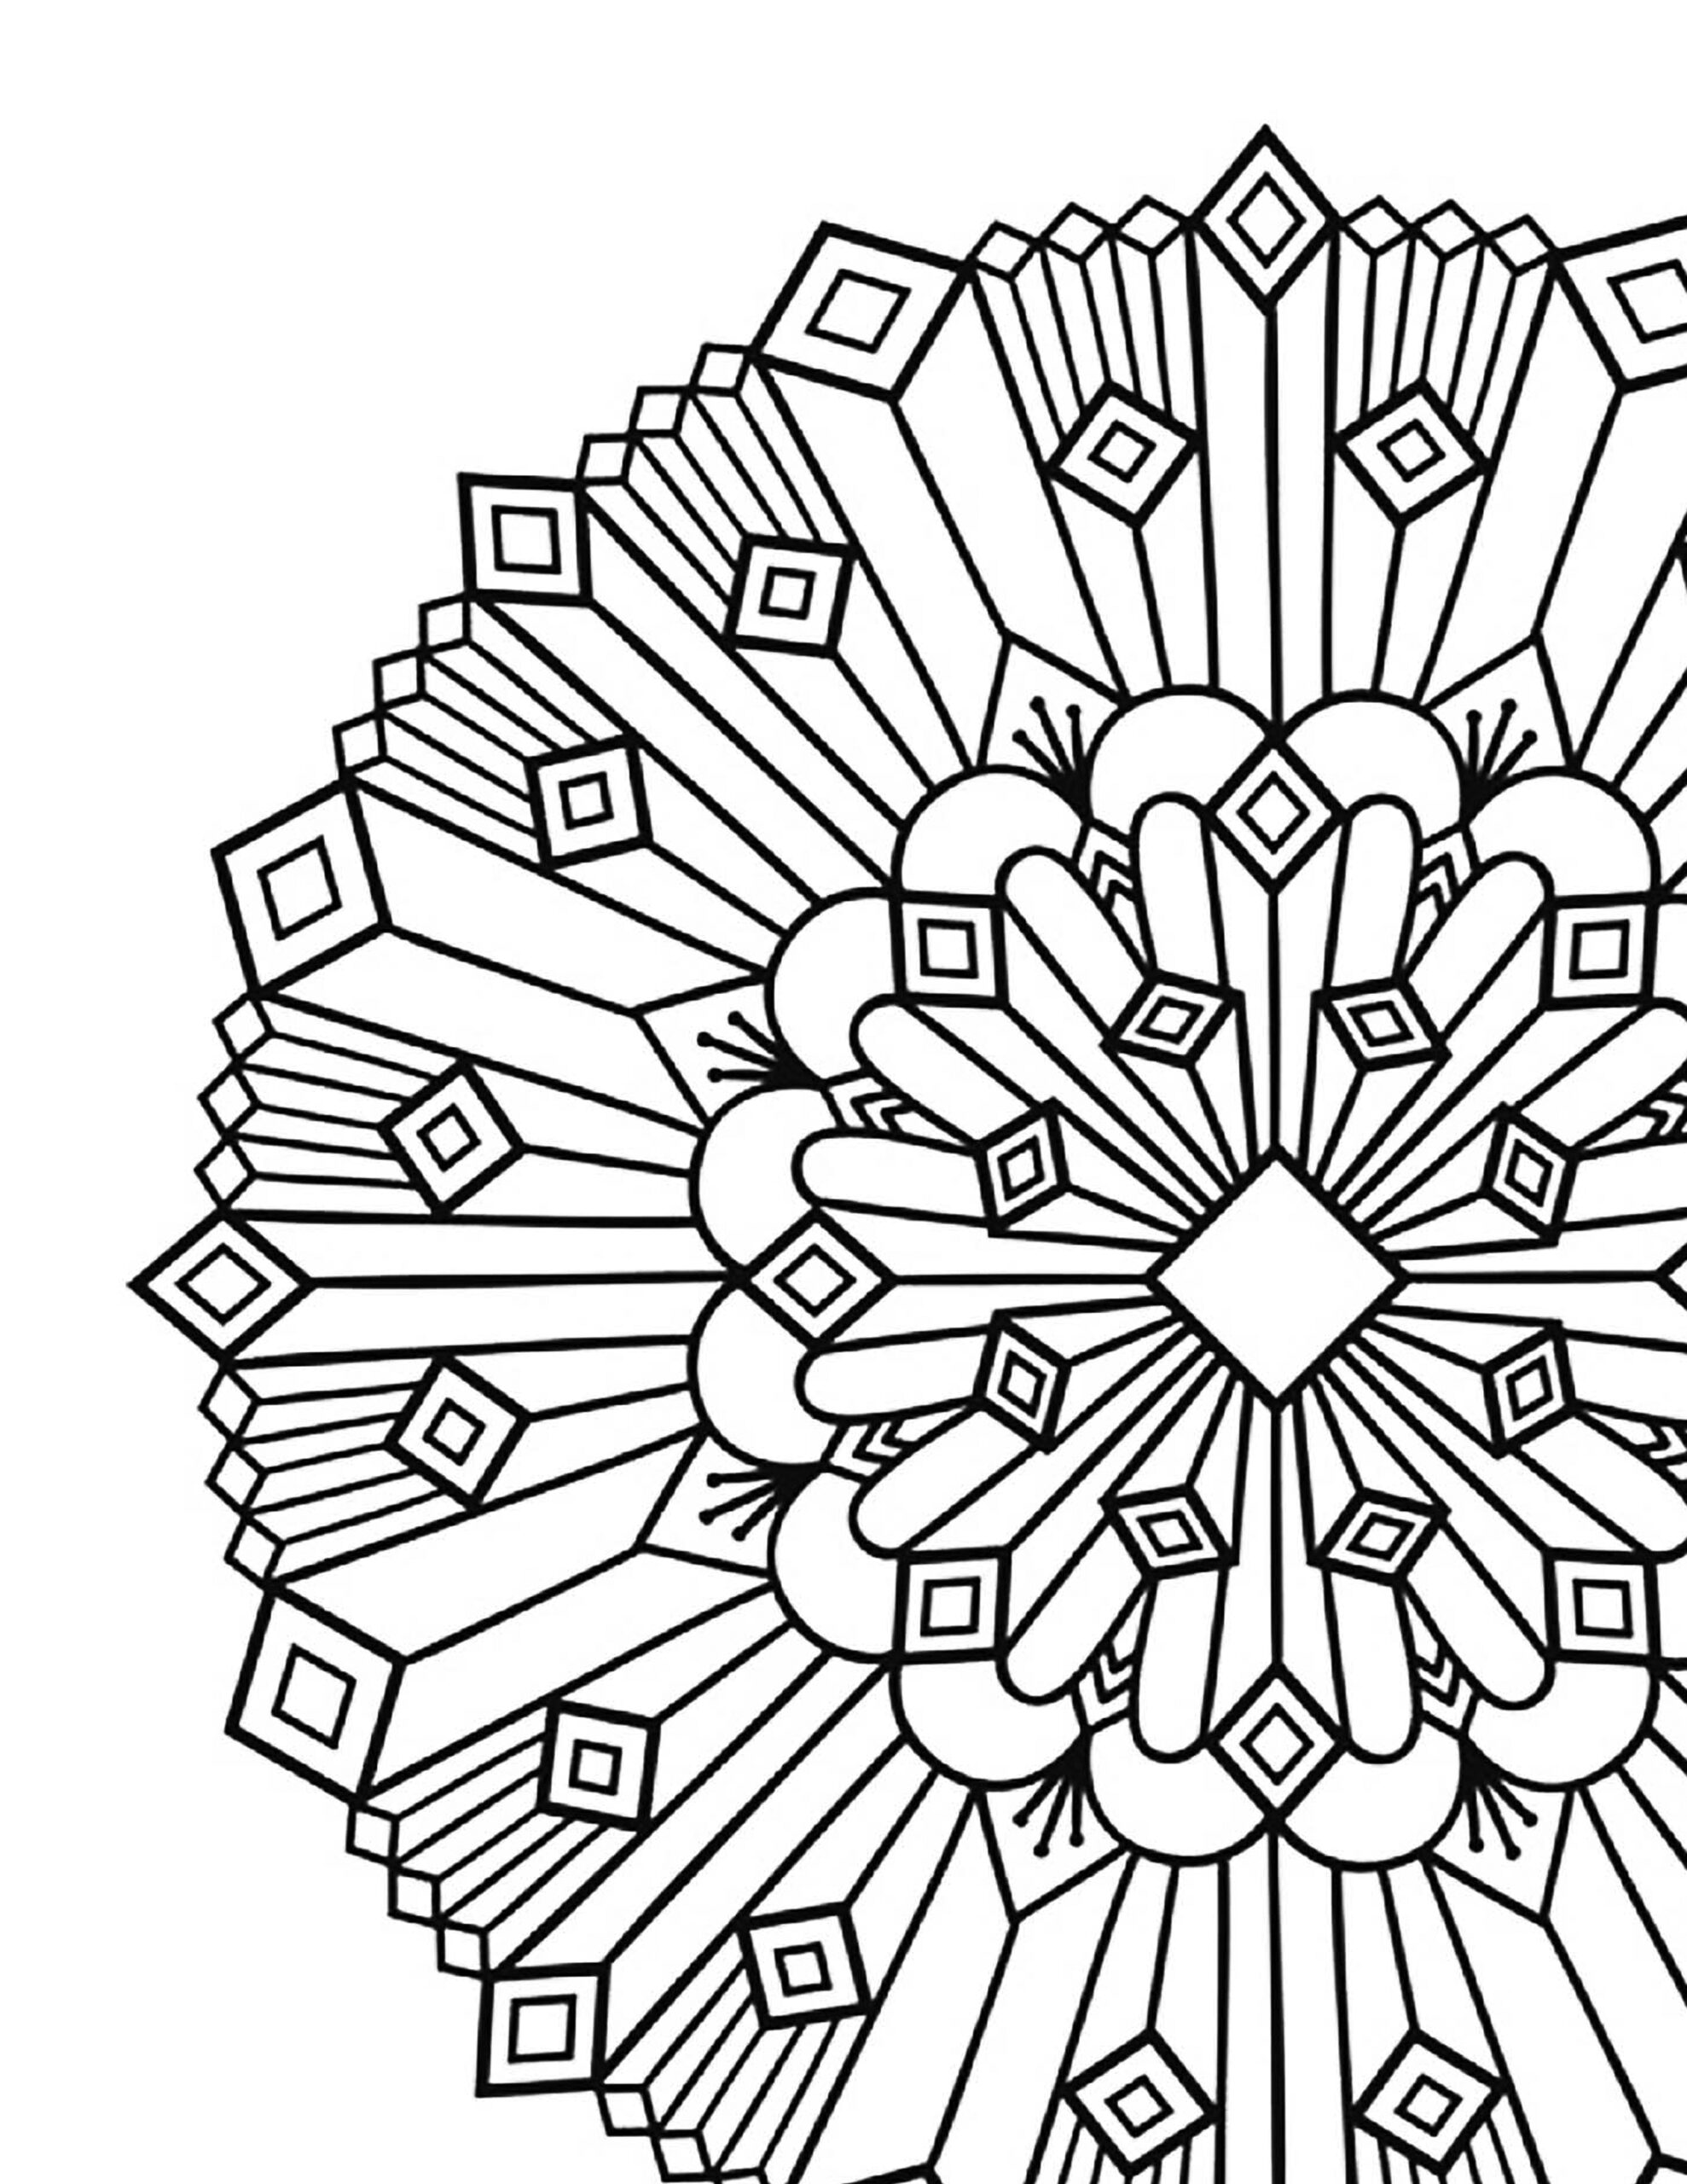
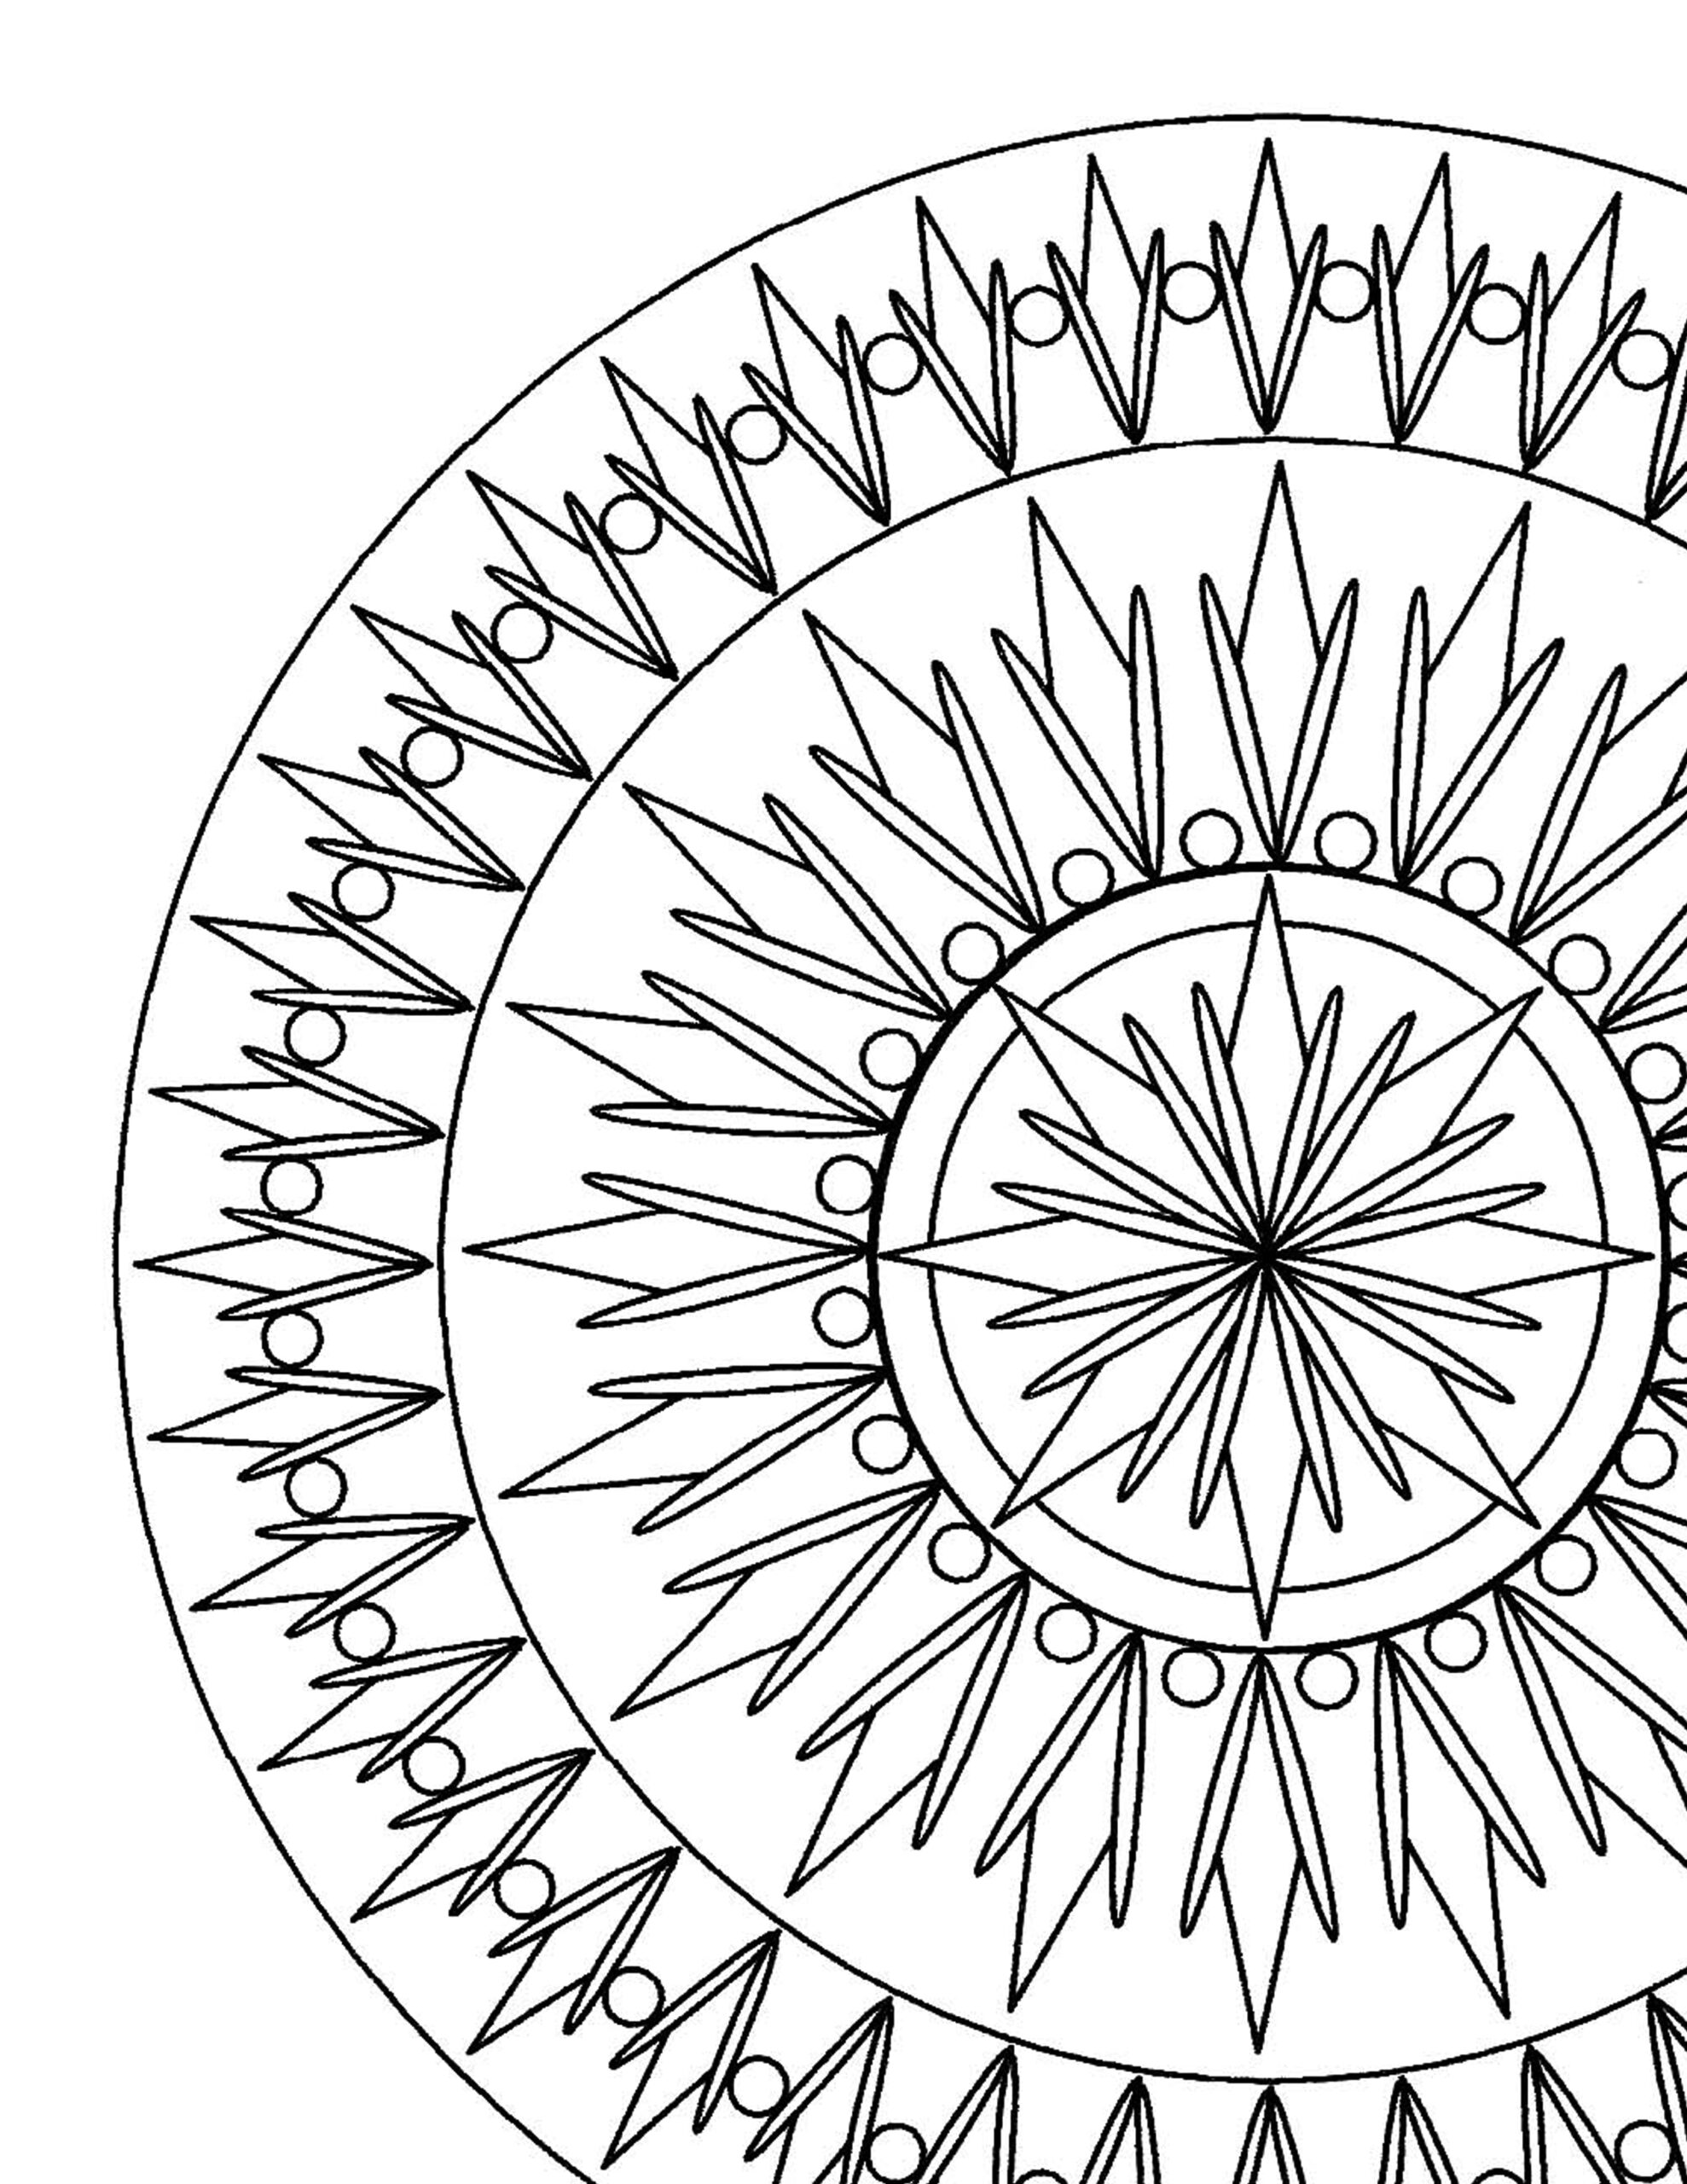
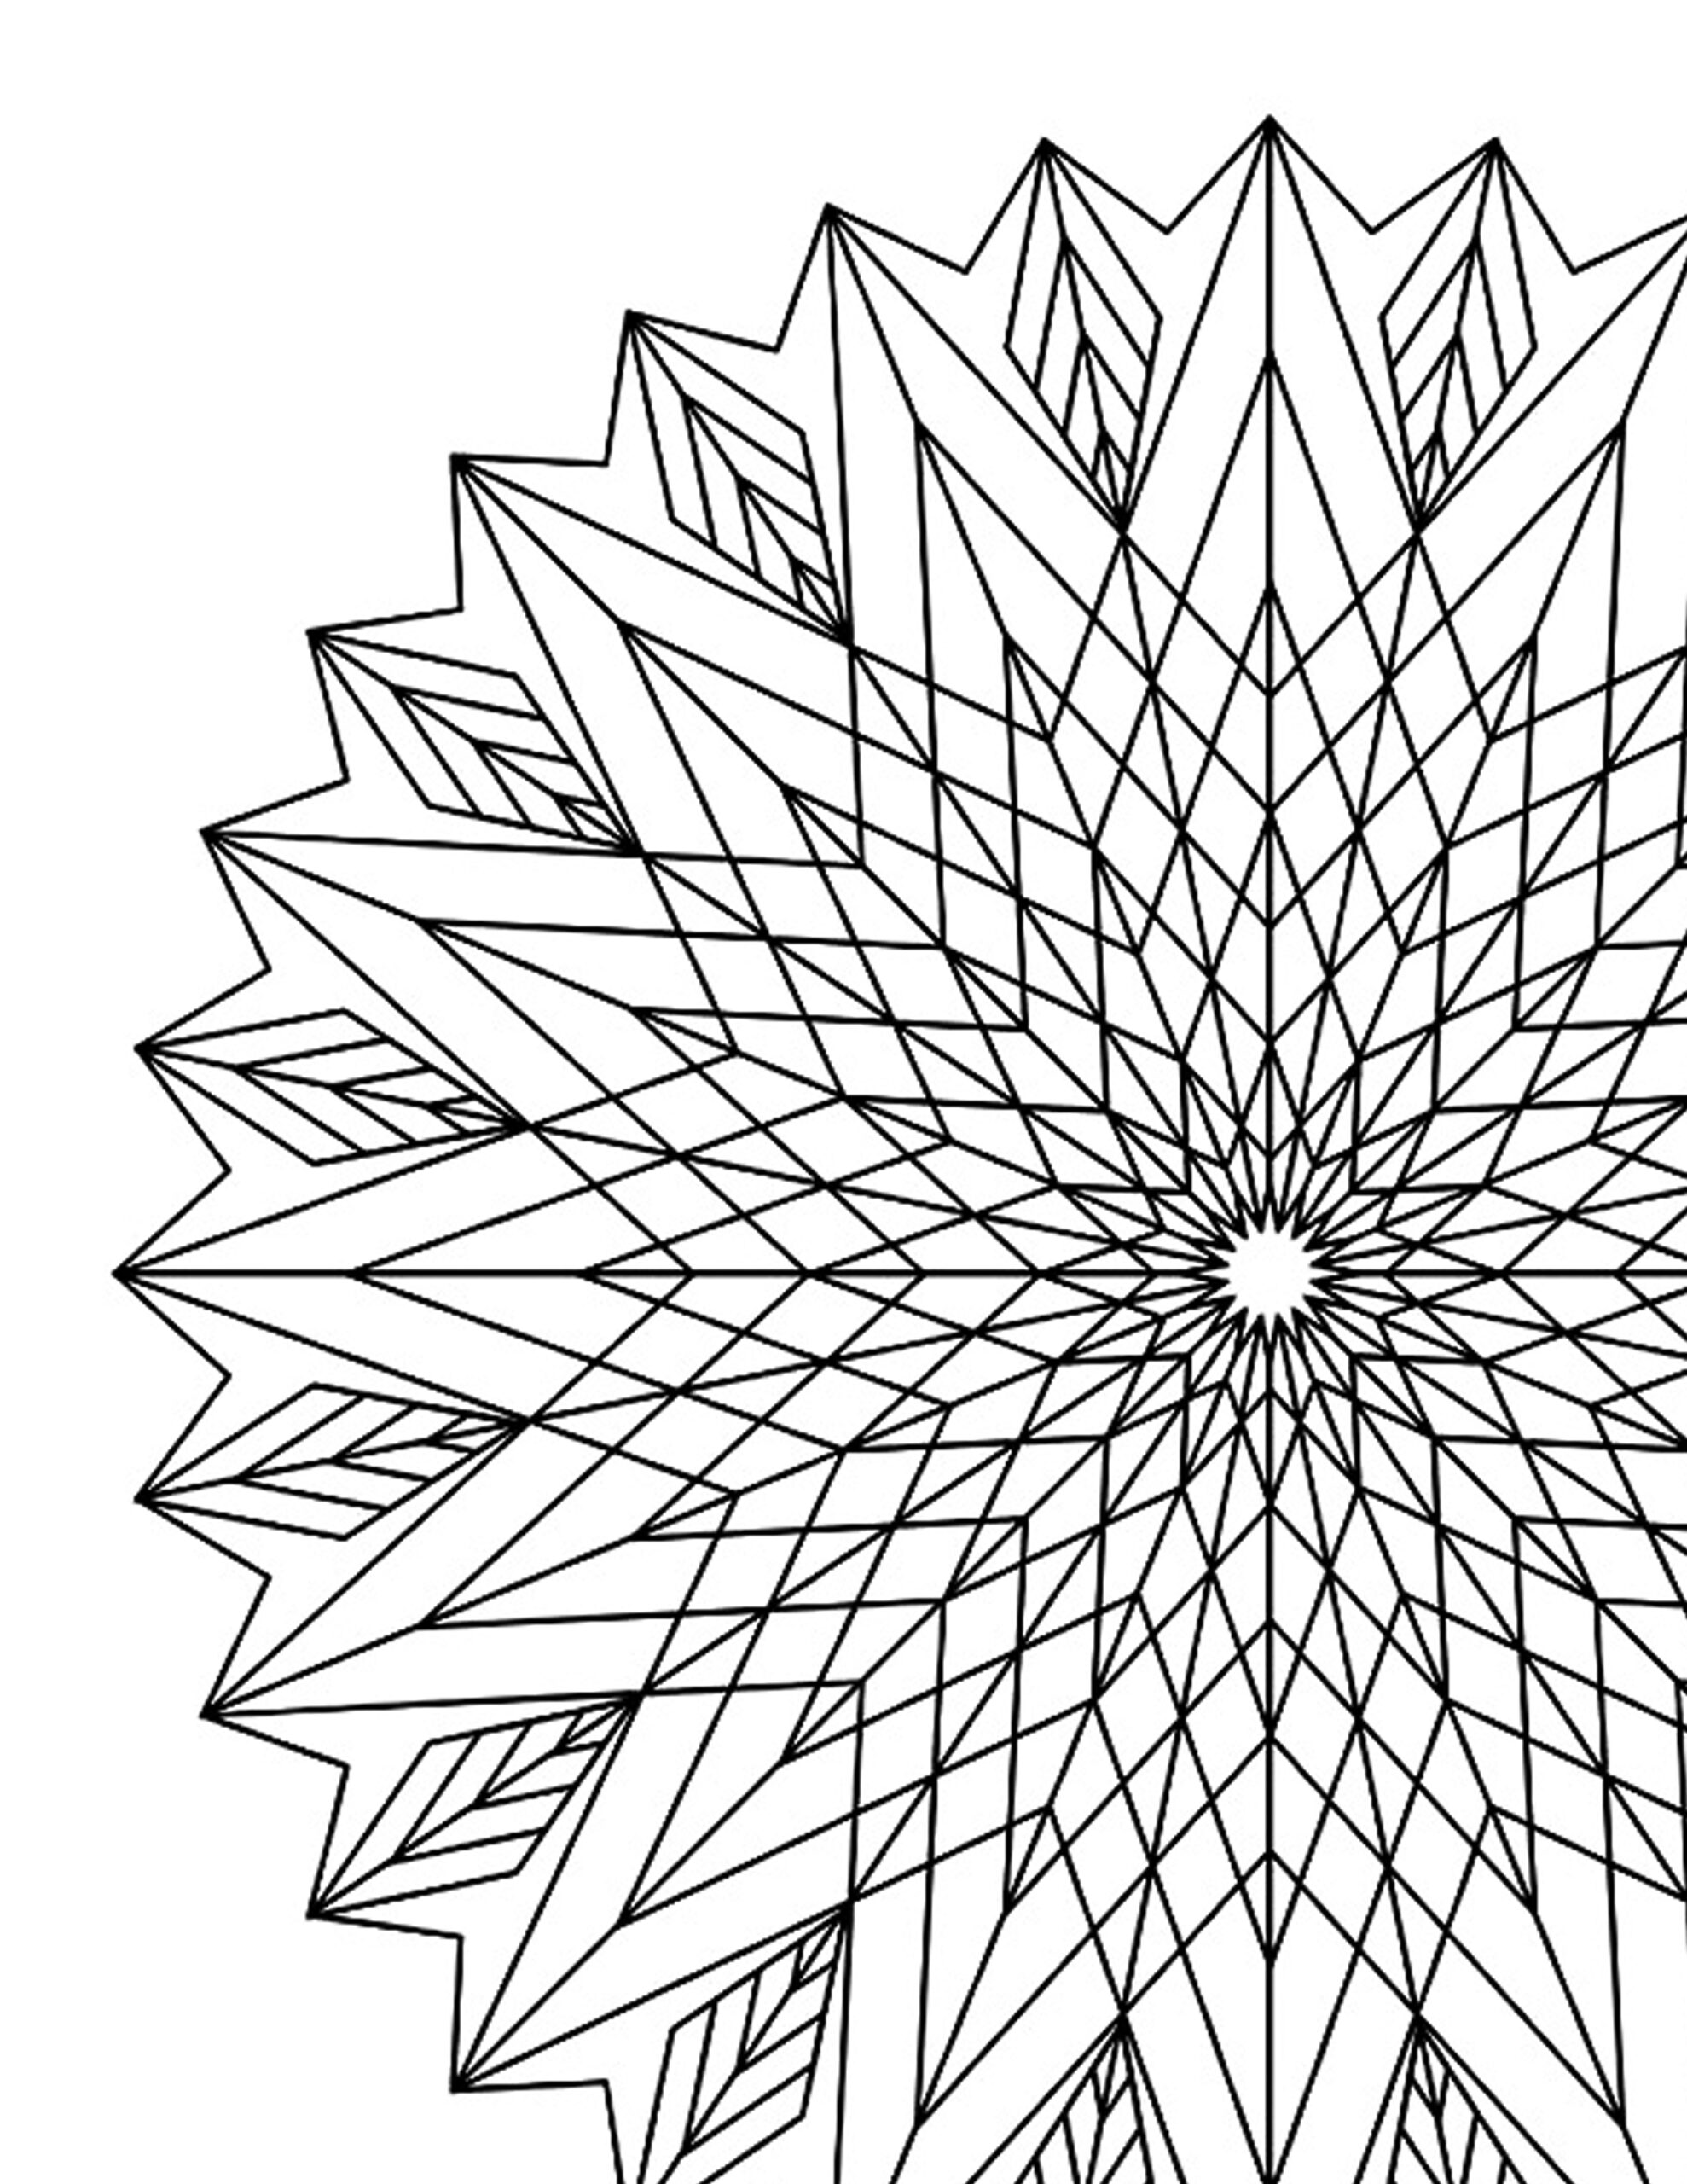
I downloaded several free mandala patterns from free-mandalas.net., including a mandala with sun rays, a simple geometric mandala, and a Celtic-art mandala, where you can also browse others.
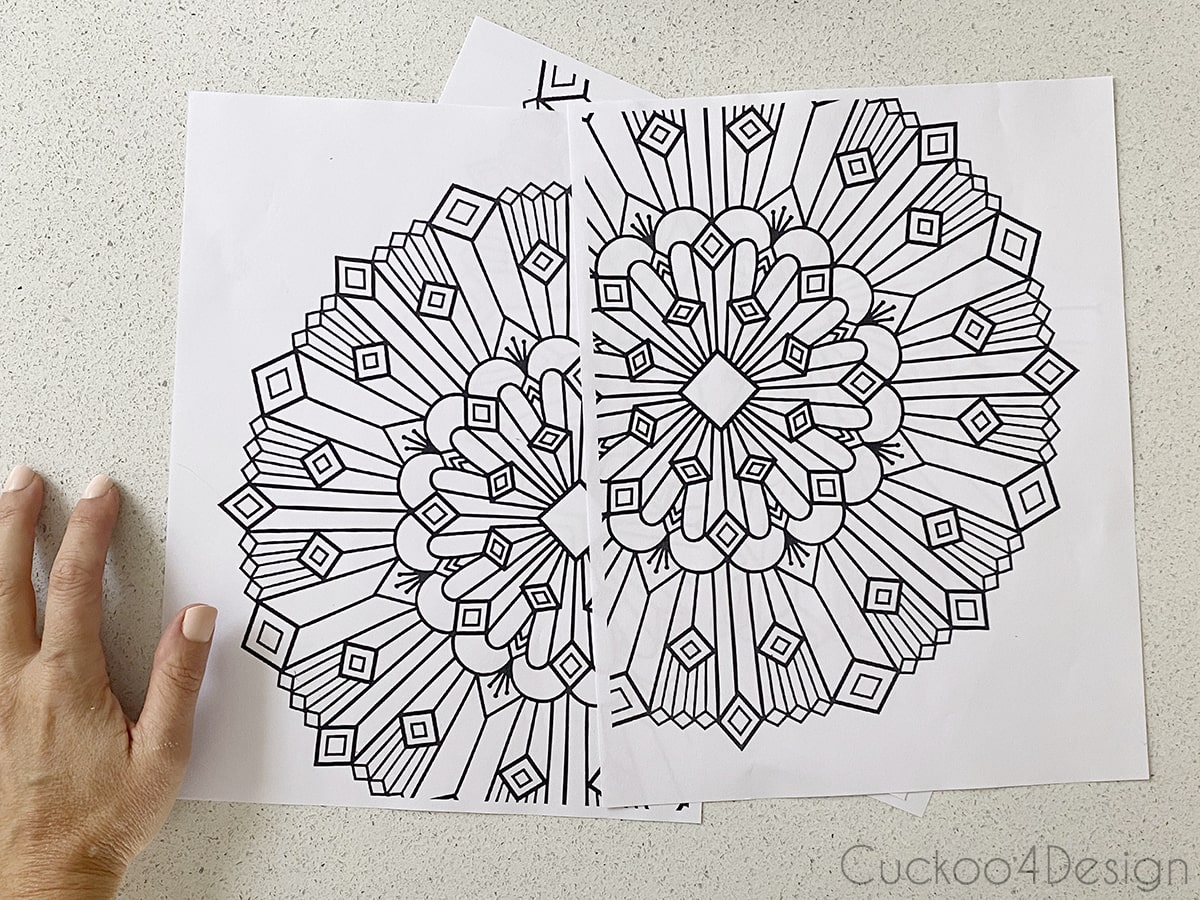
You can download my resized mandala patterns here: mandala pattern 1, mandala pattern 2, and mandala pattern 3, sized to fit 12-inch wooden circles.

For the smaller wood circle. I taped two of the same print-outs which you can see in my video.

Then place carbon paper under the print-out and secure it with tape…

…and trace the entire pattern with a pencil either freehand or with a ruler.

Now it’s time to woodburn your geometric pattern into the piece of wood. For this part, you should definitely watch my video.
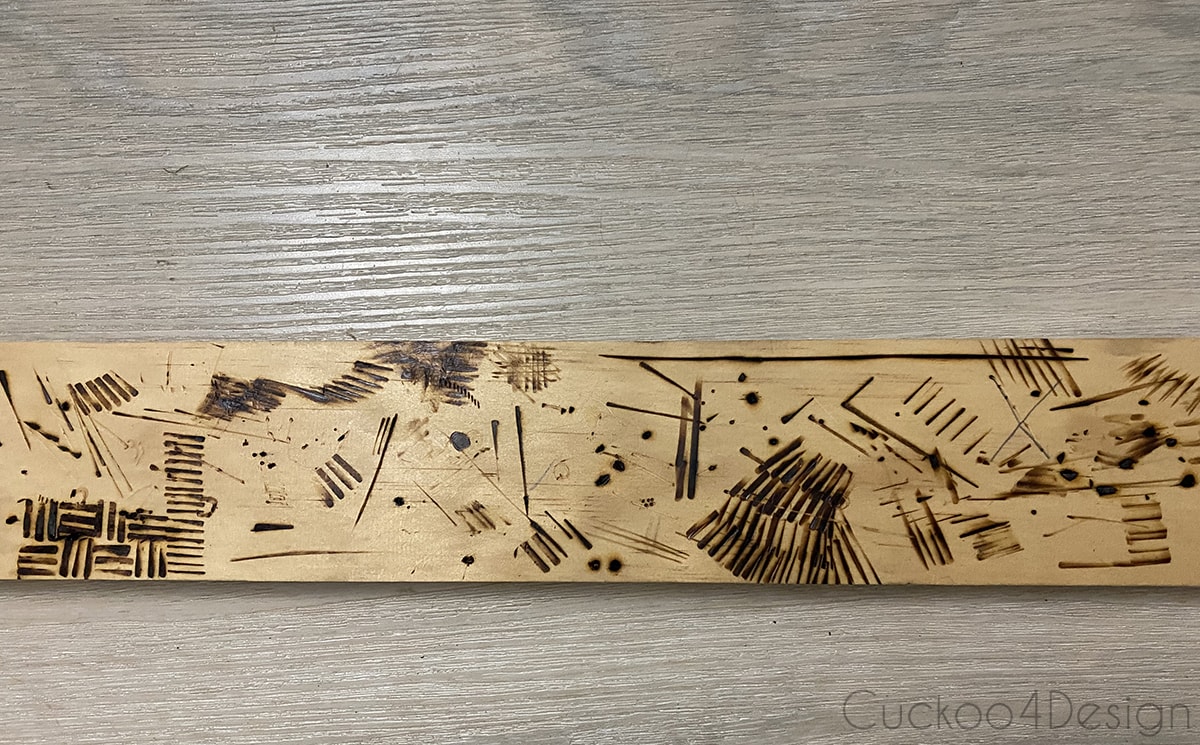
The most important thing to know is that speed controls how dark your burn gets. Move slowly for darker, deeper lines and faster for lighter ones. Keep a consistent pace and don’t stop mid-stroke, or you will get a dark spot. For filling in larger areas, use a shading tip and work in small circular motions. For the outline lines of the geometric pattern, a fine tip gives you the most control. Since every wood-burning kit is different, practicing on scrap wood first is essential to get a feel for your specific tool before you touch your actual piece.
I recommend using small pliers to change the tips when they are hot. I have a piece of scrap wood that I lay the hot pieces on and then cover them with a glass, so the cats and humans don’t accidentally burn themselves.
TIP: “It is actually easier to avoid the round shapes on your first try and go with the straight lines to practice.”

Before you start to trace the patterns I advise you to try out all the woodburning tool end tips on a piece of scrap wood to see what shapes, strokes, and shading you can create with each one of them.
Close-up photos of some of the finished geometric wood wall art pieces
And now below is the above-drawn geometric wood wall art piece burned and colored. Please watch my video to see me actually burning some of the pieces.
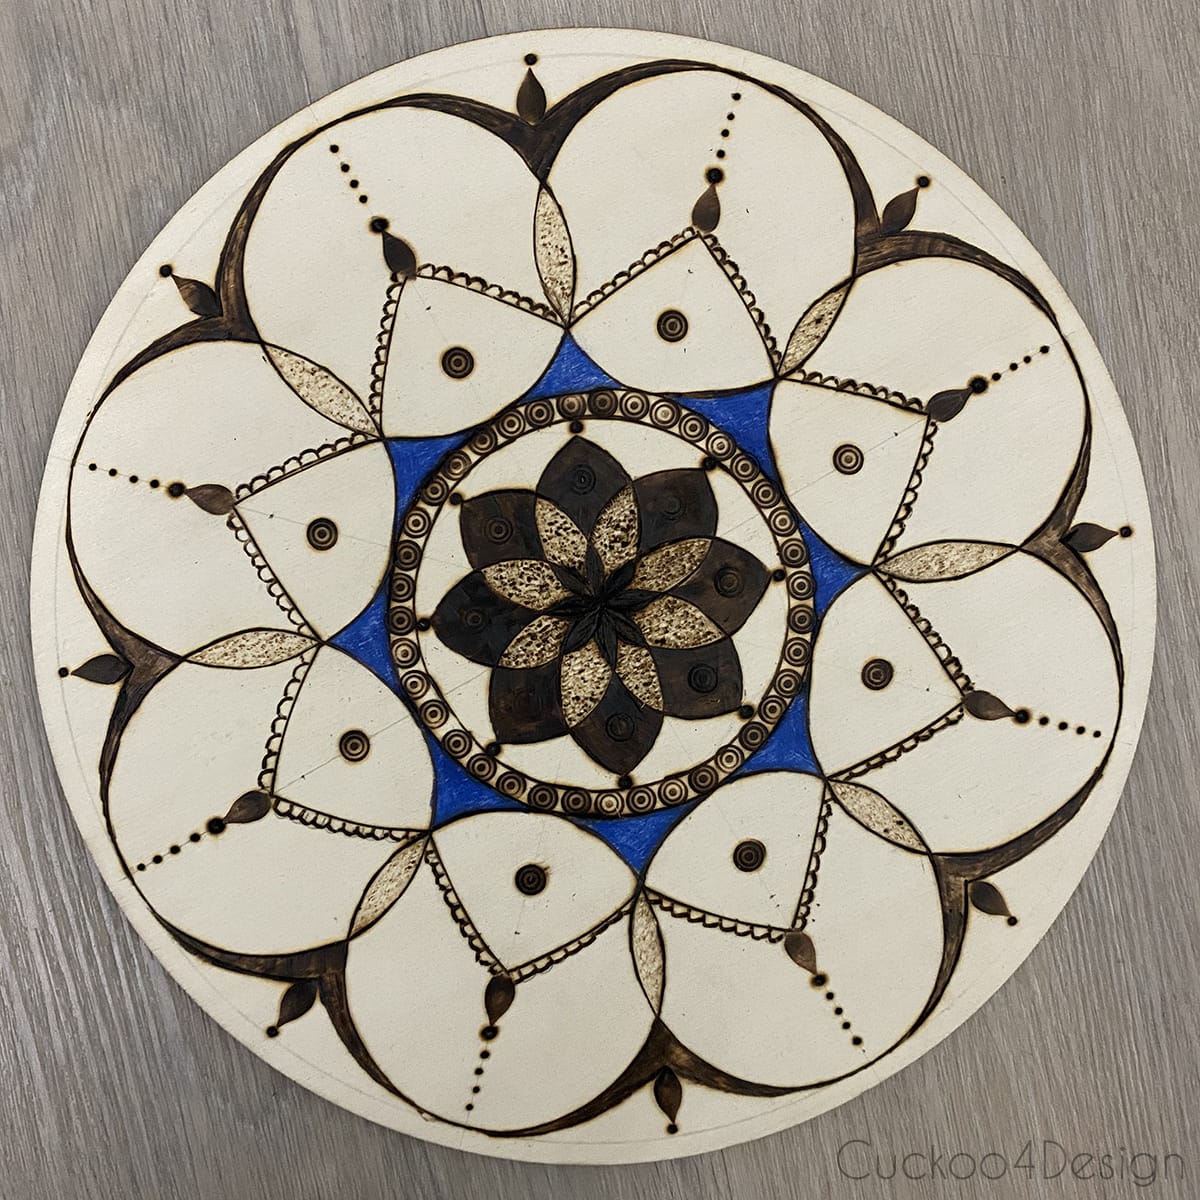
Here are two more similar ones I made with a circular structure.


I wanted to show you a different piece though where I only used a ruler for straight lines and not a compass. This gives it more of the look of a Pennsylvania Dutch hex sign. Both are pretty but a very different looks.

Below are two of the free downloaded patterns that I traced and burned. You can see more details about this in my video as well.


You can also buy different mandala pyrography templates on Etsy.

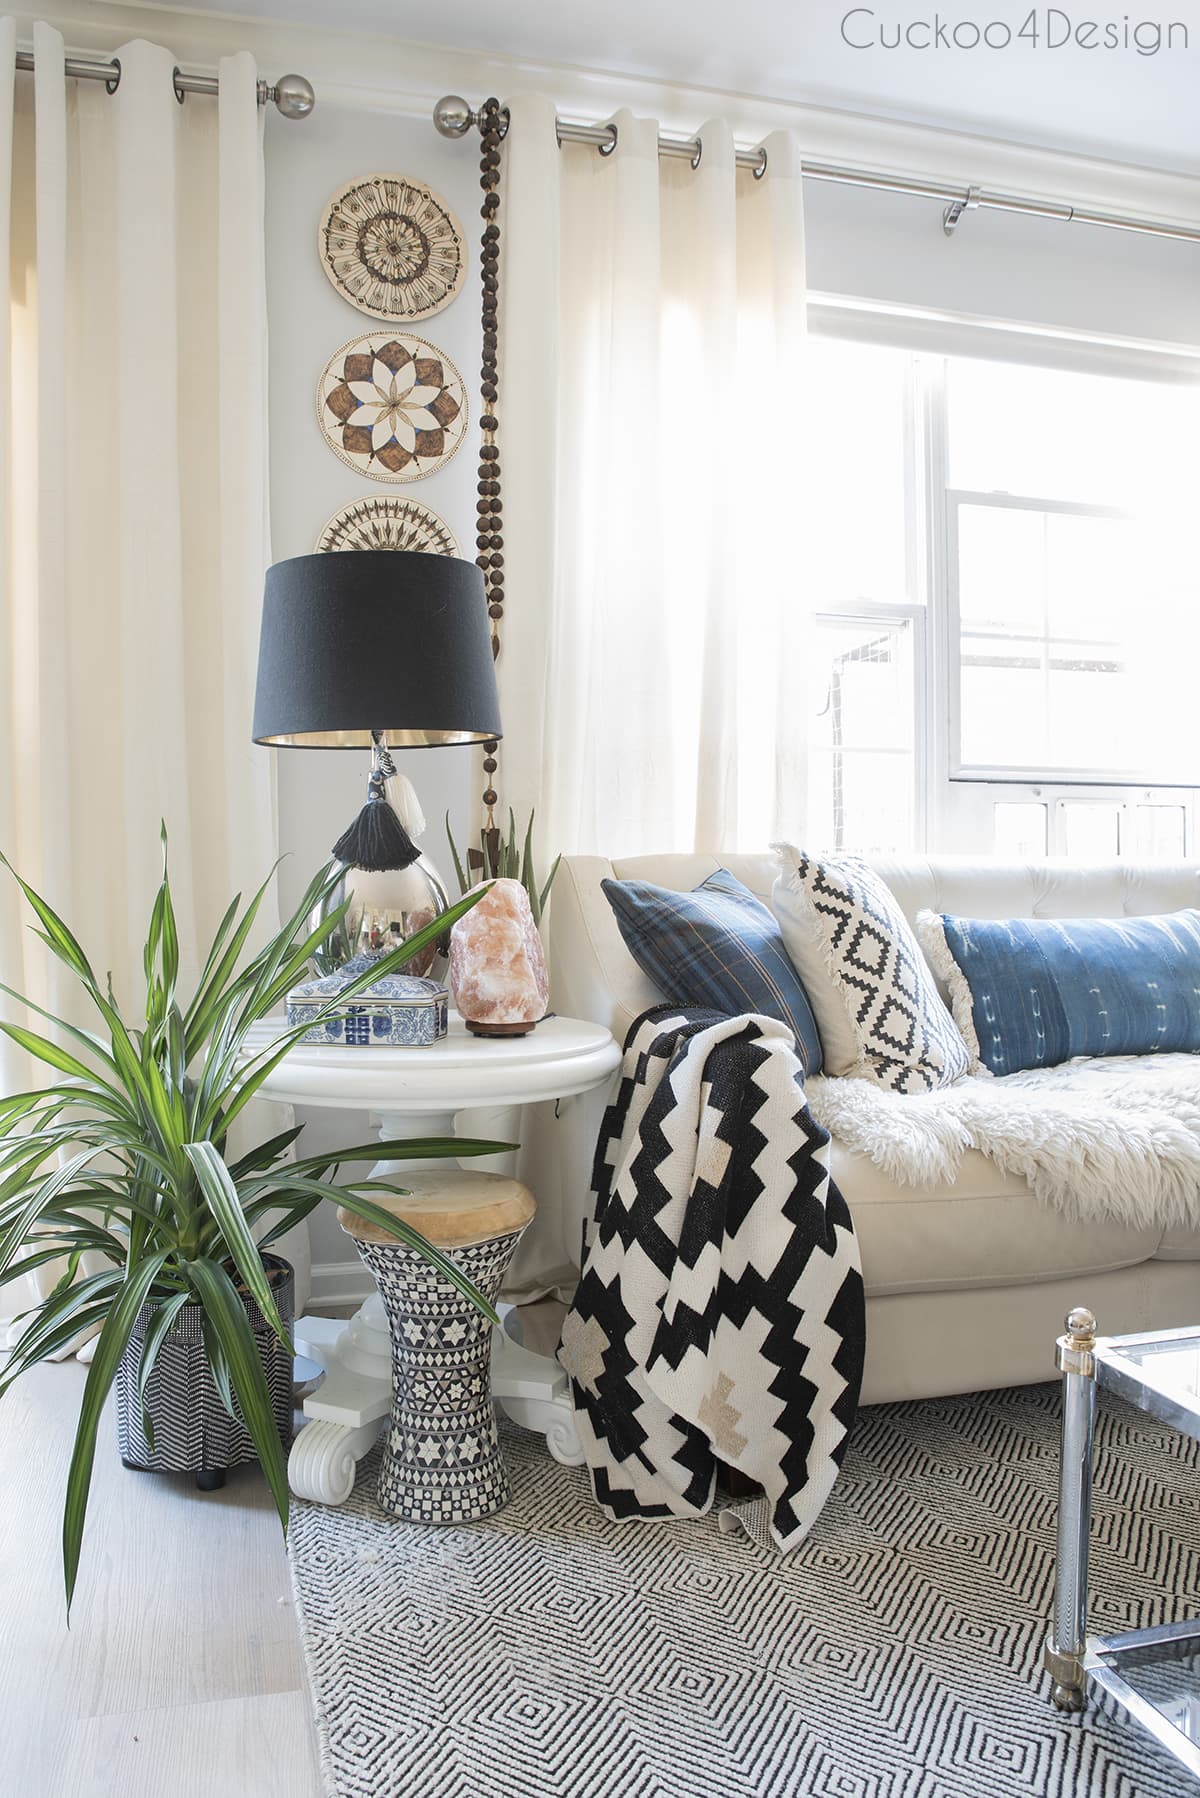
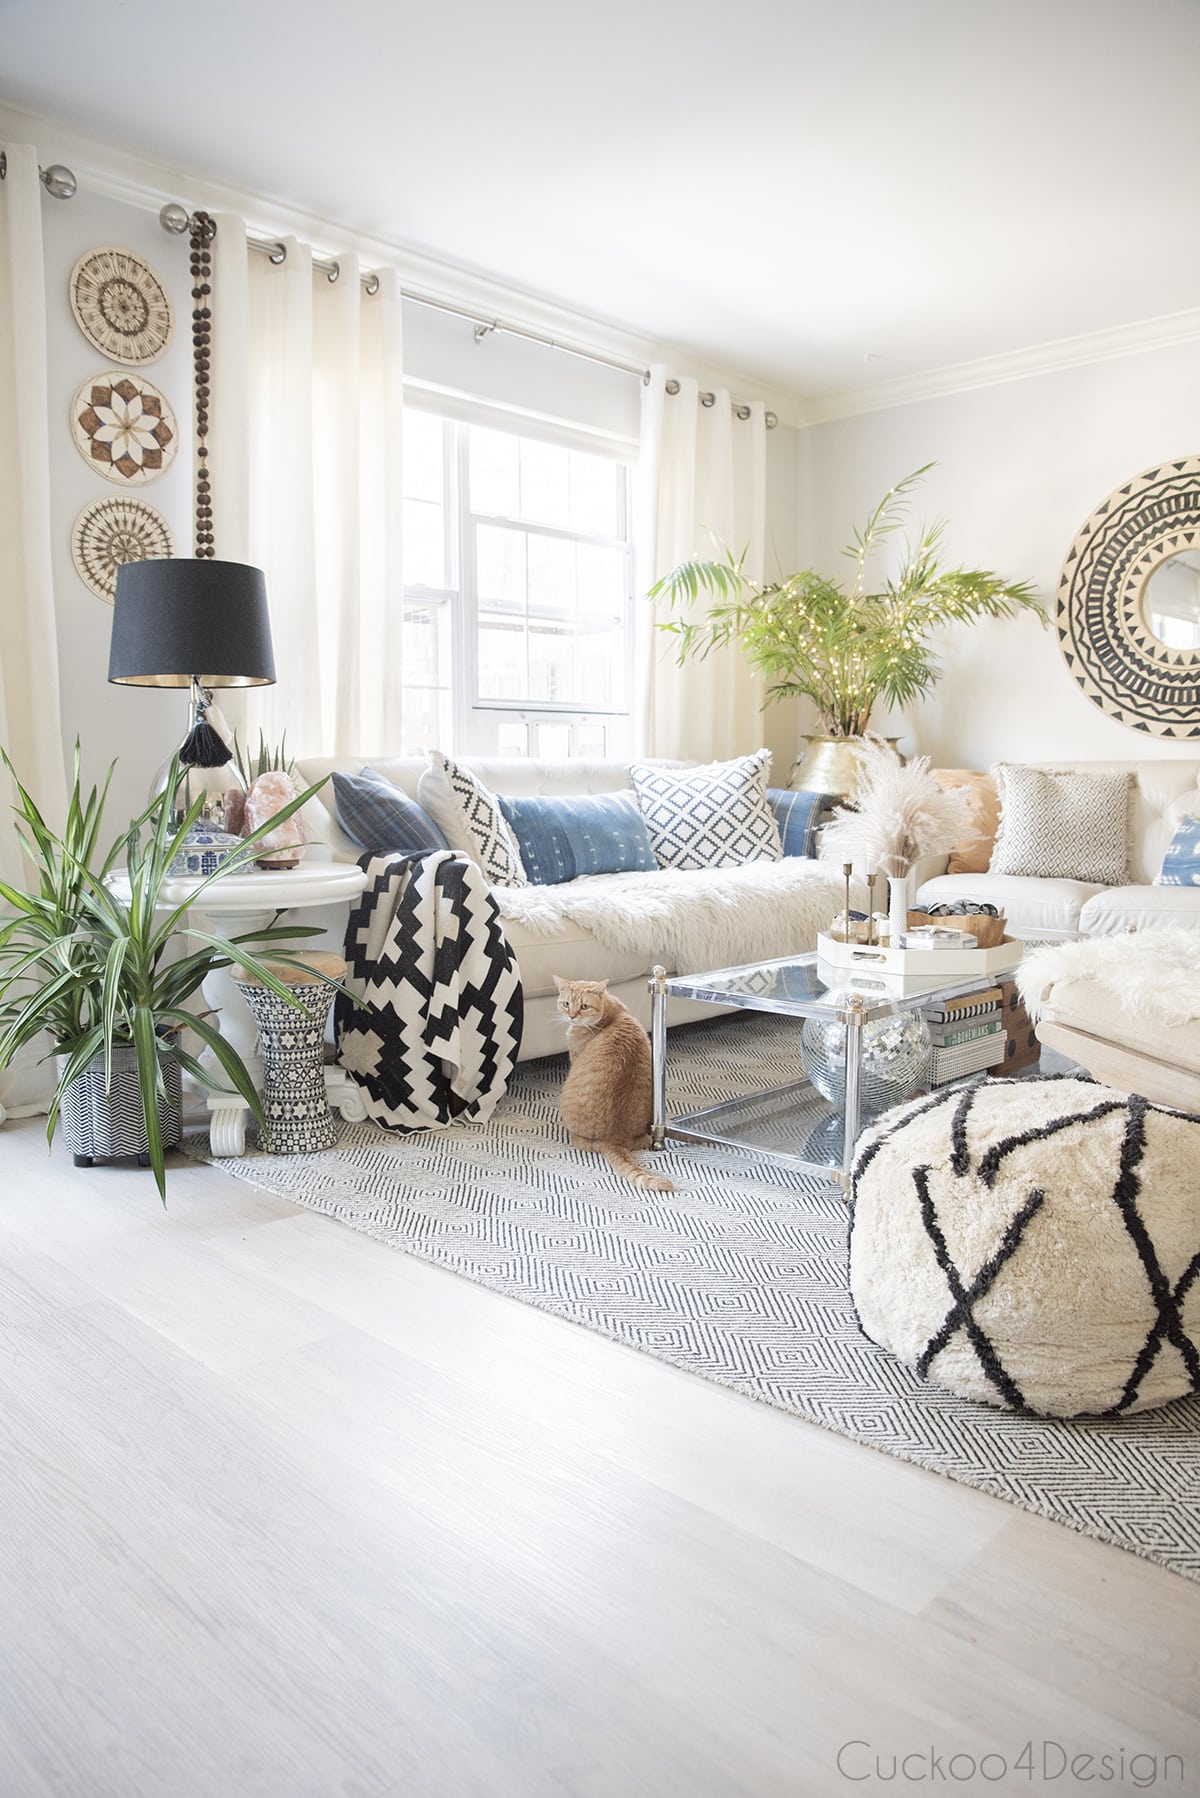
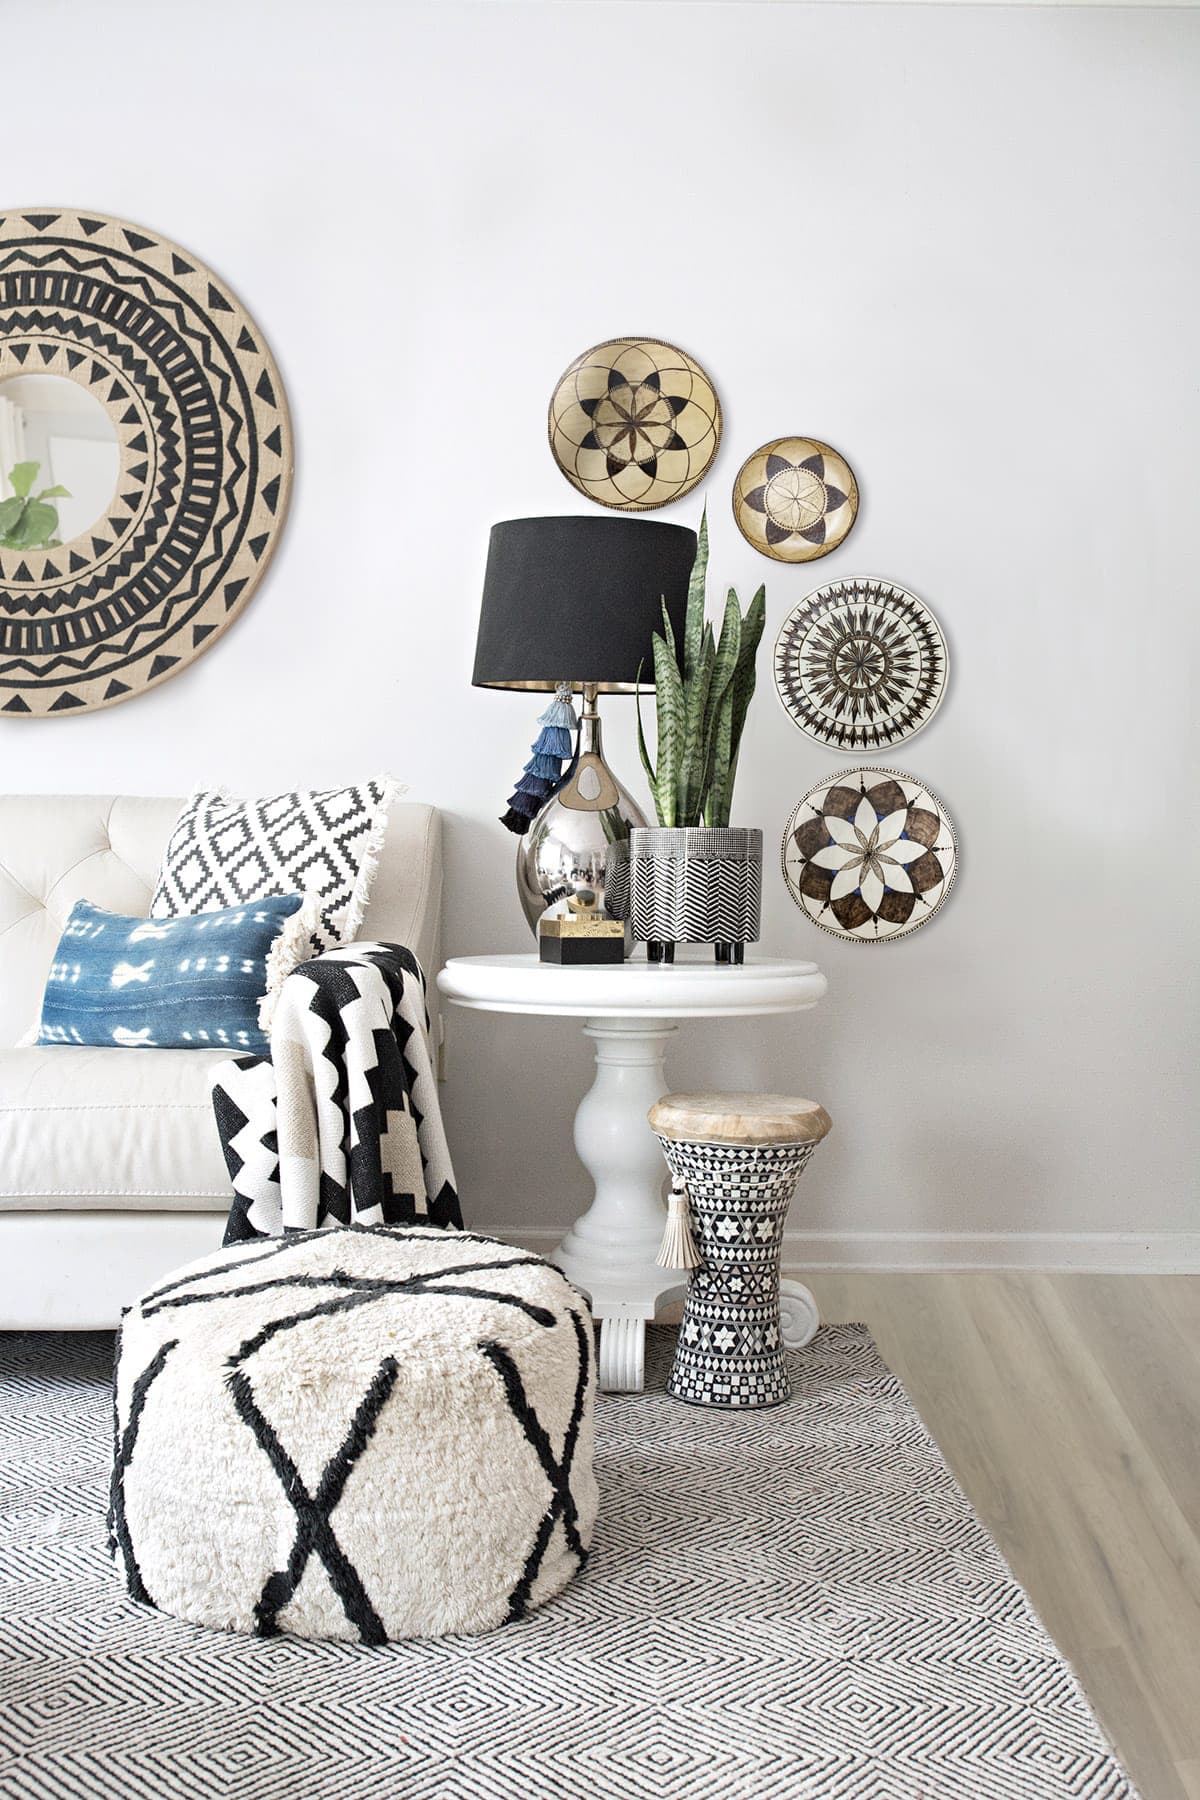
Finished DIY geometric wood wall art hanging in our living room
Here are the DIY geometric wood wall art pieces hanging on the other side of my living room as shown in my home tour this week.
Also, check out my tutorial about how to hang a plate on a wall which can be used to hang these pretty pieces.

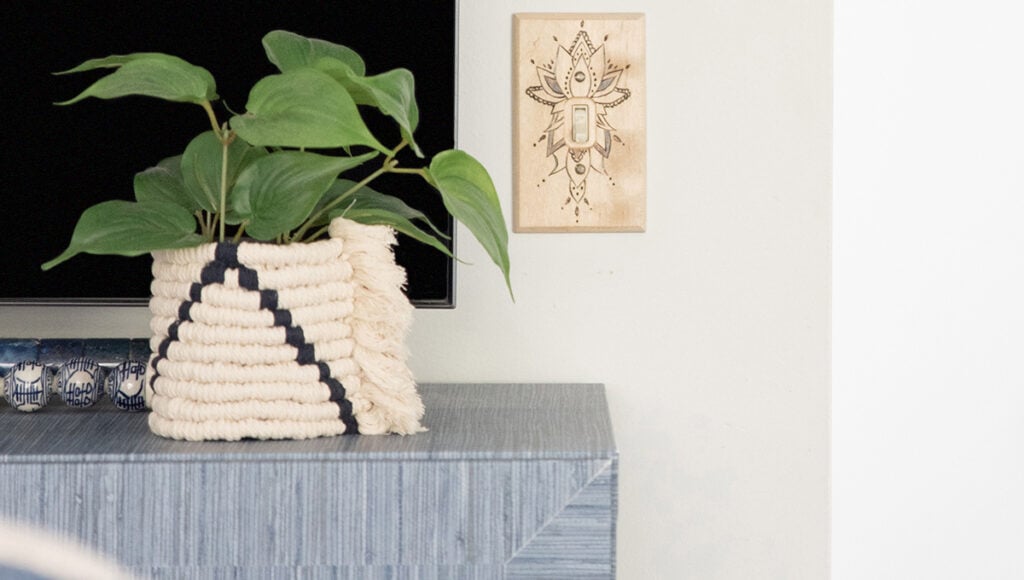
Also check out my boho DIY light switch covers, where I wood-burned similar patterns.

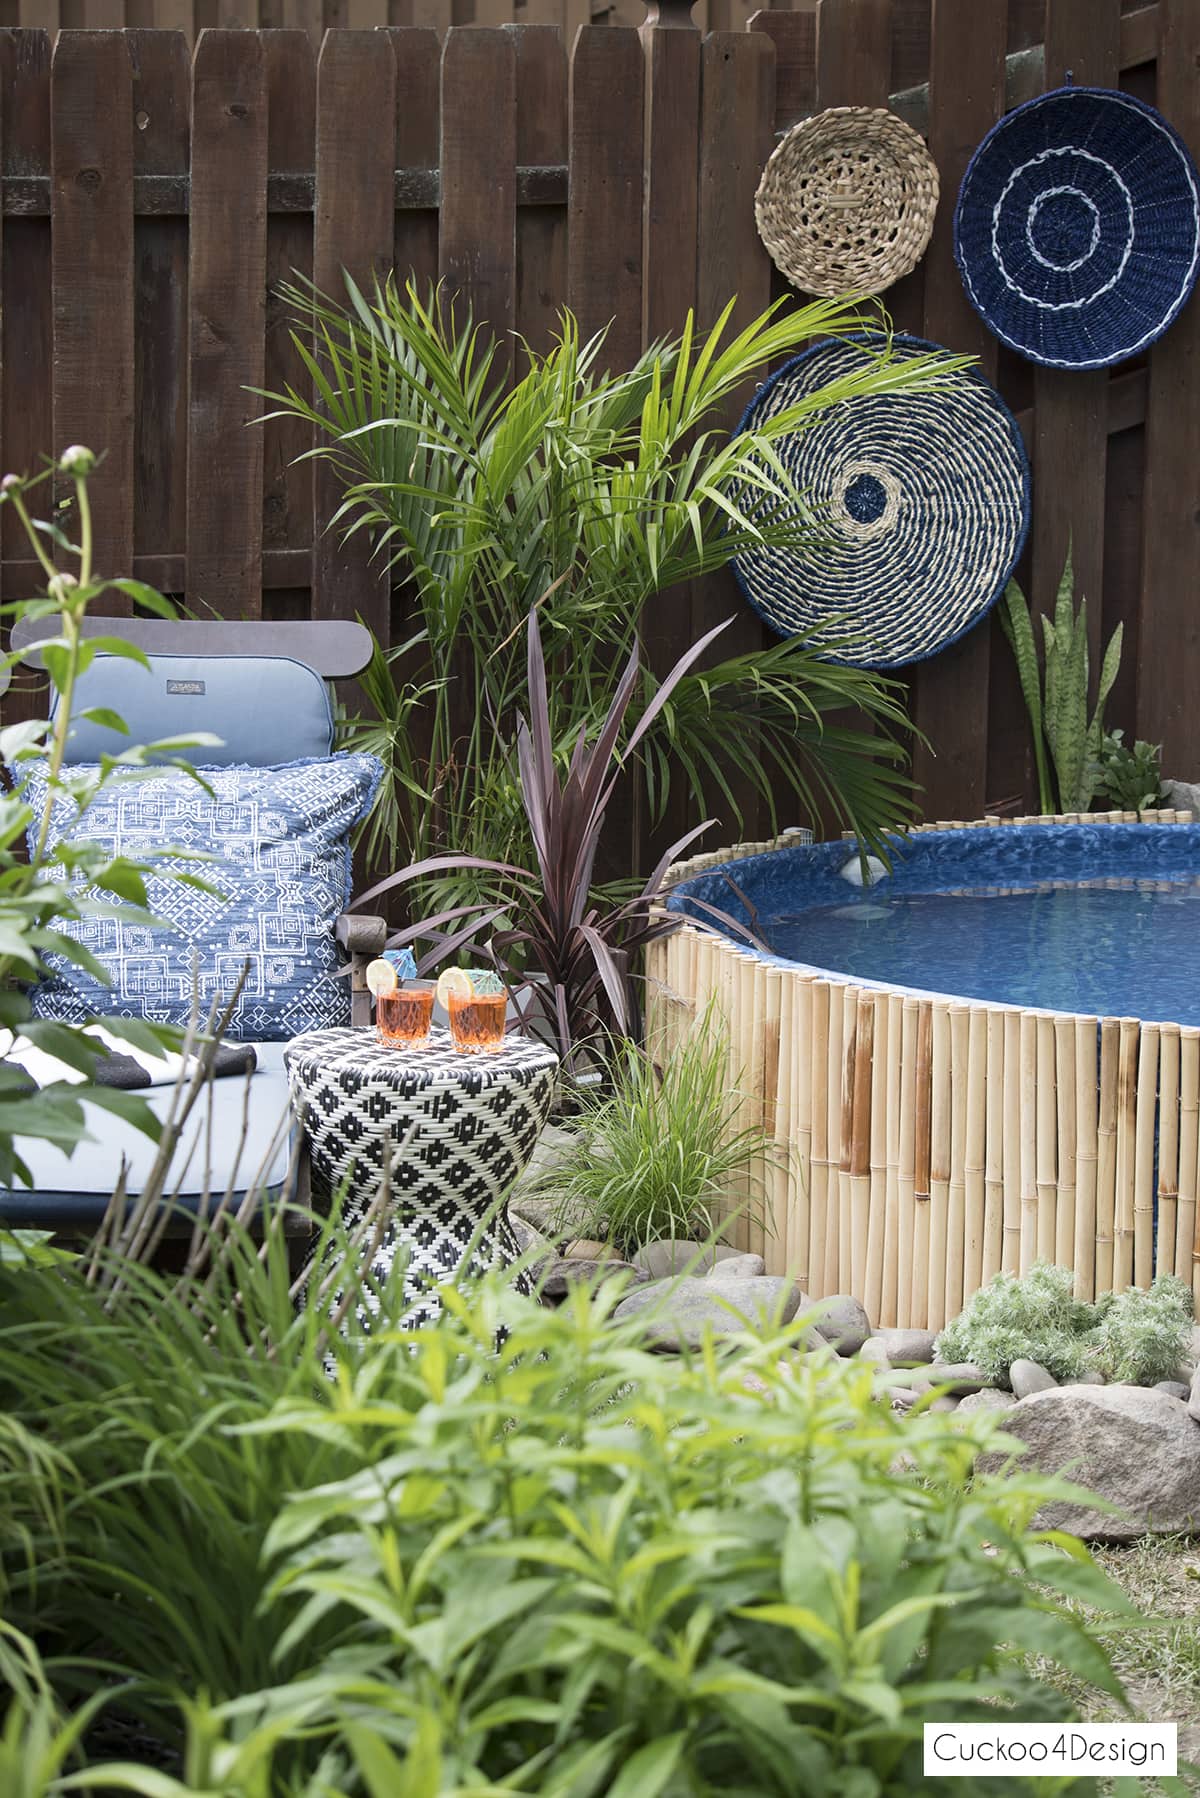
I ended up hanging them outside by our stock tank pool, too. See how I weatherproofed and mounted them in my outdoor fence art post. The basket plates you can see in the photo below weren’t made for outdoor use, which is why I replaced them.
And in my living room, where they were hanging in the above photo, I added a beautiful macrame ball wall hanging with embroidery floss, which is one of my favorite pieces ever.
Where to buy geometric wood wall art (also called pyrography mandals)
And as always, if you don’t feel like making your own, then you can always buy some lovely handmade pieces on Etsy below.
Or you can just add a large mandala wall decal to your home!

More DIY artwork and wall art projects and ideas
- What to do with old trophies (and how to repurpose them into a collage to hang on your wall)
- DIY brush stroke art
- Unique DIY modern macrame wall hanging
- This easy Bauernmalerei tutorial, which you can use on so many decorative accessories.
- How to make a picture look like a painting
- DIY canvas mural art
Whether you go with a downloaded mandala pattern or draw your own from scratch to make a pyrography mandala, this is one of those projects that looks far more complicated than it actually is. Once you start wood burning, it’s hard to stop!
Tschüß,

oH, this looks wonderful! and i will try this! Have a very old wood burning kit from at least 20 years ago! Thanks for the video and the lovely photos!
Thank you! The only problem is finding masks right now but burning one or two is probably ok without a mask.
For a mask, you could just tie a bandana over your mouth and nose. I like the way you arranged these on the wall so they wrap around the lamp. It just looks like they belong there. These turned out so cool( or hot!).
Yes, you could tie a scarf around your face. Thanks so much!
these are SO cool! love the unique idea!
Thanks Cassie, they keep me occupied for hours
Great wall art. You are very talented.
Thanks Margaret
You are so talented! I especially like the ones with a touch of blue. Beautiful!
Thanks so much Alison