

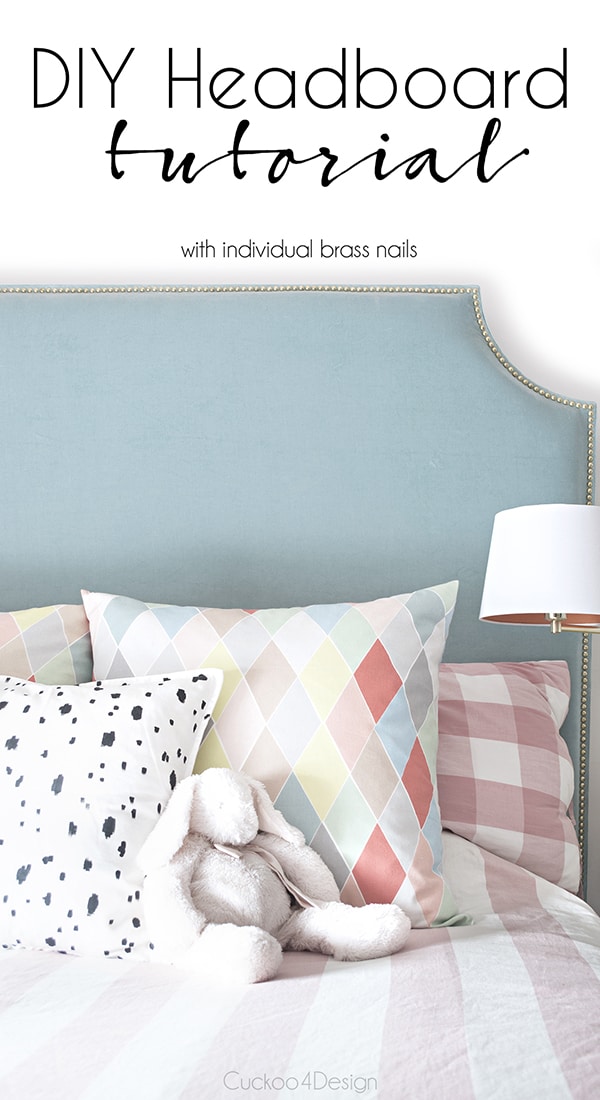
DIY upholstered headboard with nailhead trim detail
Who says building your own beautiful DIY headboard with added detail has to be difficult or expensive? Not me! In this tutorial, I’m showing you how I built a massive velvet upholstered headboard with a brass nailhead trim. You could just buy a rectangular sheet of plywood, slap some foam on it, and wrap it in fabric or you can step it up a notch with my tutorial for some added elegance on a budget.

How to build your own DIY upholstered headboard
This post may contain affiliate links from which I will earn a commission at no extra cost to you. View my full disclosure policy.
I promised you the details about my daughter’s velvet fabric headboard reveal. When I was looking for headboard ideas for our daughter’s bedroom, I couldn’t exactly find what I wanted. So I decided that I would try to make our daughter an upholstered queen headboard. I originally wanted an upholstered curved headboard with a stepped-down design. When I decided to finish the headboard with individual brass upholstery nails instead of the more commonly used nailhead trim kit, I thought a more simple shape would be much easier.
Another feature we really wanted is that it was plush upholstery and a very soft fabric because my husband and I love to read books to her before bedtime. While we read to her we sit against the headboard while she lays with her head on our lap.
In the end, I have to say that this DIY fabric headboard is pretty easy to make and affordable too.
List of materials for DIY upholstered headboard
- liquid nails
- batting
- 2″ medium firm or high-density foam (upholstery seat cushion foam or you can use a mattress pad’s foam as well)
- fabric
- staples for your staple gun
- spray adhesive
- two 2x4s
- long wood screws to attach the legs
- 1/2″ cardboard upholstery tack strip
- MDF board (particle board or piece of plywood works too)
- brass upholstery nails
My cost breakdown
- 3/4-in x 48-in x 8-ft medium-density unfinished MDF – $56
- 2-in x 4-in x 96-in spruce pine – $6.70
- upholstery tack strip roll – $8.30
- upholstery batting – around $12.00 ( I had a coupon that made it cheaper)
- since I make a lot of my own decor, I had all the other supplies and tools at hand already which made the headboard very affordable for me. I paid around $83 for it all! Of course, this might be different for you depending on what you need.
I bought the MDF board from Lowes and had them cut it down to 64″ wide. I kept the height which is 49″ and I used the rest of the MDF board to double up the shape of the headboard because I wanted it to look thick. This made it really heavy though. If you want it to be lighter then I advise you to use plywood instead. Plywood can be a bit tricky if you want to add a unique shape because of the way it is made and it can shred and fall apart.
Upholstery fabric from the fabric store tends to be pricey, so think outside of the box. Curtains are a great option, and the Ikea Sanela fabric has such a nice, thick velvet texture. Unfortunately, the color I used isn’t available anymore, but I have seen it on eBay here and there. However, Ikea has great new similar curtains in different colors. Checking Facebook Marketplace is also a great place to check for affordable curtains to use for a DIY headboard.
Tools needed to build your headboard
- pliers
- electric staple gun
- Rubber Mallet
- Quick Nailer Spacer (loved this thing)
- sharp fabric scissors
- jig saw
- measuring tape
Step-by-step tutorial for this upholstered headboard
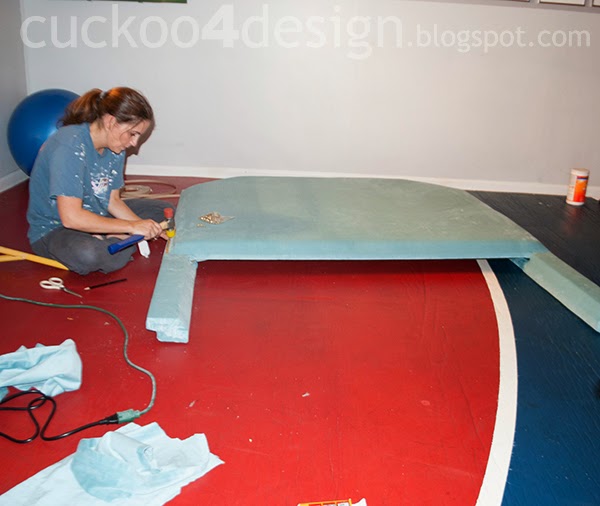
I’m not entirely new to upholstery and I promise you that it sounds harder than it actually is. Just be brave and try it. The bravest upholstery job that I ever tackled was figuring out how to dismantle a sofa to fit through a door. This is how I know that this DIY headboard is pretty easy. You just need an extra set of hands or muscles to help you maneuver the headboard, especially if it is oversized like mine.
I also upholstered a button-tufted chaise and upholstered a chair.
Step 1: Decide what size and shape of headboard you want
A simple rectangular shape is the easiest to upholster. However, I wanted to add a bit more detail which is the tricky part. I wanted to go oversized for my little princess and I am glad I did. More about that in the next step.
Things to consider when deciding on your headboard shape, size, and overall look
- A headboard size chart can help with determining what size of headboard you want to go with.
- Do you want a plain headboard, or do you want to add button tufting, channel tufting, or/and silver or gold nailhead trim?
- Adding any type of tufting or nailhead trim makes the project more expensive, difficult, and labor-intensive. So if you are in doubt, don’t add any detail to the headboard. Adding any type of tufting requires more fabric than making a tight regular upholstered headboard.
Step 2: Cut out your headboard shape
I had my rectangular headboard shape cut at the home improvement store. Usually, Lowes or Home Depot will do this for you on their big saw which makes it a lot easier. Take the scraps home with you.
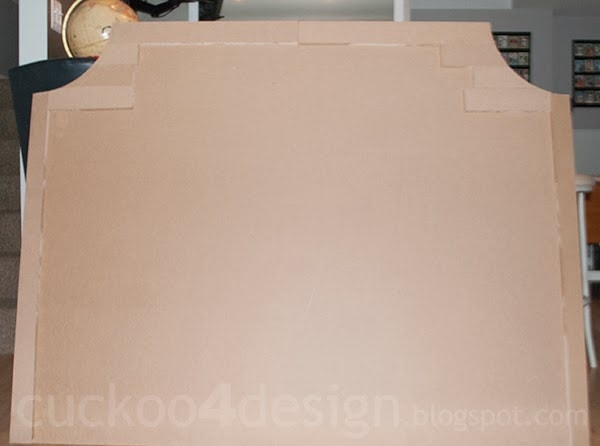
I then glued the MDF scraps to the perimeter of the backside of the MDF headboard shape with liquid nails (wood glue would work as well) to get a second layer for a thicker side profile. Then I drew the corner curves on the wood frame.
After that, I cut out the corner shapes out of the headboard frame with a jig saw. I have to admit that the hubby had to help with that step because it took a lot of strength to cut through the 2 thick layers of MDF with the jigsaw.
Step 3: Prepare the headboard legs by cutting the 2x4s to size
Measure the height of your bed frame and mattress and cut your 2x4s accordingly. If you are planning on hanging your headboard on the wall then skip steps 3 and 4.
Step 4: Attach the 2x4s to the bottom of the headboard to create legs
For the legs of the headboard, I used 2x4s which I also doubled up so the legs could hold the weight of the queen headboard. I offset the taller back layer of the legs so I could evenly staple the fabric around the perimeter of the headboard.
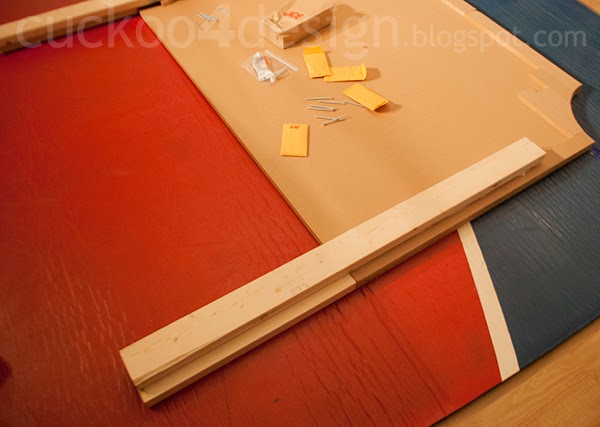
The two shorter pieces of 2x4s are there to support the weight and are attached to the bottom part of the headboard. The taller 2x4s are offset and there to stabilize the construction. I attached them all with liquid nails and screws.
(You could also use a French cleat to hang the headboard on the wall but this one was very heavy and I preferred the method of having it rest on legs that are attached to the bedframe)
Step 5: Cut the upholstery foam to the size of your entire headboard
I left a 1.5″ gap between the foam and the edge of the MDF so I could have room for my upholstery nails later. If you don’t offset the foam then you don’t have anywhere to hammer in the upholstery nails at the end easily. So make sure you don’t miss this step if you want to add nailhead trim as I did. If you simply want to upholster the headboard without nails then skip this step and cut the foam to the exact size of the headboard shape
Step 6: Use spray adhesive to glue a layer of upholstery foam to the front of the MDF
After that, I cut and glued the foam to the front of the MDF with spray adhesive. I was lucky enough to have some 2″ foam left in our attic and I only had to buy half of the amount needed. This is where I missed a photo step. Must have been my sticky hands! I left a 1.5″ gap between the foam and the edge of the MDF so I could have room for my upholstery nails. If you don’t offset the foam then you don’t have anywhere to hammer in the upholstery nails at the end easily. So make sure you don’t miss this step.
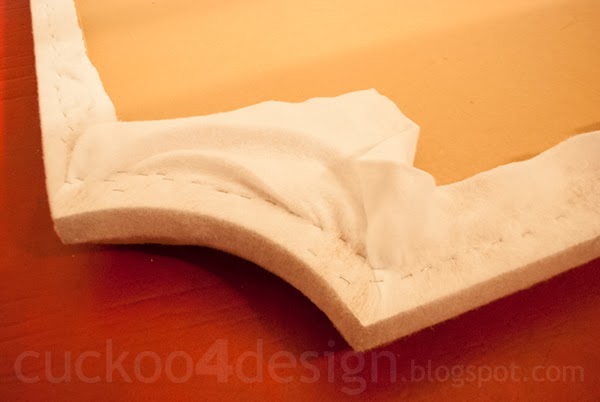
Step 7: Wrap the headboard and legs in a layer of batting and staple batting in place on the backside
You can easily pull the batting in place around the shape. Some people skip this step but I find it important because it helps to pull the actual fabric in place. The foam alone makes it hard to pull the fabric evenly and without wrinkles around the shape of the padded headboard.
Cut off the excess batting on the back.
Step 8: Wrap the headboard and legs in the fabric and staple the fabric in place on the backside
I decided to use a set of Ikea Sanela curtains for my headboard and tailored bed skirt. You can’t beat the price of $40 for the quality of the fabric. And the amount worked out perfectly. In the end, only a few scraps were left.
I bought an electric stapler just for this purpose and I was pretty happy with it. My heavy-duty air compressor stapler was way too loud to use inside for this long amount of time which is why I used my hand stapler. Both work great though.
Cut off the excess fabric on the backside of the headboard.
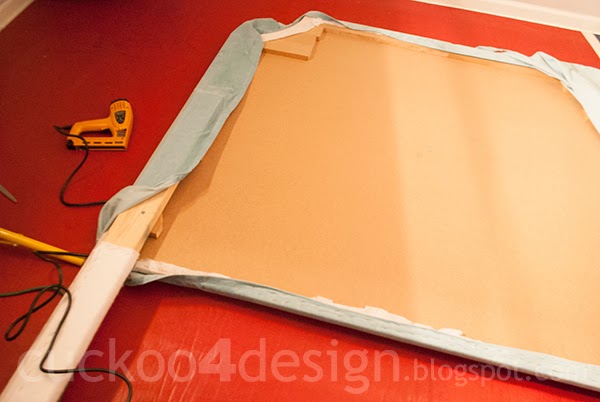
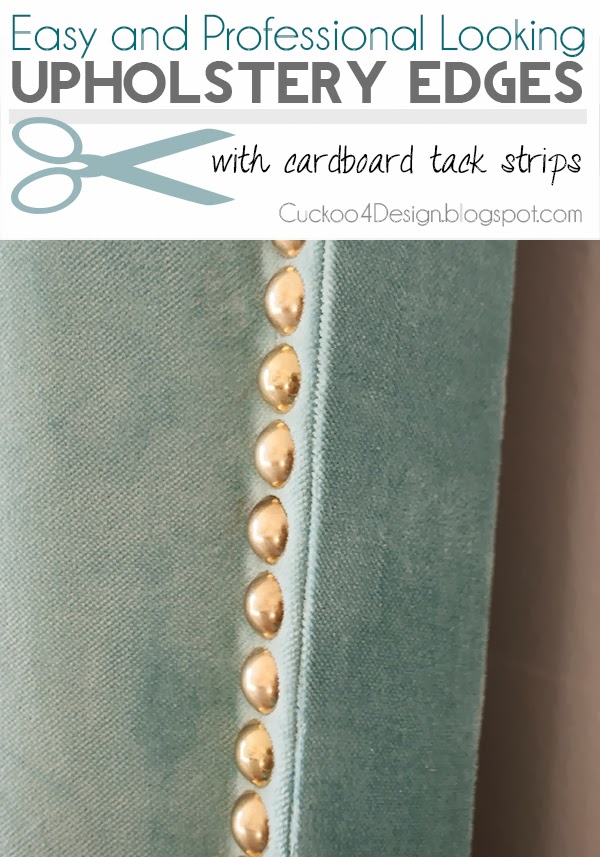
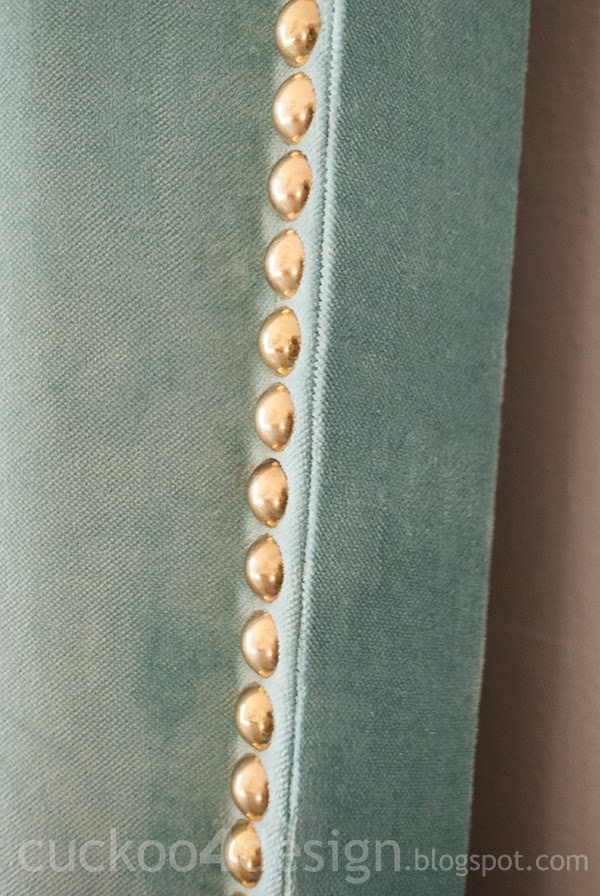
Step 9: Make the upholstered headboard look professionally done with the help of tack strips (this step is optional)
The transitions between the headboard and legs were solved with upholstery tack strips.
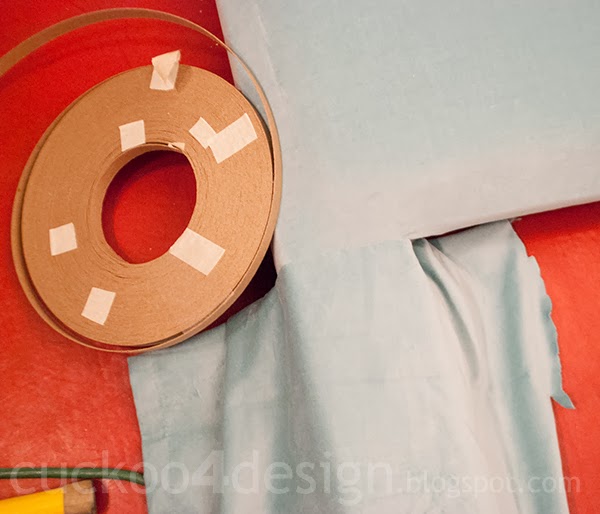
Put down the fabric and lay the cardboard upholstery tack strip down over the fabric where you want the clean edge to be (which is the edge where the legs meet the headboard in this case). Then you staple the upholstery tack strip in place (below pictured step 1), then fold the fabric over, pull it tight, and staple it in place at the back side of the headboard.
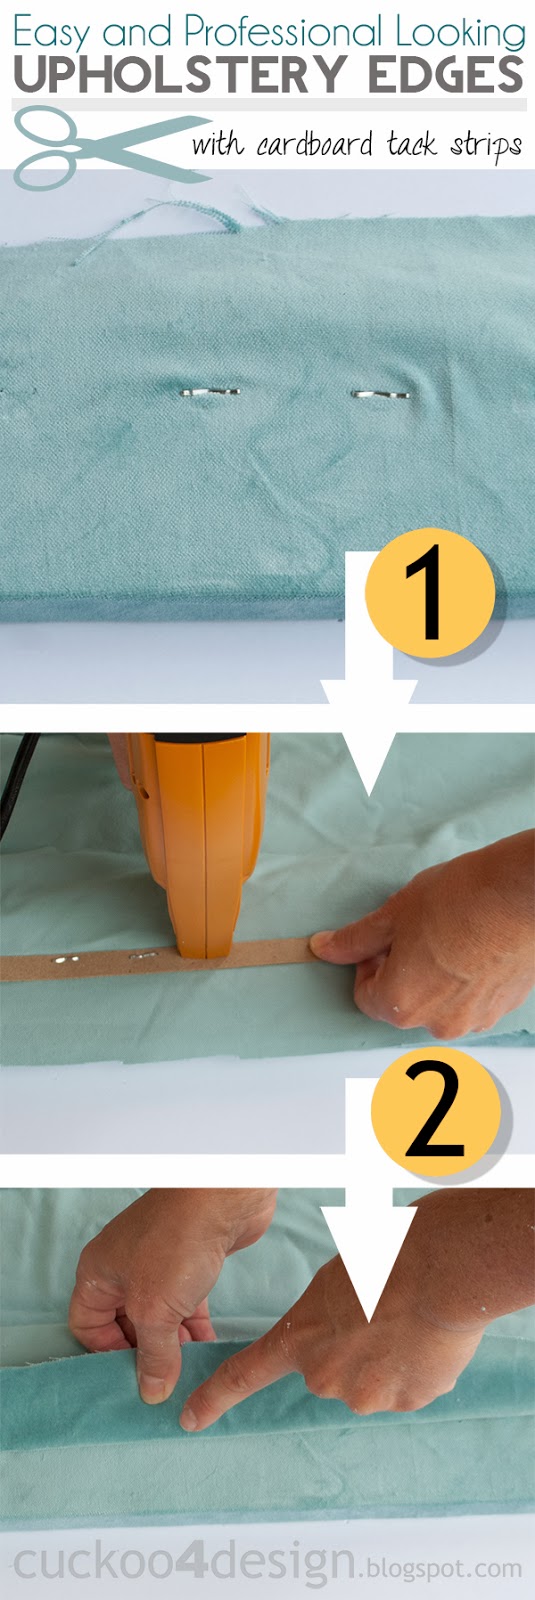
Which will give it the below pictured finished edge look.
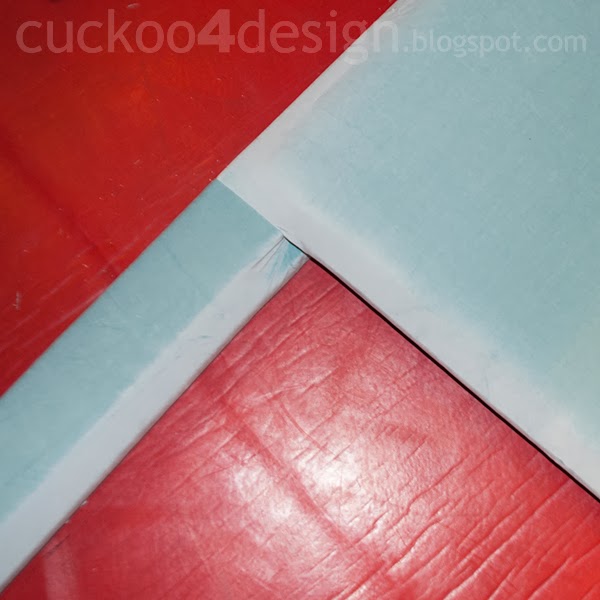
I also added another layer of cardboard tack strip and fabric along the edge of the MDF that was stapled to the back of the headboard to give it a tailored, professional, and finished look. At least that’s what I went for. You be the judge of the finished product 😉
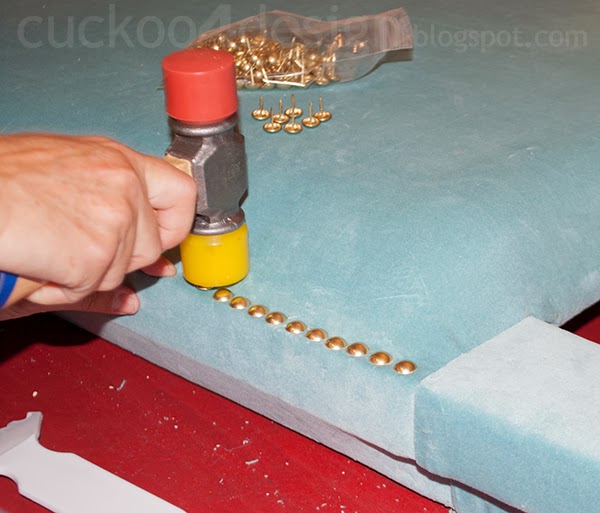
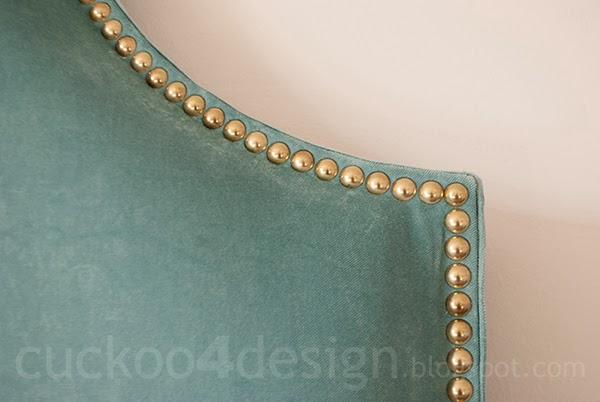
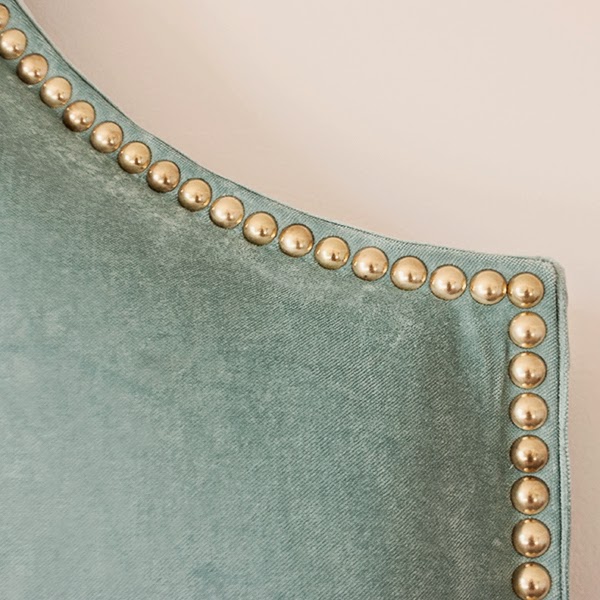
Step 10: Add the upholstery nailhead trim
After that, it was time for the upholstery nails and I’m so glad that I went with the larger individual brass nails. I like the tight and neat look they give the edge. It’s not lumpy the way it sometimes looks with the nail kits. My trick to this application was this little tool, a Quick Nailer Spacer.
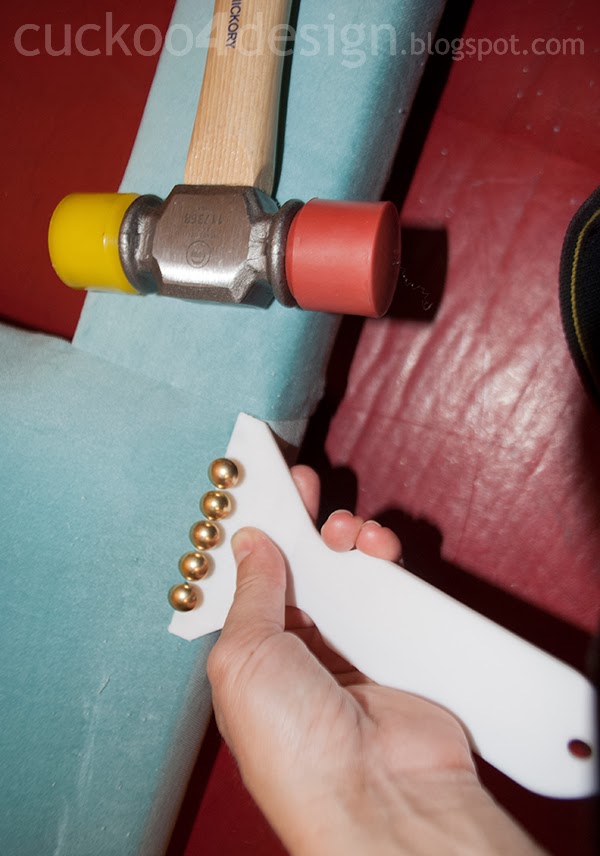
I put the nail heads into the spacers of the tool, tapped them deeper in place on top of the fabric with the mallet, and then removed the spacer and finished hammering them all the way in with the mallet. That’s it! It really wasn’t that hard. I just needed a couple of practice runs.
This is why I left the 1.5″ gap between the edge of the MDF and the foam, so I would have room for the nails.

Step 11: Attach the finished upholstered headboard to your bed frame
I used simple woodscrews to attach the queen-sized bedframe to the headboard legs.
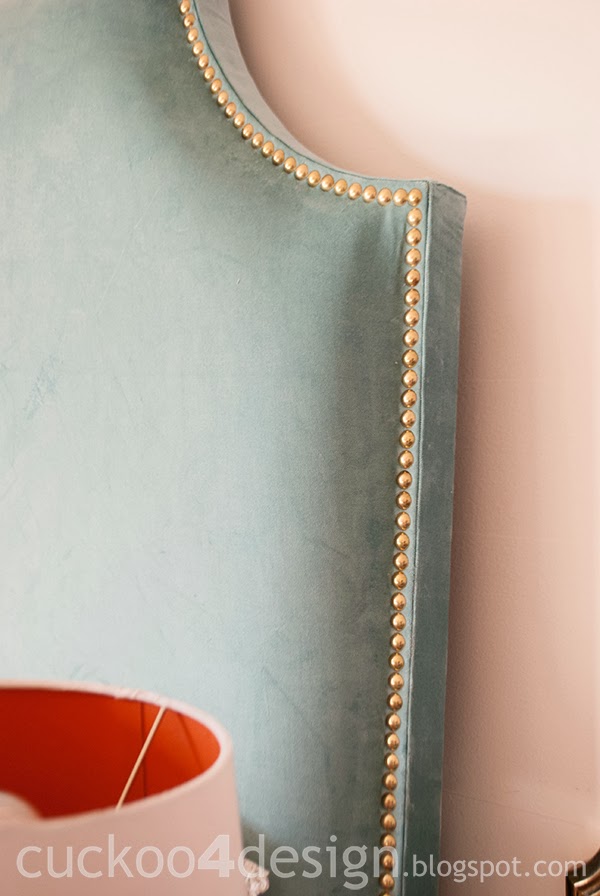
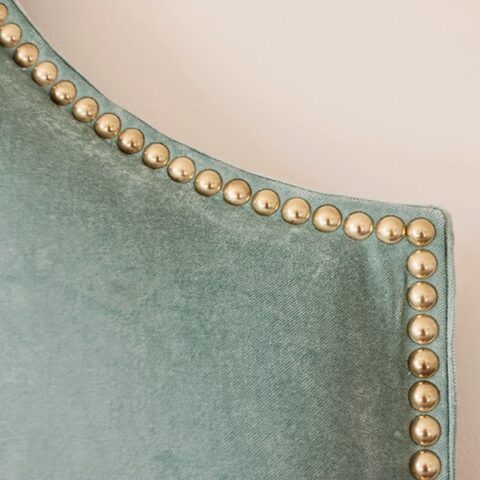
Finished DIY upholstered headboard with nailhead trim detail
So this is how I made the DIY fabric headboard. And I almost didn’t get it up the stairs with a friend, that’s how huge it is. Looking back, I think I could have totally handled the Jonathan Adler headboard shape. The hardest part of making this headboard was lifting and turning it around during the process. My back was killing me.
Here is a closeup of the finished edges that I added after adding the upholstery nails.
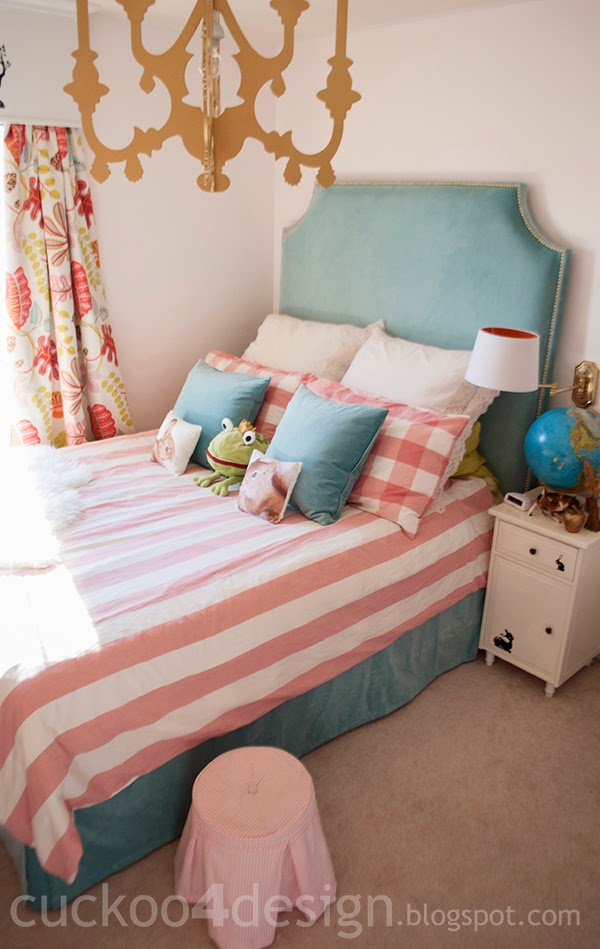
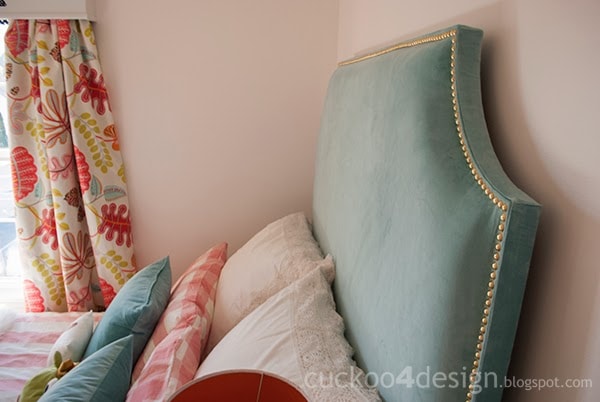
The bedroom’s paint color is Behr W-B-100 Billowy Clouds by the way and the comforter set is the Emmie Ruta set from Ikea (not available anymore). I really really love it.
If you are wondering about the bed skirt: I actually sewed panels out of the curtain scraps and attached them with velcro. One side of the velcro strip is hot glued to her box spring. This eliminates having to remove a mattress to be able to wash the bed skirt. It’s seriously so much easier.
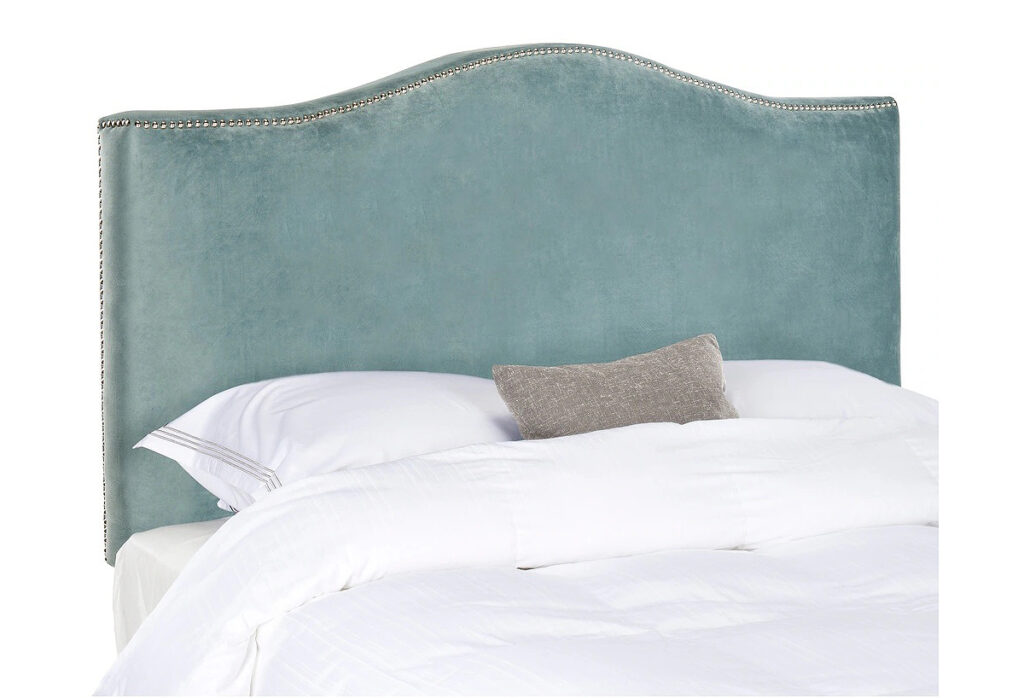
If you aren’t a fan of DIYing then you can get a similar look with the below headboards. I definitely wanted the oversized look with brass nails though. Most headboards are a lot shorter.

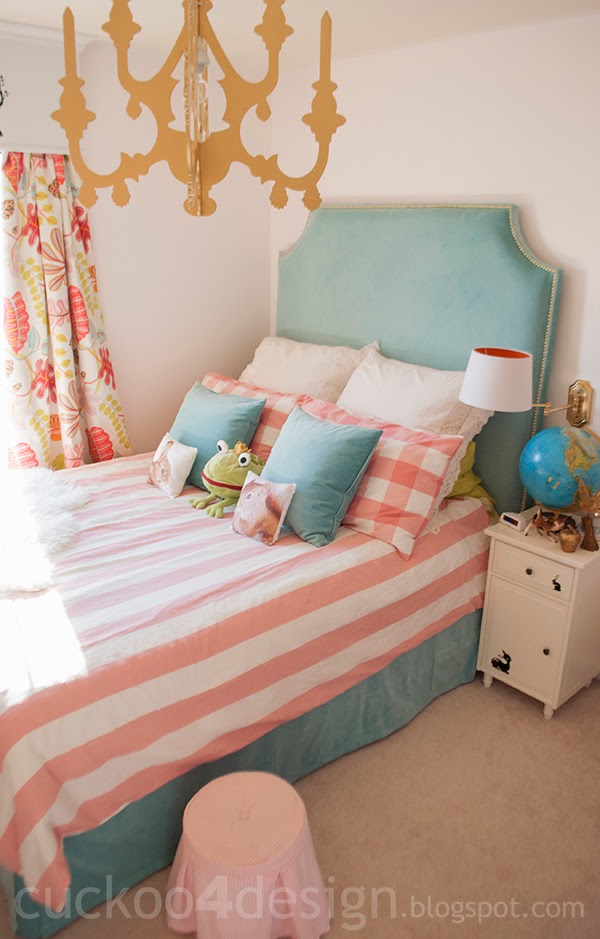
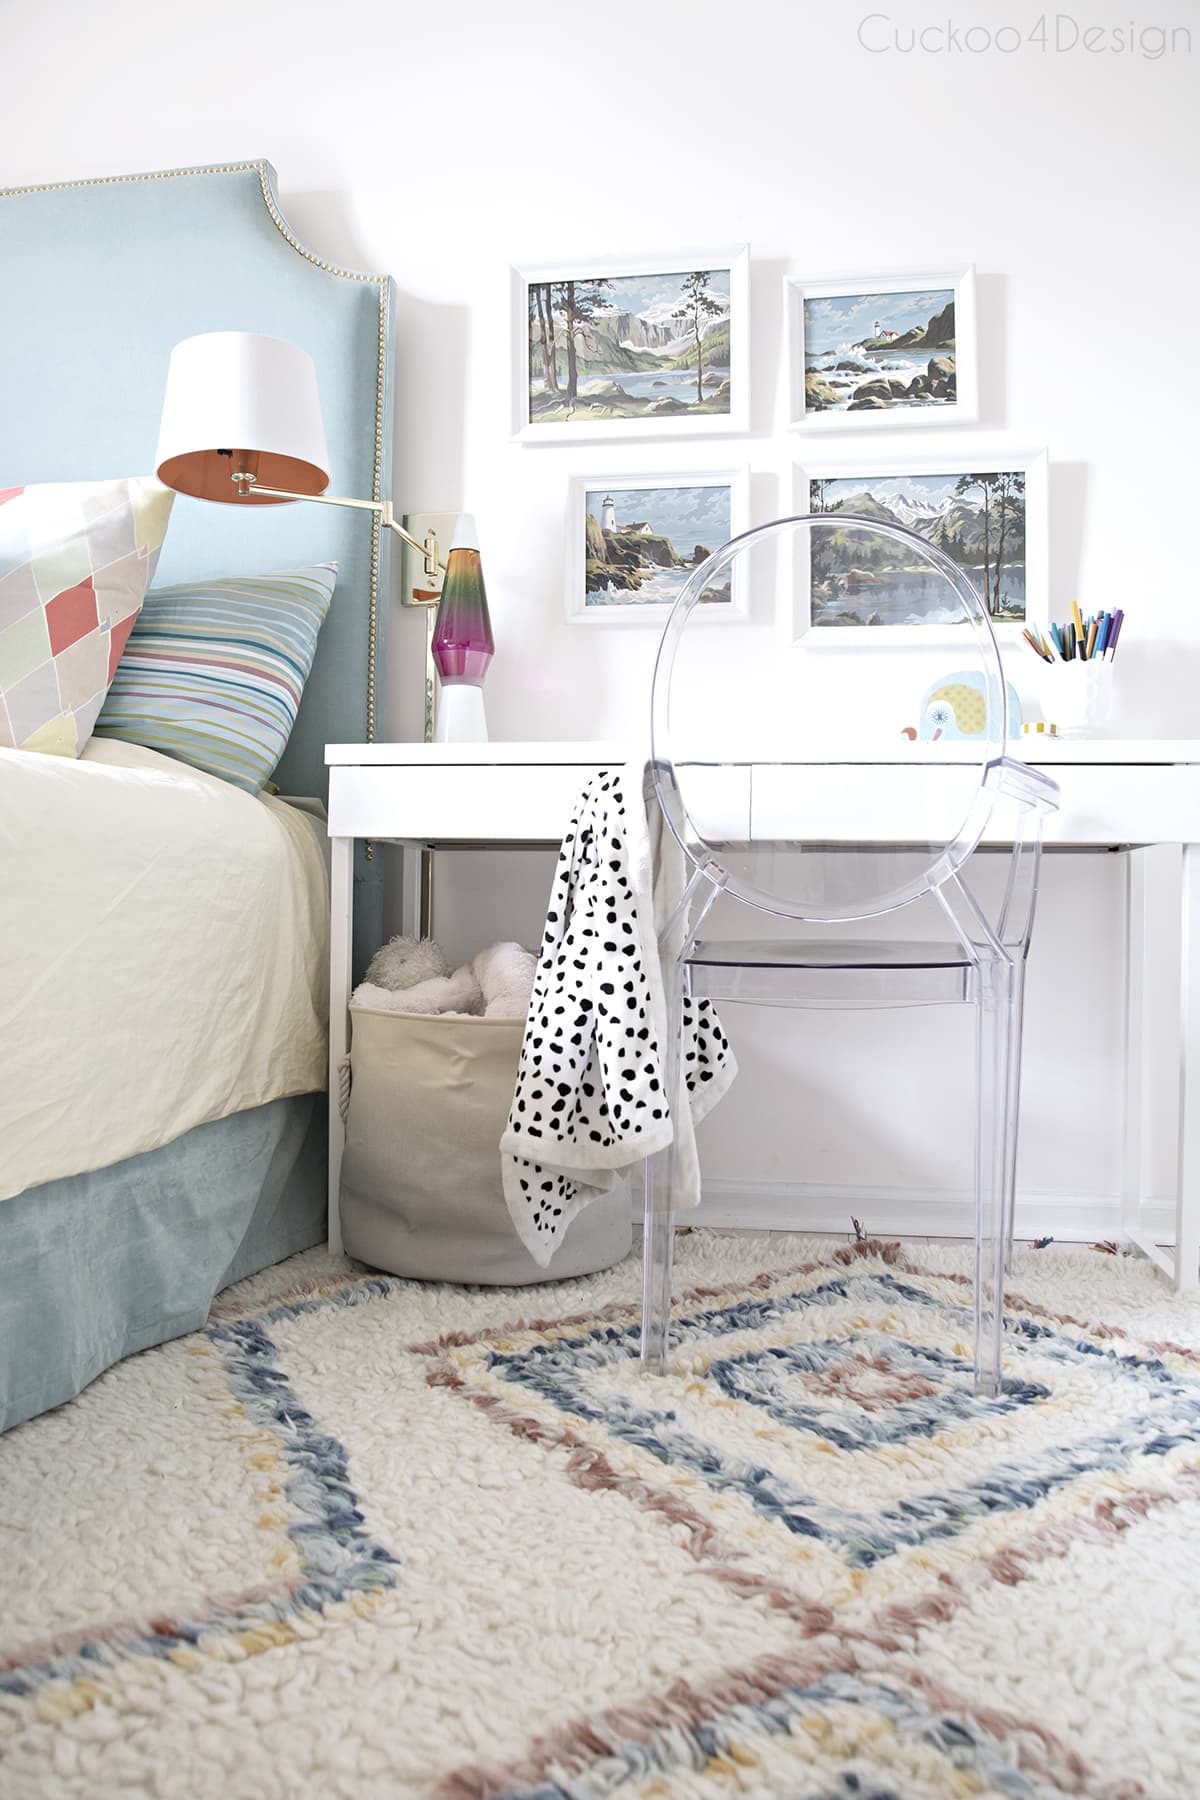
Here is a photo of her old original room:
RELATED: Check out more throw pillow ideas in my blog post about 16 fun throw pillows for a teenage girl’s bedroom. There are so many fun options and ideas.

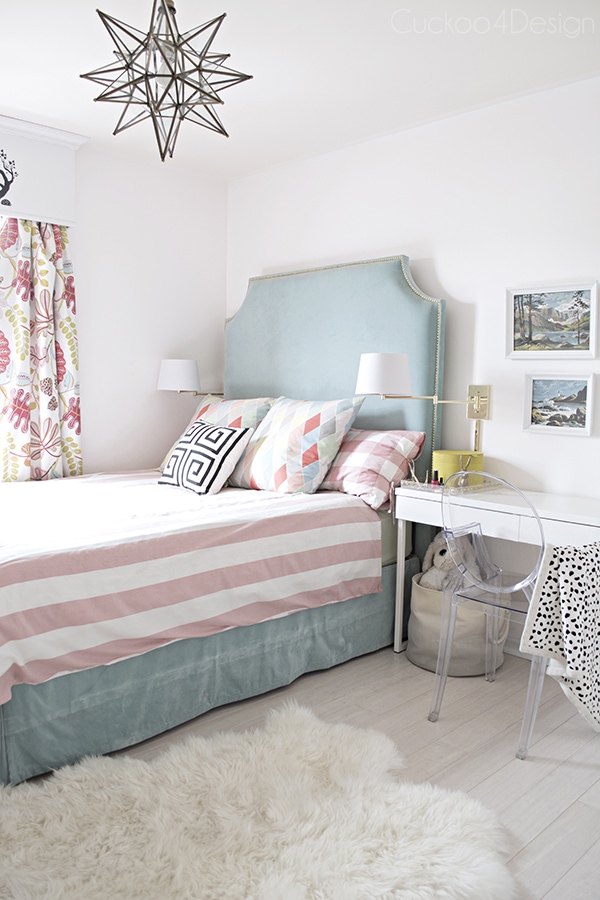
Which evolved to this room:

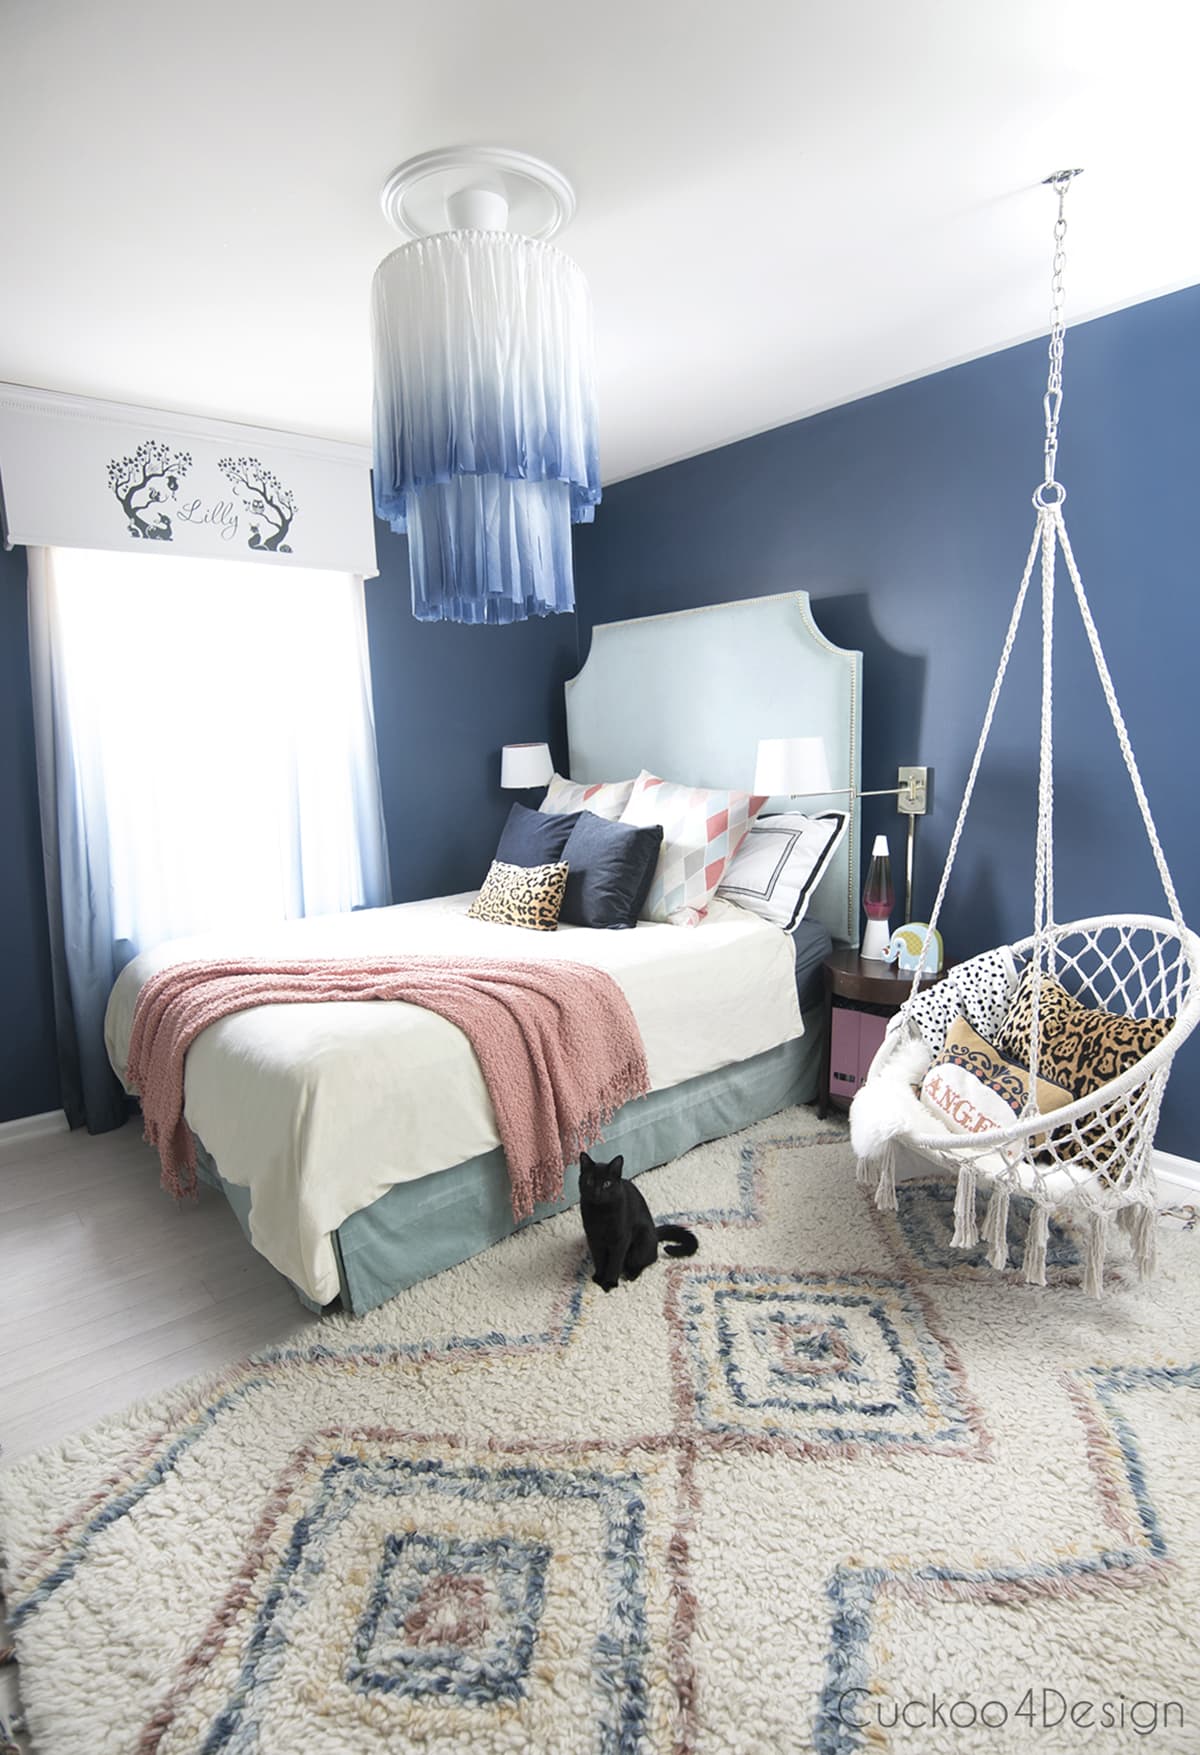
And recently changed to this dark blue room walls:
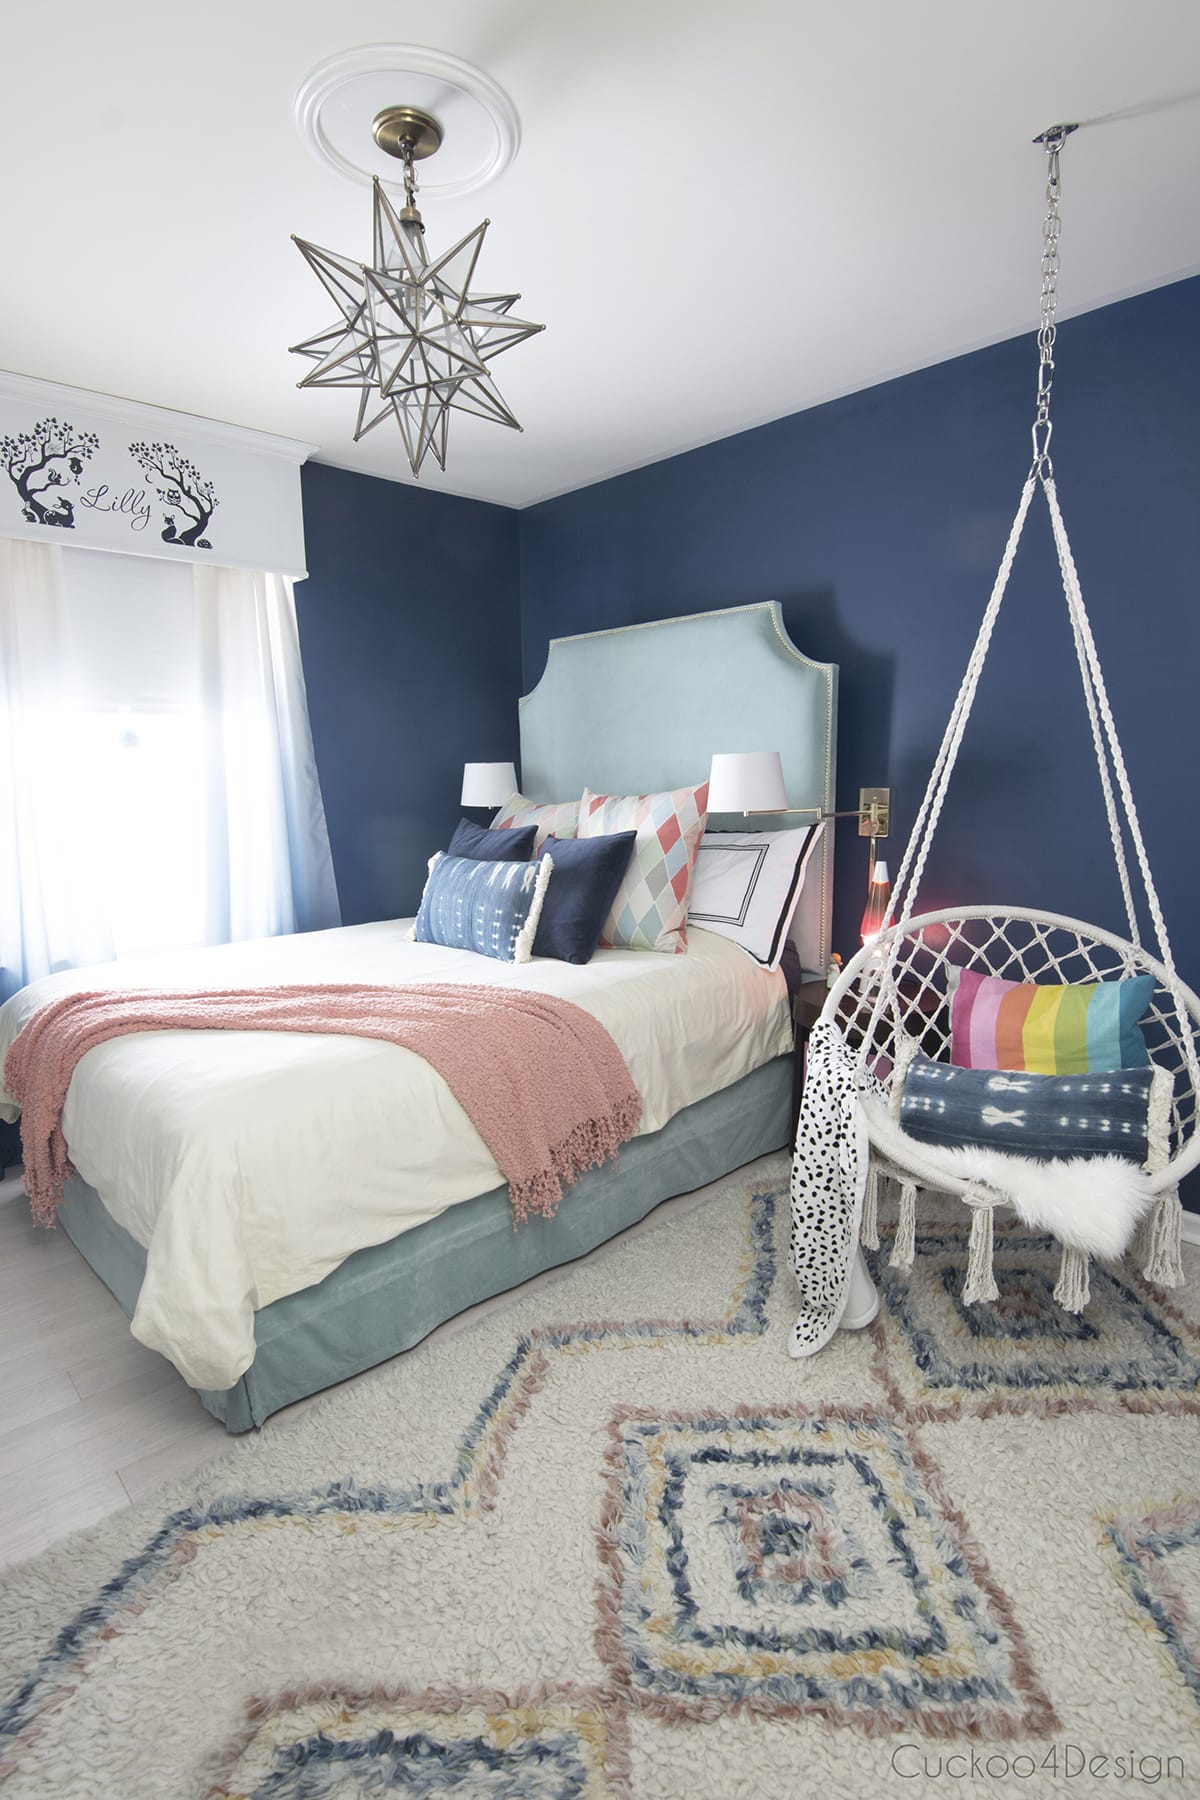
And here is the custom headboard with the beautiful blue and white fabric chandelier we found at Ikea years ago.
More unique budget-friendly DIY projects for your home
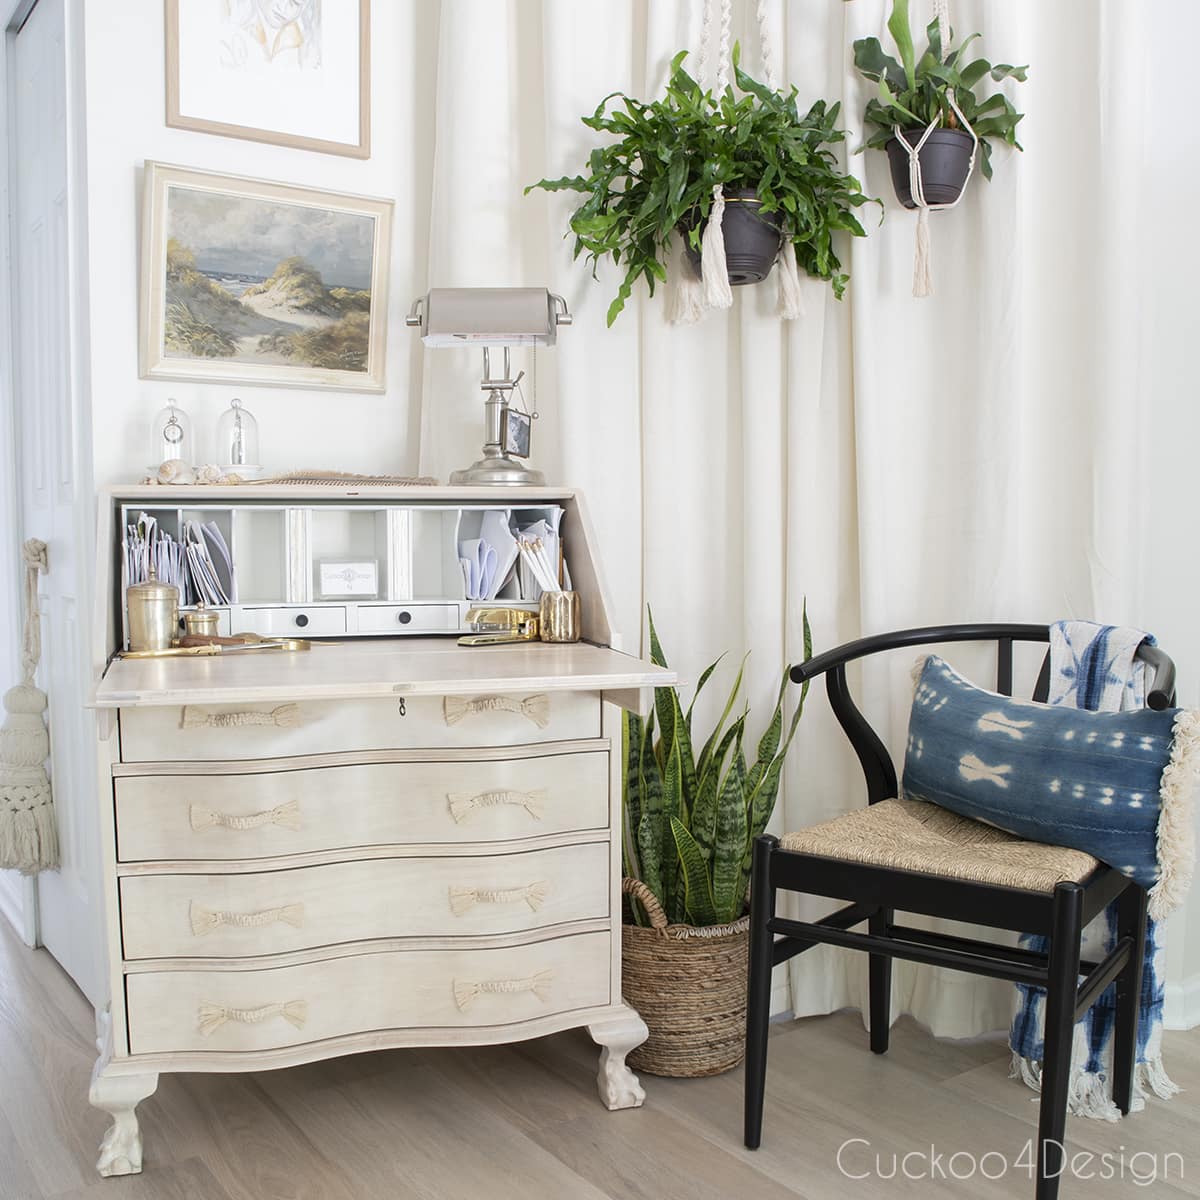
- DIY fluted dresser
- How to make a macrame plant hanger the quick and easy way
- My honest review of cheap peel and stick floor tile (installation instructions included)
- DIY pendant light using jute yarn
- bleached cherry wood desk makeover

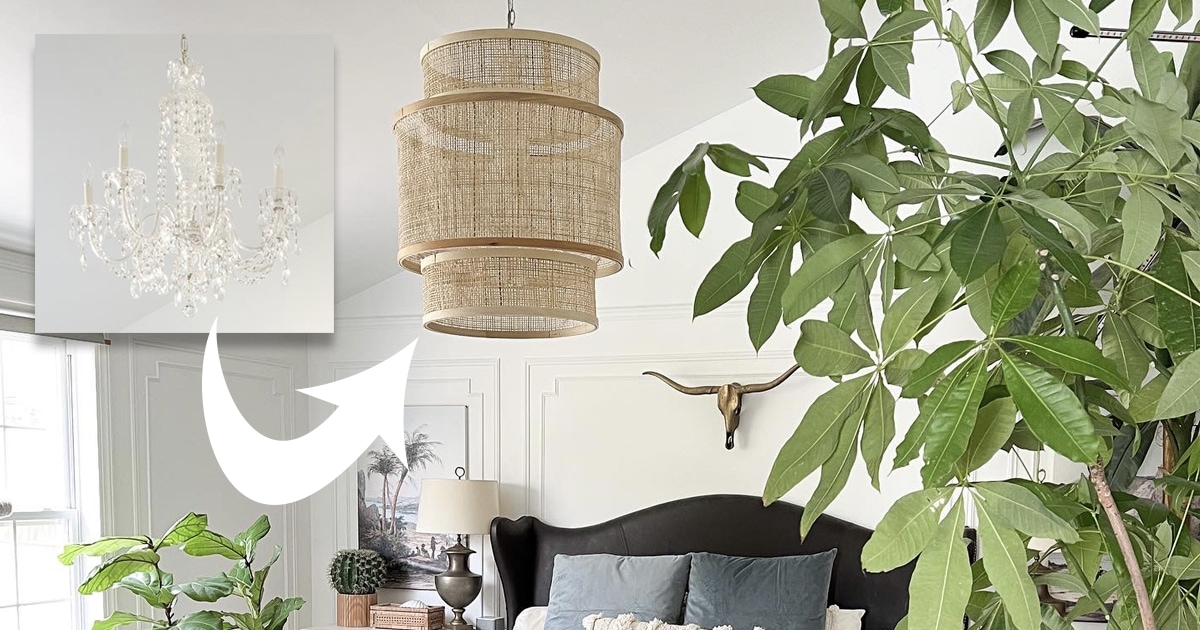
- renter-friendly chandelier makeover

UPDATE: We recently bought our daughter a channel tufted bed since the antique bed is so small and she is so happy with it.
All the work was totally worth it. We love her new headboard and it would also be great for a master bedroom.
I had sold my daughter’s existing headboard on Craigslist and used that money to redo her room. I ended up staying pretty much within budget.
Talk to you on Friday.
Tschüß

DIY upholstered headboard with nailhead trim detail
With this tutorial, you can easily build your own custom DIY upholstered headboard with an added nailhead trim detail for any size bed frame.
Materials
- liquid nails
- batting
- 2" upholstery foam
- fabric
- staples for your staple gun
- spray adhesive
- two 2x4s
- long wood screws to attach the legs
- 1/2" cardboard upholstery tack strip
- MDF board (or plywood)
- brass upholstery nails
Tools
- pliers
- electric staple gun
- Rubber Mallet
- Quick Nailer Spacer (loved this thing)
- sharp fabric scissors
- jig saw
- measuring tape
Instructions
- Decide what size and shape of headboard you want
- Cut out your headboard shape
- Prepare the headboard legs by cutting the 2x4s to size
- Attach the 2x4s to the bottom of the headboard to create legs
- Cut the upholstery foam to the size of your headboard
- Glue the upholstery foam to the front of the MDF with spray adhesive
- Wrap the headboard and legs in batting and staple it in place on the backside
- Wrap the headboard and legs in the fabric and staple the fabric in place on the backside
- Make the upholstered headboard look professionally done with the help of tack strips (this step is optional)
- Add the upholstery nailhead trim
- Attach the finished upholstered headboard to your bed frame
Notes
I bought the MDF board from Lowes and had them cut it down to 64" wide. I kept the height which is 49" and I used the rest of the MDF board to double up the shape of the headboard because I wanted it to look thick. This made it really heavy though. If you want it to be lighter then I advise you to use plywood instead. Plywood can be a bit tricky if you want to unique shape because of the way it is made and it can shred and fall apart.
Upholstery fabric tends to be pricey, so think outside of the box. Curtains are a great option and the Ikea Sanela has such a nice thick velvet texture. Unfortunately, the color I used isn't available anymore but I have seen it on eBay here and there. However, Ikea has great new Sanela curtain colors. Checking Facebook Marketplace is also a great place to check for great curtains to use for a DIY headboard.
This is one of my favorite projects of yours Julia! Everything looks so neat and professional. I never knew they made a spacer, that makes perfect sense! I’ll be pinning this for future reference for sure. Thanks for the great tips and tutorial!
It’s beautiful! I can’t figure out how you got the seam to run along the curve of the headboard so perfectly, but you did a fantastic job. It really does look like it was professionally upholstered. I love it!
Great tutorial. Never knew that a spacer tool was even available for that sort of thing. Looks amazing.
Thanks John, I actually didn’t either 😉
I want to try a headboard again after reading your tutorial. I didn’t know about the spacer tool or the cardboard edging strips. It looks amazing!
i wish you lived closer so we could thrift and make stuff and love our pets and drink together all the time.
SAME FEELINGS HERE !!!
Liebe Jrieße, Katrin
This looks crazy professional! You are a a master! How did you get the seam along the curve? That is the part that frightens me!
I was wondering the same thing?
Hi Myra, simply by pulling and adjusting. The nice thing is that any uneven folds this might create gets hidden by the cardboard upholstery tack strip trick that I am showing in the post. It’s a perfect way to disguise curved upholstery edges.
Woah, Julia! That is gorgeous! I was wondering how you got the nail heads so perfectly in line. I’m going to have to get one of those spacers…never knew it existed! The bed looks amazing!
Oh…& I’m LOVING your new header! Bring on the gold sparkle! LOVE it!
It seriously looks so good! What a lucky little girl!
It’s perfect — a “professional” could not do better. I am so impressed!!! Gorgeous room! I noticed the faux chandelier in your post earlier this week and found something similar on eBay for my daughter’s room.
Thanks Kim. I actually got the chandelier at Urban Outfitters a couple of years ago.
I love the idea of using Ikea Sanela curtains! They truly are the best deal for the quality! And that blue is one of my favorites, paired with brass nail heads – perfection!
I LOVE how this headboard came out!!! This is exactly how I want mine to look, except a little shorter. I don’t quite understand the cardboard tack strip, but I guess I can google it to find out more about it. About how many tacks did you use? I have a king-size board I want to do and would be great to have a frame of reference of how many tacks I will need.
This is beautiful! What a lucky little girl. The Ikea curtain idea is genius because fabric is always what drives the price up. I love all your creative ideas! Thanks for sharing.
Dee@delolovesdesign
Thanks for visiting 😉 Dee
Beautiful Julia. I’m adding it to my ‘One day I’ll do’ list. 🙂
I actually prefer the shape you chose. It’s perfect with the fabric (drapes) and brass tacks. Wonderful job, Julia. It looks professionally done!
It truly turned out so good, Julia! I love how you used the same fabric for the skirt, it looks more like an entire upholstered bed. Thanks for sharing your resources, too! I need some of that cardboard tack strip and the spacer tool looks like a lifesaver!
Wowzers!! Look at you go! amazing. I am in love with it, and it looks professionally upholstered. I was actually looking at those same curtains to make cushions for my benches out of – you can’t find velvet for a better price anywhere else.
Want to come down to San Diego? wink. wink. A headboard for my 6 yr old girl is on my ever-expanding “Amy-Do-It” list, but I lack all motivation right now. You sure have one lucky little girl! 🙂 Tschüß
OMG! My jaw ACTUALLY dropped when I saw this project! That has to be the most impressive, professional looking DIY headboard I think I’ve ever seen. DYING. I died. Pinning!
Although I will never attempt this, you have made it so simple to follow all the steps….Maybe someday, because I love that headboard!
Stunning Julia! I love the color scheme of this room and the headboard is killer!
It’s gorgeous, Julia! I LOVE the size and it looks so professional, that spacer is the ticket! I absolutely think you could have handled the more difficult one, next time! 🙂
oh! my it’s a lot, a lot of work and I’m sure your back must hurt very much but it was worth it, you did a beautiful job Julia 🙂 I had to read your steps a few times because I didn’t know that some of these things existed and I’m really impressed how you managed to do everything 🙂
I really love your daughter’s headboard, I wish I had something like that when I was growing up or even now (ours is too simple) 🙂
thanks for sharing all these steps with us too (great tutorial)
Great tutorial! You did such a fabulous job. It looks so so professional. I still can’t get over the brass. MM MM MMMMM!
Thanks so so much
Seriously so beautiful! I love the headboard and especially love the color!! I’m glad I’m not the only one who struggles with documenting my DIY’s, you however did a great job with this one!!
GREAT project!
The headboard is gorgeous and so professional looking! I love that Jonathan Adler bed too. I think you went with the right shape though. Good call.
Soooo, I’ve had 2 headboards that I had my boyfriend cut out of MDF (in the same EXACT pattern as yours), the fabric, and the nail head(kit) for hmmm… 2 years now? lol I’m so afraid to start them! Especially since I spent so much on the fabric. Yours turned out super professional looking. I love the cardboard tackstrip idea! When I eventually build up the courage, I think I’m going to try that method. 🙂
Das ist großartig geworden, superschön, Julia! Auch die Vorhänge sind so hübsch.
Und die Ikea Vorhänge werde ich ab jetzt nochmal mit anderen Augen sehen, prima Tipp. Habe sie in pilzfarbig in der dunklen Jahreszeit an den Fenstern, dieses aqua ist aber viel schöner…
LG, Katrin
Wow this headboard is gorgeous. I love how straight your brass pins are. This looks flawless. I didn’t quite understand the step with the cardboard strips. Somewhat, but I didn’t get how you got the fabric to be taught once you flipped it over and how you got the corners by the circles so sharp and flat. I would love to know more about that 🙂
You’re making me wish I needed a headboard somewhere!
This tutorial is awesome. Seriously! I am crazy about the color of the velvet with the gold nailheads, and insanely impressed that you were able to keep them so perfect, especially around the curves!
Julia, great job on this tutorial. The headboard turned out wonderful. I really need to get up the courage to try this project myself. We have a guest bed still with no headboard!
It looks like a pro did it. Great job!! I think a headboard is going to be the next upholstery project I attempt. You made it look manageable. 😉
I was wondering if you used the cardboard strips when I first saw the headboard! I have used those in the past and it really does give you a nice finished edge. I still am in awe of your individual nail head skills. I have that tool and I still couldn’t get them straight! Kudos to you my friend, it is just a spectacular headboard, I love it!
This is beautiful! Better than any I see in stores. The color and metal accents are perfect.
Absolutely beautiful! The color is great and the real brass nail head trim makes it!!
You did an amazing job Julia!
WOW! That is gorgeous! Every detail. I would love to make one for our king sized bed, but not sure I could tackle it. I’m in awe of your talent!
The headboard is amazing, simply stunning!! How the heck did I miss it earlier this month?
your headboard turned out so pretty, i would love to feature it, if that would be ok please let me know,
lauren
It turned out great and very professional looking!
Why does the tutorial pic have a smooth wrapped edge and the finished project had a sewn seamed edge like a cushion cover?
Stunning Julia!! Can you tell me the name of the beautiful fabric you used for the drapery as well? Thanks!!
Wonderful stuff. Bundle of thanks!!!
is bubblegum casting legitimate
Love it! I’ve been looking at many DIY bedheads (since we don’t have any at the moment). But this made me kick it off tonight. I bought the MDF and timber at 8:45pm (just before the hardware shop closed).
Thank you for all the details (much needed, and inspiring).
I’m going shopping tomorrow to get the rest of the upholstery stuff!
Good luck!
Beautifully made headboard. Excellent tutorial. I’m plotting to recreate my own right now, but I have a few questions:
1) what thickness MDF did you use?
2) why did you double up on the thickness of the MDF around the edges?
3) to make the clean fabric covered edges at the end, how is the fabric adhered to the side? I know it is stapled from the back, but is it glued with something along the edge?
– Andrea
It’s about 1/2″ thick and I doubled it to make the edges look thicker so I could finish them with the cardboard tack strip. I just like the look better.
And the cardboard tack strip is only stapled the way I’m showing in the photos not glued. Hope that helps and good luck with your project.
What was your method to draw the cut-outs so neatly?
I used a ruler and the curved parts where mostly freehand but you can use anything large that is curved like a large bucket to trace for example.
Beautiful headboard. I am featuring this on my site if you don’t mind.
I don’t mind at all if it’s only photo with a link back. Thanks for letting me know!
Hi Julia!
LOVE the headboard! I’m inspired to make my own this weekend for my bedroom! Then I get what I want, for WAY less money! I just had 3 questions! I’m motivated to make mine look as beautiful as yours!
1.) When you put the foam on the front, did it overlap onto where you “doubled” up the MDF? I just wasn’t sure if it would look funny mostly covering the less thick part, and the edges of it on the thicker part (if the front would look uneven with it being thicker at the edges). Or was all of the foam “inside” of the doubled up edge?
2.) On the “offset” on the back of the legs, when you upholstered that part, did you just put a staple in the “inside corner”, or was that somehow done with that uphostery strip? I didn’t see a staple visible in the picture, but wasn’t sure how that particular area would be done with the strip.
3.) Do you have any idea how many tacks you used? I see they come in sets of 100, but I’m not sure how many I’ll need!
Thanks!
Awesome work!
Ooops….disregard my “foam placment” question! I see now that that “double up” is on the back, so the front is a smooth surface! Makes more sense! Just a blonde moment!
Amy
I’m so sorry that I missed your comment.
Hope a late response still works for you 😉
to 2. Yes I just stapled in the back and then used the upholster strip.
3. I’m sorry but I have no idea how many tacks I used. I remember having to buy more and now I have some left over.
great job on the headboard. now I’m wondering where you sourced the curtains?
Hi there Denise and thank you. Her window curtains I made myself, the curtains used for the headboard are from Ikea.
How many panels of the curtains did you need for this project please? Also I know you said it’s sometimes on EBay, what is the color you used called please?
Thank you!