

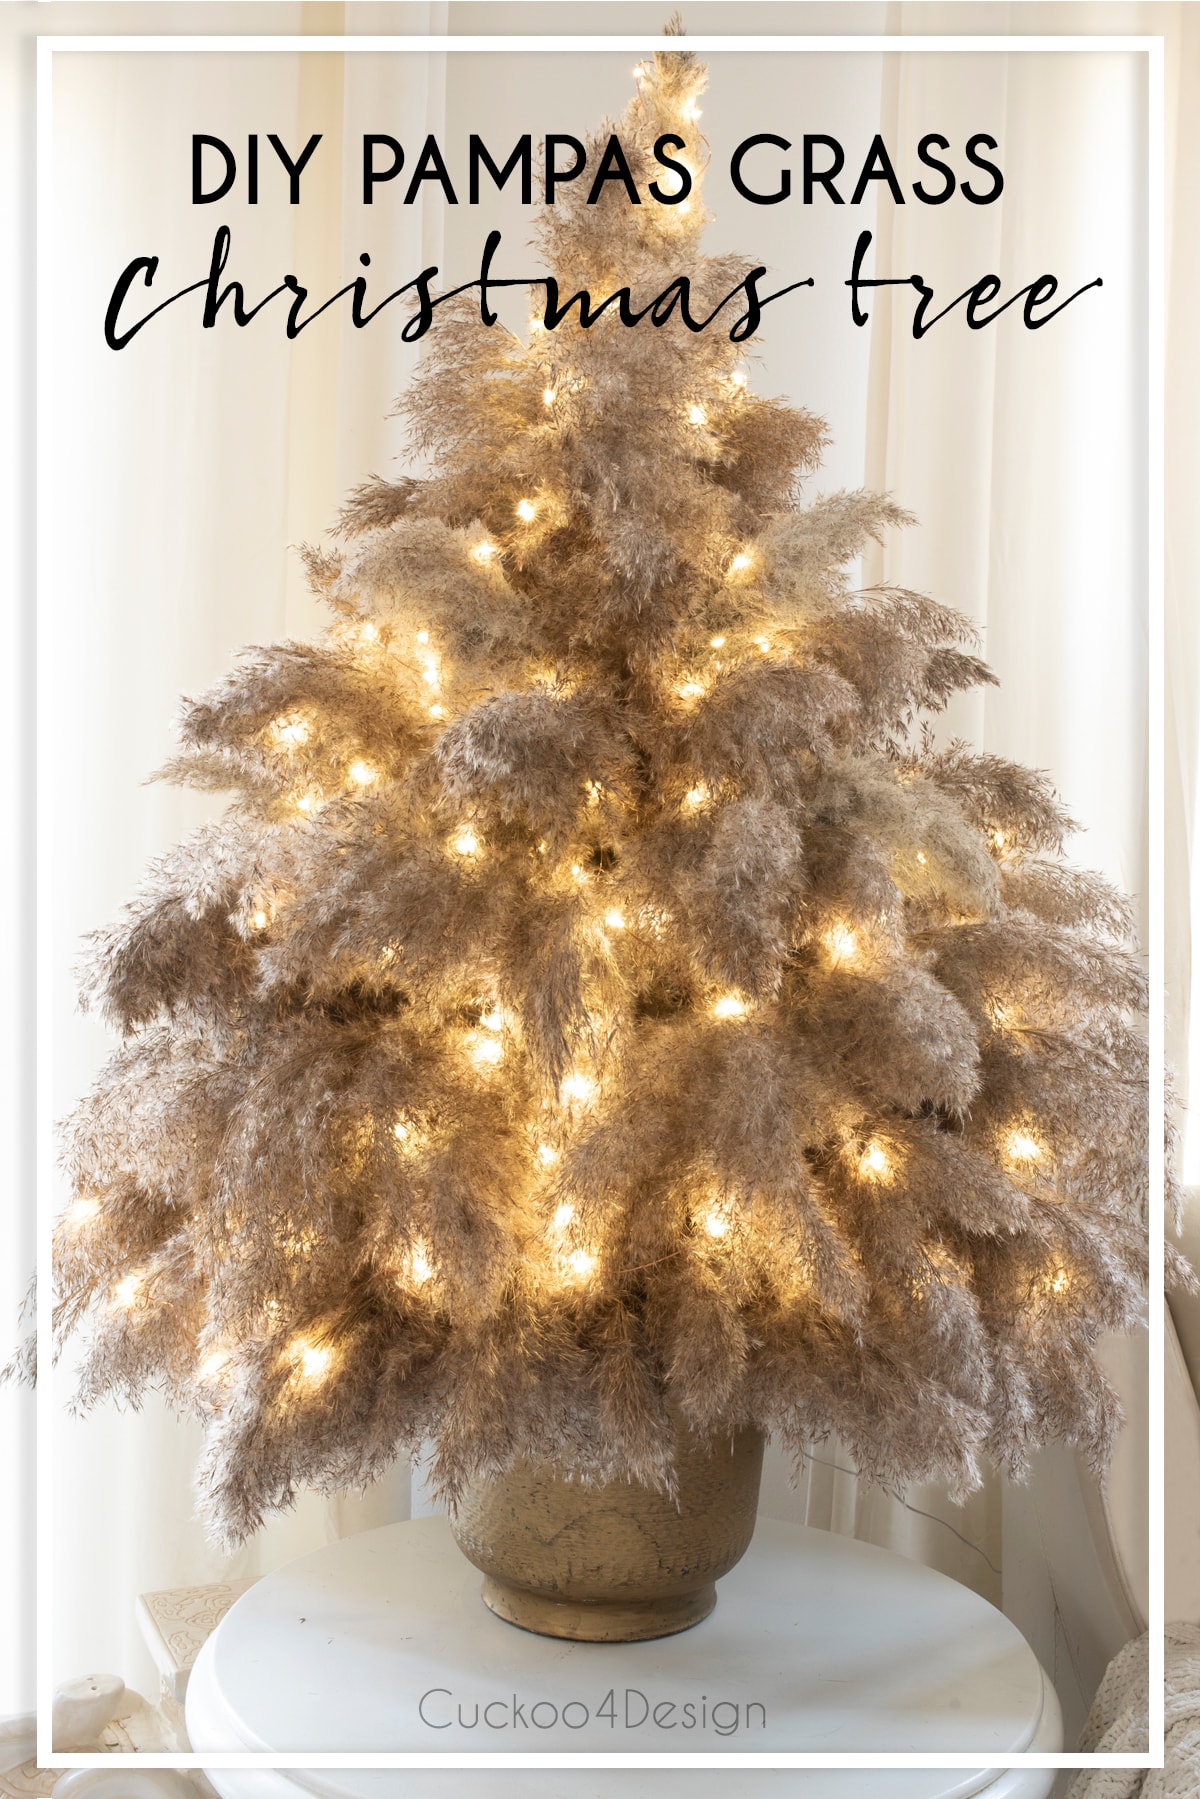
Stylish boho DIY pampas grass Christmas tree
Pampas grass Christmas trees have become one of the most popular boho holiday decor trends in recent years, but when I first created mine, there were hardly any tutorials online. That’s why I wanted to share my original step-by-step DIY pampas grass Christmas tree tutorial with you, so you can easily make one yourself. It’s affordable, stylish, and such a fun alternative to a traditional evergreen Christmas tree.
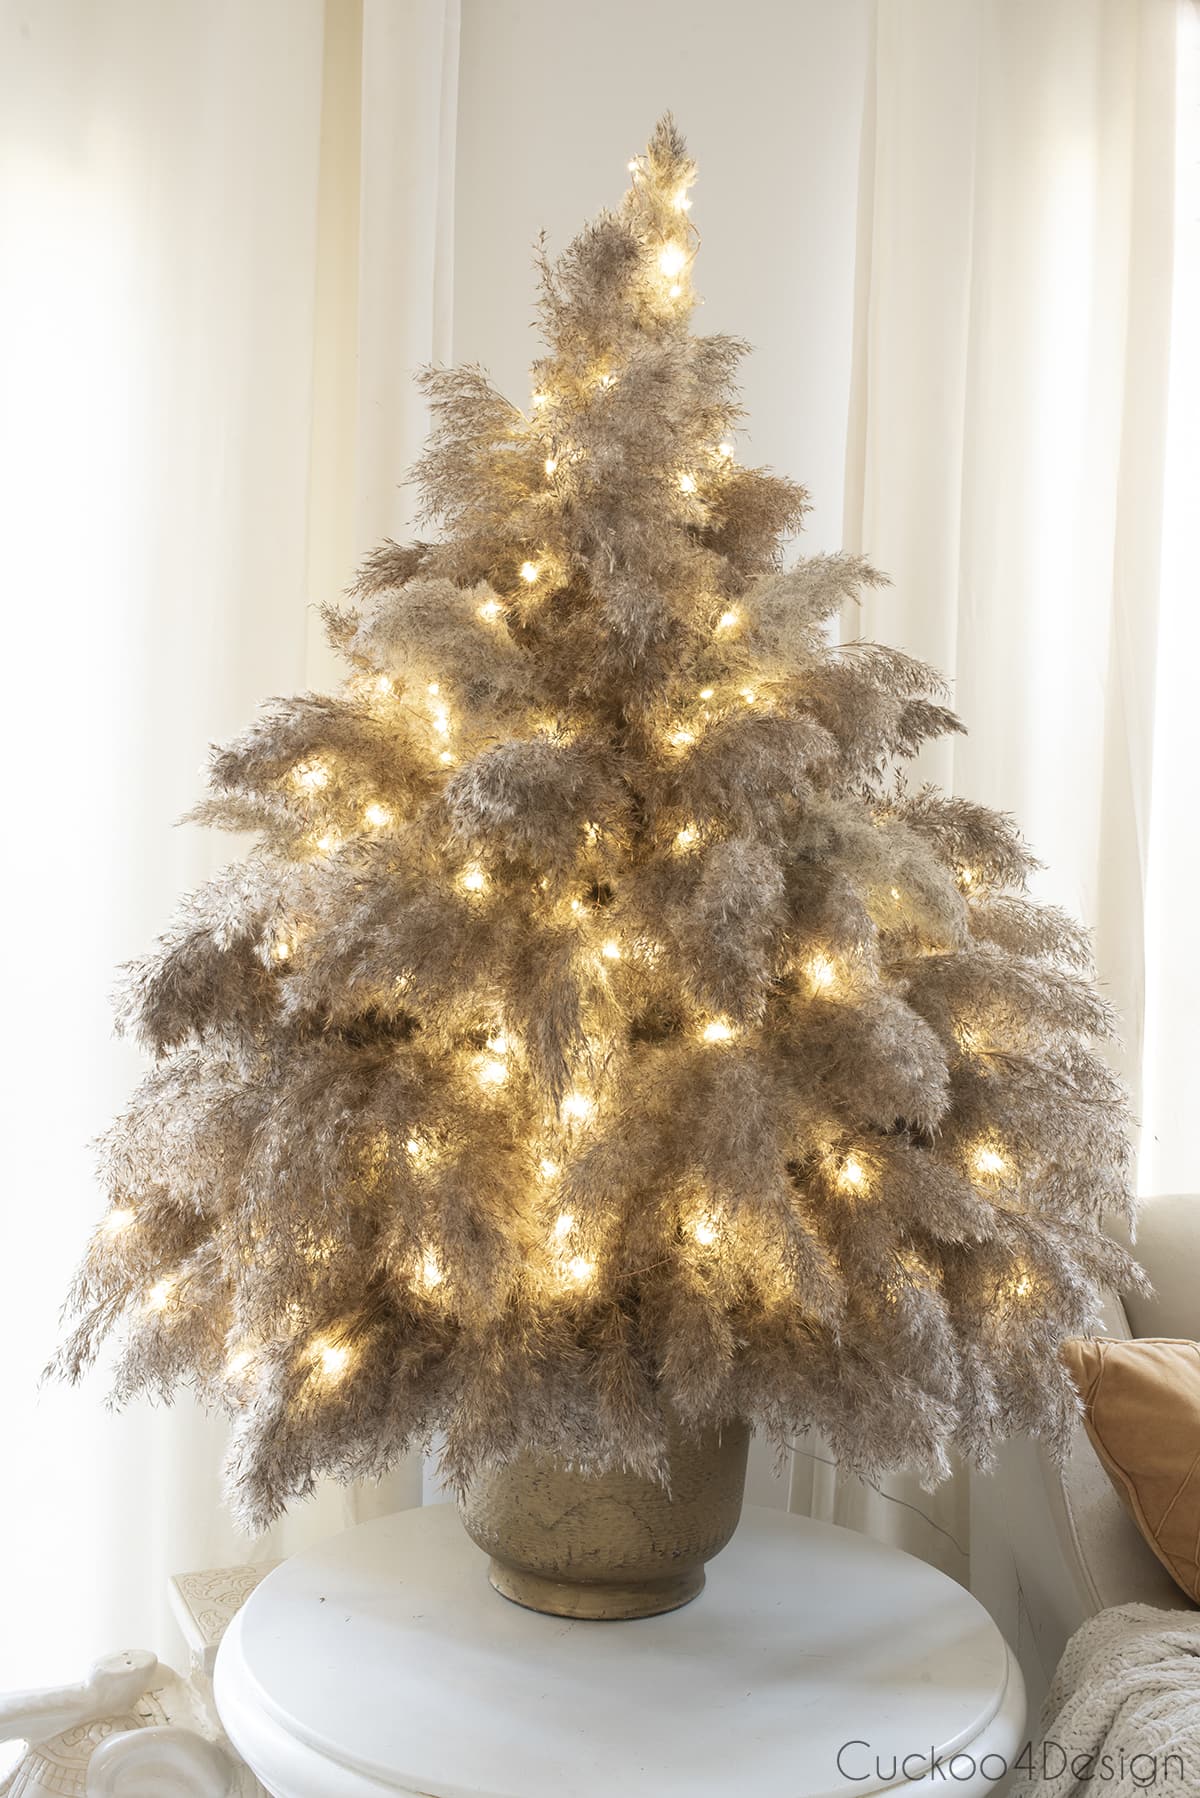
Unlike other versions that use plywood or chicken wire, my method creates a full, fluffy tree with soft plumes that look natural and festive. This pampas tree is the perfect neutral holiday decoration and can be customized with fairy lights or boho ornaments for a cozy vibe.
How to make a pampas grass Christmas tree
I’ve now made several pampas grass Christmas trees over the years, and I still love how unique they look in my holiday home. And yes, my cats surprisingly leave them alone!
Can you believe that this little tabletop Christmas tree only cost me $4? Why was it so cheap? Well, I had most of the supplies and only needed to buy the styrofoam cone which I was able to get for cheap with a coupon.
Below, I’ll walk you through exactly how to make your own pampas grass Christmas tree and share my best tips for keeping it looking beautiful all holiday season long.
Where to find pampas grass
I am lucky enough to have plenty of grasses growing where we live. I used common reed Phragmites australis for the grass, and depending on the lighting, the beige tone can appear rather brown because of the seeds. However, with added fairy lights, it looks light tan.
To bring out the creamy color of the pampas grass, wait until the darker seeds are gone from the plums later in the season. Some pampas grasses and reeds are long and pointy, and I wanted to make sure that I had a fluffy variety. I believe that fluffy, thick plums create the best pampas trees, rather than using thin, spiky-looking stems.
I went into that below field of grasses and cut a huge bundle of it to bring home.

You can also find different pampas grasses for sale on Etsy or Amazon. (The images take you to the shops)

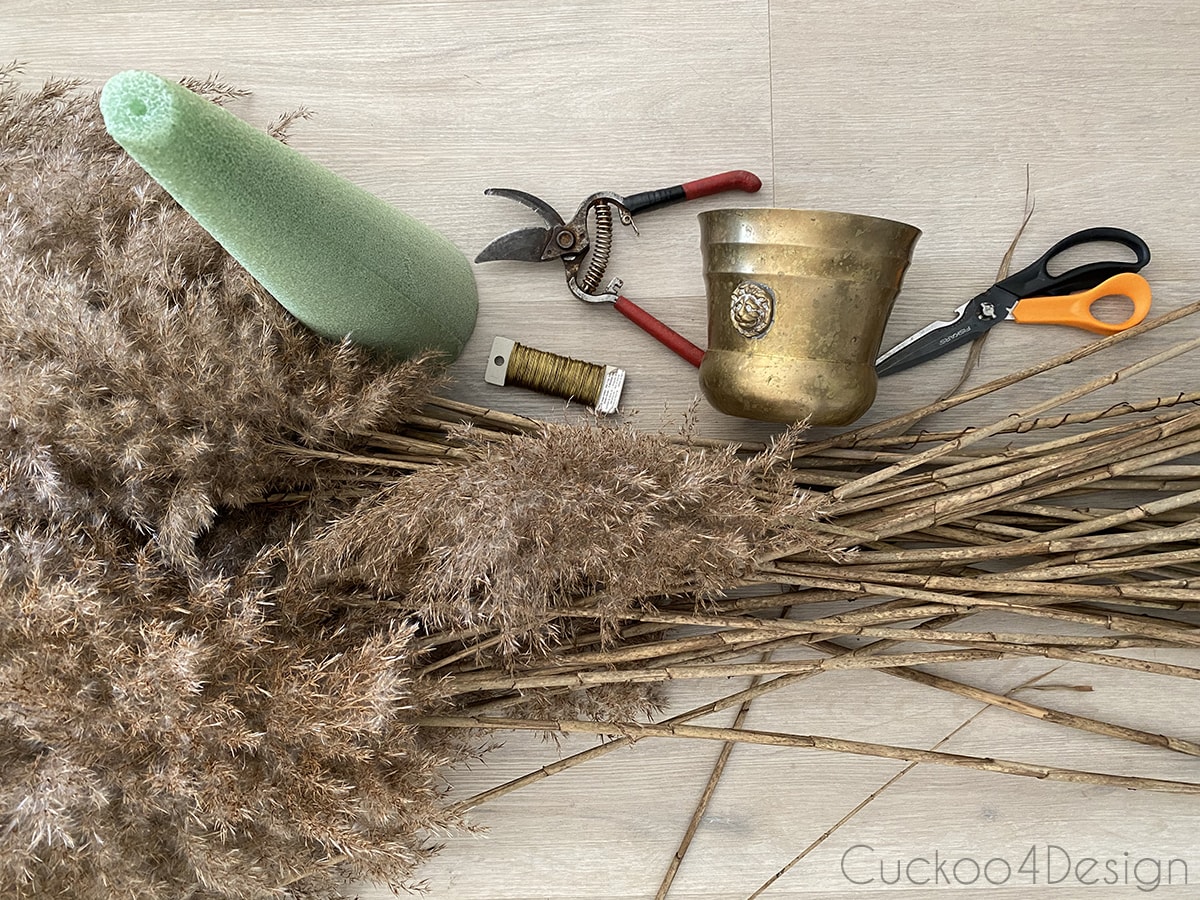
All materials needed to make a pampas
- styrofoam cone
- floral wire
- snippers
- flower pot or planter
- scissors
- hairspray
- fairy lights
- flower pot (or other containers like wicker baskets)
- pampas grass or any other fluffy plumed dried grass
(if you can’t find it free fluffy grass growing somewhere then check Etsy or Facebook Marketplace)
Pampas grass Christmas tree video tutorial
I actually made a video so you could see exactly what steps I took to make this pampas grass Christmas tree. Use the triangle on the image to turn on the video. If you are on a cellphone or other device, turn it horizontally for better viewing. If it doesn’t work, you can also head to my YouTube channel.
I mentioned my cat enclosure in the video tutorial, you should check it out.
This post may contain affiliate links from which I will earn a commission at no extra cost to you. View my full disclosure policy.
Step-by-step instructions
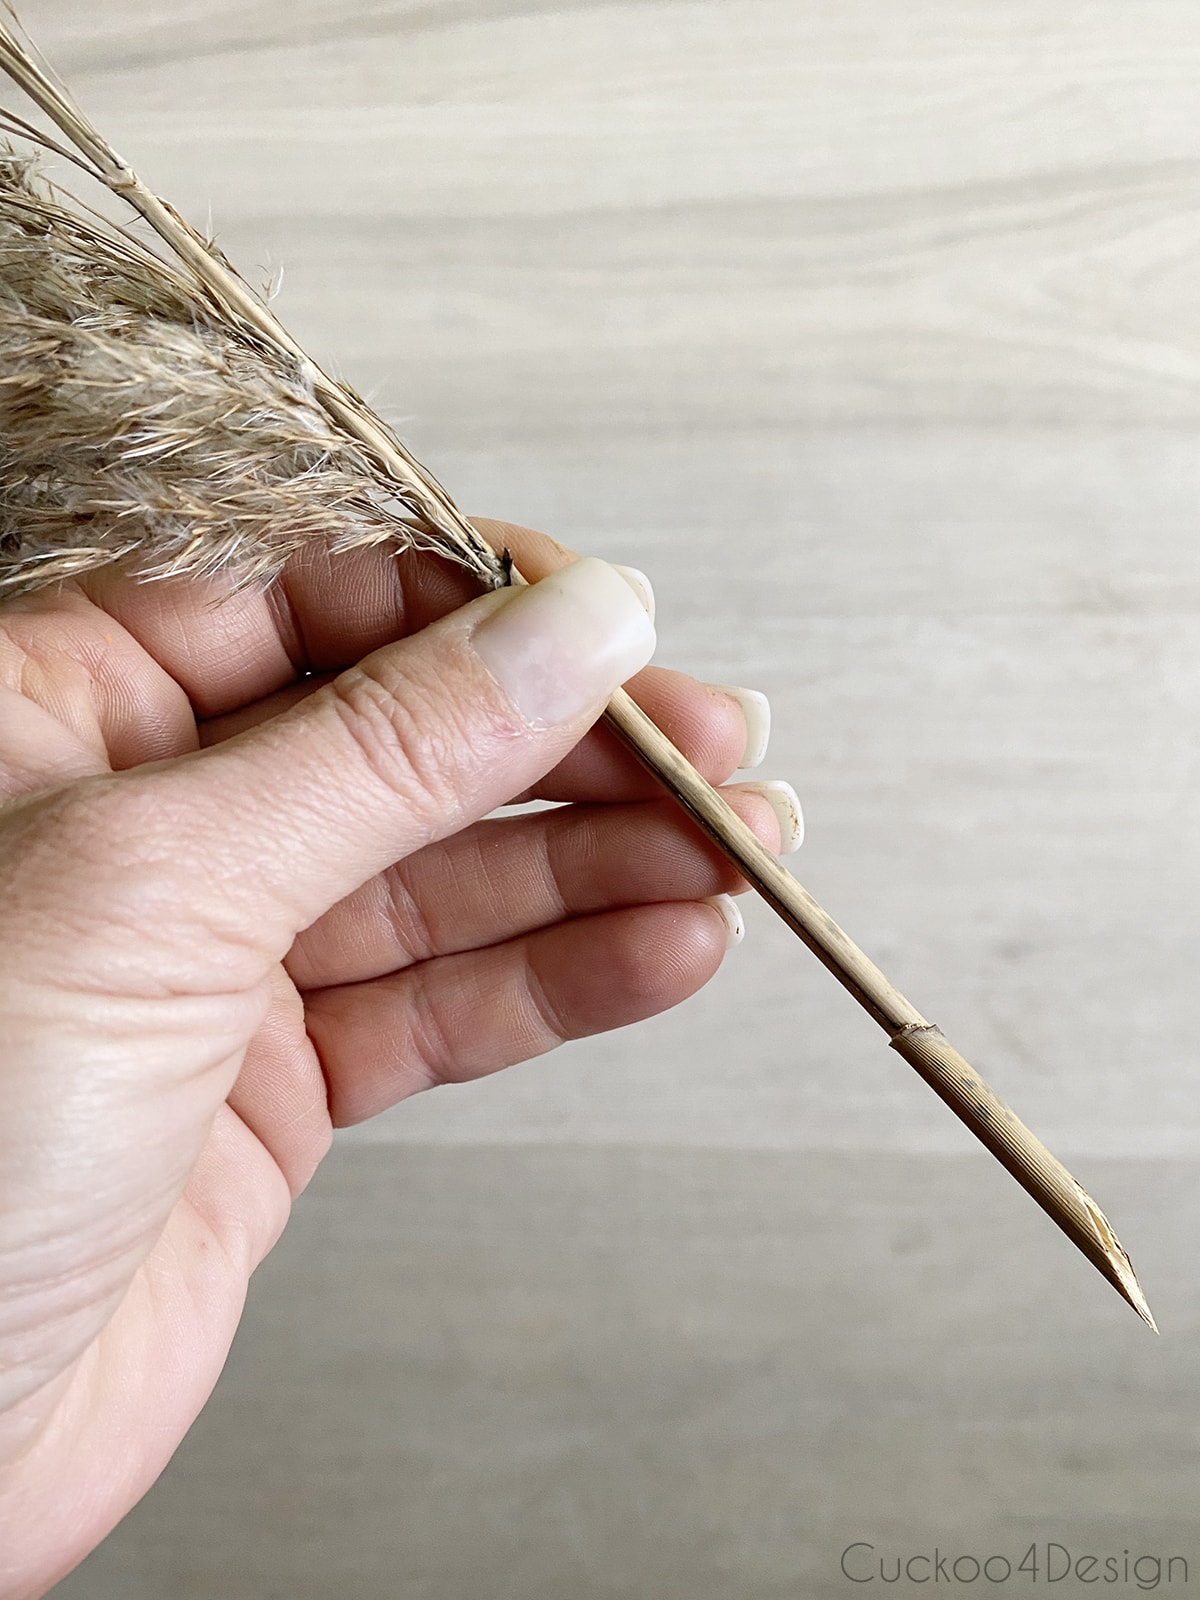
Step 1: Cut your stems at a pointy angle
One of the most important things is that you cut the stems at a pointy angle before inserting them into the styrofoam cone. It really helps!
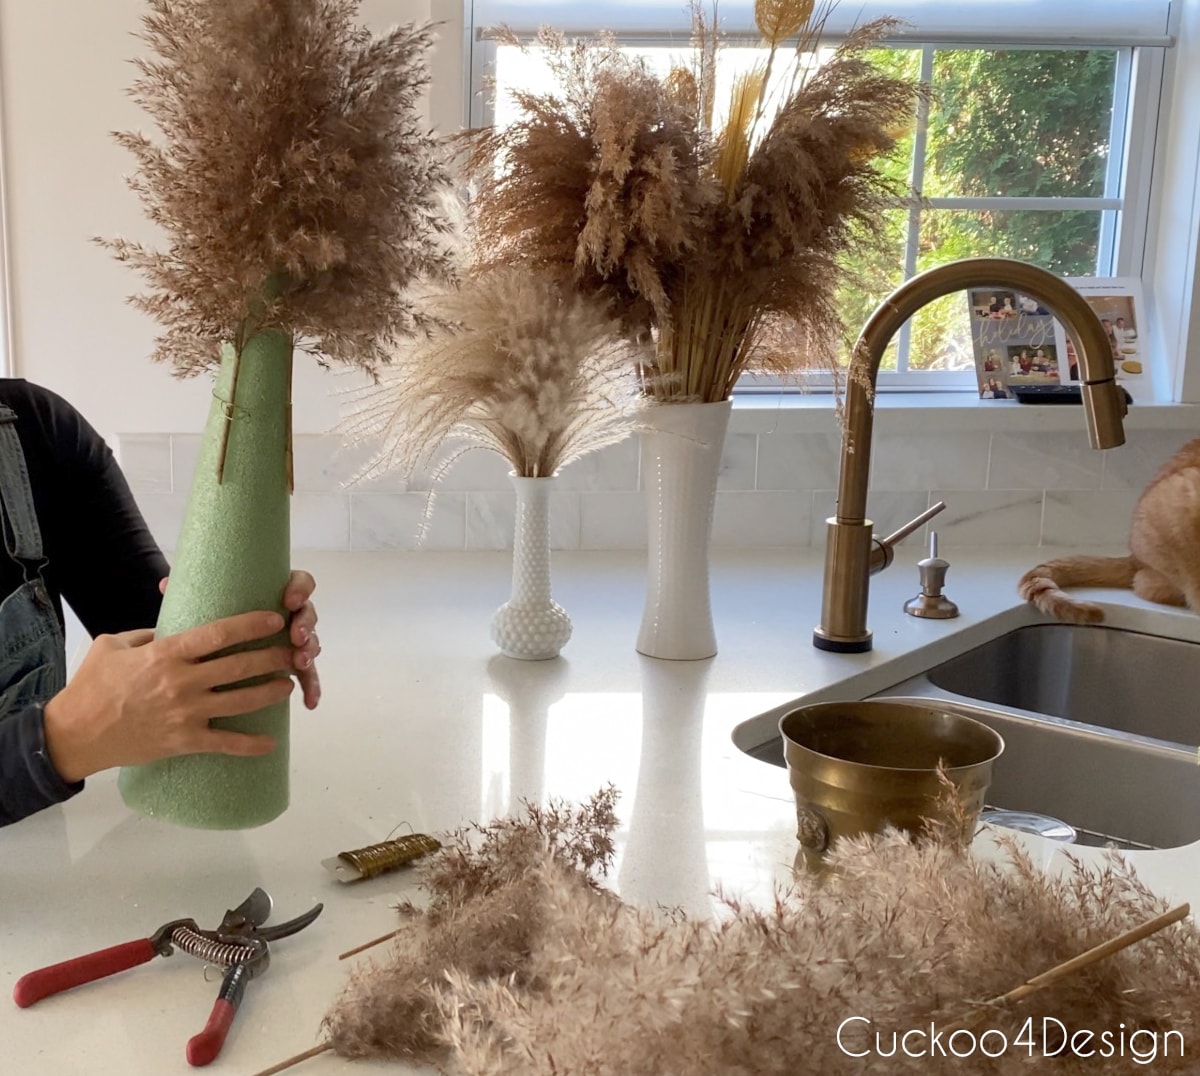
Step 2: Create the top of the pampas grass Christmas tree
Start by tying a bunch of grasses around the tip of the floral cone with the floral wire. This is the only time I used the floral wire, and I didn’t need it otherwise.
Also, insert one or two separate pieces of pampas grass into the top of the cone to create a pointy tip.
Step 3: Form the base of the Christmas tree
It helps to know what container size you will be using for your tree. This way you can determine how wide you want the base of your tree to be.
I started out at the bottom of the cone by sticking longer branches into a circle shape. Then I could prop/rest that on my planter. This works easily since the tree is to light.
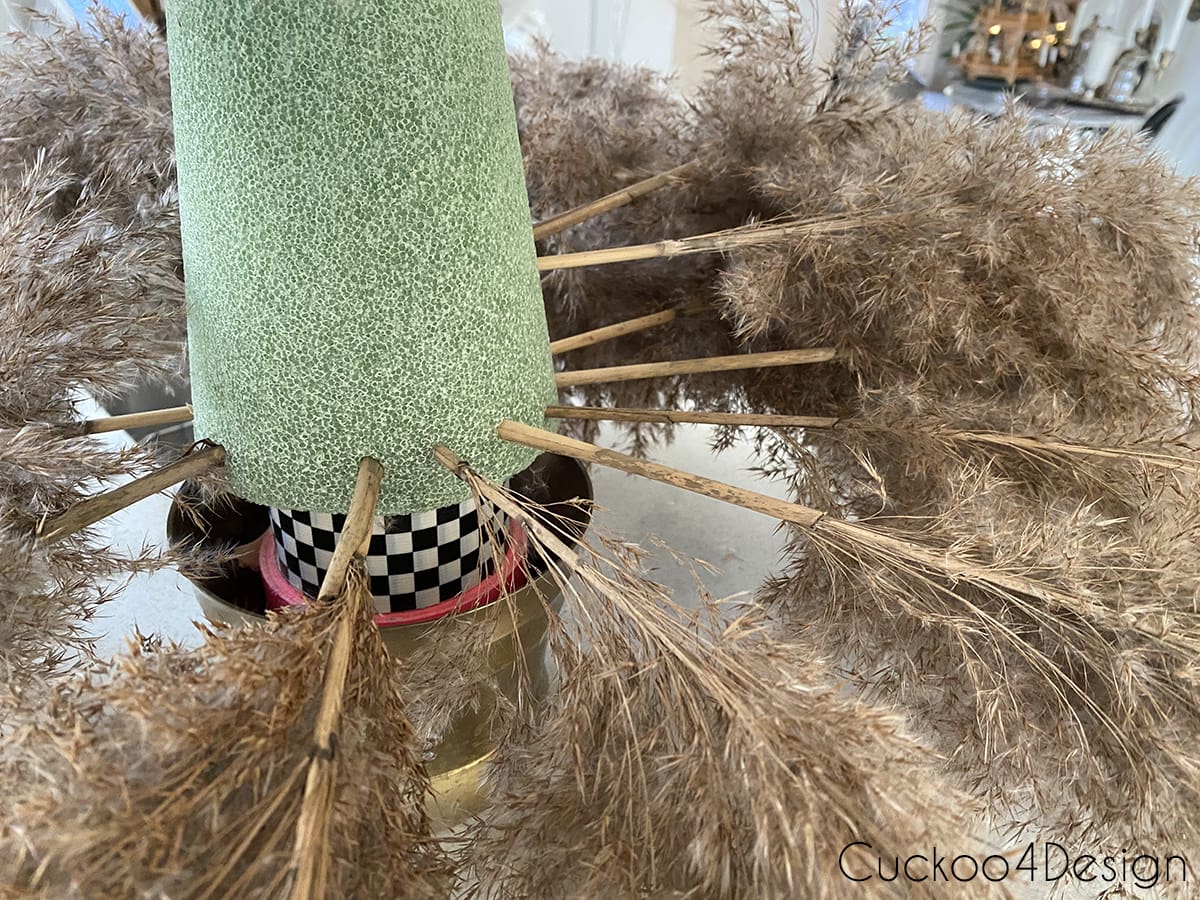
Step 4: Fill in the entire tree shape with pampas grass
After that, I filled the center of the cone with more pampas grass stems. You can work from the bottom up or from the top down. Both versions work to form the shape of a tree.
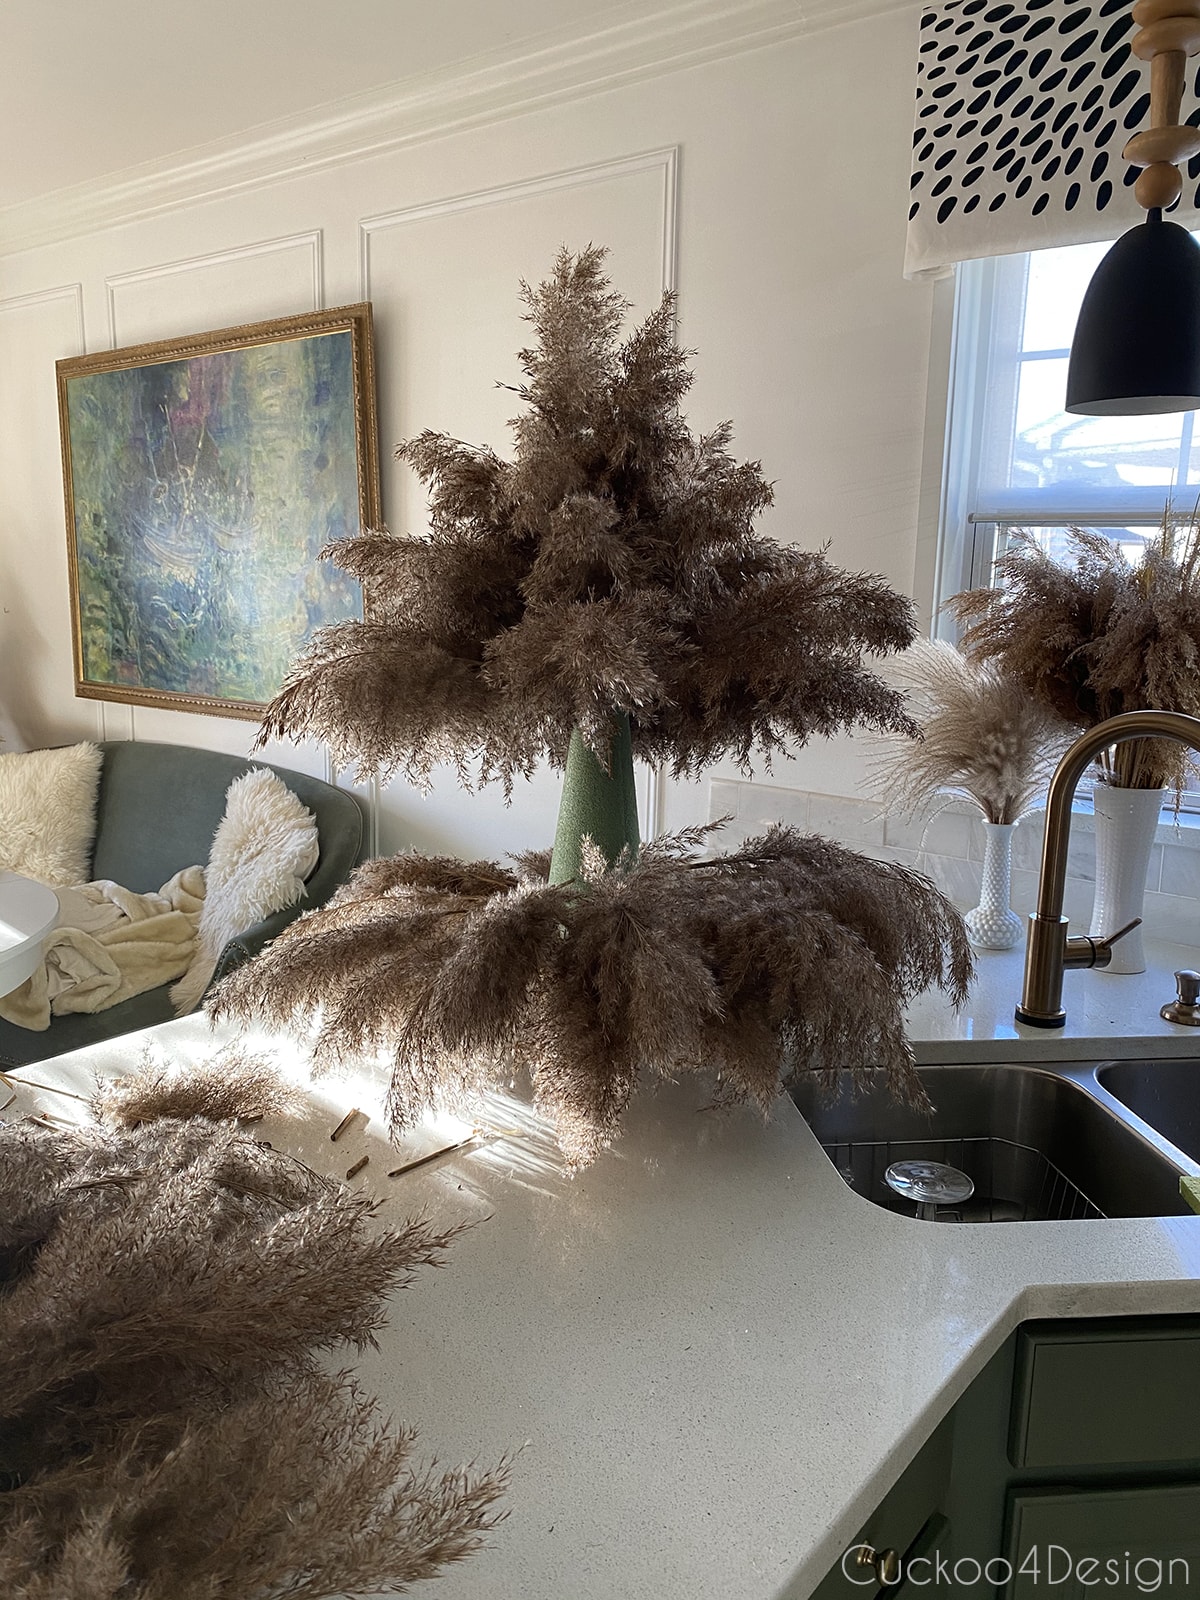
In the end, it should look like a larger cone.
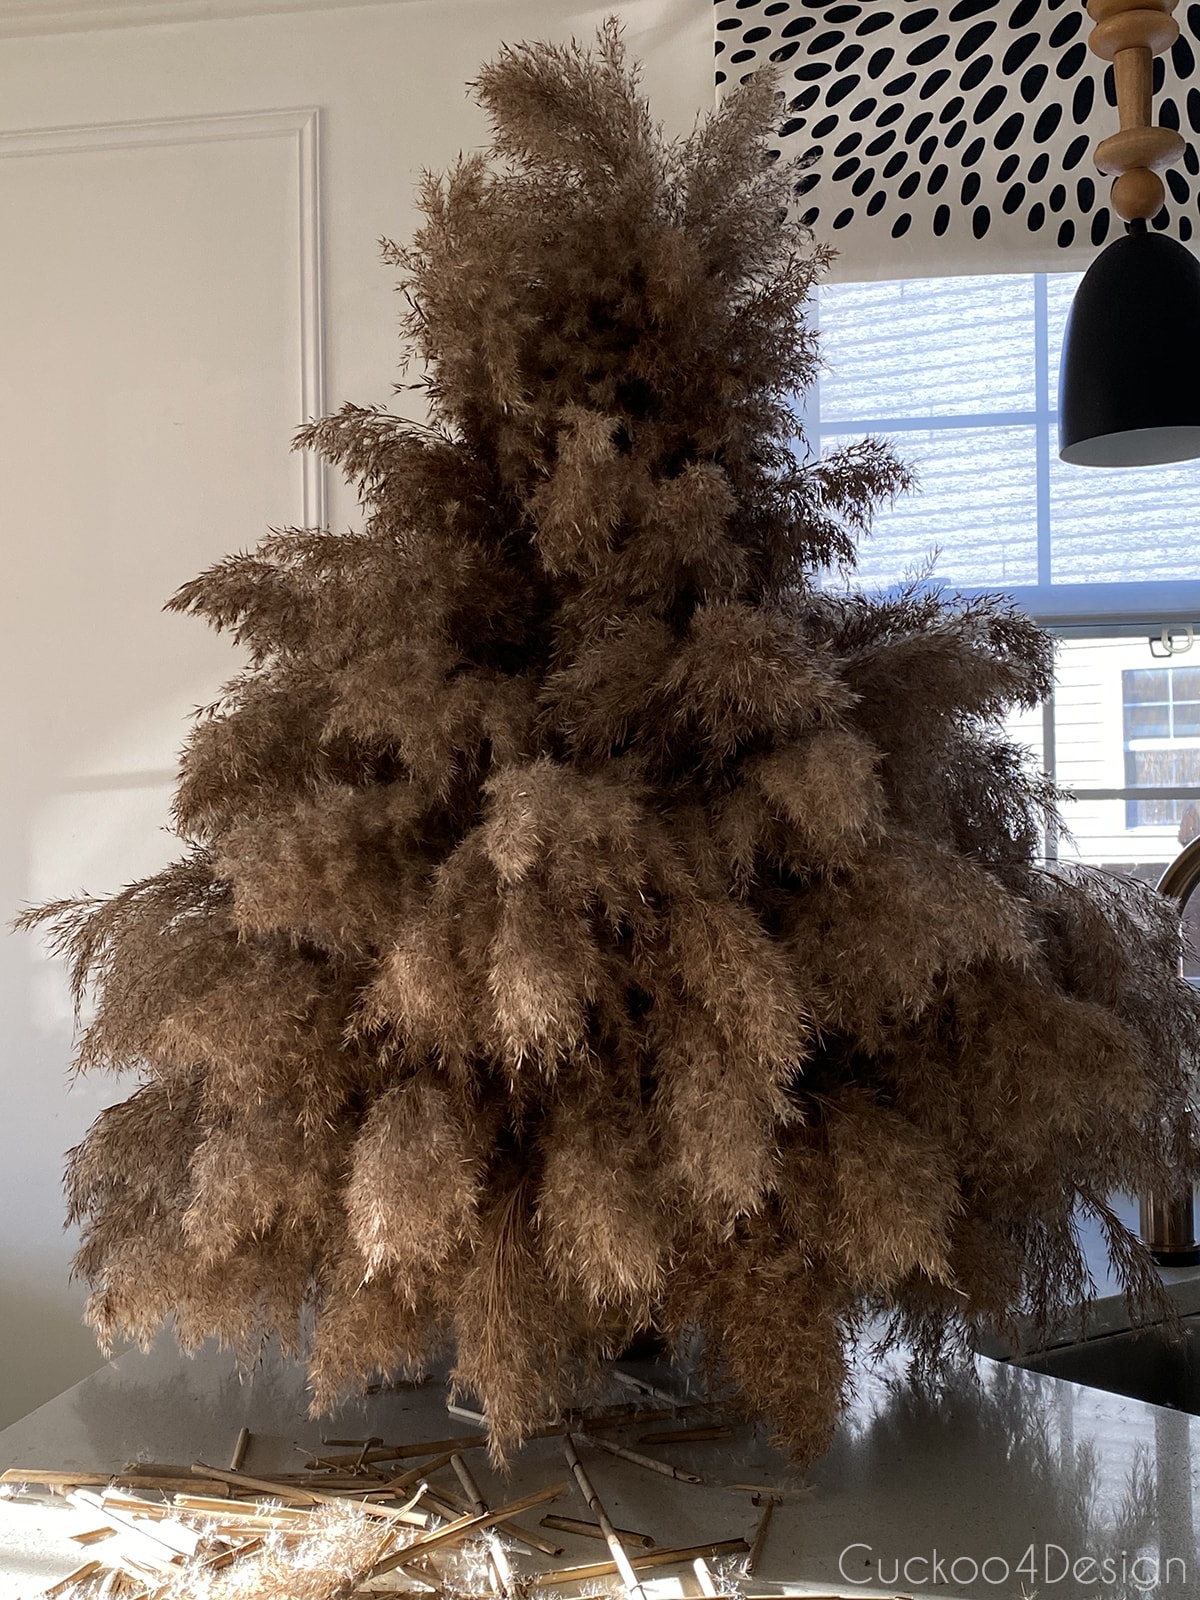
Step 5: Spray Pampas grasses with hairspray
Now it is time to make sure the grasses don’t leave a mess in your house. That means the tree needs to get sprayed with some hairspray to keep the seeds from flying around.
Step 6: Add fairy lights
I added my favorite fairy lights to the tree for an extra festive touch. Simply work the lights gently into the tree shape. It is always a good idea to have them turned on, so you can see where you are possibly missing sections.
Regular Christmas lights are too heavy and get too hot. It is safer to use fairy lights.
Make sure to check out my blog post about decorating with fairy lights for Christmas.
My tips for making your own pampas grass Christmas trees
I have made these grass trees for several years in a row now. Now I feel equipped to give plenty of good advice and tips with confidence.
- Be on the lookout already in the fall through winter for grasses growing on the side of the road, on walks, or even in your friend’s yard (yup it doesn’t hurt to ask)
- Make sure you use pampas grass that is dried all the way and doesn’t have green stems anymore.
- Depending on what type of grass you use you can find pampas grasses in pale pink to more bright pink blooms or in a variety of cream colored pampas grass branches.
- Cut the stems at a pointy angle
- Spray the tree with a lot of hair spray when it is done. Use maximum hold hairspray!
- If it isn’t too windy, assemble the tree outside. This keeps debris off floors and walls.
- Consider using a variety of grasses for extra interest, fluffy texture, and color
- You can decorate the pampas grass Christmas tree with fairy lights and very lightweight ornaments made from paper and straw. Check out my favorite German Christmas decorations and one of them are German star ornaments. They are perfect for this type of tree and you don’t have to hang them and can just stick them in between the grass stems.
- Consider taking the tree apart at the end of the holiday season so you can use the grass for other projects or make another tree the following Christmas.
- You can also store the entire tree.
- I have tried sticking the grasses into a faux tree to see if works as a base and it’s just not as full and pretty. Plus the affordable foam floral cones or foam blocks give you a lot more freedom regarding where to place the grasses and make the tree look a lot thicker in the end. And it is also difficult to successfully hide the green of an artificial Christmas tree with pampas grass unless you use a white Christmas tree.
- Don’t try to spray paint the pampas grass lighter, believe me, I have tried. The stems were just a bit too dark for my liking so I decided to use ivory-colored spray paint and I can not recommend it. The spray paint just makes everything a sticky chunky mess and the tree doesn’t look light and fluffy anymore.
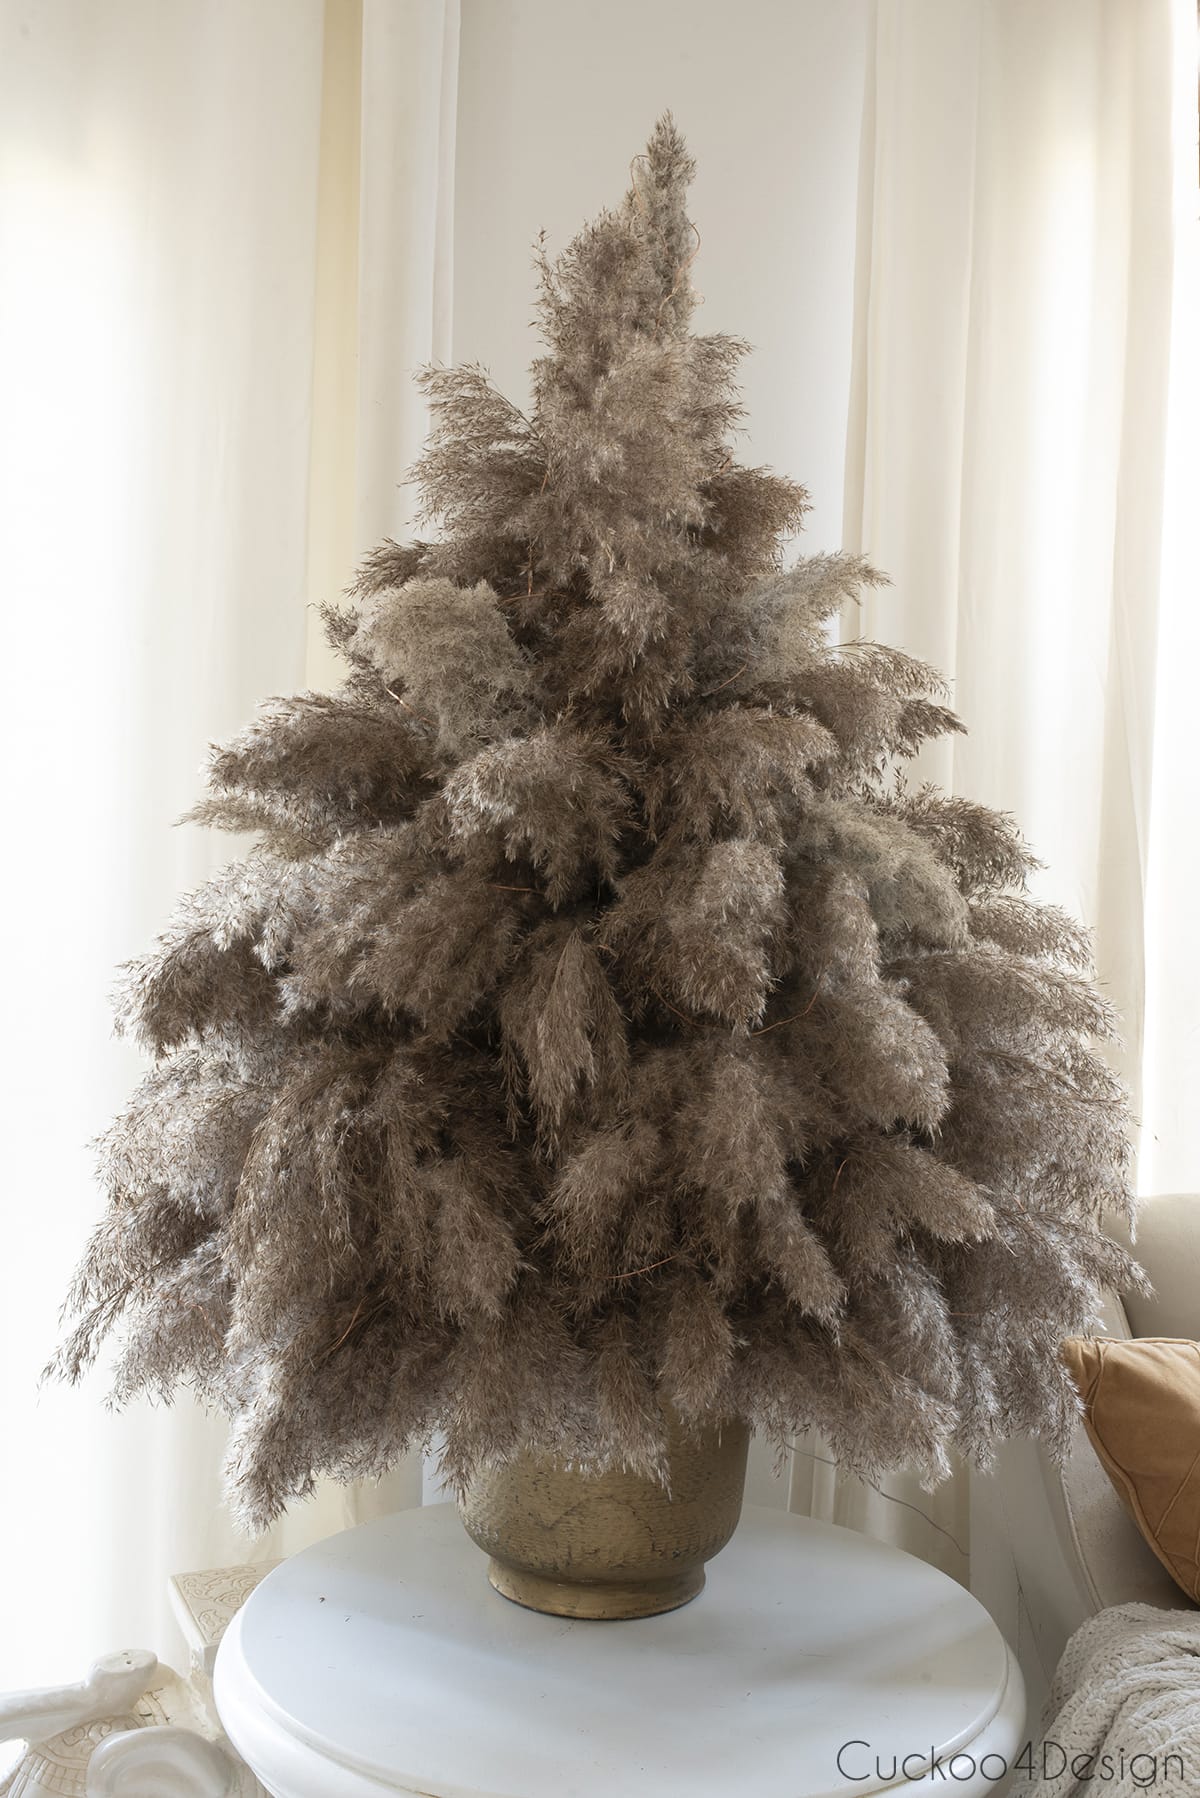
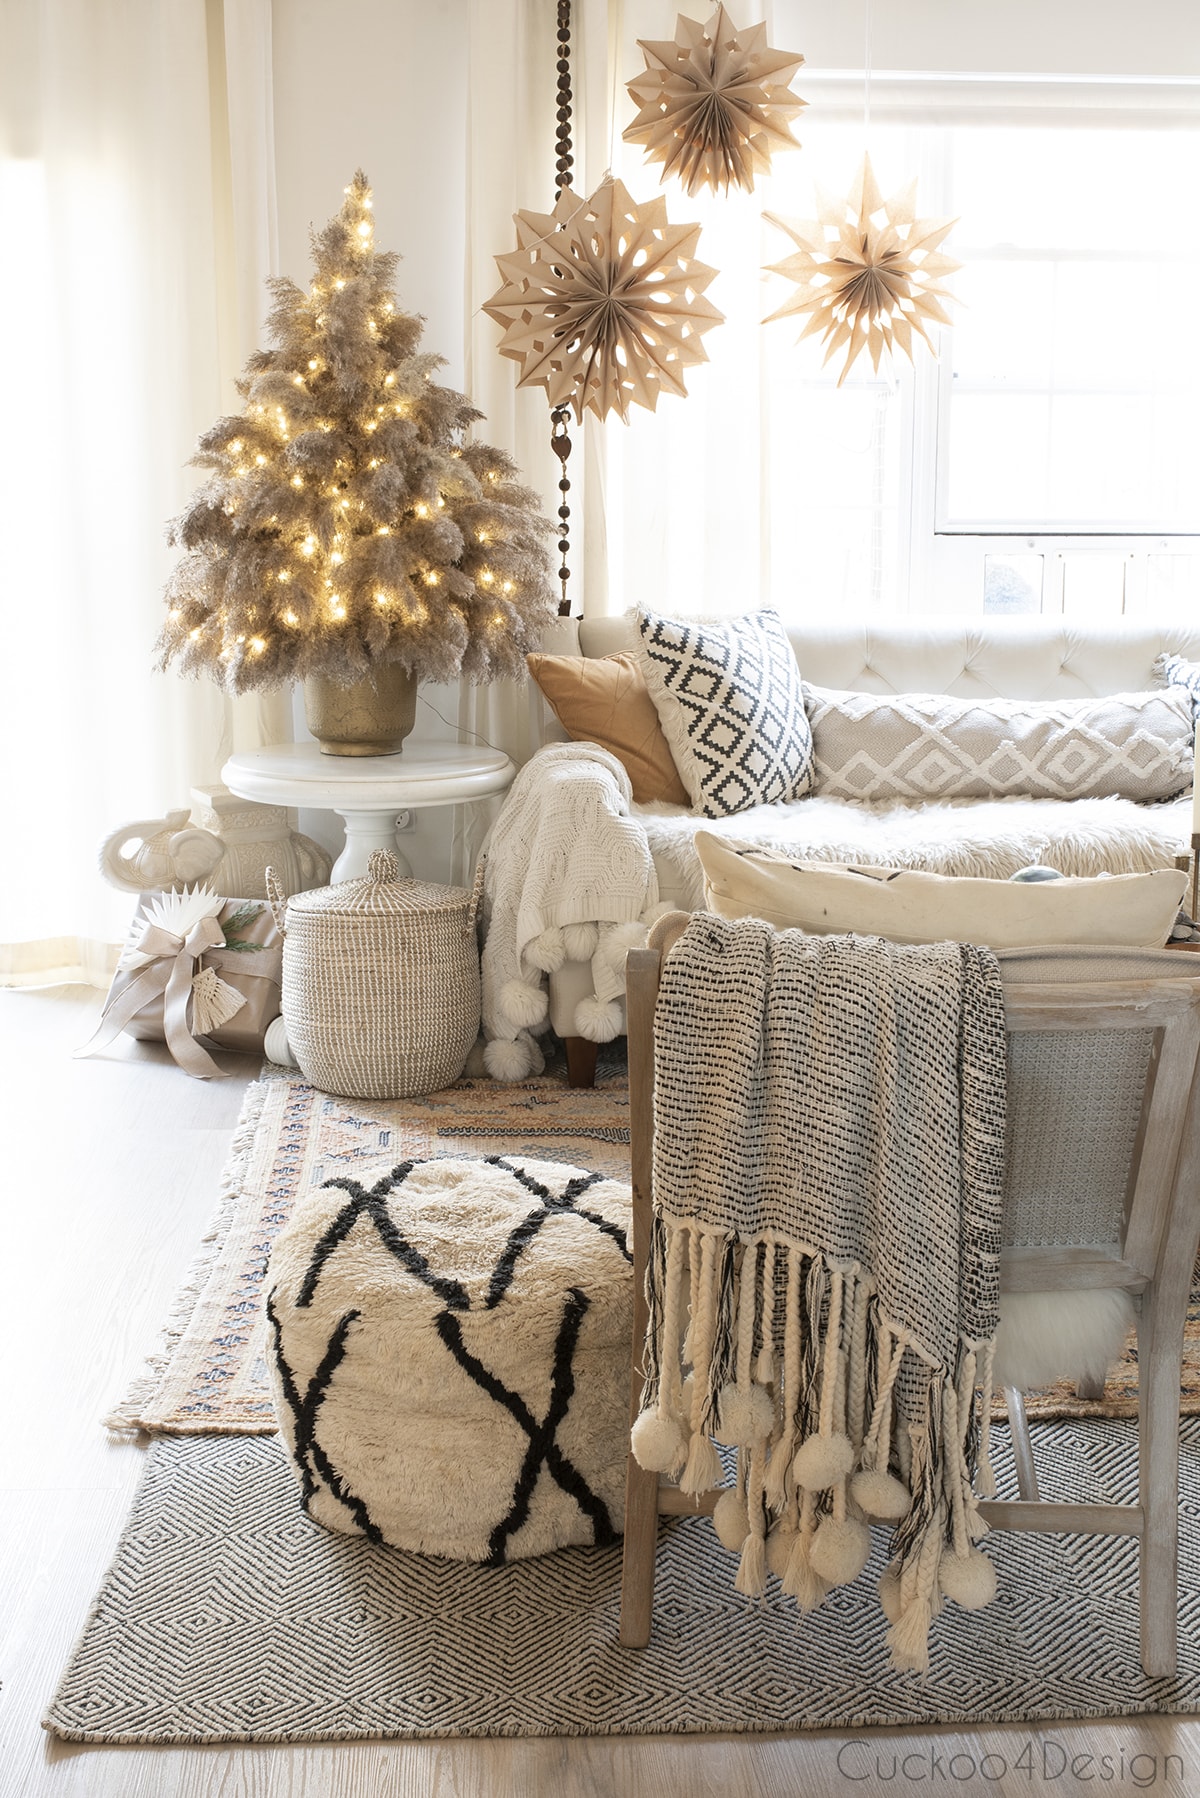
Finished pampas grass Christmas tree photos and styling ideas
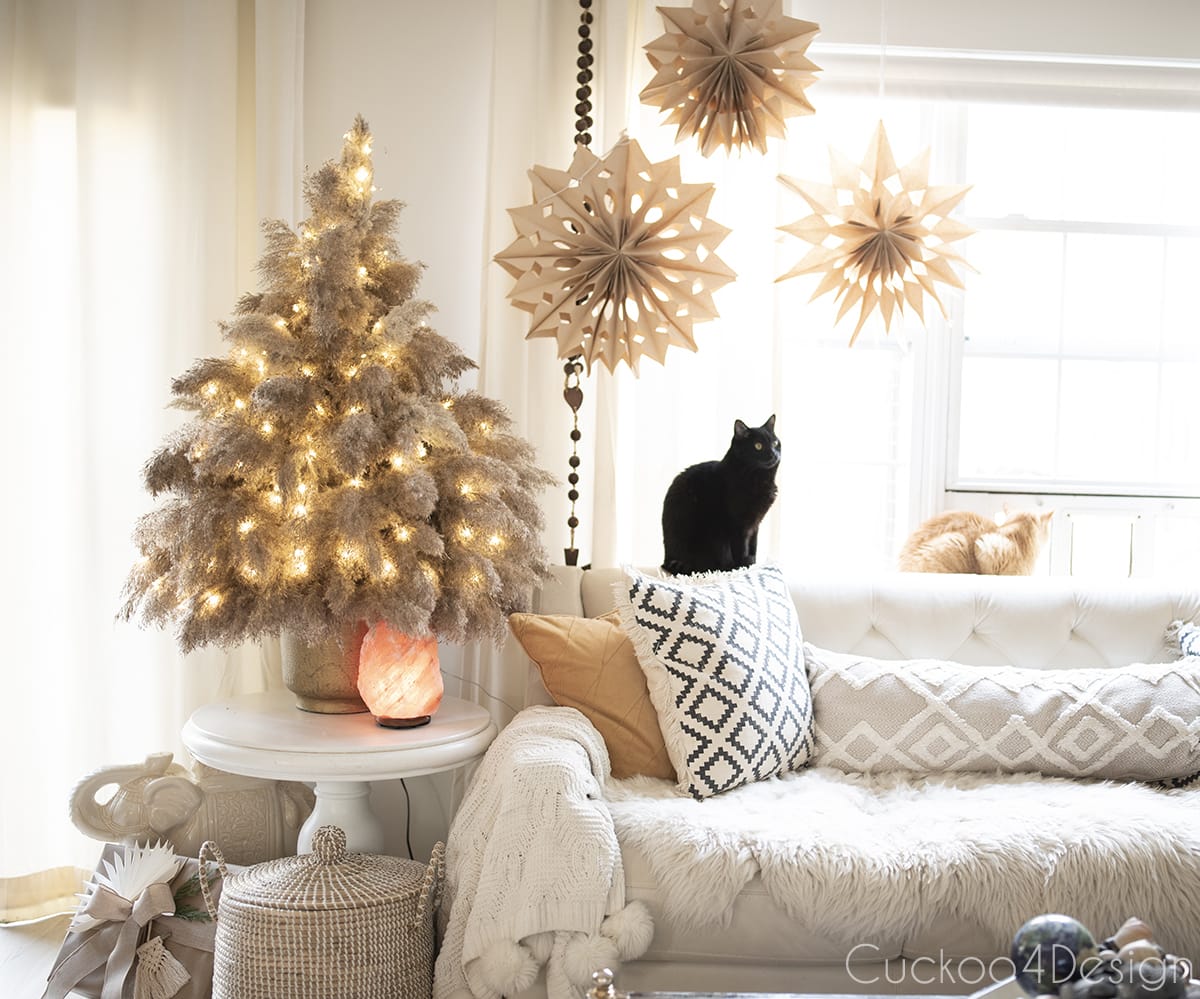
Look how cute Maya looks in my entire Christmas interior. She literally matches and blends in with all the boho decor.
You can also check out my paperbag snowflakes tutorial. They look great with the tree.

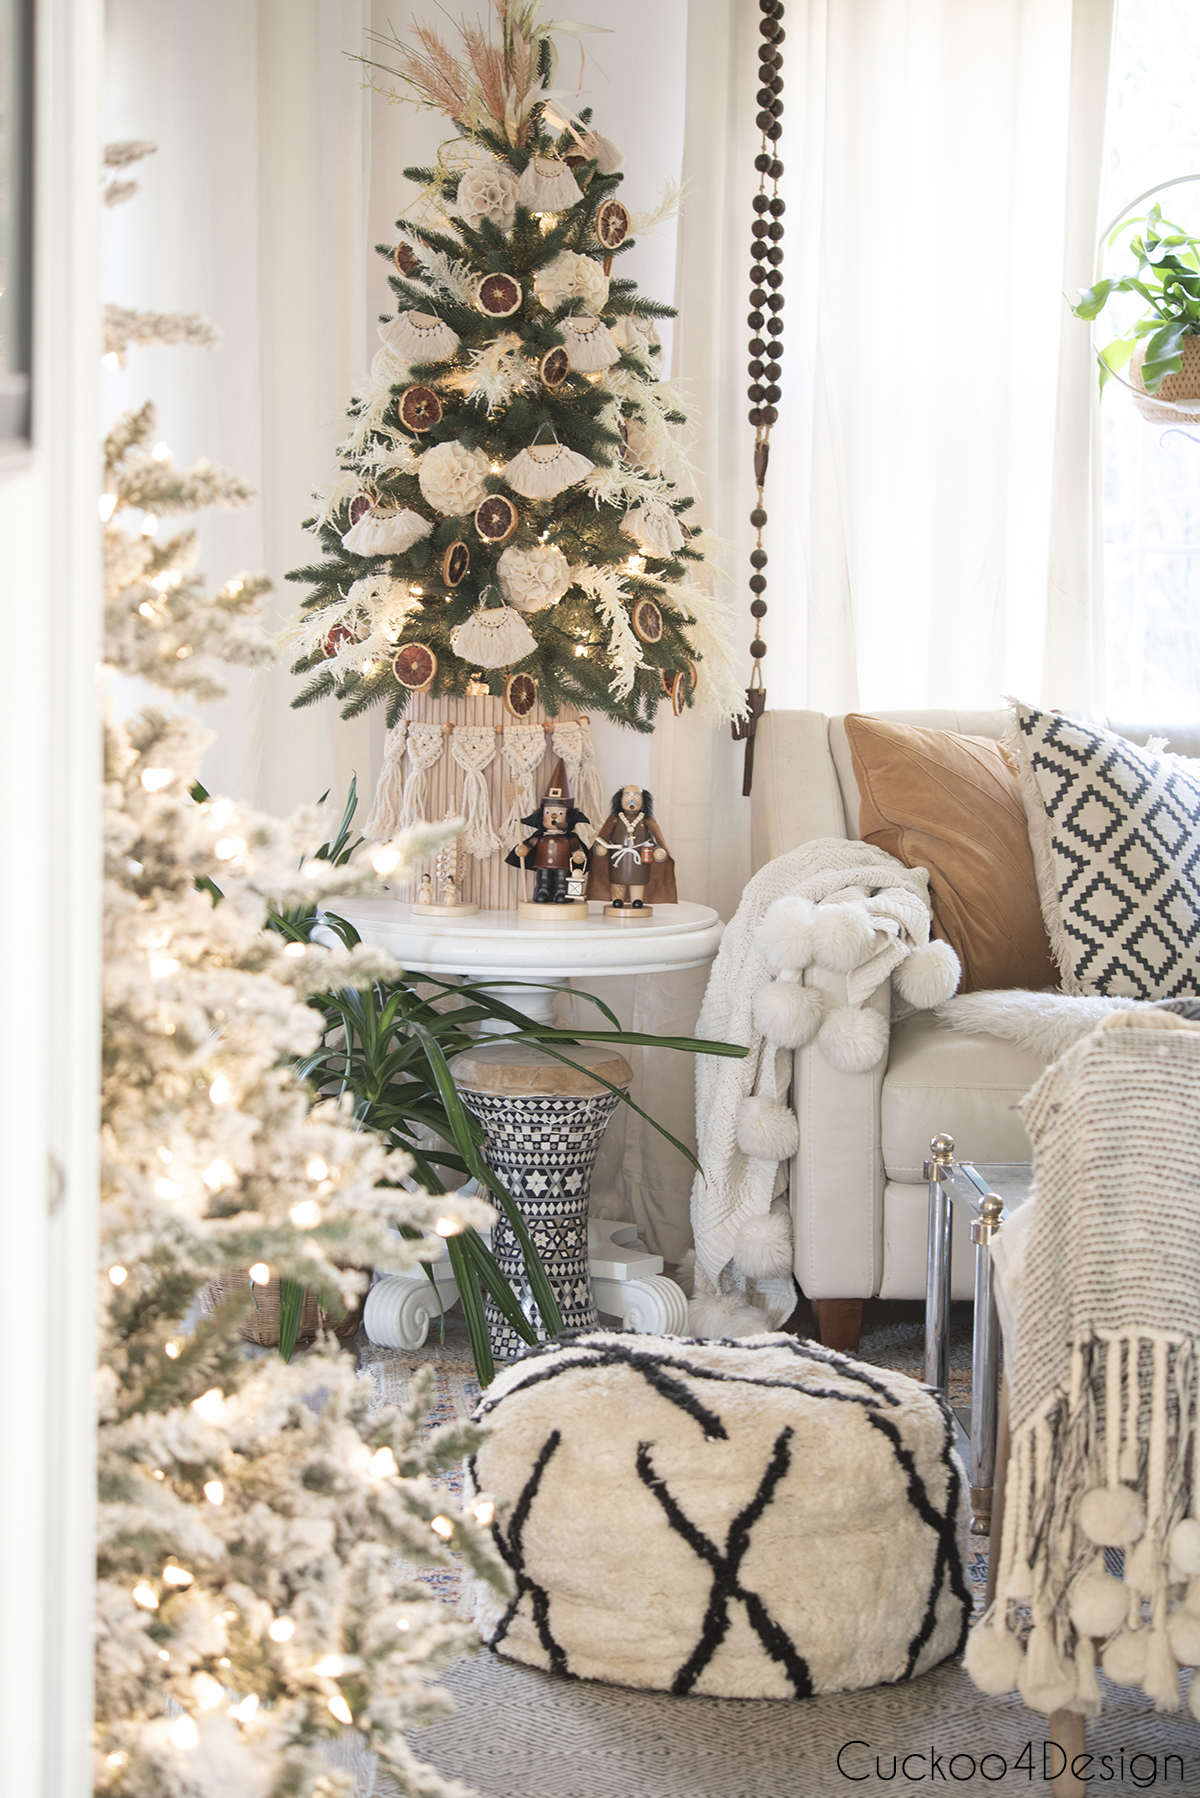
RELATED: Below you can see the same view of my living room with a different bohemian Christmas tree featuring my macrame Christmas decorations, folded paper fans, inserted pampas stems, simple and affordable painted Christmas ornaments in a terracotta color, and my favorite icicles.
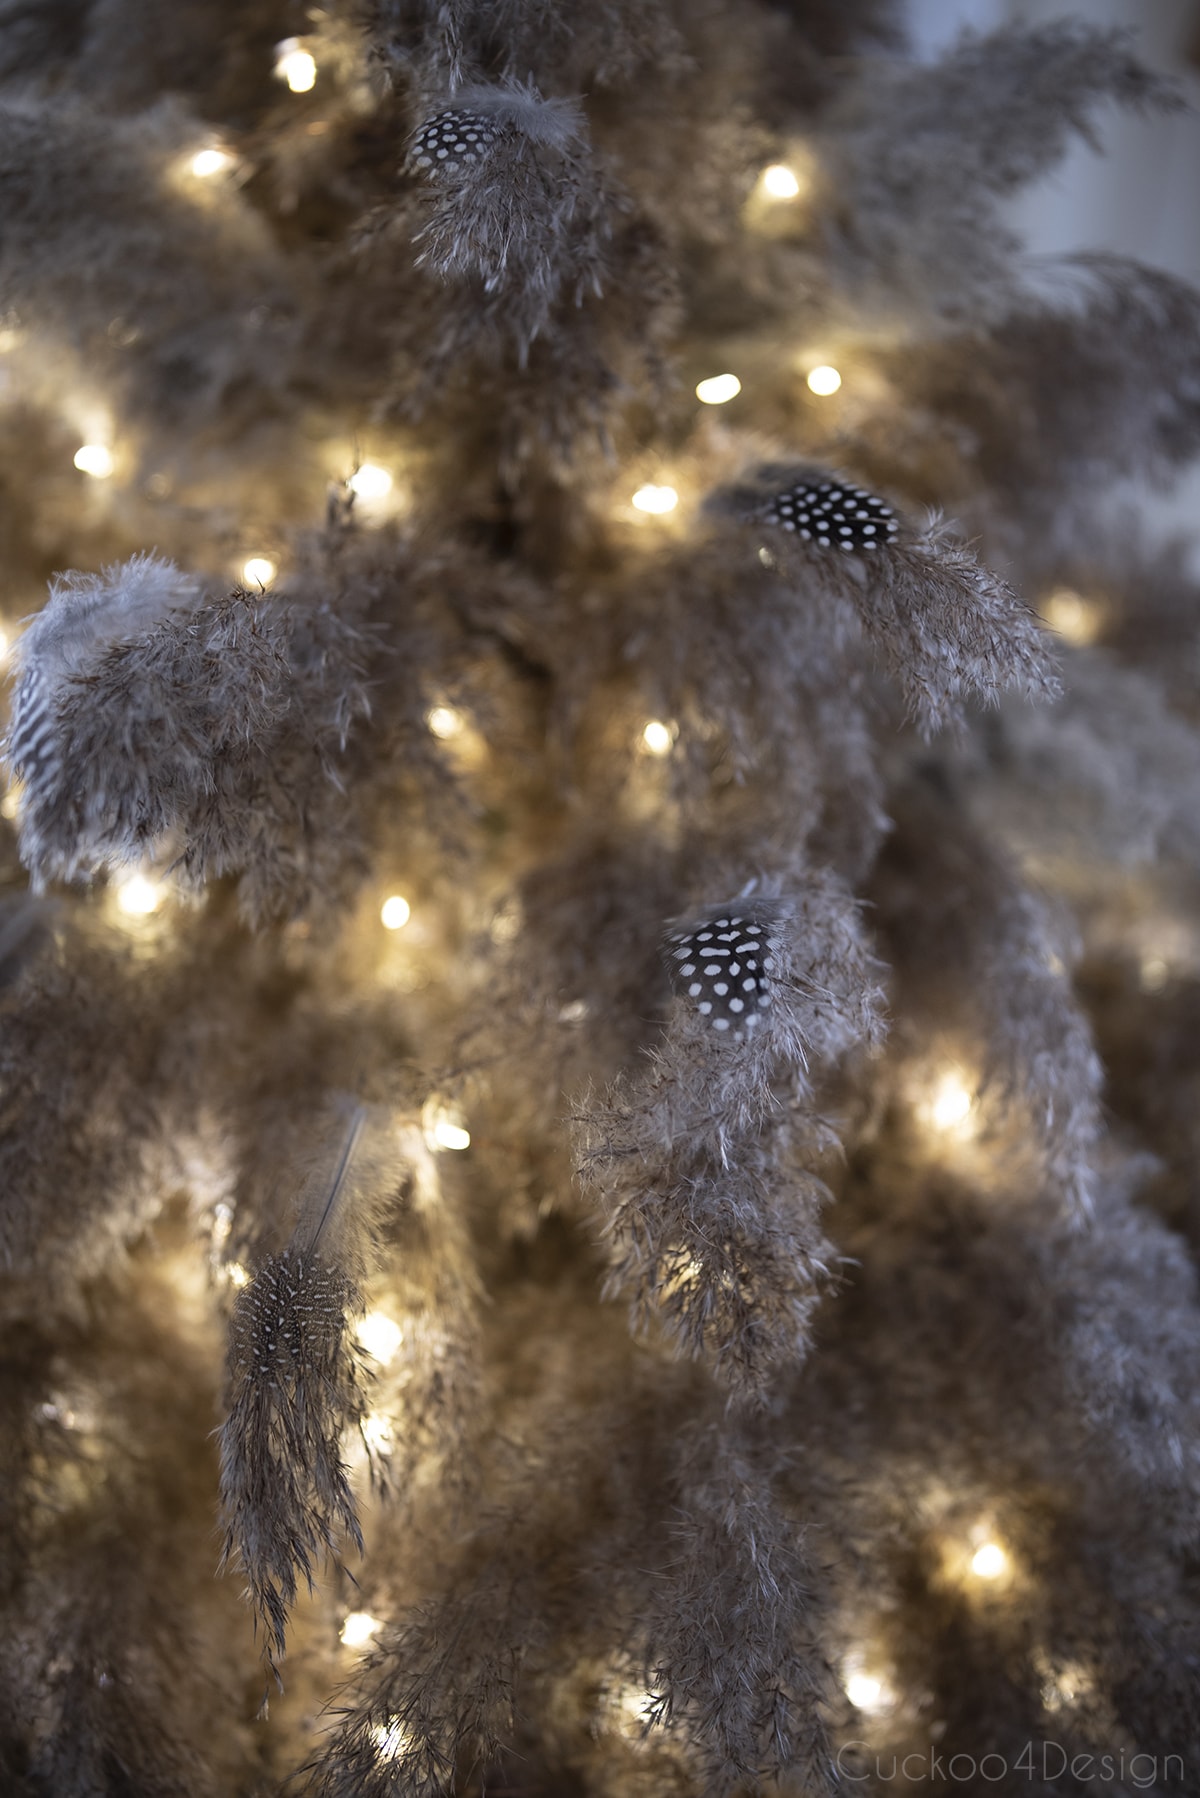
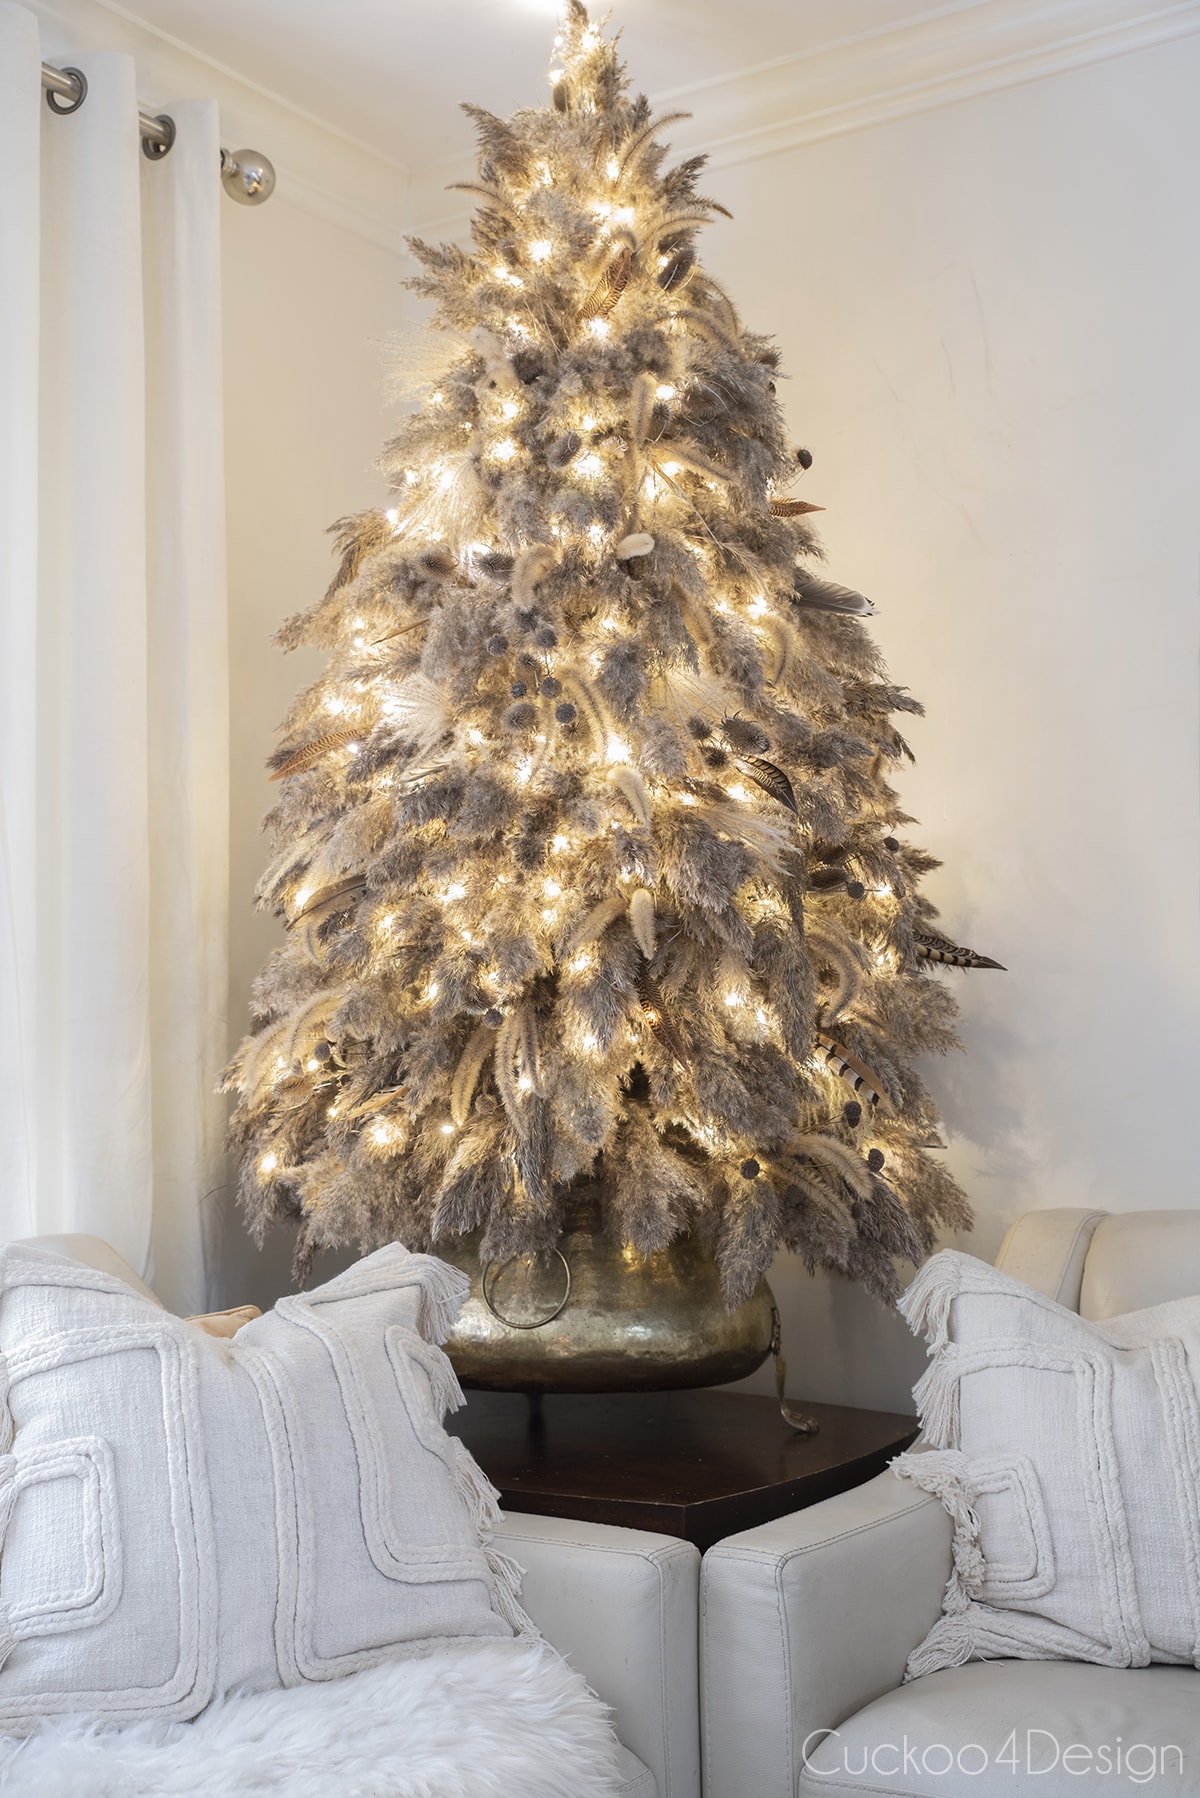
Here is another cute idea for the pampas Christmas tree. I added some feathers to the tips and love how they look. All the other photos of it in the living room are without the feathers though. You could also spray some subtle touches of glitter on the plums.
While others might think a Christmas tree like this looks too bare, I think a pampas tree needs nothing else besides some fairy lights. Sometimes simplicity is a winner and the natural elements and natural color palette of this beauty are enough for me.
UPDATE: I implemented that idea in my latest new foraged dried floral Christmas tree for you to check out, where I used this same tutorial as inspiration. I also added dried flowers, feathers, other types of grasses, and thistles.


If you have grasses left, then you can consider making the below-pictured boho DIY dried flower ornaments. They are easy to make and look so unique.

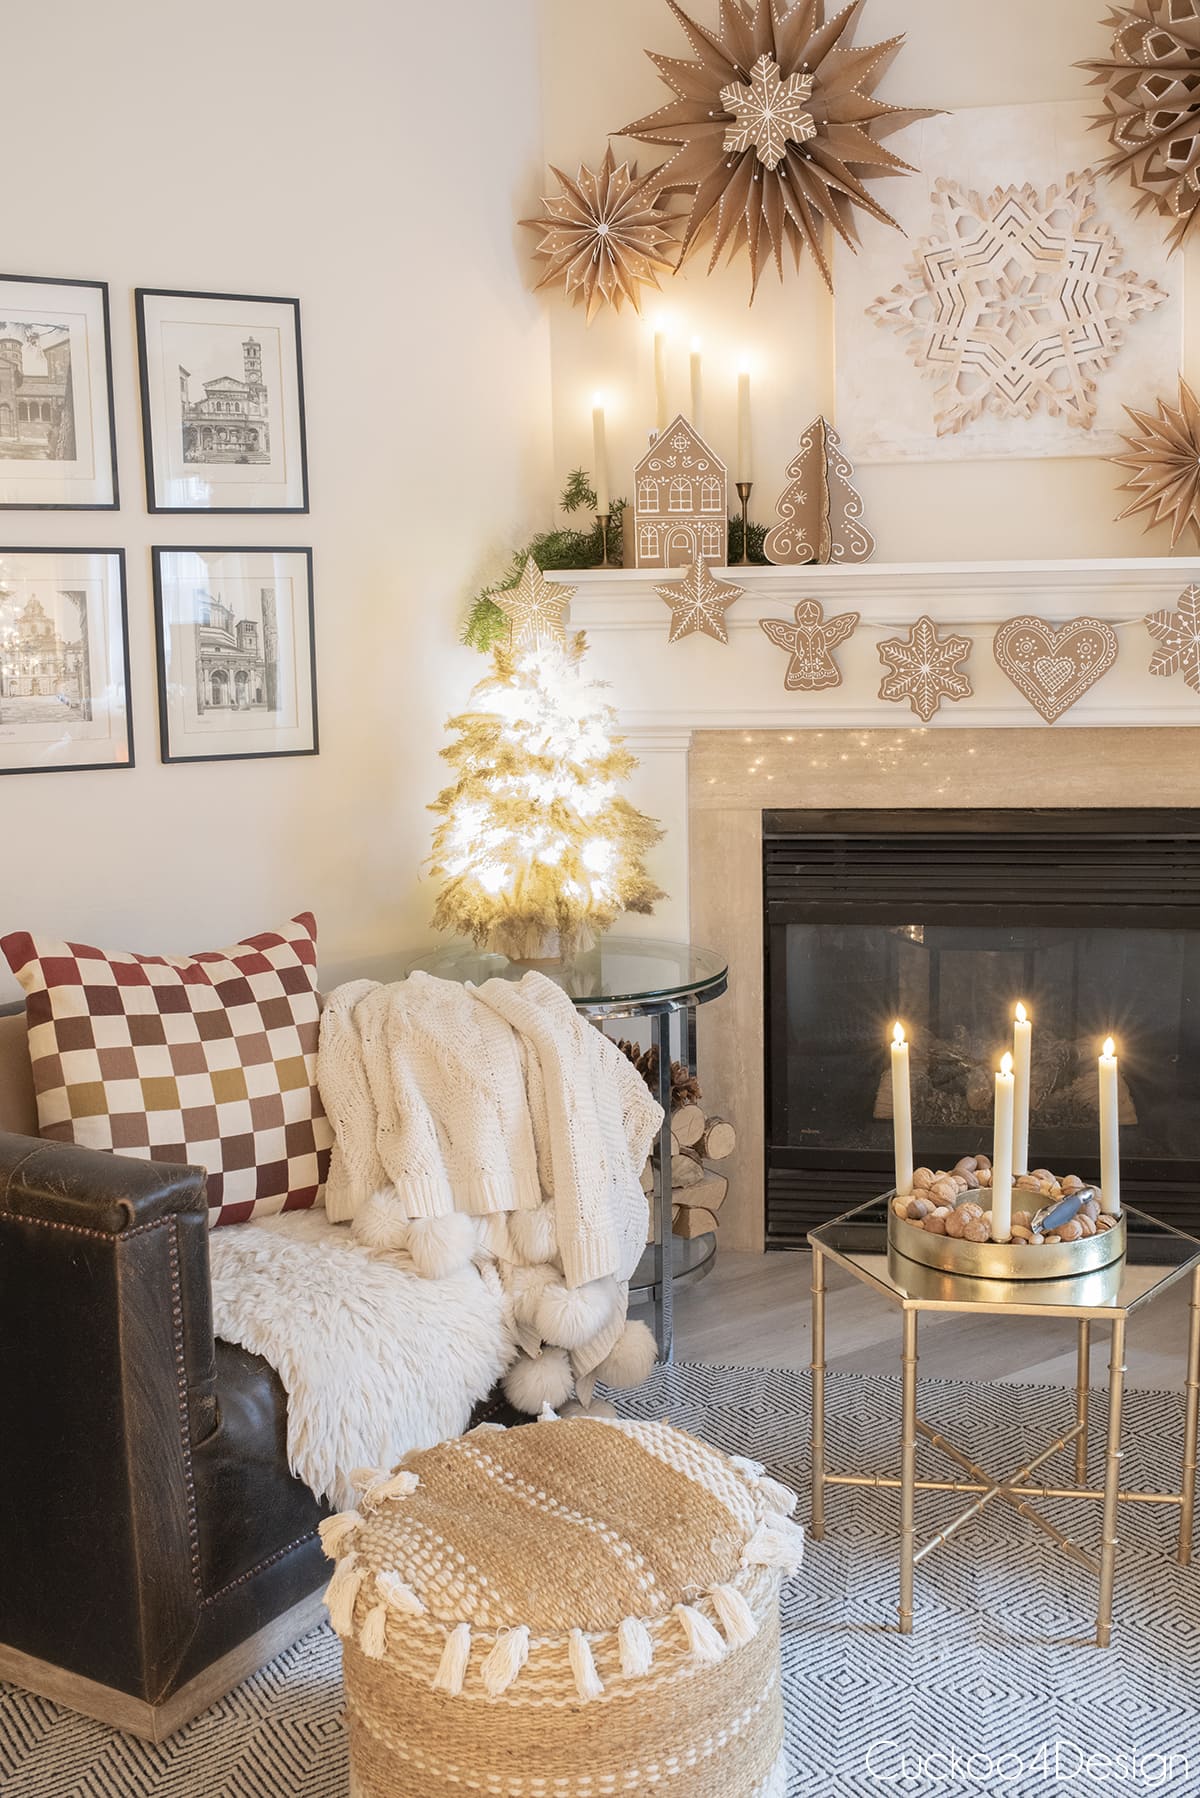
And below you can see the small tree I made recently from last year’s disassembled tree. You can see more photos in my gingerbread decor home tour. The gingerbread Christmas ornaments and snowflake artwork pictured are also great, affordable DIYs.
Where to buy pampas grass Christmas trees
If you can’t get free grasses the way I did then you might be better off buying a premade pampas grass Christmas tree. Luckily there are many great options and below are some of my favorites.

So what do you think? Do you like it as much as I do? I hope this DIY pampas grass Christmas tree tutorial inspires you to create your own version for the holidays. It is such a beautiful and unique alternative to a traditional tree.
I love that pampas grass isn’t a forgotten plant anymore and I even made a pampas garland for our fireplace mantle.
I think I’m going to slow down now and enjoy the season. And when Christmas is over, I will finally share the updates I have given our bedroom.
Tschüß,


pampas grass Christmas tree
Learn how to make a DIY pampas grass Christmas tree, which is a stylish, boho holiday decoration that’s affordable, fluffy, and easy to create.
Materials
- styrofoam cone
- floral wire
- flower pot or planter
- hairspray
- pampas grass or any other fluffy plumed dried grass
- fairy lights
Tools
- snippers
- scissors
Instructions
- Cut your stems at a pointy angle
One of the most important things is that you cut the stems at a pointy angle before inserting them into the styrofoam cone. It really helps!
- Create the top of the pampas grass Christmas tree
Start by tying a bunch of grasses around the tip of the floral cone with the floral wire. This is the only time I used the floral wire, and I didn’t need it otherwise.
Also, insert one or two separate pieces of pampas grass into the top of the cone to create a pointy tip.
- Form the base of the Christmas tree
It helps to know what container size you will be using for your tree. This way you can determine how wide you want the base of your tree to be.
I started out at the bottom of the cone by sticking longer branches into a circle shape. Then I could prop/rest that on my planter. This works easily since the tree is to light.
- Fill in the entire tree shape with pampas grass
After that, I filled the center of the cone with more pampas grass stems. You can work from the bottom up or from the top down. Both versions work to form the shape of a tree.
In the end, it should look like a larger cone. - Spray Pampas grasses with hairspray
Now it is time to make sure the grasses don't leave a mess in your house. That means the tree needs to get sprayed with some hairspray to keep the seeds from flying around.
- Add fairy lights
I added my favorite fairy lights to the tree for an extra festive touch. Simply work the lights gently into the tree shape. It is always a good idea to have them turned on, so you can see where you are possibly missing sections.
Regular Christmas lights are too heavy and get too hot. It is safer to use fairy lights.
Notes
The grass I used is called common reed Phragmites australis and grows everywhere where we live. You can find it on the side of the road or along train tracks and river beds. If you can't find it for free then you can search on Etsy or Facebook Marketplace where people sometimes sell if for cheap.
Julia, this is gorgeous!
Thank you so much Lori
This is amazing!!! Love how it turned out!
Thanks so much Doreen. I’m so glad that I made this last week and not this week because now the grasses are covered with snow
Stunning!! Love the final results.
Thanks so much Tammara, it was worth the mess it created 😉
I swear you are a genius. The end. Nothing else I can say.
LOL, I like the sound of that, I should tell Jarrid 😉 Thanks so much my friend
Wow, so stunning but seems pretty easy actually.
Yes, Susan…it was easy for sure and thanks so much!
Hi! Could you tell me how much pampas grass or how many stems you need to make this tree? I absolutely love it!
I’m so sorry Cheris but I have no clue as I just kept going back and cutting more. It also depends on how dense you want to make it and how puffy the actual stems are which can be so different.
How many stems did you need to create it?
I’m actually not really sure because I just kept going back to get more. It definitely also depends on the type of grass you are using because obviously the thicker it is the fewer stems you need.
Julia: you have inspired me to try making my own!! I love it! Looks like I am on the hunt for more grass, I did not grab enough or maybe I am not spreading them enough?? I have decided to put some in my Christmas Tree also to add a lil boho look! Thank you so very much!
Oh glad you like it. And yes you need a lot of grass for a tree for sure.
Wow just wow
These are the ugliest Christmas tress I have ever seen!!!!
And your fake nails should be painted before doing a video .
LOL, I think someone woke up on the wrong side of the bed.
Christmas tress? Is that a new name for Holiday hair?
Julia, I love your style, your decor, your nails, your hair AND your response to hate, I mean Kate.
Wow, just wow. What an ugly comment from Kate.
Hi, what size pot did you use for your tree?
Hi the pot is about 15 inches tall and 10 inch diameter. Good luck!