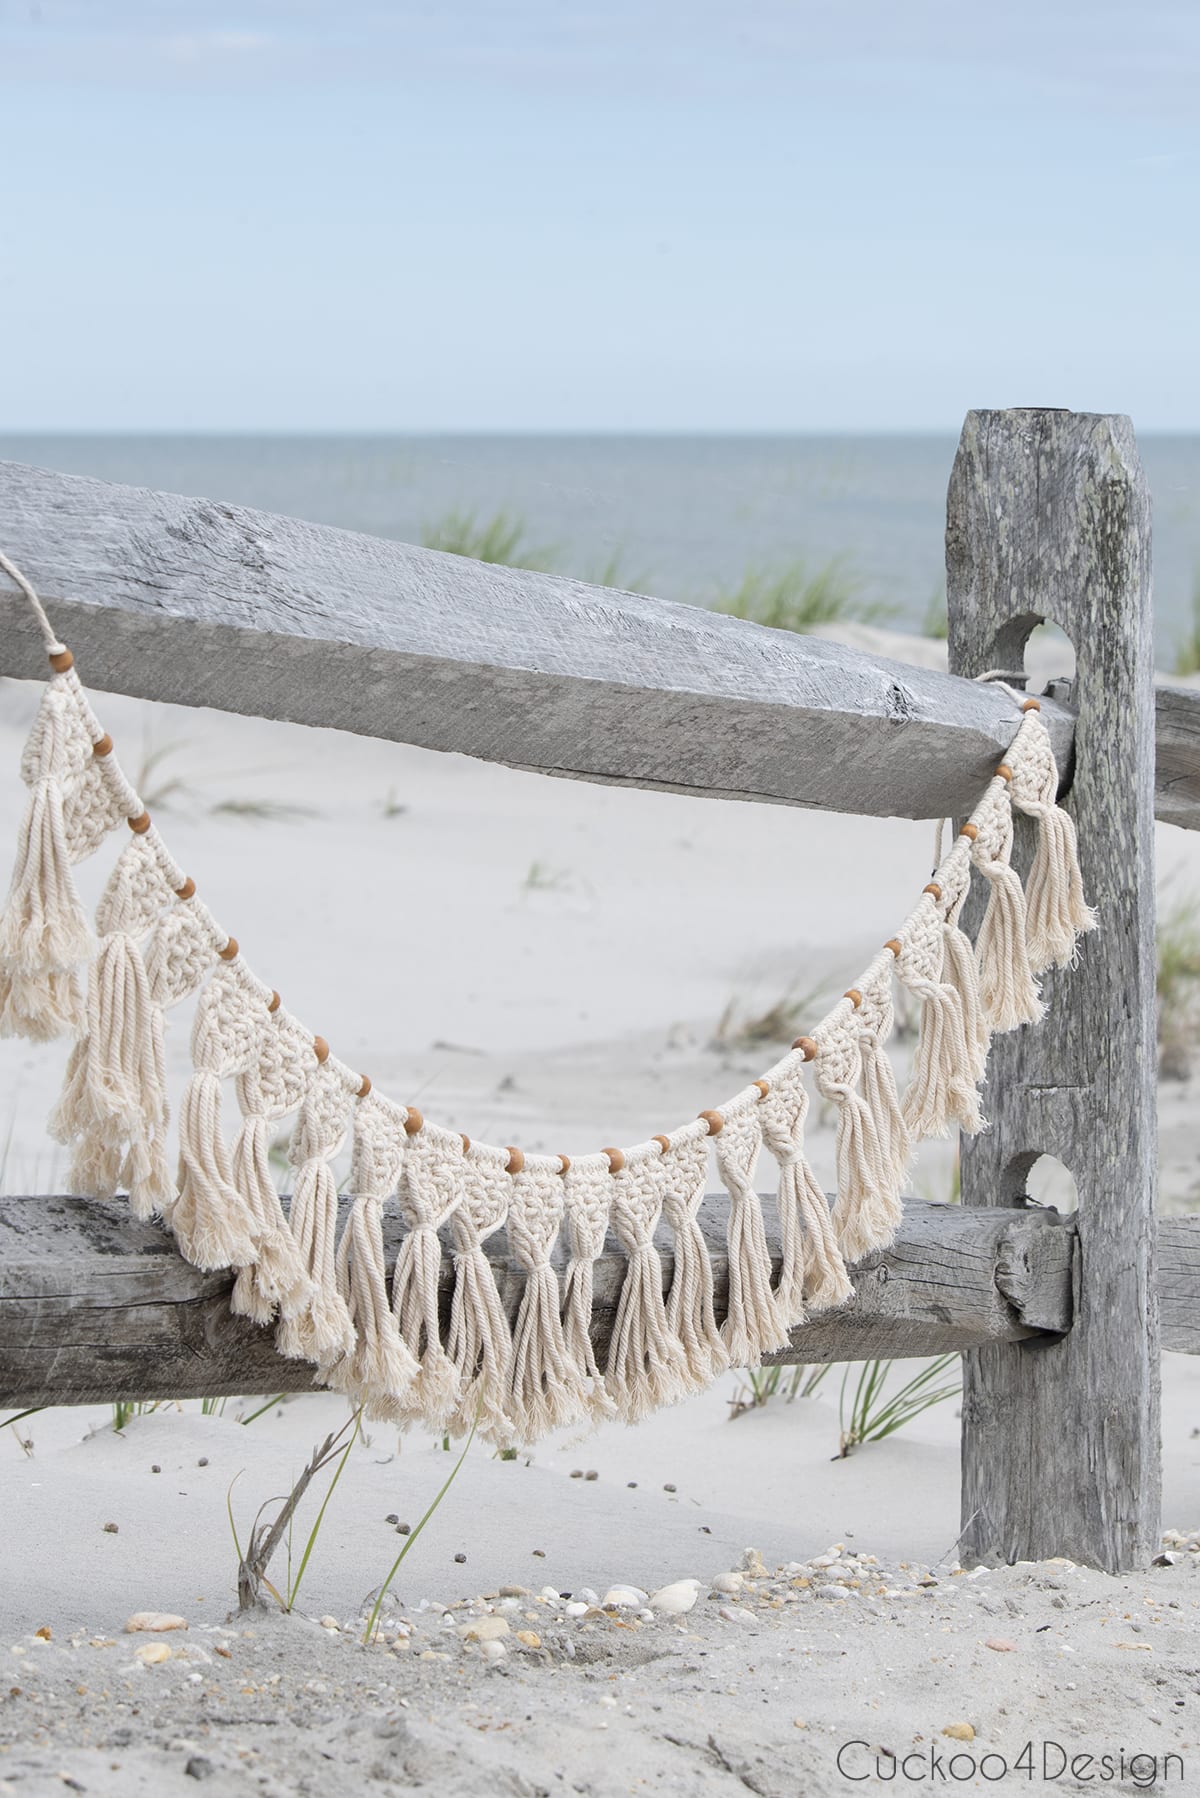
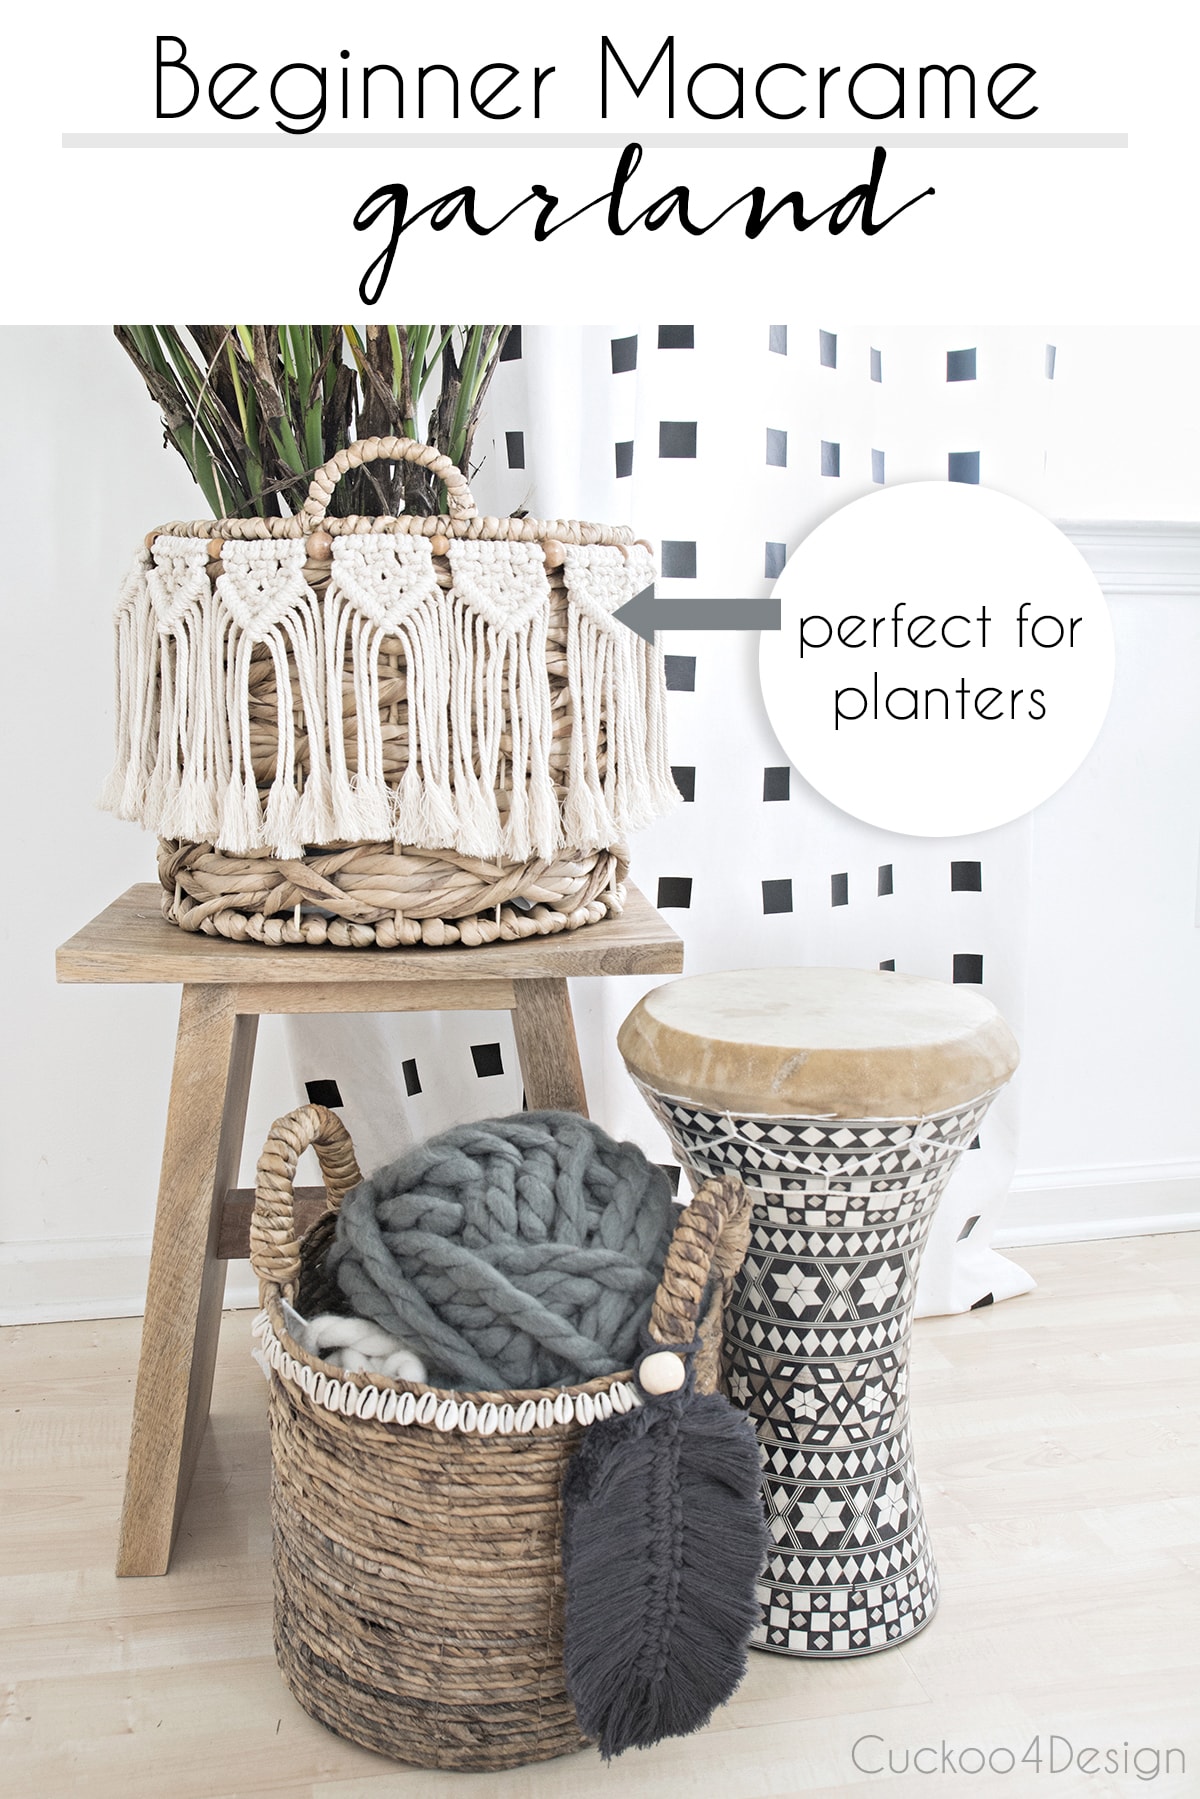
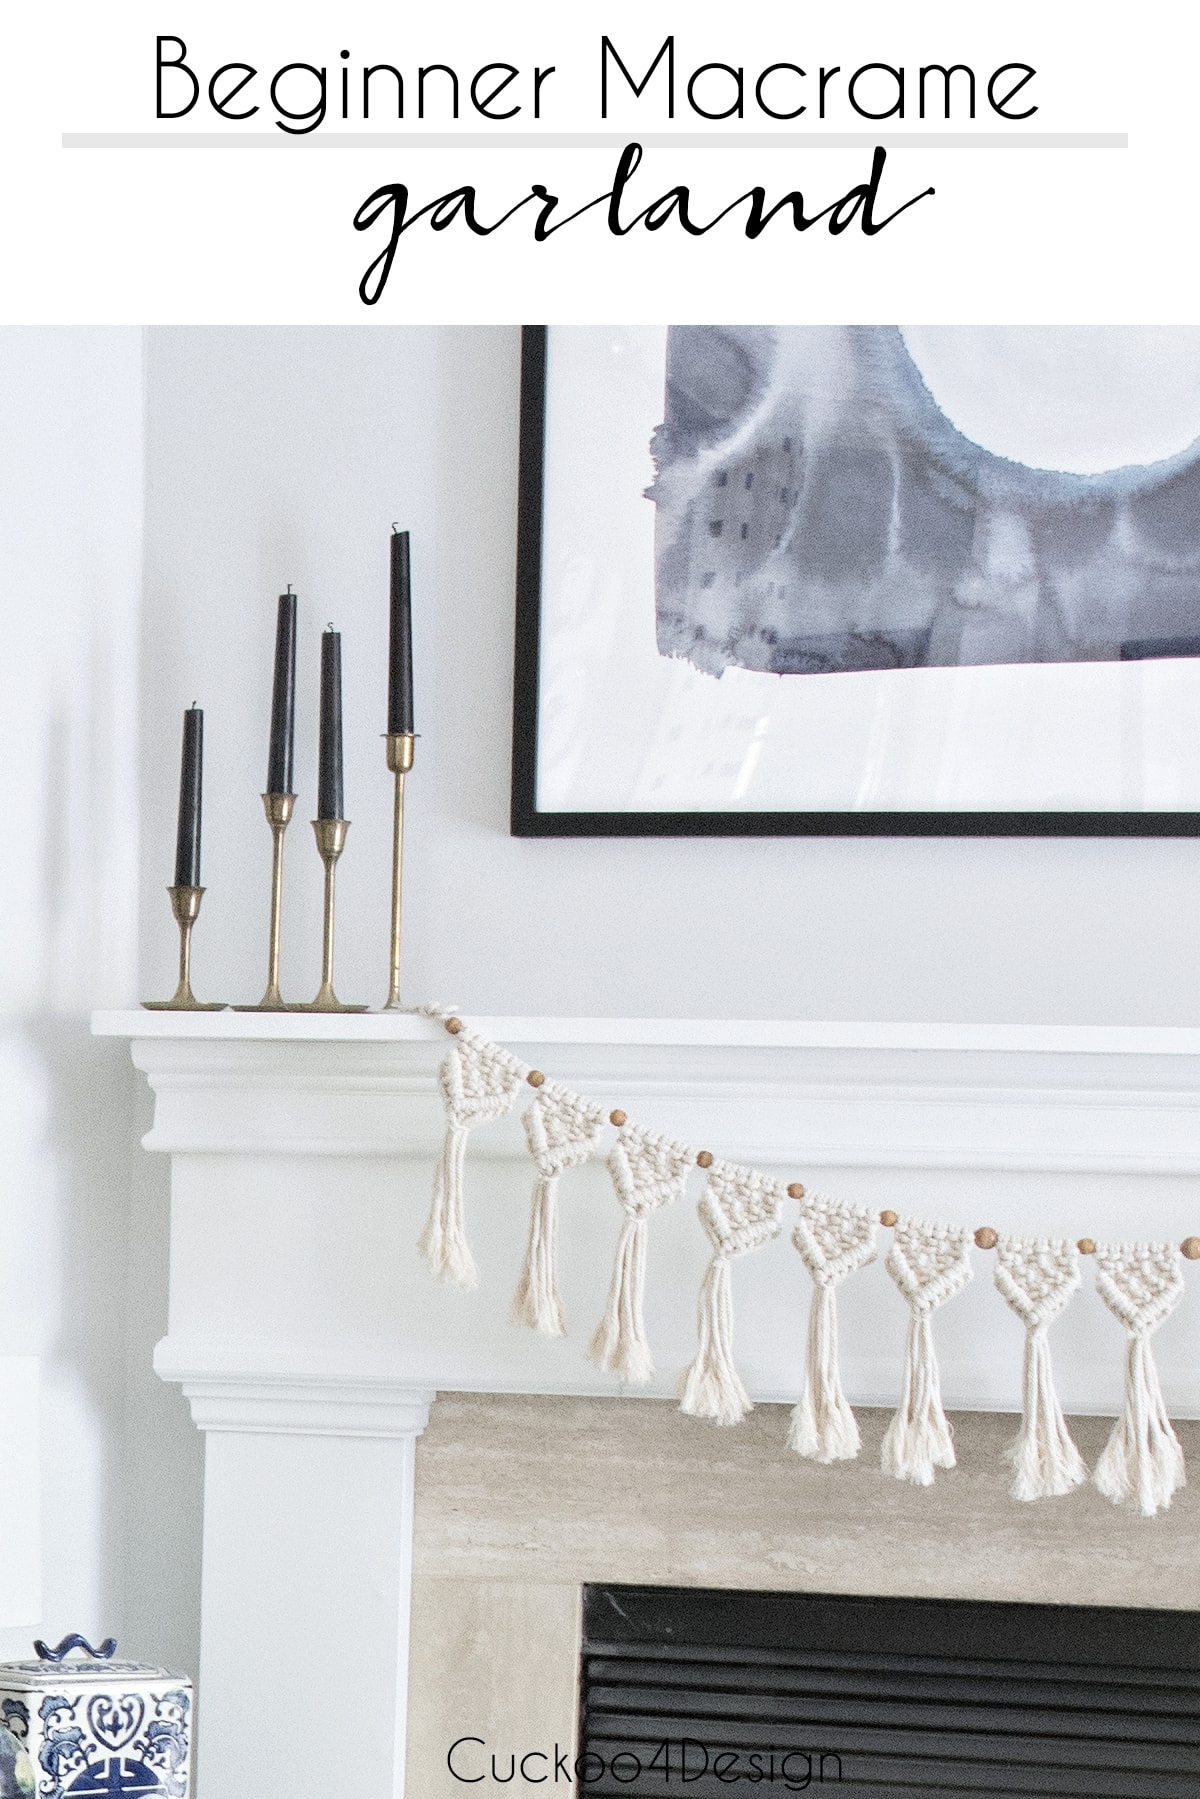
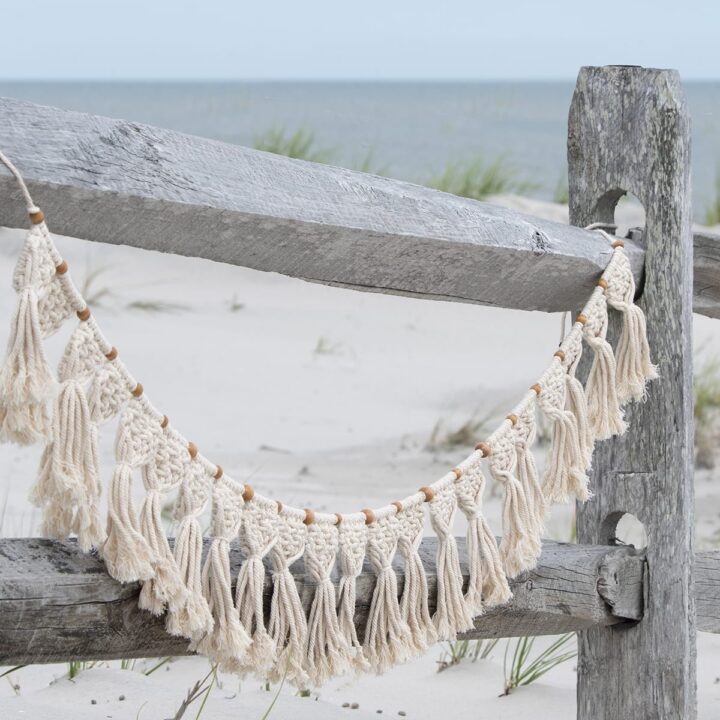
This beginner macrame garland with wood beads is one of my favorite DIY projects because it works anywhere in your home. Hang it on a fireplace mantel, tie it around planters, hang it on a fence, or use it on a Christmas tree. It only uses simple knots, which makes it perfect for beginners.
I know I said I wouldn’t have any macrame tutorials, but I can’t find myself ending this macrame madness. I’m so hooked and happy knotting all the time! (Check out my macrame feathers and the DIY macrame earrings)
I’ve noticed that I have more natural and rustic elements sneaking into our home. I don’t want it to take over completely, but I can’t get enough. Natural fibers and wood is my jam right now.
sharp scissors (I like using hair-cutting scissors)
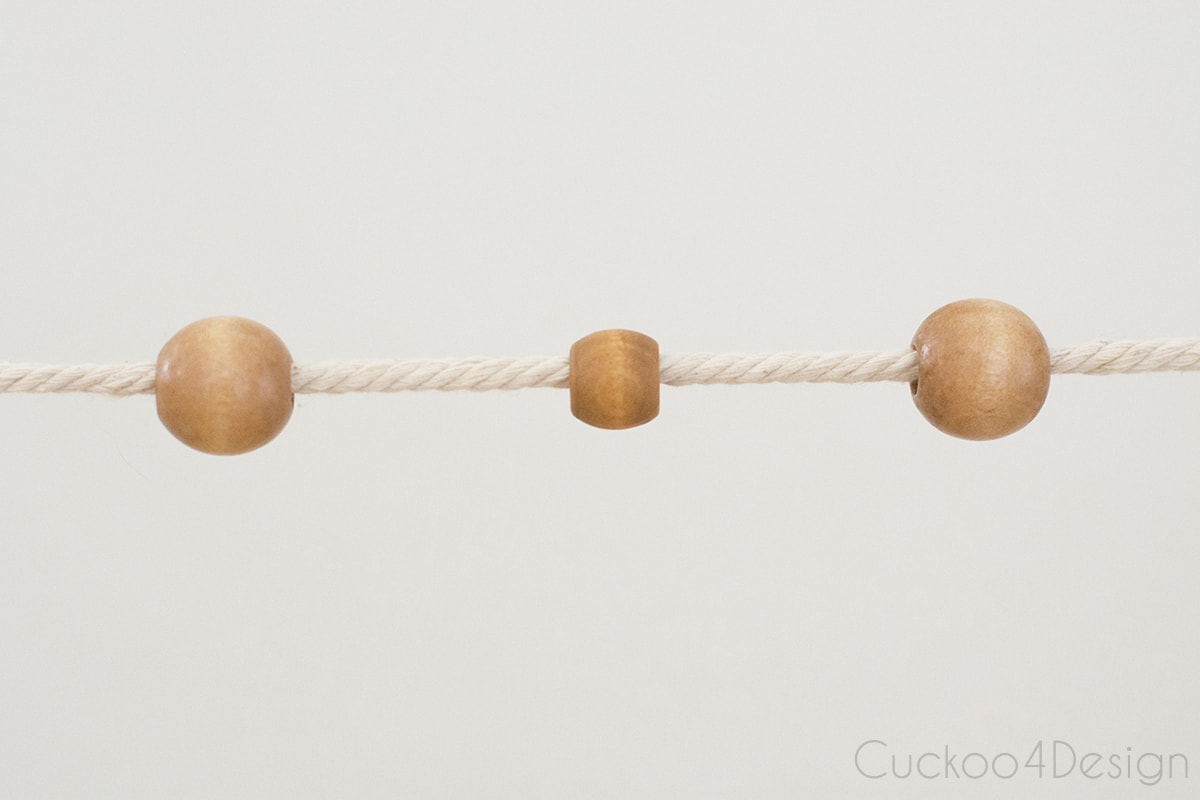
wood beads (I used these beads and some slightly larger ones I had, I liked alternating slightly different sizes)
hair comb (if you want to brush out the edges again)
Macrame garland with wood beads video tutorial
I made another video, which you can see below, and you can also follow my step-by-step instructions as described in the photos. If the video doesn’t load for you, then you can watch it on my YouTube Channel instead.
For a different look, check out my macrame chain tutorial. It uses individual links instead of one long strand to create a garland, which can be used as a stunning wall hanging, curtain tie-backs, or a chain-link Christmas garland.
Step-by-step instructions
It’s almost like I have Scandi glam rustic boho stuff going on right now, but I hate labeling it this way. I know that Google likes those labels because people search for them. Go figure.
So let me show you how to make this simple macrame garland for beginners, which I’m planning on using in my holiday decoration for fall and Christmas decor. It is a very versatile garland and can be used for many decorating purposes all year long. It’s also a small enough project that you can take it with you to work on, just like knitting.
Measurements
You can certainly make this garland as long as you want, but here is what I used for this specific one. I used 23 wooden beads threaded on a 10-foot piece of macrame cord for my garland. I wanted it to be long, so I could possibly use it on a Christmas tree in the near future and not just for planters.
10-foot piece of yarn (for garland base)
23 wooden beads
132 pieces of 40-inch macrame yarn
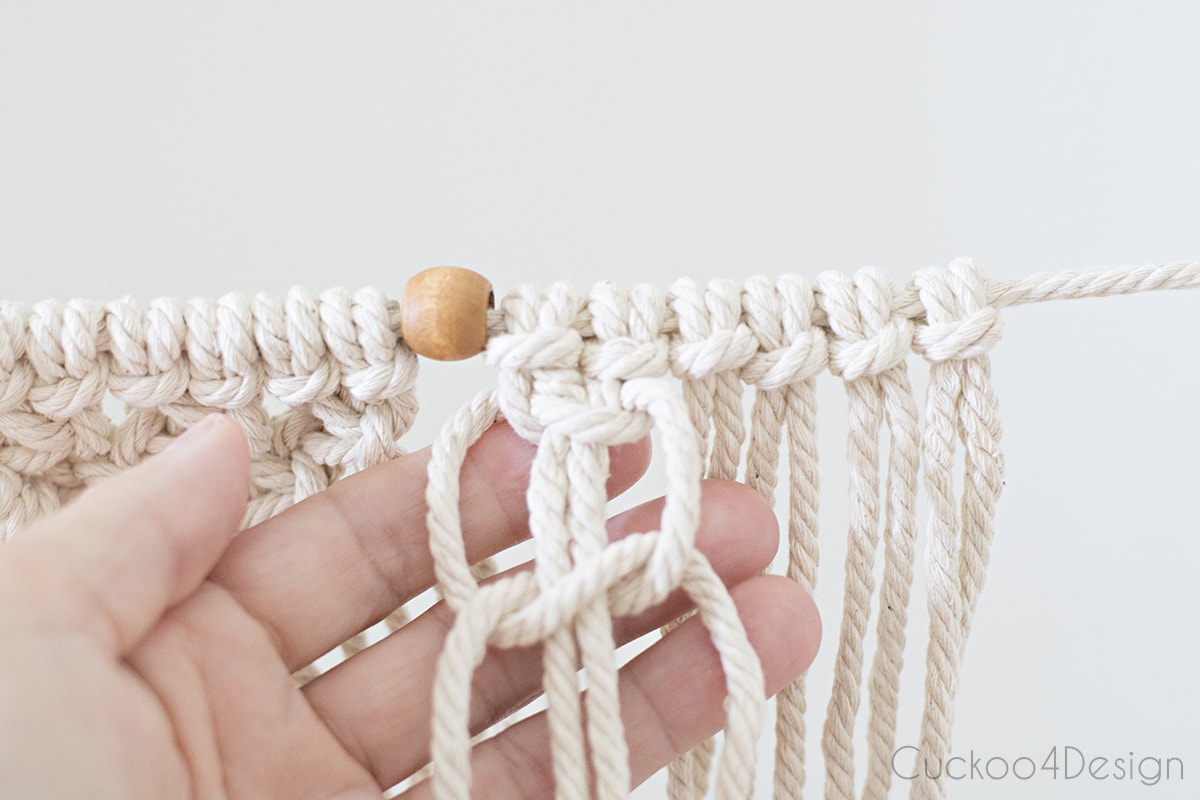
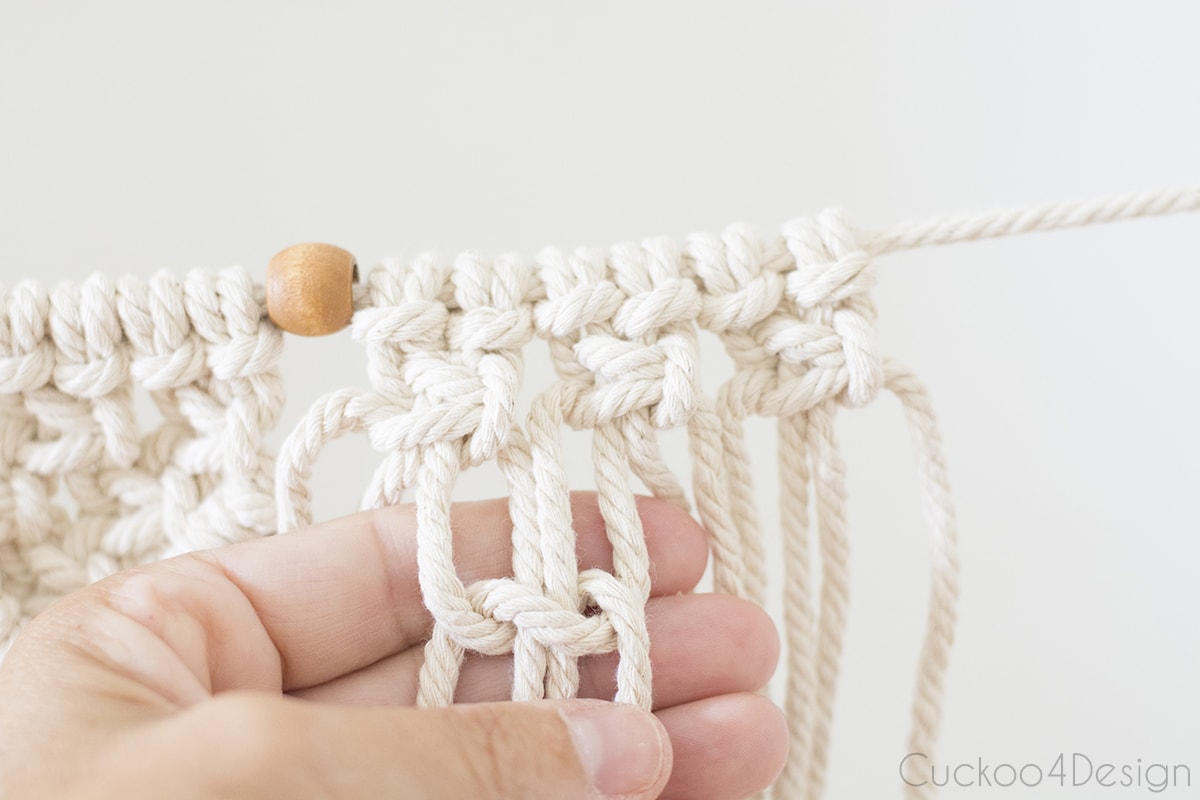
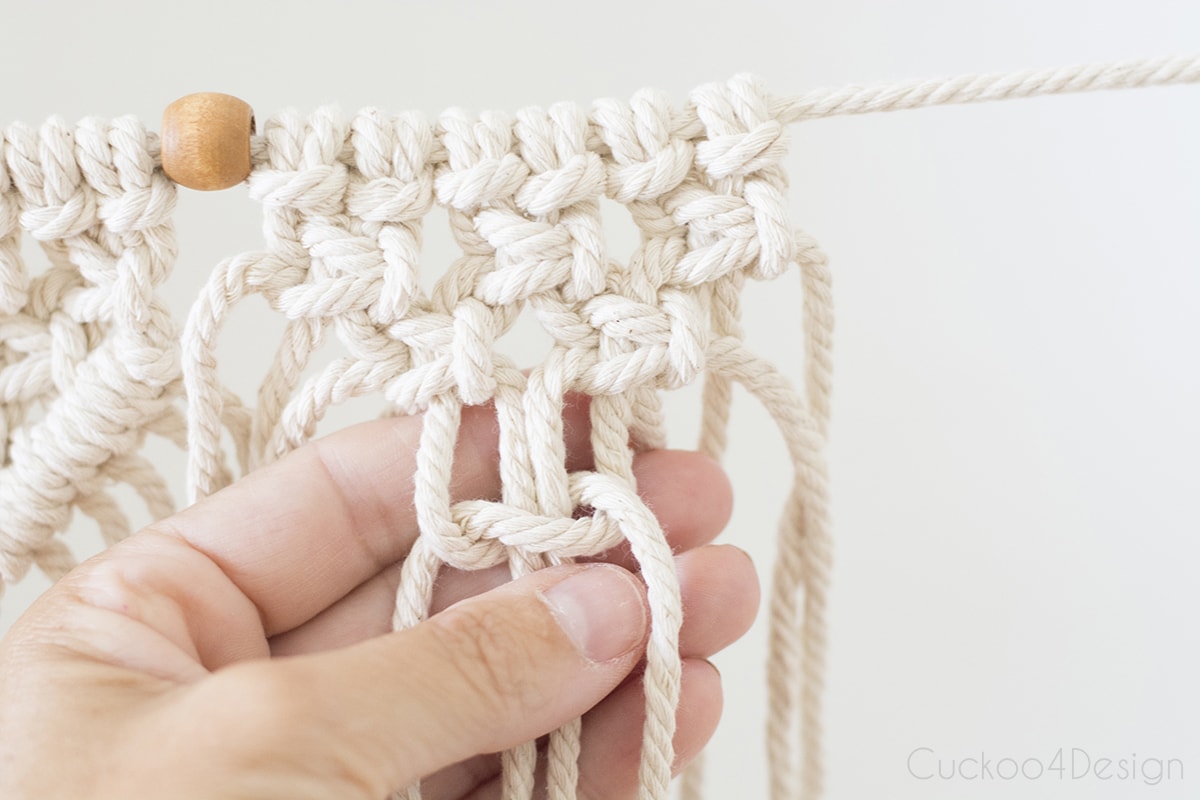
Step 1: Set up your base cord and thread on the beads
I threaded the 23 beads onto the 10-foot piece of macrame yarn ahead of time and tied that long piece of yarn between two chairs, so I could work on the macramé garland.
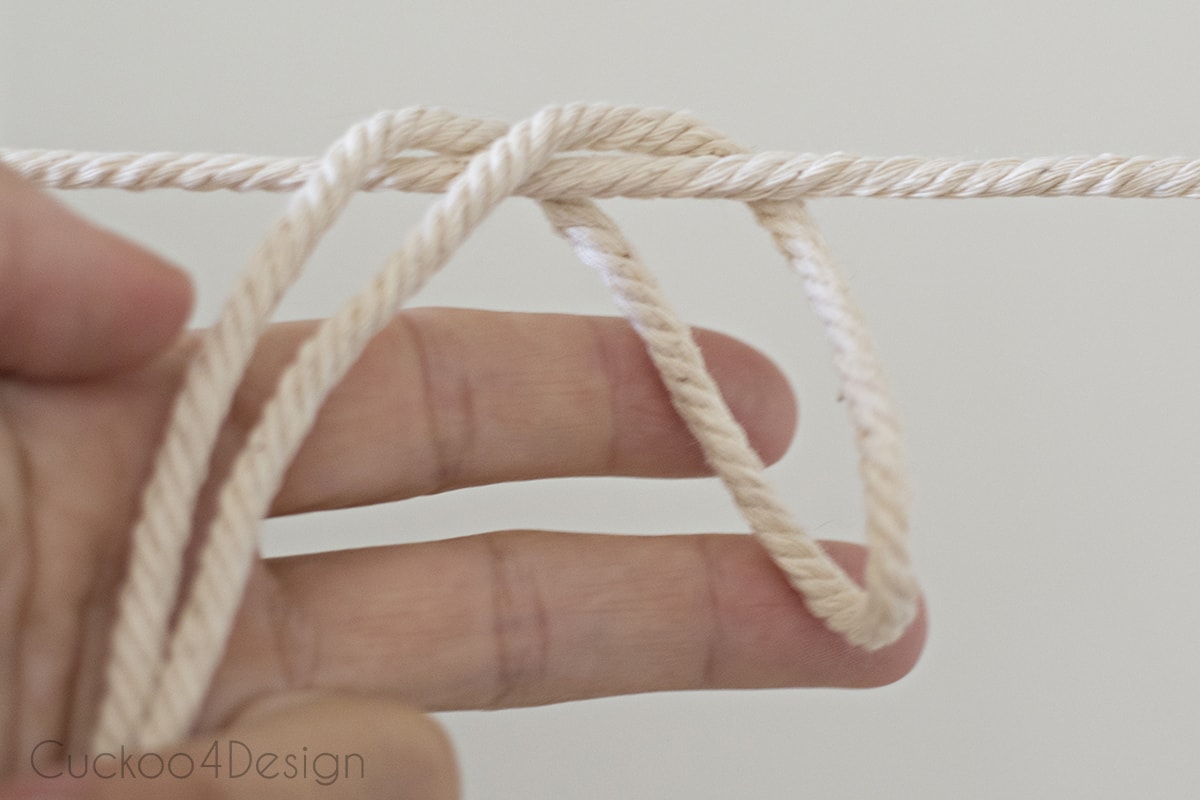
Step 2: Attach yarn with Lark’s Head Knots
For my length of garland, you need to knot 22 small v-shaped pieces of macrame in between the wooden beads.
And when you make one piece of macrame in between the above wood beads, you need to cut 6 pieces of 40-inch macrame yarn, which you then have to repeat 22 times or however long you want your garland. I had to cut 132 pieces of 40-inch macrame yarn strings. Does that make sense?
I started out my beginner macrame garland by folding 6 of the 40-inch pieces of macrame cotton cord in half and looping them onto the base string with Lark’s Head Knots. Each section between the beads needs 6 pieces of yarn, as shown below. My little video shows you how to do this too, and it might be easier to follow that than the photos and descriptions.
Make sure to pull them tight and repeat 6 times.
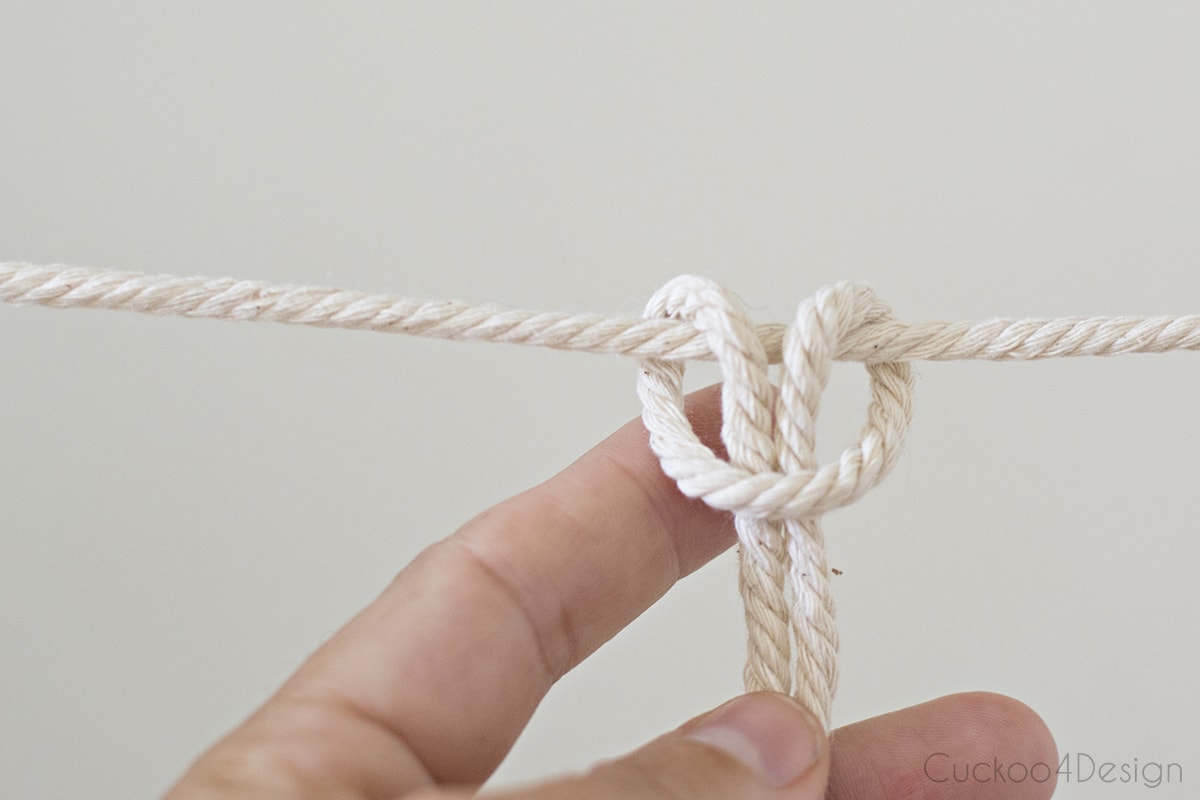
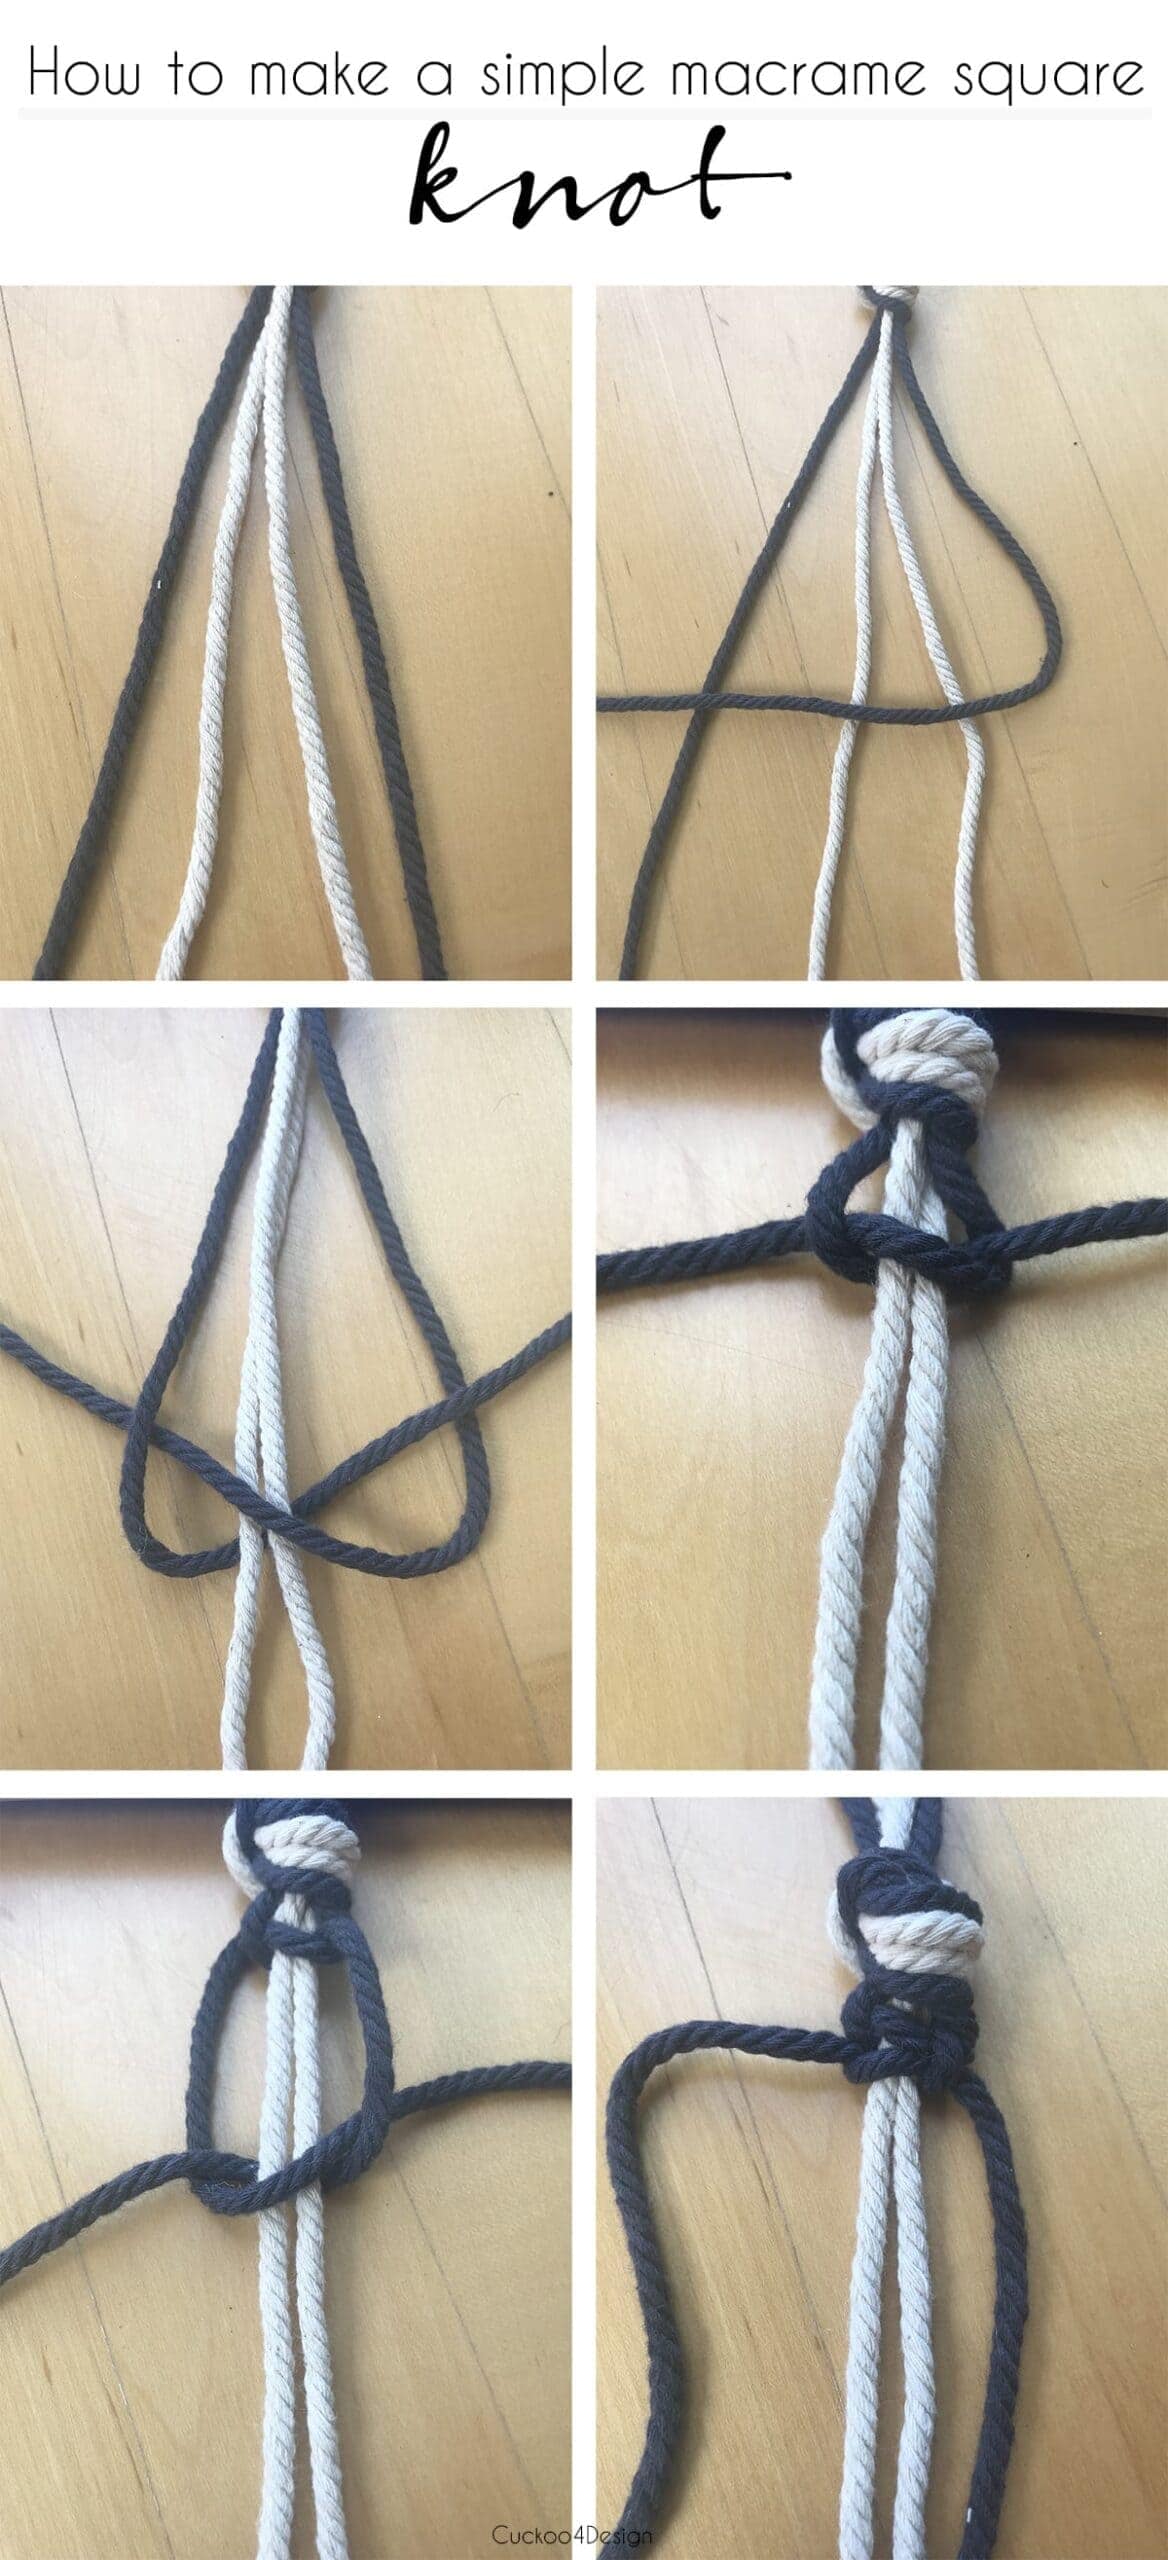
Step 3: Tie your first row of Square Knots
After that, you have to make Square Knots. The image below shows you how. Just be sure to alternate the string that is placed on top.
The dark cord is called the working cord, and the light one is called the filler cord since it is the one that the yarn gets wrapped around and knotted. Be sure to alternate that working cord that is placed on top.
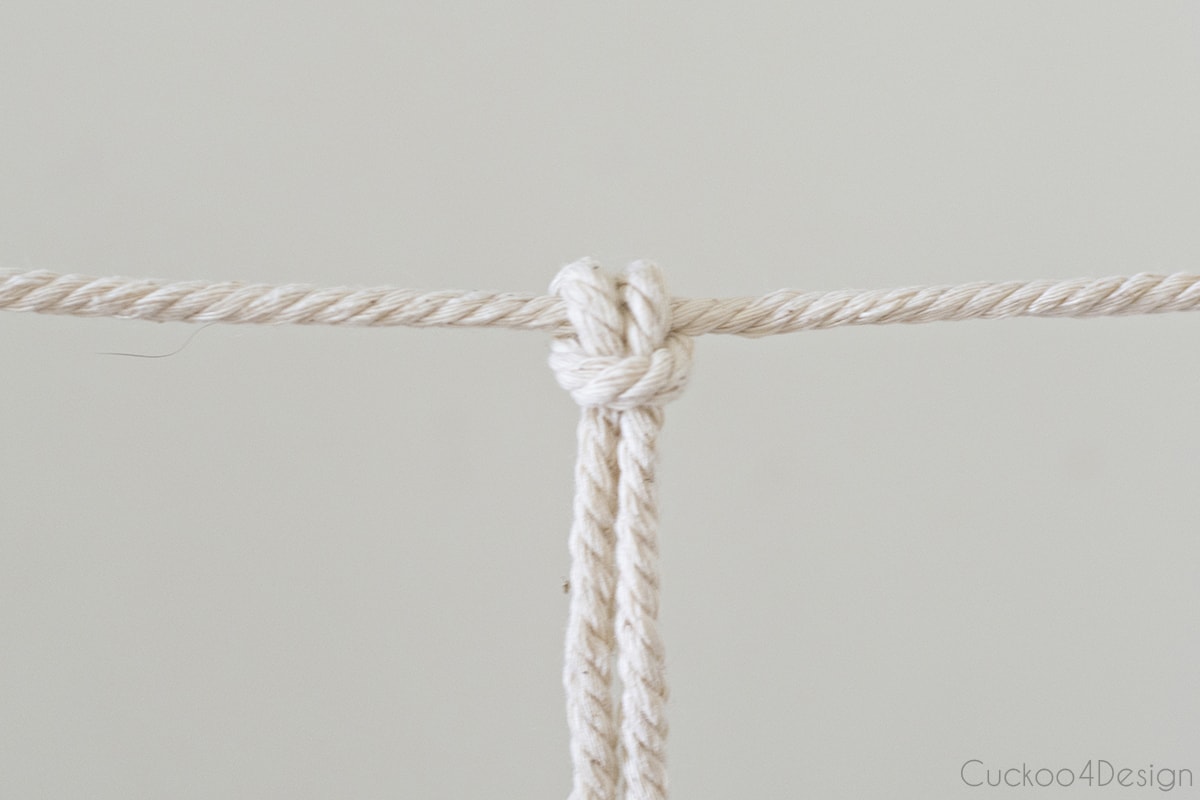
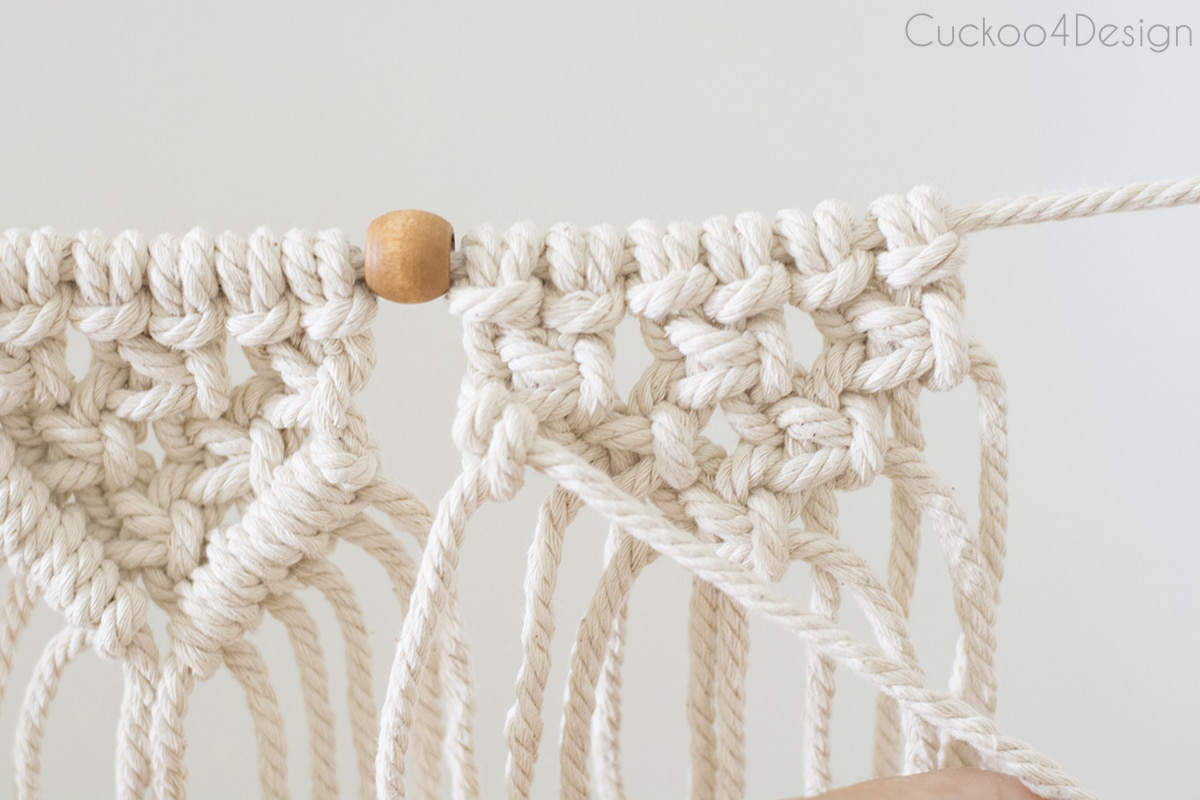
Step 4: Add two more rows to create a v-shape
After making a row, you have to offset the simple knots so you can create a pyramid at the end.
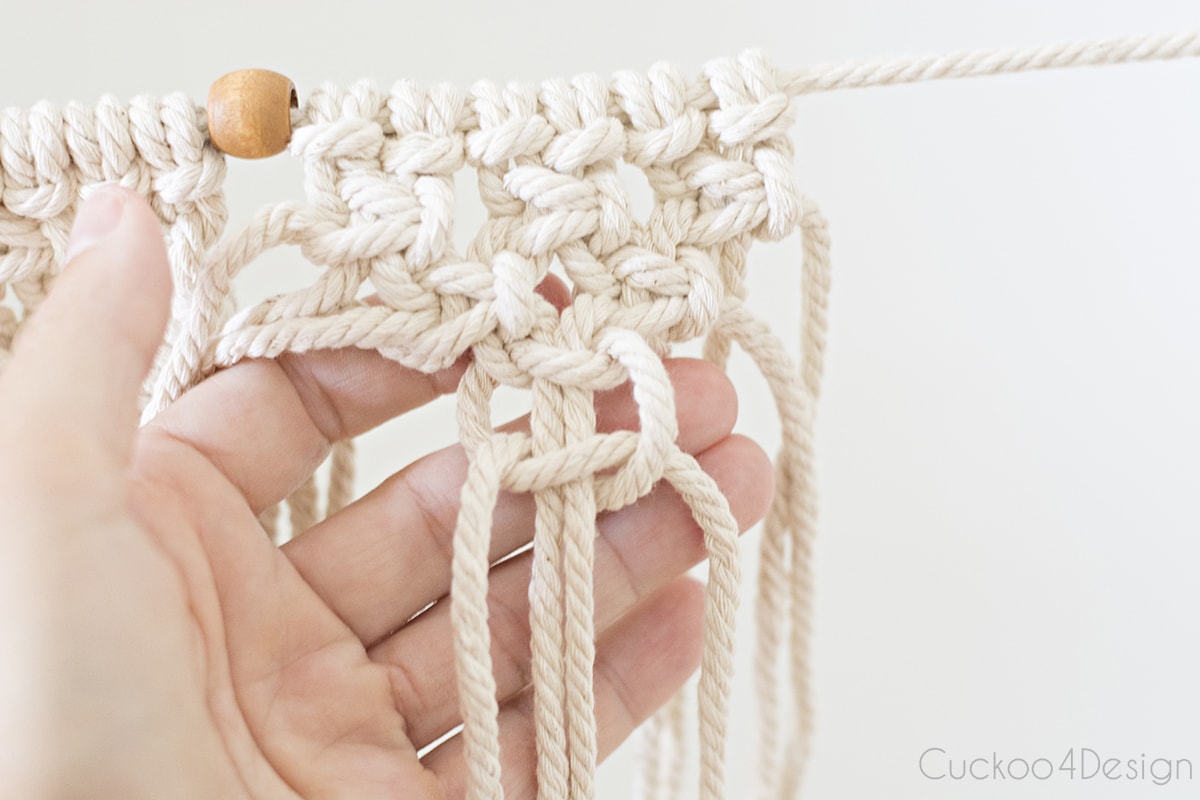
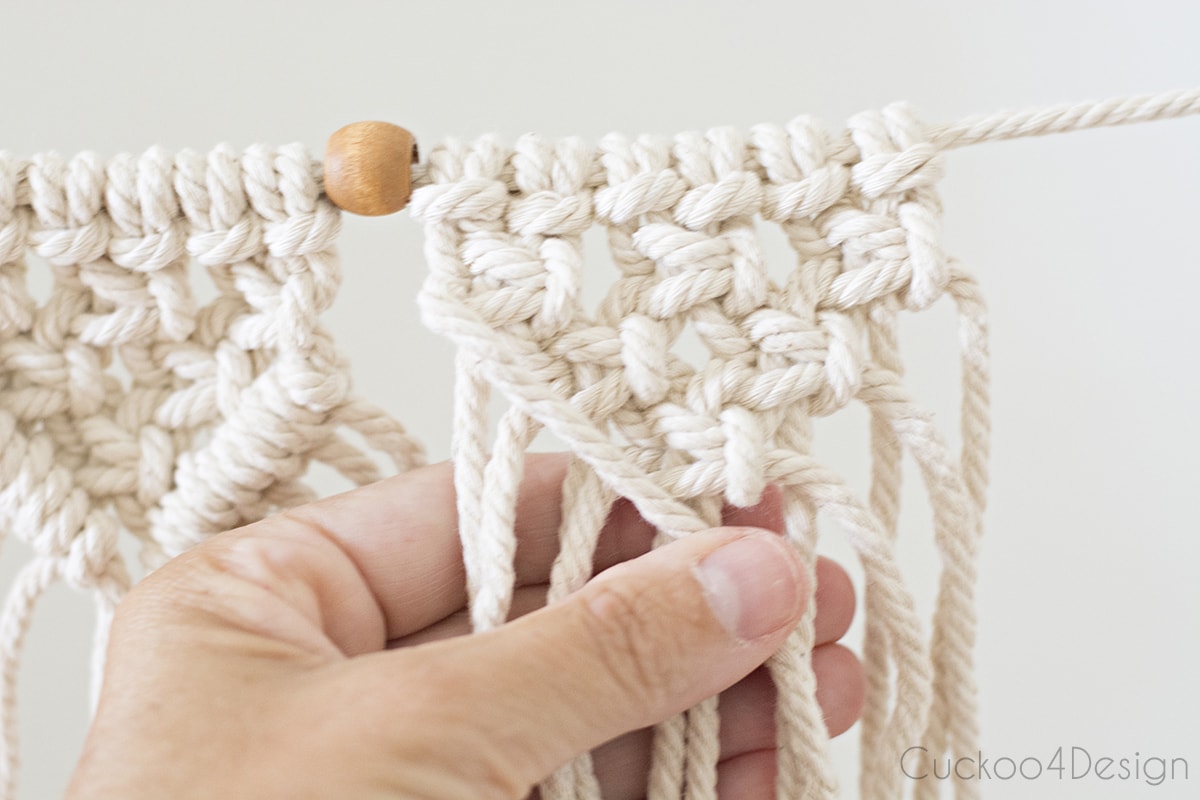
Step 5: Add Diagonal Clove Hitch Knots along each side to complete the v-shape
Then it is time to make Diagonal Clove Hitch Knots (also called Diagonal Double Half Hitch Knots, as named in the video)) on each side of the little macrame triangle/pyramid. Use the outside pieces of yarn on each side as the lead string.
These types of knots are basically two loops placed on the outer lead strings on each side that then meet at the center of the piece in a v-shape.
My video might help you better with this step as well.
Below, you can see the two loops placed on the lead string that you keep holding diagonally in the shape of a V, while grabbing the next string of the Square Knots until you reach the bottom of the V-shape.
Step 6: Repeat for each section between the beads
Keep repeating the same steps for each section between the wood beads to achieve the desired length of your garland.
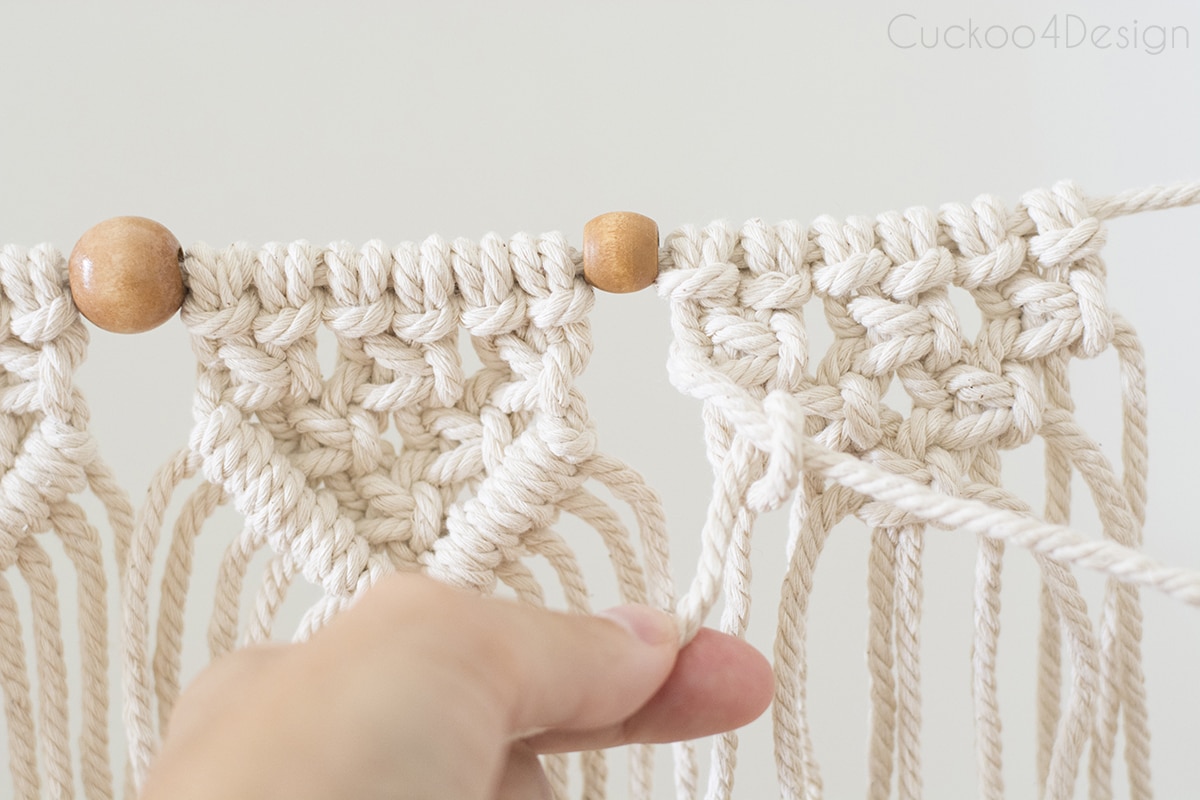
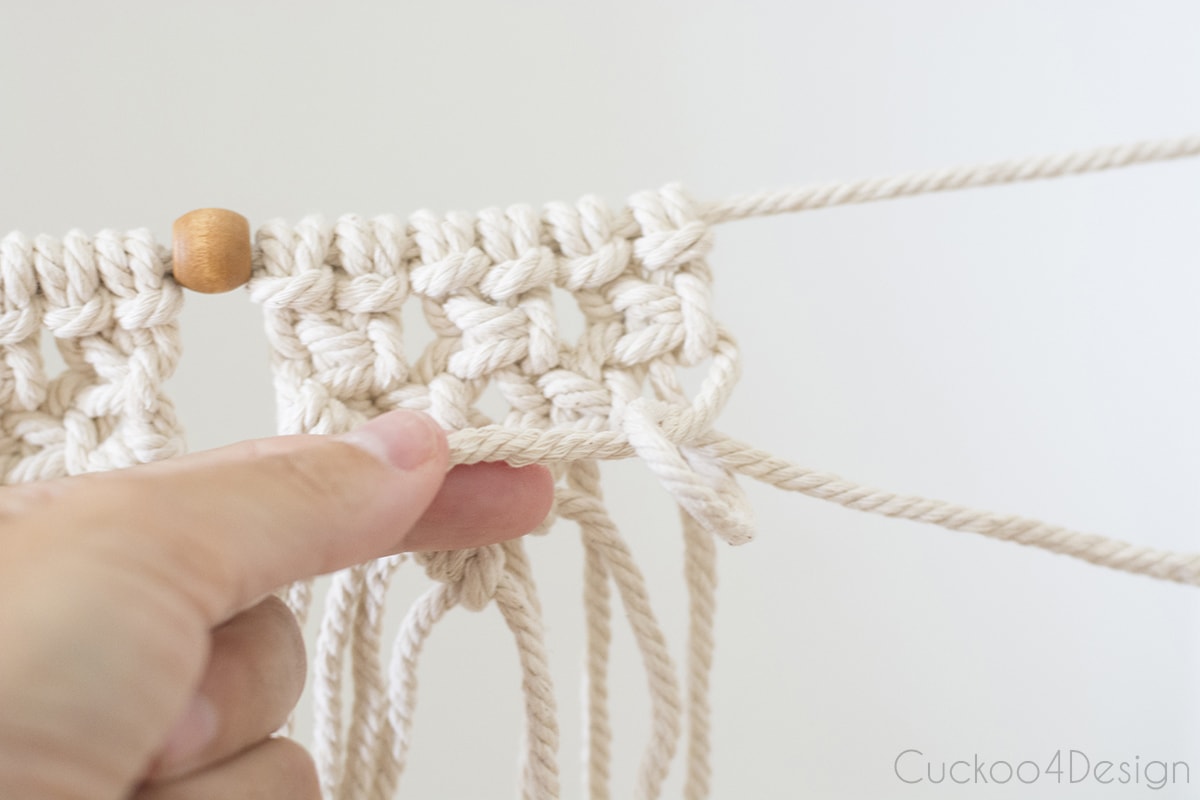
Step 7: Tie off the ends
And then the garland is almost done. You can either choose to leave the garland open or you can tie each end off as I did.
Here is a side-by-side view of how tying off the ends changes the look of the garland.
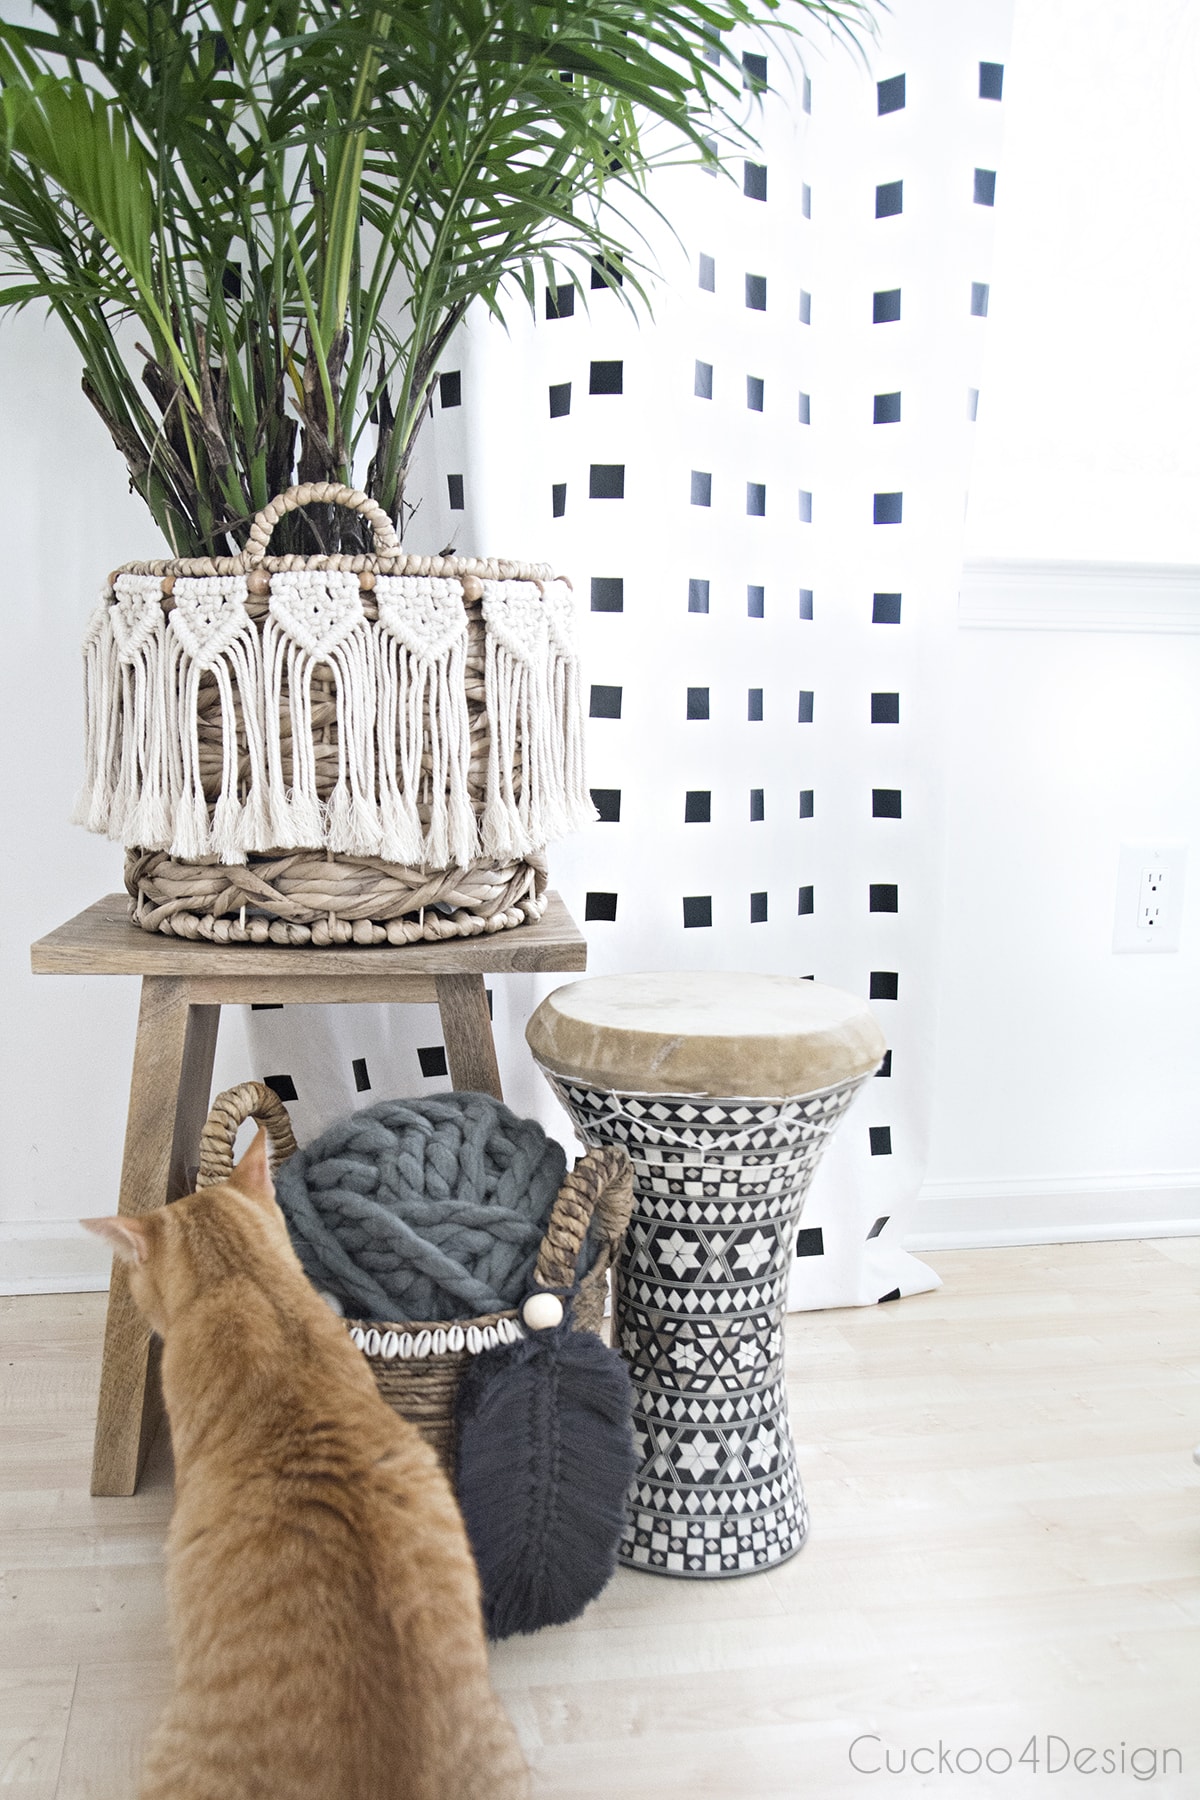
Ways to use your macrame garland in home decor
This post may contain affiliate links from which I will earn a commission at no extra cost to you. View my full disclosure policy.
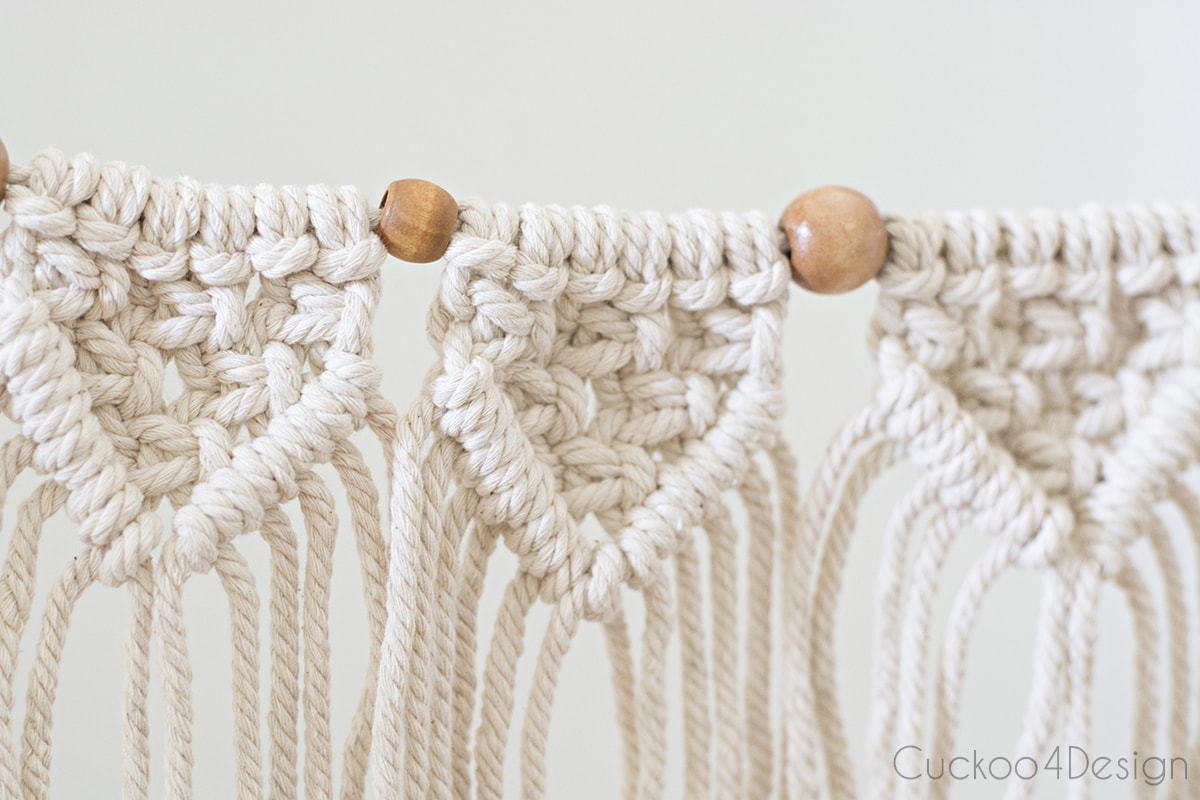
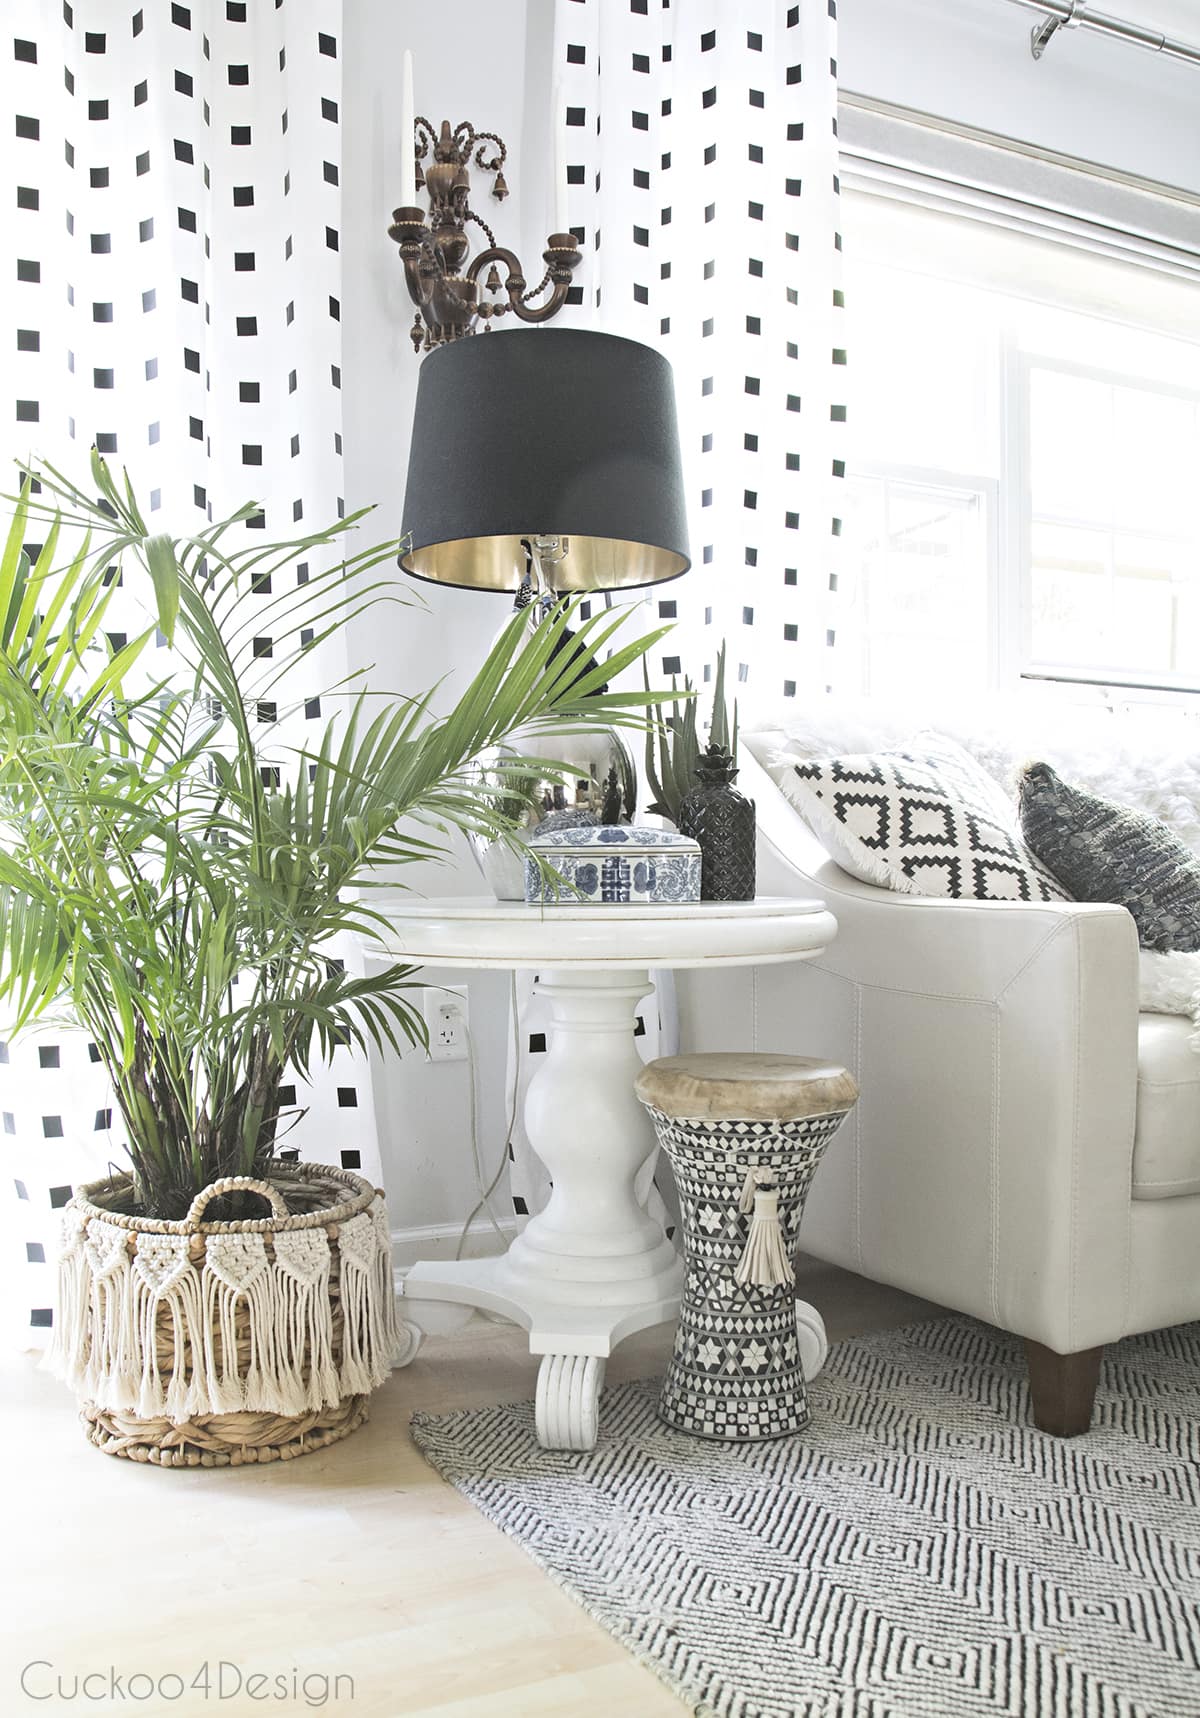
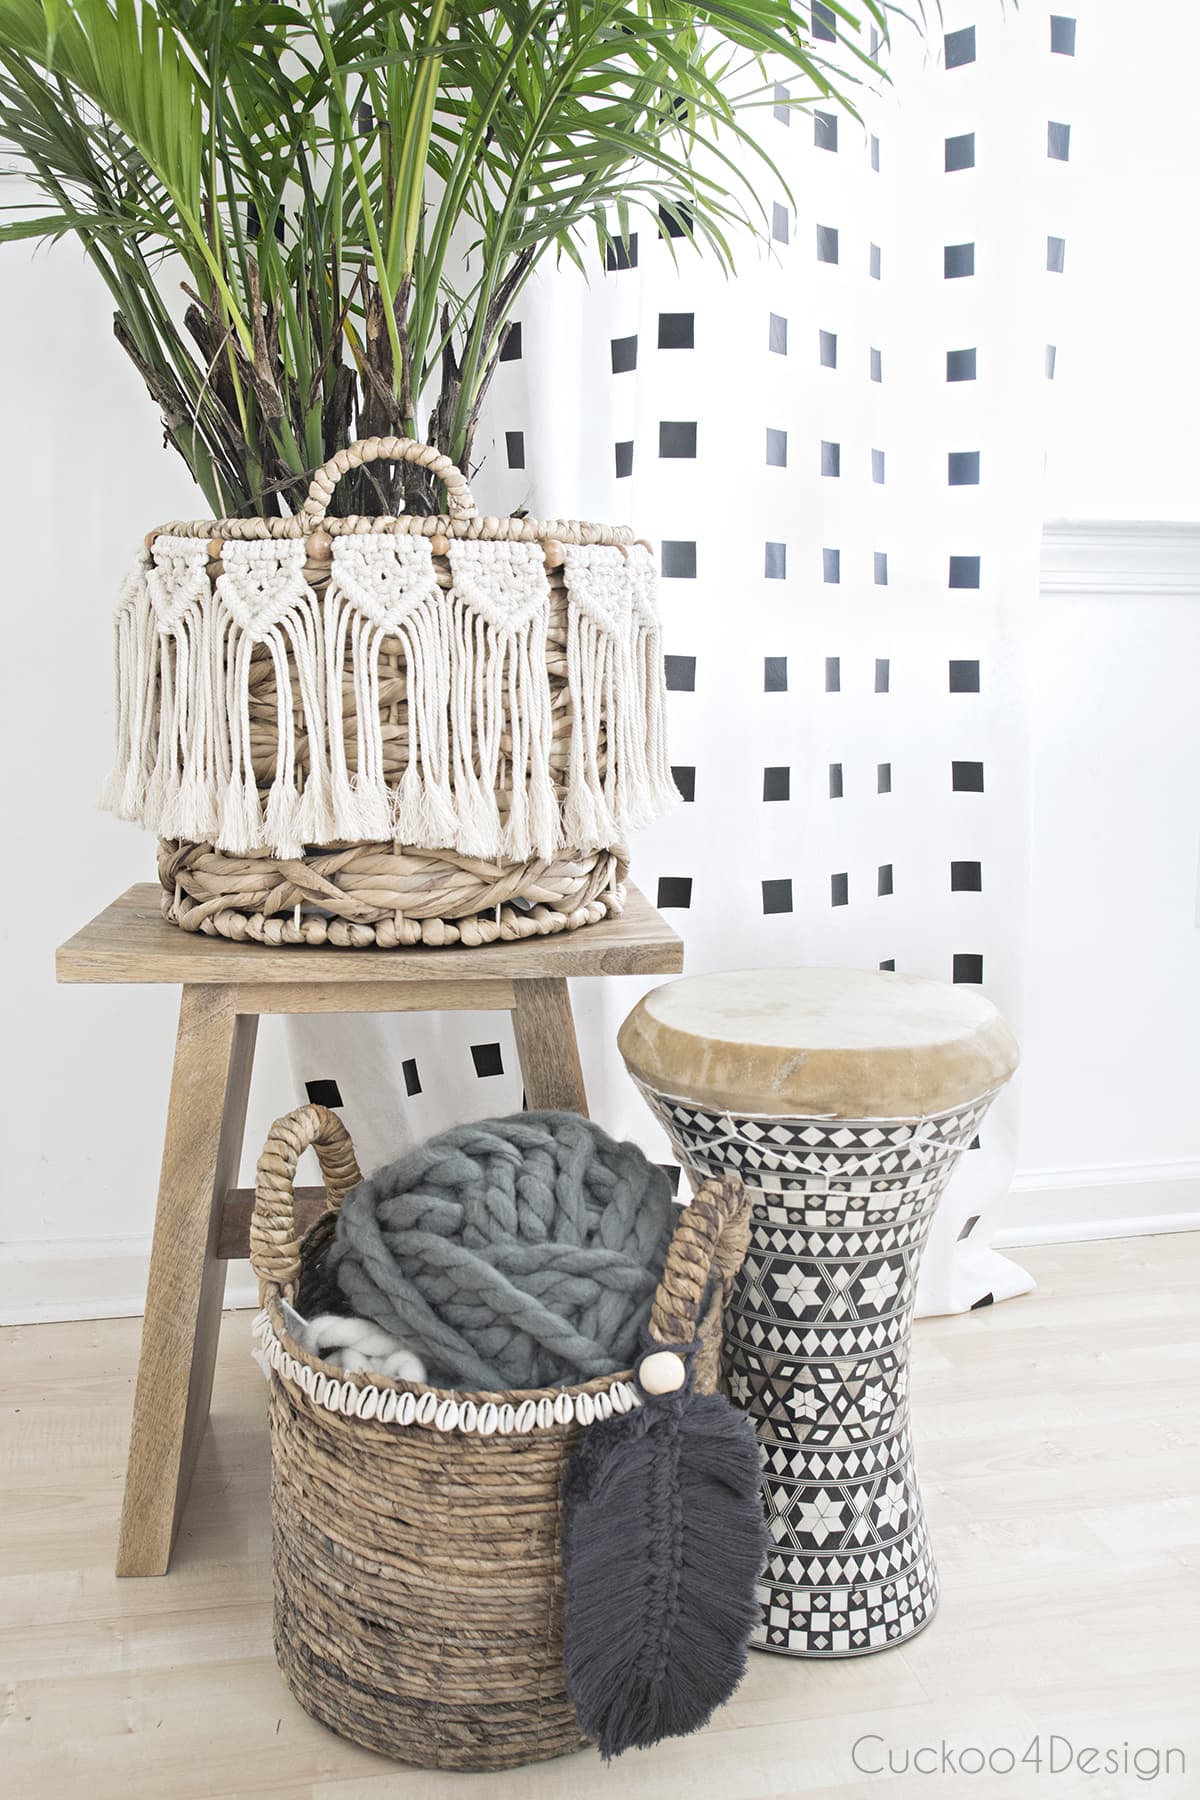
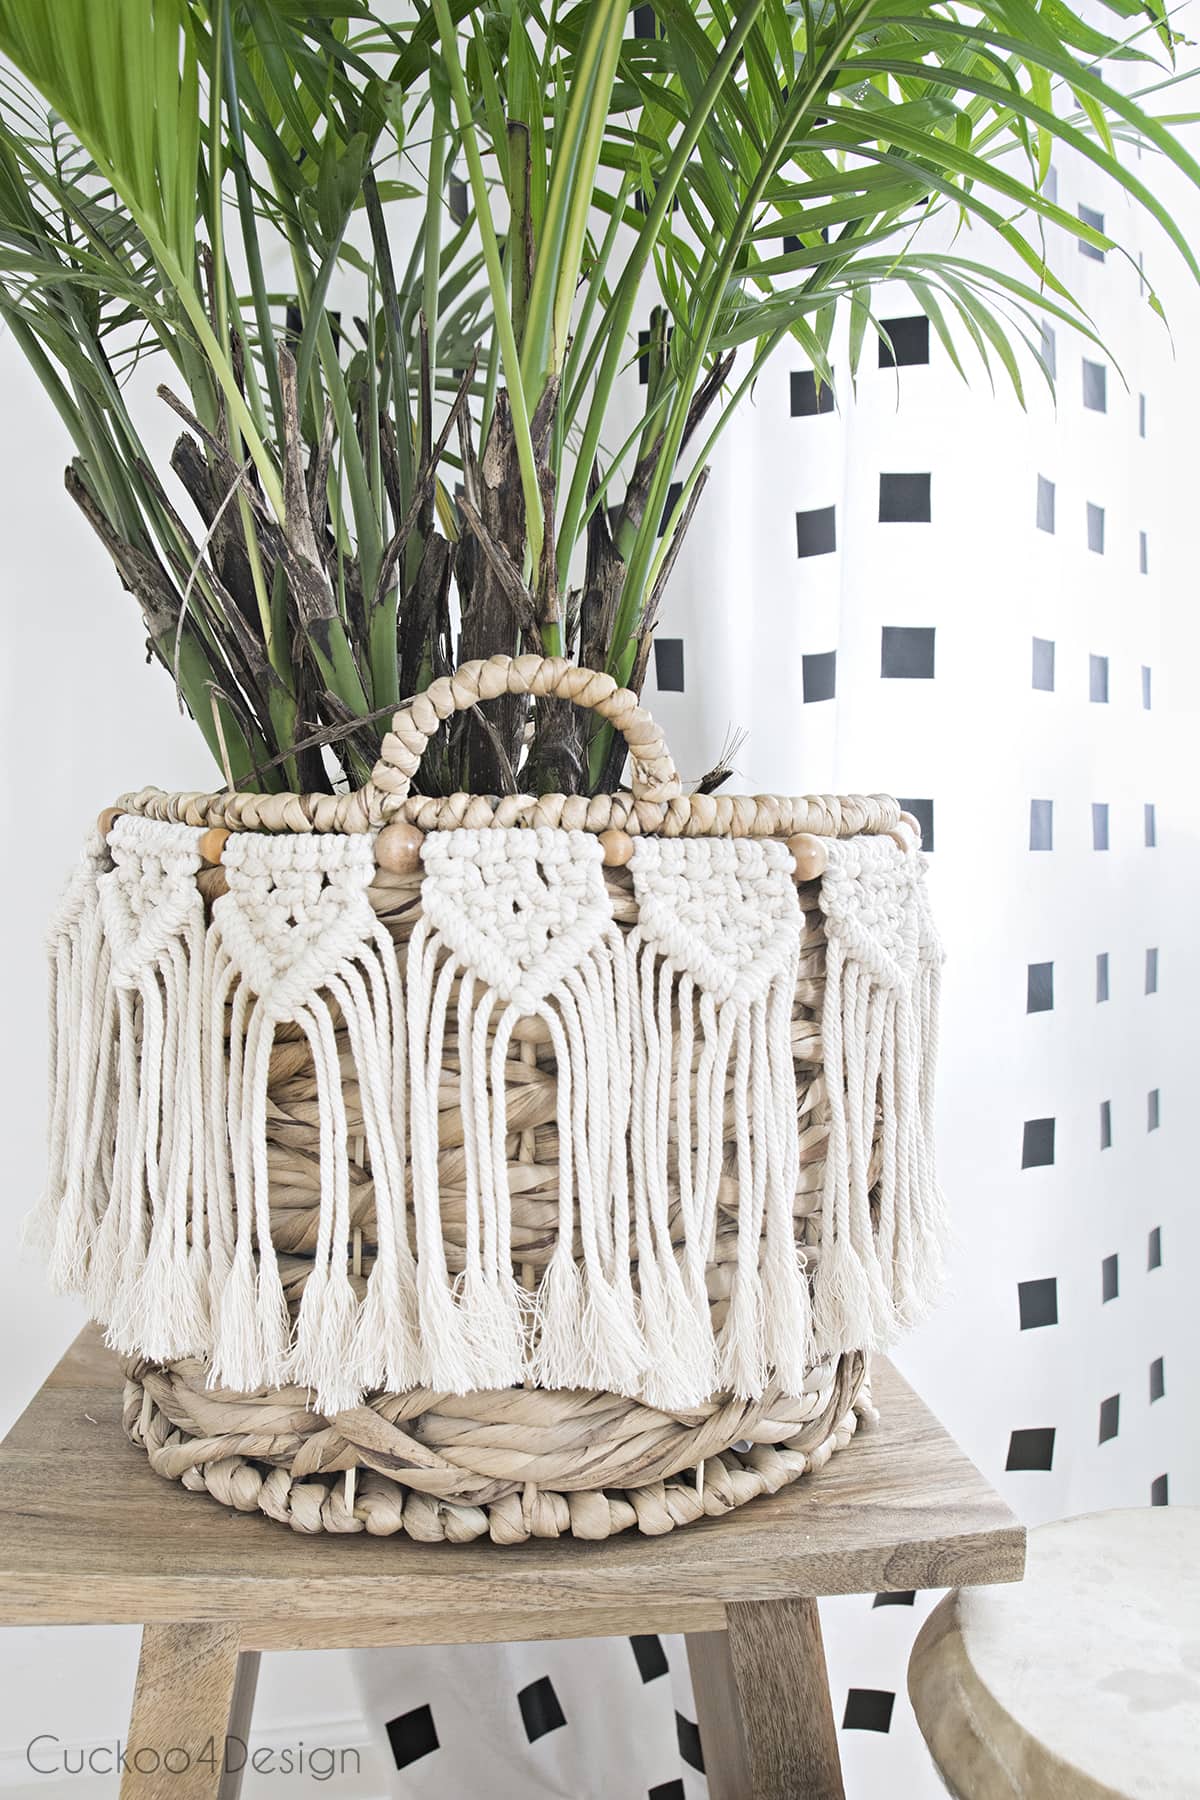
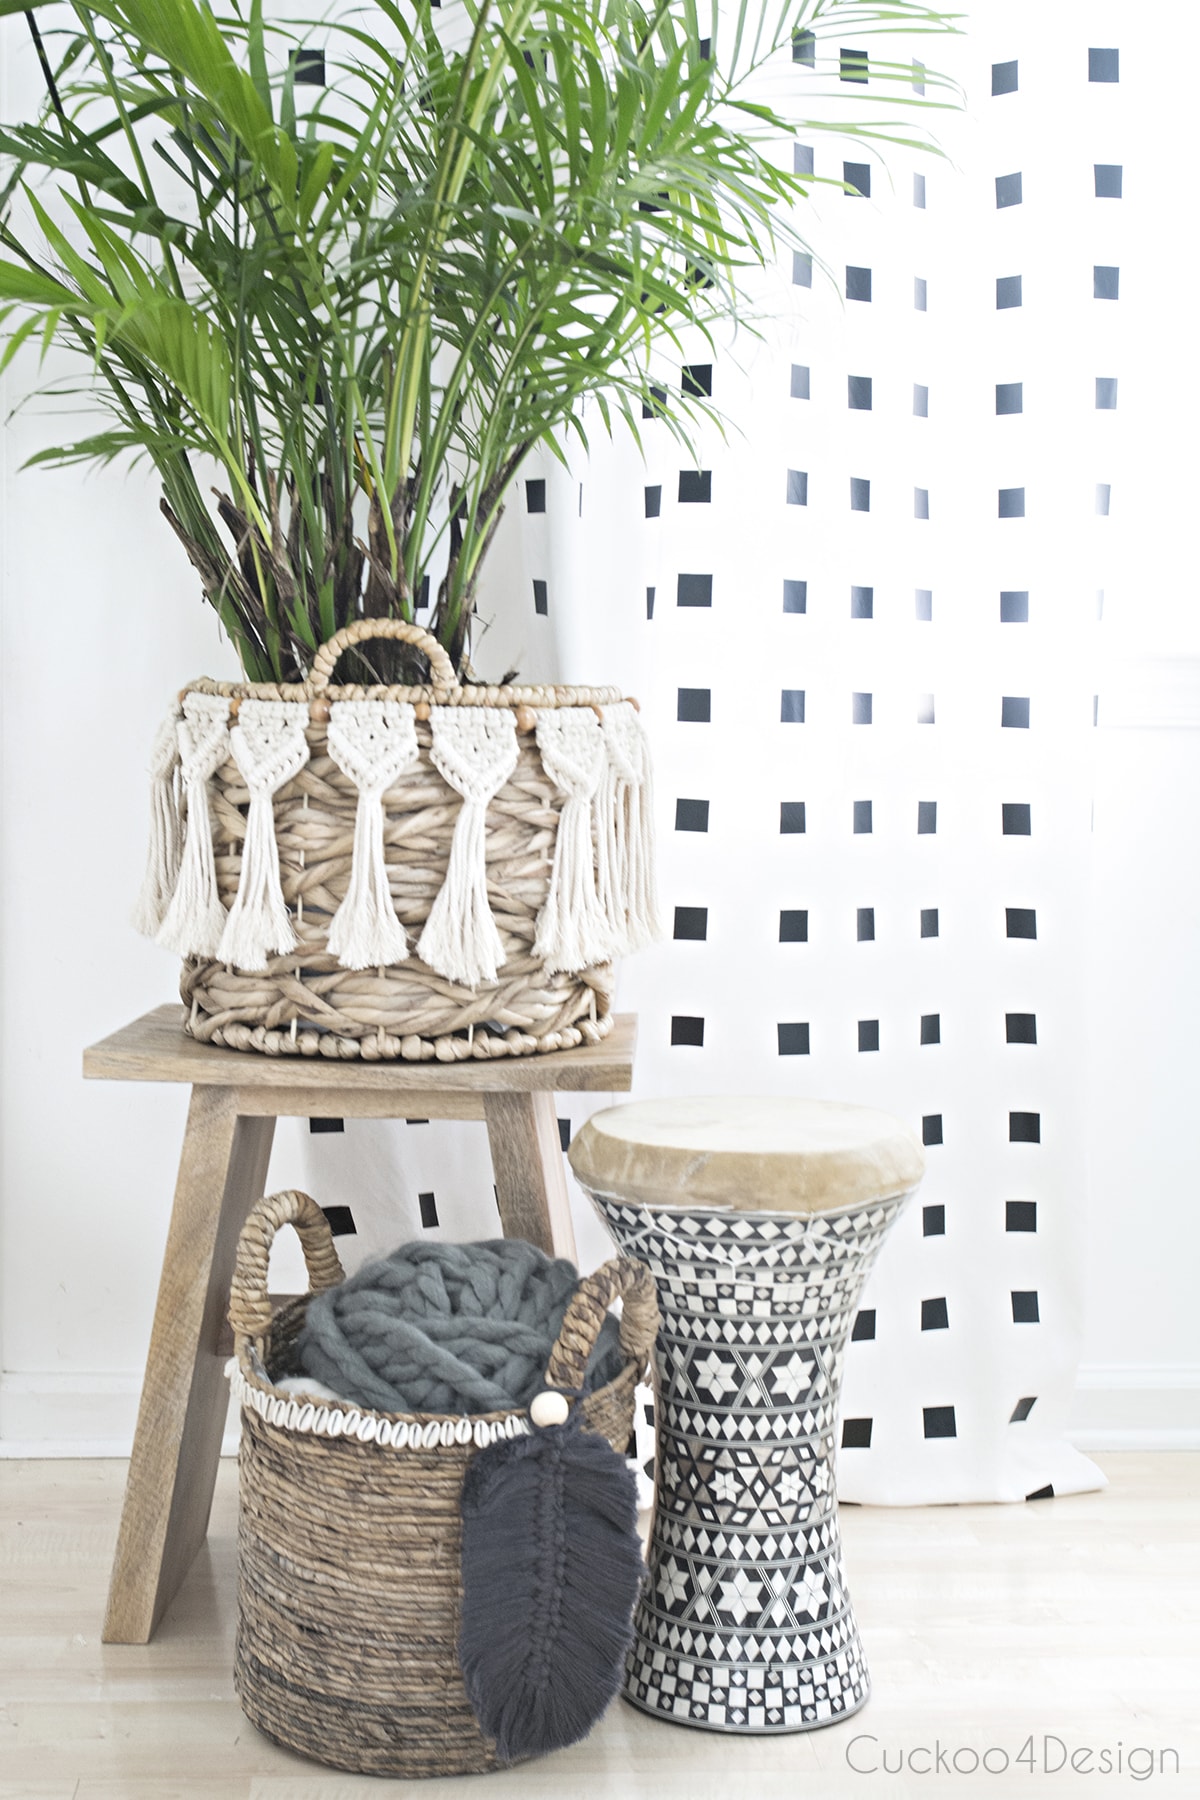
I love using the boho macrame garland around flower pots. Below you can see it with the strands open and not tied.
Below, I have the garland tied off into tassels for a change. You can even comb out the strands all the way, which I did in my macrame feather tutorial.
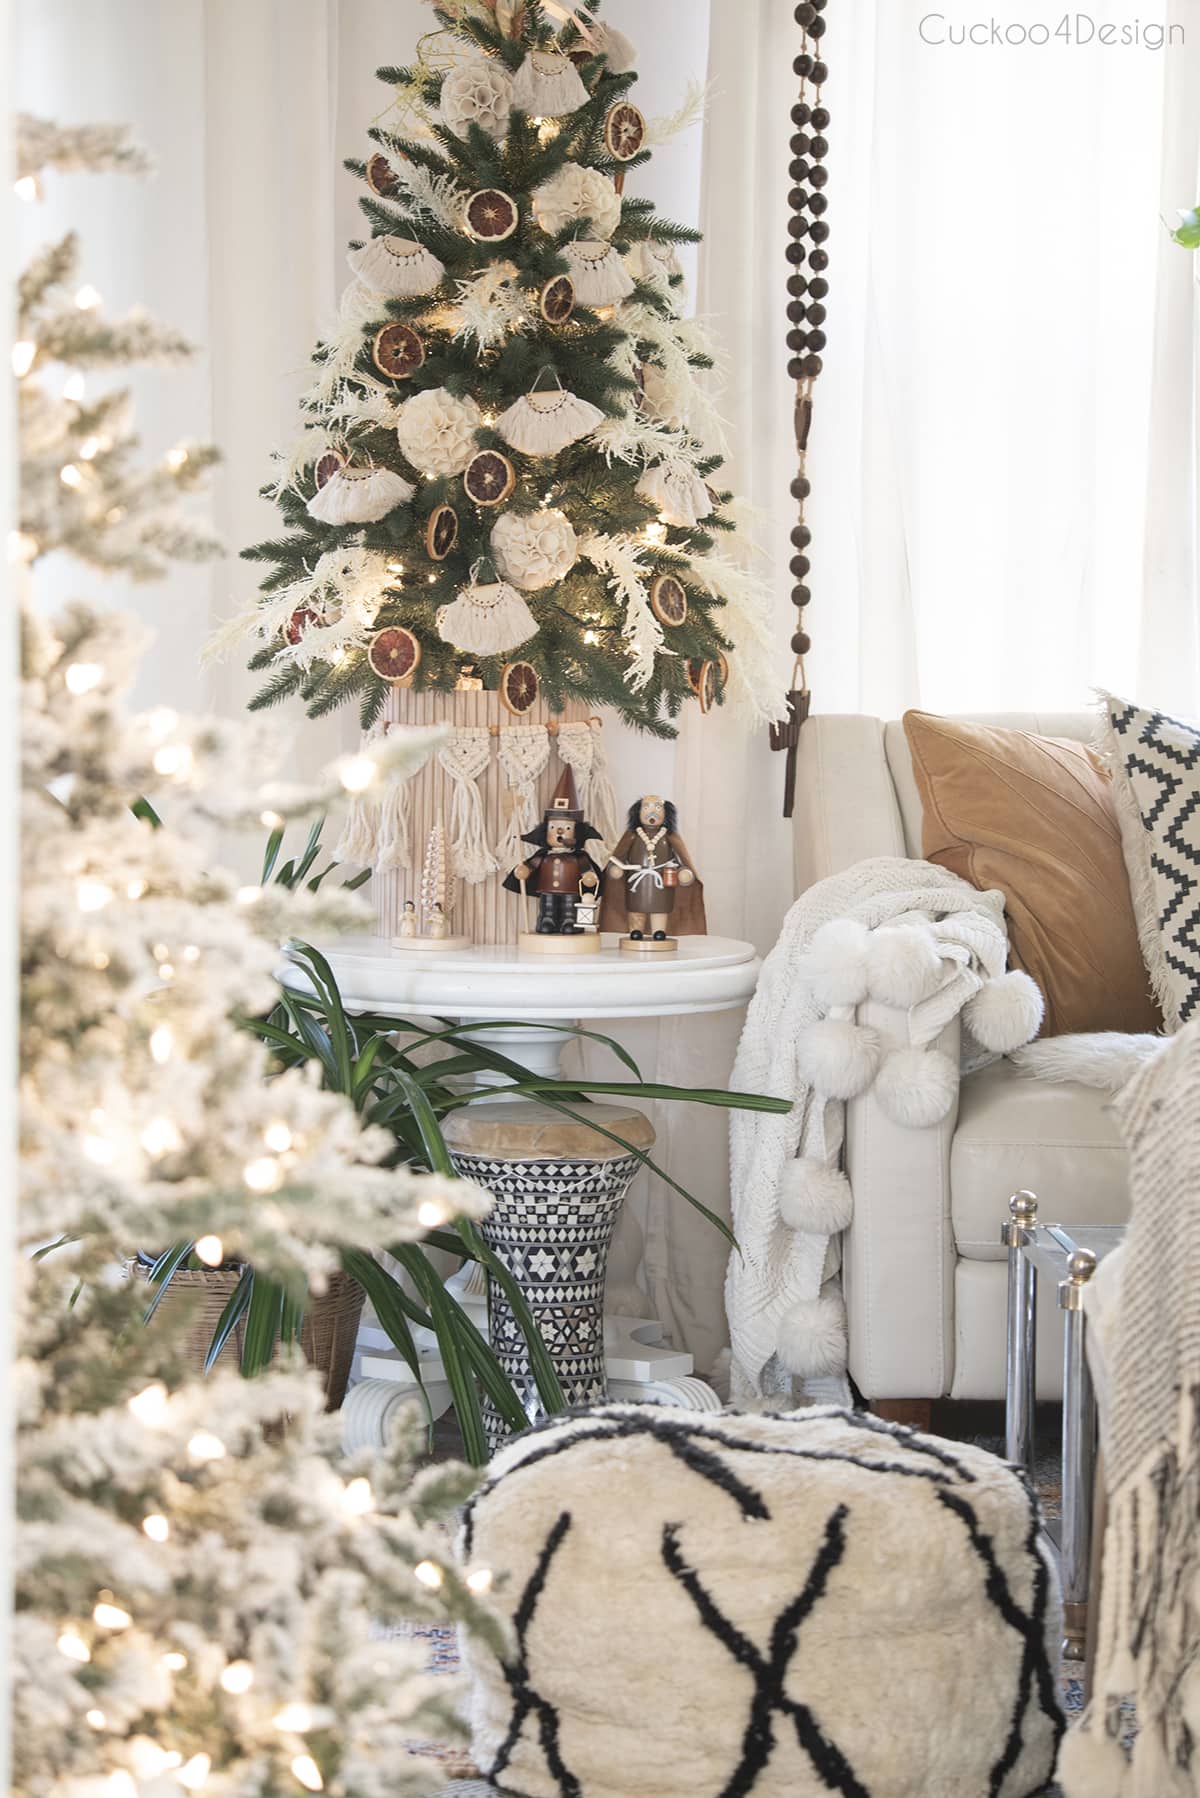
For the holiday season, I used the macrame garland in my boho Christmas tree. You can see it at the bottom.
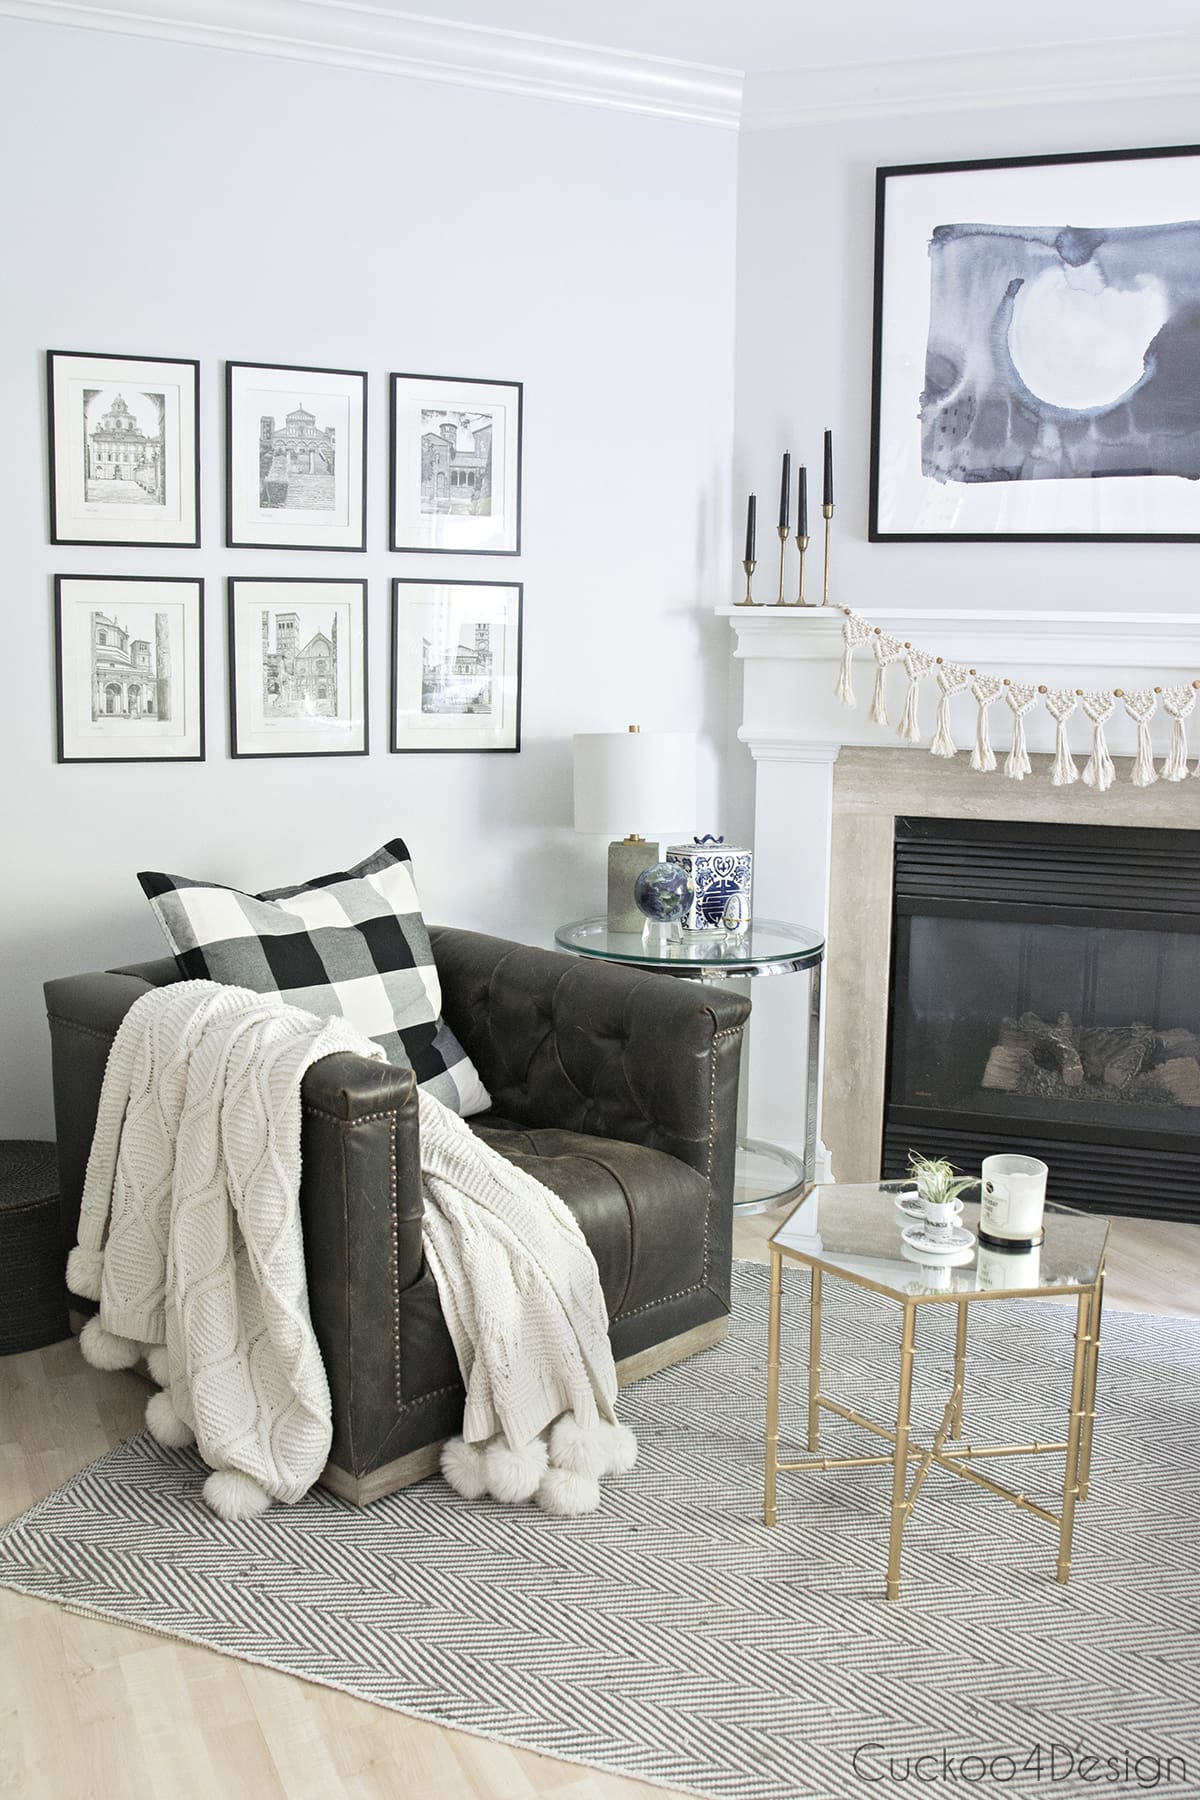
I really like how the macramé garland looks on our fireplace mantle too. And you can see how the garland looks if you tie the ends off with a piece of string right after each v-shape.
And Willy agrees that it also makes a great cat toy. It’s a win-win for all of us, isn’t it?
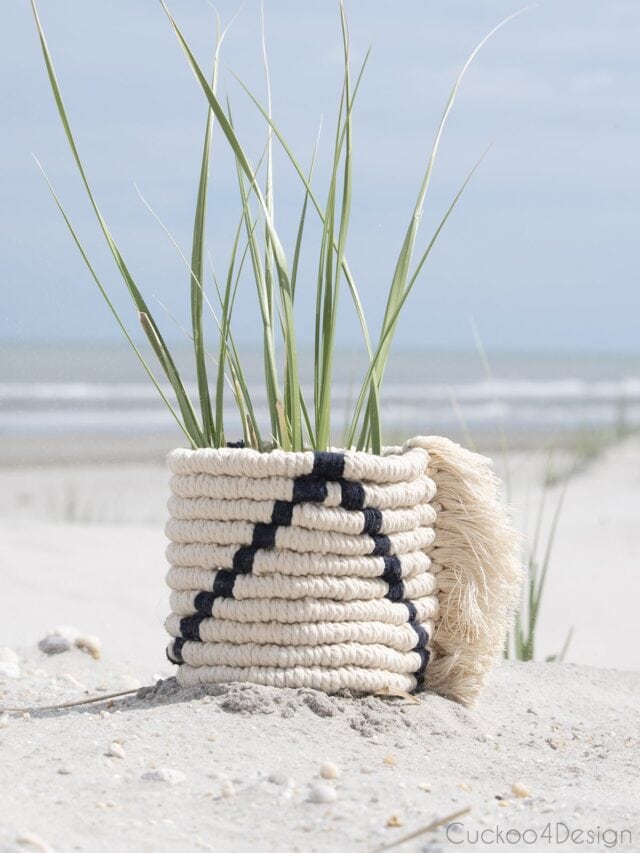
RELATED: Are you into beachy home decor? Then you might like my mussel shell craft that turns ordinary mussel seashells into a beautiful flower bud:
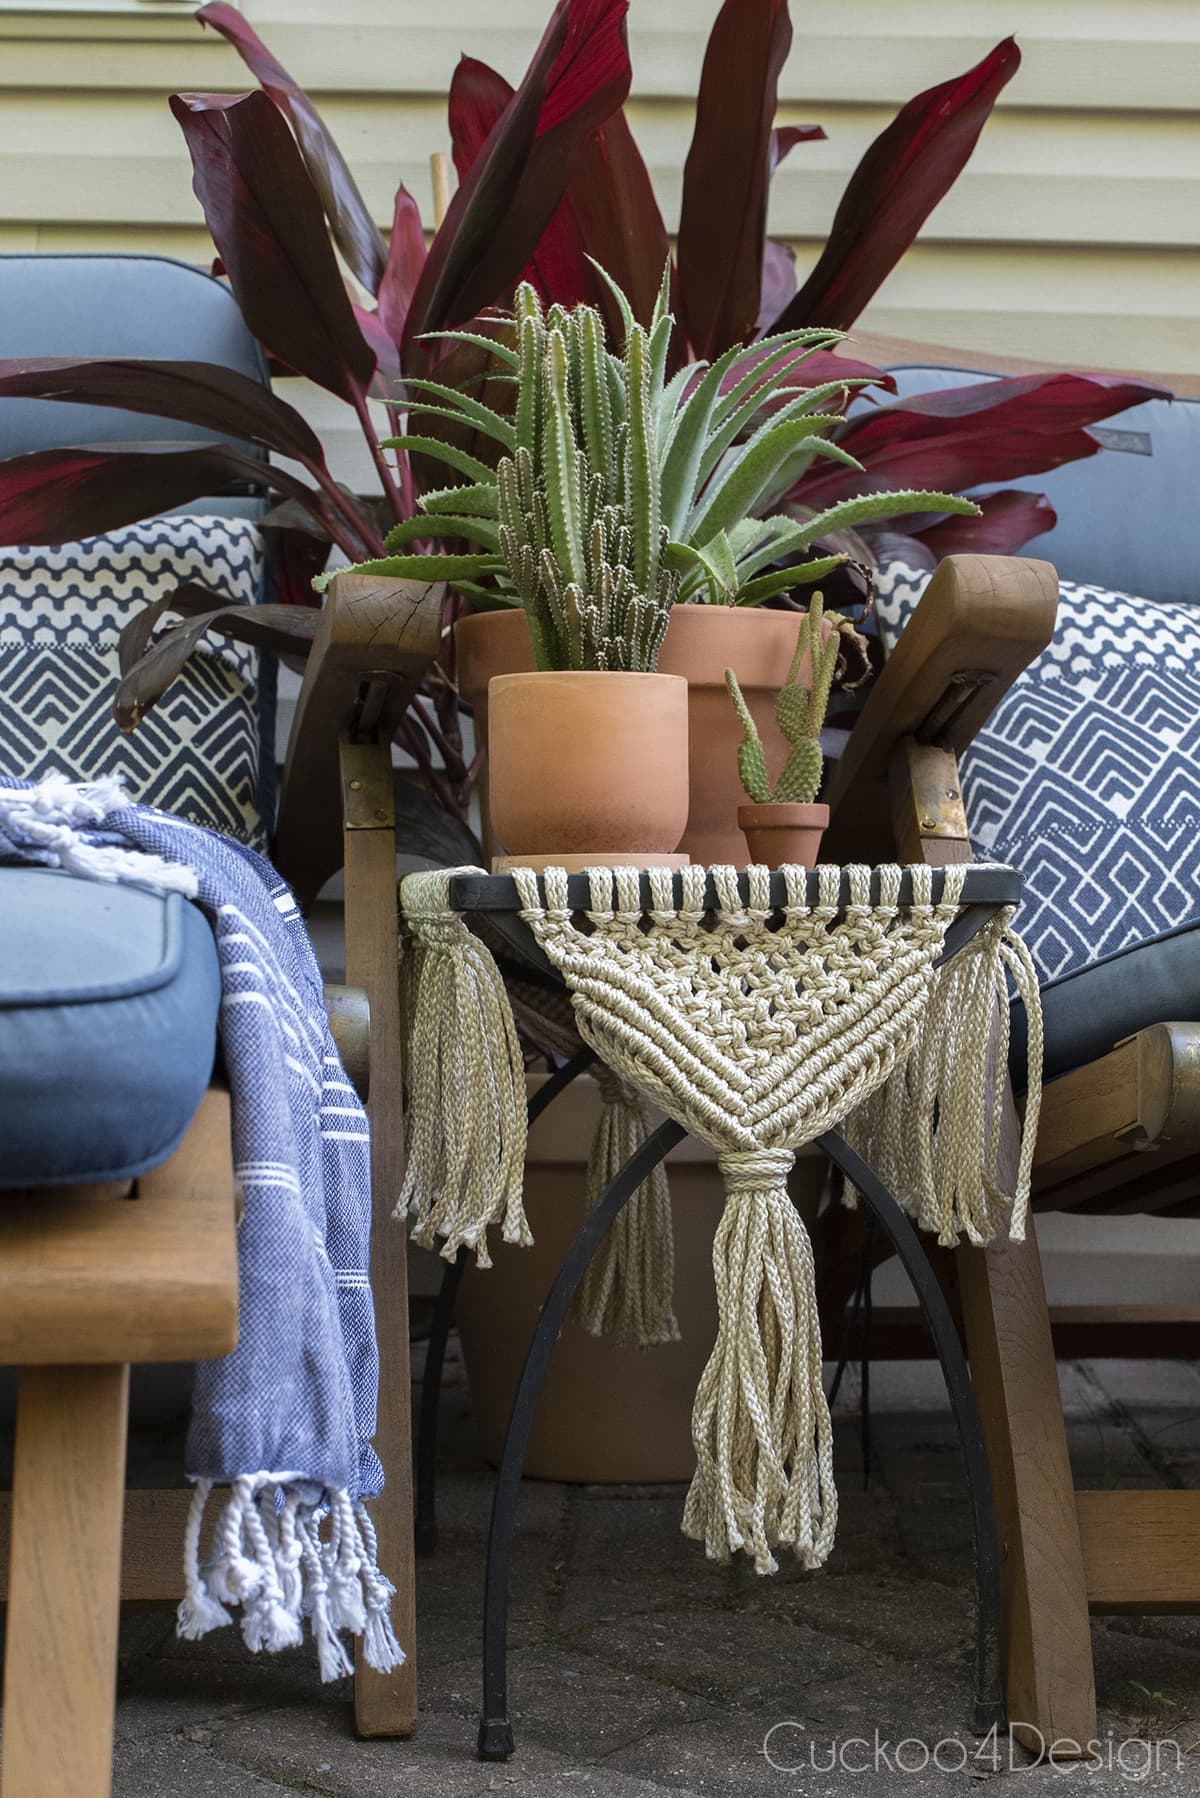
Below you can see an example of how you can use the same process shown above in a different way. Just check out my metal patio table makeover. The macrame triangle used on the table is basically the same pattern as I used for each section of the macrame garland. I only added extra rows of Diagonal Clove Hitch Knots.
And guess what the best thing is? At the end of this step-by-step tutorial and after repeatedly practicing with little macrame pieces, you can move on to a bigger piece because they are all very similar. You can create your own macrame creations if you know how to do different basic knots.
More of my easy beginner macrame projects
Add more bohemian vibes to your home with more of my unique projects. I’m sure you can find something else that you love below.
Learn how to make an easy DIY beginner macrame garland with wood beads that you can use on your fireplace, planters, and seasonal decor.
Materials
4mm macrame yarn: one 10-foot piece of yarn and 132 pieces of 40-inch macrame yarn
23 wood beads
Tools
hair comb
sharp scissors
Instructions
Set up your base cord and thread on the beads I threaded the 23 beads onto the 10-foot piece of macrame yarn ahead of time and tied that long piece of yarn between two chairs, so I could work on the macramé garland.
Attach yarn with Lark's Head Knots For my length of garland, you need to knot 22 small v-shaped pieces of macrame in between the wooden beads. And when you make one piece of macrame in between the above wood beads, you need to cut 6 pieces of 40-inch macrame yarn, which you then have to repeat 22 times or however long you want your garland. I had to cut 132 pieces of 40-inch macrame yarn strings. Does that make sense? I started out my beginner macrame garland by folding 6 of the 40-inch pieces of macrame cotton cord in half and looping them onto the base string with Lark's Head Knots. Each section between the beads needs 6 pieces of yarn, as shown below. My little video shows you how to do this too, and it might be easier to follow that than the photos and descriptions. Make sure to pull them tight and repeat 6 times.
Tie your first row of Square Knots After that, you have to make Square Knots. The image below shows you how. Just be sure to alternate the string that is placed on top.
Add two more rows to create a v-shape After making a row, you have to offset the simple knots so you can create a pyramid at the end.
Add Diagonal Clove Hitch Knots along each side to complete the v-shape Then it is time to make Diagonal Clove Hitch Knots on each side of the little macrame triangle/pyramid. Use the outside pieces of yarn on each side as the lead string. These types of knots are basically two loops placed on the outer lead strings on each side that then meet at the center of the piece in a v-shape. My video might help you better with this step as well. Below, you can see the two loops placed on the lead string that you keep holding diagonally in the shape of a V, while grabbing the next string of the Square Knots until you reach the bottom of the V-shape.
Repeat for each section between the beads Keep repeating the same steps for each section between the wood beads to achieve the desired length of your garland.
And then the garland is almost done. You can either choose to leave the garland open or you can tie each end off as I did. Here is a side-by-side view of how tying off the ends changes the look of the garland.
Notes
You can use a macrame garland as a Christmas tree garland, basket decor, wall decor, or even as wedding decor.
Thanks Cassie,
I know I’m overdoing it a little but it relaxes me so much and I just love doing it.
I’m scared that if I keep making it and writing about it that people will get bored fast 😉


you are on a macrame roll and i love it!
Thanks Cassie,
I know I’m overdoing it a little but it relaxes me so much and I just love doing it.
I’m scared that if I keep making it and writing about it that people will get bored fast 😉
This is amazing, I can see many ways to put this technic to good use. Thank you so much for sharing.
Thanks Diane, yes you can use it for many different things
This is so pretty.
Thank you!