

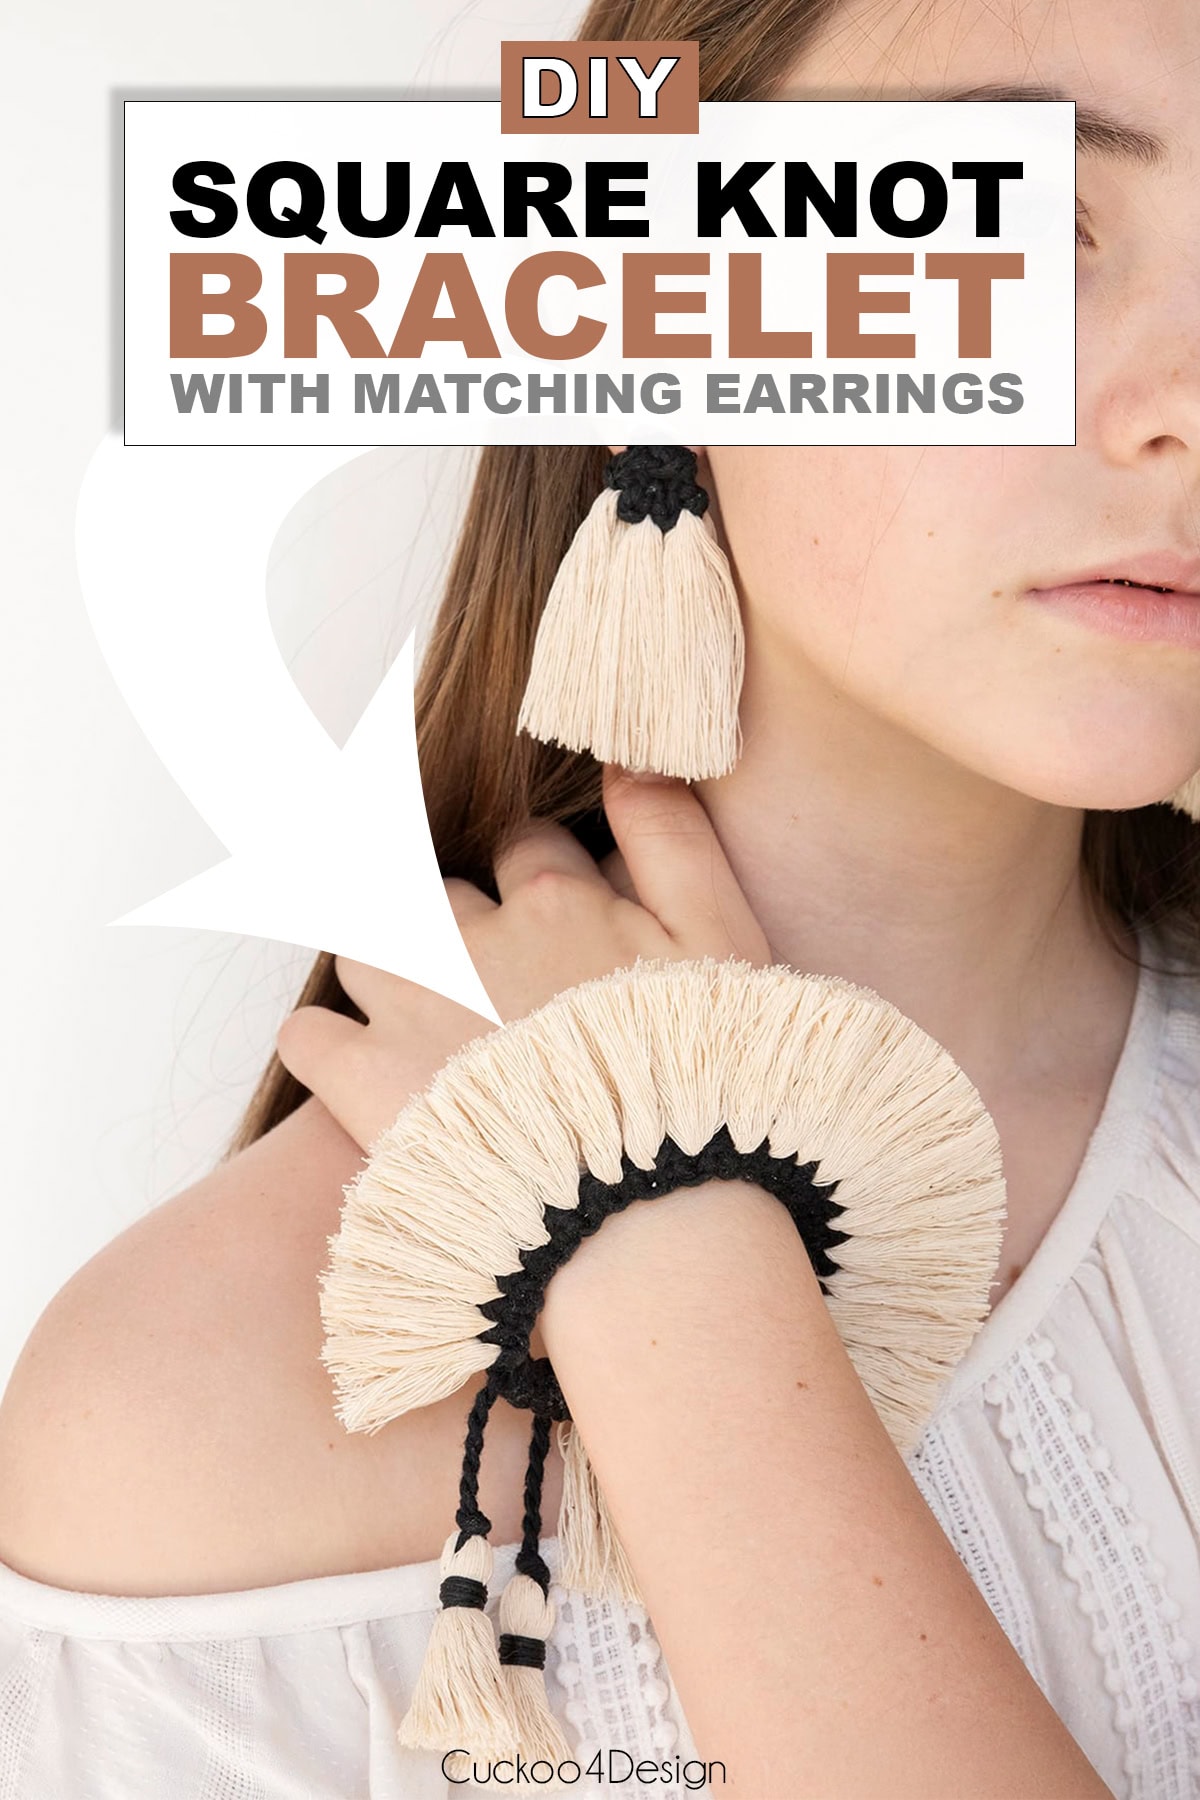
How to make a trendy boho square knot bracelet
This square knot bracelet is pretty easy to make with added fringe and tassel detail to make it unique and trendy. I love adding unraveled macrame fringe to my projects and have done so in many of my macrame projects.
For those of you who don’t know what a square knot bracelet is, it’s basically a string tied around a center string or grouping of strings the way you tie a shoe. A square knot is two of those tied knots but you alternate which string goes on top first. I’m also showing that in my video.
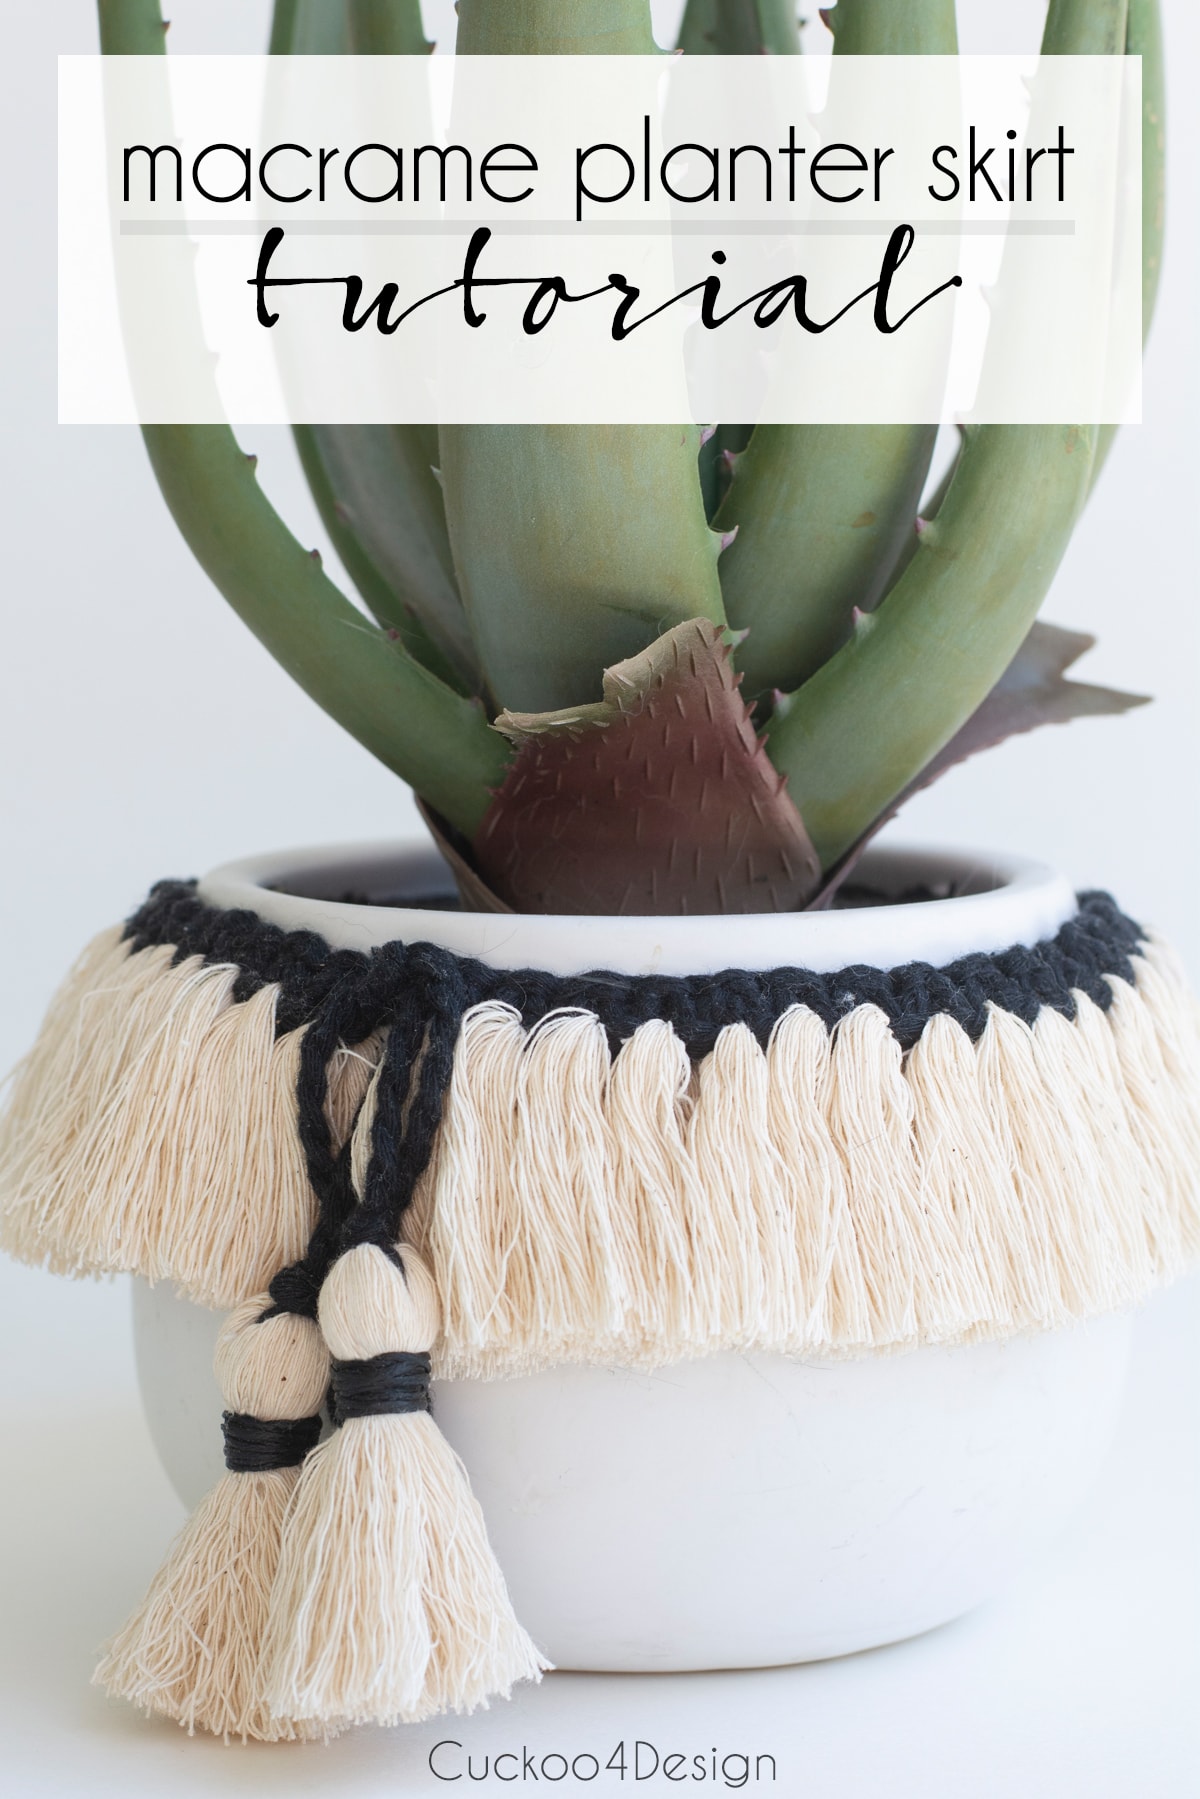
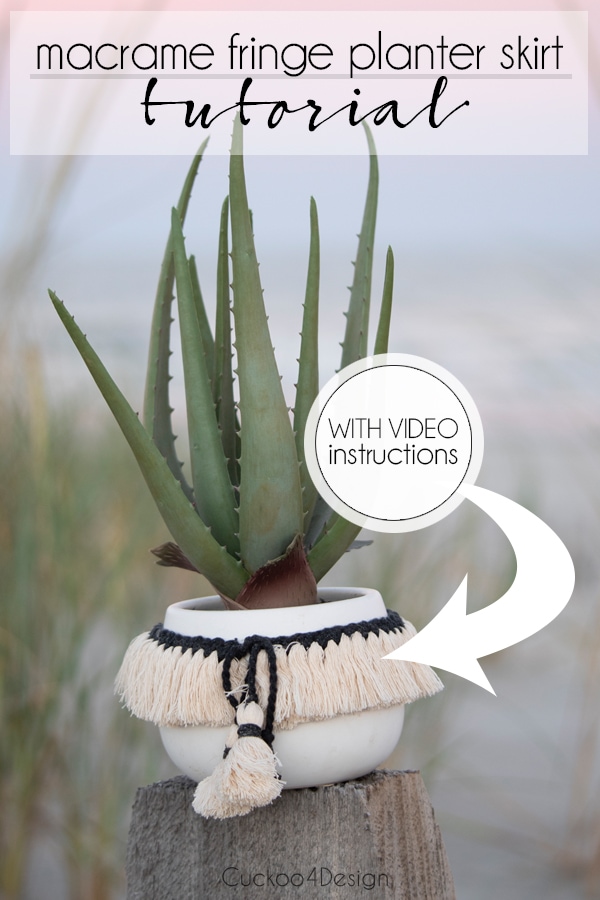
I saw this bracelet for the first time on Free People’s website about 2.5 years ago and then I saw it in person at a store in Austin Texas two years ago and have been wanting to make it ever since. Right now being stuck at home was the perfect time to make this fringe and square knot bracelet. I really love how it turned out. If you don’t want to wear a bracelet this big then please still check out the tutorial because it can also be used as a decorating accessory on a planter, bottle, candle, or even table lamp. I’m showing you photos of it all the way at the bottom of the tutorial.
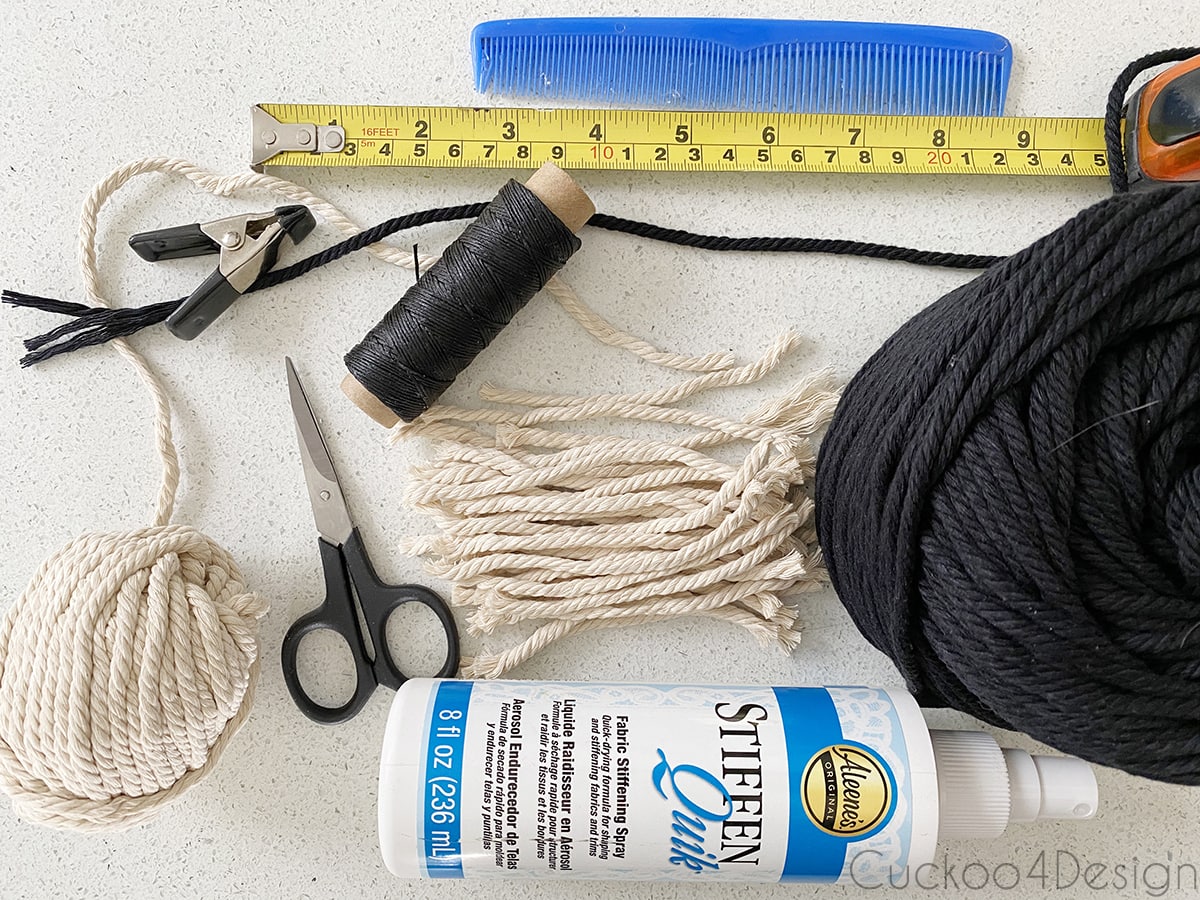
Materials needed for the bracelet
- black 4mm macrame cord
- ivory 4mm macrame cord
- scissors
- measuring tape
- clothing pins or small spring clamps
- fabric stiffener
- comb
- wax cord, or you can just use macrame cord instead as well
- clear strong craft glue
- tooth picks
Fringed square knot bracelet video tutorial
Watch the full tutorial below or head to my YouTube channel if the video doesn’t load.
Instructions for how to make a square knot bracelet
The bracelet was about $90 if I remember correctly, and mine is obviously much cheaper to make. Do you remember making friendship bracelets as a kid? This is literally the same technique. It is a simple square knot bracelet at its core, and if you decide to skip the fringe, you can just add tassels to the ends instead, which would look pretty too.
Step 1: Cut and prepare your cord
I made a bracelet where I didn’t split the macrame cord, but ended up liking the thinner string better. So that is the version I’m sharing with you today.
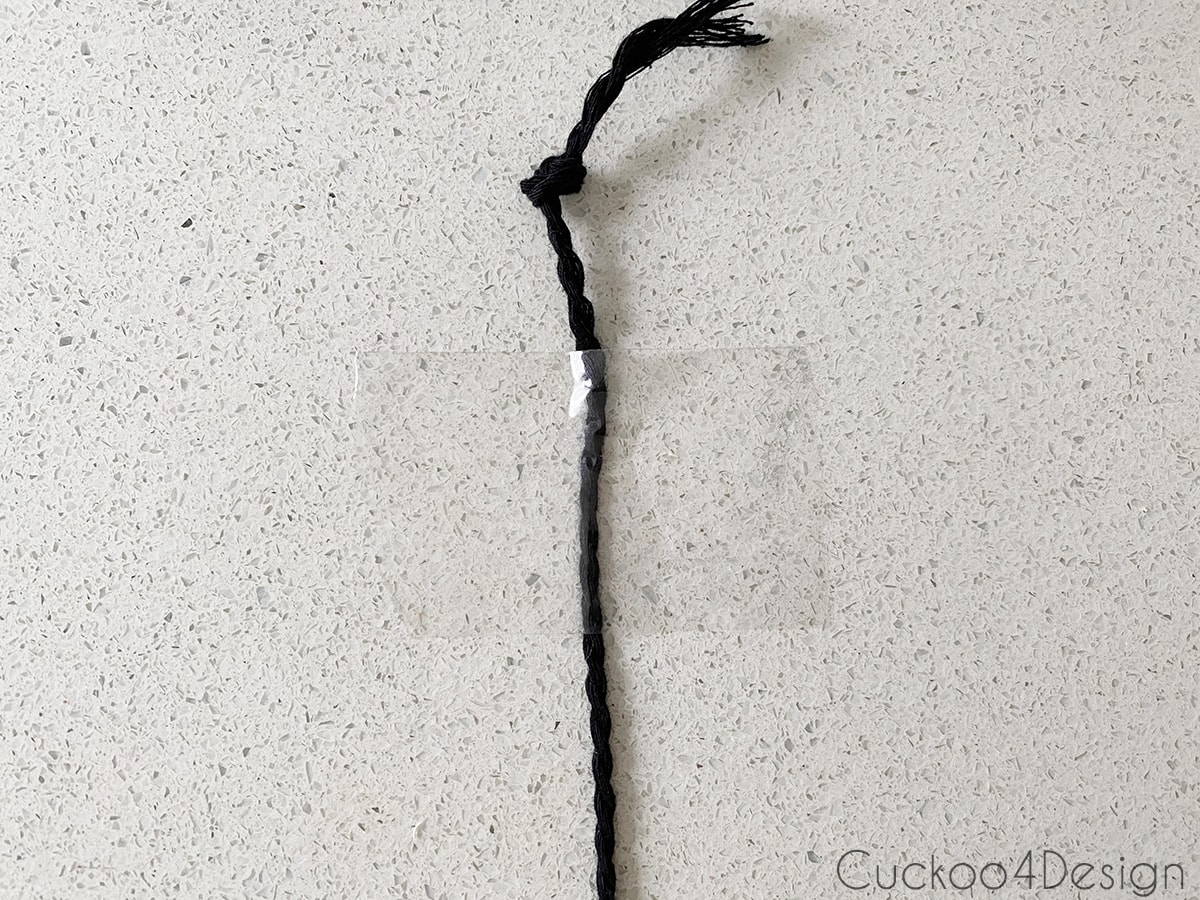
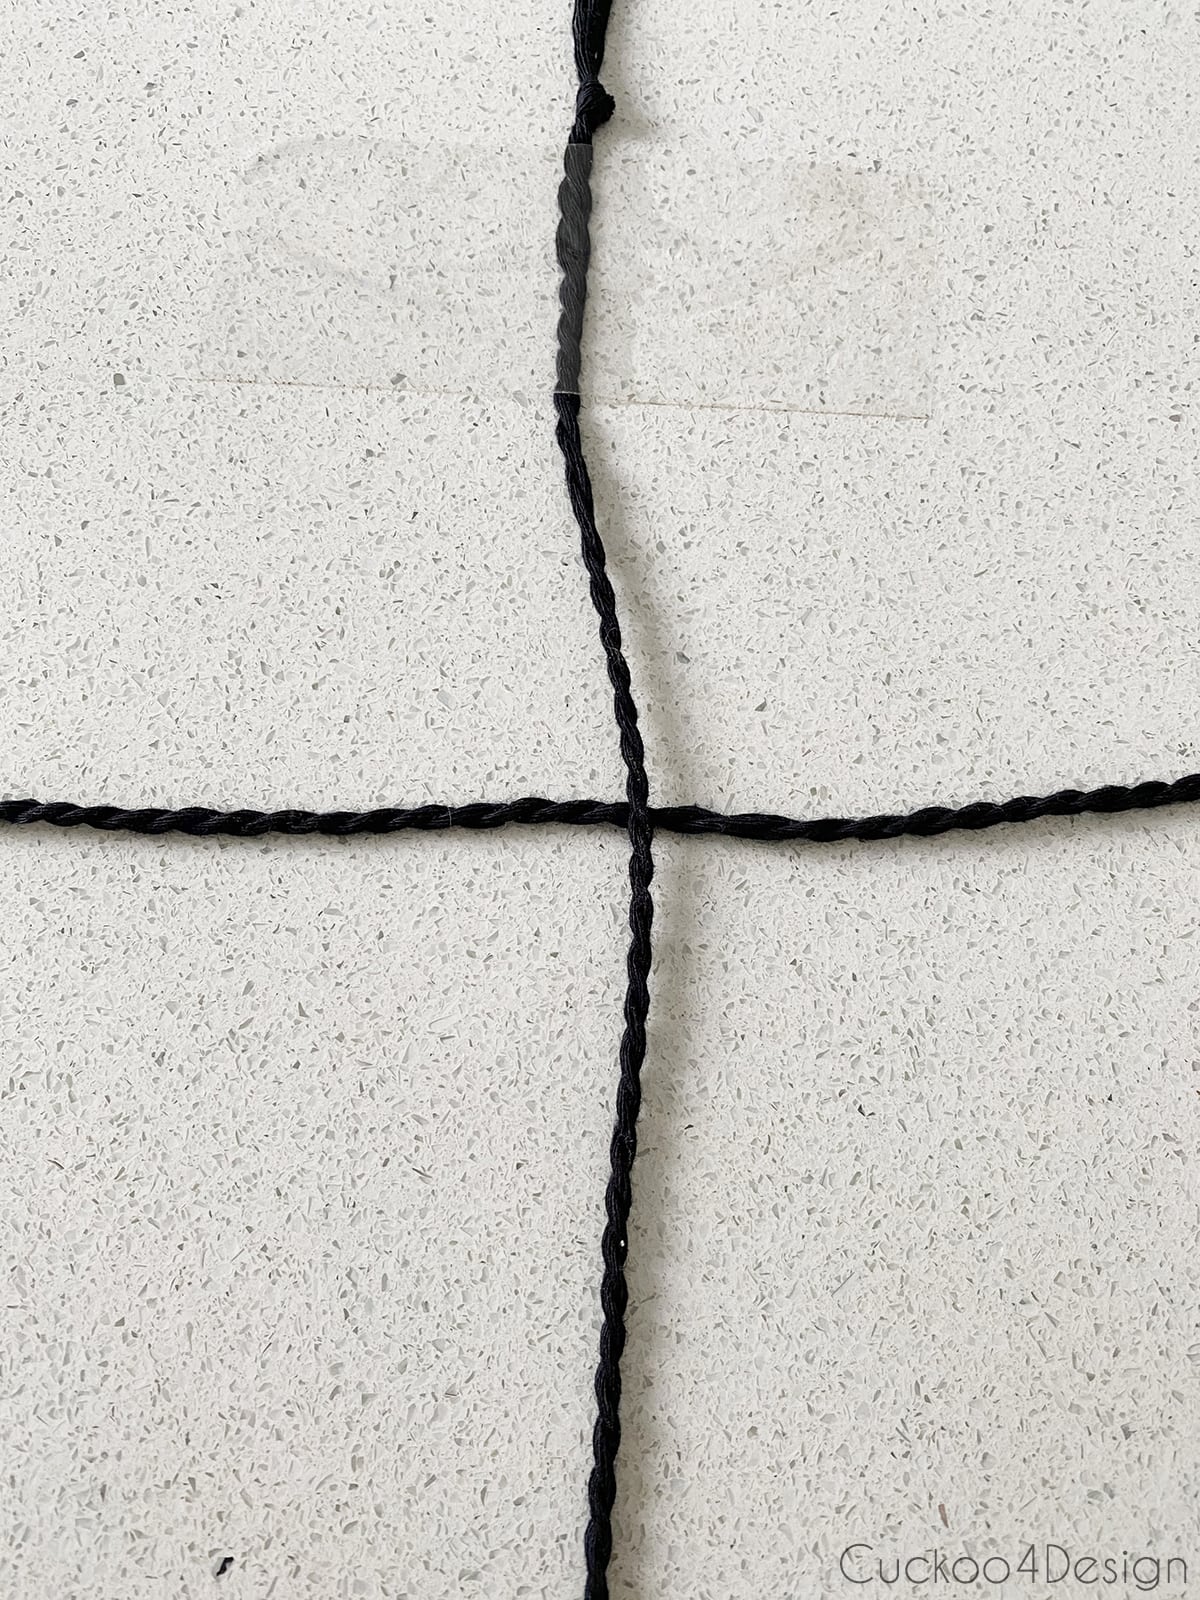
Split a 120-inch piece of black macrame cord in half as shown below. It will most likely be a bit long in the end, but better safe than sorry.

Then you have two 120-inch pieces. The one will be used for the knotting of the bracelet, and the other we will use now to measure around your wrist. I have really thin and tiny wrists, so it is pointless for me to tell you how long the actual bracelet piece should be. To be safe, add about 20 inches to the measurement of the wrist and cut a piece of that length off of the other 120-inch-long piece.
Take that piece and tape it to a hard surface. I also knotted the ends of all the separated macrame strings to stop them from fraying.
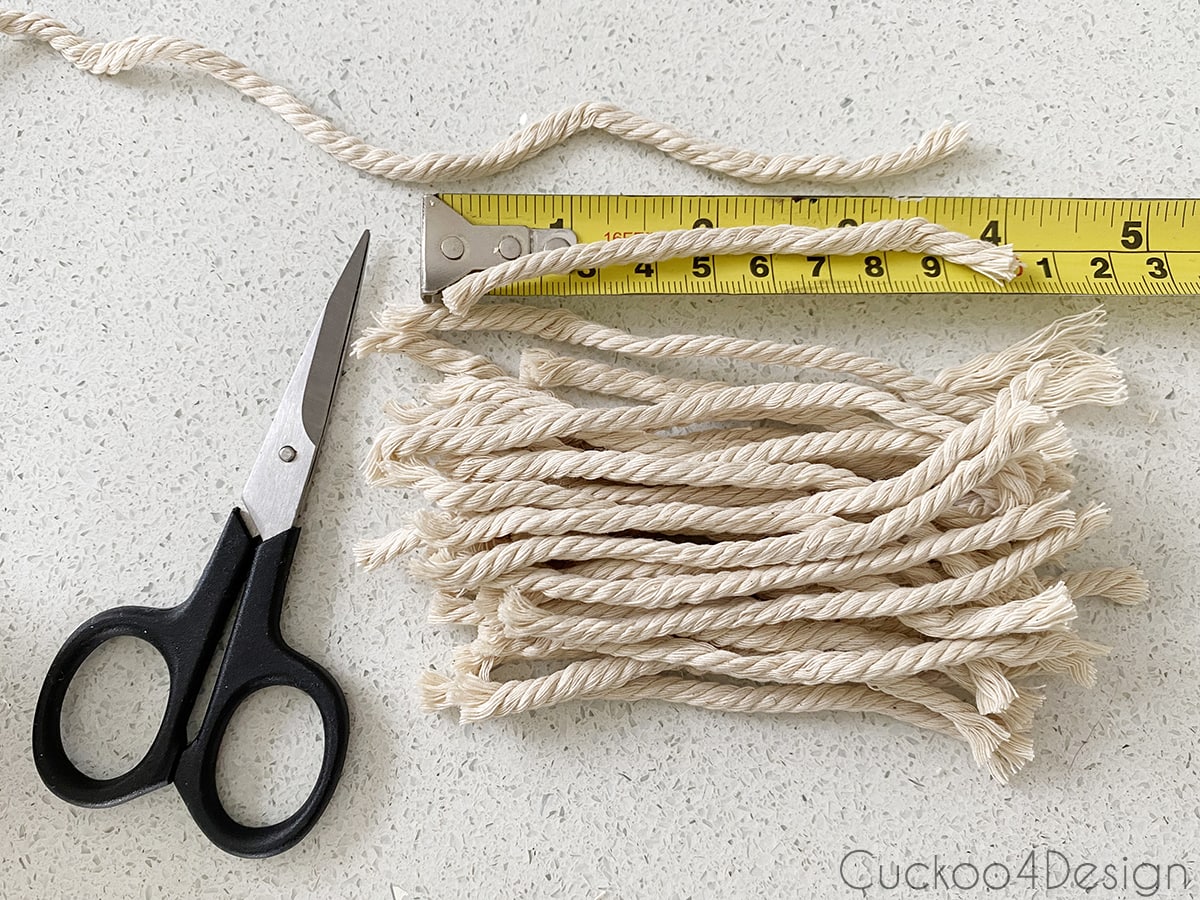
Cut the short strands of ivory macrame cord into 4-inch pieces. I needed about 25 of them, but this again depends on how big your wrist is. You can just cut more as you go, too.
Step 2: Make the Square Knots and add the fringe
This post may contain affiliate links from which I will earn a commission at no extra cost to you. View my full disclosure policy.
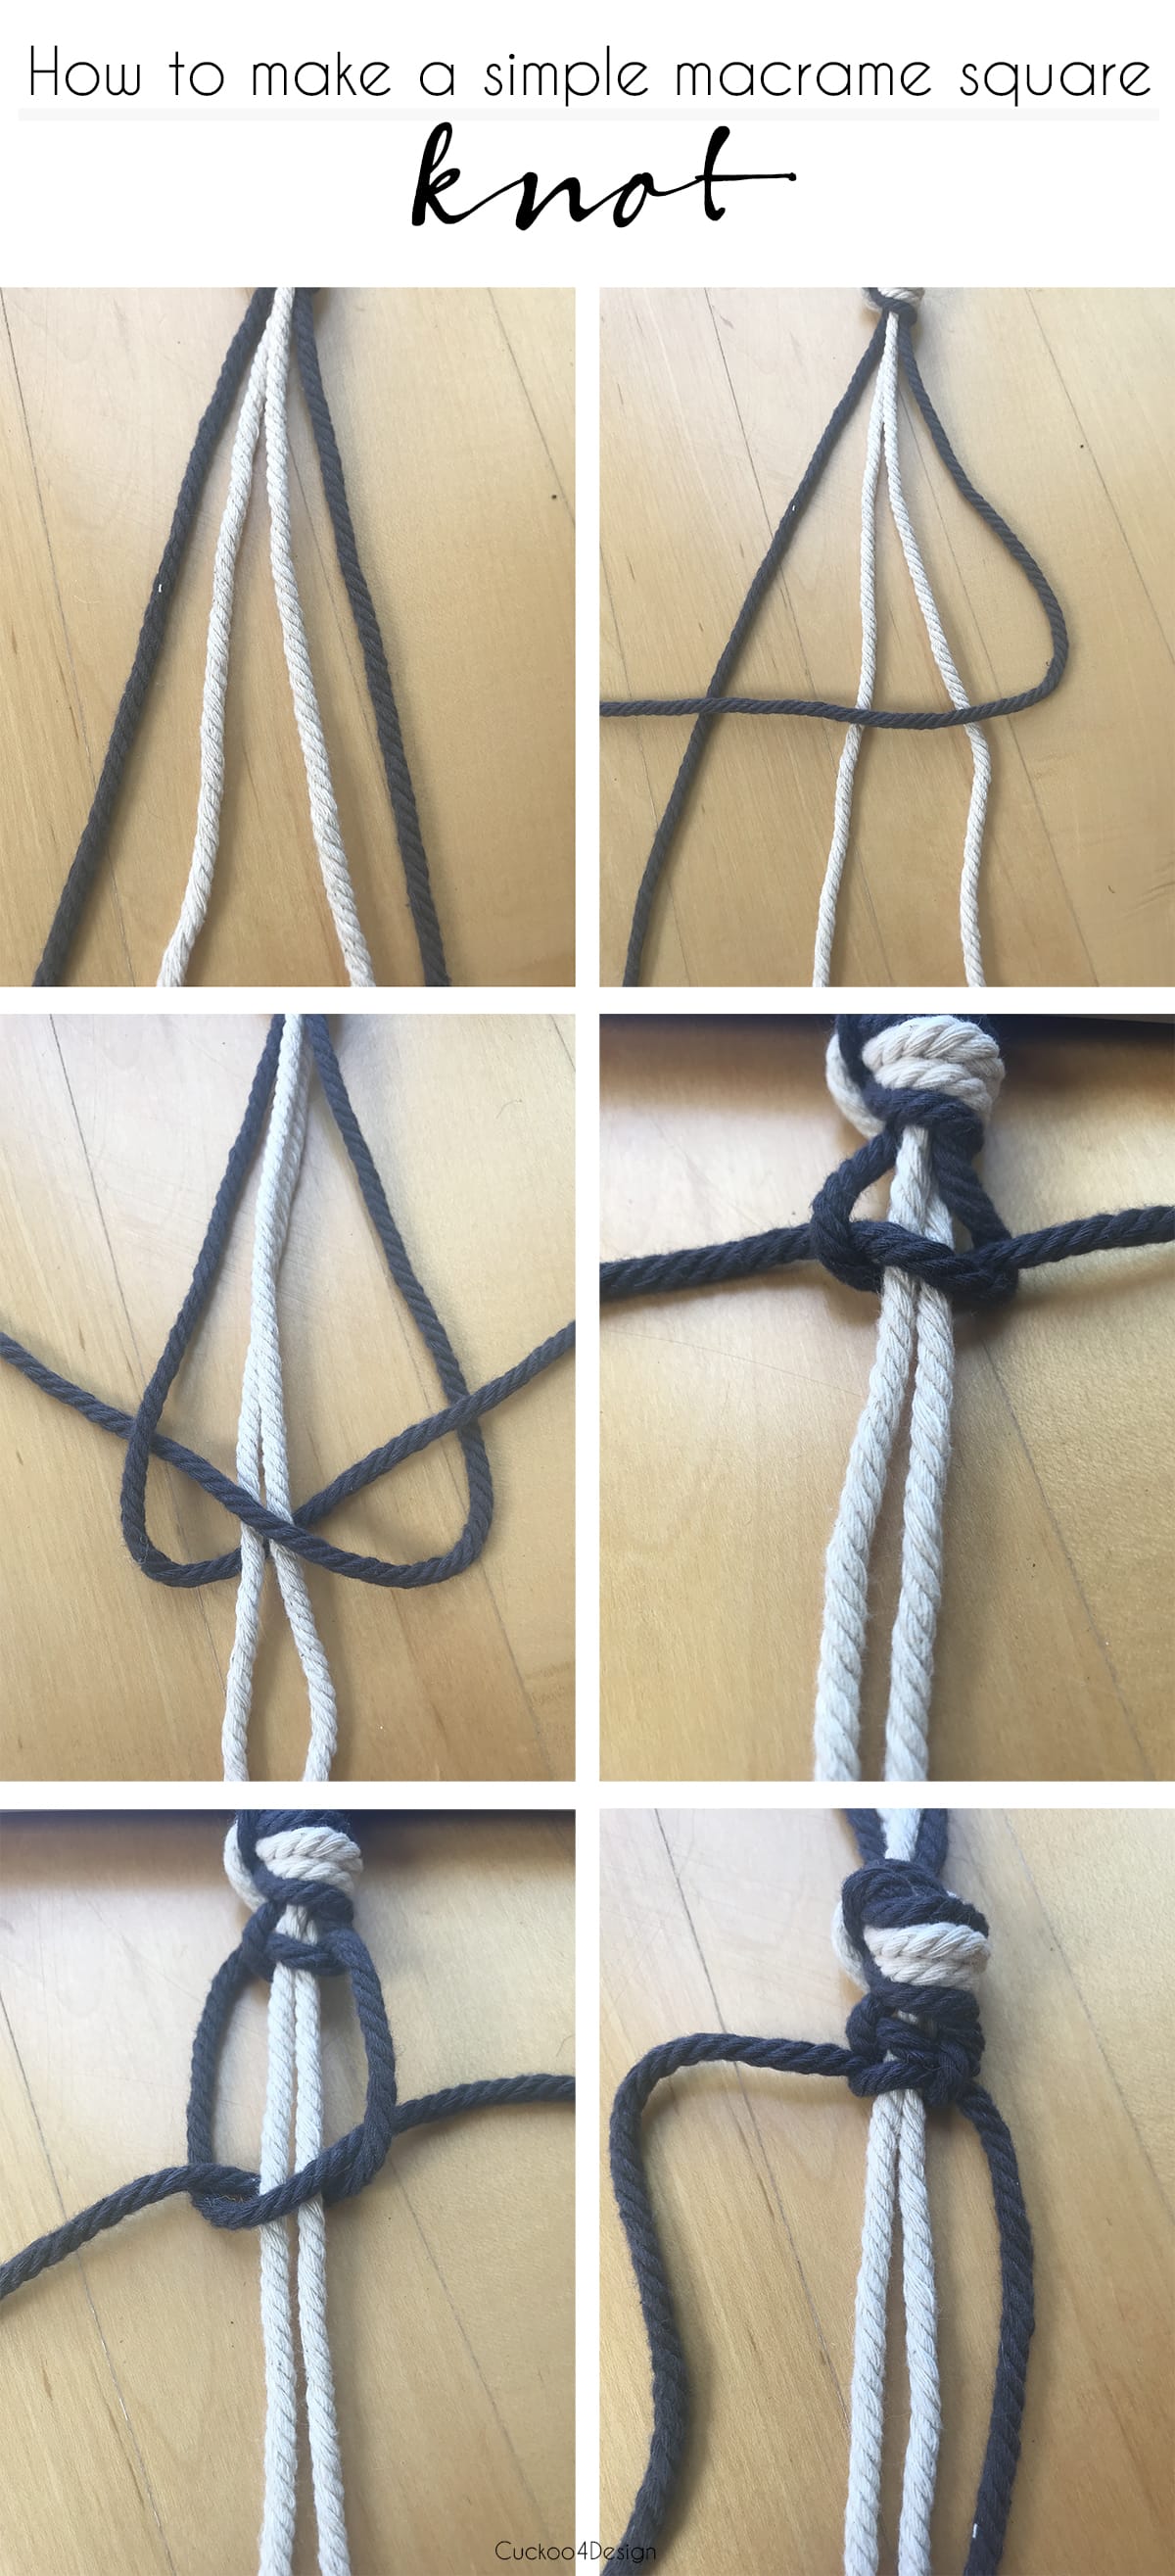
Start with the first half of the knot about 10-12 inches from the start because you will need a long piece to be able to add a tassel to the end.
Fold the left strand of the string over the center cord.
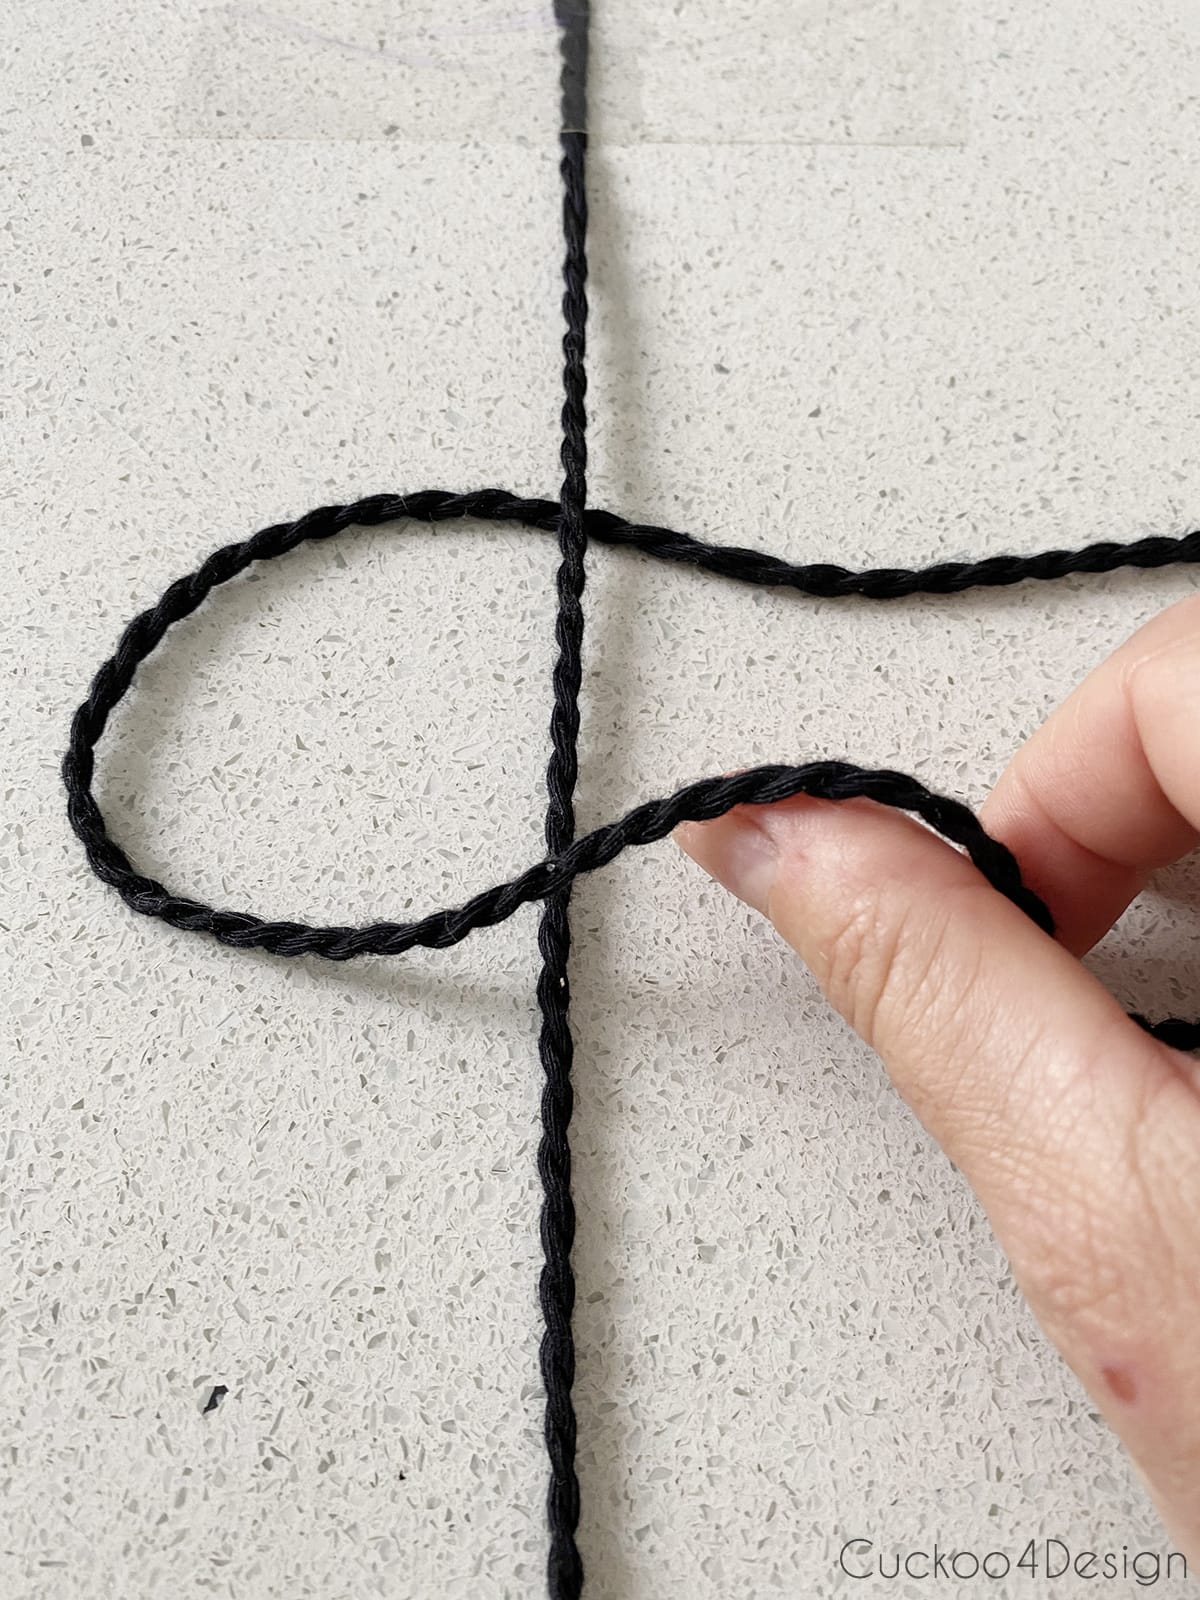
Loop the right strand behind the left and center strand as shown in the photo below.
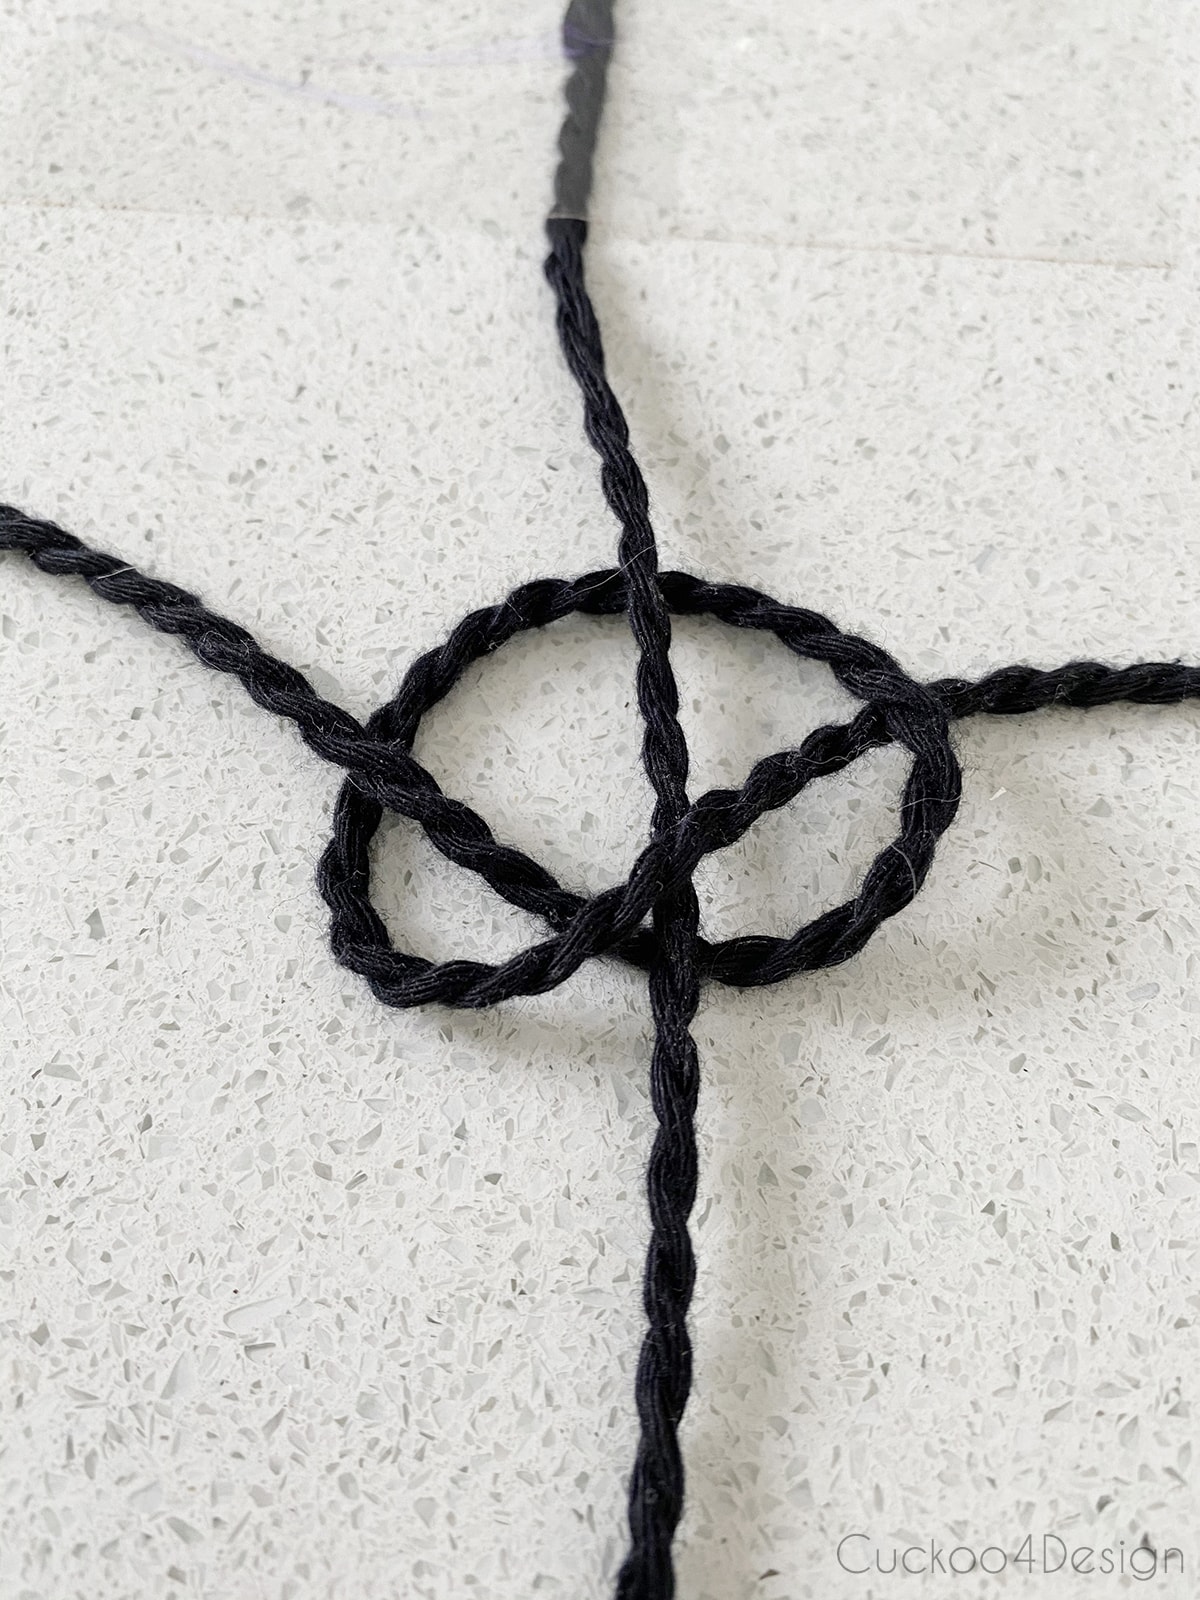
Pull everything tight for the first knot.
Then start with the right string folded over the center string and loop the left string behind, just the opposite of what you did before.
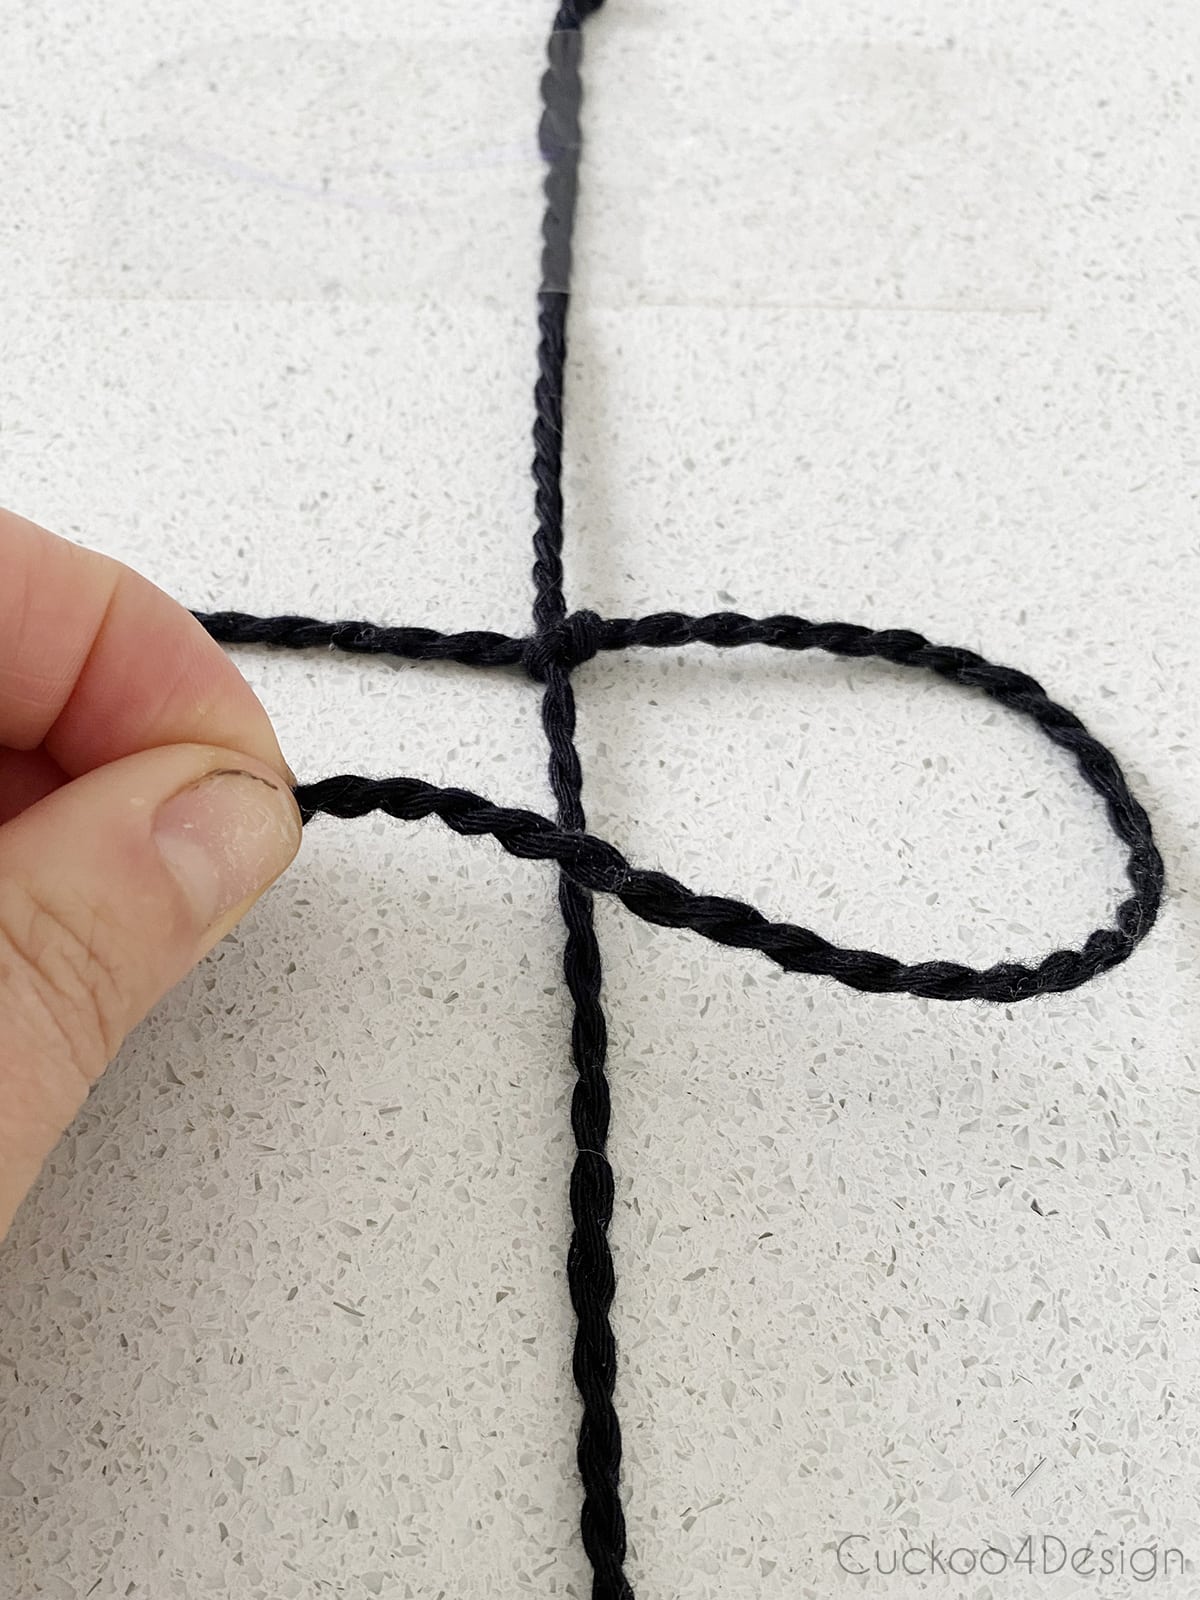
Before pulling everything tight, you add a piece of the 4-inch macrame yarn to the loop. You don’t have to hold it in place the way I did in the photo, but to me, that made it easier when I pulled the knot tight.
Then you have to repeat the same knots again. Fold the left string over and loop the right behind. You can see it a little better in my video, I hope.
When I tie the square knot I keep saying in my head “leftover middle string ” and “right over middle string with a fringe piece in”. If I don’t do that, I get confused and can’t remember which I folded over last…haha.
Below is another image from another blog post of mine where I show the square knot with two colors, but instead of one center string, I have two. You get the point, though, right? If you don’t alternate the leftover and the right over, the knot will go in a spiral around the center string, which is used for hanging planters a lot of times.
Repeat the steps of the square knots and add fringe until you reach the length of your wrist circumference. As I mentioned earlier, you can just skip the fringed strands for a simple square knot design bracelet.
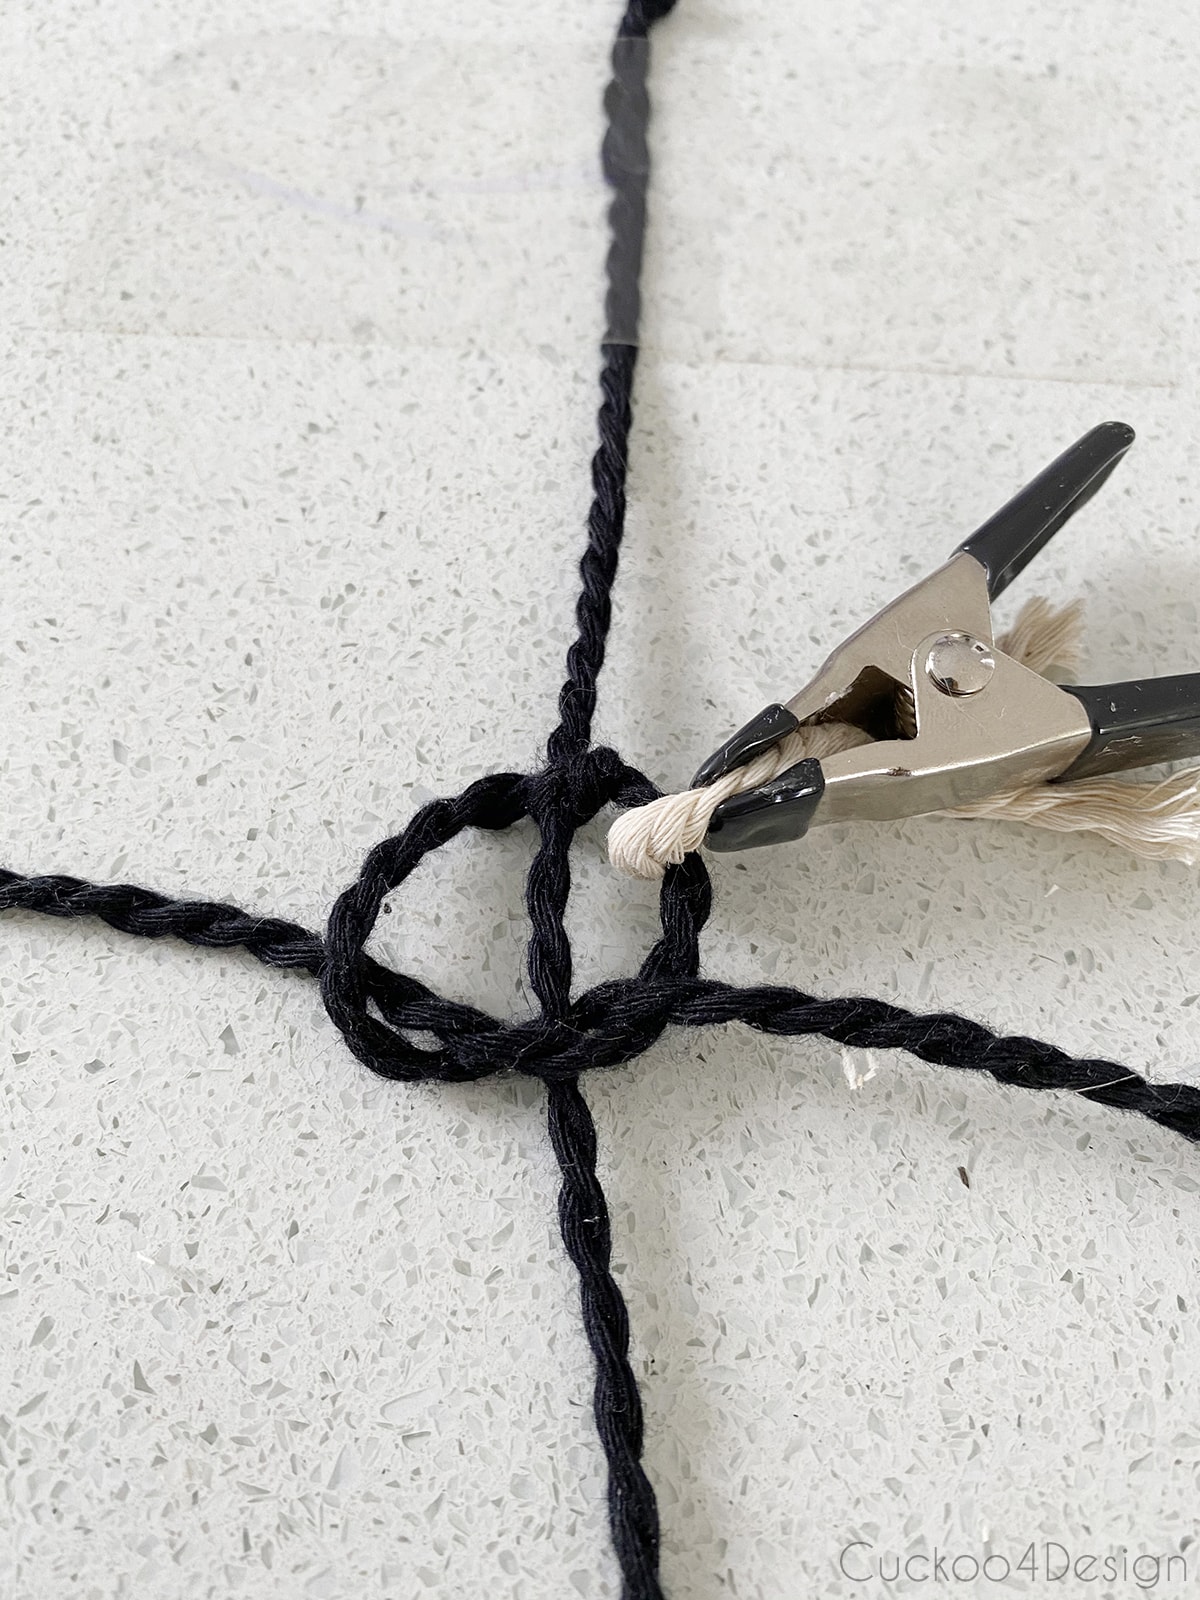
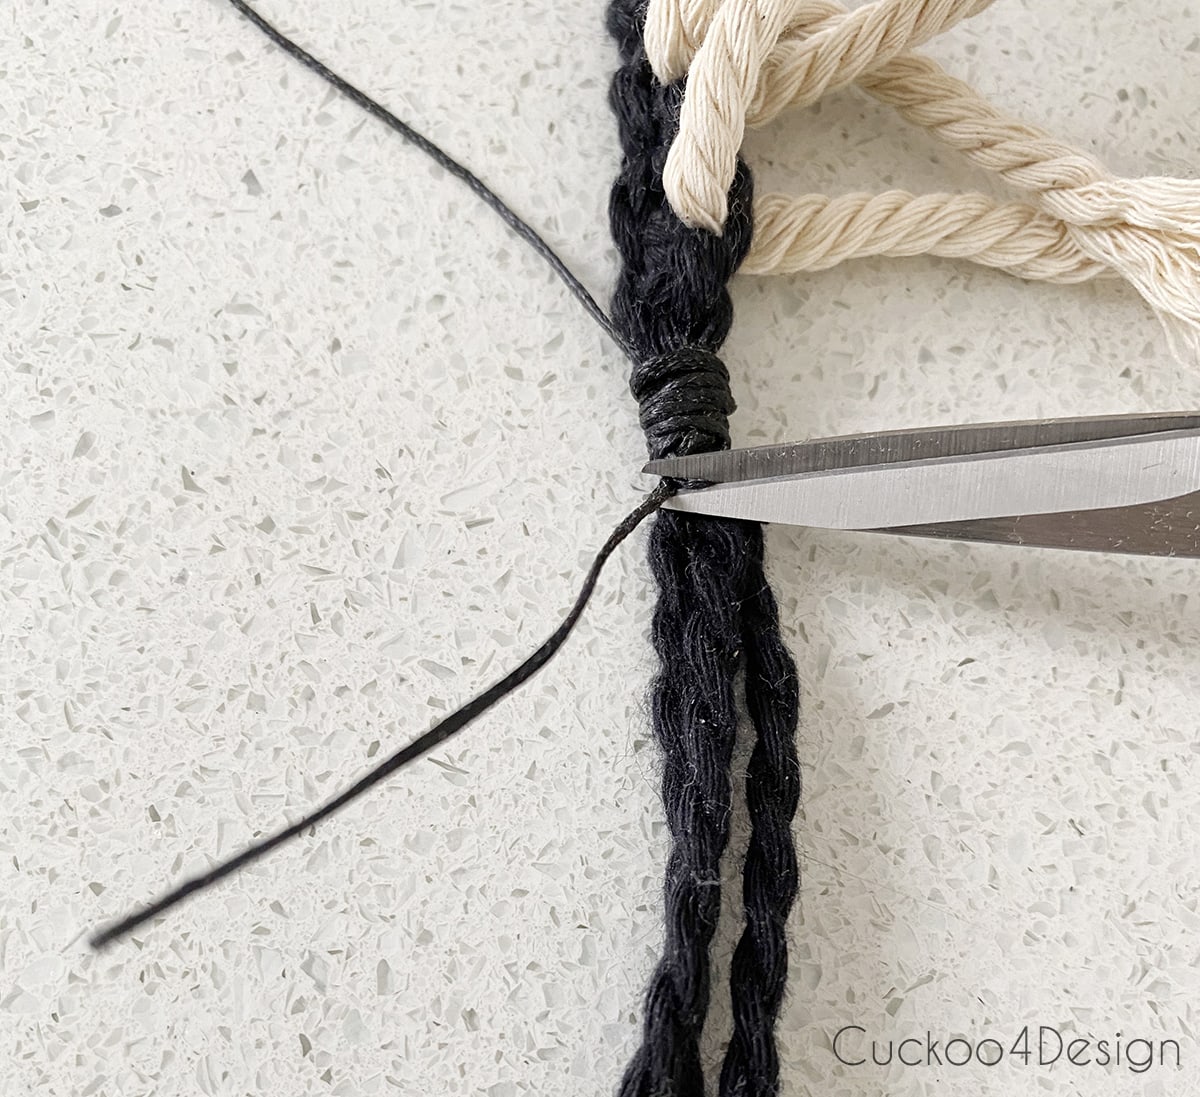
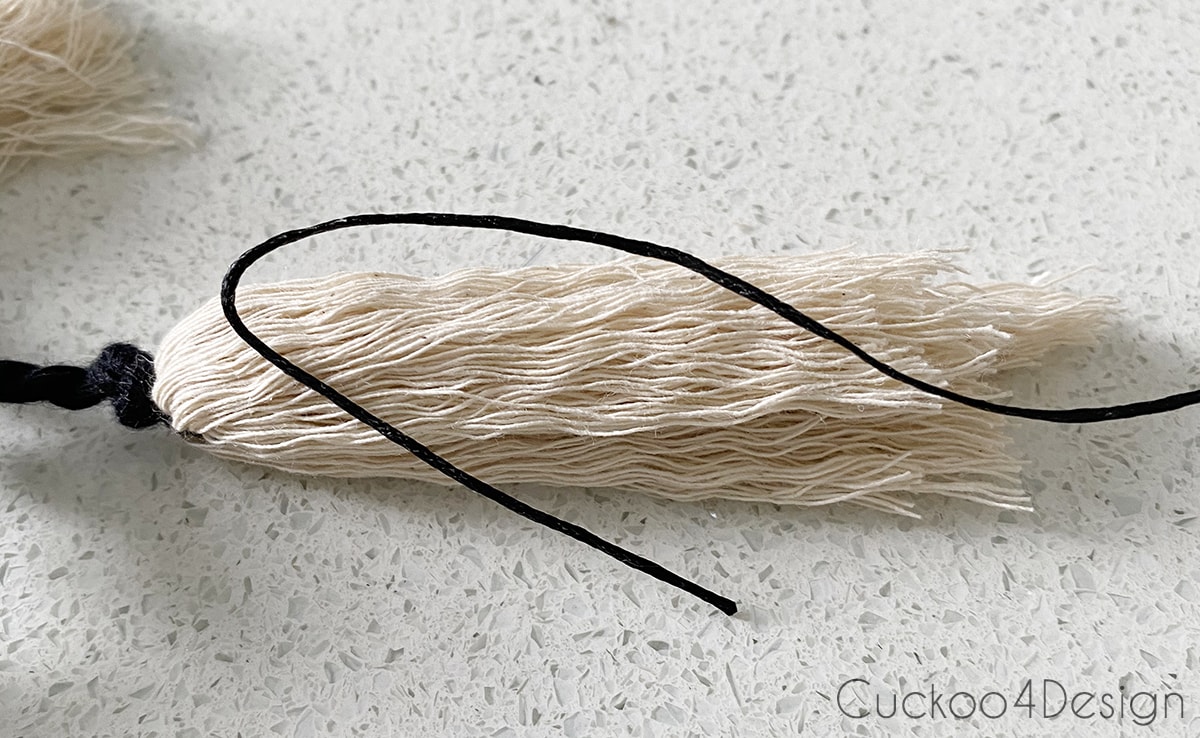
At the end of the fringe part, you can finish the square knot off with another square knot and glue the way I’m showing you in the sliding square knots further down, or I used the small wax cord to end it with the gathering-knot method. I’m not even sure why I decided to go that route. I just like the look, I guess, but it is preferential.
Start by making a U-shaped loop at the top and wrap the cord around firmly, over and over again, from top to bottom.

Then stick the cord through the remaining loop that is sticking out and pull at the bottom string until the loop and top string disappear under the wrapped around the string.
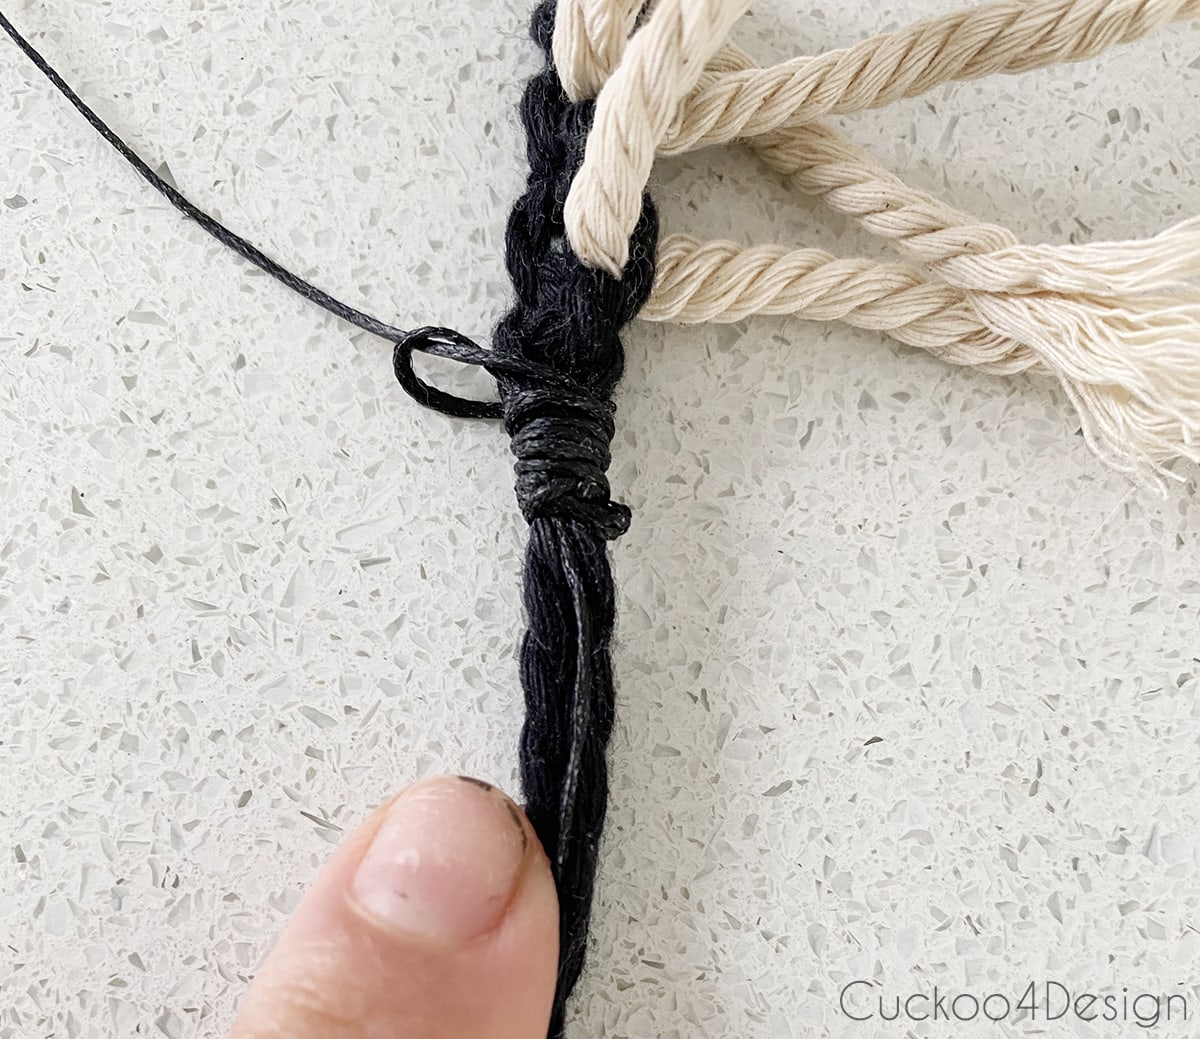
Trim the remaining ends.
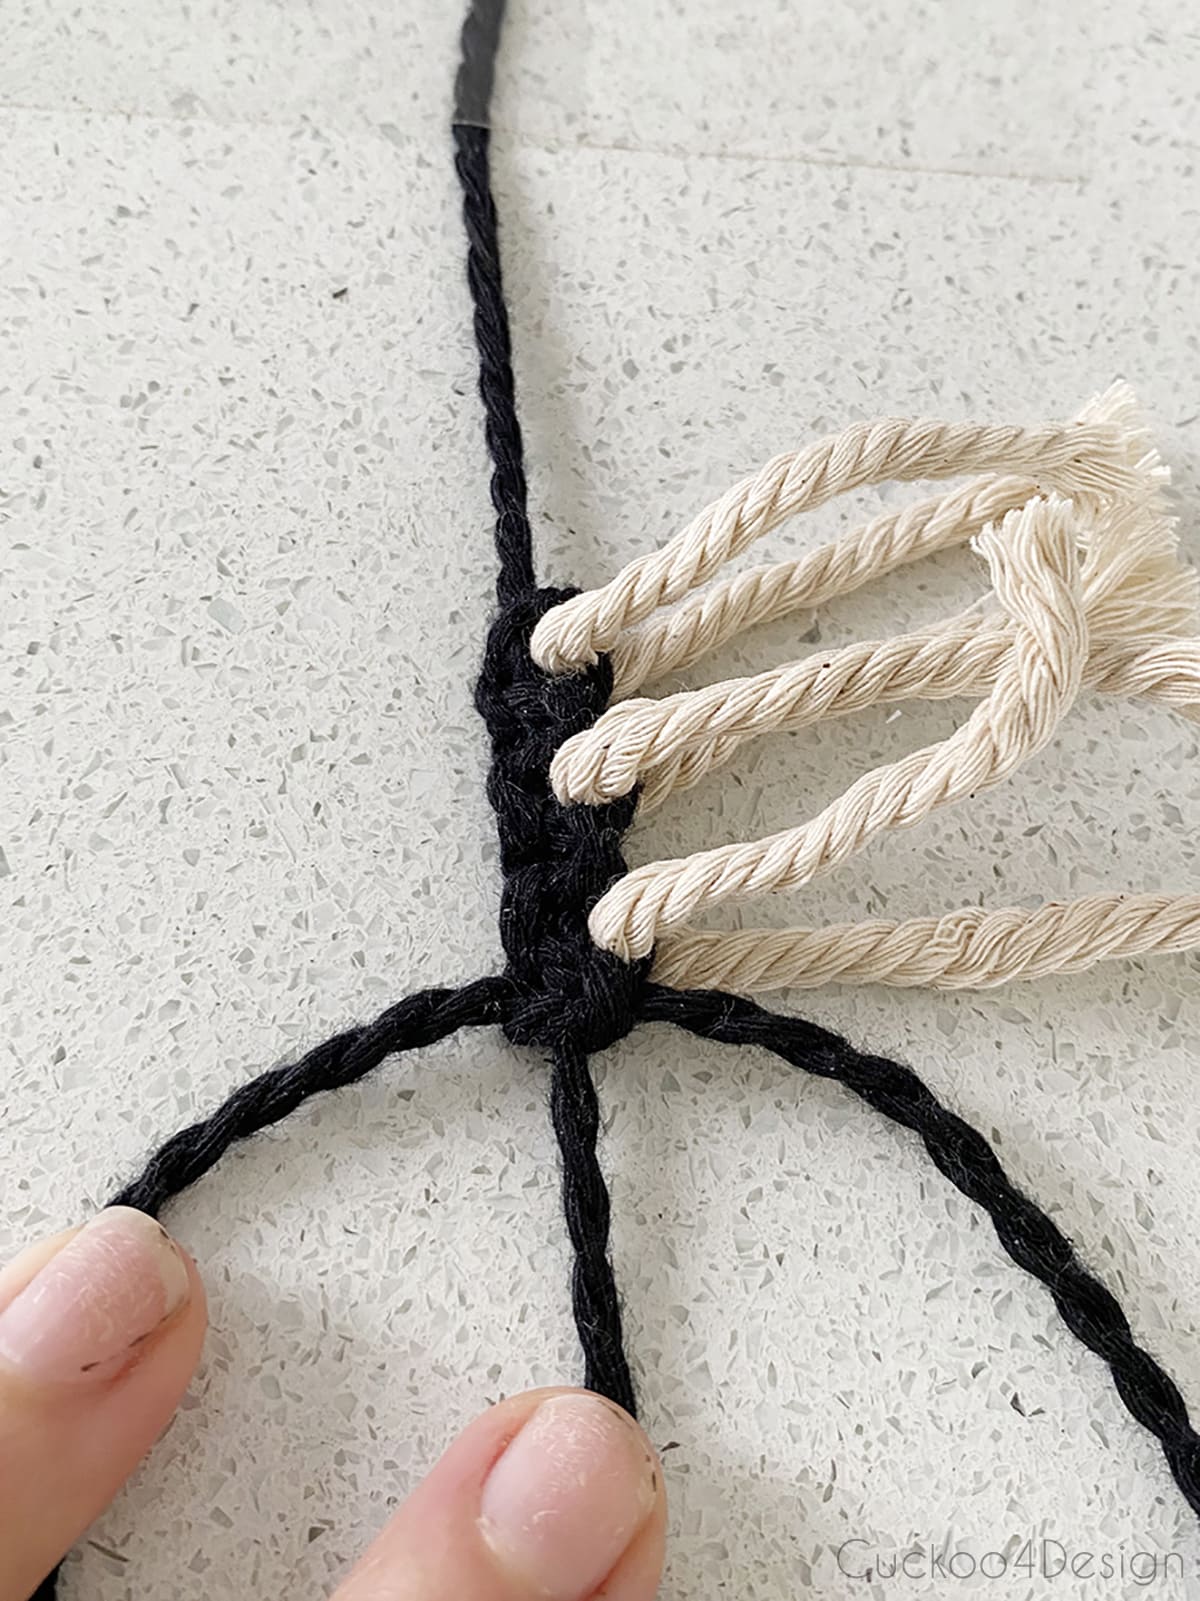
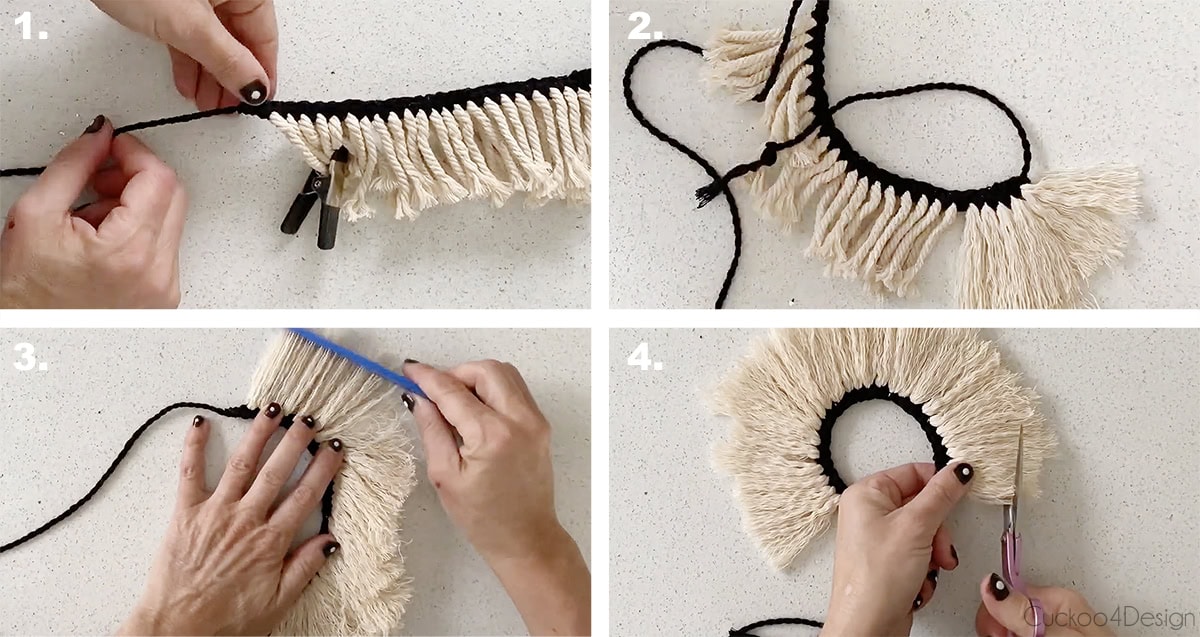
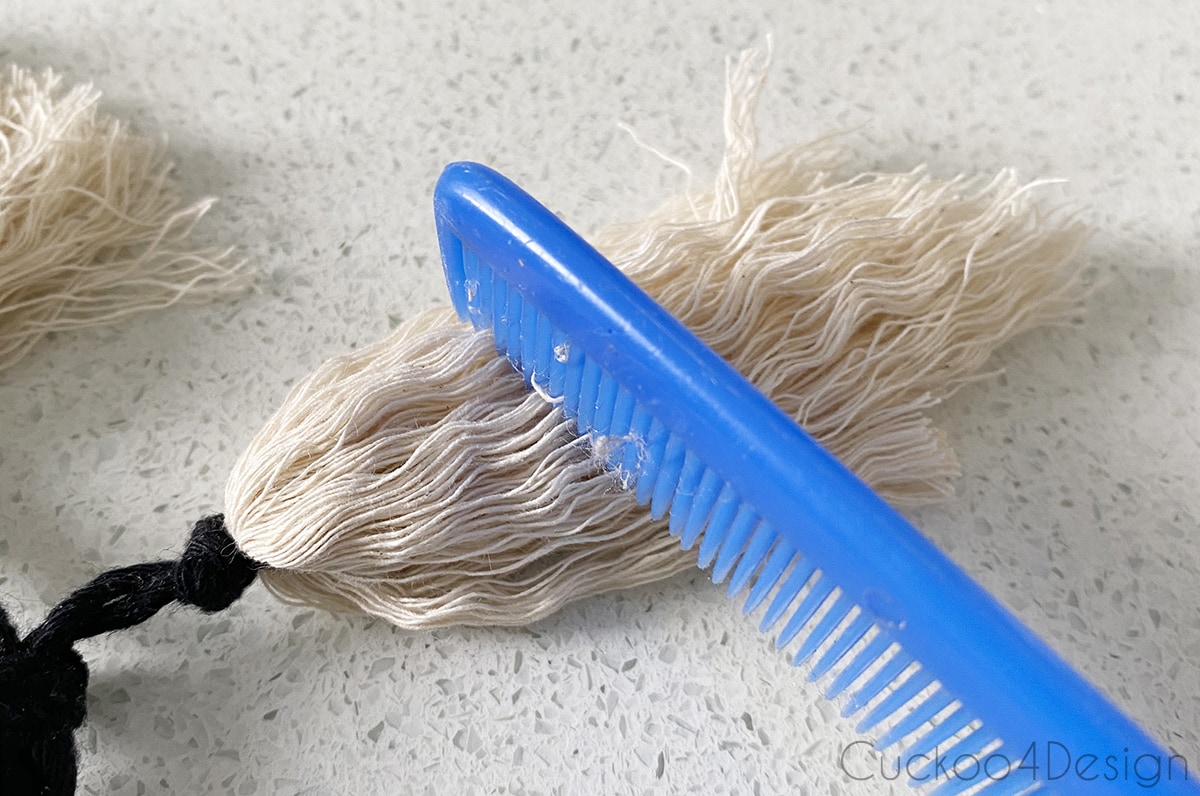
Step 3: Unraveling, combing, and trimming the fringe
Next, open up and unravel all the fringe as shown below and in the video. When they are all opened, comb them out straight and trim them to the desired length of maybe 2 inches or whatever you’d like.
Step 4: Adding the adjustable closure of the bracelet
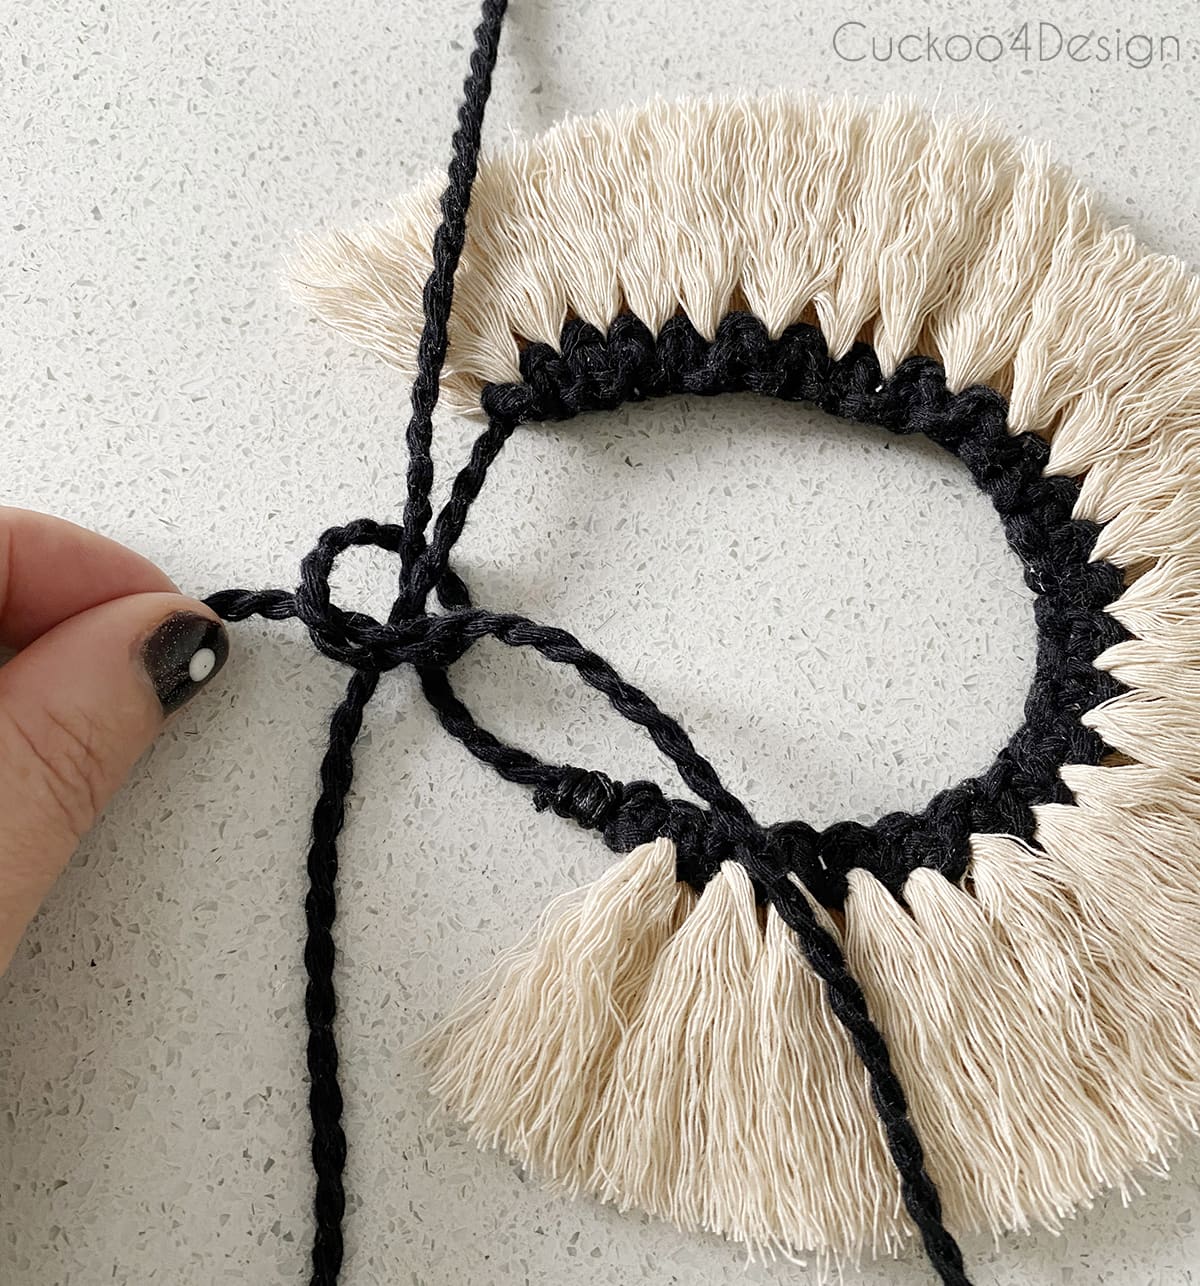
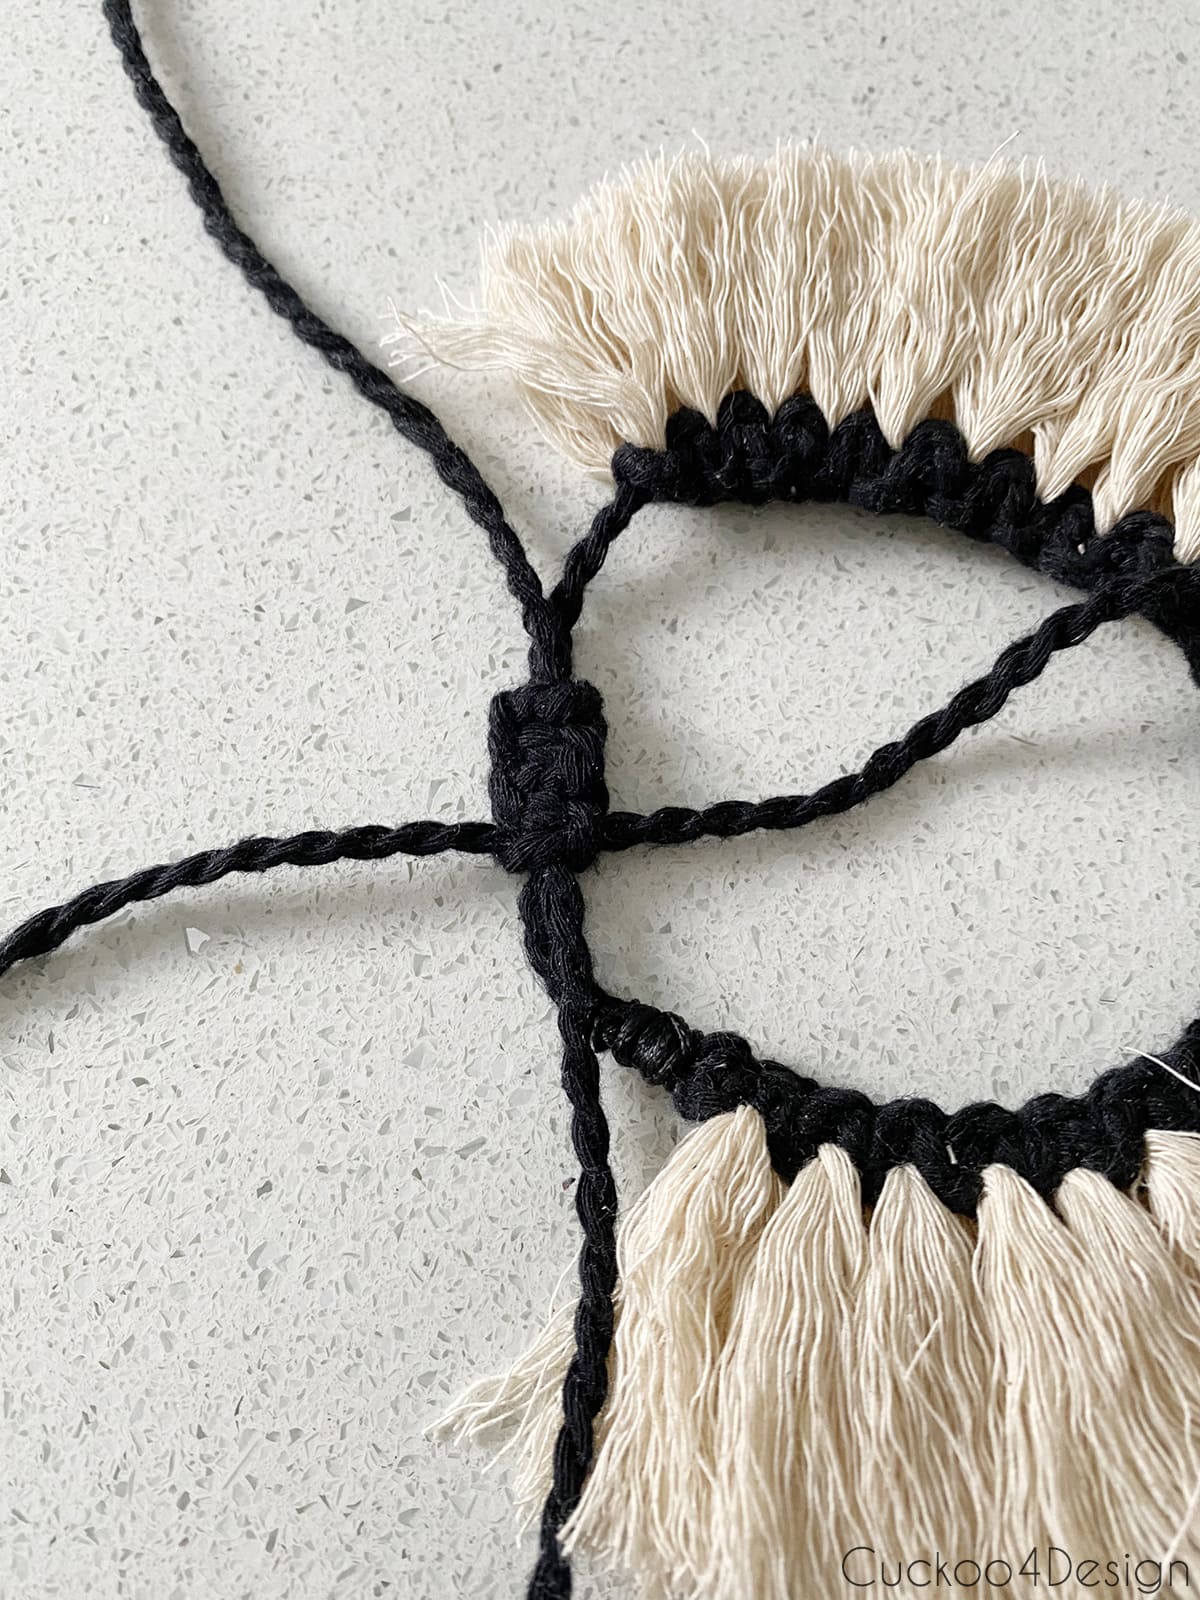
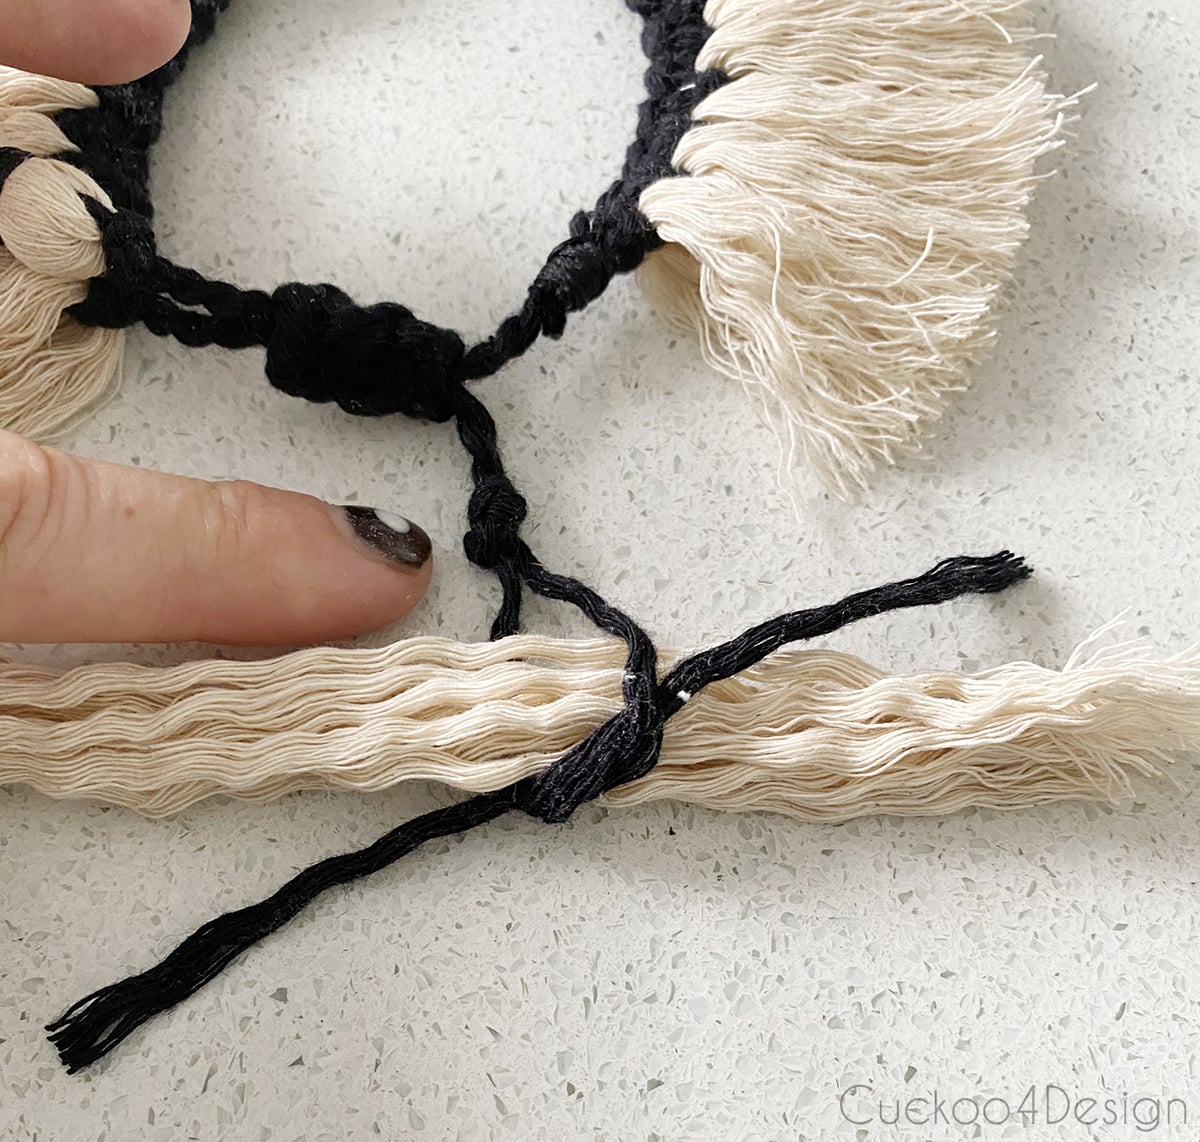
You need to make the bracelet adjustable with the sliding square knots or sliding clasp that I mentioned above.
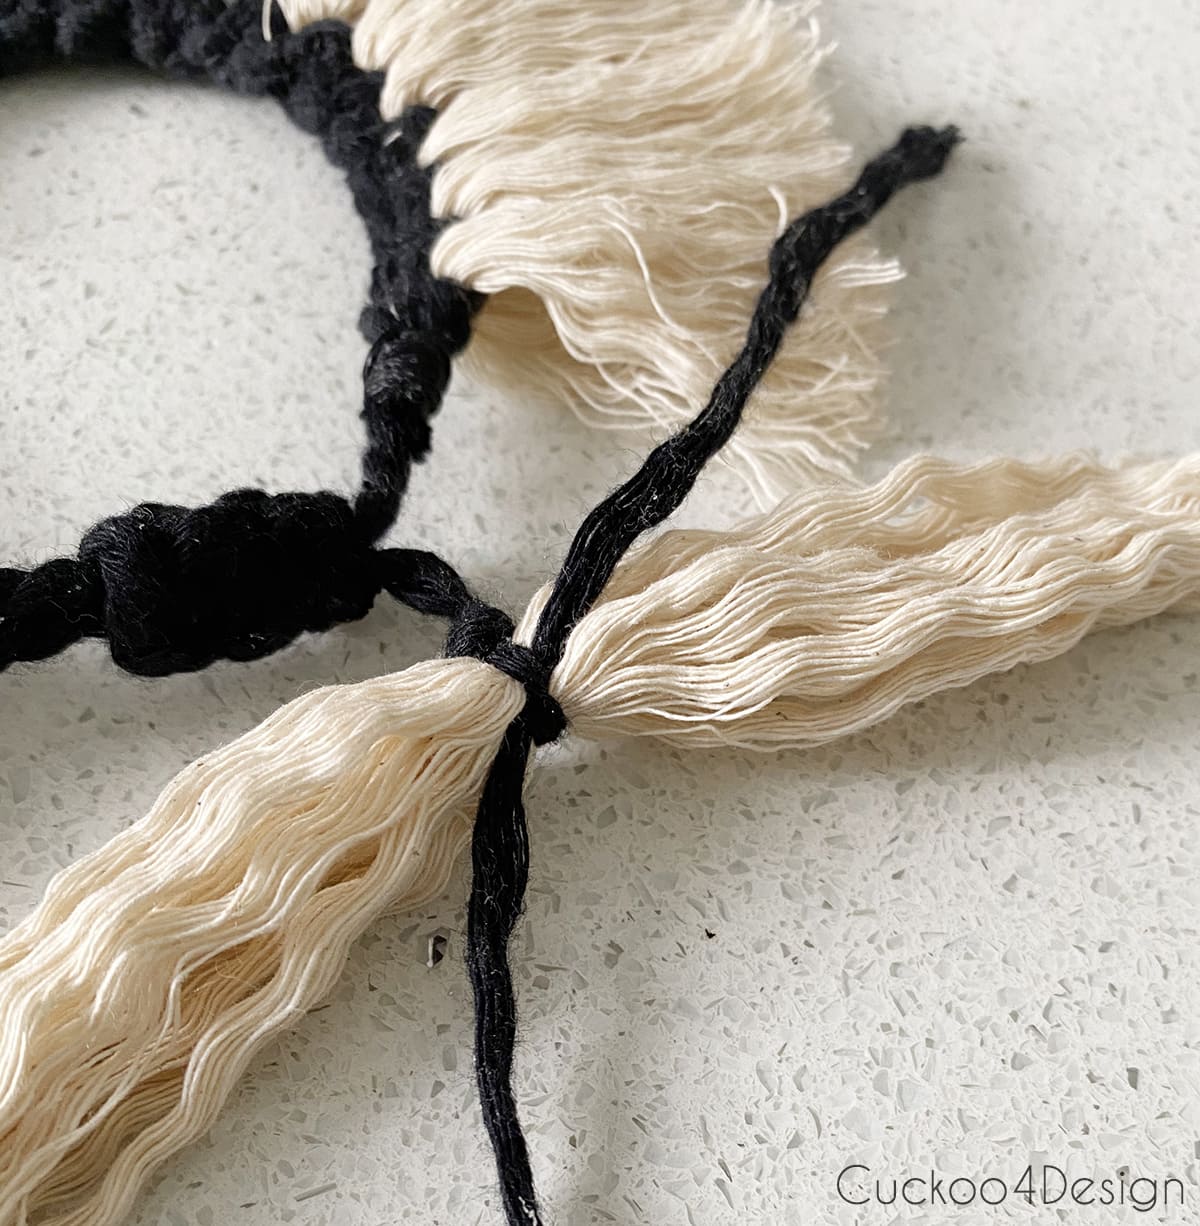
Cross the bracelet ends the way I’m showing below.

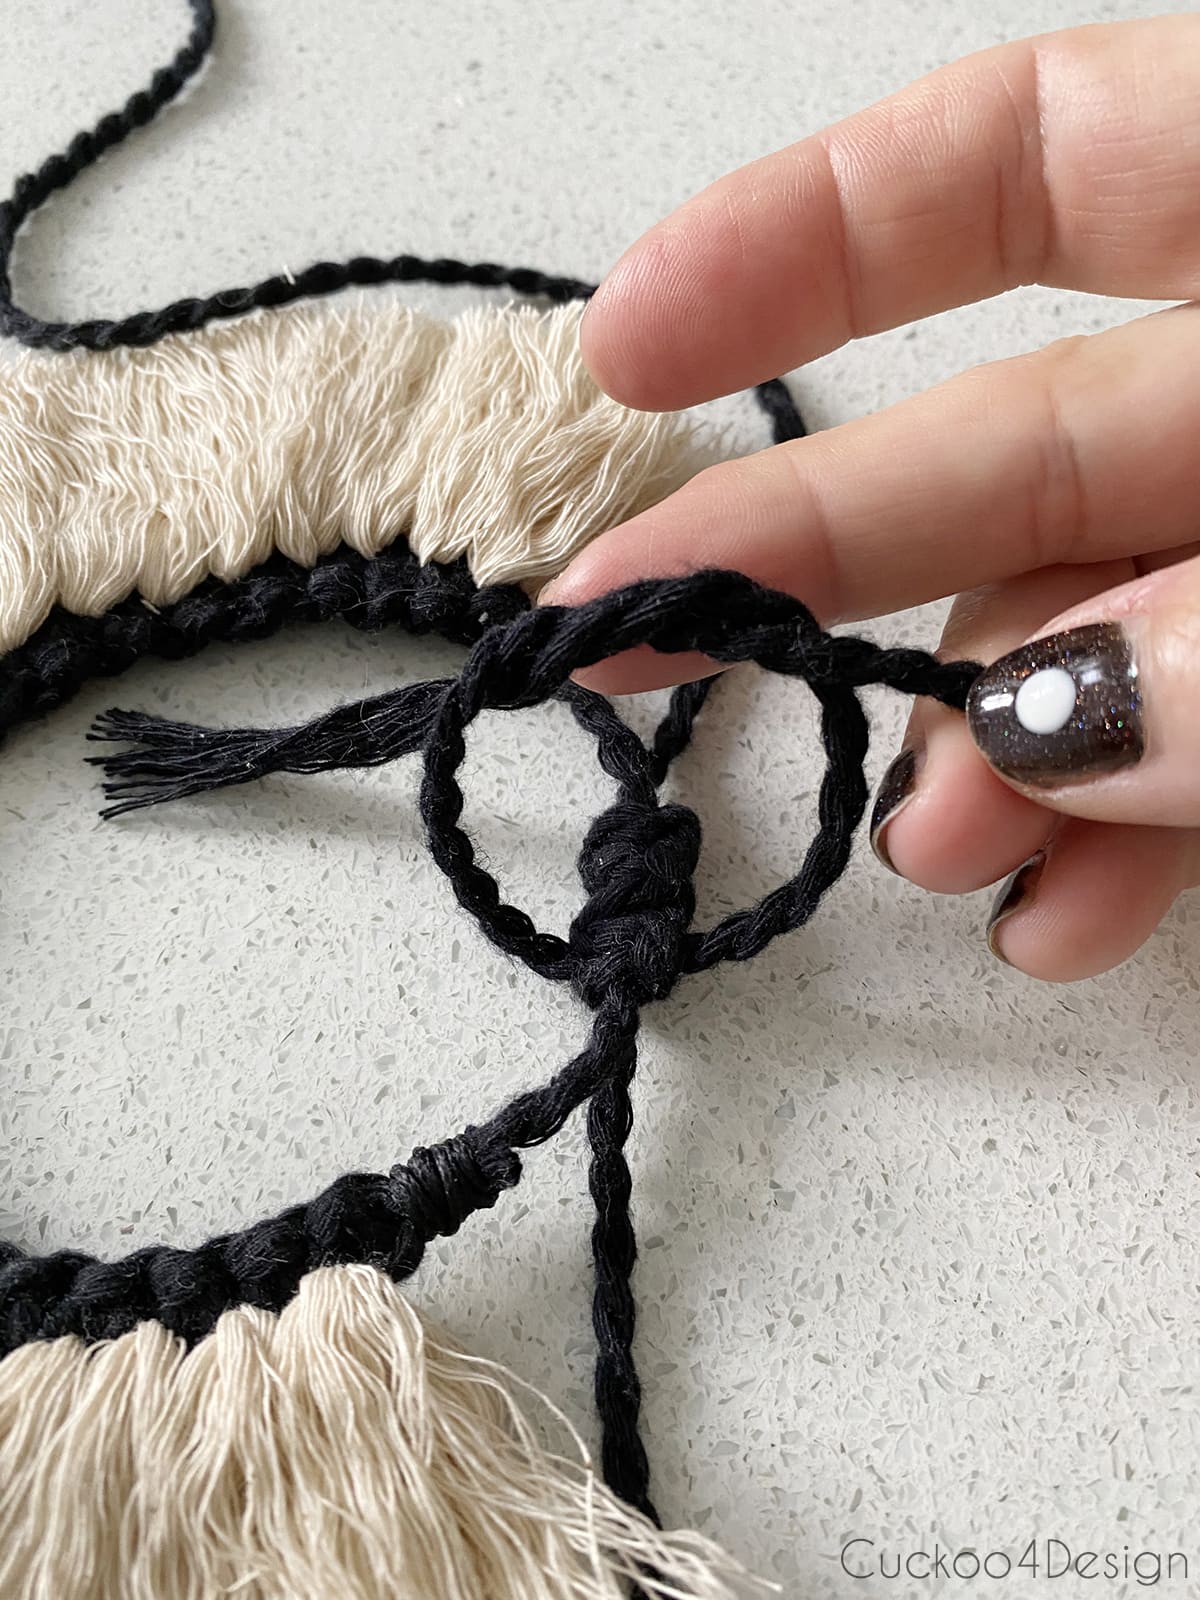
Then repeat what you just did at the beginning of the bracelet with the square knots, but this time over the two bracelet end pieces. My string piece was about 15 inches long.
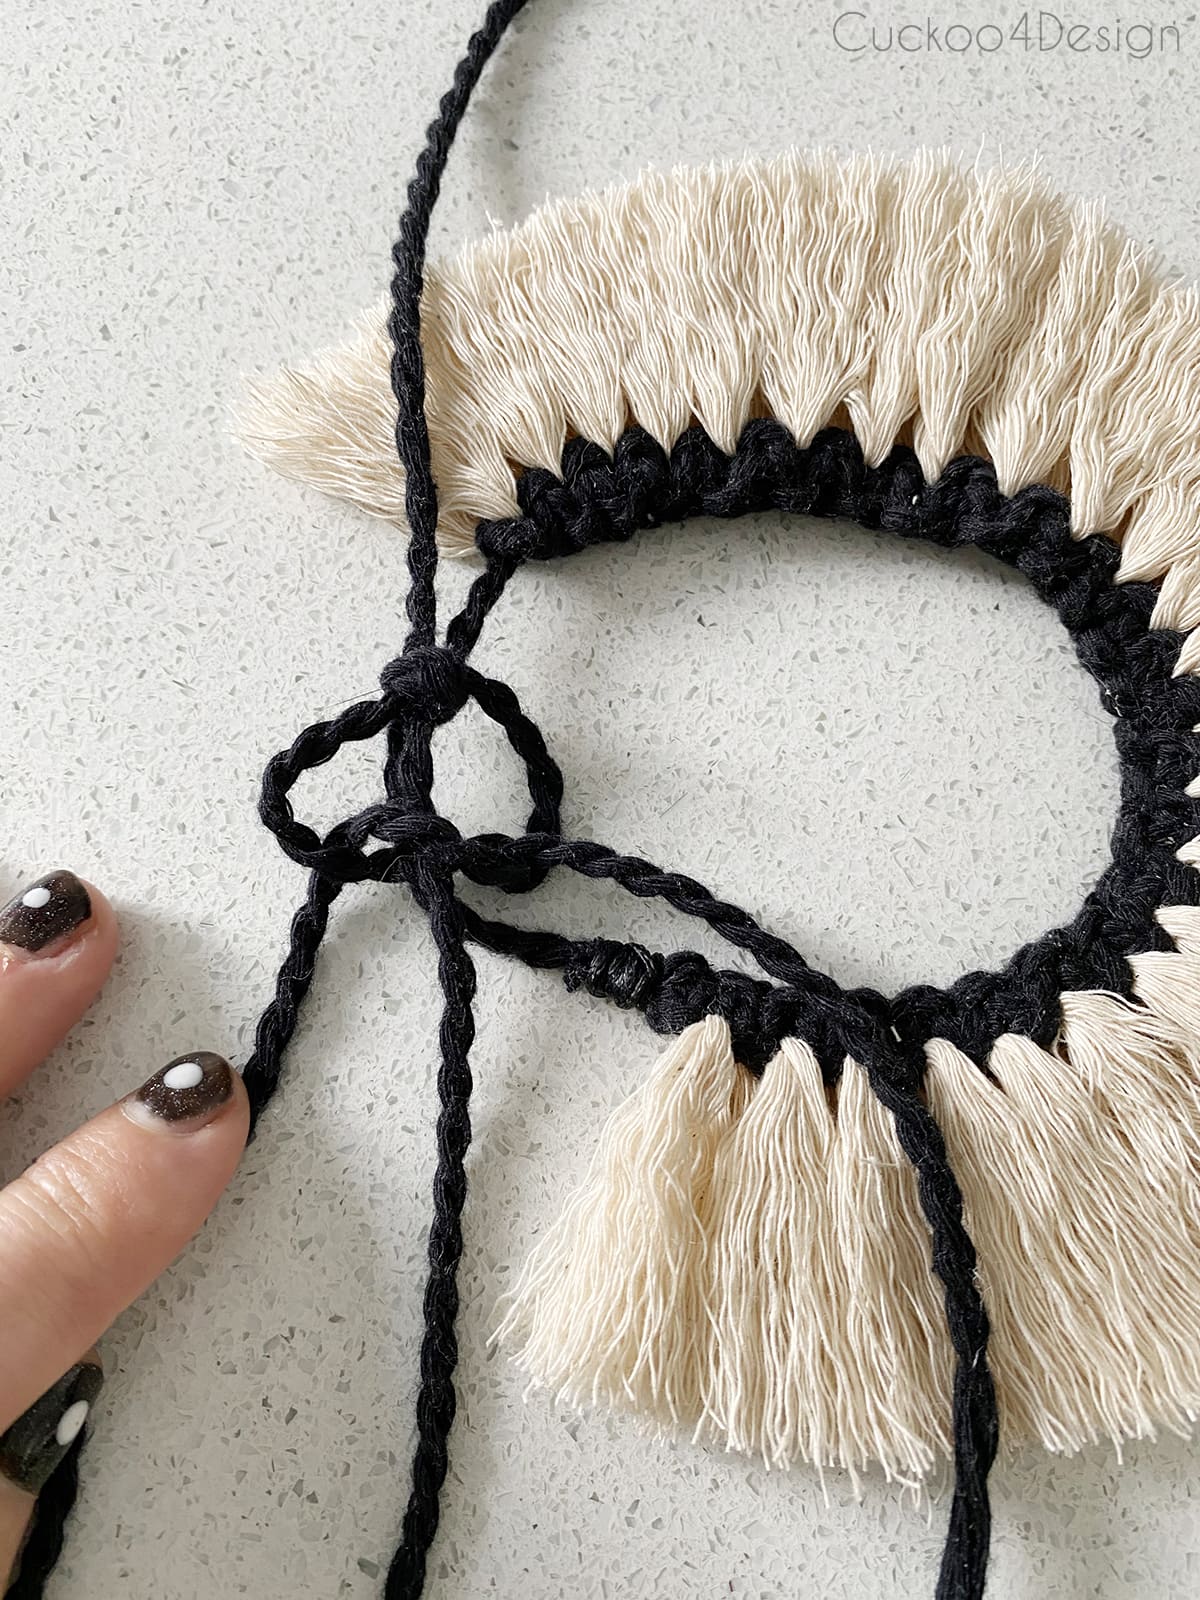
I tied about 3 square knots and was happy with the results, and could easily slip the bracelet over my wrist and tighten it.
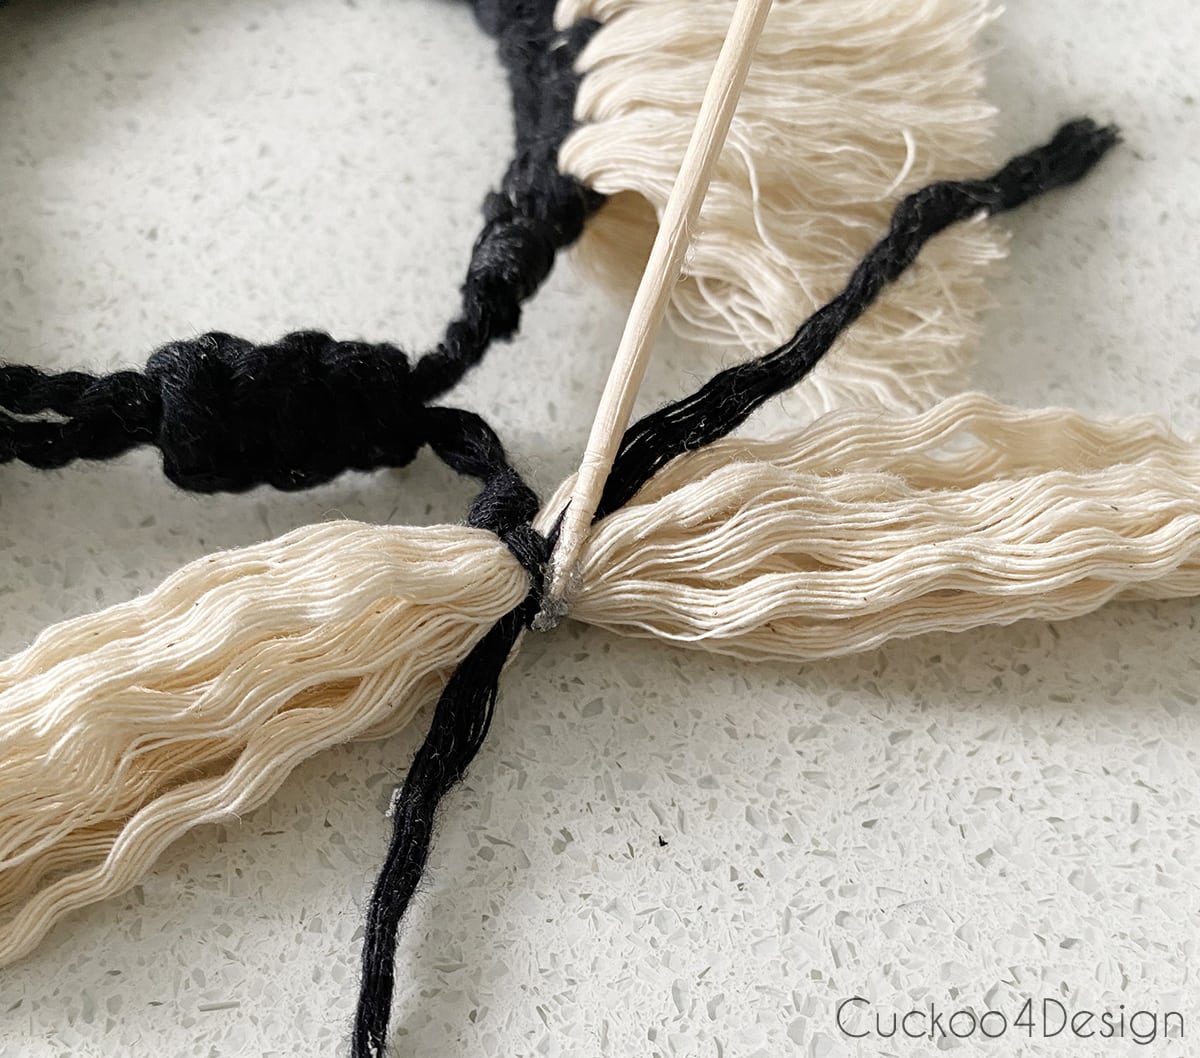
To finish it, I tied a single normal knot, not over the center string, because you want to avoid getting glue on the center string. This would result in not being able to slide the closure.
Add some glue with the tip of a toothpick to the knot.
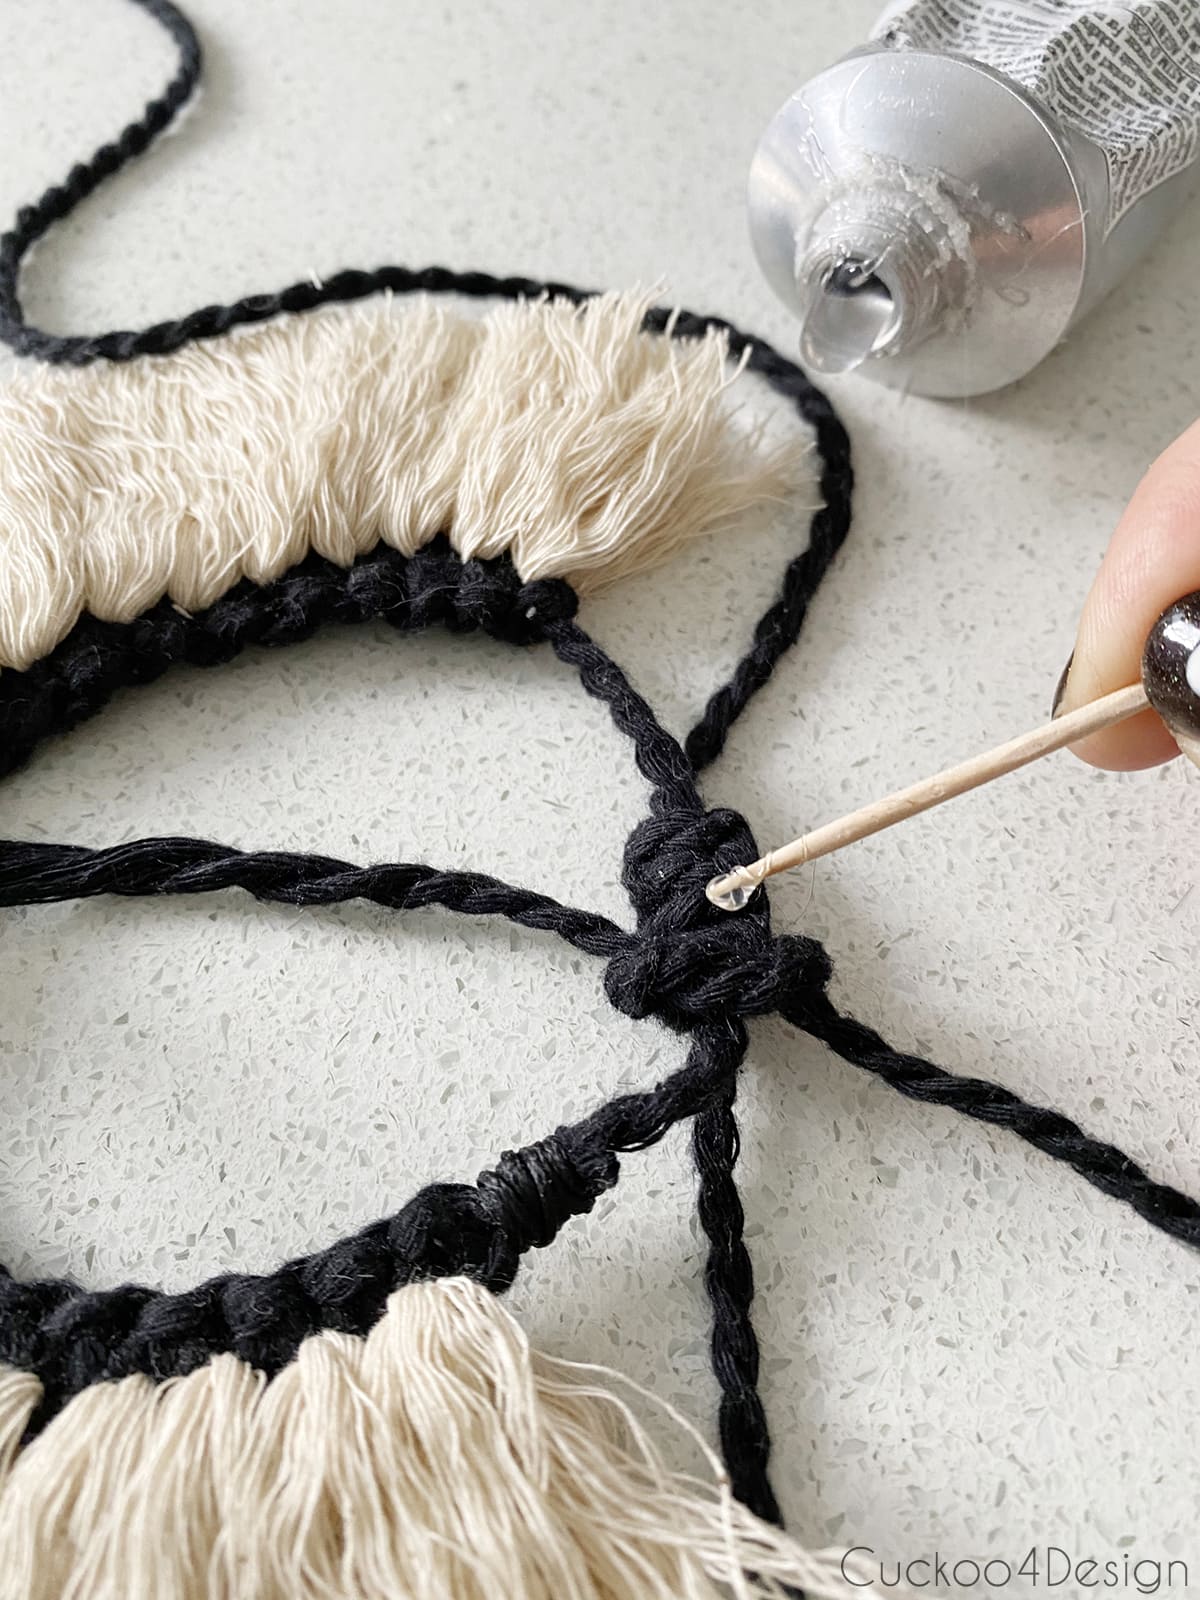
Make sure the knot is securely pulled tight over the glue and trim the ends. You might want to clamp the knot if needed.
Step 5: Adding the tassel detail to the knotted bracelet ends
I love making tassels, and in this case, they are the perfect detail again for this bracelet.
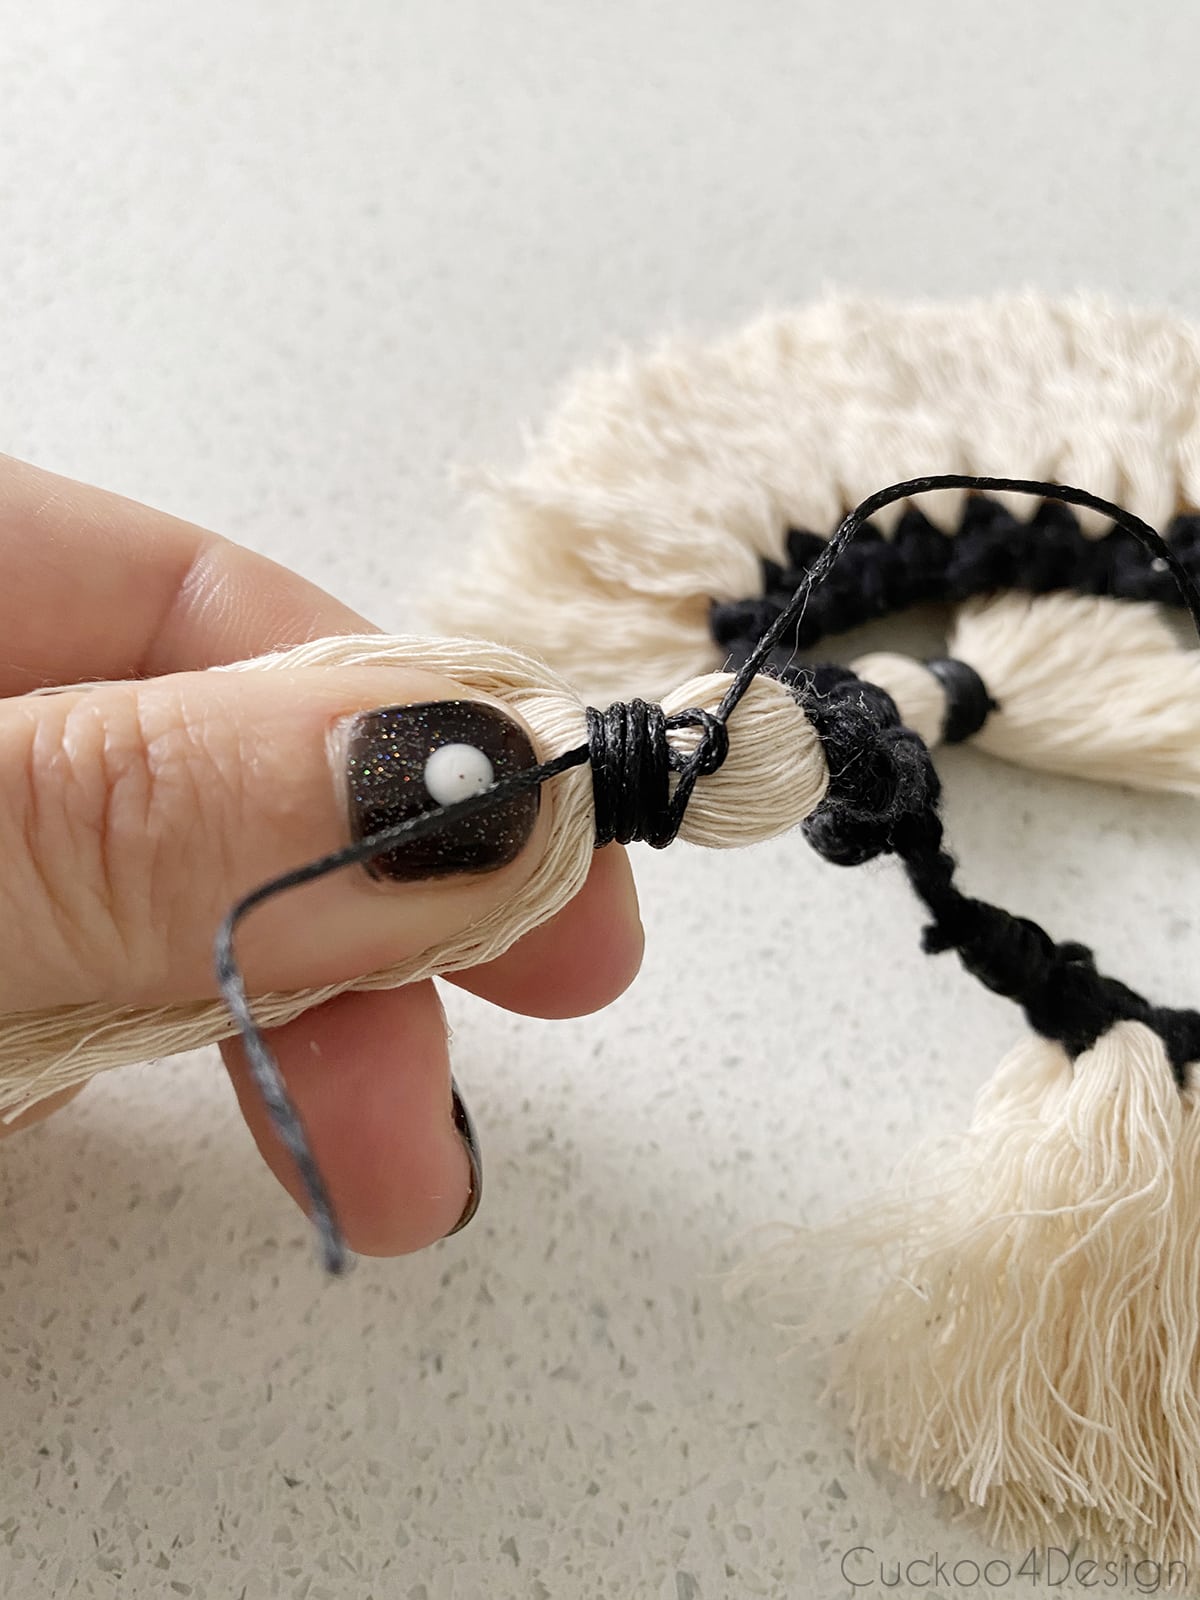
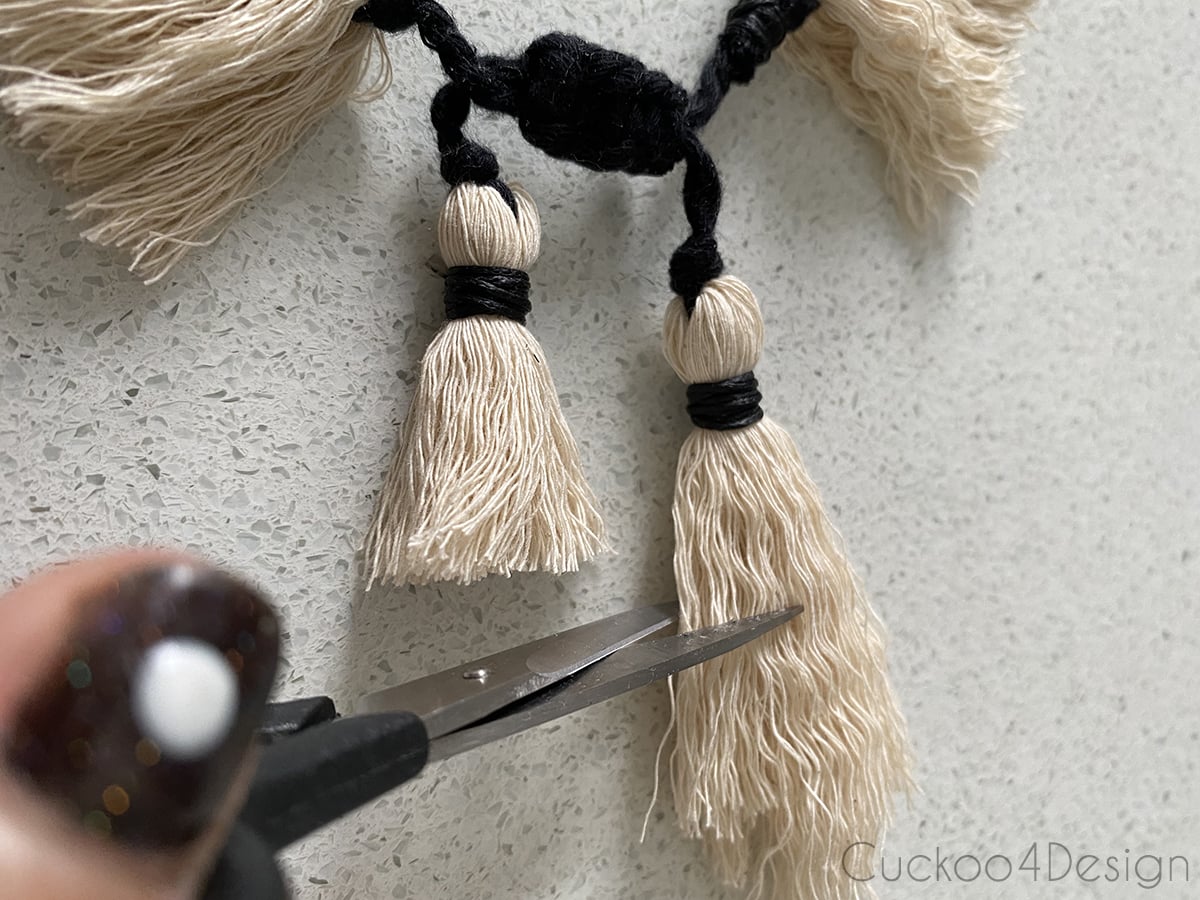
I added a knot to the two strings where I wanted the tassel to start. It is about 1.5 inches down from the fringe part.
I unraveled three pieces of 5-inch ivory macrame yarn that I precut for each tassel. Tie the unraveled pieces to the end as shown below.
Make sure you tie a double knot and pull it very tight.
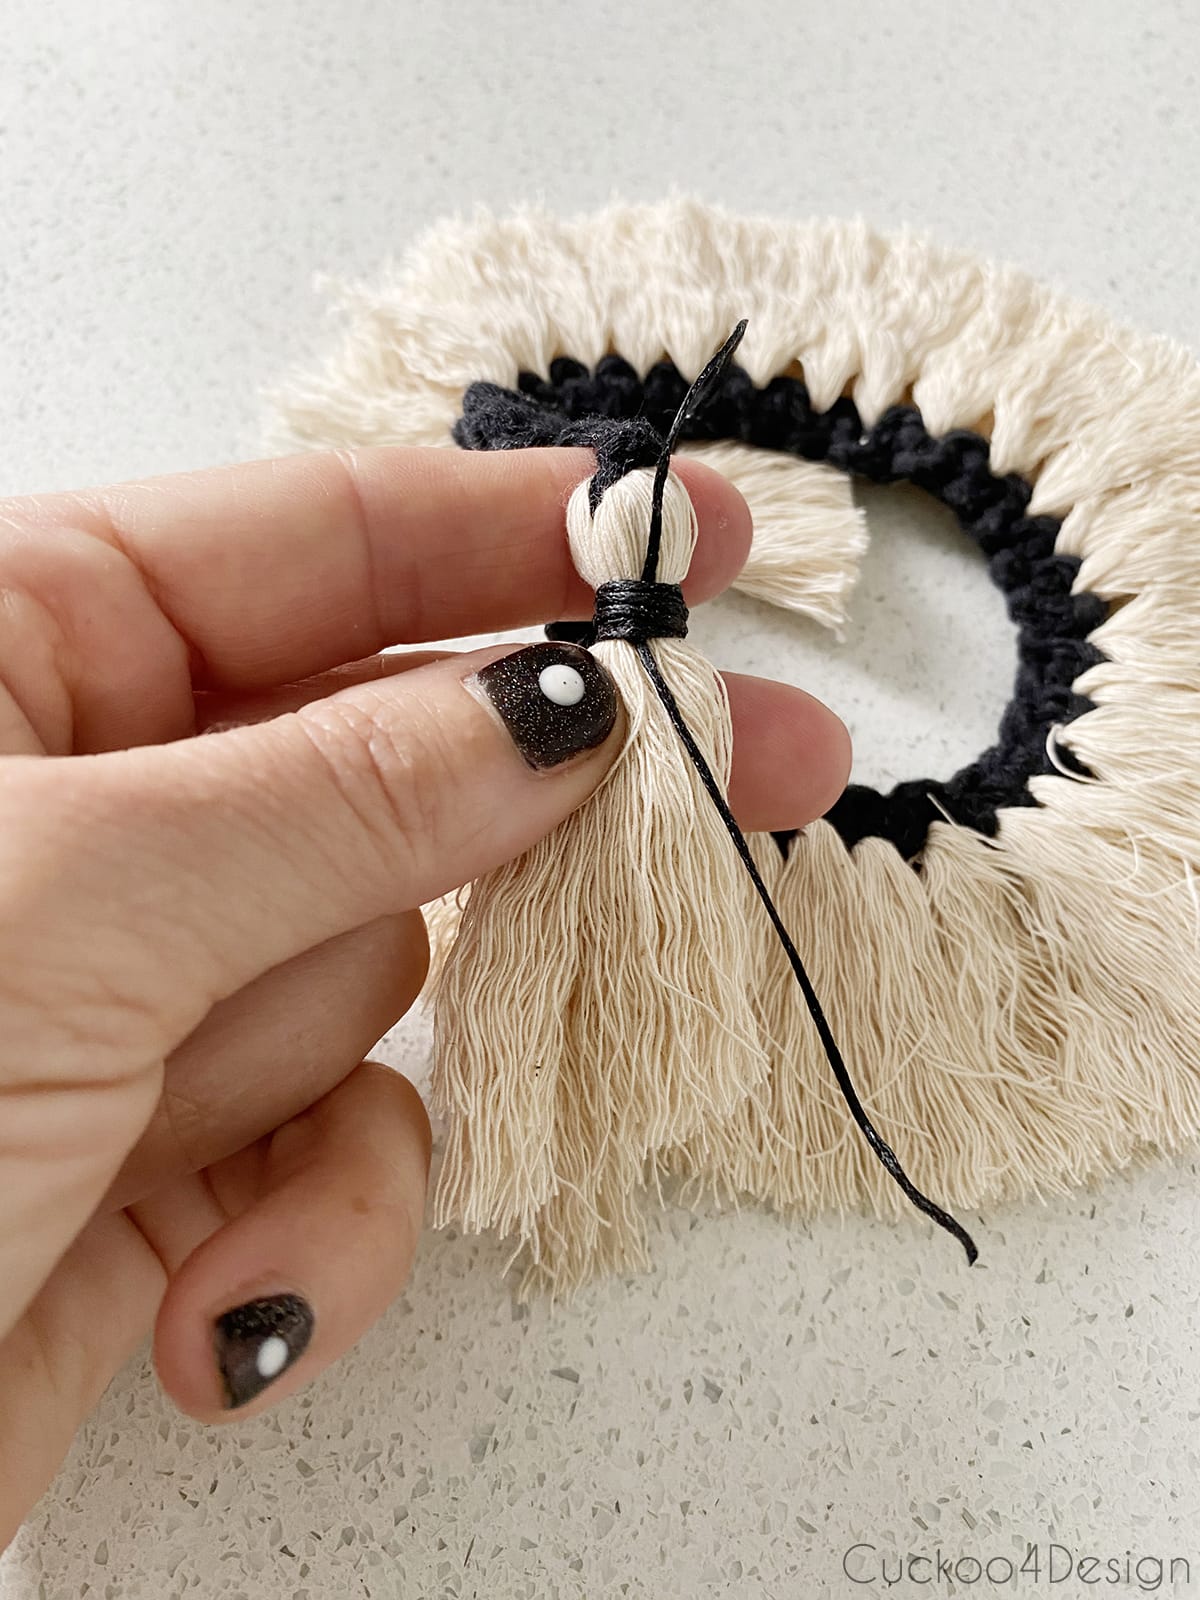
I added some more glue to this part to make sure the tassel wouldn’t open up.
And trimmed the ends but not too short.

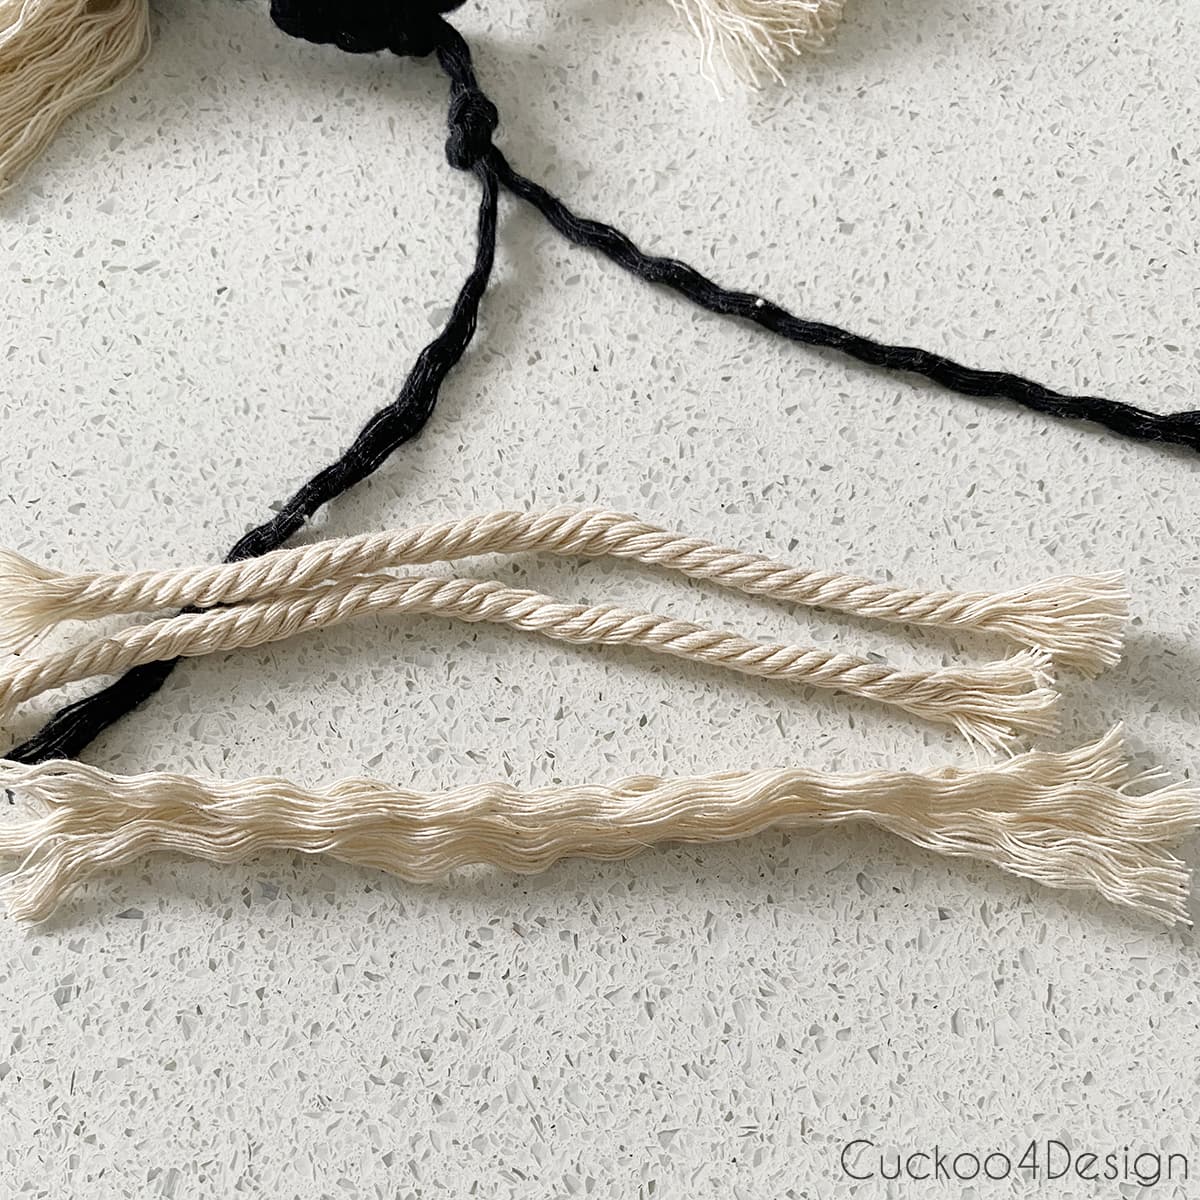
Fold the ivory macrame yarn in half and comb it nicely.
Now you have to finish the tassel with the gathering-knot method again, the way I showed you above. If you don’t have wax cord, then you can just open another piece of macrame string to get a thinner piece of yarn. I love the wax cord, though, for this project and many others.

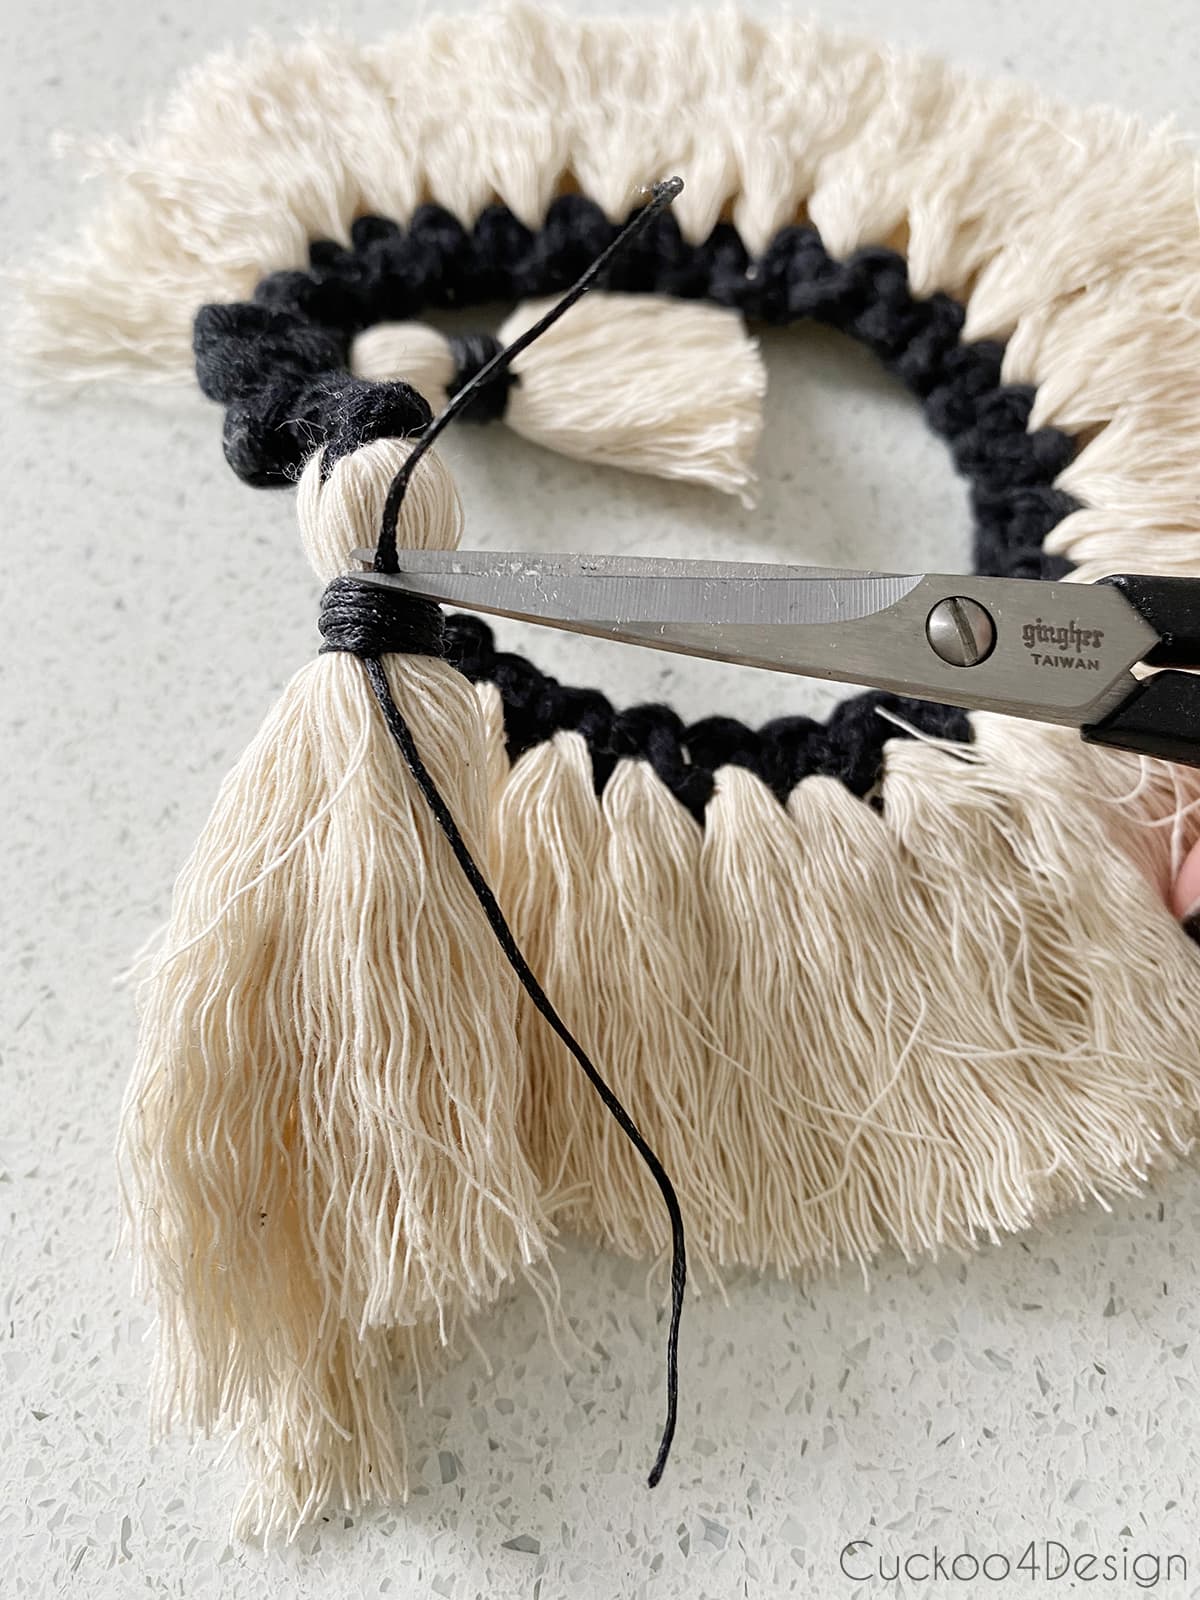
At the end trim the tassels to the same height.
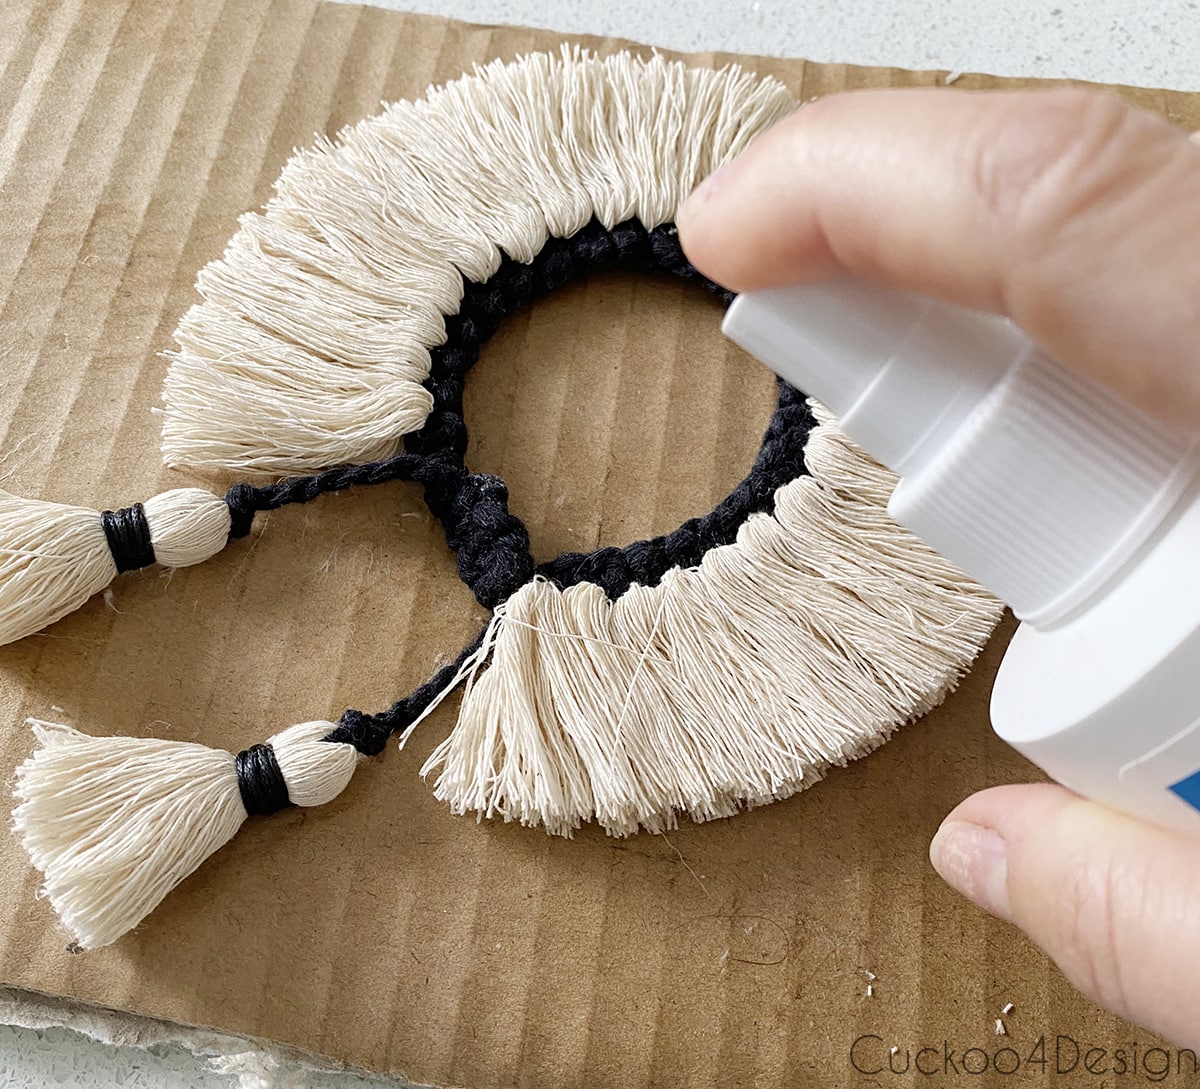
Step 6: Stiffening the fringe
Spray the trimmed and combed fringe thoroughly with the fabric stiffener.
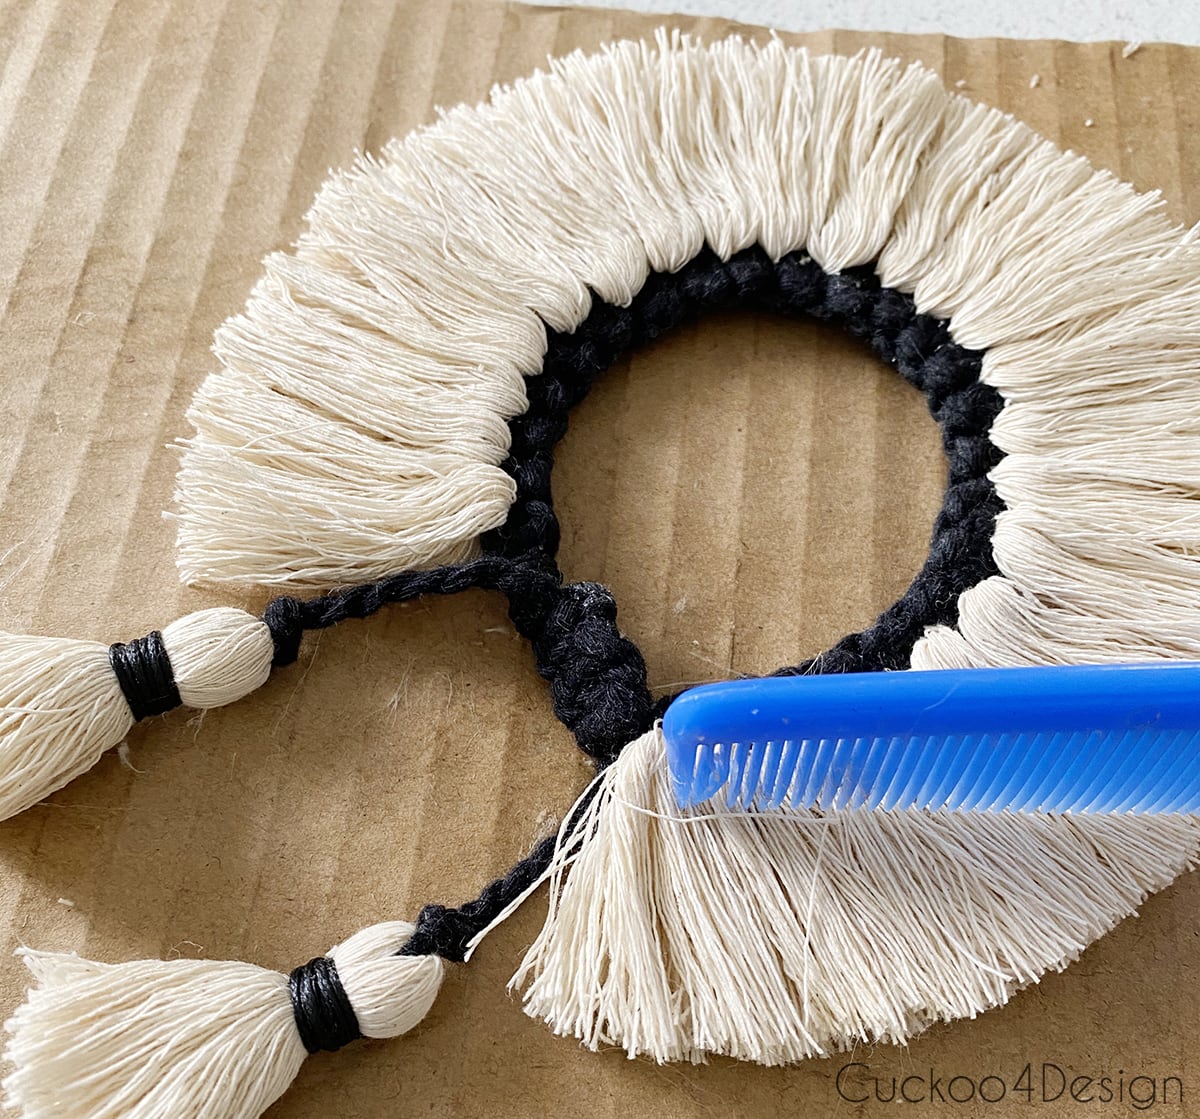
The fringe has a tendency to keep curling into the shape of the twisted macrame cord that it was previously in. So after you sprayed the stiffener on the fringe, keep brushing repeatedly until it stops curling. Sometimes it is very stubborn, and you have to weigh it down a bit with something. After everything dried, I kept repeating this step several times until the fringe had the texture of a stiff bristle brush. I think you could even use a watered-down version of polycrylic on the fringe to make it even stiffer, but that is totally preferential. I have tried it on a separate tassel, and it definitely works as well.
Keep trimming the fringe as needed.
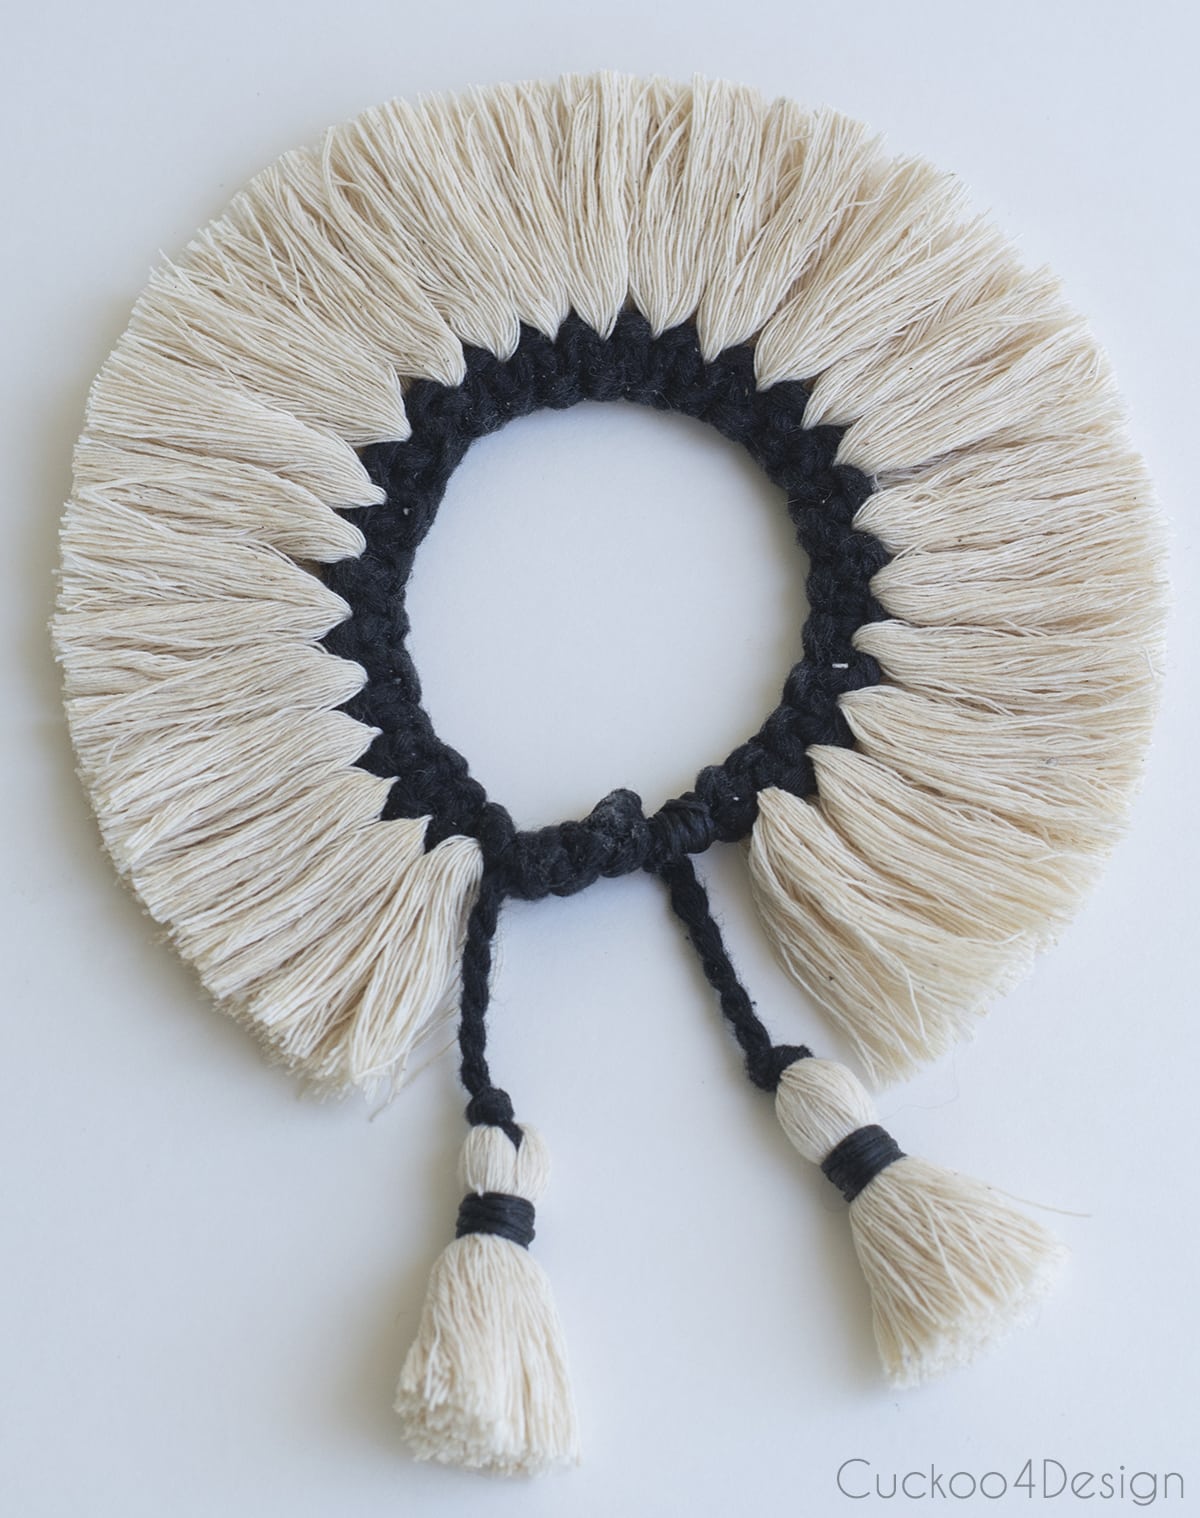
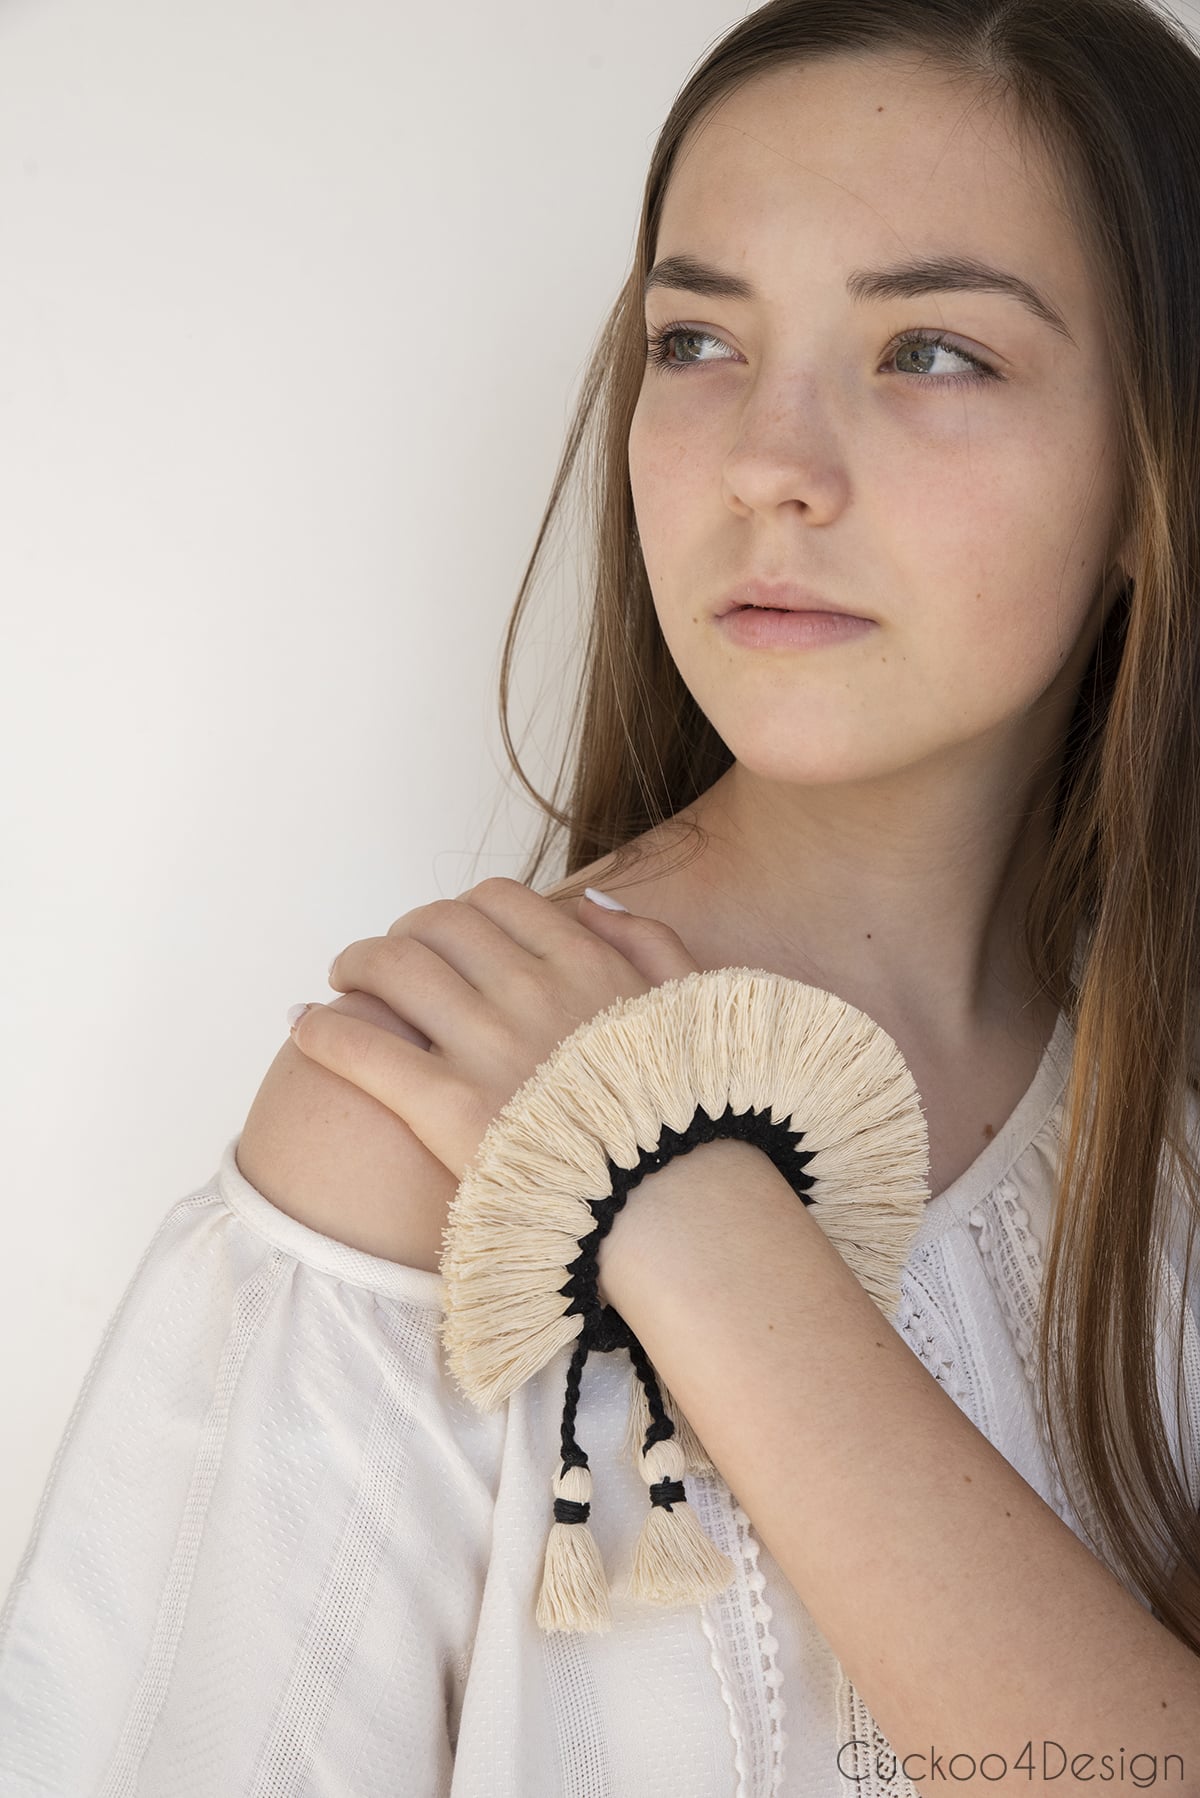
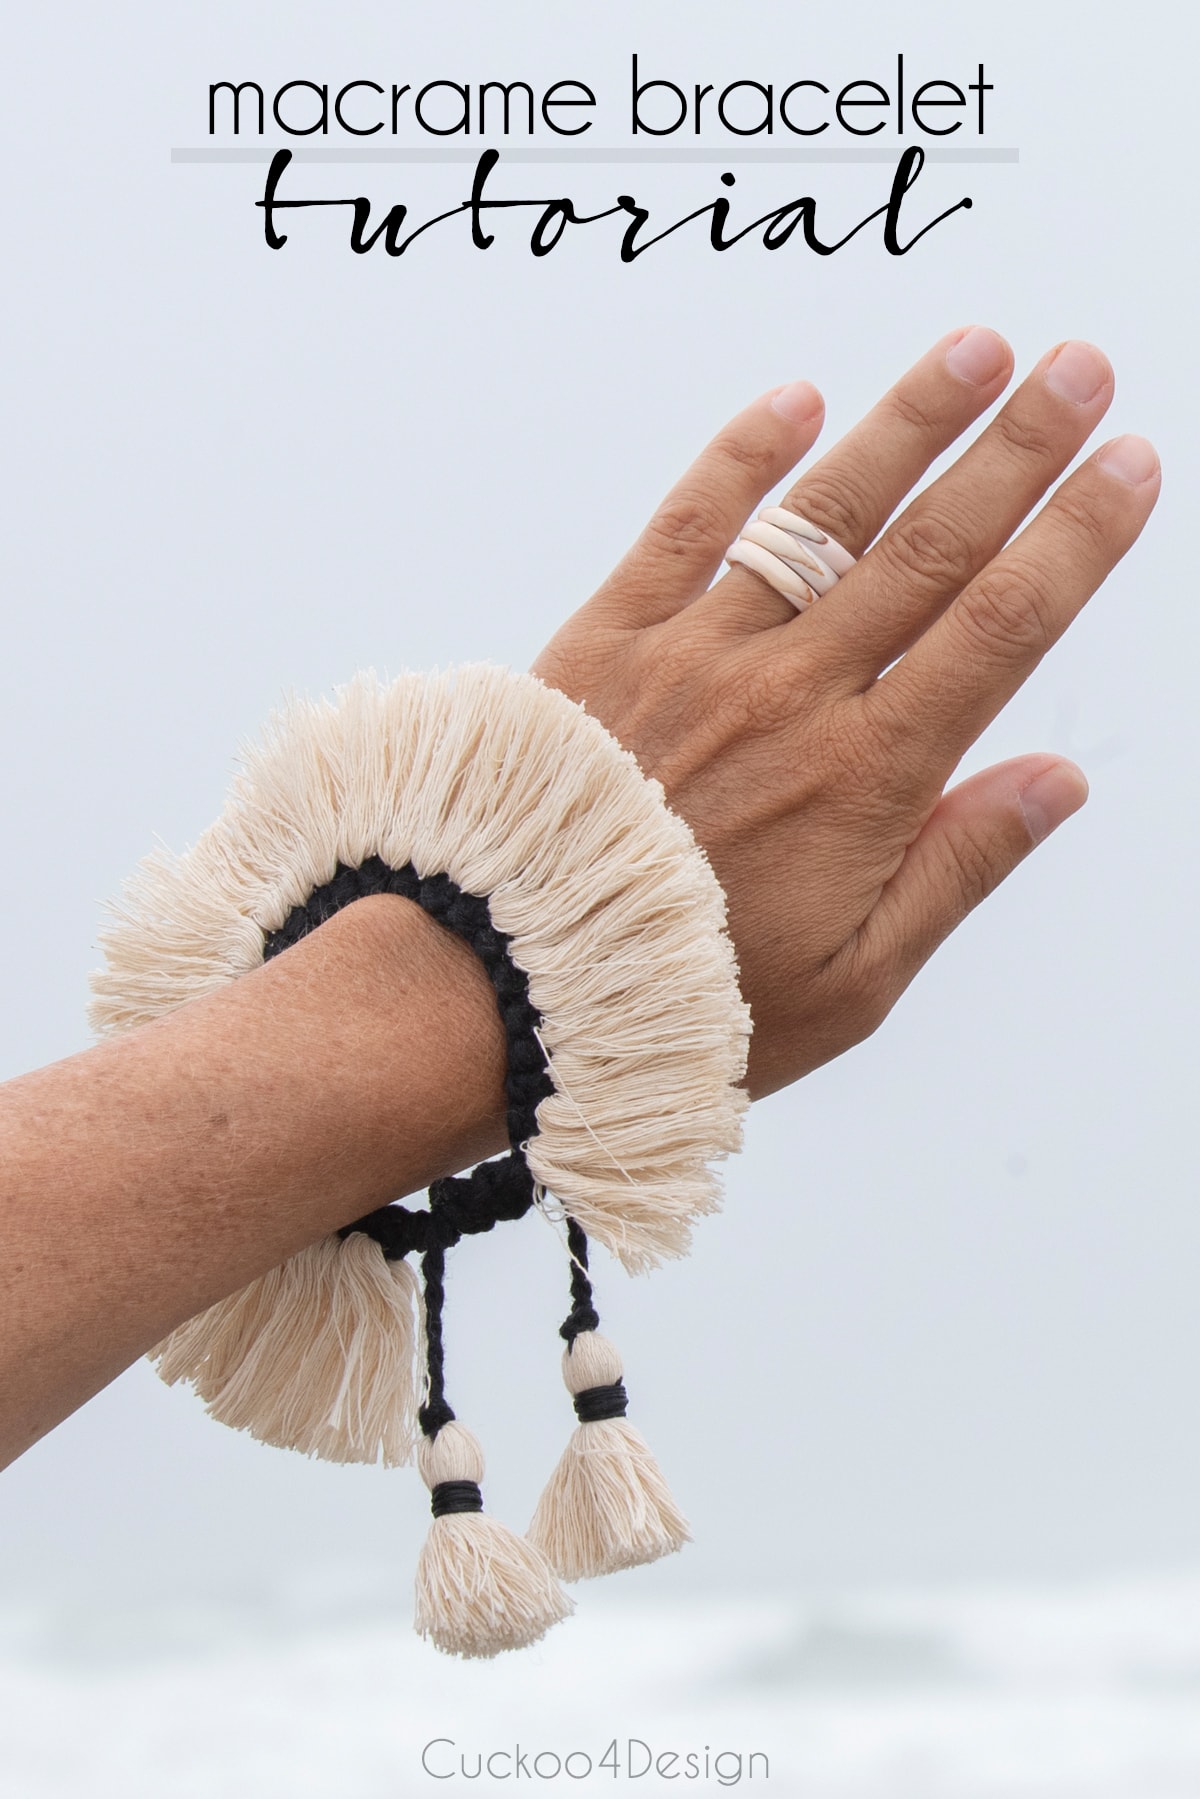
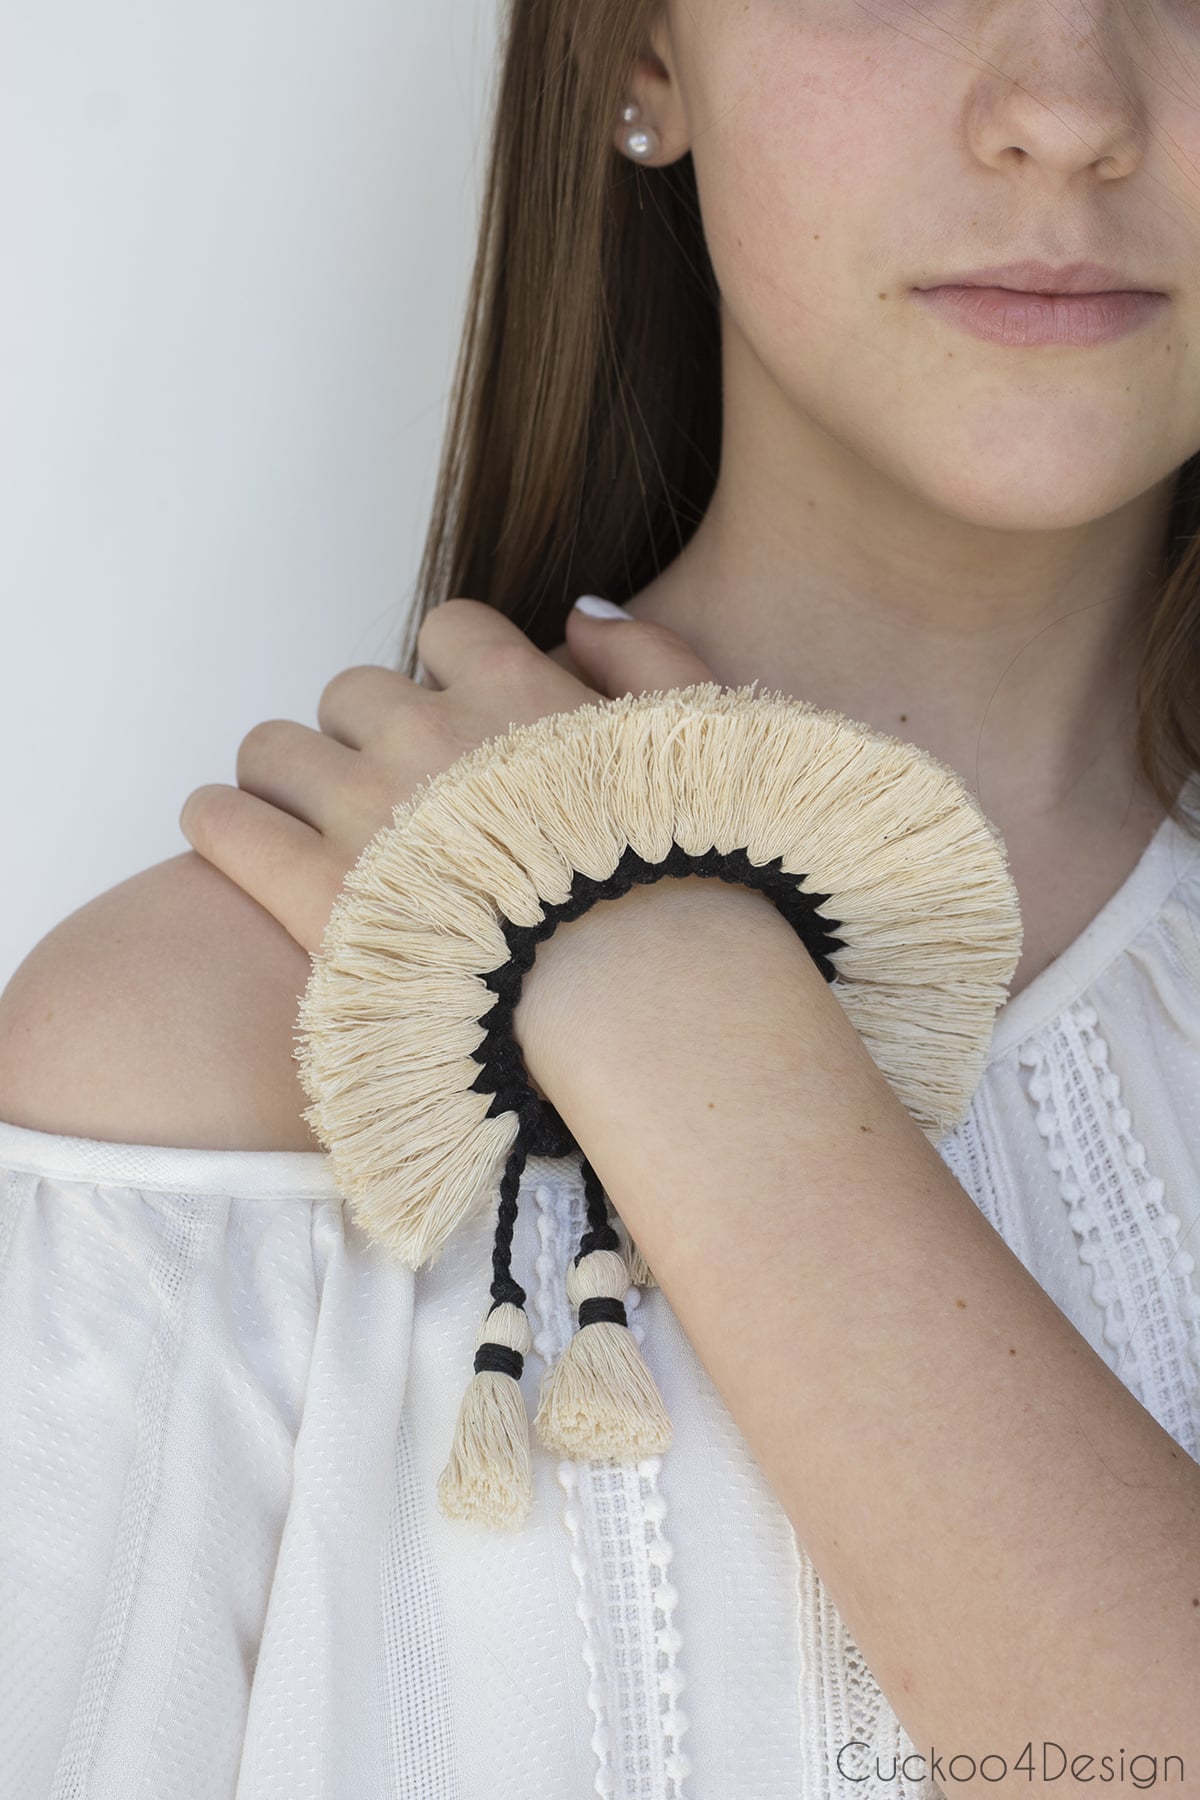
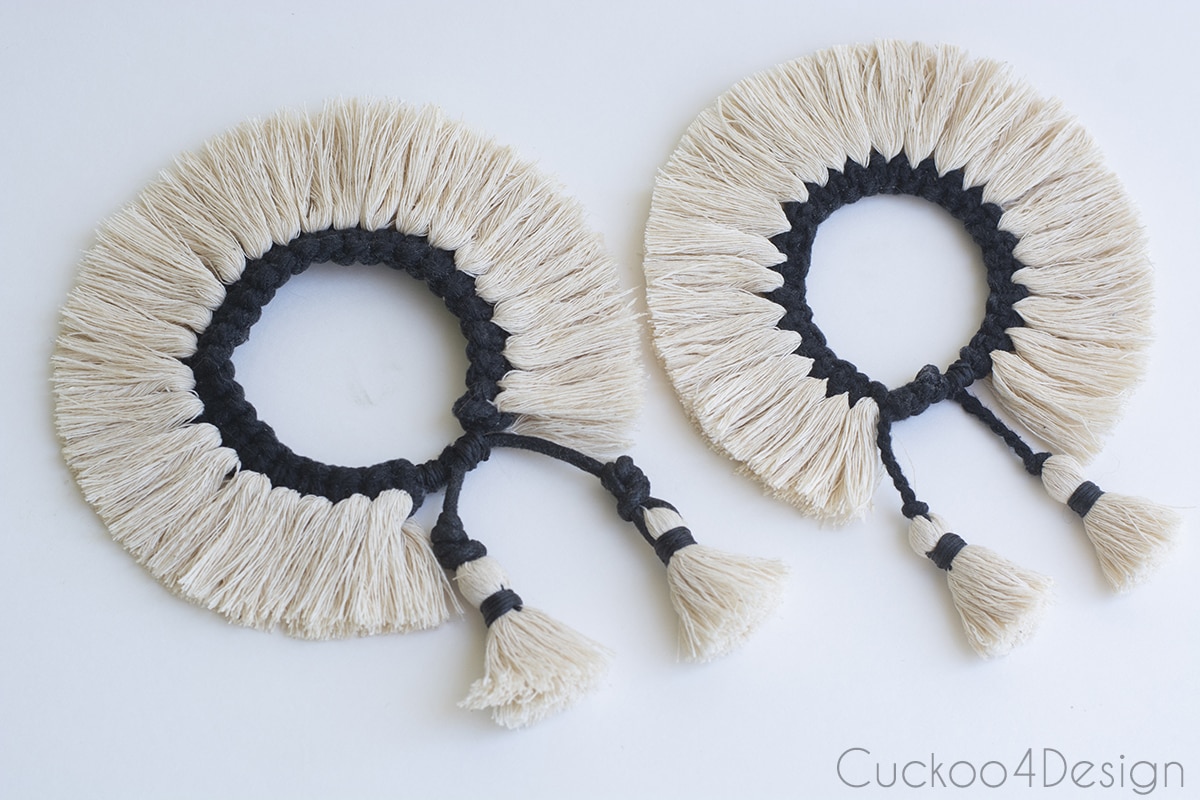
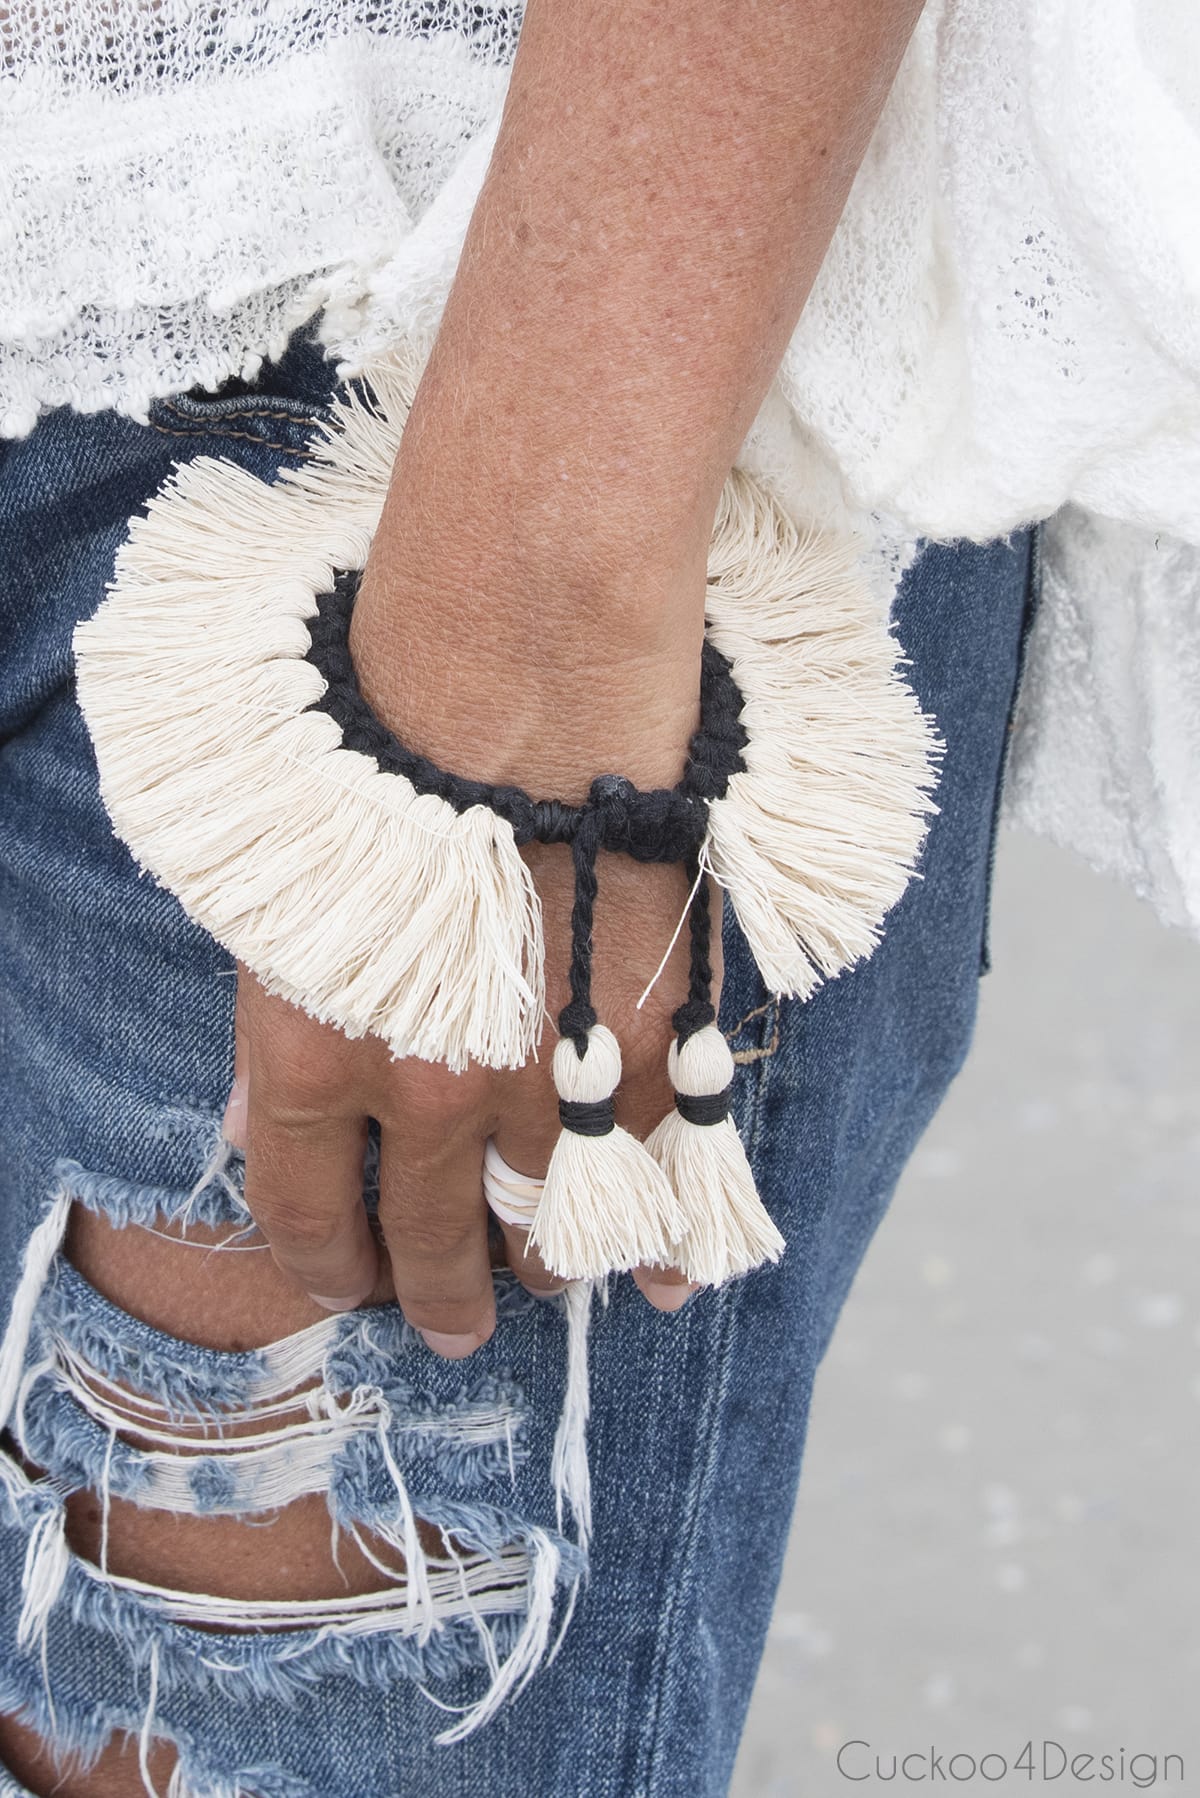
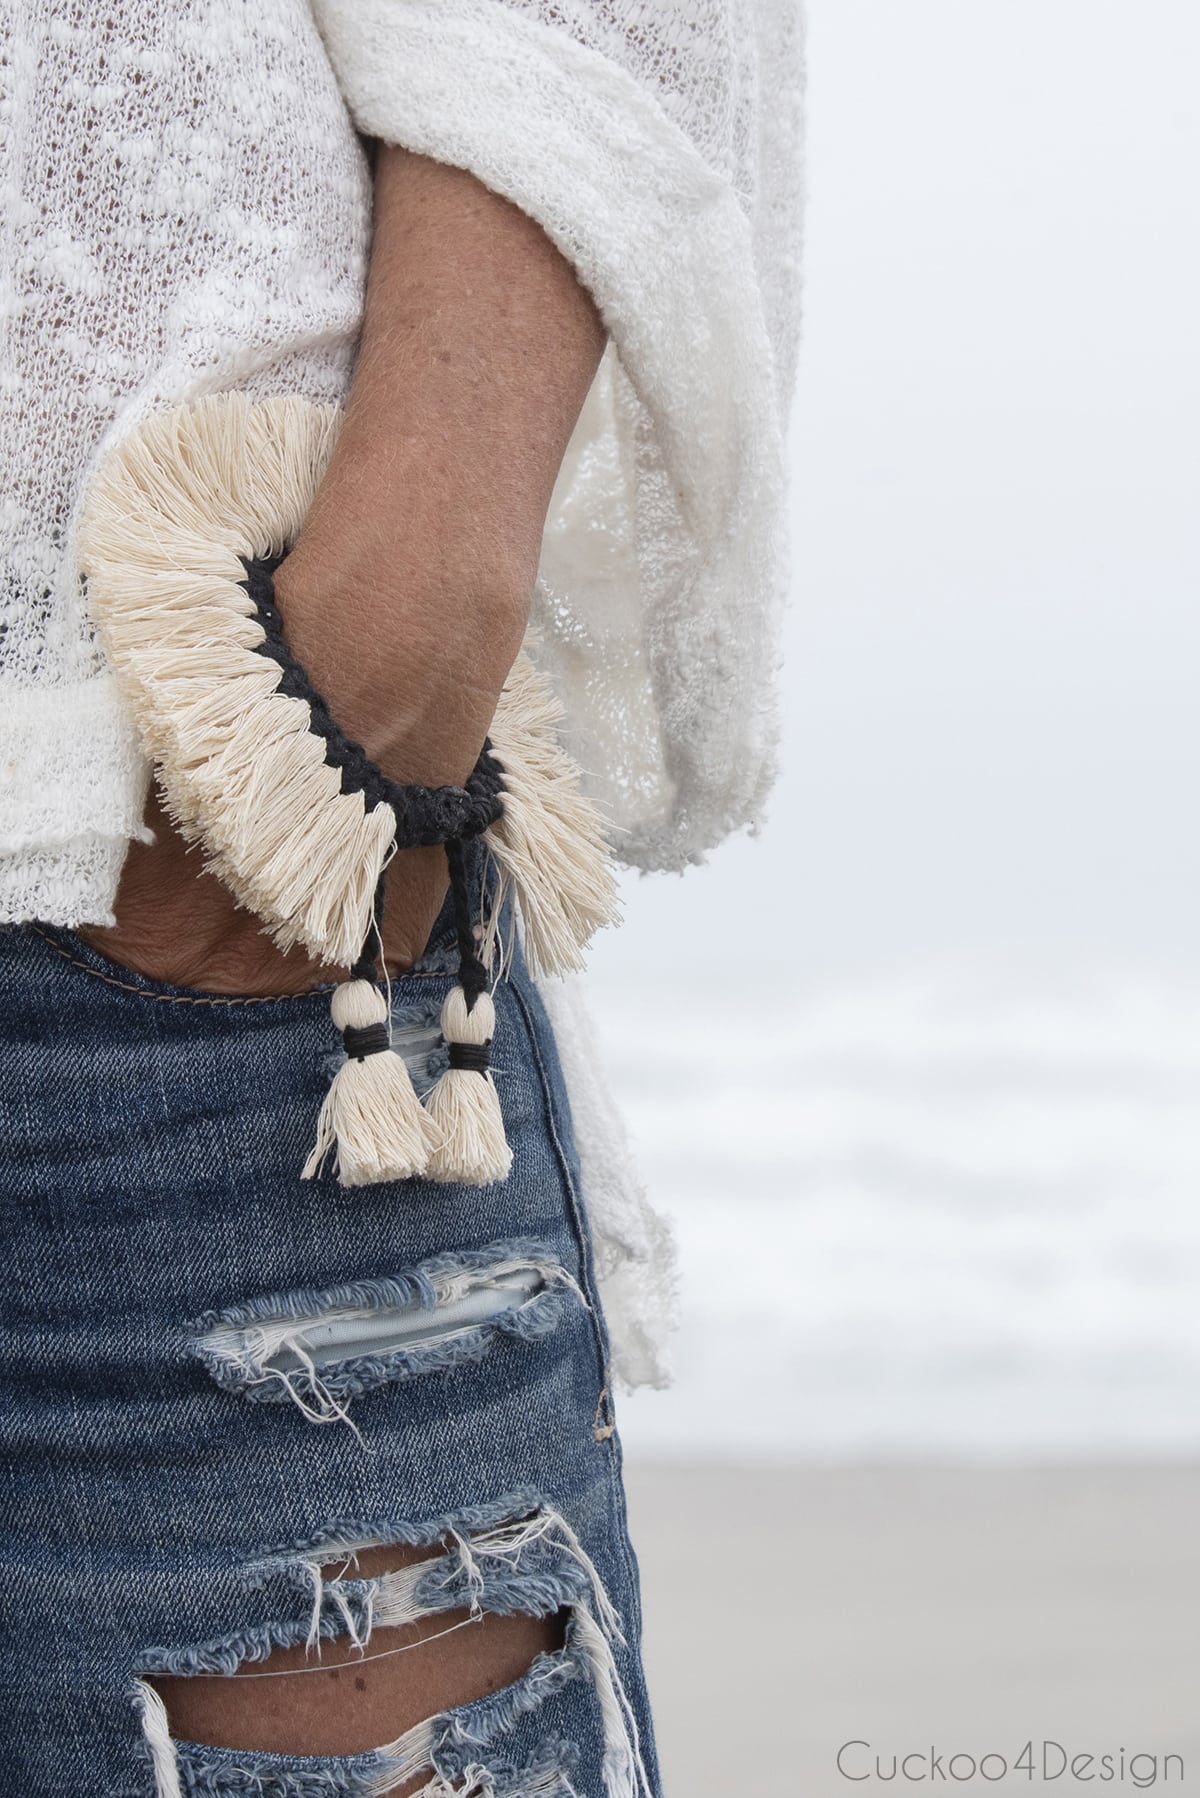
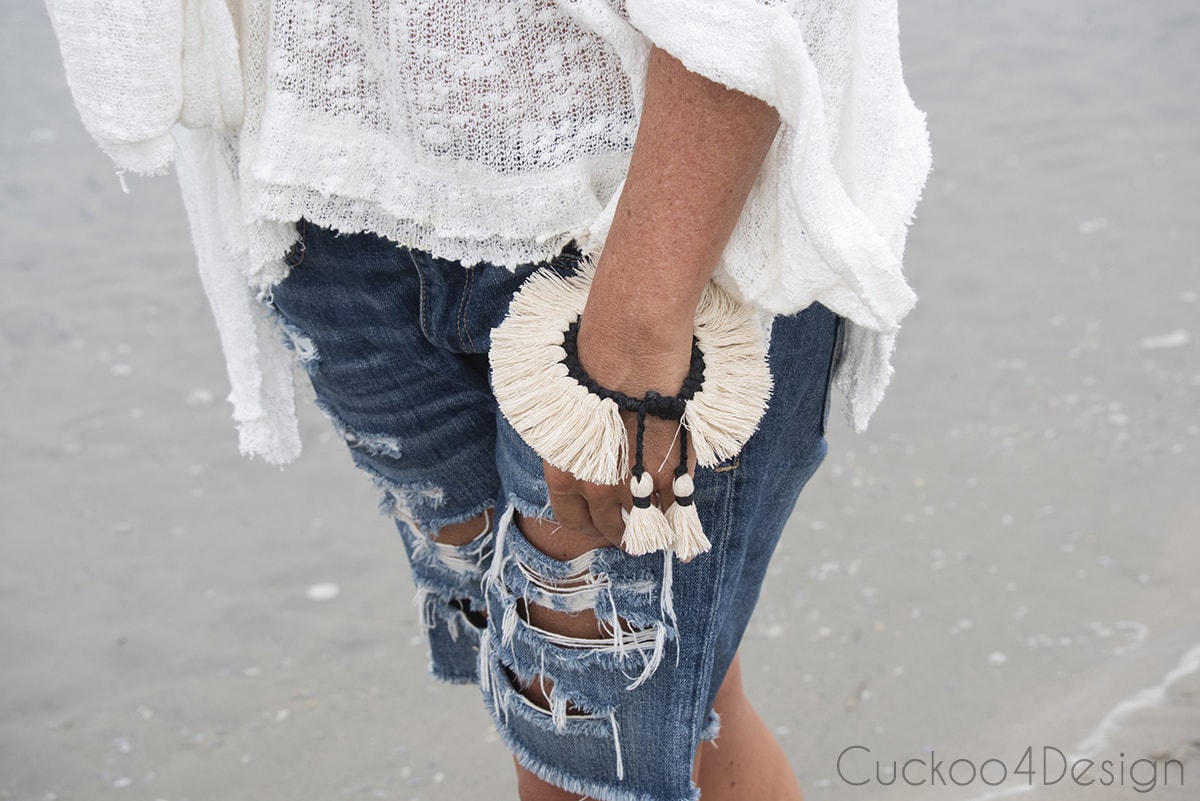
Here is the finished bracelet.
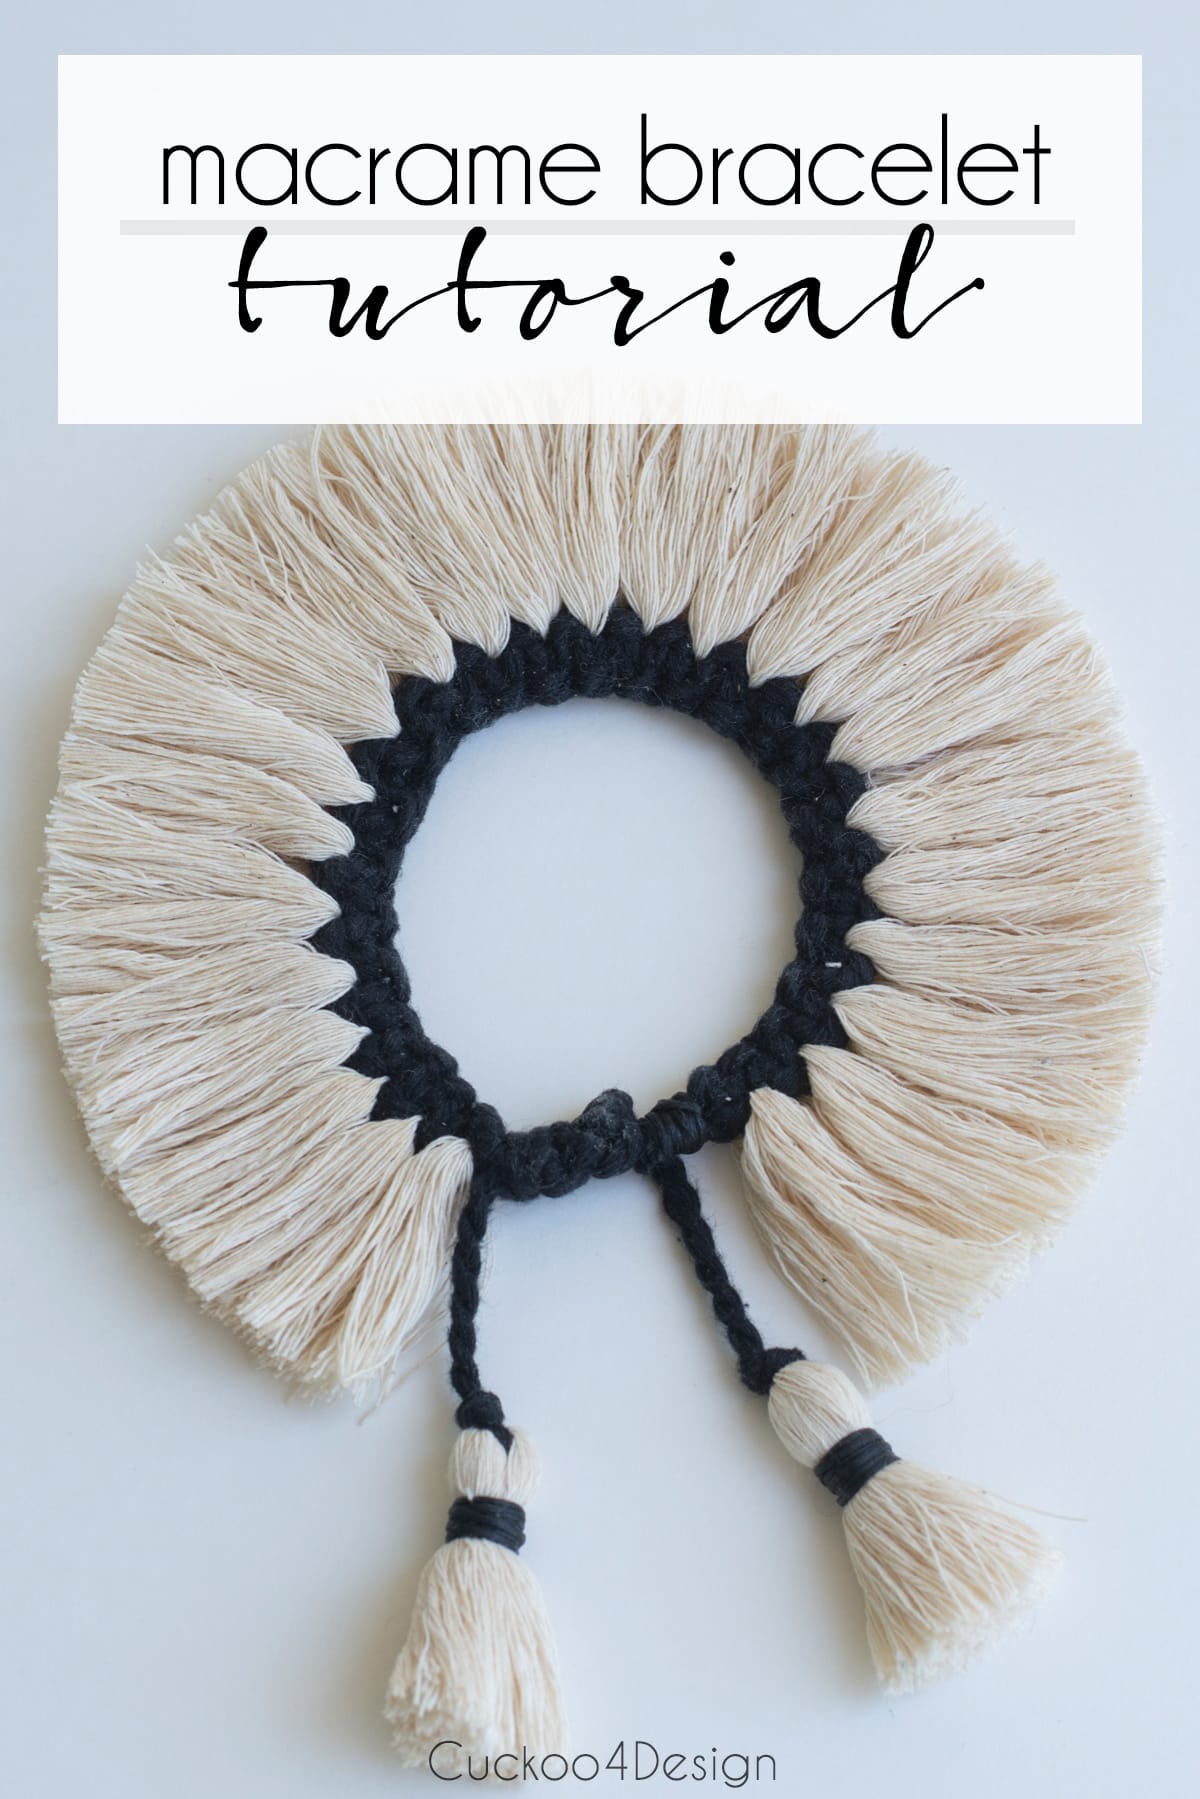
My daughter modeling the finished Square Knot bracelet
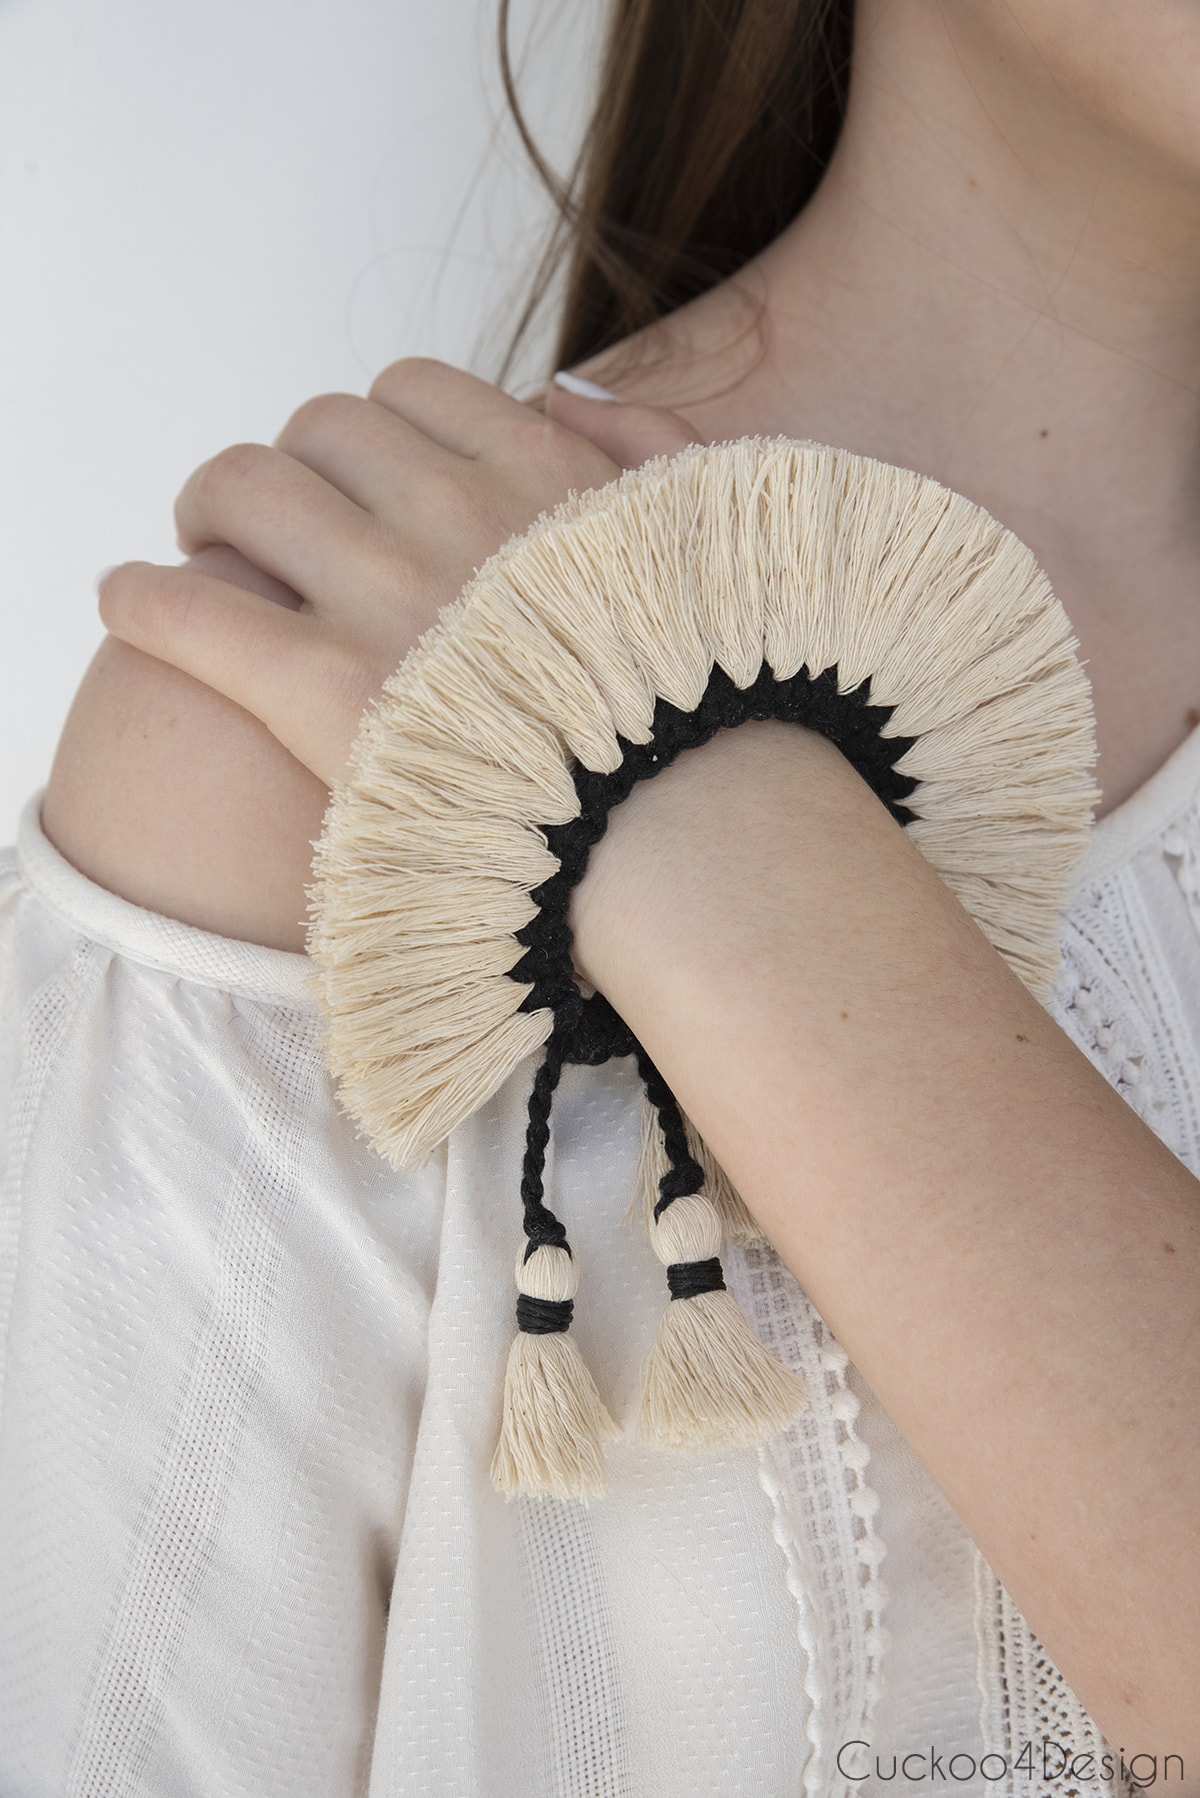
It came pretty close to the original piece, right?
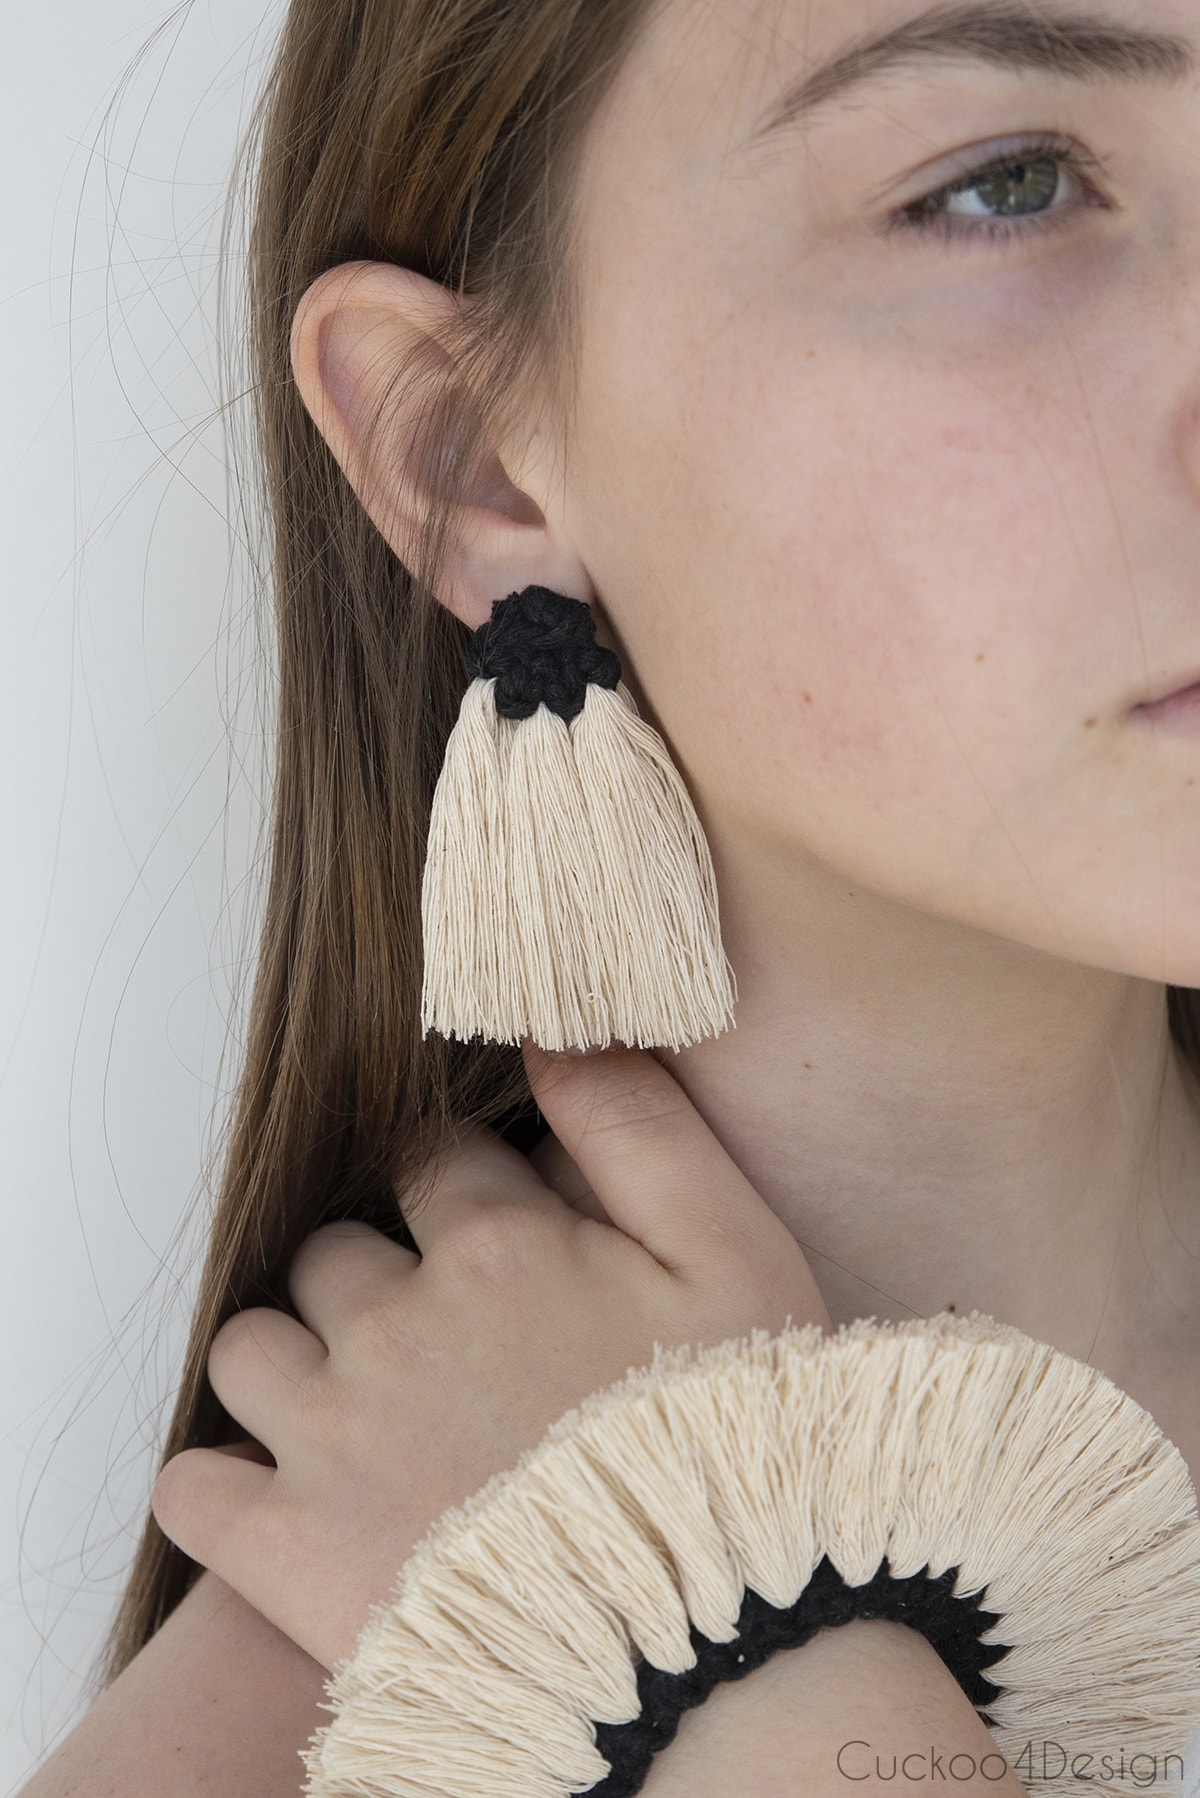
Also, check out how to make matching fringe earrings on studs to go with the bracelet.
Here is another bracelet idea that would look really pretty stacked with my square knot bracelet. Check out the DIY snail shell bracelet tutorial.

I also wrote a tutorial on how to make a macrame starfish, which you might like.

Also, check out how to make a macrame necklace (3 different ways).

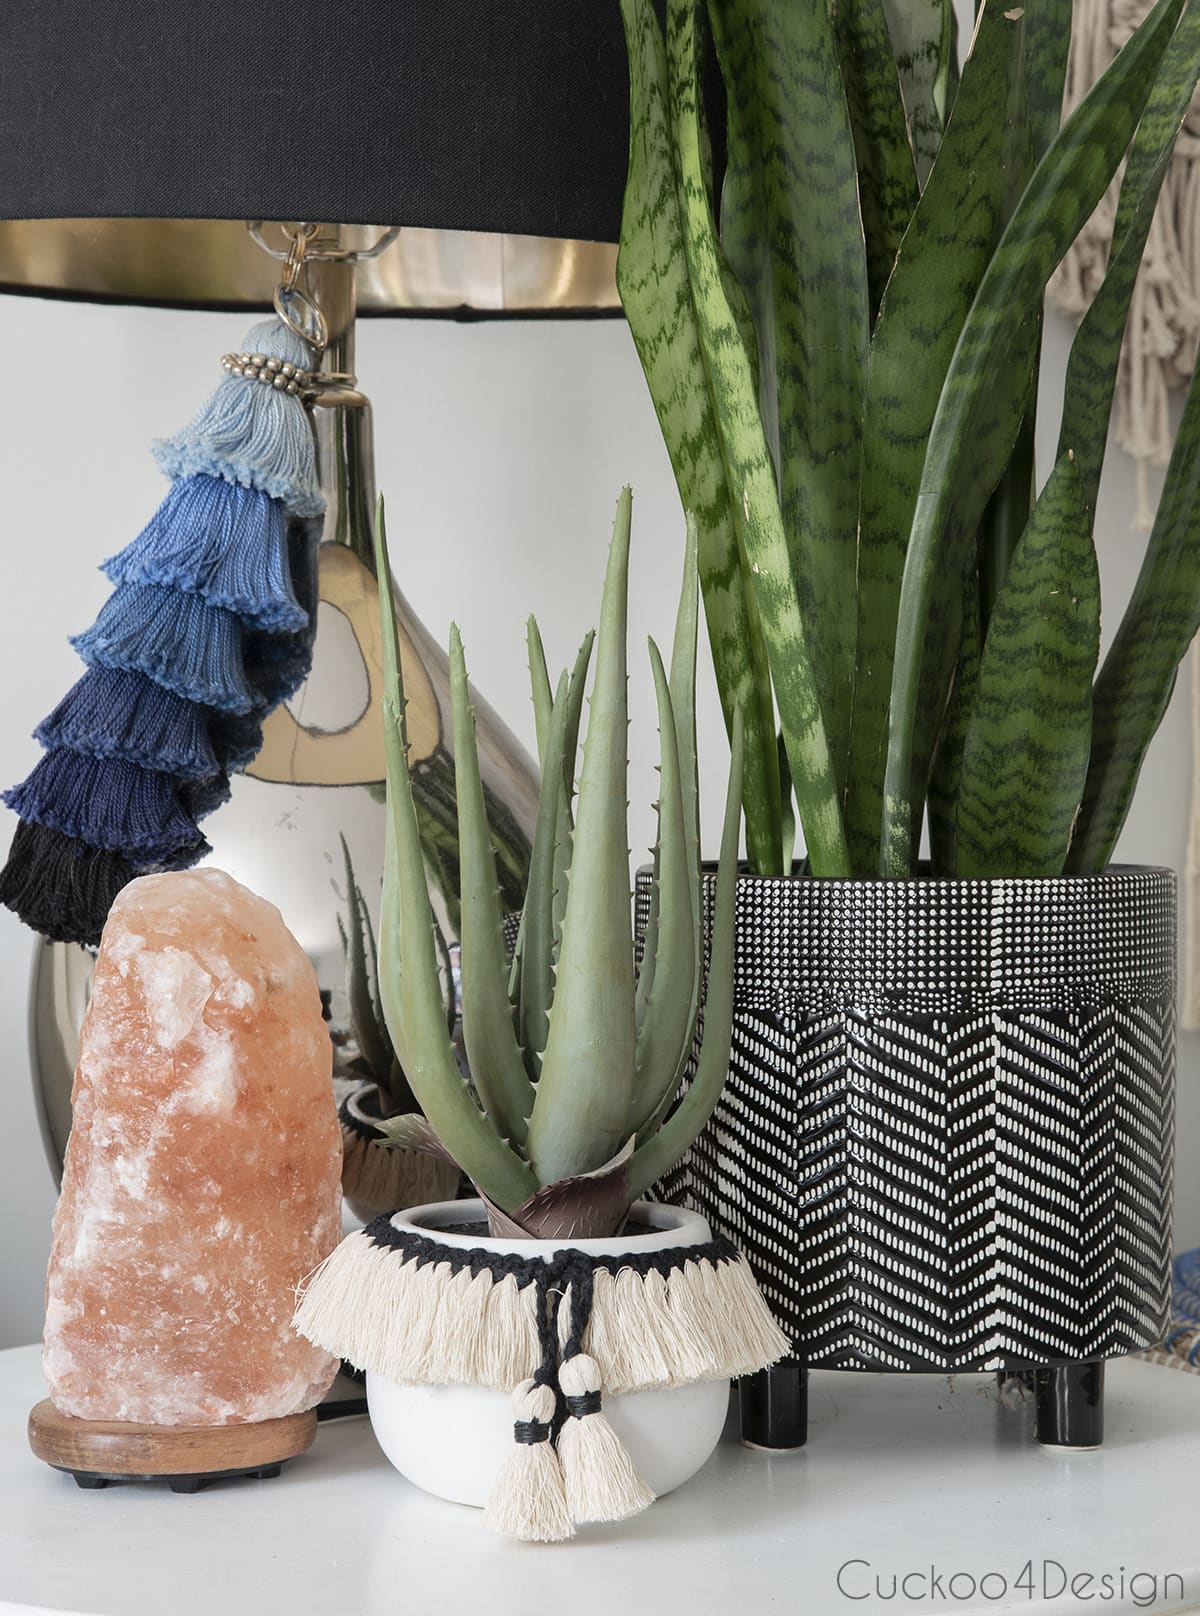
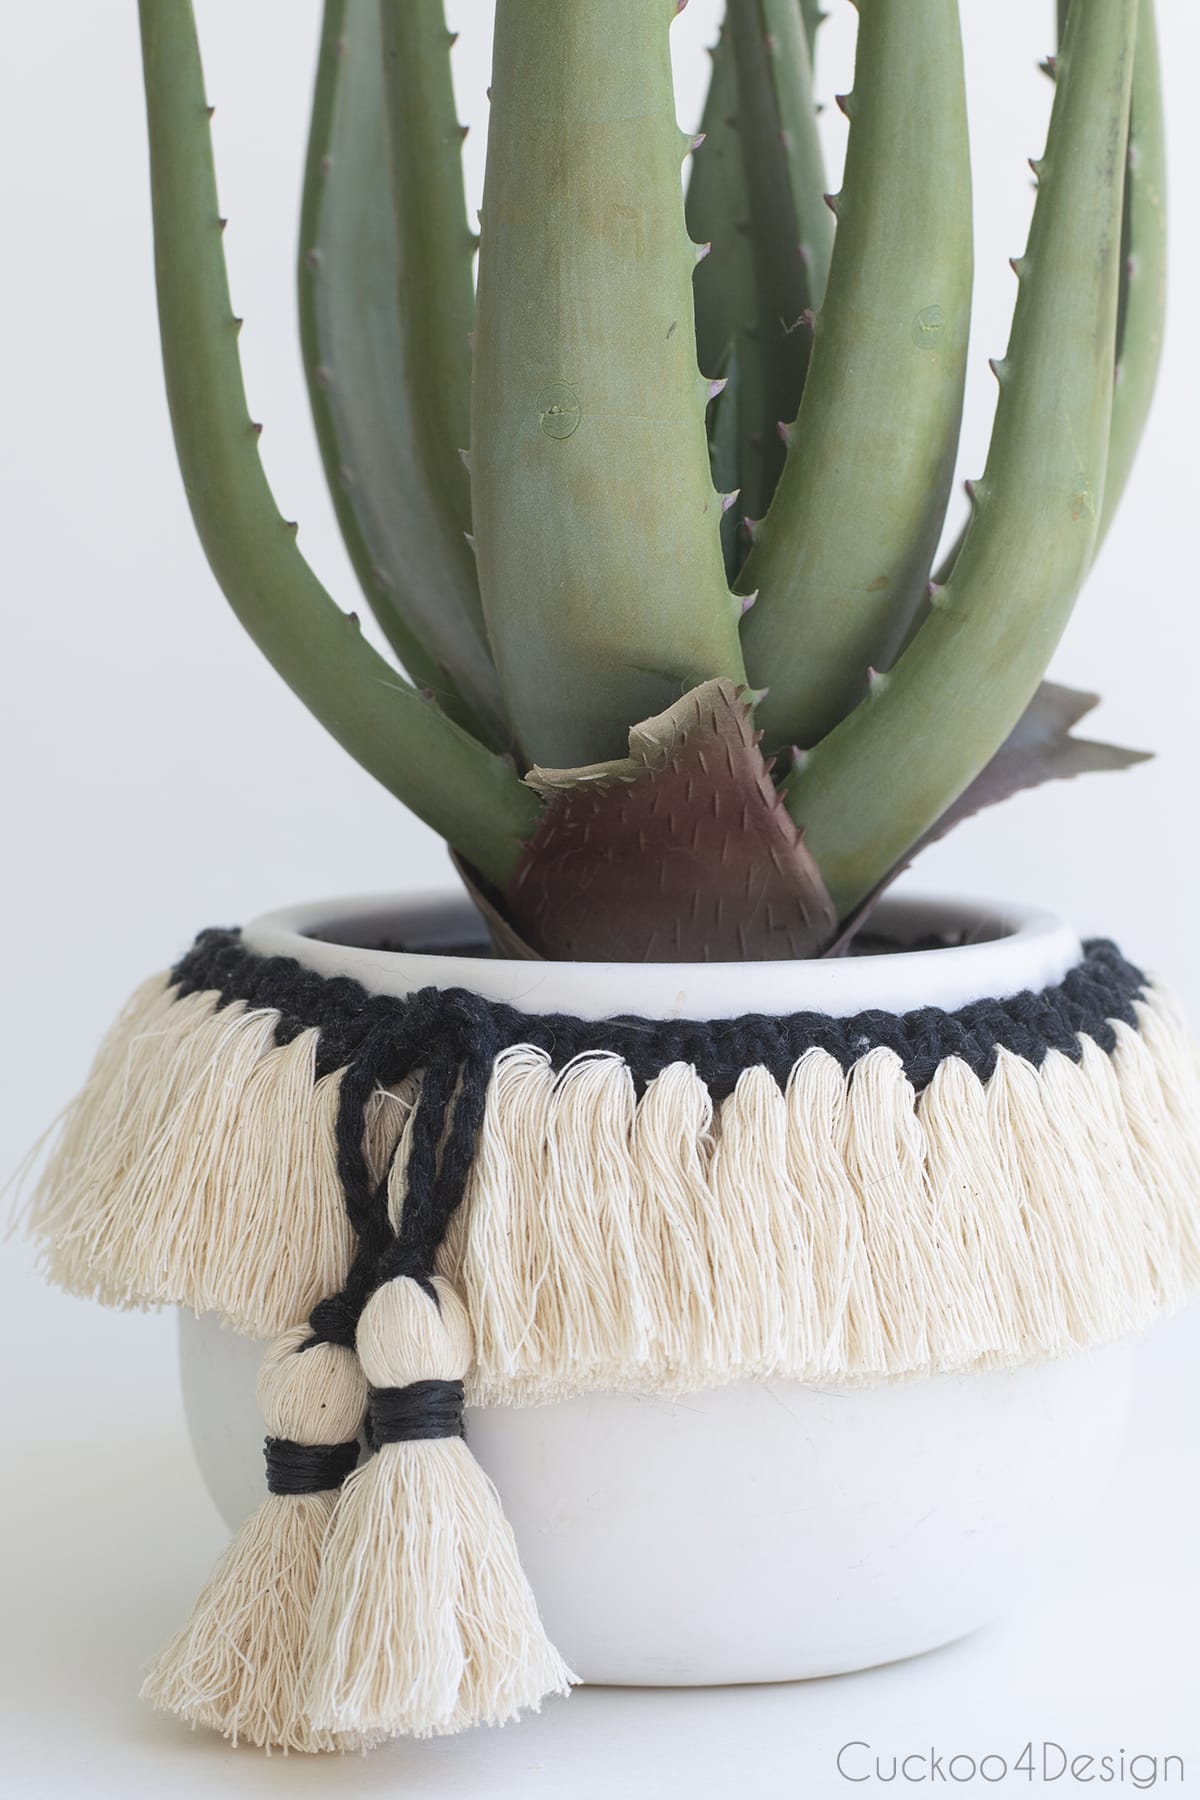
It all doesn’t end here, though, because you can make this same piece without the sliding square knot, so it remains in the shape of a garland and just tie it over a planter, lamp, or candle. I love that look as well. You don’t need to really stiffen the fringe for this if you don’t want to.
Look how cute this little faux plant looks with the planter skirt.
Also, check out my other macrame garland tutorial.
More of my combed macrame projects
- unique and stylish modern macrame wall hanging tutorial
- Green macrame Christmas tree wall hanging with fairy lights
- macrame chain garland tutorial
- macrame chandelier using a planter basket as a starting structure
- macrame Christmas ornaments
- large macrame tassels on a rope garland
Tschüß,


How to make a trendy boho square knot bracelet
Learn how to make a square knot bracelet with stiff fringe and tassel ends, inspired by a Free People design. An easy DIY for any skill level.
Materials
- black 4mm macrame cord
- ivory 4mm macrame cord
- fabric stiffener
- wax cord, or you can just use macrame cord instead as well
- clear strong craft glue
- tooth picks
Tools
- scissors
- measuring tape
- clothing pins or small spring clamps
- comb
Instructions
- Cut and prepare your cords
I made a bracelet where I didn't split the macrame cord, but ended up liking the thinner string better. So that is the version I'm sharing with you today. Split a 120-inch piece of black macrame cord in half as shown below. It will most likely be a bit long in the end, but better safe than sorry.
Then you have two 120-inch pieces. The one will be used for the knotting of the bracelet, and the other we will use now to measure around your wrist. I have really thin and tiny wrists, so it is pointless for me to tell you how long the actual bracelet piece should be. To be safe, add about 20 inches to the measurement of the wrist and cut a piece of that length off of the other 120-inch-long piece. Take that piece and tape it to a hard surface. I also knotted the ends of all the separated macrame strings to stop them from fraying.
Cut the short strands of ivory macrame cord into 4-inch pieces. I needed about 25 of them, but this again depends on how big your wrist is. You can just cut more as you go, too. - Make the Square Knots and add the fringe
Start with the first half of the knot about 10-12 inches from the start because you will need a long piece to be able to add a tassel to the end.
Fold the left strand of the string over the center cord.
Loop the right strand behind the left and center strand as shown in the photo below.
Pull everything tight for the first knot. Then start with the right string folded over the center string and loop the left string behind, just the opposite of what you did before.
Before pulling everything tight, you add a piece of the 4-inch macrame yarn to the loop. You don't have to hold it in place the way I did in the photo, but to me, that made it easier when I pulled the knot tight.
Then you have to repeat the same knots again. Fold the left string over and loop the right behind. You can see it a little better in my video, I hope. When I tie the square knot, I keep saying in my head "leftover middle string" and "right over middle string with a fringe piece in". If I don't do that, I get confused and can't remember which I folded over last...haha. Below is another image from another blog post of mine where I show the square knot with two colors, but instead of one center string, I have two. You get the point, though, right? If you don't alternate the leftover and the right over, the knot will go in a spiral around the center string, which is used for hanging planters a lot of times.
Repeat the steps of the square knots and add fringe until you reach the length of your wrist circumference. As I mentioned earlier, you can just skip the fringed strands for a simple square knot design bracelet.
At the end of the fringe part, you can finish the square knot off with another square knot and glue the way I'm showing you in the sliding square knots further down, or I used the small wax cord to end it with the gathering-knot method. I'm not even sure why I decided to go that route. I just like the look, I guess, but it is preferential. Start by making a U-shaped loop at the top and wrap the cord around firmly, over and over again, from top to bottom.
Then stick the cord through the remaining loop that is sticking out and pull at the bottom string until the loop and top string disappear under the wrapped around the string.
Trim the remaining ends.
- Unravel, comb, and trim the fringe
Next, open up and unravel all the fringe as shown in the video. I forgot to take a photo of that part. Sorry! When they are all opened, comb them out straight and trim them to the desired length of maybe 2 inches or whatever you'd like.
- Add the adjustable closure of the bracelet
You need to make the bracelet adjustable with the sliding square knots or sliding clasp that I mentioned above. Cross the bracelet ends the way I'm showing below.
Then repeat what you just did at the beginning of the bracelet with the square knots, but this time over the two bracelet end pieces. My string piece was about 15 inches long.
I tied about 3 square knots and was happy with the results, and could easily slip the bracelet over my wrist and tighten it.
To finish it, I tied a single normal knot, not over the center string, because you want to avoid getting glue on the center string. This would result in not being able to slide the closure.
Add some glue with the tip of a toothpick to the knot.
Make sure the knot is securely pulled tight over the glue and trim the ends. You might want to clamp the knot if needed. - Add the tassel detail to the knotted bracelet ends
I love making tassels, and in this case, they are the perfect detail again for this bracelet. I added a knot to the two strings where I wanted the tassel to start. It is about 1.5 inches down from the fringe part.
I unraveled three pieces of 5-inch ivory macrame yarn that I precut for each tassel. Tie the unraveled pieces to the end as shown below.
Make sure you tie a double knot and pull it very tight.
I added some more glue to this part to make sure the tassel wouldn't open up.
And trimmed the ends, but not too short.
Fold the ivory macrame yarn in half and comb it nicely.
Now you have to finish the tassel with the gathering-knot method again, the way I showed you above. If you don't have wax cord, then you can just open another piece of macrame string to get a thinner piece of yarn. I love the wax cord, though, for this project and many others.

At the end, trim the tassels to the same height. - Stiffen the fringe
Spray the trimmed and combed fringe thoroughly with the fabric stiffener.
The fringe has a tendency to keep curling into the shape of the twisted macrame cord that it was previously in. So after you sprayed the stiffener on the fringe, keep brushing repeatedly until it stops curling. Sometimes it is very stubborn, and you have to weigh it down a bit with something. After everything dried, I kept repeating this step several times until the fringe had the texture of a stiff bristle brush. I think you could even use a watered-down version of polycrylic on the fringe to make it even stiffer, but that is totally preferential. I have tried it on a separate tassel, and it definitely works as well. Keep trimming the fringe as needed.
Notes
- The fringe has a tendency to keep curling into the shape of the twisted macrame cord. Keep brushing repeatedly after spraying the stiffener until it stops curling. Sometimes you have to weigh it down while it dries.
- You can skip the fringe entirely for a simple square knot bracelet and just add tassels to the ends instead.
- You can also make this piece without the sliding closure so it stays in garland shape and use it as a planter skirt, bottle wrap, or candle decoration. No need to stiffen the fringe for that version.
- If you don't have wax cord for the gathering knot, just open a piece of macrame string to get a thinner strand.
- You could use a watered down version of polycrylic on the fringe instead of fabric stiffener to make it even stiffer.
That is awesome. I am trying to figure out how to macrame a bracelet with some beads and hemp cord. Not sure how to do the ends And trying to do it without buying anything. Maybe when I’m done working today I’ll try and figure it out. Do you put your videos on YouTube
Thanks Sarah, yes I have my videos on YouTube as well. You can close the ends the two ways I did in the video.
Cool, you have a new YouTube subscriber! A new channel to watch during quarantine
Thank you so much!
it’s gorgeous and lilly is a beautiful model! it’s just like the example!
Thanks Cassie, it was fun to make.
That’s really pretty! And I like your nails.
Thank you! I thought I’d try something different on my nails 😉