How to make a scary scarecrow mask with burlap for Halloween
This year our annual Halloween party has a horror theme. I love doing scary make-up but this year I don’t have time to spend much time on makeup since I have to work before the party. I wanted to make something scary and different that I could make ahead of time. No time-consuming makeup is needed! When I was scrolling through Etsy and Pinterest, I came up with the idea to make a scarecrow Halloween mask. So, let me show you how to make a scarecrow mask. It’s a lot easier than it sounds. You can just wear a simple scarecrow outfit with it or in my case a simple black outfit and cape to let the mask stand out.
How to make a scary scarecrow mask with burlap for Halloween
This post may contain affiliate links from which I will earn a commission at no extra cost to you. View my full disclosure policy.
The origin of scarecrows goes way back and while we all know that they were generally used by farmers to scare away animals from eating crops, they certainly have an undeniably scary appearance for humans too.
So let’s have some fun with this. I didn’t want to just pull an entire burlap sack over my head like traditional scarecrows. So after seeing some masks on Pinterest, I came up with a unique fantasy Halloween scarecrow mask version that I could just tie at the back of my head instead.

Have you seen Batman Dark Knight? The villain is Scarecrow who is actually a psychiatrist named Jonathan Crane at an asylum who performs experiments on inmates. He is wearing a more basic stitched burlap mask in the movie. I wanted it to be a bit different and more like the masks I saw on Pinterest.
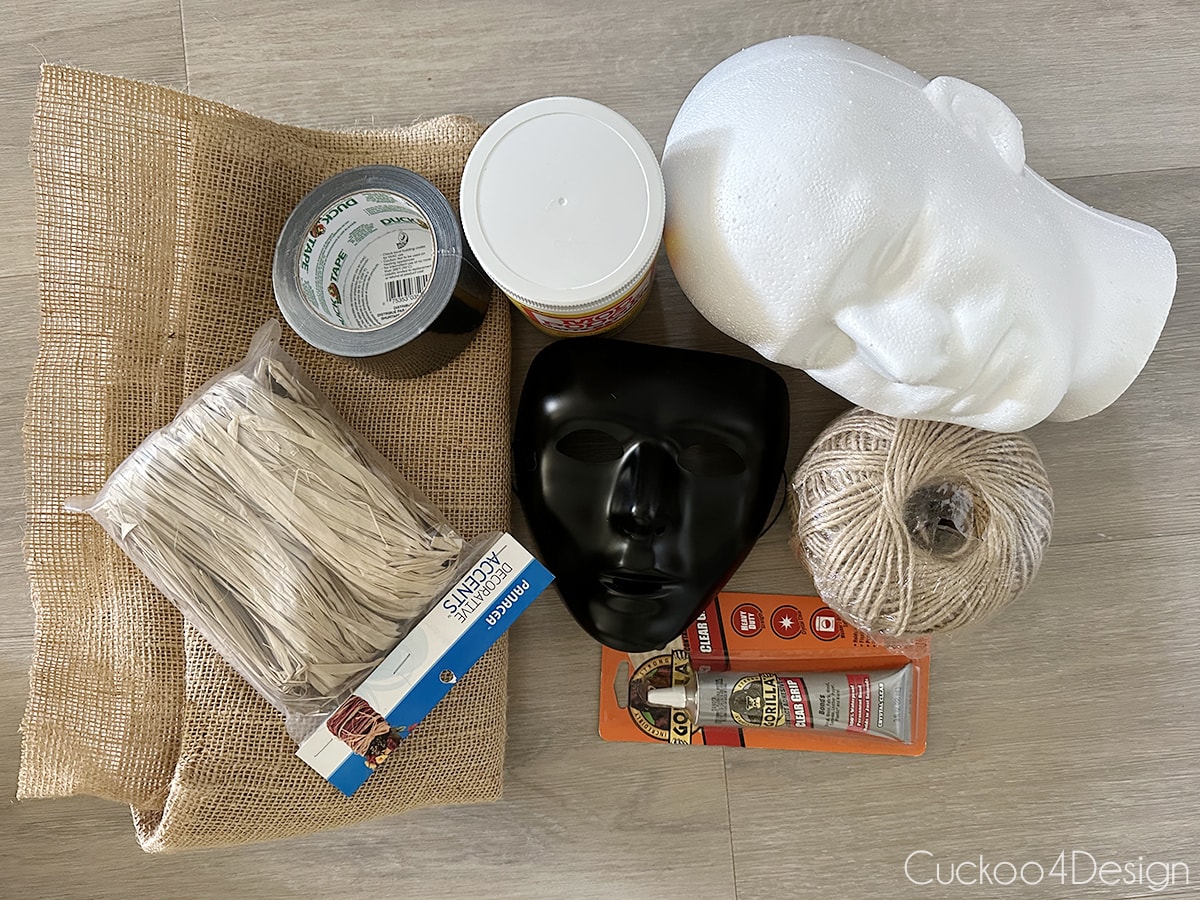
Materials needed to make a burlap scarecrow mask
- burlap/hessian cloth ( bought two yards because I want to make two masks, one yard should be enough for one mask)
- jute yarn
- black mask, the masks are a bit more expensive at Party City where I got mine (if you can’t find a black mask, just use the black duct tape all over the mask / a skull mask, theater mask, or scream mask would work great too)
- black duct tape
- X-Acto knife
- aluminum foil
- needles
- matte Mod Podge glue
- clear Gorilla glue or hot glue
- scissors
- big-eye stitching needle
- large curved upholstery needle
- black and brown craft paint (I’ve seen people using black tea to darken burlap but I prefer the craft paint because it gives me more control over the shading)
- raffia ribbon
- hard bristle craft paintbrushes
- Styrofoam head for wigs (also called armatures)
- drill and drill bit
This project cost me about $55 and I still have enough craft supplies left to make a second mask.
What is burlap or hessian cloth?
A fabric woven from yarn that was derived from the jute plant (jute yarn) is known as burlap fabric or hessian cloth fabric. It is fully natural and environmentally friendly. This type of fabric is generally used to make sacks. These sacks are also known as potato sacks, burlap bags, gunny sacks, burlap sacks, and toe sacks.
You can use a potato sack (like I just mentioned) to stuff it with straw to make a traditional scarecrow or scarecrow costume with a straw hat or floppy hat. But I wanted to switch it up a bit to make a scarecrow mask.
Burlap scarecrow mask video tutorial
I recommend that you watch my video about how I made the mask because you can see exactly what my hands were doing. If it doesn’t load for some reason then you can head to my YouTube Channel instead to watch.
Step-by-step burlap scarecrow mask
You can make a scarecrow mask by simply using a stiffener like decoupage but I didn’t want my face to touch the itchy jute material of the burlap fabric. So I decided to use a standard plastic mask as a mold under the fabric. It definitely feels better that way and helped with forming the entire scary Halloween mask.
As I said earlier, Halloween masks are a great way to achieve a look without having to spend much time on makeup. Plus I can use it as scary decor as well throughout the house. This mask even matches my decor.
Step 1: Cut out bigger areas on the plain mask
Put the plastic mask onto the styrofoam head. Then I used the X-Acto knife to cut out bigger holes for the eyes, nose, and mouth so I could replicate a more skull-shaped mask. Don’t worry about being too exact.

Step 2: Shape the mask into a skull-like shape
I used crumbled up and shaped aluminum foil and duct tape to raise the eye sockets on the mask. I also used the same technique to make the chin larger and protrude more. The reason I did this is to make the small mask larger and more skull-shaped.
I also added more tape to the top of the forehead so there would be material on the top of the head. It helps to carry the weight of the finished mask and gives it more visual impact.
The original mask was just a bit small but I couldn’t find a different affordable plain mask to work with. Maybe you are luckier than me and you can skip the steps to make the mask larger. This is why I said that an expression drama/theater mask would work well.
While working on the mask shape with the duct tape and aluminum foil, I kept trying it on to make sure it still fit my head right. I also added a bit of padding to the chin so the mask wouldn’t rest entirely on my face. I wanted the nose to not stick through the nose hole to make it look more like a skull.
Unfortunately, I don’t have the entire process on video. I missed hitting the video button for the bottom eye socket. Sorry! Overall I added the brow part of the eye sockets, the bottom part of the eye socket, and a larger chin. (The duct tape also helps in the later steps when pinning the burlap to the mask.)

Step 3: Prop the mask onto a stick or tripod
I stuck the styrofoam head wearing the mask (which had a hole on the bottom) onto one of my photo light tripods. You can maybe use a stick instead and duct tape the stick to a chair for similar stability.
I also put an old towel under the tripod because I knew the next steps would get a bit messy. This solution worked great.
Below you can see the finished shape of the molded mask with the added aluminum foil and duct tape. See how the bottom eye socket goes below the top brow and slightly protrudes more?

Step 4: Make a small darker burlap BASE LAYER
I cut a 9-inch strip of burlap from the 2 yards of fabric as well as a 2.5 inch strip. I folded the 9-inch strip in half and then cut it in half.
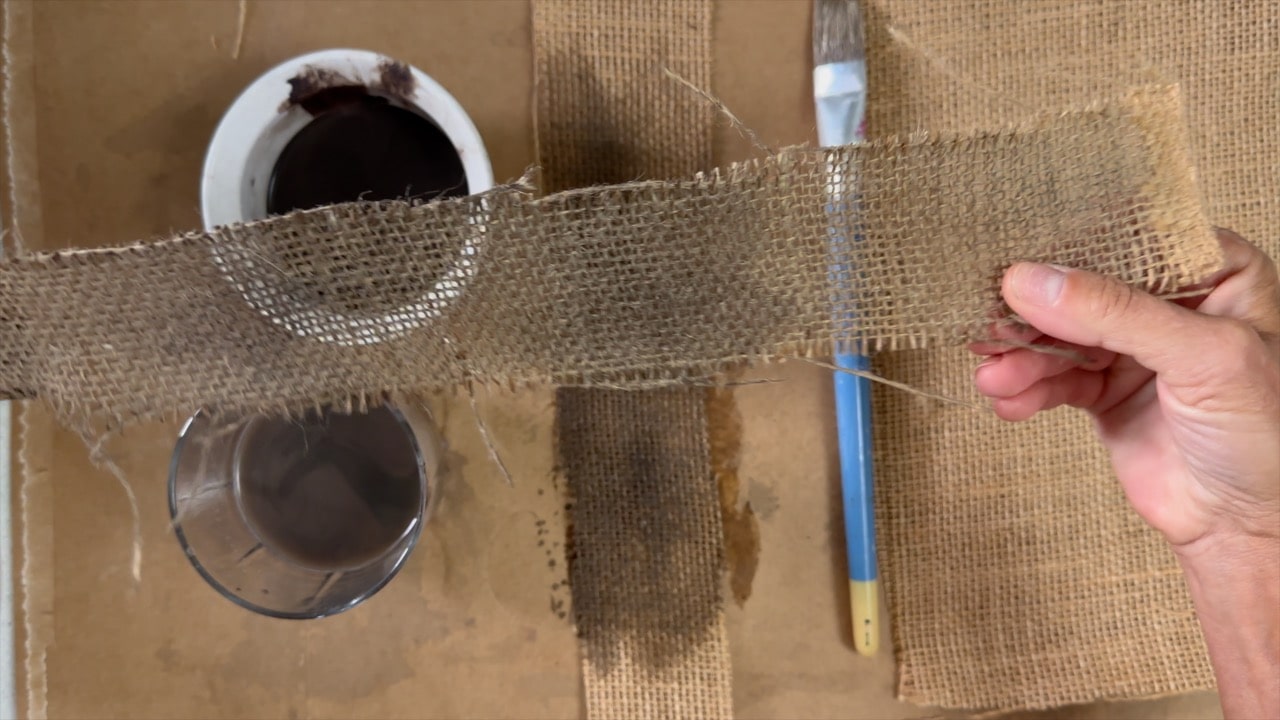
Then I mixed some dirty dark water with brown and black craft paint and painted all the strips with that dirty water.
The larger 9-inch pieces are for each cheek and the 2.5-inch longer strip will run from the top of the head over the nose to the chin.
Step 5: Glue the darker burlap base layer to the mask
I used the clear glue to attach the darker strips that I made in the previous steps to the mask and let it all dry before moving on to the next step.
Use the needles to pin the burlap in place while the glue dries.

I cut out the areas around the eyes out of the long strip of darker burlap as you can see below.

Step 6: Add two large pieces of burlap to the entire face
- I cut two large pieces of burlap around 20 inches long from the burlap fabric. Then I filled a bowl with some Mod Podge and dipped one of the 20-inch pieces into the glue. I squeezed out any excess glue. One side of the burlap is sealed and doesn’t fray (If yours doesn’t have the sealed edge like mine then just fold it under). Place that side down the center of the mask. I used my fingers to work the burlap fabric into all the facial features. I pushed especially deep into the eye sockets.
- I cut slits into the side of the burlap fabric towards the side of the eye sockets. This way I could lay out the fabric better and reveal the smaller square I had attached in that spot earlier.
- I also used my fingers and some extra needles to pleat the fabric where the mouth is.
- Using scissors, tweezers, and my fingers, I removed some of the burlap strings from the fabric grid so you could see while wearing the mask.
Repeat the same steps for the other side of the mask. Make sure that there is a gap in the center where the two pieces of fabric meet to show the underlying darker burlap.
IMPORTANT TIP: You can see in the video how I cut the strings out of the burlap grid in the eye sockets.

Step 7: Fix the sides of the mask
This step is only necessary if you suddenly have a gap next to the eyes and can see the black plastic mask shining through. My burlap just frayed a bit too much or shrunk or both. I don’t know what happened exactly but I wanted to fix it. So I cut two smaller rectangles out of the burlap, dipped them into more Mod Podge, and inserted them under the front layer of the mask as you can see below. That did the trick and I liked the look too.

Step 8: Add jute yarn stitching to the front of the burlap mask
I decided that the jute yarn was too much of the same color as the burlap so I dipped it into the same dirty watered-down color that I used to paint the three smaller burlap pieces earlier. I didn’t let the jute yarn dry before stitching the face.
It’s also important to do this while the Mod Podge glue is still wet or you won’t be able to add the stitching to the dry mask. I used a large curved upholstery needle for this which worked well.
I started at the top of the head with one row going down and then worked myself back up to finish the cross stitch.

Now it is time to let the mask dry fully before moving on to the next step.
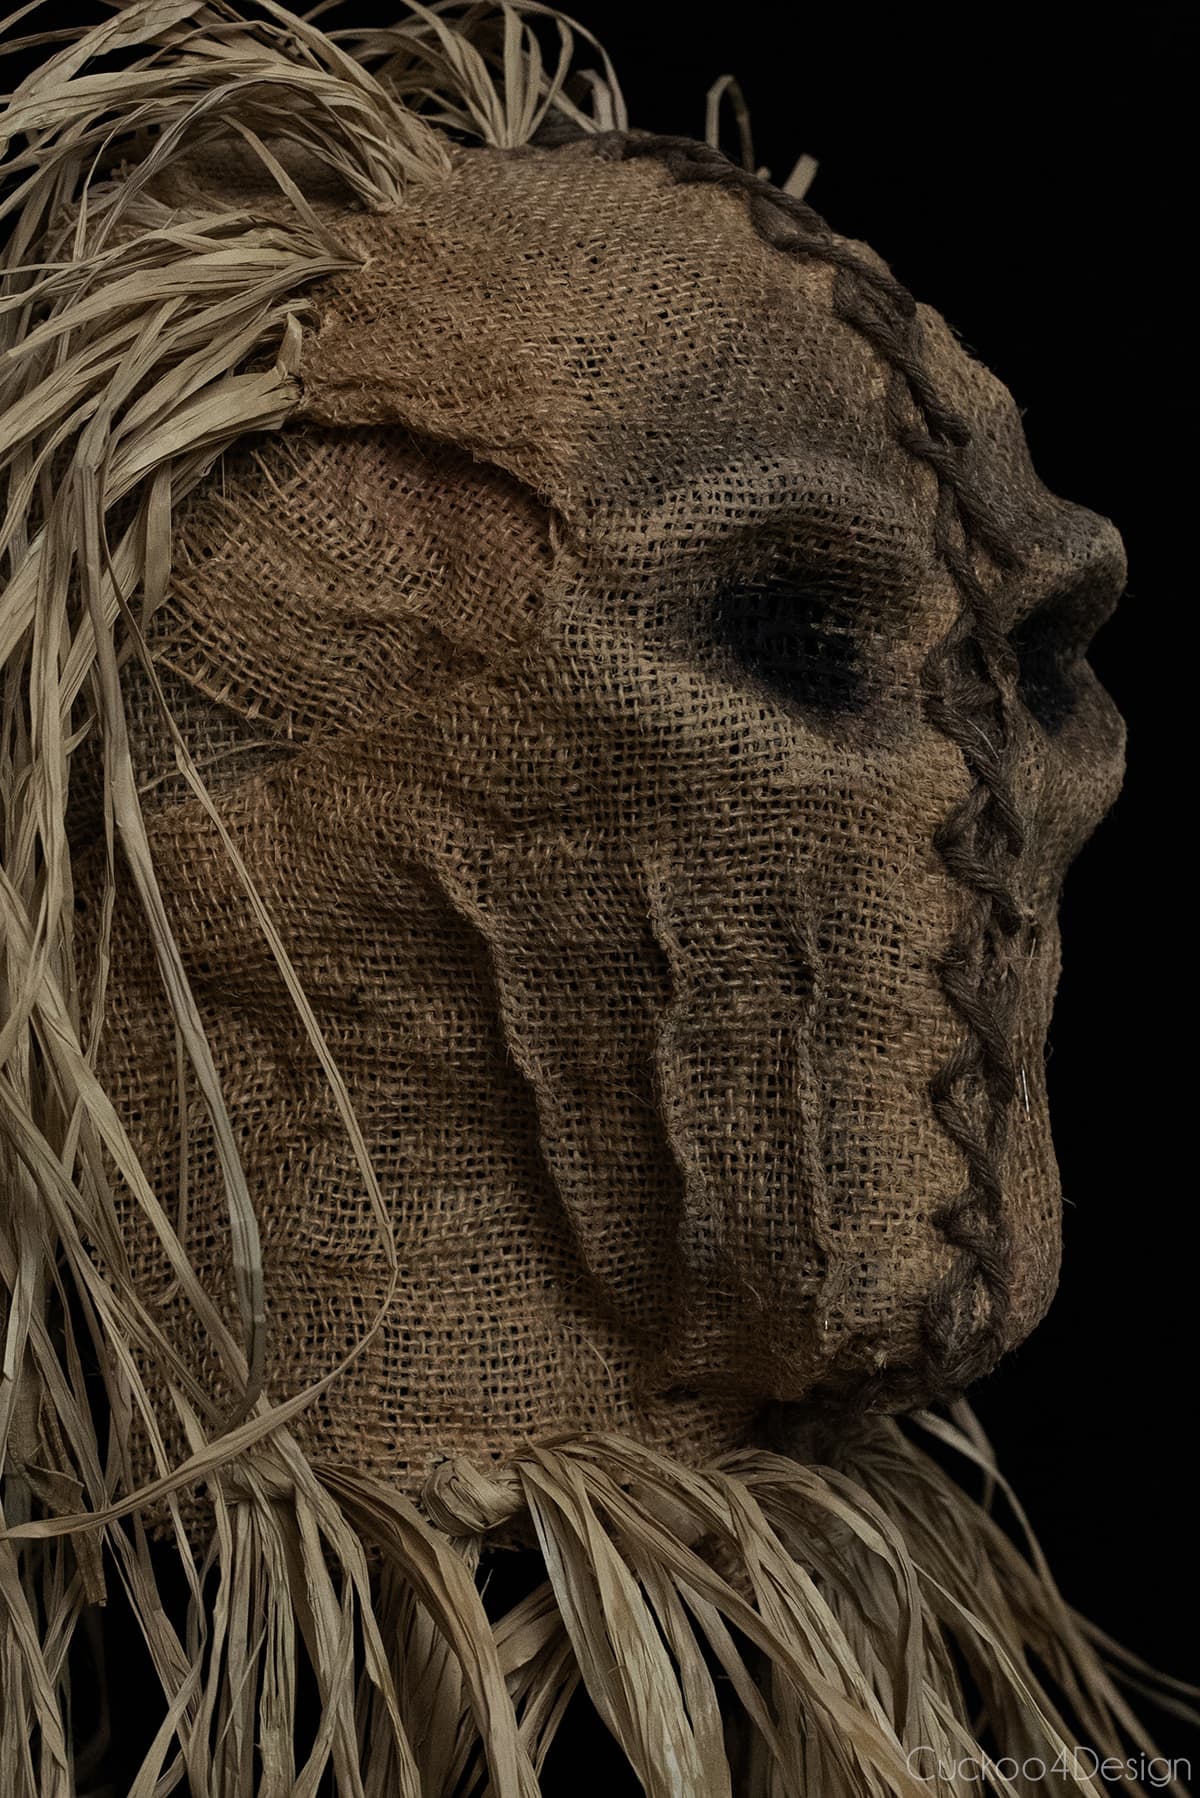
Here is the mask after it had dried fully, with all the needles removed, and where you can see the added darker cross-stitch detail.

The red color in the mouth area is actually real blood LOL. I poked myself badly with one of the needles. So be careful!

RELATED: The jute yarn was leftover from my DIY pendant light shade that I made a while back. Jute is so versatile and affordable. I love it.
Step 9: Paint burlap with darker and lighter shading details
For the eye sockets, I used pure black that I feathered outwards towards the raised part of the brows and cheeks with a stiff bristle craft paintbrush. For the rest of the mask, I used the same dirty brown and black water that I used for the smaller side pieces of burlap and the jute string earlier. In hindsight, I should have even watered it down a bit more. You can see how dark it is on the right side above the eye.
I painted some shading around the mouth pleats to make them stand out a bit more. I also added some lighter highlights as well at the top of the eye sockets and the mouth pleats.

Step 10: Add raffia hair detail to the mask
The burlap mask is really hard now so a drill and large drill bit works best to add holes for the raffia to the top of the mask.
- Hold the mask with one hand and use the drill and drillbit with the other one to add the holes to the top of the mask. I added 6 holes on each side but you could do more and add them closer together.
- I threaded around 6 raffia strands through my large plastic needle.
- Then you just thread the strands through two holes. This way the raffia strands are basically folded in half. It’s better than trying to knot them in the back.
- Keep adding raffia to all the holes. If some strands look too bare then you can just add more the same way.

I also drilled more holes in the bottom half collar of the mask and added more raffia the same way I did above. The only difference is that this time, I knotted the strands for a different look. I also cut them slightly shorter than the raffia around the hairline.

Photos of the finished DIY scarecrow mask
And here is the end result! This mask will actually make its debut at our annual neighborhood Halloween party and then I have photos I will update the post with them! We are planning on wearing a simple hooded velvet rope and black clothing with this mask. It almost covers the entire head. You could certainly wear it with traditional scarecrow clothing. I think a plaid shirt and jeans overalls would look great too.
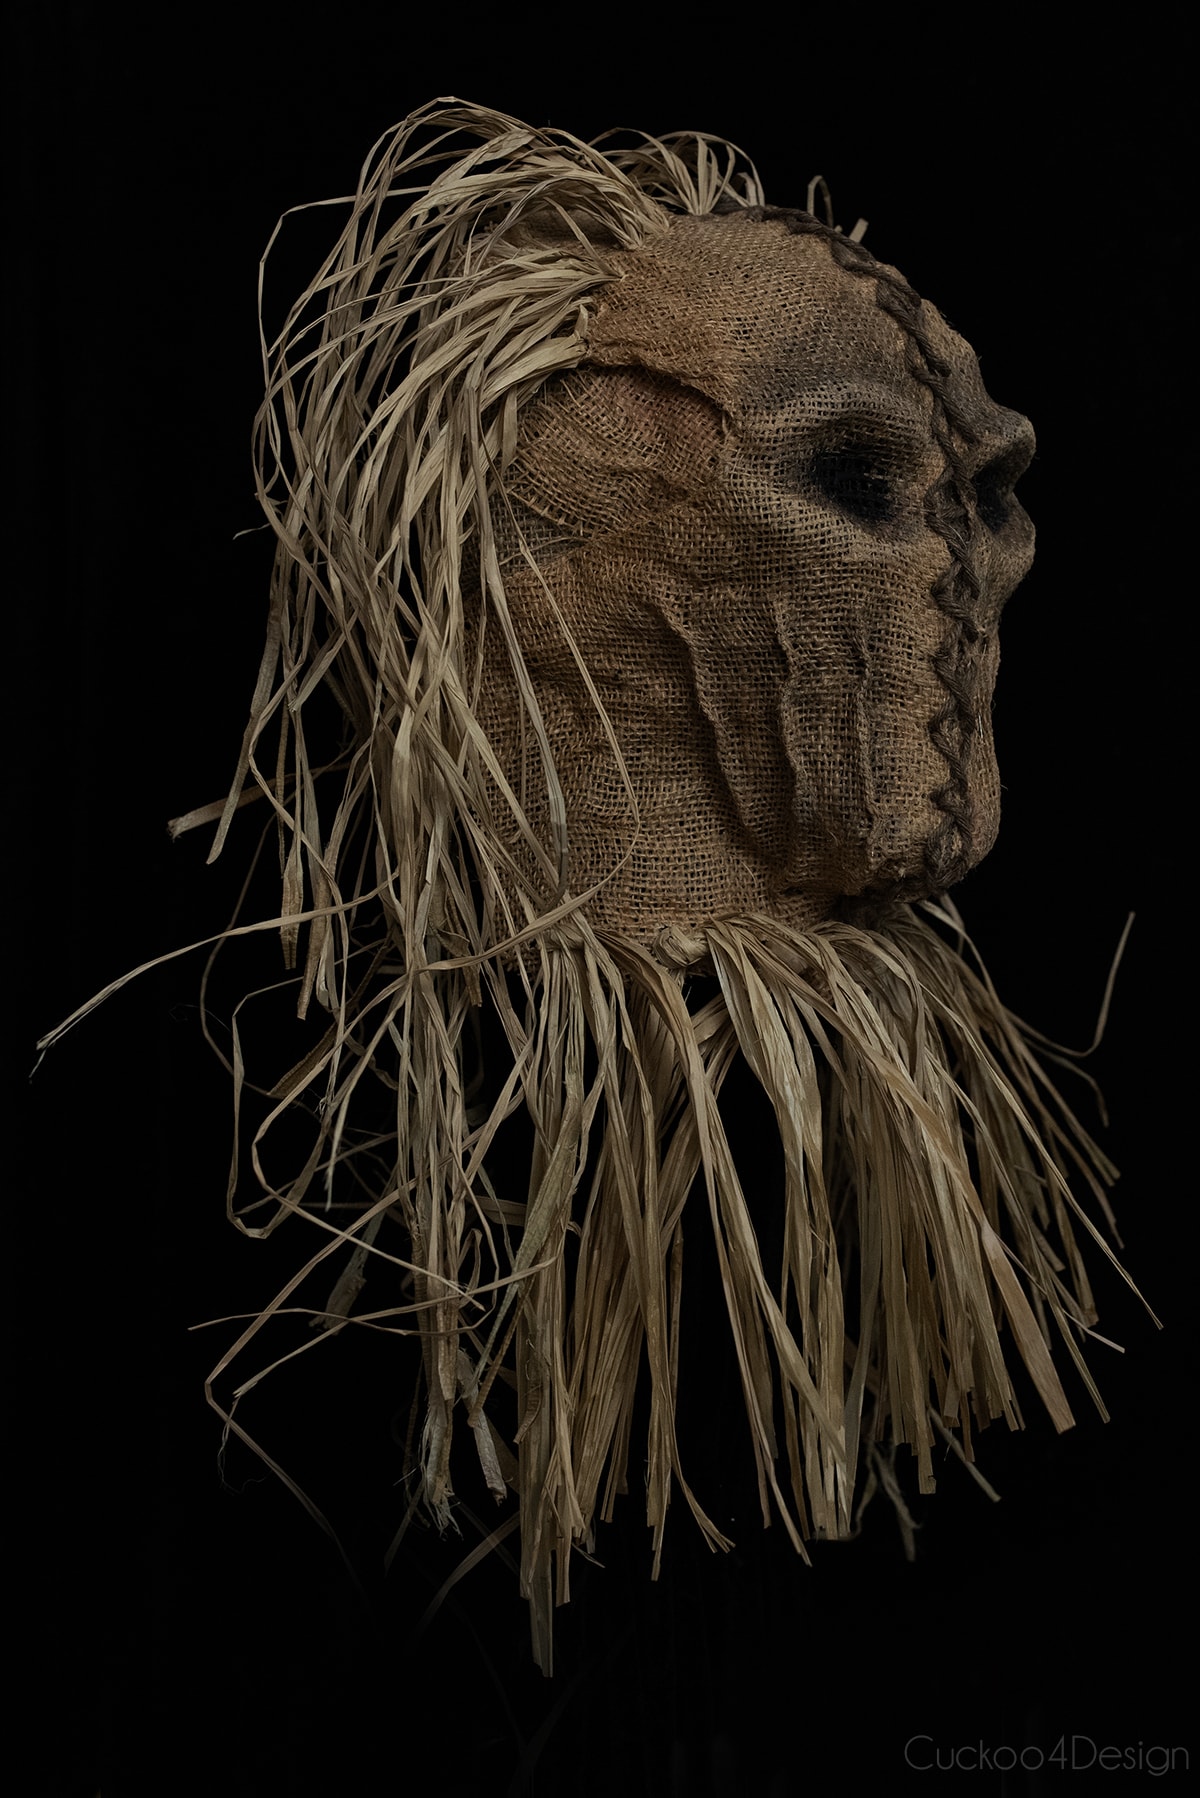

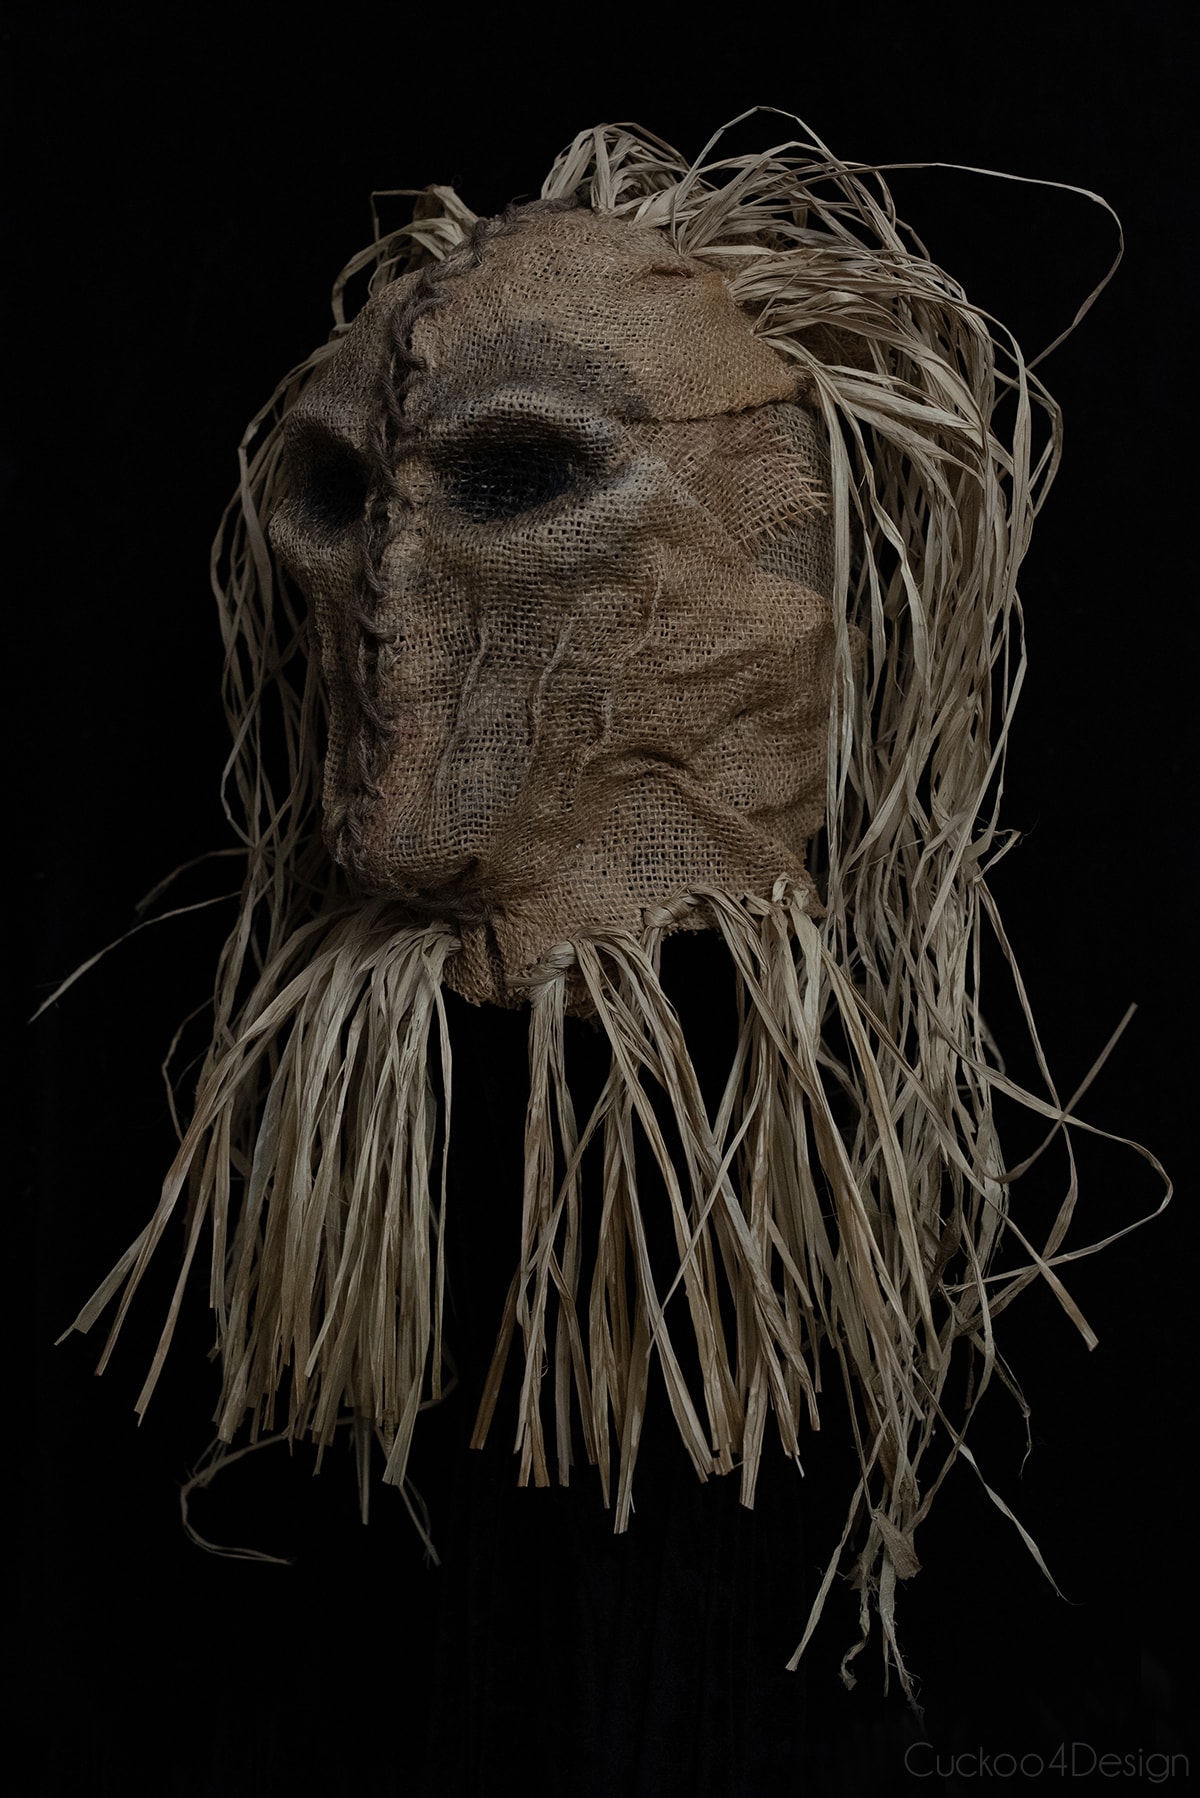

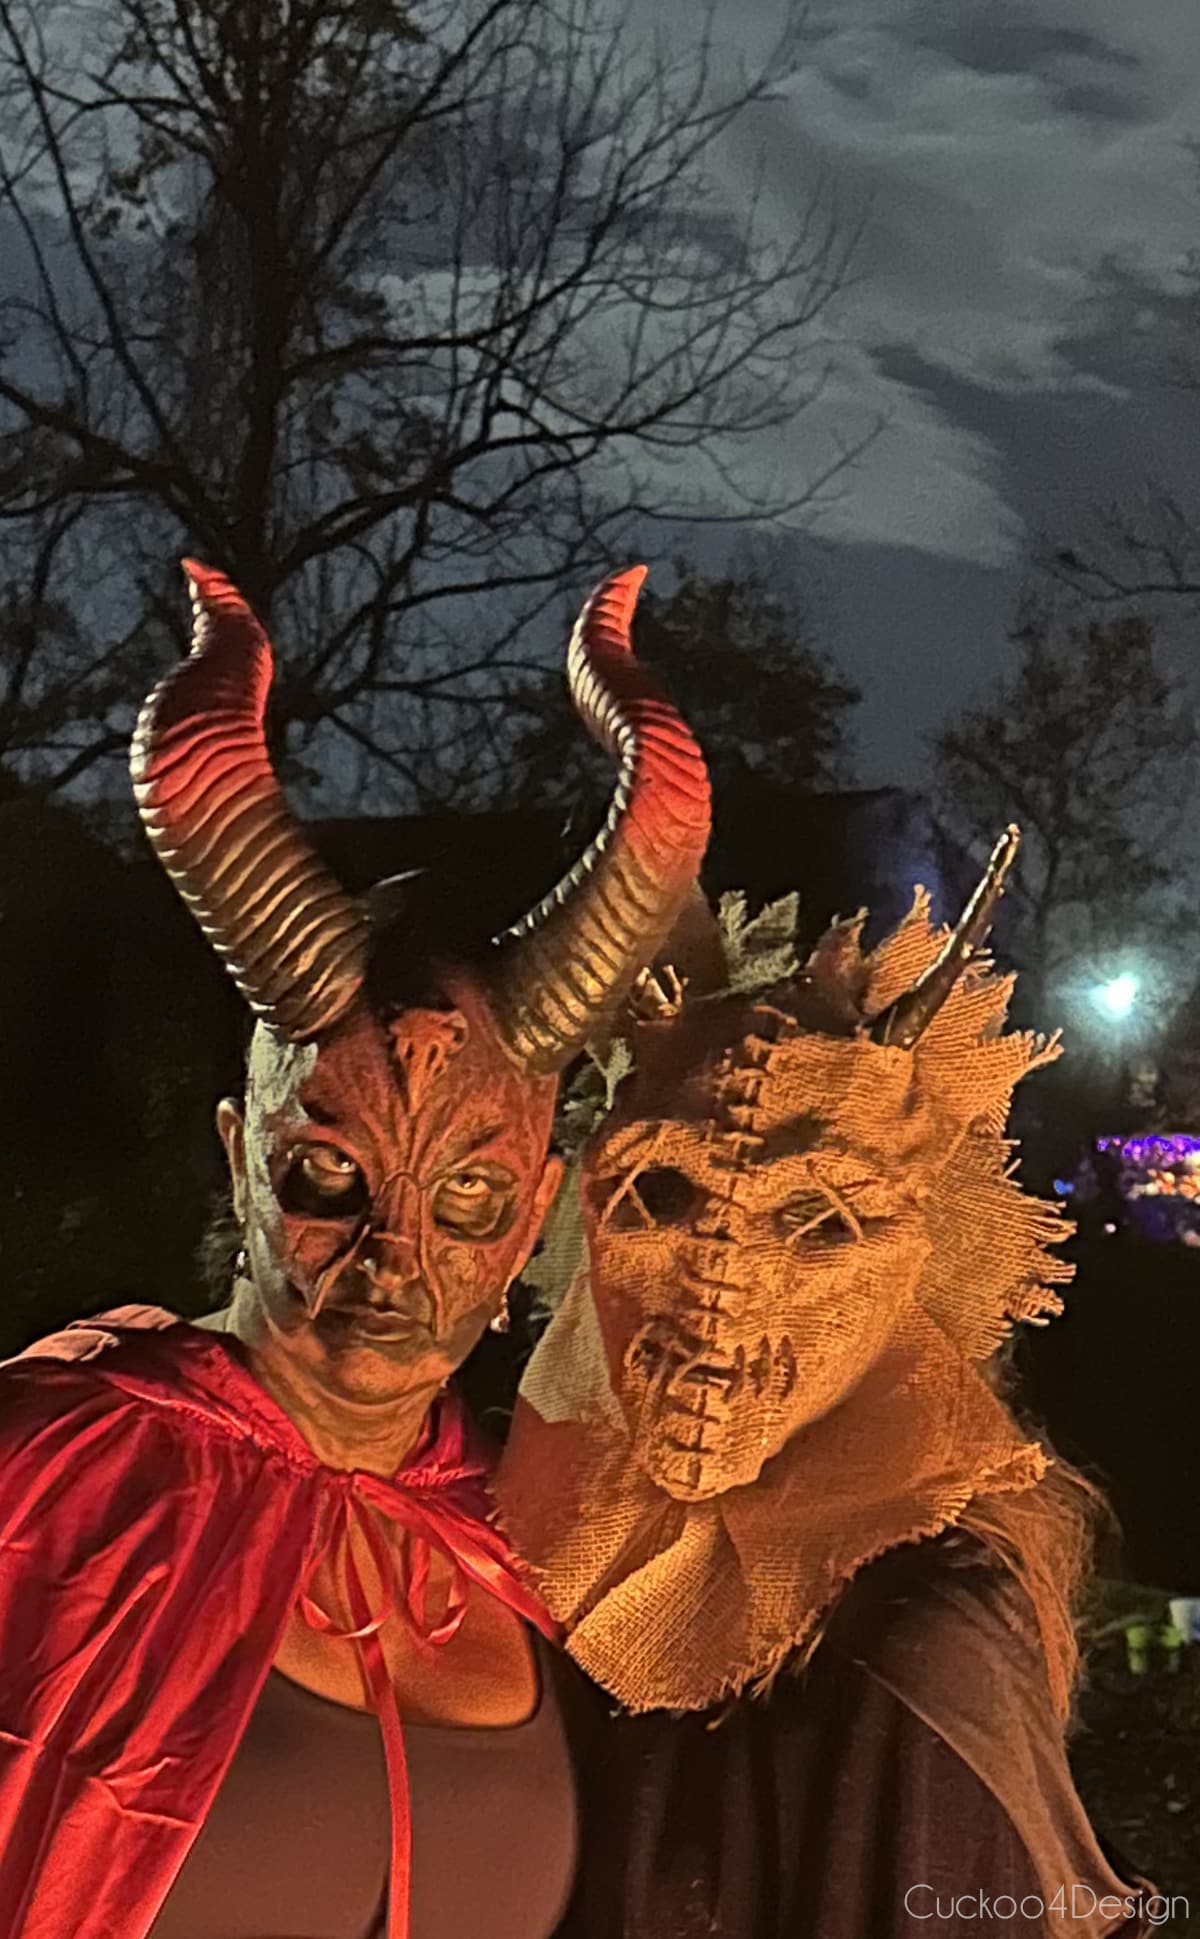
UPDATE: I made a second mask the same way but added some duct tape horns and a slit for the eyes with added stitching to the eyes and mouth.



RELATED: Do you want another easy costume idea that starts with a basic black outfit? Check out my fallen angel costume tutorial or my easy Maleficent costume DIY. An adult version is the same.

Where to buy scarecrow masks
As always, I want to include some shops where you can buy similar handmade scarecrow burlap masks for those of you who just don’t like to DIY. As you can see, some of the below masks actually have jute yarn as hair instead of the raffia and I like that too. Maybe I’ll try that look for my next mask. (scroll through the thumbnails below to head to the shops)
RELATED: you might also like my post apocalypse costume or my zombie soccer player costume for more spokie ideas.
I know that these kinds of creepy Halloween DIYs aren’t for anyone but I sure had fun making it. Working with the glue-dipped burlap did require some patience and it sure was messy but worth it for the overall price and custom look that I ended up with.
Tschüß,


