

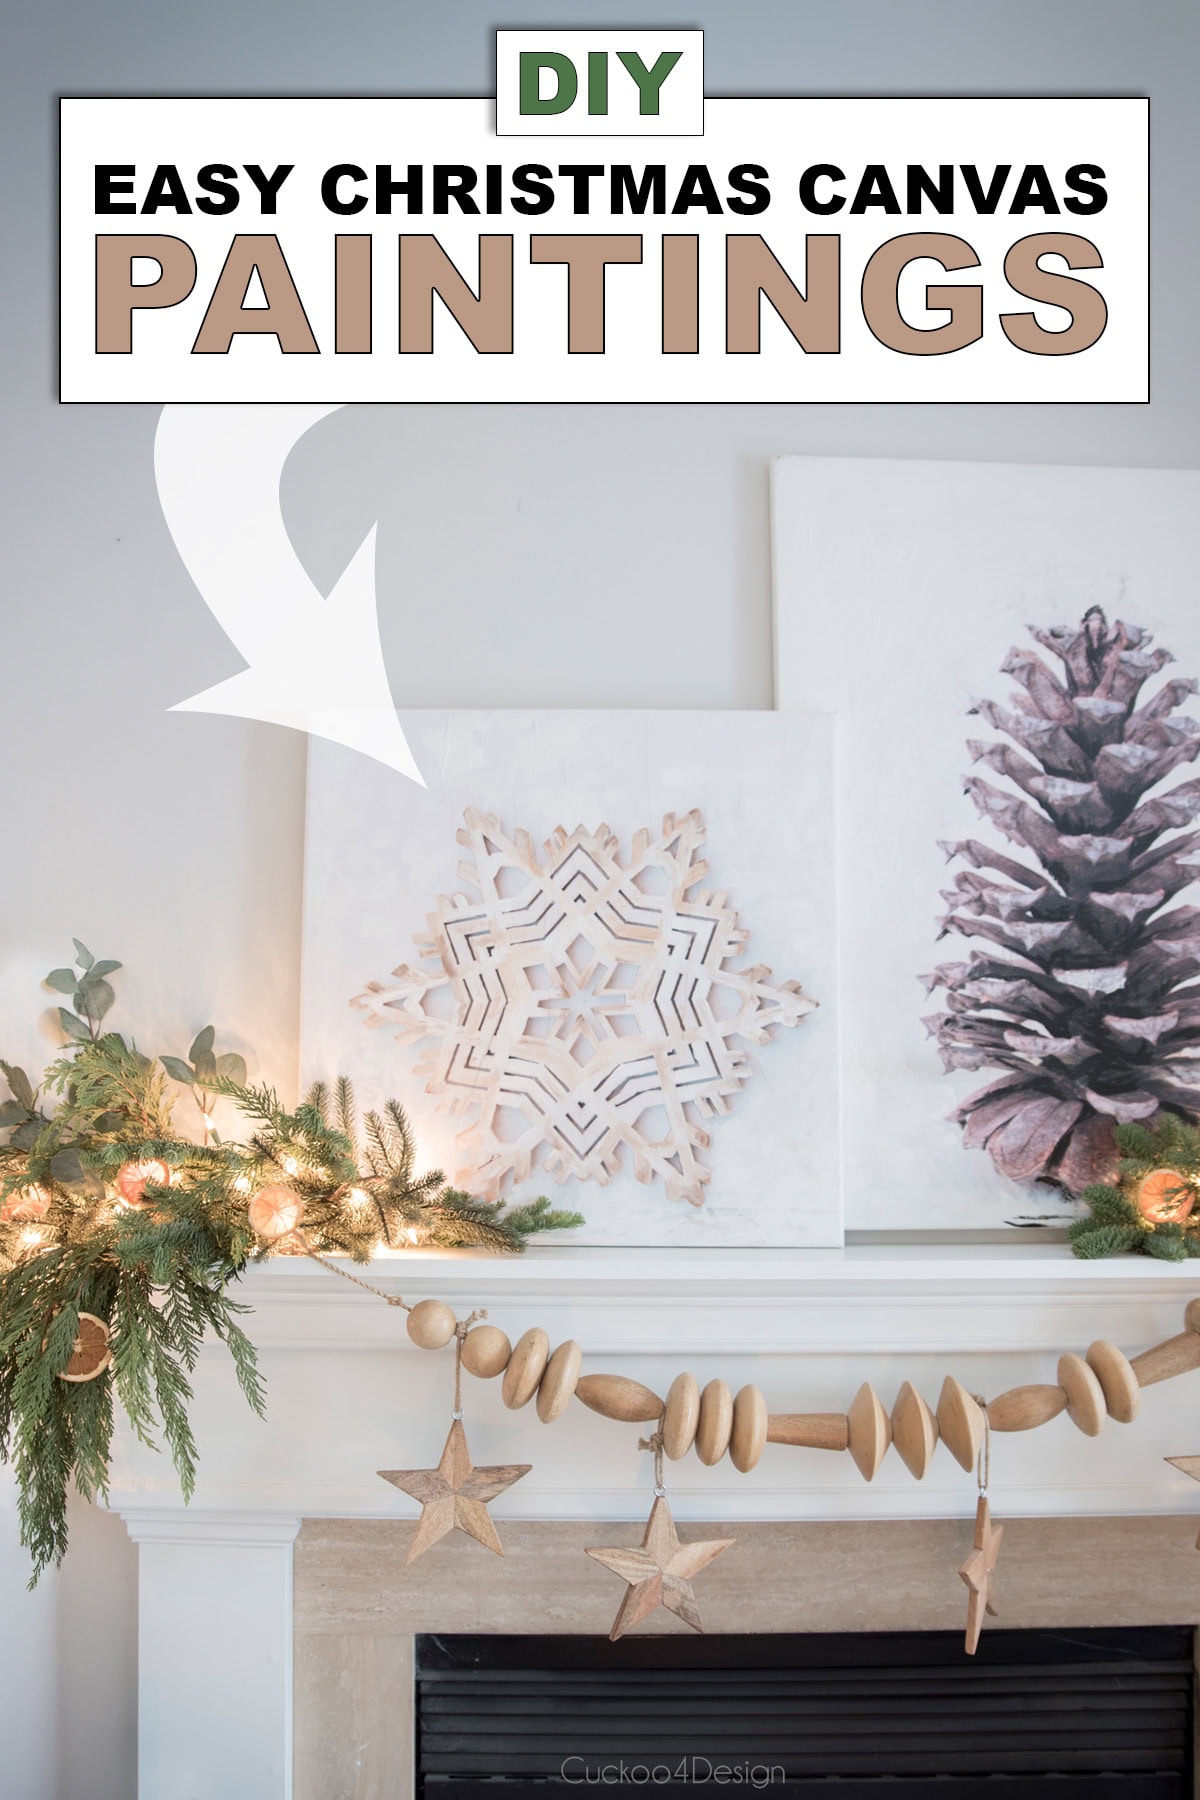
Easy Christmas paintings on canvas (DIY snowflake and pinecone art)
If you’re looking for an easy Christmas canvas painting idea that looks high-end but costs almost nothing, this DIY snowflake and pinecone canvas art is perfect. For this year’s holiday decorating, I wanted to create a couple of easy Christmas paintings on canvas using inexpensive engineering prints. And I filmed a full video tutorial to walk you through it.
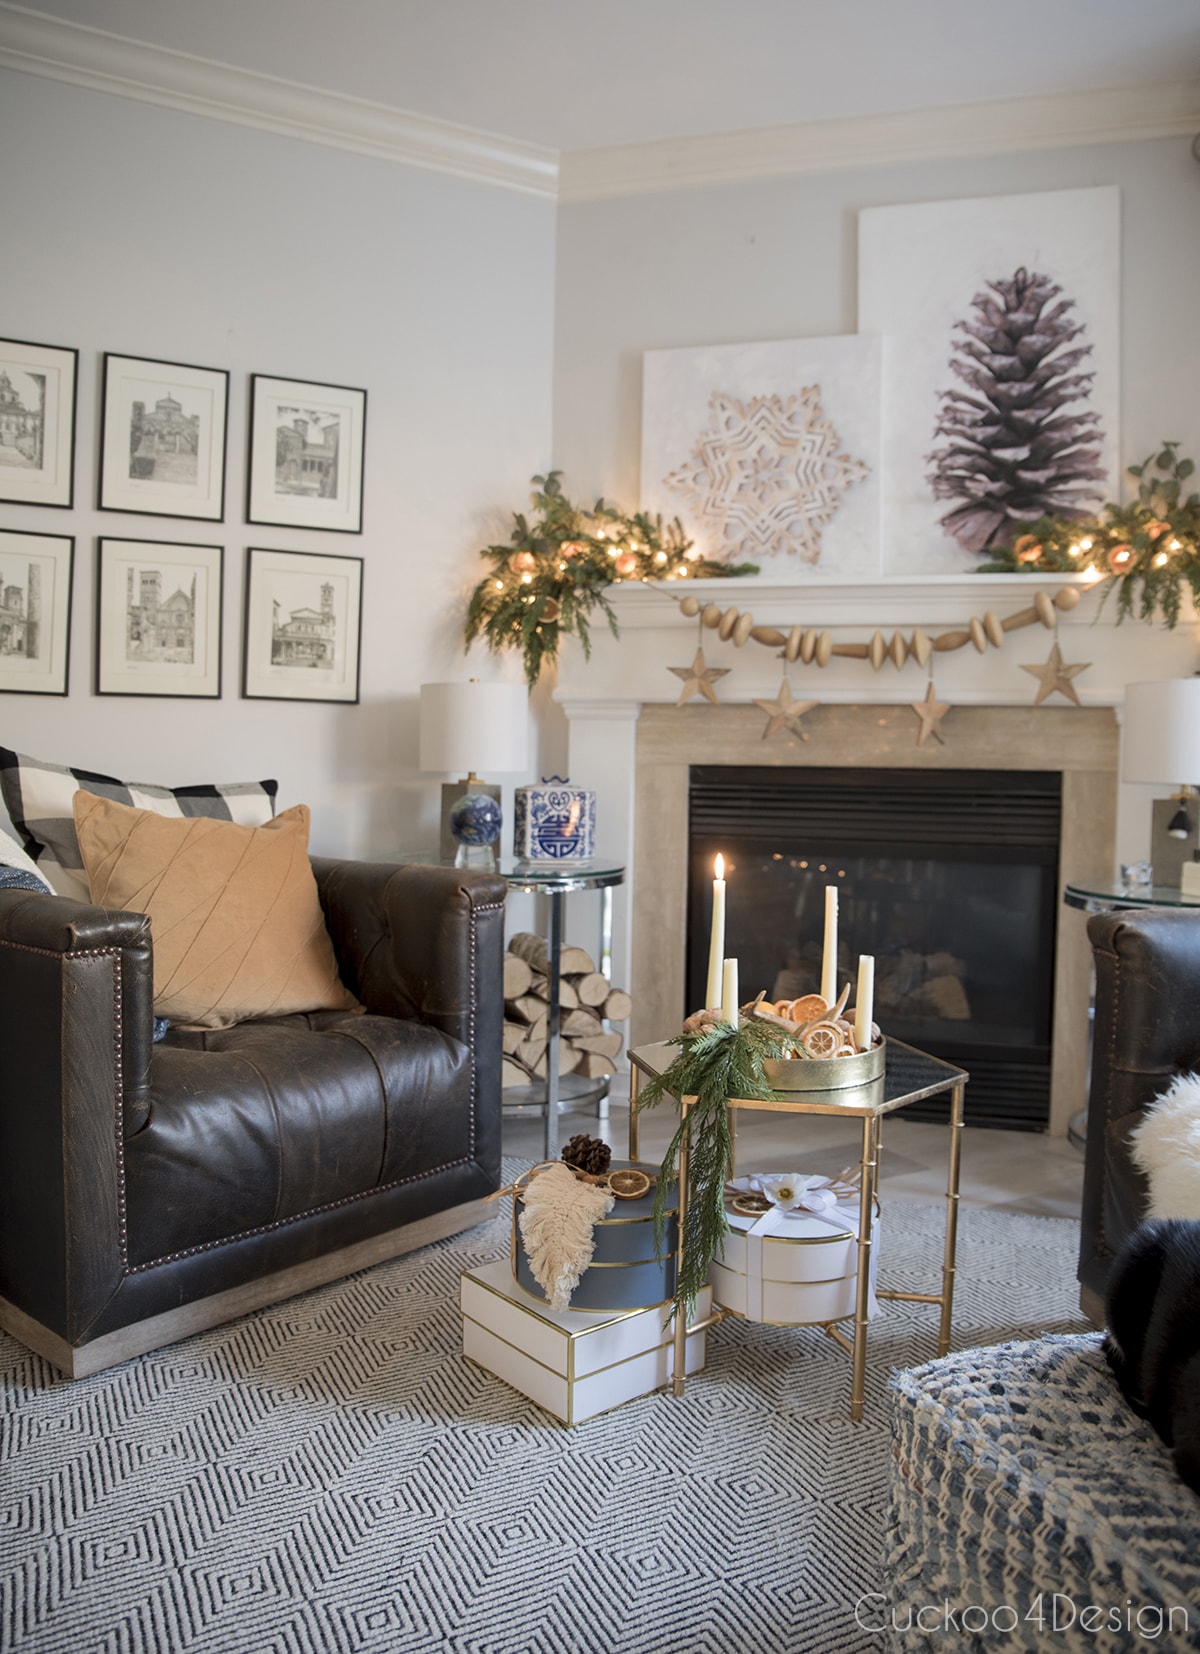
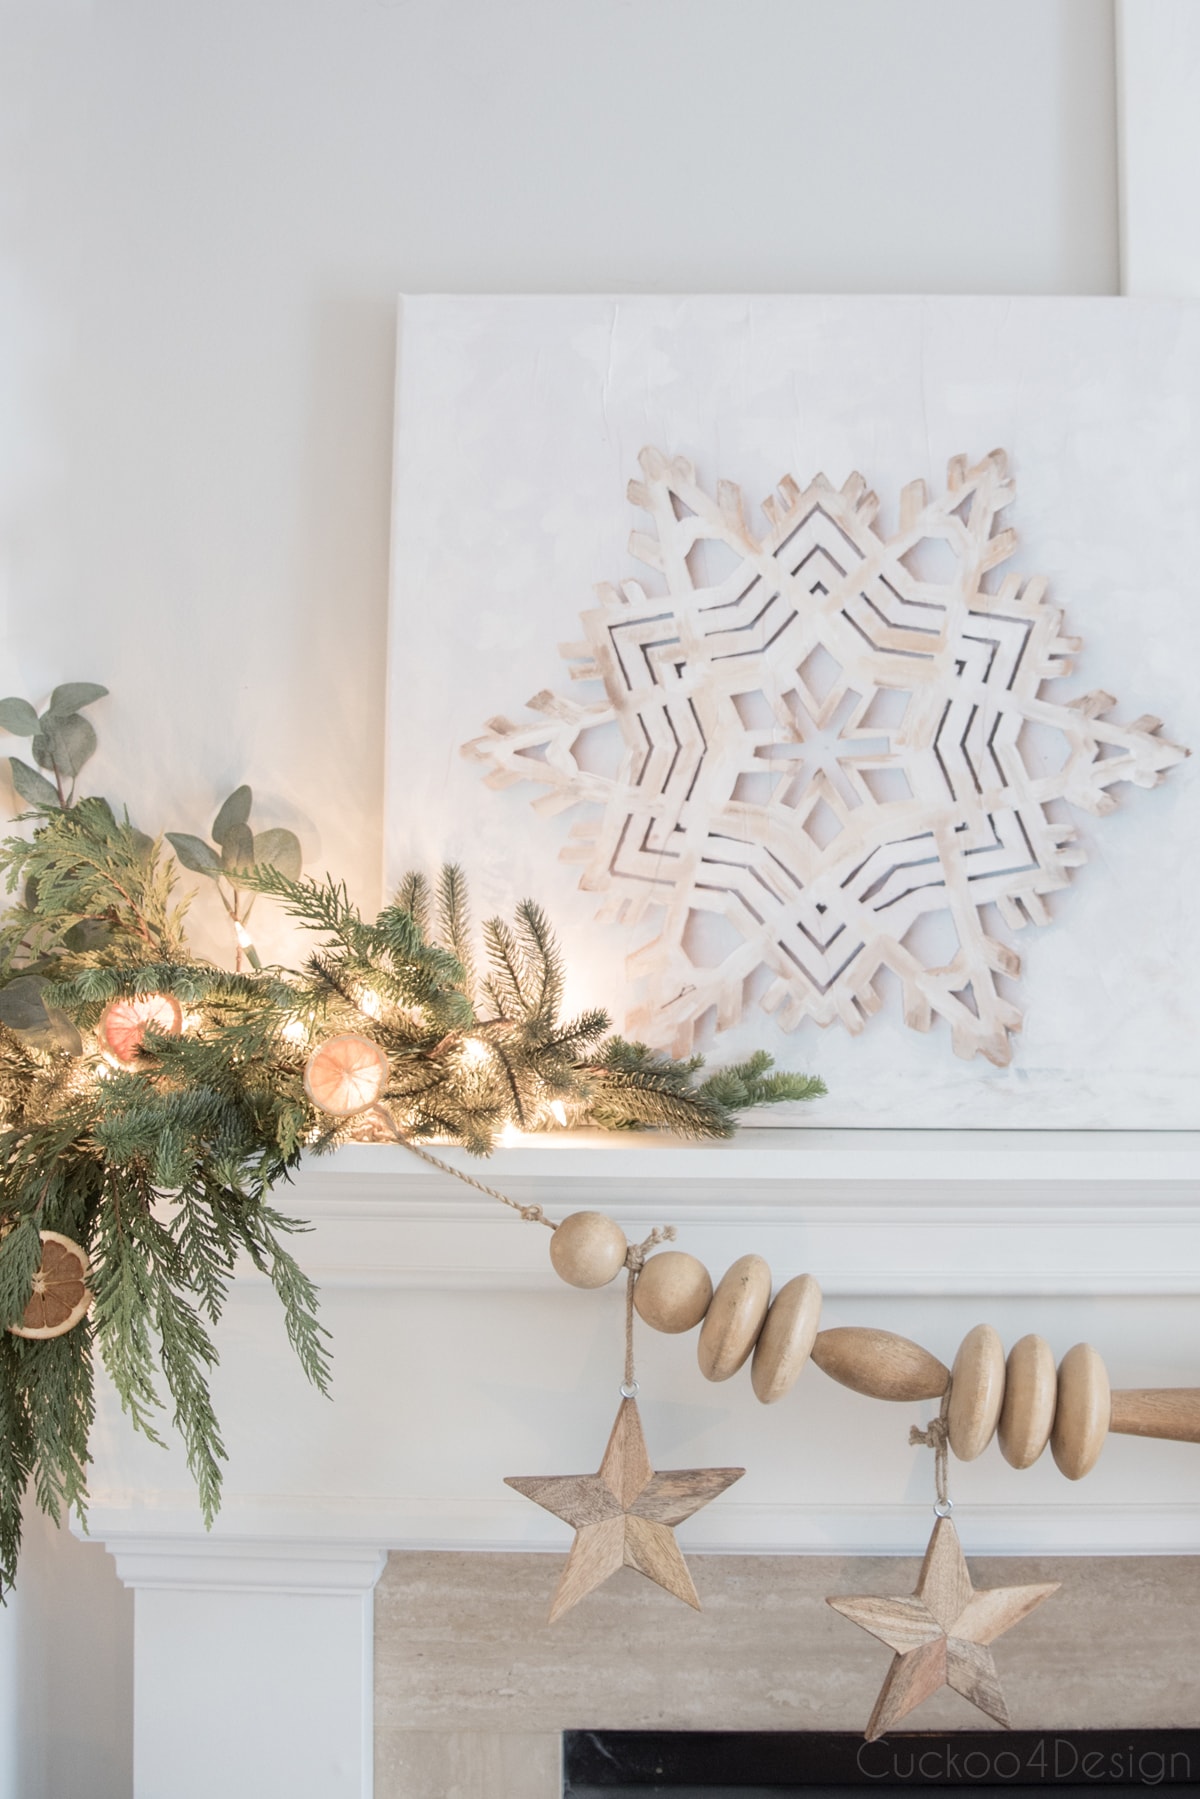
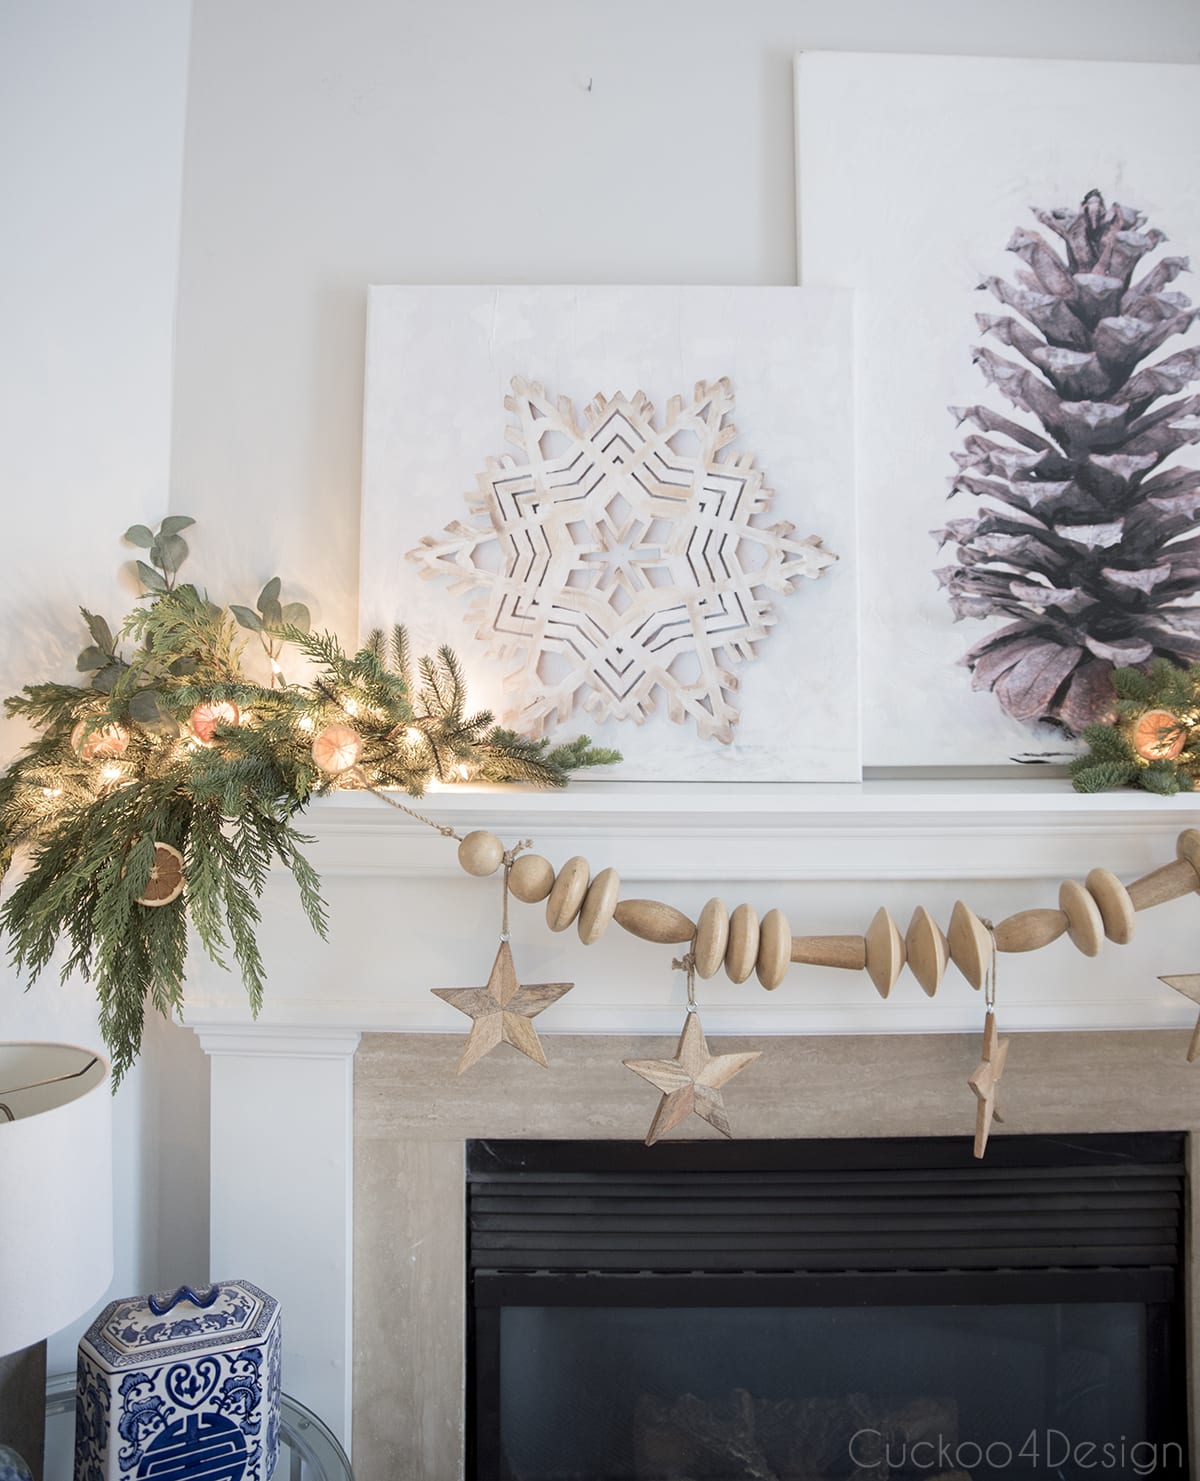
Since I had added more pinecones and some German wooden snowflake cutouts to our natural German Christmas tree, I thought those two pieces of art were the perfect new additions to our fireplace this year. A small change without spending a ton of money.
How to make easy Christmas canvas paintings
This post may contain affiliate links from which I will earn a commission at no extra cost to you. View my full disclosure policy.
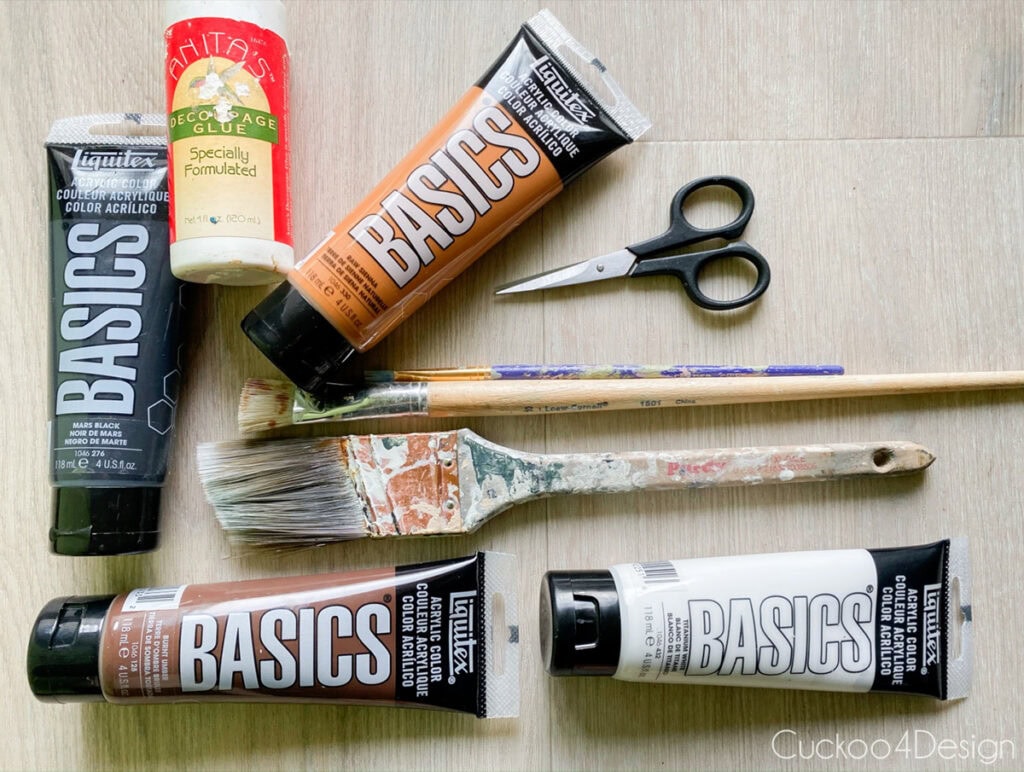
Before you get started on your easy Christmas canvas painting, here’s everything you’ll need. The supplies are inexpensive and easy to find, making this the perfect beginner-friendly holiday craft.
Materials needed for Christmas canvas paintings
- I had my snowflake and pinecone images printed at a local Staples as an engineering print for $6 at 24″x36″
- 24″ x 24″ canvas for snowflake and 24″x 36″ canvas for pinecone
- matte mod podge
- scissors
- small paint roller and different-sized brushes (I used a roller for the pinecone, but only brushes for the snowflake, as shown in the video tutorial)
- black, white, tan, beige and brown acrylic craft/artist’s paint (48 color set HERE or you can buy single colors)
Video Tutorial
If the video doesn’t work on my blog for any reason, then you can also watch it on my YouTube channel instead.
{Music credit: Music from https://filmmusic.io: “Christmas Rap” by Kevin MacLeod (https://incompetech.com) Licence: CC BY (http://creativecommons.org/licenses/by/4.0/)}
Step-by-step instructions for Christmas canvas paintings
Here’s how to turn a simple engineering print into an easy Christmas canvas painting with a textured, hand-painted look.
This method also works for many styles of easy Christmas paintings on canvas, especially if you want the look of hand-painted holiday art without needing advanced skills.
Step 1: Photograph your pinecone or snowflake (or any other item you’d like)
Place your pinecone, wooden snowflake, or any decorative item on a white poster board outside in bright but indirect light (a cloudy day or shade works best). This prevents harsh shadows and gives you a crisp, clean image for printing. Snap your photo, crop it tightly, and save it at the highest resolution.
After that, you only have to crop the image before getting it printed at a place that offers engineering prints. As I mentioned above, I had mine printed at Staples.
If you don’t feel like photographing your own item: I’m offering my snowflake for a limited time for free as a downloadable file. This is my Christmas gift to you guys! Choose the “File” tab in your browser window and then scroll down to “Save As” to save the file to your computer.

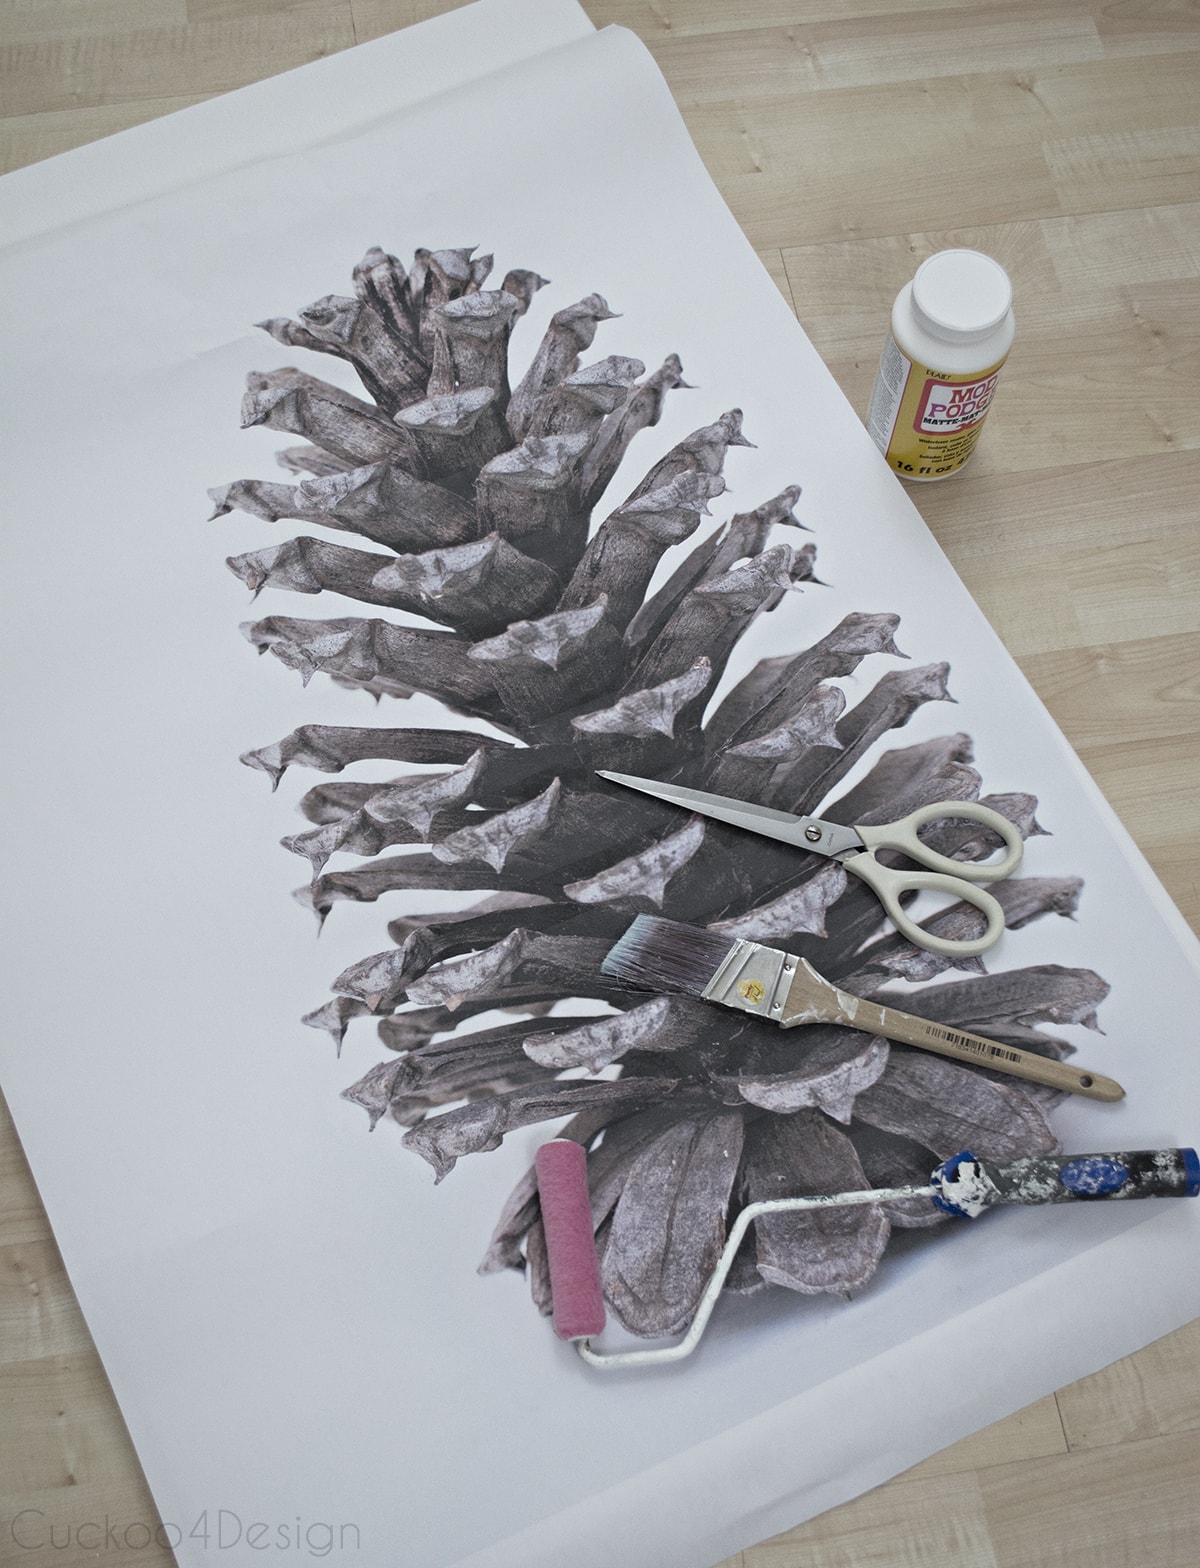
Step 2: Print the photo as an engineering print
Take your image to Staples or another print shop that offers engineering prints.
These large-scale black-and-white prints cost only a few dollars and are perfect for creating affordable, high-impact wall art.
I printed mine at 24″×36″ and trimmed them down to fit my canvases.
Tip: Double-check the print before leaving the store—sometimes they accidentally resize it! It happened to me twice and was very frustrating since I didn’t notice the mistake until I got home.
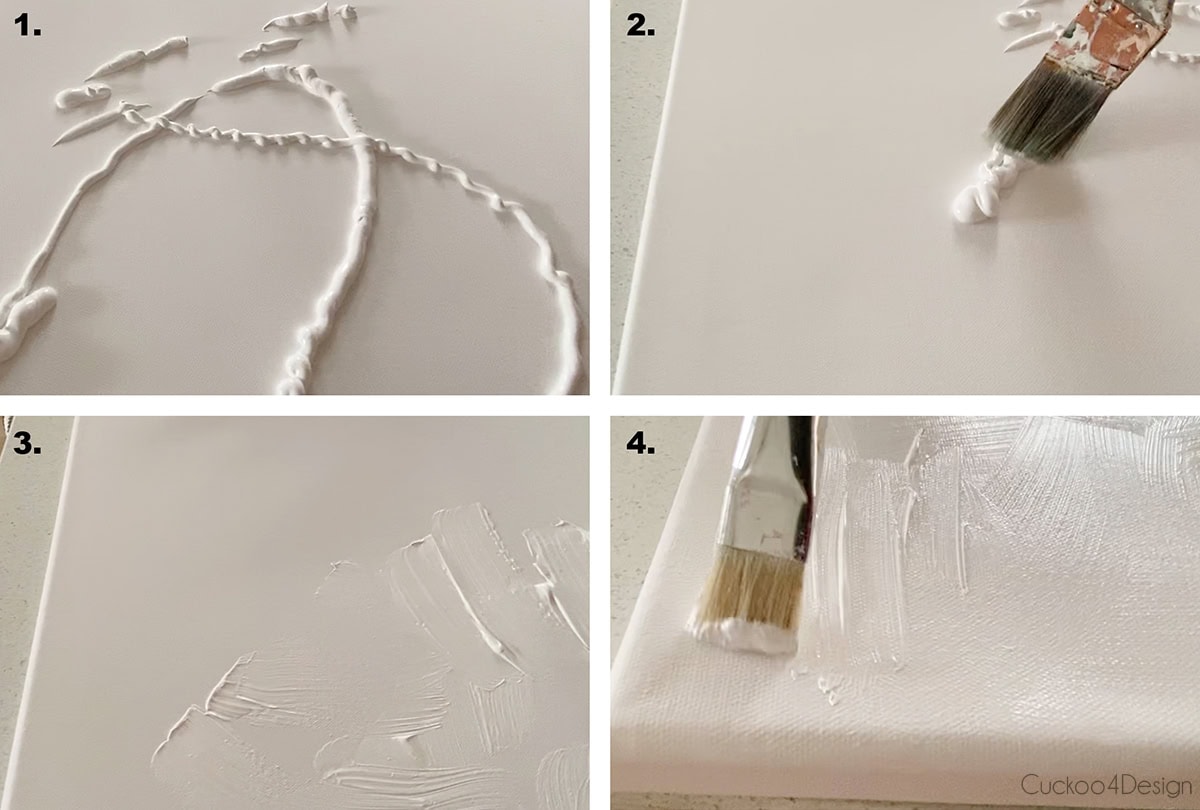
Step 3: Prep the canvas
Before applying the engineering print, I added a layer of white acrylic paint and a hard-bristle brush to give the canvas some texture and make it look more like a real painting. Let the paint dry.
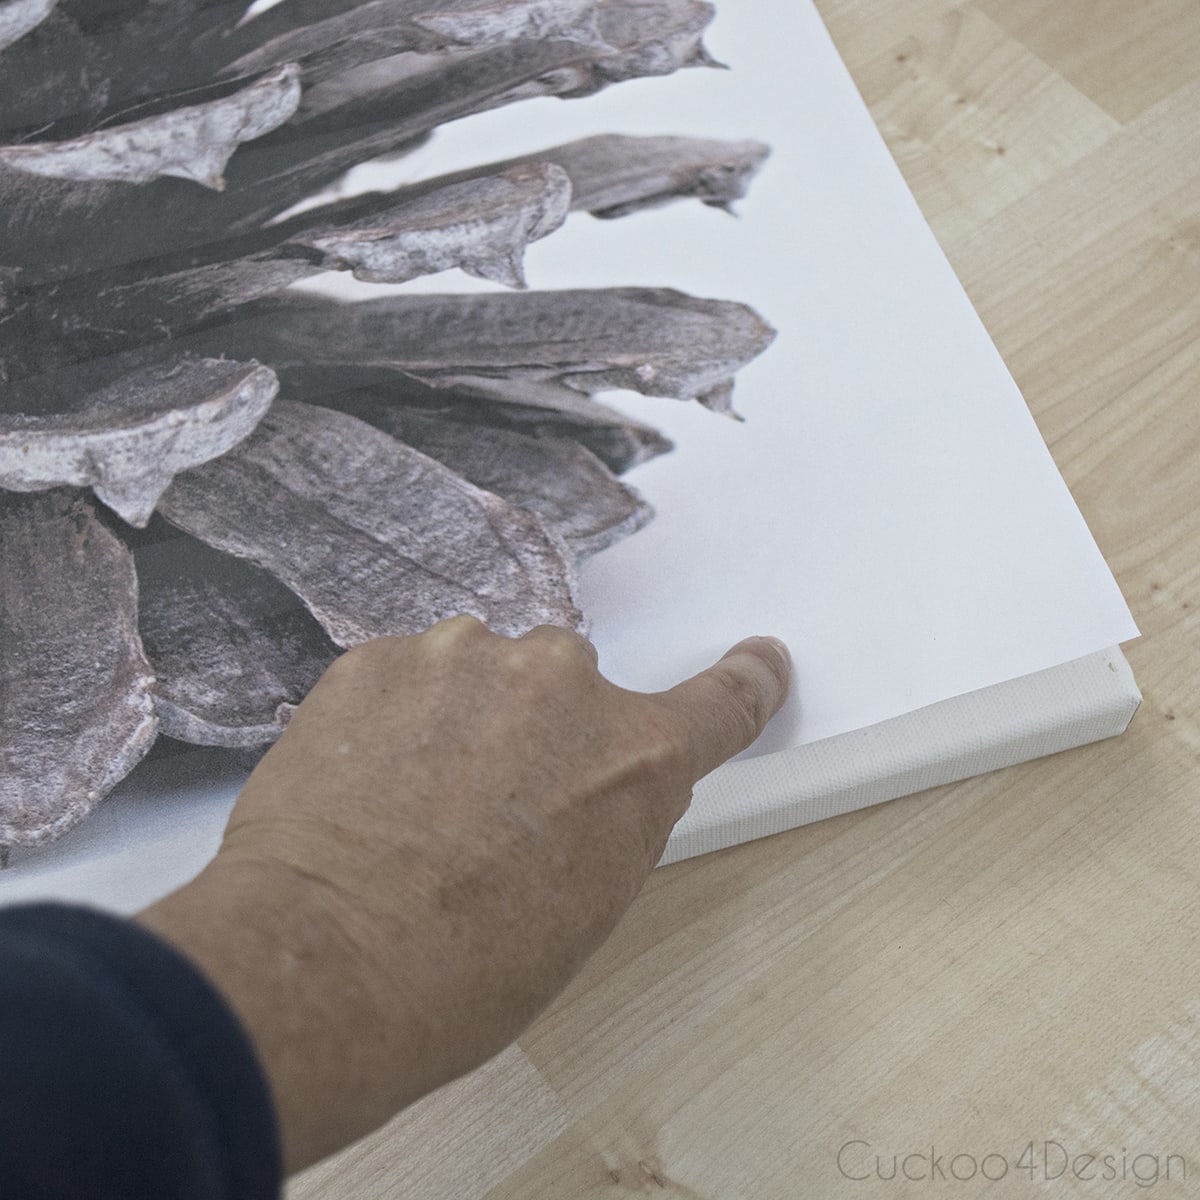
Step 4: Trim the engineering print to fit the canvas
Cut your engineering print to the size of the canvas. Don’t worry about being exact.
Step 5: Coat the canvas in Mod Podge
After that, it was time to cover the entire canvas in Mod Podge with the roller. Or you can use a brush as I did in the video tutorial.

Step 6: Apply the print to the canvas
Take the engineering print and place it on top of the canvas. Smooth it out with a brush and fingers. Apply another coat of Mod Podge with a big brush and fingers on top of the print. You can poke tiny holes into stubborn air bubbles to help with flattening the print.

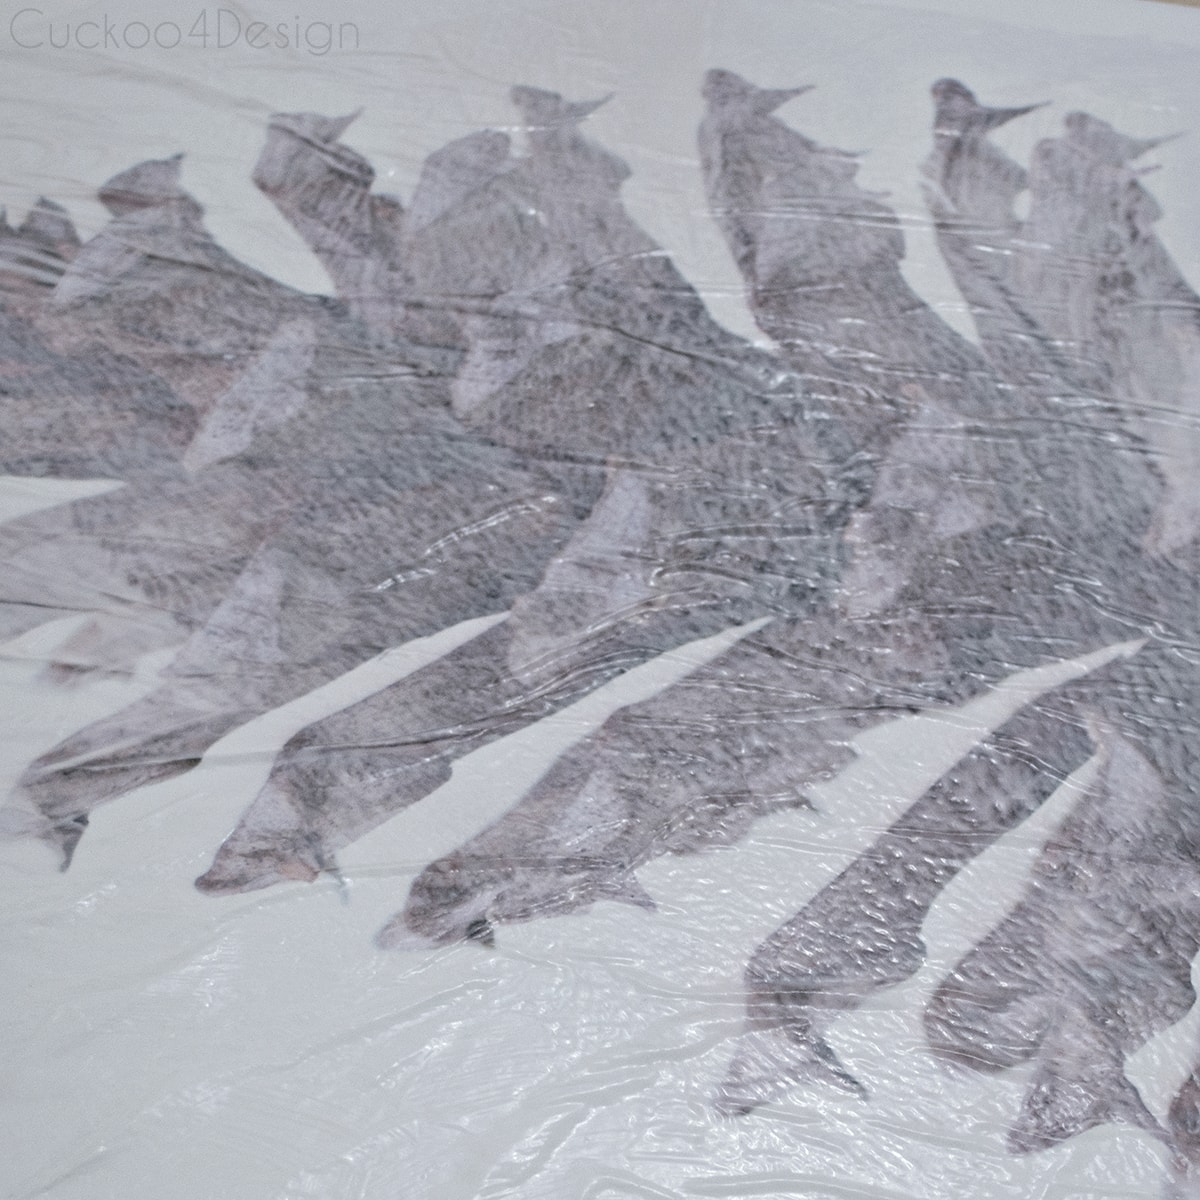
Let it all dry.
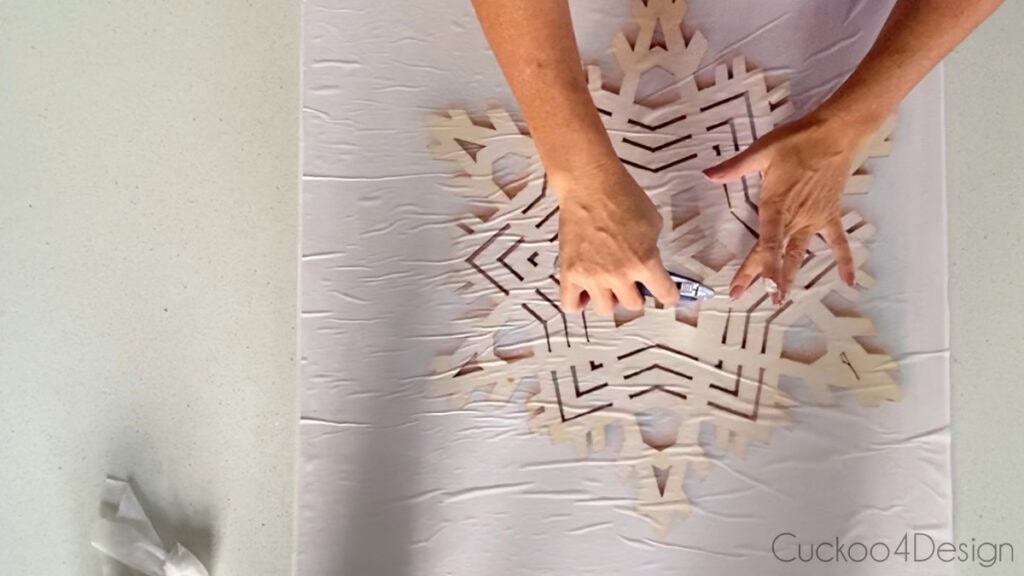
Step 7: Add some more texture with paint
Some areas may end up imperfect or wrinkled, which is totally fine and actually adds great texture to the artwork.
Once everything was dry, I added acrylic paint to the image and the surrounding areas, as shown in my video tutorial. You don’t have to do this step, but I think it adds dimension and texture to the overall look of the Christmas canvas paintings. This helps to make them look more like actual paintings.
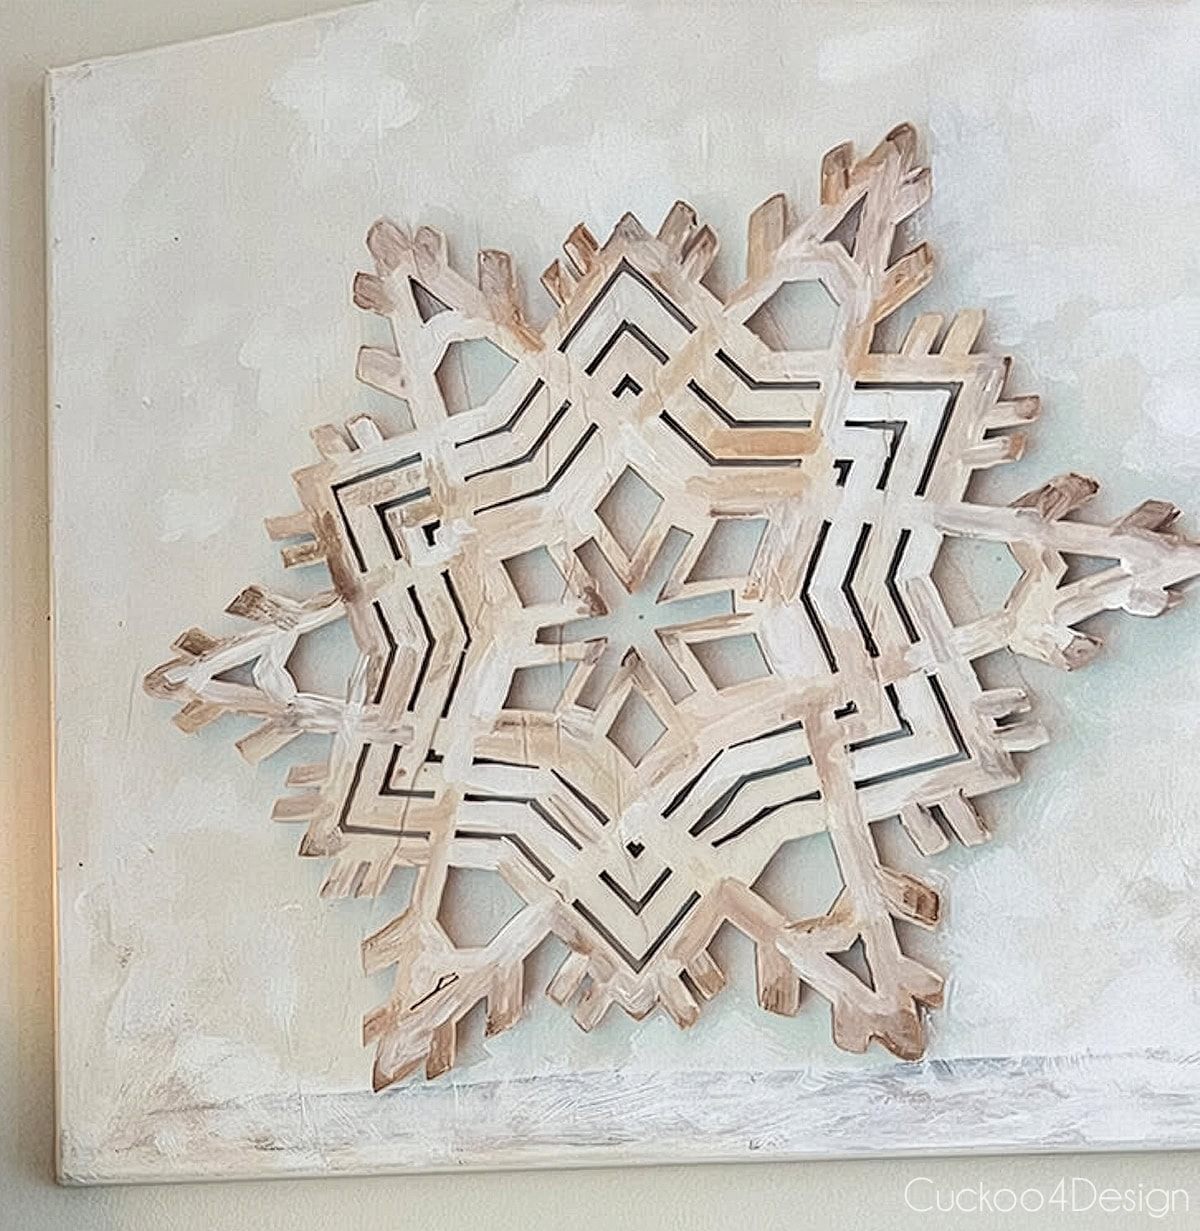
And voila, you have two textured pieces of art that look like real paintings.
Photos of finished easy Christmas canvas paintings
RELATED: If you love snowflakes, check out my affordable and easy toilet paper roll snowflakes or poster board snowflakes as Christmas ornaments.
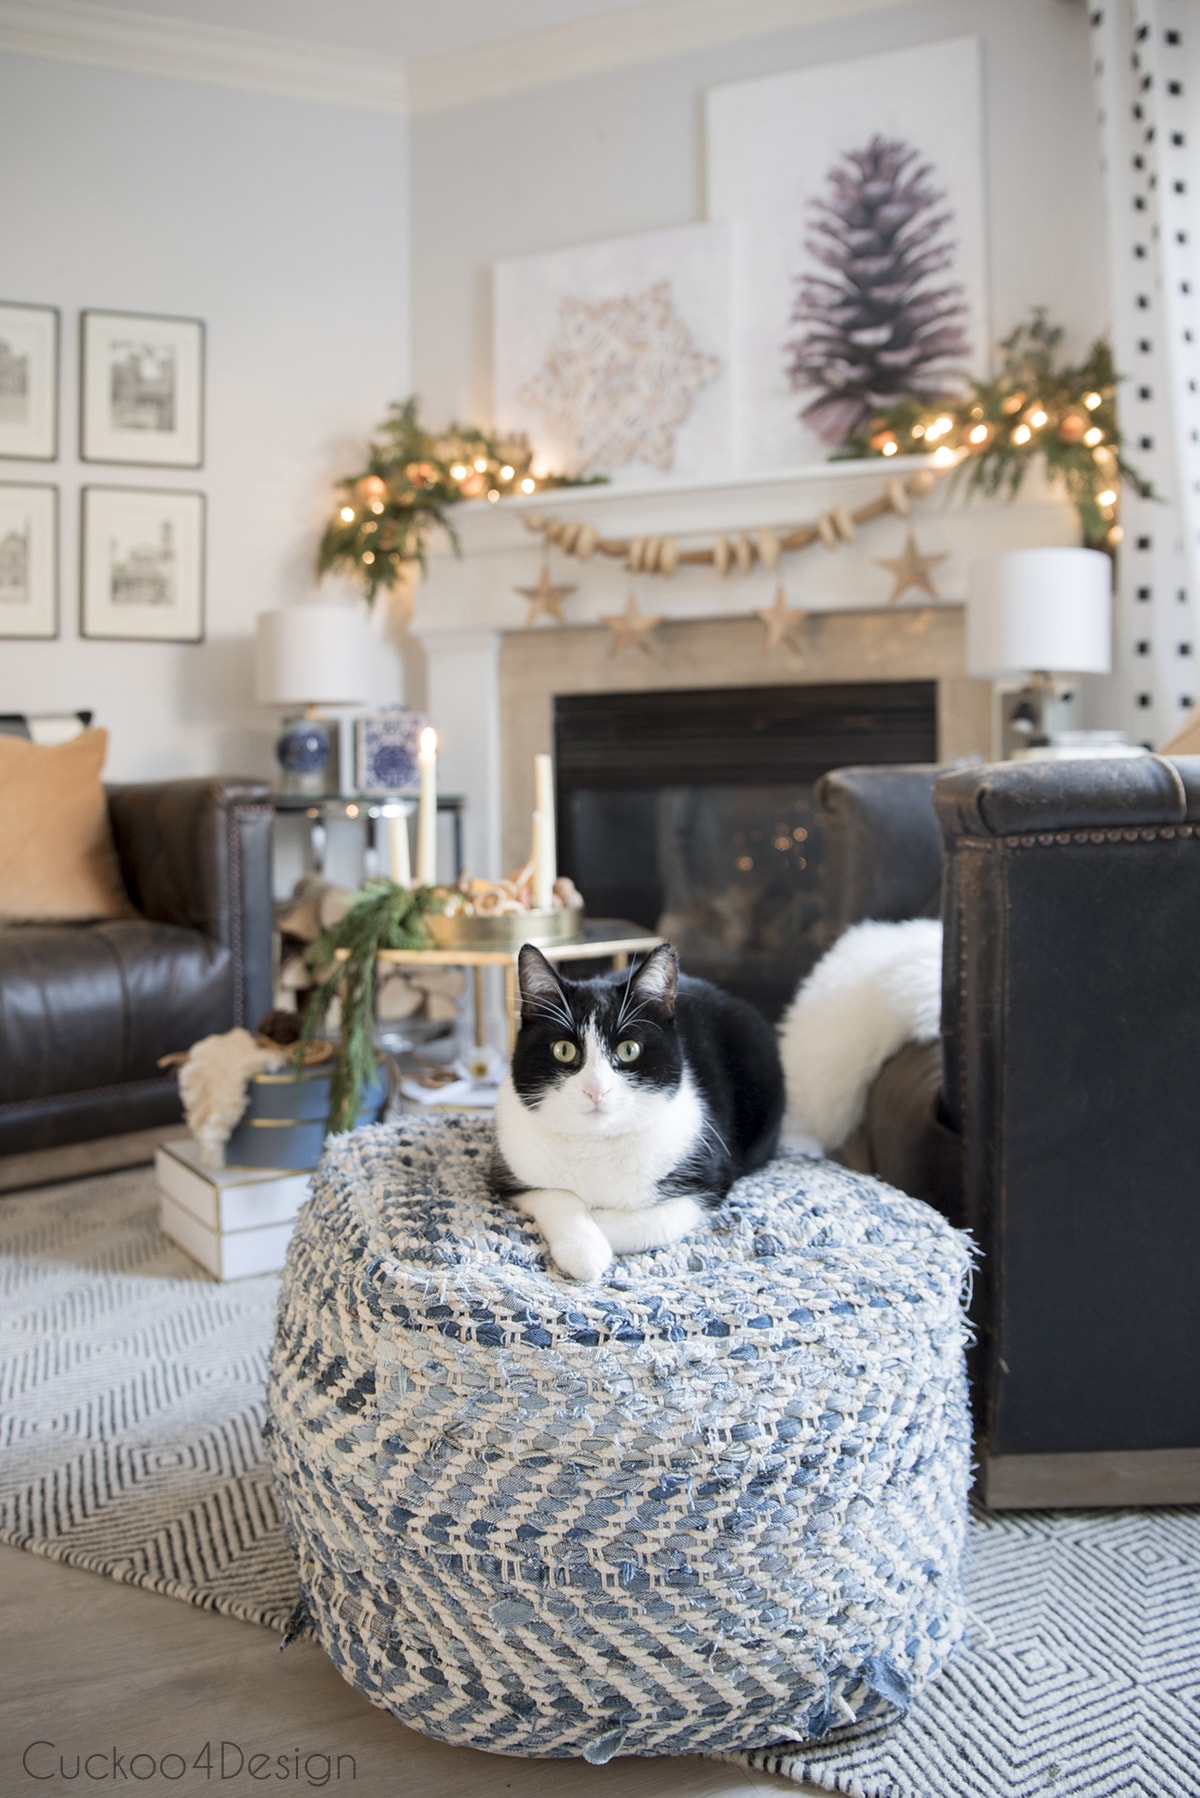
Willy is the best little model and loves posing. I can’t get enough of taking photos of him.

The wood bead garland is a Pottery Barn clearance find from years ago. But I came up with a wood bead garland DIY to make your own very similar one out of furniture feet or affordable wooden body massagers.
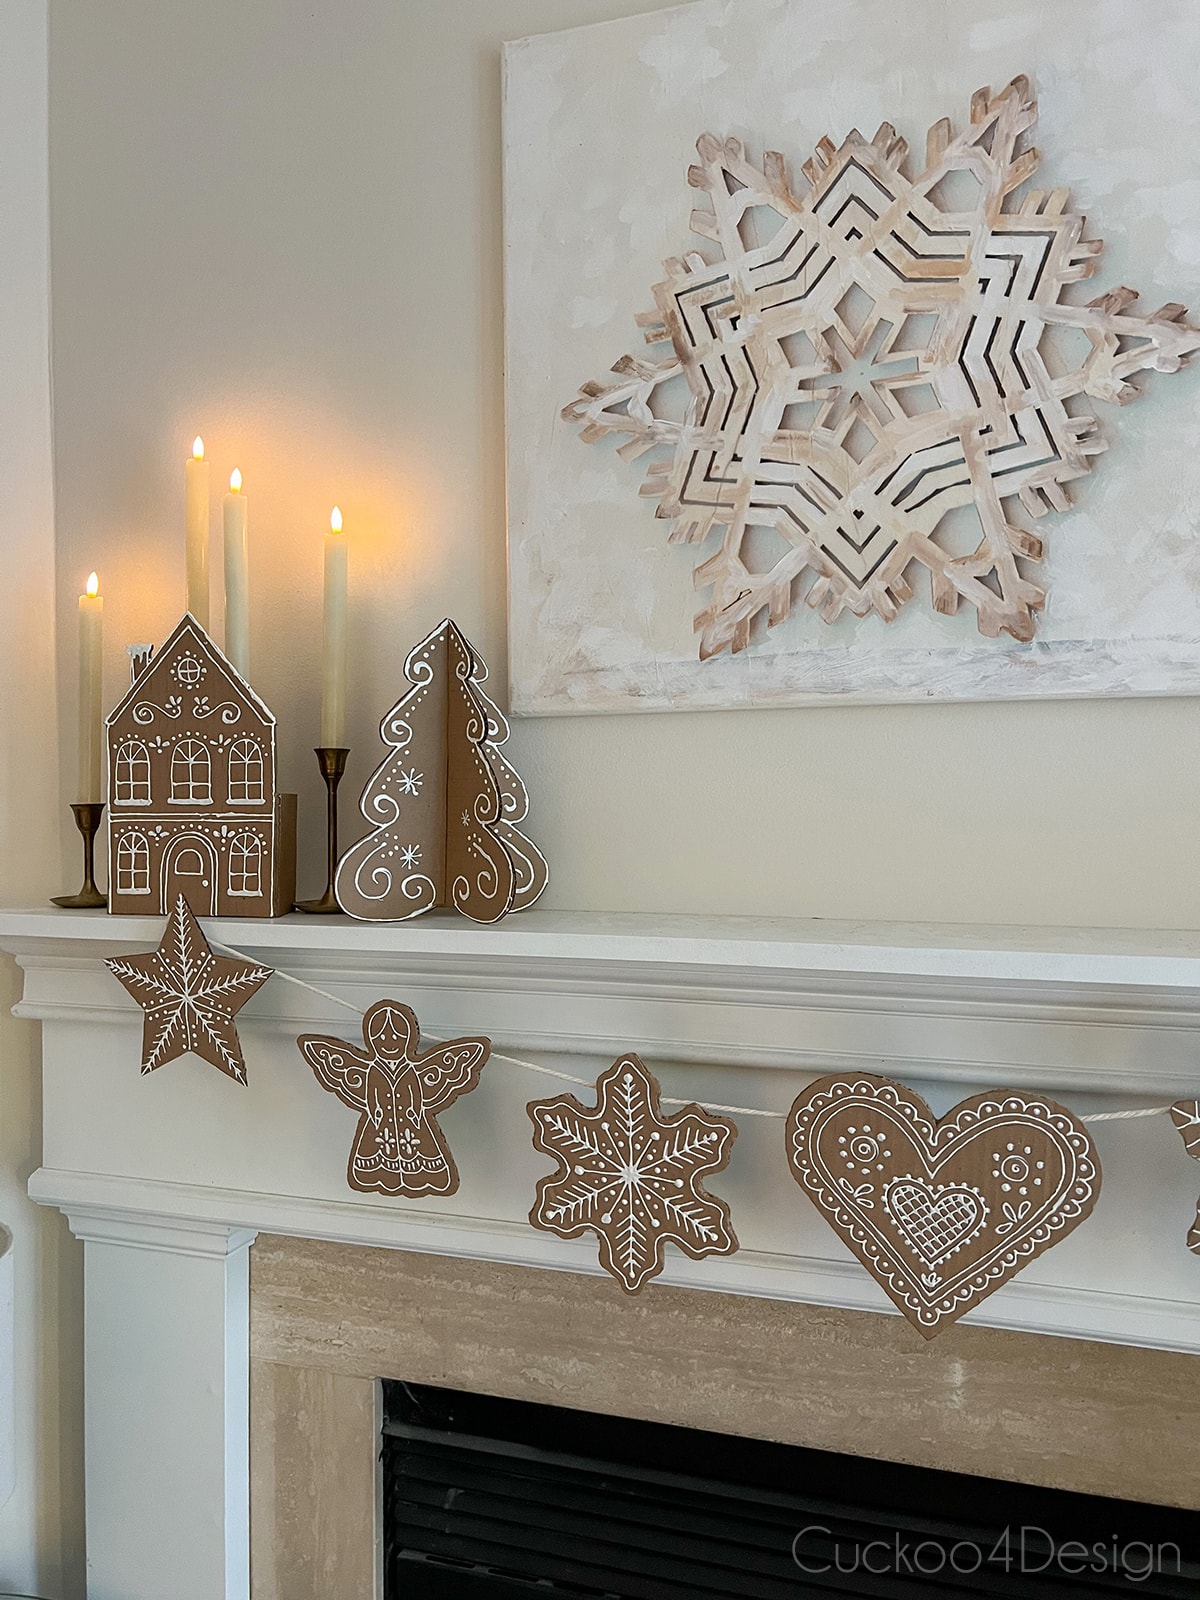
I recently used the snowflake canvas with my newly made gingerbread cardboard Christmas ornaments, and I love the look.
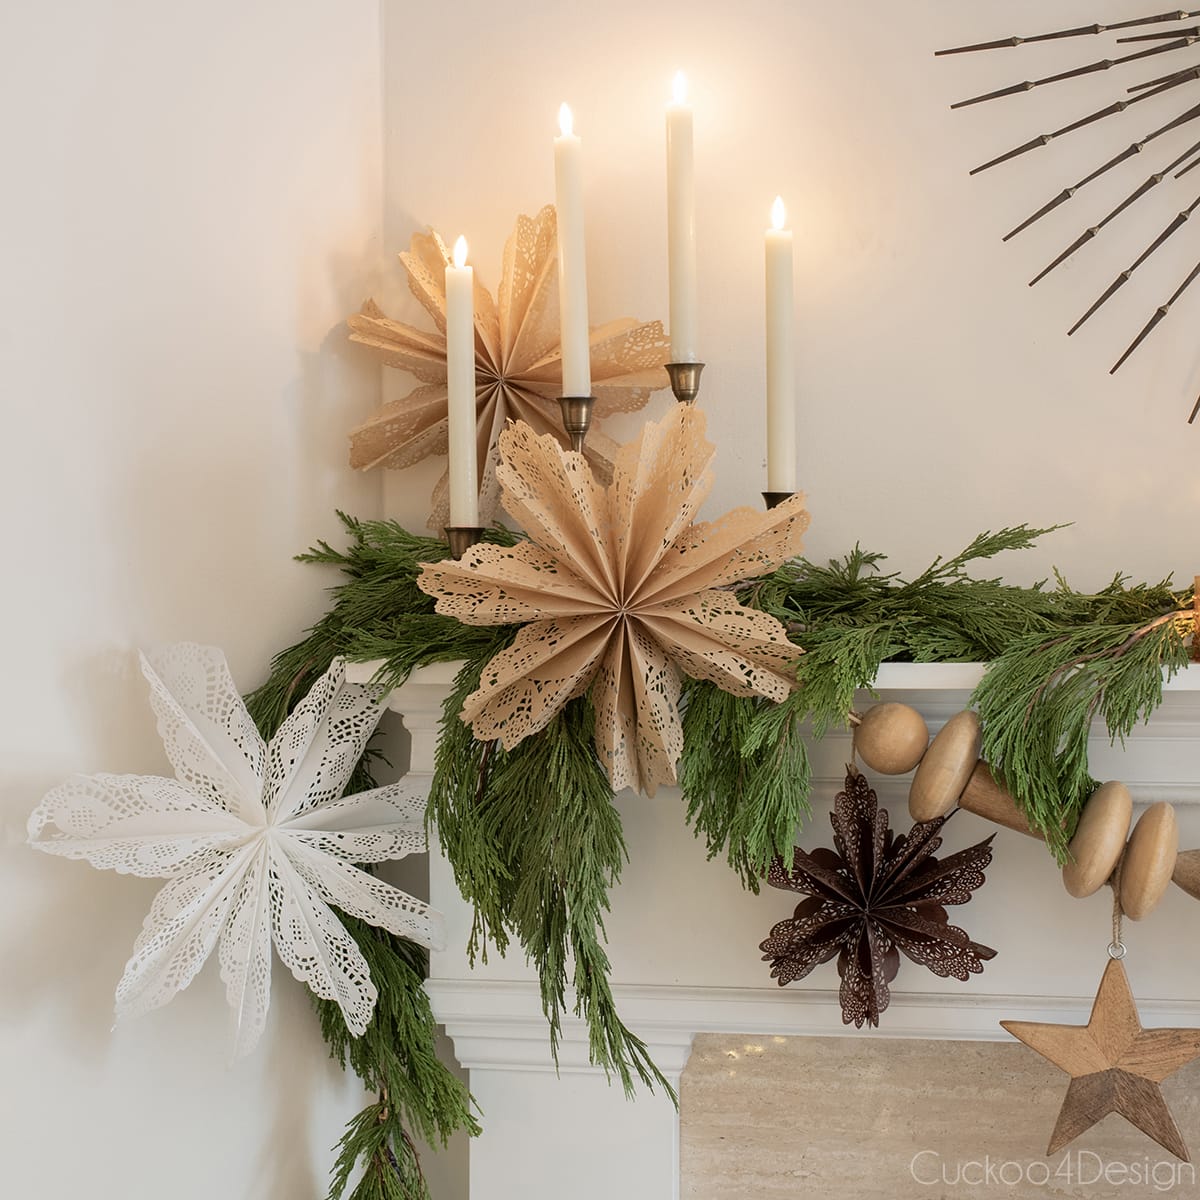
If you are a fan of large snowflakes, then you might also like my paper doily snowflakes that I recently made for our mantel or my large paper bag snowflakes.
Where to buy pretty canvas Christmas paintings
And as always, if you don’t feel like making your own similar Christmas art, then you can find some pretty options for sale below.

I hope this tutorial inspired you to try your own easy Christmas canvas painting. It’s such a simple craft that makes a big impact during the holidays.
As always, I would love it if you’d share this post with your friends who might like this or on Pinterest. Thanks so much.
Tschüß

test
Test
This is soo cool! I have to try this myself:-)
Thanks my friend
Such a great project. Thanks for showing how to do it!
Oh I’m glad you like it and good luck! And love finding fellow kitty lovers
PS- always like to see your kitties in posts. I’m a cat lover too 🙂
I’ve always been a big fan of that pinecone, and the snowflake is an excellent addition!
Hey Gretchen, thank you. I’m kind of addicted to making these now. I want to make one of a seashell for summer. Maybe even an outdoor piece so I can hang it by the stock thank pool 😉
i LOVE these so much! love the new snowflake addition but that pine cone still has my heart! Sorry I am so late getting to this- I saved it because I was busy and then it got buried!
Lovely idea! How is an engineering print copy different than a regular print copy?
Hi Kay, it’s just available in large sizes and very affordable compared to regular large prints. And thanks!
Hi Julia – thanks so much for this tutorial. My local Staples says the engineering prints are “not suitable for photos.” Do some Staples simply not have the same capability?
Hi Jane, they aren’t great quality prints and that’s why it might say that at your staples but I like the way it looks for this particular type of project. Unless they changed something else with their prints since I made mine? Good luck
Love the project !
What is that cool ottoman your cat is laying on ? It’s so neat !
It is a jeans remnant pouf/ottoman. I think they are still available and not expensive.