

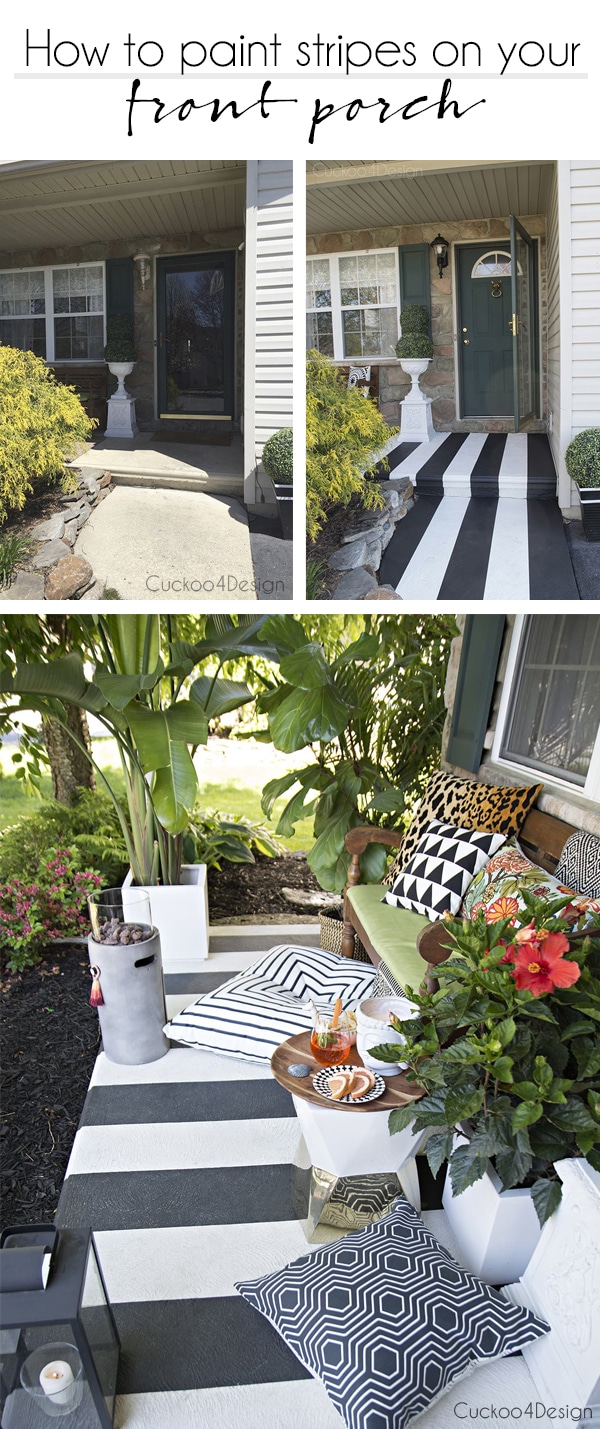
How to paint stripes on your concrete front porch
Y’all don’t even know how excited I get about black and white stripes, and today I’m sharing my striped concrete front porch makeover with you. Painting crisp stripes on a concrete floor is totally doable; you just need the right taping technique. In this step-by-step tutorial, I’ll show you exactly how to paint perfect stripes on your concrete front porch without any bleed-through, plus this same trick works on walls and furniture, too. Whether you’re going for bold stripes or just want clean painted concrete, this method gets you crisp, professional-looking results every time.
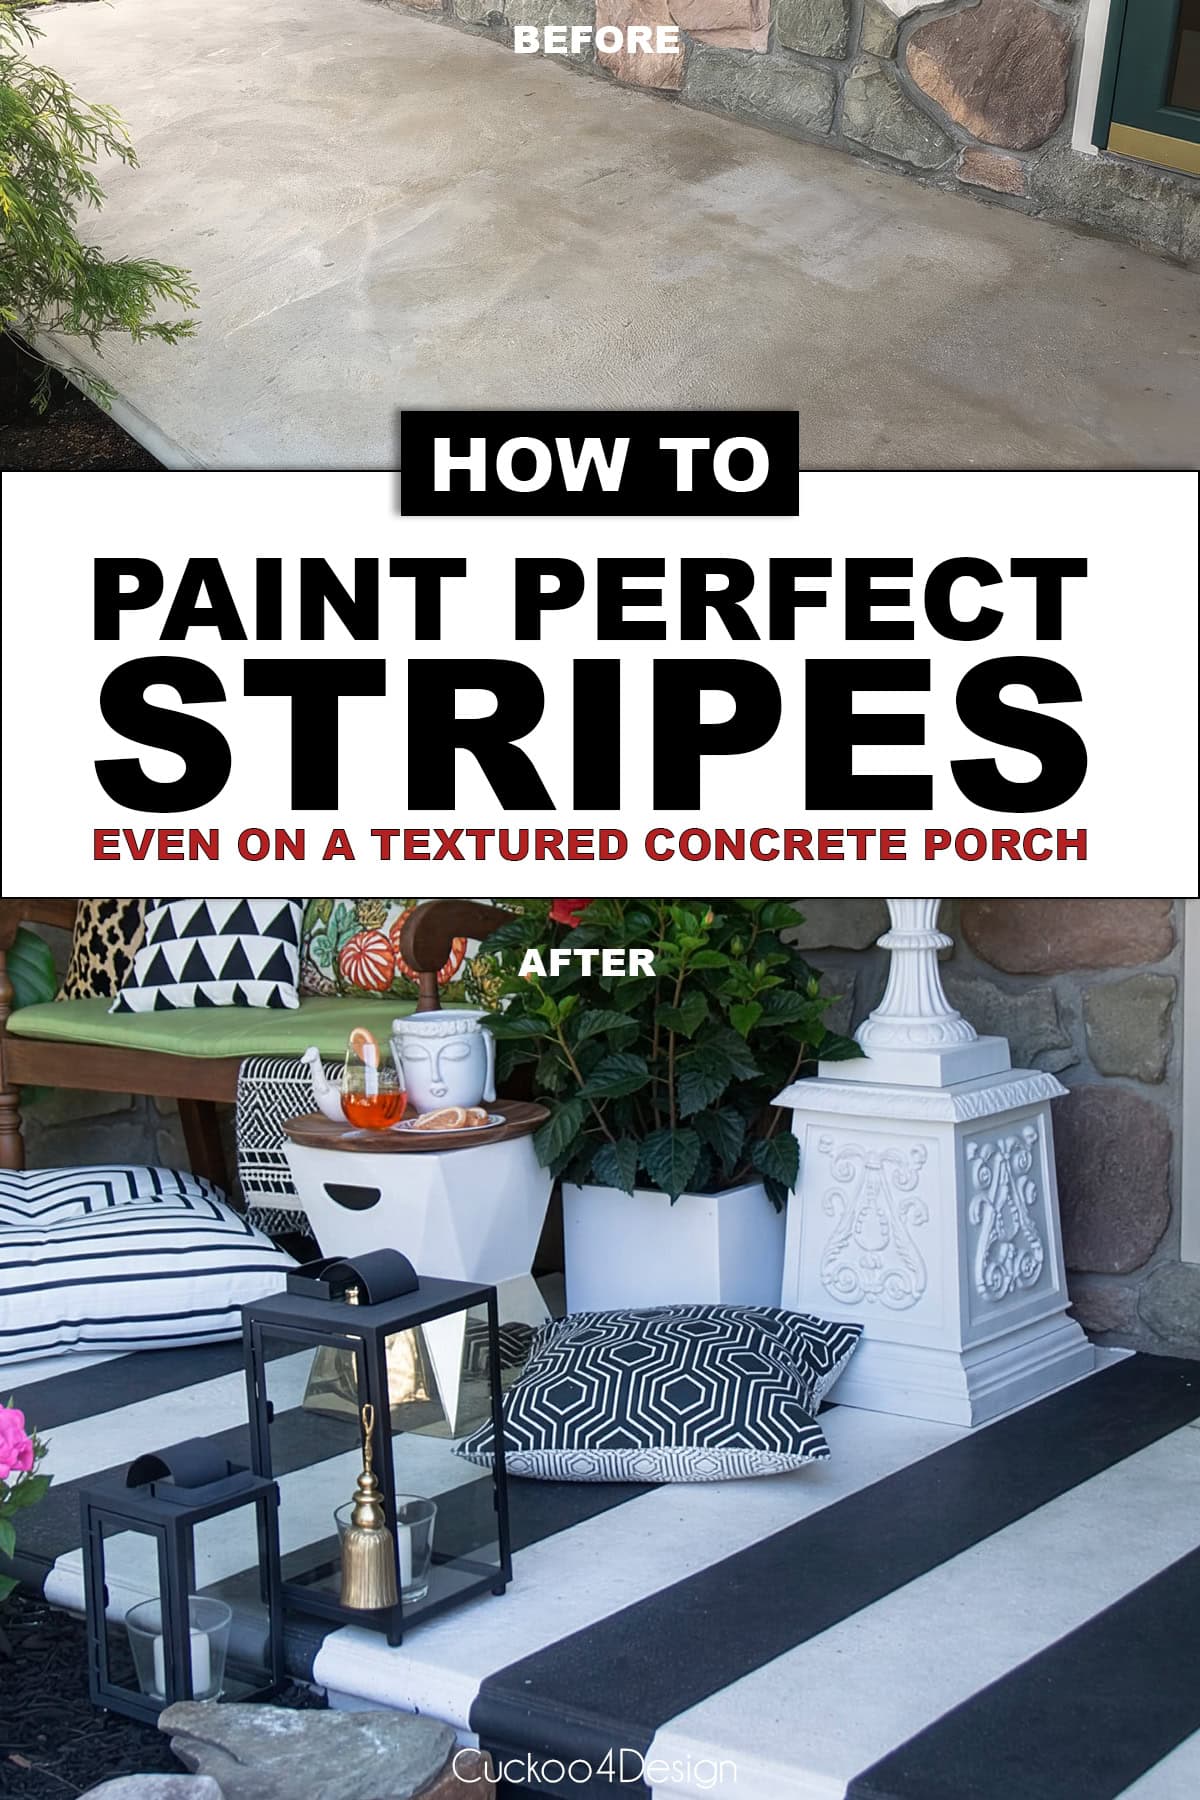
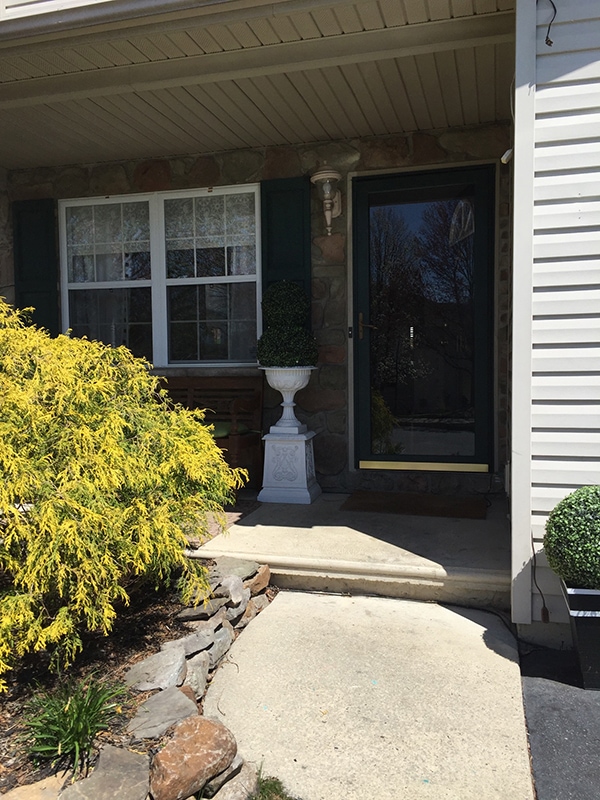
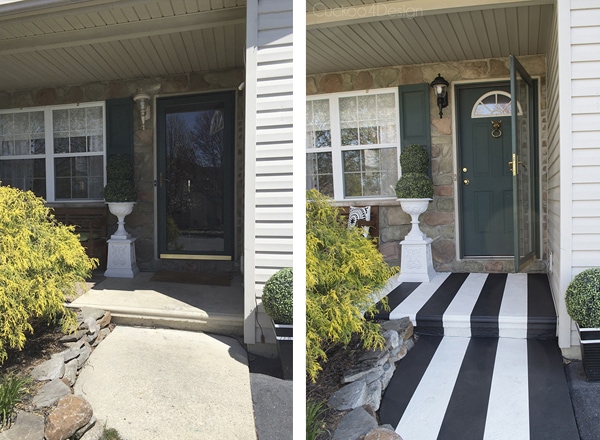
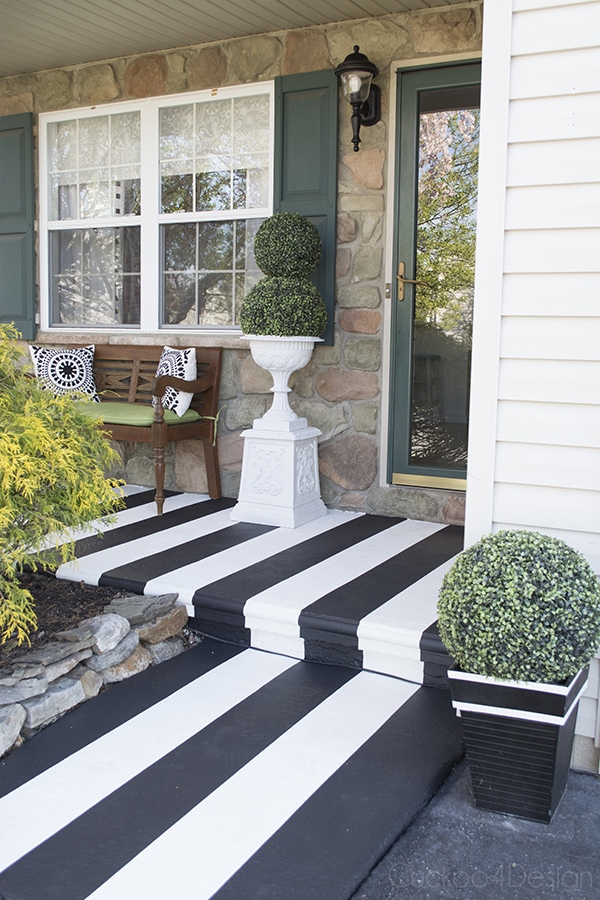
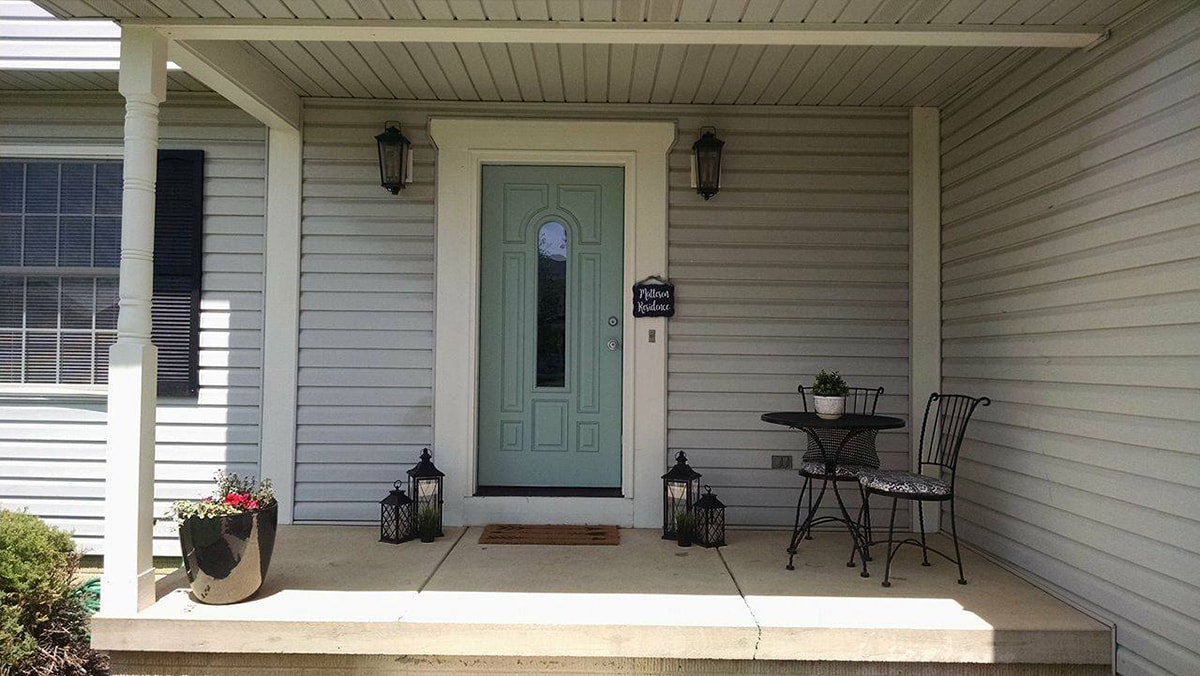
The reason I finally decided to have striped concrete at our entrance is that the concrete on our front porch had become bad after living here for 16 years. The yearly pressure washing didn’t help, and neither did any type of bleach cleaner anymore. Not to mention that most of the homes in our neighborhood look like ours, and I wanted to make my curb appeal stand out from the rest of the homes.
Supply List
- One can of white and one can of black Olympic Rescue It and cleaner, which I purchased at Lowes, and I decided on this paint because it is tintable and you can choose from a large variety of colors. (UPDATE: we’ve had this porch painted for two years now, and the color is holding up great!)
- a good bristle brush (very important to get into all the pores of the concrete surface),
- metal paint tray (I like lining mine with garbage bags, which makes it easier for cleanup and covering the roller between coats. (You can read more about my painting tips and tricks)
- painters tape (I used frogtape)
- paint roller made for really textured surfaces, roller frame, and an extension handle
- a large ruler or a straight piece of wood molding
- measuring tape
- broom
- gloves

Step-by-step porch painting instructions
This tutorial walks you through painting a striped concrete porch from bare concrete all the way to the finished pattern. You can also use this tutorial if you just want a solid painted concrete floor. Simply stop after the base coat.
Step 1: Clean the bare concrete
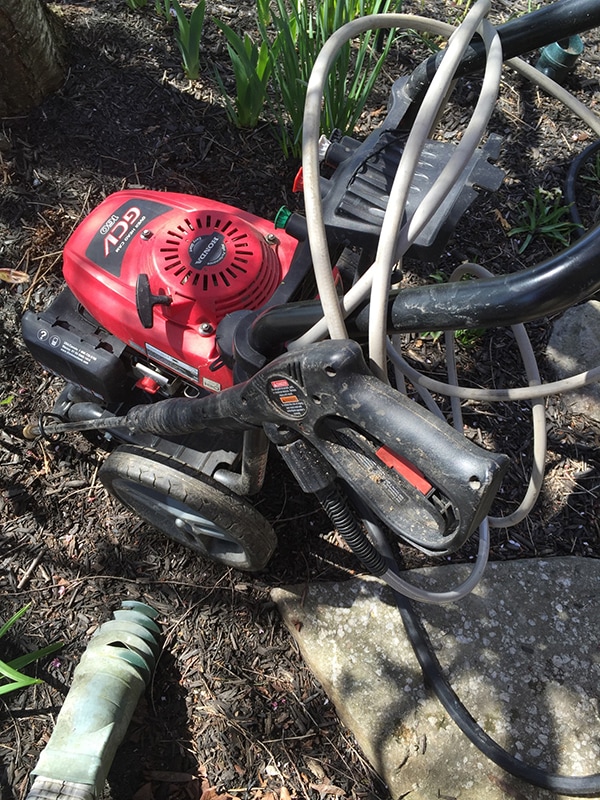
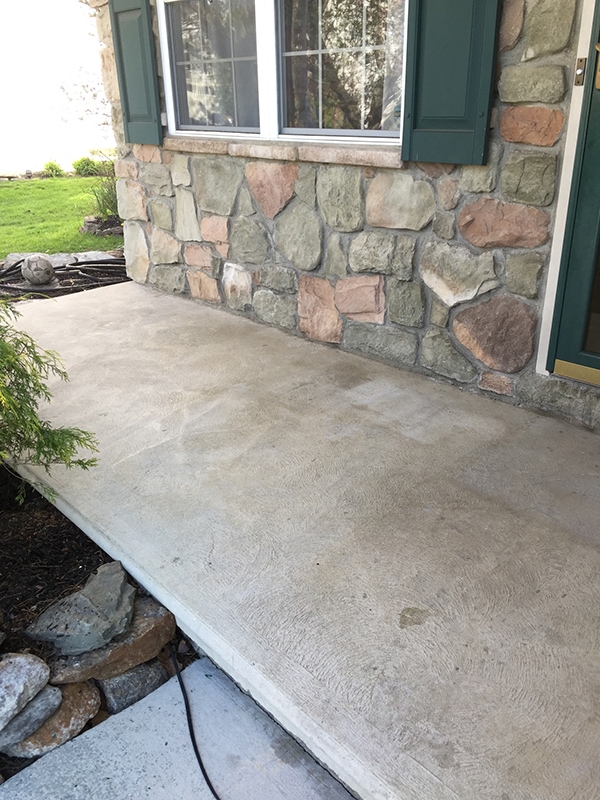
I used a pressure washer in combination with the cleaner to make sure I really removed all the debris, dust, dirt, and grime. I brushed it on according to their instructions and then pressure-washed the entire porch and small walkway.
To be honest, though, I felt like the cleaner was a waste of my money, not because it’s a step you should skip. Definitely not! It’s because it smelled like straight-up bleach, which it also proved to be because it ruined the bottom of my sweatpants after pressure washing, and you might just be able to buy bleach from the grocery store, which is much cheaper to prep your surface with. So you can be the judge of this step, whether you want to clean with the manufacturer’s recommended cleaner or just standard bleach. Regardless of what you use, please be careful with yourself and the surrounding plants.

Let the cleaned porch dry completely before moving on!
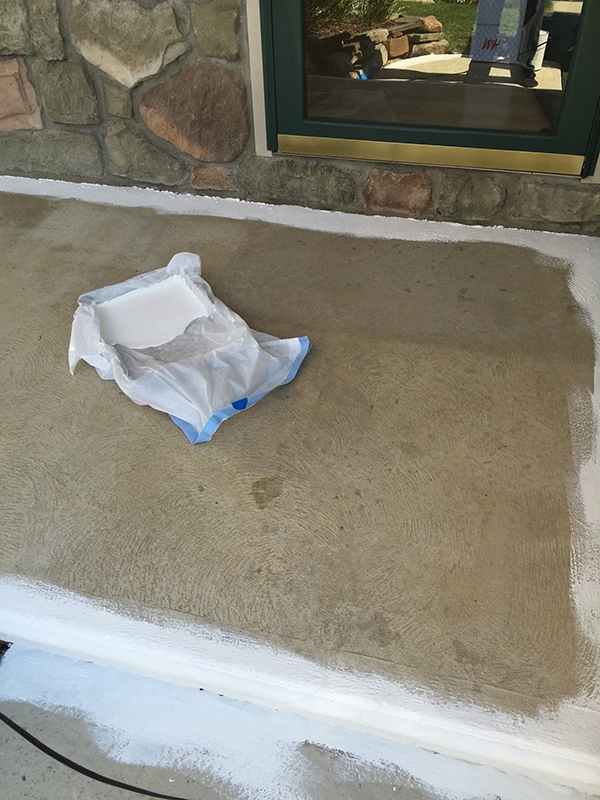
Here is another view of the porch after I cleaned it. Lots of stains and discolorations.
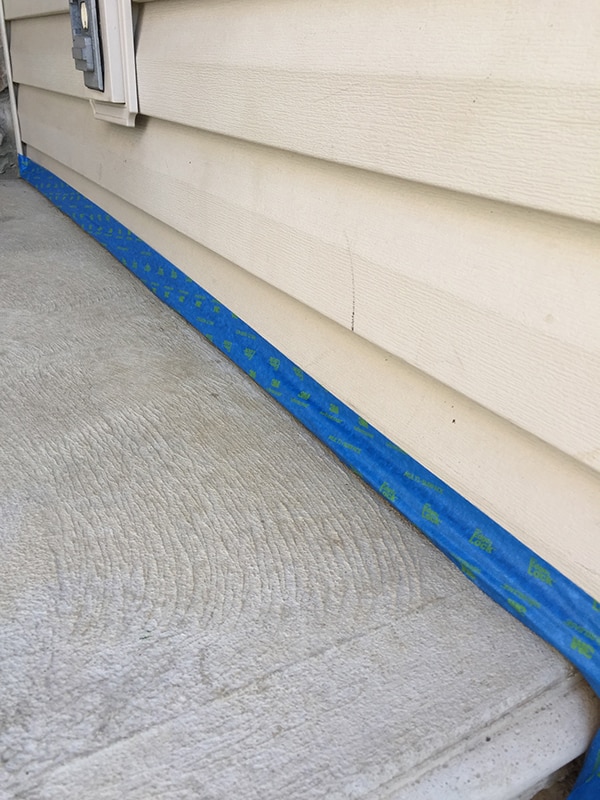
Step 2: Tape the perimeter of the porch
I used painter’s tape to tape the areas around the siding. However, I didn’t tape the stone wall and just cut in by hand, which worked better.
Step 3: Paint the concrete
As I mentioned earlier, the type of concrete paint I used doesn’t require a primer. If you are using a concrete paint that requires primer, simply paint the concrete with primer first by painting the perimeter with a brush and then rolling with the primer on. Let that dry and follow up with the paint.
Also, read more about the best paint for a concrete porch so you can choose what is best for you.
Update: after 5 years, the paint did not peel, and it proves that I priming the concrete really wasn’t needed with this type of paint
I was able to paint the textured concrete porch right away without priming. I used the hard-bristle brush to cut in the perimeter with the white paint, and then rolled on the white paint with my paint roller.
Tip: I line my tray with a garbage bag so I can keep the roller from drying out when I take a break, and also for easy clean up after painting.
I waited 4 hours and then rolled on the second coat. Two coats of paint are really all I needed. You must pick the right weather for this, which it certainly was for me. There was barely any wind, so no dirt and leaves got blown into my wet paint, and the temperature was just what they recommend on the paint can. Always make sure you read the manufacturer’s recommendations on the paint can before starting a project.
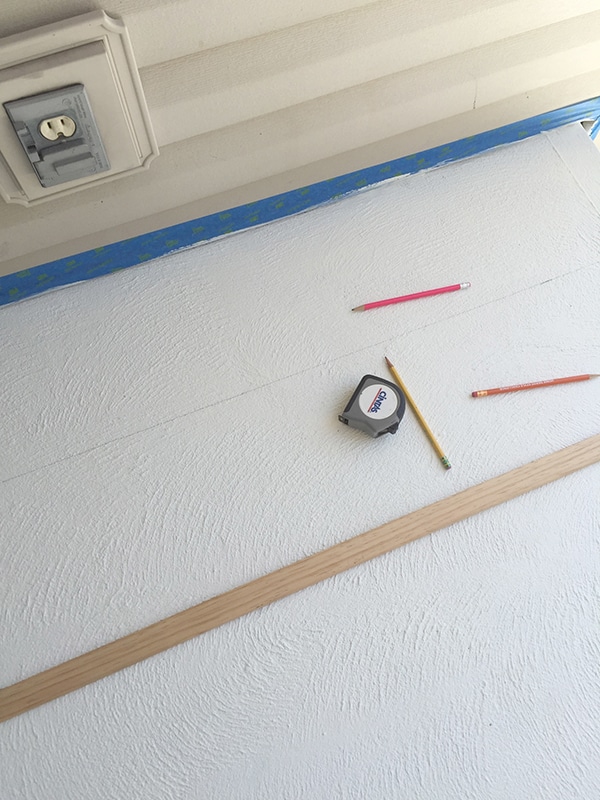
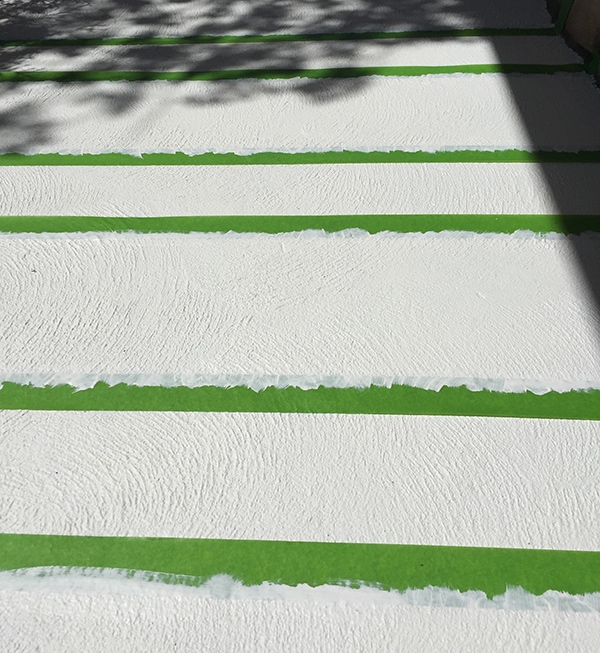
Step 4: Measure and draw the stripe lines
After the second coat dried, it was time to figure out the width of the stripes. I marked them and drew them in with a pencil and my large piece of straight molding, which served as a ruler for me (see photo below)
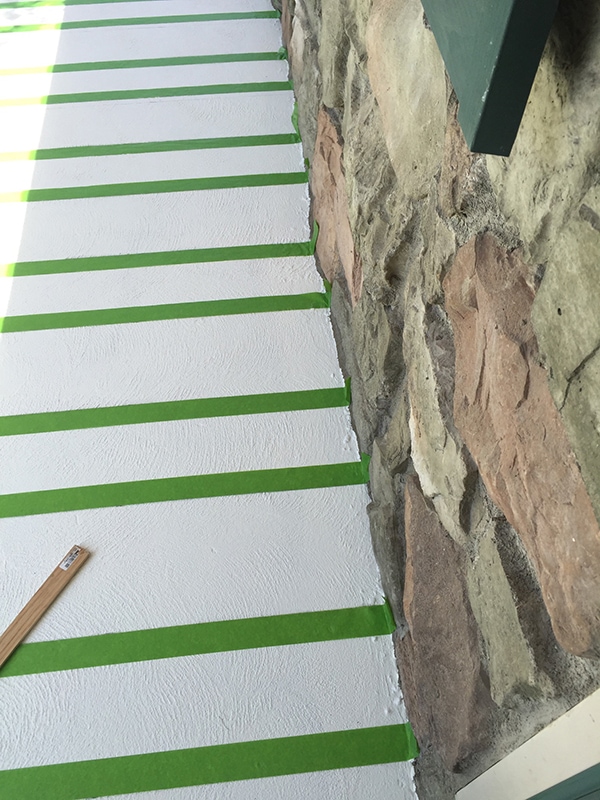
Step 5: Tape the stripes
I taped my lines with painter’s tape. The stripes that get painted with a darker color are sometimes hard to distinguish, so I like to make sure to mark them with an X to avoid any mistakes later.
Step 6: Seal the painter’s tape
This is where things get interesting, and my favorite painting trick comes into play. A long, long time before I started blogging, I went to the library and read painting and home improvement books, and came across this tip in a book. I can’t remember which book this was, though.
My favorite painting trick of all time:
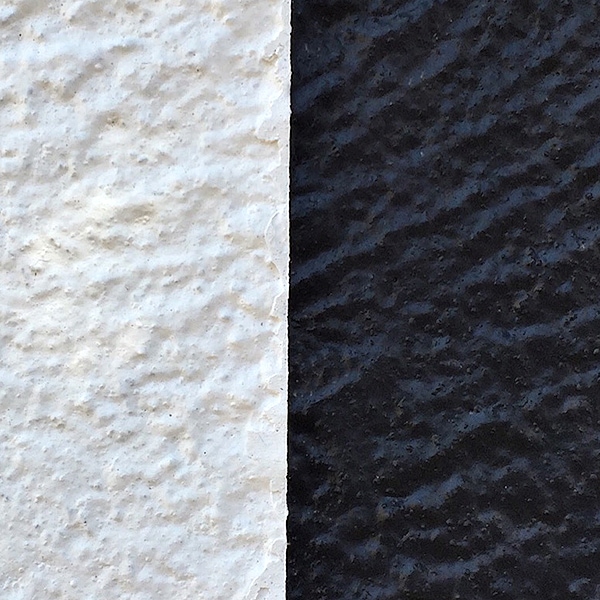
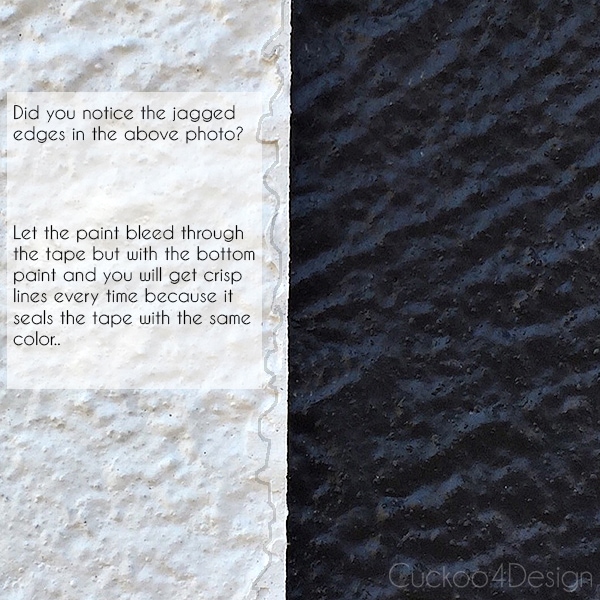
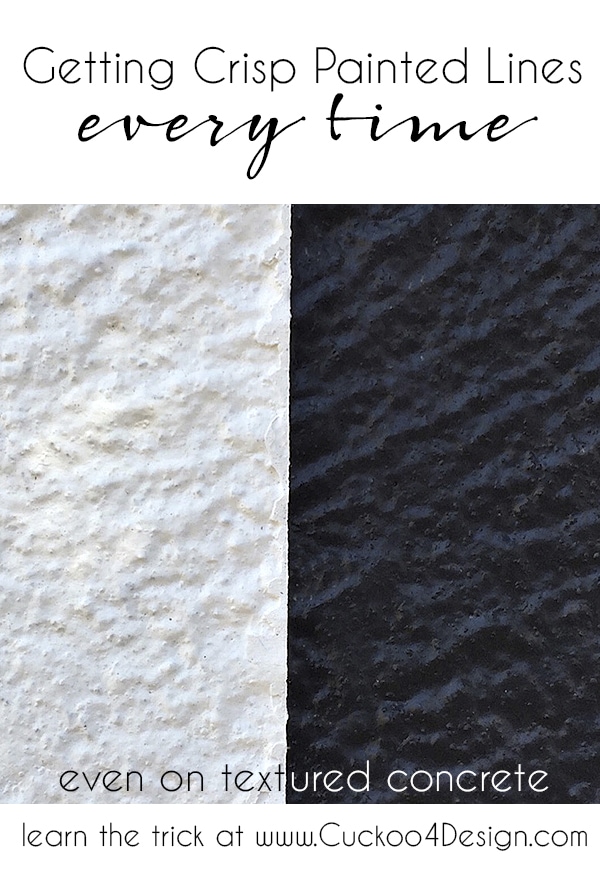
The trick is that paint always bleeds under tape. Have you ever noticed that? No matter how hard you push down the painter’s tape, when you pull it off, the lines are jagged. Even if you use Frog Tape, whose company claims that this won’t happen. So let the paint bleed underneath the tape!
Say what? Is she nuts? No, I’m not… let it bleed with the same color as the base coat, which means that I paint over the line with the same color as the underlying color of paint, which in my case was the white. That seals the painter’s tape, and the bleeding isn’t visible because it is the same color!!! Get it?
Check out the photo below! I painted over the tape in the areas where the black will hit the tape and have its line.
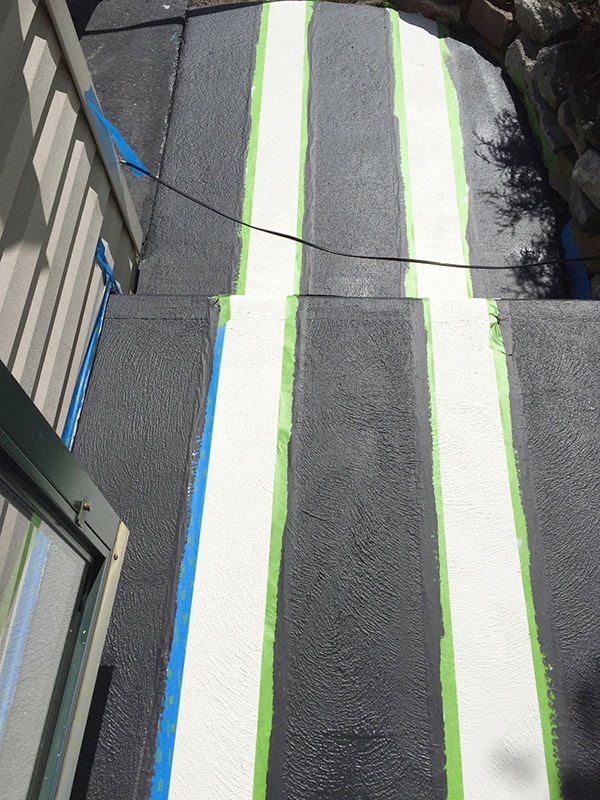
Step 7: Paint the stripe color
When that bleeding and sealing line is dry, paint over it with your next paint color, which is my black stripe.
Make sure to roll on a second coat of black paint and let it dry.
Step 8: Remove the painter’s tape
This post may contain affiliate links from which I will earn a commission at no extra cost to you. View my full disclosure policy.
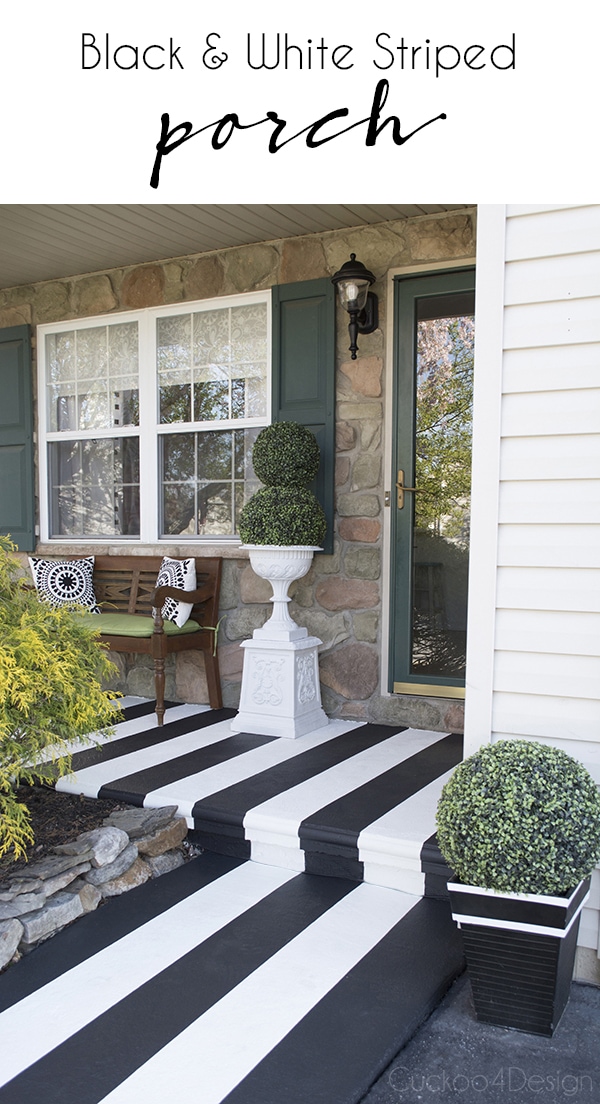
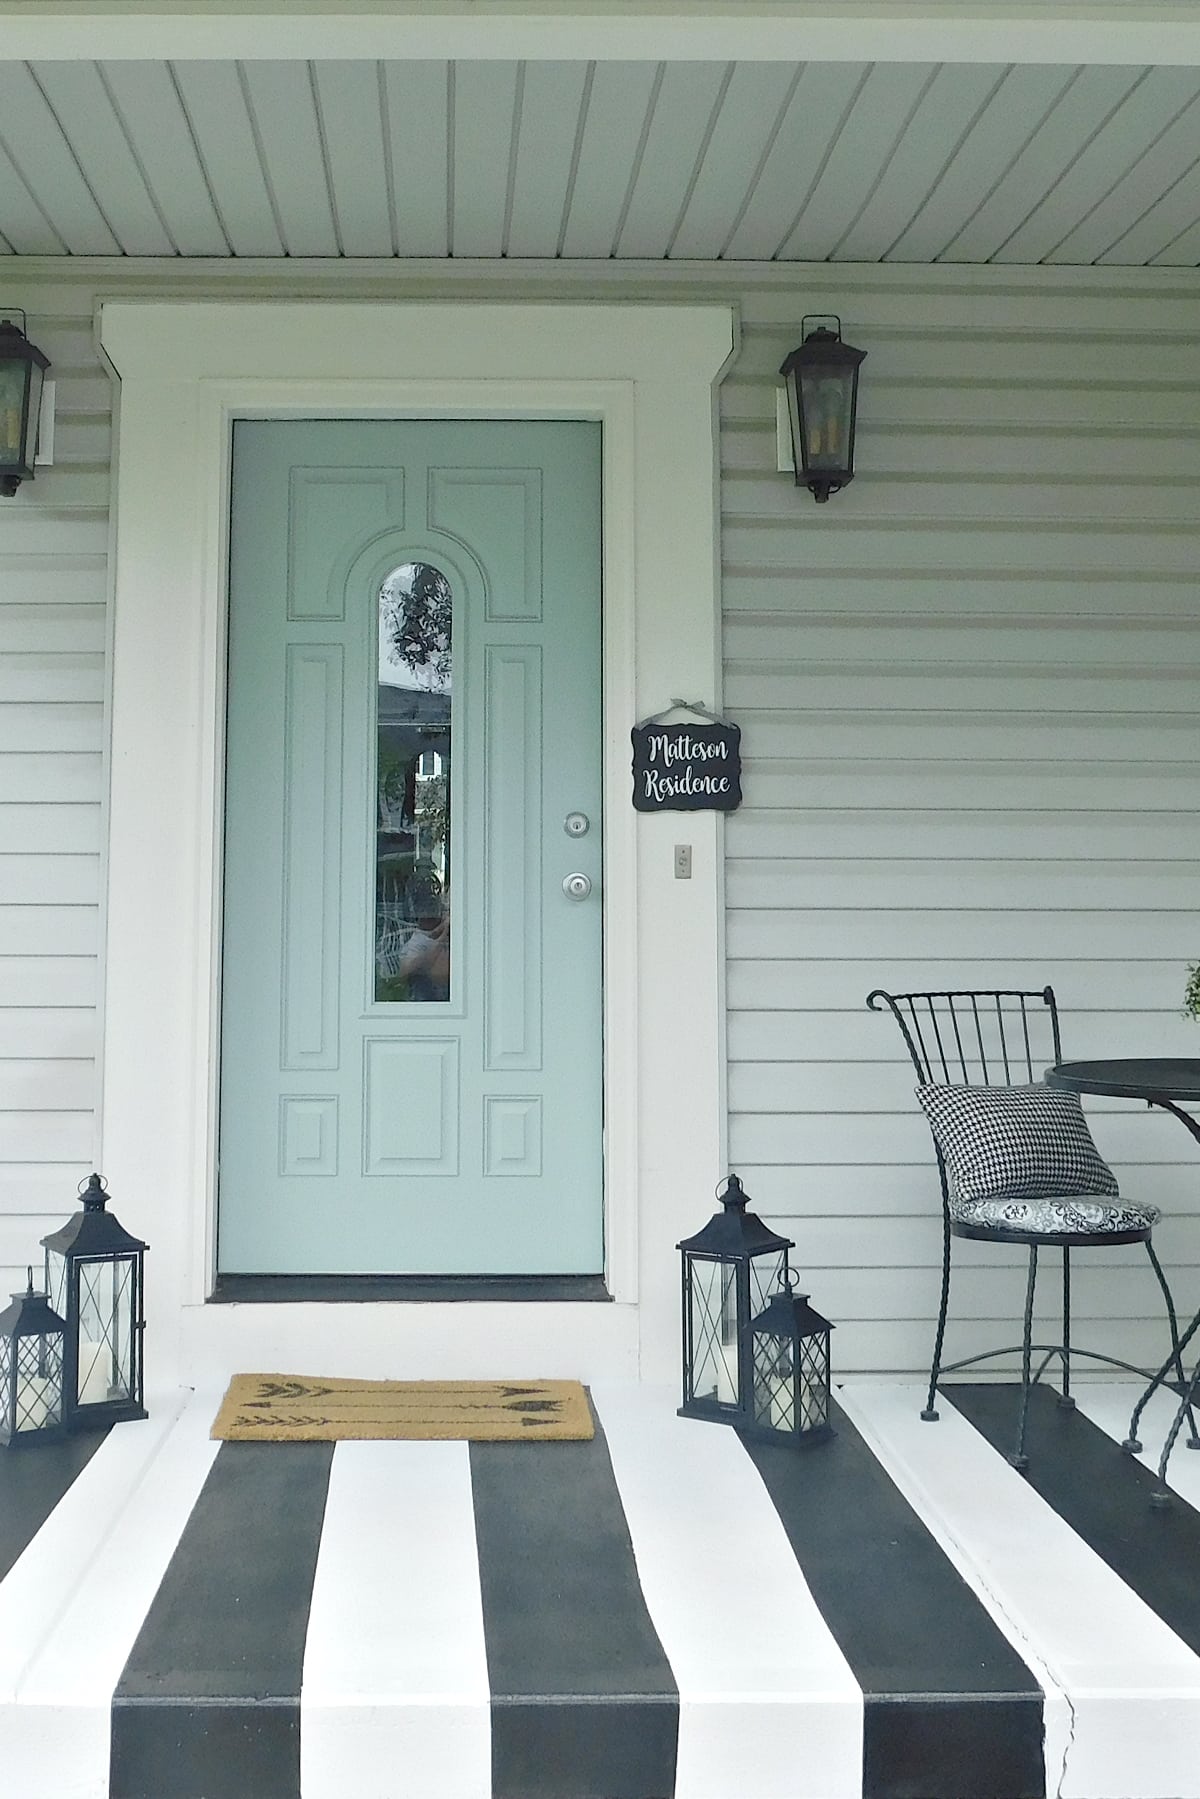
Pull off the painter’s tape and admire your crisp, clean, and beautiful striped concrete front porch.
Let me show you a close-up. You can barely see where the white paint bled through. Can you?
Best tips for painting perfect stripes on concrete
- Always read the paint manufacturer’s instructions before starting a project
- Thoroughly clean the concrete and let it dry
- pick the right weather (no wind, rain, or cold temperatures)
- Let the painters’ tape bleed with the bottom base coat to avoid jagged edges
- Pull the painters’ tape off before the second coat of stripe color is completely dry
If you do my trick, you get an ultra-crisp line every time. No matter what type you use, and even on very textured concrete like mine.
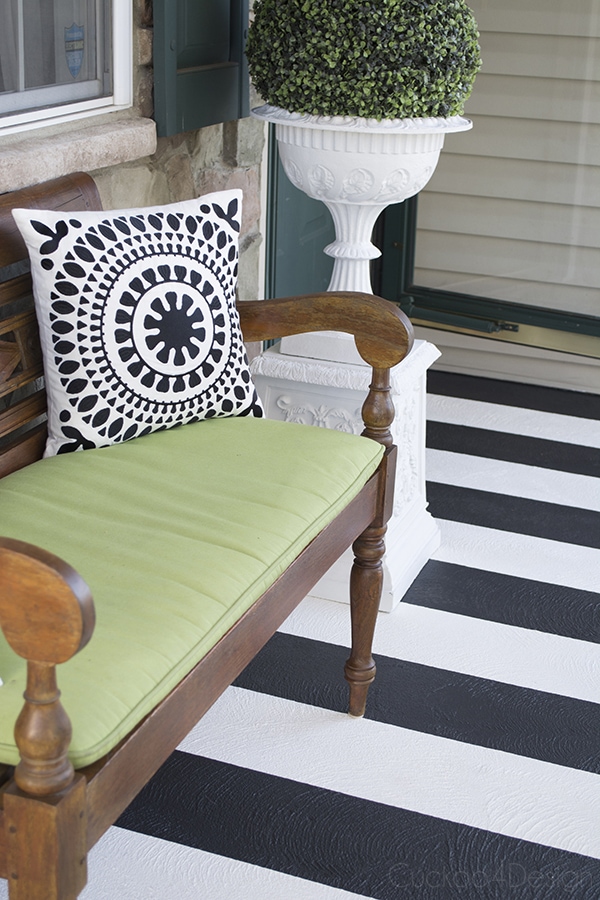
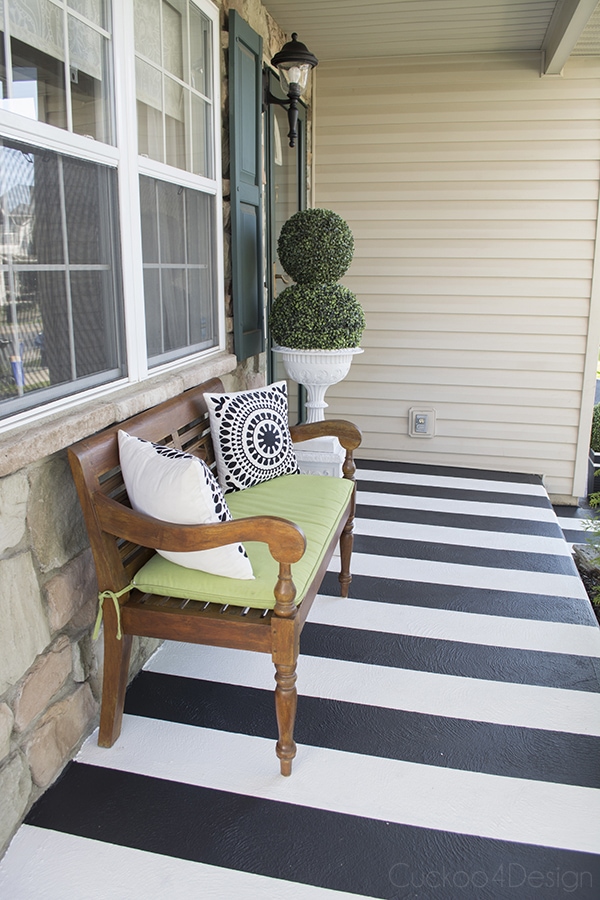
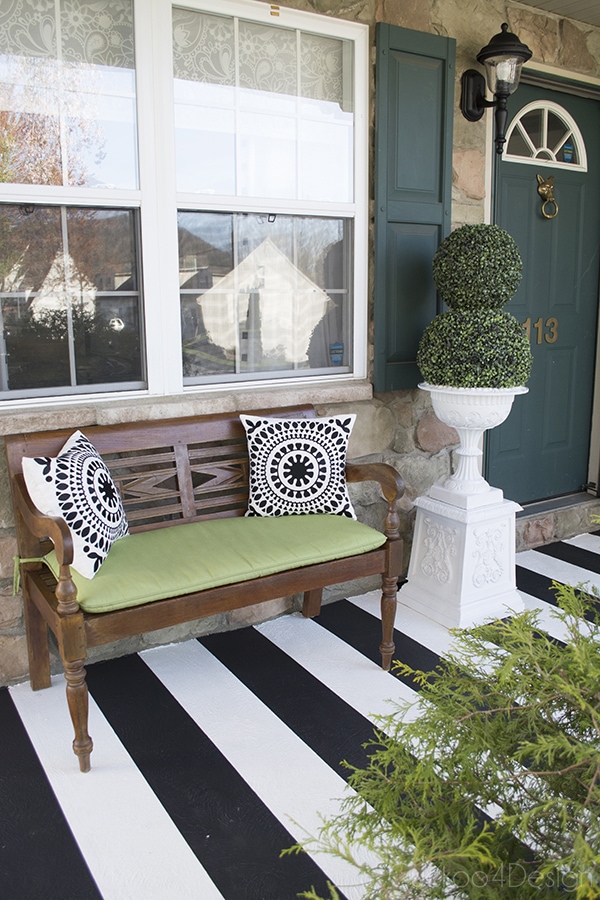
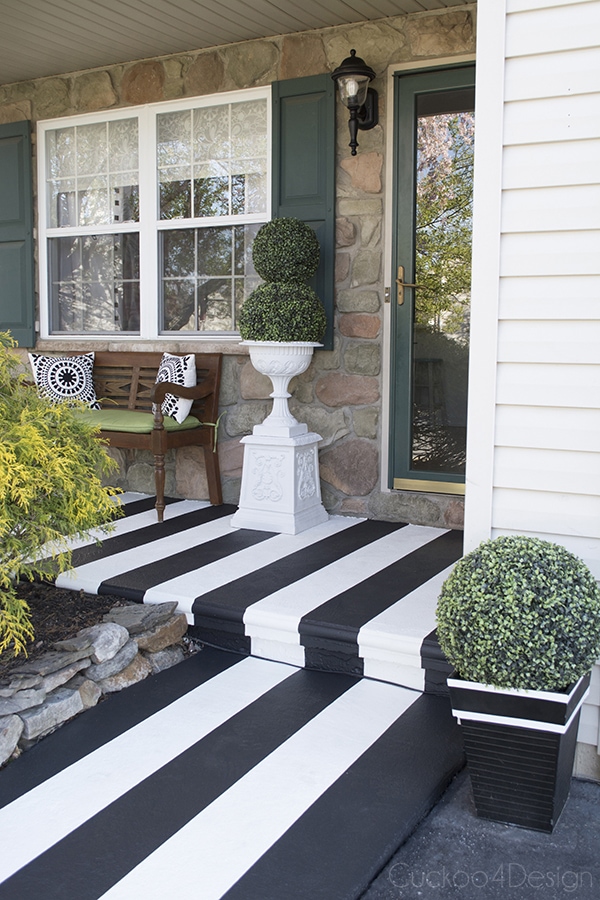
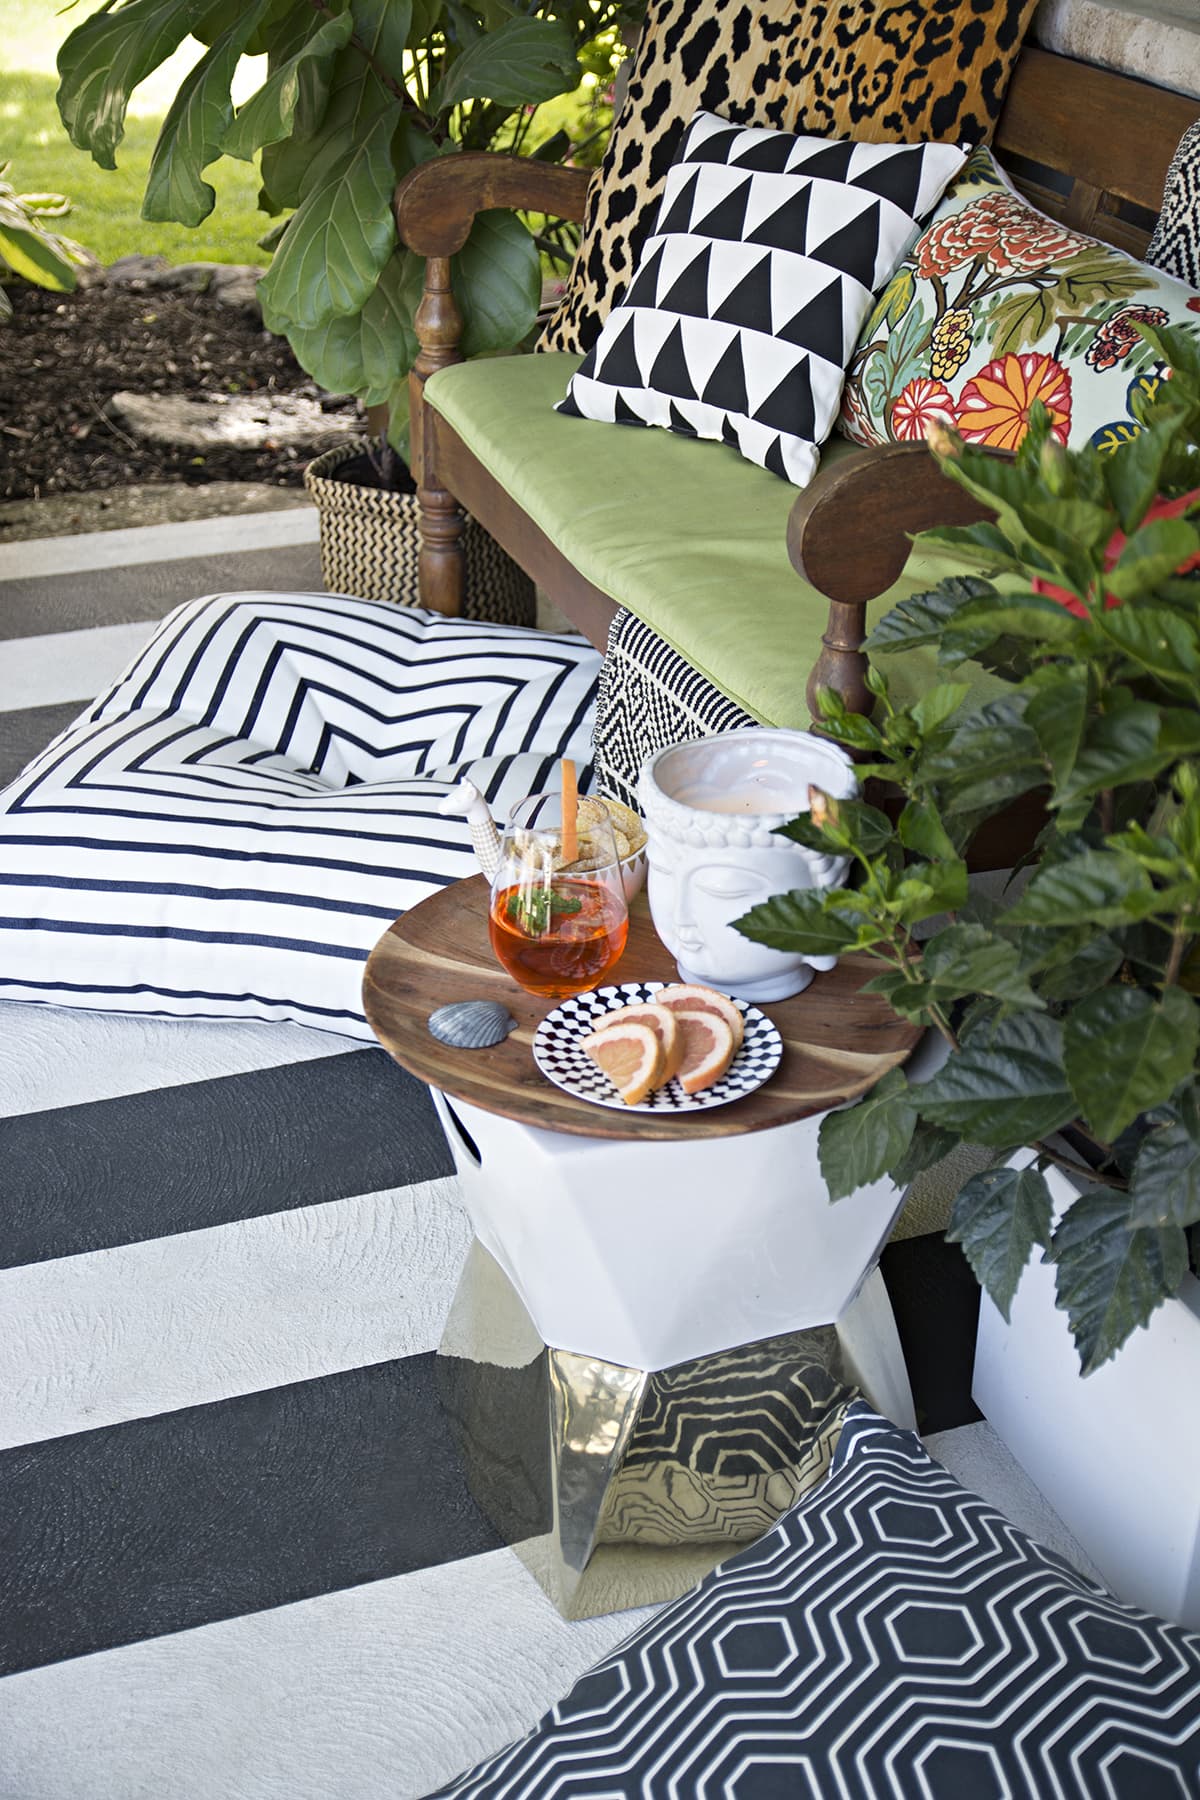
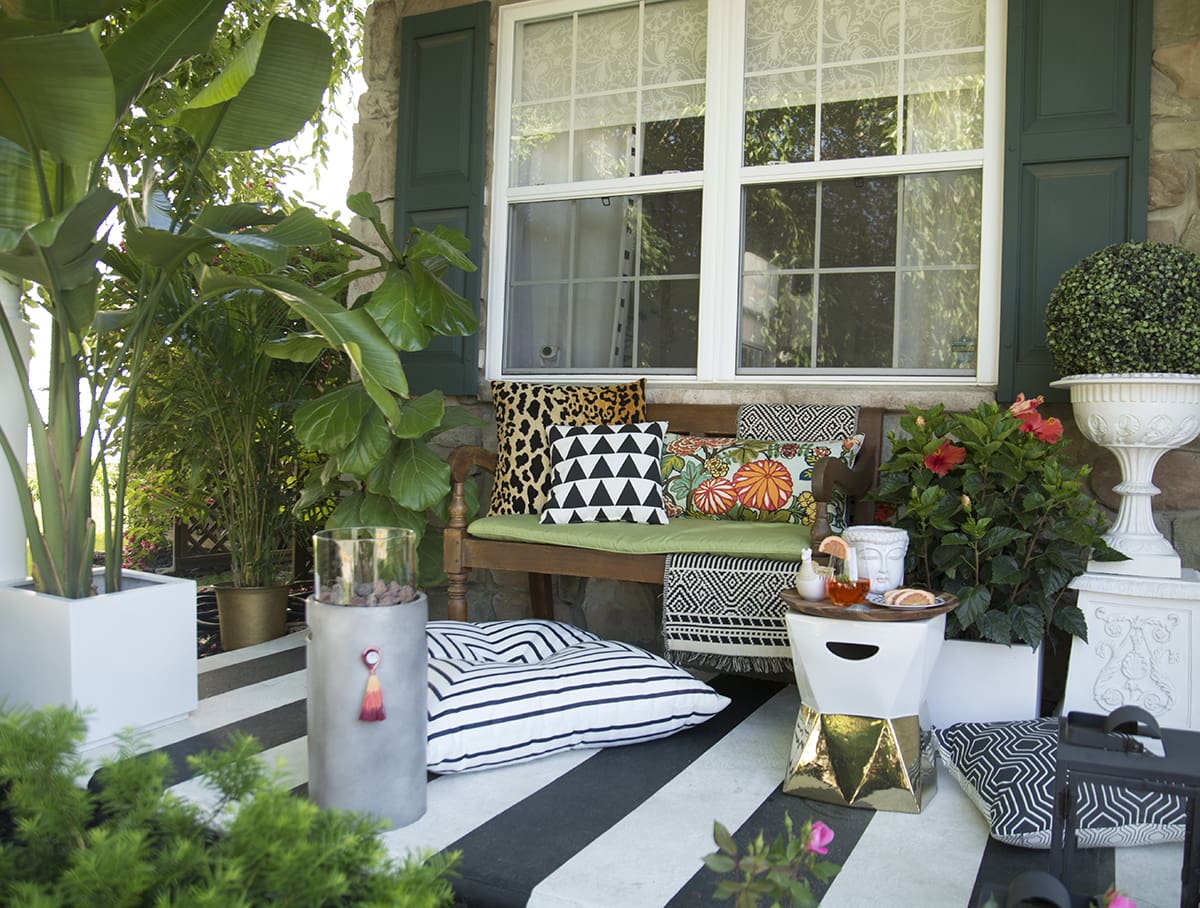
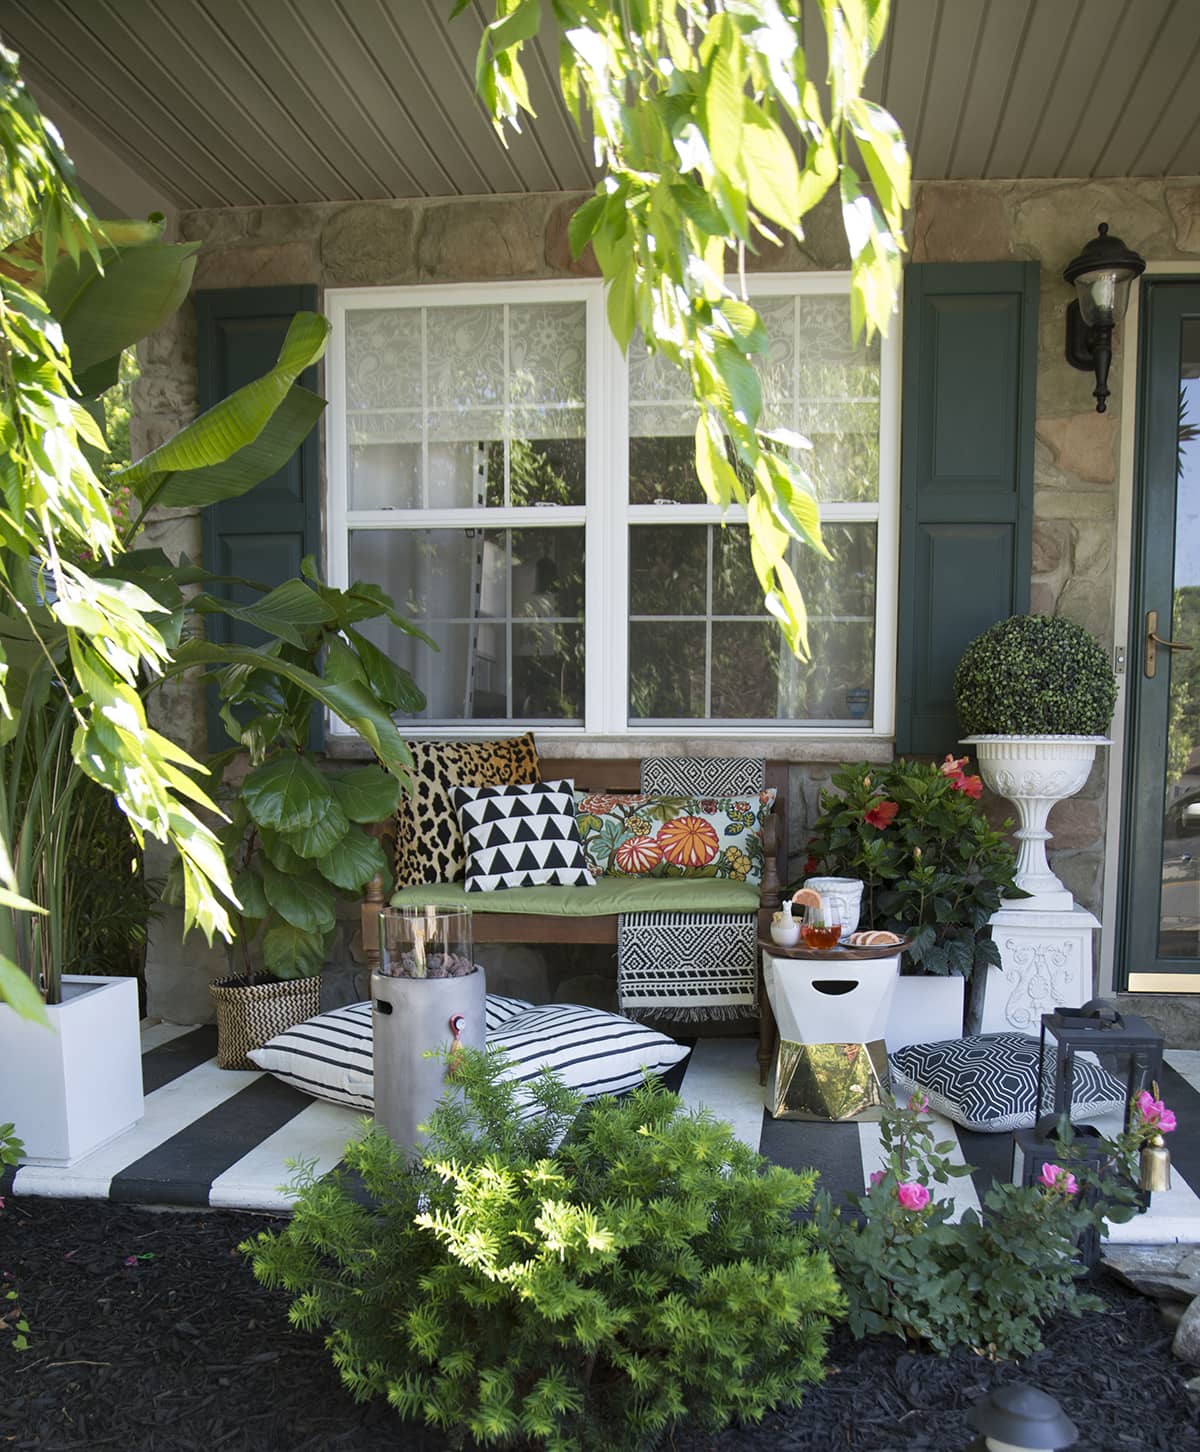
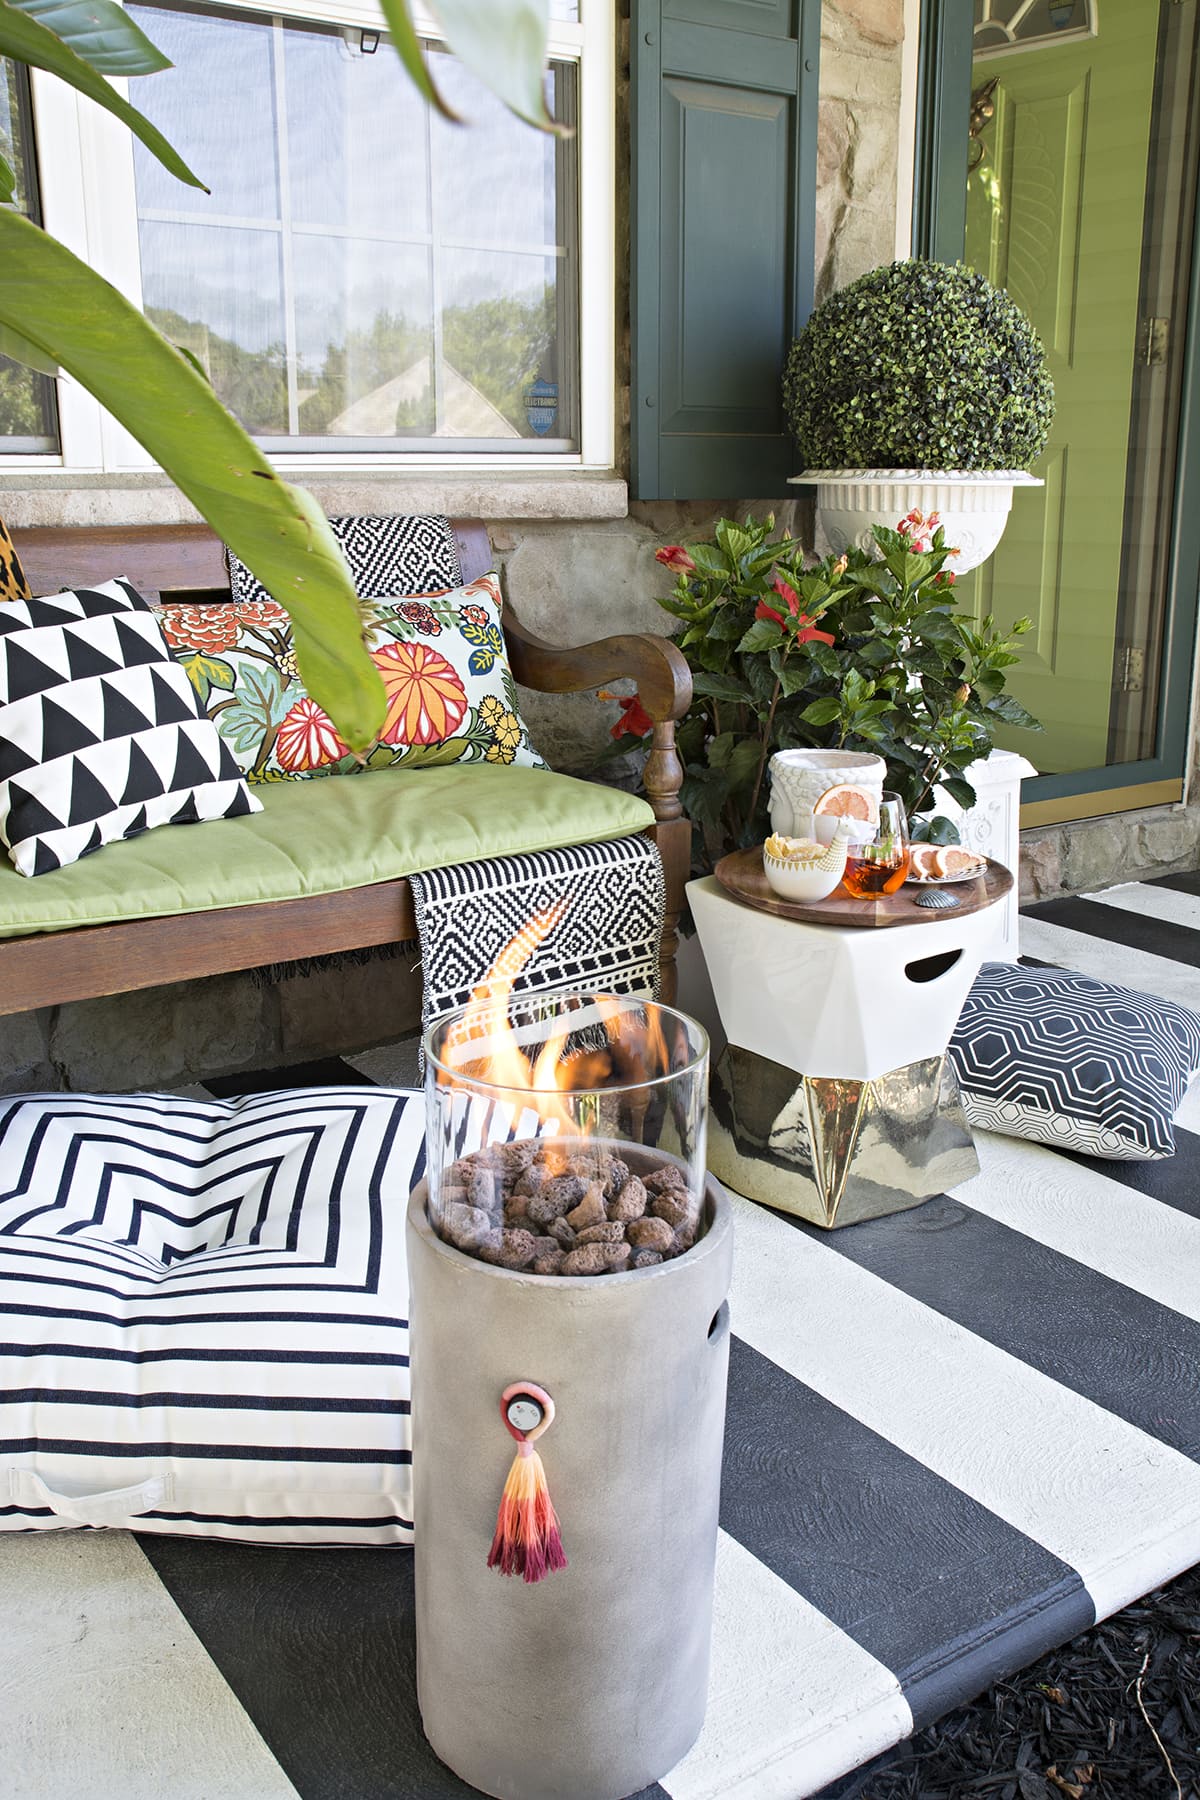
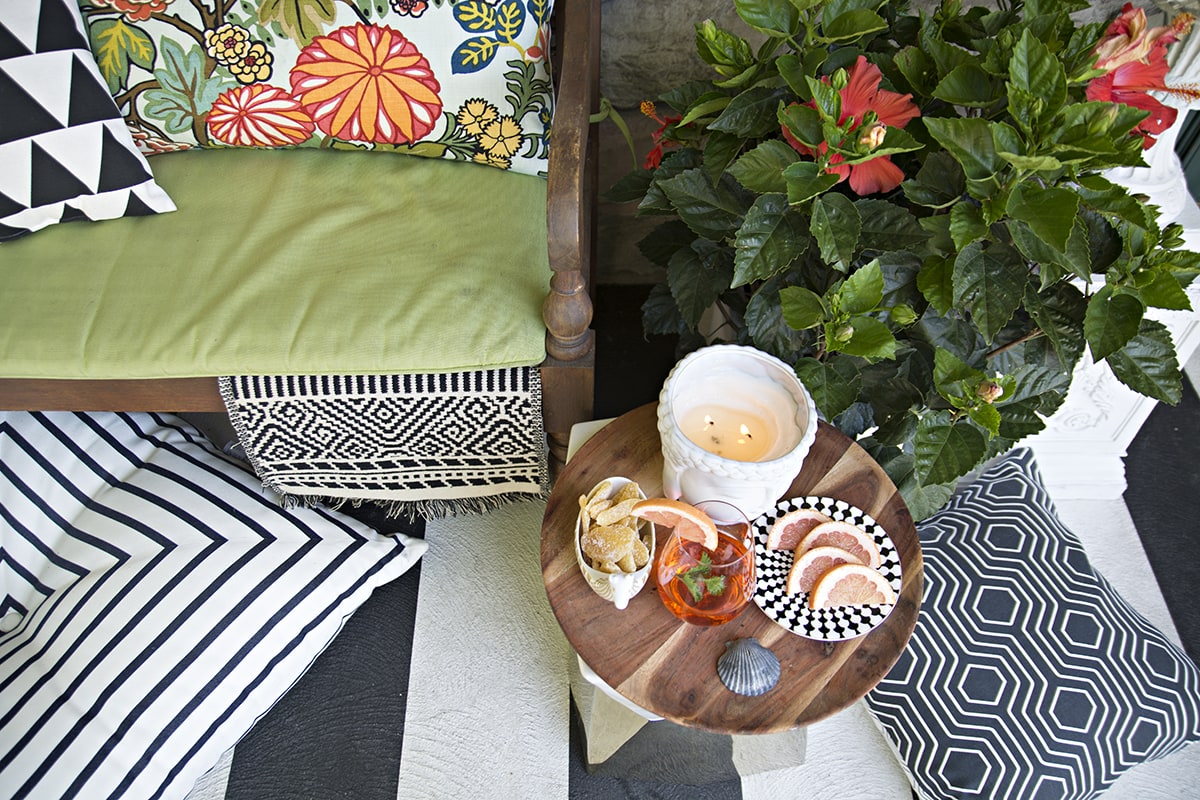
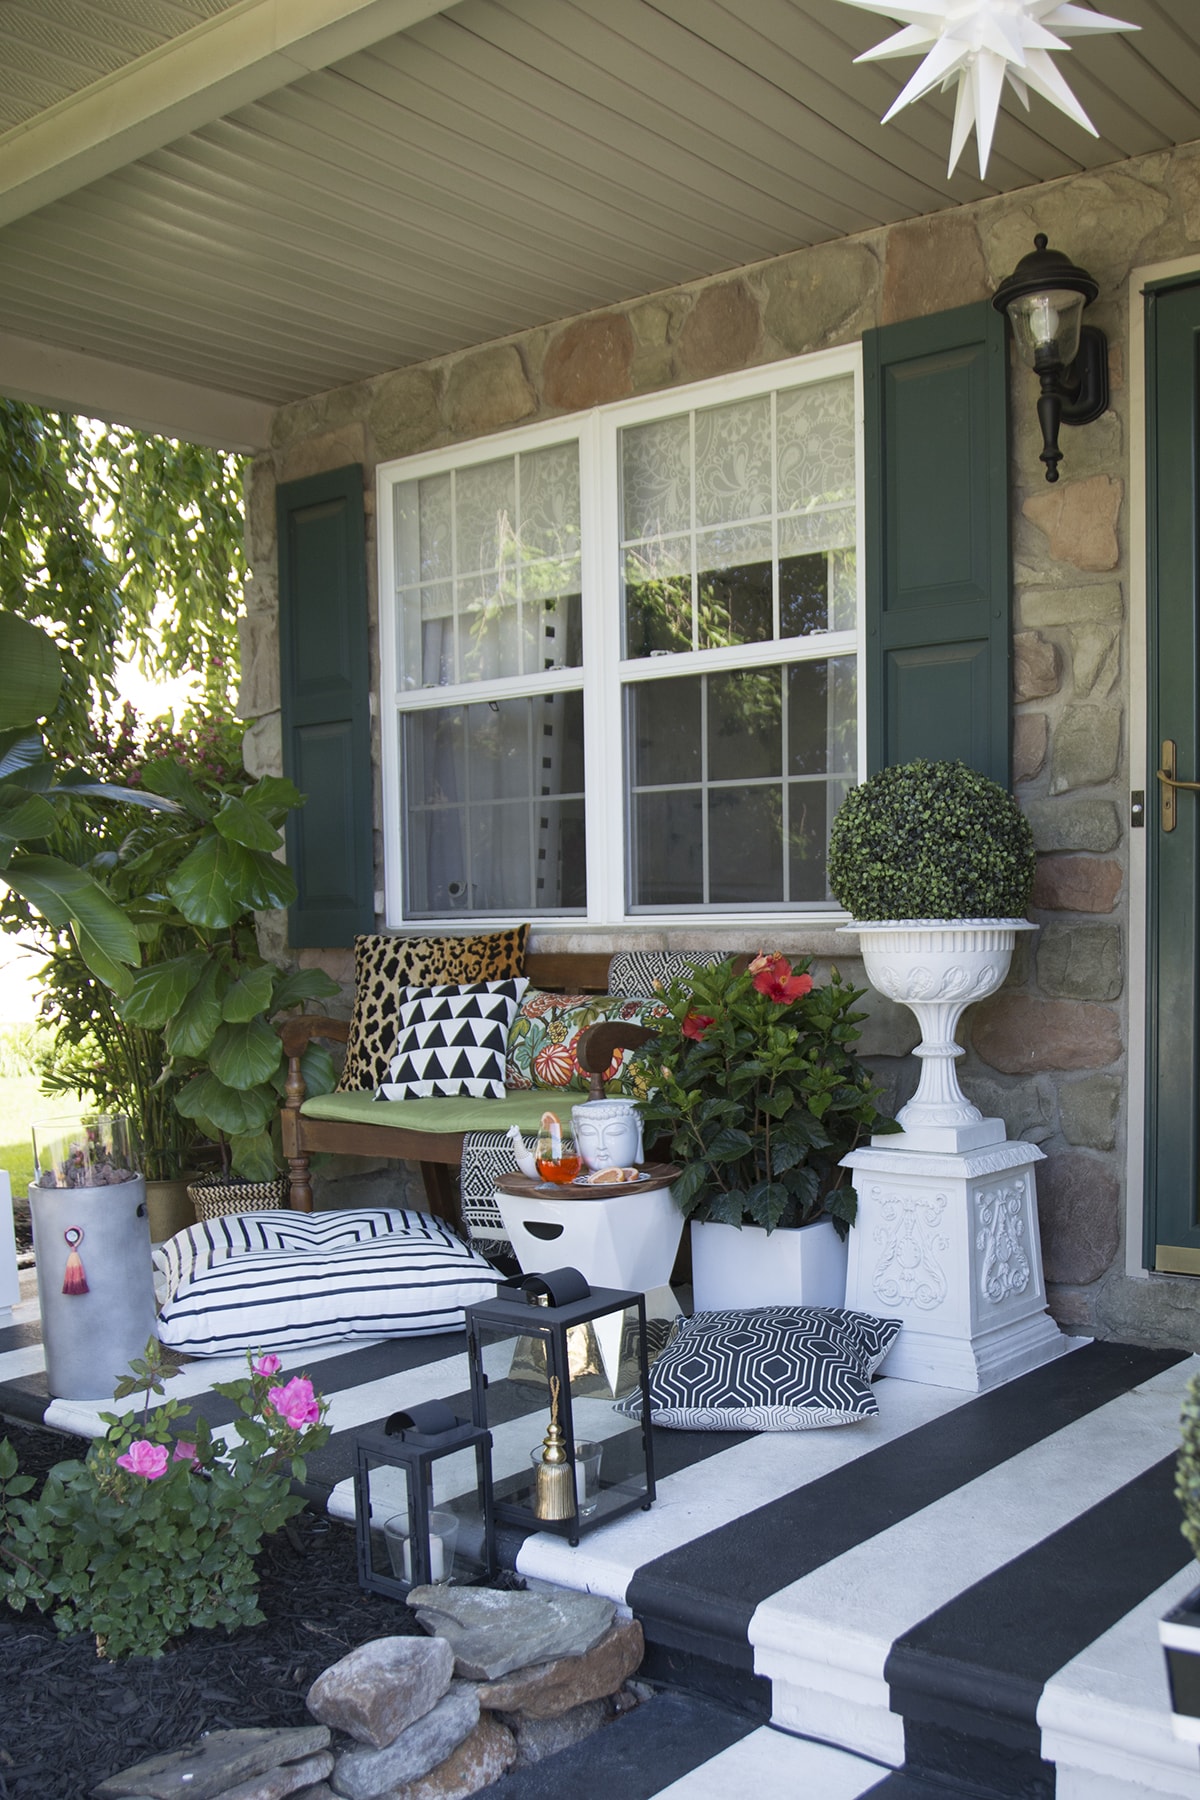
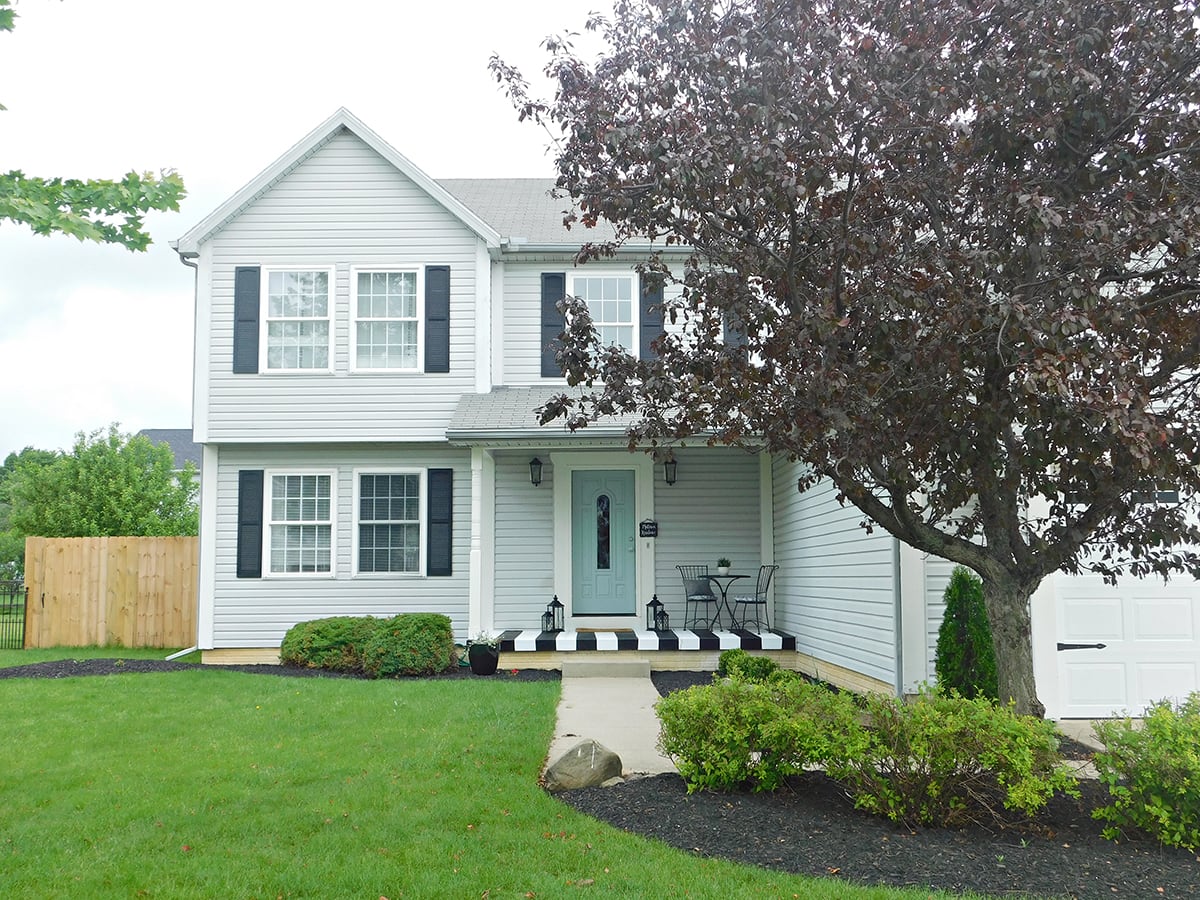
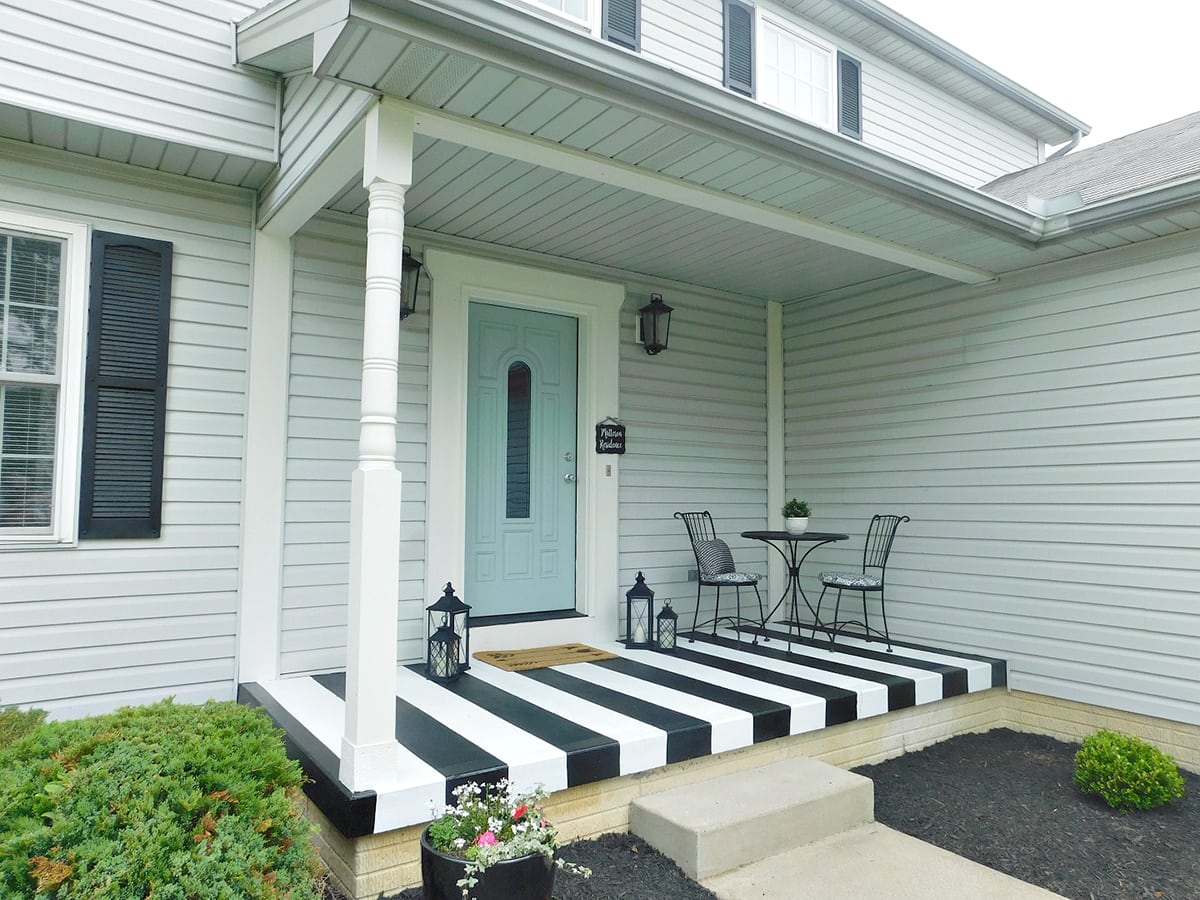
The finished painted concrete porch (and decorating ideas)
The painted concrete front porch turned out exactly how I wanted. And this project actually didn’t need all that much elbow grease from start to finish.
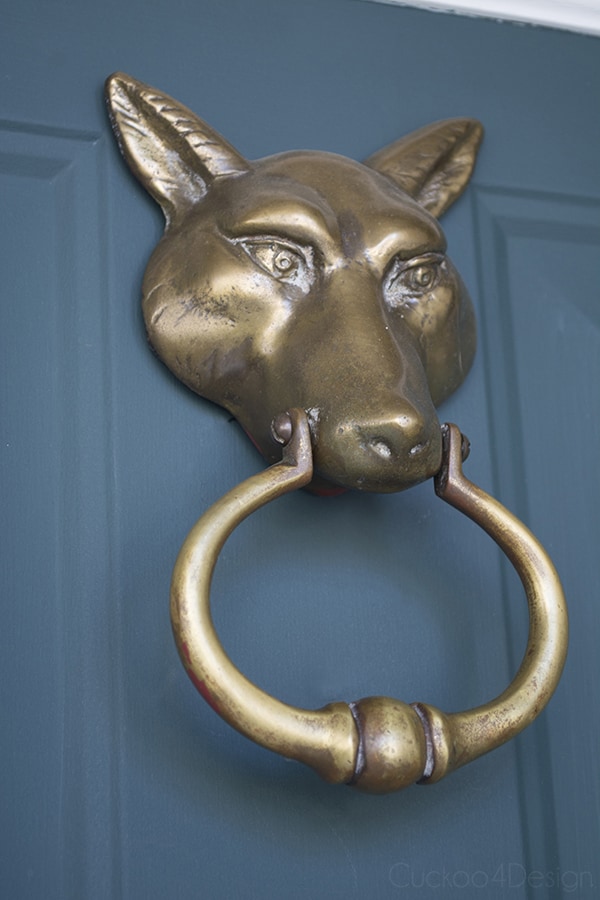
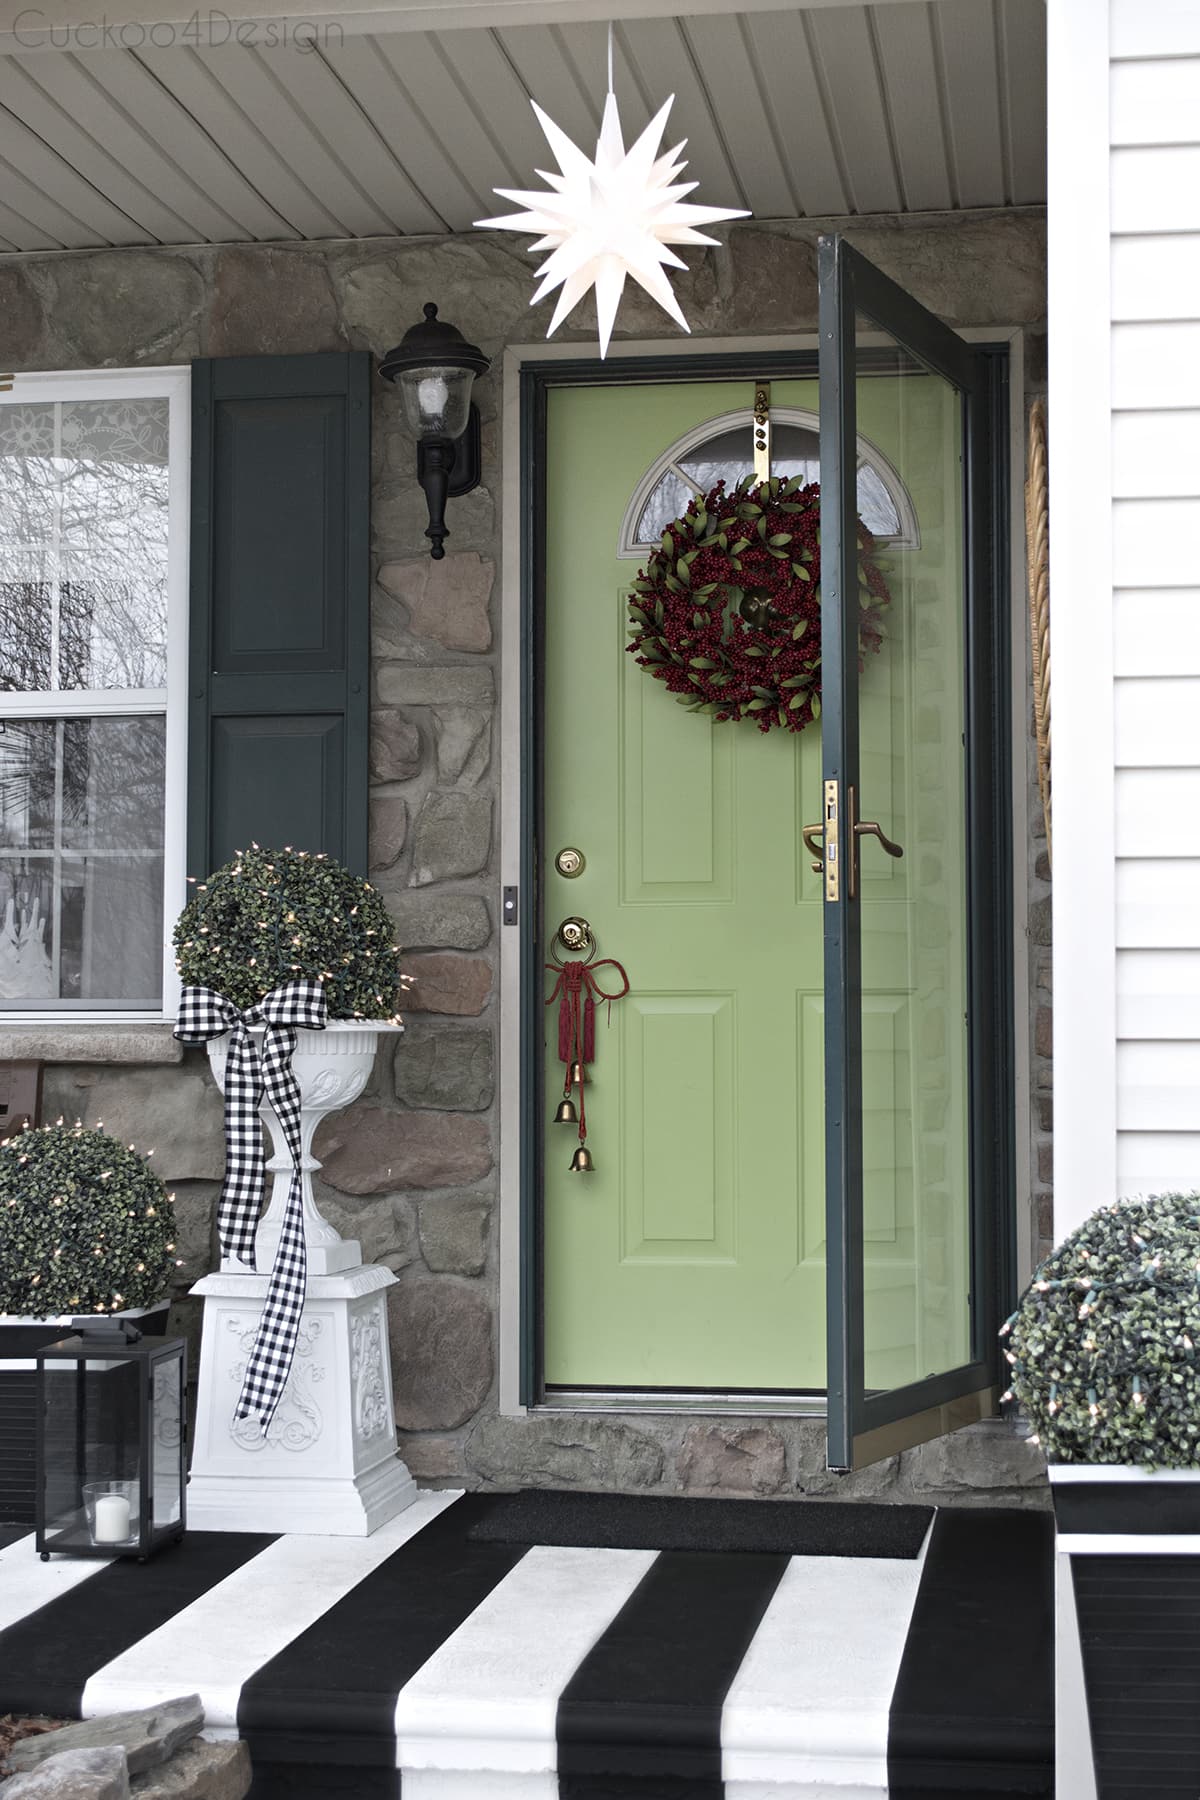
Can you see my newly painted black light too? I also have on my list to paint the front door a different color. I think I will use a bright green, similar to that bush, which I still want to rip out and replace with a smaller version of the same bush. It’s so overgrown. I can’t see the kids playing when I sit on the porch anymore, and I hate that.
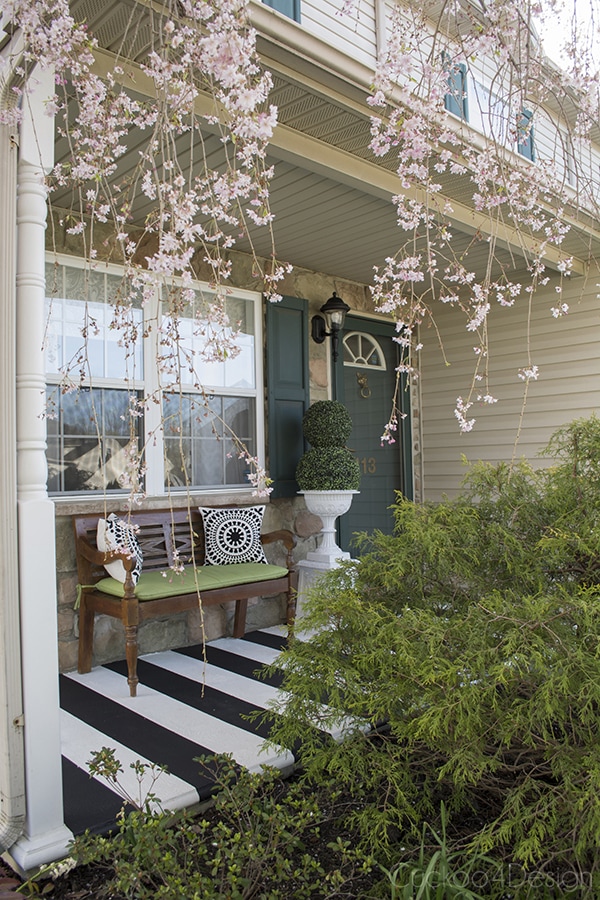
I had picked just the right time to paint because now all those pretty blooms are shedding and falling on the porch. It would have been a disaster had they all fallen into the fresh coat of paint.
Oh, and while I was at it, I also removed my lighting because it was dirty and bleached out, and gave it a black spray paint makeover. I simply used black semi-gloss Rustoleum metal spray paint after I thoroughly cleaned the light.
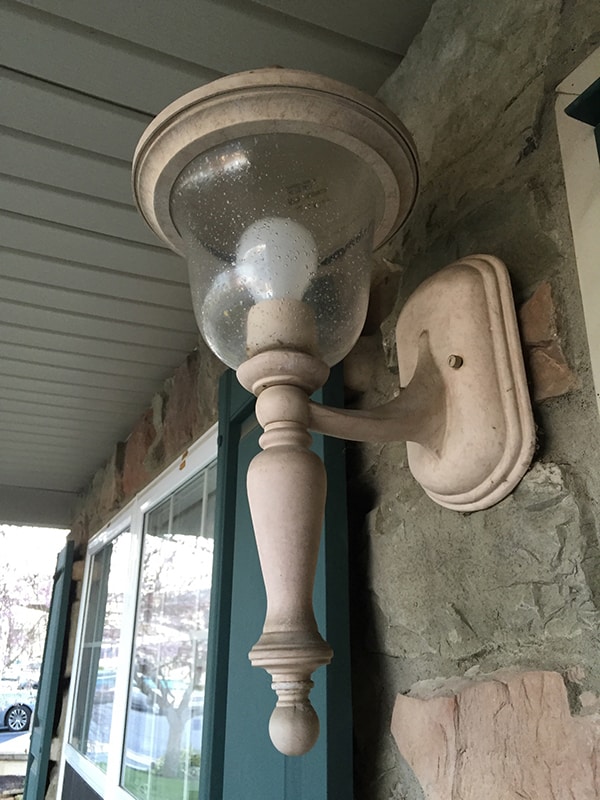
And below you can see the painted porch light.

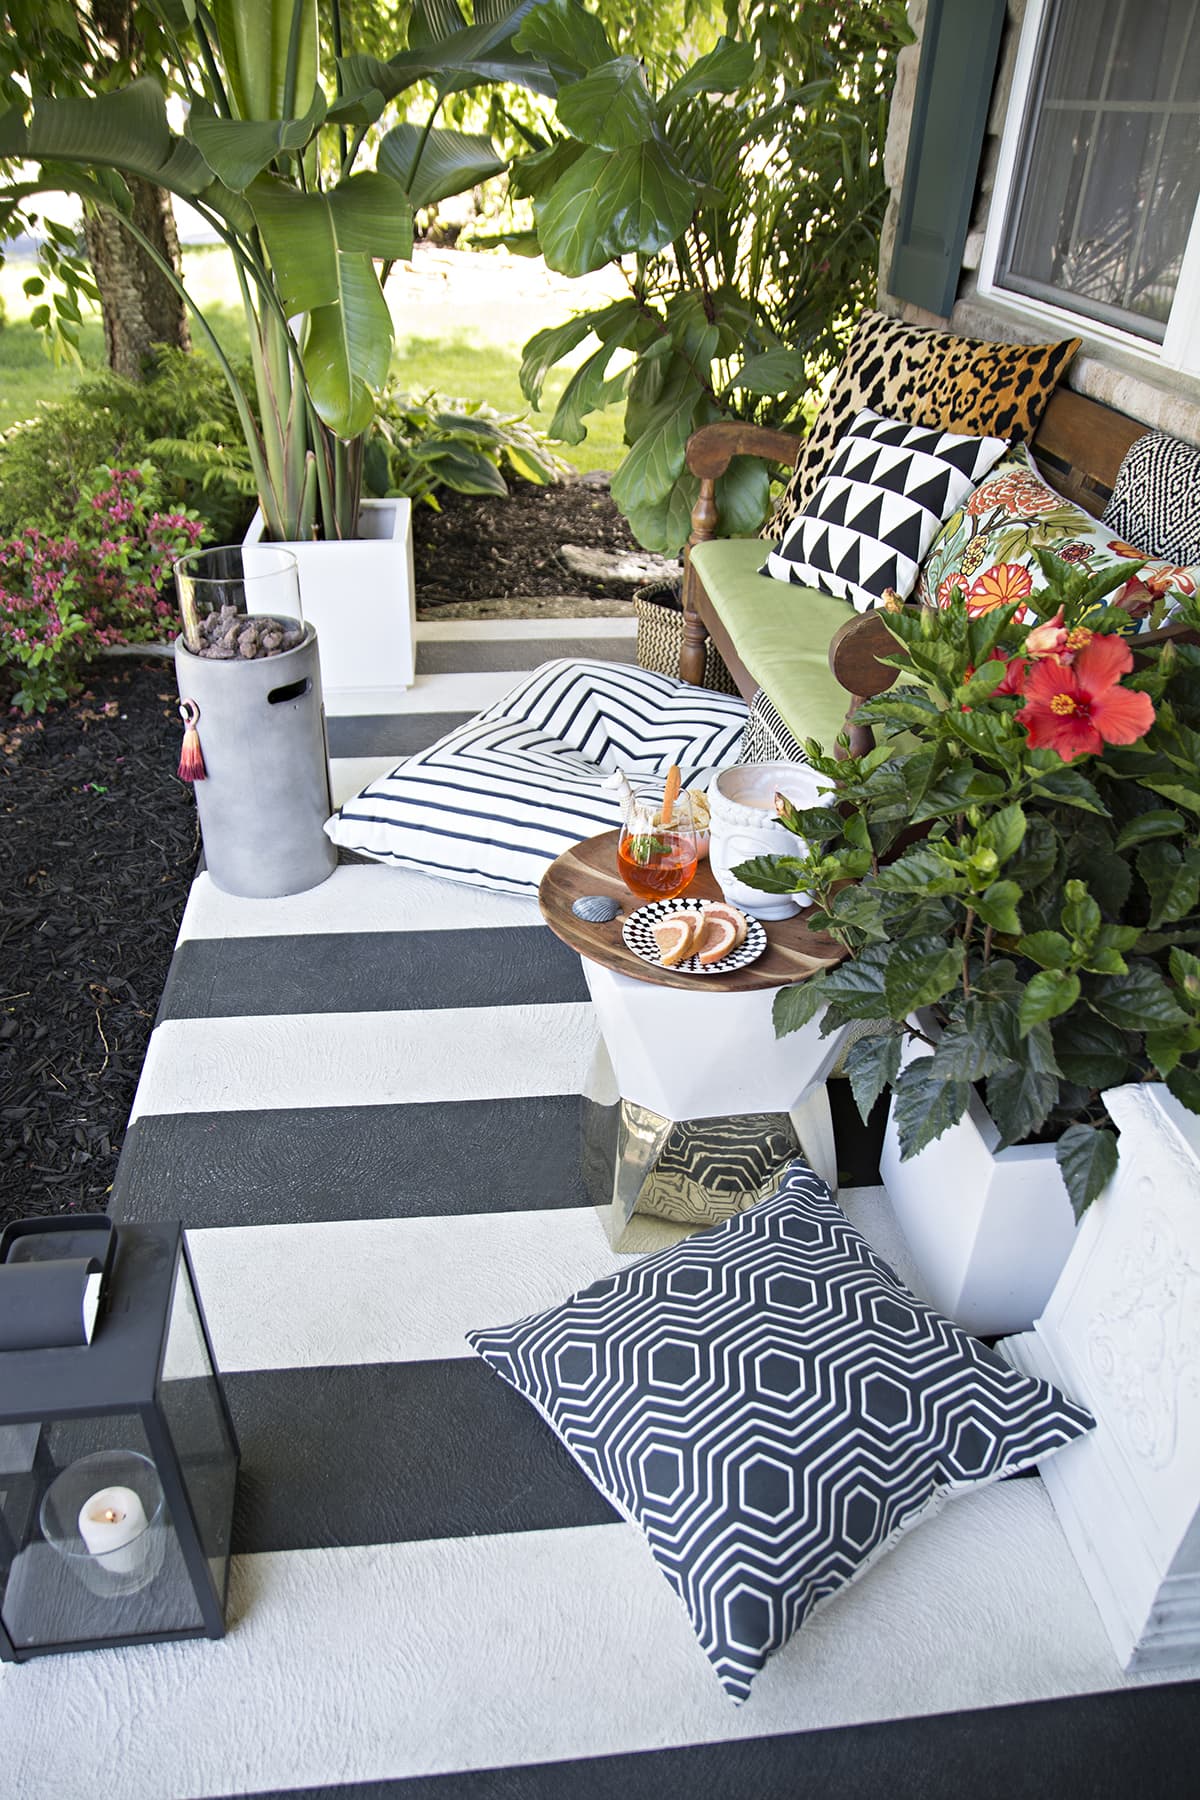
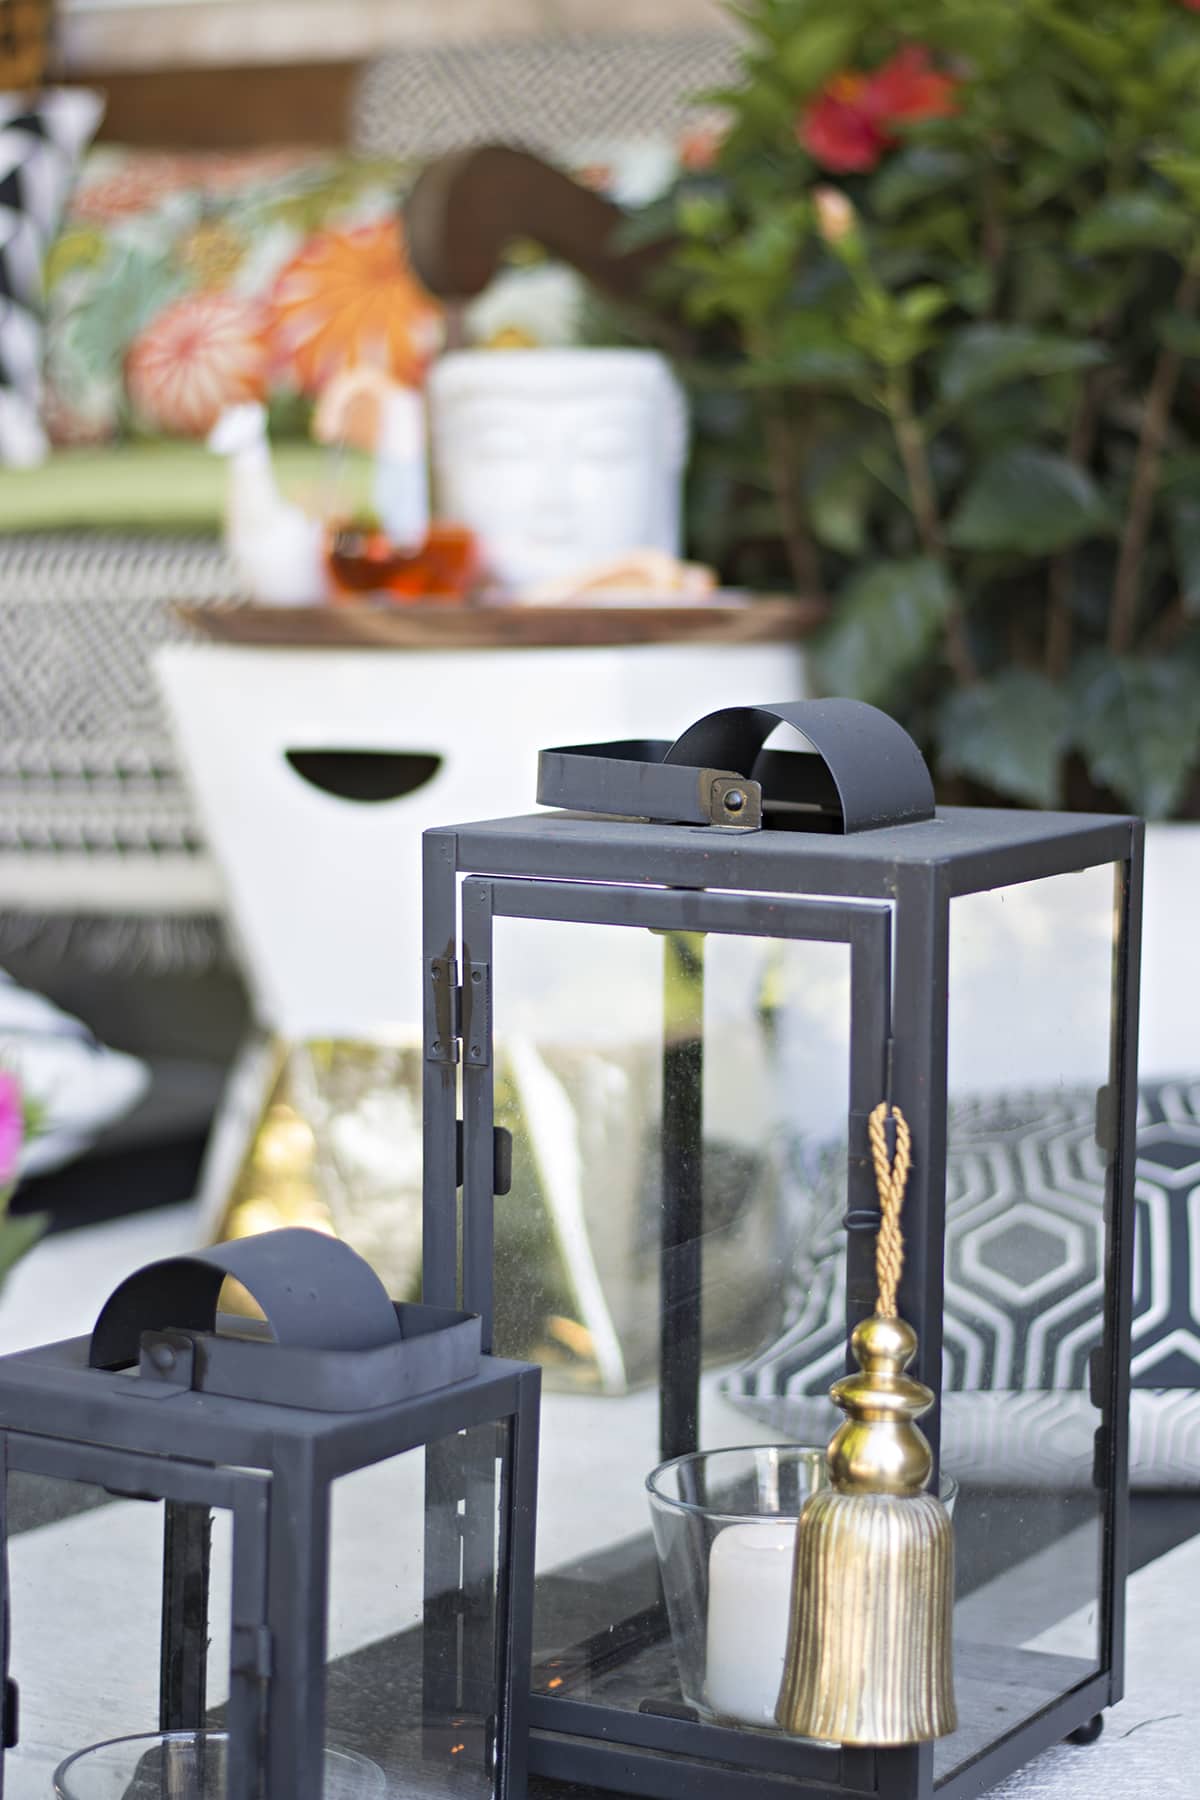
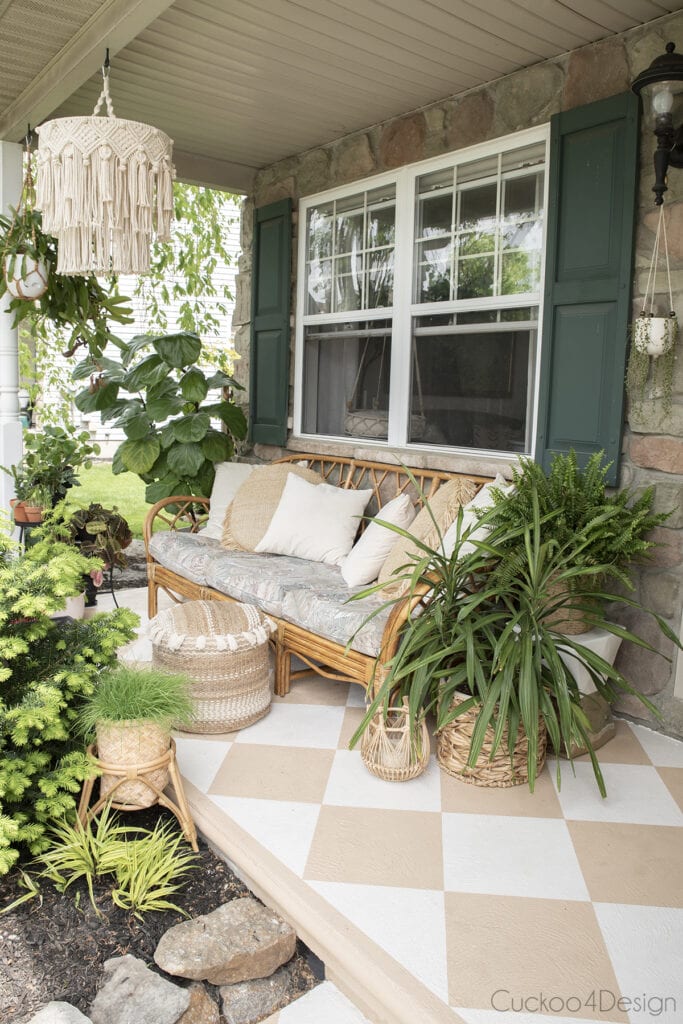
And my favorite way to decorate this porch now is in a colorful tropical look:


Here is the porch decked out for Christmas:
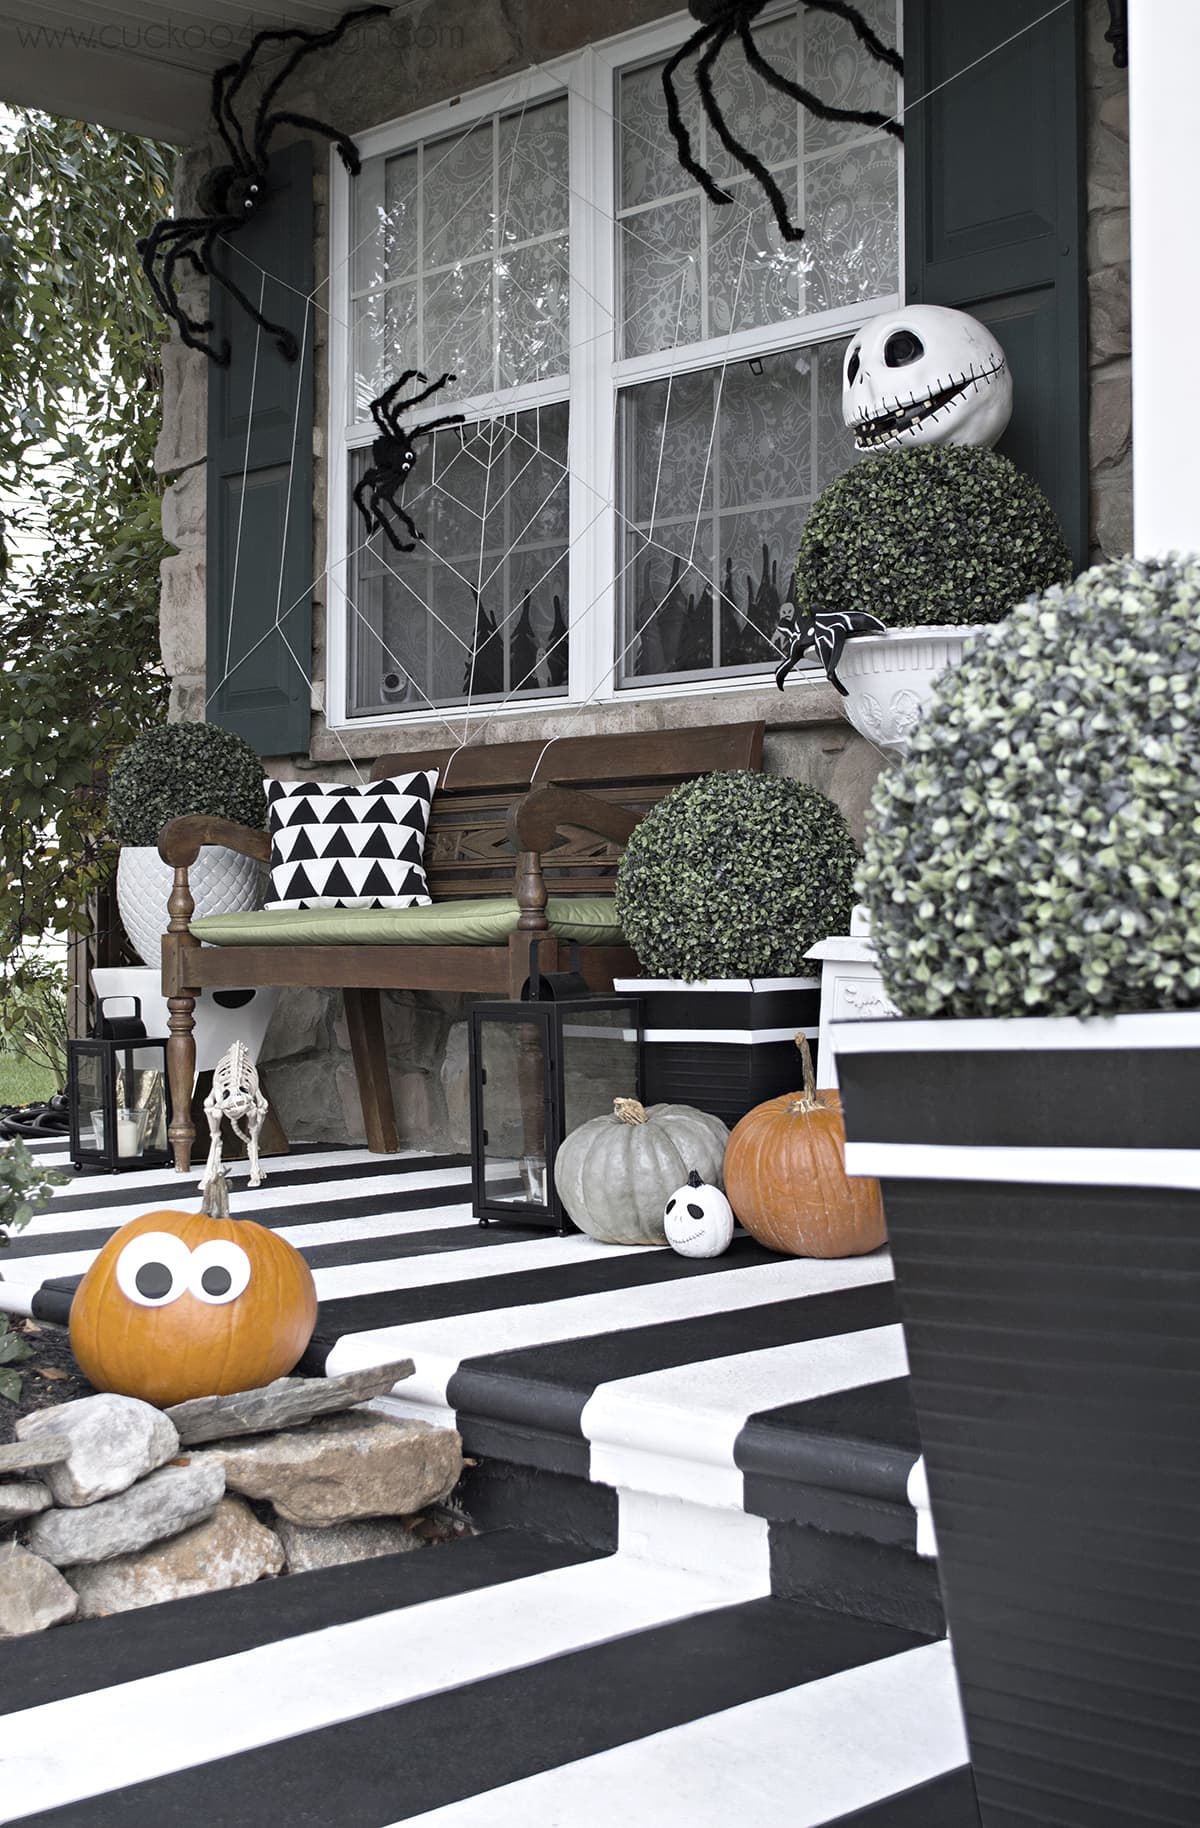
And my black and white Halloween porch:
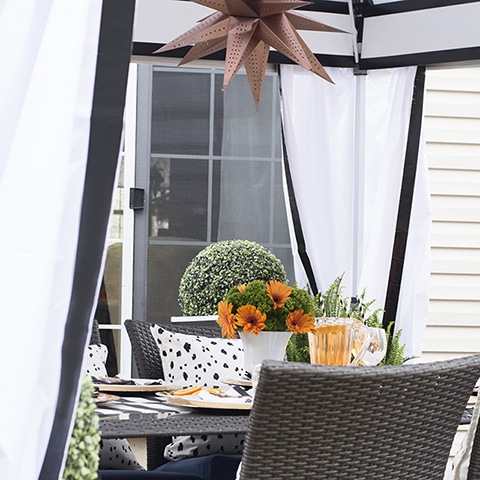
This all matches my cabana patio makeover post I did last year for Home Depot.
UPDATE: I recently re-painted this porch in a checkerboard pattern. Check it out because I love the change so much. Also, check out how this porch looks after the first winter and how to clean a painted concrete patio or porch.
A reader’s porch makeover using this tutorial
Nothing makes me happier than seeing that my projects inspire people. And seeing that my tutorials work. So when Tina messaged me with photos of her black and white striped painted porch, I had to include photos in my blog post.
Here is the before:
And here is the after:
Would you consider painting your porch in a bold stripe, and do you like the porch as much as I do?
I’ll keep you updated to see how it wears, ok? So far, it’s kept its looks for two years, and we couldn’t be happier.
Tschüß,

that door knocker kills me every time! i LOVE it! and your porch- DREAMY! i would love to do this to our porch but i need to wait until we redo the entire exterior. or paint yellow and brown stripes. gross.
That would look amazing on your big porch but I agree brown and yellow stripes wouldn’t be my thing either unless you are into bees, hornets and wasps 😉
Oh my word, this is amazing. I love it. Such a statement.
Thank you so so much Marty
This turned out amazing! Seriously, before/after is sooooo good! Can’t wait to see it with the door.
Thanks! I’d actually love to do the brighter pink or coral as a door color but the hubby said no. I’m already getting my pink dresser so I guess I’ll go with the green 😉
I love what you did Julia! The stripes really make a huge difference and up the style and curb appeal of your home.
Thanks Diane, I’m hoping they will last too 😉
Oh my goodness! This is amazing! It was the perfect solution to the front porch. It looks so chic now!
Thanks Emily. I shouldn’t have waited so long to finally do this. It was fun to see how much all the neighborhood kids actually love the stripes. They are really into it
Julia, Your porch turned out so lovely. The before picture actually caught my eye – I think the rocks on the front of your house are so classically American, and when you mentioned Pennsylvania I had a living history moment. I don’t know how old your house is though! Ha ha. Great job on the porch though, really fantastic.
Thanks Julia! My house isn’t old at all. It’s all faux, even the stupid plastic shutters 😉
What a fantastic transformation. Well done!
Love!!! If you think your porch looked bad I don’t want you to see the brown, ugly peeling mess of my porch. I don’t know that my house could pull off stripes, it’s a 1950’s California stucco bungalow….but I am painting it with this. I was waiting till I painted my house next year, but not anymore!
Thanks so much Renne, I was driving the other day looking at houses imagining them with black and white striped porches LOL and I feel like any house can pull it of. A dose of black and white can’t hurt 😉
So beautiful!
Thanks so much sweet Sheryll. How are you?
The transformation is amazing! I admire your patience and hardwork!
Thanks Charlie
You did a fantastic job and it looks great. It is so amazing what a difference paint can make.
I am wanting to get a pressure washer so would you recommend the one you have? I have been reading about them and it gets confusing as to what to get – gas or electric, etc?
Thanks so much Debbie. It’s actually not my pressure washer but my husband’s cousin’s and I love it. I’ve borrowed many different ones and this one is my favorite pressure washer so far. I’d definitely buy this one and I heard good things about this brand too. This one is gas and I think I would get gas too because there is just something about water and electricity that I don’t like 😉
I love it! You did an amazing job!
Thank you
What a great job you did! I love it as big black and white stripes is one of my fave décor accents. Now, all you need to do is paint the frame of the storm door and the shutters black!
Yeah that would be nice. We are technically not allowed to paint the shutters and doors. One of my neighbor’s painted their shutters black and some people flipped. The funny thing is that they forgot to add something about not painting the concrete porch LOL. And when I said that I’m painting my door a light green… that way I’m staying with the word green 😉 oh those rules 😉
Love the stripes. Looking forward to seeing the new green door.
Whoa! That tip about the painter’s tape will Change My Life!!! Thank you so much for sharing that (and the patio looks great, too!).
I saw that umbrella the other day at the store, so cute! Would you say its more black and white or black and sand? I should have looked more closely! XO, Amanda @ lifeonlinton.com
You are amazing and so talented – who would have thought of this idea???? So striking and different- I’m sure it looks so good from the street! Wonderful job! So creative!!!!
Julia I just love the black and white stripes – so fun for a front entry! I love your bold style, and I love those beautiful crisp paint lines!!!!!!!!
oh Julia it looks amazing, doesn’t even look like the same porch…what a transformation ….You did such a great job!
Liebe Grüße Astrid
Vielen Dank Astrid
Wow Julia, absolutely stunning as usual.
Thanks so much Trisha, I had a feeling you might like this 😉
black, white, and green–yes–love it!! The stripes are amazing, and painting that light fixture is such a big improvement!
I realise I’m SUPER BEHIND with my blog reading so late to the party here but this came out INCREDIBLE!! I love the stripes and it looks so very ‘you’ now 😀 Super smart method and I love the combination with green. Oh also, we’ve been getting winter weather this past week and it’s rubbish!! Snow and sleet one minute, sun the next – it’s doing my head in. Bring on proper Spring so I can do some outdoor projects too! xxx
You were on a fabulous vacation, no need to even catch up 😉 but thanks so so much. I love my porch now. It’s not as fabulous as your tiled entry and probably won’t hold up as well but I can always paint it again should it chip off right?
What a beautiful space! The black and white stripes changed the whole look of your porch. Looks like the perfect spot to spend a spring afternoon. I’m inspired to spruce up our place now!
Well thanks and have fun sprucing up your space!
Your stripes look amazing, Julia! I love that paint trick too for clean lines, worked like a charm on my daughter’s room! I can’t believe it worked so well on such a rough texture.
You’re amazing! please come to my home and do this!
Wow, what a transformation! I’ve been debating painting our tiny front porch concrete, and this is giving me the push I needed. Someone back in the day had painted it hunter green, and there are still patches of it that refuse to come off. I think painting it will brighten it up AND hide the green!
Yes, it’ll hide the leftover green perfectly. Good luck
This makes such a powerful statement and show great style. So awesome!!
I would like to know Julia I love the stripes! my question is because I am in love with this! I don’t have a front
porch, I have four steps that leads to a straight walkway in front of my house. my question is do you think just doing my steps? I am thinking that if I do the steps & walkway would be too much? what do you suggest?
I think you should go for it. The nice thing with paint is that you can paint over it again if you don’t like it. That’s why I love using paint
Hi, I cant find anything that states how big the stripes are? How wide are they?
I’m so sorry I evenly divided the depth of the porch to determine the size of the stripes. Since I painted over them, I can’t go measure anymore.