

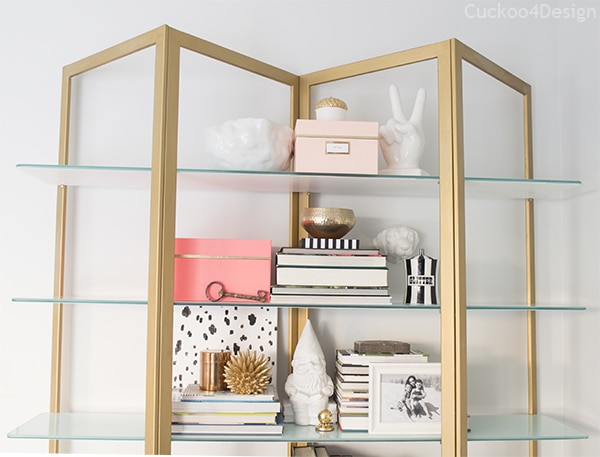
Brass and glass shelving unit makeover
So I finally wrapped up and finished the brass shelf in my “cursed corner”.
The shelving unit is brass-plated metal and not solid brass. Find out how to tell if something is brass before possibly painting it because solid brass is worth something and quite lovely. The metal looked rather crappy because the brass finish was wearing off in places and made it look cheap and ugly. If this piece would have been solid brass, I wouldn’t have painted it.
Brass and glass shelving unit makeover
This post may contain affiliate links from which I will earn a commission at no extra cost to you. View my full disclosure policy.
If you haven’t been reading along and are wondering why I call it the cursed corner, let me explain again.
This project started with the fact that I wanted to replace this Ikea shelf in my living room:
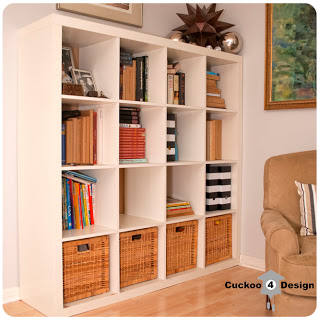
My children did a number on it with their toy baskets. I was also bothered by the fact that no big books and decor items fit into the cubbies. It’s just a big bulky square that I originally chose for it’s abilities to store my toddlers toys and to be able to get screwed into the walls for safety.
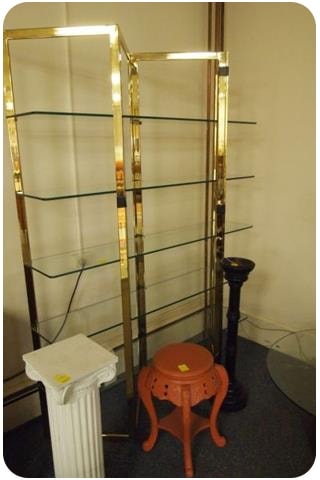
Well my kids aren’t toddlers anymore and I was so ready for a change and when I spotted this 80’s brass and glass shelf at the auction I knew I could turn it into something that I would love. It has the perfect size. I bought it for $35! Great price!
Now it appears a simple project, right? Remove Ikea Expedit shelf and put up brass shelf. That’s what I thought too but it just ended up being such a hassle.
I had screwed the Expedit to the wall and cut the molding to fit it in. I also painted around it several times. So there was a big mess to clean up and fix.

I think everything that could go wrong went wrong from this point on and a small project turned out to be a long process. Did that ever happen to you?
- I cut the molding wrong several times and had to run back and forth to Home Depot to get more
- I lost the original screws to the brass shelf on one of those runs because I wanted to replace several stripped ones. Of course, they were metric and hard to find
- I cut my foot on the half-finished floor molding and I was barely able to walk.
- Lowes mixed the paint wrong that I used to paint over the messy wall, so I had to paint a second time.
- I wanted to build chunky white shelves. Yeah, how about those? Do you remember? Well, I changed my mind after finding out how much the lumber was and I couldn’t find a cheap alternative. I was thinking of the white Ikea Lack floating shelf, but they weren’t deep enough. Why spend extra money if I had perfect glass shelves? So I did a little somethin’-somethin’ with them. I’ll explain later.
- And last but not least: Fixing the shiny chippy brass on the frame. I bought Rub ‘n Buff. It took quite some time to get to my house and it wasn’t as easy to apply as I had expected.
Materials used
- white paint
- small paint roller
- gold Rub’n Buff
- buffing cloth
Brass and glass shelving unit makeover
So this post is to explain what I did to get rid of the chipping brass layer and what I did to the glass shelves.
I used my $1 brass bookends as guinea pigs.
My first try was to just take the chippy shiny brass off. Well, it didn’t come off and I tried several potent things. I tried lacquer thinner (paint thinner) and even heavy-duty stripper right onto the frame but nothing worked.
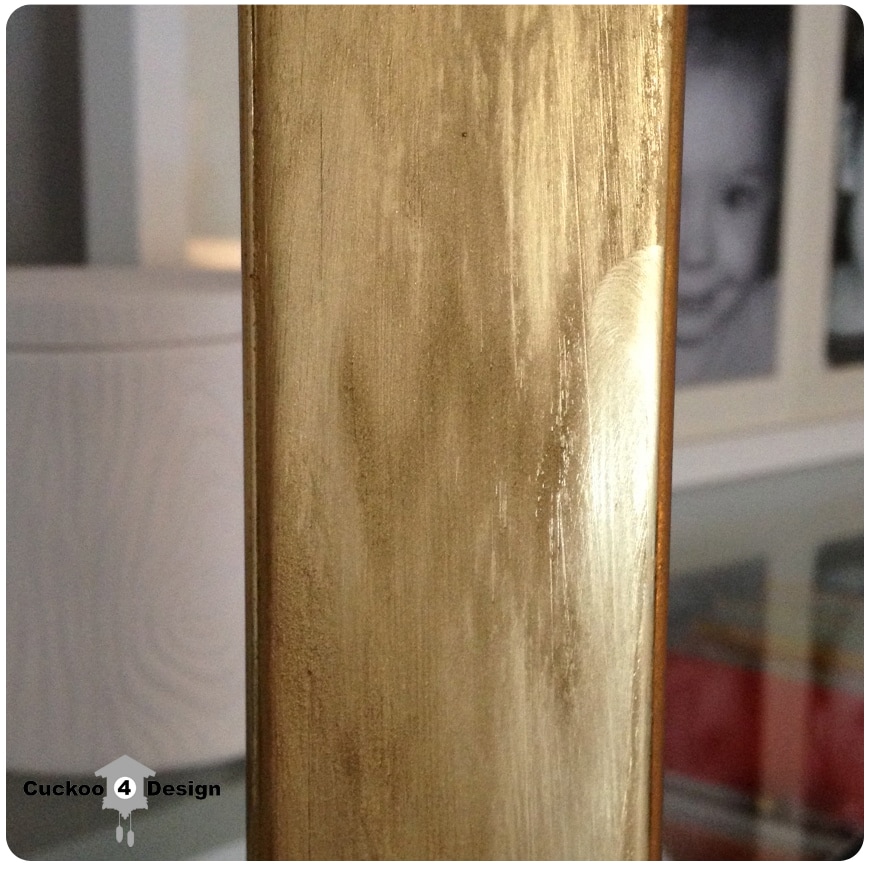
Then I moved to the Rub’n Buff. I tried to apply it right to the brass and it got blotchy and uneven. I have seen several bloggers do that and for them, it worked. For me not so much. My shelf is in the cursed corner though so it didn’t work for me and this is what the finish looked like for me. I tried diluting it with deglosser but didn’t like the results. I tried liquid leaf. No likey likey either.
The left side shows the blotchy Rub n’ Buff, and the right side shows the matte clear coat
So I ended up priming the frame with metal primer spray paint. The first time I didn’t wait the full 48-hour drying time and the Rub n’ Buff ate away the paint. So I had to fix the primer again.

BUT finally the Rub n’ Buff stuck to the frame. Yippie!
It was hard to understand for my husband why I primed the gold shelf frame to just paint it gold again. Haha, but he doesn’t need to understand it 😉
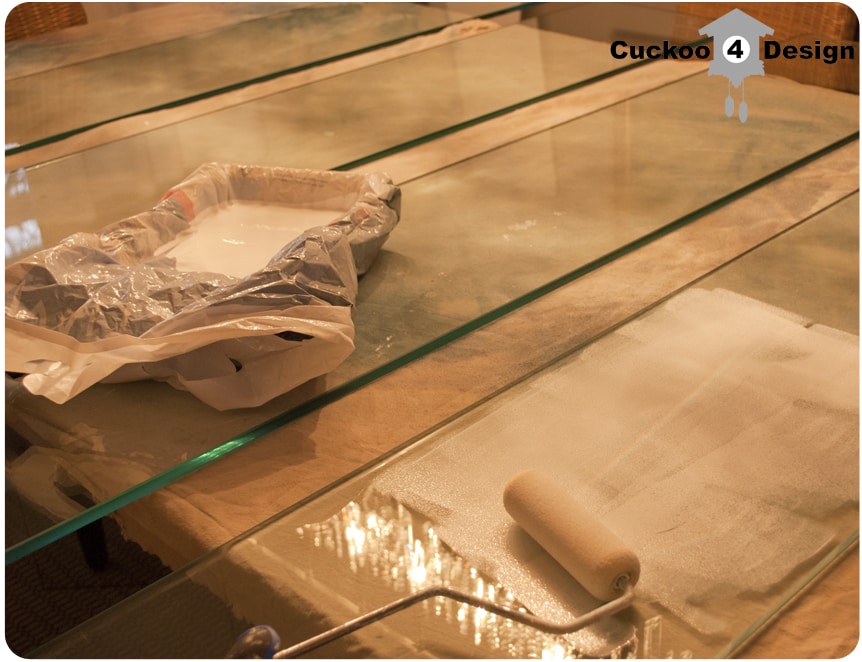
Now we come to the glass shelves and this is where the bracelet from yesterday’s post comes into place. I loved the jade and gold of the bracelet. Since the glass was tinted green, I decided to try painting the underside of each glass white to bring out the tint. It worked! And I really like it. It doesn’t mean that I might not change them out for my first choice, the chunky white shelves, down the road, but for now, I’m really happy with this result. I used water-based primer to paint the shelves.
After this long post (if you made it through the entire rambling) you can understand why a seemingly easy project turned out to be such a long process.
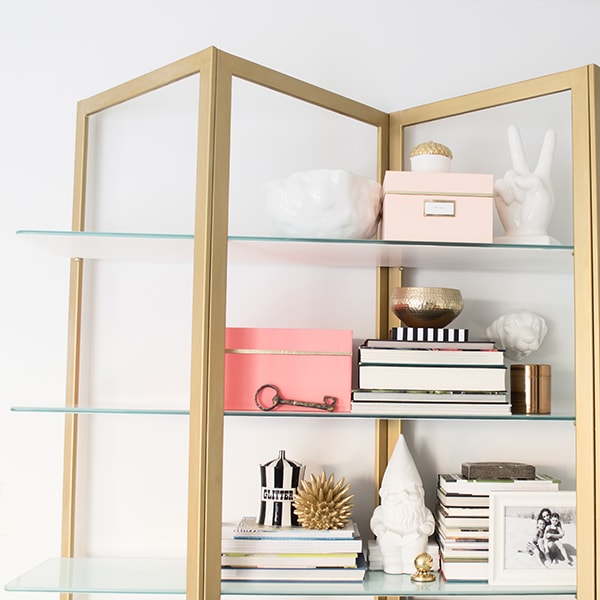
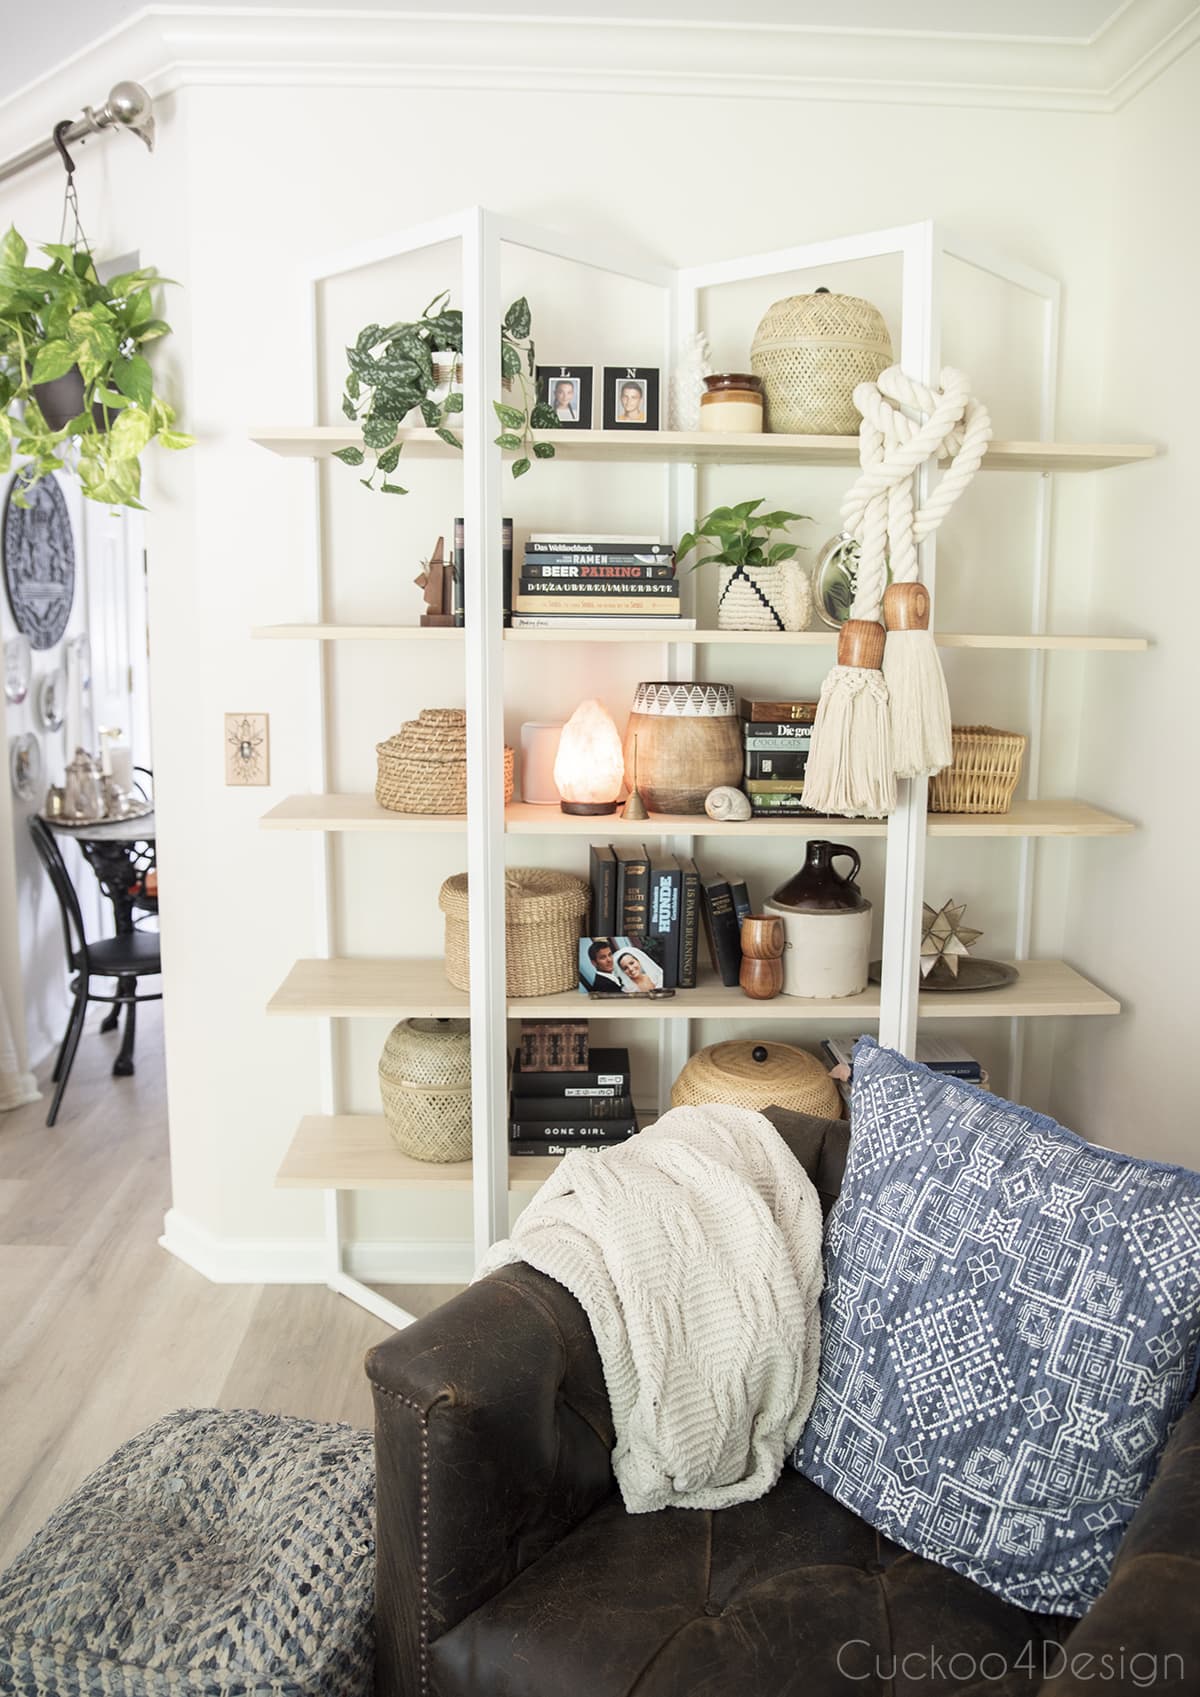
This is an older post of mine and the shelf styling has changed since then. Here are some updated photos before you get to the old tutorial:
And without colors:

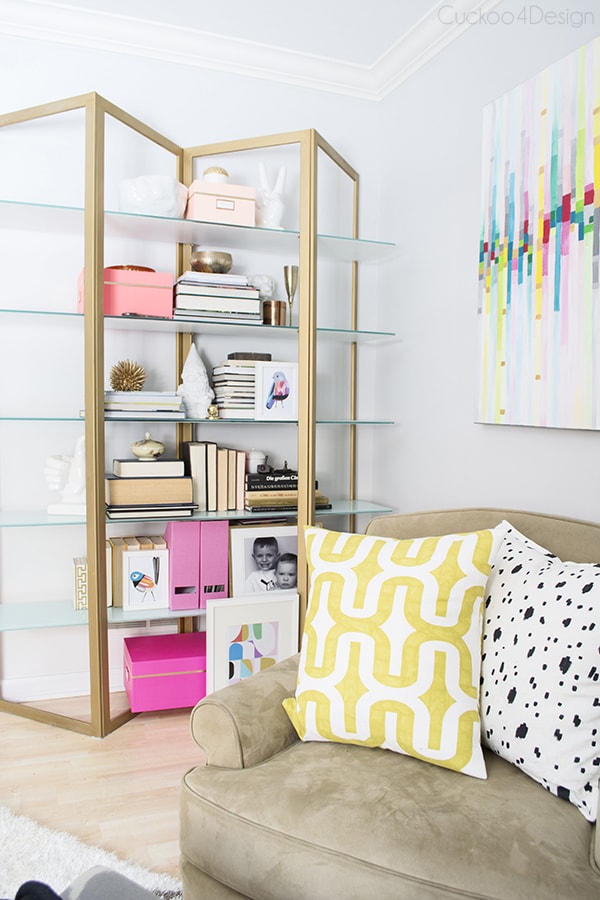
You can see more of that corner of my living room by clicking HERE. (I painted the artwork a while ago)
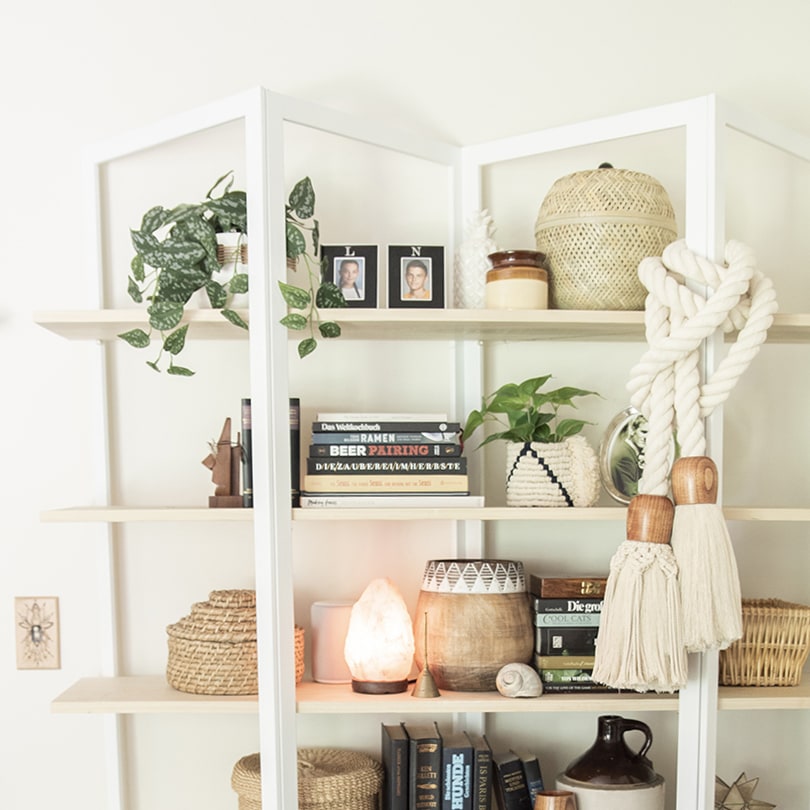
Update: I recently gave the shelving unit another makeover by replacing the glass shelves with wooden boards.
And the hubby doesn’t think that the shelf is hideous anymore. He said: “I never pictured it looking like this!” and I’m doing a happy dance. Mission accomplished!
I finally like my “cursed corner”.
What do you think?

Julia, I love your ideas! Shelving looks very interesting! It is a wooden or steel frame?
Hi Alicja, it is a brass coated metal frame.
It looks great, Julia! I love that you are bringing more color into your space too! The blues look great! xo Kristin
Thanks, I love the color too but I think I have to stop myself soon, so it doesn’t get to colorful 😉
Omg what an ordeal!!
Yup, totally LOL!
It was worth it in the end because it looks gorgeous! Now that you figured it out, you will be the queen of brassy makeovers!
Thanks! Who knows maybe by next year shiny brass will be in style 😉 as of now I like the more muted and dull brass.
ooooooh it was worth the work- looks awesome! i am working with a cursed table at the moment…. gah!
I can’t wait to hear the story about the cursed table!
It turned out great!
This looks fantastic! I love the whole room! It’s so frustrating when what you originally planned doesn’t work out, but your end result is great so maybe it was worth all of the trial and error? lol
Thanks and it was totally worth it in the end.
Wow, looking good girl! I love it 🙂
Have a great day!
Sonia xo
Thanks so much Sonia!
Wow, you are the transformation queen! That is amazing, you did a wonderful job, even with all your pitfalls! Great job.
Thanks Karen!
I swear, it’s the projects that seem straightforward that always give me worst trouble. The shelves turned out SO nice though! It looks fantastic!
Yes, it’s so true. The straightforward projects usually turn out to be a nightmare 😉
And thanks. Your closet shelving looks great too 😉
It looks fantastic Julia! I love that you kept at it until you got there. I bet those shelves make that whole area feel a bit more open!
Yes, it does feel more open…no more chunky square shelf 😉
Love it !
Thank you!
The shelf looks great! Bravo to you for continuing to find a solution to why the Rub ‘N Buff wasn’t working. I probably would’ve given up and used gold paint instead haha
Thanks Caitlin, I tried the liquid leaf and I forgot to mention that I bought gold spray paint too but I didn’t like the look. I really like the color of the gold leaf Rub n’ Buff. Otherwise I would have just given up and used the good old spray paint 😉
I’ve been reading through all your posts and I’m so impress with your style. I wish you were in Phoenix to give me pointers. And believe me I need them after 9 brain surgeries! I am really loving your bookshelf and got to thinking- wouldn’t the frame be pretty easy to recreate out of wood.
Aww thank you so much Kimmothy. Sorry to hear about 9 brain surgeries.
By the way you are totally right, you could recreate the shelf with wood but you’d have to use some lighter shelving materials and accessories because the glass shelfs and books are so heavy!
Wow! I probably would have given up once I took the Expedit off the wall and saw all the painting that had to be done. You have some serious will power to spiff that shelving up. It looks so fantastic in the end! I love the painted shelves. Brilliant.
Thanks, LOL, I always tell my husband that this is the area where I’m seriously competitive.
Visiting from Roadkill Rescue. Good on you for persevering…well worth the effort. My first thought with all the brass was 70’s…but that was a shot in the dark. I lived through the 70’s but don’t remember a whole lot…but that’s because I’m “old”, not due to chemical recreation. Anyway, I pronounce the curse lifted. The corner ROCKS!
LOL, thanks LuAnn.
Looks amazing! Great job!
Thanks Ashley!
What I can’t figure out is what’s holding up the glass shelves–which look fantastic w/ the green color. And the white paint on the undersides was a touch of genius.
Hi, the shelves are resting on top of padded screws that are attached to the metal frame.
Awesome!! The best makeover I have seen for a long time!
Thank you so much! I love your name by the way. Ama was my grandmother’s nickname and she was awesome.
What a unique piece of furniture. I love it. I love your style too. I am hosting a new link party and would love it if you would link up. http://www.ifitsnotbaroquedesignblog.blogspot.com
Hi Lauren and thank you so much!
Totally worth all the effort! I’ve had similar troubles with rub n buff and actually found that lightly sanding helps too. Your shelf looks amazing!
Thanks Carmel, I’m glad that I’m not the only one with RubNbuff issues.
Hi Julia! So this explains those gold fingers on Instagram!! It looks great! Such a good result for all the trouble!
🙂 Yes it does that was before the entire hand turned gold.
Hi Julia, I love your style….truly unigue. You really are cuckoo 4 design! I have to tell you I love your bookcase…however,a silver finish vs gold would really make it pop. I would have to guess…you alreay have one in the works. Let me know when it done. I would love one for my living room.
I am cuckoo for design 😉
That is an awesome transformation indeed! I will be featuring it tonight at my Winter Blues Wednesday party that opens at 8pm EST. Please stop by and pick up an I’ve Been Featured button. Thanks.
Thank you so much Judy! I did pick up my button 😉
Hey Julia! So, I am totally your blog stalker tonight! I have been wanting to read more of your posts and I am FINALLY getting a chance to do so!! LOVE this bookshelf. It is so cool that you painted the undersides of the shelves white! I would have never thought of that! Pinning lots of things! Jenna @ Rain on a Tin Roof
awesome, awesome, awesome! found you from the linky party at Our Fifth House :o) I love how this project turned out! I have a buffet/dresser thing that I’m working on and it is taking fo.ev.er. so I get it! Glad I found your blog!
Incredible….looks fantastic in the room too!!
Oh my goodness, Julia, you majorly persevered on that project! Way to stick with it and figure it out! Glad to know about the R&B on shiny brass. I’ve had that problem too! Your corner is GORGEOUS, and I would guess cursed no more! 🙂
test
My shelf is in the cursed corner though so it didn’t work for me and this is … icornershelf.blogspot.com