

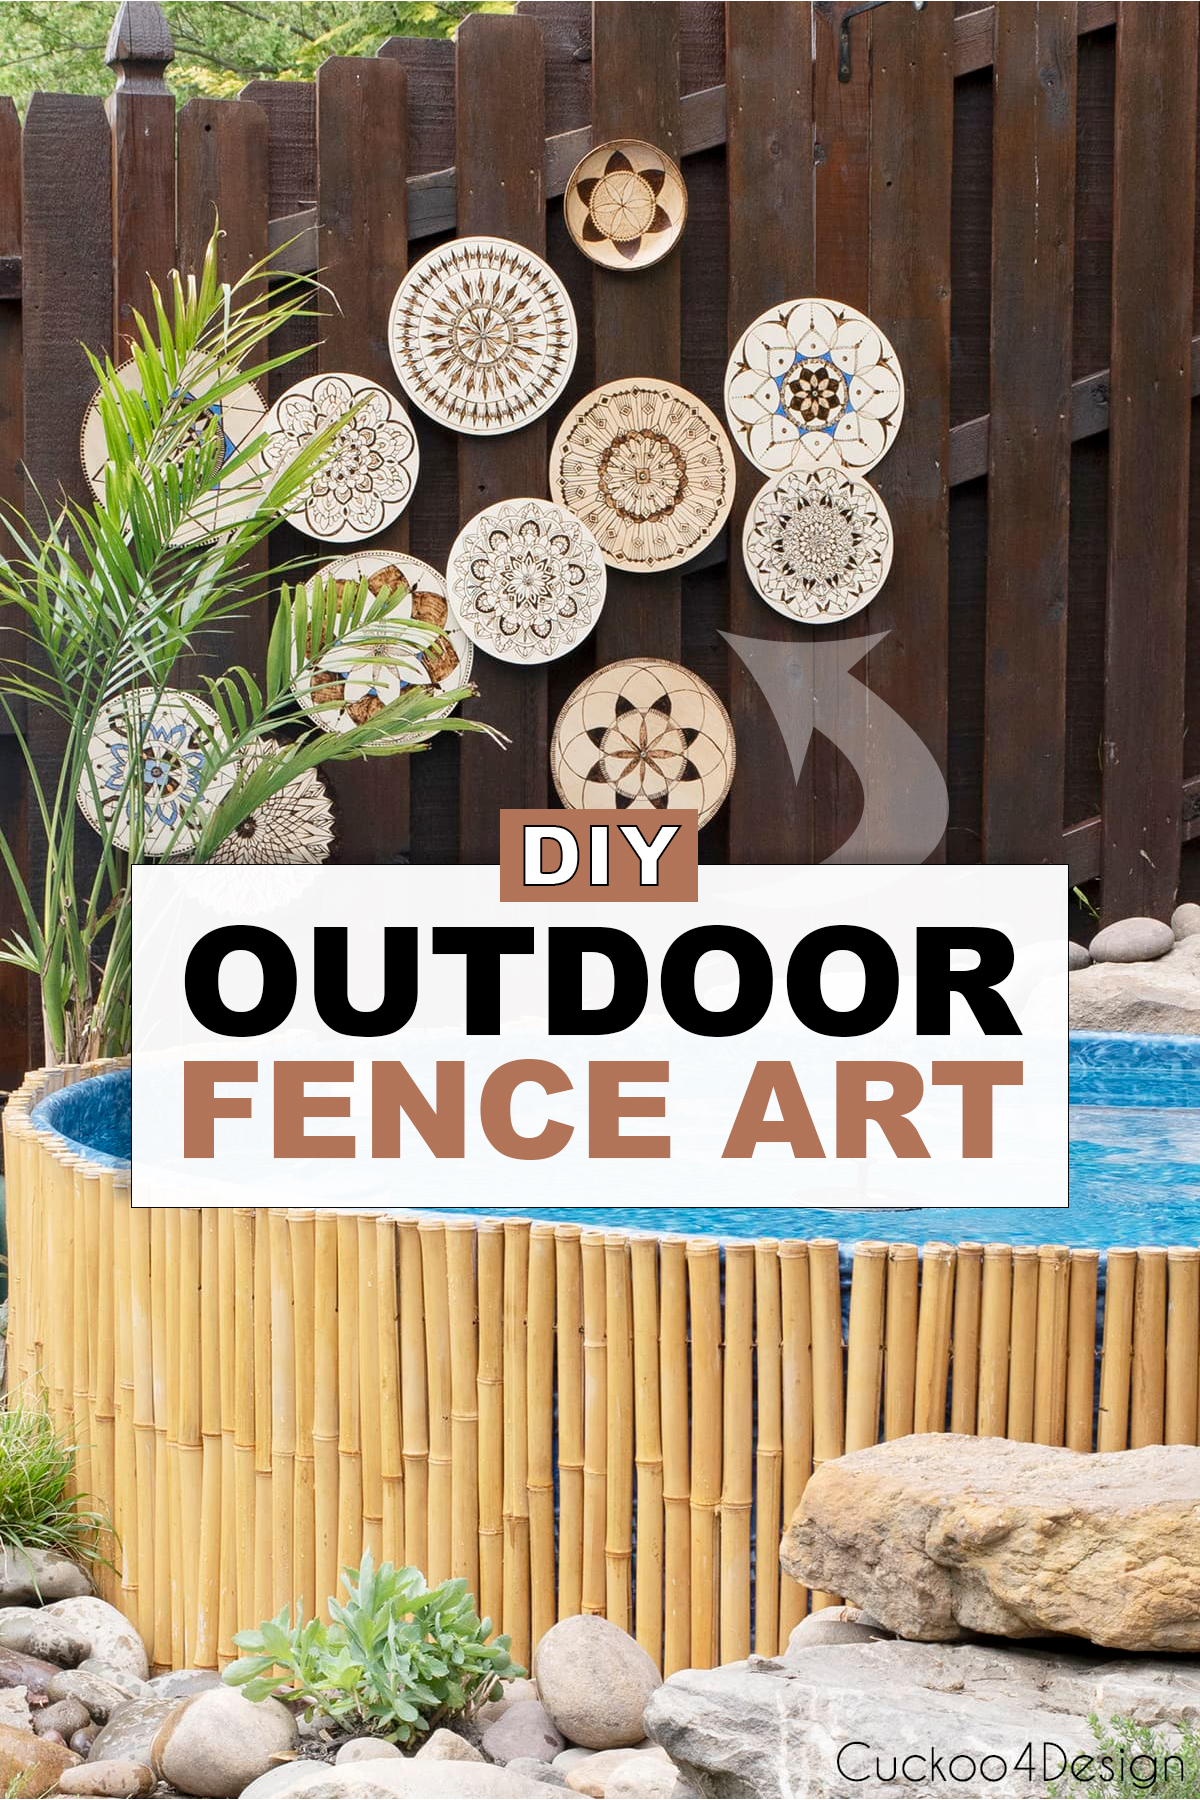
DIY Outdoor Fence Art Using Wood Burned Discs
If you’ve been looking for outdoor fence art that goes beyond the usual metal sun or store-bought wall decor, this project is for you. I had this DIY geometric wood wall art grouping indoors first, but I always had our fence by our stock tank pool in mind as its final destination. The challenge with any art on a fence is durability! I’d tried natural woven grass plates the year before, and they fell apart so fast. So I sealed the wooden discs and used a mounting method that lets you stack and overlap the circles for a layered, bohemian look. Here’s exactly how I did it, plus what I learned about weatherproofing the hard way.
Video tutorial
This post may contain affiliate links from which I will earn a commission at no extra cost to you. View my full disclosure policy.
Below is the video tutorial on how to make the DIY outdoor fence art, and you should also check out the written tutorial about my DIY geometric wood wall art tutorial.
Use the triangle on the image to turn on the video, and if you are on a cellphone, please hold your phone horizontally to watch.
Supplies needed
- pressure treated 1″x 2″ wood strip
- 1-1/4 in. exterior/deck screws
- screwdriver
- drill
- saw
How to weatherproof wood art for outdoor use
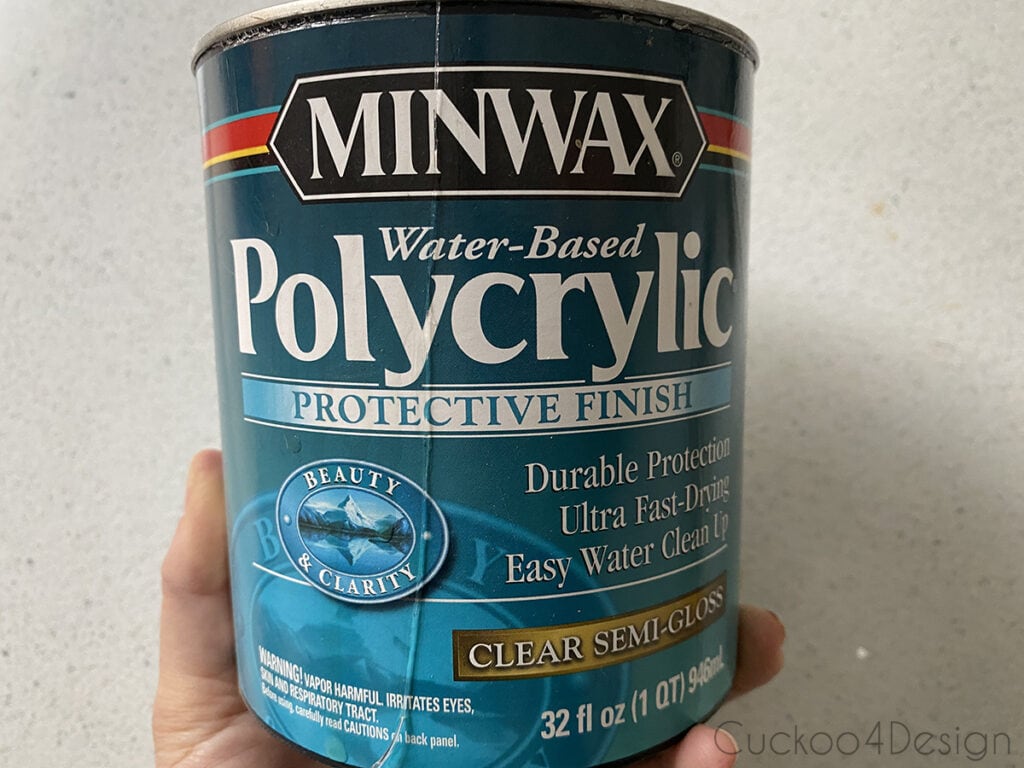
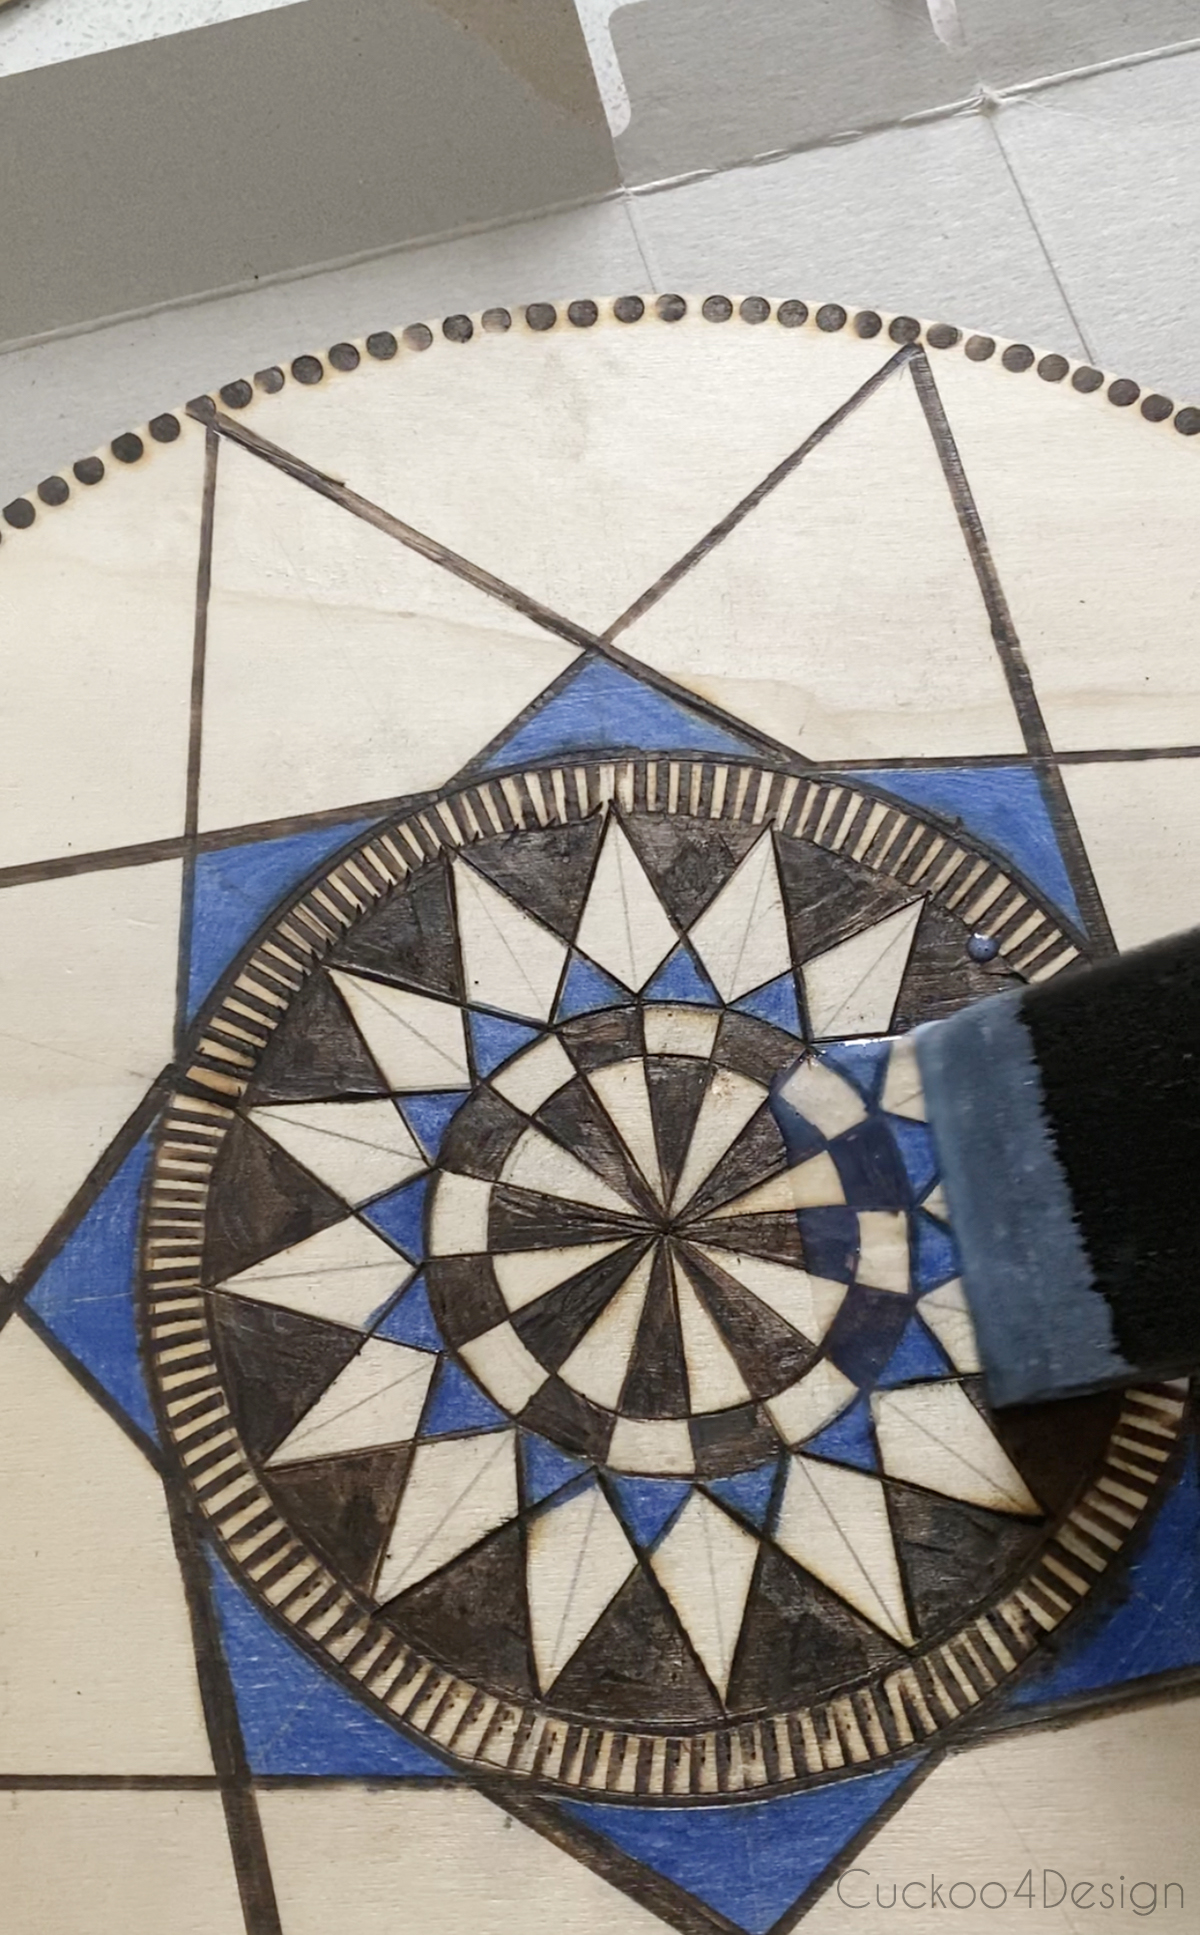
When I first made this outdoor fence art, I treated the wooden discs with five coats of Polycrylic, applying it with a sponge brush on both sides and the edges. I chose Polycrylic over Polyurethane because Polyurethane yellows over time in the sun, and I used semi-gloss hoping the moisture would run off better. I was so careful about it.
It still didn’t work. Over time the pieces warped, faded, and peeled from the moisture and sun exposure, and eventually they were ruined. Polycrylic is simply not made for true outdoor conditions no matter how many coats you apply.
What you need instead is a product specifically rated for exterior use, either a spar urethane or a marine-grade sealer. Spar urethane is originally formulated for boats, which means it’s built to handle temperature swings, UV exposure, and moisture far better than anything water-based. Apply it the same way with a sponge brush or regular varnish brush, multiple coats on all sides and edges. Just know that if you colored your discs, the oil-based formula will add a slight warm tint to the wood.
I’m keeping the photos below as a reference for the process, but use the better sealer from the start and save yourself the heartbreak.
How to hang outdoor fence art
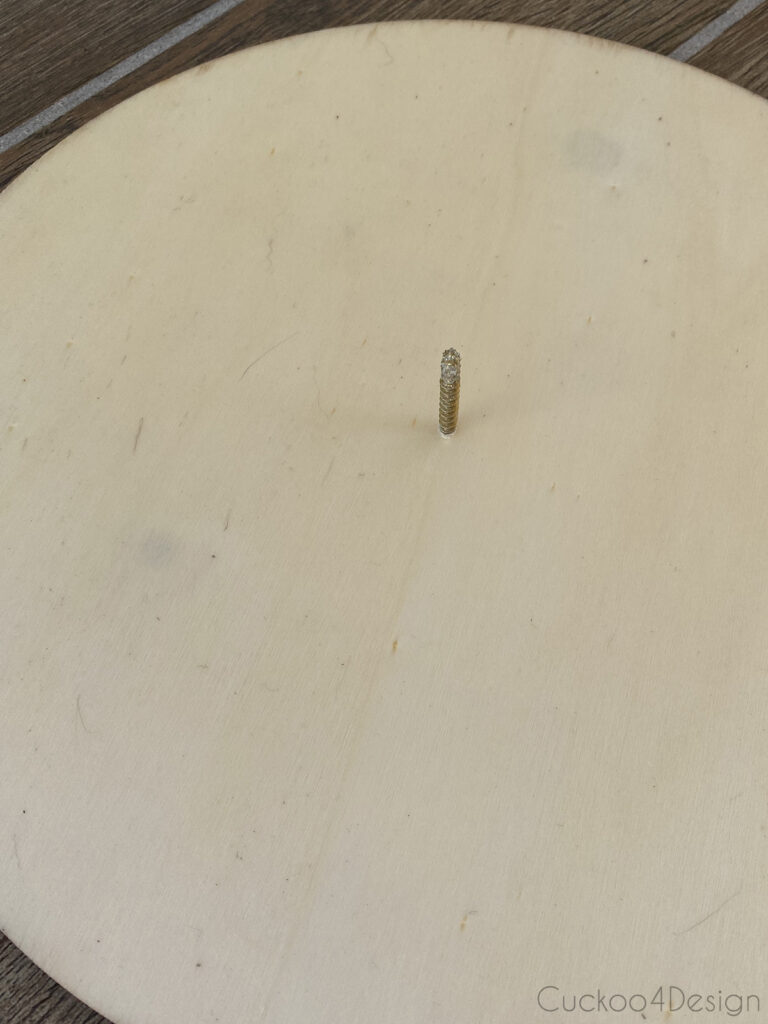
I used the outdoor screws without even having to predrill the holes. Usually, you should always predrill so the wood doesn’t split and splinter. These wooden discs are so thin and light though that the screws go in like butter without even having to do much. SUPER EASY! Just find the center of the medallion and start screwing the screw in. Just be careful that you don’t damage the surface underneath where you are screwing.
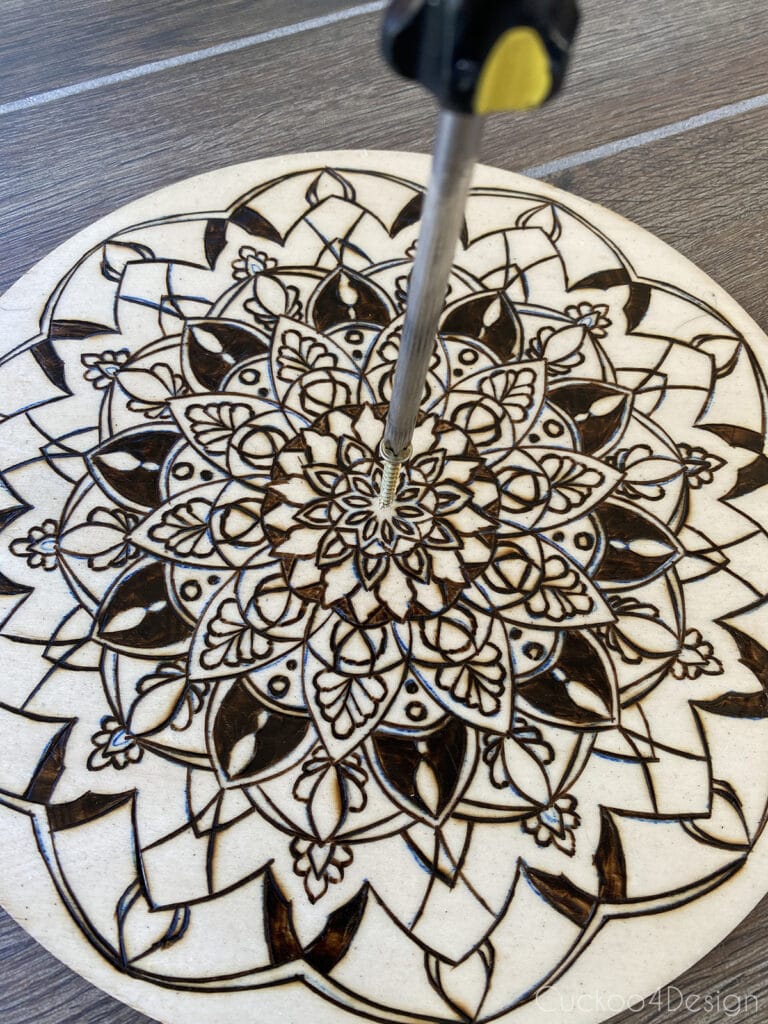
Below you can see the back of the wooden disc and that I screwed the screw all the way in.
Next, I cut the pressure treated wood into small pieces/squares. I used my electric miter saw to quickly cut mine but you can just use any handsaw. It doesn’t even need to be straight because you can’t see these pieces. They are only used to offset the pieces from the fence so you can stack and overlap the circles.
You don’t have to stain yours. My piece was a leftover from my outdoor cat tunnels which I had stained.
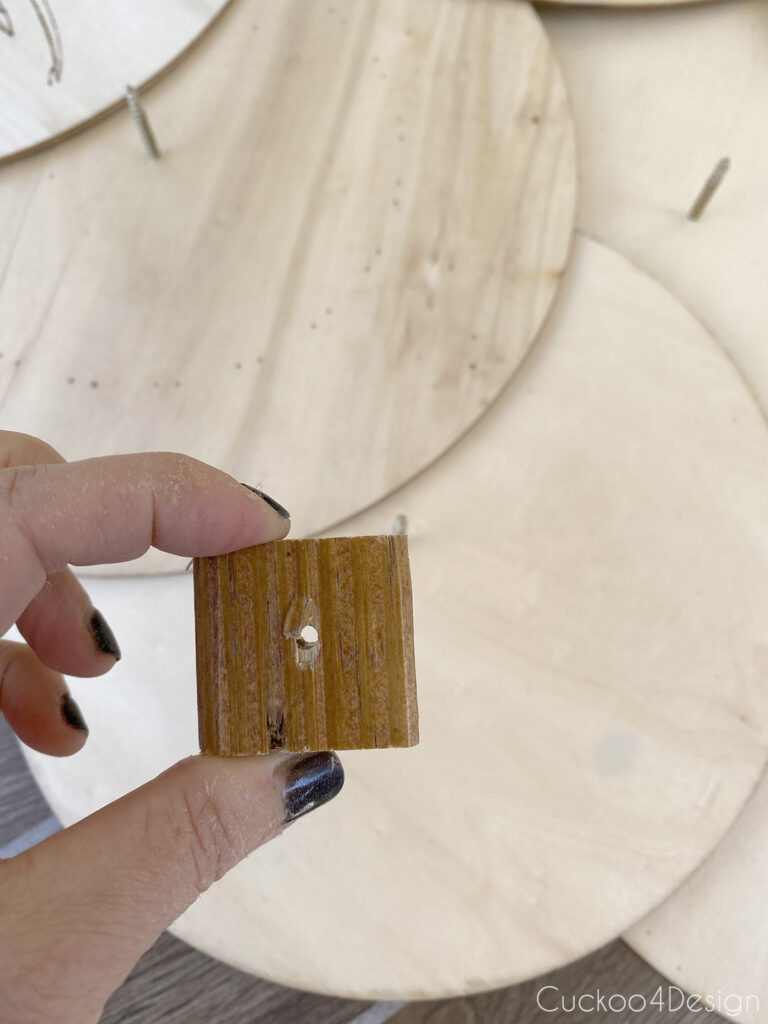
This time, you do have to predrill the hole in the center of the blocks with a drill bit that is slightly smaller than the screw diameter, but you can use one slightly smaller.
I attached a spacer block to every medallion to keep them off the fence surface and prevent moisture from getting trapped behind them.
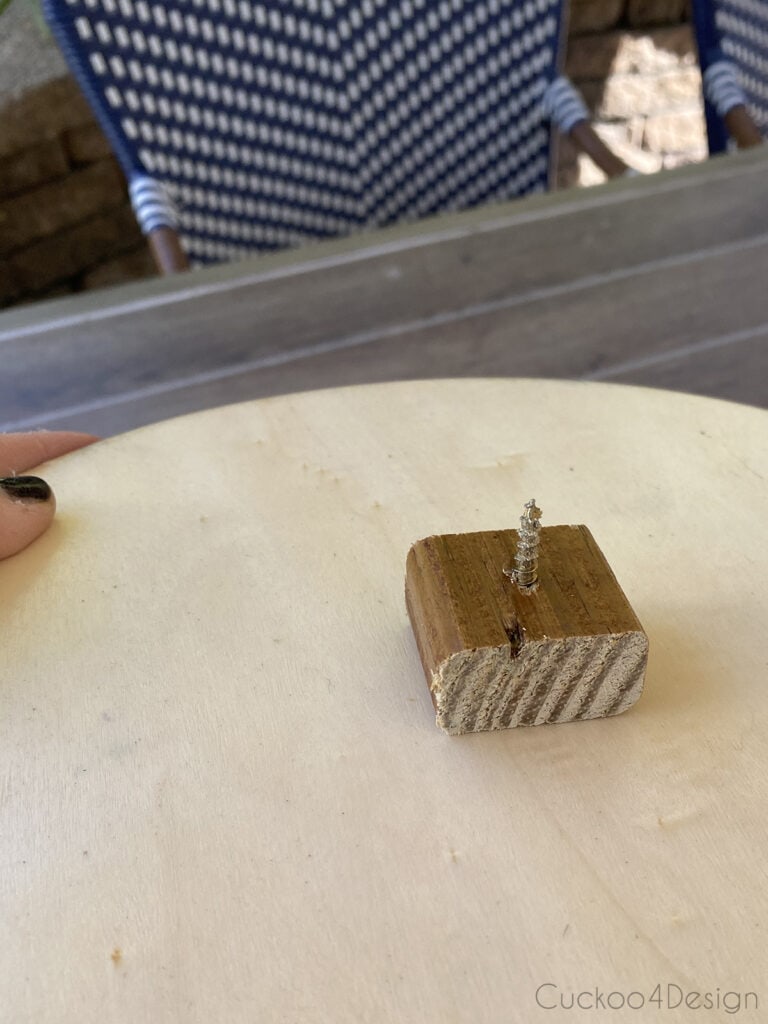
I attached them simply by screwing right into the fence with the existing screw through the center.
This is where you want to stack the circles here and there for some added interest.
How to arrange your outdoor fence art
I used odd numbers of discs and mixed the 10″ and 12″ sizes, which immediately makes the grouping feel more natural and less rigid. Spacing was mostly intuitive and I laid them out on the ground first to get a feel for the arrangement before committing to any screws in the fence.
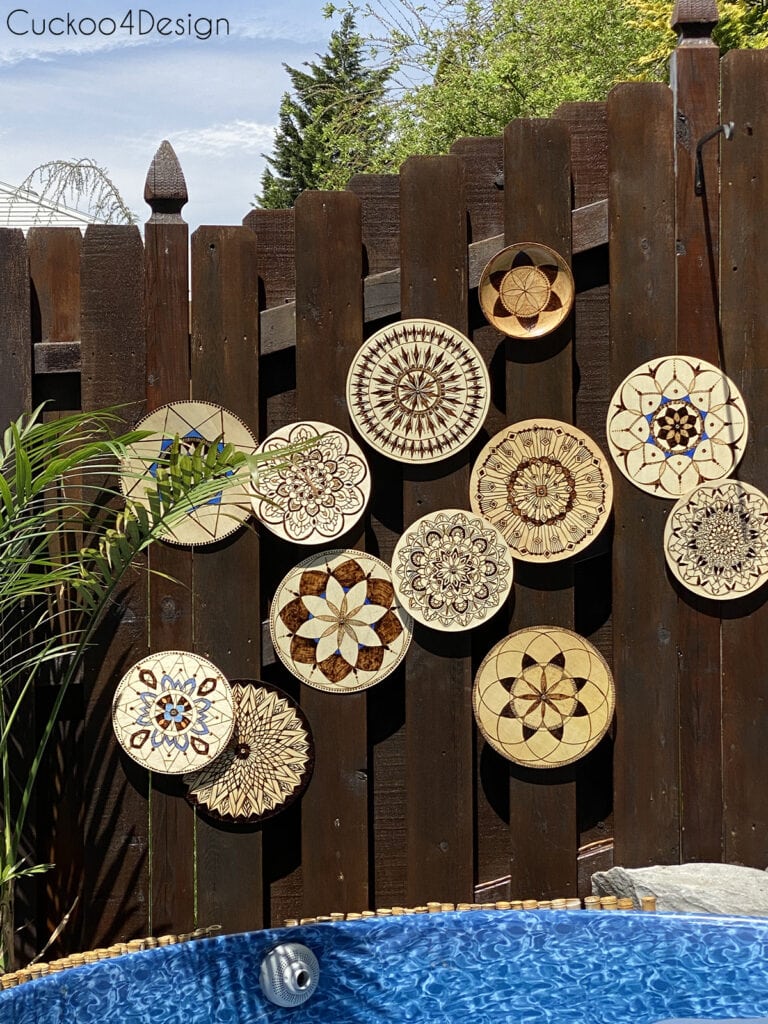
The real trick is the spacer blocks. By cutting the pressure treated wood blocks in different thicknesses, you can layer the discs so they actually overlap each other at different depths. I gave every single disc a spacer block behind it so that none of them sit flush against the fence. This is important because moisture can get trapped between the disc and the fence and speed up the deterioration of your art. Some discs pop forward just a little, some pop forward more, and that dimensional, layered look is what makes the whole arrangement feel intentional rather than just a row of circles on a wall.
Play around with the arrangement on the ground first, figure out which ones will overlap and in which direction, and then cut your spacers in varying thicknesses accordingly before you start mounting.
This is the arrangement I came up with and I’m super happy with it.

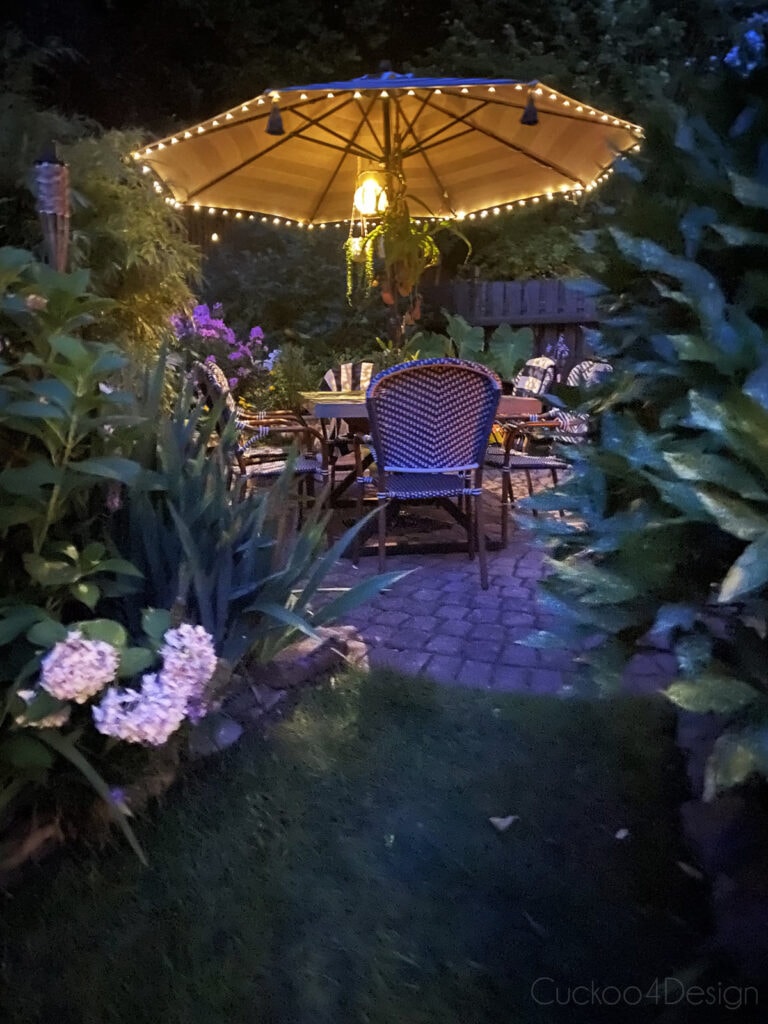
I also made a DIY macrame lantern using solar fairy lights to hang above the pool with my outdoor fence art. This lantern is safe to hang above water!

This is the other side of the yard. Check out how I made the outdoor tassels for the umbrella. It’s another outdoor project where the material choice matters so much.
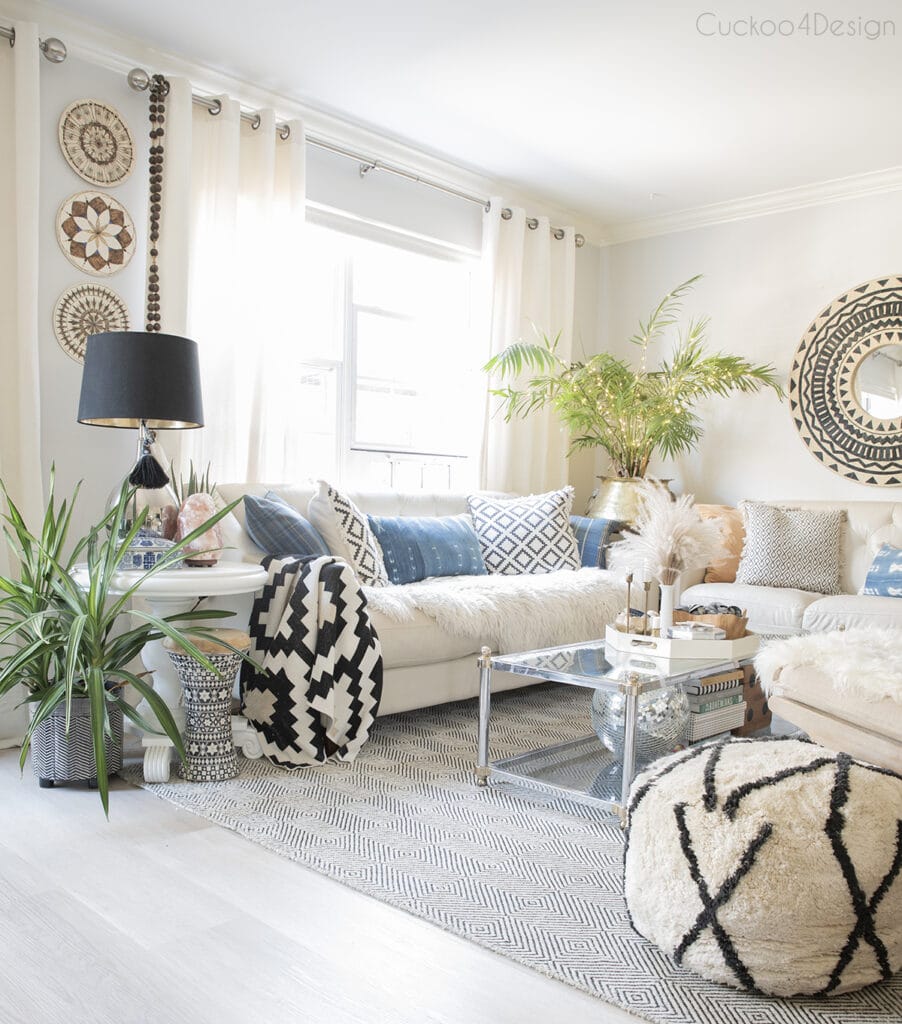
Below you can see DIY geometric wood wall art hanging in our home as a comparison.


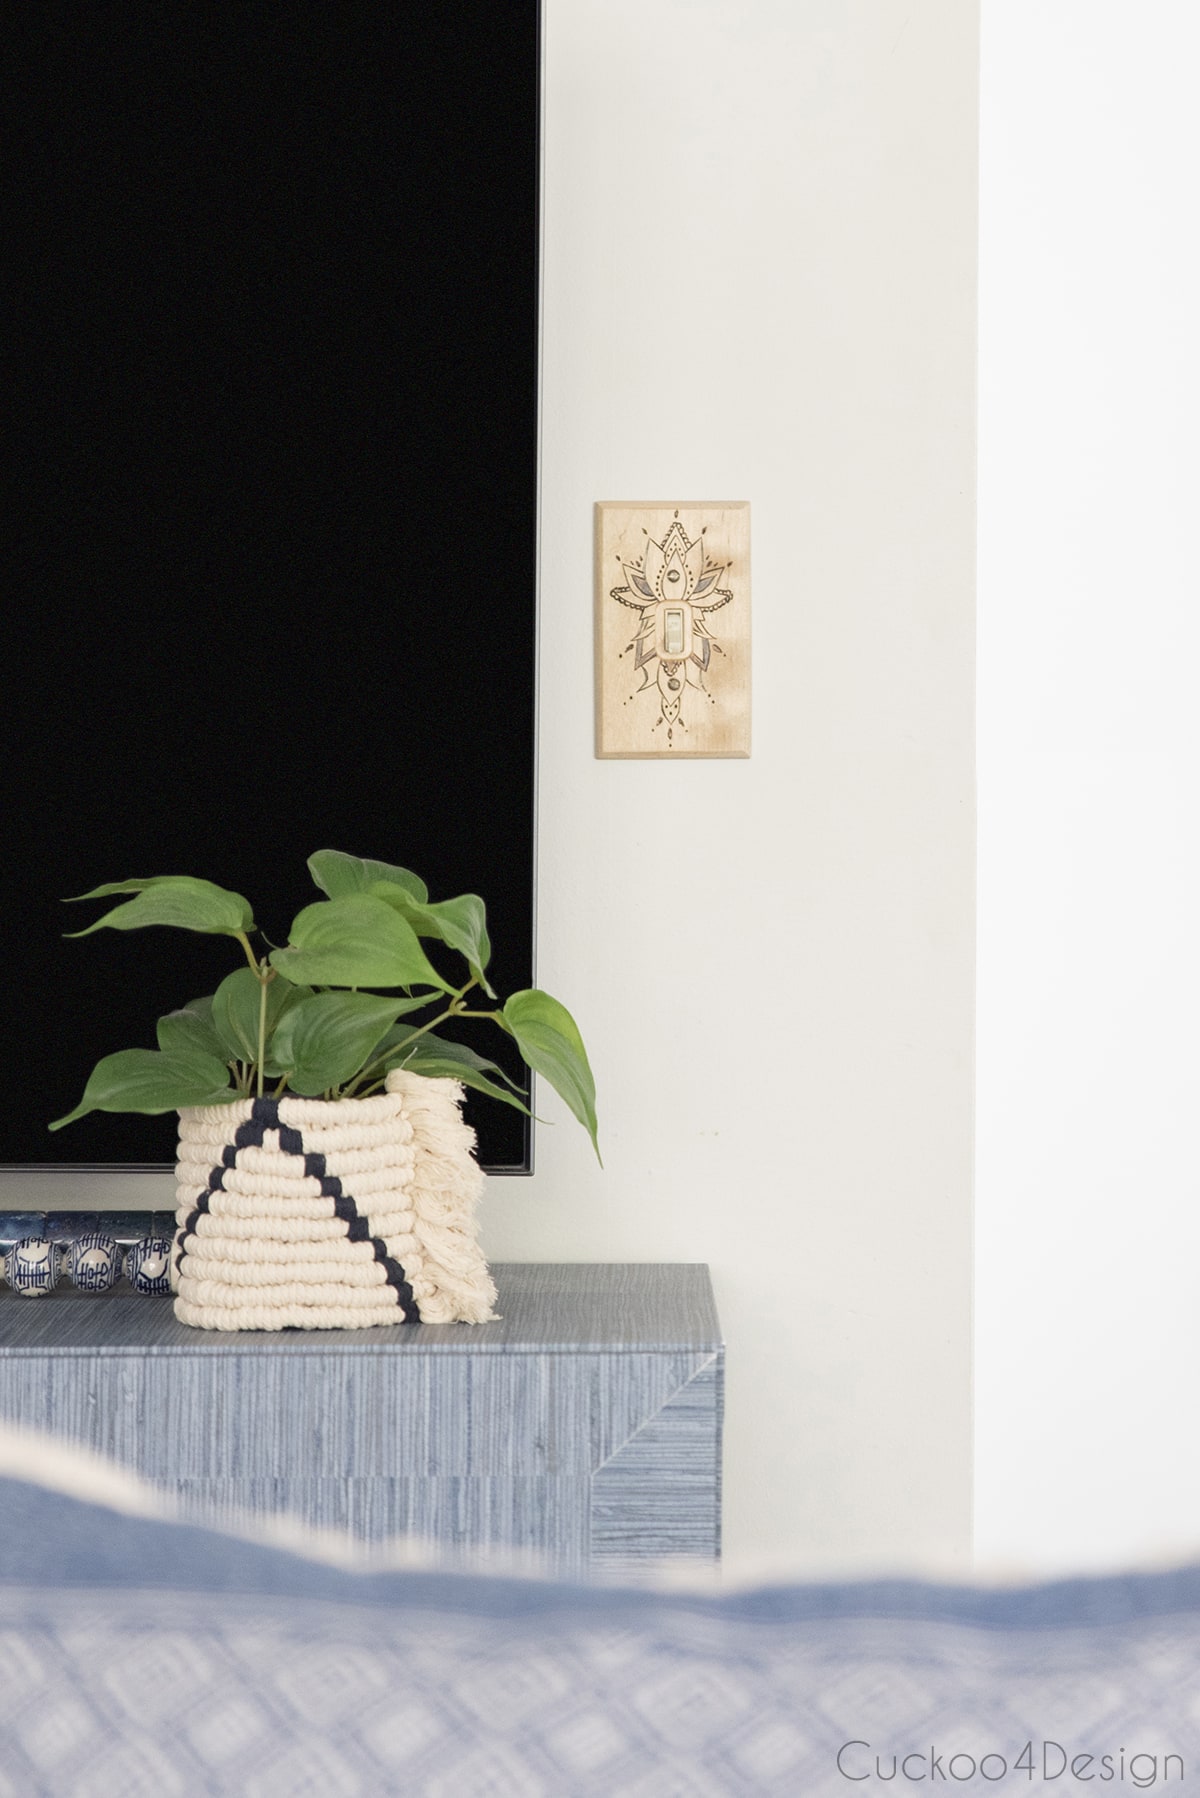
If you are into wood burning now, too, then check out my DIY light switch covers that I made for my living room. I also included my free pattern.
These are such a fun and personal way to decorate a fence, and the layered arrangement really makes an impact. Just make sure you use the right sealer from the start. I learned that lesson the hard way, so you don’t have to.
Tschüß,

these are SO amazing! i am in LOVE!!! and i love the idea of adding color!
I want to make a bigger one yet too to add to the mix but am waiting to see if these will last.
These are so cool!!!
Thanks Jen. I’m glad I went woodburning crazy 😉
This looks fabulous. I love it. What a unique and gorgeous art feature. Love the pieces in your home too.
Thanks Marty! Maybe they can leave outside during the summer and inside during the winter 😉
They look great! So perfect for that space!!