

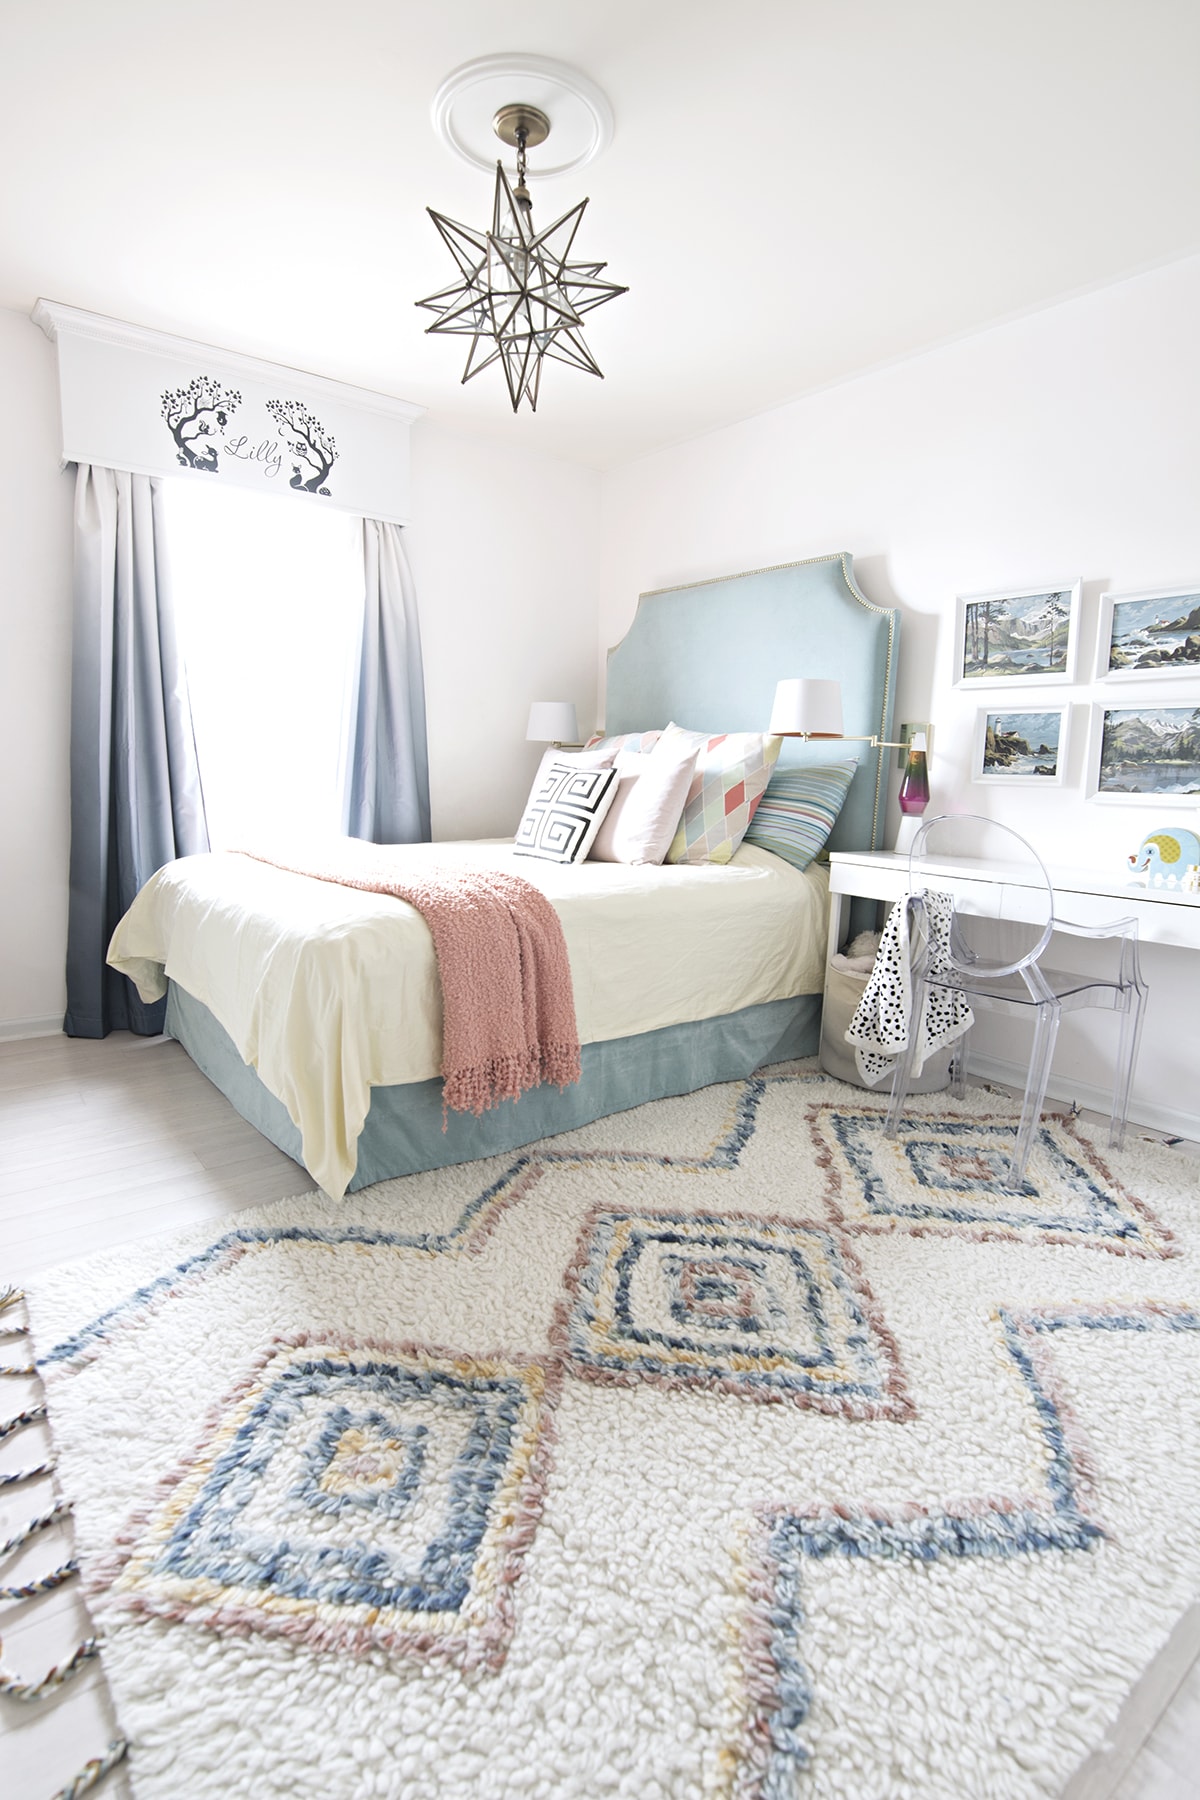
How to build a painted window cornice
A long long time ago I posted about how I made our kitchen window valance with the dotted fabric on it (HERE and HERE) and I’ve been getting questions about my daughter’s window cornice throughout my blogging years. Since I made it pre-blogging I never posted about it.
I took it down to paint my daughter’s walls so I thought I’d share with you how it is constructed. I was ready to take it down for good but she says she loves it and wants to keep it.
The reason I originally built it is that I wanted to make her room as dark as possible for her nap time. She didn’t sleep well at the slightest sign of light and this certainly helps keep it darker. Of course, we have room-darkening curtains and a room-darkening shade in here as well. Her room is so dark that my husband prefers to sleep in here when he works nights and she is at school.
How to build a painted window cornice
This post may contain affiliate links from which I will earn a commission at no extra cost to you. View my full disclosure policy.
rug HERE | duvet HERE | rug HERE | throw from HomeGoods | bed tutorial HERE | similar headboard HERE | similar bed HERE or HERE | my Ikea home decor post HERE | chair HERE | similar throw HERE | lava lamp HERE | downloadable artwork HERE, HERE, HERE and HERE | curtains HERE | pink pillows HERE | colorful diamond pillows from Ikea Germany | lamps HERE | shades from Target not available anymore | similar greek key pillow HERE | light HERE or similar light HERE | desk Ikea or similar desk HERE
The construction is very similar to the one in my kitchen (HERE ) but some key parts are different. It has no fabric, is painted and has some crown molding.
What you need:
- MDF board (HERE)
- liquid nails (HERE)
- counter sink drill bit (HERE)
- wood screws (HERE)
- wood filler (HERE)
- putty knife (HERE)
- sandpaper (HERE)
- primer and paint (my favorite primer HERE)
- screw drill bit (HERE)
- 2×4 wood
- bolts (HERE) and drill attachment to screw in the bolts
- foam crown moulding (HERE)
- small finishing nails for molding
For this type of project liquid nails is always my best friend. It’s a great glue for these types of projects.
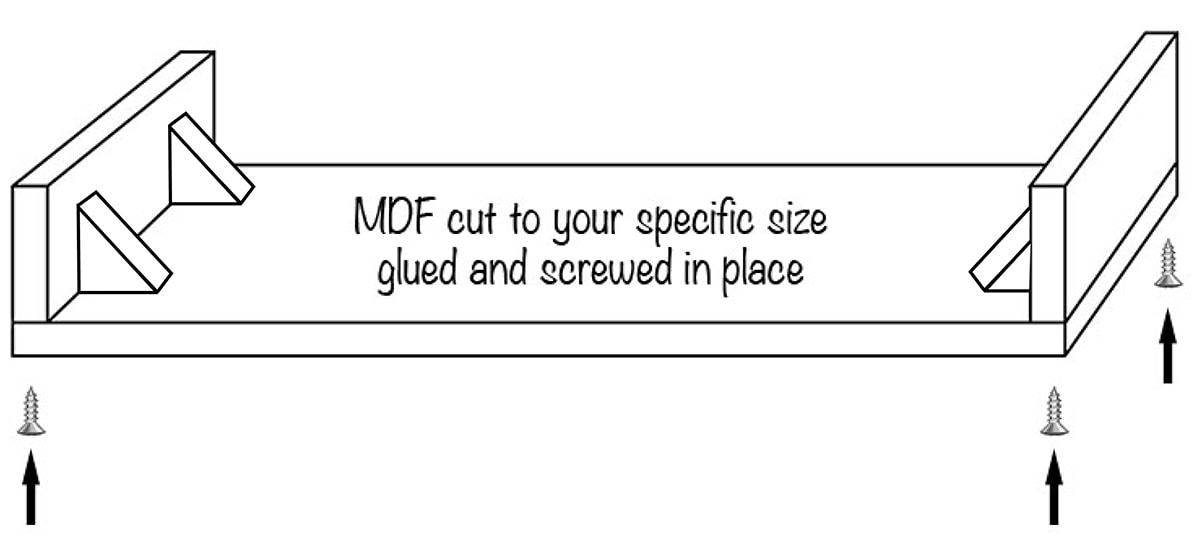
When you pick the size for your structure you have to make sure that the curtain rod fits within. So I recommend that you hang the rod and curtains first and then measure what the size of the box should be.
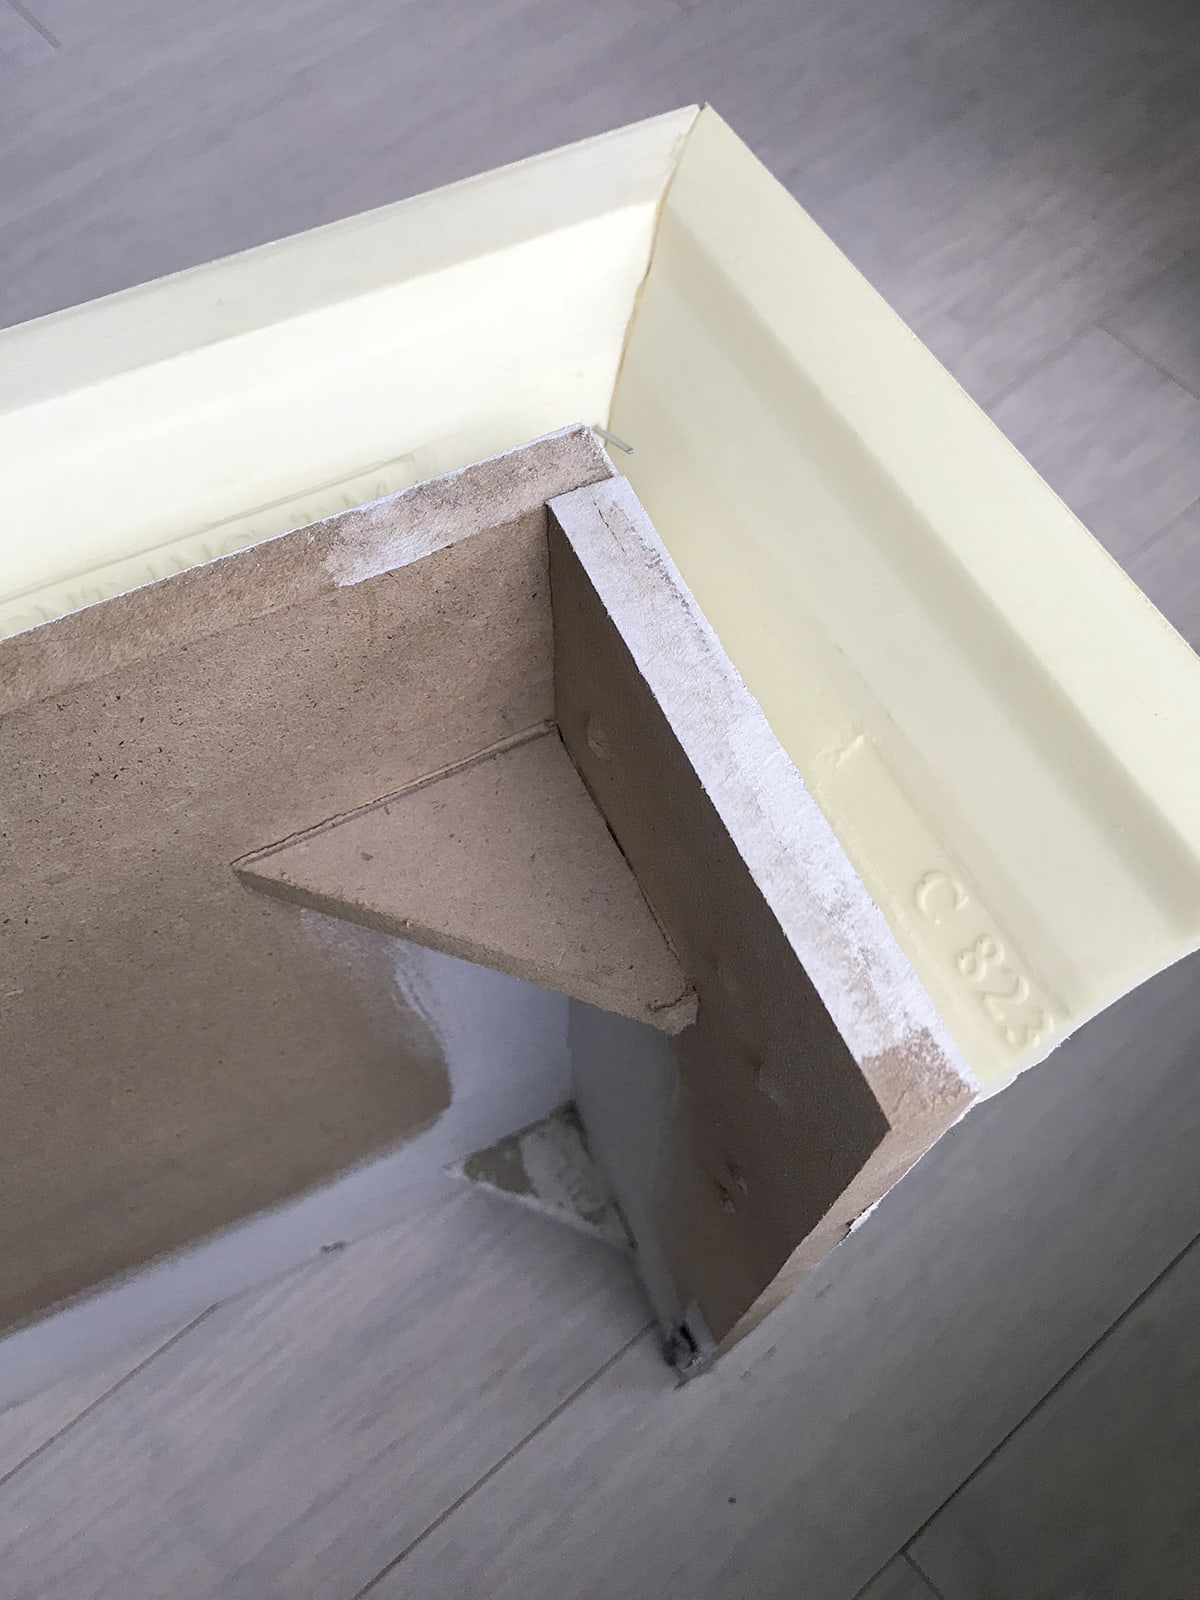
I made the same shape as I did for my kitchen valance but I reinforced it with some corner triangles which weren’t screwed and only glued in. I cut the little triangles pout of the scrap pieces of MDF that were left and just used my electrical miter saw for that.
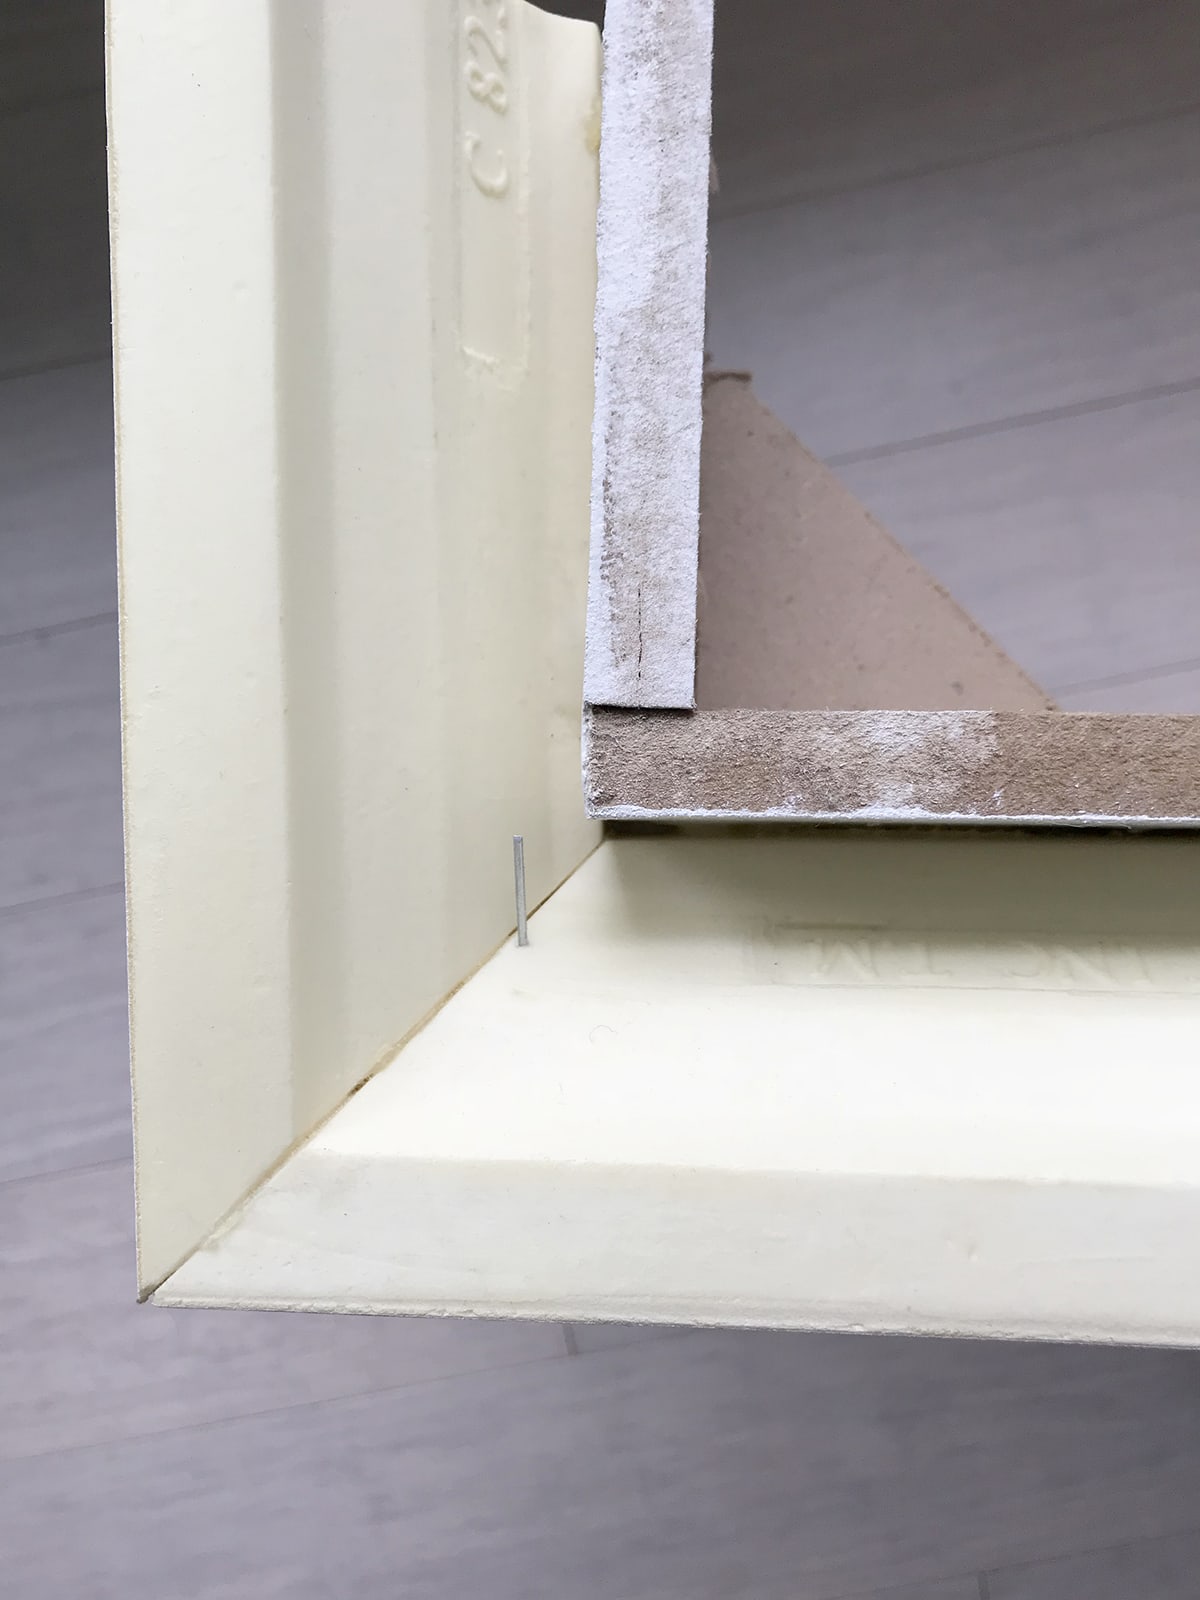
MDF is really heavy material and to make the structure not too heavy is the reason I picked foam crown molding for the top part.
Use a miter saw to cut the angles and again use liquid nail and small finishing nails of finish the corners. The finishing nails should go into the foam like butter.

Prime and paint the structure before hanging.
To hang the cornice, I bolted a 2×4 that was the exact inside width of the cornice to the wall. Make sure it is centered over the curtain rod.
See the below photo. I wasn’t finished painting the new blue color yet (HERE for her new room plans)
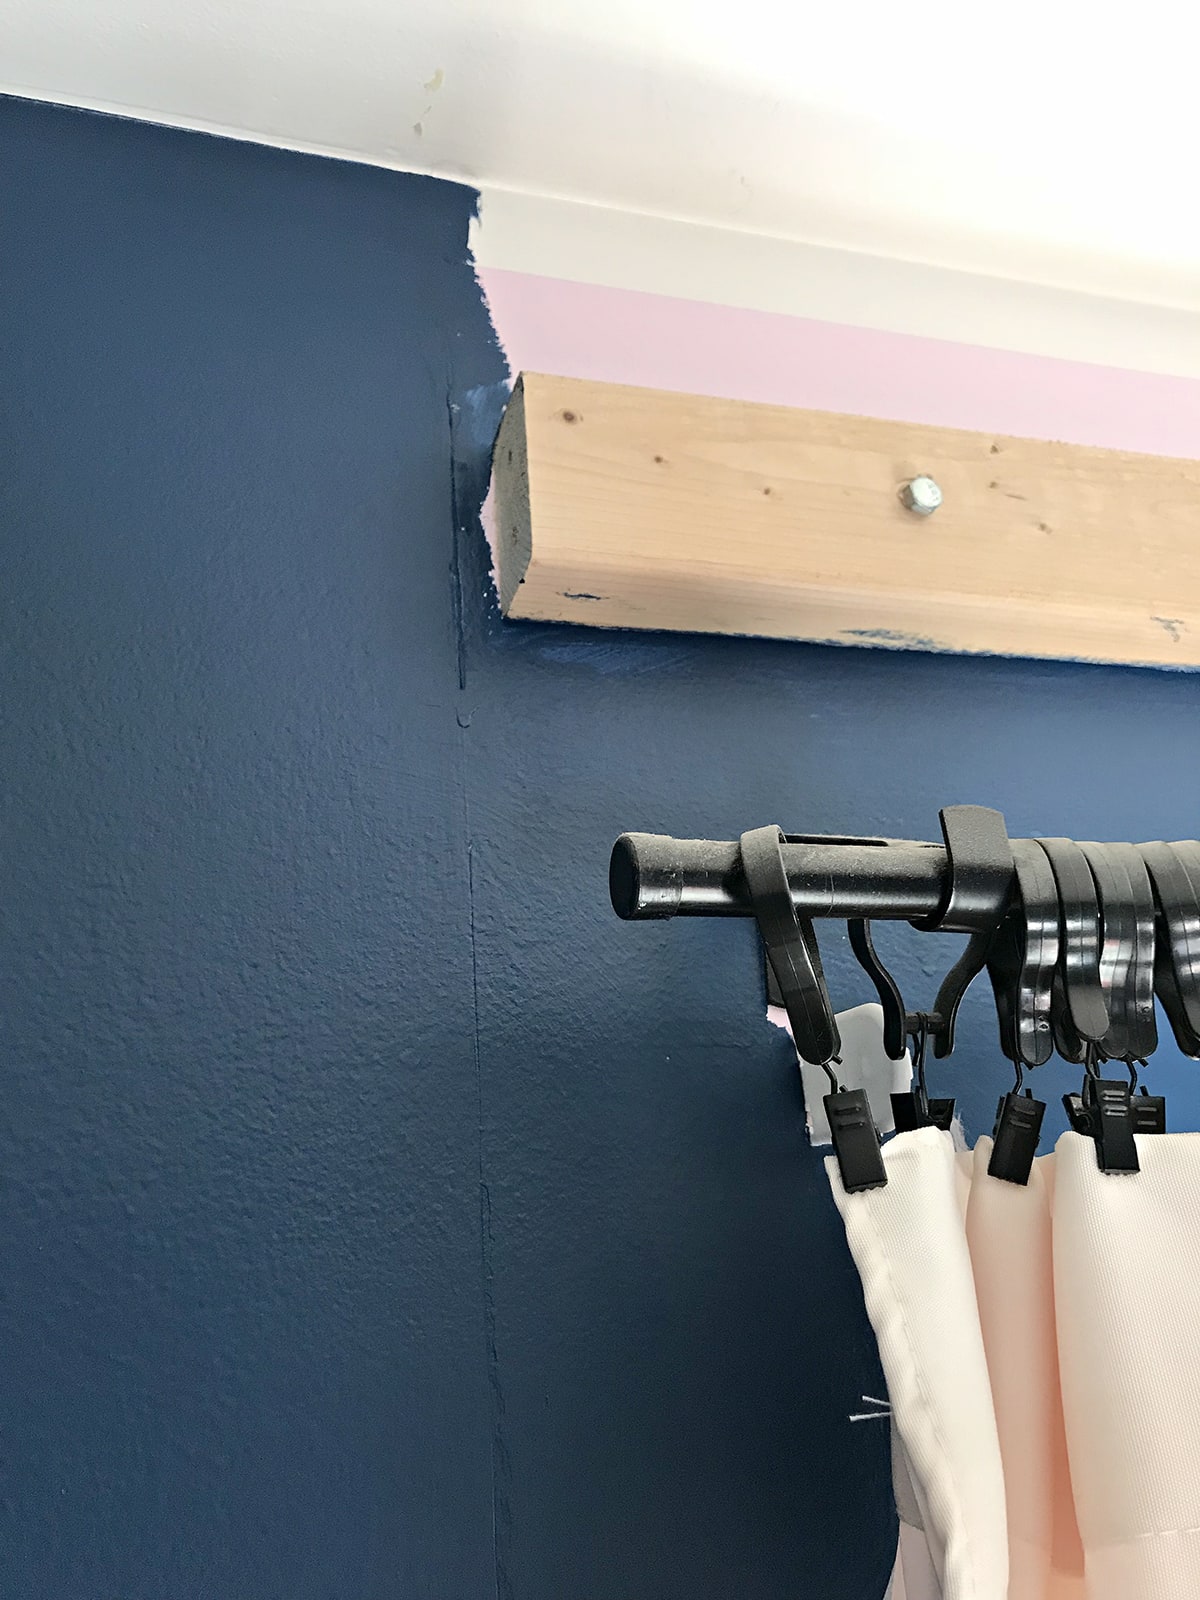
{nice dust on the rod}
All I had left to do is screw the cornice to the 2×4 from the outside. Yes in my case you can see the screws because I wanted to be able to quickly remove the piece should I have access anything. It really comes in handy when I paint the room and it also doesn’t bother me that you can see the screws.
In reality, you don’t even notice them.

The little decal was purchased on Etsy a long long time ago (before the time when I made my own) and it is no longer available. Sorry!
I hope this helps those of you who have asked about it in the past. It really is a nice feature and makes the room a lot darker.
Tschüß,

i am loving that new color i see!!!!