

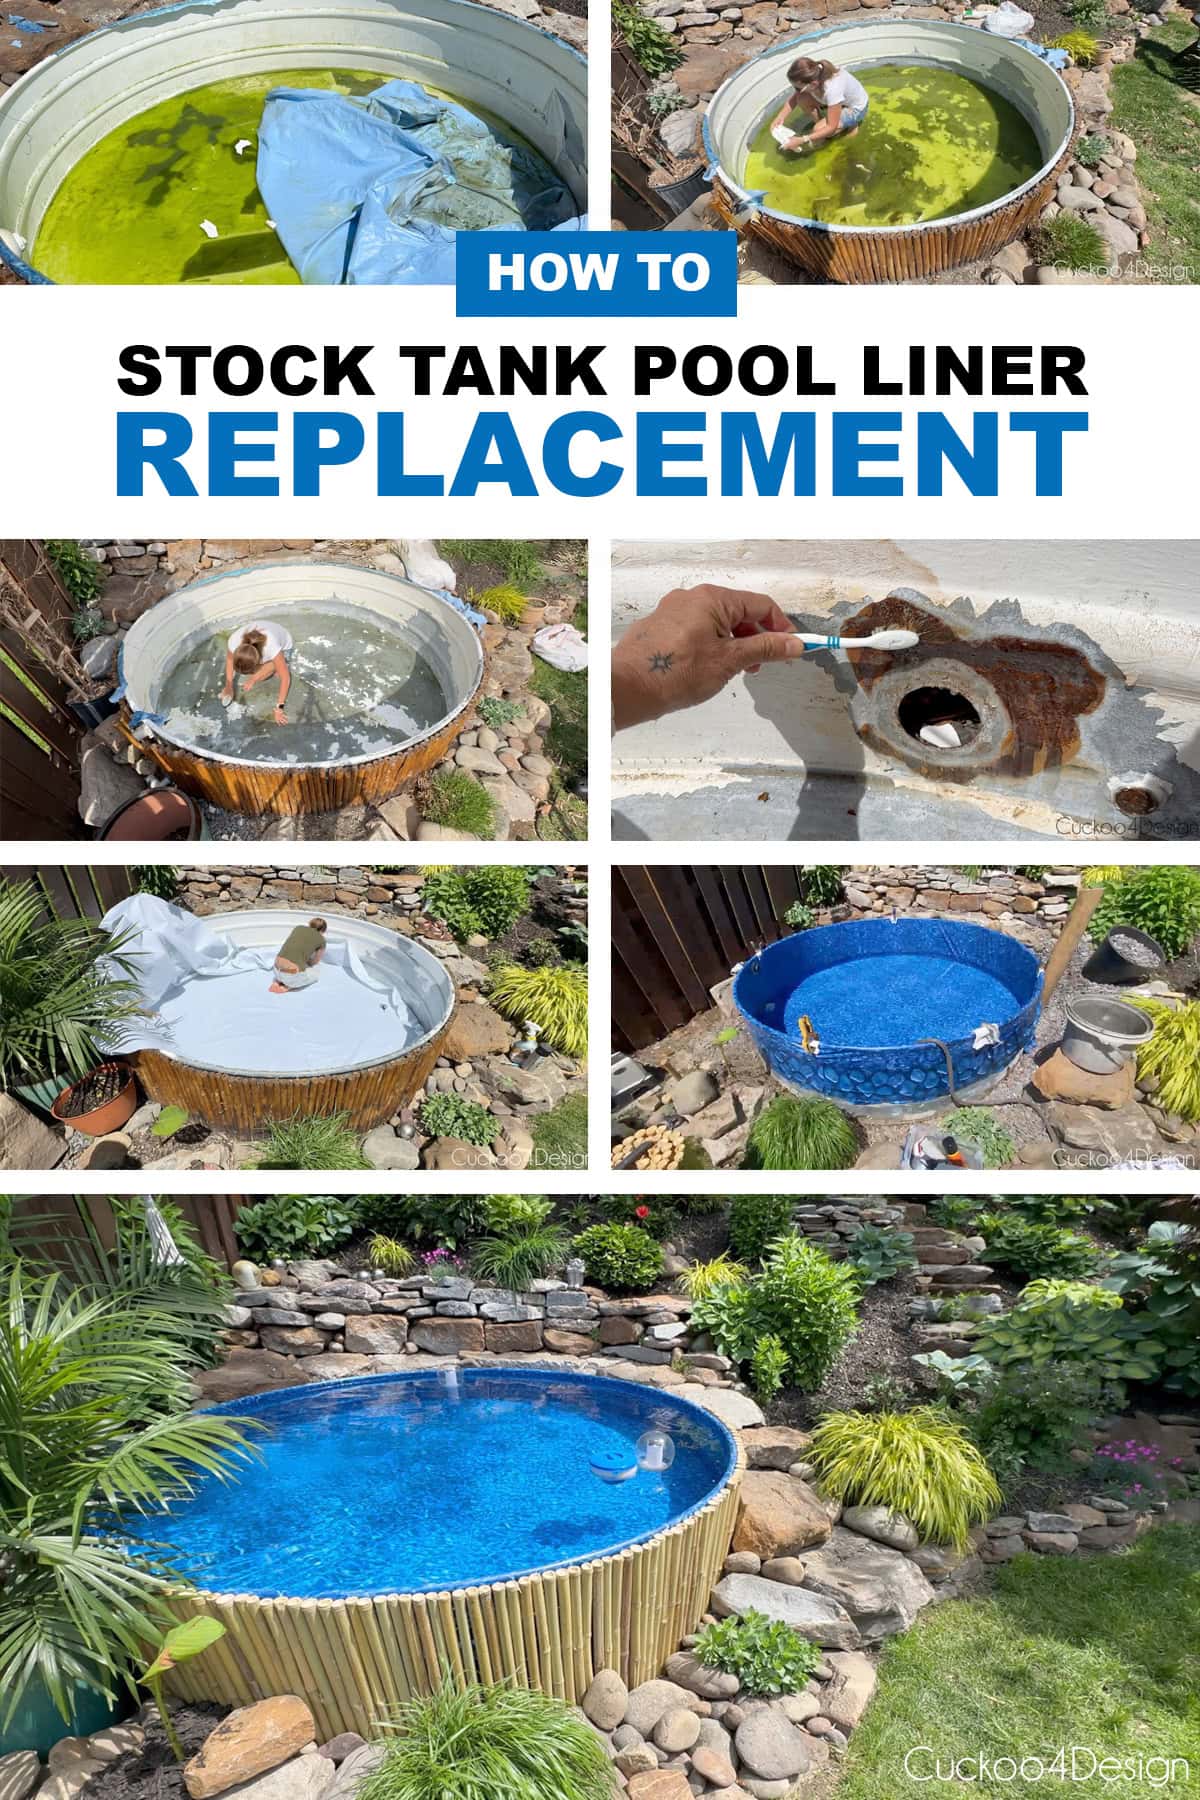
Stock Tank Pool Liner Replacement: What Ours Looked Like After 6 Years
After 6 years of daily summer use and harsh Pennsylvania winters, we replaced our stock tank pool liner in 2025. This post shows you exactly what condition the liner was in after 6 years, how to remove and replace it, what we did differently this time, and whether pool liners are worth the investment.
What our stock tank pool liner looked like after 6 years
Before I tackled the entire process of taking the liner out, I did research again, of course. That is always the biggest thing before starting any DIY project. And as I mentioned in my video, when we did this project in 2019, there wasn’t any information out there about pool liners for stock tank pools. I did read on Reddit now that there were people who had done it before, but in 2019, I couldn’t really find any information about doing this. So while there were blog posts out about stock tank pools, there weren’t any DIY projects published about installing liners.
I do consider ourselves the internet pioneers of installing a pool liner, and all the blog posts now come based on what we posted. So now, 6 years later, there are many people who have installed a liner in their stock tank pools, and I checked out some of those projects as well.
Backyard and pool liner replacement video
If this video doesn’t load for you, then you can also view it on my YouTube Channel instead.
Song: Electro-Light – Symbolism [NCS Release], Music provided by NoCopyrightSounds, Free Download/Stream: http://ncs.io/symbolism, Watch: http://youtu.be/__CRWE-L45k
Supplies used
- new 8′ pool liner
- 12′ pool liner pad
- Heavy-duty Gorilla Glue spray adhesive
- Rustoleum Rust Dissolver and old toothbrush
- Rustoleum Rust Reformer
- Sharpie and scissors
- 2’ tall bamboo fencing or HERE
- all the old inlet and outlet valve parts from our original stock tank pool liner installation were reused (check out the full blog post for more info)
How to replace a stock tank pool liner step by step
This post may contain affiliate links from which I will earn a commission at no extra cost to you. View my full disclosure policy.
Here is the big hole again as a reminder of what started this stock tank pool update. The old patches also had collected mold and really stuck out. Not a good look!

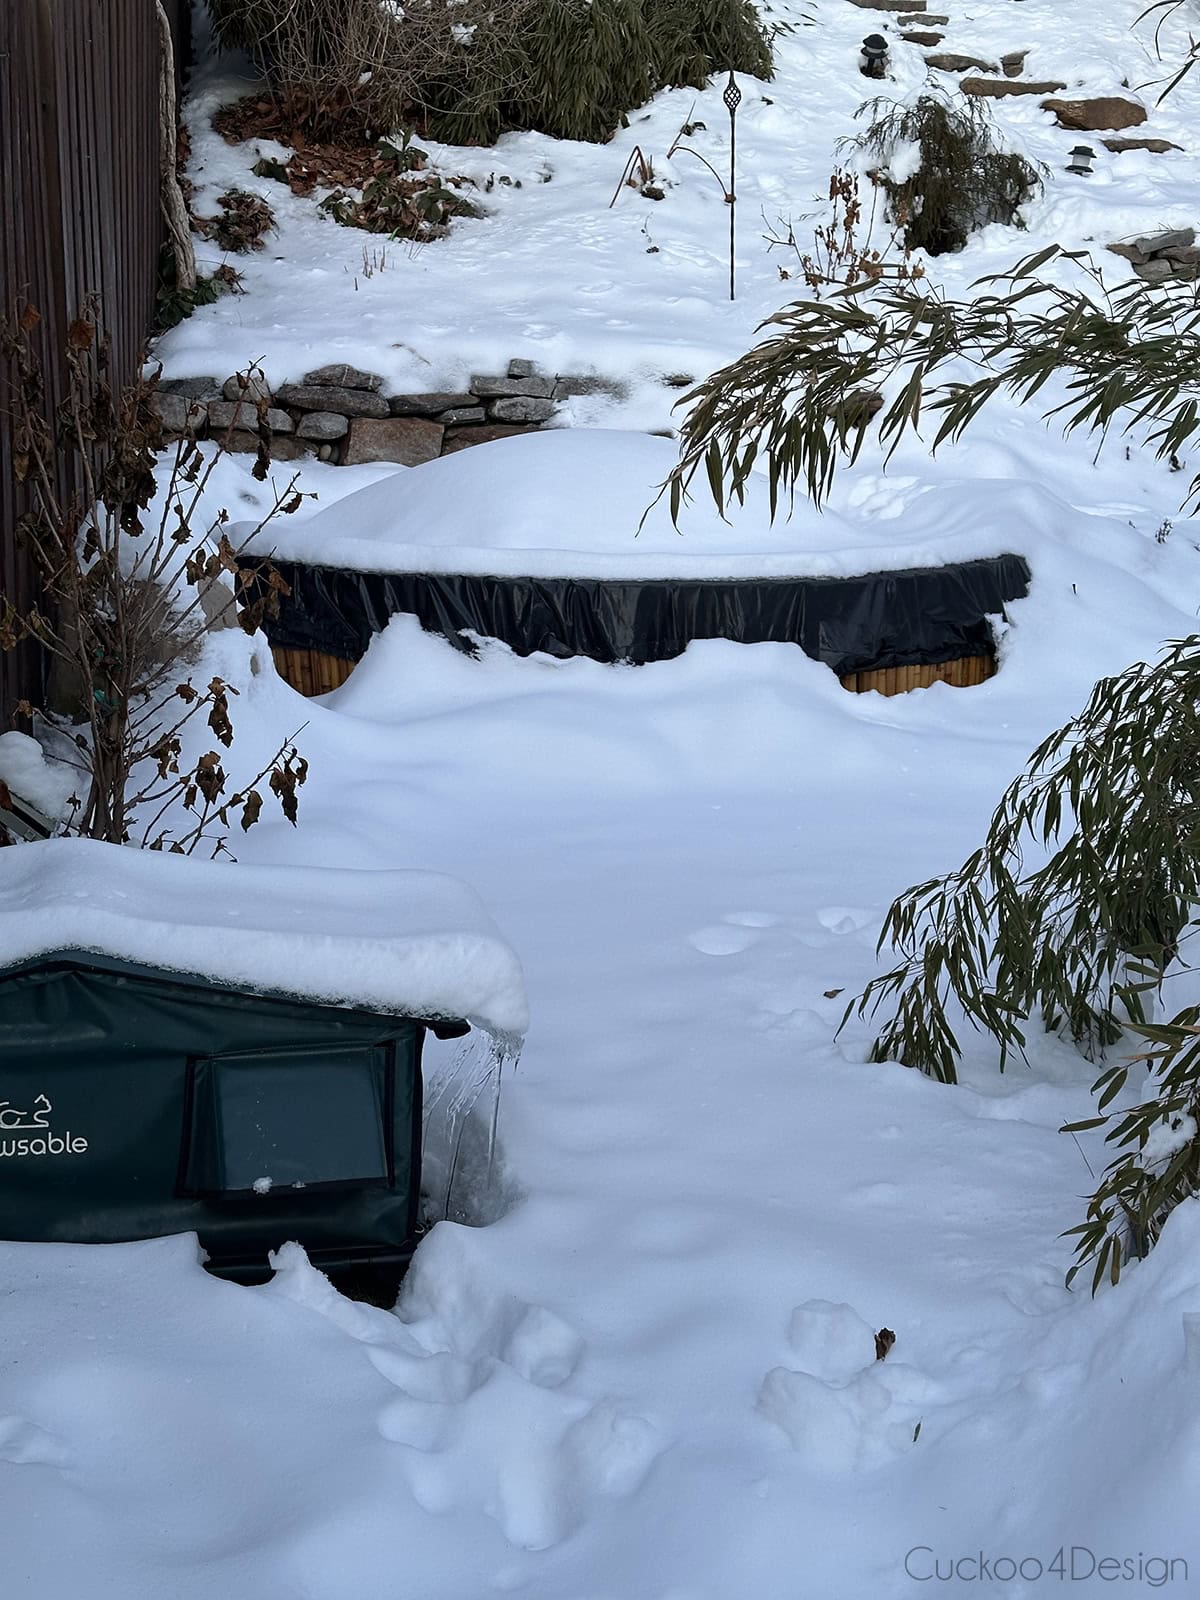
And as a reminder, this is what the pool looked like last summer. The liner definitely faded over the years, but it was still pretty nice for being 5 years old.
Just shows how much damage a harsh winter can do to a pool and pool liner. The bamboo had also seen better days.


Let’s get to it and let me show you what I did…
Step 1: Removing the pool liner
Again, since our stock tank pool is built into the hill of our yard with lots of rocks, it wasn’t as easy as just removing the pool liner like a trash bag from a metal trash can. So I started out by cutting the liner around the edges to see what was underneath. And then dragging it into the trash.

The failed Flex Seal paint project was really showing with chunks of it flaking off and even rust around the bottom inlet valve. The Flex Seal has done one good thing for our stock tank pool, and that is protecting it from more rust. So it wasn’t a complete fail!

Here you can see the rust spot at the filter inlet.

Step 2: Cleaning the stock tank pool surface
Look at that big chunk of Flex Seal in my hand. In some spots, it really came off in large portions like that. In others, it adhered better.

I cleaned out those large chunks of peeling Flex Seal first and then used our shop vac to suck out the rest of the green dirty water, and the remaining dirt and debris.
After that I tried scrubbing some of the remaining Flex Seal with a brush which didn’t work so well.

Then I tried pressure washing the Flex Seal off the stock tank surface, which also didn’t work that great. It’s doable, but this is definitely where I decided the best option was just going to be to add another liner instead of trying something different.

As part of the cleaning process, I also used the Rustoleum Rust Dissolver and an old toothbrush to remove as much rust as I could. I then followed that up with the Rustoleum Rust Reformer spray paint to give it some extra protection. My biggest fear is that those valve holes could rust out and the valves wouldn’t fit right anymore.

Step 3: Adding a pool liner pad to the stock tank pool bottom
Since we had issues with small holes on the bottom of the stock tank pool over the years, I decided to add a pool liner pad this time around. It is like a felt pad or foam underlayment.
My only worry is having to vacuum out water again, the way we used to every spring when it got between the liner and tank. The padding might make that process possibly more difficult. We had to patch several holes every spring.

I used a 12′ round pool liner pad. I simply placed it on the bottom of the pool and traced the tank diameter outline with a Sharpie and then used a sharp pair of scissors to cut the padding.
After that, I used the heavy-duty Gorilla Glue spray adhesive to secure the liner pad to the stock tank pool. I think this step is really necessary, considering the possibility of water getting between the liner and tank again and then having it bulge and wrinkle which would be a disaster.

Step 4: Adding the new pool liner and installing the inlet and outlet valves
Now, all we had to do was the same process as we did originally to install the pool liner. I cut the holes into the liner at the same spot and then used silicone sealant to the inlet and outlet valves parts after screwing them in place. It was once again pretty much like lining a metal trash can with a trash bag. No joke!
I did do a much better job this time at avoiding wrinkles. Check out my original stock tank pool post to see how I cut the holes into the tank.

Step 5: Filling up the pool and checking for leaks
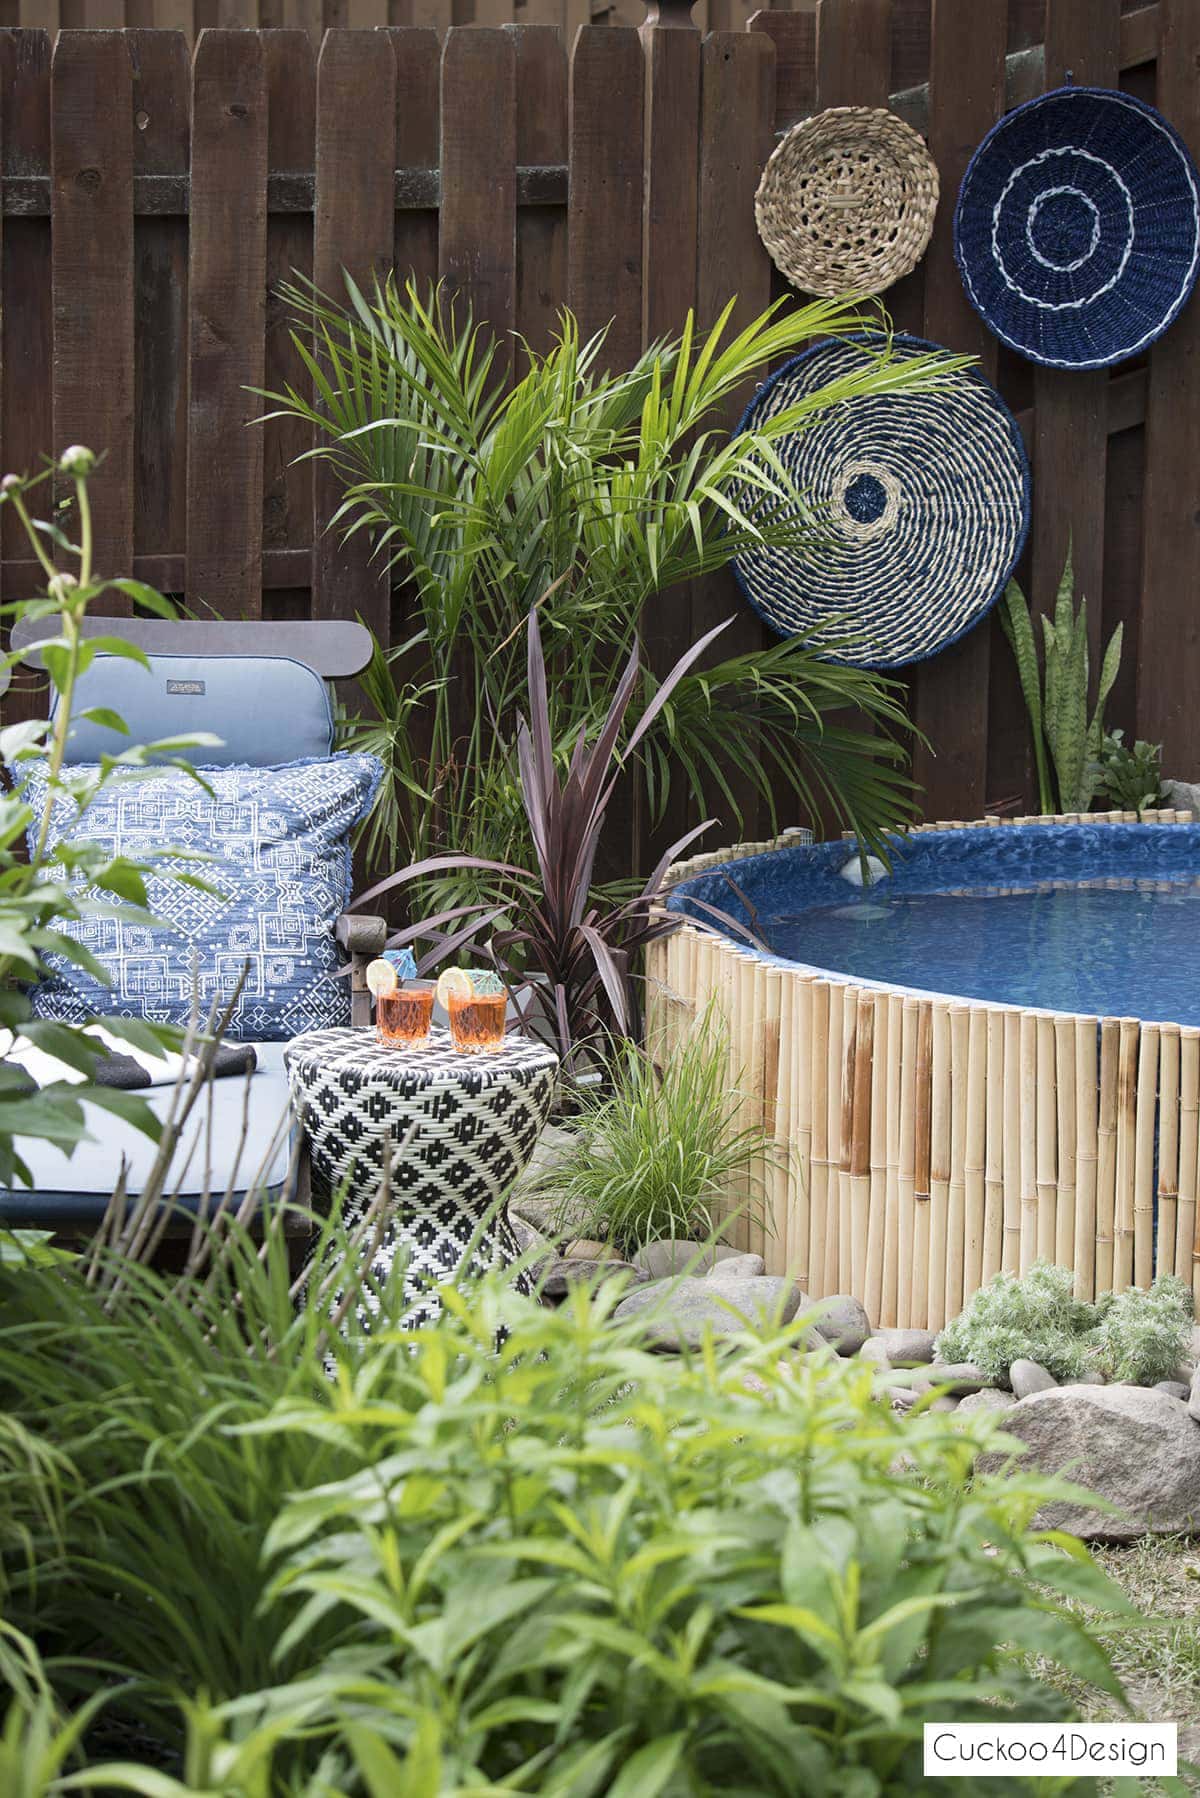
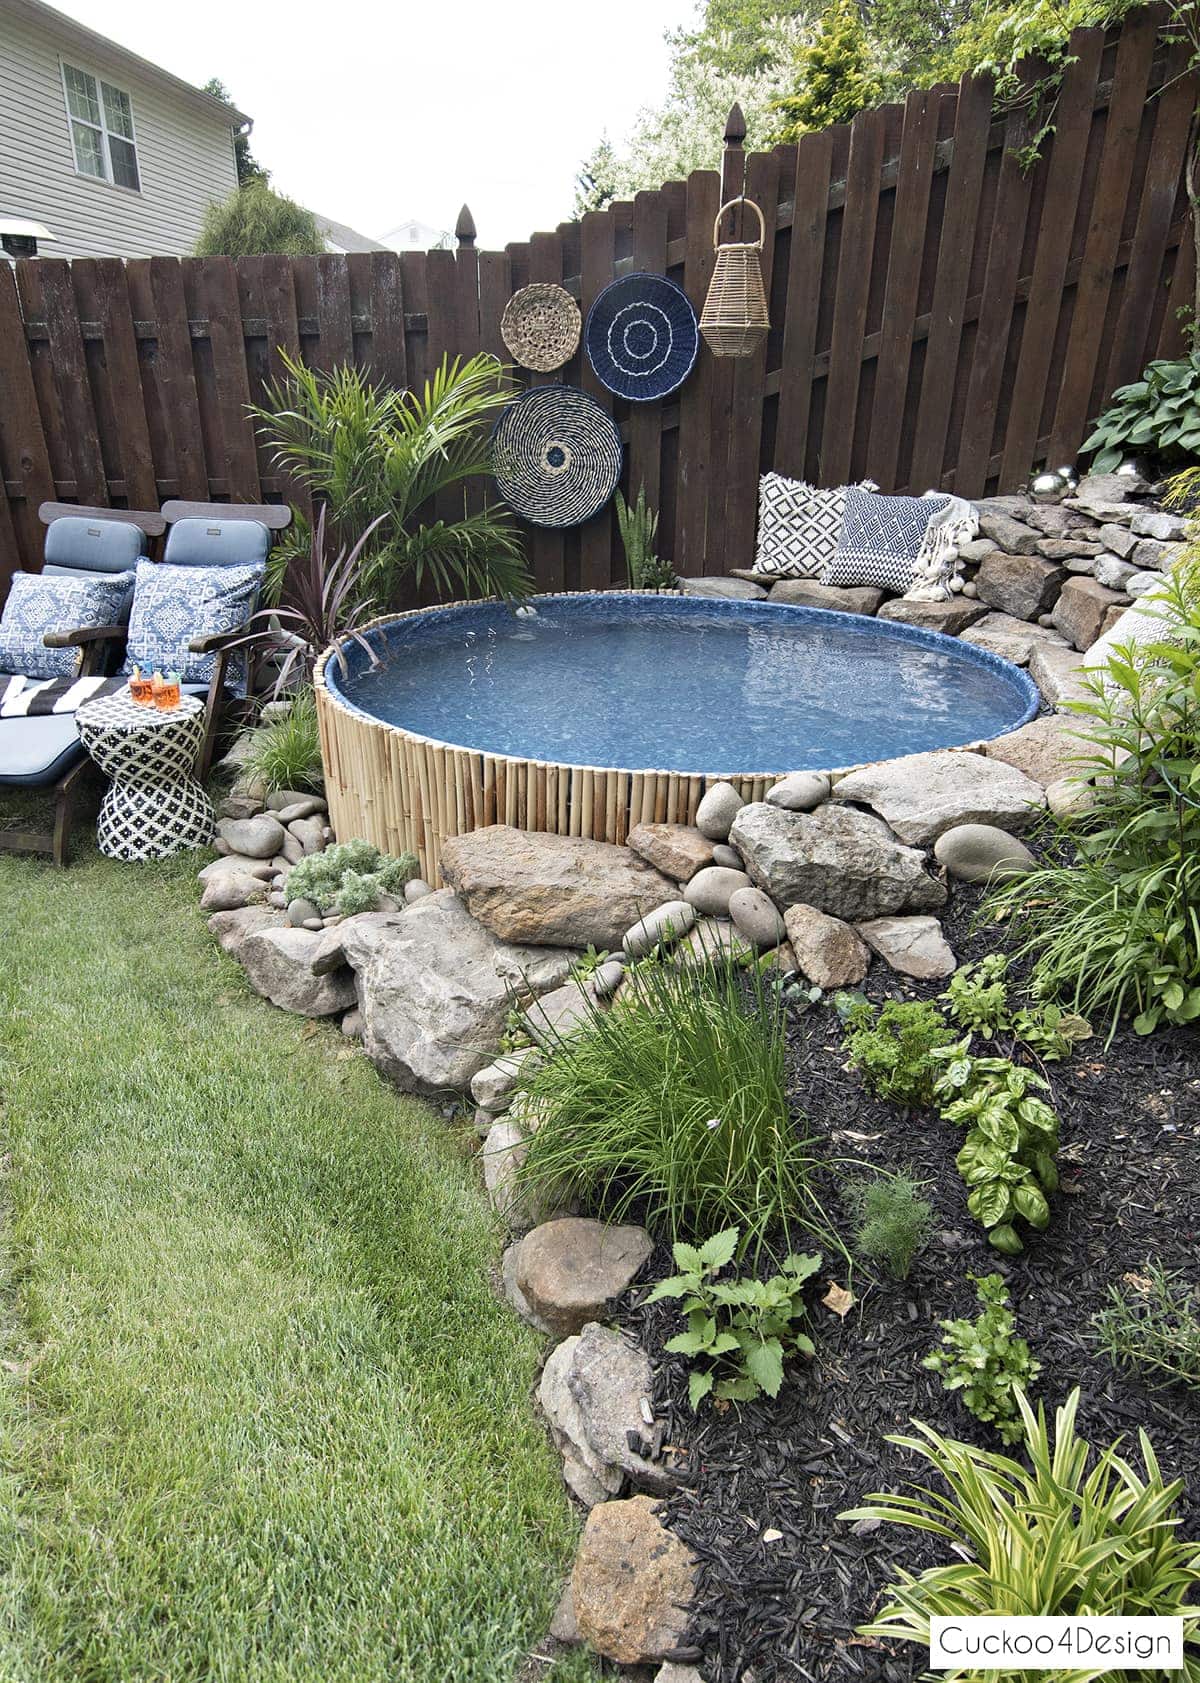
My husband removed all the rocks and gravel so we could add the liner on the outside surface of the pool. We also removed the old bamboo fencing. Then we filled up the pool while checking for leaks at the inlet and outlet valves.

After that, we added the new bamboo fence and put all the rocks back in place. Voila, it looks like new.

Other ways to line a stock tank pool
After checking out what other people had done since our original post, I considered painting the sides with truck bed liner and gluing vinyl tiles to the bottom. I’ve seen both done on YouTube and TikTok. I ultimately decided against it, though, because that would require removing every single speck of Flex Seal.
Here are the two combos I was considering that I mentioned in my last blog post and my video, in case you want to try this. I love them so much! If you do try this, send me some photos!
Zellige Peel and Stick Floor Tiles by WallPops and truck bed liner in Navy Blue – T87

Topaz Peel and Stick Floor Tiles and truck bed liner in Air Force Gray T-91

As a reminder, the photo below is what the pool looked like in 2019 when we originally installed it.
Is a stock tank pool liner worth replacing?
For us, the stock tank pool liner replacement was an absolute yes. When it came time to replace ours, I briefly considered trying something different, as I mentioned already, like a truck bed liner or peel-and-stick tiles. But after 6 years of knowing exactly how well our pool liner had performed, I didn’t want to risk it. The liner has kept our tank protected from rust the entire time, and as I show in my post about how to stop a stock tank pool from rusting, rust is the one thing that can truly ruin a stock tank pool for good.
A year later, I can also say that adding the pool liner pad underneath was absolutely worth it. We used to get small holes in the liner every season and had to patch them every spring. So far with the pad in place, that problem seems to be solved.
If your liner has lasted 6 years and needs replacing, don’t overthink it. Just replace it.
More of my stock tank pool blog posts
- I’m breaking down our stock tank pool cost for the original tank setup.
- Check out stock tank pool ideas inspired by our setup, which readers sent to me.
- My DIY pool pump cover for our Intex sand filter pump next to the stock tank pool. It really hides the pump well and blends right in with all the rocks.
We are so glad our pool is ready to be used again and looks brand new. All we still have to do is add a bamboo protector to the pool surround.
Oh, and how about my Frank in the video? He loves having us out in the yard again. He’s also happy to have his roommate, aka my son, back to snuggle in bed with him every night.
Tschüß,

Great to see how the pool liner held up over 6 years and the detailed update on fixing it. Did you find one liner brand held up better, or was the replacement about the same quality? Curious about what to expect if I try this myself.
I’ve only ever used the one brand.