

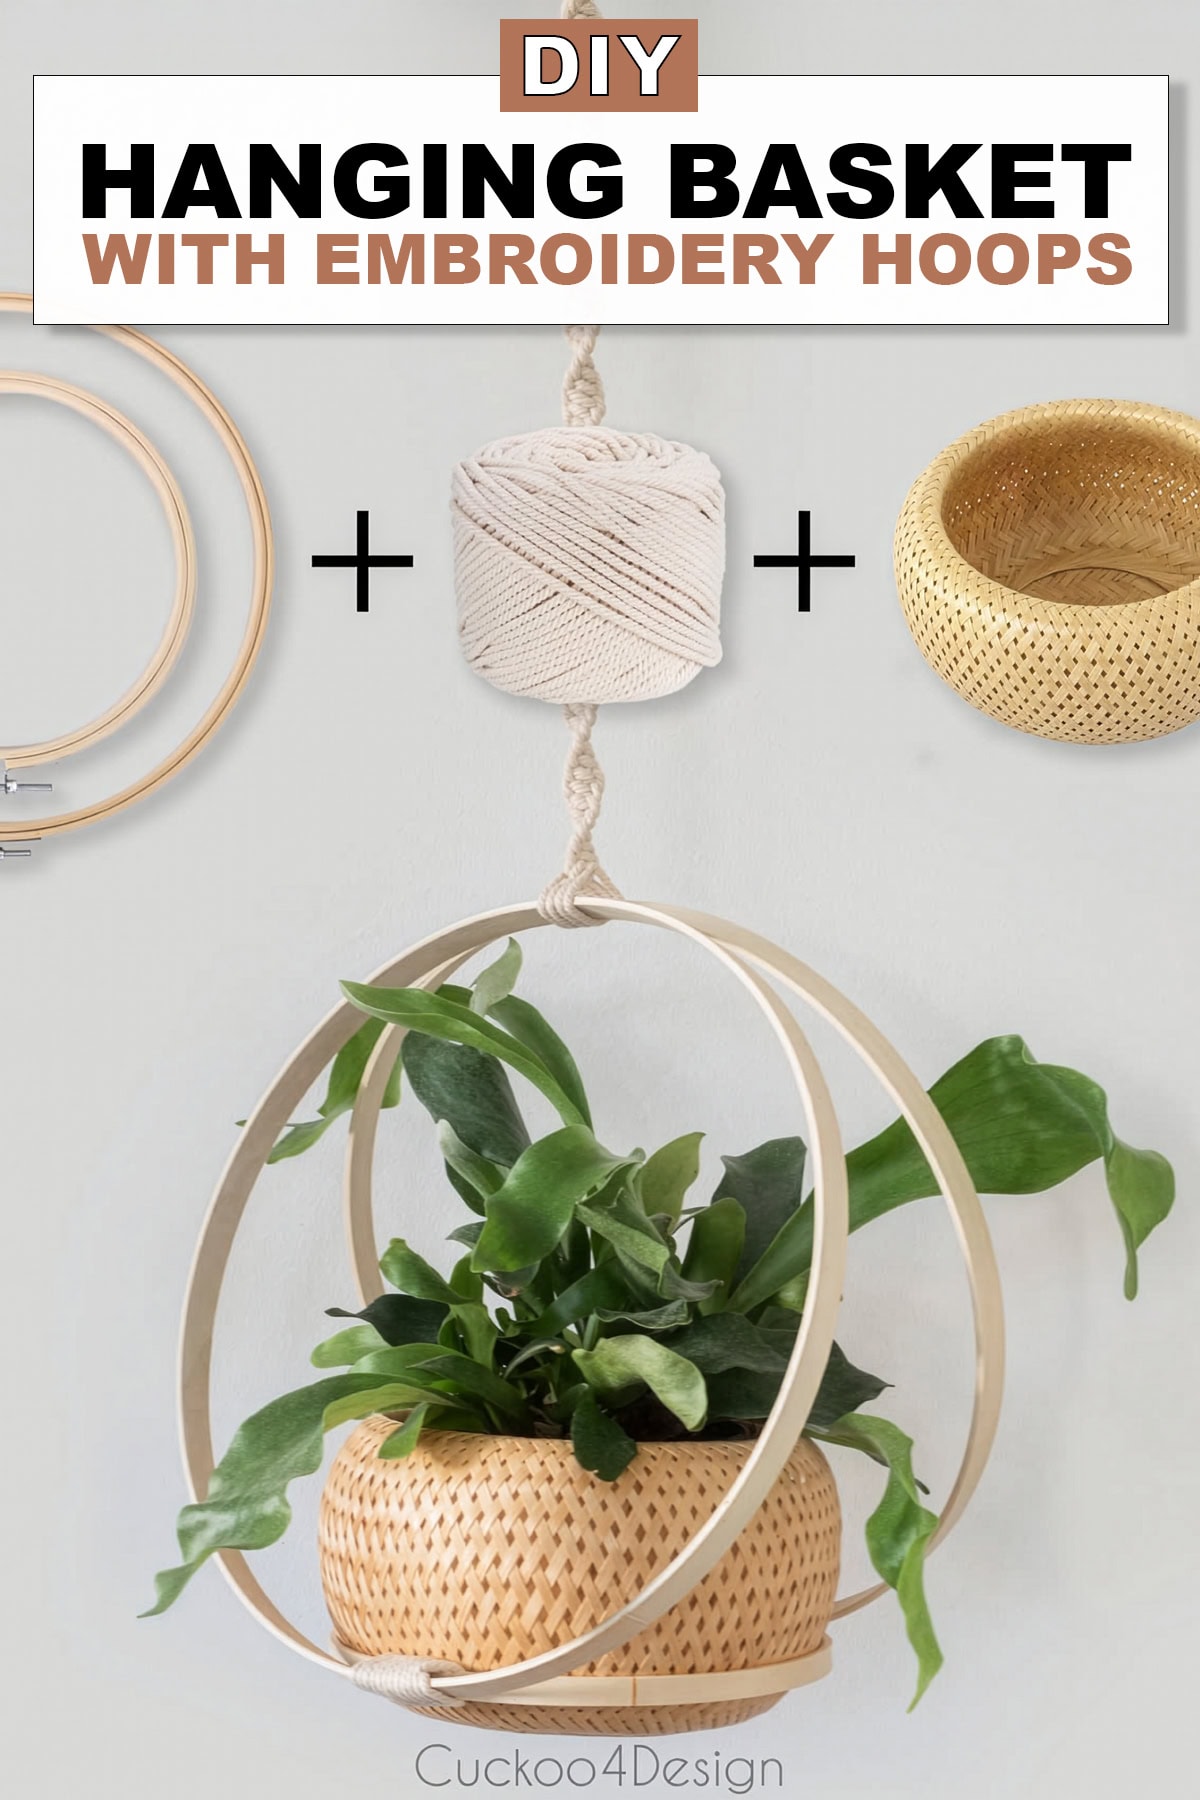
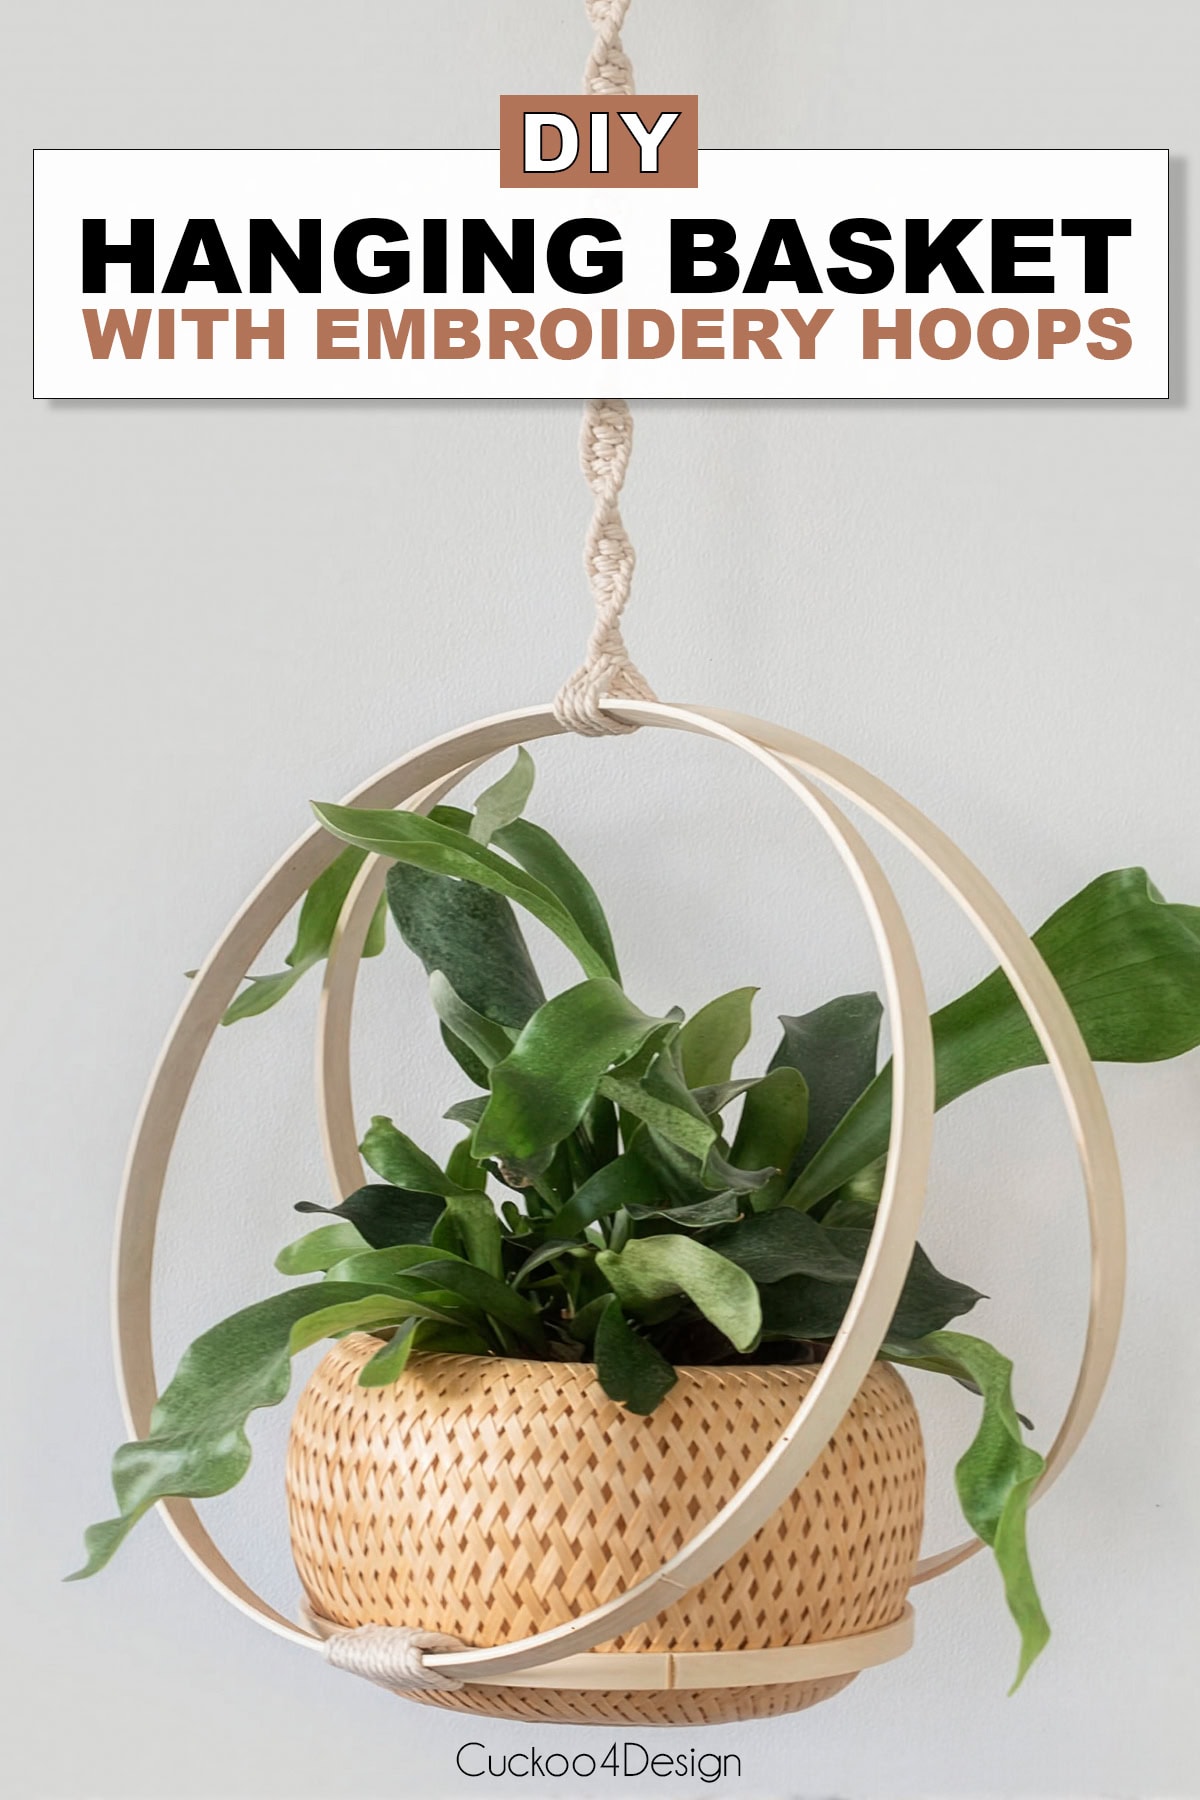
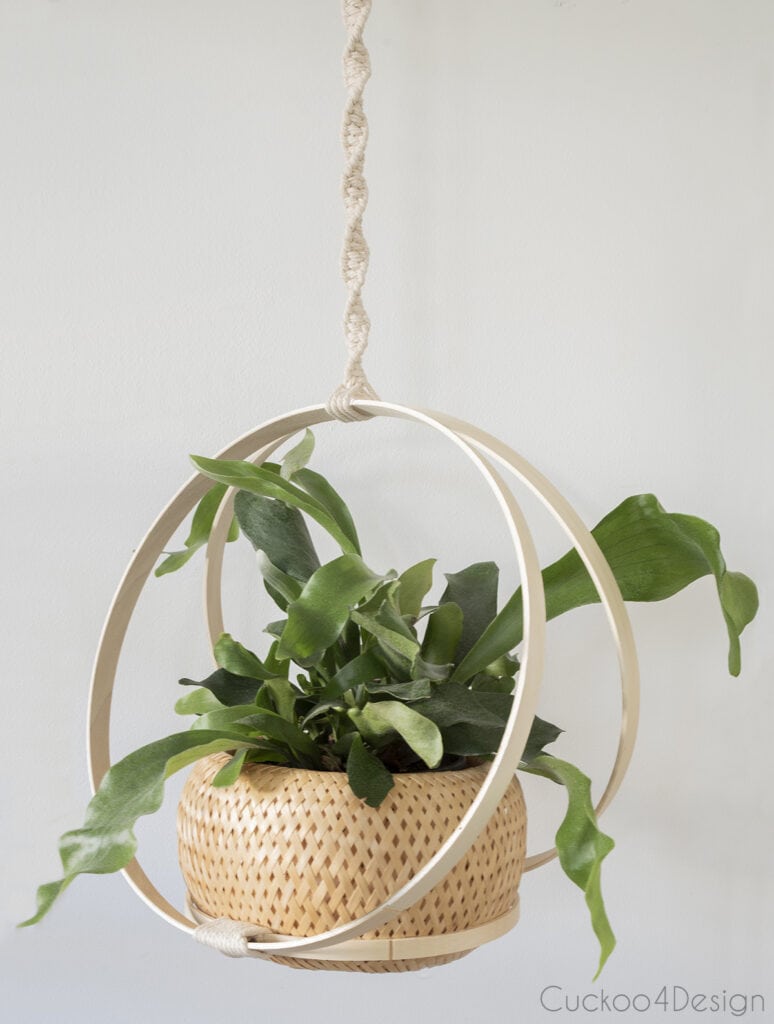
DIY Hanging Basket With Embroidery Hoops
This DIY hanging basket with embroidery hoops is inspired by an Urban Outfitters hanging planter that used to sell for $89. When I found a double-walled woven basket on Amazon, I knew I could replicate the look for a fraction of the price. The same basket works beautifully as a fruit basket or storage basket indoors, or as a plant hanger. And you can use macrame yarn, jute twine, or any cord you have on hand.
The Urban Outfitters inspiration basket:

Materials needed for DIY Hanging Basket with hoops
This post may contain affiliate links from which I will earn a commission at no extra cost to you. View my full disclosure policy.
- basket (you can use a different basket, but you have to make sure the small hoop fits the size of the basket)
- two large 14″ embroidery hoops (you can also use metal hoops/rings)
- one small 9″ embroidery hoop (you can also use a metal hoop/ring)
- white duct tape
- macrame yarn or jute yarn (which is used in my inspiration piece)
- scissors
- wooden ring
- hook for a curtain rod or other hook depending on where you will be hanging yours
When I found a double-walled woven basket on Amazon, I knew I could replicate the look for cheaper.

For me, it was cheaper than it might be for you since I had a lot of the materials on hand already. All I had to buy was the basket and hoops. You don’t have to use macrame yarn either, and can just use cheap jute twine or anything else. The inspiration planter didn’t use macrame yarn and only used cheap, thin cord as well.
Step-by-step-instructions
If you are making this hanging basket for outdoor usage, make sure you protect the wooden hoops with outdoor wood stain first, use synthetic yarn instead of natural yarn, and wrap aluminum foil around a plastic planter pot to protect the woven basket from water and dirt
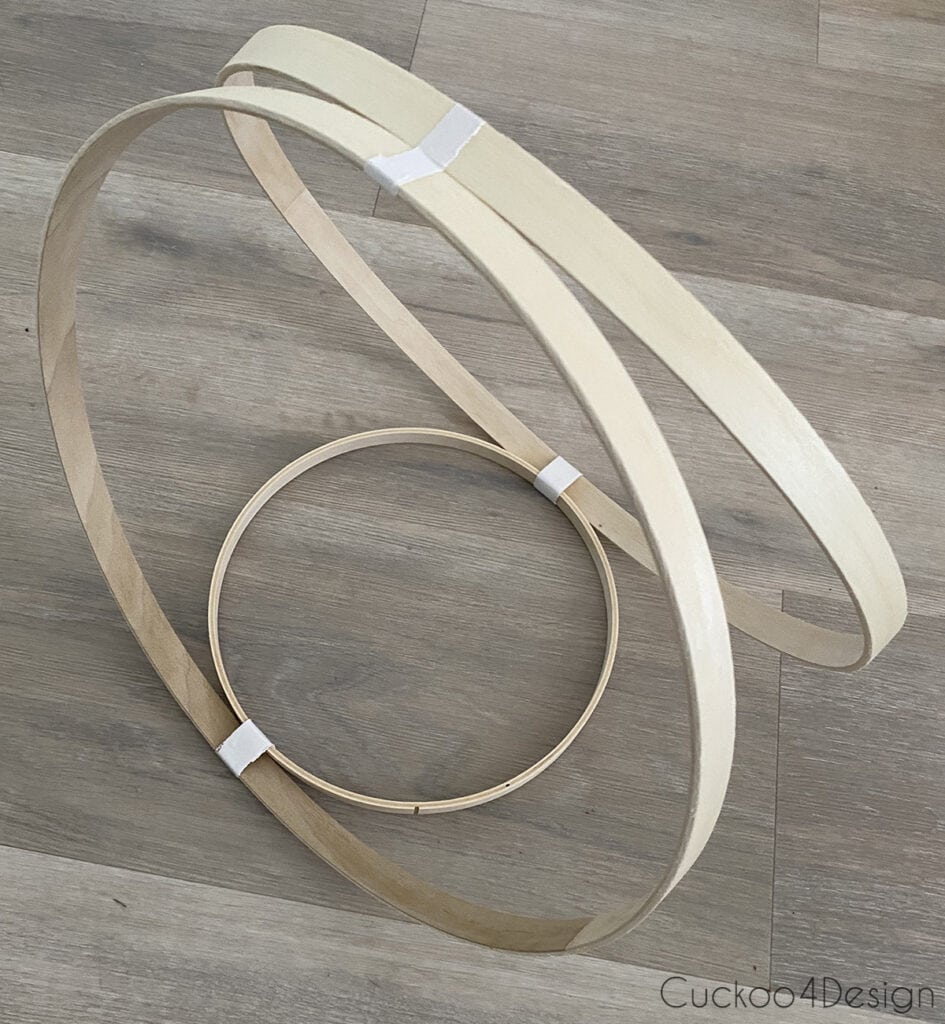
Step 1: Connect the two larger hoops in one spot
Start with the two 14″ hoops lined up next to each other.
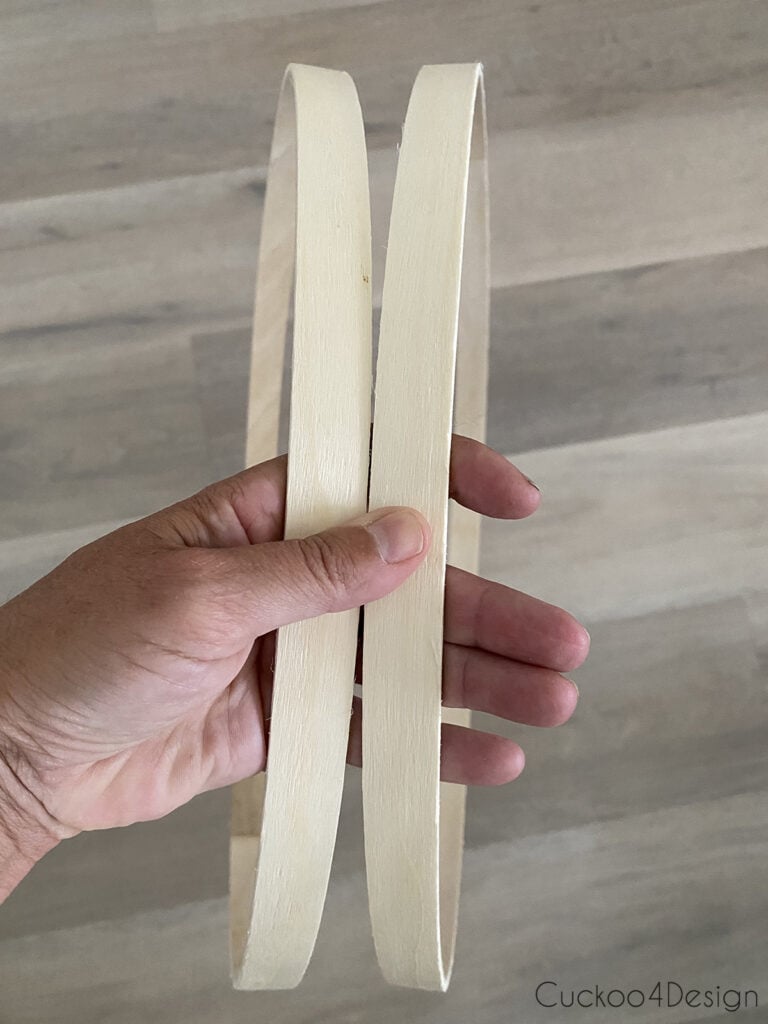
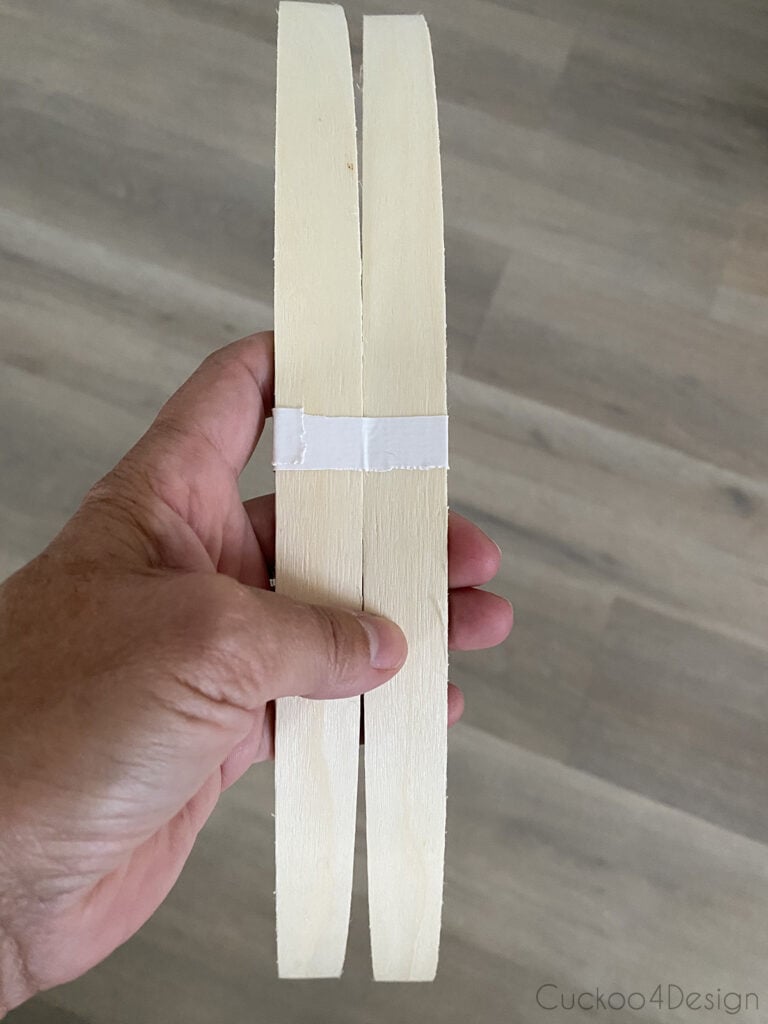
Connect the two hoops with a thin strip of white duct tape.
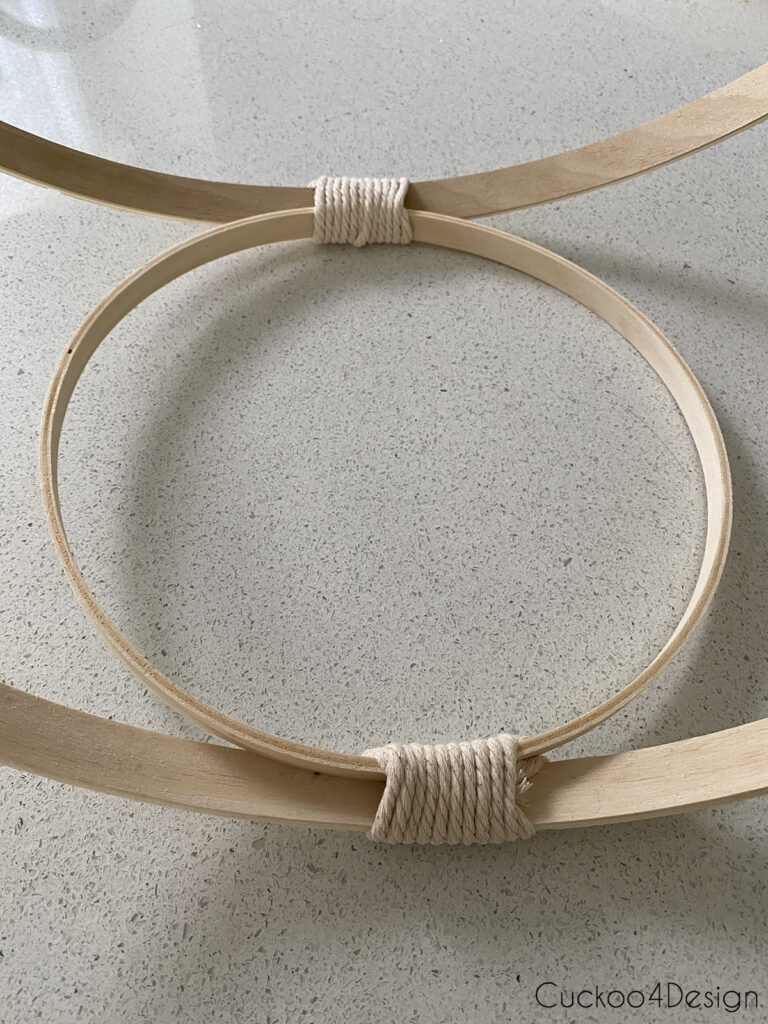
Step 2: Add the smaller hoop to the bottom of the larger hoops
Place the smaller 9″ hoop between the bottom of the two larger hoops as pictured below.
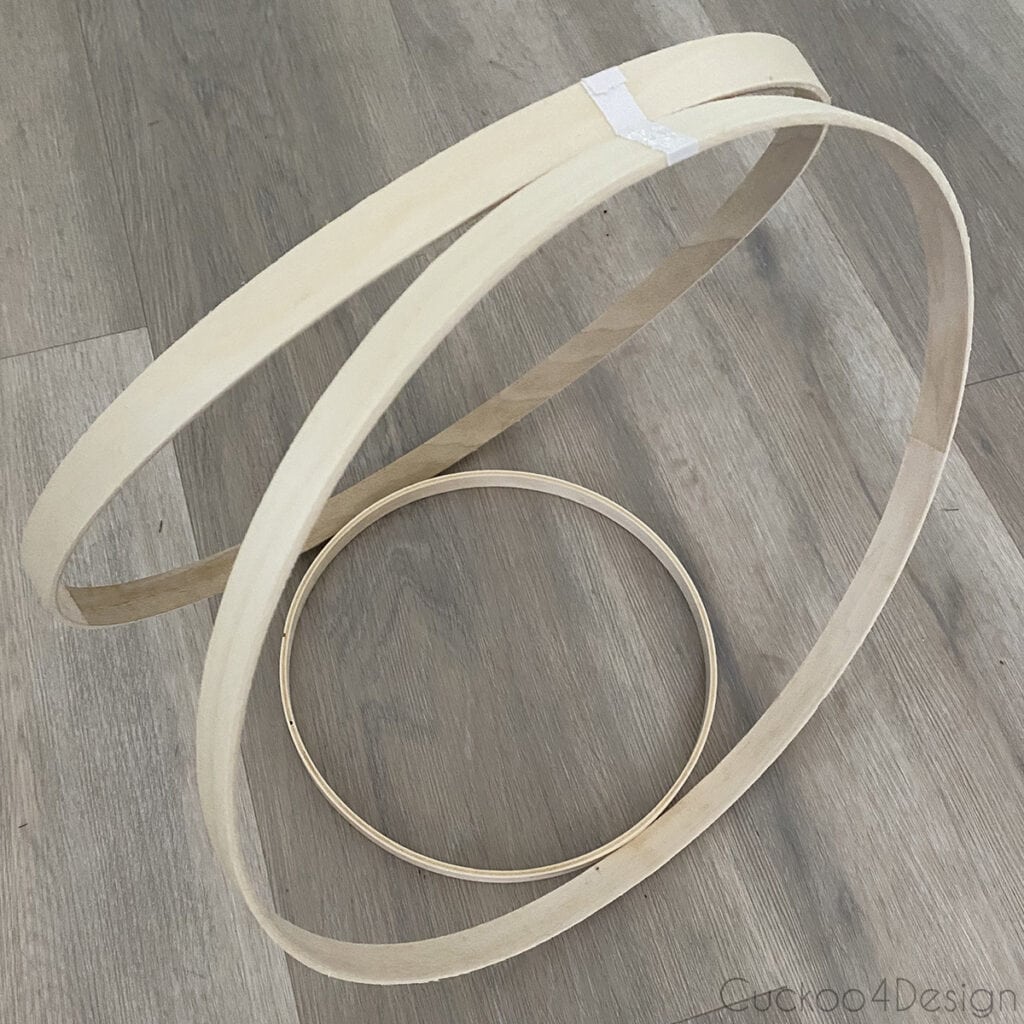
Secure the 9″ hoop with duct tape to the larger hoops.
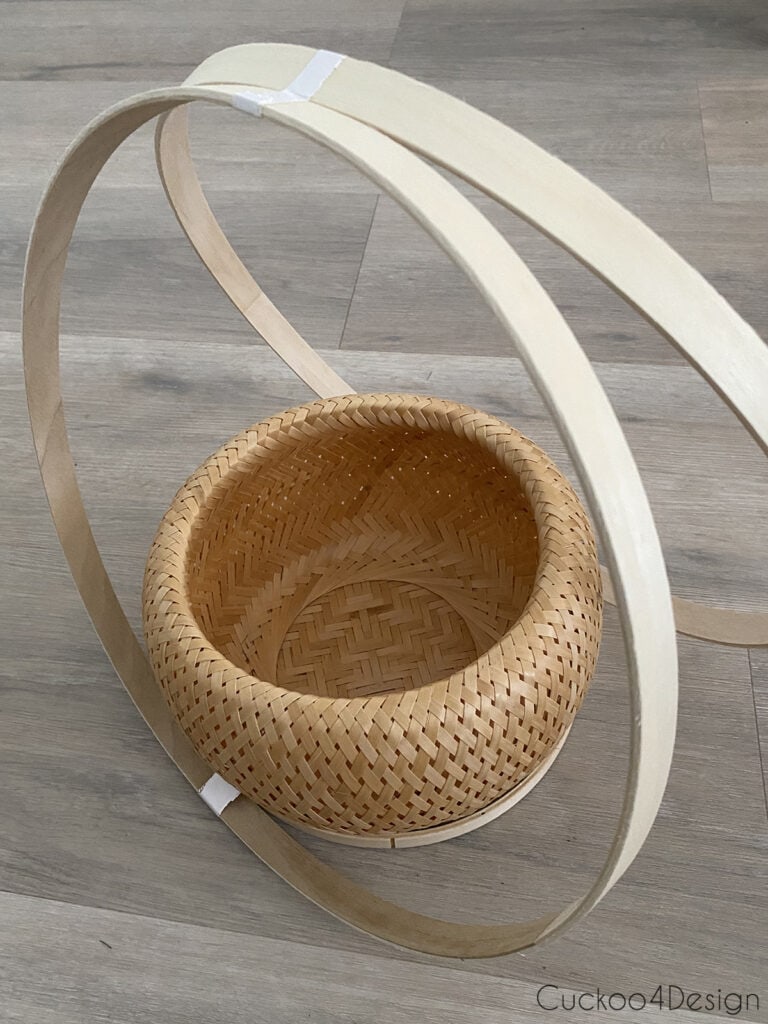
Step 3: Fit the basket into the smaller hoop
Place the basket into the smaller hoop to make sure it fits.
Step 4: Cover the duct tape with Gathering Knots
I used macrame cord because that is what I had on hand. As I said earlier, you can use jute yarn or synthetic yarn for outdoor usage.
Cover up the duct tape part of the smaller hoop with Gathering Knots.
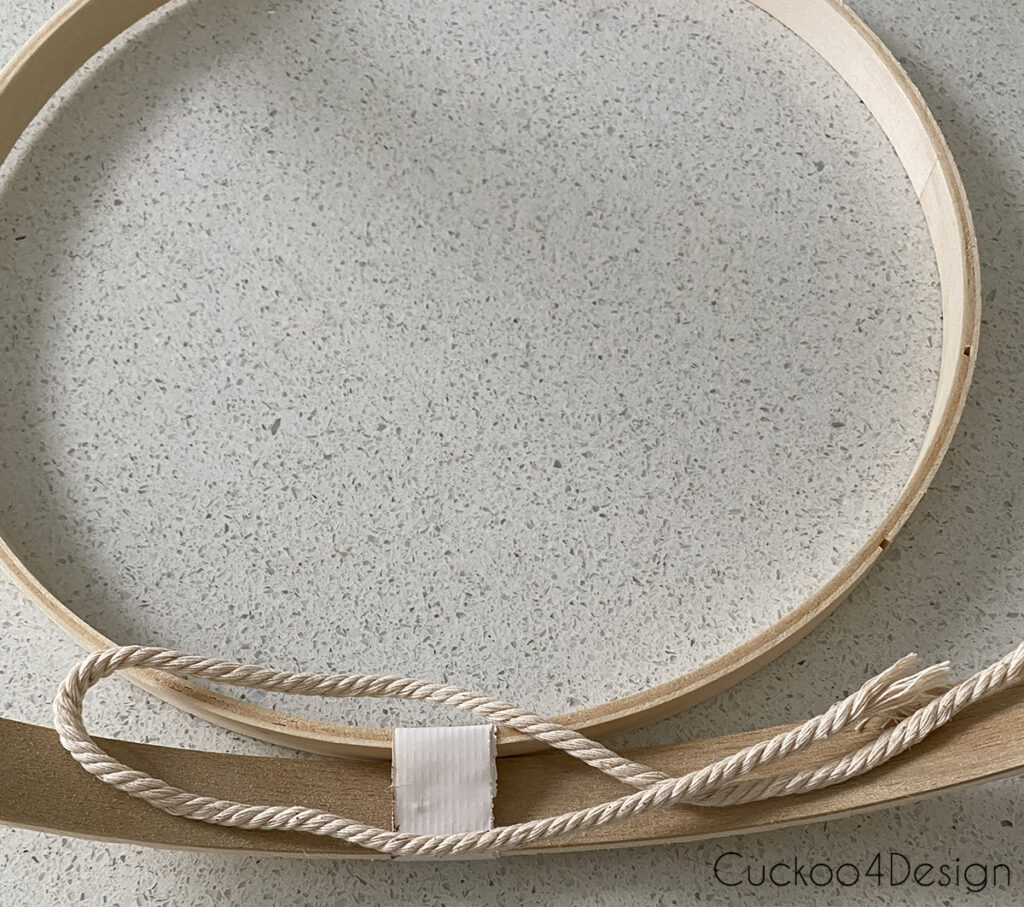
For the Gathering Knot, you start out with a small loop laid out as shown above, and then wrapping the macrame yarn tightly around the hoop and the looped yarn.
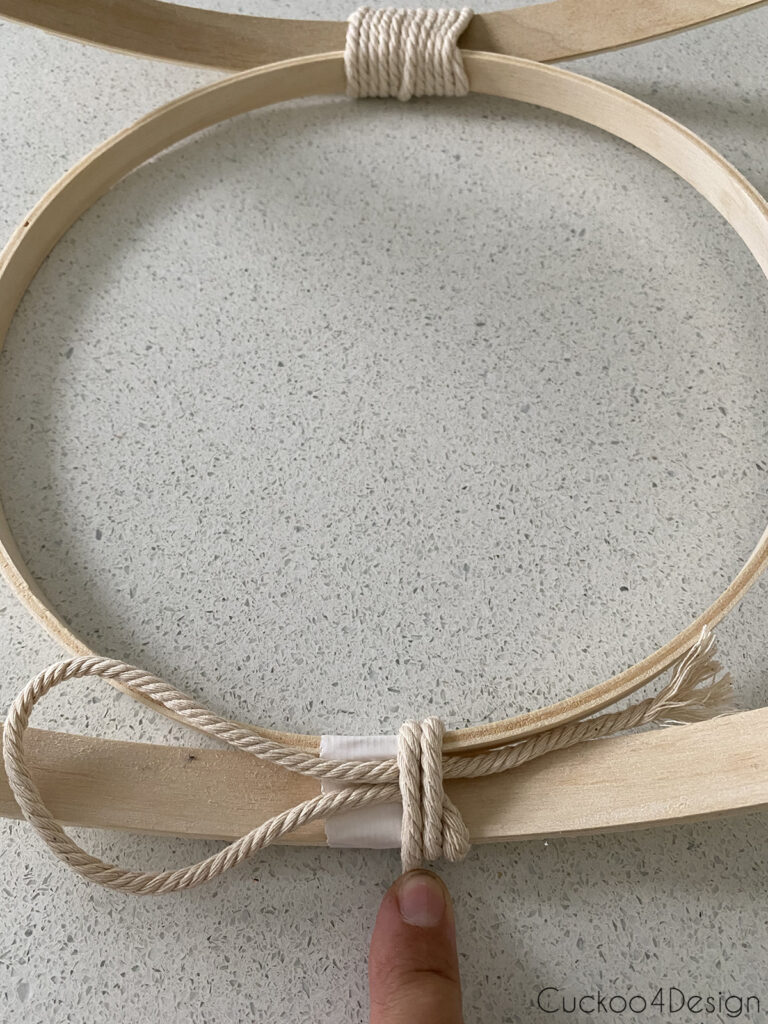
At the end, pull the yarn through the loop, then grab the other end of the string hanging out so you can pull the loop and yarn end through the tightly wrapped bunch of yarn until it disappears.
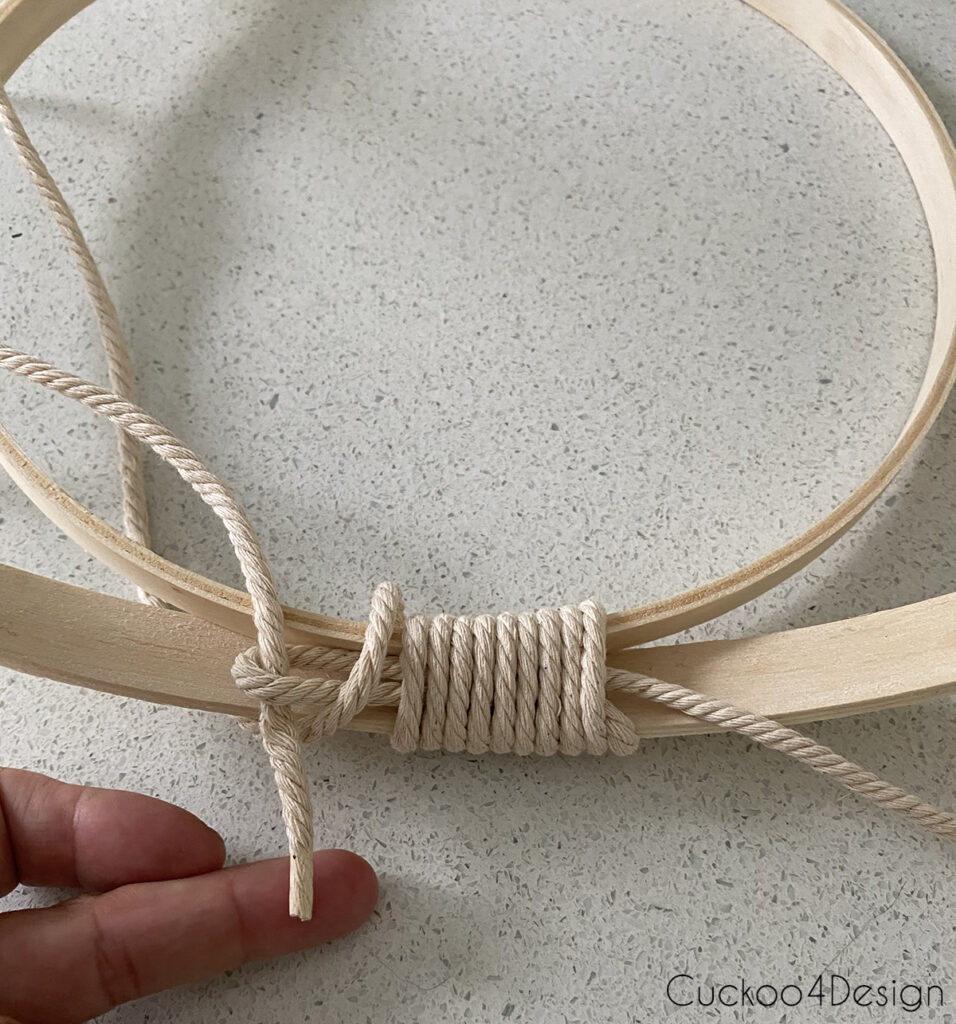
Trim the yarn ends for a neat look.
Step 5: Attach the hanging cord with Lark’s Head Knots
For the top part of the 14″ hoops, I wanted something more chunky than the inspiration planter. So I decided to cut two pieces of macrame yarn, fold them in half, and loop them over and onto the 14″ hoops with Lark’s Head knots as shown below.

I did this in the reverse direction, which you can see below.
To determine what length you need for those strings, you have to figure out how long and low you want the planter to hang. Measure that distance and then multiply that by 5 to determine the length. Some even multiply by 6 to be safe but I don’t.

Below, you can see how the four strands will line up.

Step 6: Add Spiral Knots to the hanging strand (optional)
The inspiration piece doesn’t have any macrame knots used in the hanging strand. So this part is optional. You can simply use the strings and call it a day by attaching the string to a metal hook.
I added Spiral Knots to my strand of macrame yarn, and you can watch my video tutorial below on how to make them:
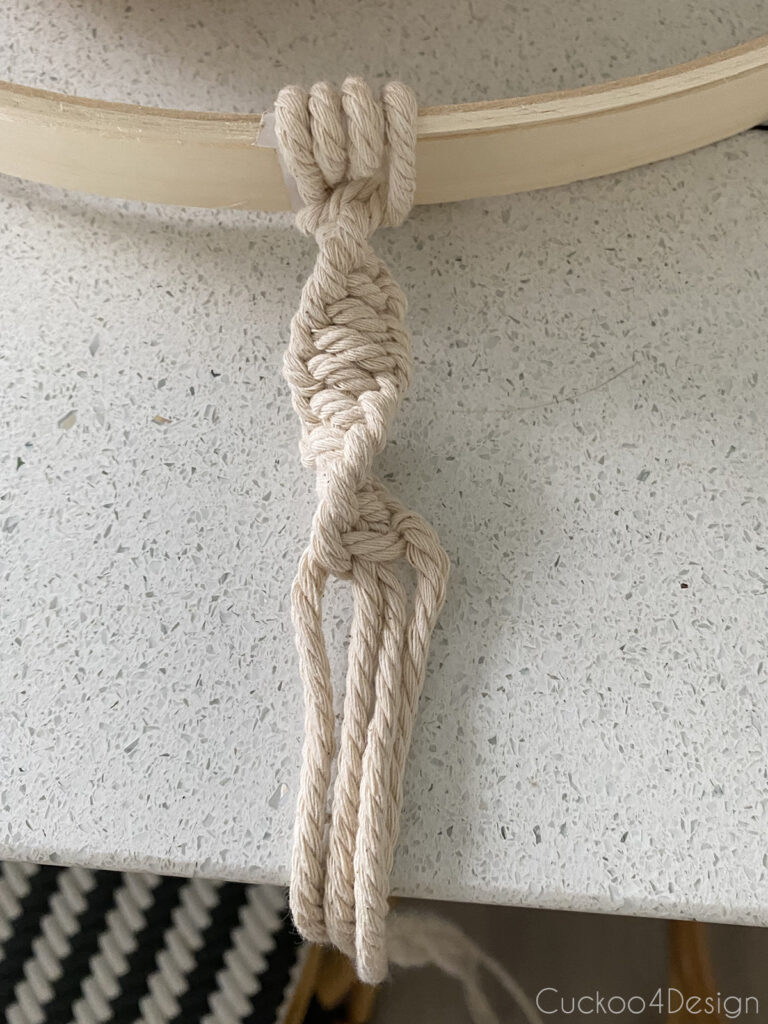
Make the square knot strand as low as you want the planter to hang, which you measured earlier.

Step 7: Attaching the hanging strand to a wood ring or hook
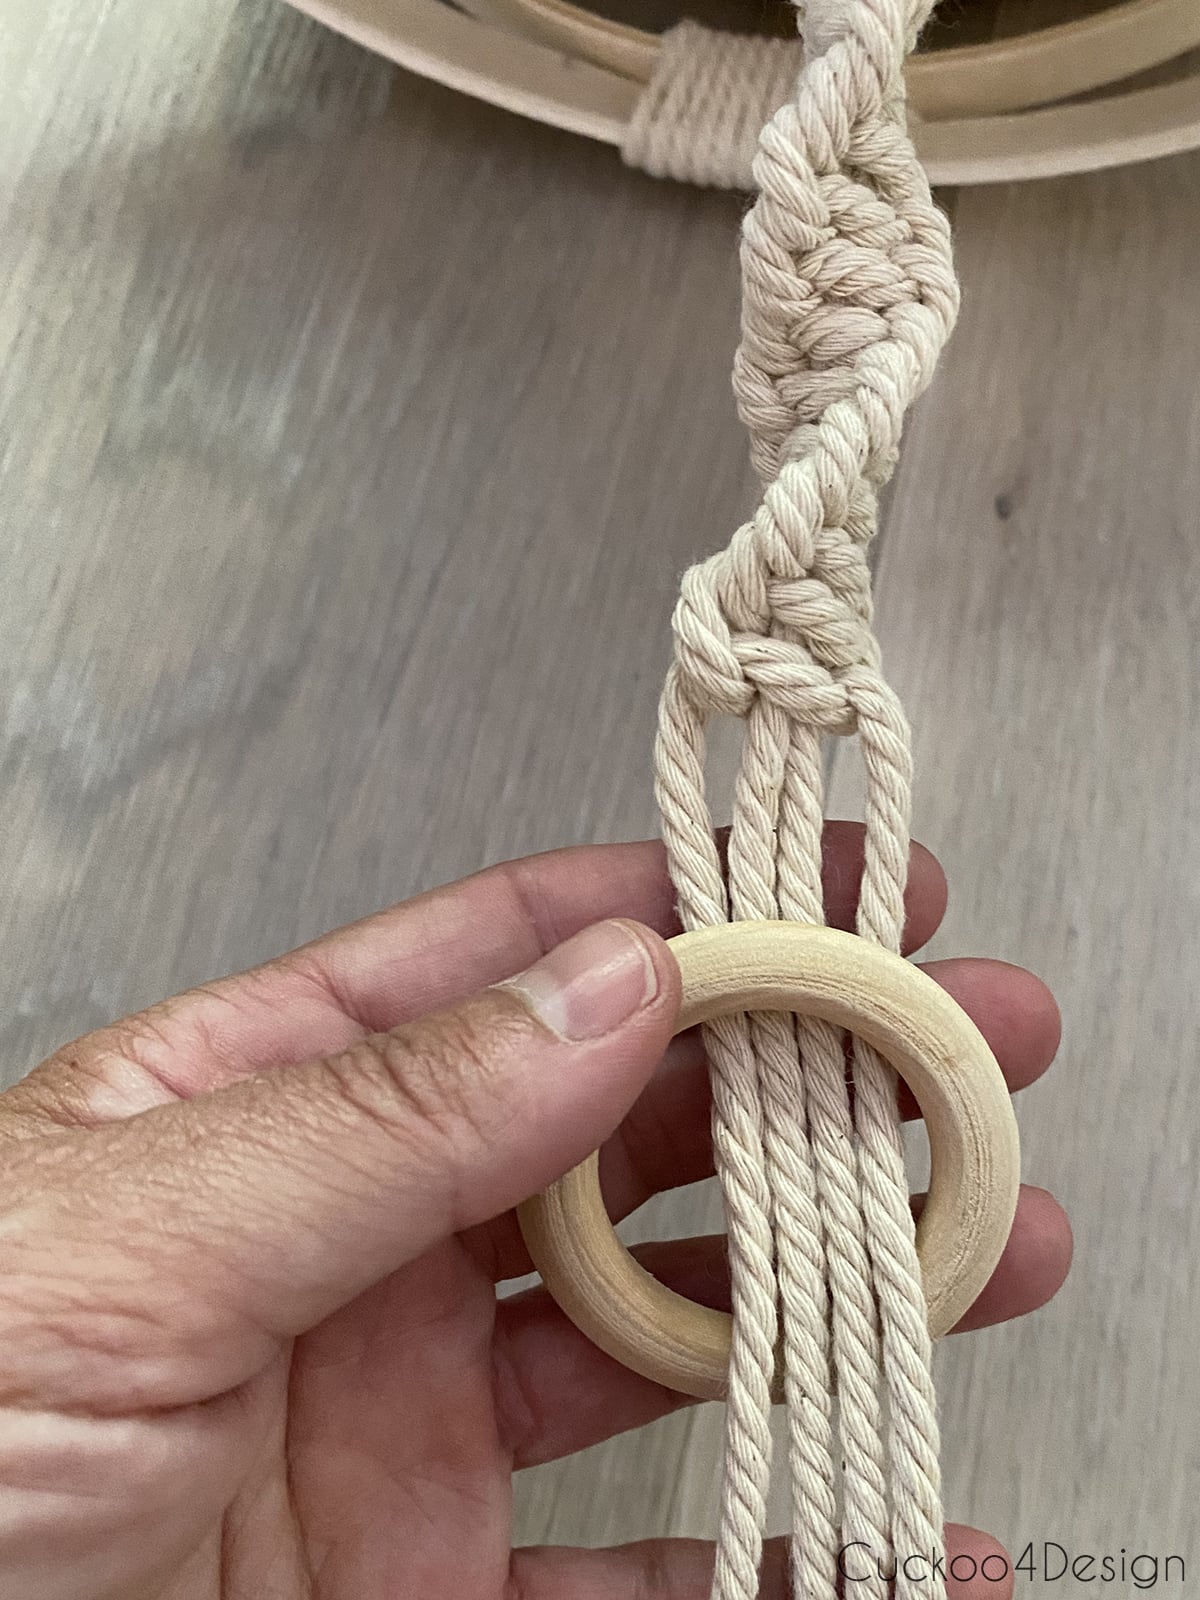
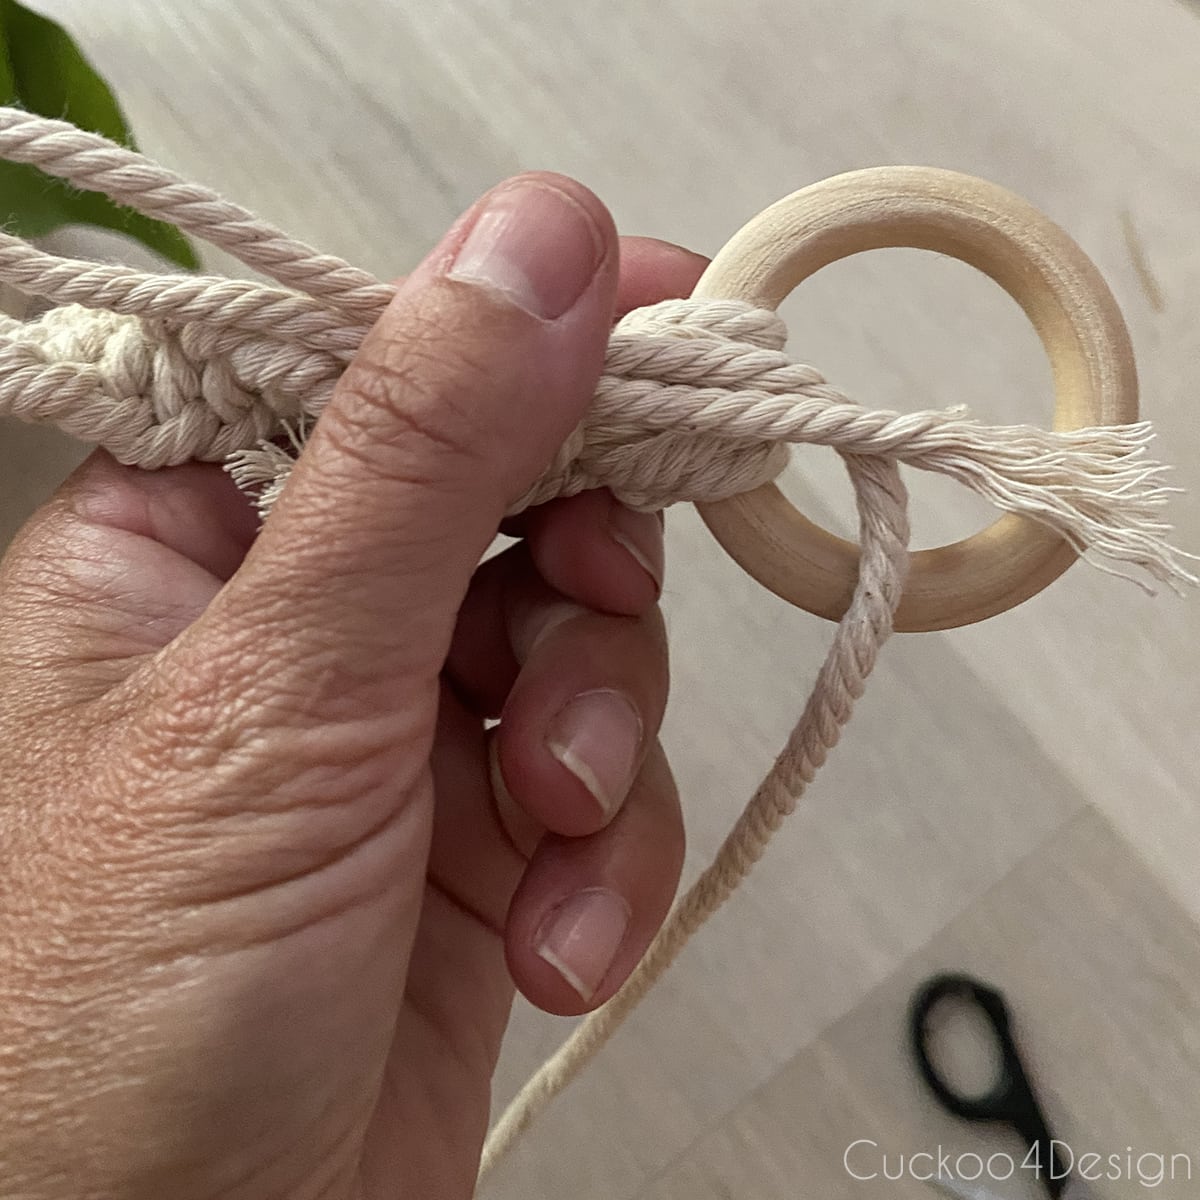
Now it is time to add the wooden ring so you can hang the planter on a hook.
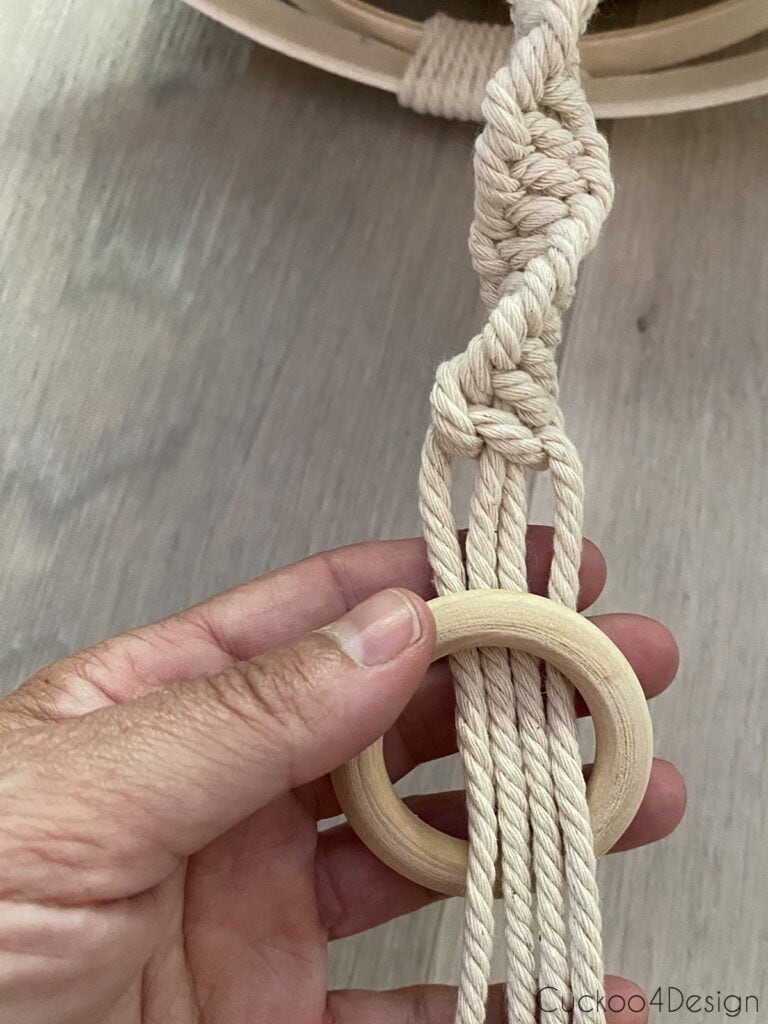
Randomly knot the strands onto the wooden ring. Don’t worry about it looking messy; you will cover everything up with another Gathering Knot.
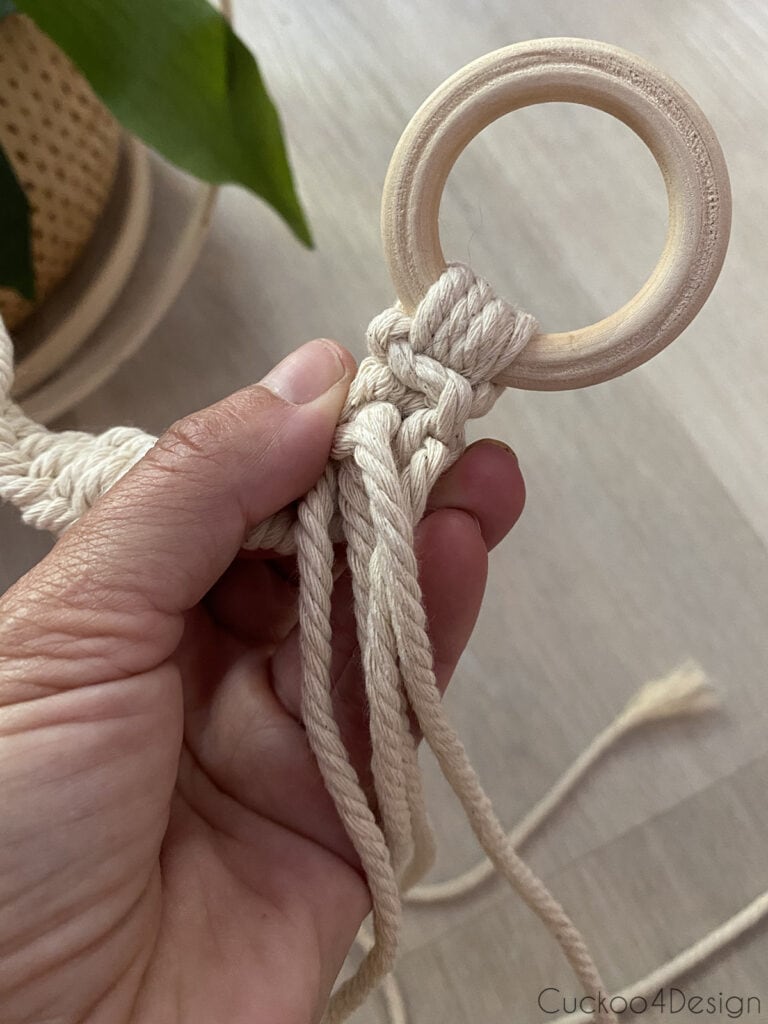
Trim the ends of the knots, but not too short.
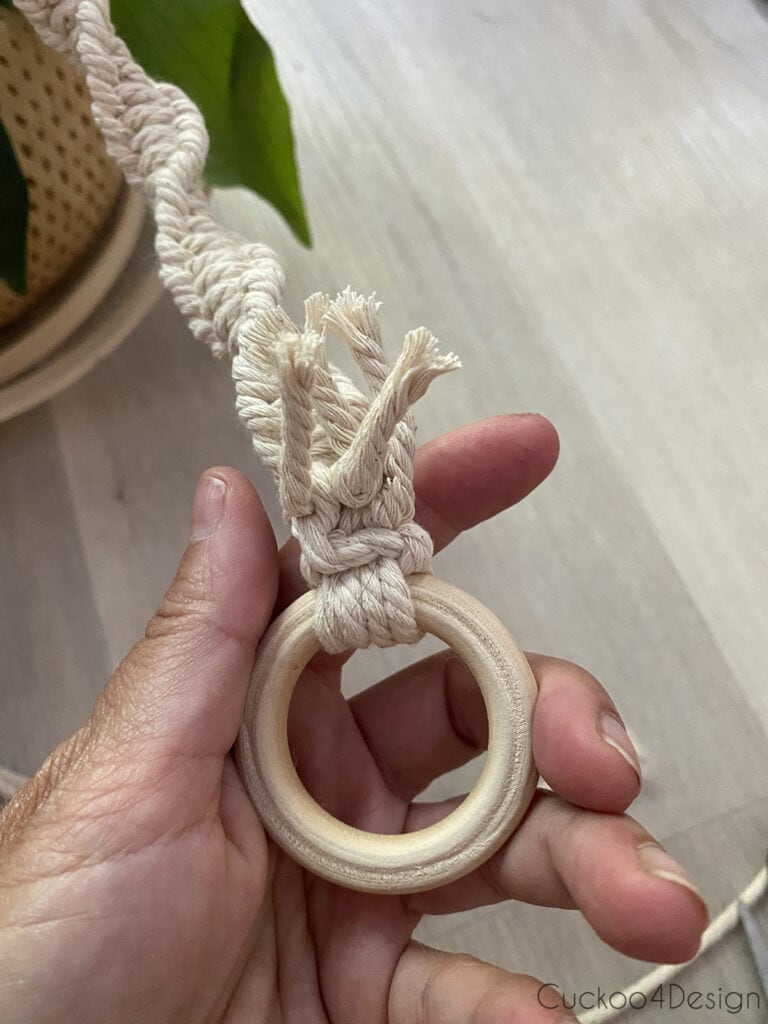
Lay out another loop over the knots.
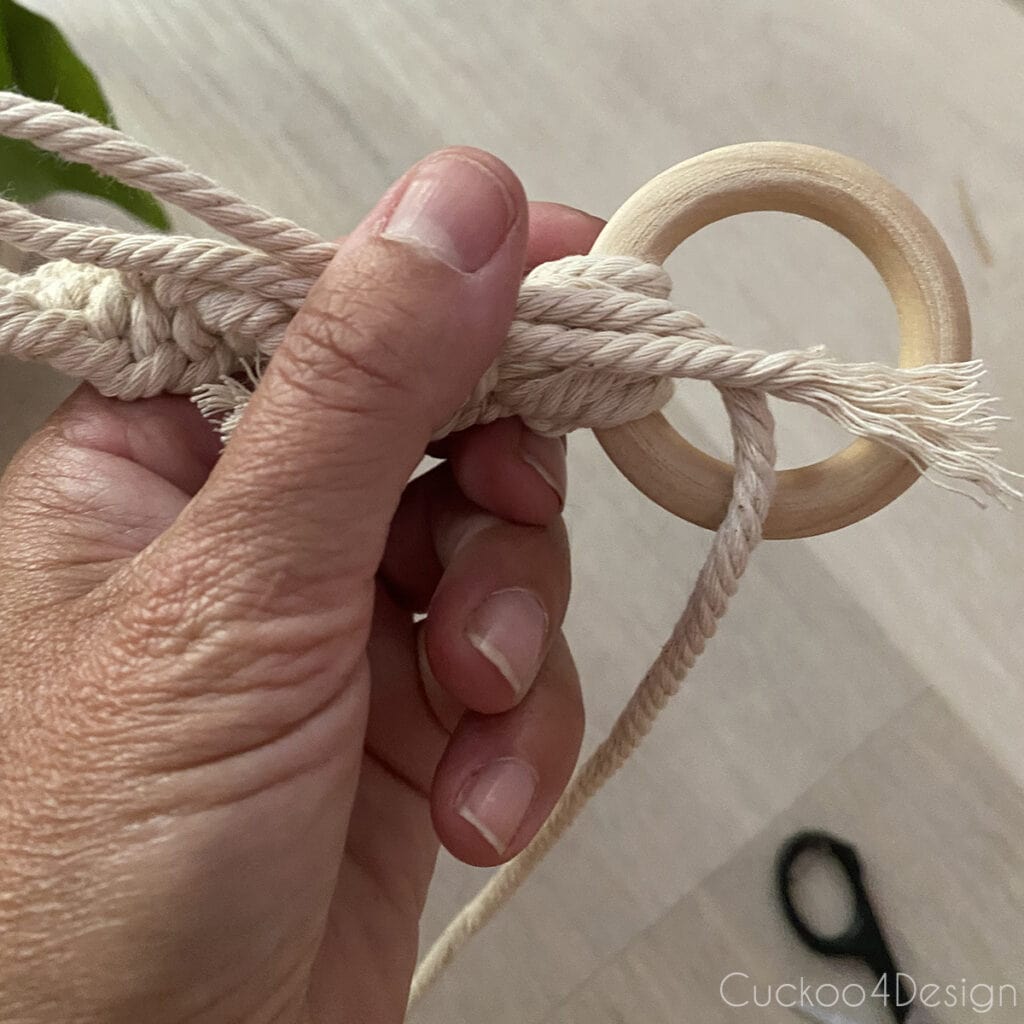
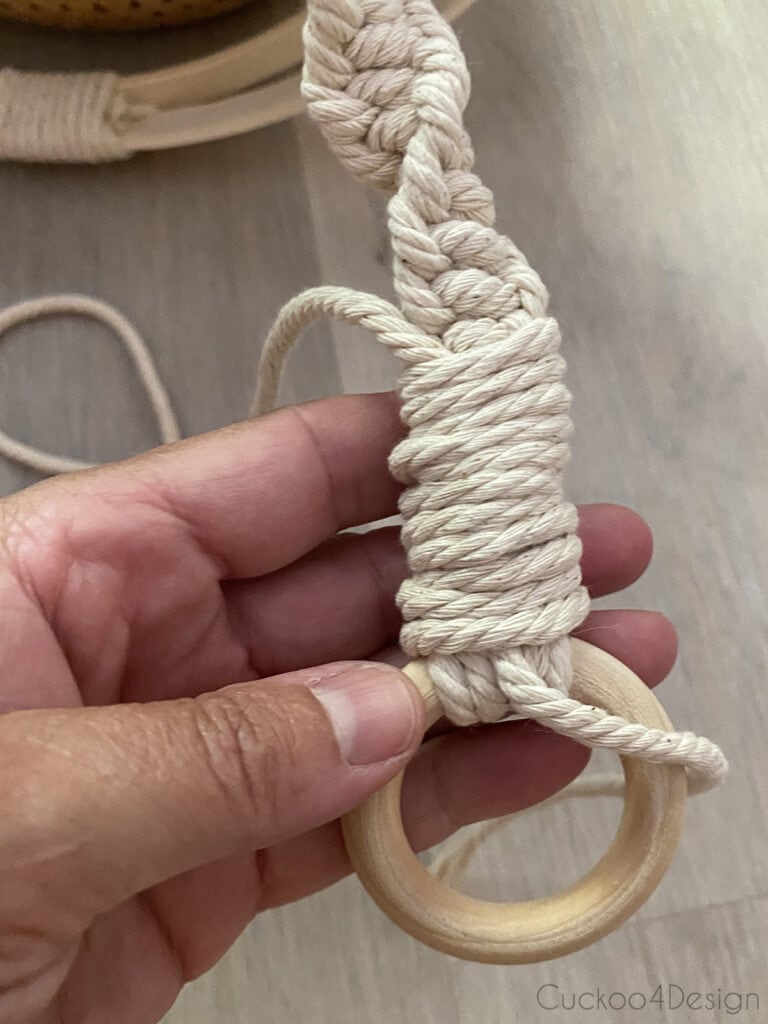
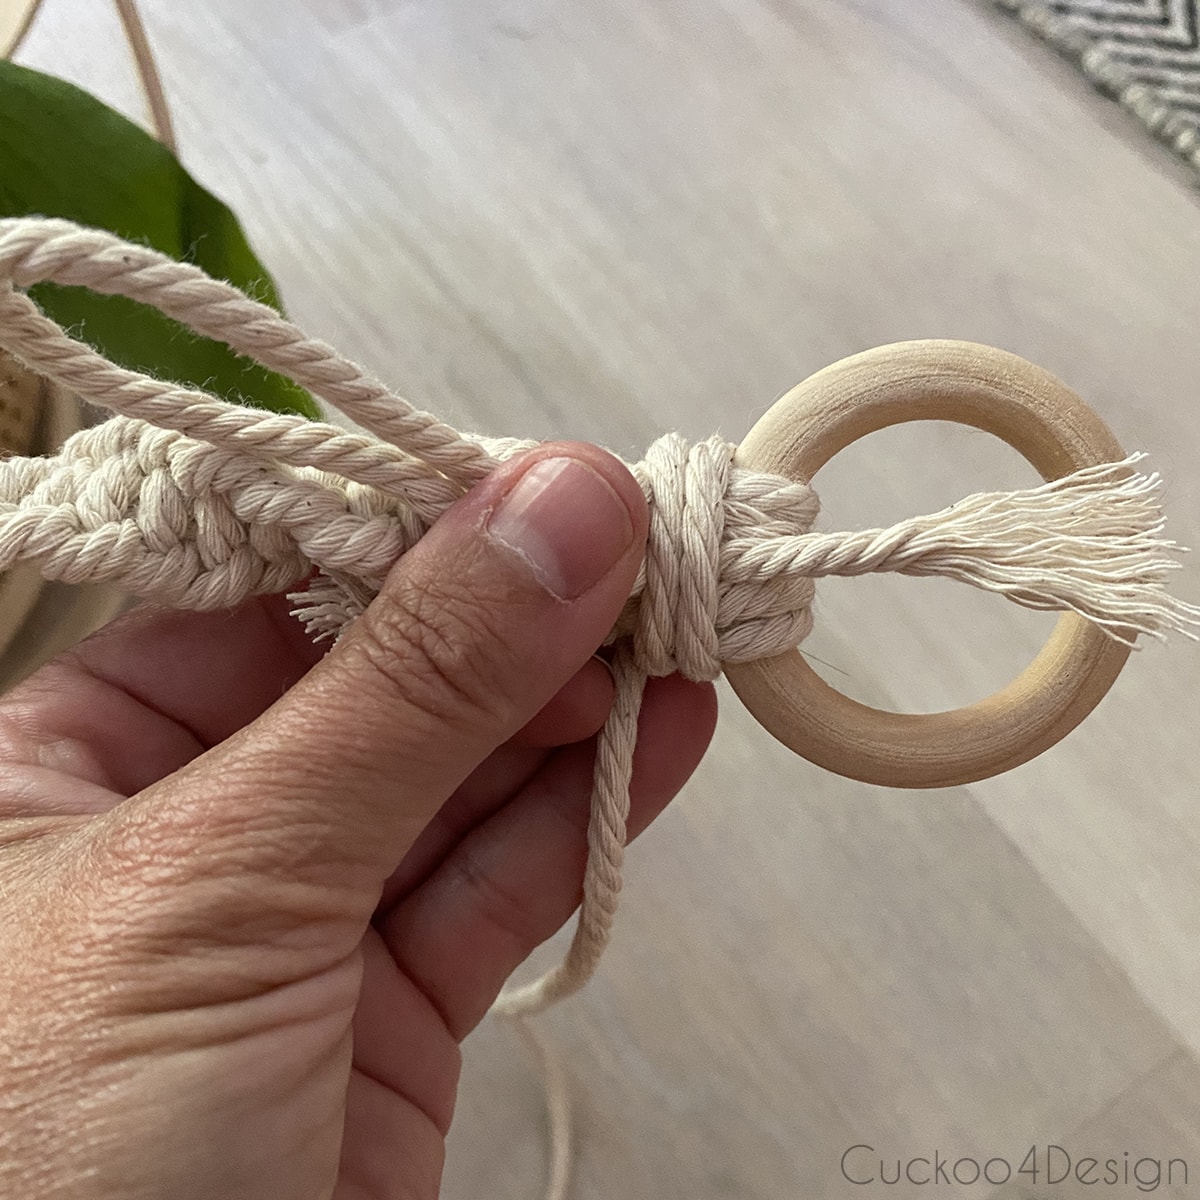
Wrap the yarn around tightly again.

Pull the string and loop through behind the wrapped yarn to finish the Gathering Knot, and then trim the ends.
I use the same metal hooks I mentioned earlier on my curtain rods to hang things.
Different ways to use this DIY hanging basket with embroidery hoops
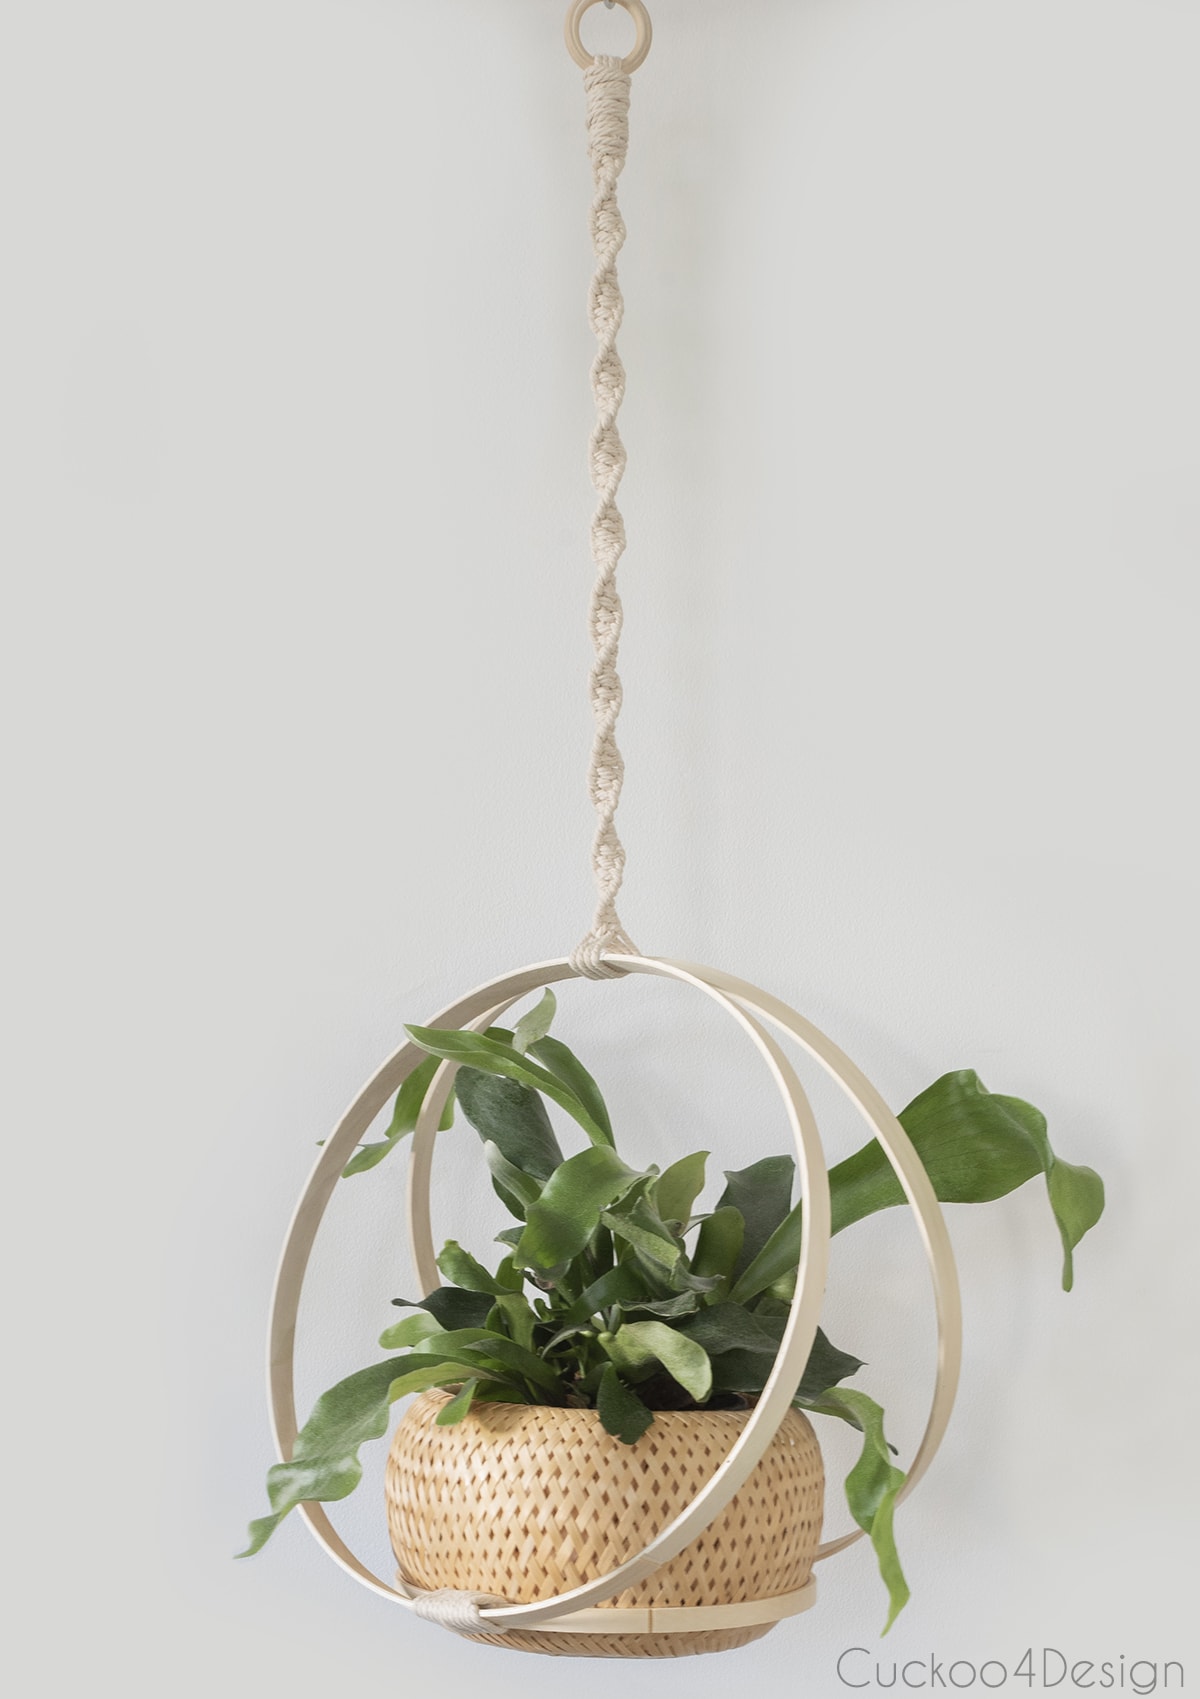
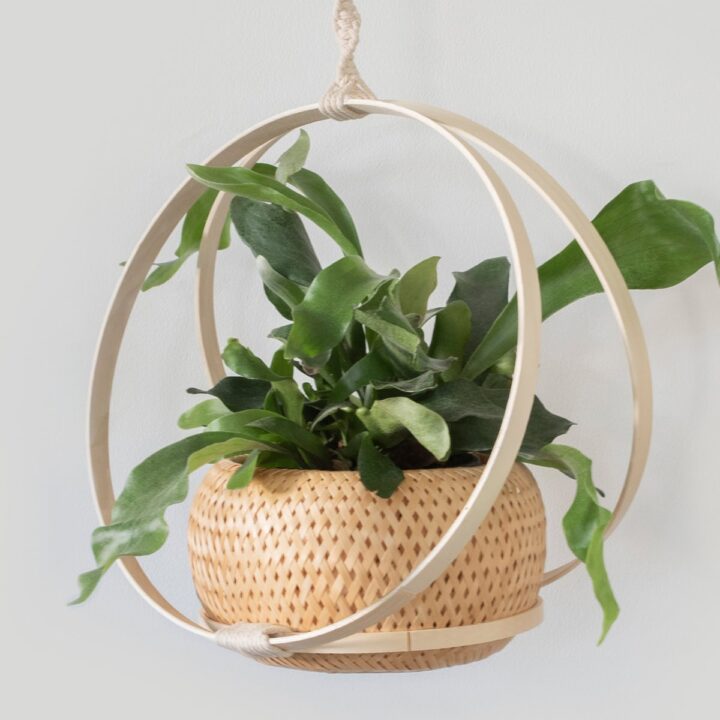
My little fern looks and fits beautifully into the basket. I wrap aluminum foil around the original plastic planter to avoid water and dirt ruining the beautiful handwoven basket.
The nice thing about the basket I bought is that it comes as a set of two and I can use the smaller basket yet for another project or decor.
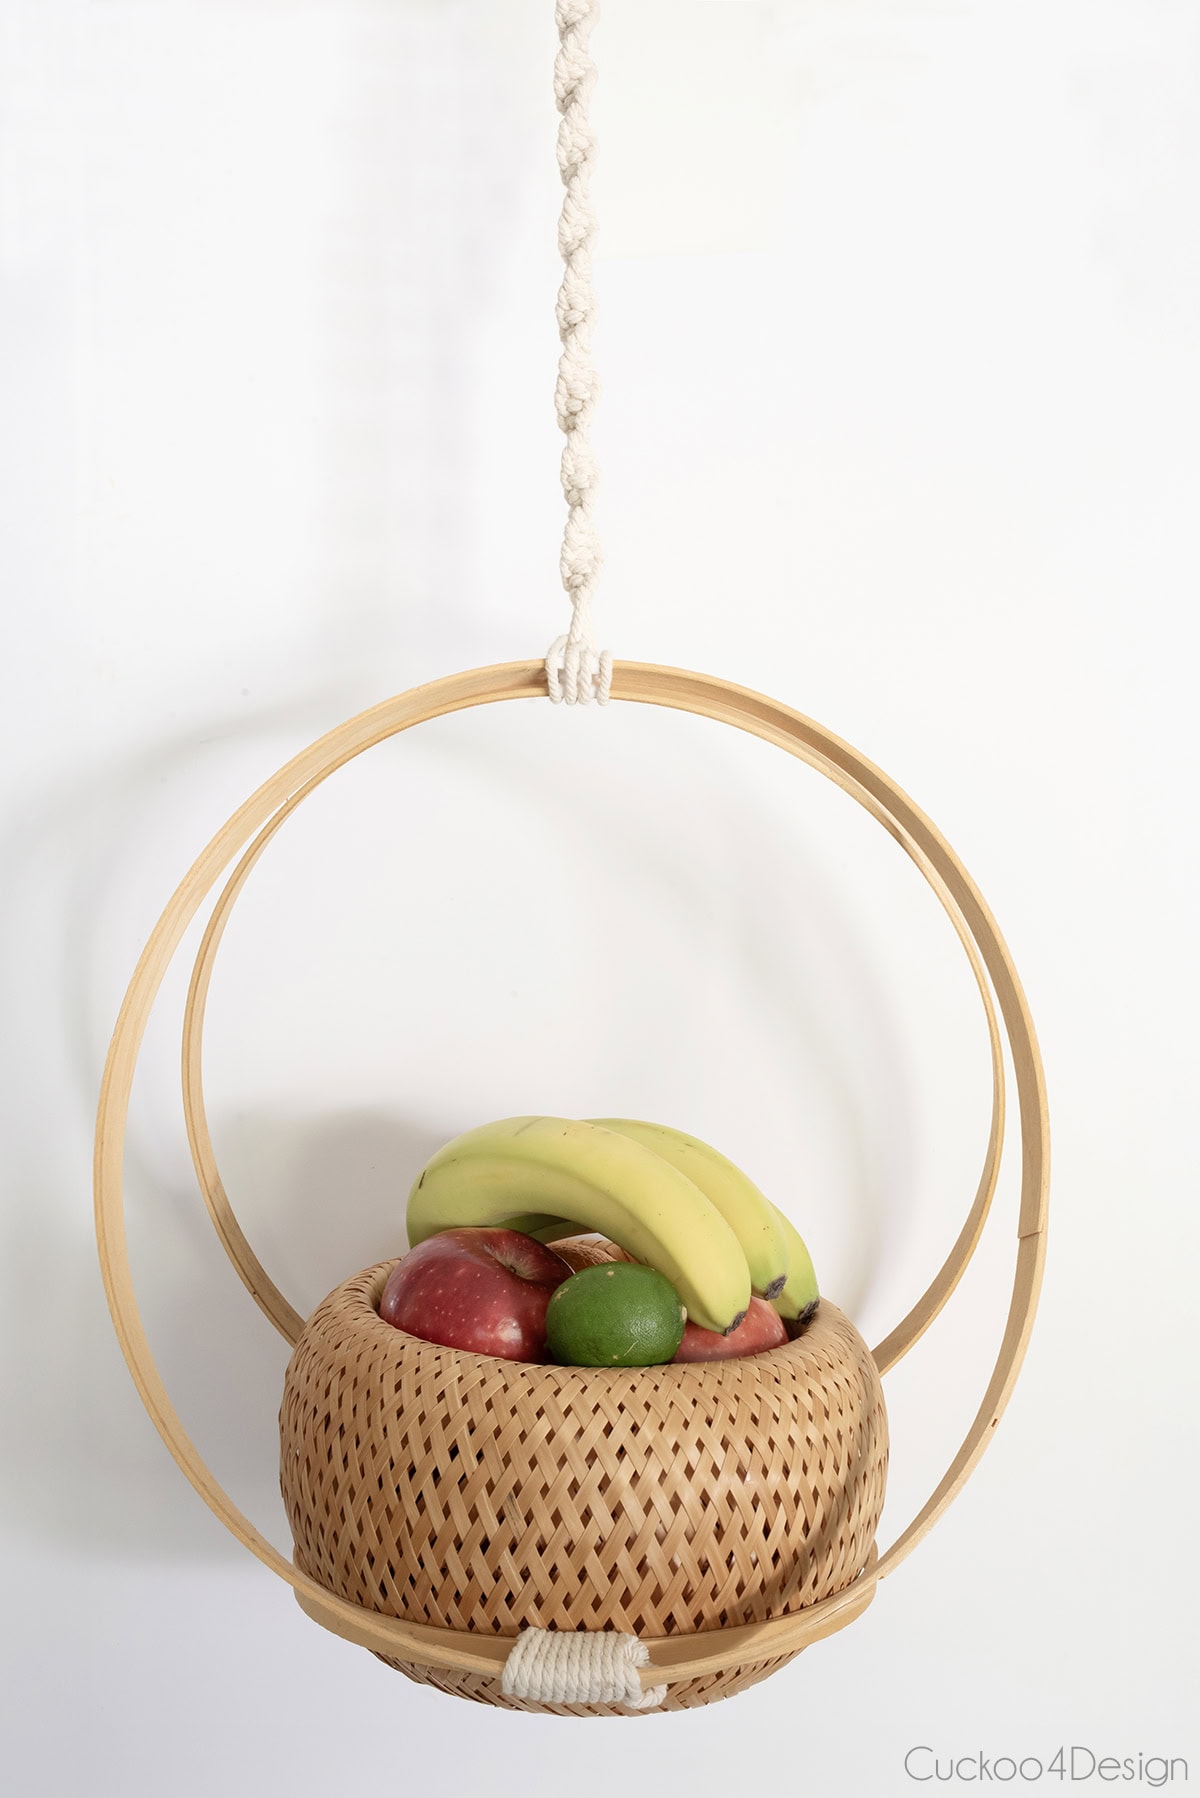
It works just as well as a hanging fruit basket in the kitchen, and no plants are required.

Similar hanging baskets for sale
More of my macrame projects
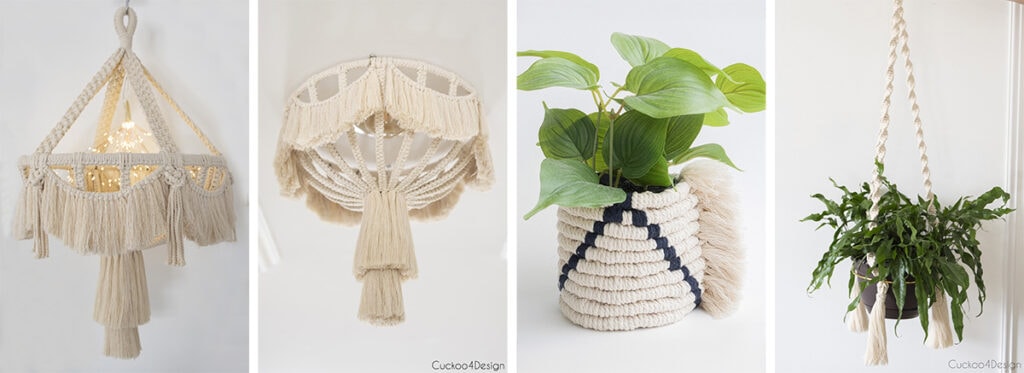
If you enjoyed this project, here are some of my other macrame projects you might like.
- My simple macrame plant hanger uses a metal hoop, only one knot, and takes about 45 minutes to make. It is perfect if you’re just starting out with macrame.
- The black and white macrame basket planter sleeve is inspired by the same African woven baskets and works for any size pot.
- I also used a metal hanging basket as the base for my DIY macrame chandelier and my macrame light fixture, which have the same starting point but are used completely differently.
- And if you love the solar fairy lights trend, my macrame lantern is a fun outdoor version.
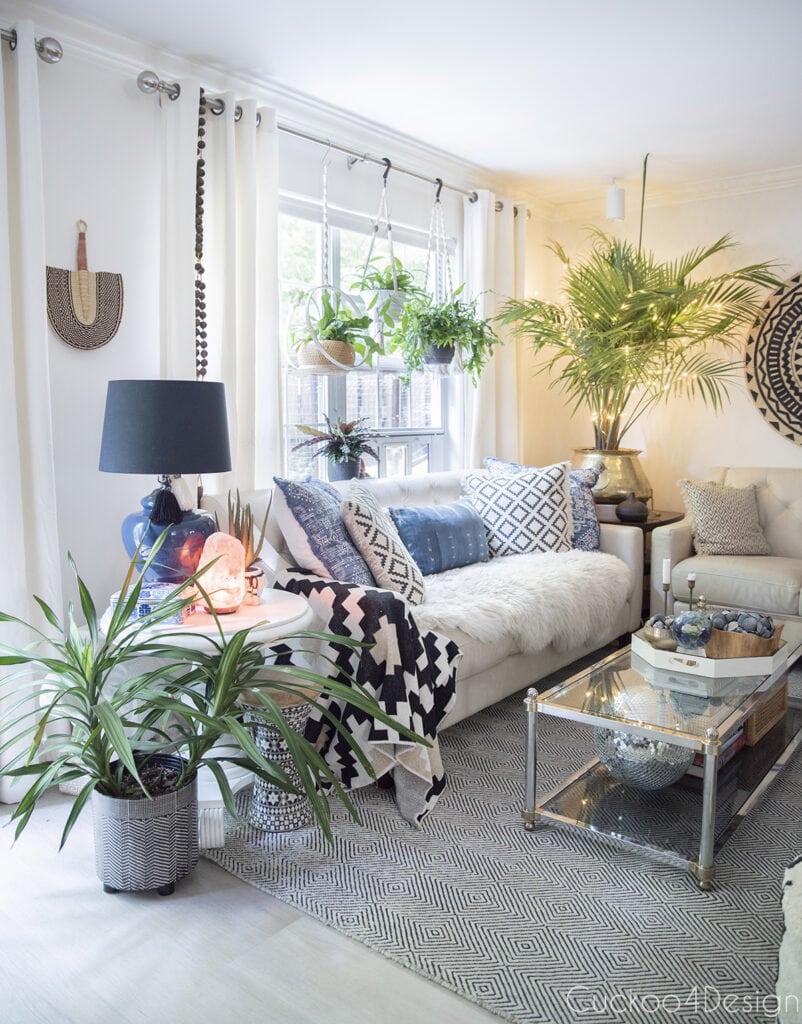
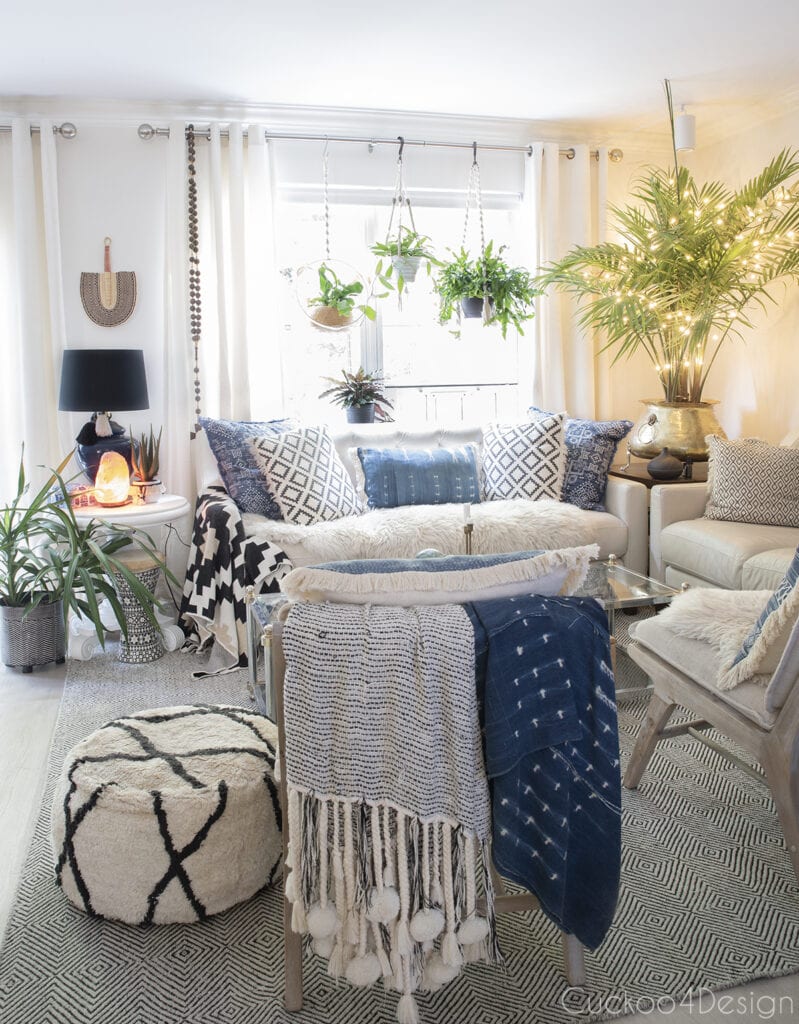
These DIY hanging baskets with embroidery hoops are still hanging in our living room window years later, and they look just as good as the day I made them. The woven basket gives it a texture and depth that you just can’t get with cords and hoops alone.
Tschüß,

DIY Hanging Basket With Embroidery Hoops
Learn how to make a DIY hanging basket with embroidery hoops, a basket, and yarn. Works as a plant hanger, fruit basket, or storage basket.
Materials
- basket
- two large 14" embroidery hoops (you can also use metal hoops/rings)
- one small 9" embroidery hoop (you can also use a metal hoop/ring)
- white duct tape
- macrame yarn or jute yarn
- wooden ring
- hook for a curtain rod or other hook, depending on where you will be hanging yours
Tools
- scissors
Instructions
- Connect the two larger hoops in one spot
Start with the two 14" hoops lined up next to each other.
Connect the two hoops with a thin strip of white duct tape.
- Add the smaller hoop to the bottom of the larger hoops
Place the smaller 9" hoop between the bottom of the two larger hoops as pictured below.
Secure the 9" hoop with duct tape to the larger hoops.
- Fit the basket into the smaller hoop
Place the basket into the smaller hoop to make sure it fits. - Cover the duct tape with Gathering Knots
I used macrame cord because that is what I had on hand. As I said earlier, you can use jute yarn or synthetic yarn for outdoor usage. - Attach the hanging cord with Lark's Head Knots
For the top part of the 14" hoops, I wanted something more chunky than the inspiration planter. So I decided to cut two pieces of macrame yarn, fold them in half, and loop them over and onto the 14" hoops with Lark’s Head knots as shown below.
I did this in the reverse direction, which you can see below. - Add Spiral Knots to the hanging strand (optional)
The inspiration piece doesn't have any macrame knots used in the hanging strand. So this part is optional. You can simply use the strings and call it a day by attaching the string to a metal hook. - Attach the hanging strand to a wood ring or hook
Now it is time to add the wooden ring so you can hang the planter on a hook.
Randomly knot the strands onto the wooden ring. Don't worry about it looking messy; you will cover everything up with another Gathering Knot.
Trim the ends of the knots, but not too short.
Lay out another loop over the knots.
Wrap the yarn around tightly again.
Pull the string and loop through behind the wrapped yarn to finish the Gathering Knot, and then trim the ends.


Cover up the duct tape part of the smaller hoop with Gathering Knots.
For the Gathering Knot, you start out with a small loop laid out as shown above, and then wrapping the macrame yarn tightly around the hoop and the looped yarn.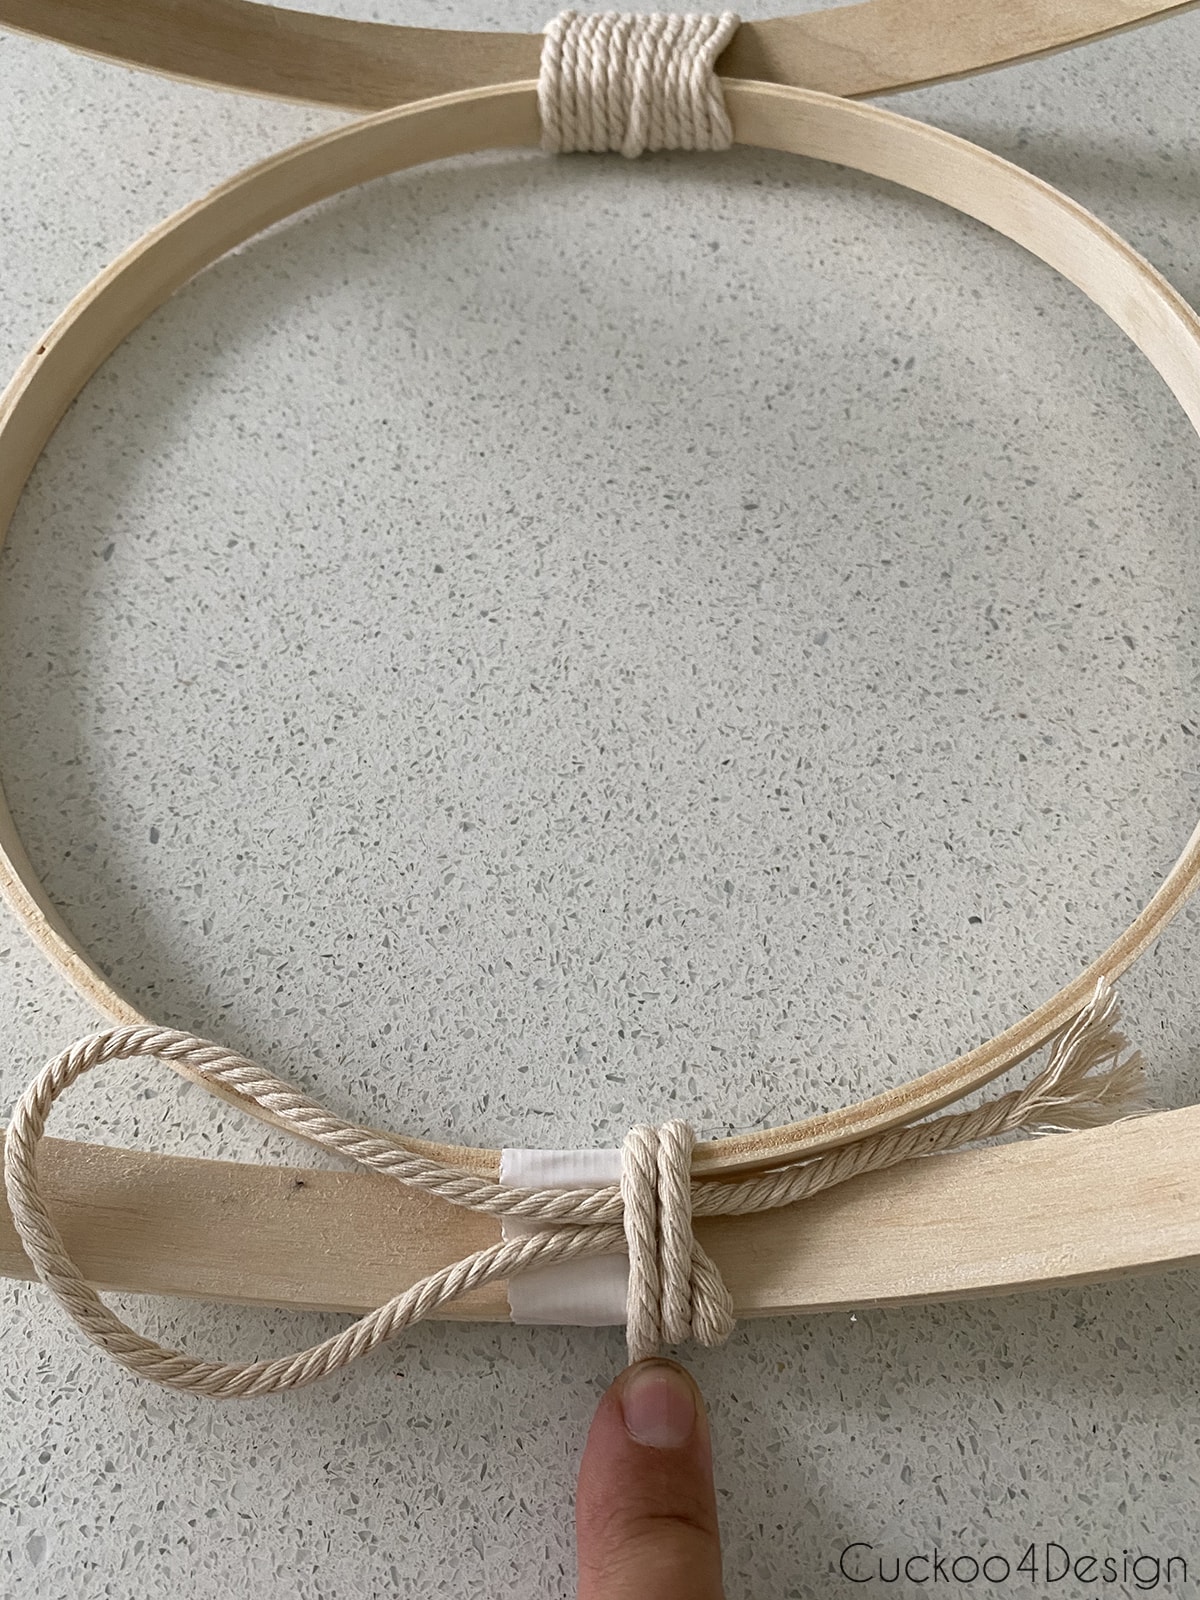
At the end, pull the yarn through the loop, then grab the other end of the string hanging out so you can pull the loop and yarn end through the tightly wrapped bunch of yarn until it disappears.
Trim the yarn ends for a neat look.

To determine what length you need for those strings, you have to figure out how long and low you want the planter to hang. Measure that distance and then multiply that by 5 to determine the length. Some even multiply by 6 to be safe, but I don't.
Below, you can see how the four strands will line up.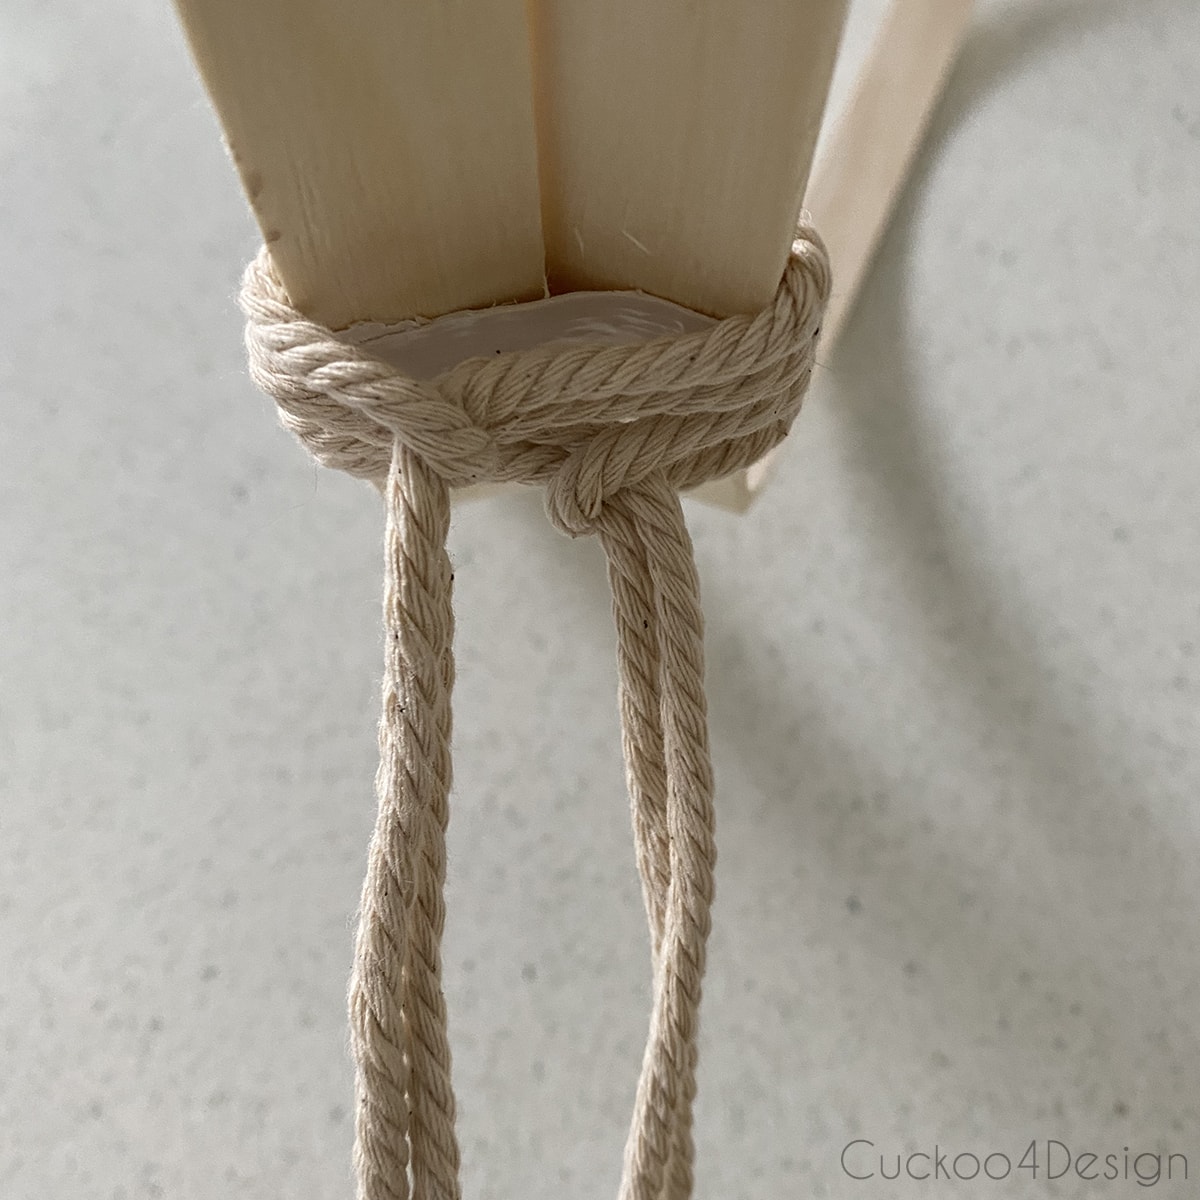
I added Spiral Knots to my strand of macrame yarn, and you can watch my video tutorial to see how,
Make the square knot strand as low as you want the planter to hang, which you measured earlier.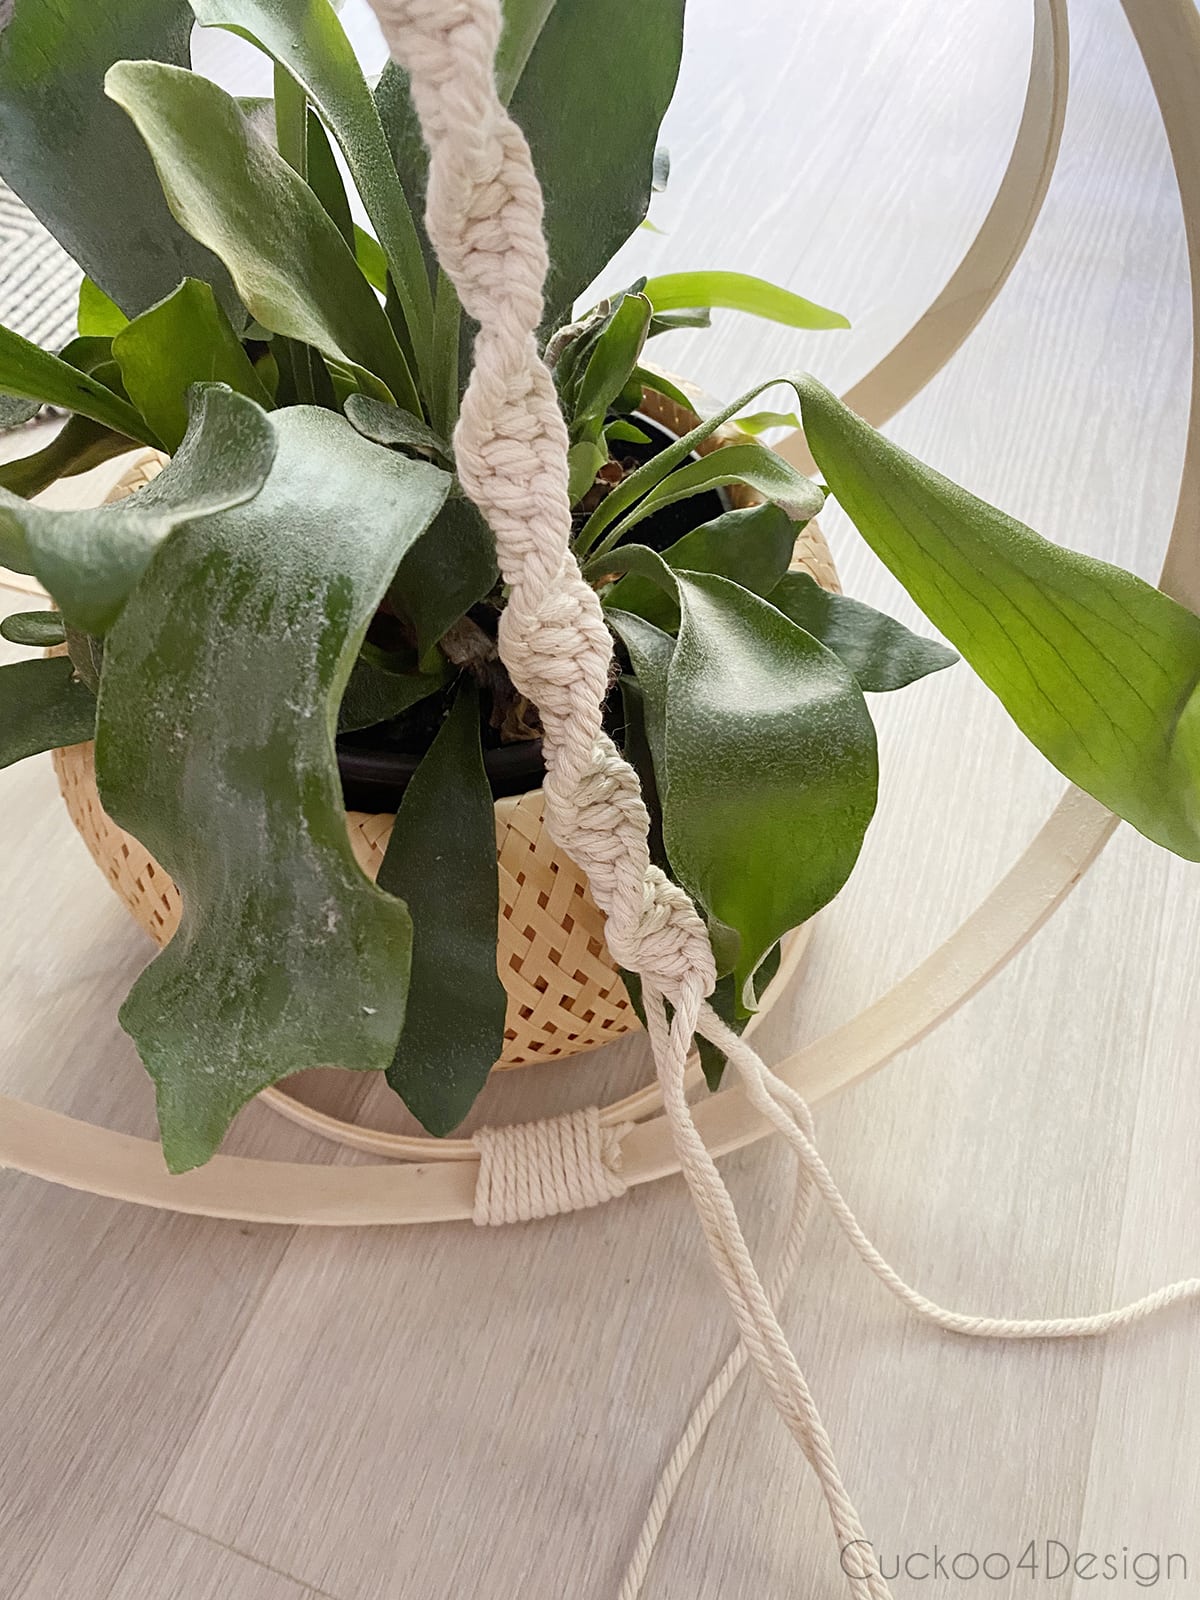


You are amazing. I am never disappointed reading your blog.
Thanks so much Barb, that is the best compliment.
Wow, beautiful and easy! Love that you created a nice macrame knot hanging string vs. plan string lines. Also, the blue lamps look great and what a excellent find!!
I couldn’t believe the price of the lamps. I’m going to regularly stop at the thrift stores again now. And thanks so much. I felt like the plain string of the inspiration planter was too flimsy 🙂
this is so freaking cool! love it, julia!
Thanks Cassie. That double wall basket was a lucky find.